


Tailfin AeroPack Review: A premium, rigid seatpack


Cass gives the premium-priced AeroPack – Tailfin’s cross between a racktop bag and a modern seatpack – a thorough thrashing. After a few months bouncing across the roughest trails and dirt roads he can find in the UK, here are his deep dive findings…
PUBLISHED Nov 15, 2019
Aug 21 update: Since this review, triple eyelets have been added to all alloy arch versions of the AeroPack. Tailfin now offer a range of cargo cages, in addition to Mini Panniers for AeroPacks that have pannier mounts. Further accessories include an AP Mount for stowage below the AeroPack, as well as an Extended Seatpost Connector for small frames or those planning to run a dropper post. A Universal Thru Axle is now available to simplify life for those without rack eyelets on their bikes, no matter the width and pitch thread of their framesets. The Pros and Cons section of this review has also been updated.
When I first heard about Tailfin’s AeroPack, I have to admit that I wasn’t sure it was for me. A carbon-supported seatpack for bikepacking? And, that was before I even found out how much it costs. Depending on my trips and how much I need to carry, I’ve always alternated between a Porcelain Rocket Mr Fusion XL, or a minimal steel rack and a traditional saddlebag. Both systems have done me good, surviving multi-month trips around the world.
But… as Tailfin is based in Bristol, where I live, the least I could do was find out more. Earlier in the year, I popped into the company’s office to gain a better understanding of the product and the team behind it. Much to my surprise, I came away completely intrigued. A month later, Tailfin set me up with a pre-production sample and some initial use, I returned extremely impressed. When I offered feedback, it was encouraging to note how receptive Tailfin’s owner, Nick Broadbent, proved to be – to both to the AeroPack as it stands and to future additions and accessories. Given the exhaustive list of options available – and the fact that Tailfin aims to caters to so many styles of bikes, component standards, and interests – it’s also clear that the company is in it for the long haul.
Fast forward a couple of months and I swapped out my pre-production AeroPack for the finished version, then headed to find out how it fared on a number of bikepacking trips and day rides. Whilst I was subjecting it to my own testing, the AeroPack developed quite the pedigree of its own in the gravel and race community, proving itself popular (and failure-free) in 2019′ Transcontinental Race.
But first, the slightly confusing bit. There are several models available under the AeroPack umbrella. The one I tried is the lightest, most minimal, stripped-down version – the Carbon S. It’s the top bag specific iteration with a carbon ‘arch’. The Carbon X, on the other hand, accepts Tailfin’s proprietary large panniers and (in time) other accessories. If you’re looking at saving some money (at the cost of a little weight), you can also choose to spec your AeroPack with an aluminium arch, both with and without the pannier/accessory mounts (called the Alloy S and Alloy X). What’s more, all of the individual parts are available aftermarket, so you could even swap them out if you wanted to. There are a variety of mounting options available as well, depending on your bike, be it road or MTB spacing, TA or QR. There’s even provision for bikes with traditional rack eyelets, too. More on that later.
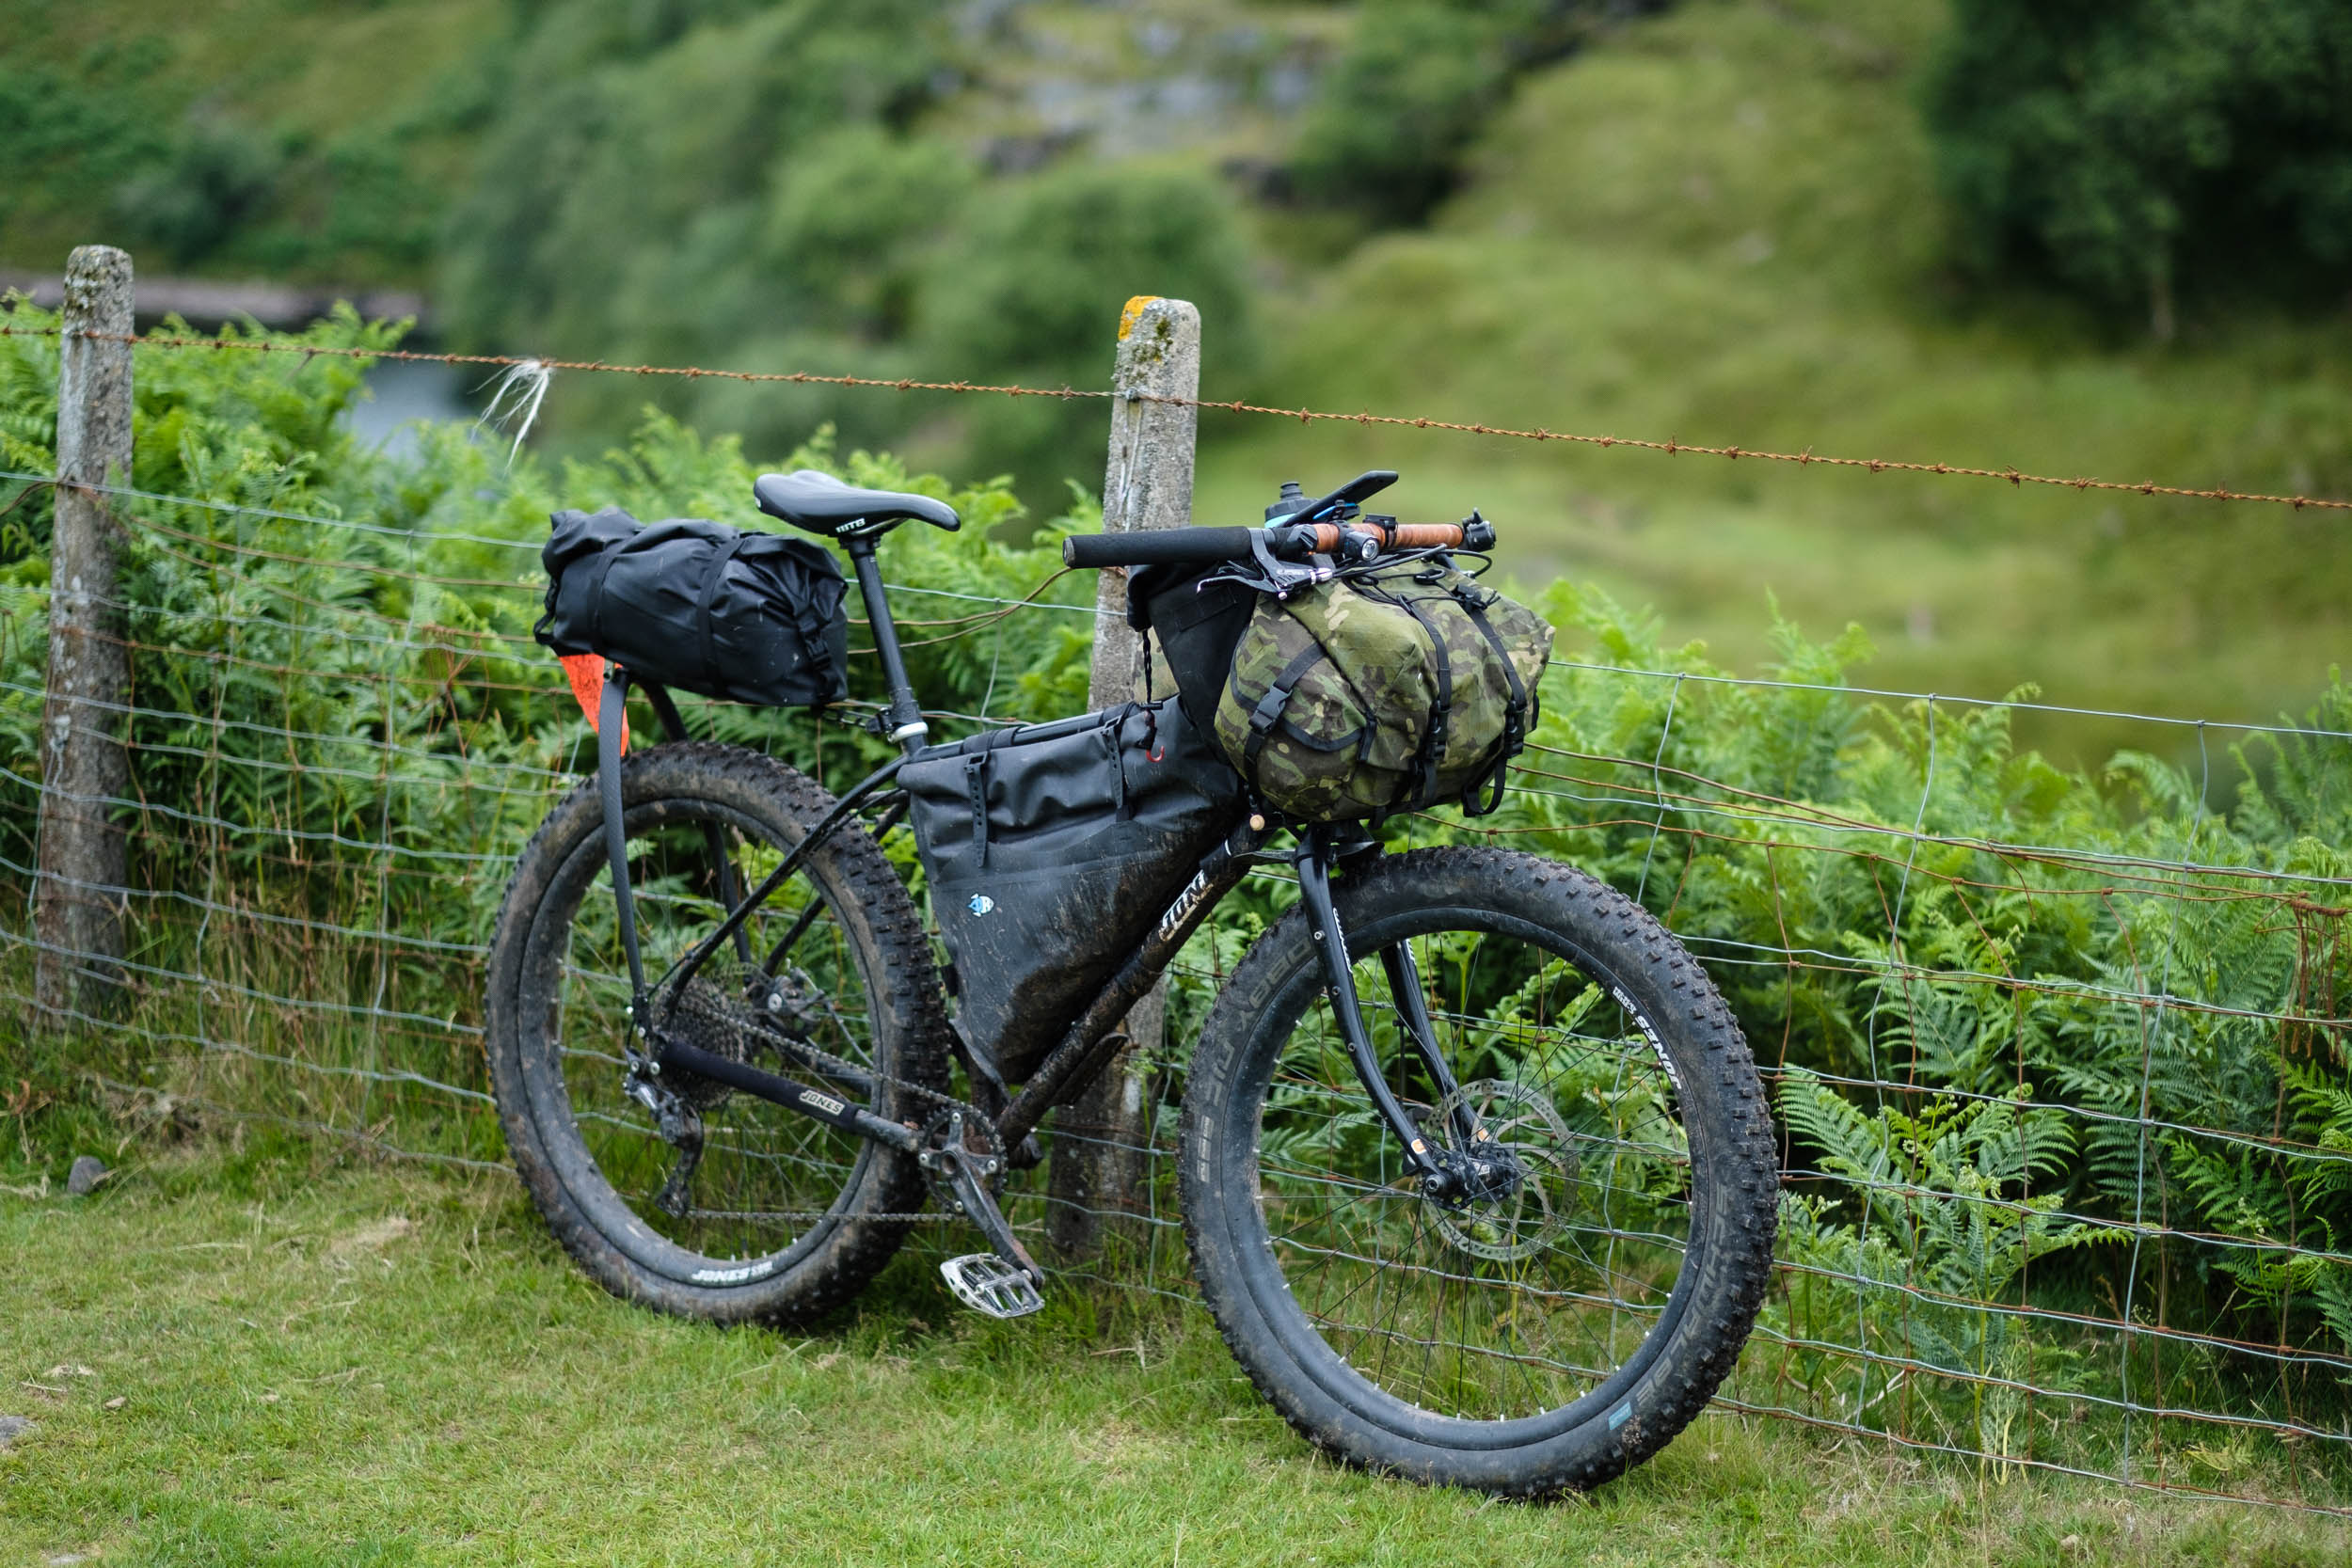
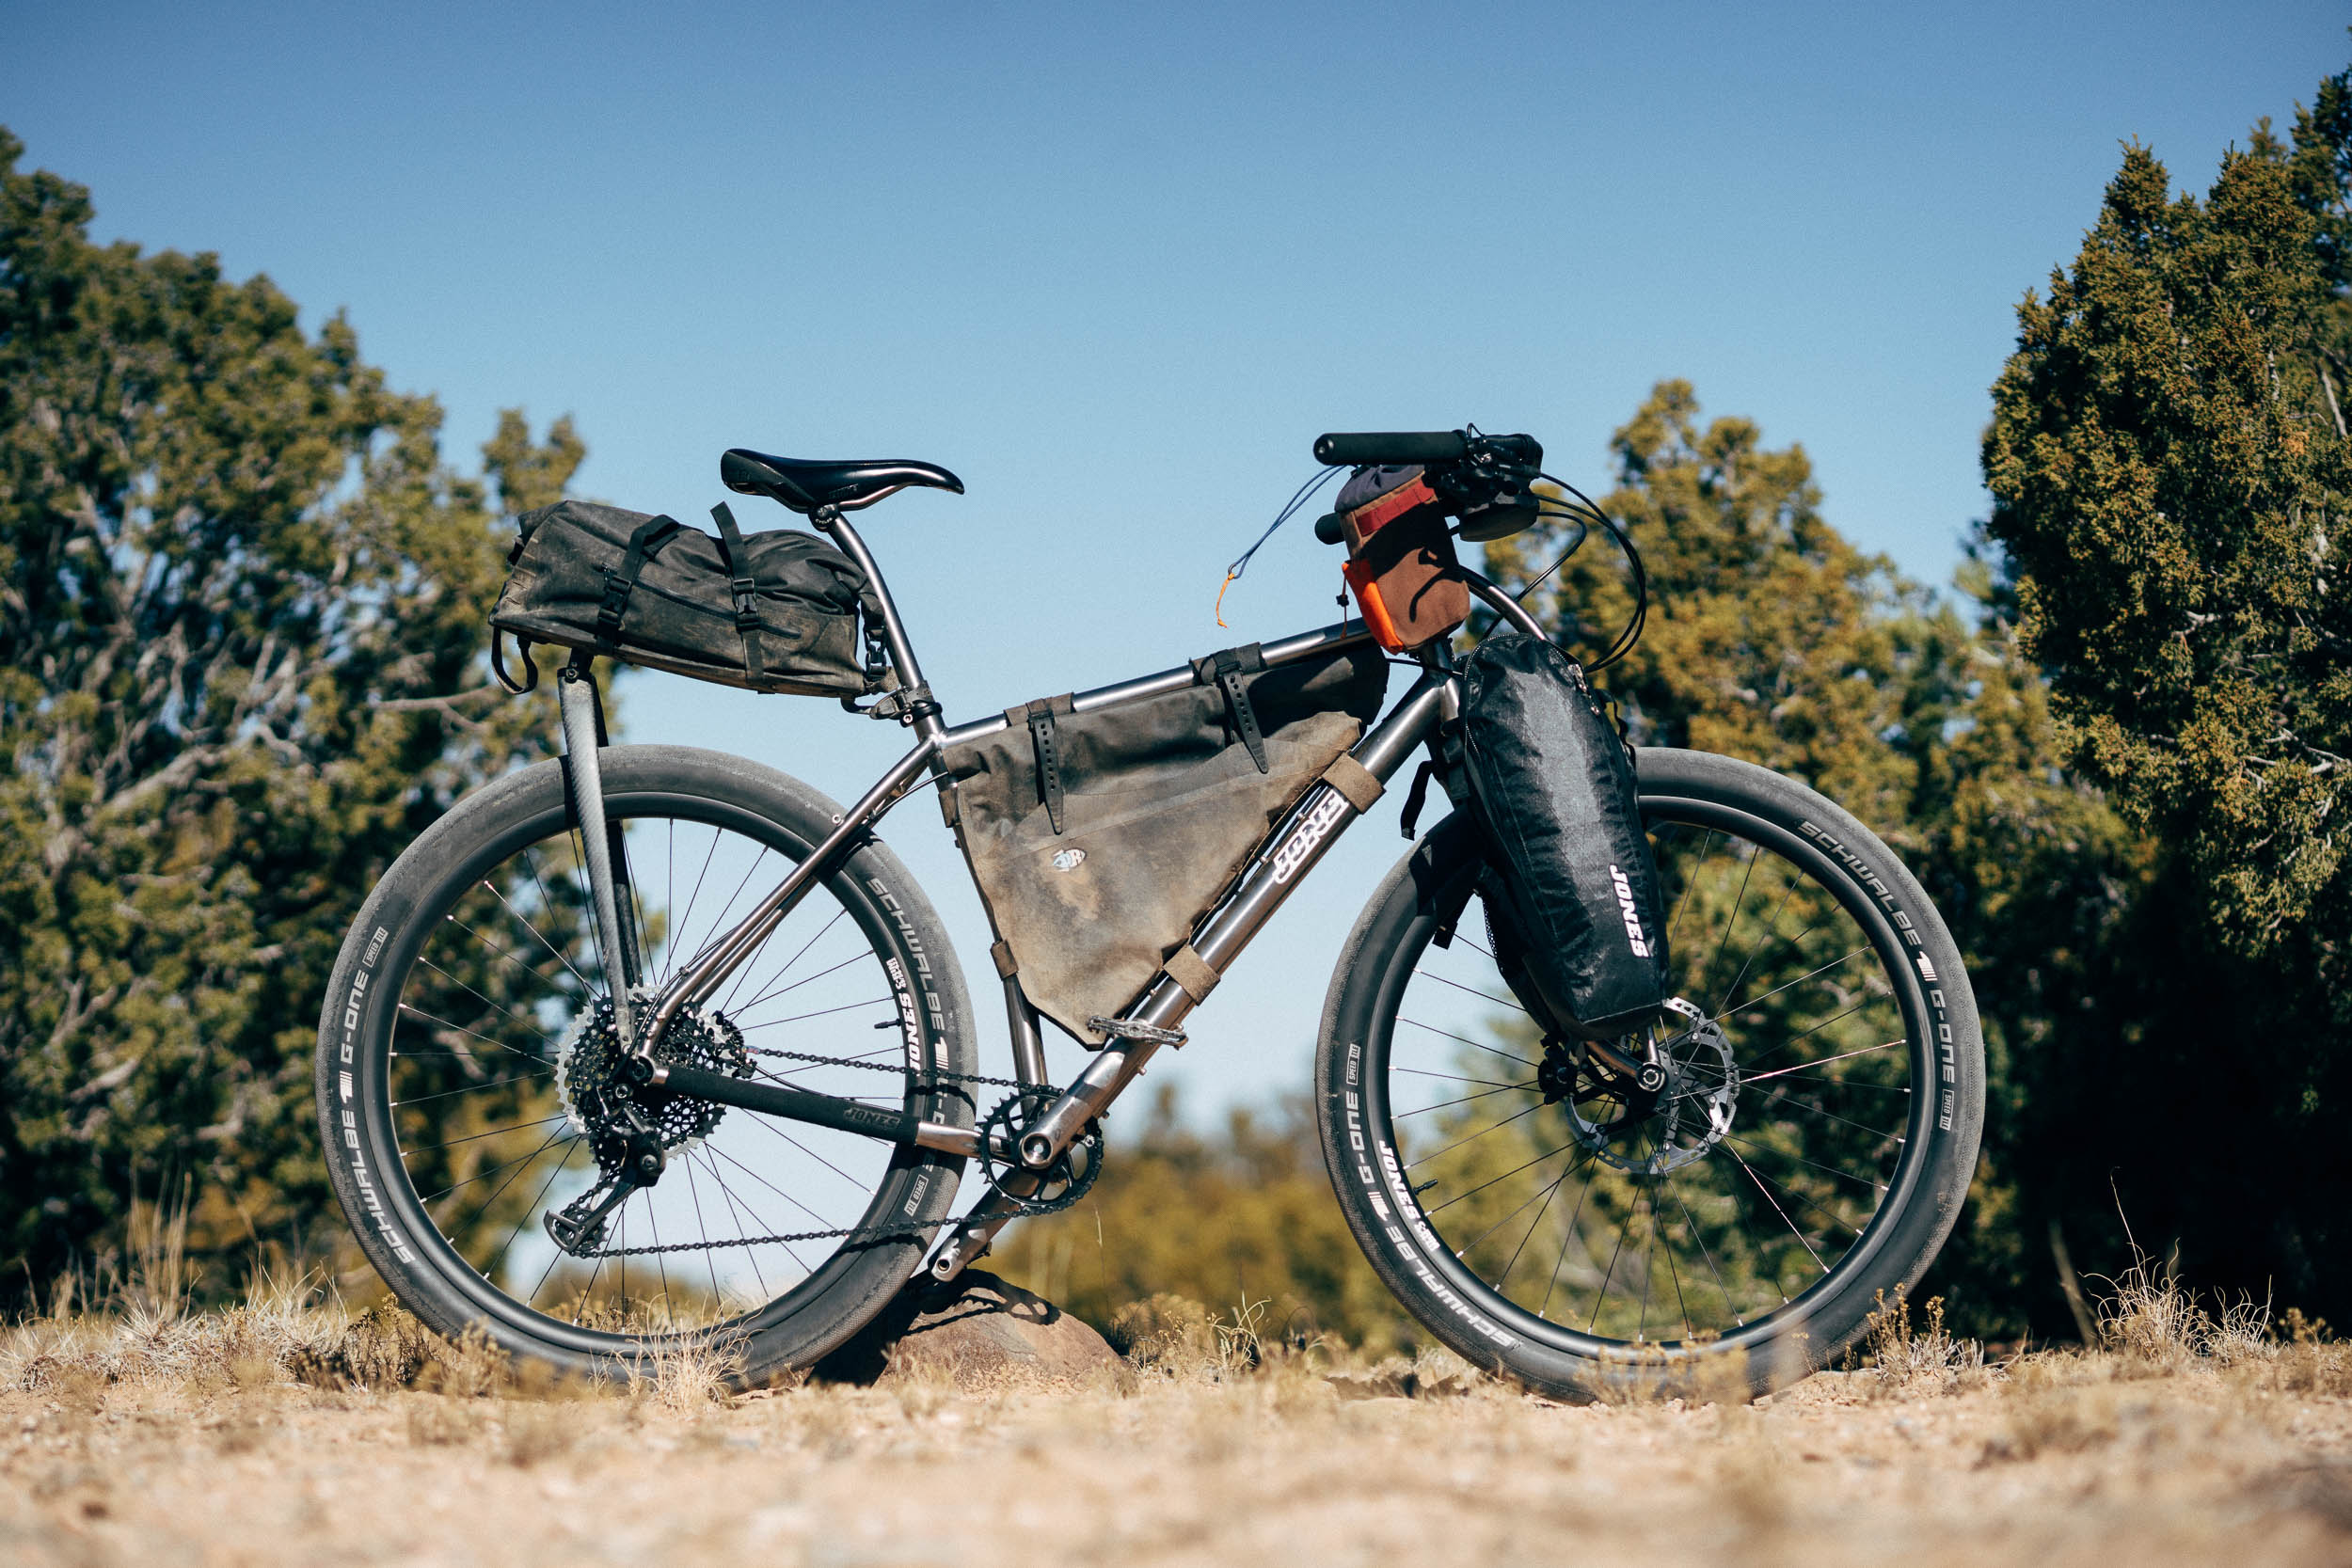
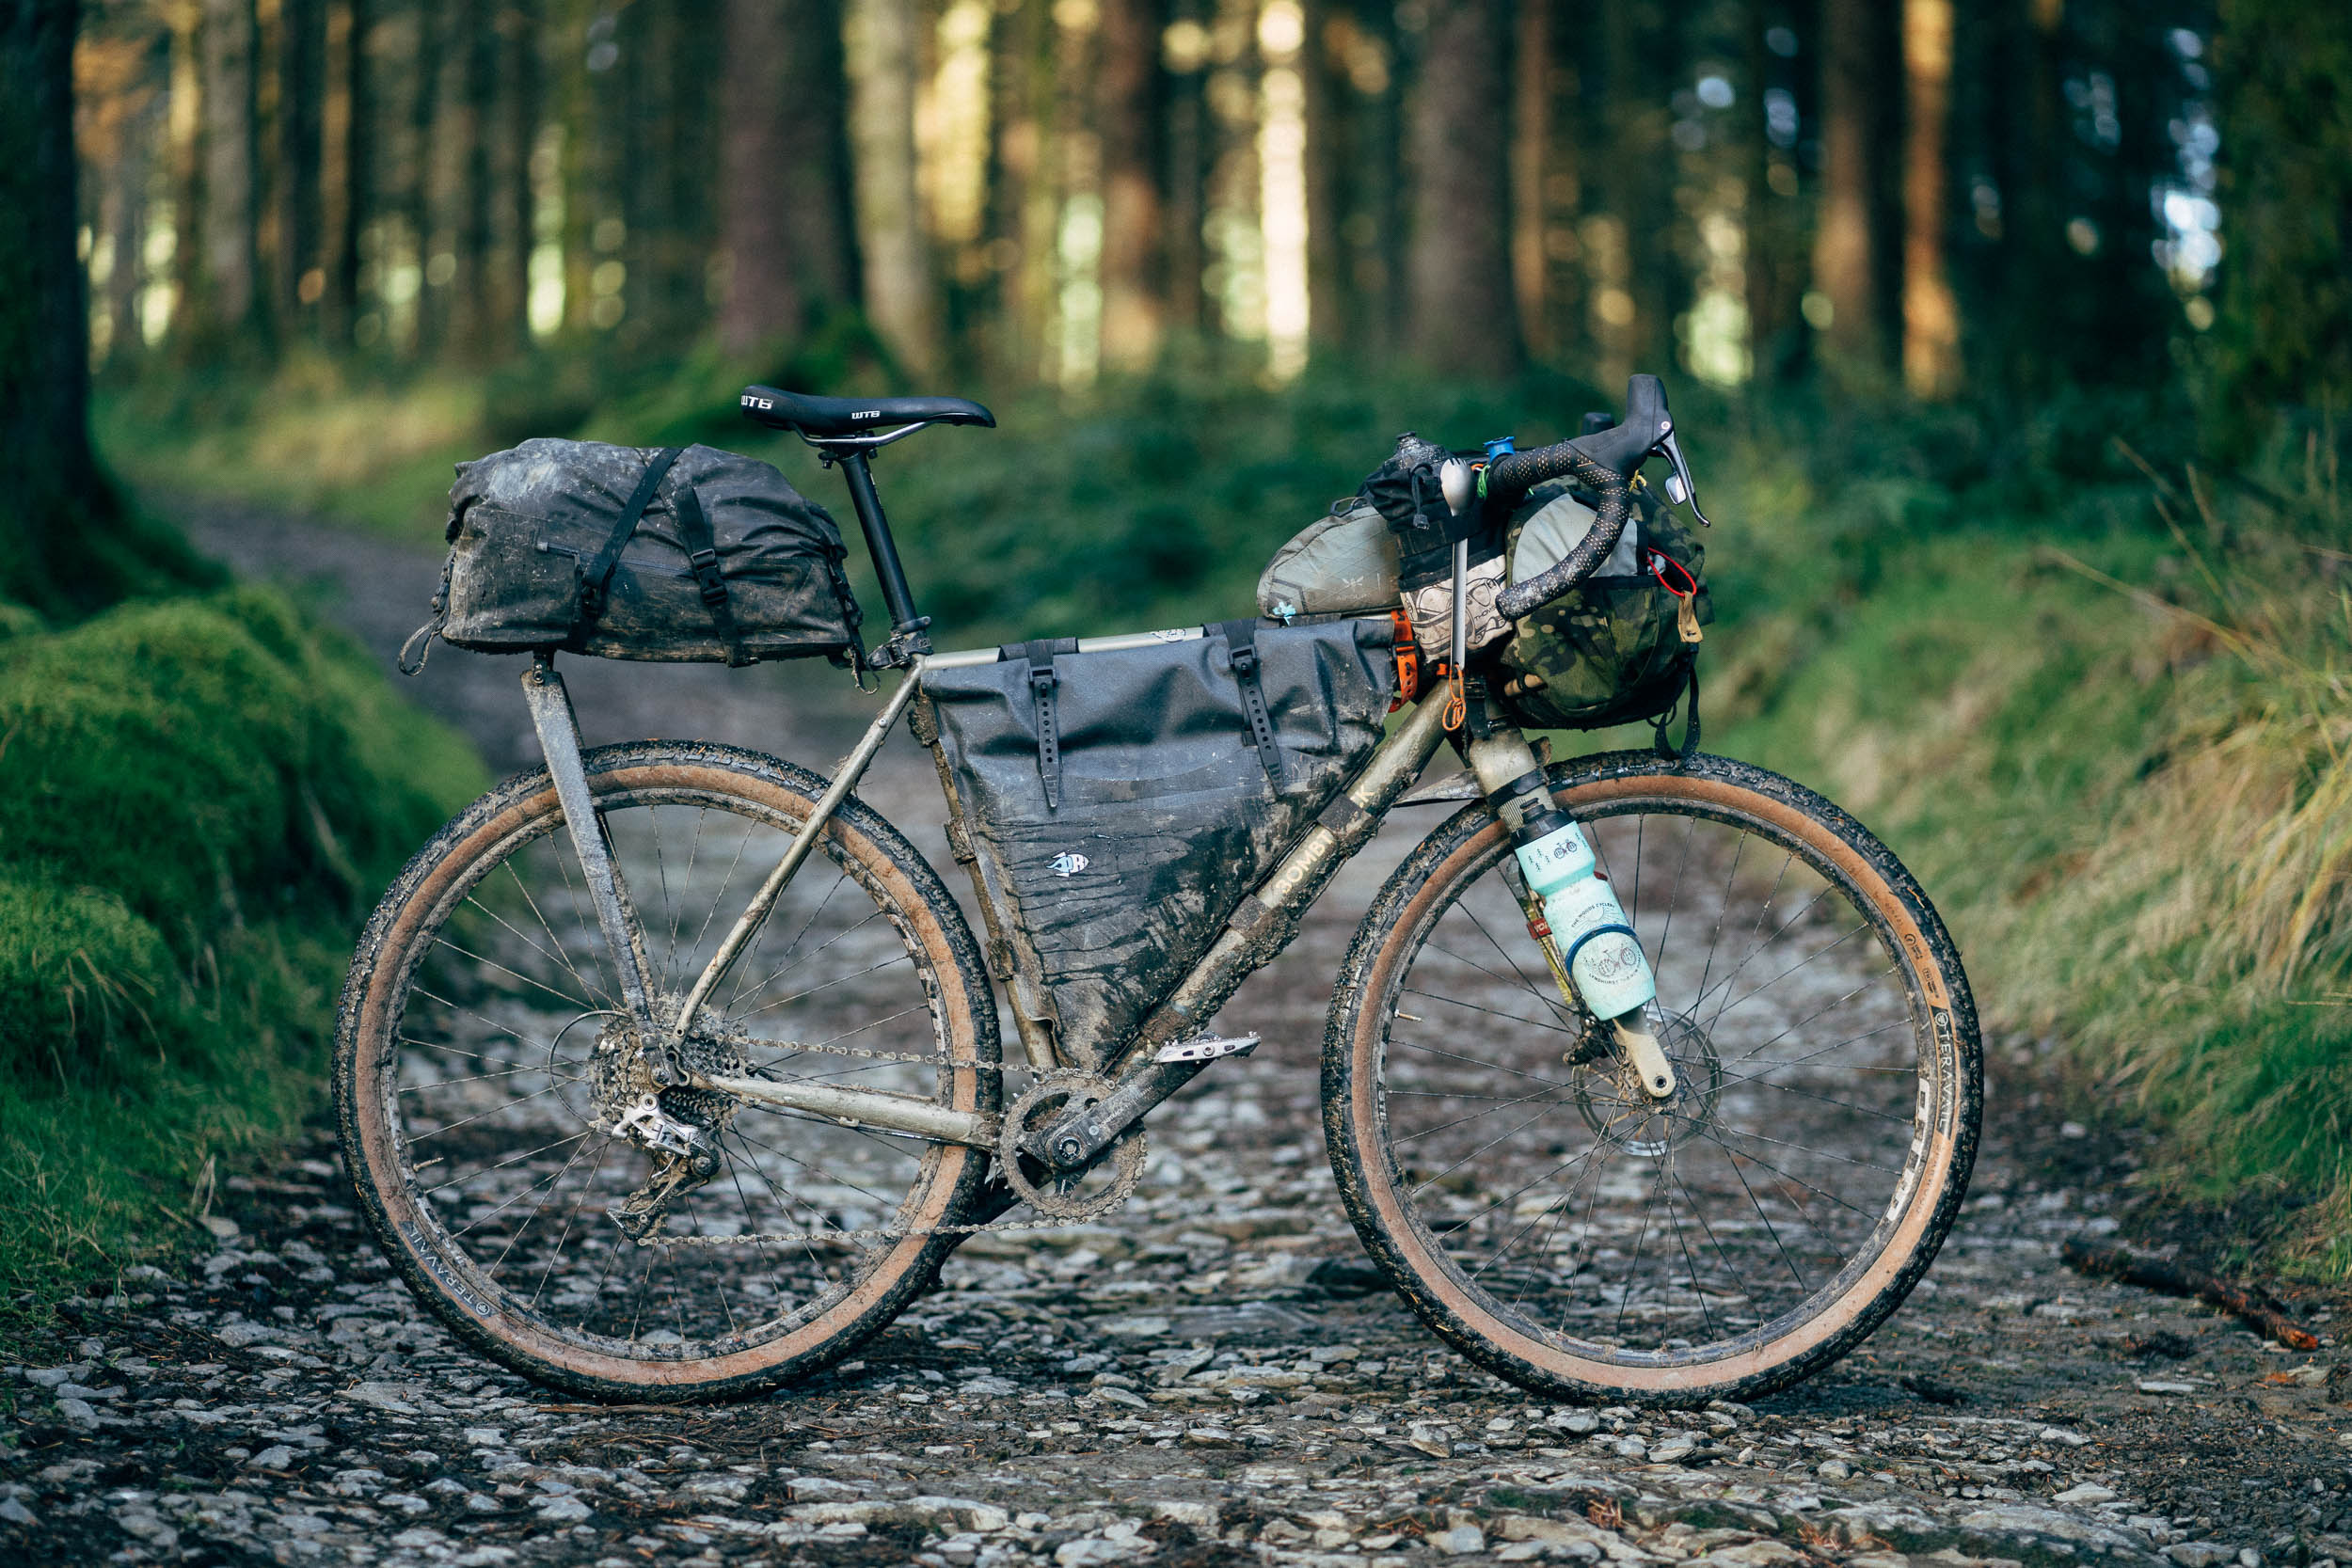
I tried the Carbon S on two different bikes – a Jones SWB Complete (using the frame’s rack bosses) with 3in tyres and a Bombrack Hook EXT (using a through-axle as the mounting point and the longer neck, as seen in the photos below). If you visit Tailfin’s website, all these variables can be unearthed via drop-down menus. There’s also a basic filter, indicating which model suits which application best (be gravel racing, off-road bikepacking, or commuting). Of course, there’s nothing to stop you using whatever model you prefer for the bikepacking activity of your choice, like the Carbon S on a long travel steel hardtail…
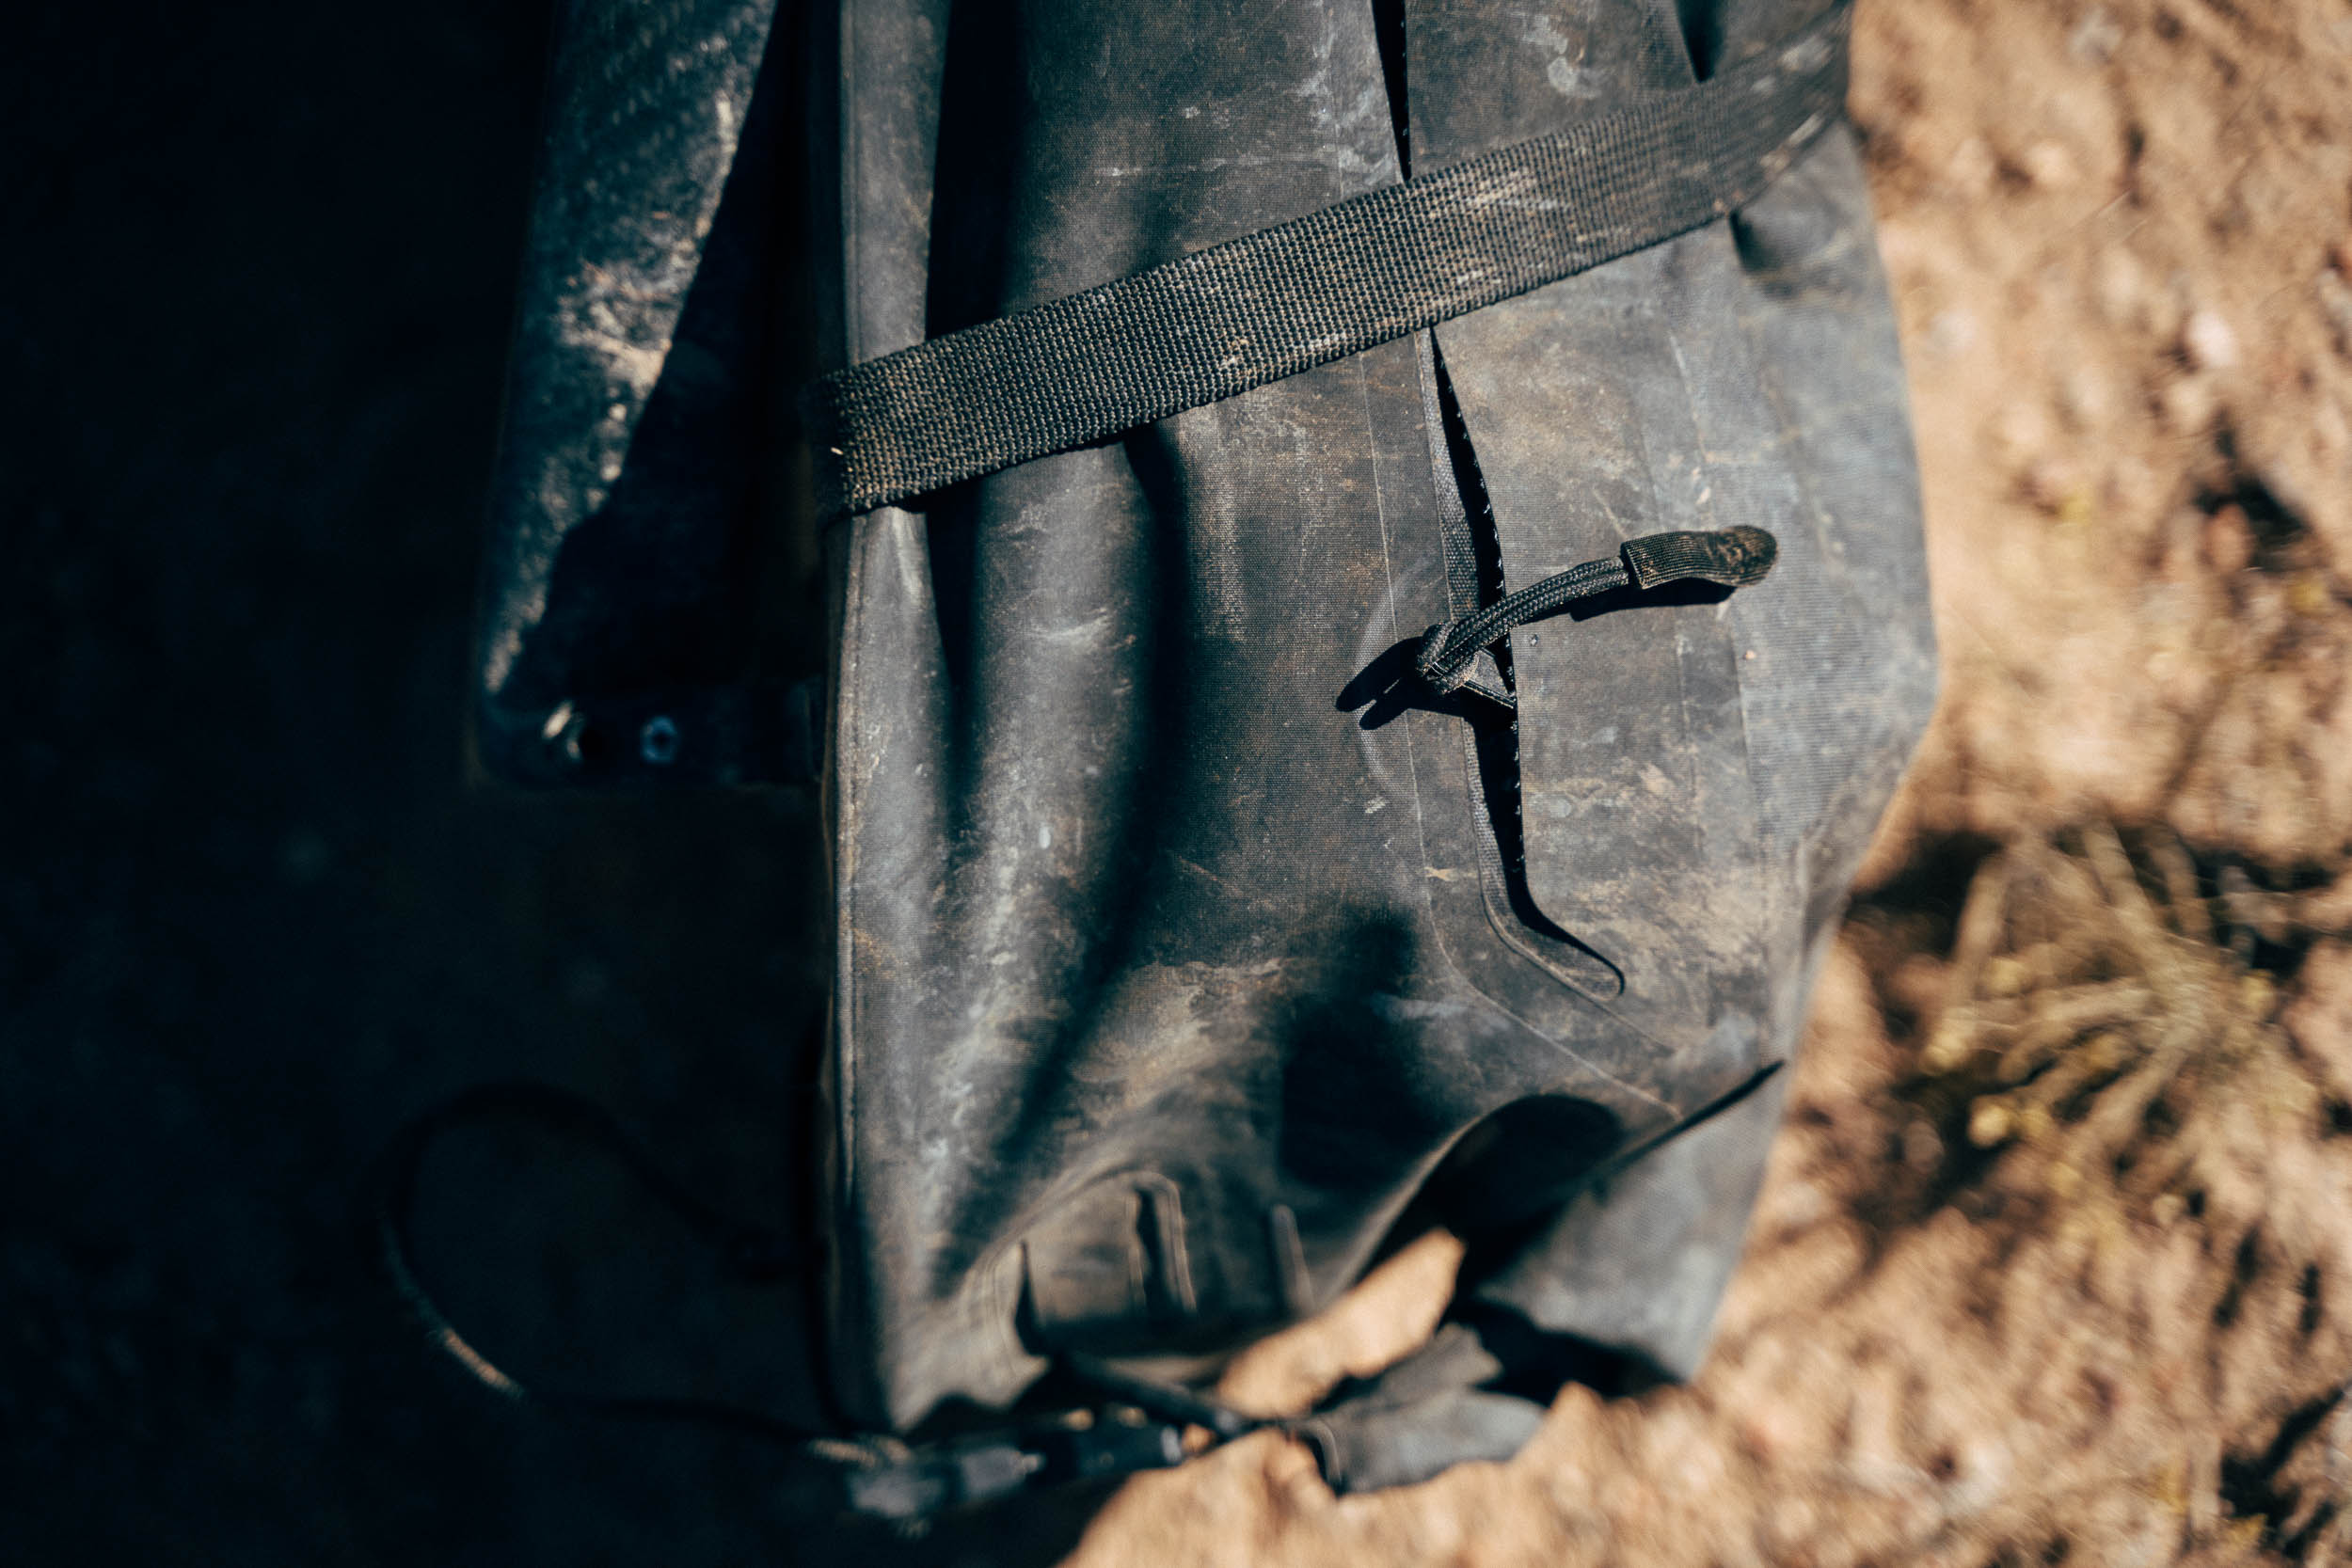
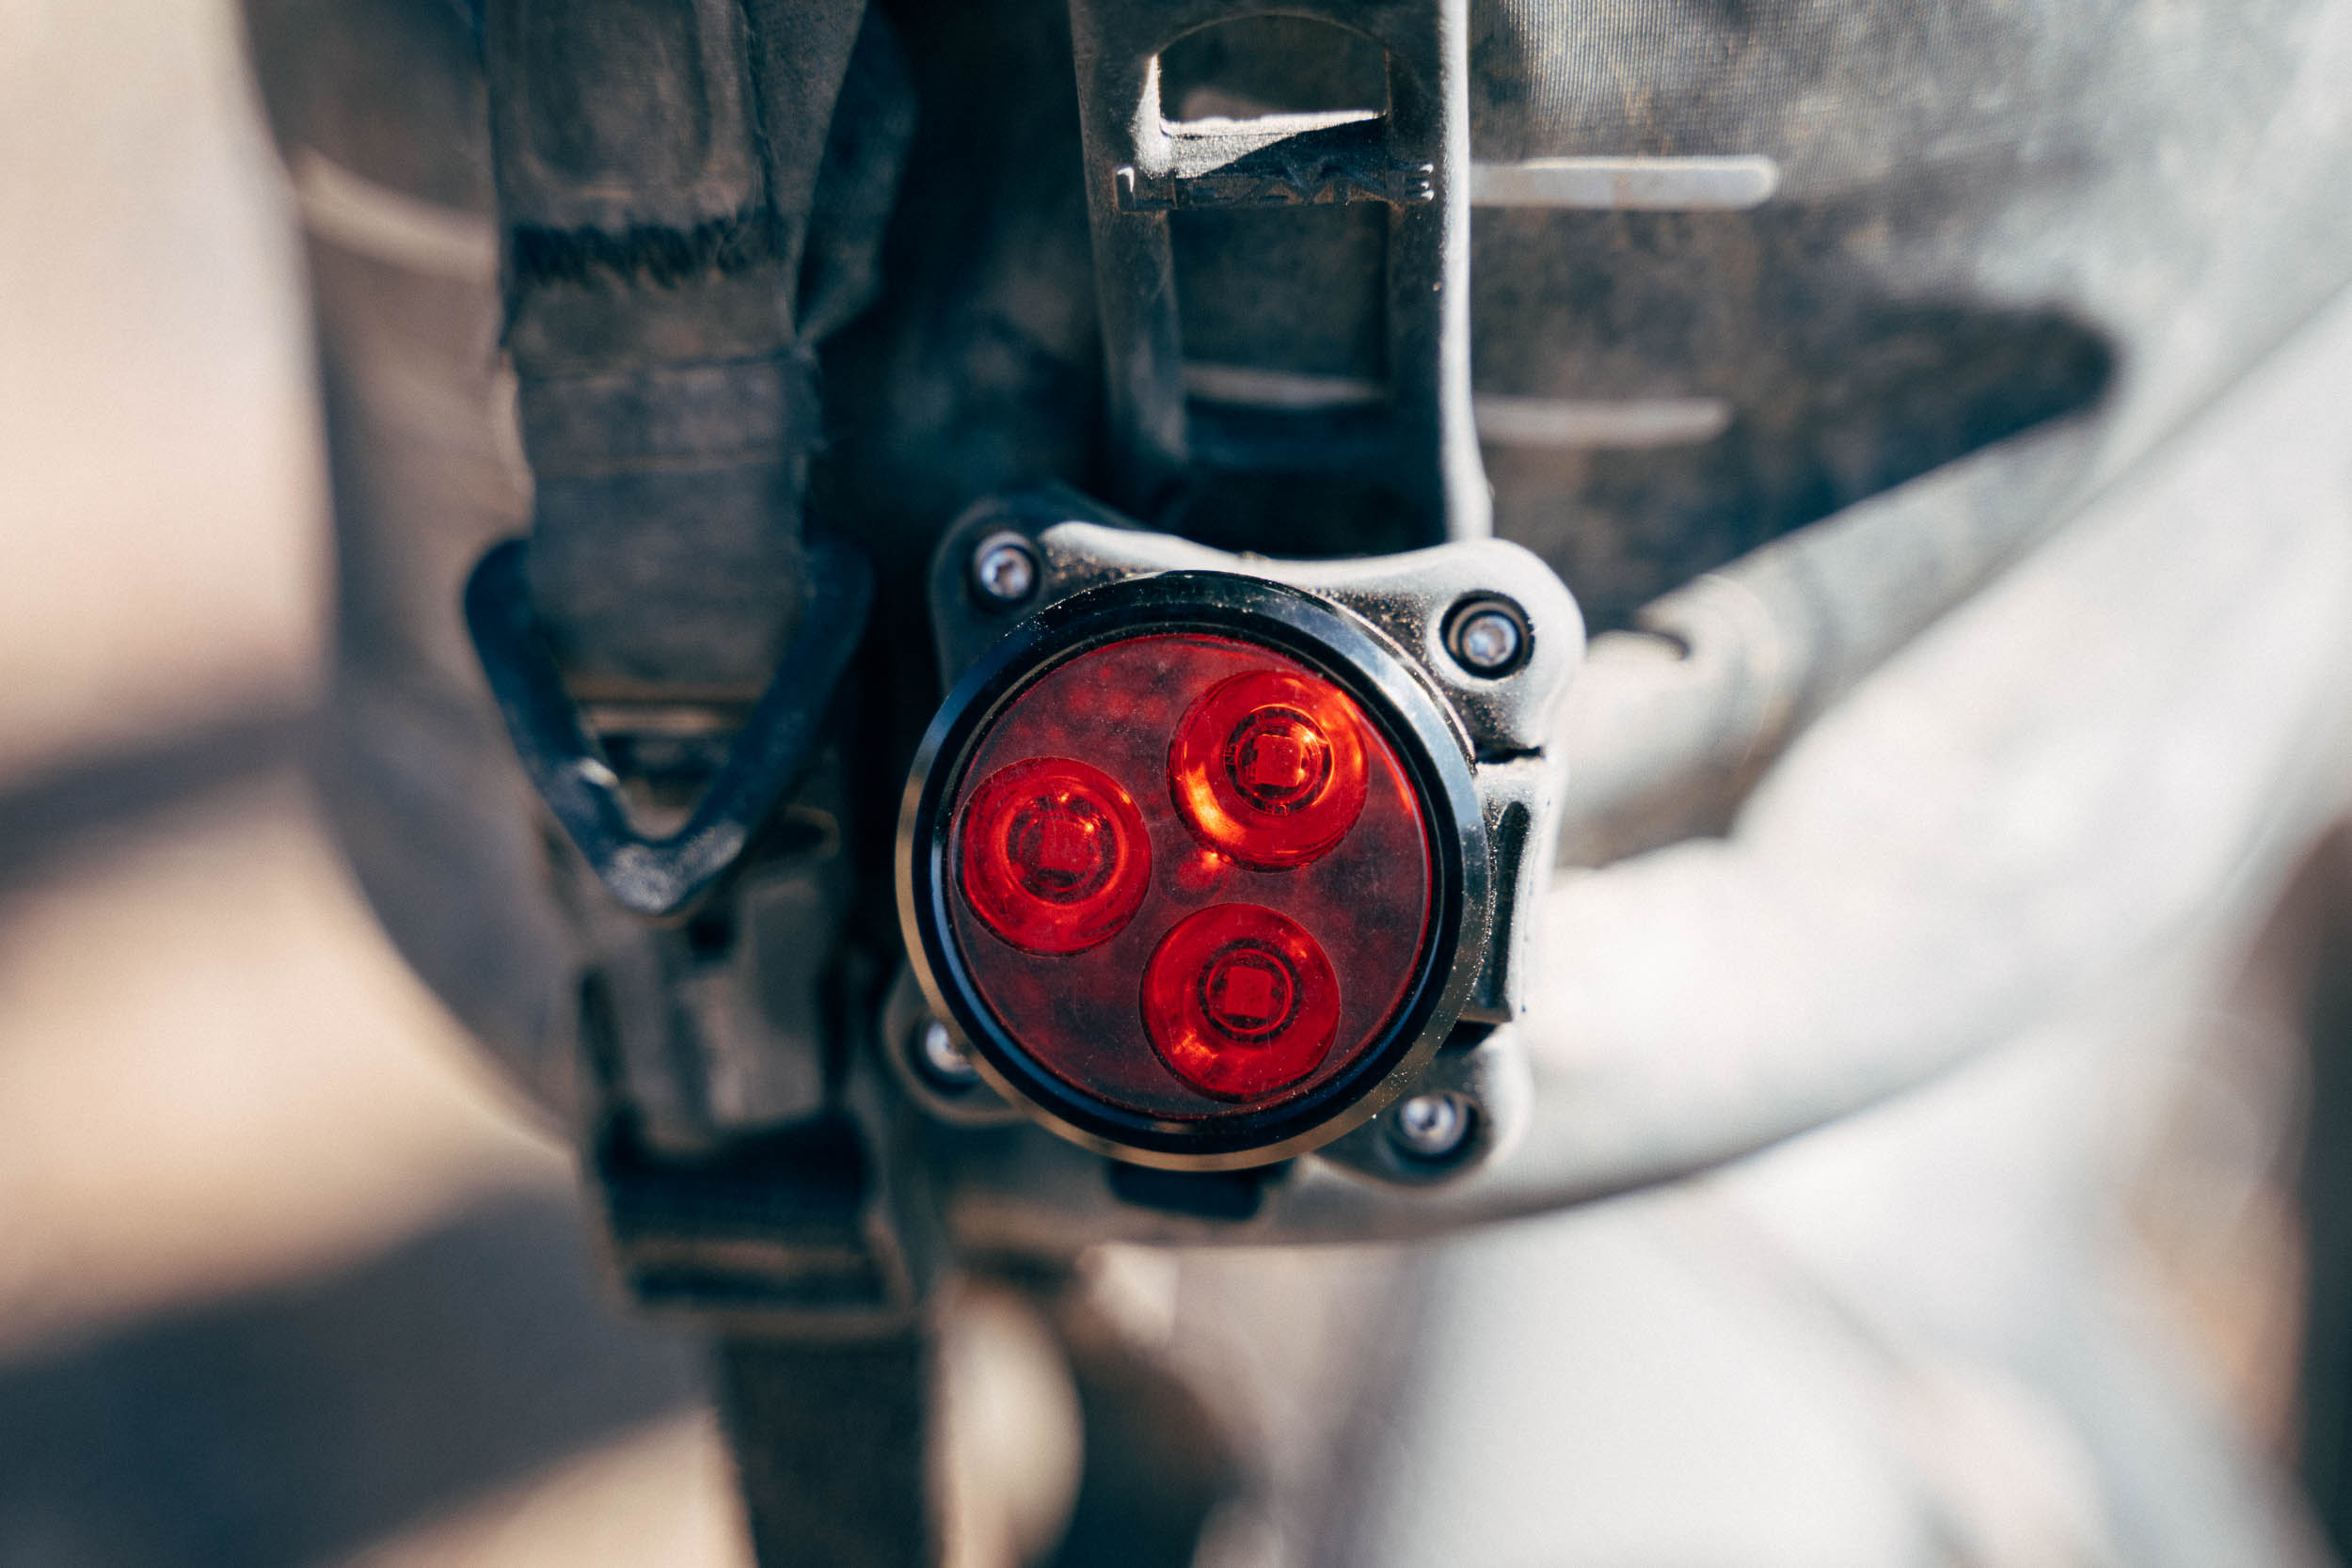
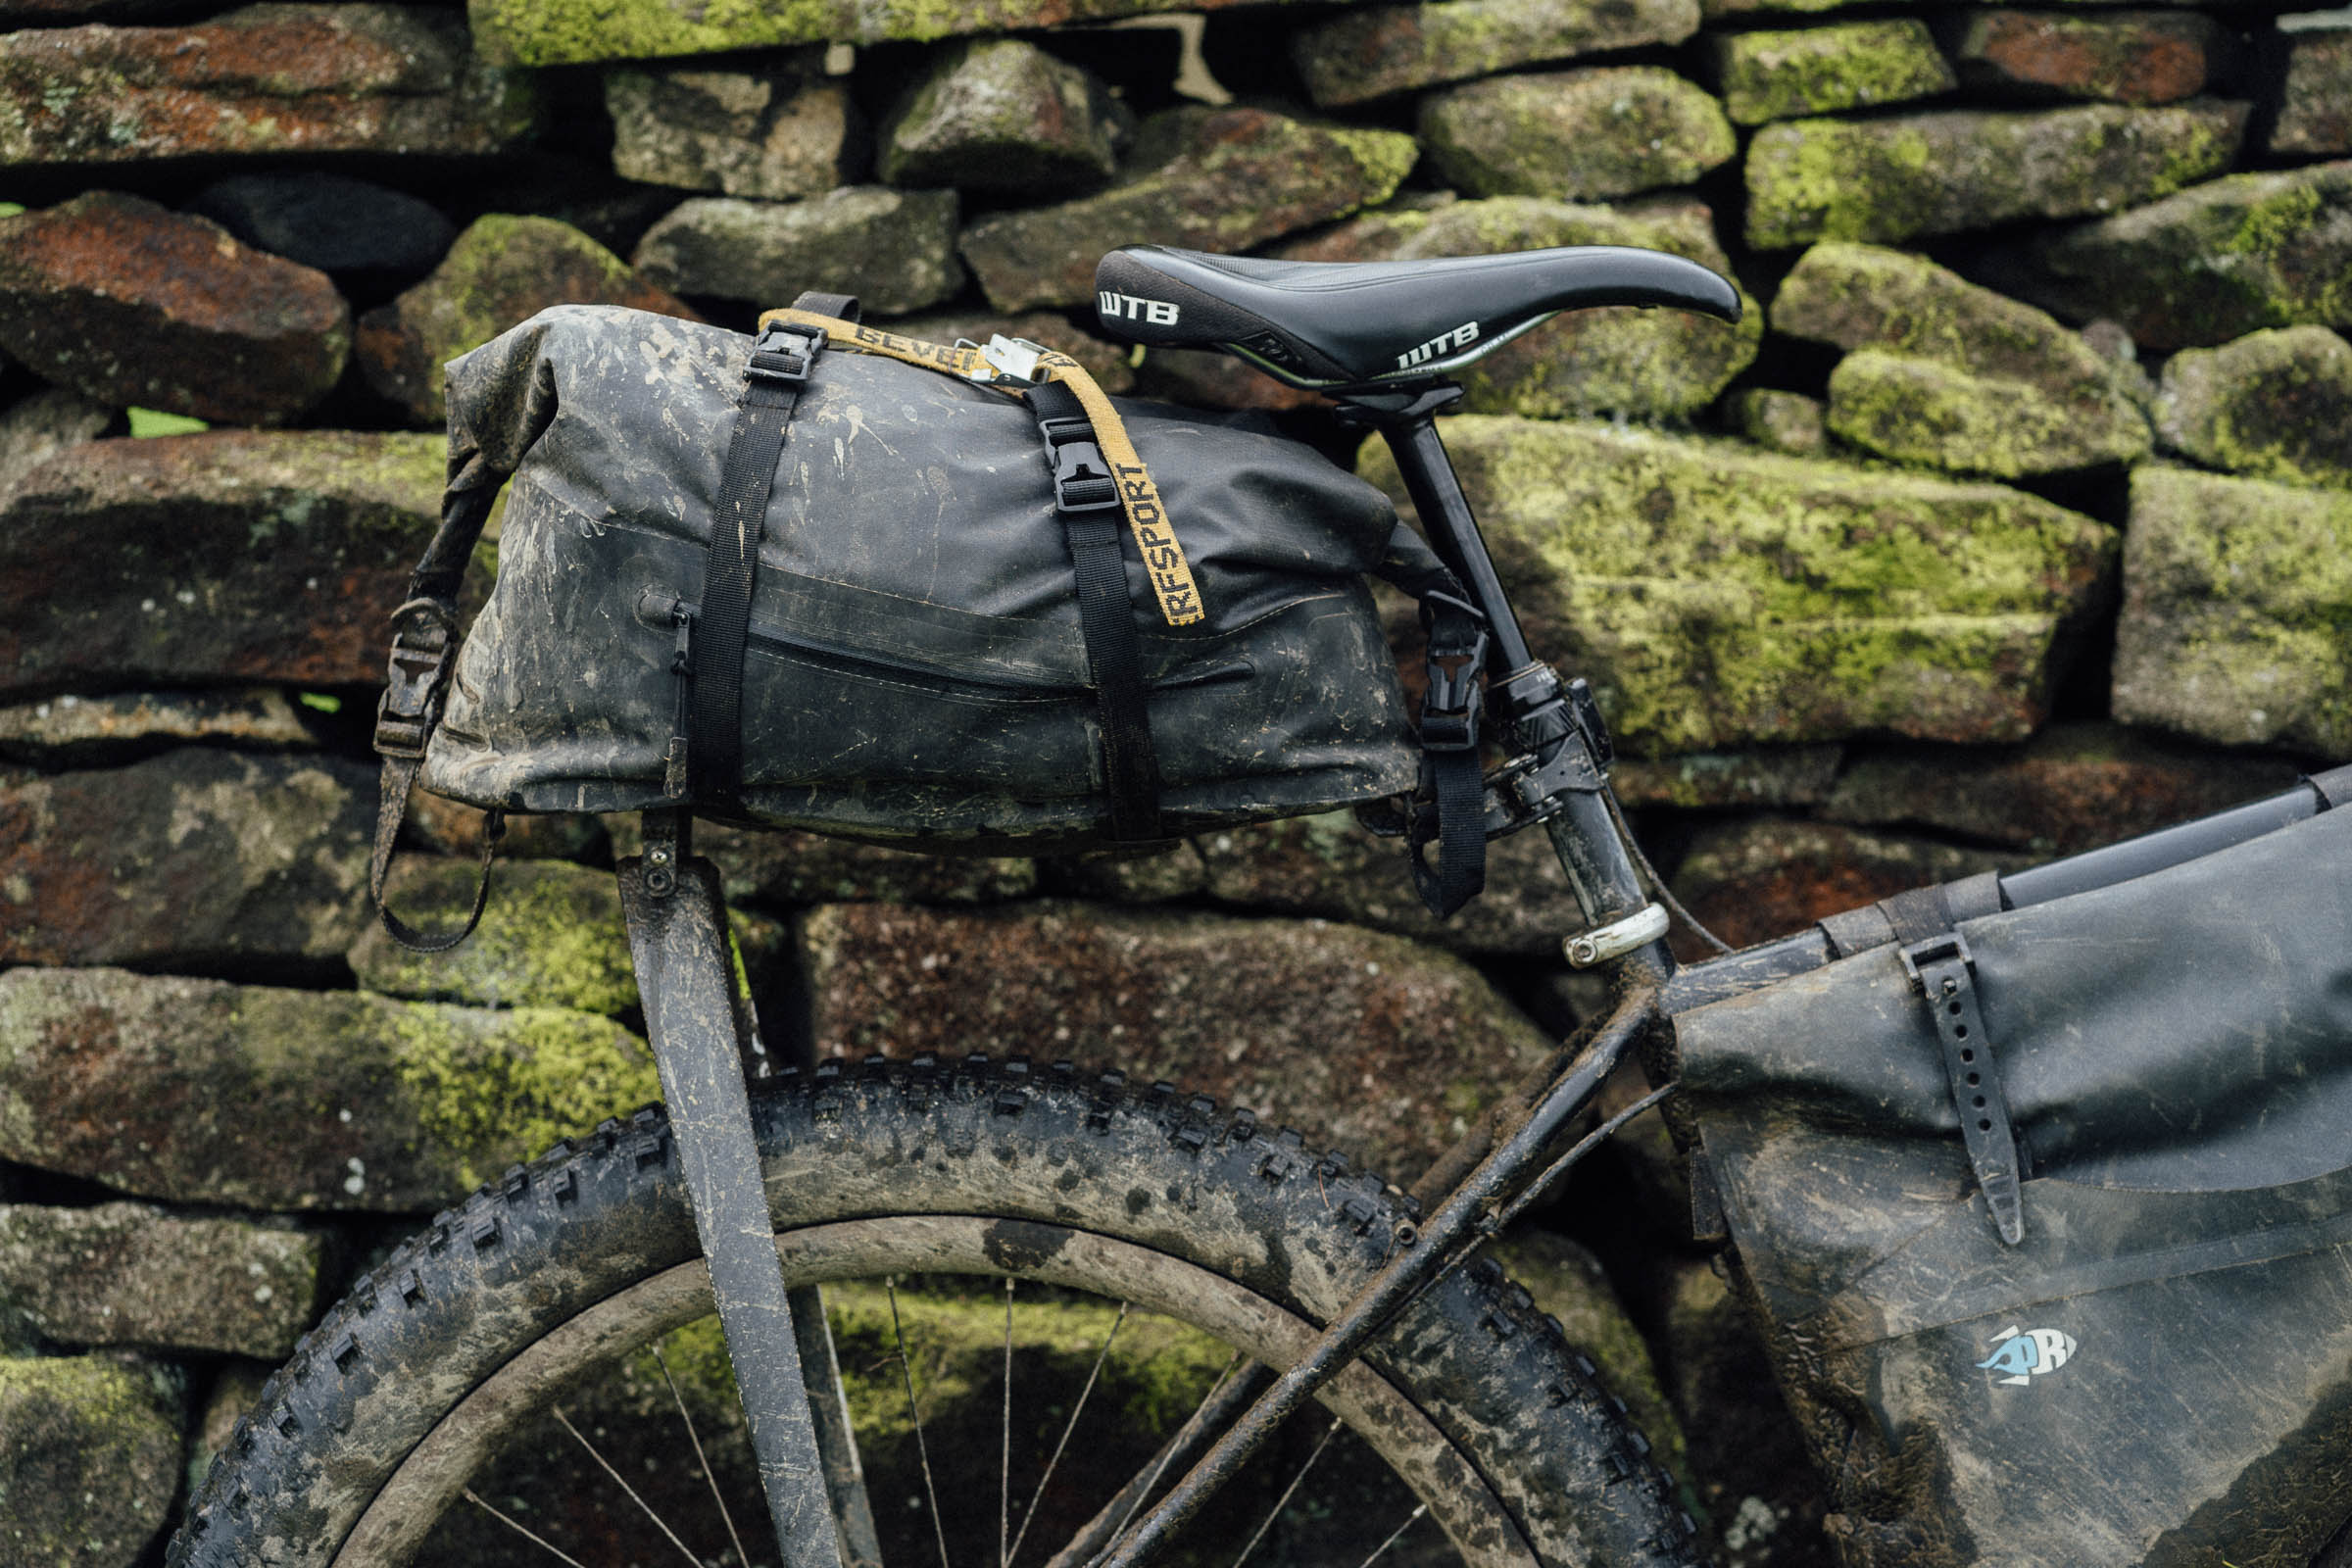
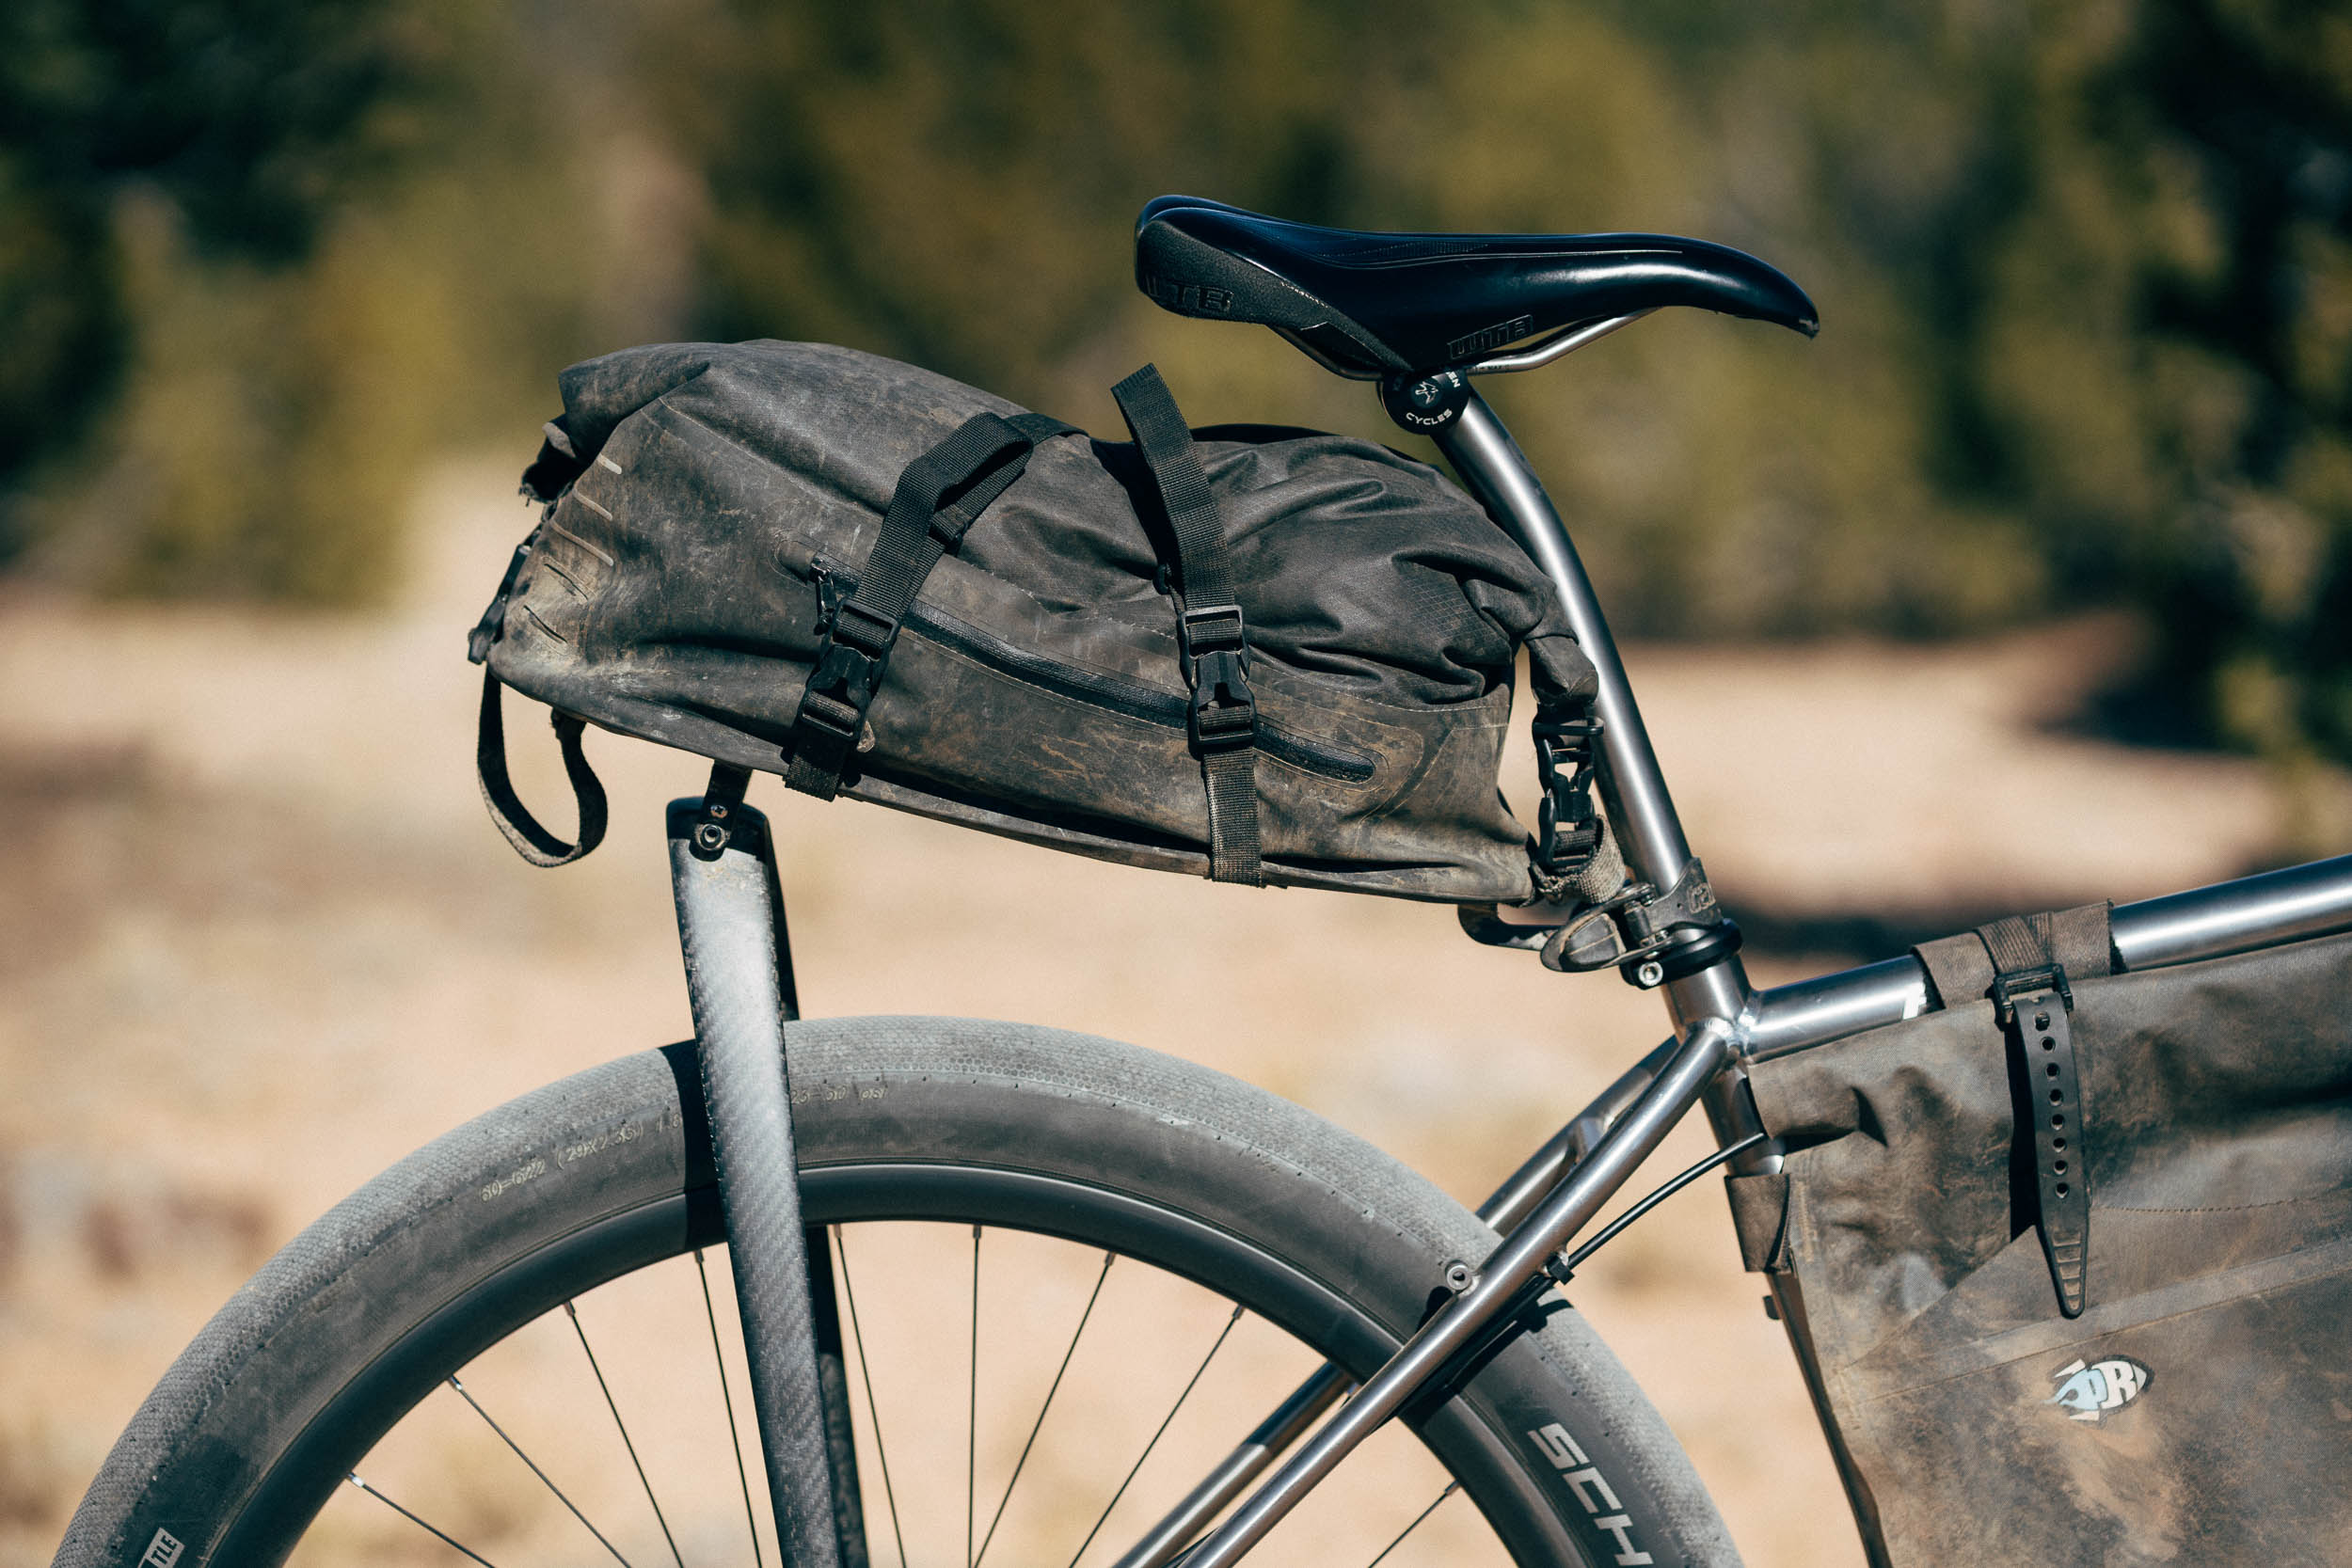
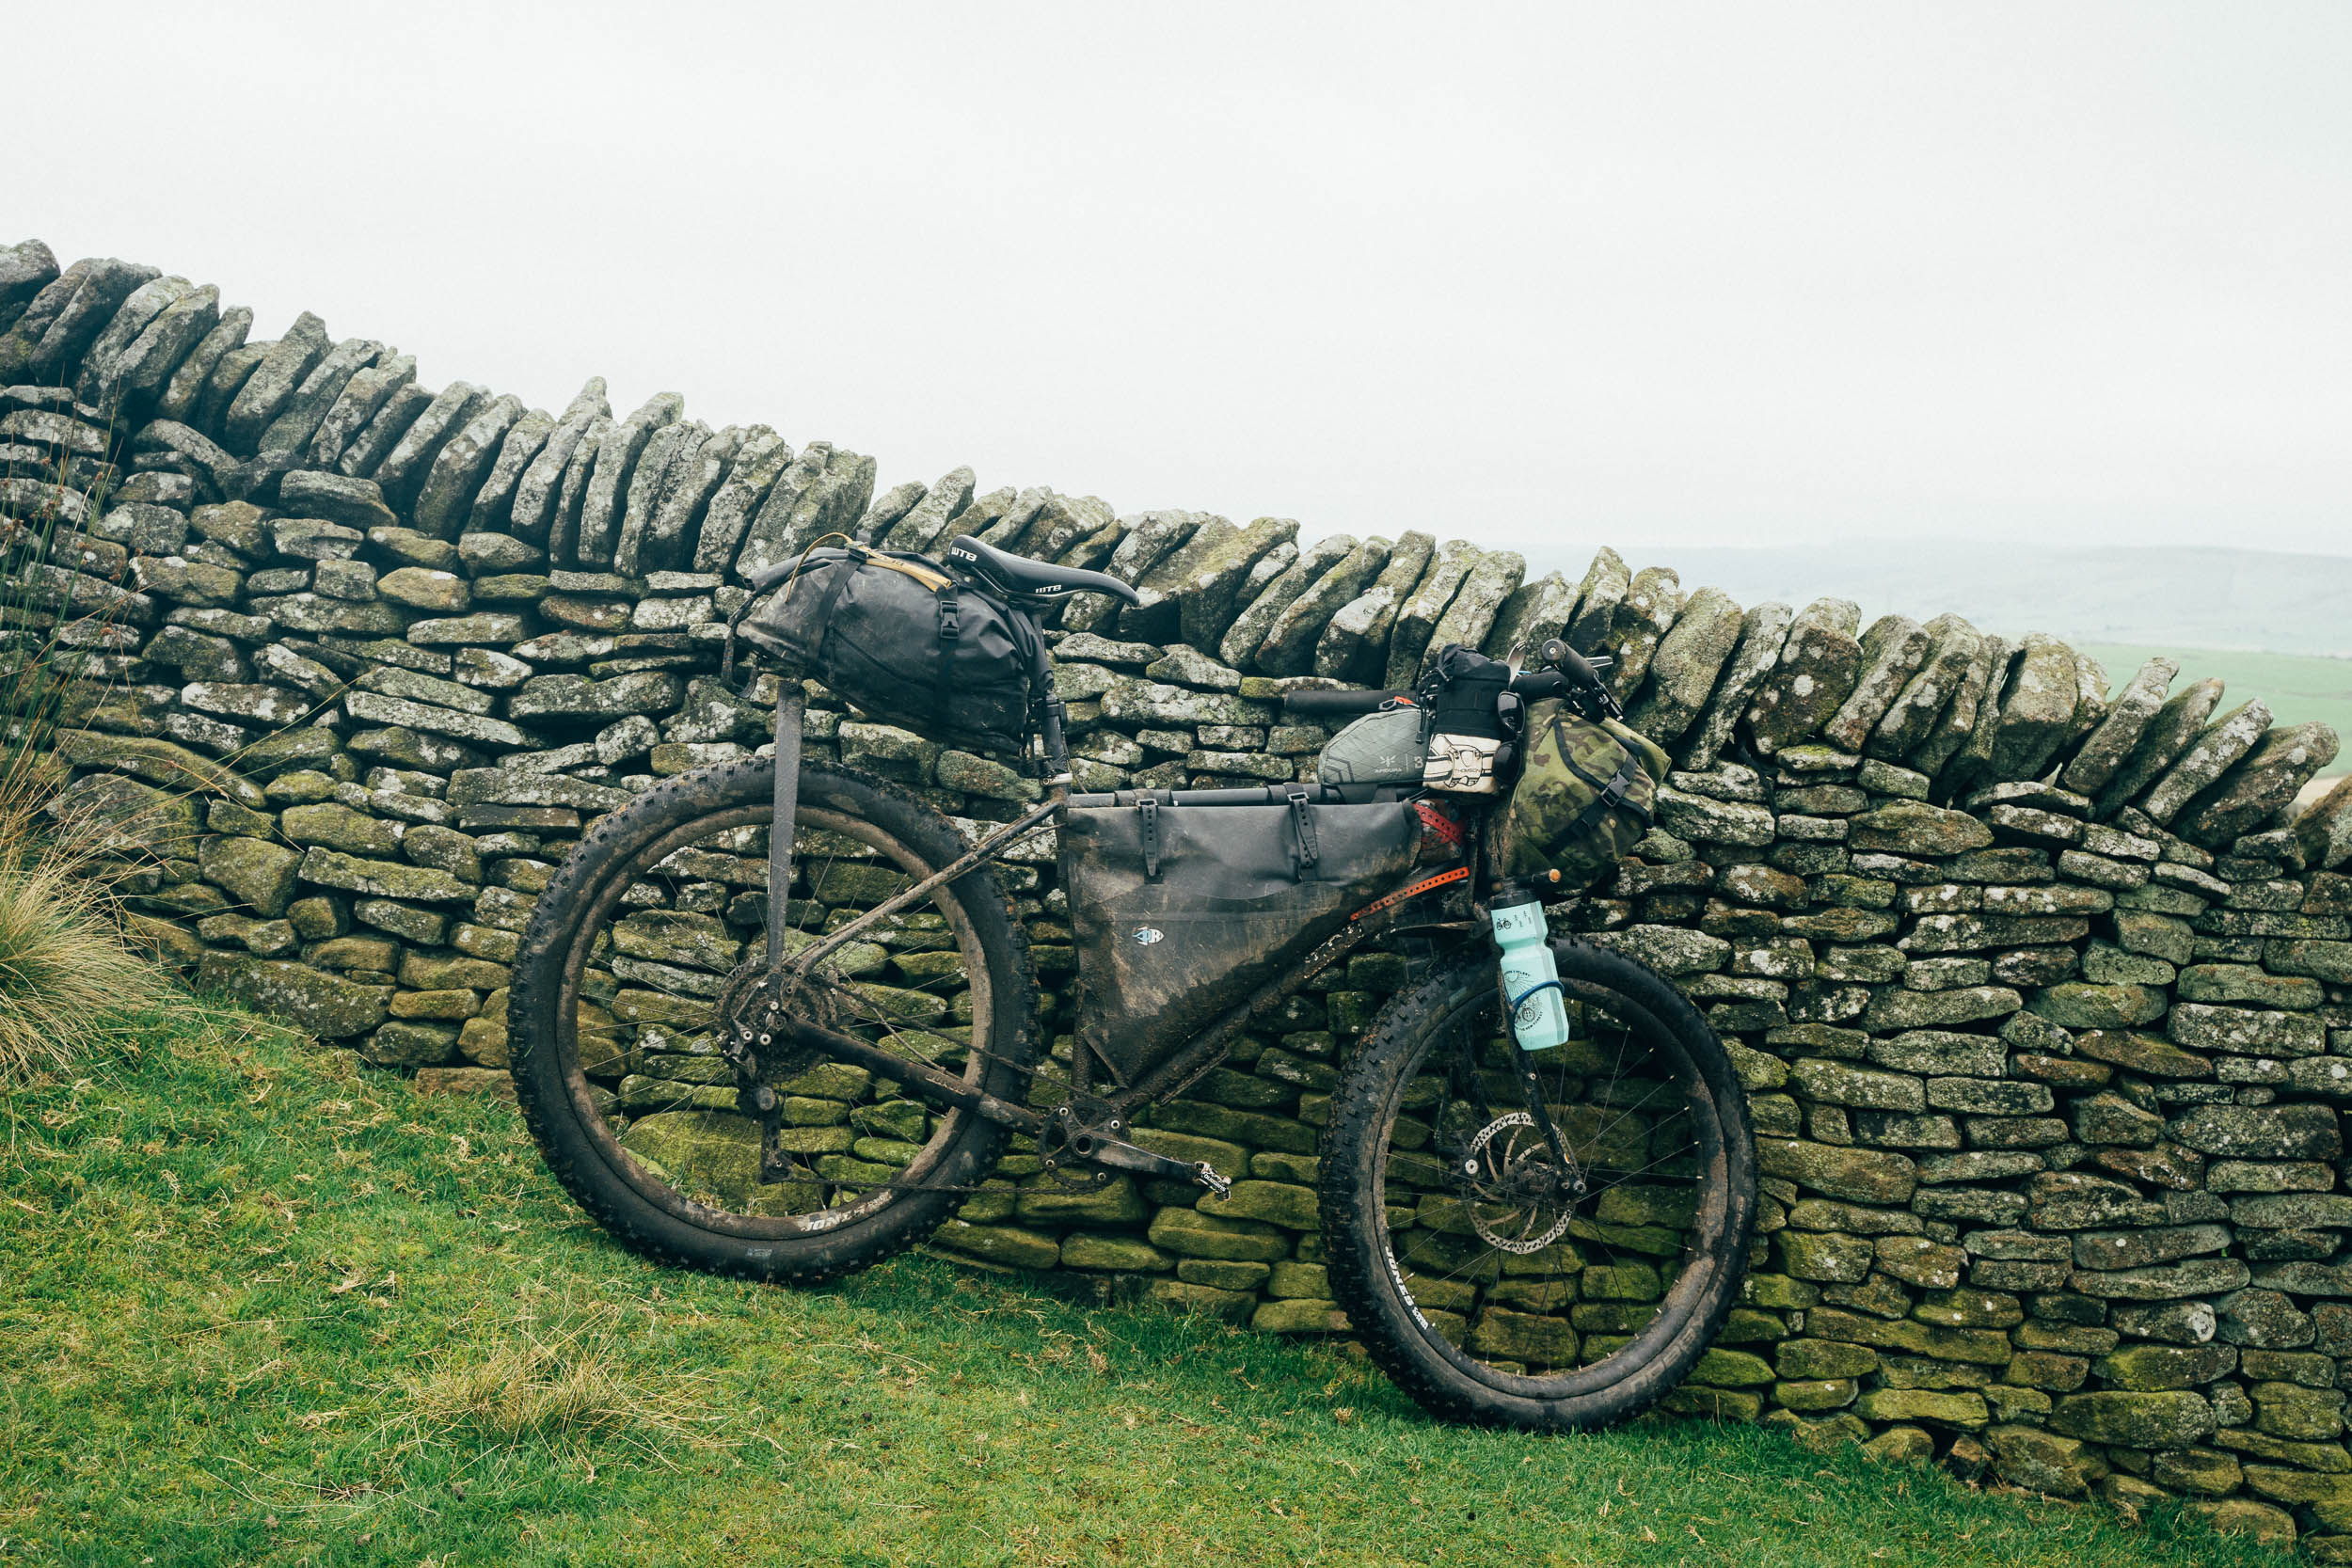
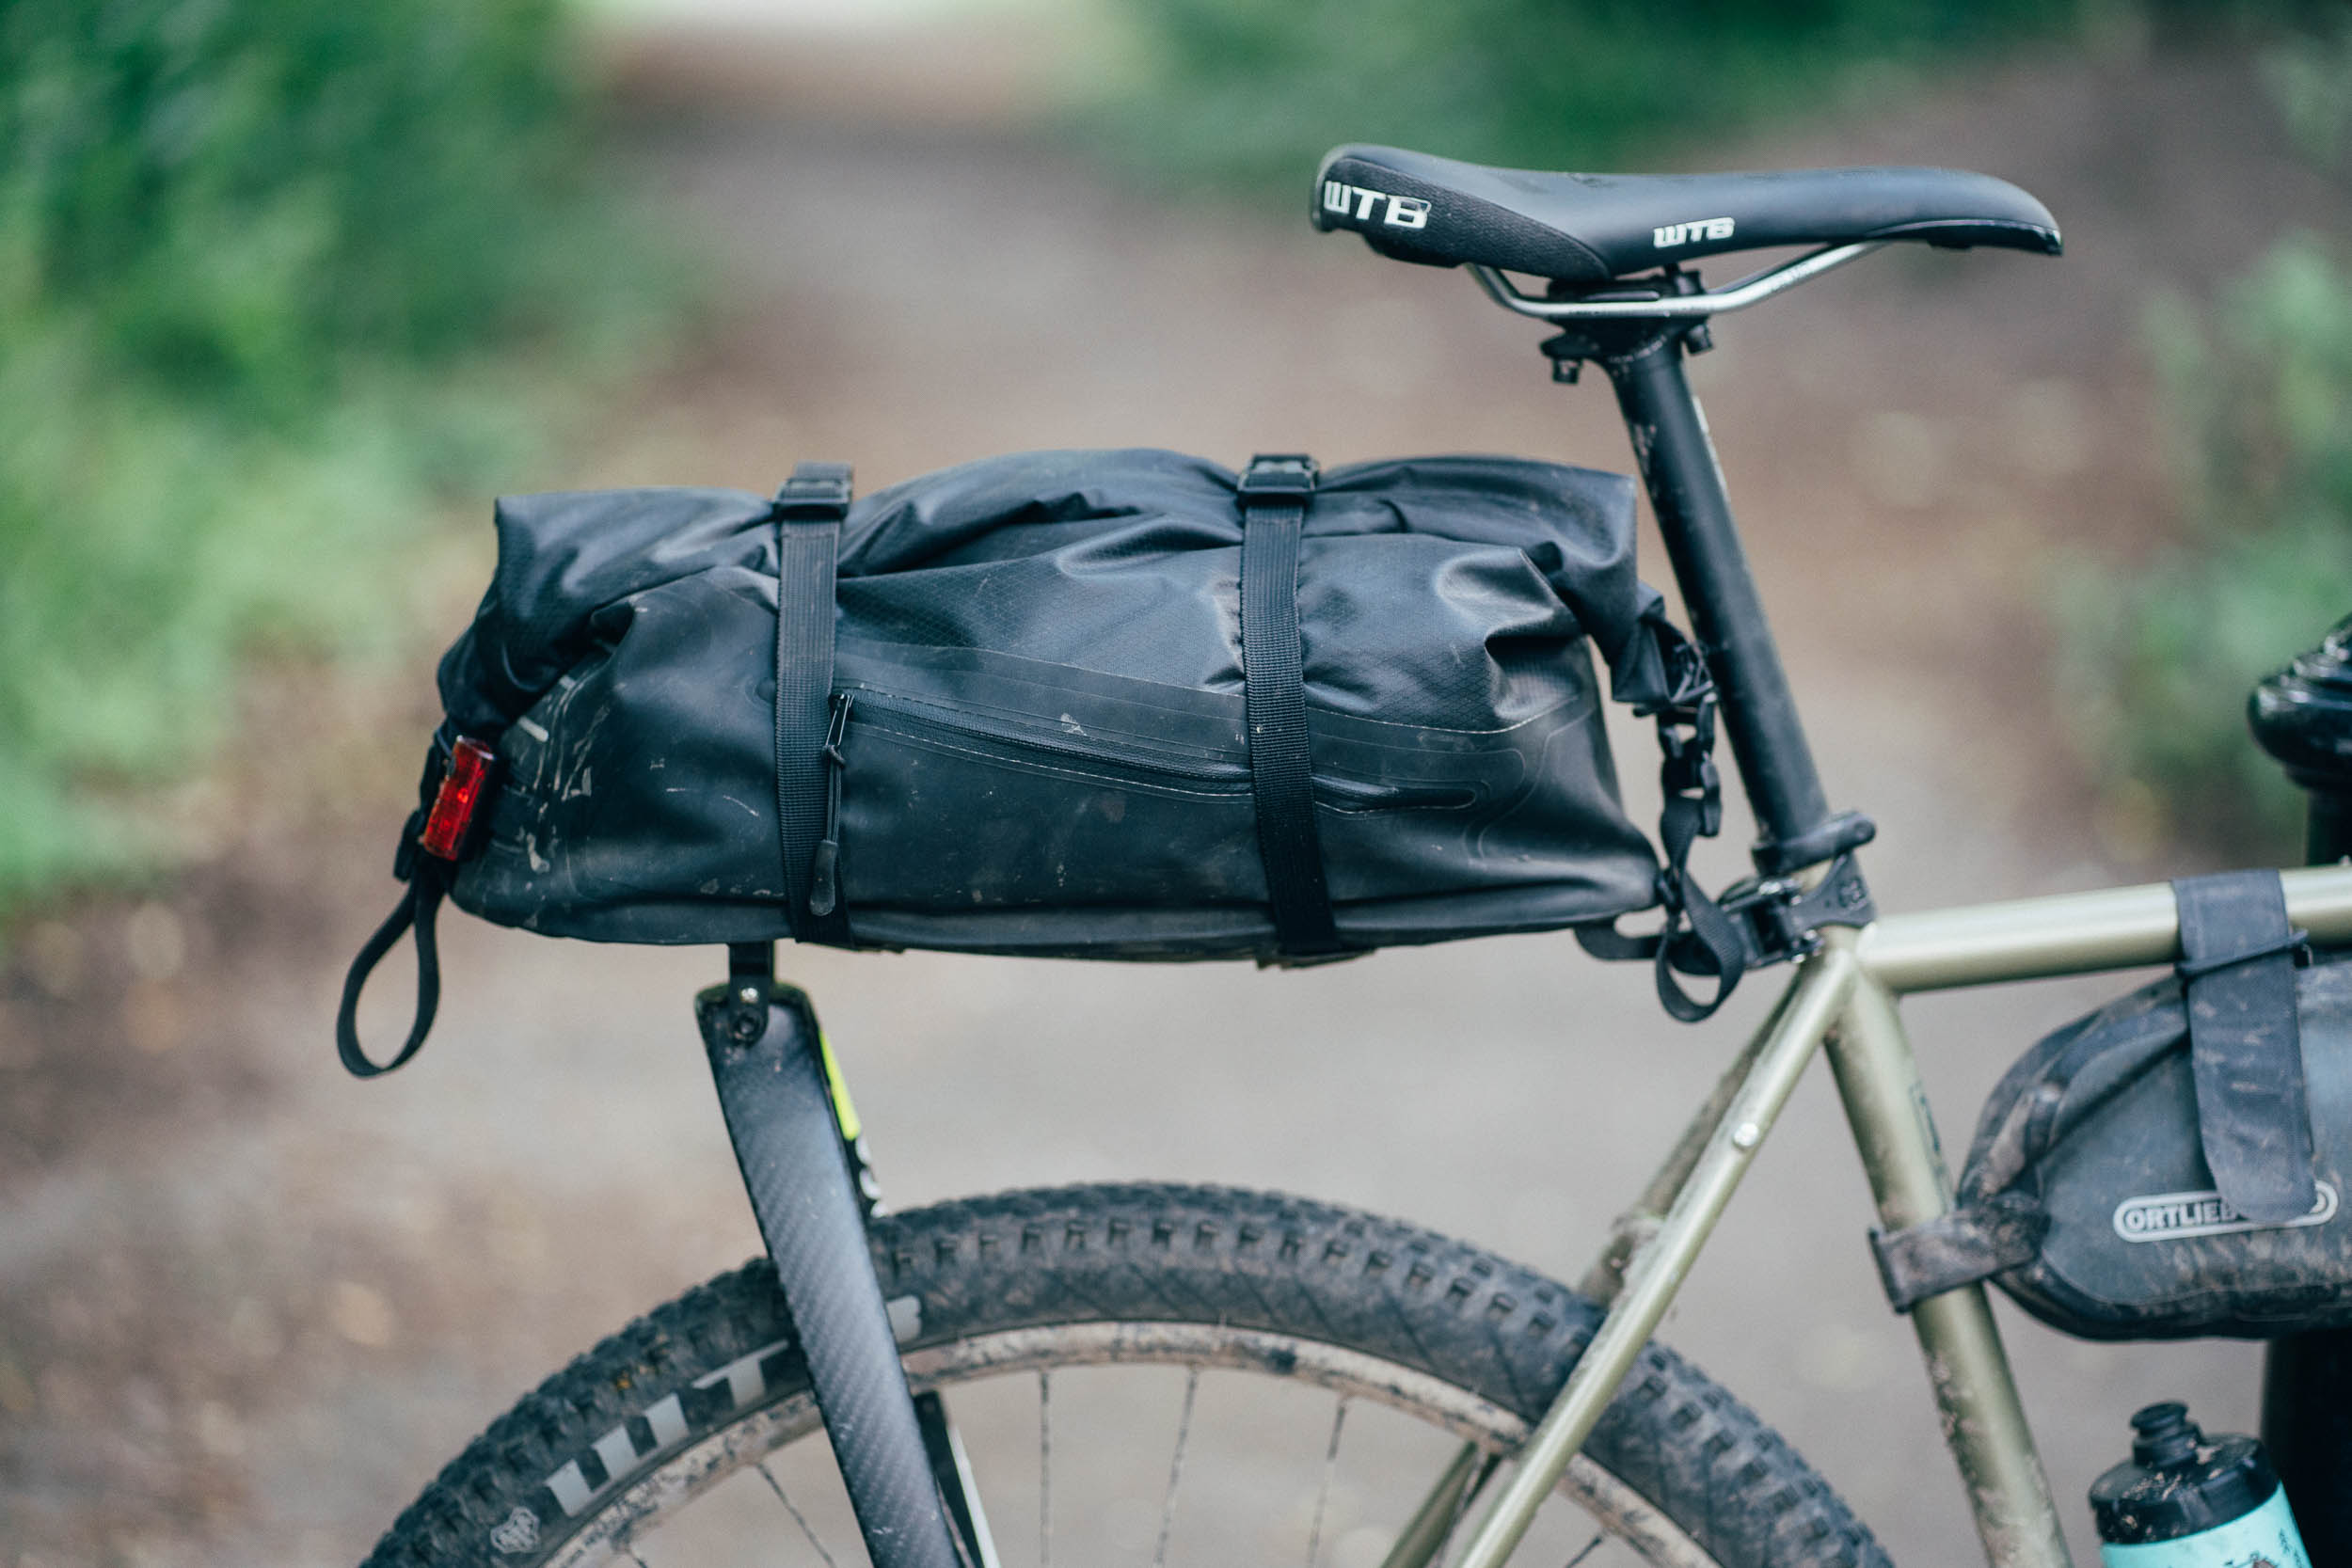
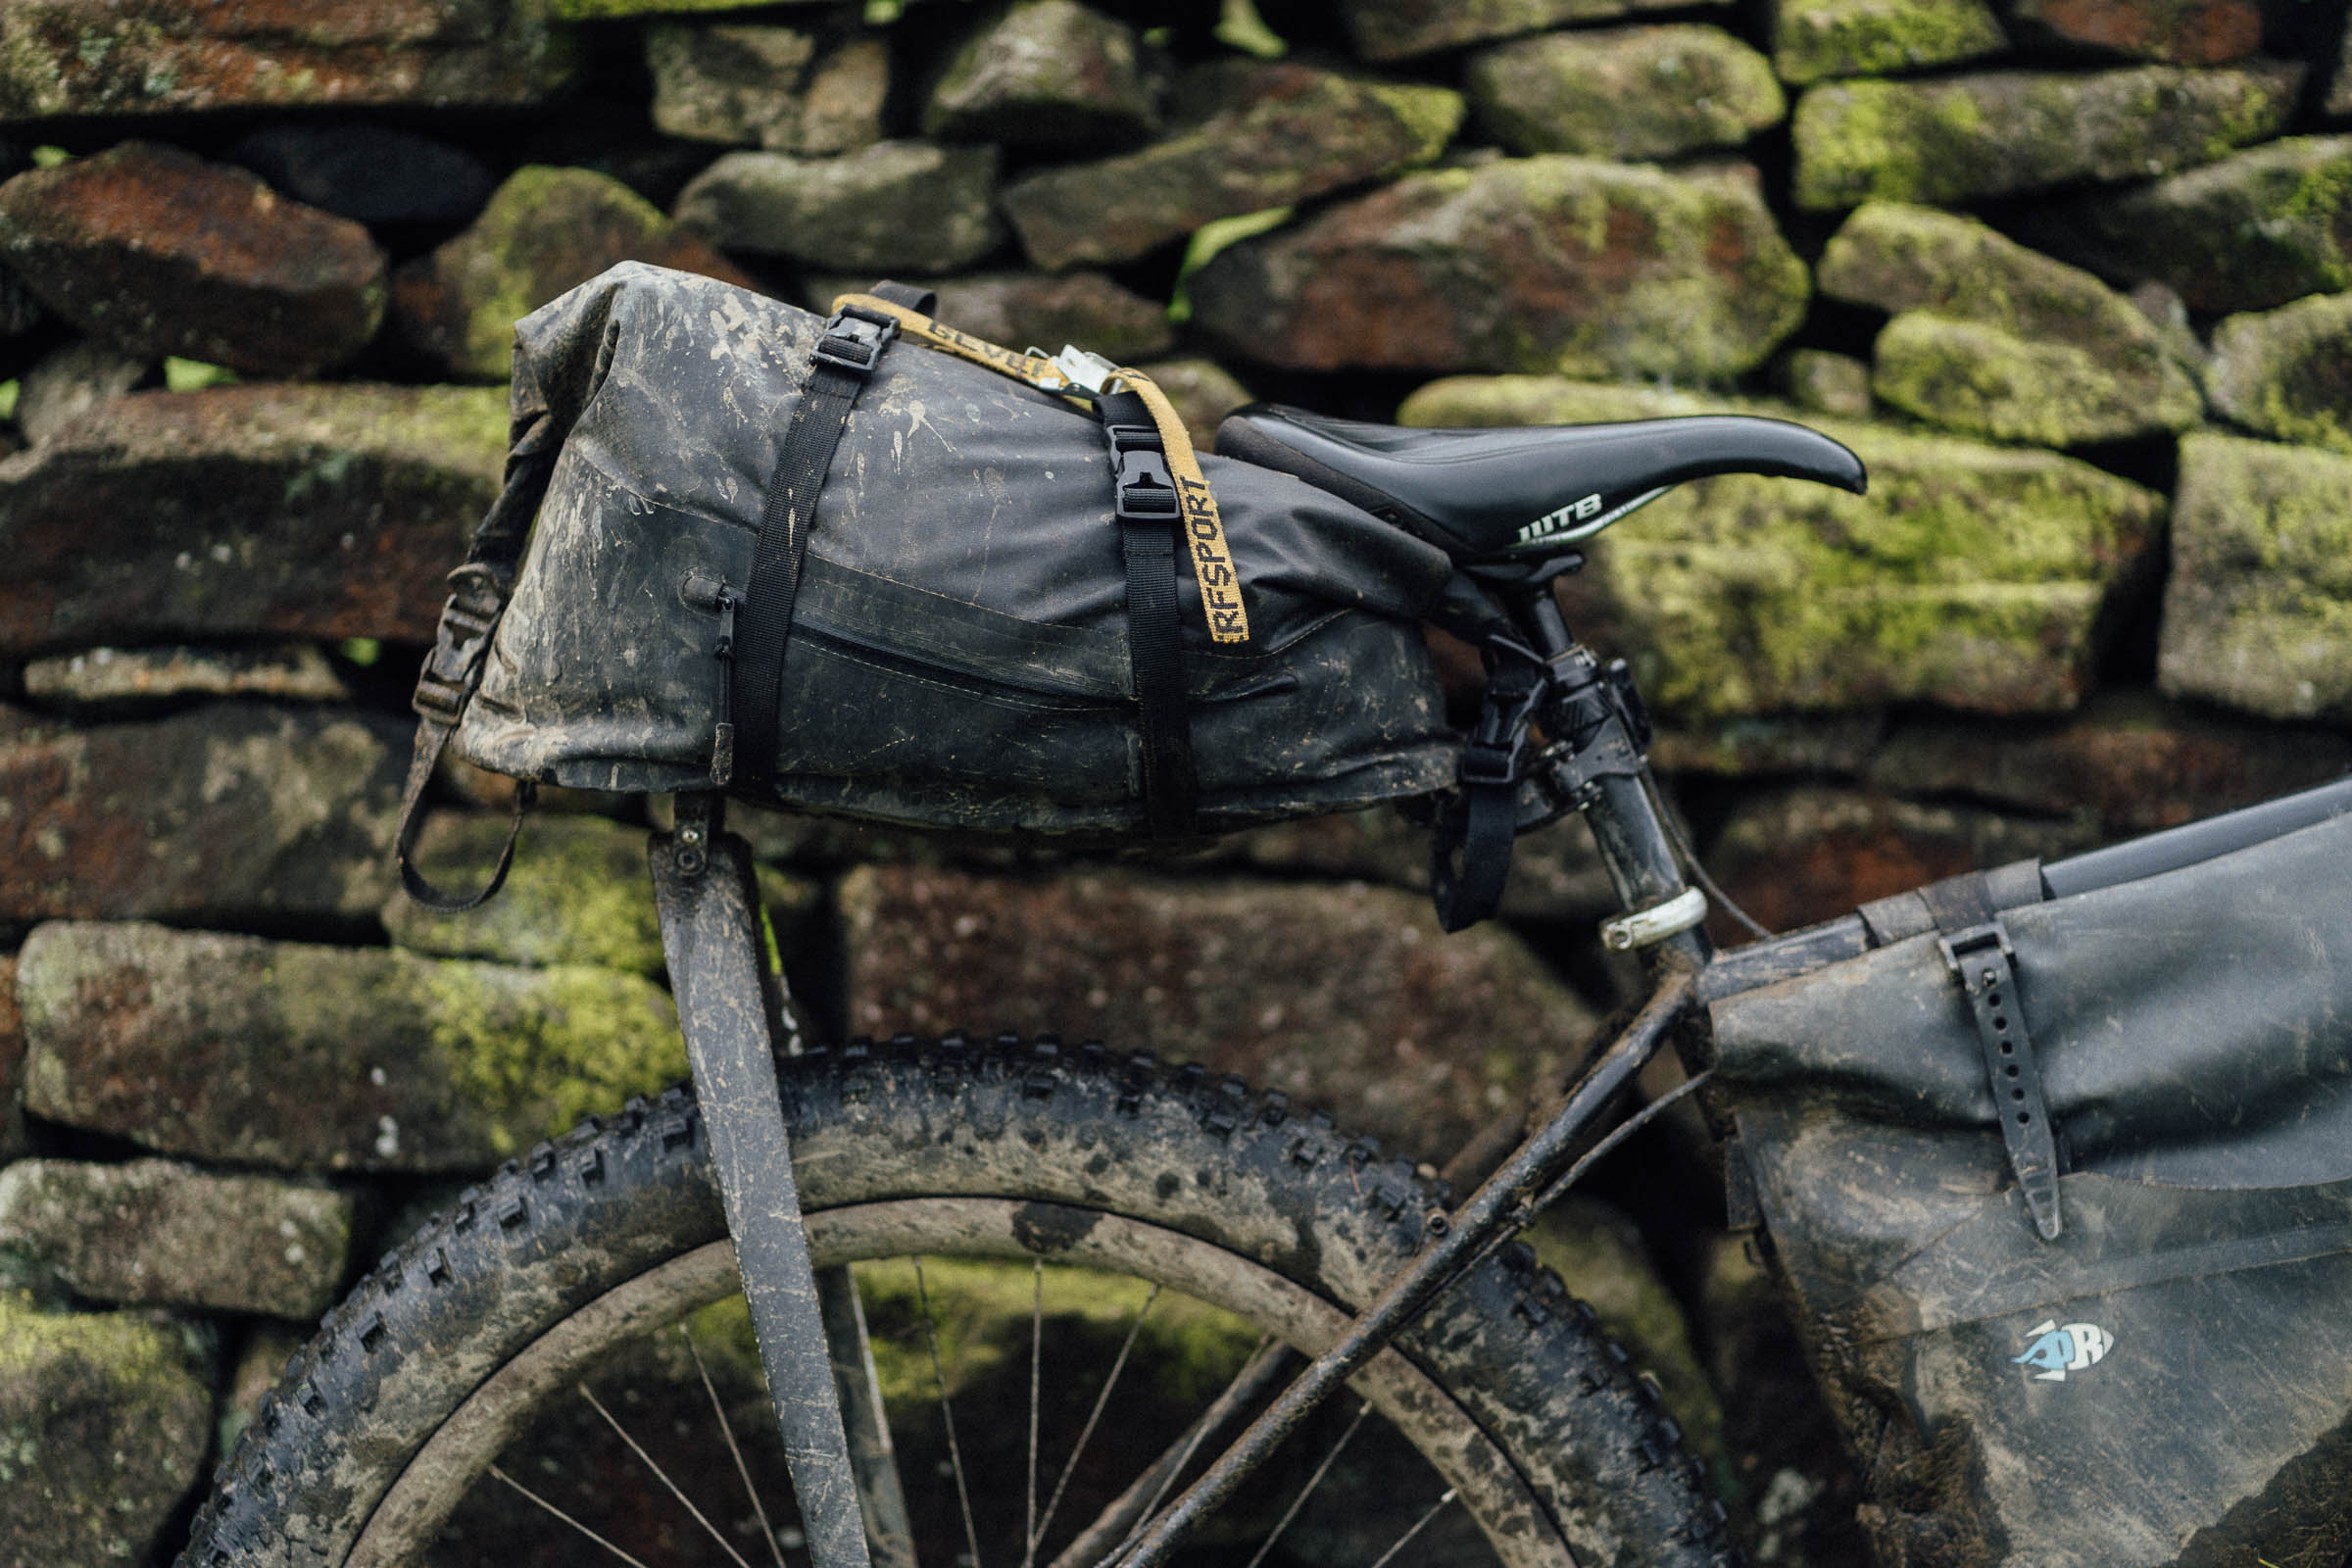
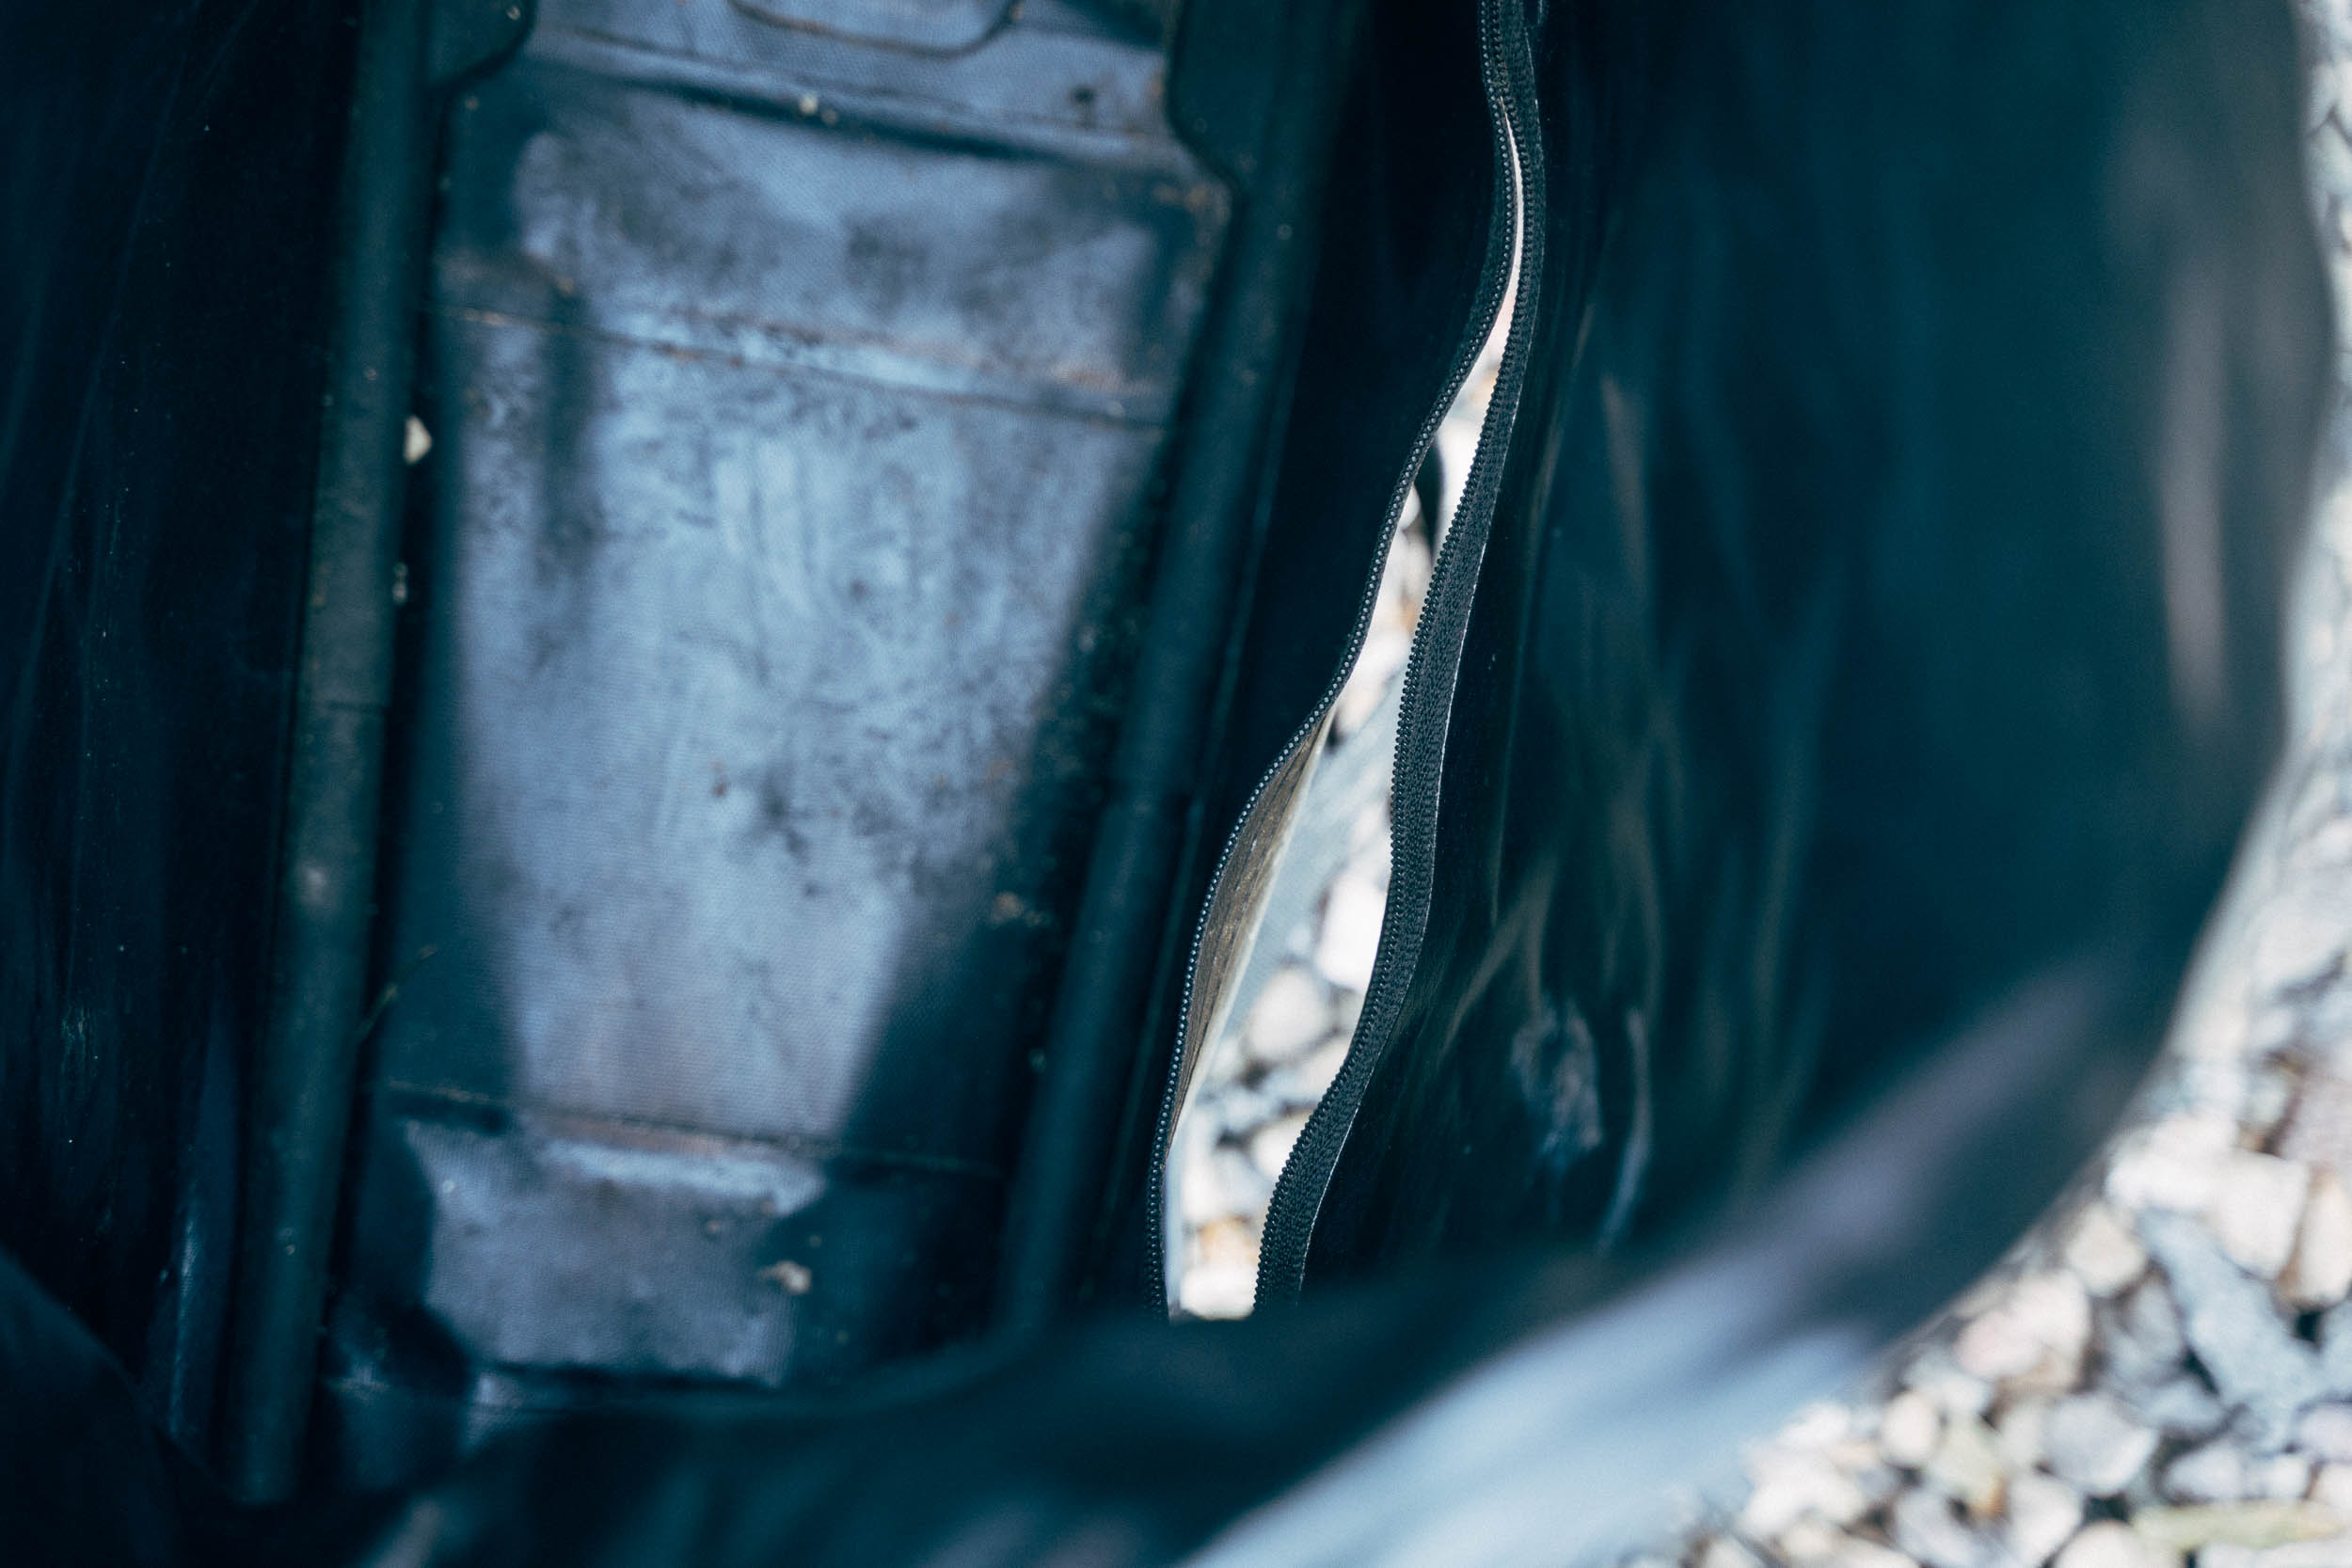
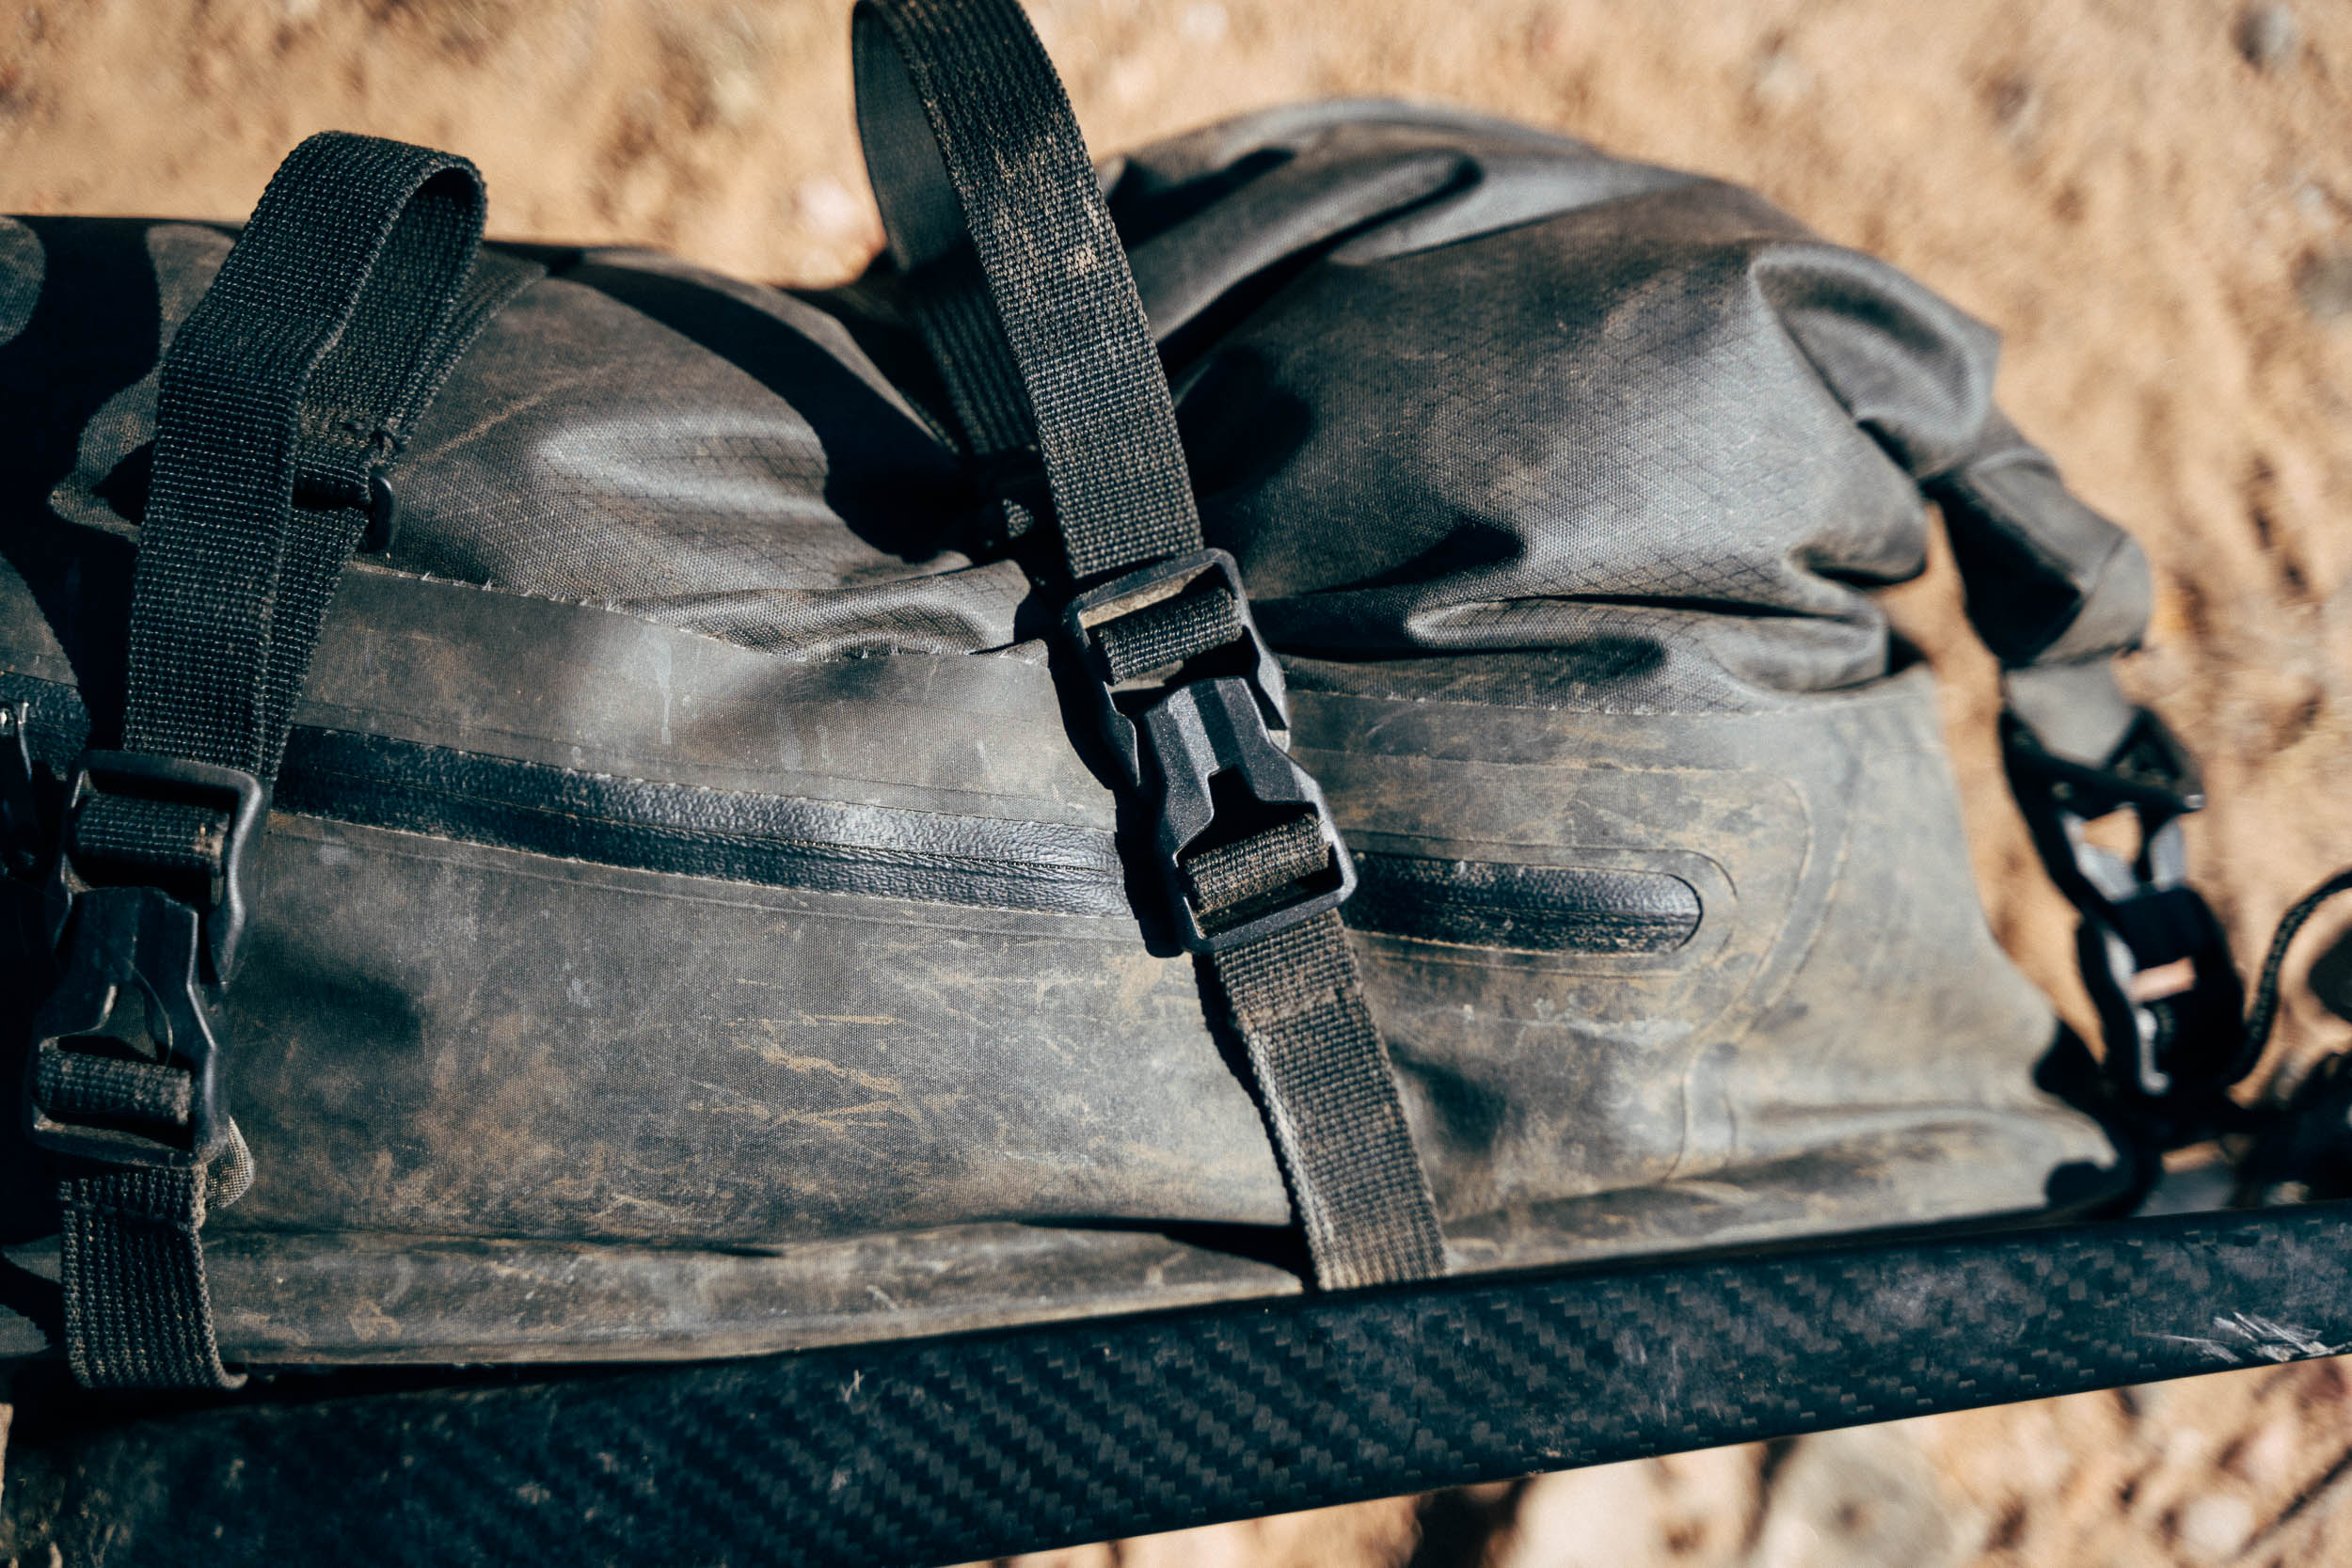
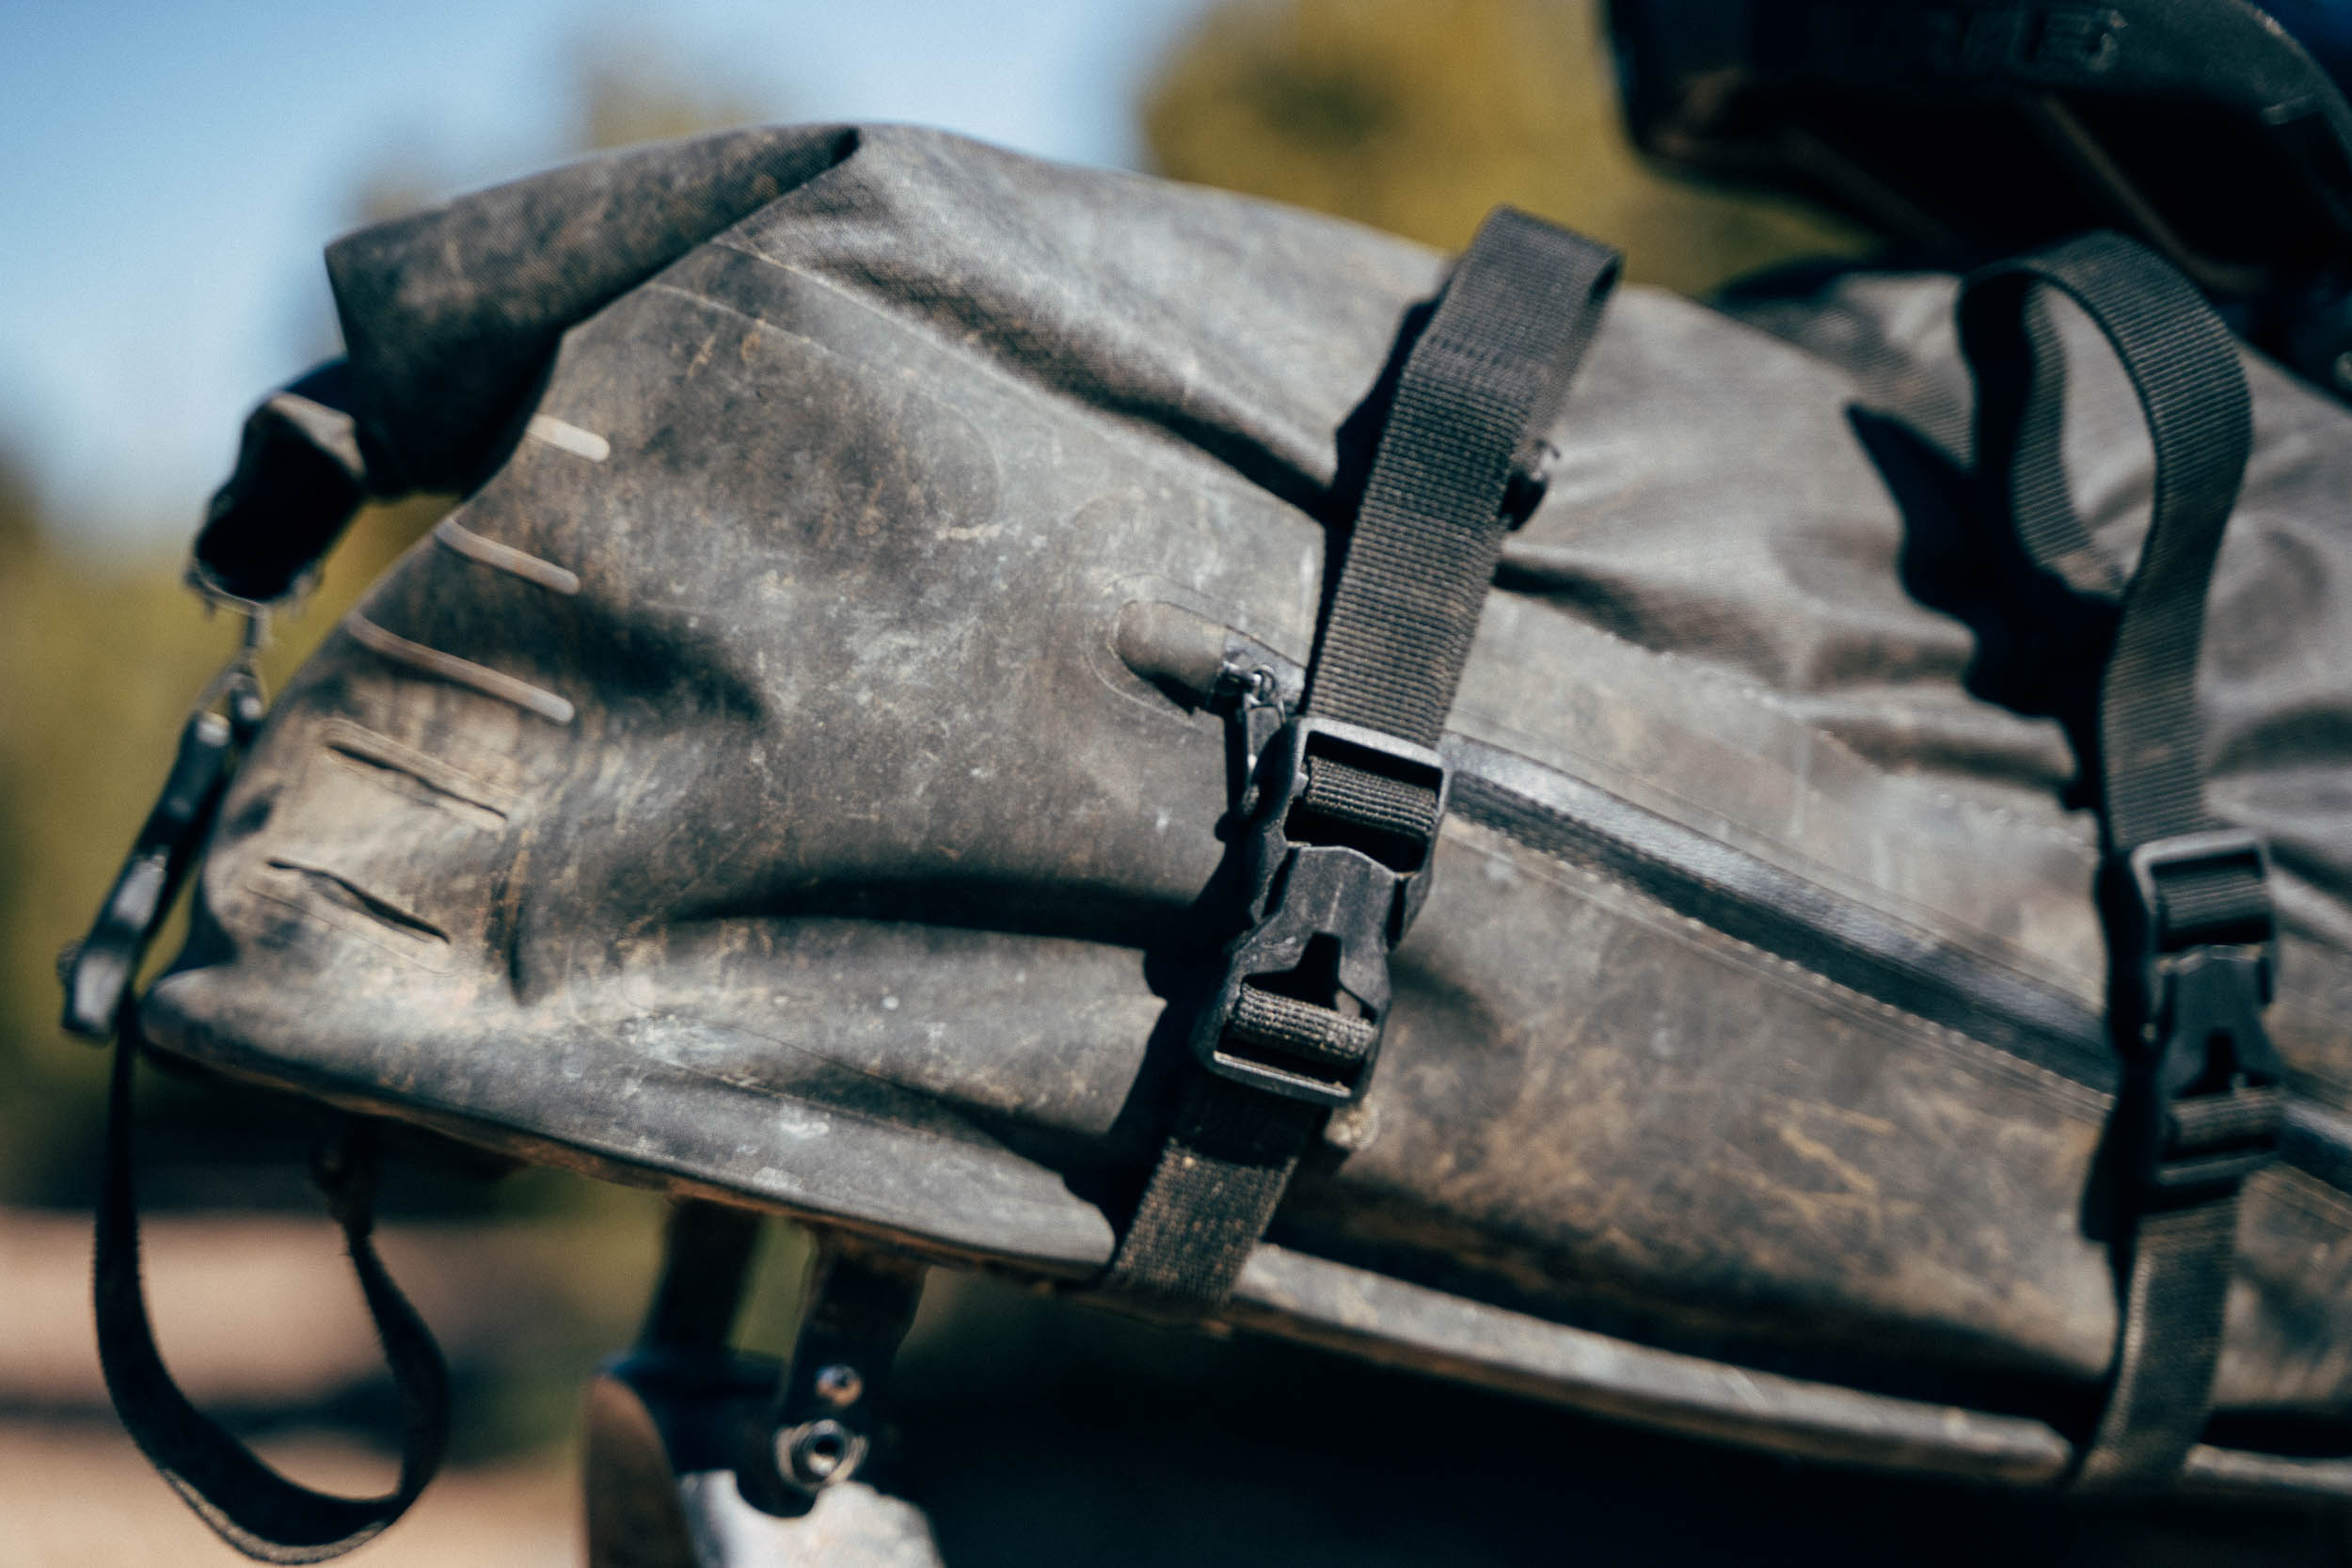
In use, there’s absolutely no ‘wag’ or any movement whatsoever to the AeroPack, as is often experienced with seatpacks that don’t include additional support. The waterproof bag is 3D welded and 100% waterproof. It features reflected piping at the back, a light tab, and two side zips – one accesses a slim pocket, a handy spot to stash a rear light, and the other offers a shortcut into the bag, so you don’t have to open it completely (or you can use it to purge air when you’re rolling it down). The zips themselves are tiny but as they’re not under stress, I haven’t had any issues with them failing. The bag loaf-shaped is accessed from the top using a roll closure, cinched down into place via two high quality buckles at either end. Tailfin also offers two additional straps for those (like me) who tend to fill the bag to the brim. I found crossing them over proved most secure; otherwise, the front one can slip down the nose of the bag when riding off road. Like a modern seatpack, the narrow profile makes pushing the bike much easier than panniers or a traditional saddlebag. From an aeshetics point of view, branding is very low key. Personally, I really like the overall look of the pack, though opinions were divided from others.

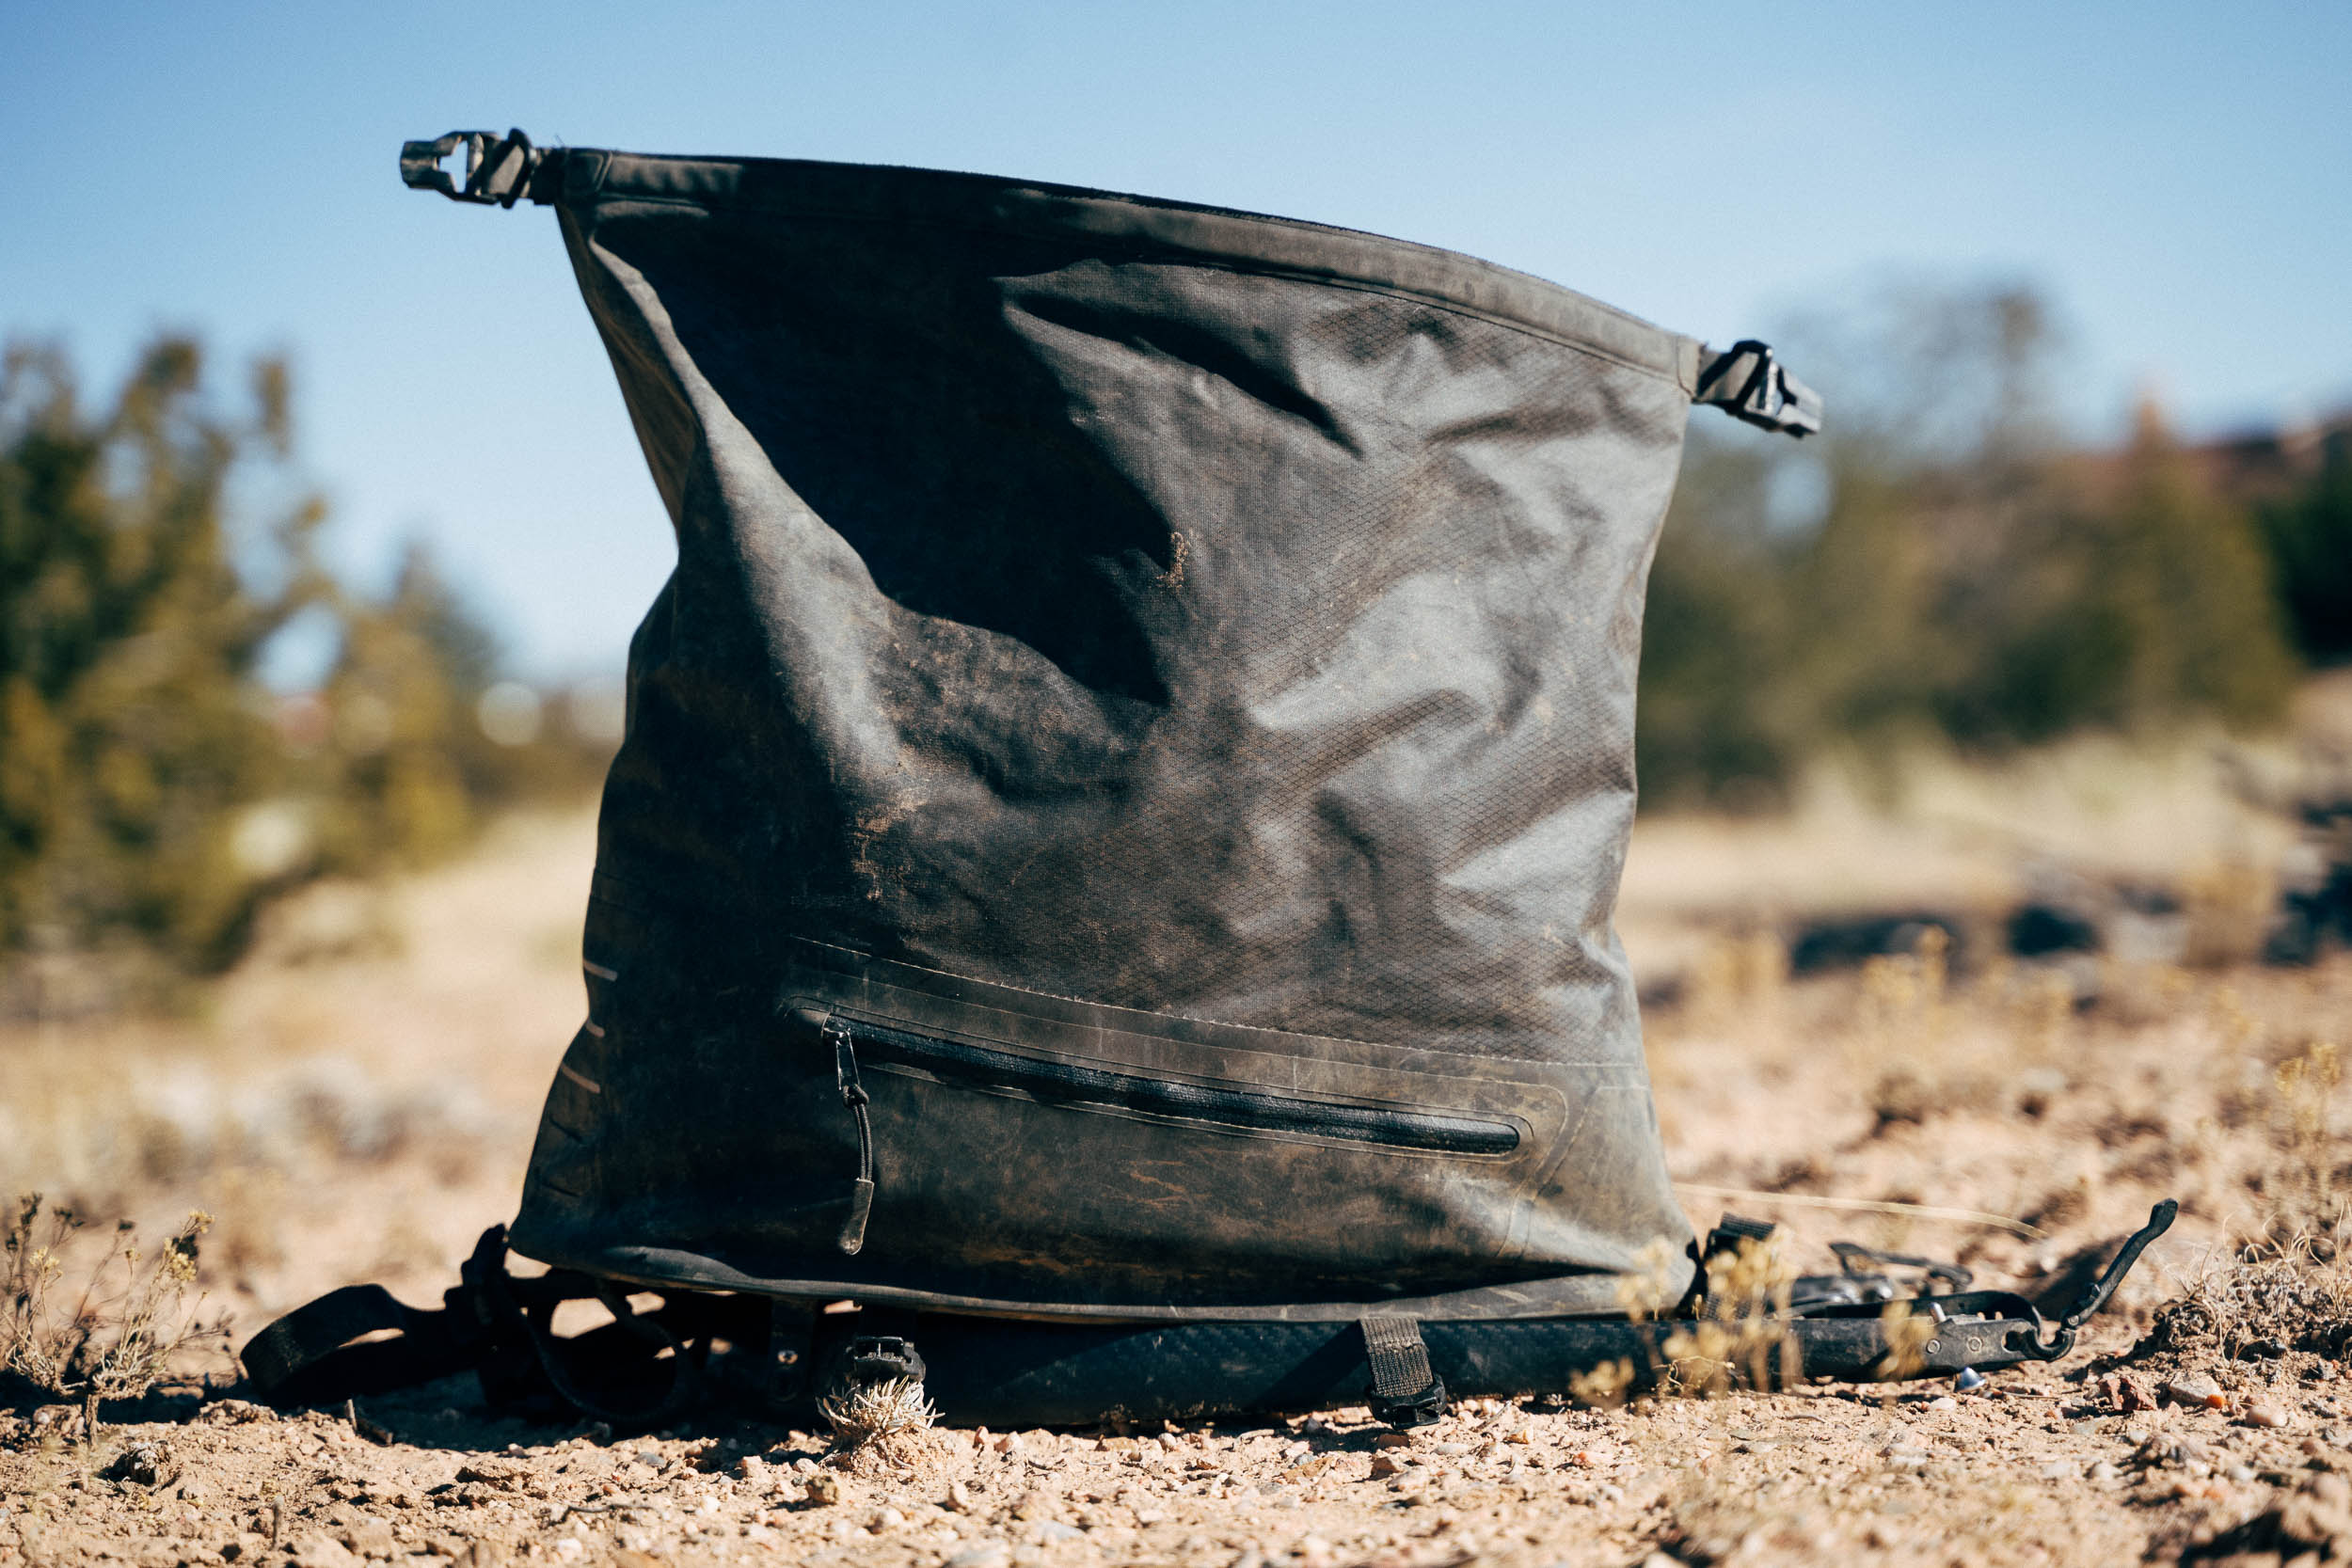

I’ve long been a fan of bags that can be accessed from the top, which is part of the reason why I got on so well with the AeroPack from a day to day user perspective – be it bikepacking or around town shopping. Its rolltop design is shaped around an aluminium subframe, which gives it structure. Packing it is a breeze, especially off the bike, and stowing awkwardly shaped objects (be it fresh produce, a loaf of bread, or a potset) is easily done.
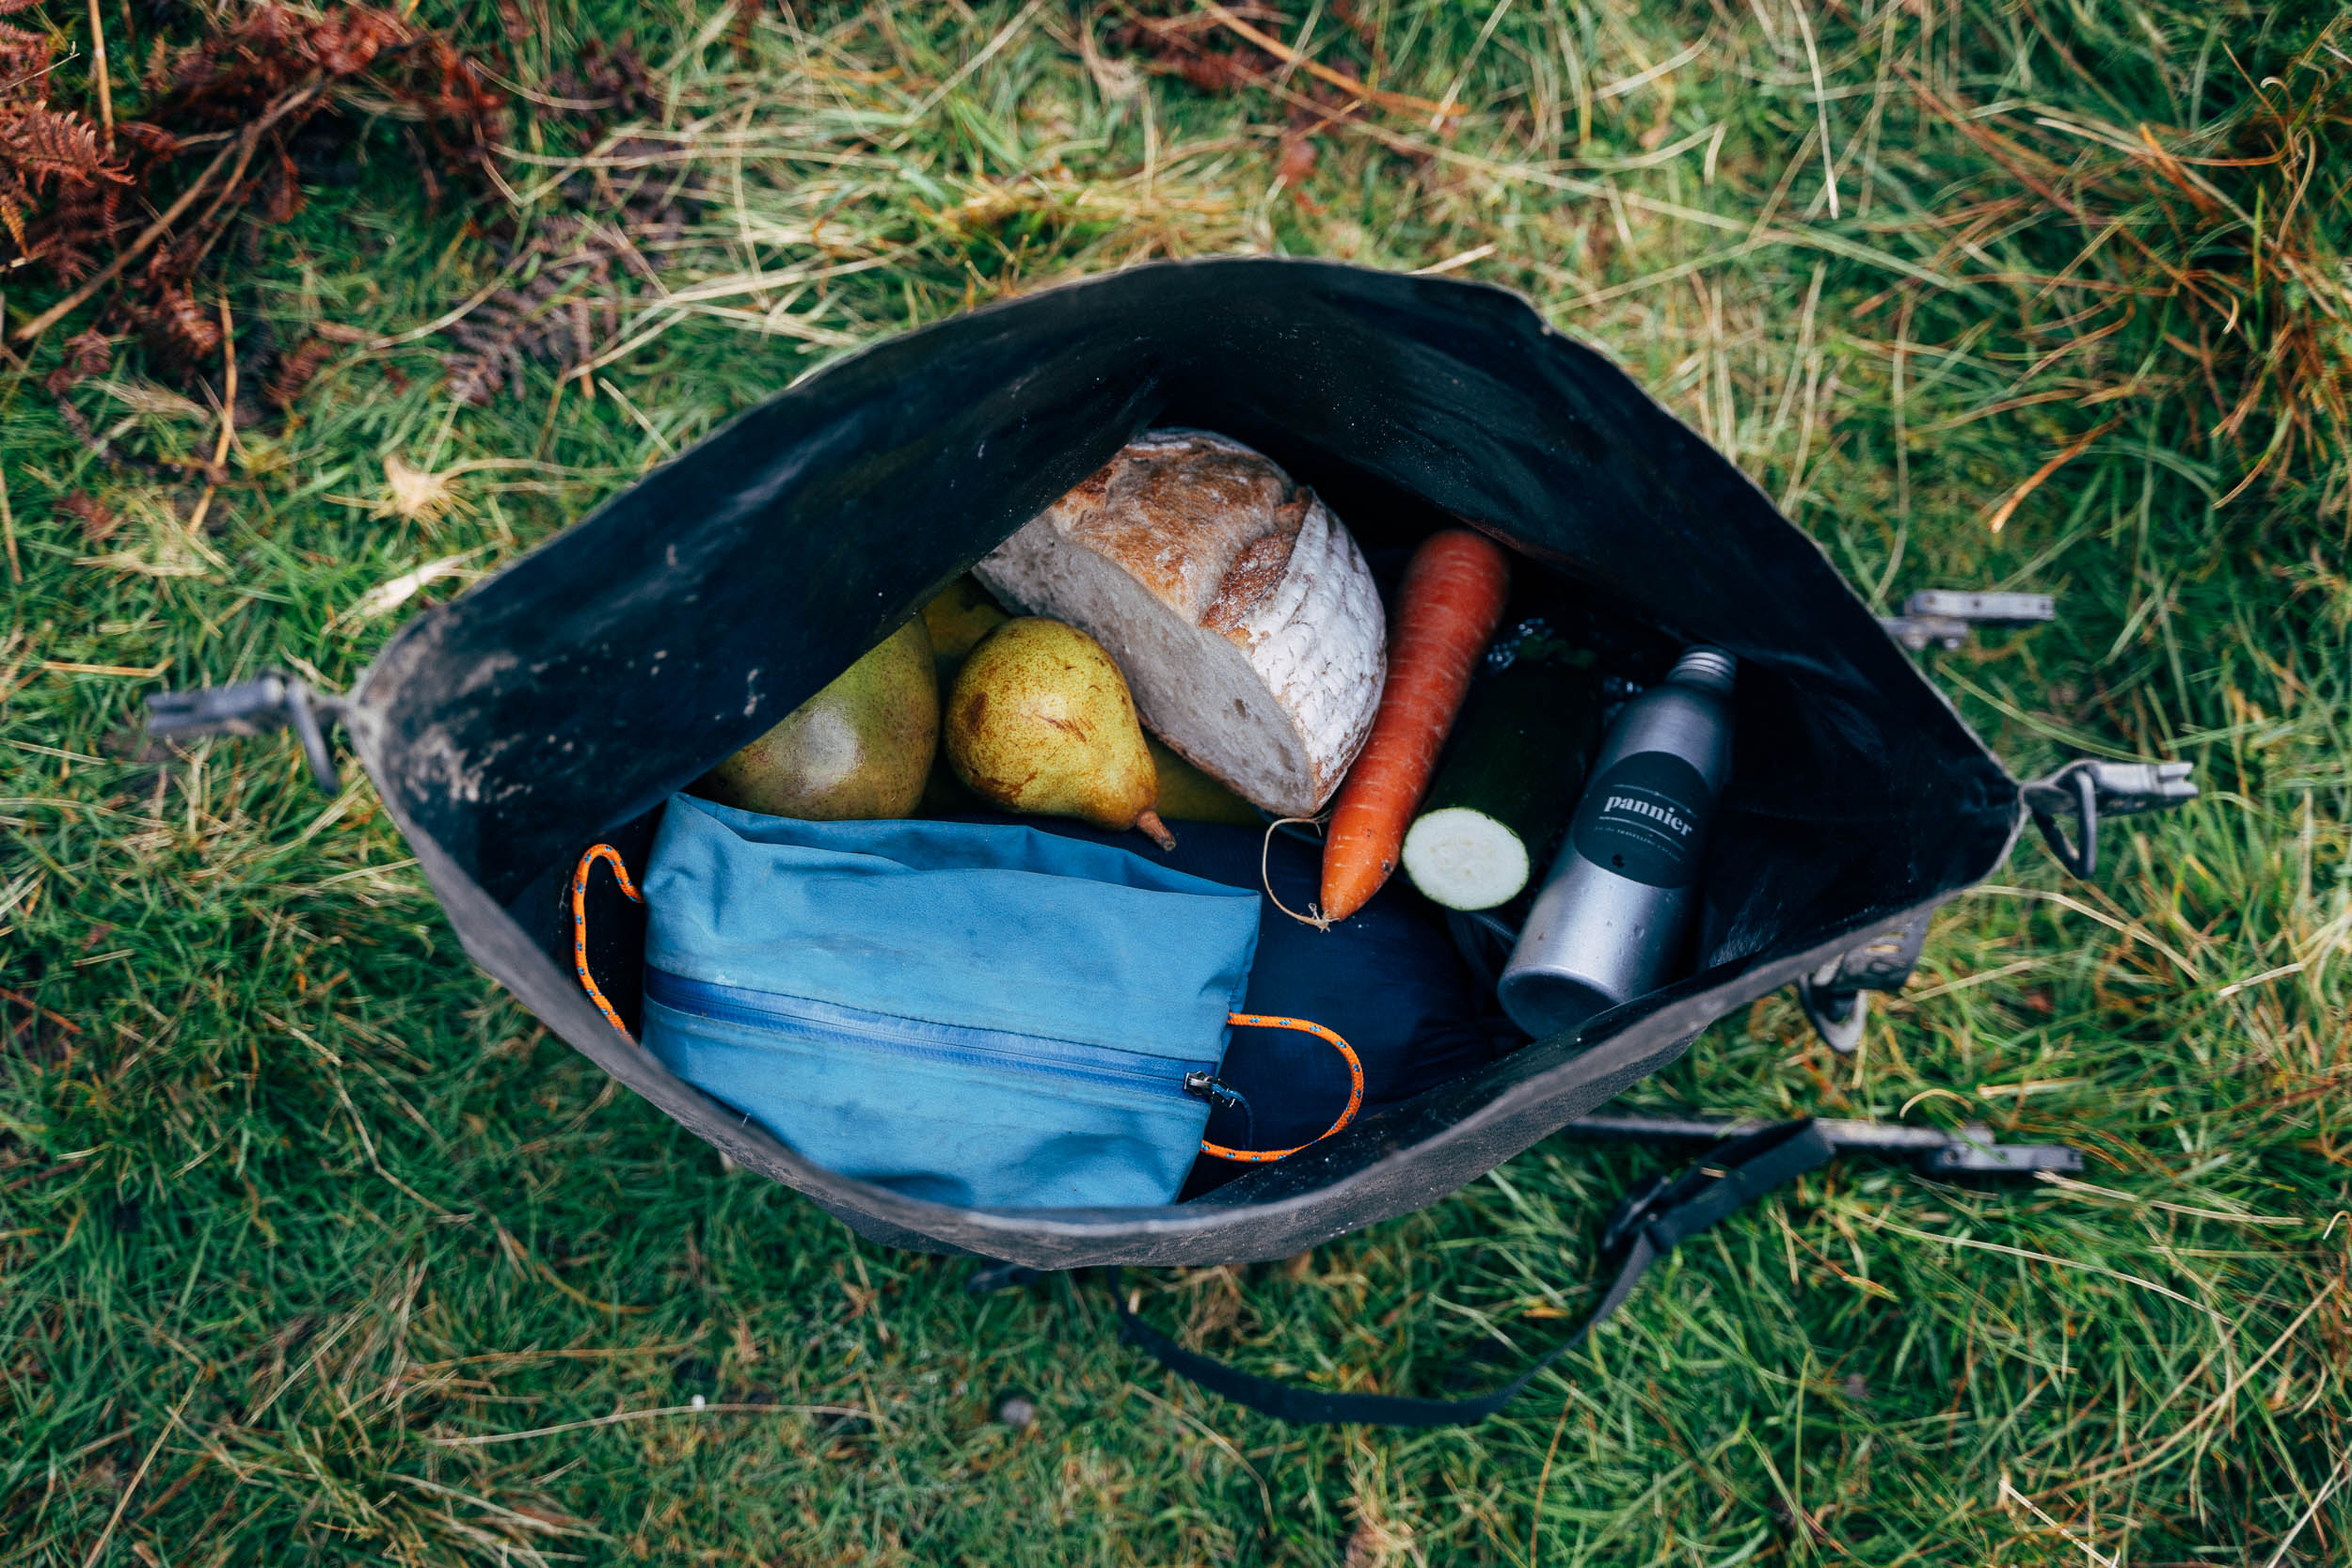
Granted, the front of the roll can be a little tricky to access on some bikes, depending on the geometry, size, and how much layback your seatpost features. As a ballpark figure, Tailfin recommends a minimum saddle to frame clearance of 100mm/4in – you can get away with less, but you’ll need to pack less at the front. However, if you’re worried that the pack will be too tucked away under your saddle, or you run an XS frame, there’s also a longer ‘neck’ available, which pushes the bag back by a few additional centimetres. I’ll add some images once I get the chance to set it up on a smaller bike. If in doubt, get in touch with Tailfin to confirm which you’ll need. All this does mean that calculating the AeroPack’s exact capacity is tricky; in theory, it’s a big as 27l if packed to the very hilt on a large frames. Huge!

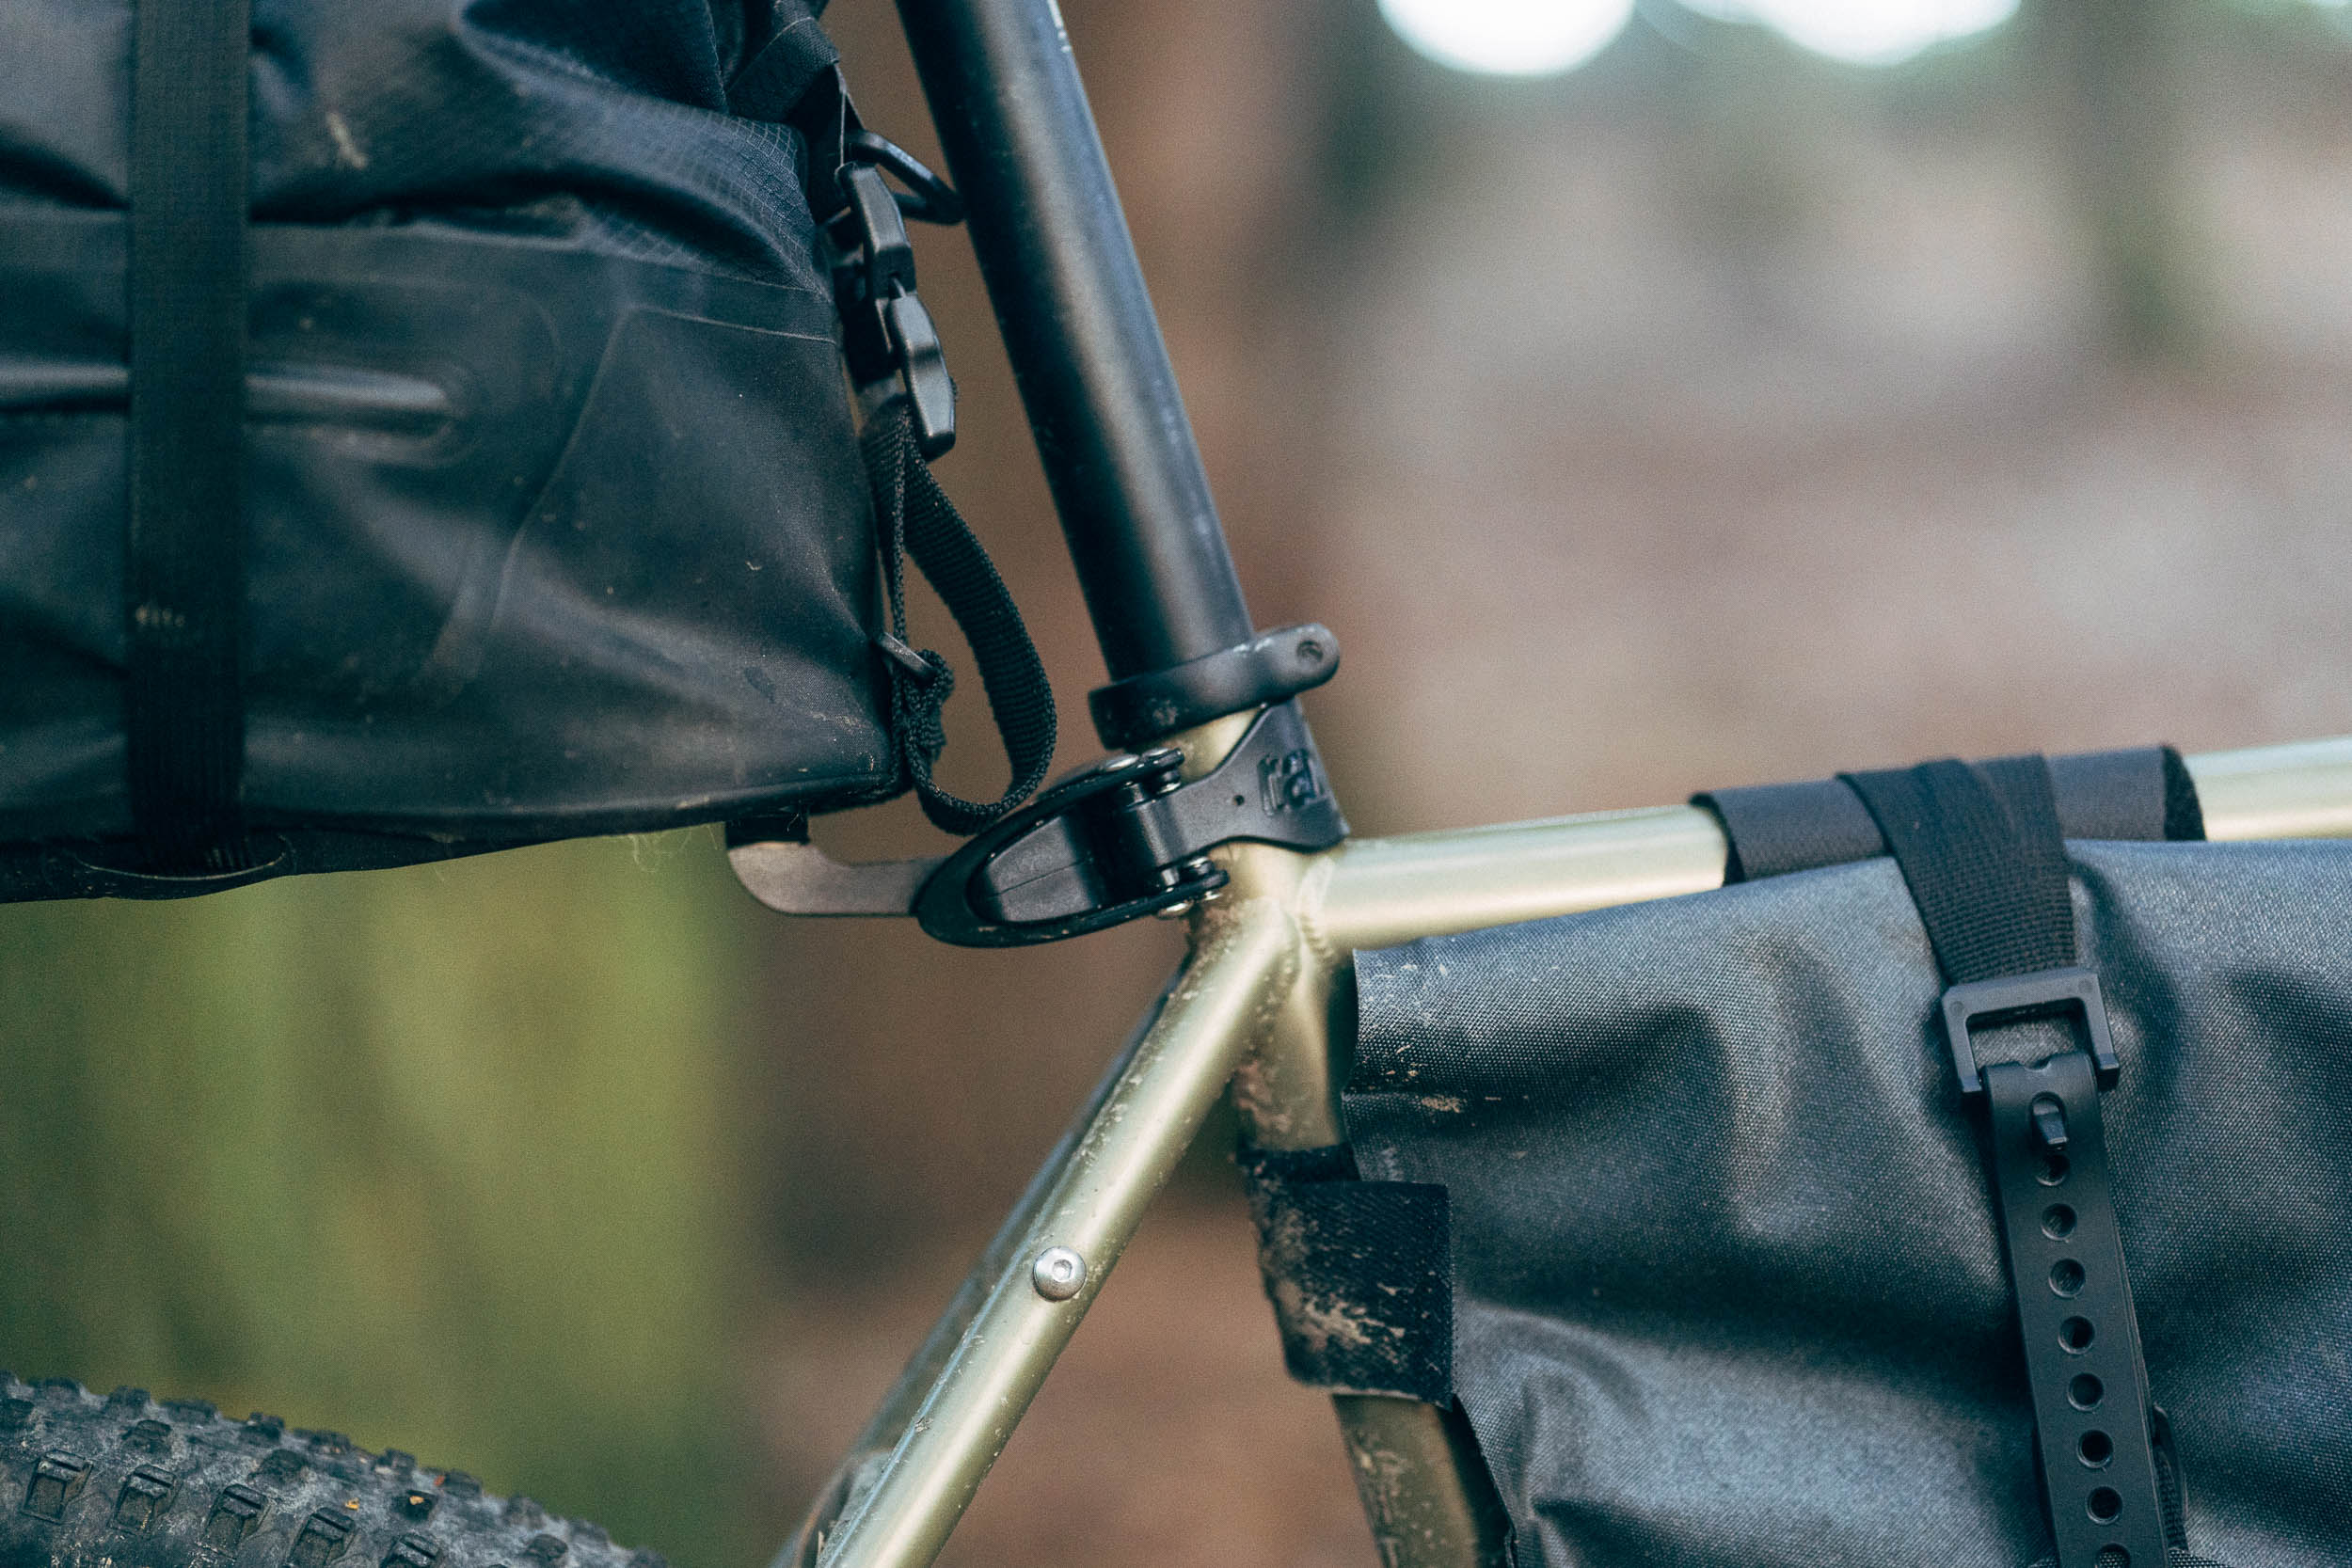
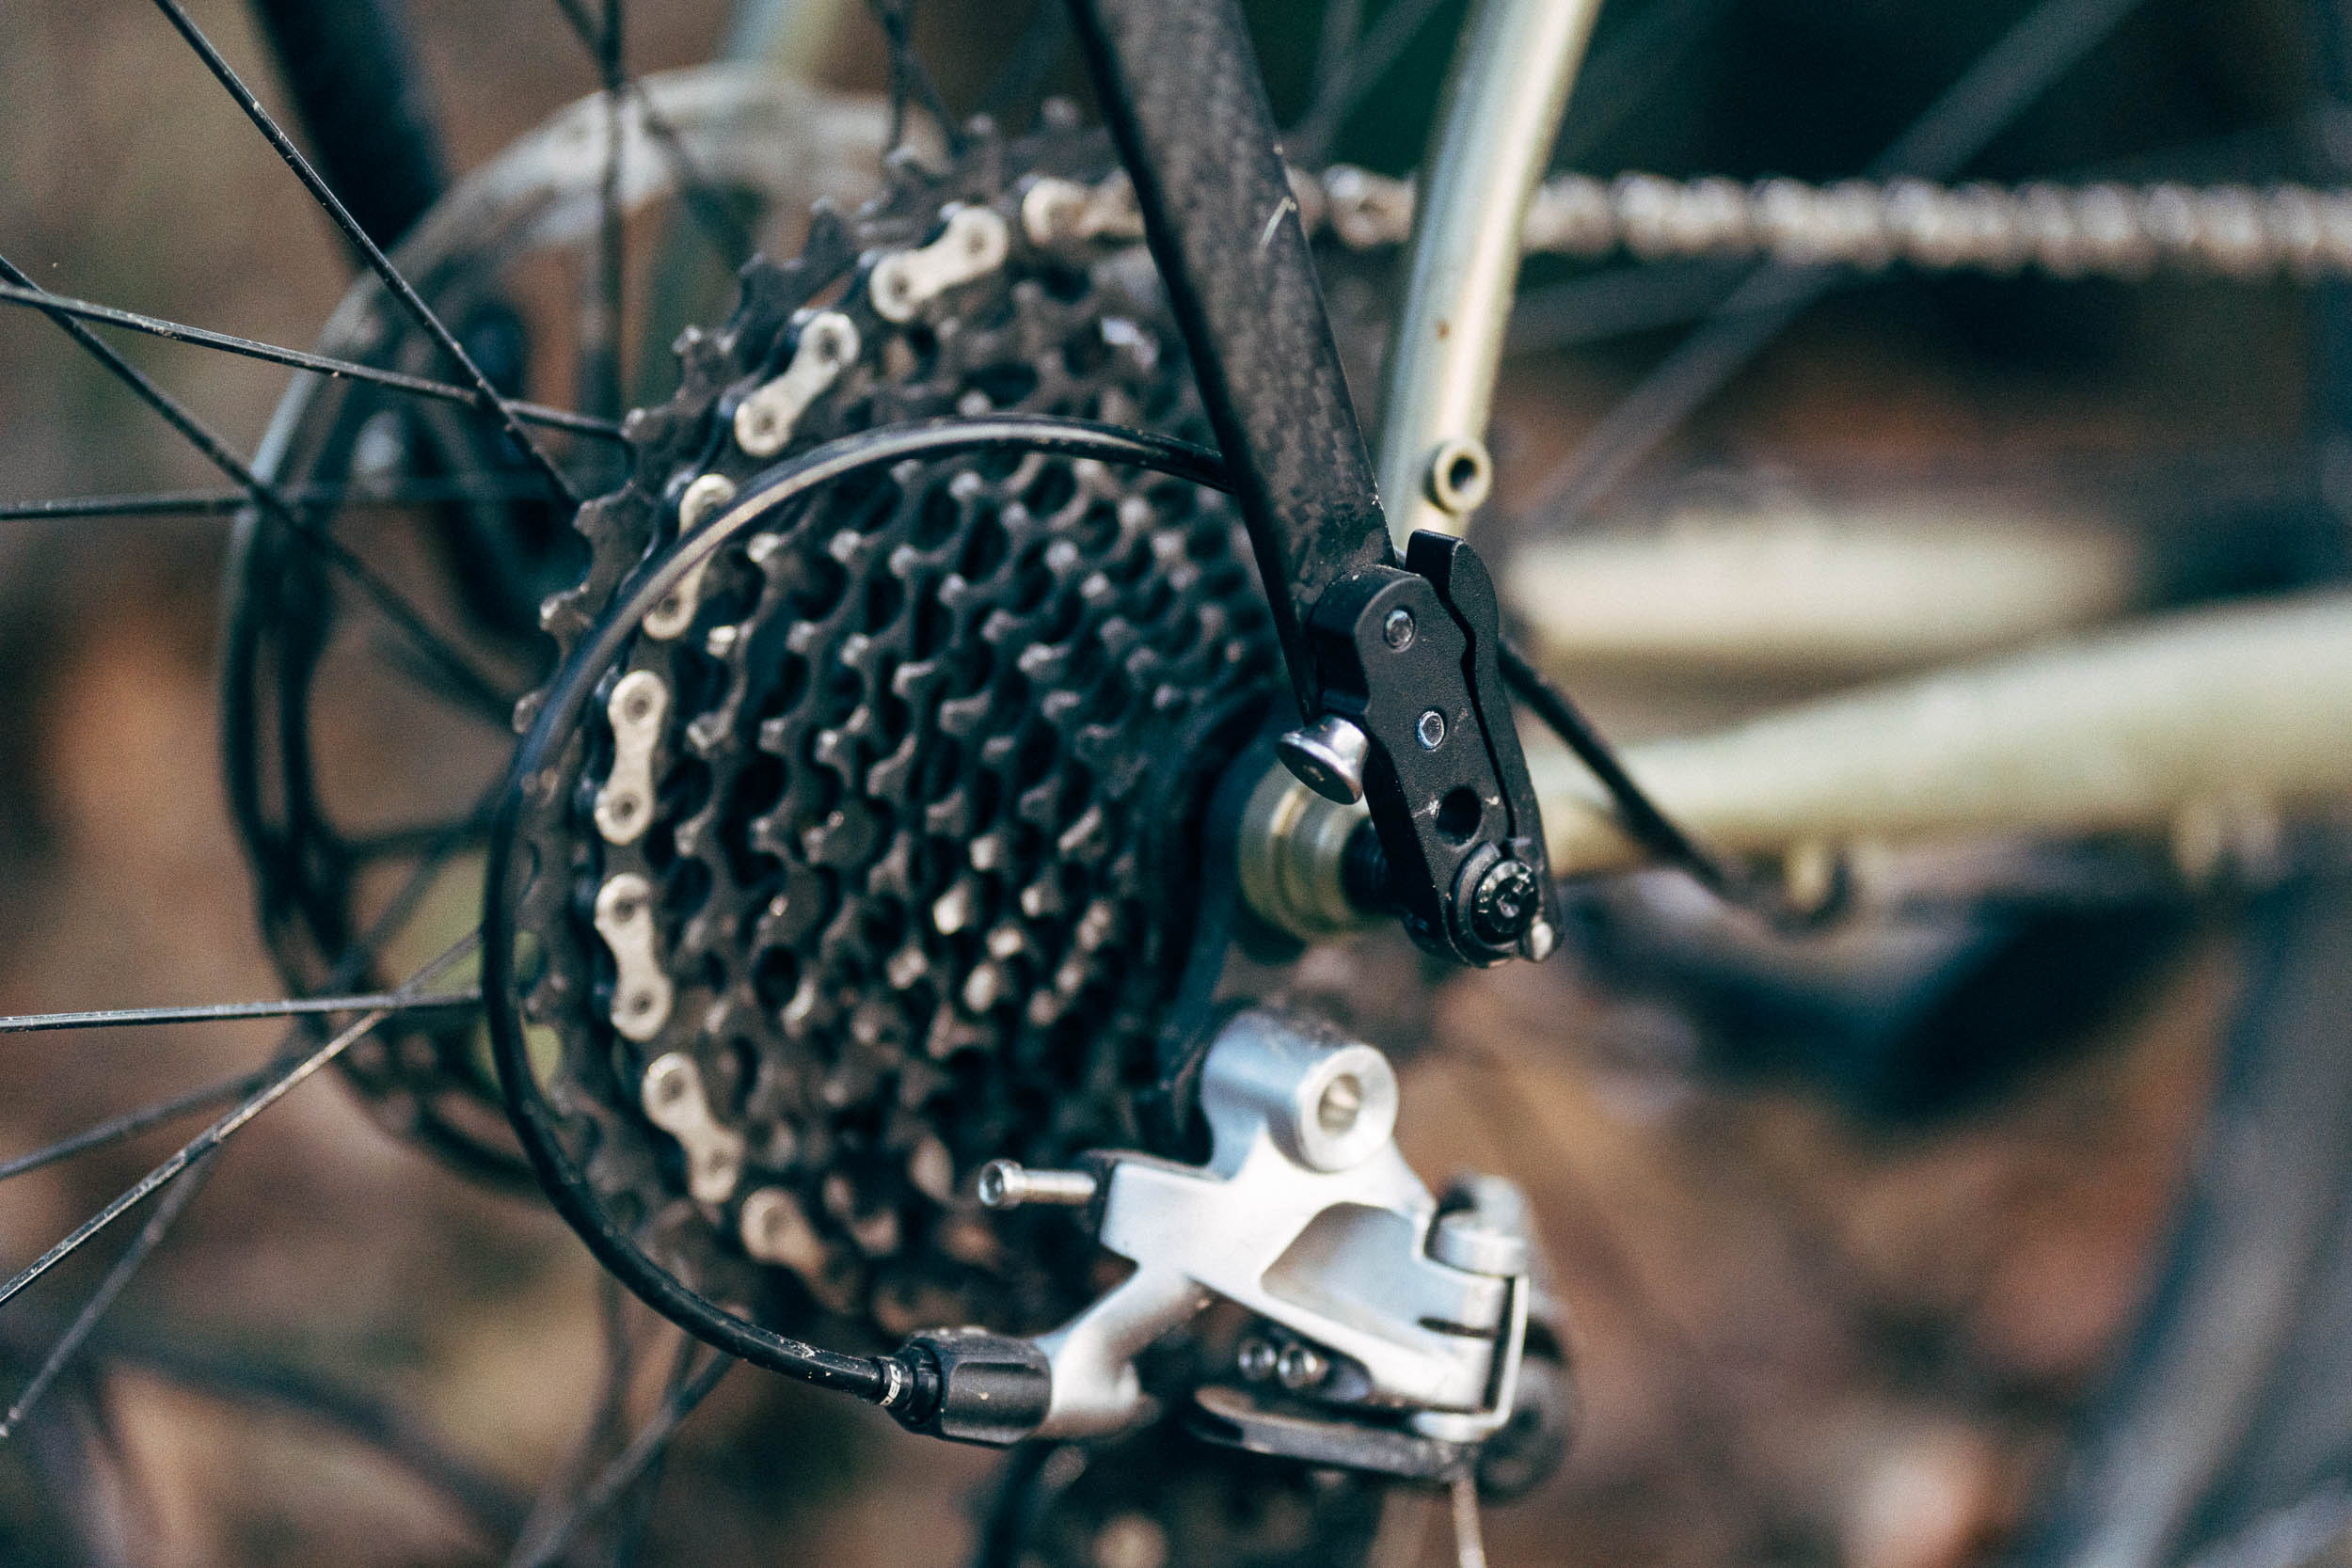
Just to complicate matters (or rather, provide users with more options), you can choose to attach the AeroPack directly to the rack eyelets on your bike with a series of spacers (see Direct Frame Mounting in the pricing list below), or via Fast-Release, aluminium hinged clamps that attach either to a replacement TA, replacement QR skewer, or optional threaded rack mount adaptors. I used the rack mount adaptors on the Jones SWB, due to the shape of the dropouts, and a replacement TA on the Bombtrack Hook EXT. Note that the rack mount adaptors have yet to appear on the site and will feature in the drop down menu.

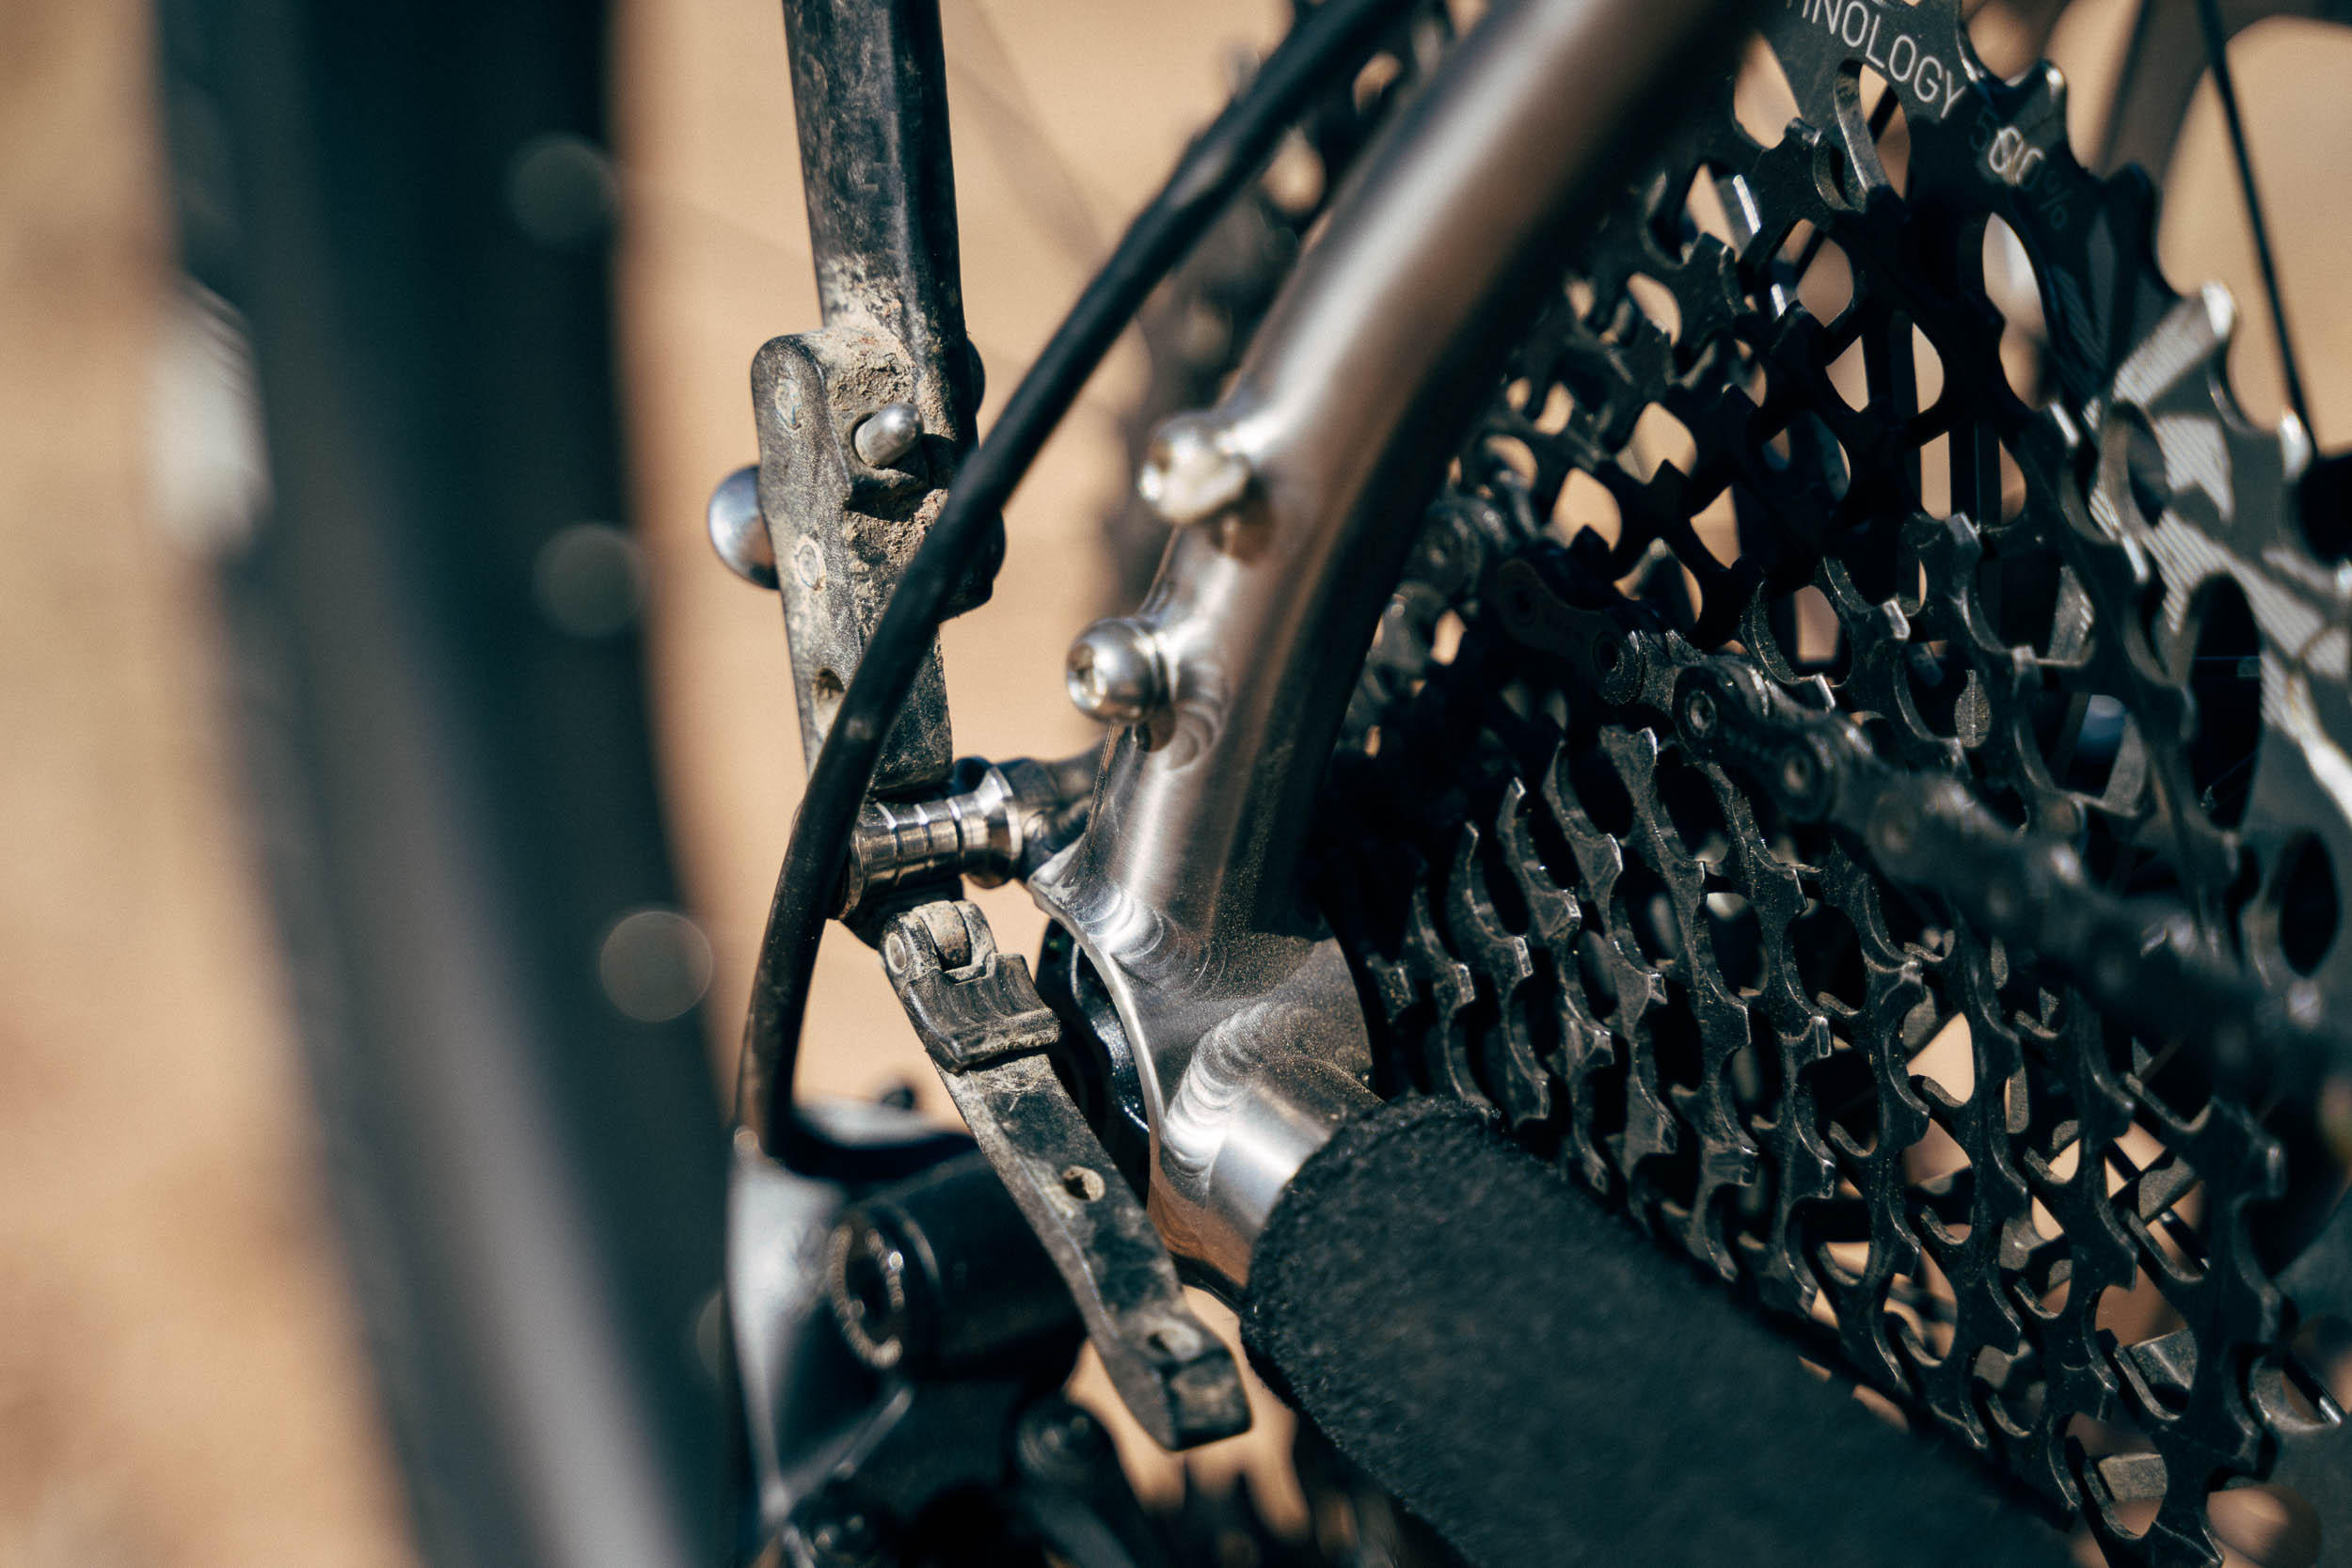


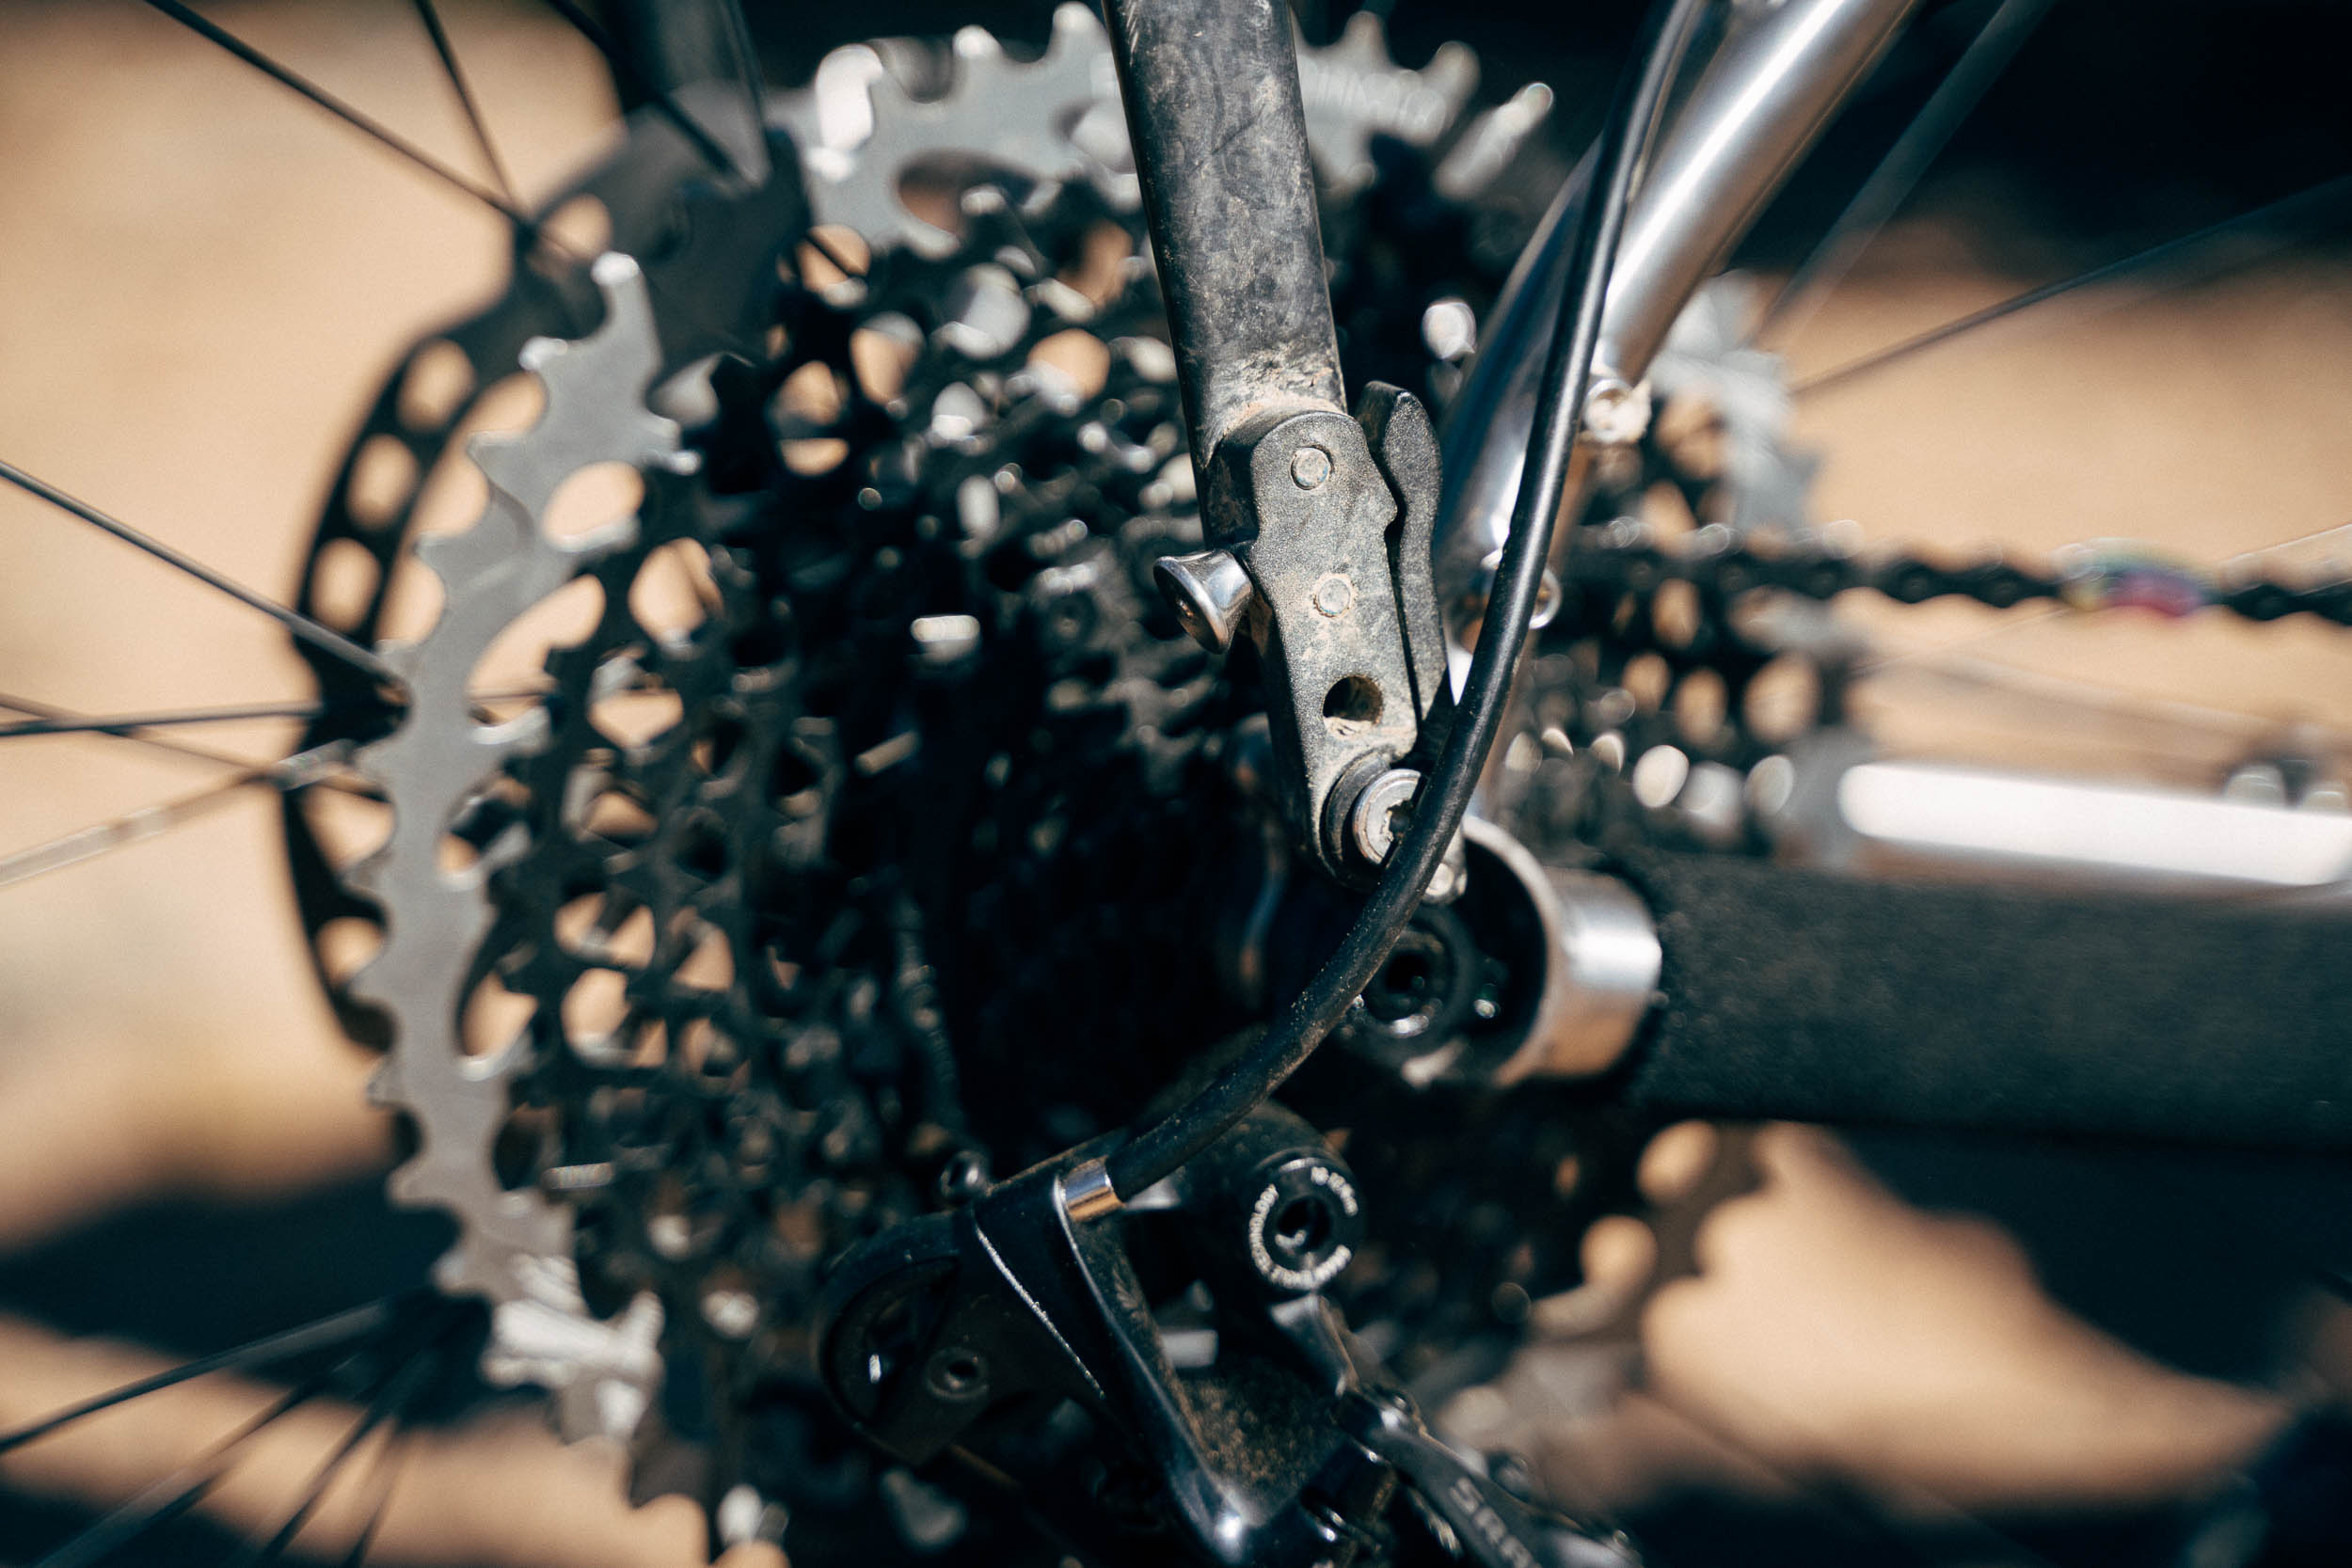
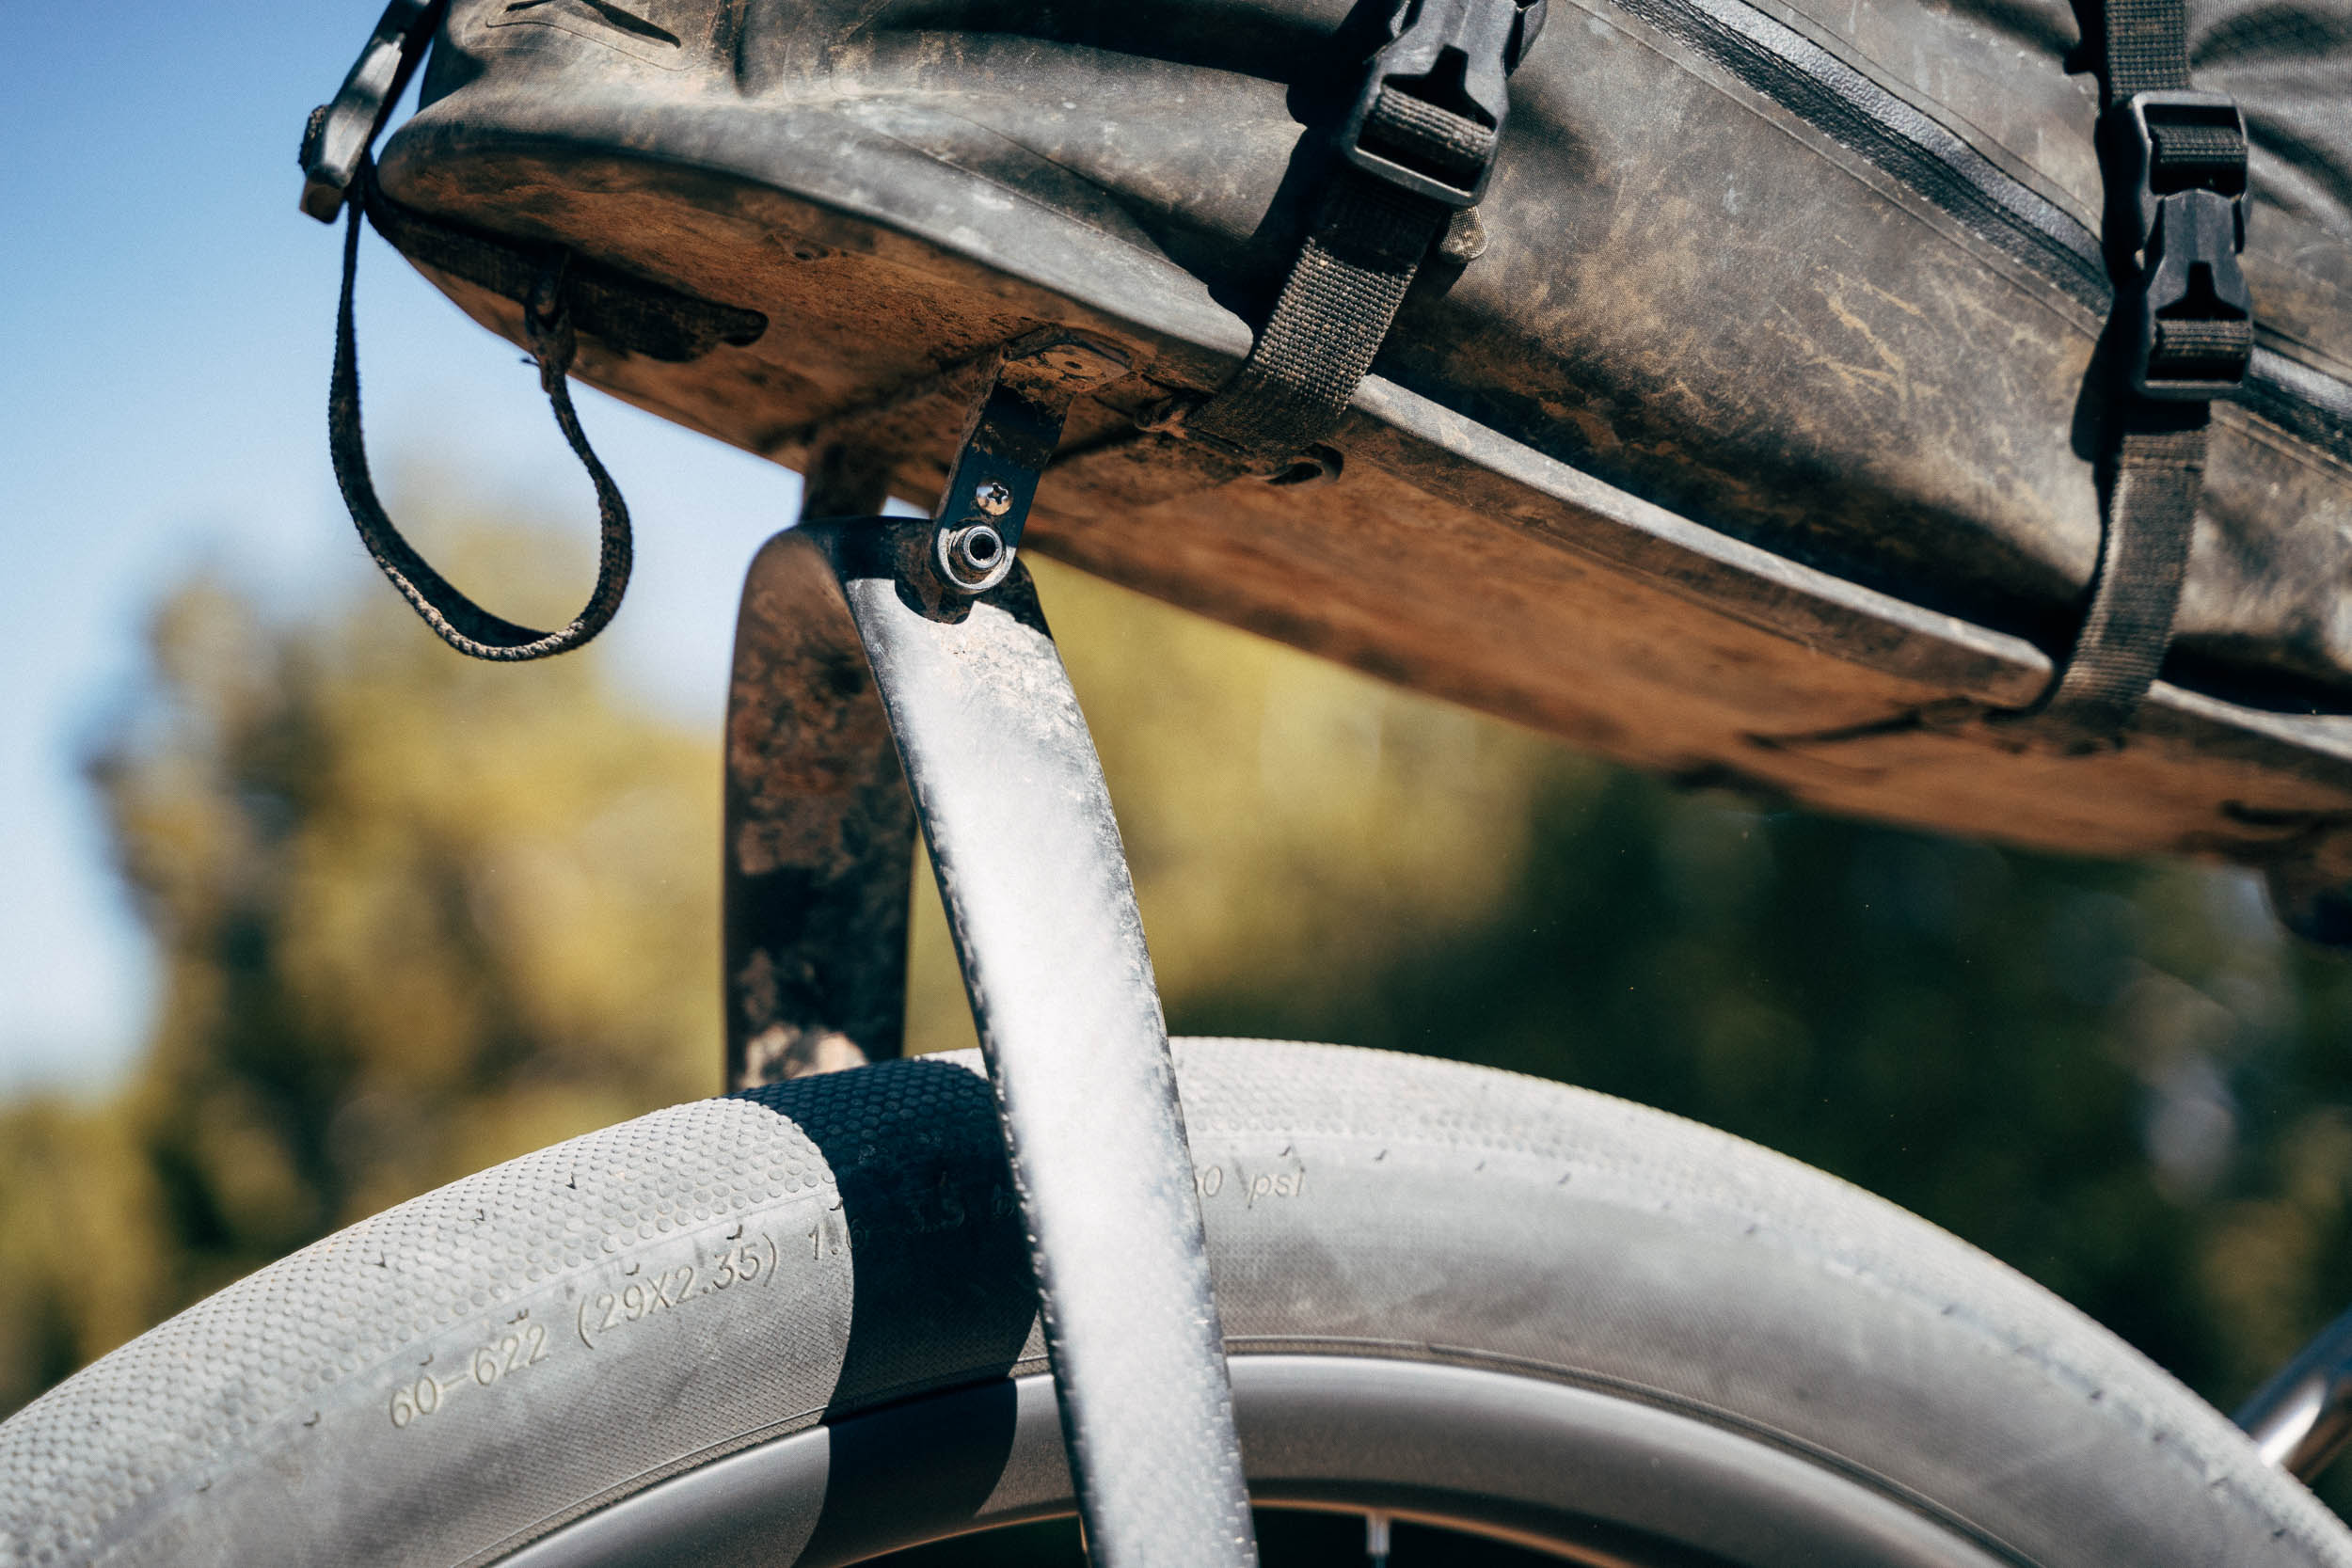
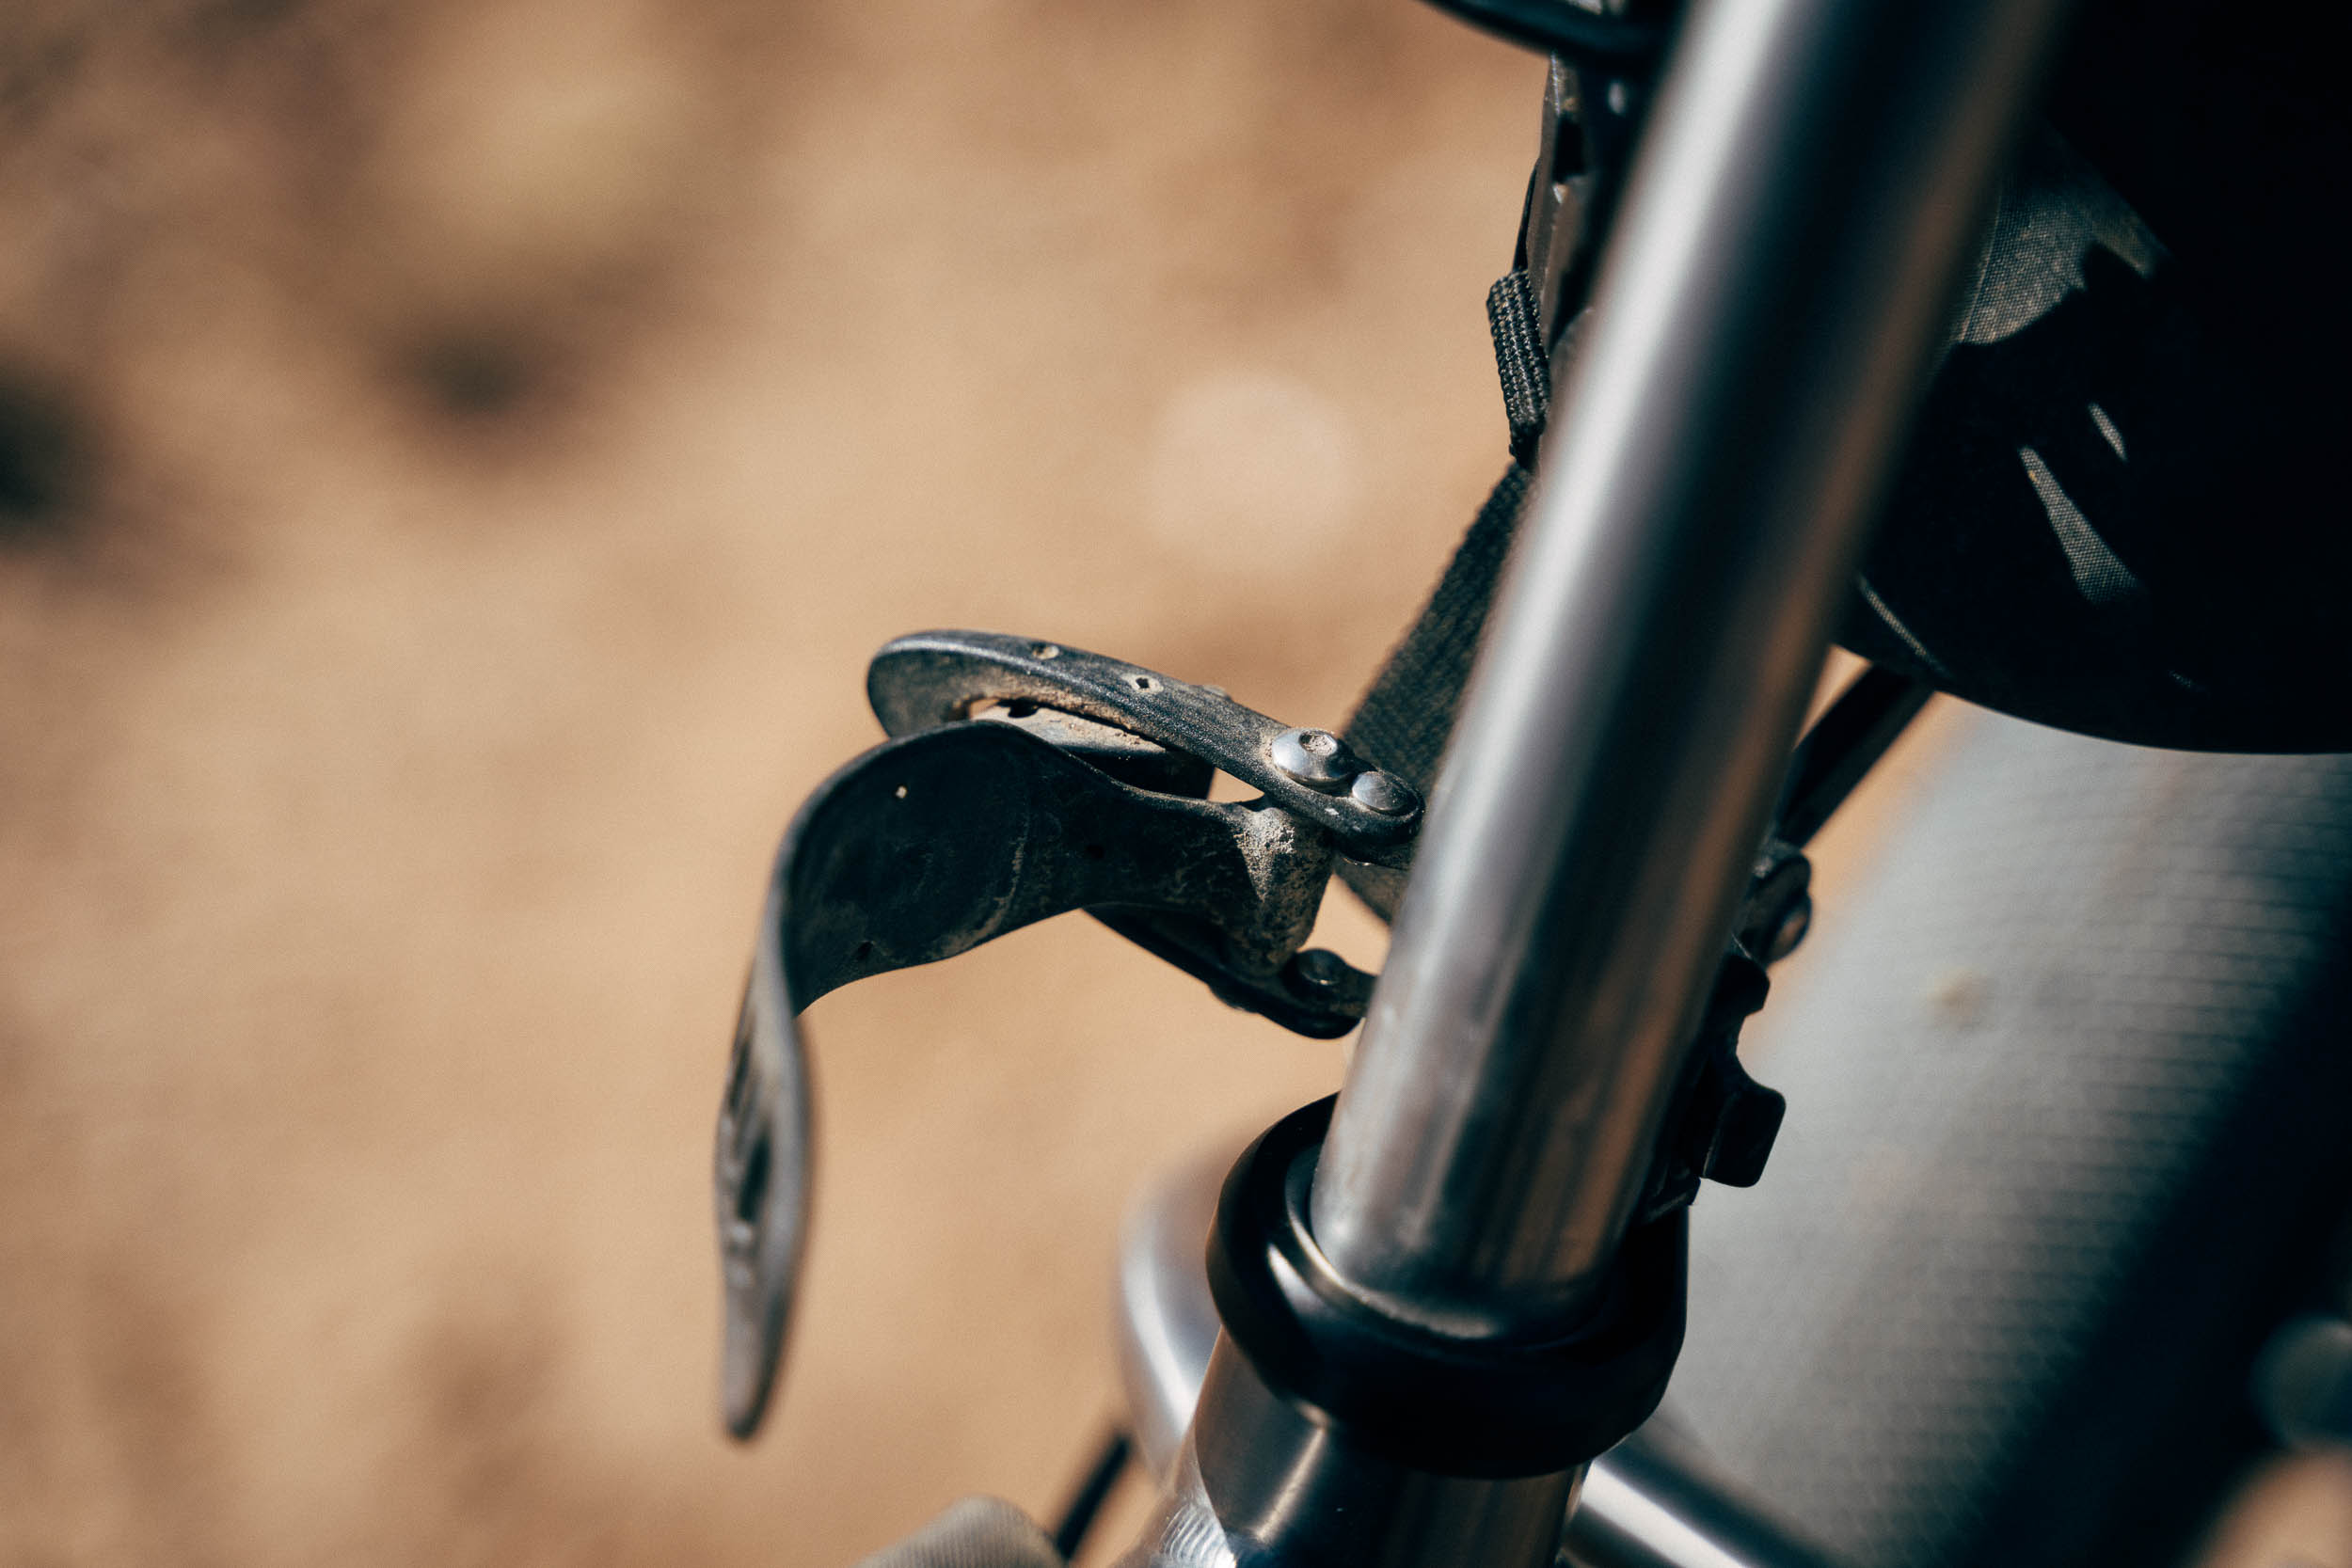
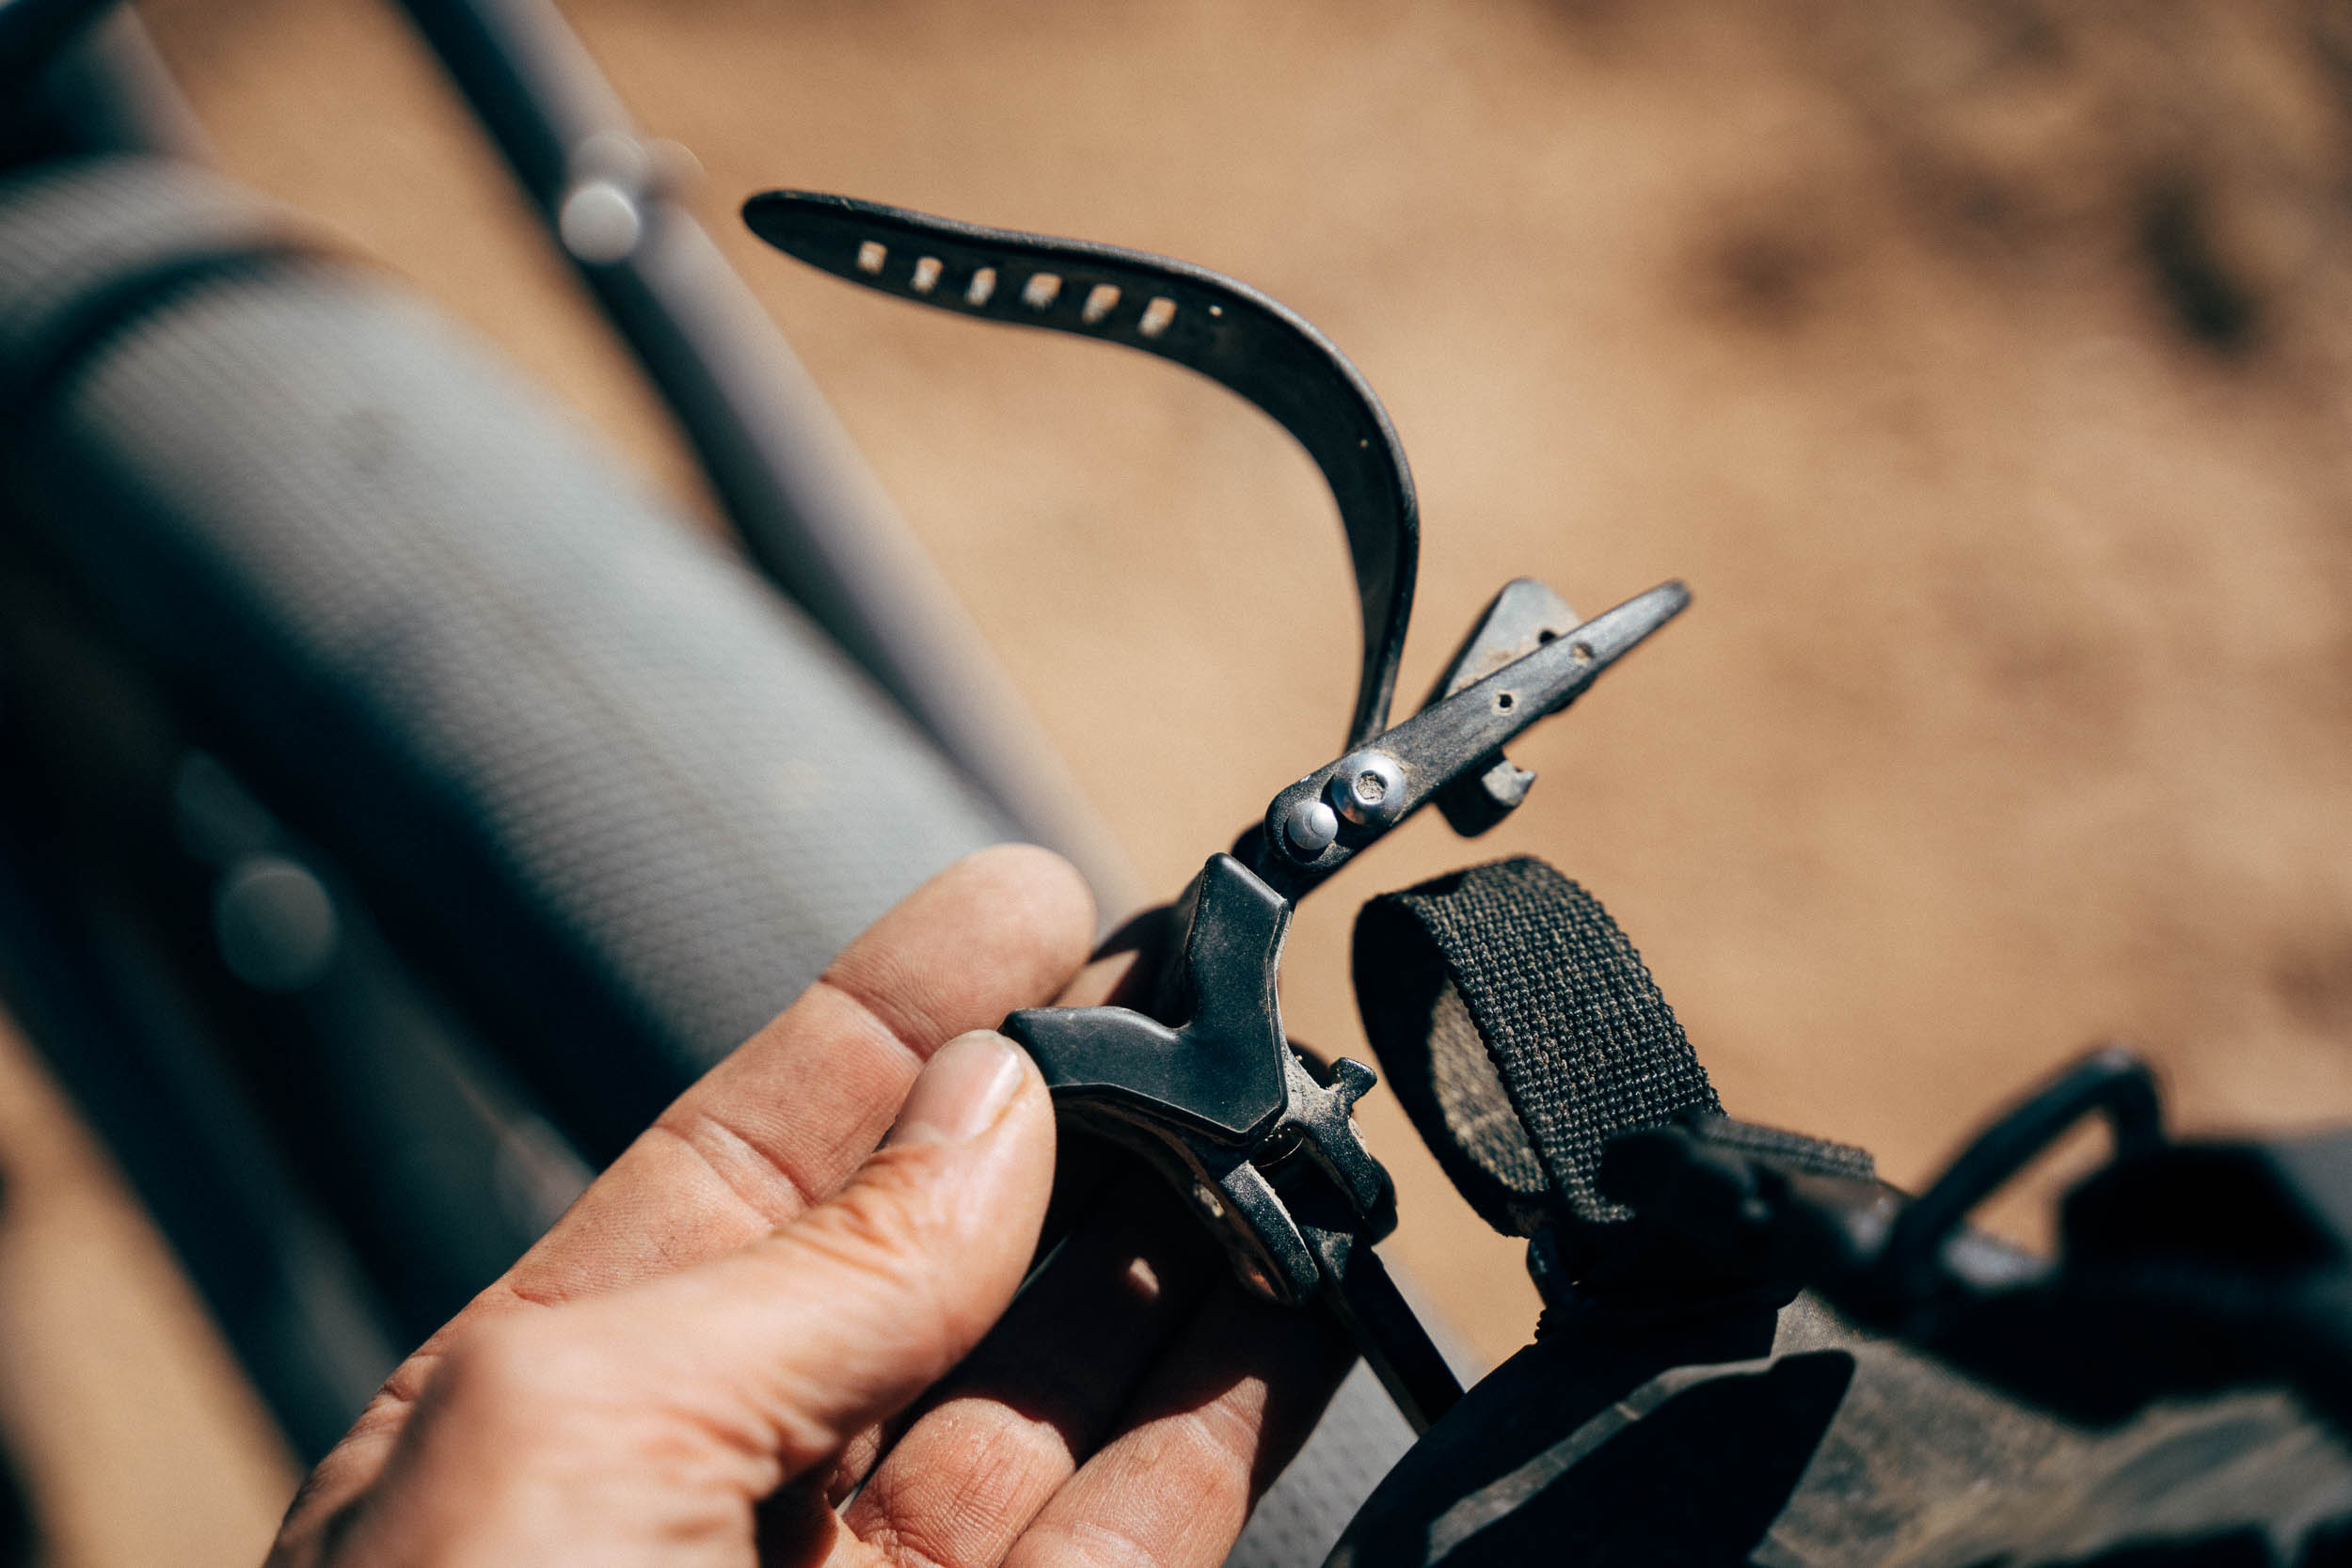
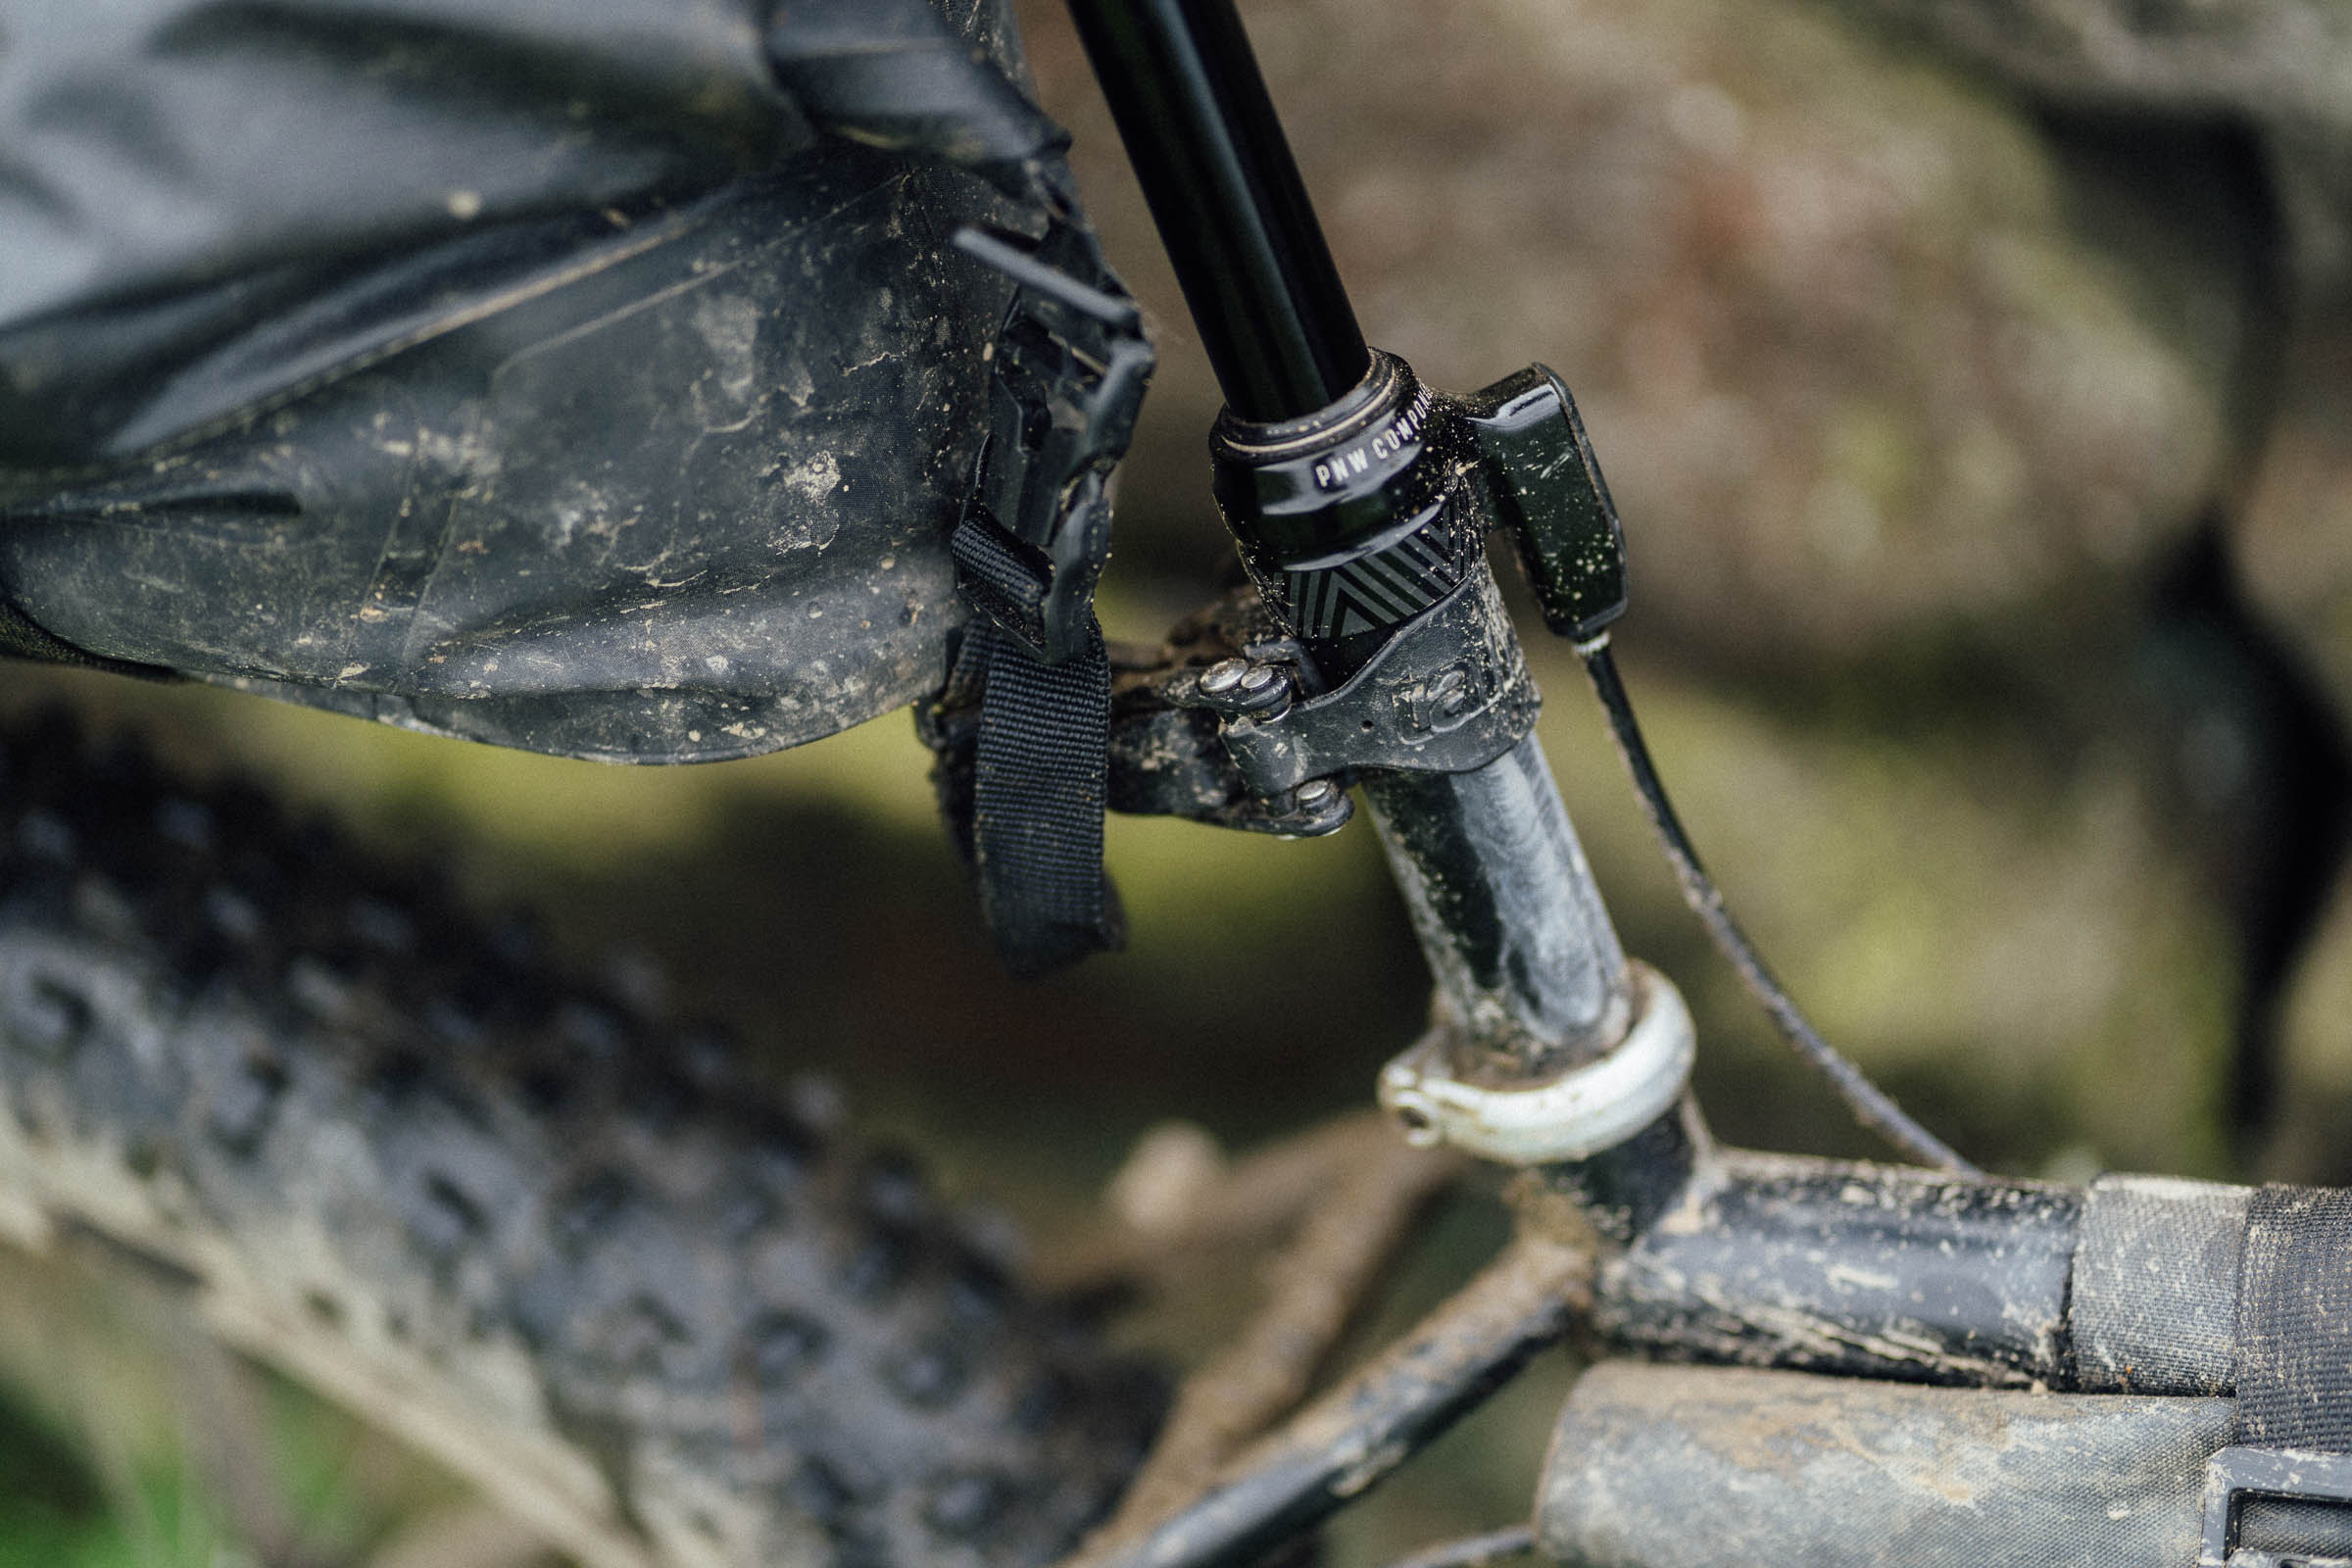
With the Fast-Release clamps, removing the bag is very easy – I often removed it at the end of the day to bring it into my tent. Be sure too to close them when the bag is off the bike, so you don’t risk losing the rubber grommets (if you do, they’re available aftermarket). Coupled with the adjustable seatpost clamp (designed to work with posts from 25mm in diameter through to 3″ deep aero designs), this means the AeroPack can be removed in about half a minute, though I did find the lower clamps needed the odd clean if you’re riding in mud. The kit includes locking screws if removing the seatpack easily desired – for commuting, as an example. In use, noticed that the seatpost clamp can slide upwards, depending on the finish and the angle of the seat tube – some gorilla tape or a thin rubberised strip keeps it in check, and protects the finish on your post which will scuff in time. I should add that initially, I was worried about the longevity of the clasp itself, which is made from polyurethane over-moulded around a stainless steel inner. But now that I’ve used it for several months, my concerns have largely dissipated. Should it fail, I’m sure there’s a way of jerry-rigging it to the seatpost. A Voile strap, maybe?

Talking of seatposts, the Tailfin is largely dropper post friendly, as long as your frame is big enough to accommodate both the pack and the drop, given the length of the arch. I run a large frame and this proved to be a real advantage on several bikepacking routes I rode over the summer. And, with so many trail bikes now shipping with internally routed dropper posts, it means you can ride your trail bike and pack considerably more than a dropper-specific seatpack, even if you don’t intend to use the dropper much. One caveat: don’t get too carried away and overdrop! The subframe of my AeroPack bent slightly, likely because of my somewhat free-spirited use on a techy tour around the the UK’s Lake District.

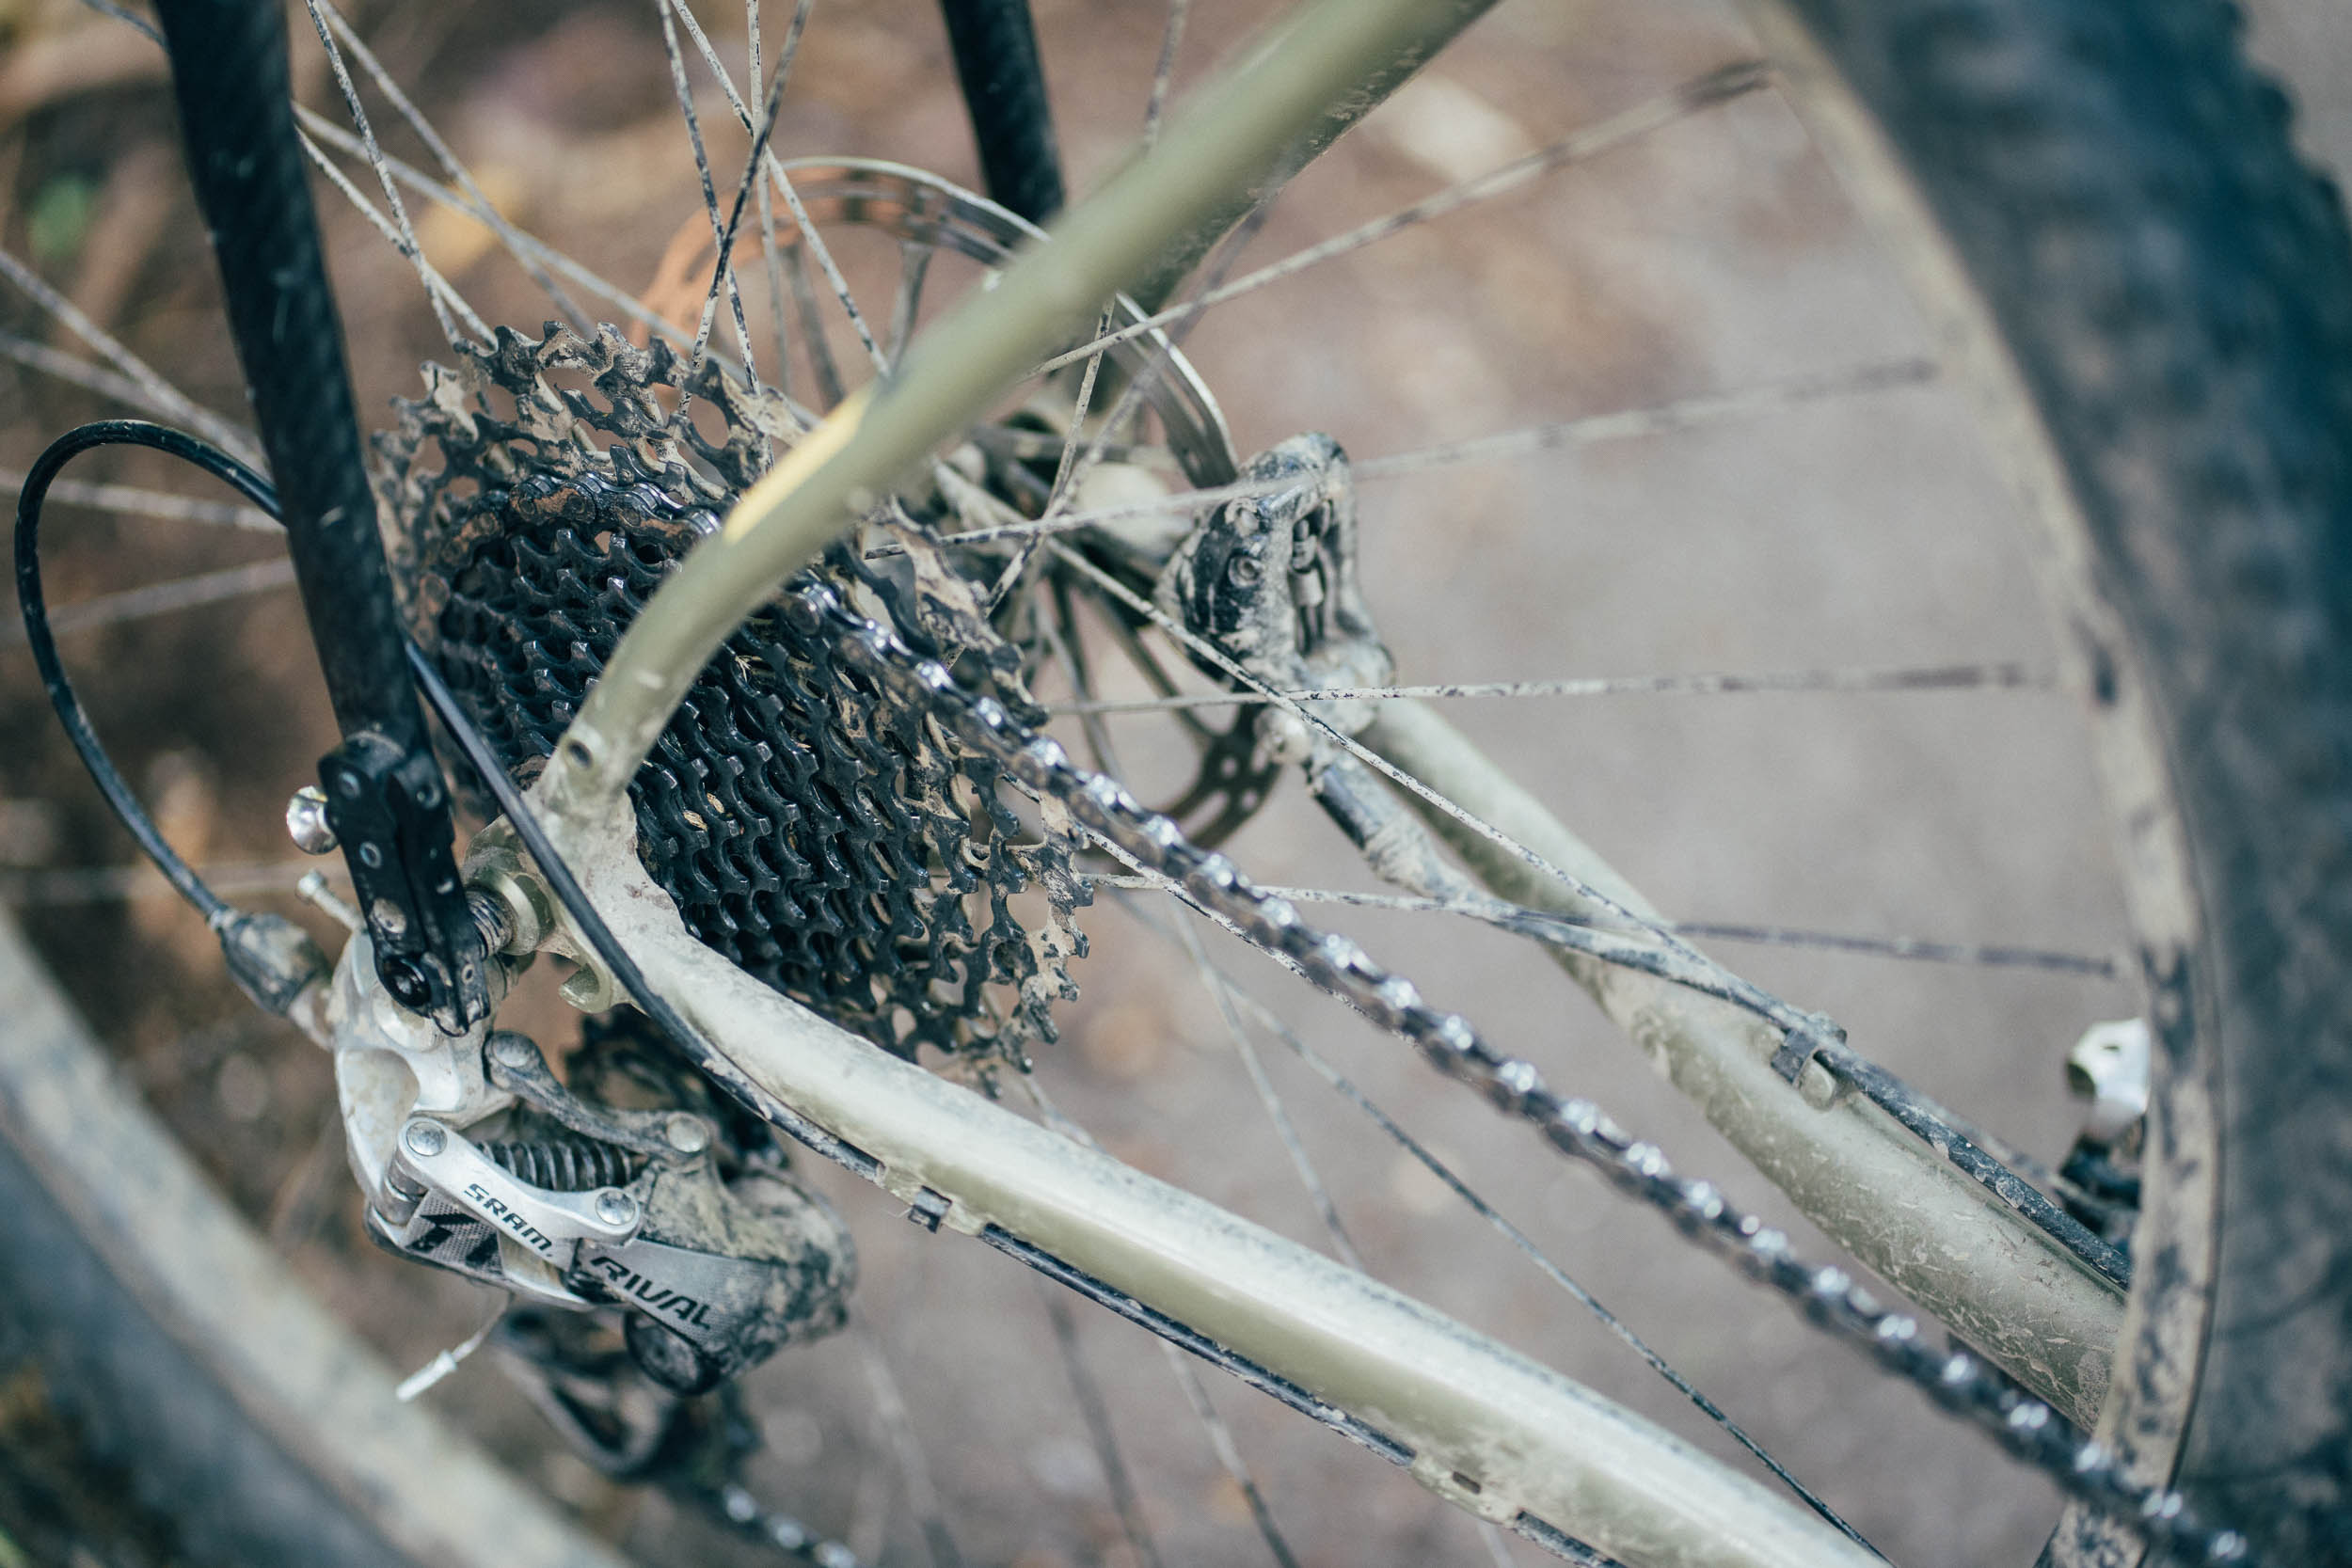
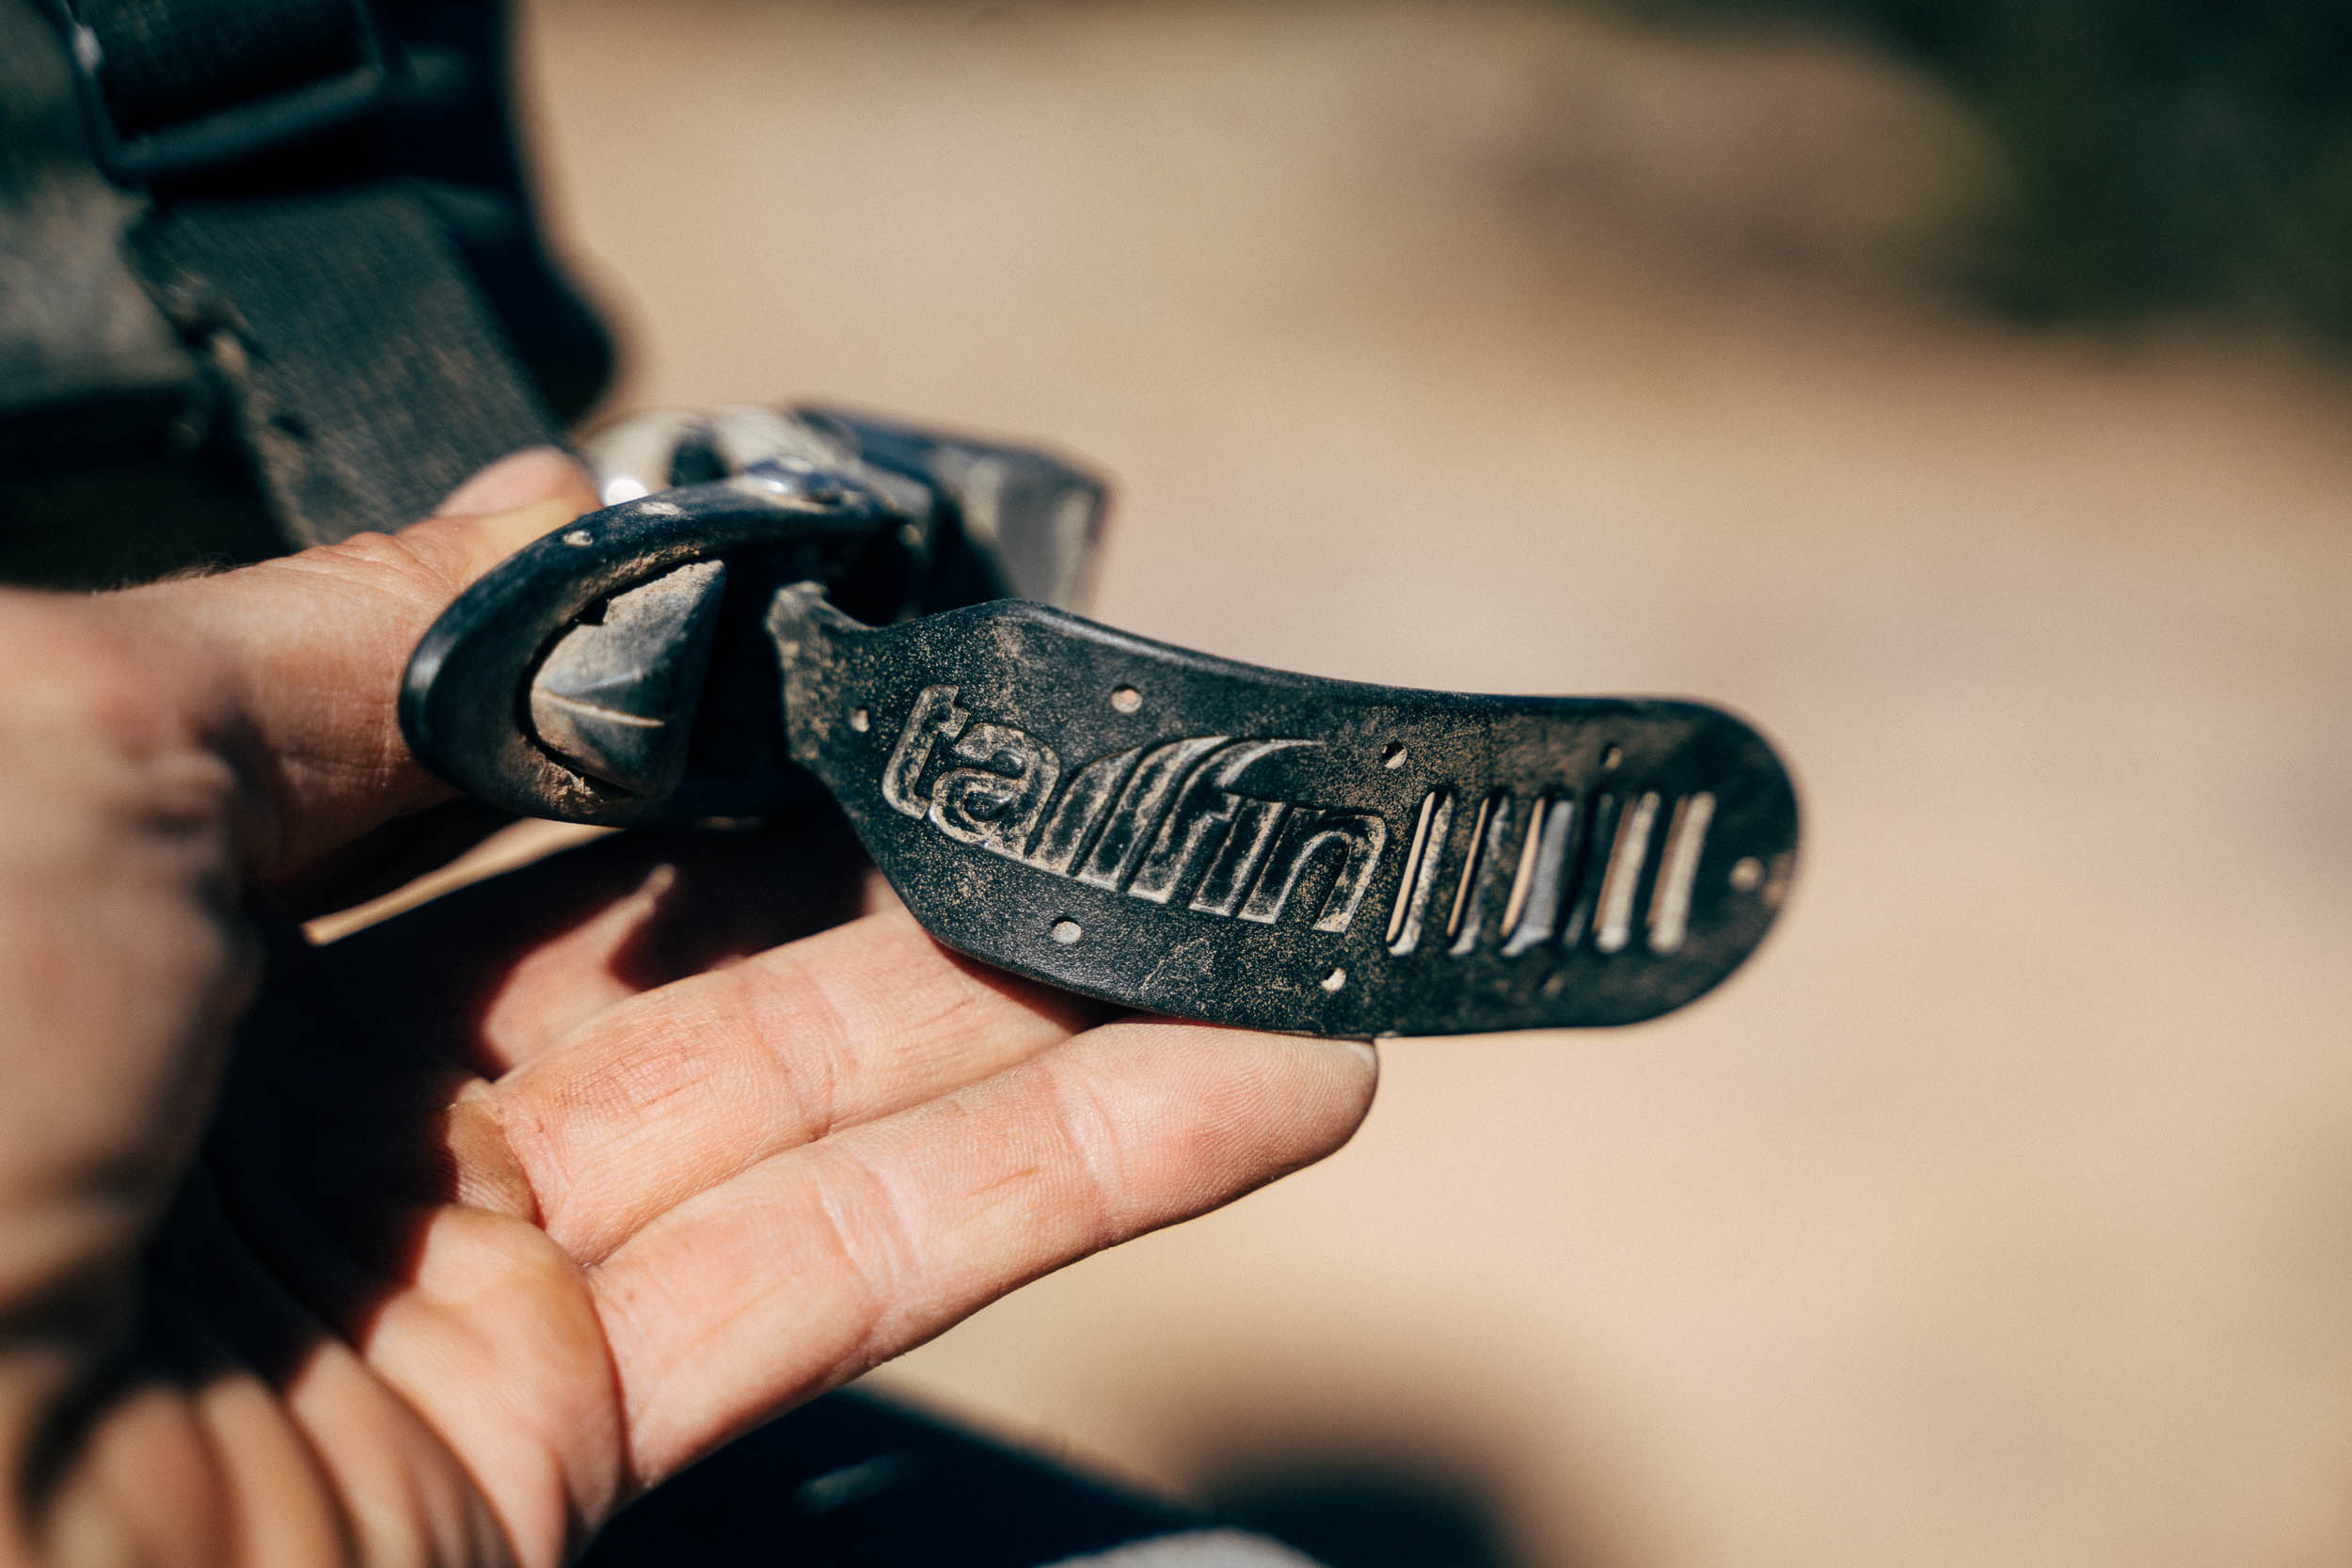
As mentioned, the ‘arch’ is available in carbon or aluminium, with or without the provision for panniers. In terms of sizing, the axle to pivot point is 440mm long. I asked Tailfin why it settled on this particular length and was told that it positions the AeroPack in such a way that it fits the majority of average-sized bikes. “Too low and it sits at a funky angle pointing skywards. Too high and it sits to high. For the majority of bikes this is the Goldilocks number. As we expand our range it might make sense to make smaller/longer versions.” As for the construction, Tailfin has this to say: “We’ve used various processes to create our carbon parts over the last few years. The current crop of carbon arches use the exact same technique as carbon MTB cranks – a polyurethane foam core is injection moulded, wrapped in carbon fibre, then put in a heat press. Like carbon cranks, this method creates a high strength, tough part that is designed to take a beating.” Clearance wise, the arch can accommodate 26″ wheels that are 4″/100mm wide, 27.5″ up to 3.5″/85mm wide, and 29″ up to 3″/75mm wide. Only fully-fledged fat bikers will feel left out. As it is, I can see the addition of a shorter arch being useful to maximise bag space for smaller riders and those with a dropper, even if the current one can be made to work. And the bag won’t necessarily sit straight, depending on the bike and size; typically flatter on a gravel bike and steeper – more like a seatpack – on a mtb.
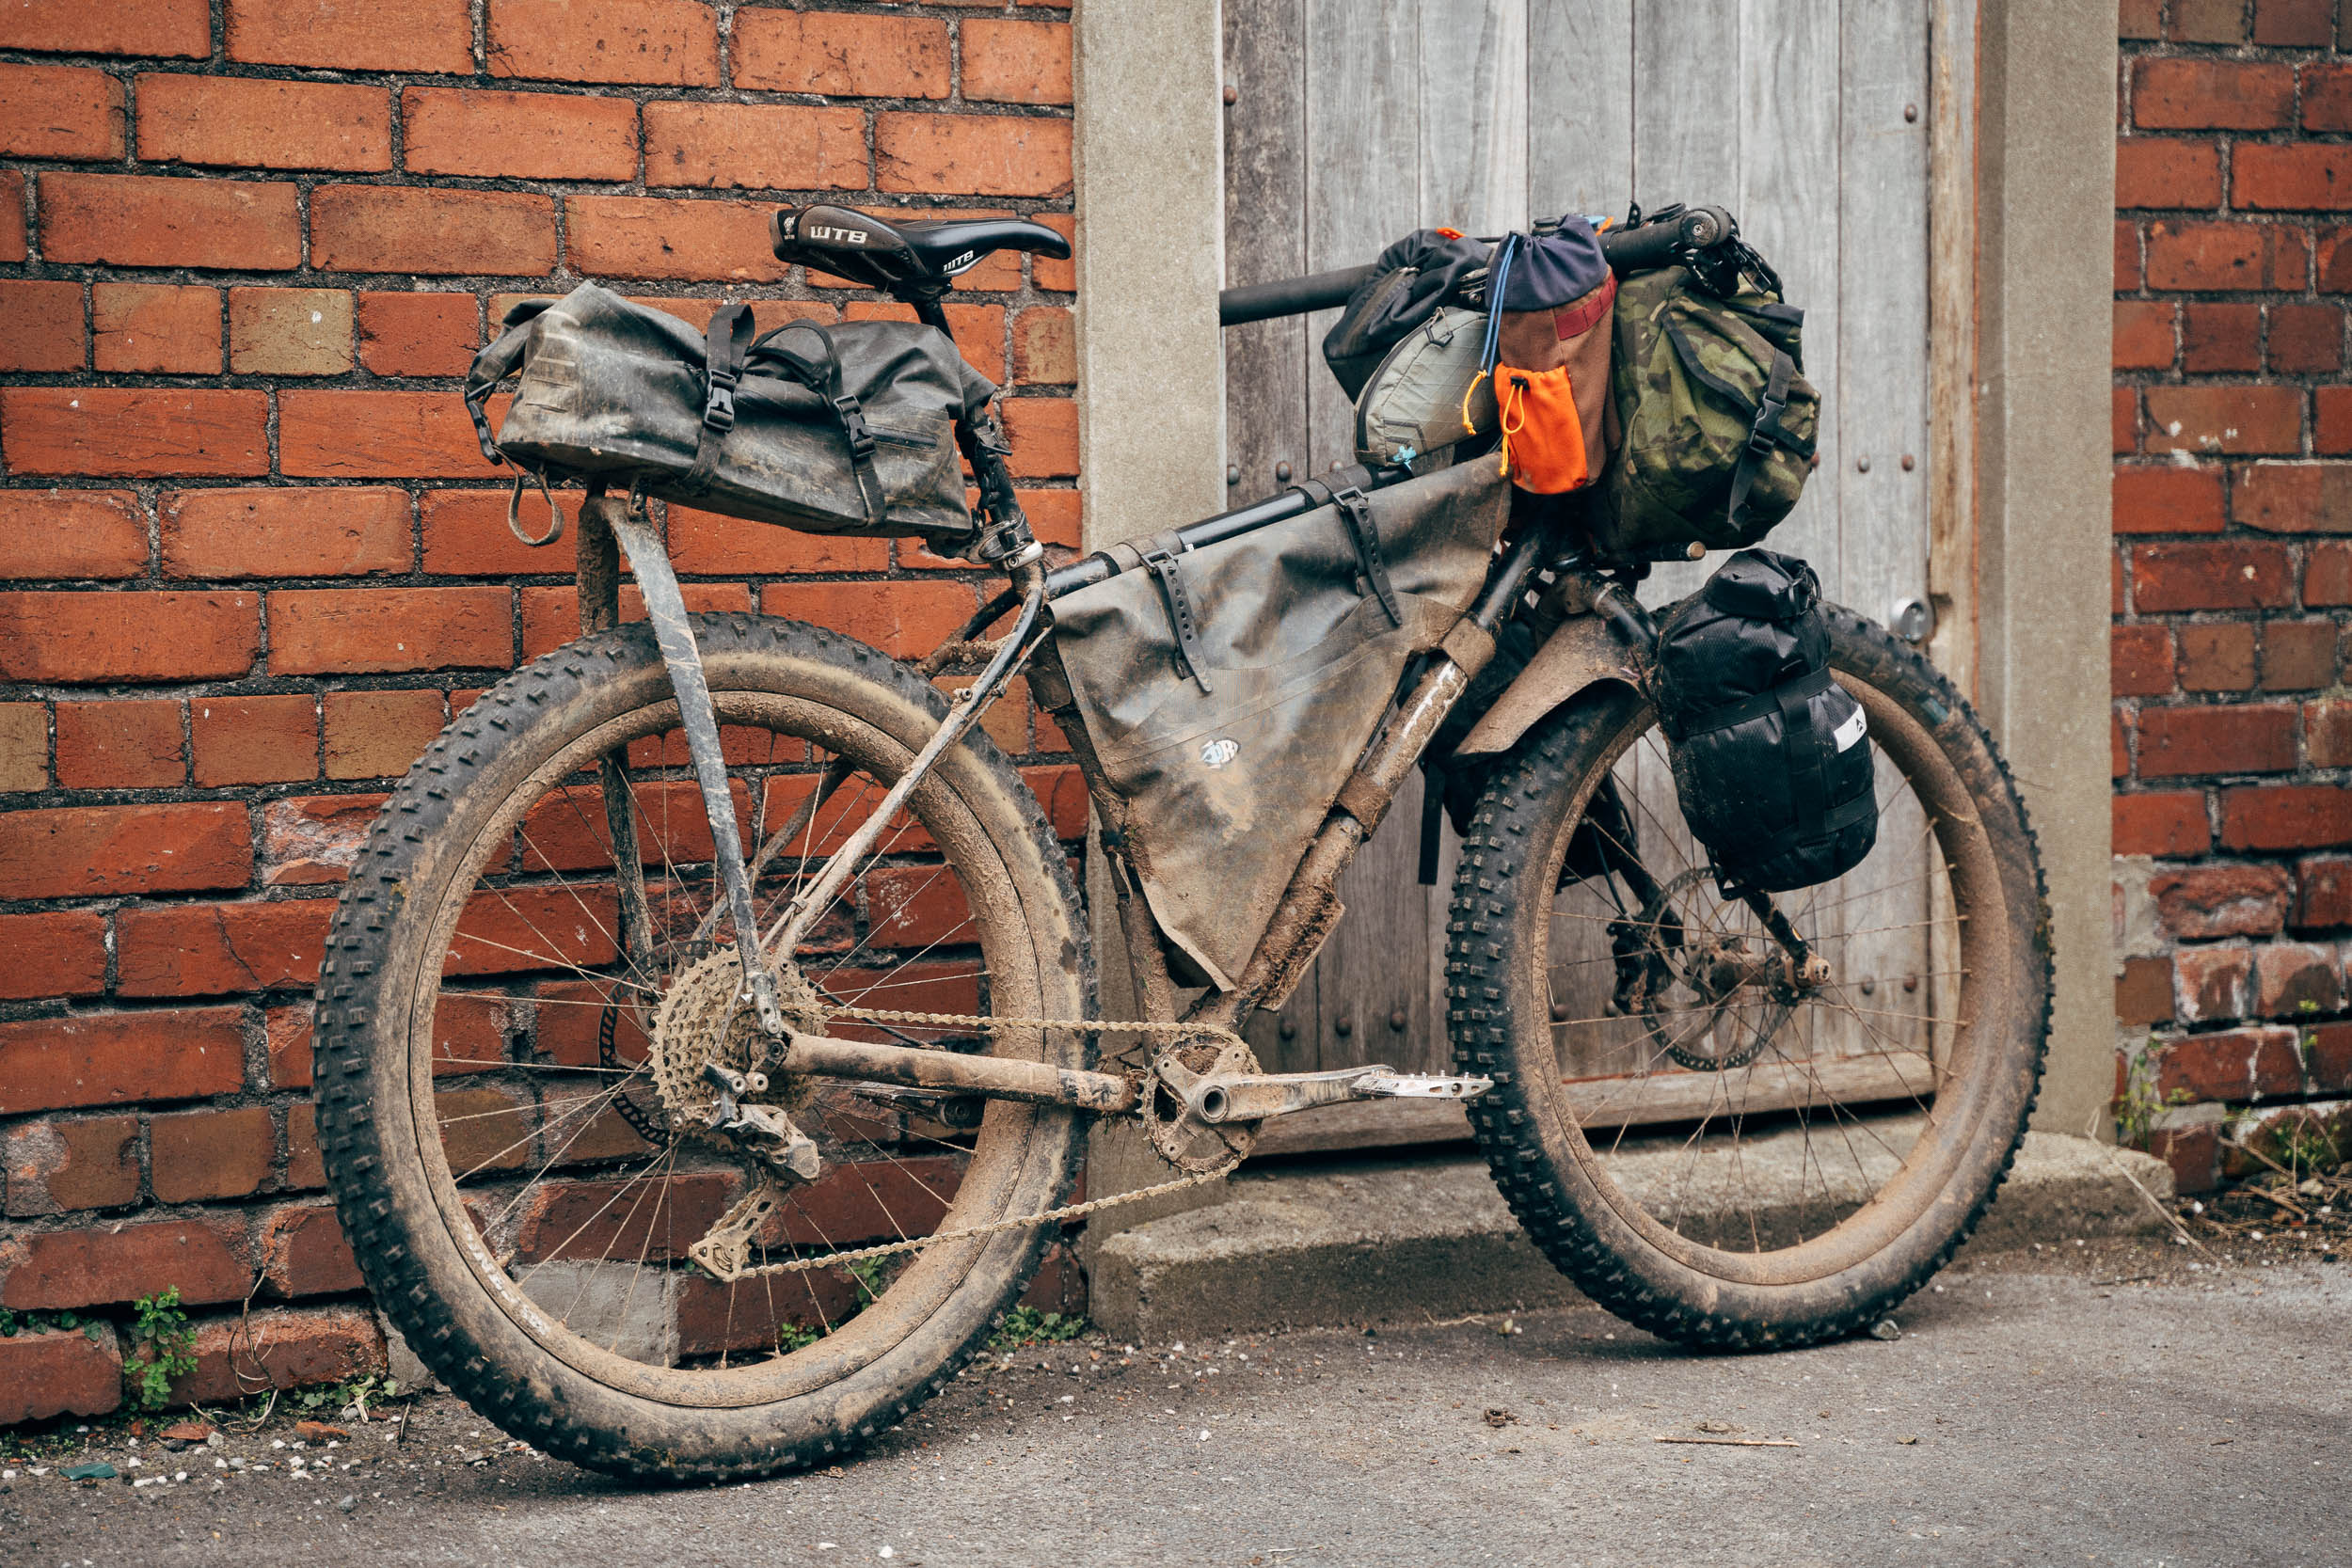
Of course, all this hardware means more potential wear and tear, or damage during a fall. I’ve yet to take a really big spill, thankfully, though the AeroPack has been completely unscathed after a couple of minor incidents, in addition to dropping the bike on its side. And as for wear and tear, I did notice a small amount of play developing in the pivots of the seatpost clamp, after some particularly hard riding with a heavy load. The official rating is 9kg on road/gravel and 6kg offroad. I don’t think I was carrying as much as that but still, Tailfin offers a very forgiving warranty and repair guarantee. And the tri-pivot design uses replaceable nylon bushings that are available as spares, with replacement only requiring screwdrivers or hex allen keys. I’d also recommend some helicopter tape to protect the carbon stays, which I noticed had a tendency to catch on walls when leaning up the Bombtrack Hook – less so on the Jones SWB, presumably because of the wider bars and tyres. My take? As lovely and light a the carbon version is, if it was my money I’d stick to the alloy AeroPack for ‘expedition-style’ bikepacking, even if Tailfin insists the strength and general toughness is very similar between the two materials, even if the carbon arch is a little lighter.
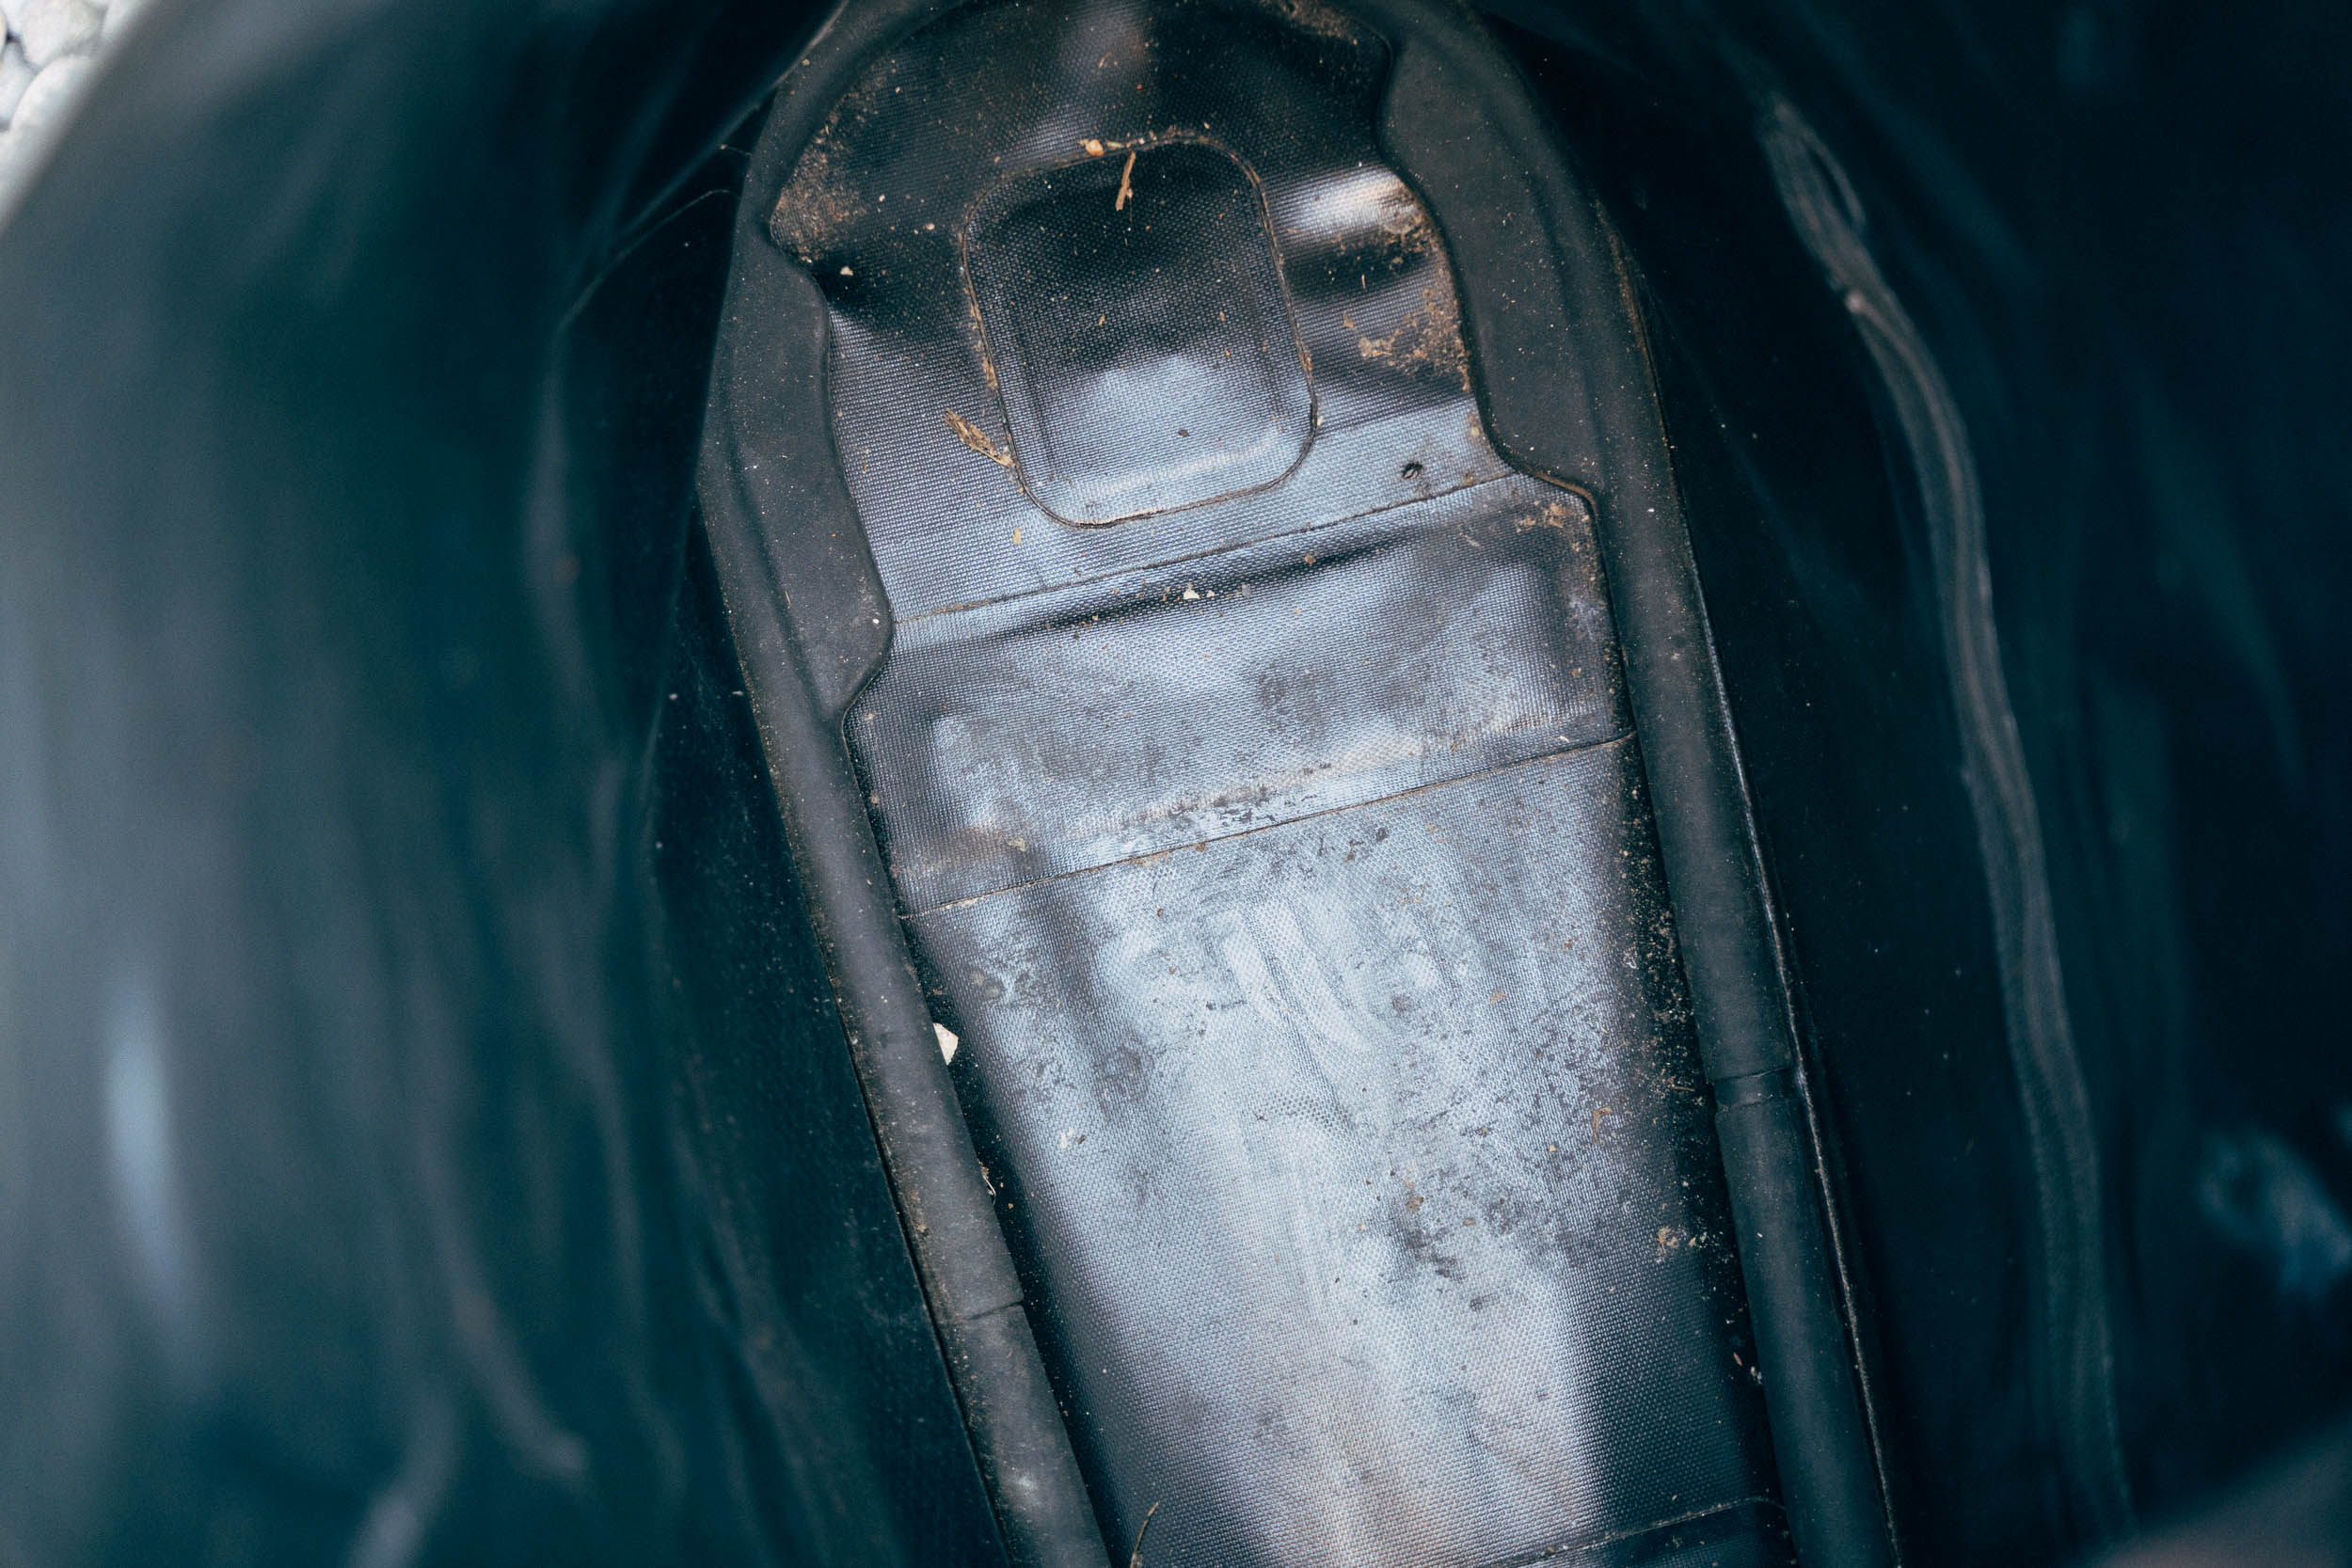
As for weight, the Tailfin S (690g) can’t match the weight of standard a seapack, but it’s in a similar ballpark to bags of a similar size that feature supports (like Porcelain Rocket’s Mr Fusion XL (560g, 15L capacity, $240 CAD, $180 USD). If we’re getting fussy, note that the AeroPack’s two additional straps weigh 50g and there’s also an optional rubberised backbone liner (40g) that wraps around the internal aluminium subframe – I found this useful, as I often packed my cookset inside – which brings it up to almost 800g as tested.

But while it’s not as light as some seatpacks, it’s considerably lighter than a rear rack and a saddlebag. As a price and weight comparison, a Taiwanese-made Tumbleweed T-rack and a BXB Goldback will set you back $370 and likely weigh close to 1.5kg. Granted, you could also choose to run a rack like a Tubus Vega ($110) and lash on a hardy dry bag – which will likely weigh about 800g combined – but then you’re going to completely lose out on day to day functionality.
Additional information on compatibility with full suspension bikes
I didn’t have a chance to try the AeroPack on a full susser, so here’s what Tailfin has to say, with regard to compatibility…
“We genuinely believe “the best bike packing bike is the bike you already own” therefore it was important that the AeroPack could be used with full suspension bikes. Using a unique tri-pivot design each pivot contains replaceable plain bushings which allow it to adjust position as the suspension compresses.
Carrying any gear behind the seatpost of a full suspension bike is challenging. With regular fabric seat packs there are three issues. Firstly they impede dropper post use. Secondly, they must be kept small (sub 7 litres) in order to avoid the rear wheel driving into the bottom of the pack. And thirdly, they are often in the way of your backside when making steep descents.
The AeroPack does a fair job to resolve those issues, however, it is still not without its compromises. Due to the weight of your gear sitting directly on the wheel, it changes the unsprung mass of the wheel (similar to URT suspension system in the 90s), which will therefore change the suspension dynamics and create more chatter on rowdy trails.
The majority of our in-house testing has been done with a Santa Cruz Bronson which has 150mm rear travel. The results were generally positive with the positives outweighing the negatives.”
And if aero-efficiency is your game, the AeroPack – as the name suggests – apparently matches or betters other seatpacks on the market. These advantages will appeal to gravel racers more than trail riders, who are unlikely to be riding at the kind of speeds where this makes a significant difference. But still, good to note.
Pricing and Weights
With TA or QR axle + Fast Release Dropouts
AeroPack Carbon S – £299 / €350 / $390
AeroPack Alloy S – £229 / €270 / $300
AeroPack Carbon X – £349 / €410 / $455
AeroPack Alloy X – £269 / €315 / $350
With Rack Mount Adapters + Fast Release Dropouts
AeroPack Carbon S – £279 / €325 / $375
AeroPack Alloy S – £209 / €245 / $275
AeroPack Carbon X – £329 / €385 / $430
AeroPack Alloy X – £249 / €290 / $325
Direct Frame Mounting
AeroPack Carbon S – £239 / €280 / $310
AeroPack Alloy S – £169 / €200 / $220
AeroPack Carbon X – £289 / €340 / $375
AeroPack Alloy X – £209 / €245 / $270
With TA or QR axle + Fast Release Dropouts
AeroPack Carbon S – 750 grams / 26 oz
AeroPack Alloy S – 860 grams / 30 oz
AeroPack Carbon X – 810 grams / 28 oz
AeroPack Alloy X – 960 grams / 33 oz
With Rack Mount Adapters + Fast Release Dropouts
AeroPack Carbon S – 760 grams / 26 oz
AeroPack Alloy S – 870 grams / 30 oz
AeroPack Carbon X – 820 grams / 28 oz
AeroPack Alloy X – 970 grams / 33 oz
Direct Frame Mounting
AeroPack Carbon S – 690 grams / 24 oz
AeroPack Alloy S – 800 grams / 28 oz
AeroPack Carbon X – 750 grams / 26 oz
AeroPack Alloy X – 900 grams / 31 oz
I’ve no doubt that the AeroPack will evolve over time – Nick Broadbent strikes me as the kind of designer and engineer always looking to make improvements – so it’s good to hear that Tailfin aims to keep everything retro-changeable. As it stands, it’s so well polished and thought through that it’s hard to imagine any changes being anything more than incremental. If you’re like me and you’ve always found a modern seatpack to be a lightweight solution to carrying gear, but not an especially practical one, I expect you will love it exactly as it is.
AeroPack Pros
- Top loading design is very easy to pack and access, compared to a seatpack or a rolltop bag on a rack
- Very capacious – and the AeroPack subframe allows for add-shaped cargo
- Compatible with bikes with and without rack eyelets, be with Thru Axles or quick release dropouts
- All alloy arches feature triple eyelets, for extra water or cargo
- Different arches can be specced for different accessories, including Mini Panniers
- Completely stable and silent off road
- Very quick to install and remove for transportation or unladen day rides
- Easy to move from bike to bike
- Completely waterproof
- Dropper friendly with Extended Seatpost Connector, within reason (though travel is reduced depending on frame size)
- Good clearance for all but the biggest tyres
- 5 year warranty plus all parts are replaceable and user serviceable, with crash replacement offer
Cons
- Carbon Aeropack is considerably more expensive than a high end seatpack (though the alloy version is more affordable)
- Heavier and more expensive than a seatpack
- Heavier and more expensive than a minimal rack and rolltop bag cinched on top
- Bushings and seat post connector straps will eventually need replacing
- More hardware to potential fail or be damaged in a crash
- Only one length arch, so smaller riders will need the Extended Seatpost Connector and even then, may not be able to make the most of the bag’s massive capacity, especially if running a dropper post.
- Weight: 690 to 990g (780g as tested)
- Volume: up to 27 litres (with a large frame)
- Max load: 9kg road 6kg off-road
- Required distance between seatpost and saddle: 4” (100mm)
- Place of Manufacture: Taiwan
- Price: $220-$455 ($390 as tested)
- Manufacturer’s Details: Tailfin
Wrap Up
We all aspire to carry less. But in reality, often our needs reach beyond a minimal bikepacking setup. The AeroPack bridges this gap perfectly, with practicality to boot. It strikes a sweet spot between weight, space, and usability, that’s less restrive than a seatpack but more minimal than running a set of panniers. Assuming your frame has eyelets, the concept of a minimal rack and with gear on top is nothing new – there have been plenty of racktop bags that have come and gone throughout the annals of bike touring history. It’s just that the AeroPack’s execution is so much better than anything I’ve ever seen.
Yes, the carbon AeroPack very pricey; the direct mount alloy version is closer to high end, North American-made seatpacks. And yes, there are more moving parts to potentially fail, or to be damaged during a crash. Still, having used one for a number of months across a wide variety of trips, I’m completely confident that the build quality and attention to detail are at least in keeping with its high price – attention to detail is superlative in every way. In short, this is a premium piece of gear that’s designed with diligence and care, and should anything be damaged or wear out, spares are available for every part.
From a bikepacker’s perspective, I’d say the AeroPack is at its best on long distance gravel outings and short-range mtb adventures – though with minimal spares, it should be up to bigger trips too. It’s super stable off road, accepts a wide variety of tyre sizes, and best of all, it’s compatible with a dropper post, when packed accordingly. With the new Extended Seatpost Connector, most riders should find a solution that works for them, and eventually, the addition of a shorter arch would be welcome to cover the full sizing spectrum.
If you can get away with a seatpack and the associated packing restrictions, good for you. You’ll save weight and money. But if you’re looking for a relatively lightweight solution that allows a more ‘liveable’ form of bikepacking – or indeed, you gravel race and prefer the idea of loading up the rear and leaving the front of the bike unencumbered and light – then the AeroPack is a great investment and one of the best pieces of gear I’ve tried in years.
Tailfin Aeropack Review Video
The Tailfin Cycling AeroPack is the brand’s spin on the traditional seat pack. While it might look complex, it’s actually a rather simple system that offers unmatched stability compared to other cargo options in the category. In this video, Neil shares his thoughts on the AeroPack, how it achieves its stability, the install process, how it rides, and more…
Please keep the conversation civil, constructive, and inclusive, or your comment will be removed.