


Bikepacking Repair Kit & Tools: Essential and Auxiliary


When bikepacking in the backcountry, a mechanical mishap can quickly turn a nice ride through the woods into a miserable hike-a-bike exodus. A well-thought-out bikepacking repair kit can help you avoid that fate. Find our detailed guide to assembling the right tools and spares here, plus our latest video outlining a complete repair kit…
PUBLISHED Apr 12, 2021
Originally published July 2015; updated April 2021
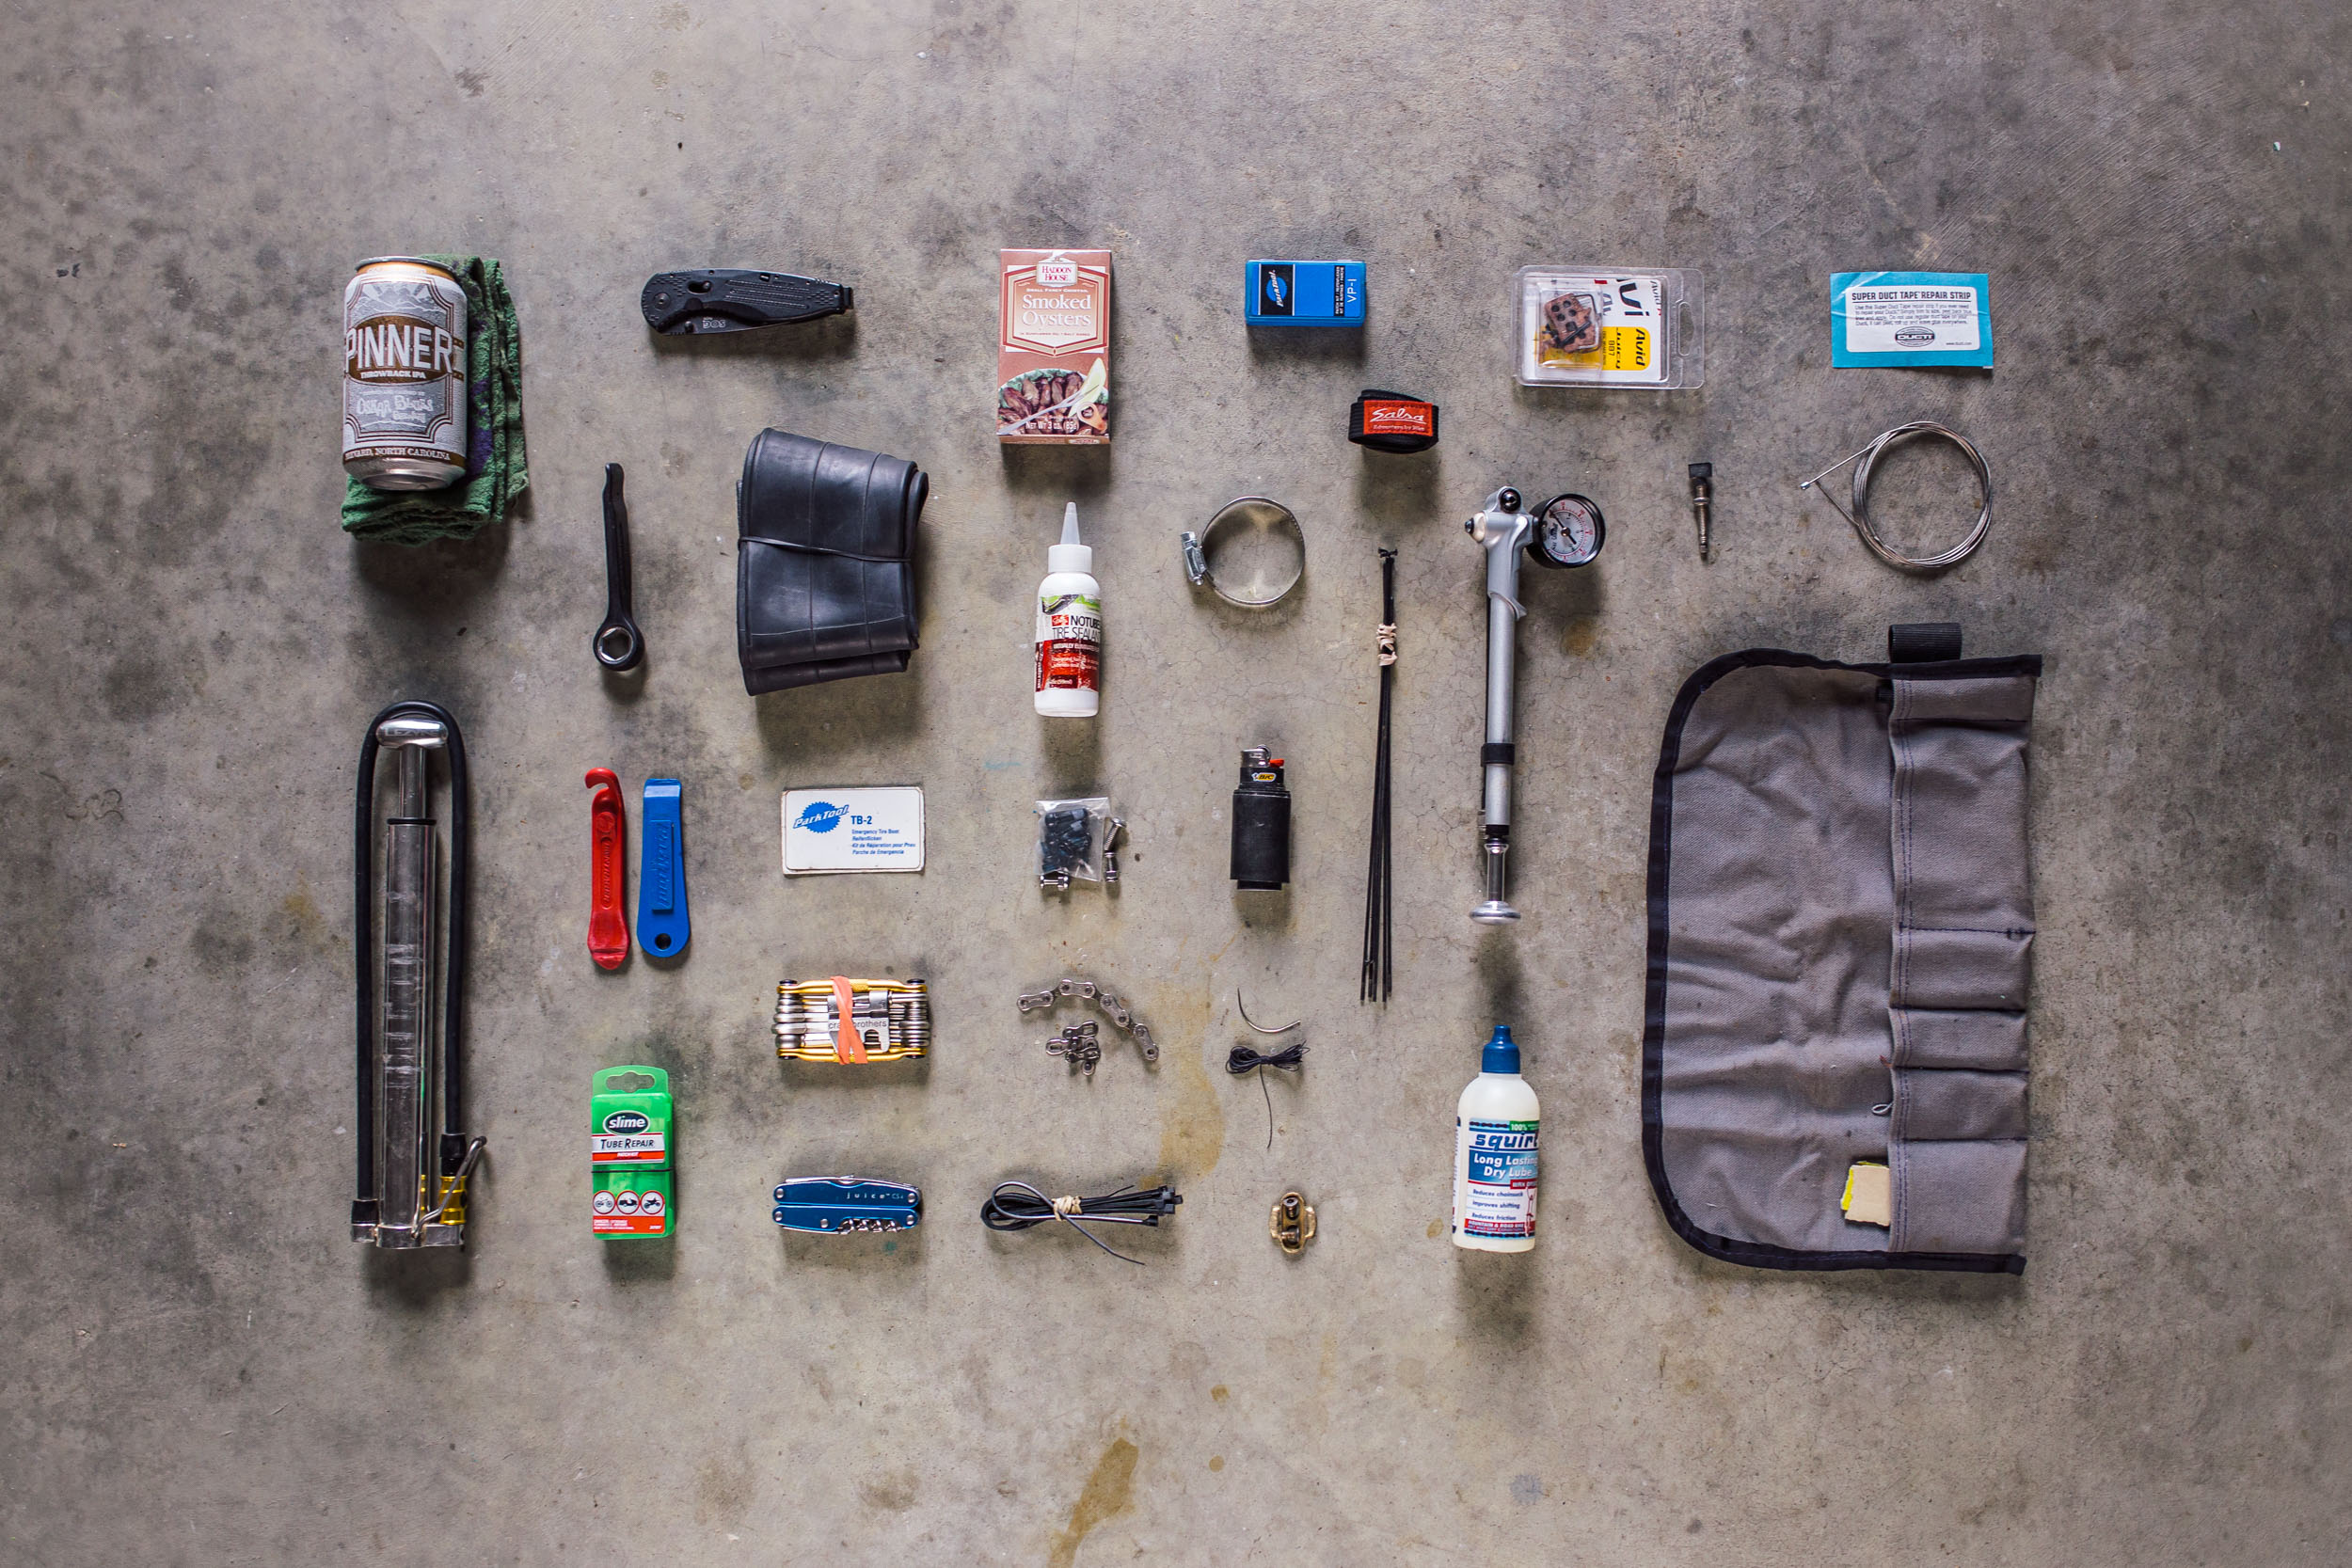
Assembling a sufficient repair kit can be a disconcerting task. It’s somewhat of a balancing act between necessity, fear, and space constraints. There are a lot of potential mechanical issues that may arise, and being ready for all of them would require lugging around an 11-pound toolbox. However, a basic assortment of tools and spare parts can get you out of most sticky situations, keeping you rolling through the backcountry instead of pushing out of it.
With that in mind, we’ve put together this detailed repair kit, pieced together to handle real-world mechanical issues. It’s separated into two main sections, The Essentials, and a secondary list that may come in to play for a longer trip. It’s worth noting that your needs may vary depending on your bike, accessories, length of ride, and location. Also note that there are links to various online retailers for reference on many of the products and tools listed, but we encourage you to support your local bike shop and pick them up there if you can.
The Essentials
We consider the following kit to be fairly bare-bones, but it may still be a bit much for the gram counters out there. Some may pack more, while others will pack less and put their inner MacGyver to the test.
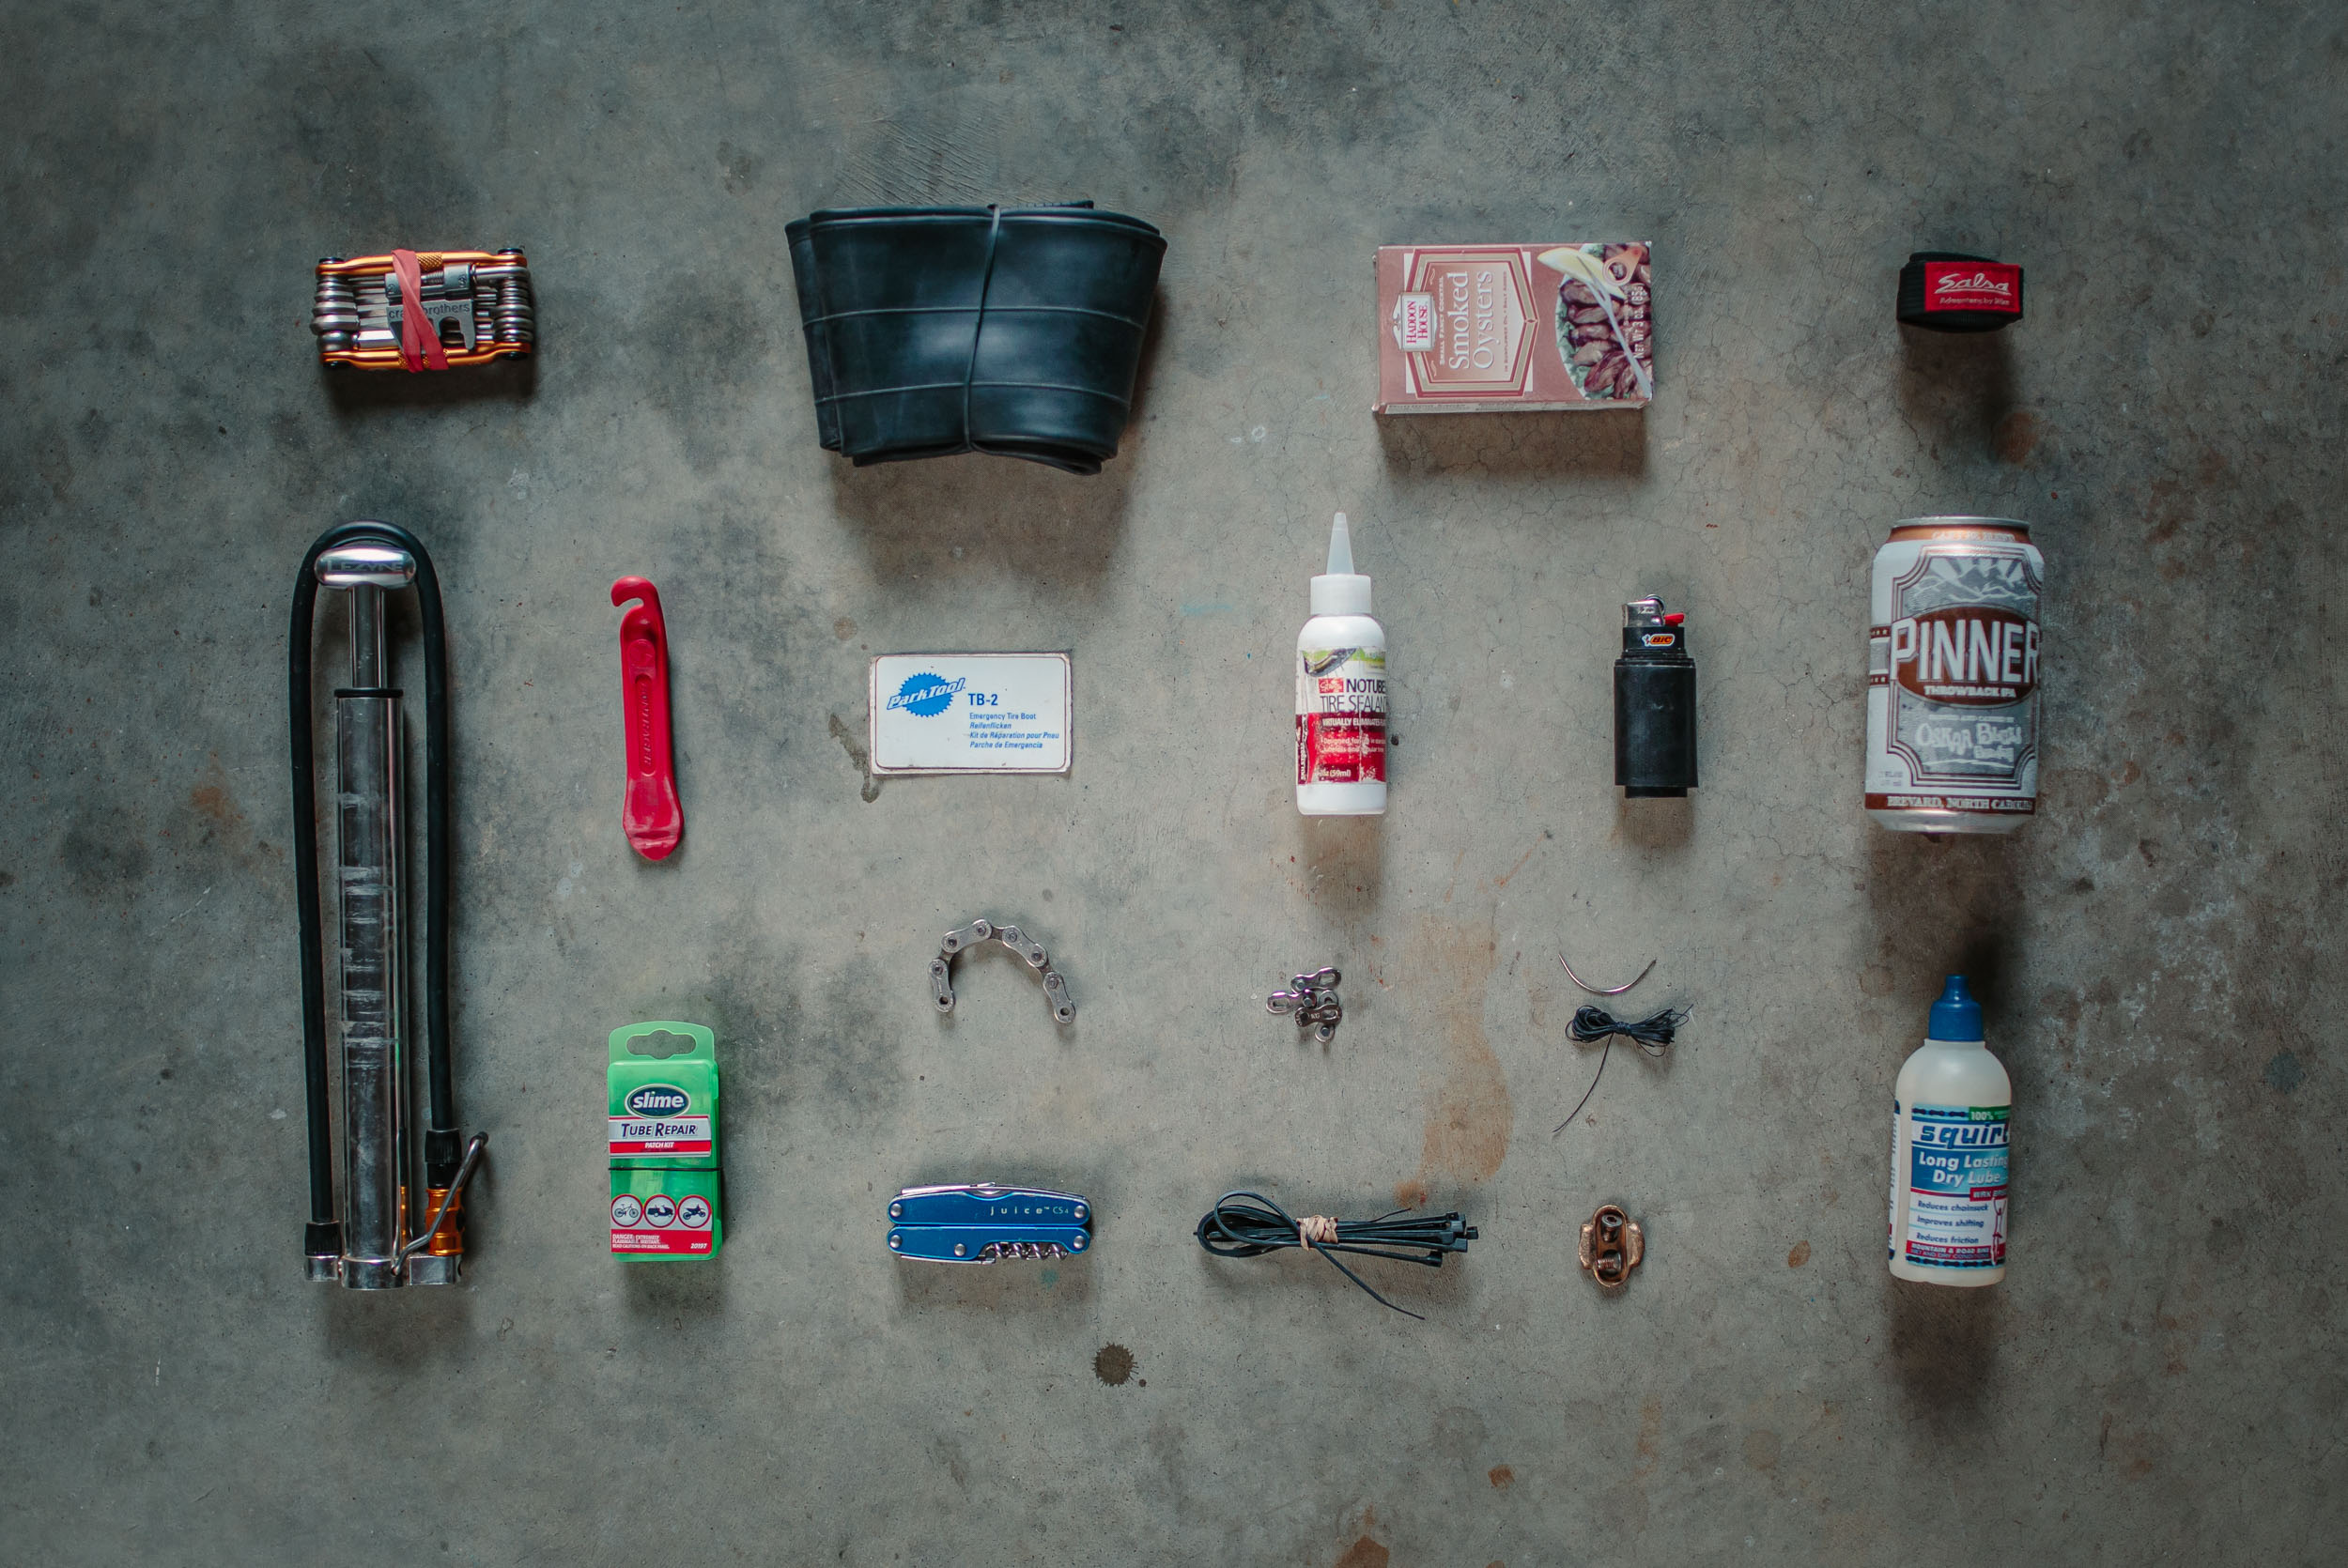
Core Toolkit
This group of tools makes up the bulk of the kit and can be carried in a tool roll, dedicated bag, or spread throughout your pack luggage. Items marked with an asterisk are necessary only for certain applications.
Multi-tool (with chain breaker)
This is the heart of the kit. Make sure yours has the correct sizes of Allen and Torx keys to fit the parts of your bike that might need adjustment or repair. The Crank Brothers M19 is shown here, which happens to be missing the Torx T20 needed for Rohloff twist shifters (more of a long-term issue, but worth noting). Missing Allen keys and Torx drivers can be packed as extras when needed. We also like the Lezyne Blox 23. There are a few great bit-driver options we like as well, but these require additional thought for some functions. Also, with most of these tools, you can take them apart and mix and match similar sized keys.
Leatherman with pliers
There are many occasions when you might need pliers while out riding. We’ve used them to remove thorns, aid in sewing a sidewall, remove a stuck tire valve core, and other tasks. As such, a small Leatherman tool is always included in the repair kit. The small and simple Juice has a few other handy tools as well, such as a knife and can opener. The old one shown in some of these photos has been around since 2002, but it was recently replaced with the Squirt.
A reliable pump
The pump shown is the Lezyne Micro Floor Drive. Slightly unweildy, but reliable, even for voluminous plus tires. We’ve even set up tires tubeless with it. One I like a little more these days is the OneUp EDC Pump (100cc), which I’ve now put a ton of miles on; it can also contain a basic tool kit with the EDC system.
15mm Wrench*
A 15mm wrench is necessary for Rohloff drivetrains as well as old-school bolt-on hubs. The Portland Design Works 3wrencho is shown below; it is a solid option and doubles as a tire lever.
Tire Repair
A good repair kit is always heavily weighted toward tire repair. Flats are inevitable, even when set up tubeless. Having the means to repair a tire is key. You can find much more on this subject at our Field Guide to Tubeless, but here’s a basic repair kit.
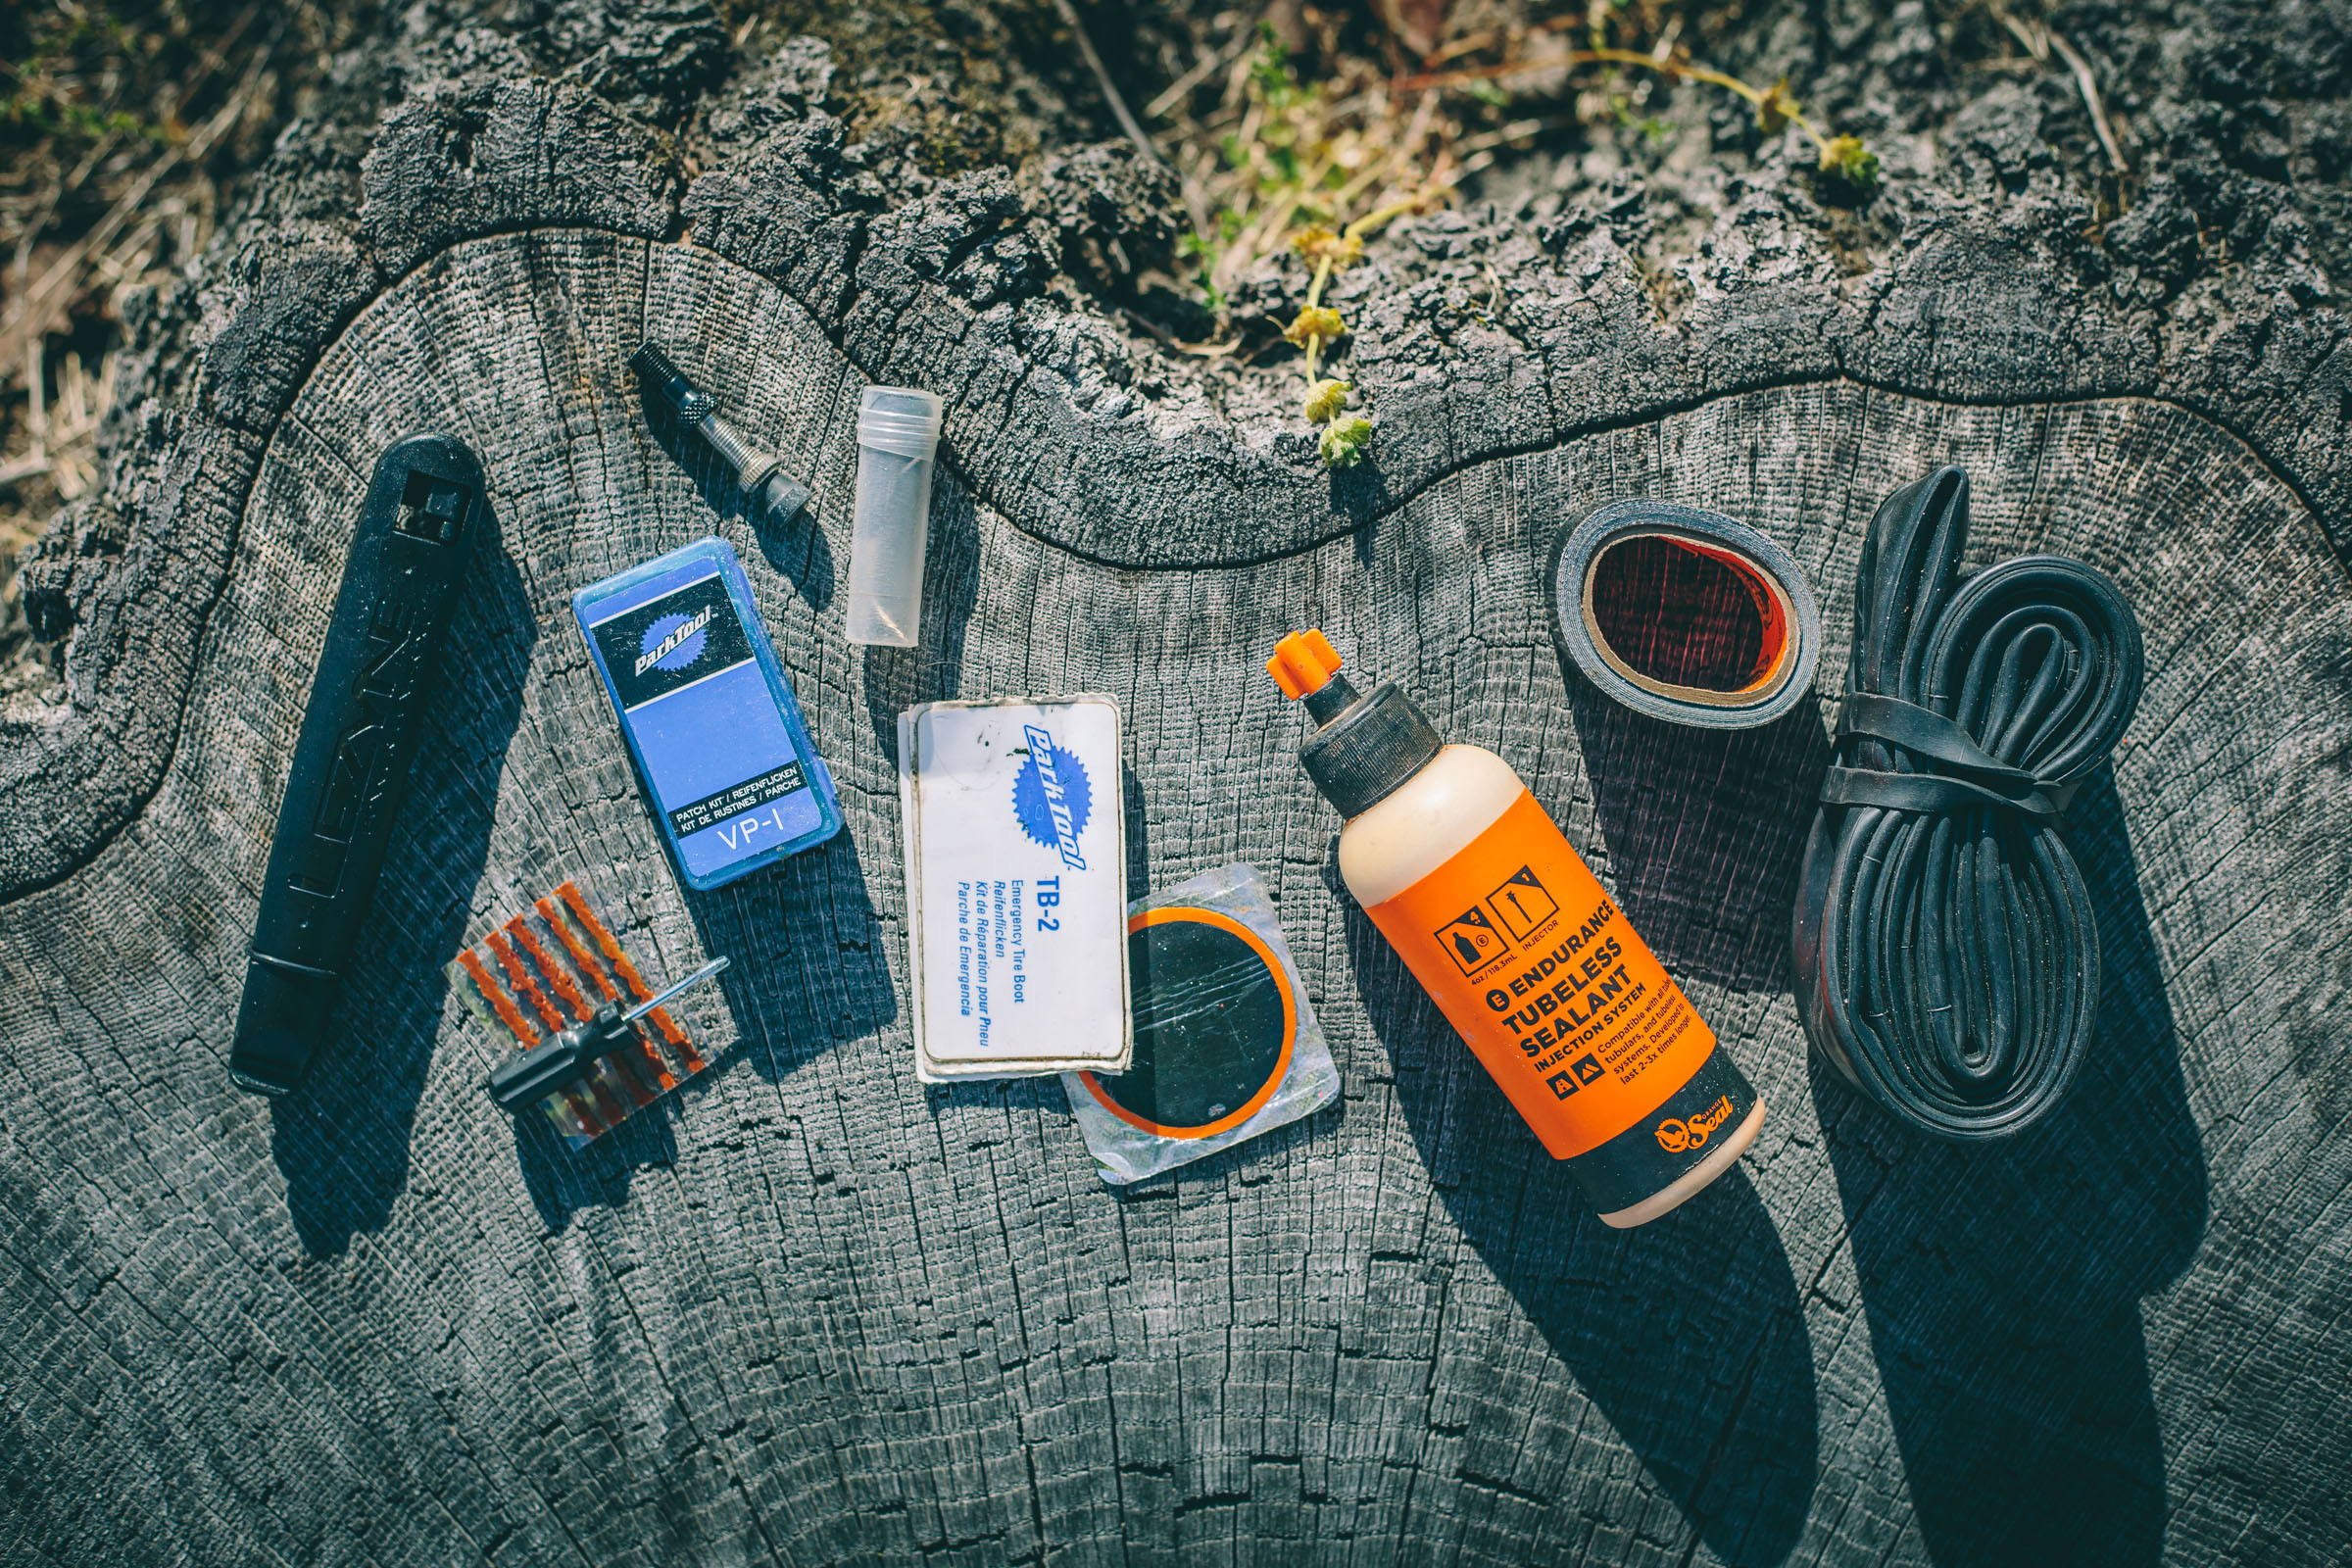
Spare Tubes
Even when running a tubeless setup, spares are an annoying necessity. I usually carry one on shorter outings and two on longer trips (between two of us) which accounts for blowing both tubeless seals on one bike. From there, faith must be placed on patches, sewing, and plugs.
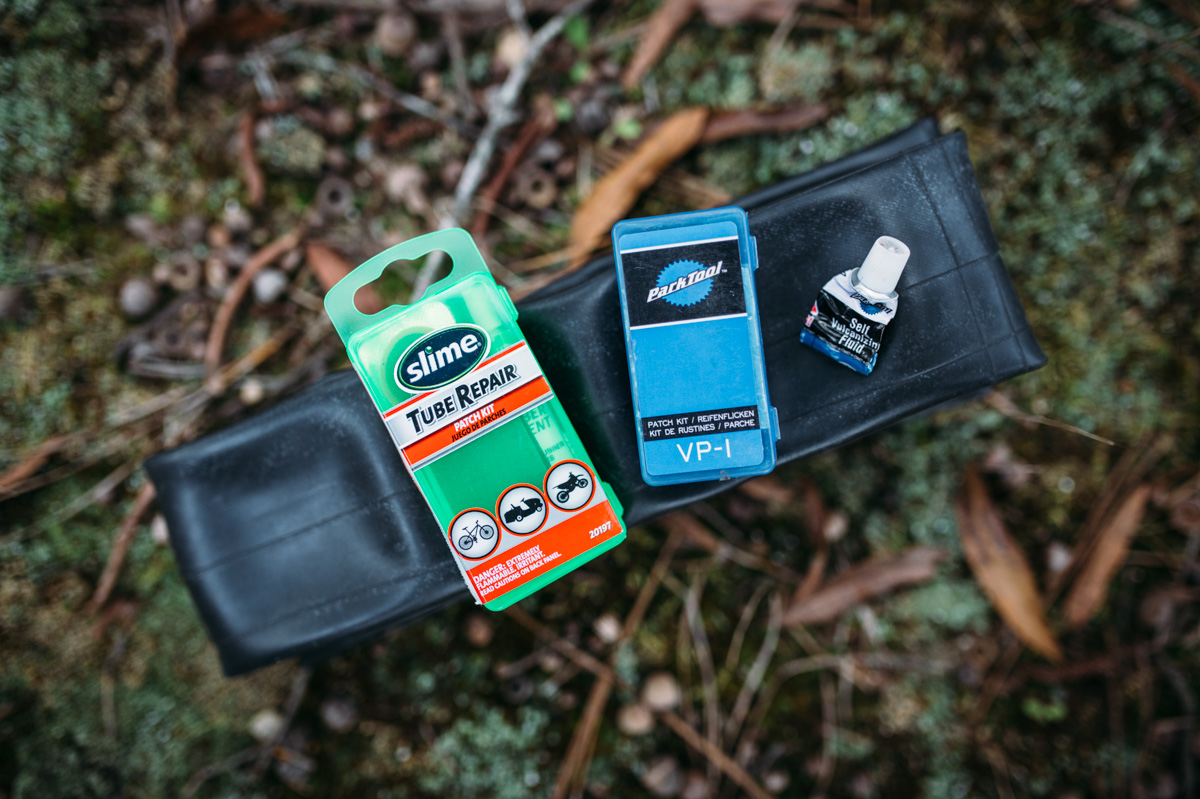
Patch Kit
After having six flats in one day, I never leave without double-checking my patch kit. Before leaving for any substantial ride, make sure the cement isn’t dried out and the sandpaper is in good shape.
Tire Lever(s)
Some folks carry two. Nylon levers are better than metal ones, but they can break. We have a few favorites, including the classic Pedro’s levers.
Park Tool Tire Boots
Fortunately, I’ve only had to use a boot once, after a sidewall gash in the Arizona desert. Gorilla tape can work in a pinch.
Extra Sealant
For a shorter trip, one or two ounces should do. Stan’s two-ounce bottles are minimal in size and weight. Also, you can put your favorite sealant in Nalgene HDPE bottles, which come in 1-4oz sizes and seem to be tough and leakproof. My favorite tire sealant is Orange Seal Endurance. It does a good job at sealing leaks and lasts. Keep in mind that you’ll need an injector or a fill tube/cap to inject sealant through the valve stem.
Curved Needle and Heavy Guage Nylon Thread
Whether it’s for first aid or repairing a torn sidewall, a curved needle and thread are an indispensable part of a repair kit.
Tire Plugs
Tire plugs are key for those puncture 3/16″ tears that stubbornly won’t reseal. Check out the Dynaplug Micro Pro.
Super Glue
Super Glue (or Crazy Glue) is another staple for small punctures or even capping off a plug to ensure its longevity.

Accessories and Parts
A few other items for maintenance and emergency situations.
Dry chain lube
Keep your drivetrain performing well by cleaning and lubing the chain every couple of days. Dry lube (try Rock N’ Roll Absolute Dry) is preferred by some in dusty conditions as wet lube can collect grit and residue on the chain and cassette. However, it’s hard to beat Rock ‘n Roll Gold and Dumonde Tech for their lasting lubrication.
Zip Ties
Carry more that you could possibly need. Zip ties weigh next to nothing and can fix almost anything.
Gorilla Tape + Lighter
Gorilla Tape is heavy-duty duct tape that can repair almost anything, from a bag, to a pair of shoes, to a tire. A great way to store 10 or 20 winds is on a lighter. Another option is to have a few wraps around the shaft of your tire pump.
Quick Chain Links / Powerlinks
SRAM Powerlinks are a good option. Get two or three pairs for whatever size chain you have, as well as a small spare length of chain.
Spare Cleat and Bolts*
If you ride clipless, I would recommend packing an extra bolt and cleat. I’ve lost a cleat bolt mid-ride, and cleats can wear down to a dangerous level.
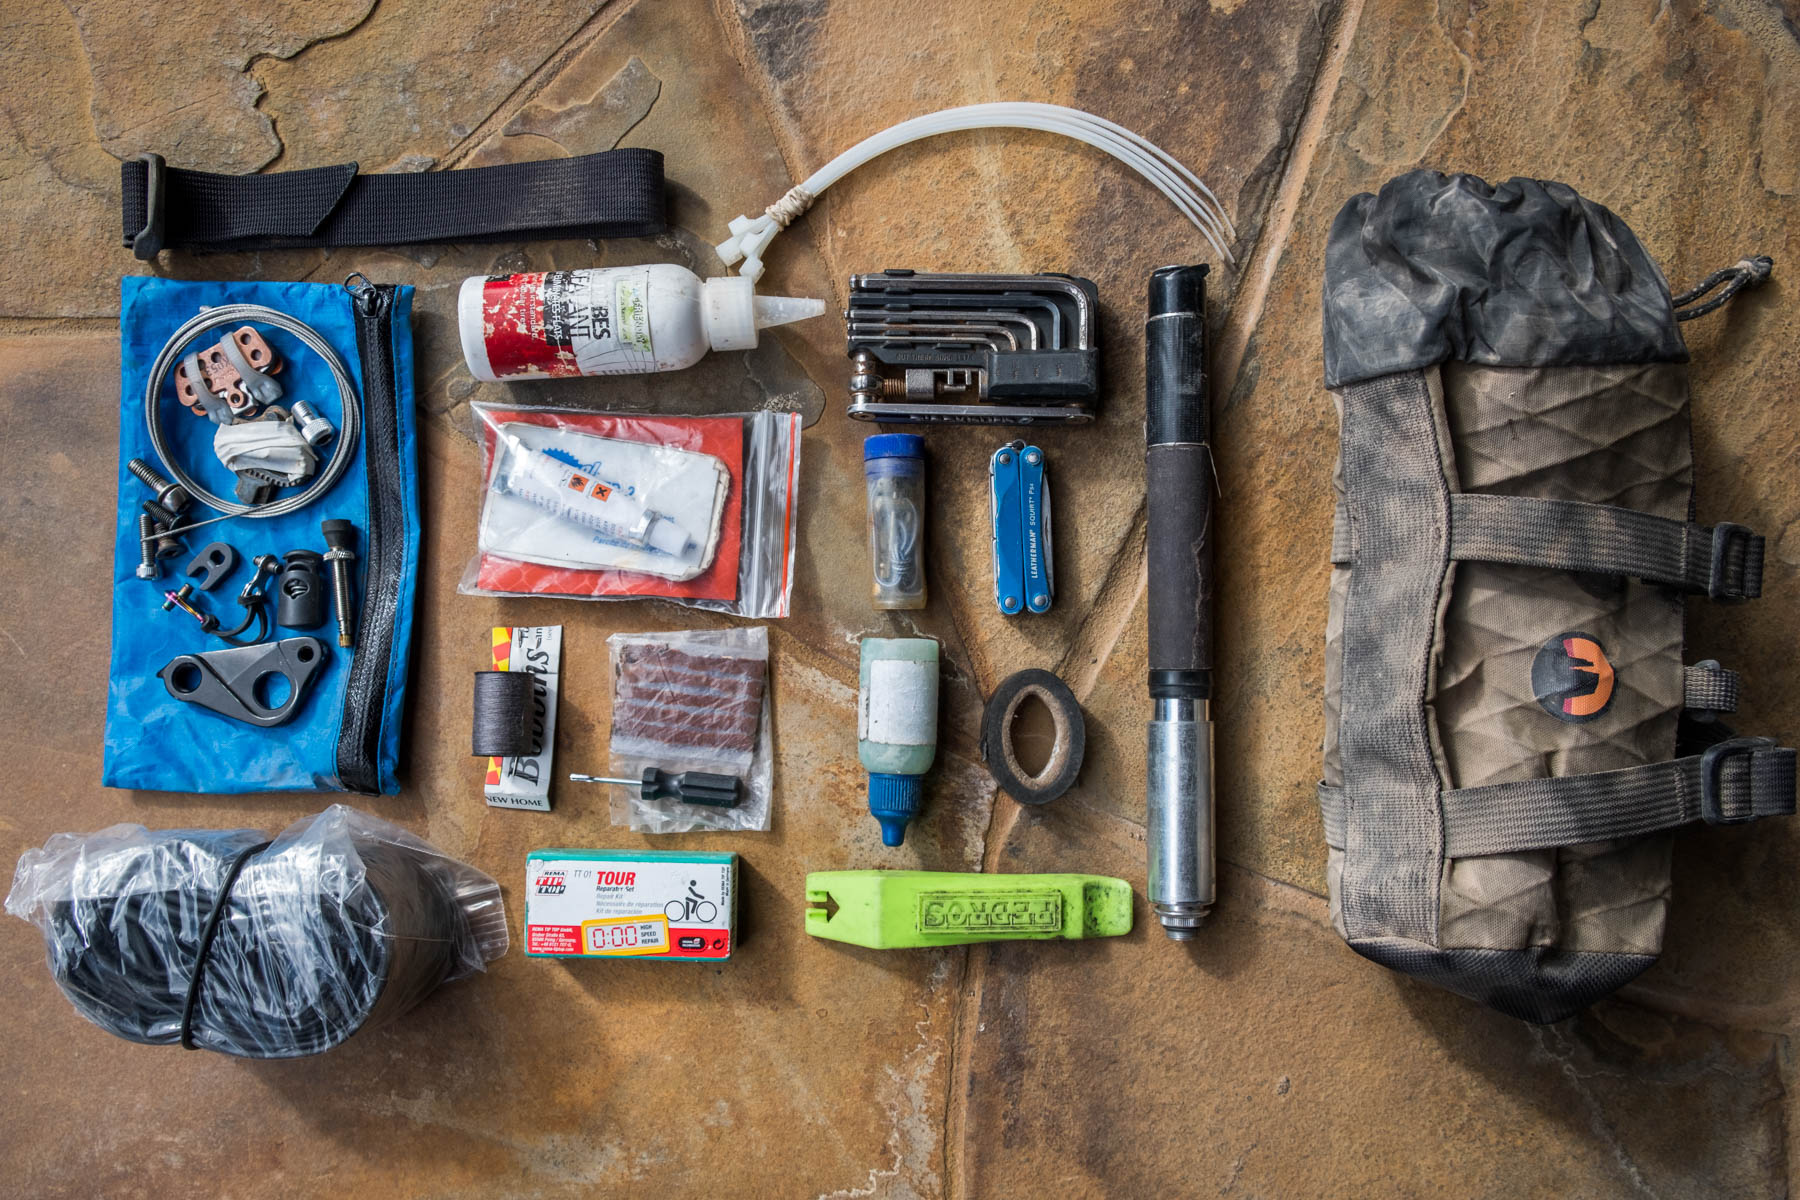
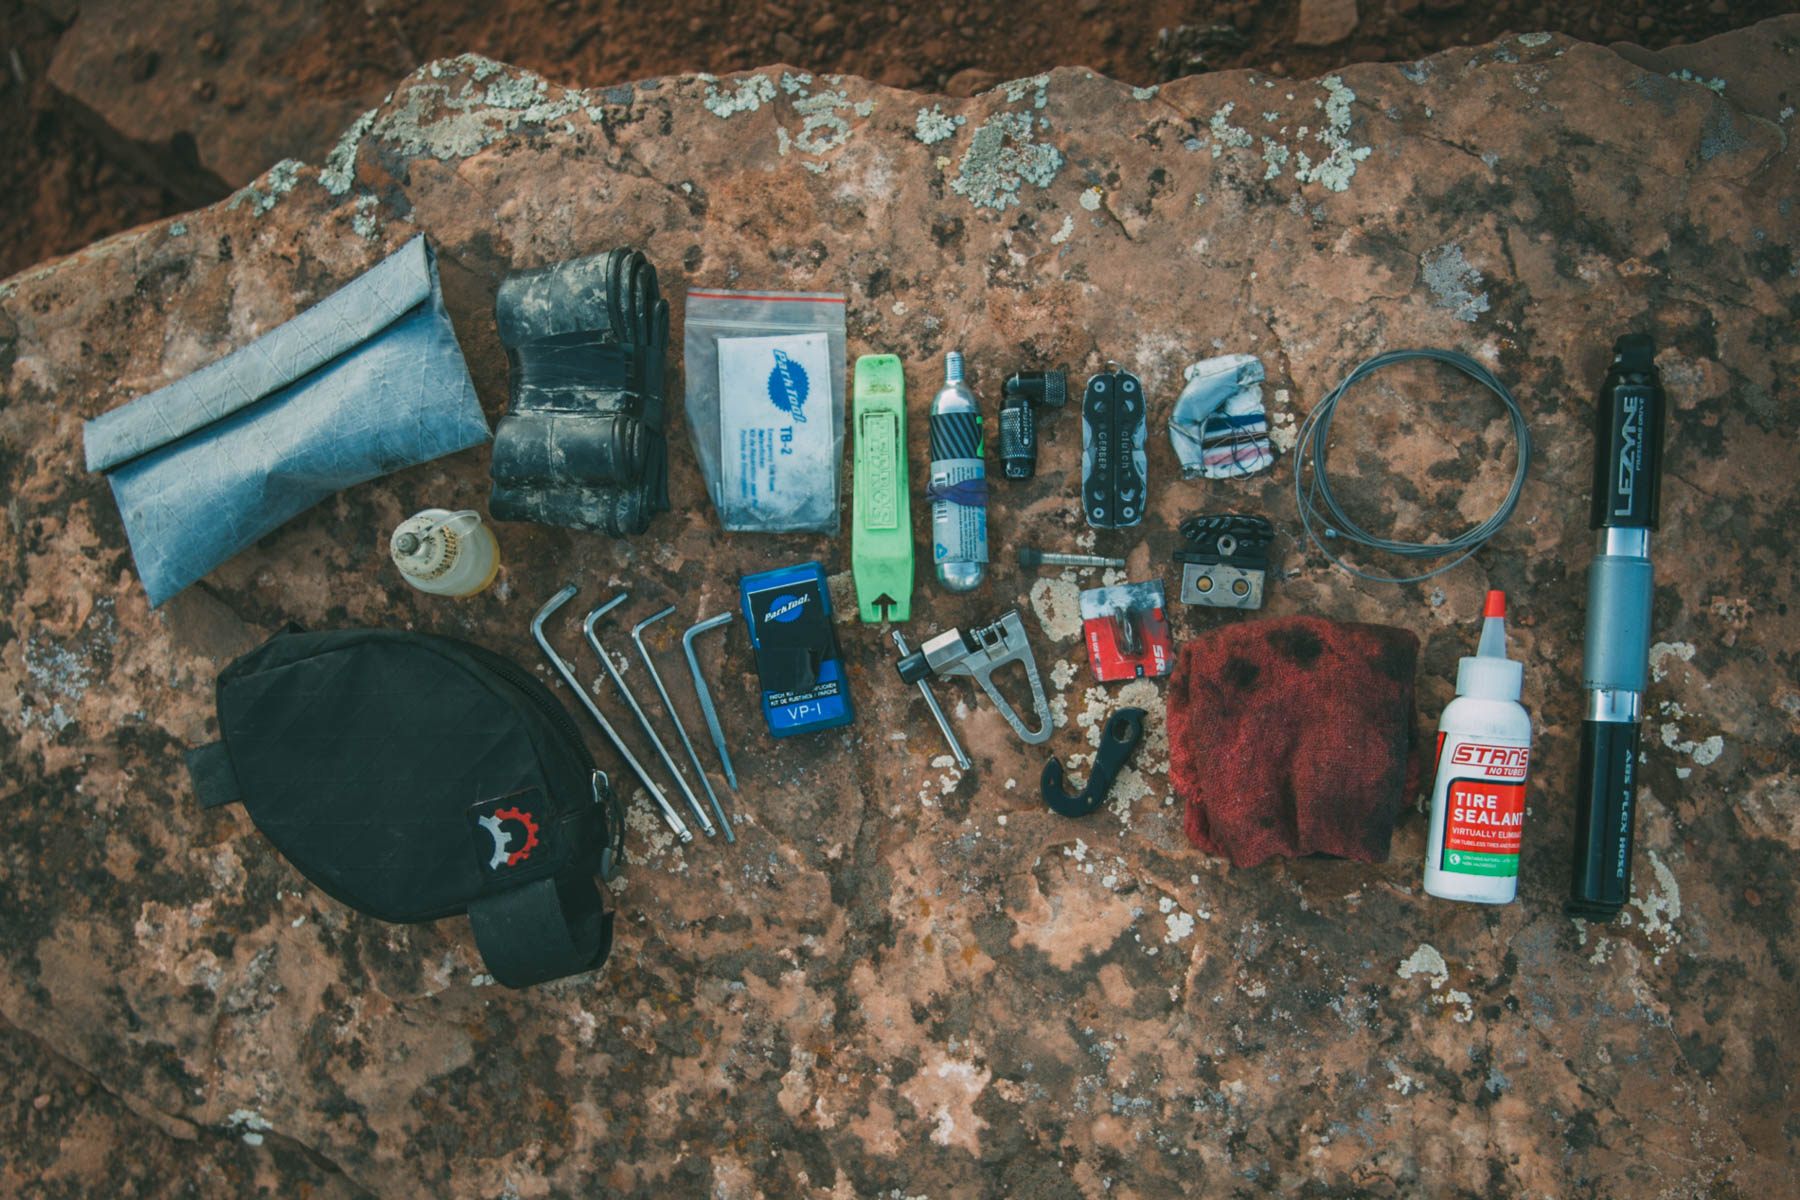
Spare Parts & Tools: The Extended Cut
The following list is based on needs for a longer trip. Some riders may include a few—if not all—of these items in a standard carry kit. Every bike is different and requires unique parts, bolts, etc. Some of the items in this list may be applicable to your kit and others may not.
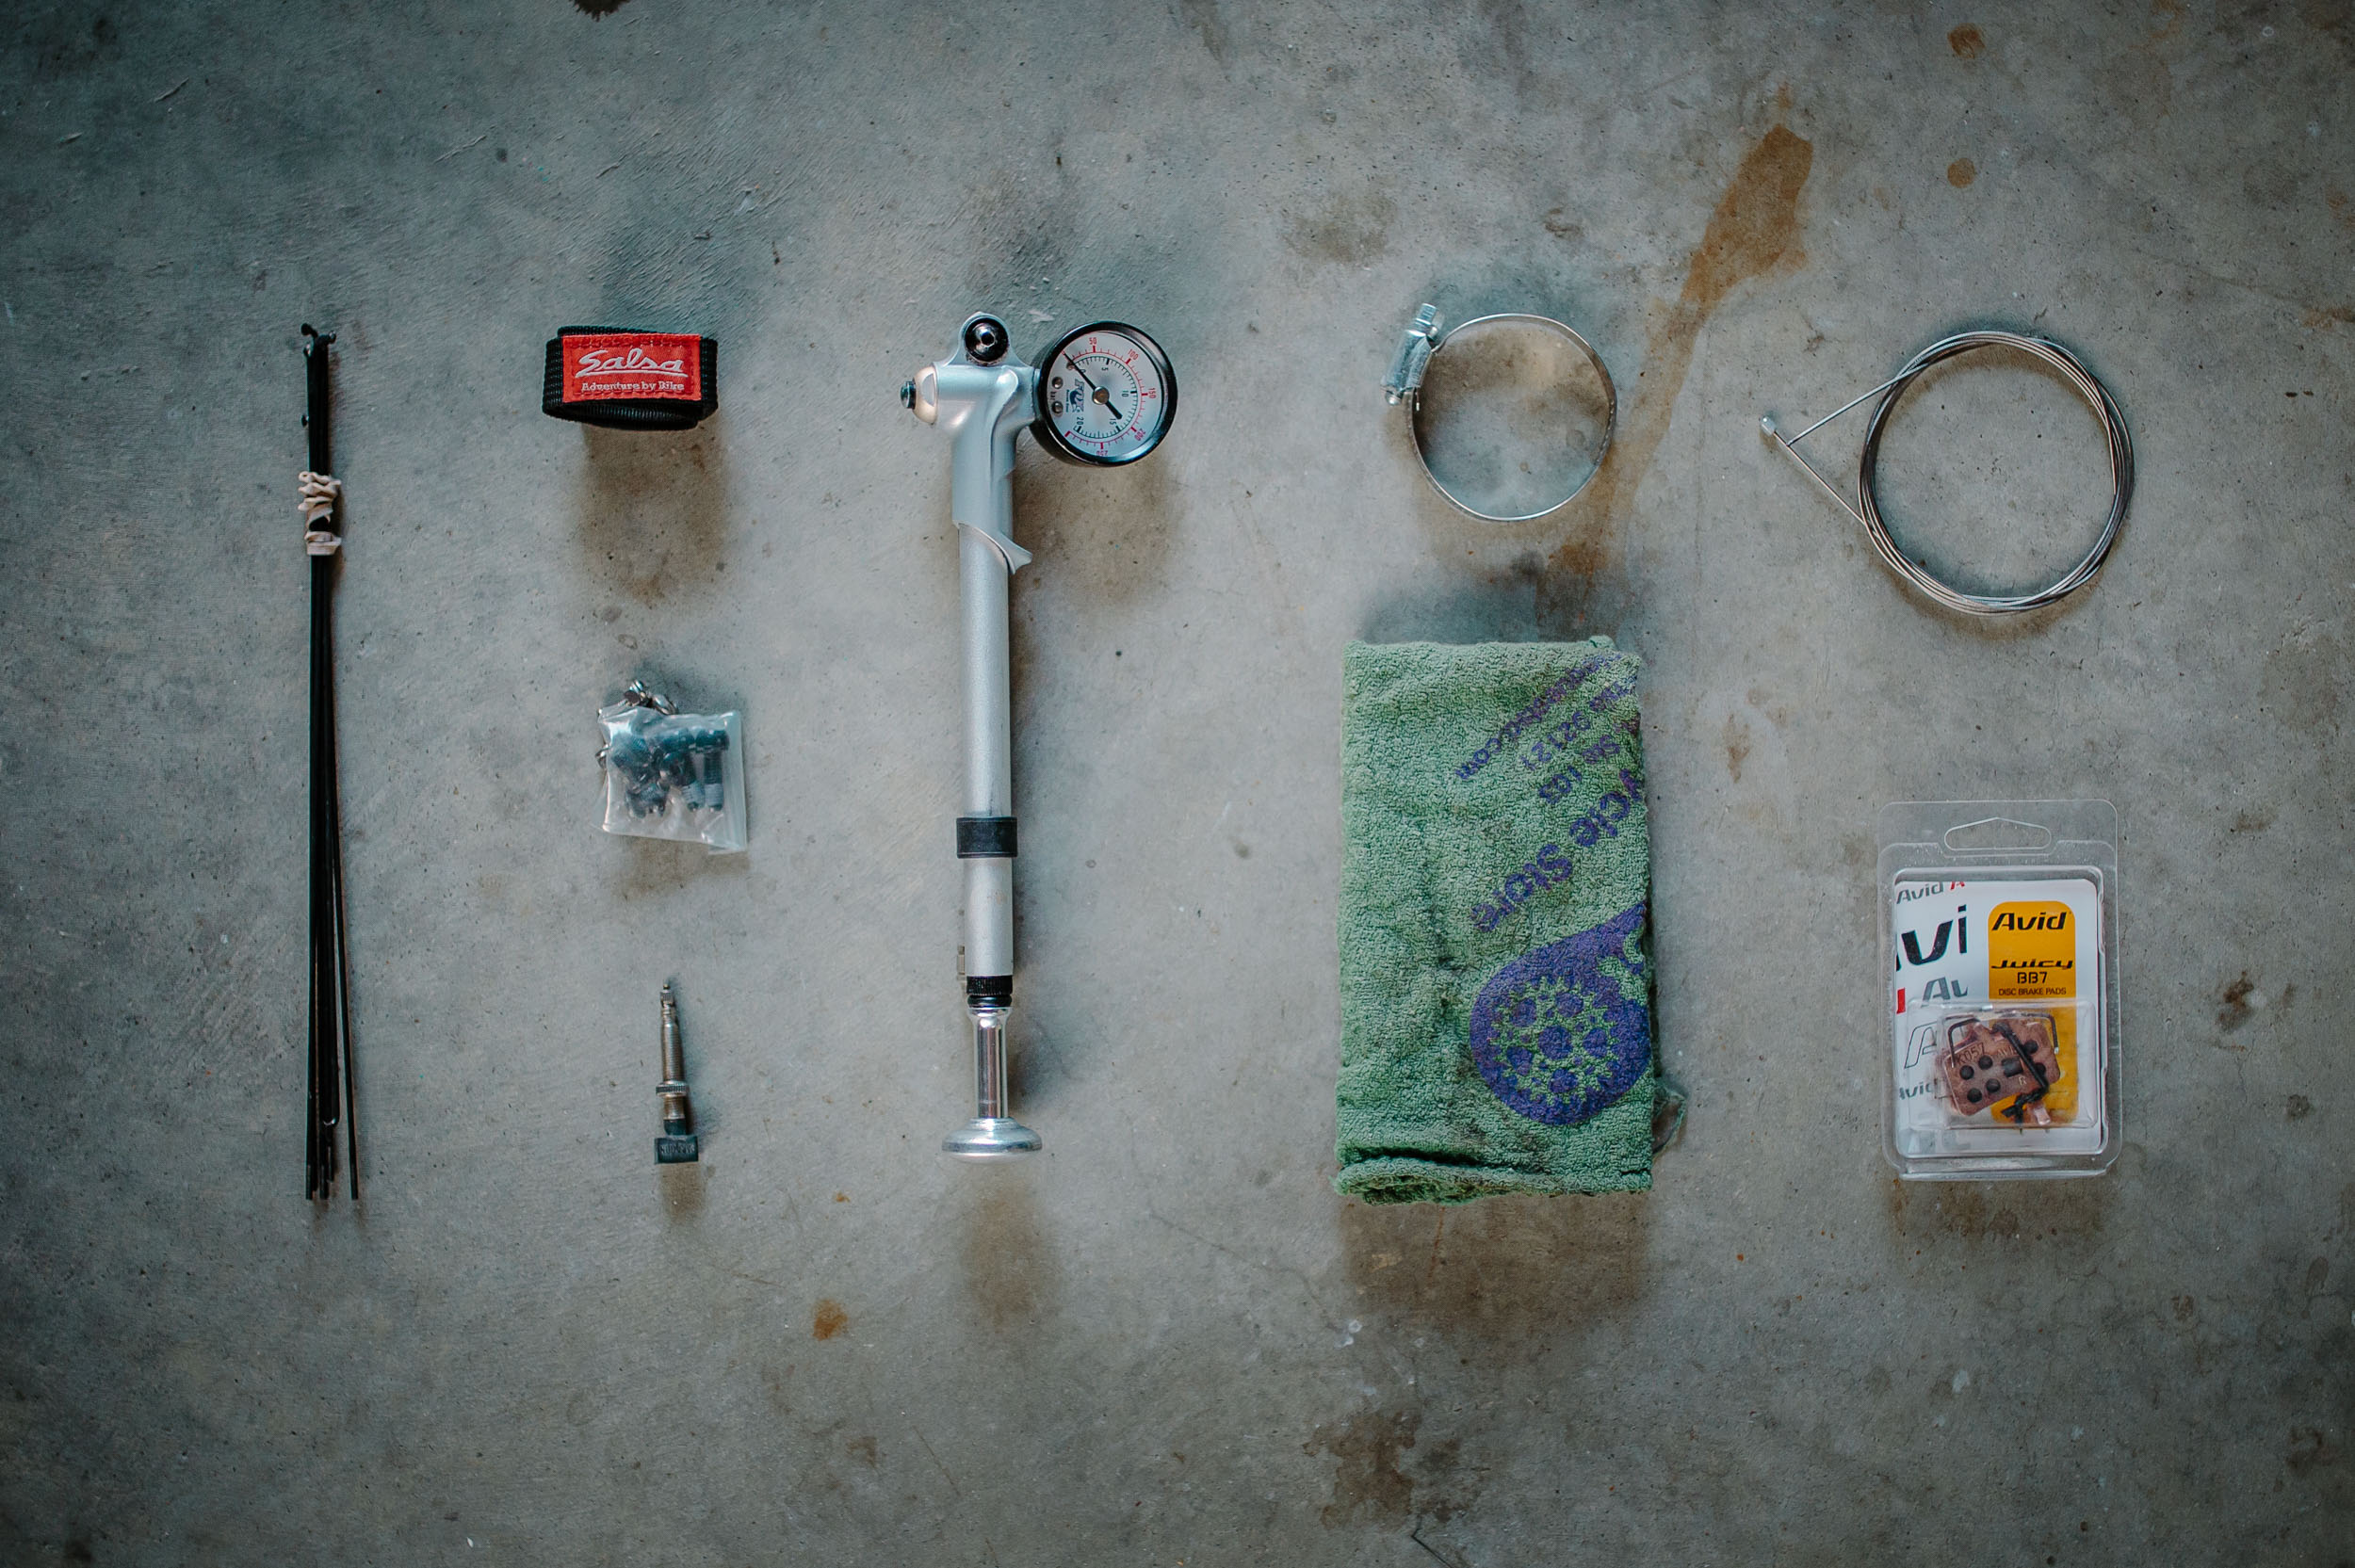
Brake Pads
It’s worth carrying a spare pair of pads or two for longer trips. Some brakes, such as mechanical discs, are easier to replace than others. Make sure you have the right tool(s) for the job.
Spare Spokes/Nipples
On longer trips, you might choose to carry a few spokes in your seatpost by stuffing them through a piece of semi-rigid foam to hold them in place. Carry matching nipples and make sure there is a spoke wrench in your multi-tool (the Crank Bros M19 has it built into the chain breaker lever).
Spare Bolts
Some bolts worth considering are rack bolts, chainring bolts, rotor bolts, and cleat bolts. I often carry a replacement seatpost bolt and nut on longer trips as I’ve had one break.
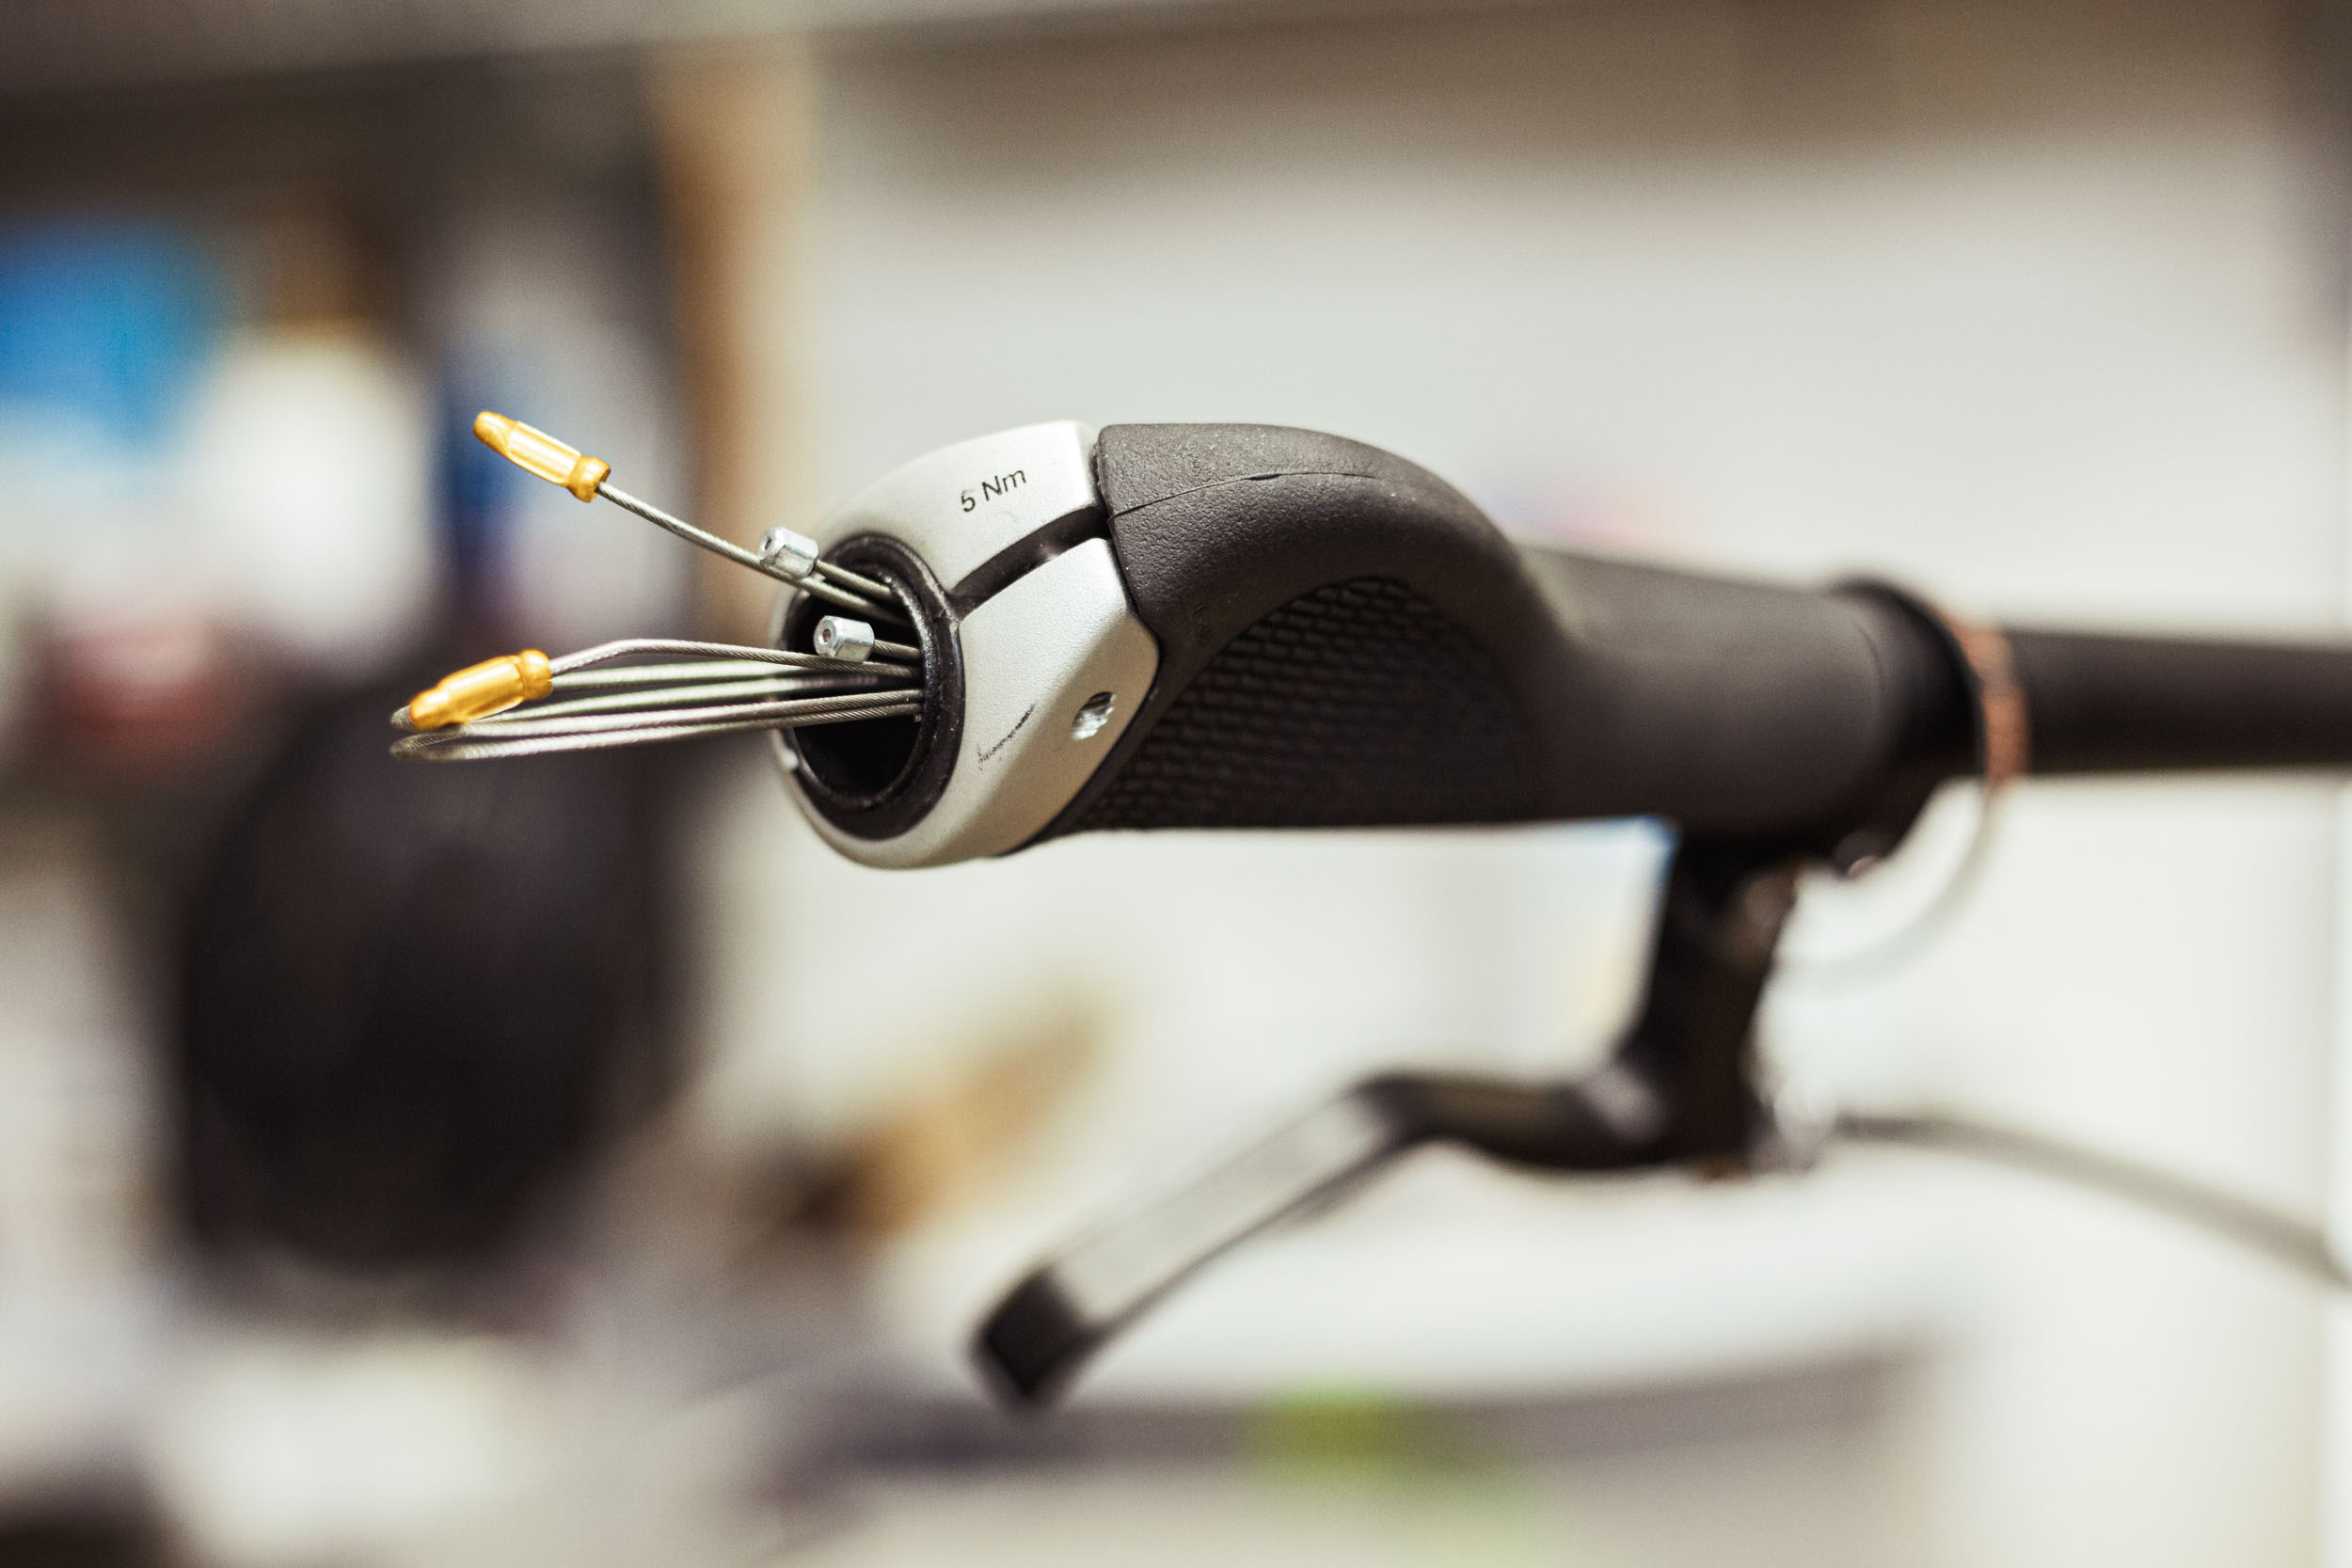
Spare Cables
Spare cables can be stashed in your handlebars. Think about carrying an extra derailleur cable, brake cable, or Rohloff cable.
Derailleur Hangers
Another piece on a bike that is prone to damage is the derailleur hanger. I’ve bent several and seen them break, too. This is a must for longer (and even shorter) trips, especially on rough terrain.


Additional Tools
A few other tools to consider.
CO2/charger*
One of these may come in handy for a broken seal on a tubeless setup.
Pipe Clamps (of various sizes)
One step above a zip tie. Pipe clamps can do anything from replacing a broken seat clamp to holding a damaged bottle cage.
Shock Pump*
Carrying a load on a full-suspension rig requires some care and adjustment. Some may choose to tune their shocks before departing and leave the shock pump at home.
Specialized Tools
A few tools of which you may find yourself in need include bottom bracket tool or socket, Torx drivers of various metrics, crank plug bit, crank extractor (for you old-schoolers), etc.
Cleaning Cloth
A small rag or cleaning cloth, while not absolutely necessary, is good to have around to clean the chain.
Various Straps
Always a handy addition. We like Voilé Straps.
Neil’s Repair Kit (Video)
Sooner or later, everyone experiences a mechanical out on the trail. As mentioned, we know putting together a repair kit can be daunting, but having the right items packed can make or break your trip. In the video below, Neil offers a detailed look at his repair kit and shares some thoughts on how each item could help you out of a jam. Watch it below and scroll down for a full list of his repair kit.
- Topeak Race Rocket pump
- Tube
- Spare spokes
- Zip Ties
- Topeak Alien 3 multi-tool
- MSW Co2 and Chuck
- Wolftooth Pack Pliers + 2 quick links
- Stans 2oz bottle
- Stans valve core remover tool
- Stand alone 4mm Alan key wrapped with tape and thread
- Wheels Manufacturing derailleur hanger
- Spare brake pads
- Duct tape
- Crazy Glue
- Spare cleat with bolts
- Small parts Box: Chain link, Plug tool, Spare plugs, Brake screw, Patches, Curved needle x2, Valve core, Bolts for nearly everything
- Spare shifter cable
- Sleeping pad patch kit
- Tent pole crutch/splint wrapped with thread and tape
- Lighter
- Dumond Tech OG formula in an eye drop container
- Gerber pliers/pocket knife
Keep in mind that your bike and situation are unique, and your repair kit and tools should be too. If there’s anything you feel we left out of this list, please leave a comment below. Also, be sure to check out our One Question, Five Voices installment that asks five guests what’s in their tool kits.
Please keep the conversation civil, constructive, and inclusive, or your comment will be removed.