


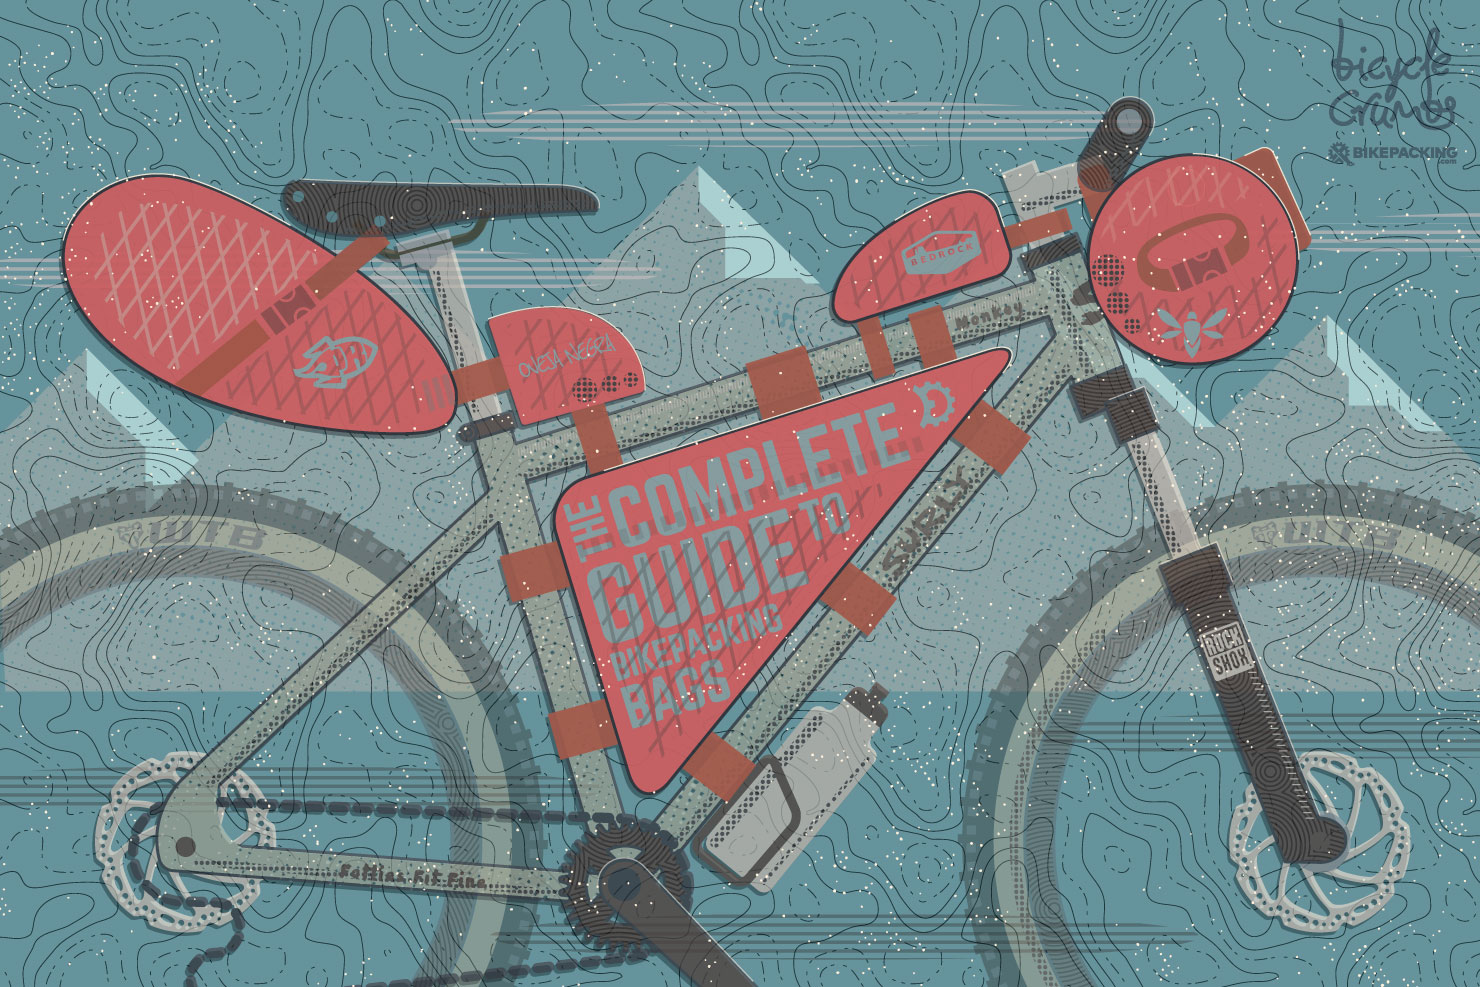
The Complete Guide to Bikepacking Bags


“Which bags should I start with? Are there any specific bags you’d recommend? What do you pack where?” These are probably the most common questions we’re asked. In an effort to answer them, we proudly present our Complete Guide to Bikepacking Bags, along with six starter setups — from our barebones Hack Kit to our money-no-object Dream Bag Kit. For ideas on how it’s all put into practice, we’ve also included packing techniques from several bikepacking veterans, along with a list of bag makers the world over.
PUBLISHED Nov 15, 2016
Below you’ll find our guide to bikepacking bags and packing. It’s divided into four sections. Part one, The Basics, opens with definitions for each type of bag or pack, with tips on what to look for when purchasing. Part 2, Six Example Kits, outlines a variety bikepacking bag kits with specific bag recommendations, based on our own experiences. Part three, How We Pack, offers packing tips as well as notes from five seasoned bikepackers including Joe Cruz, Cass Gilbert, Lael Wilcox, and Skyler Des Roches. And part four, Bag Makers is a list of companies wordwide that make bikepacking bags, what they make, and where it’s fabricated.
The Basics
Naturally, there are downsides too; bikepacking bags require more considered packing than panniers, carrying capacity is more limited, and until you hone your ‘system’, what to pack and where can initially feel over complicated or fussy. But trust us. For the most part, the joys of riding with a lightweight, minimal rig — and the terrain such a setup will encourage you to explore — more than makes up for these compromises.
Which brings us onto the guide. Below, we’ll outline the basics of each type of bag, demonstrate six levels of bikepacking kits, reference relevant links to reviews and recommended gear, and share some insight to how we pack.
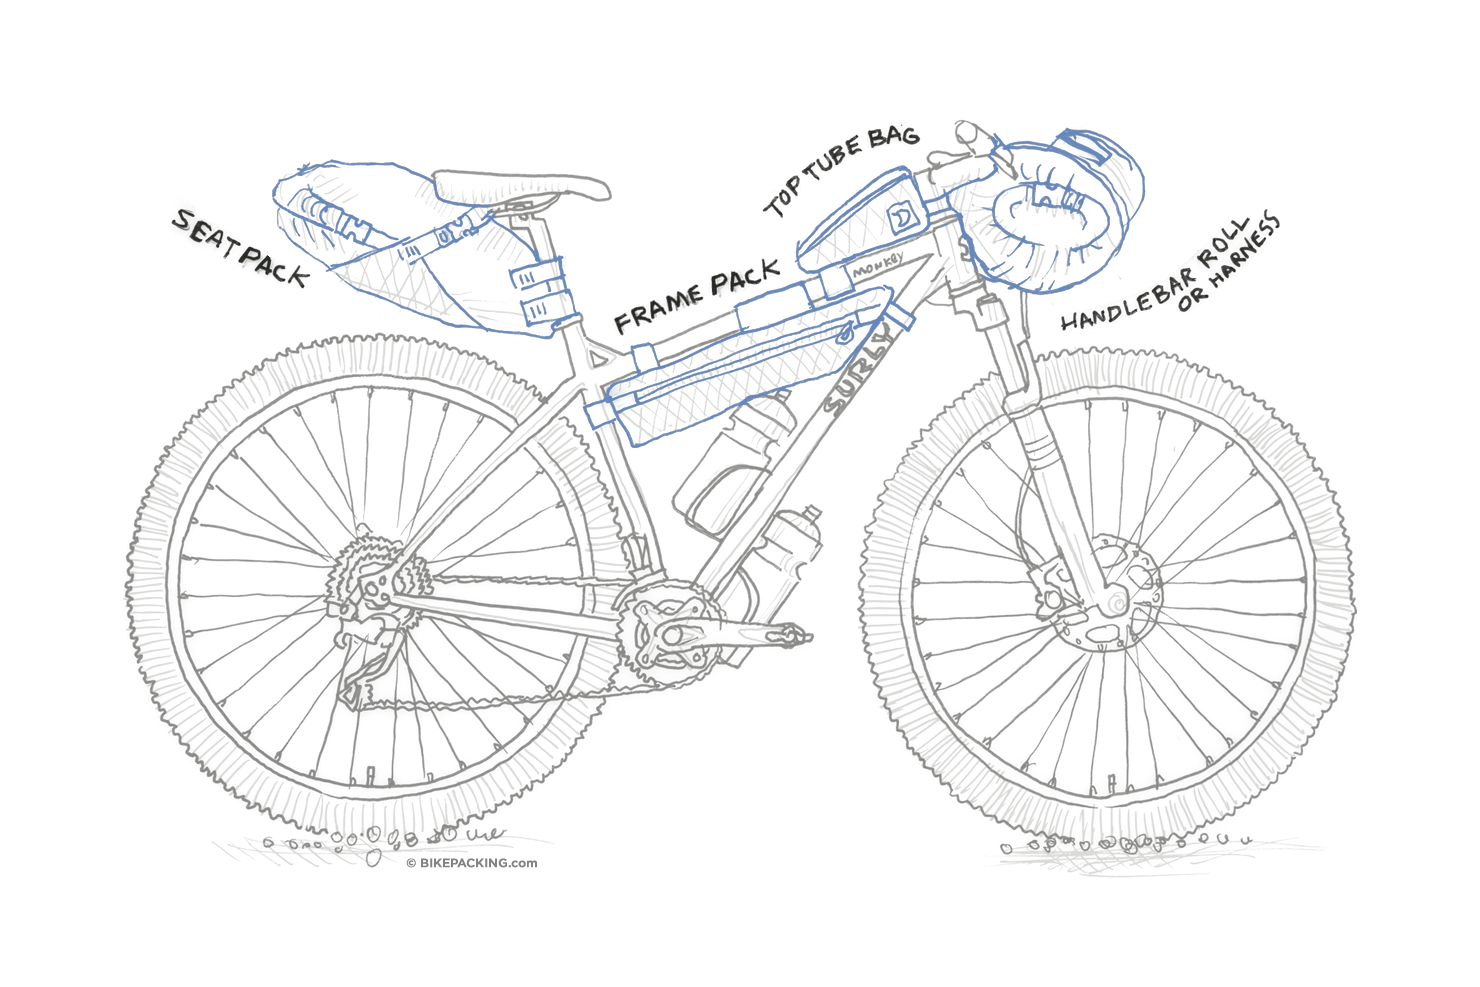
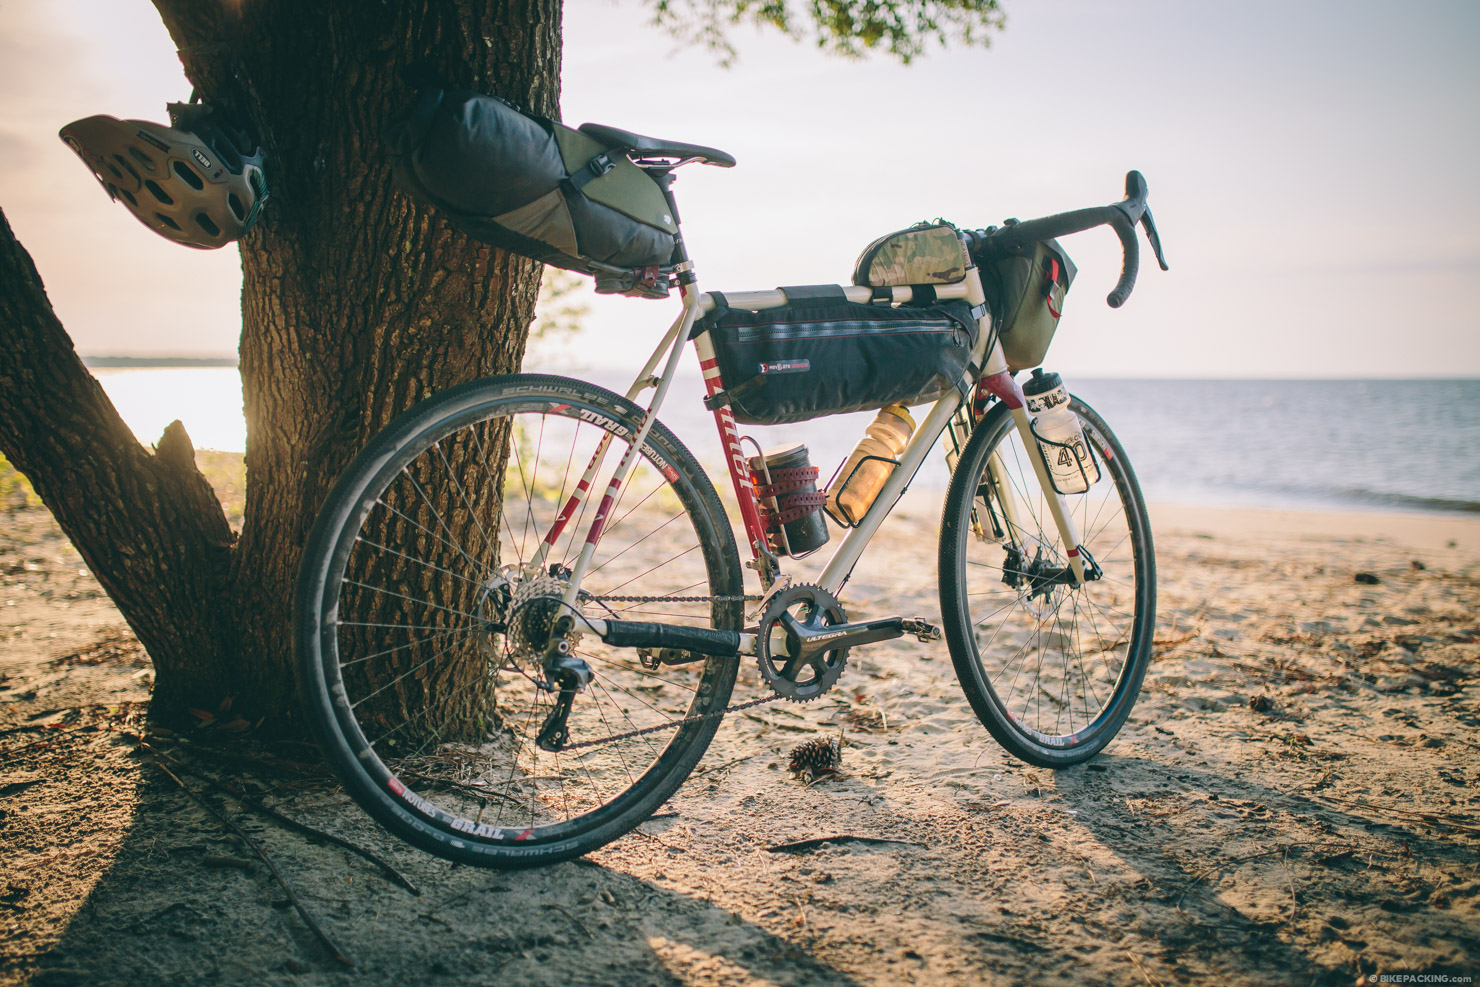
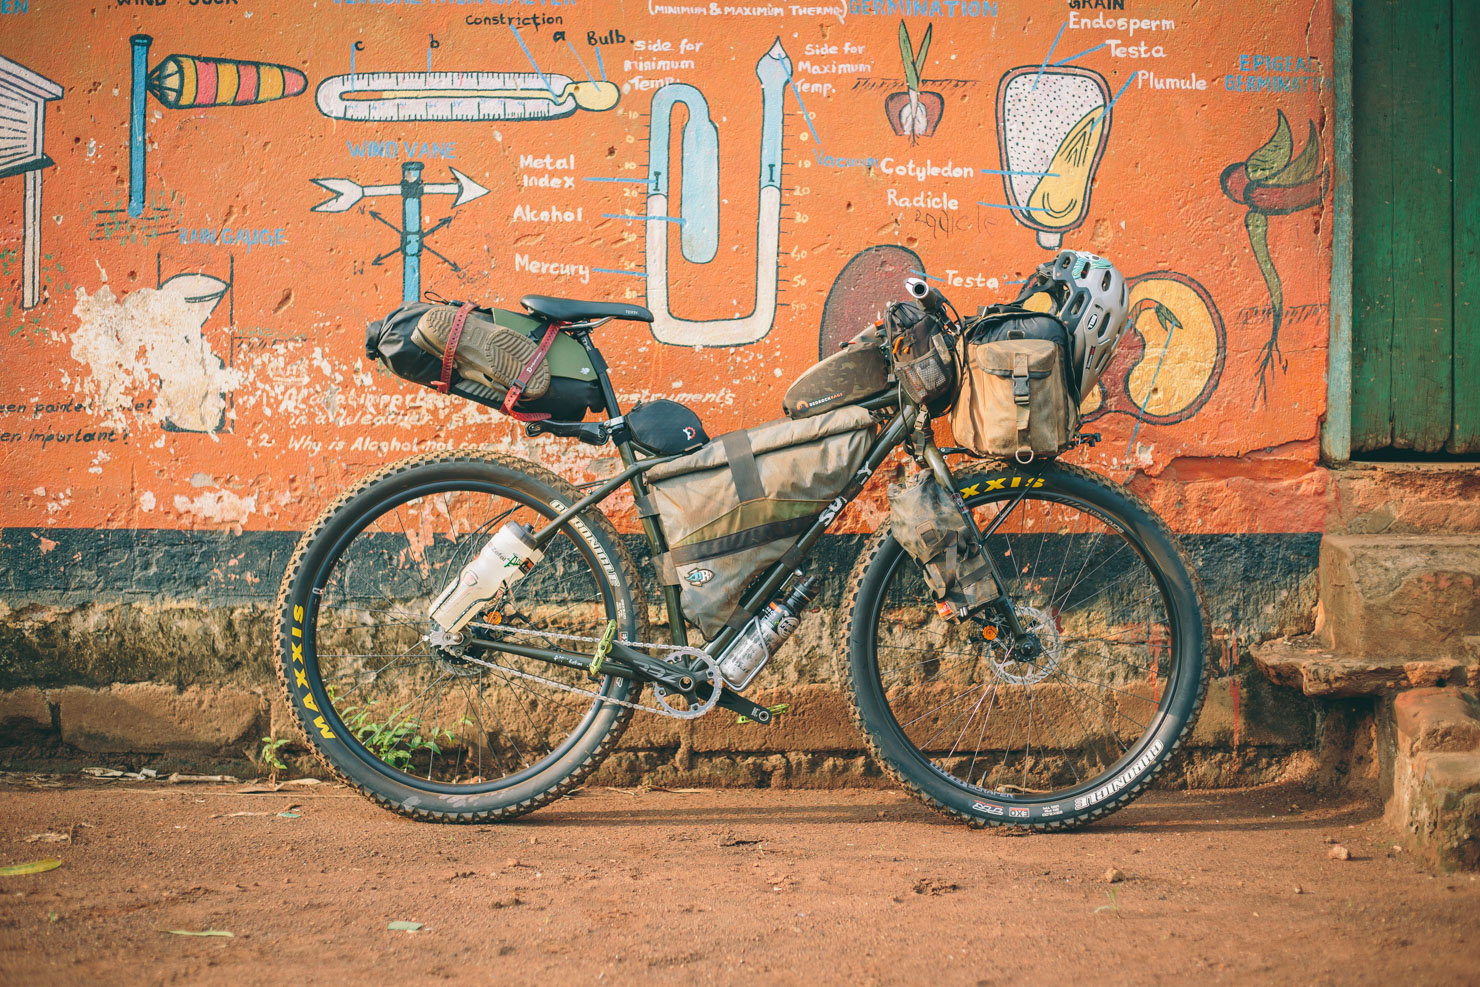
But before we start, let’s get the terminology down. A bikepacking bag kit typically consists of a frame pack, a handlebar bag or harness, a seat pack and several smaller peripheral bags that live on the frame, handlebars and forks, helping to spread weight across the bike. Here are definitions and pointers for each:
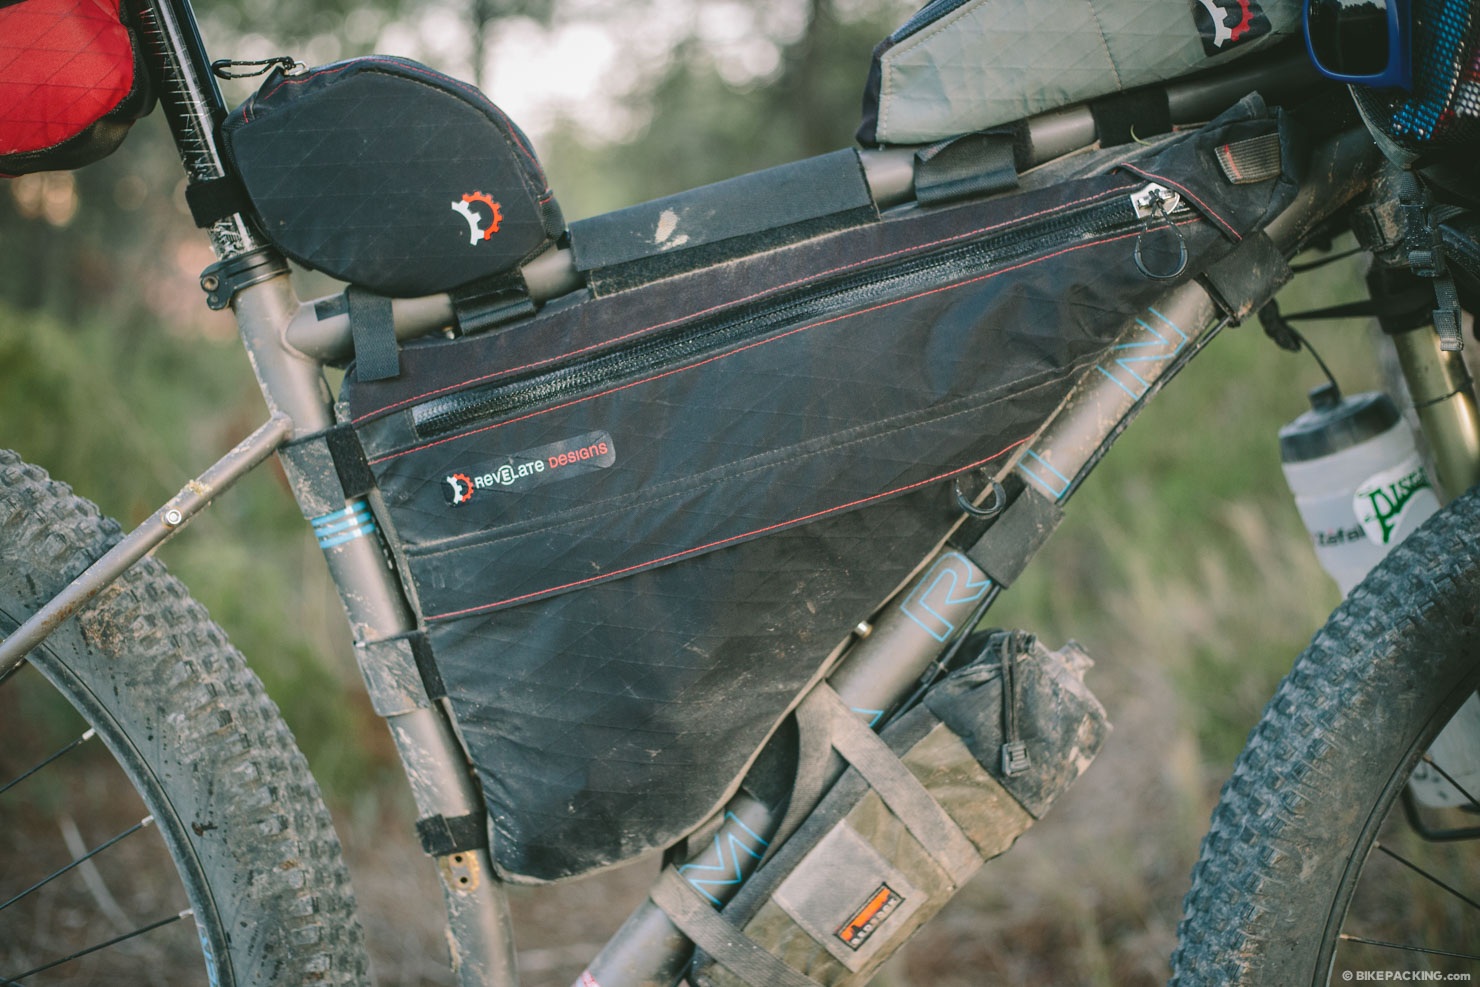
Frame Packs
The frame pack was conceived to allow storage within a bike’s triangle – the space formed by the top tube, seat tube and downtube. It’s usually lashed on by a series of velcro straps. Frame packs are available for both full suspension, hardtail and rigid bikes alike. While ideally each is custom made to fit a snugly within a bike’s unique frame, there are some universally sized bags commercially available that will fit most bikes. The frame bag is an excellent place to store heavier items as it maintains a low center of gravity, though smaller frames and full suspension will have more limited capacities. If you want to keep the option of mounting two water bottle cages, there are half/partial -framebags available too. See below for details.

What to consider
Watch those zips
Zips are the weakest part of a frame pack, as with all gear. Try and resist the temptation to cram as much as you can in, as it will inevitably stress the zip in the long run and cause it to split. Although not as quick to access, there are several zipperless frame bags on the market, including those from Porcelain Rocket and Rogue Panda. These are especially well suited to longer journeys, where reliability is more important than practicality.
Multi-pockets
Many frame packs have a main compartment on one side — typically the drive side — and zippered flat pocket on the other. This is especially handy for keys, a wallet, or other odds and ends. Most custom bag makers work these in nowadays, and bags like the Revelate Ranger have the flat pocket with several convenient storage areas. For the organizers amongst us, frame packs with multiple compartments or dividers are available too.
Meet halfway
If you are able to keep your packlist slim and trim, it’s worth keeping in mind the half frame pack. Typically these are long and rather skinny and can usually fit more gear than you’d expect. This format is especially fit for gravel bikes where the large frame triangle still allows two water bottles in addition to the pack. In addition, they are more versatile, they’re lighter, and can easily be swapped between bikes.
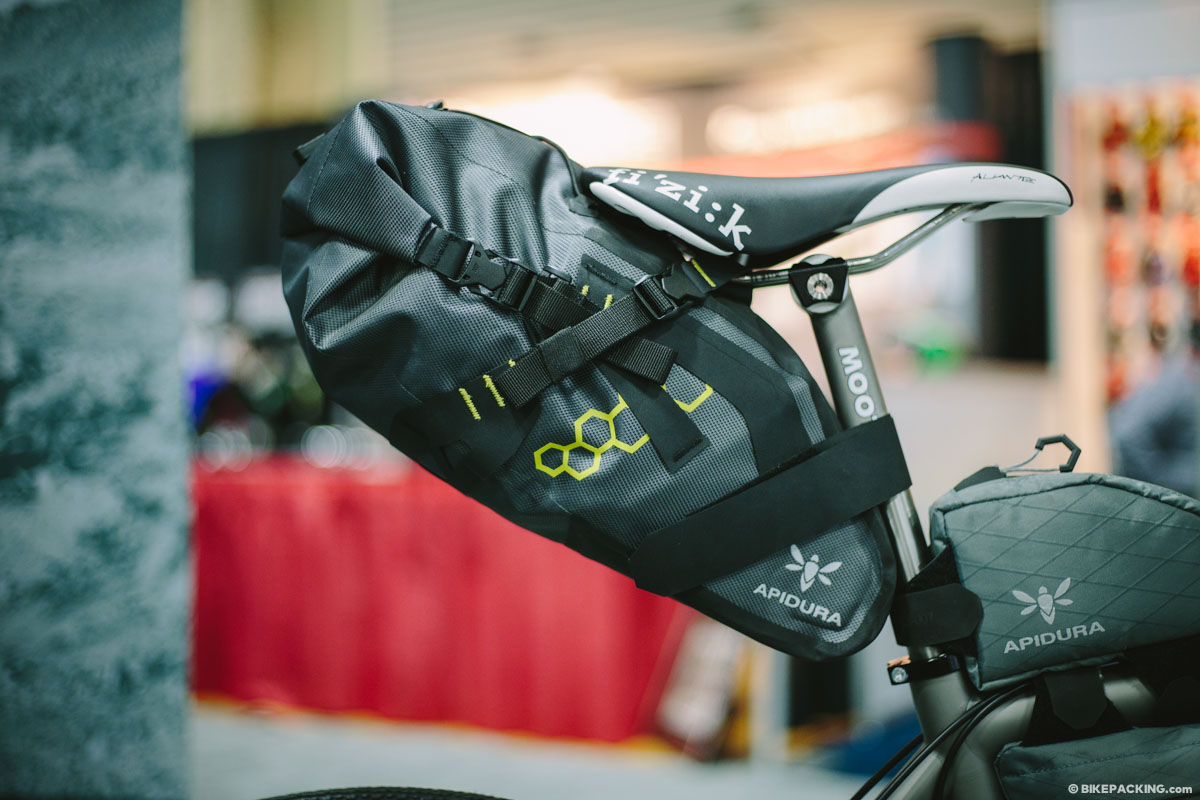
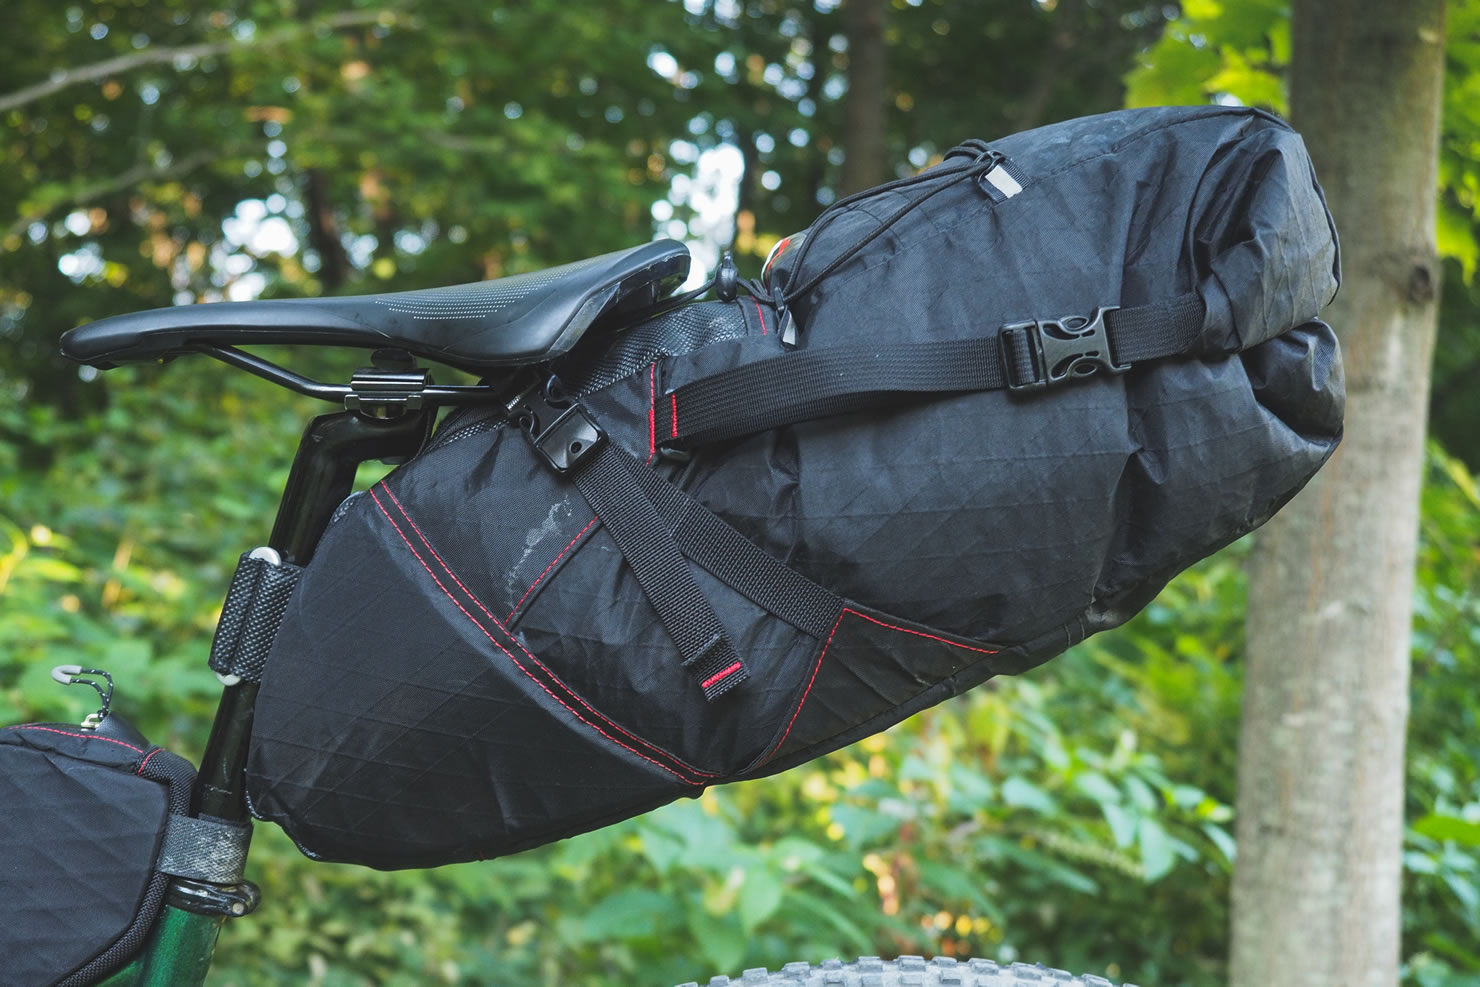
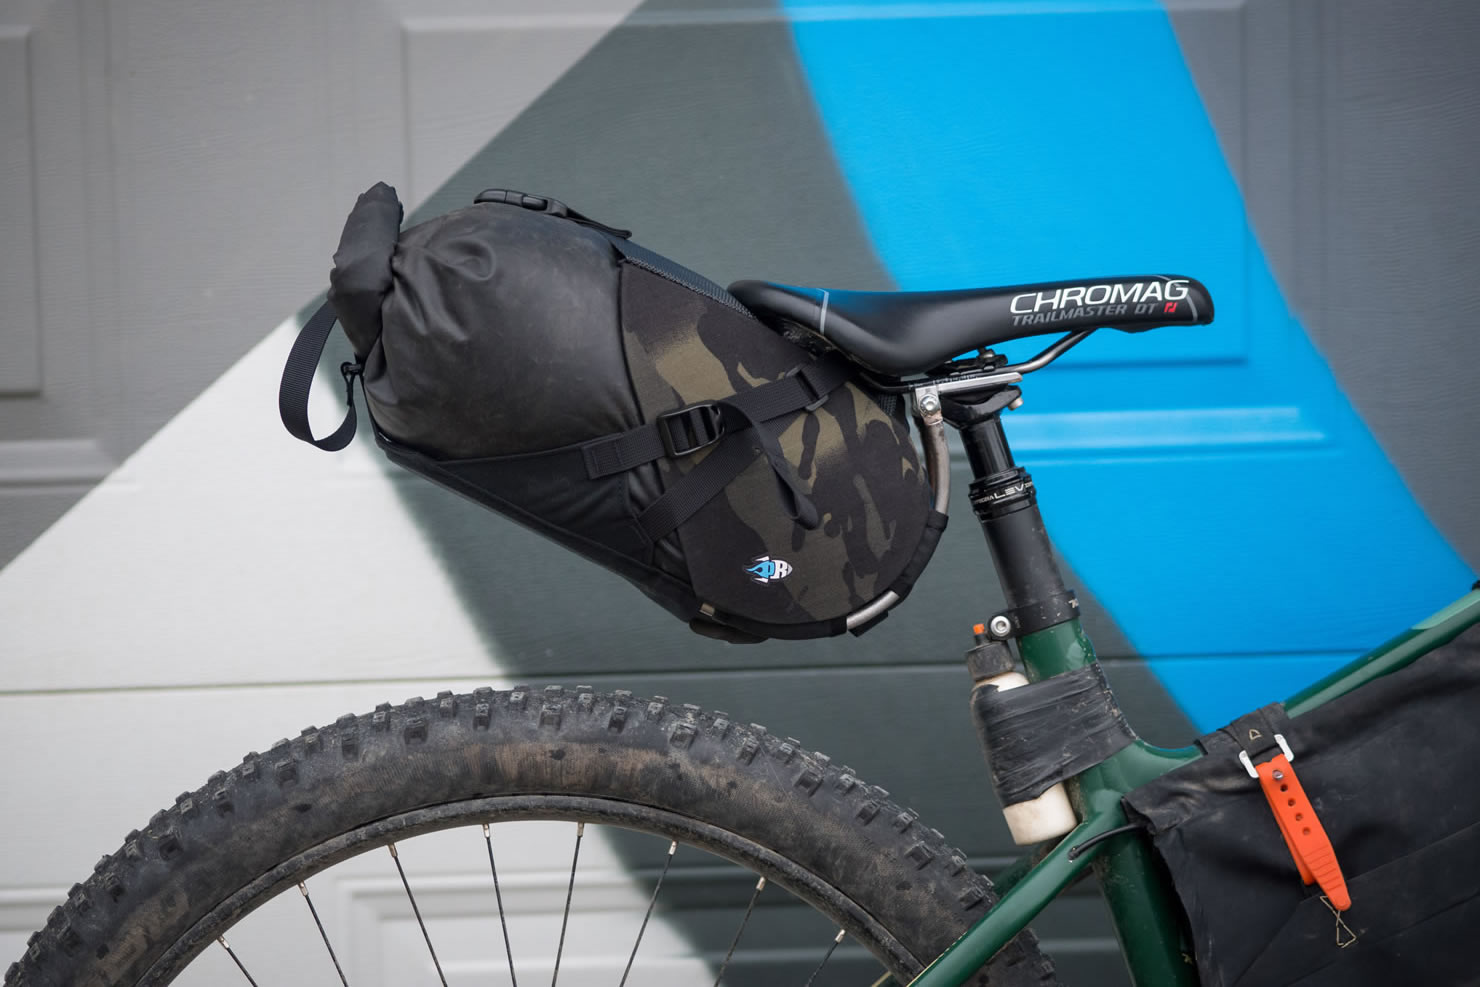
Seat Packs
The seat pack may appear odd to the uninitiated, but it’s a key piece in a bikepacking bag kit. It’s sometimes conical, or missile shaped body is wedged under the saddle rails and strapped to the seat post. Most seat packs’ volume ranges from 5 liters, running all the way upwards of 14 liters. One benefit of a seat pack over traditional panniers is wind resistance. They’re considerably lighter than a rack and pannier setup. When riding off road, they don’t flap around noisily. They also make those innevitable hike-a-bikes more bearable; seat packs won’t catch on your legs like panniers do. In our opinion, the seat pack is one of the best investments you can make toward building a bikepacking kit.
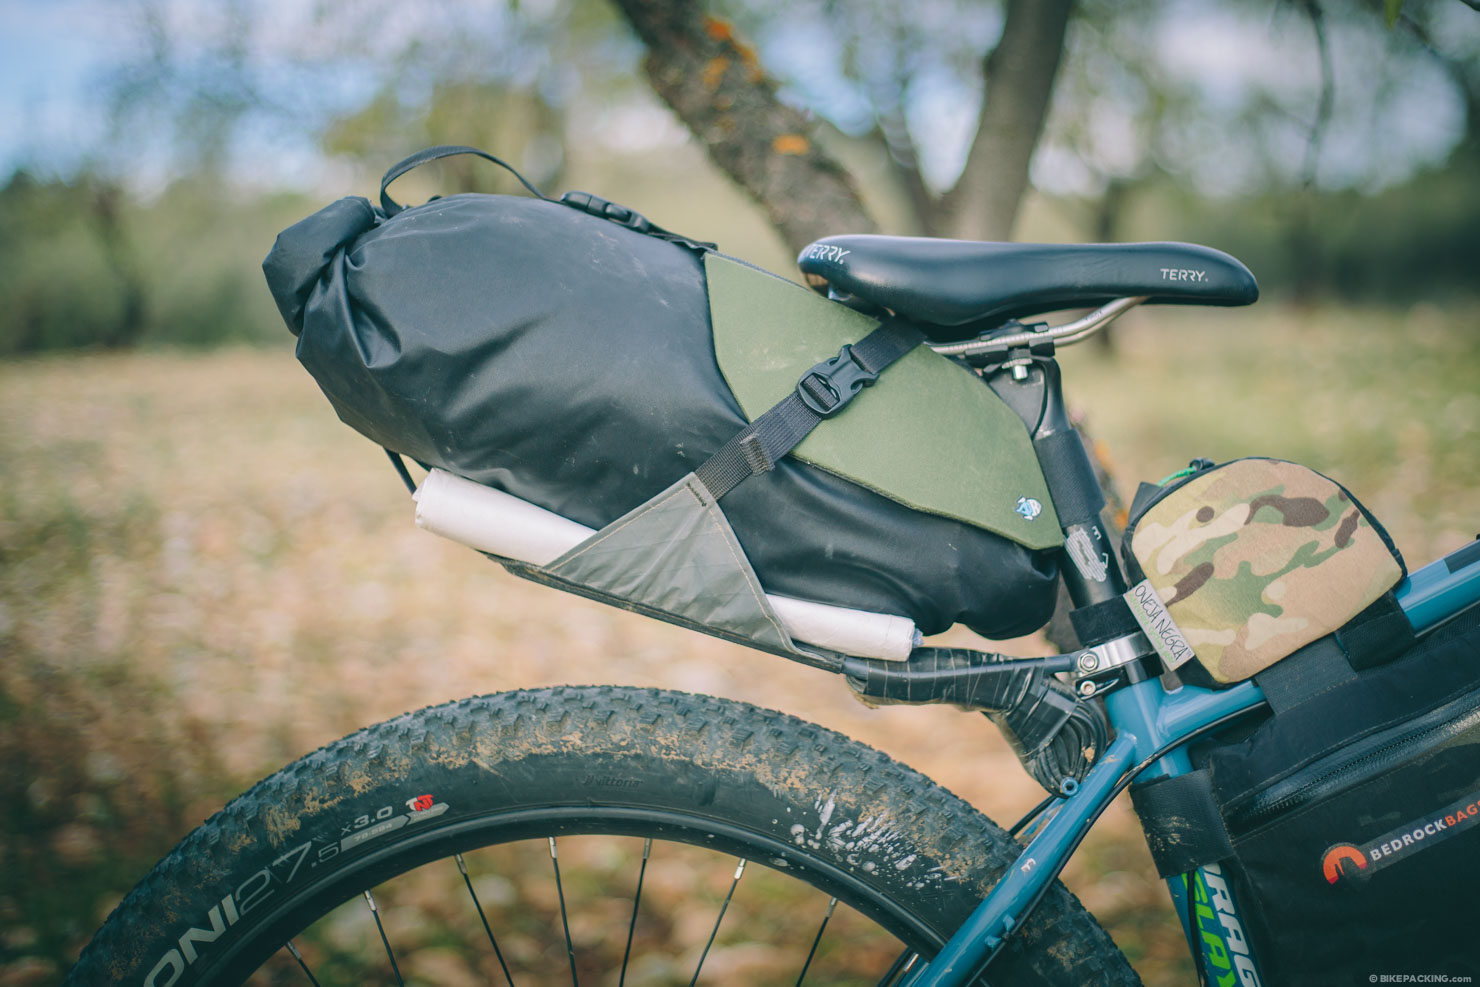
Waterproof or resistant?
While most seat packs on the market are touted as being water resistant, waterproof options are becoming more and more common. That said, some of the classic designs, such as the Bedrock Coconino and Revelate Viscacha, are simply water resistant – although the fabric is waterproof, the seams aren’t sealed. No need to fret though, one or two Sea to Summit Ultrasil dry bags can be used to compensate.
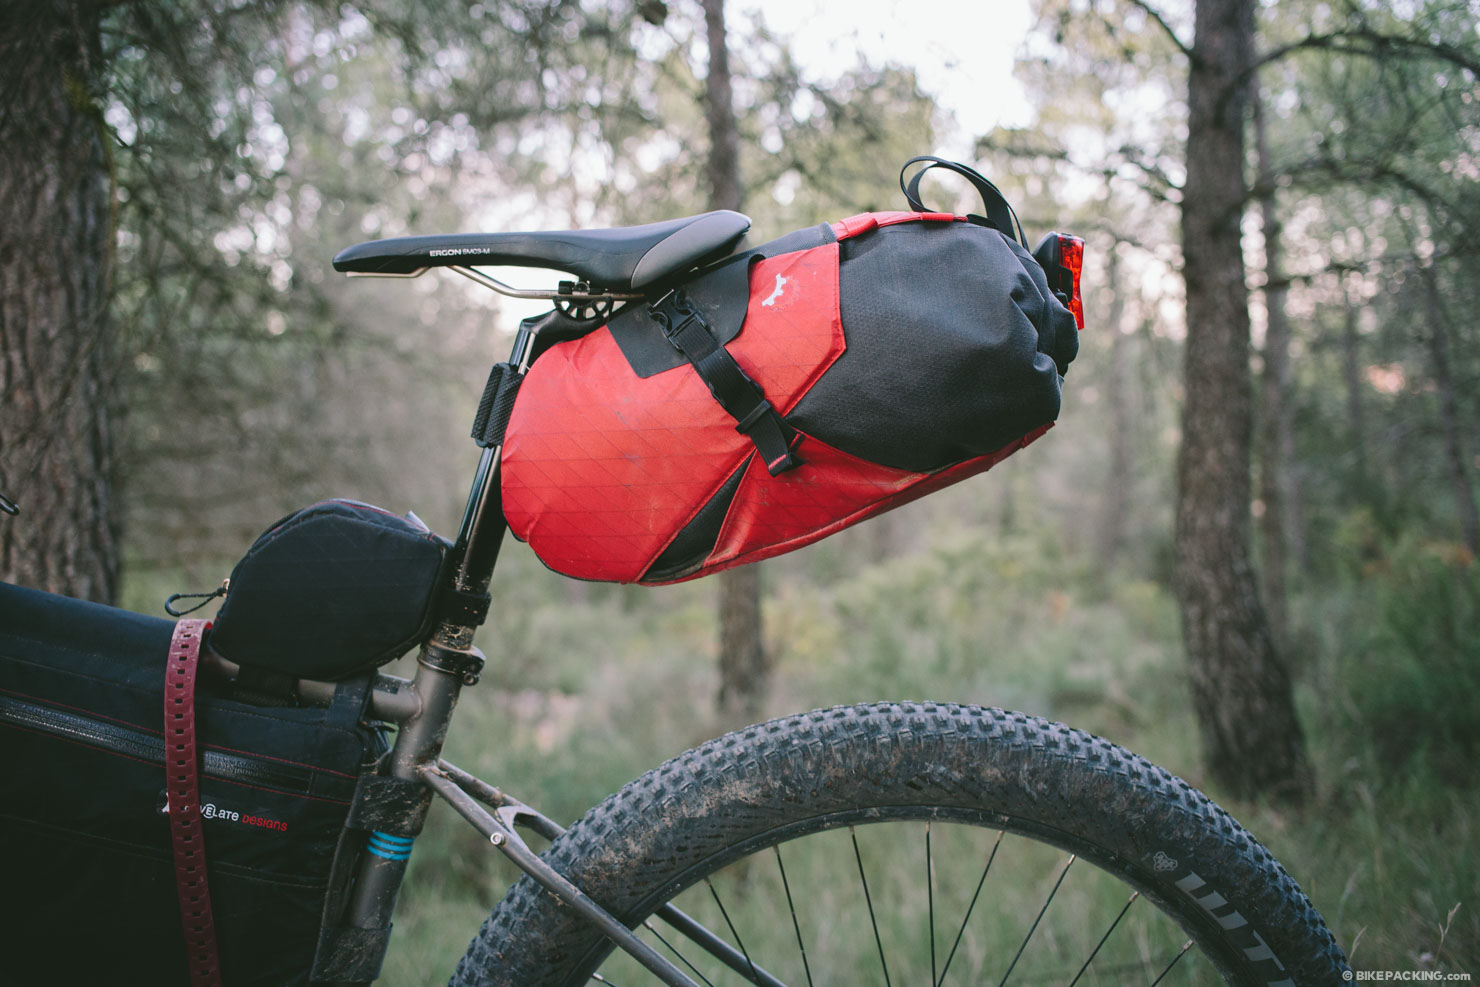
Tail Wag
While it’s no matter to some, others find the side to side sway generated by heavy loads in a seat pack rather bothersome. Several bag makers have figured out ways to eliminate this effect. The Porcelain Rocket Mr Fusion uses a small loop shaped rack, and the Specialized Burra Burra and Arkel Seatpacker followed suit. The Bedrock Coconino uses a nifty Rail Wing to dissuade tail wag.
Ease of removal
Seat pack systems are inceasingly being developed to allow quick and easy removal. The first two to lead this charge — the Revelate Terrapin and the Porcelain Rocket Mr Fusion — have now been refined many times over. Both use waterproof dry bags that slide in and out of the harness; this makes packing and repacking easy, and doable in the tent if the heavens have opened!
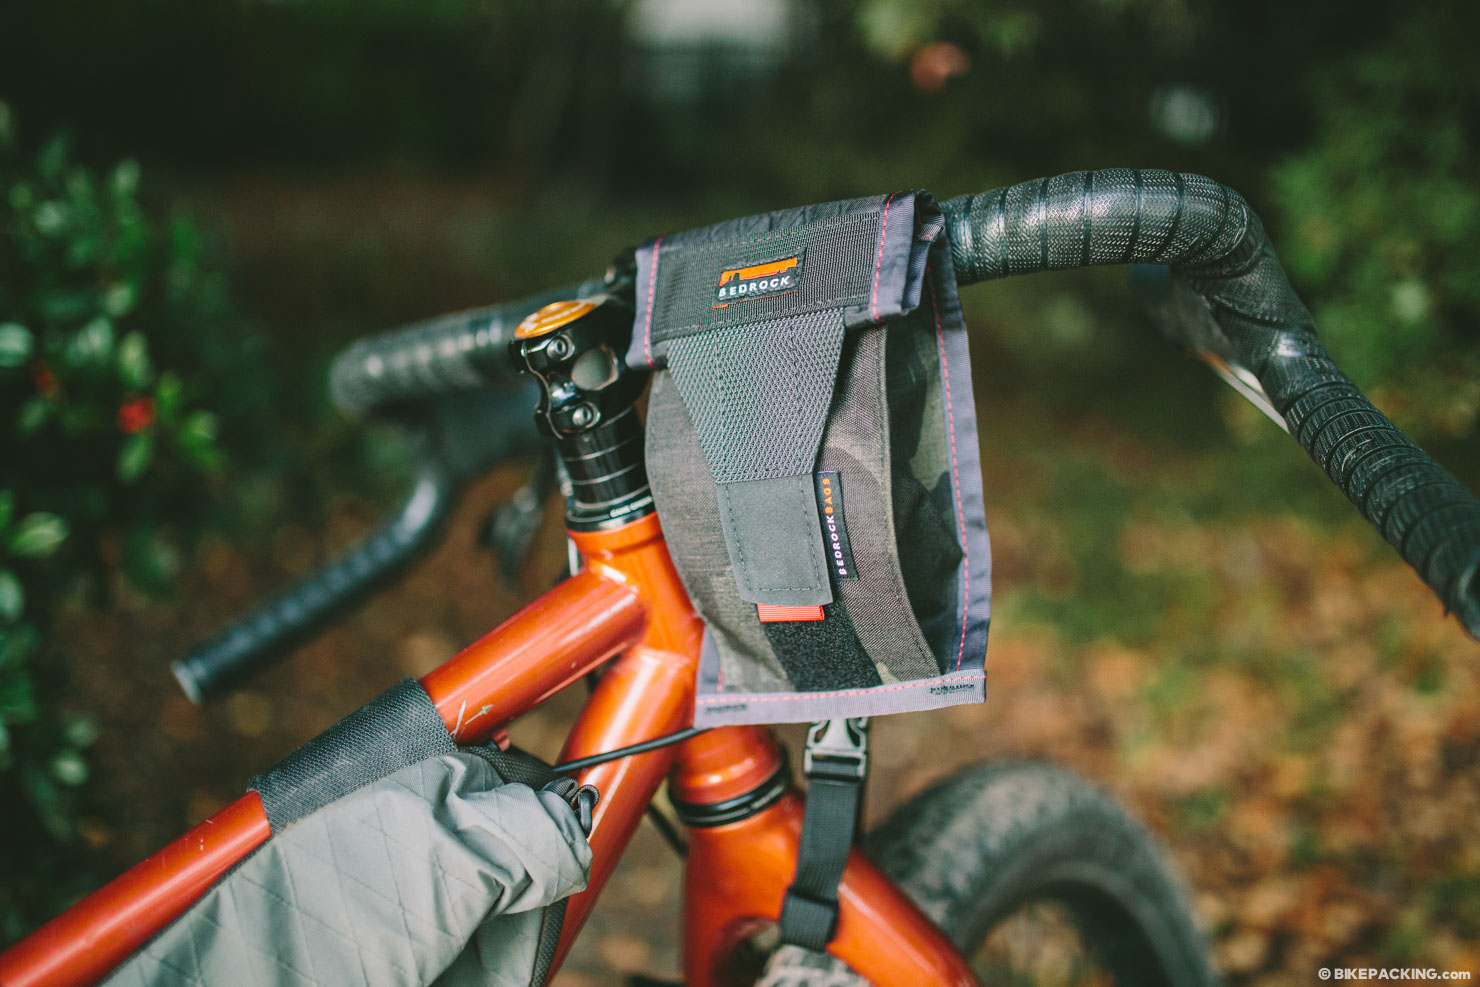
Handlebar Packs
The handlebars are the most natural spot to store gear. Folks have been strapping bags to the bars ever since the advent of the bicycle. Purpose-made handlebar packs go one significant step further by featurung rugged handlebar connections, anti abrasion patches to reduce damage from and gear levers, as well as additional accessory pockets. The rule of thumb is to keep front load relatively light, or your bike’s handling will suffer.
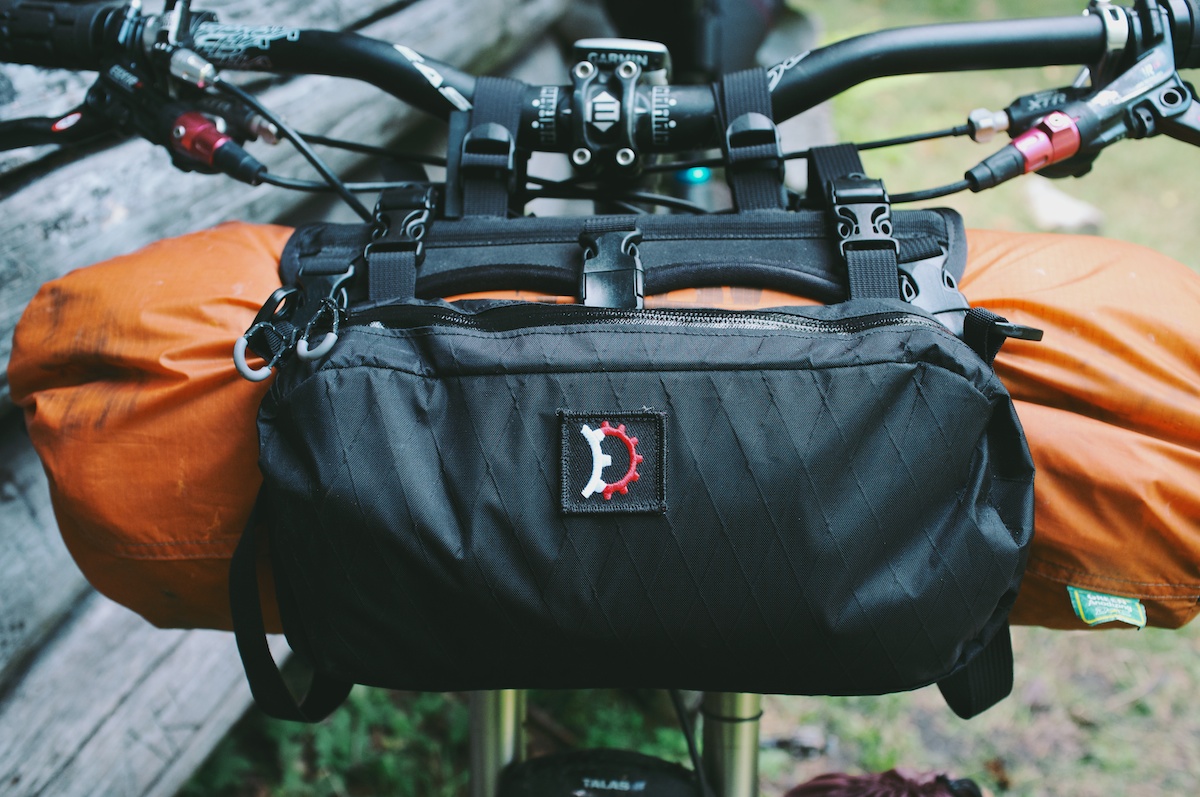
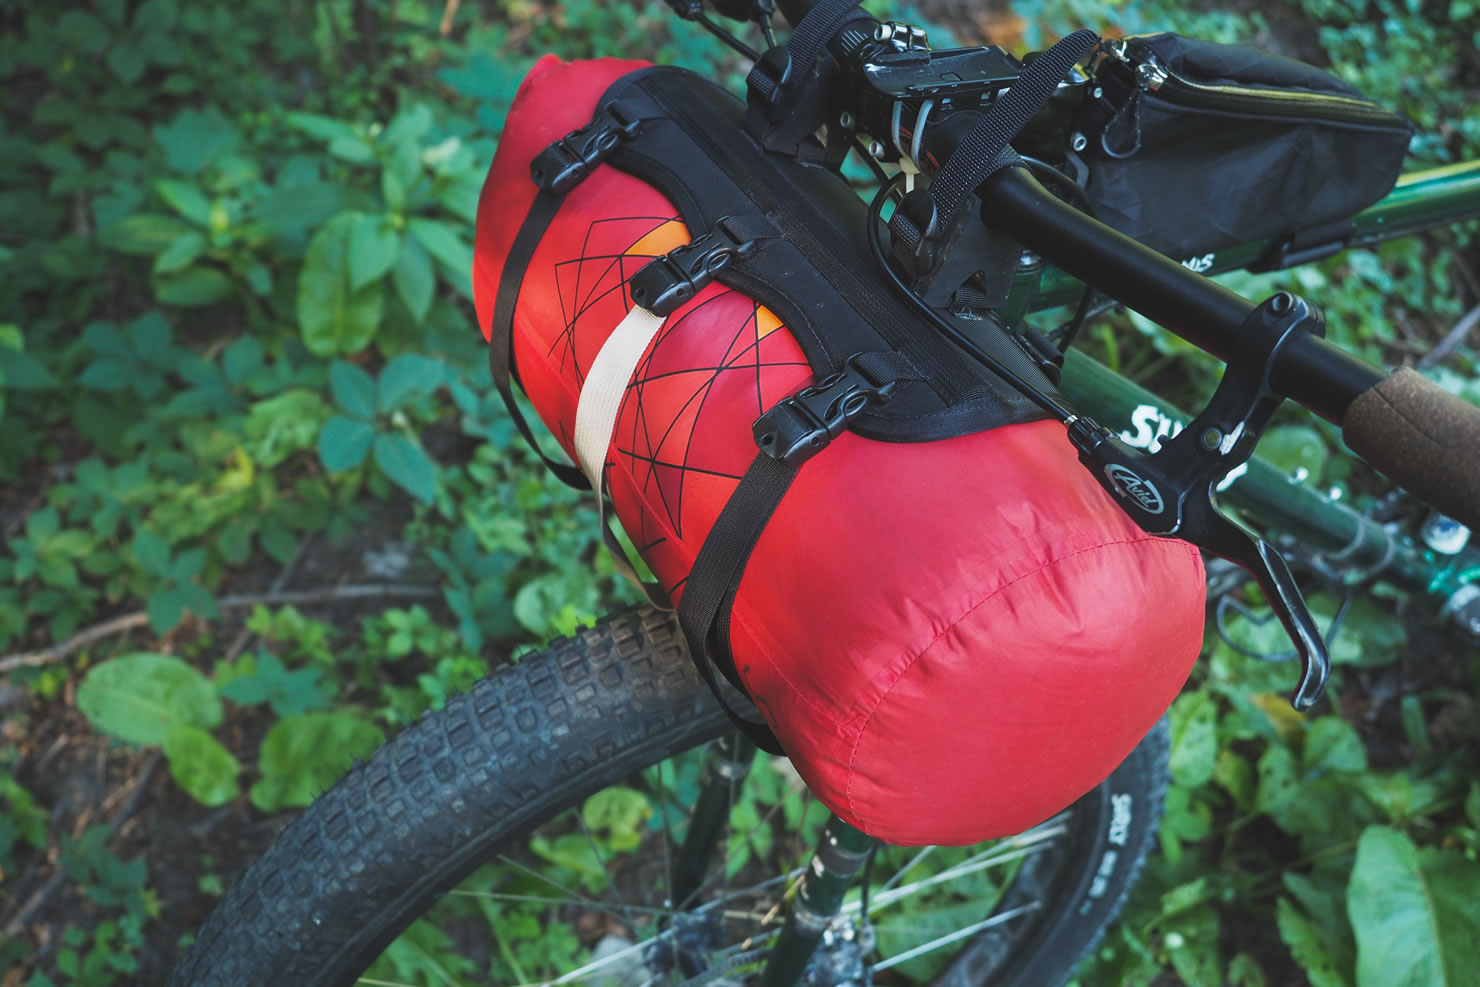
Roll or Harness?
Harnesses are another popular way of carrying multiple drybags or loads such as a tent, especially those that are too long to fit elsewhere. A slimmer roll is usually better for bikes with a suspension fork, while a harness can have multiple items ‘stacked’ within the cradle. Harnesses are very adaptable and generally less expensive too.
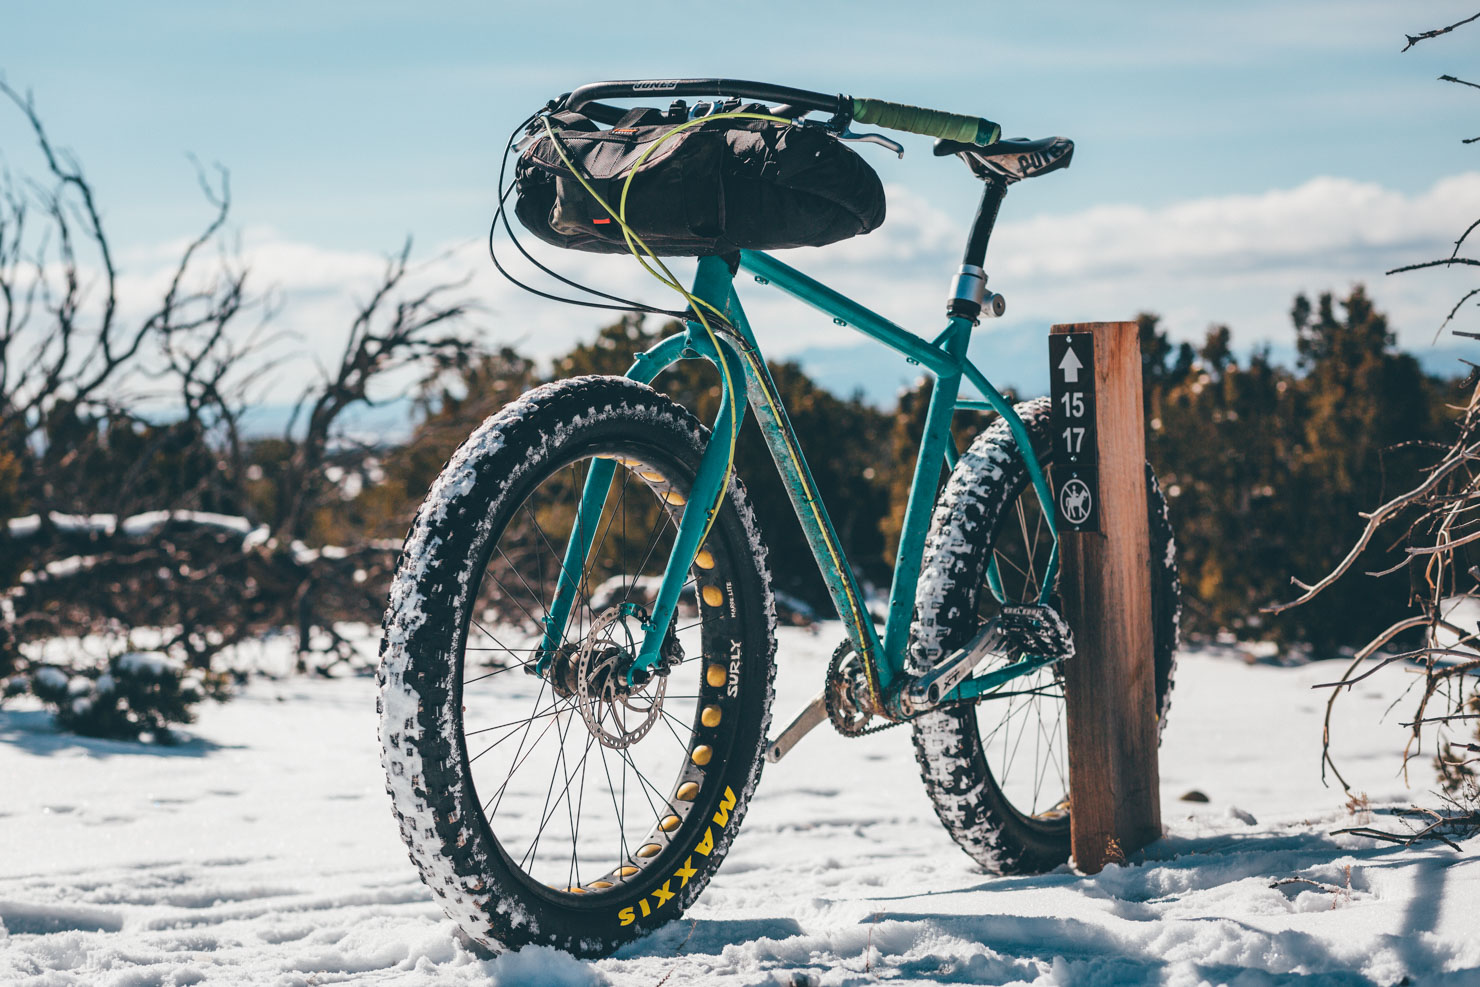
The long and short
A few things to pay attention to when purchasing a handlebar roll are the maximum length and diameter. If you are using big wheels with a small frame, or front suspension, consider a skinnier roll that can be packed long – the downside being they’re a little harder to pack. As an example, the medium Revelate Sweetroll is about 7” in diameter, and has a generous length. This is perfect for a short-travel hardtail. For a longer travel bike, consider the small version.
What about drop-bar bikes?
You’ll need to get a little more creative with a drop-bar bike, as space between the drops can be cramped. The Revelate Designs Handlebar Harness works well and allows multiple dry bags to be sandwiched in the cradle. Specialized’s Handlebar Harness was designed with drops in mind, and Porcelain Rocket’s MCA handlebar system is a good option too. Additionally, it’s worth considering a large roll that can be packed short. See the Gravel Kit below for more details.
Peripherals and Accessory Bags
Bikepacking soft bags can be awkward to access quickly on the road. Cue the accessory bag, which adds handy packing space to your kit. Stem bags are small can-shaped bags that fit at the stem and handlebar. They’re often referred to as ‘feed bags’, because they are a great place to keep snacks, and can be accessed on the move. Top tube bags are another great accessory for snack storage, or other small items that require quick access. These are mounted to the steerer tube and top tube forming a shape similar to that of a motorcycle gas tank. There are also countless other accessory bags that can be added. Check out this roundup for more ingenious ideas.
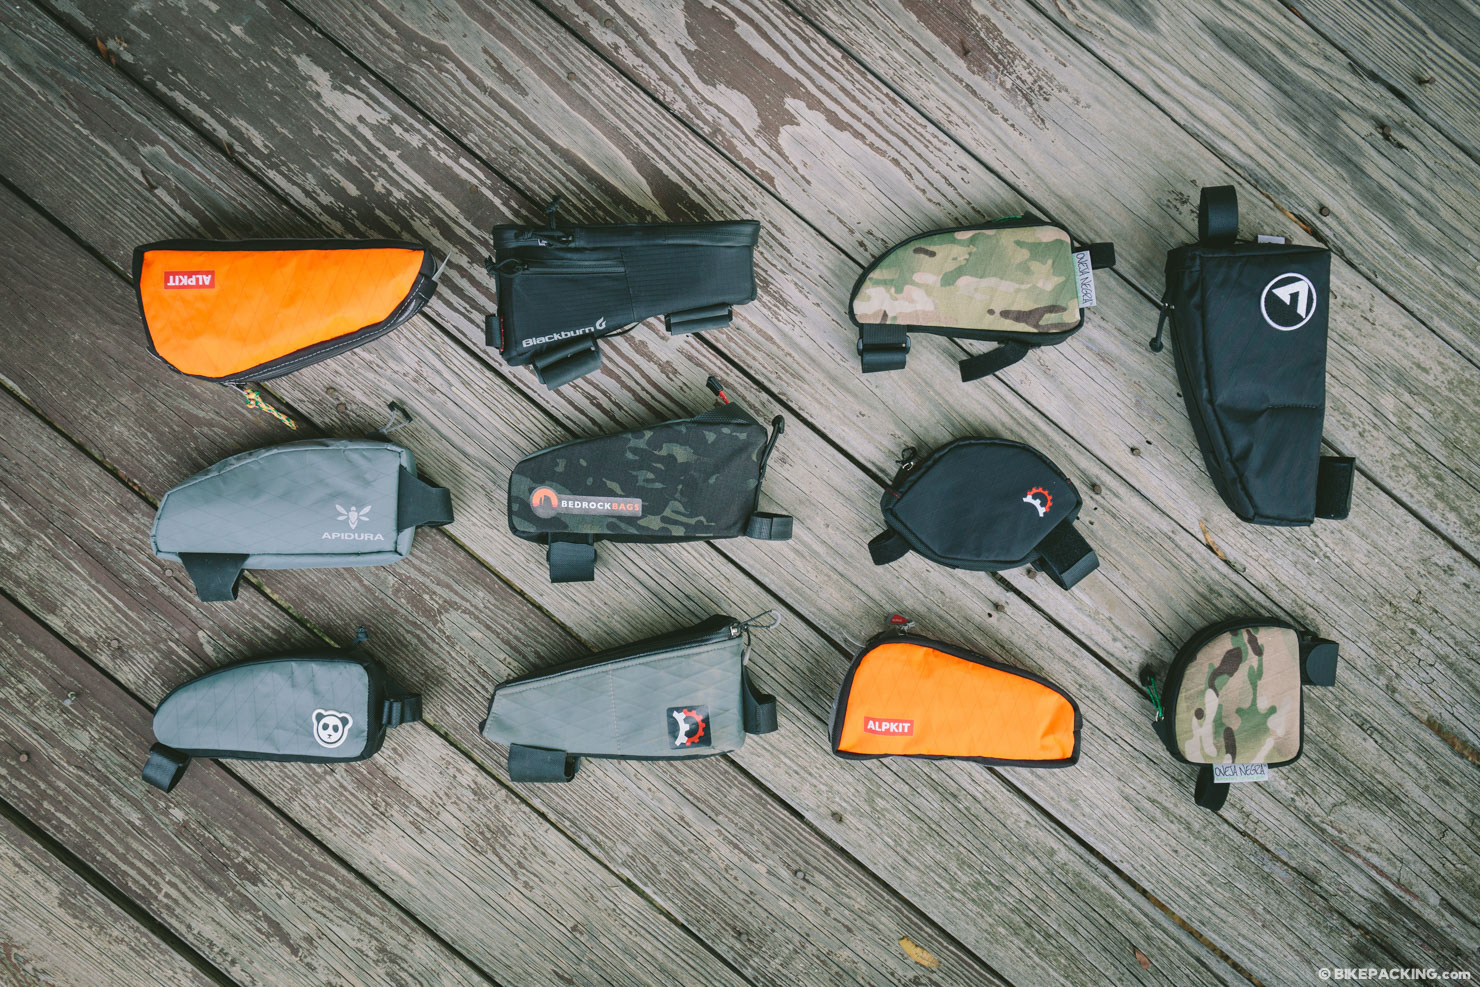

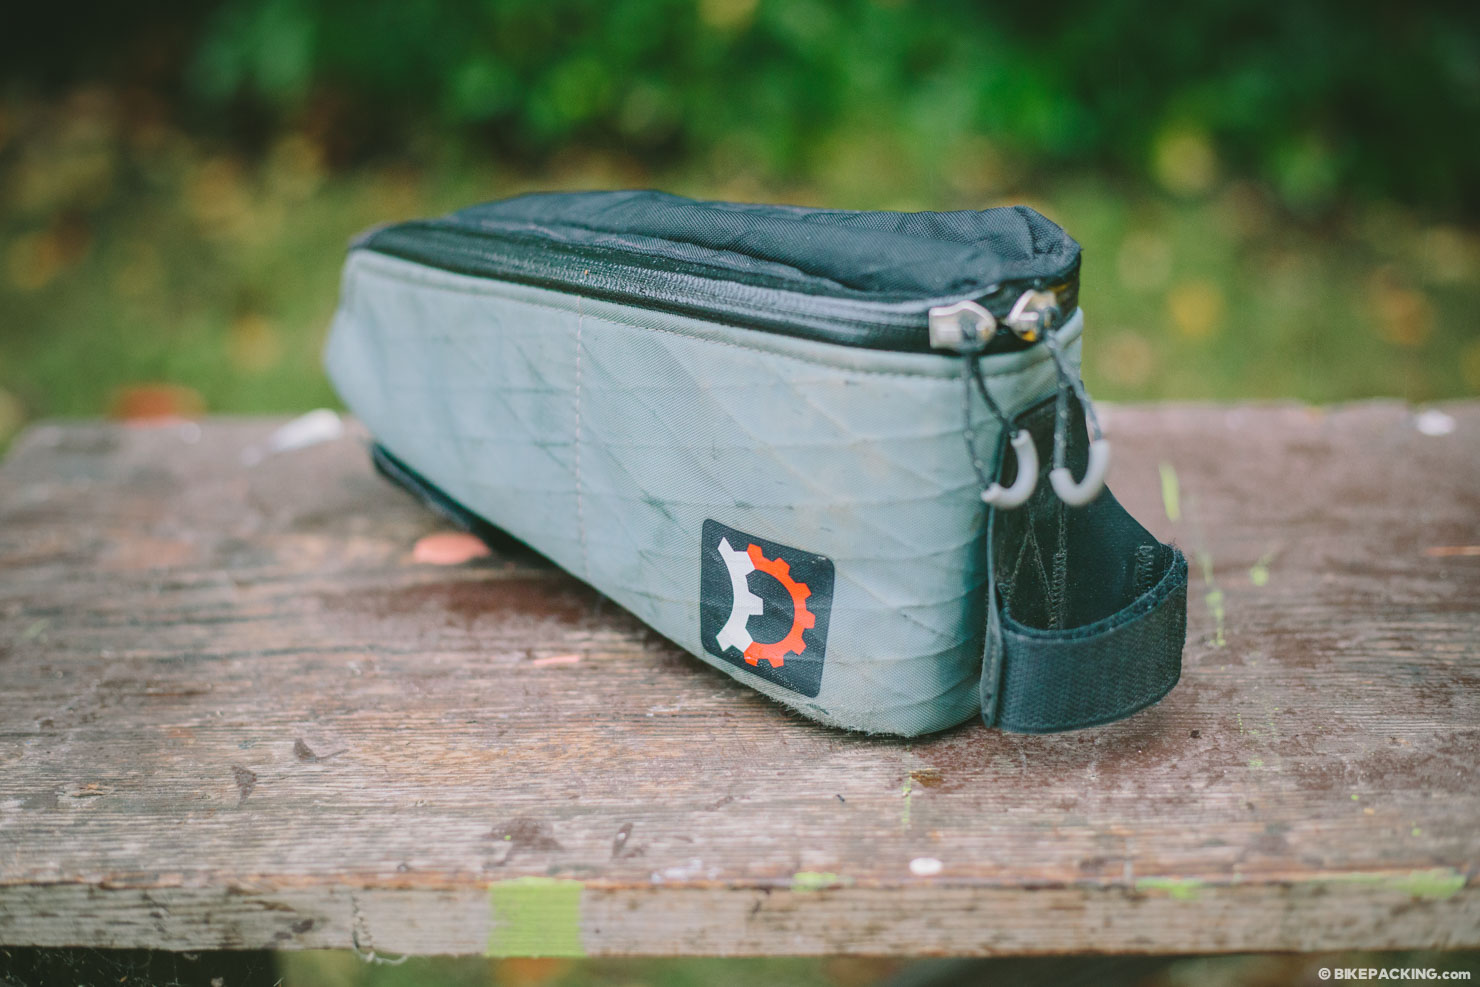
Fuel Tanks
The two most well known accessory bags are the top tube pack and the stem bag. The former looks like a motorcycle gas tank, which is how the Revelate Gas Tank earned its name. The stem bag is a can-sized cylindrical bag that hangs to the right or left of the stem. Both of these are typically used for snacks and various doodads, like sunglasses, a cell phone or a compact camera. Some are padded, providing ideal stowage for electronics like camera lenses, perfect for the photographers amongst us.
Fork it
Several years ago, Salsa introduced their Anything Cage, an oversized bottle cage that bolts to a triple mount configuration on the fork legs — a feature increasingly seen on bikes marketed as bikepacking steeds. There are now several other cage options available, including King Cage’s Manything cage. Several bag makers have also made bags specifically for these carriers — Salsa has its own Anything bag, while Andrew The Maker has a model for the King Cage.
Everything but the…
Given the quick thinking nature of cottage industry manufacturers, there are plenty of other clever accessory bags that companies have released. Check out Bedrock’s Honacker, for a under downtube solution. The Rogue Panda Oracle downtube bag is a nice solution for carrying a toolkit on your frame. And most bag makers also make accessory pockets to strap around their handlebar bags, offering convenient storage for the likes of a mirrorless camera.
Six Example Kits
Next up, we’ve collated six example kits to suit different budgets and riding styles, along with prices. If you are new to bikepacking, we’d recommend planning a short overnighter with the ‘Hack’ Kit, just to give it a try. If you love it – which we know you will! – consider investing in the Intermediate Kit. Once you’re hooked – or if your pockets run deep – check out our suggested Dream Kit.
1. The Starter ‘Hack’ Kit ($0-77)
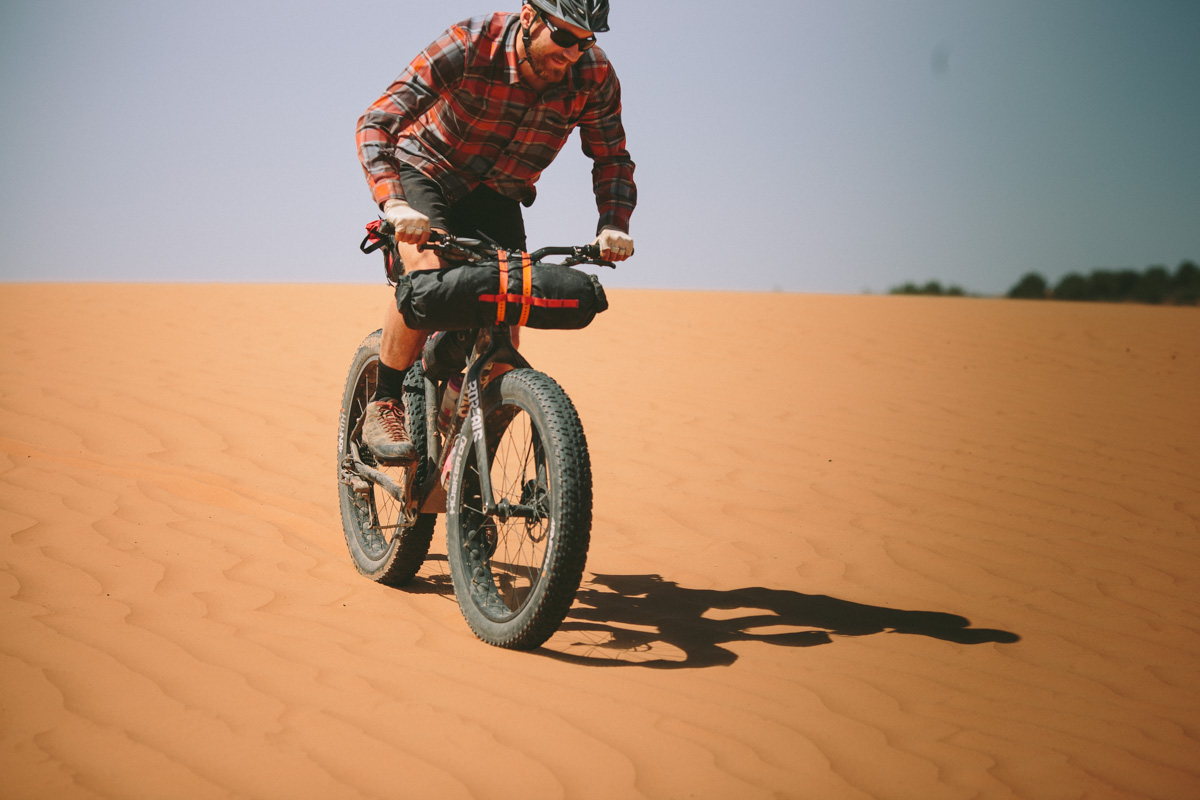
It’s fairly uncomplicated to gather some provisions and disappear into the woods for a couple of days – a quick overnight can be done with minimal equipment and a few minutes of preparation. A comfortable daypack teamed with dry bags lashed to your handlebars and seatpost makes a good barebones approach. This is especially true for overnight trips, or summer trips that might not require heavy gear to keep you warm. If you’re new to bikepacking and just want to try it out, plan a short 20-40 mile trip punctuated by a campsite or shelter somewhere in the middle. This starter kit is a great way of discovering the wonderful world of bikepacking.
- Seat Pack Sea-to-Summit Big River Dry Bag (5L) $25
- Handlebars Revelate Salty Roll $39
- Handlebars 2 Voile Straps (25”) $13
- Backpack Your daypack
- Other Paracord/Electrical Tape/Bottle Cages/Webbing straps
- Total $77
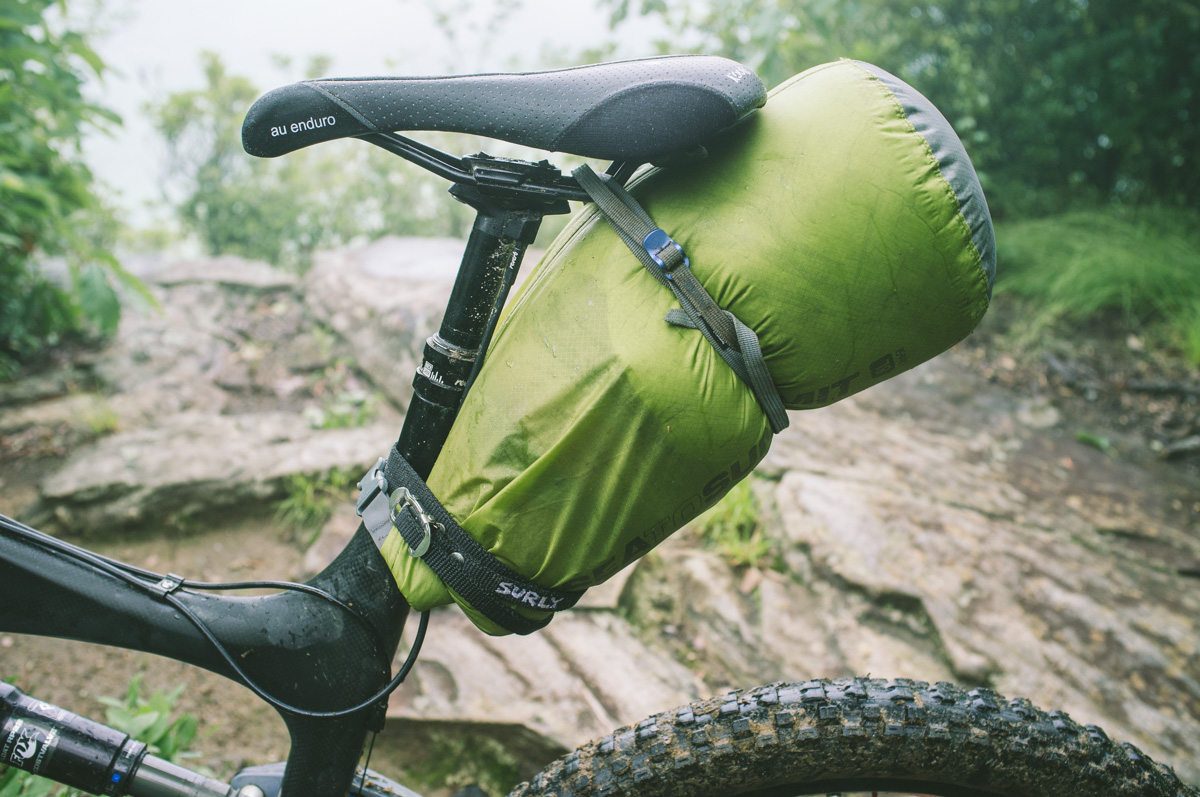
Seat ‘Pack’
Use a 5-7 liter dry bag clipped around the seatpost and cinched to the saddle rails with a webbing strap. Store a change of clothes and a few other odds and ends in it. It helps stabilize it if there’s something stiff within the bag, such as tightly rolled clothing.
Handlebar Roll
A larger 14-20 liter dry bag can be cinched to the handlebars with two webbing cinch straps or Voile straps. Include a small tent (the poles will help keep a straight shape to the bag) and a lightweight sleeping bag. Add duct tape to contact points between the dry bag and cables and/or brake levers. Otherwise, pick up a Revelate Salty Roll for $39 and get two 25” Voilé straps (around $6.50 each).
Daypack
Chances are you already have a day pack; bike specific models that are 14+ liters in capacity are best. Use your backpack to carry sleeping gear, rain gear, or food and cooking supplies. Start with packing your inflatable sleeping pad and a few dehydrated meals; or you can strap a closed cell foam pad to the outside of the pack. Keep it as light as possible.
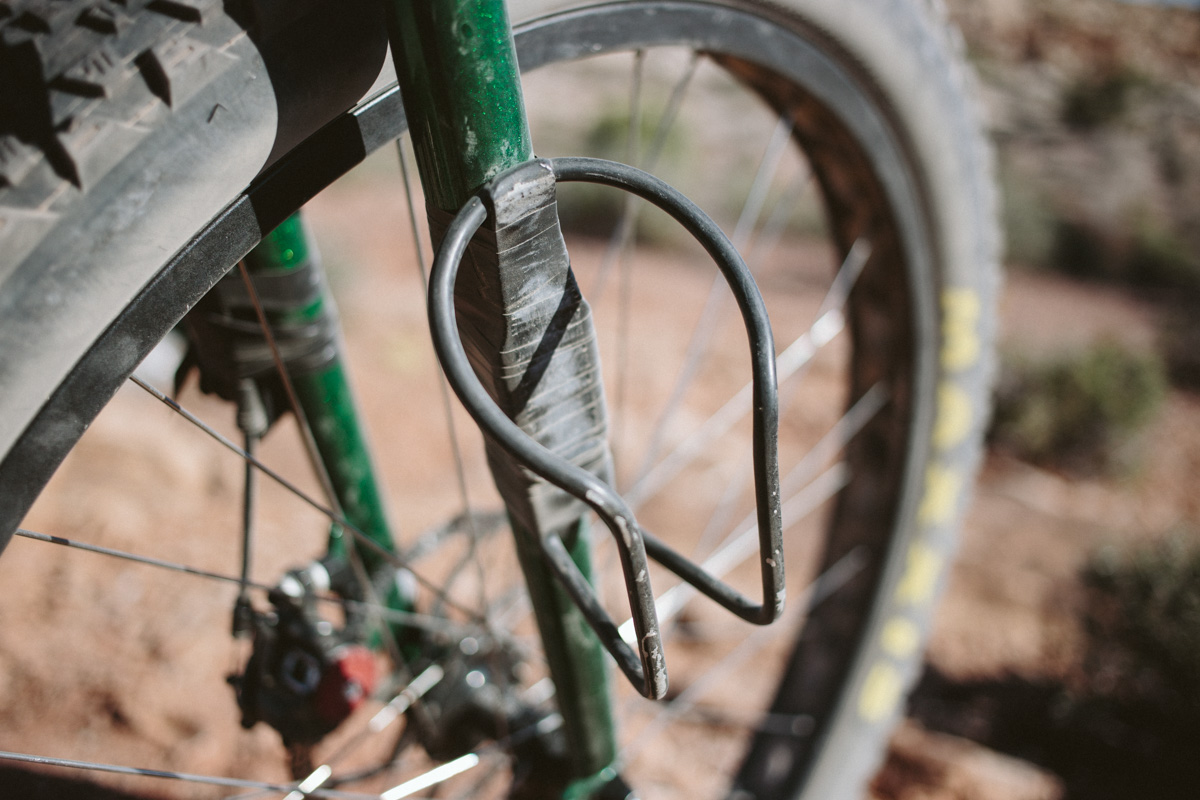
Electrical Tape Bottle Cages
In addition to your standard water bottle cage mounts, use about a half roll of electrical tape to add bottle cages to your fork legs or the underside of your downtube. This will reduce the water you need to carry on your back and help maximize the storage space in your backpack. Lezyne Power Cages work well, but most any cage will do. Other space saving tricks include using electrical tape attach a spare inner tube to your bike, such as below the top of the downtube.
Added Utility
Use cord to tie your tent poles onto the side of your bike’s top-tube. In addition, you can use straps to affix your tire pump, a larger water bottle or other items to your bike frame.
2. The Solid Budget Kit ($384-389)
Once you’ve enjoyed your first overnighter, there’s a good chance you’ll be hooked and want to take your bikepacking adventures to the next level. Consider first investing in a seat pack, then a frame bag – just be sure you’re completely happy with the bike you’ll be using for bikepacking first. If you’re crafty and have access to a sewing machine, make your own! Invest in a handlebar harness and an accessory pocket. You’ll end up with a complete, relatively inexpensive, and bomber strong setup.
- Seat Pack Revelate Viscacha $130
- Handlebars Revelate Harness $75
- Frame Pack Oveja Negra Half Pack $80-85
- Top Tube Pack Oveja Negra Snack Pack (large) $50
- Stem Bag Revelate Mountain Feedbag $49
- Total $384-389
Seat Pack, simple and lightweight
Pick up a basic inexpensive seat pack. There are many readily available. A few worth noting are the Revelate Viscacha Seat Pack, a venerable classic, the Oveja Negra Gearjammer, Apidura’s Saddle Pack, and the Bedrock Coconino.
A Universal Frame Bag
There are several frame packs designed to work on most any bike. The most obvious and ubiquitous is the half frame pack. These are especially usable on a hardtail or rigid bike. The Revelate Tangle half frame bag is a good option, as is the Oveja Negra Super Wedgie, which uses the front of the triangle and maintains space in the back for a full water bottle. If your bike has a large frame triangle, chances are with a medium Tangle, you’ll have room for two water bottles as well. There are also many off-the-shelf full frame pack options, such as the Revelate Ranger which comes in three sizes. For each of these bags, look at the dimensions on the manufacturer’s website, then measure your triangle to match up the right bag.
Handlebar Harness
Our intermediate kit uses a handlebar harness. These allow you to lash on your tent and a separate dry bag, tent poles, or just some stray items. Because harness systems are versatile, they allow bikepackers to try different solutions as to which components to pack where. A couple harness options are the Revelate Harness, the Oveja Negra Loader, the Porcelain Rocket MCA system, and the Specialized Harness. Also, most of these (save the Specialized) have attachable accessory pockets to add more valuable space to your kit.
Accessorize
The most spacious and valuable accessory is the stem bag (AKA, feedbag). A Revelate Mountain Feedbag alongside a top tube pack makes for a good pair of accessories.
3. Conversion Kit #1 (for bike tourists) $615-786
We’ve met more than a few ‘bike tourists’ on trips abroad, inevitably running the traditional four pannier (and more) setup. Their first words are usually along the lines of, “Wow, you guys are traveling light! How do you have enough room for food and warm clothes?” But it can be done! With careful gear selection, a minimal, softbag setup provides enough room for almost all extended bike trips. But you do need to rethink your pack light, rather than just shuffle existing gear into different spaces. For both day to day riding enjoyment, and as a way of increasing the breadth and scope of your travels, it’s a worthwhile endeavour. Some of us started out using four panniers, and believe us, we’ll never go back.

- Seat Pack Revelate Terrapin or Ultraswift Wizard Sleeve or Jr. Ranger Panniers $130/250/266
- Handlebars Ortlieb Handlebar-Pack / Pocket $205 or Carsick Designs Handee Randee / $240
- Frame Pack Revelate Tangle half frame pack $90
- Top Tube Pack Bedrock Bags Dakota Tank Bag $70
- Stem Bag Revelate Mountain Feedbag $49
- Accessory Cage Salsa Anything Cage HD and Anything Bag $71
- Total $615-786
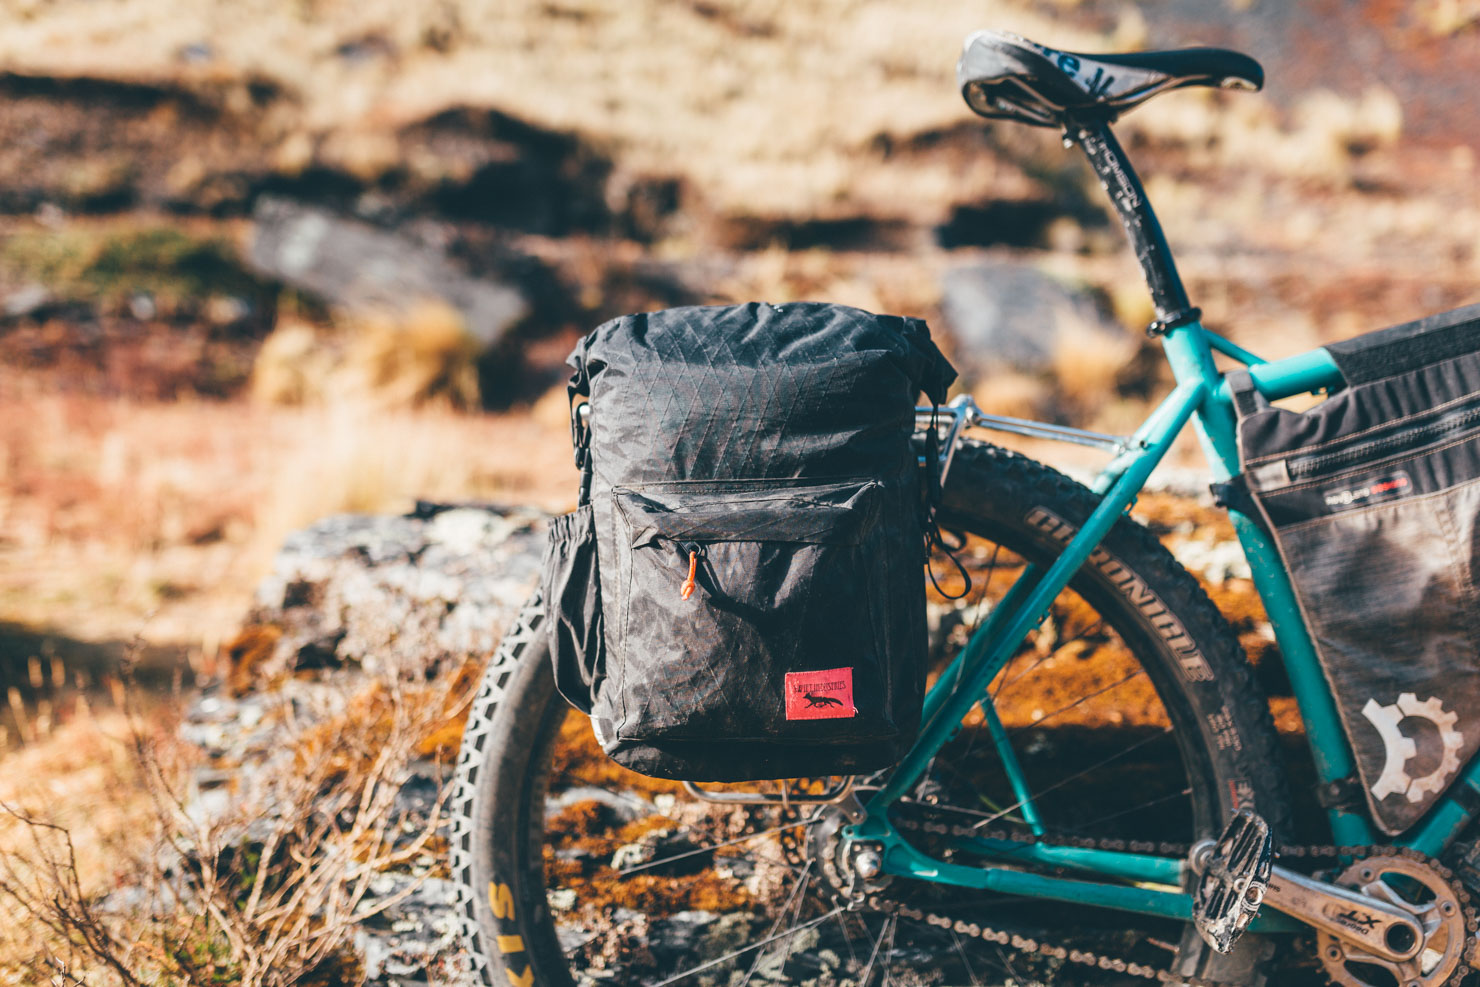
Panniers aren’t dead!
For smaller riders, or when there is simply a need for extra gear — such as a winter trip or when more than a week’s worth of food is required — it’s more than feasible to use a pair of smaller front panniers on either the front or the rear of the bike. Swift’s Hinterland Jr panniers are a great choice, as are Ortlieb’s Sport-roller front panniers. In addition, consider Revelate’s Nano Panniers used in tandem with a smaller seat pack. Keep in mind that a lightweight rack is ideal to maintain the benefits of a lightweight setup — at 575 grams, the Tubus Vega is a good choice, with a decent tire clearance, but make sure you have a hardtail or rigid bike with the right mounts. Double check tire clearances too.
A note on saddlebags
As much as we really like the new wave of ultralight bikepacking seat packs, there’s still a place for more traditional forms of minimal luggage – like Swift Industries’ Zeitgeist Saddlebag, the Ultraswift Wizard Sleeve, or Carradice’s Super C. These work particularly well for long distance tourers transitioning to a lighter setup, or anyone riding dirt roads rather than more technical singletrack. Saddlebags have been around for years, for good reason. With their large capacity and easy access lids, they’re a very practical way to travel. Most feature plenty of options for lashing on extra gear too. Although weight is positioned higher than panniers, it’s centrally located behind the saddle, which makes for relatively good handling. Depending on what you’re packing, you maybe benefit from the support of a small rack – it doesn’t need to be anything like as burly as a carrier designed for large panniers. We also hang saddlebags off handlebars too, just bear in mind though excessive weight will compromise handling. Again, a lightweight minimal rack mounted to the fork – like Nitto’s M-18 – may be all the support you need.
Additionally
There are several other means of adding space to your kit. Bottle bosses on the fork and downtube can hold 3+ liters of water. Also, if your fork has ‘3-pack bosses’ you can use Anything cages and bags for overflow gear, and water.
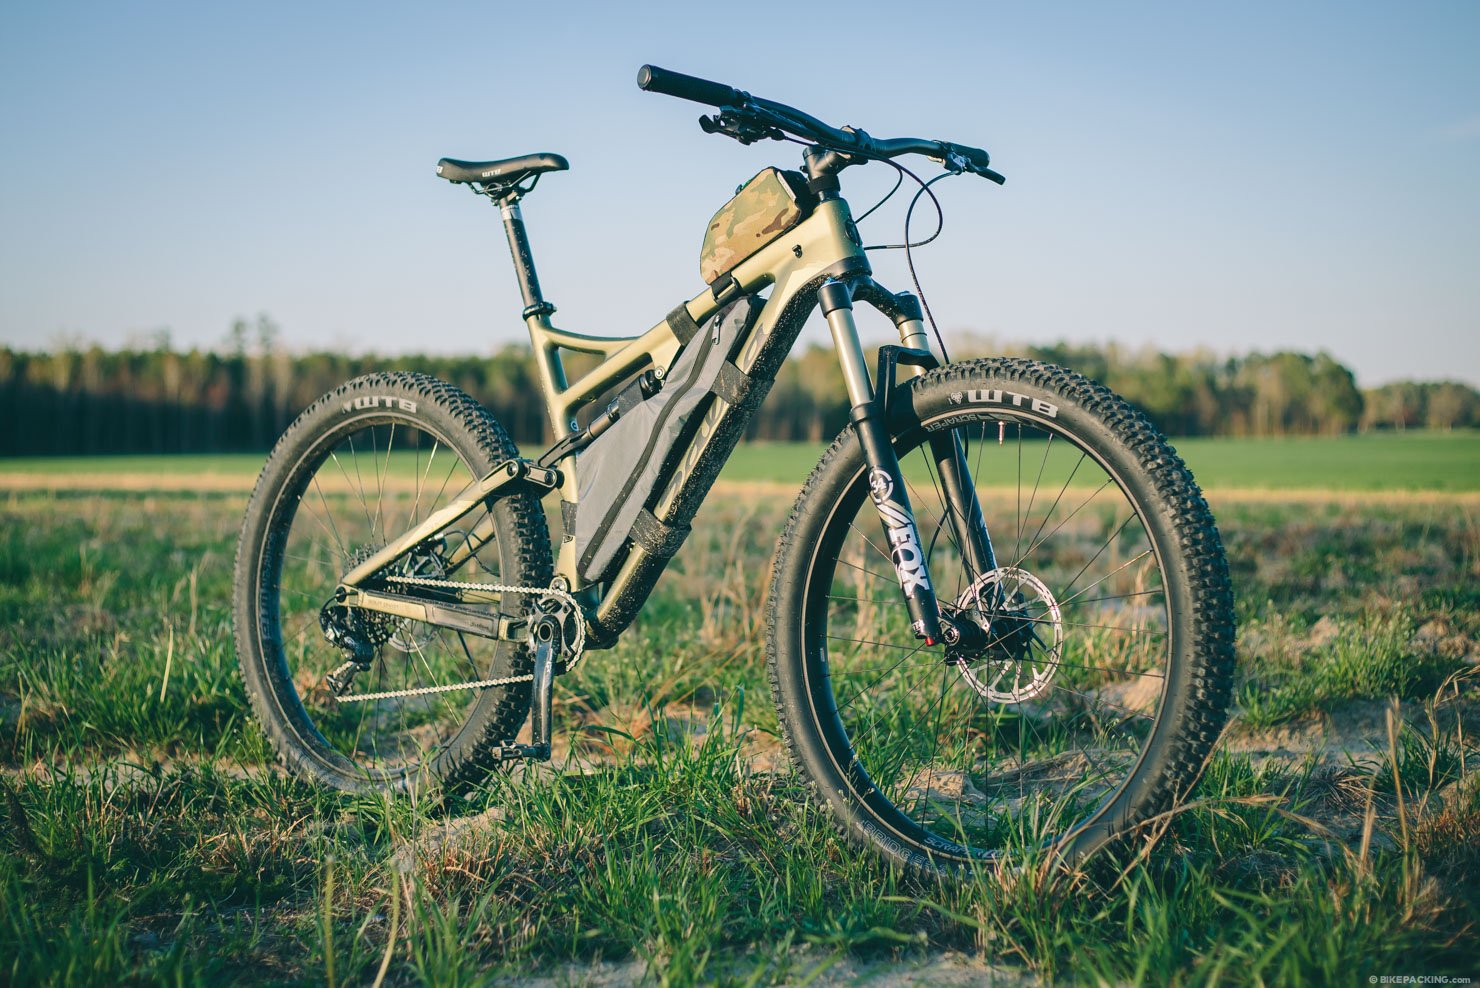
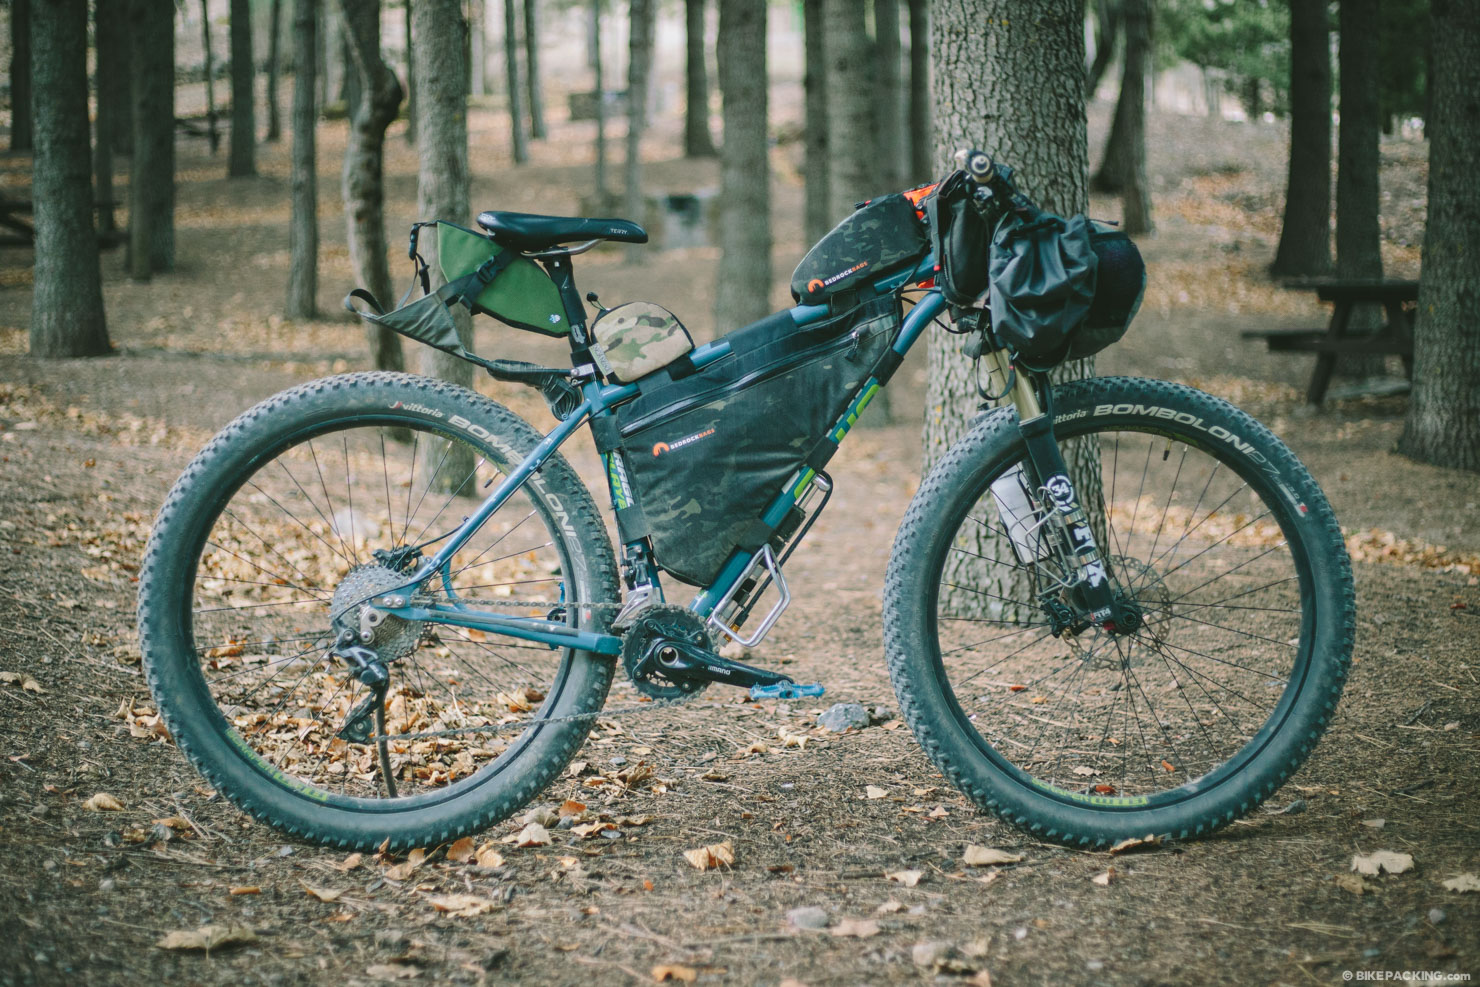
4. Conversion Kit #2 (for the weekend shredder) $605-805
Just because you have the latest carbon fiber full-squish trail slayer, doesn’t mean it has to be left at home. You can still use bikes like these to carve primo singletrack, camp, then do it again the next day. We approached this bag kit with full-suspension trail mountain bikers in mind. Generally speaking the volume of this kit is appropriate for short trips that are in the weekend variety, using ultralight equipment, and minimalist packing sensibilities.

- Seat Pack Porcelain Rocket Albert $175
- Handlebars Bedrock Bags Entrada/Pocket $160
- Frame Pack Custom $0-200
- Top Tube Pack Revelate Gas Tank $55
- Backpack Mission Workshop Hauser 14L $215
- Total $605-805
Skinny Roll
Key to this kit is the use of a smaller handlebar roll to avoid rubbing the front tire when the fork is doing what it’s designed for – compressing. Chances are, you’ll need to up your fork’s air pressure a touch to to compensate for the added weight on the bike. As an example of a minimal rool, we recommend the Bedrock Entrada handlebar roll – it’s approximately 6″ in diameter.
The backpack can be your friend
Most bikepackers aim to avoid carrying a heavy load on their backs during multi day rides – when needed, use a backpack for lightweight stuff, such as sleeping gear and freeze-dried meals. If you’re carrying water in a bladder on your back, drink it before the water your packing on your bike. We particularly like the Hauser from Acre; and here are a few more backpacks we’d recommend.
The Latest in Seat Pack tech
Hot off the press, Porcelain Rocket will start shipping their latest innovation, the Albert dropper-post specific seat pack, in December 2016. This is the first seat pack designed specifically for dropper seatposts – expect other manufacturers to follow suit in the future.
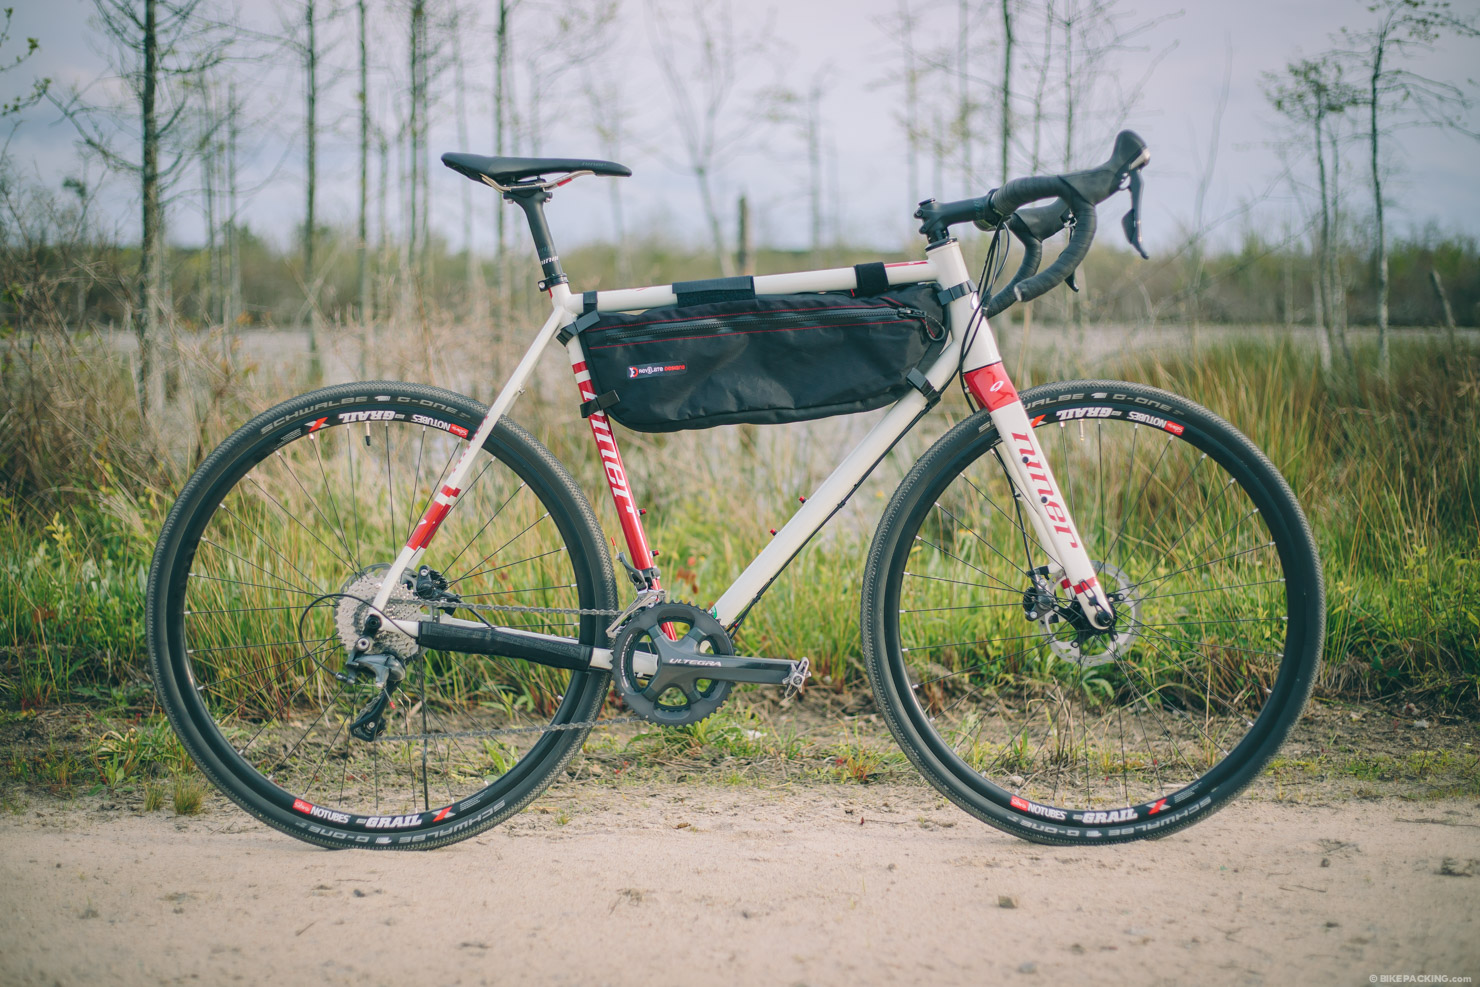
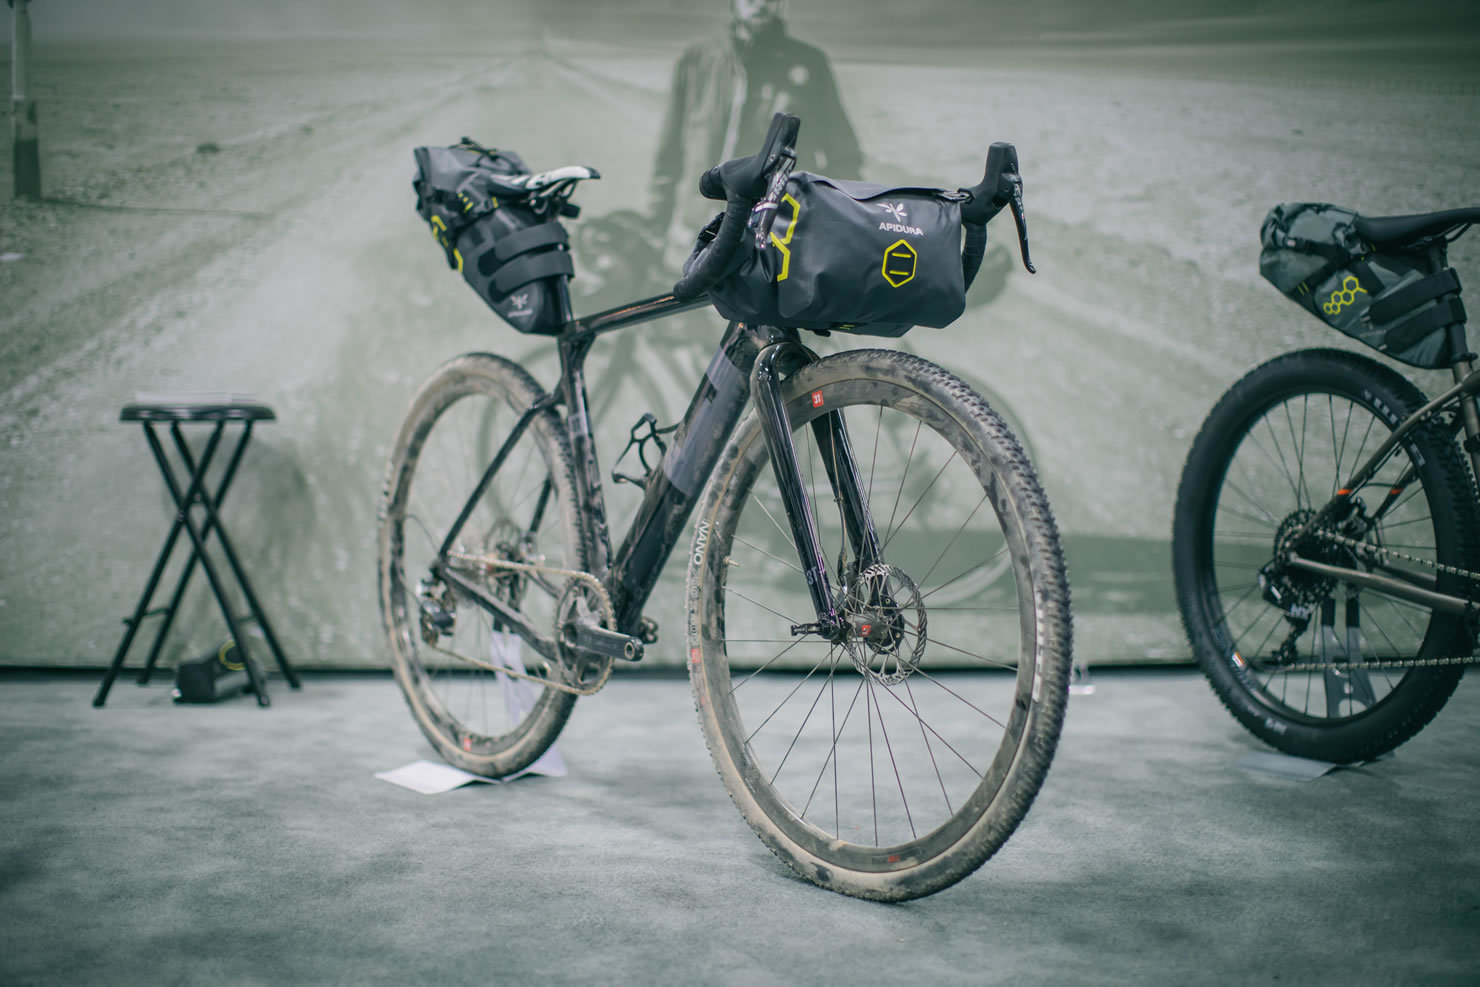
5. Conversion Kit #3 (for gravel cyclists) $555
Gravel and all-road bikepacking is gaining in popularity. And justifiably so. Given the versatility of such bikes, they’re ideal for making quick miles out your front door, unearthing forgotten gravel roads, tying in a little single-track amuse-bouche – and generally escaping the monotony of highways and the traffic that comes with them. This bag kit was created to keep the loads minimal on the front and back, and the contents dry.
- Seat Pack Apidura Saddle Pack Dry (9L) $150
- Handlebars Apidura Handlebar Pack Dry (14L)/Pocket Dry $190
- Frame Pack Revelate Ripio $160
- Top Tube Pack Revelate Gas Tank $55
- Total $555.00
Big triangle
Given that gravel and all road bikes are non suspension corrected, bikepackers can really benefit from the all the space within their frames – which translates into relatively huge framebags! Running a large frameback, like the Ripio or a custom made model, you can keep the other pieces of luggage relatively small.
Little bar space
Conversely, you’ll need to get a little more creative between the drop bars. As mentioned above, the Revelate Designs Handlebar Harness allows multiple dry bags in the cradle, while Specialized’s Handlebar Harness was designed just for drops. Additionally, consider a big roll bag like the Apidura Handlebar Pack Dry (large) or the Revelate Sweetroll.
6. The Dream Kit ($726)
Given how many great bags there are on the market, as bikepackers we’re lucky enough to be spoilt for choice. Our last suggested setup collates some of our favorites. It’s all gear we’ve put through the ringer on multiple trips, and have no hesitation in recommending.
- Seat Pack Porcelain Rocket Mr. Fusion $185
- Handlebars Revelate Sweetroll and Pocket $147
- Frame Pack Porcelain Rocket Orbiter $200
- Top Tube Pack Oveja Negra Snack Pack (lg) $50
- Top Tube Pack (rear) Oveja Negra Snack Pack (sm) $45
- Stem Bag (right) Bedrock Bags Tapeats Bag $50
- Stem Bag (left) Revelate Designs Mountain Feedbag $49
- Total $726.00
A Waterproof Seat Pack
Right now one of our favorite seat pack is the Porcelain Rocket Mr. Fusion. It has a seat post mounting clamp and a removable waterproof dry bag for off-the-bike unpacking and repacking. There are also several other great waterproof seat packs; check out Ortlieb’s waterproof Seat Pack, Apidura’s Saddle Pack Dry, or the Revelate Terrapin.
Tailor made
There are many solid universal frame packs on the market; but the best option is to get one custom made for your bike. No matter if it’s a full-suspension trail bike or a gravel grinder, a tailored bag can easily be made to fit your rig. Typically bag makers request that you trace a cardboard template of your frame triangle. But there’s often a waiting list. A few bag makers we highly recommend are Bedrock Bags out of Durango, CO and Oveja Negra in Salida, CO. Our dream frame pack is the Porcelain Rocket Orbiter. It’s a custom made bag with a roll-top instead of a zipper. This allows it to be stuffed to the gills without risking zipper failure. Unfortunately, Porcelain Rocket is no longer doing custom work, so find a bag maker and get something tailor made to your bike.
Handlebar Harness or Roll?
This is certainly a personal preference. We have used both, but our Dream Kit choice is a waterproof handlebar roll. The Revelate Sweetroll is one of a few we really like. It has a waterproof seam sealed construction and has proven extremely durable over a few big trips. It works much like a dry bag, but it has purpose built connection points and added structure. There are a couple different sizes to choose from too; we recommend the medium, which is about 7” in diameter and tends to work with most bikes. 25” Voile straps make a great addition for lashing on tent poles as well (for both drop-bars and straight mountain bike bars). In addition, the lightweight Apidura Handlebar Pack Dry and the robust Ortlieb Handlebar-Pack are other waterproof options that are constructed using RF welding.
More Accessories
In addition to the stem bag and top tube bags mentioned in the intermediate kit, there are also a lot of other great accessory bags to expand storage capacity. Both Salsa and King Cage make oversized cages that accept larger loads. The Salsa Anything cage pairs well with their Anything Bag which works well to store a camp kitchen.
There are also rear top tube bags that mount to the seat post. Check out the Revelate Jerry Can or Oveja Negra’s Snack Pack (sm).
How We Pack
For some folks, one thing that’s engaging about bikepacking is the process of perfecting what and how you pack to make the most of your outings. There are some general truths to packing – such as always keeping the heaviest gear at the lowest spots (like the bottom of the frame pack) and lighter items on the handlebars – but ultimately packing techniques vary between riders. Everyone tends to develop their own system, depending on the bikes they ride, personal gear preferences, and the terrain they cover. We thought a fun way to approach this topic is to ask some of our regular contributors…
Joe Cruz
Joe is a minimalist master. In a group of several riders, his bags are always magically the smallest and lightest; yet somehow they seem to contain more useful stuff. Here are a few notes from Joe about how he packs during any given trip:
Frame Pack (Revelate)
Since I ride a small frame, the frame pack can’t be my primary carrying bag. I’ll usually place spare parts in a small box in the tiny triangle right at the bottom near the bottom bracket and then on top of that a pot with stove and canister inside above it. In the pocket of the frame pack I’ll have my knife, tools, mini cable lock, spork, pen. The rest of the frame bag will have heavier and denser food. Tent poles go under the velcro that attaches the frame bag.
Seat Pack (Revelate Viscacha)
Food, with the heavier denser items (and a spare tube) closer to the seat post.
Handlebar Roll (Revelate Sweetroll and Pocket)
One half of the roll has all my spare clothing with the items that I want ready at hand (e.g. rain pants) near the opening end. The other half of the roll has my tent and quilt. Sleeping pad is strapped on top of the front roll. Everything is very compact. In the front pocket I’ll have my rain jacket, camera, maps, passport and anything else I’ll want to be able to carry with me for short times when I leave the bike.
Top-tube bag (Revelate)
Both of these bags will have trail snacks. I also run a small bag at the junction of the top and seat tube which has my headlamp and sundry electronics like spare batteries and earbuds.
Backpack
I work very hard never to have a backpack, though sometimes the format of the trip—if it’s short and more technical mountain bike terrain oriented—makes it make sense to have a water bladder on my back.
Skyler Des Roches
Skyler tackles bikepacking trips of all sorts. On his latest trip on the Colorado Trail, he tested the Albert dropper seatpost, but here’s Skyler’s standard kit and how he packs it.
Frame Pack (Porcelain Rocket Orbiter)
I see my frame bag as the best place to pack the heaviest items. It’s also pretty easily accessed during the day. So, most of this space is reserved for dense food items, while a spare tube and low-use tools live in the bottom.
Seat Pack (Porcelain Rocket Mr. Fusion)
I pack my seat pack with spare clothing (thermal layers, gloves, down jacket, rain jacket, hat), spare batteries and chargers, and often my jetboil pot, which contains the stove, a small gas canister, a lighter, and a small salt shaker. Any left over space can be taken up with more food.
Handlebar Harness (Porcelain Rocket MCA System)
Though I always use a modular handlebar harness system, where the dry-bag can relatively easily be removed from the bike, I aim to rarely open this bag. Over the years I’ve acquired extremely light and compact camping gear, so I’m able to fit my down sleeping bag, air mat, and tent into a 10L dry bag. The poles get strapped outside the drybag. The result, at about 5.5lbs, is about as heavy as I’d tolerate in a handlebar bag.
Accessories
Everything that I like to keep handy lives in the top tube bag: a multi-tool, leatherman knife, spork, chap stick, sunscreen, headlamp, and maybe a blinky rear light. I have a big enough top tube bag that I can also get my sunglasses in there, if needed.
A pair of water bottles get holstered in stem bags, one on either side of the stem. Putting water weight so far forward on the bike is not ideal, but it’s hard to beat for easy access to bottles. (A third bottle lives under the downtube.)
Backpack (fanny pack)
I carry a fanny pack containing my camera, spare lenses, wallet, phone, documents, and my wind vest. On trips where I need more space, I have a rather large fanny pack, which has space for all of the above, and a bunch of food (6-8 bagels of space capacity).
Cass Gilbert
Cass gravitates towards both longer, dirt road tours, and shorter singletrack-orientated outings. This is a typical packlist for the latter – the main modification is the use of a traditional saddlebag for rides that are more dirt than trail, replacing the need for a backpack.

Frame Pack (Porcelain Rocket Orbiter)
Given that I ride an XL frame, I have a tonne of space in my framebag. Food, a potset nesting my stove, a bottle of denatured alcohol, tools, the pole for my tarp and a water bladder (when required) live here. On longer trips, my Macbook Air (11in) slips in too, housed in a waterproof padded case.
Seat Pack (Porcelain Rocket Mr Fusion v1)
An inner tube or two fills up the dead space at the bottom of the bag, followed by extra food when needed (like a bag of pasta). My inflatible mattress, tarp and puff jacket go next. I generally pack my waterproofs at the end – unless I need quick access to them, in which case they’re cinched to my Jones Loop H-bar with a Revelate Washboard strap – a great accessory in itself. As mentioned above, if I’ve embarked on a dirt road tour, I’ll use a Tubus Vega rear rack with a Carradice Super C Saddlebag in lieu of a seat pack. I find it easier to access, it’s roomier, and the shape is better suited to stowing for my chunky DSLR camera. My other go-to setup involves mounting a saddlebag to the handlebars, supported by Nitto’s minimal M-18 front rack.
Handlebar Roll (Carsick Designs Handee Randee)
I’m a big fan of the Handee Randee, a roll bag that’s designed to work with a Jones Loop H-bar, with a boxy design that makes it a breeze to pack, especially for awkard shaped items. My sleeping bag, liner and sleeping clothes nest in the centre, with a wool hat and an extra riding layer packed in at either side. The roomy front pocket is generally home to sunglasses, snacks, thin gloves, my iPhone, wallet etc…
Backpack (Acre Hauser 14L)
I try and avoid wearing a backpack. If I do, it will only be to carry my DSLR during singletrack-orientated trips. I’ll do my very best not to cram anything else in my pack, in an effort to keep it as light as possible. The only caverat is if the route I’m planning involves extended hike-a-bikes. At such times, I’ll transfer extra gear onto my back, as I find a light bike and a heavy backpack preferable during these kinds of ordeals.
Top-tube bag and Stem bag (Bedrock Designs and Carsick Designs)
My spork, multitool, headlamp, knife make up the bulk of my top tube bag, plus a snack or two if I can cram it in – I like Bedrock’s Dakota Tank Bag, as it’s wide and roomy, and easy to zip on the move. I use padded stem bags, custom made by Carsick Designs to fit a Canon 70-200ft lens. When not required, I’ll slot a water bottle in there instead – compared to the fork, bottles stowed on the handlebars stays clean during even the muddiest of condtions. Like others, its netted pockets are great for packing out trash.
Anything Cages
If I need extra space, I pack my a tarp on one side of the fork, and an air mattress on the other, freeing up my framebag for more food/water. In the past, I’ve modified fork legs to be able to carry both a water bottle cage and an Anything Cage on either side of the blades.
Logan Watts
Logan often switches around bags and gear — sometimes just to try new things and document findings on this site. Here’s an outline of how he packed during his last big trip in Kyrgyzstan.
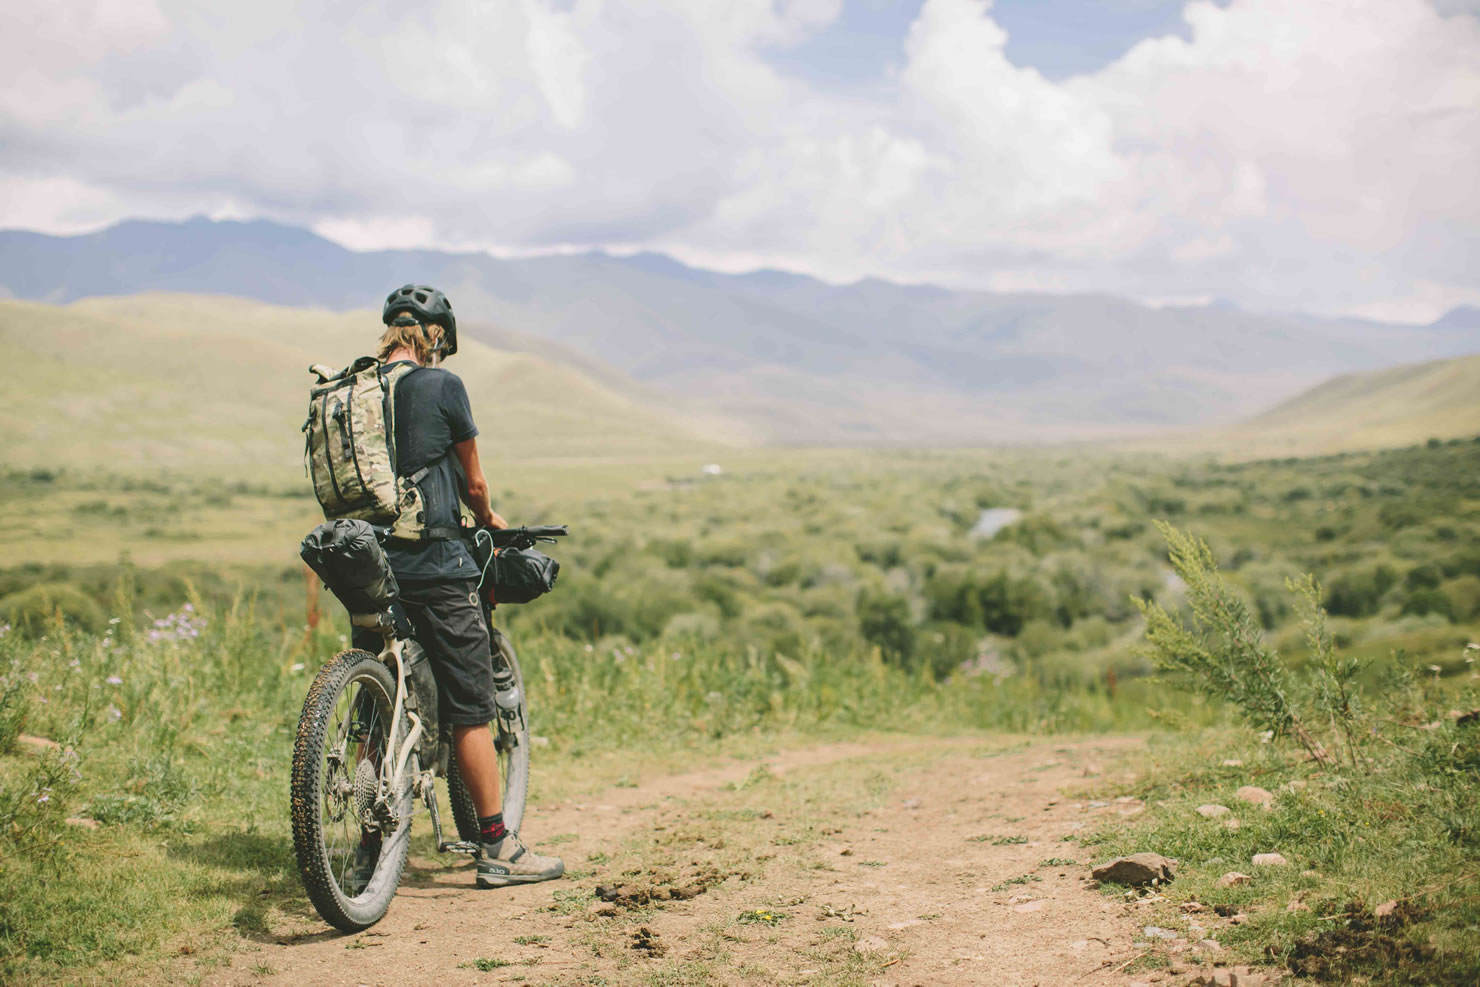
Frame Pack (Porcelain Rocket, custom)
I always put my heaviest items in the frame pack; In Kyrgyzstan I had a cavernous frame pack on the Salsa Woodsmoke. It contained extra tire sealant and my tool kit (DIY roll) positioned at the bottom corner, a cook stove and fuel, a Sea-to-Summit UL Insulated sleeping mat, Gore-tex pants, and then food.
Seat Pack (Porcelain Rocket Mr. Fusion)
I tend to pack my seat pack pretty small. It usually contains all of my off-the bike clothing (wool long-johns, wool long-sleve top, wool socks, 1 tshirt, a pair of boxers and toiletries.
Handlebar Roll (Revelate Sweetroll and Pocket)
I make extra effort to keep the handlebar roll as light as possible, so I always pack my ultralight sleeping gear there to keep it to around 4-5 pounds. In Kyrgyzstan I packed my Sweetroll in an extra long format, which worked out well. One half of it contained my tent (Zpacks Duplex Flex) rolled short and thick, and the other half contained my Katabatic 20° quilt and Vargo 1L titanium pot with a few light odds and ends inside. The Pocket contained my phone, a small sketchbook and pencils, a few snacks, a hat and gloves. I also used Voile straps to fix tent poles to the Sweetroll.
Accessories (Revelate Gas Tank and Mountain Feedbag)
The gas tank usually contains a headlamp, some snacks, and my Sawyer mini water filter. In the Mountain Feedbag there is usually a Ti mug and a spare lens wrapped in a rag. I prefer to carry water on the fork legs and under the downtube; this keeps weight low. I also like to use electrical tape to fix a spare tube or two to the frame.
Backpack (Acre Hauser 14L)
No matter how hard I try to not carry a backpack, my bulky camera gear won’t usually let me leave it at home. The Acre Hauser is a good choice because it’s waterproof and comfortable. I carry a rain jacket at the bottom of the main compartment and a Crumpler camera insert that contains my DSLR and other odds and ends. Depending on the length to resupply, there is usually some lightweight food items in there as well.
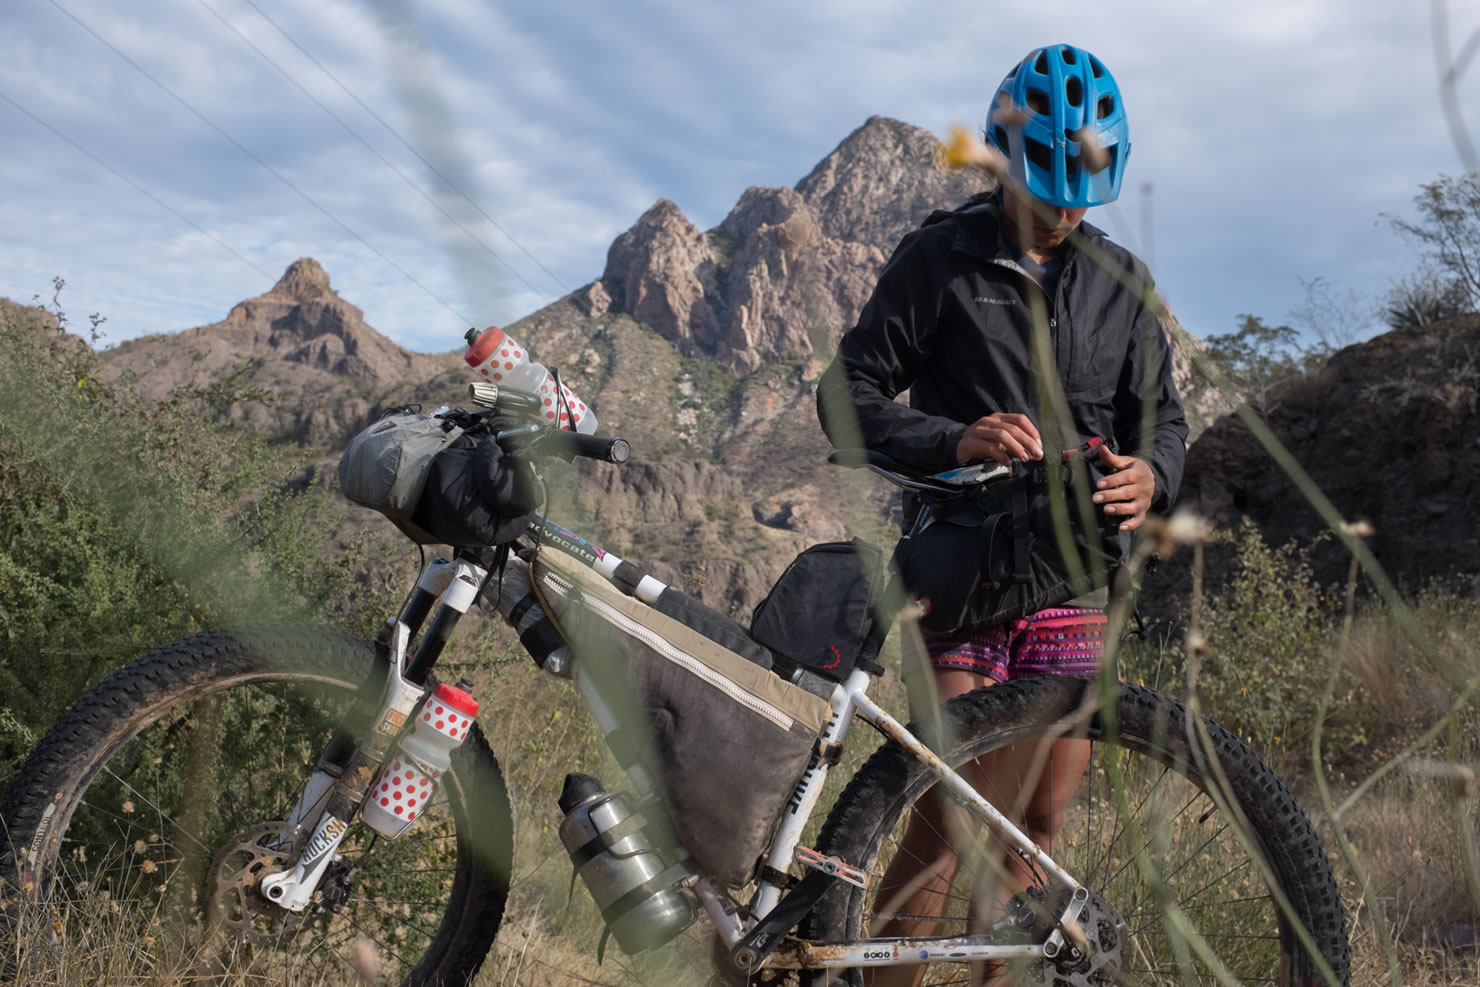
Lael Wilcox
Lael has been traveling by bike for the last nine years, and has recently taken to ultra-distance bike racing with success in the Tour Divide and Trans Am Bike Race. Here’s her gear list for the inaugural Baja Divide, a route she co-created.
Framebag (custom Revelate Ranger)
I pack a SnowPeak 450ml titanium cup in the bottom of my framebag, usually with small snacks stuffed in the cup to use the space. I carry other food and tent poles in the main compartment and pack an extra two liter water bladder when necessary. My jumprope usually lives in the framebag. My framebag is a prototype version of the new Ranger framebags, which features a large plastic toothed zipper and stretch panels on either side to limit wear on the zipper and to ensure smooth operation. This zipper has lasted two years, which is many times longer than other framebag zippers I’ve used. The action on this zipper is super smooth.
The small compartment on the non-drive side of the framebag is my junk drawer and it’s where I put all the small things I don’t want to deal with most of the time– sealant, lube, chapstick, toothbrush, knife, sunscreen, spoon, spare derailleur hanger, and more. A spare tube is bagged and taped to the frame, usually under the downtube.
Handlebar roll (Revelate Sweetroll and Pocket)
I try to keep my handlebar roll fairly lightweight. I pack it in the morning and don’t get into during the day. I carry a Western Mountaineering Highlite sleeping bag and Klymit O-Zone sleeping pad in the Sweetroll because it’s a waterproof bag. I use a size small Revelate Pocket up front, and always carry a book. Right now I’m packing Dune. When water is limited in Baja, I’ll strap a two liter water bladder in between the Pocket and the Sweetroll.
Seatpack (Revelate Viscacha)
I pack my clothes and the body of the tent in the seatpack. I try to keep the seatpack pretty tight to the saddle to avoid sway, but I’ll occasionally pack bulky food items like chips and bread in the end of the seatpack. If the tent is wet or I don’t have room for it internally, I strap it to the top of the seatpack.
Top tube bags
Custom Revelate Mag Tank: This gas tank has a magnetic closure instead of a zipper. I used it first in the Trans Am, but have also enjoyed it for touring. It is really convenient, durable and great place for snacks.
Custom Revelate oversized Jerry Can
Cell phone, wallet, and sunglasses. When I was sick during the Tour Divide I filled this bag with medicine and called it the Medicine Cabinet. It has a large zipper like my frame bag and has been very durable.
A note on water (not exactly what this post is about, but considering these notes are regarding packing for the Baja Divide): I mount a Salsa Stainless Cage on each side of the fork, which can easily be attached with steel hose clamps. A Specialized Rib Cage attached to a King Cage Top Cap mount provides easy access to water while riding. An awesome way to add a lot of water capacity is to mount a Salsa Anything Cage to the underside of the downtube, which can hold a 64oz Kleen Kanteen. Revelate Designs Washboard straps secure the Klean Kanteen because they are easy to get on and off and hold the bottle tight to the cage. Specialized Purist bottles are preferred for standard cages as they limit the funk common in standard bike bottles, and leave water tasting like water. I avoid carrying a hydration pack because I think it’s uncomfortable to ride with a backpack– it’s sweaty and makes me sit heavy. However, this is another easy option to add water capacity if a rider doesn’t have enough room on the bike.
Bag Makers
There are hundreds of companies and individuals making bikepacking packs. Here is a short list of bag makers from around the world. Each is represented in a grid showing what they make and where it’s made. Expect a full list in the future, but for now here are some companies whose products we’ve seen or experienced first hand. Note that the link icons are linked to reviews and coverage on this site.
| Company (location) | Made in |
CSTM Bags | Seat Pack | Hbar Pack | Frame Pack | Cockpit Bags |
|---|---|---|---|---|---|---|
| AcePac (CZ) | CZ | – | X | X | X | X |
| Alpamayo Designs (UK) | PE | X | X | X | X | X |
| AlpKit (UK) | UK | – | X | X | X | link |
| Andrew the Maker (ATM) (USA, KS) | USA | X | X | X | X | link |
| Apidura (UK) | CN | – | link | X | X | link |
| Arkel (CAN) | CA | – | link | X | X | X |
| Becker Gear (USA, AK) | USA | X | X | X | X | link |
| Bedrock Bags (USA, CO) | USA | X | link | link | X | link |
| Bike Bag Dude (AU) | AU | X | X | X | X | X |
| Bike Pack Bags (PL) | PL | X | X | X | X | X |
| Blackburn Designs (USA, CA) | CN | – | X | X | X | link |
| Carsick Designs (USA, CA) | USA | X | X | X | X | link |
| Cleaveland Mountaineering (USA, CO) | USA | X | X | X | X | X |
| Conquer Bikepacking Bags (Thailand) | THA | X | X | X | X | X |
| Defiant Pack (USA, CO) | USA | X | X | X | X | X |
| J.Paks (USA, CO) | USA | X | X | X | X | link |
| Miss Grape (ITA) | IT | X | X | X | X | X |
| Nuclear Sunrise Stitchworks (USA, TX) | USA | X | X | X | X | link |
| Ortlieb (GER) | DE | – | link | link | X | X |
| Oveja Negra (USA, CO) | USA | X | X | X | link | link |
| Porcelain Rocket (CAN) | CA | – | link | – | link | – |
| Randi Jo Fabrications (USA, OR) | USA | – | – | – | – | link |
| Restrap (UK) | UK | – | X | X | X | |
| Revelate Designs (USA, AK) | USA | – | link | link | X | link |
| Rockgeist (USA, NC) | USA | X | X | X | X | link |
| Rogue Panda Designs (USA, AZ) | USA | X | X | X | X | link |
| Salsa Cycles (USA, MN) | TW | – | link | link | link | link |
| Specialized (USA, CA) | CN | – | link | link | link | link |
| Spok Werks (SUI) | SUI | X | X | X | X | X |
| Stealth Bike Bags (NZ) | NZ | X | X | X | X | X |
| Topeak (USA) | TW | – | X | X | X | X |
| Swift Industries (USA, WA) | USA | – | link | X | – | – |
| Wanderlust (USA, VA) | USA | X | X | X | X | link |
| Wildcat Gear (UK) | UK | X | X | X | X | X |
Do you enjoy our in-depth reviews, route guides, and stories? We’re a small, independent publication dedicated to keeping our content free for everyone, but we need your support. To keep articles like this one coming (and not behind a firewall), please consider becoming a member of our Bikepacking Collective. By joining, you’ll receive The Bikepacking Journal in the mail twice a year, industry discounts, and many other great benefits. Learn more here.
FILED IN (CATEGORIES & TAGS)
Plan
Bikepacking Guides
apidura-bikepacking-bags bedrock-bags bikepacking-seat-packs frame-packs handlebar-bags oveja-negra porcelain-rocket revelate-bagsPlease keep the conversation civil, constructive, and inclusive, or your comment will be removed.