Bikepacking Basics

an Introduction

You’ve surely heard of backpacking. But how about bikepacking? Simply put, bikepacking is the synthesis of mountain or gravel biking and minimalist camping; it evokes the freedom of multi-day backcountry hiking, with the range and thrill of riding your all terrain bike. It’s about forging places less travelled, both near and afar, via singletrack trails, gravel, and abandoned dirt roads... carrying only the essentials.

A common misconception is that bikepacking requires a lot of new gear and countless hours of planning; the perfect bike, custom bags, and all the latest ultralight camping gear. While investing in quality gear and a reliable bike is never a bad idea, it’s certainly not necessity to get you up and running. Start by using what you own and picking a short overnight route (20-40 miles). Here are the basics:

Share Facebook 0 Twitter 0 Pinterest Google+

The Bike

Bikepacking Bags and Packs

The best bike to use is the one you already have. If you already ride a mountain bike that works for you on the trail, chances are it will make a very capable bikepacking steed, with few modifications. After all, bikepacking doesn’t rely on a frame having eyelets for racks and panniers, as with other styles of bike touring. Want to dig deeper? Here are some related links:

bikepacking basics

Comfort and Gearing

Bikepacking lends itself to long hours in the saddle, so having a comfortable bike and saddle is key. Make sure you have a proper fit and if you have a new bike, try it out a few times before setting out on a trip. In addition, having the right gearing is key...

bikepacking basics

Types of Bikes

Generally speaking, you can take almost any bike bikepacking. However, the nature of bikepacking usually involves gravel, dirt roads, and/or singletrack trails. Make sure you use a bike that can handle the terrain you set out to explore.

bikepacking basics

Repair Kit and Safety

There are a few things you should make sure to have on hand (and have the necessary know how) before setting out into the backcountry. Here are a few links to get you on the right path:

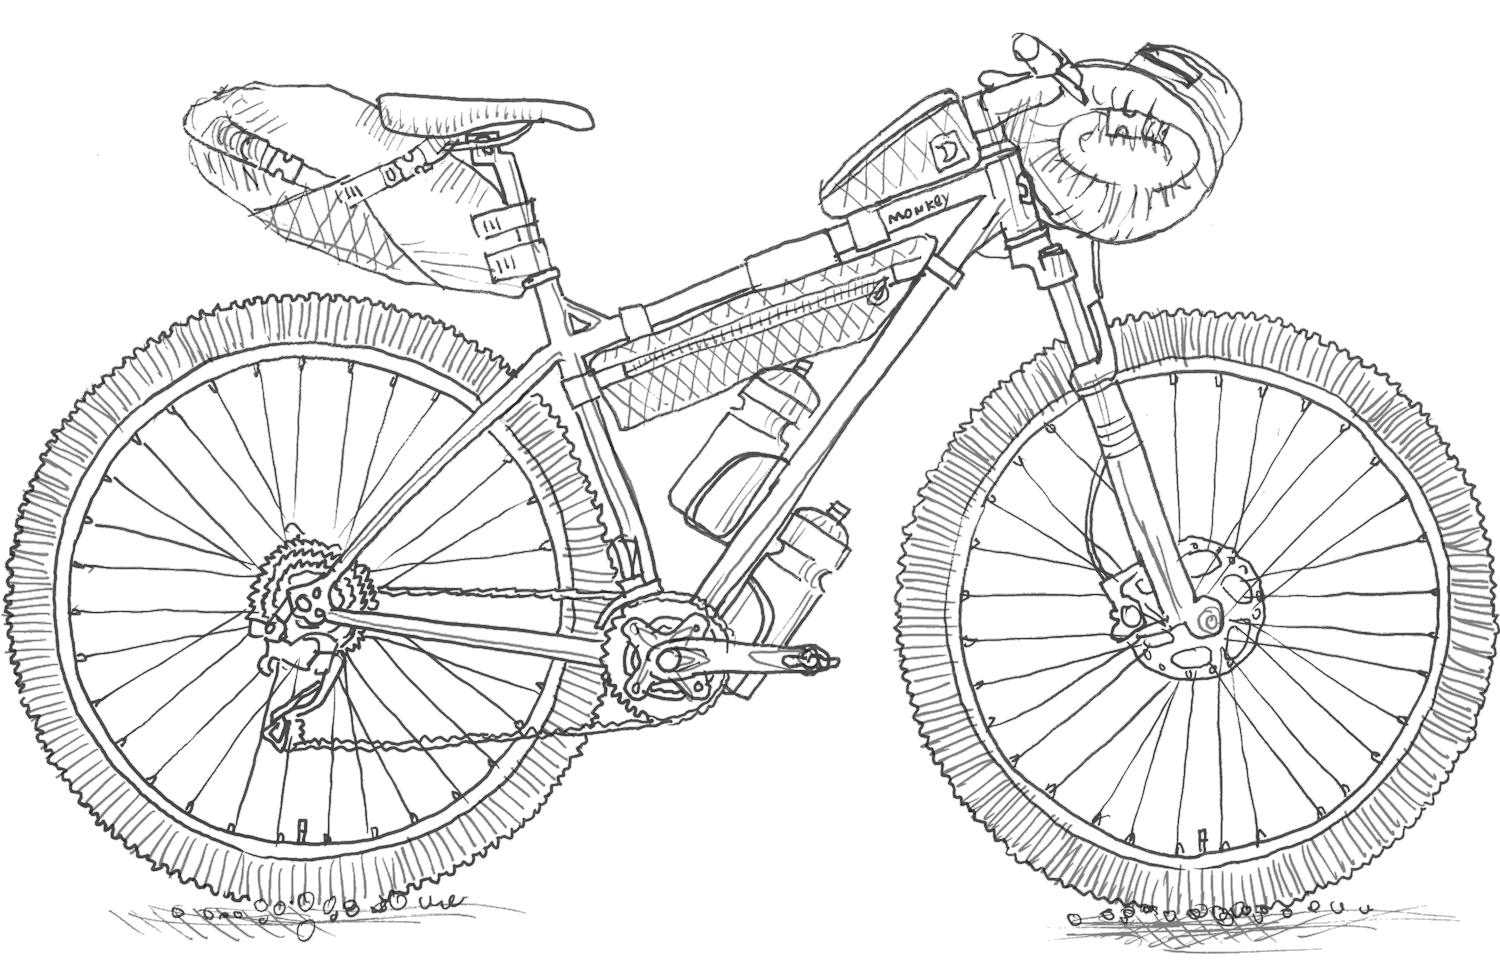
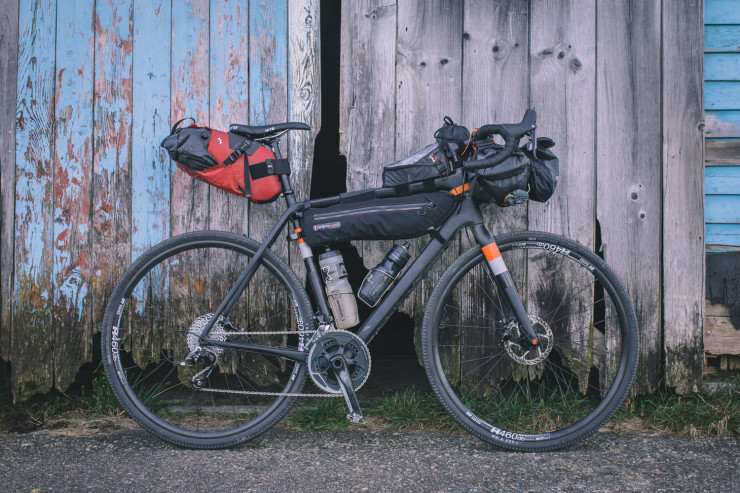
Bikepacking Bags & Packs

Bikepacking Bags and Packs, Surly Straggler

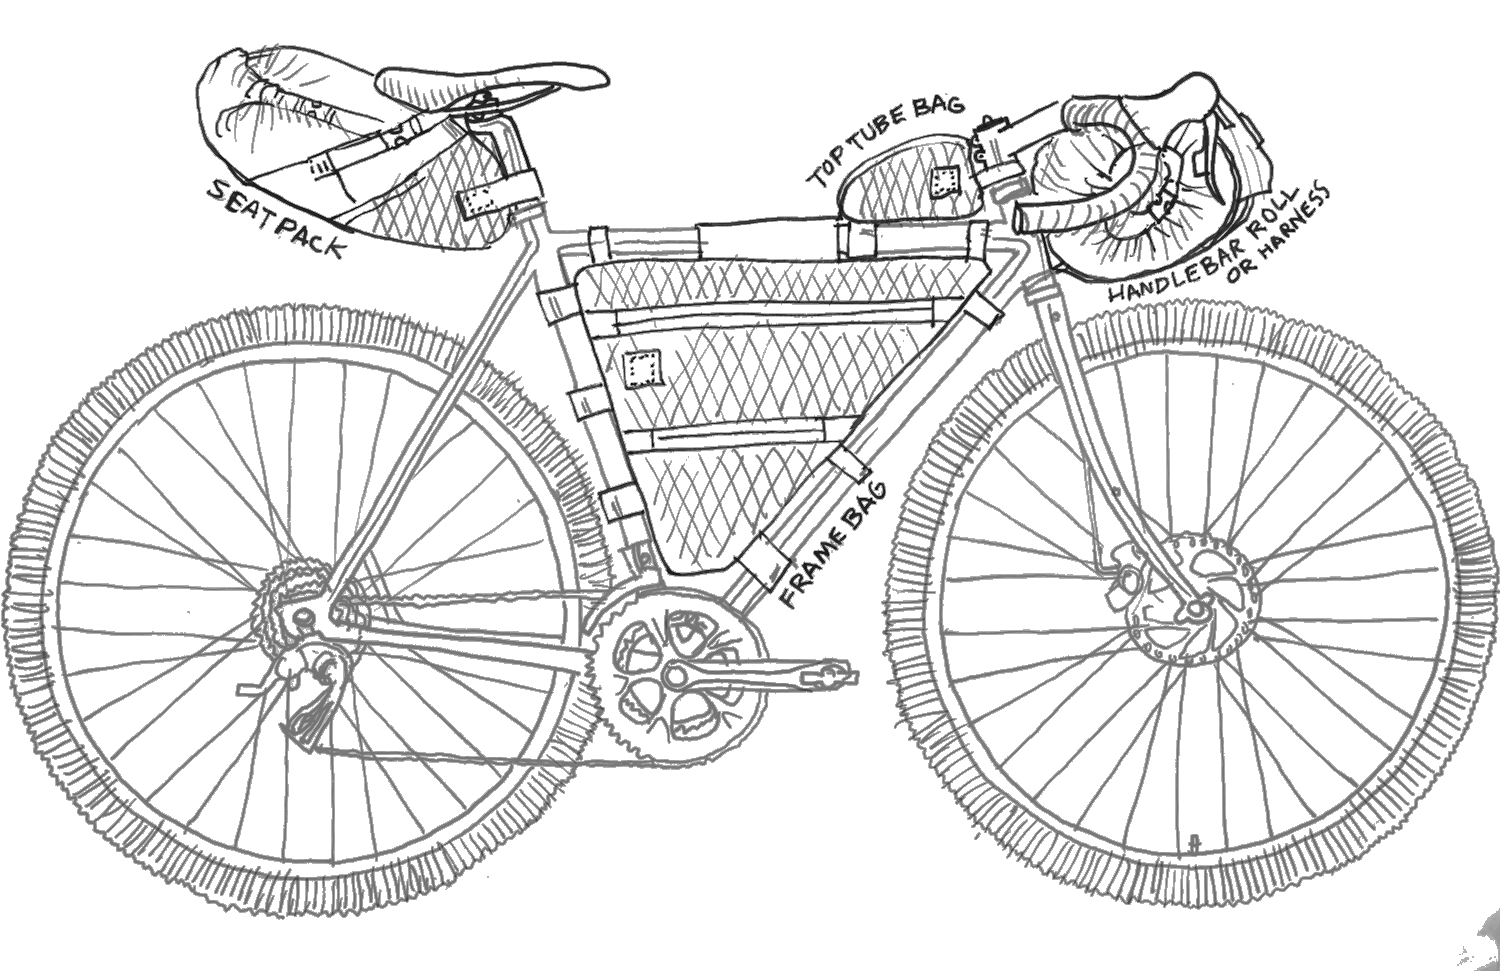
The most significant gear innovation that has helped popularise bikepacking is the commercial availability of bike-specific soft bags. Replacing traditional racks and panniers, these consist of a framebag, a handlebar bag or harness, a seat pack and peripheral bags. Light, rattle free and tailored to modern mountain bikes, they’ll optimize your bike’s carrying capacity without adding significantly to its weight, or affecting the way it handles. Consider investing in a seat pack and roll bag first, then a framebag when you’ve settled on a bike you’re happy with.

If you don’t want to buy bags, you can use a few simple pieces of gear you probably own to do a quick overnighter. For starters, a comfortable daypack, teamed with dry bags lashed to your handlebars and seatpost, makes a good barebones approach. Traditional panniers will probably work if you’re pedaling forest service roads and plan to be out for several days. But if you’re exploring technical singletrack on a one or two night trip, it might be best to leave the panniers at home. Remember, bikepacking is about having fun on the trail, and not being overloaded with gear.
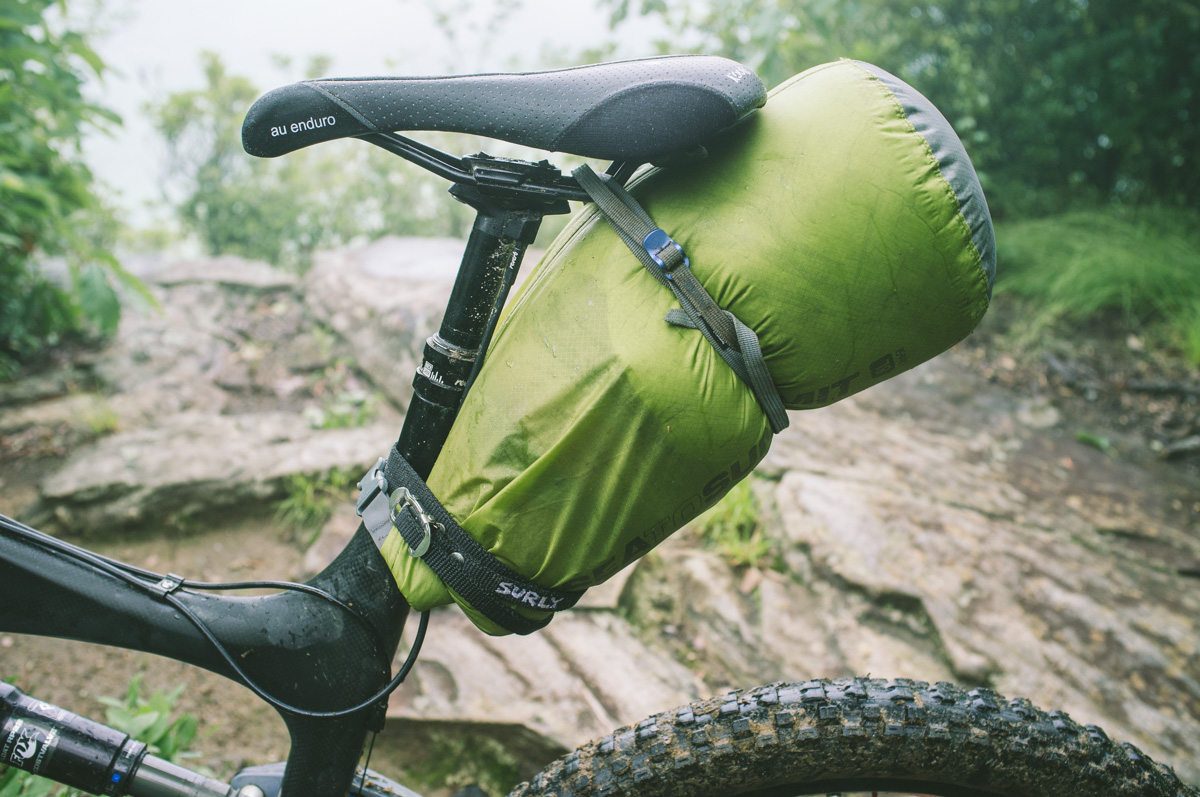
seat Pack

Seat Pack Dry Bag

For a seat pack, use a 5-7 liter dry bag clipped around the seatpost and cinched to the saddle rails with a webbing strap. Store a change of clothes and a few other odds and ends in it. To help stabilize the load add something stiff within the bag, such as tightly rolled clothes.
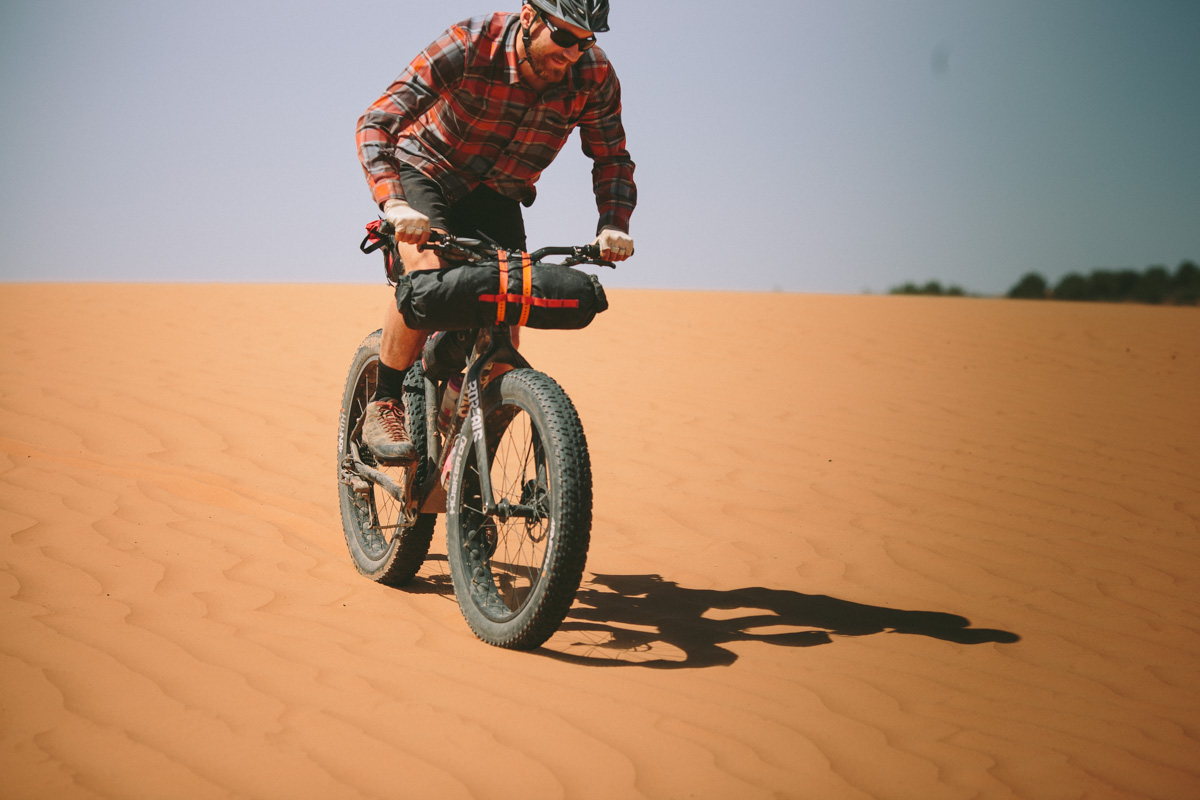
Handlebar pack

On The Handlebars

On the handlebars, use a larger 14-20 liter dry bag cinched to the handlebars with two webbing or Voile straps. Include a small tent (the poles will help keep a straight shape to the bag) and a lightweight down sleeping bag. Long and slender bags work better than short fat ones. Sea-to-Summit Big River bags work well.
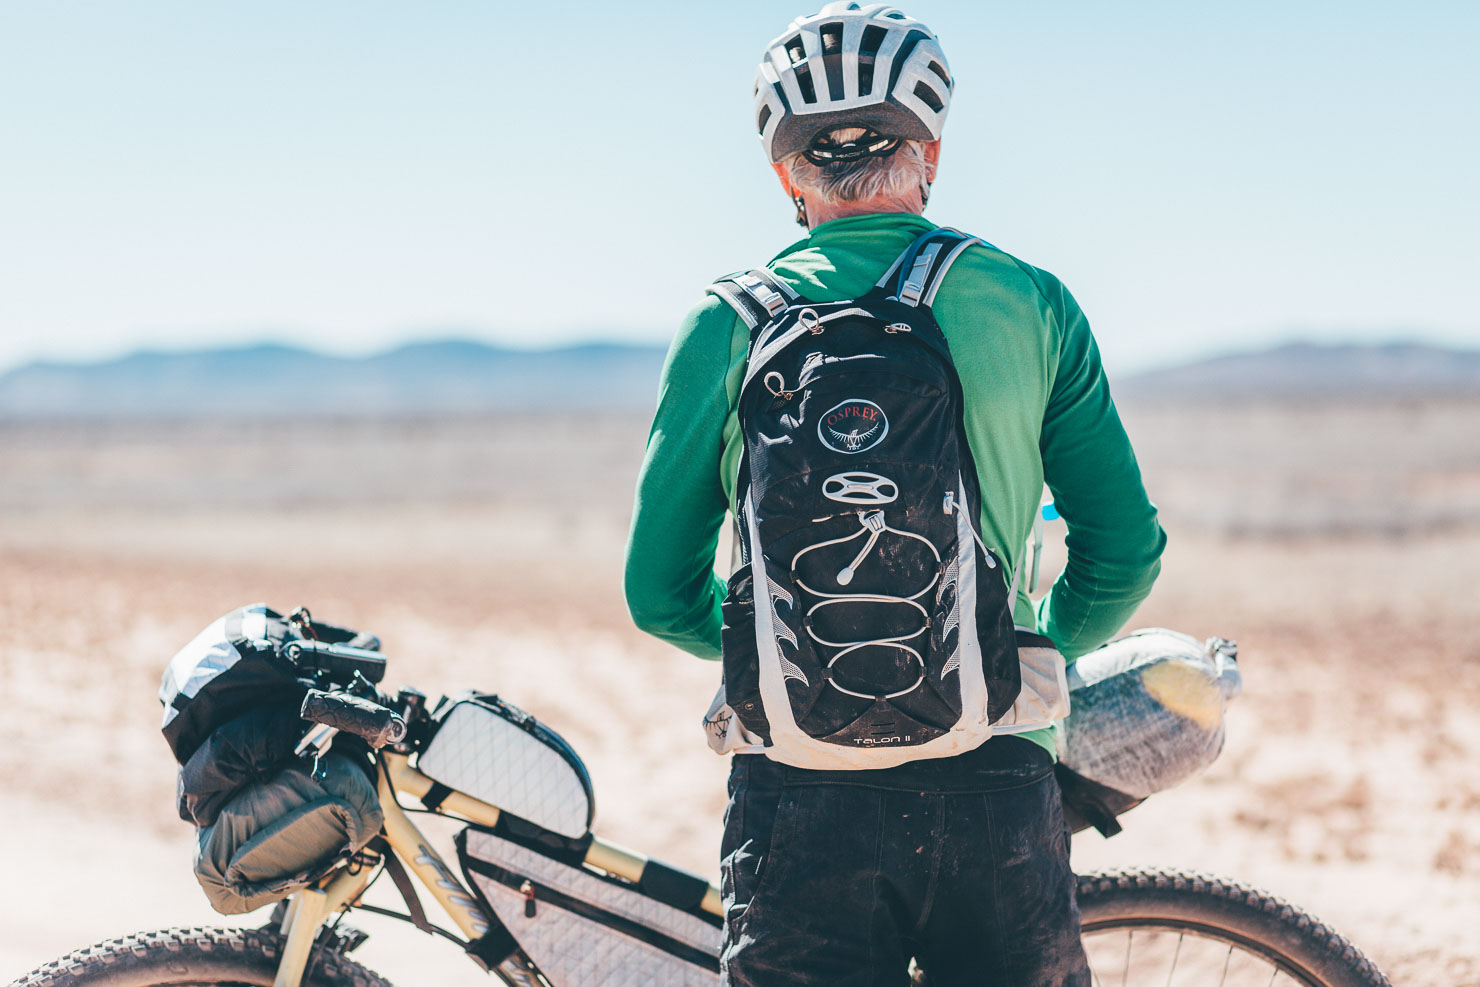
Backpack

Backpack

On your back any larger 14+ Liter hydration pack will do. Or, just use a day pack you have lying around. This can carry extras such as sleeping gear, rain gear, or food and cooking supplies.

If you’re interested in investing in purpose built bikepacking bags here are a few pointers and how you can learn more. In addition, make sure to check out our Complete Guide to Bikepacking Bags.
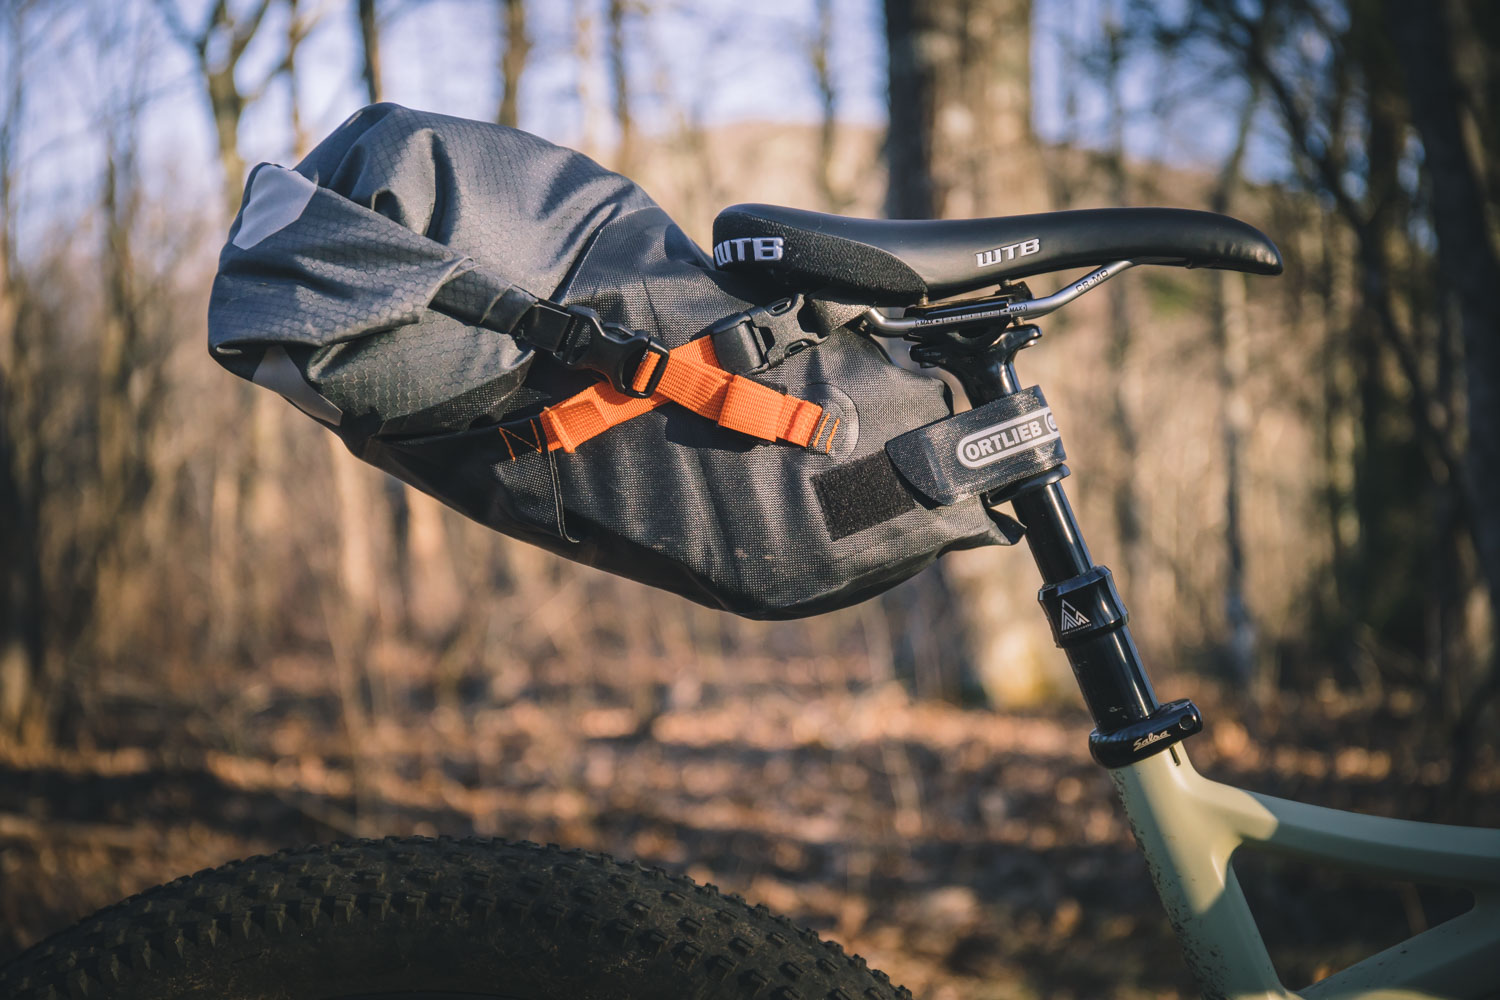
bikepacking basics

Seat Packs

Grab a basic seat pack. They essentially strap onto your seat rails and around your seatpost. There are several readily available for under $100. One easy and available option worth noting is the Revelate designs Viscacha Seat Pack.
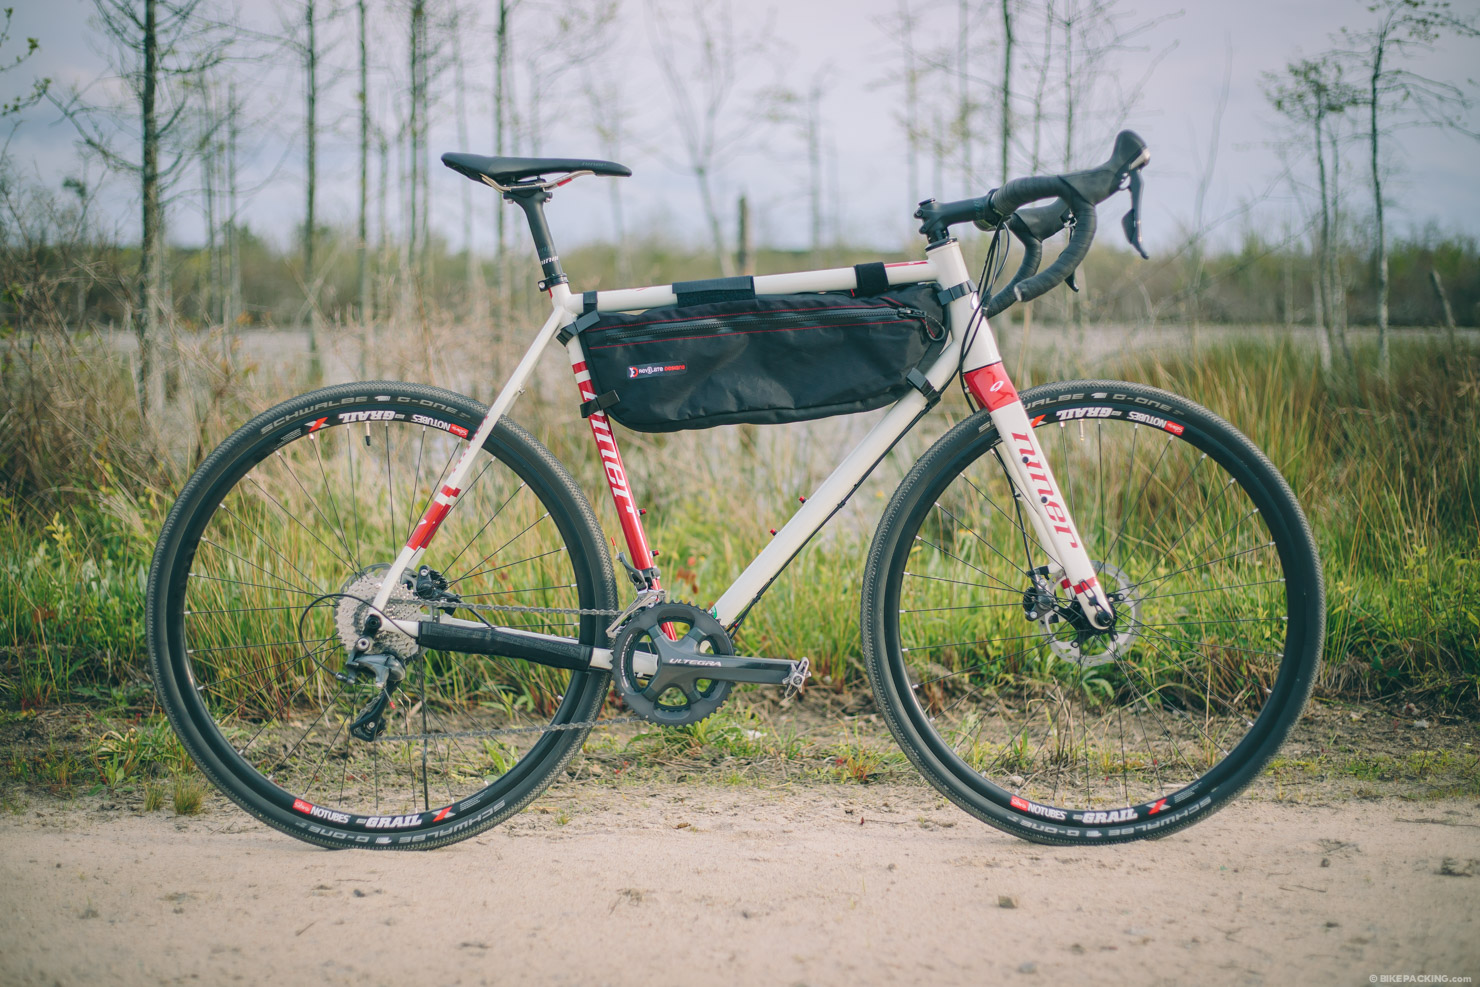
bikepacking basics

On the Frame

There are also frame packs designed to work within the bike’s frame triangle… variations for both full-suspension and hardtail. The most obvious and universal type is a half frame pack. These are especially usable on a hardtail or rigid bike.
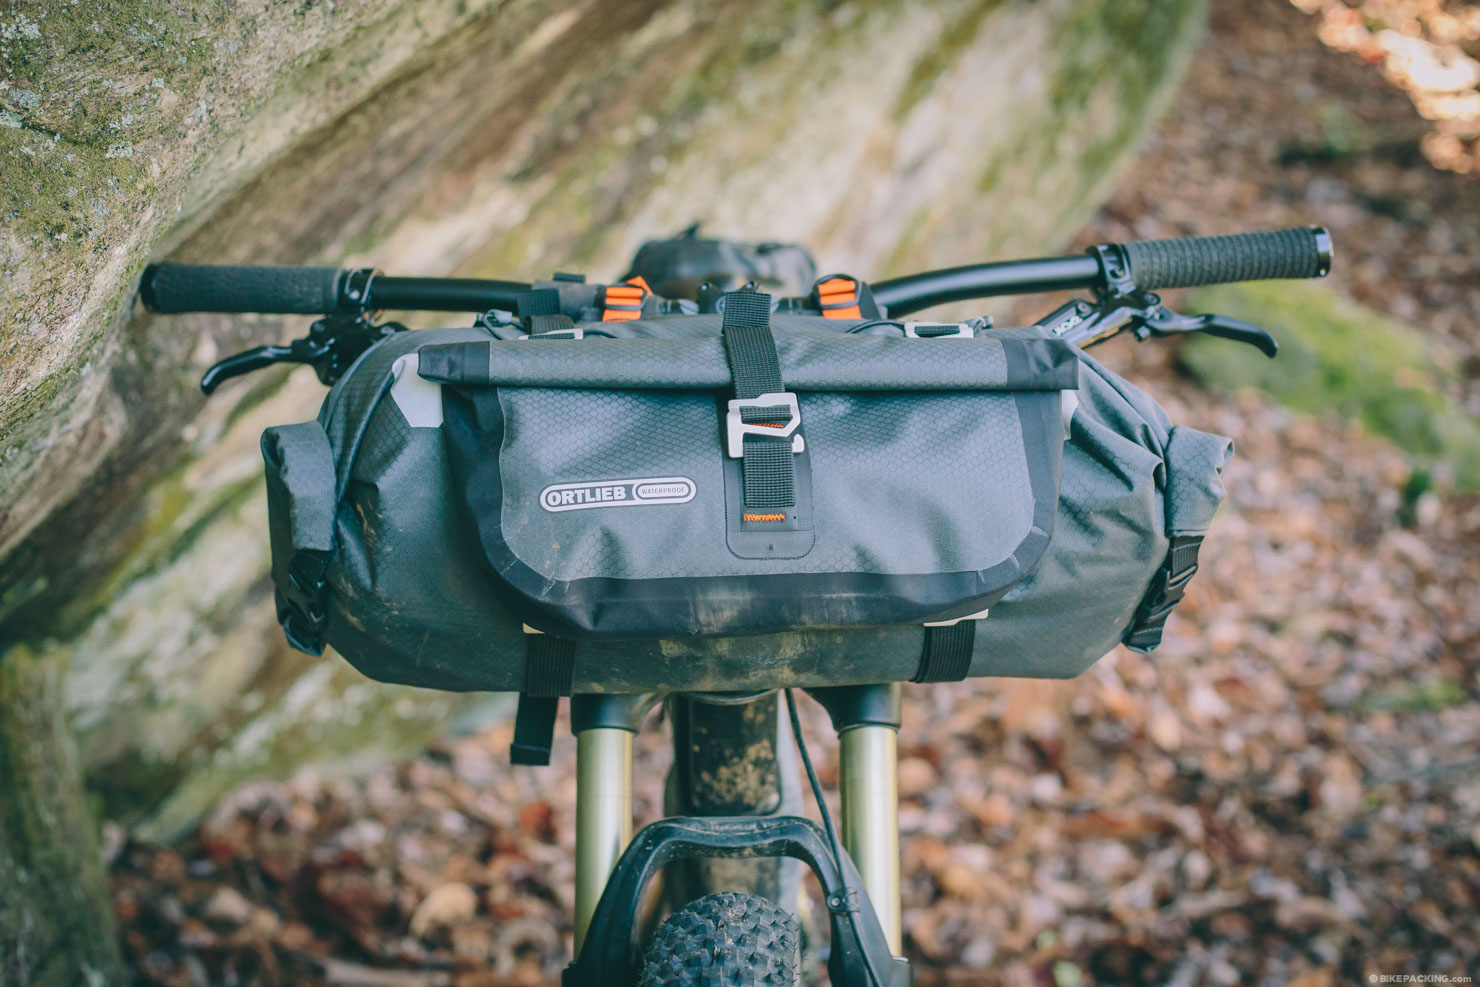
bikepacking basics

Cockpit

As mentioned, it’s pretty easy to strap a dry bag to the handlebars, but you can also get a purpose built bag or harness. There are also various accessory bags that can add peripheral packing space to your kit.

If you need advice for camping and cooking equipment, apparel, and other such gear, start at our Bikepacking Hacks and then our list with our list of long distance tested stuff, Bikepacking Gear that Lasts.

Where to go

As important as it is to have a reliable bike and packing as light as you can, choosing the right route is perhaps the key to your enjoyment - whether this involves forging your own path or following an existing one.

Be it short or long, bikepacking routes fall into one of two categories: 1. The Loop, which starts and ends at the same place; 2. The Through Route, which is linear in nature, and requires an additional logistical component if returning to the start. For your first trip, we recommend a short 20-40 mile overnight loop. Pick a trail you’re familiar with where you’ve seen access to a good camp spot. Bring a few essentials, a dehydrated meal, a breakfast bar, and a post-ride beverage of your choice. Have a fire, sleep under the stars, then wake up and ride some more!

We have a wealth of bikepacking routes on our site. And if you are interested in planning your own route, here is our full guide. In addition, we have a guide on using your smartphone as navigation system as well as a guide to downloading and using our routes. As mentioned, start with a simple overnighter on trails you know. Then, you can aspire to bigger weekend bikepacking routes such as these:

Bikepacking ROute

The White Rim

A classic desert dirt road bikepacking route within the spectacular Canyonlands National Park. While popular amongst supported cycle tour groups, jeeps, and motos, this beautiful loop is not to be missed.

Bikepacking ROute

Grand Staircase Loop

Wending its way through the Grand Staircase-Escalante National Monument and the Glen Canyon National Recreation Area, the Grand Staircase Loop is a three or four day bikepacking route following quiet and remote dirt roads over spectacular plateaus and canyons. With abundant scenery and wide open camping, the route was designed to bring awareness of to this beautiful and threatened area.

Bikepacking ROute

Attack of The Buns

Attack of the Buns is a 3-day bikepacking route exploring Australia’s Southern Tablelands and Highlands by linking up three significant sections of car-free, wild, forest trails with quiet gravel backroads and short paved sections through four towns. It’s a perfect route for a long weekend that will spoil nature lovers with a buffet of lush landscapes, wildlife, majestic cliffs, and rock formations.

More Information

We have a wealth of information on this site, and it's growing rapidly. Aside from the links above, here are a few more to get you pointed in the right direction.