


‘Hop-can’ Stoves: How to make 5 ultralight bikepacking stoves
Five ultra-lightweight and very functional DIY stoves for bikepacking and bike touring. Made from handsome cans that housed some hoppy brew. Built and tested.
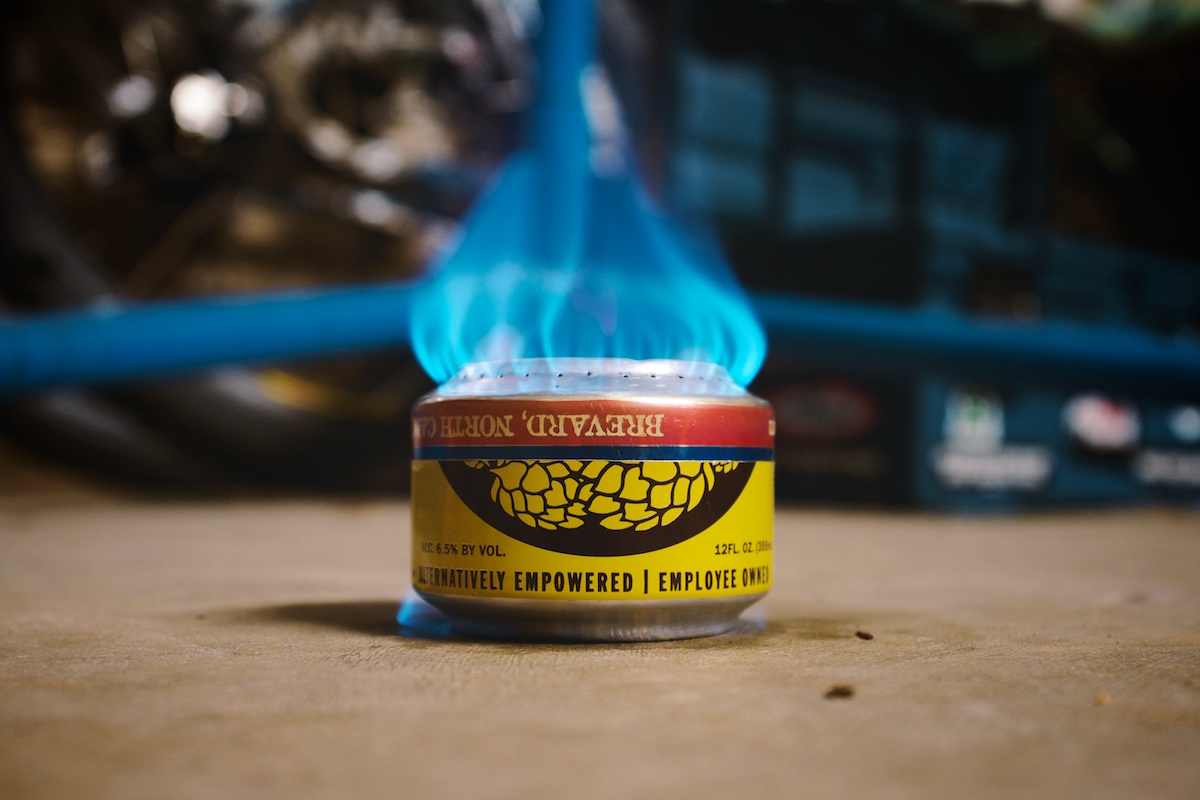
The first time I’d seen a DIY camping stove in use was in Costa Rica when my riding partner Lee broke out his self-made ‘penny stove’ fashioned from a Modelo can. I kind of dismissed the idea until I realized that alcohol was a viable and easy to obtain fuel source for trips abroad. And the weight and space savings are very attractive to an ultralight bikepacker. So after poking around the webbernet for ideal designs, I settled on five that I wanted to try. And is there a better or more aesthetically pleasing medium than a hoppy craft-beer can? Make it a can from a post-ride beer and it’s even more special.
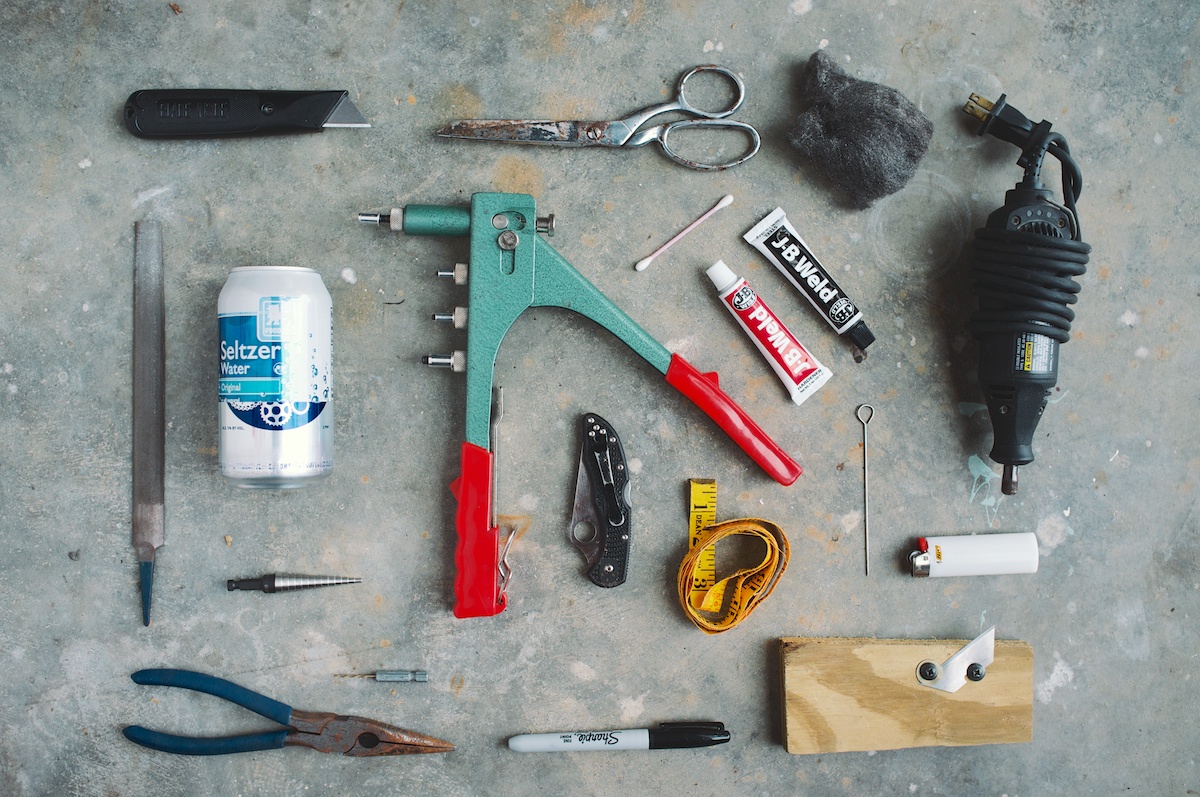
Tools Needed
So here they are. I built each one and tested them for fuel consumption, weight and time-to-boil. They are ordered by ‘difficulty to make’ — easiest to most difficult. For each stove, you’ll find a rough ‘how-to’ as well as links to more detailed info. Click on the how-to image collages to open a larger version if need be. Then at the bottom of the post, you’ll see the testing results.
Do you have another good design? If so, send me a comment… I actually enjoy making these things, so I’d love to try another.
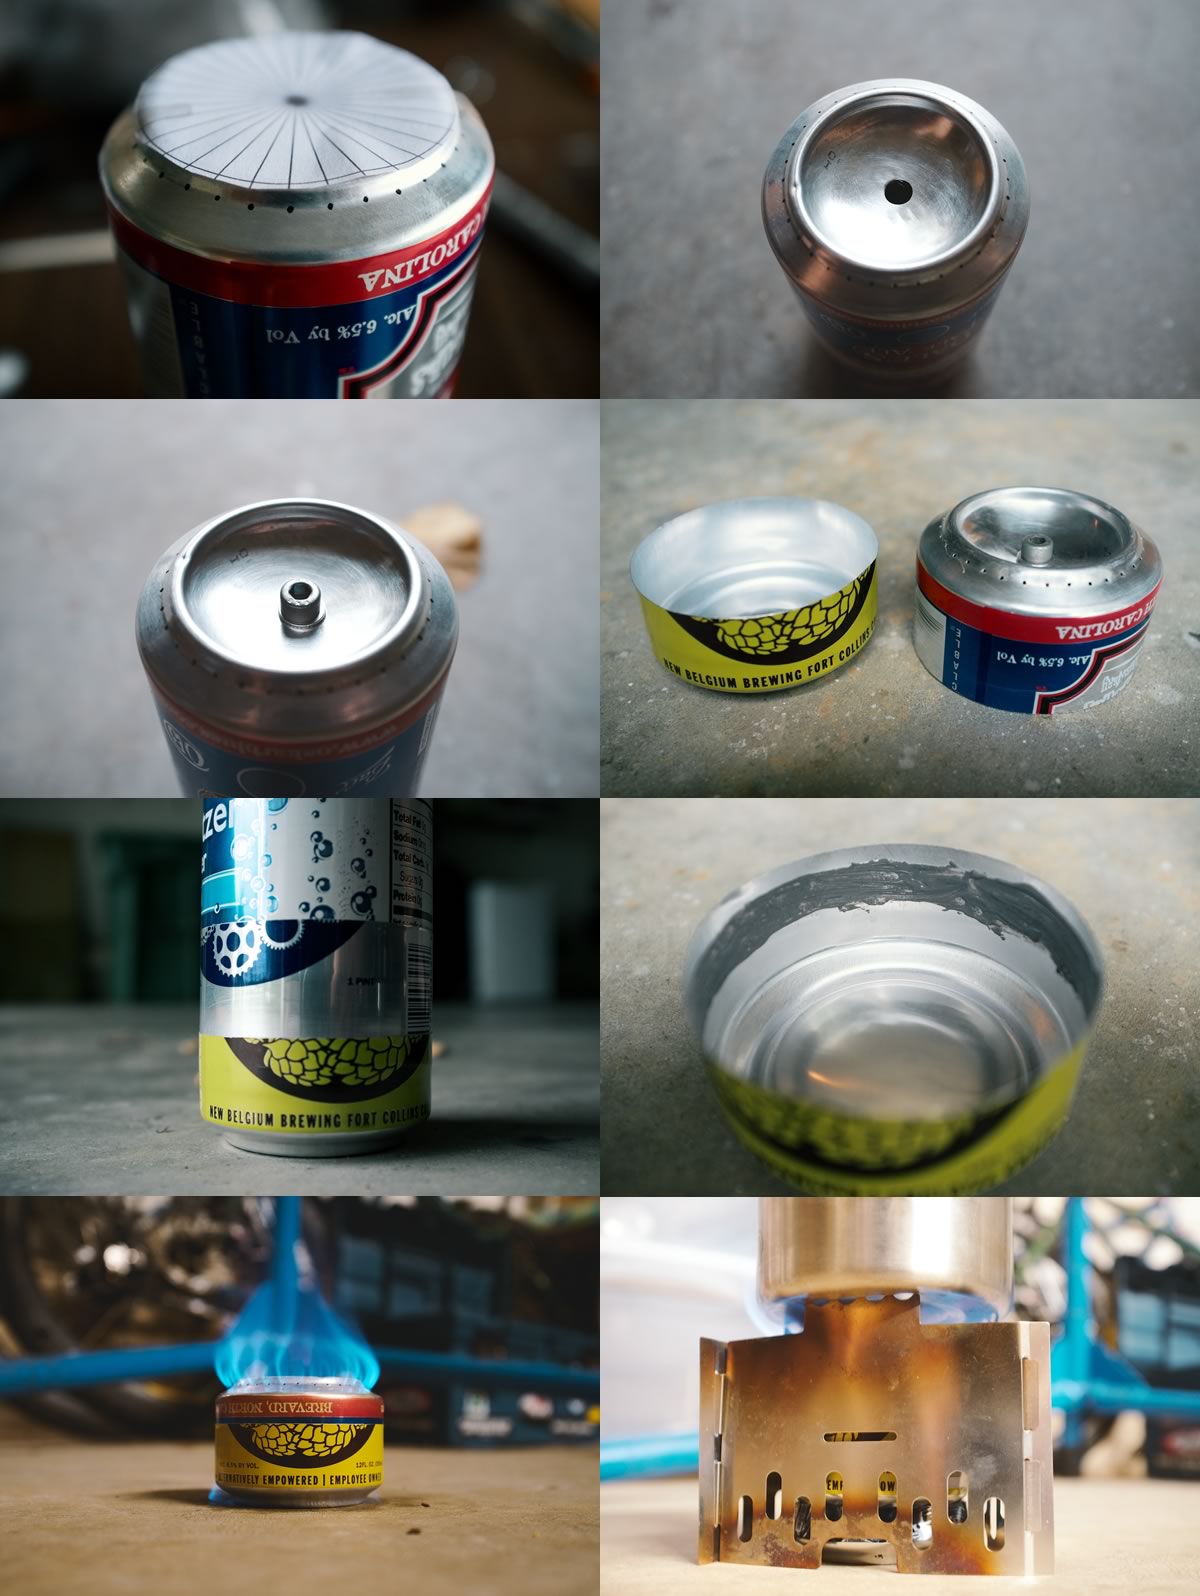
#1. The YAC Stove (Yet Another Can Stove)
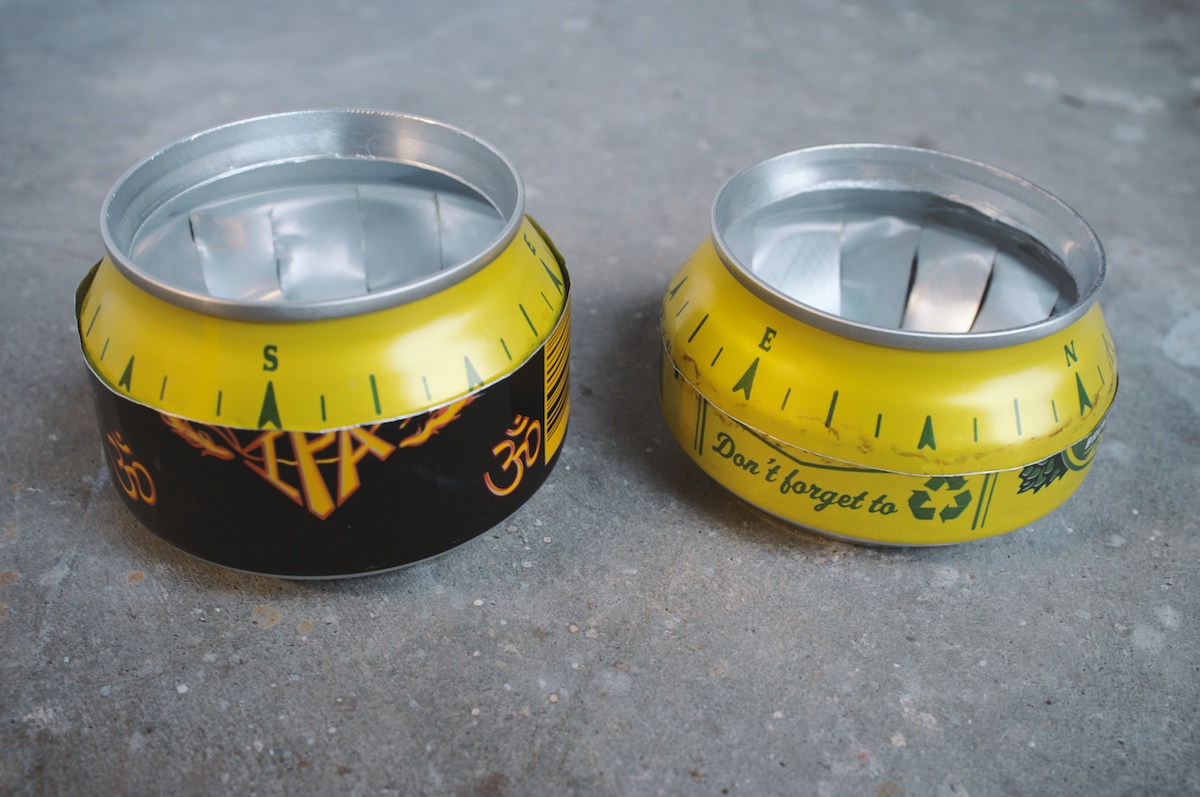
I ran across this design and it seemed so simple that I wasn’t sure if it would actually work. But as it turned out, this is actually one of my favorites. It’s easy, solid and burns at a very nice temperature. I made two variations of these. the second taller than the first and you’ll notice in the results that the height affects the time-to-boil and fuel consumption.
Pros: Easy to make; sturdy
Cons: Can sputter a little if the ‘fins’ don’t overlap correctly
How to make the YAC
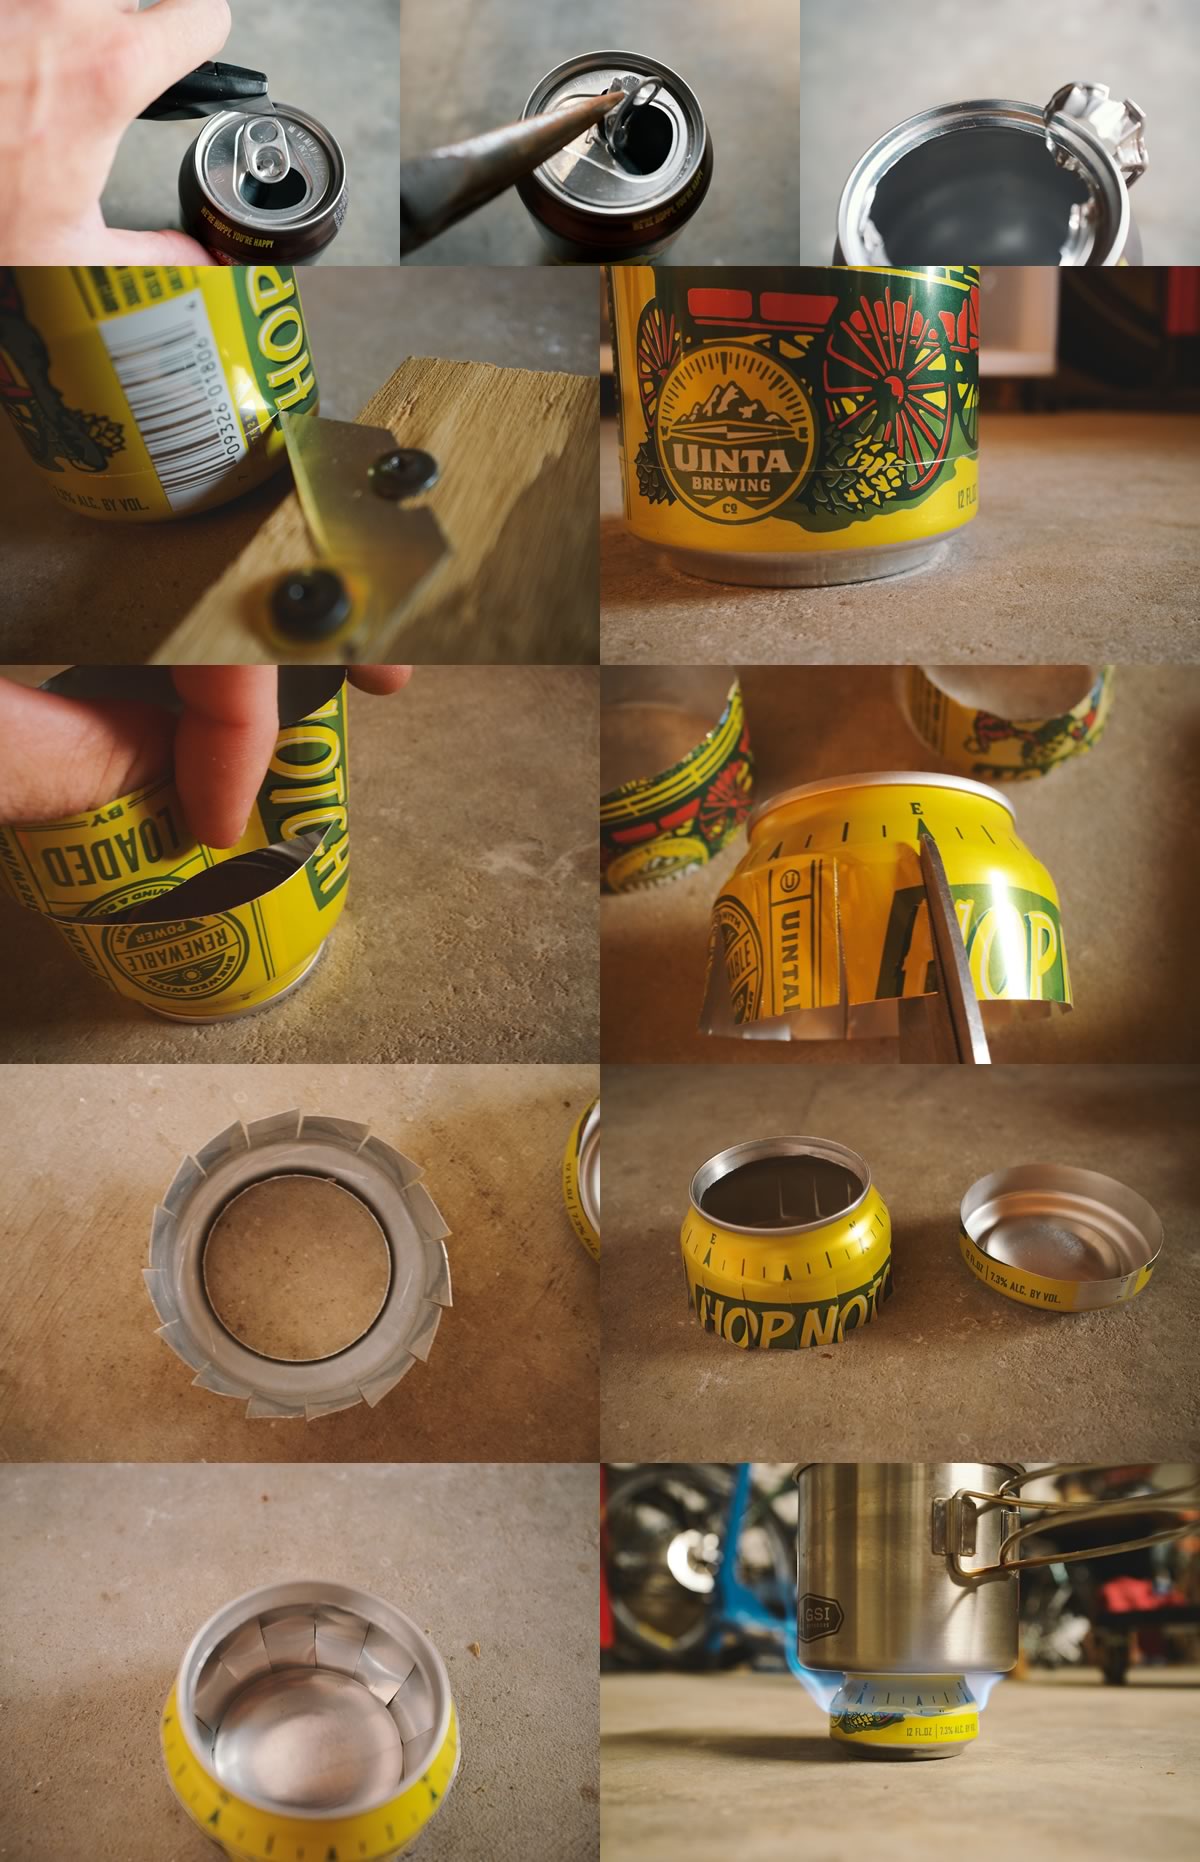
Directions – From top left
- 1. Score the top of the can at the crease (several times around)
- Start removing top with needle nose pliers
- the edge will peel out where scored properly
- Use a jig made with a razor blade screwed to plywood to score can (jig height can be adjusted with scrap wood or books)
- Score can top to 3/4″ and bottom to 1 1/2″; or top to 1 3/4″ and bottom at 1 3/16 for slightly different performance and more fuel capacity
- Jiggle it loose and break the score for a clean cut
- Make 15 evenly spaced slits in top part about 1/8″ from can curve edge
- One about every 1/2″
- The two halves are ready
- Slide top into bottom allowing the slats to overlap in the same direction
- Add alcohol, light and flame will begin to emit from the sides; then set pot directly on top
NOTE: if sputtering occurs add a single tiny pinhole about 1/8″ from can top
#2. ‘Tom’s Beer Can Stove’
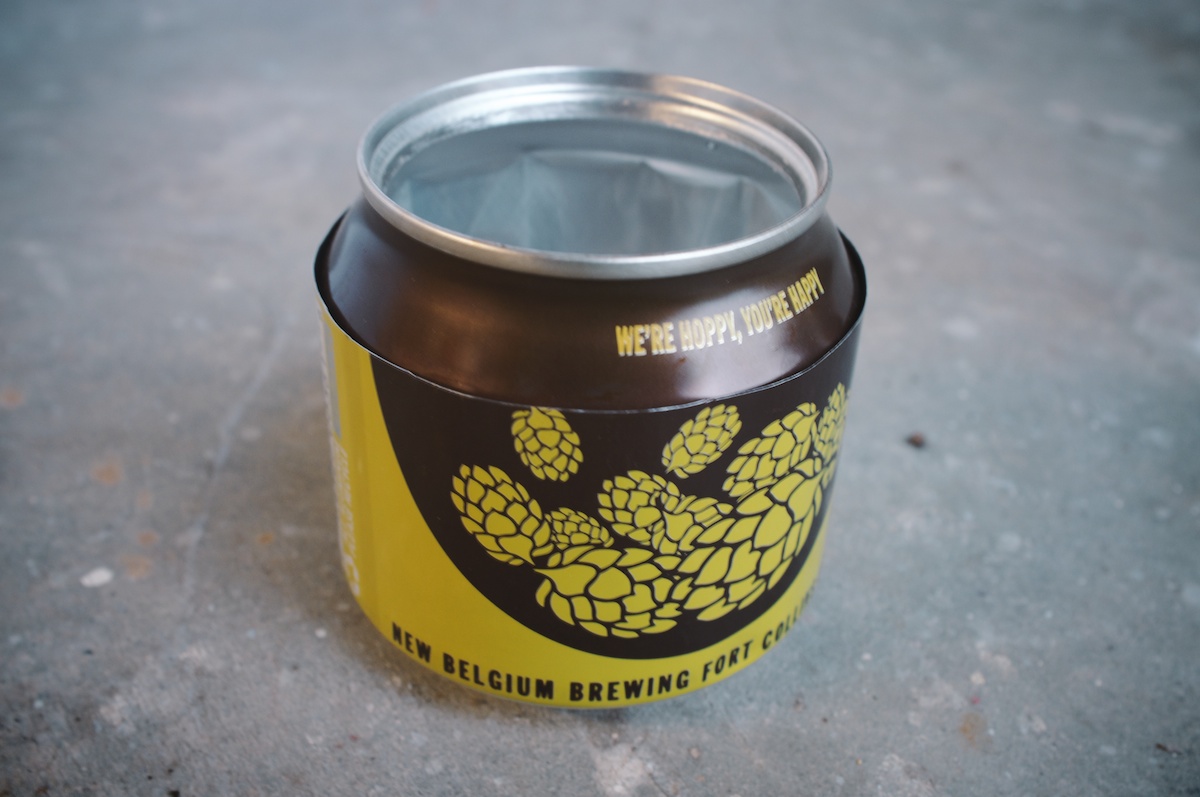
I ran across this in a post by Tom. Another very simple to make design and Tom’s assistant (the inventor?) does an excellent job showing how to do it with nothing more than a pocket-knife and scissors.
Pros: Easy to make; very sturdy; can be made with just a knife
Cons: Consumes a little more fuel than some of the other models
How to make Tom’s Stove
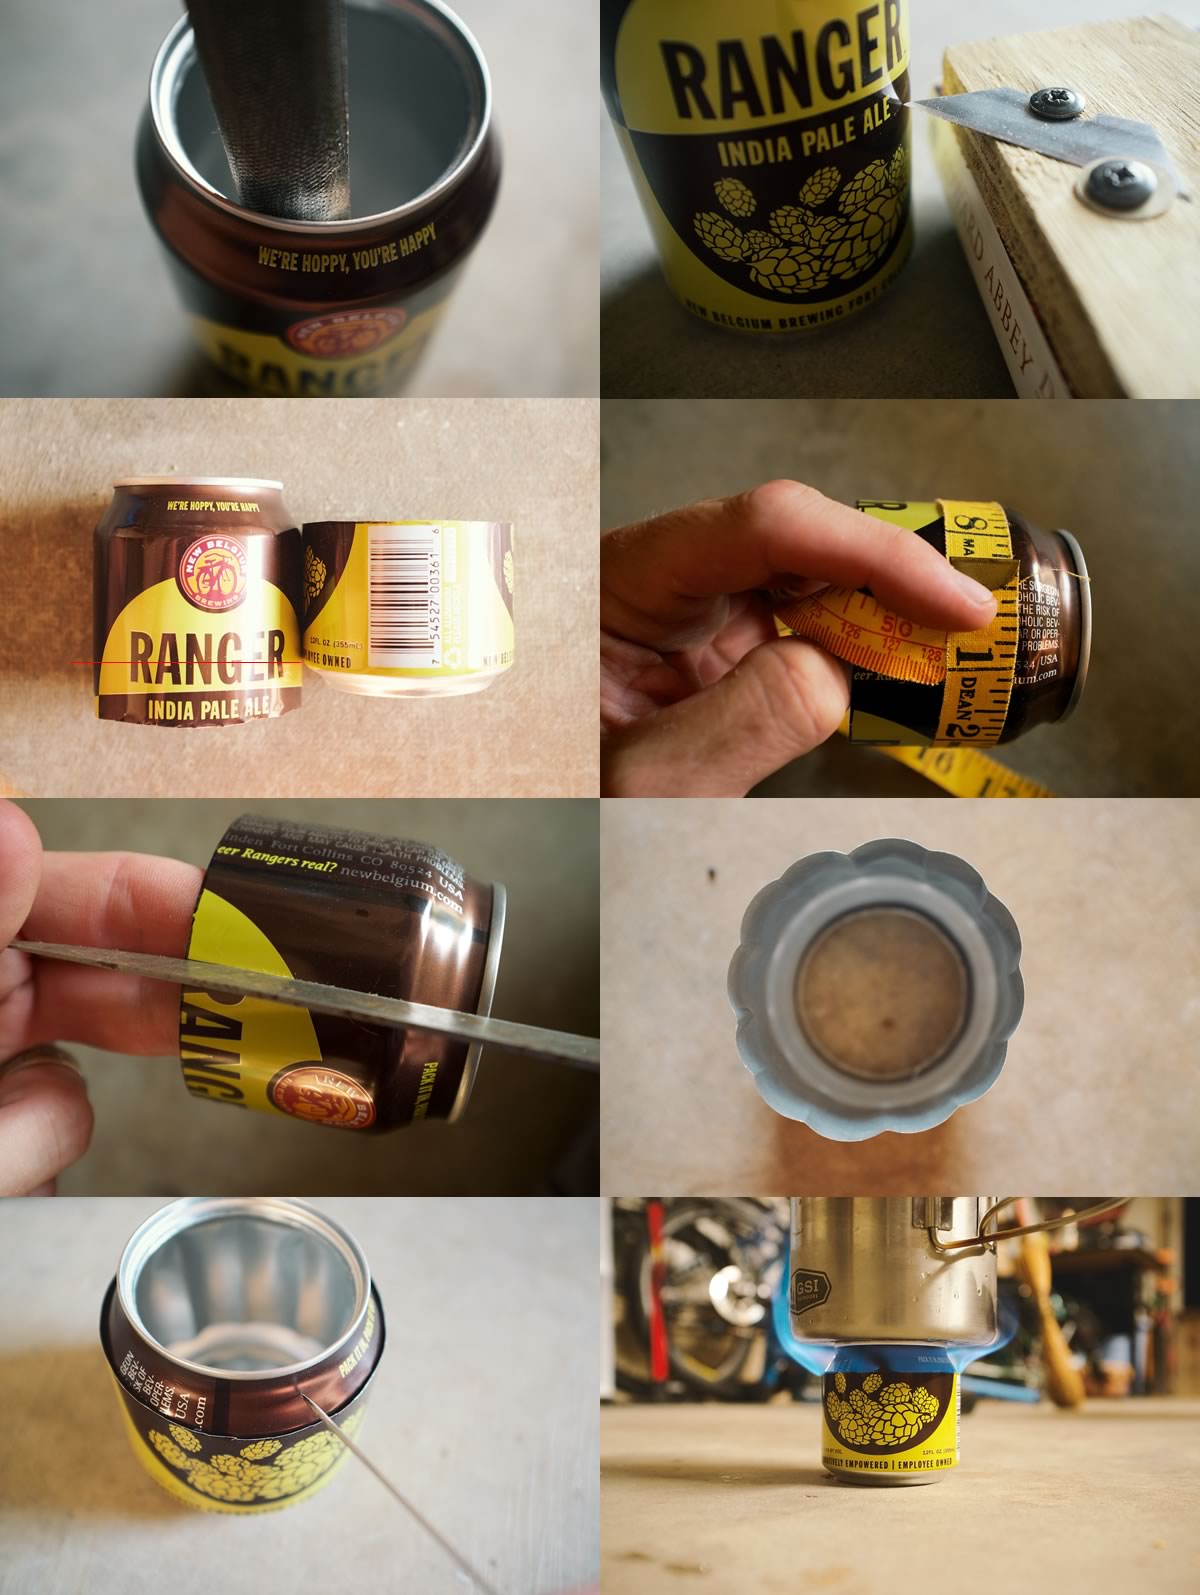
Directions – From top left
- Cut out top using method outlined above; and use a file to smooth
- Cut bottom of can to desired height (I did the top at 2 1/4″ and the bottom at 2″)
- Cut top section so that bottom will overlap curved lip by 1/16″ (proper height shown at red line)
- Mark 12 sections where creases will occur (slightly less than every 3/4″)
- Hold 2 fingers on inside of can and lightly create crease with knife (from curved lip to bottom adding more pressure at bottom)
- Finished scallops should look something like this
- Press top into bottom and add small pinhole about 1/4″ from top
- Add alcohol, light and flame will begin to emit from the sides; then set pot directly on top
#3. The Penny Bike Touring Stove
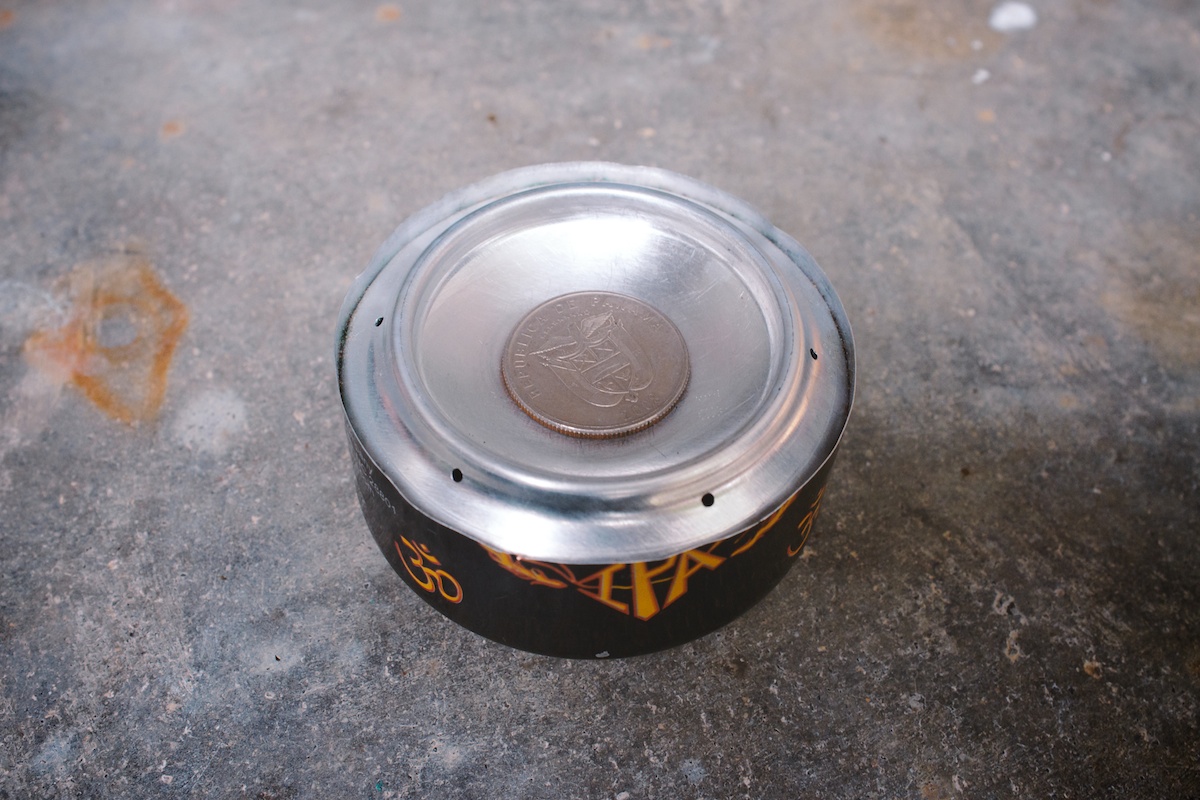
There are a multitude of different variations on the Penny Stove. I settled on something similar to this one. This one turned out to have some of the best results, and it’s almost as easy to make as the top two… you just need two tools instead of one.
Pros: Conserves fuel extraordinarily well
Cons: You have to carry a coin; Instead of simply burning out, it kind of dwindles in the last few minutes.
How to make the Penny Stove
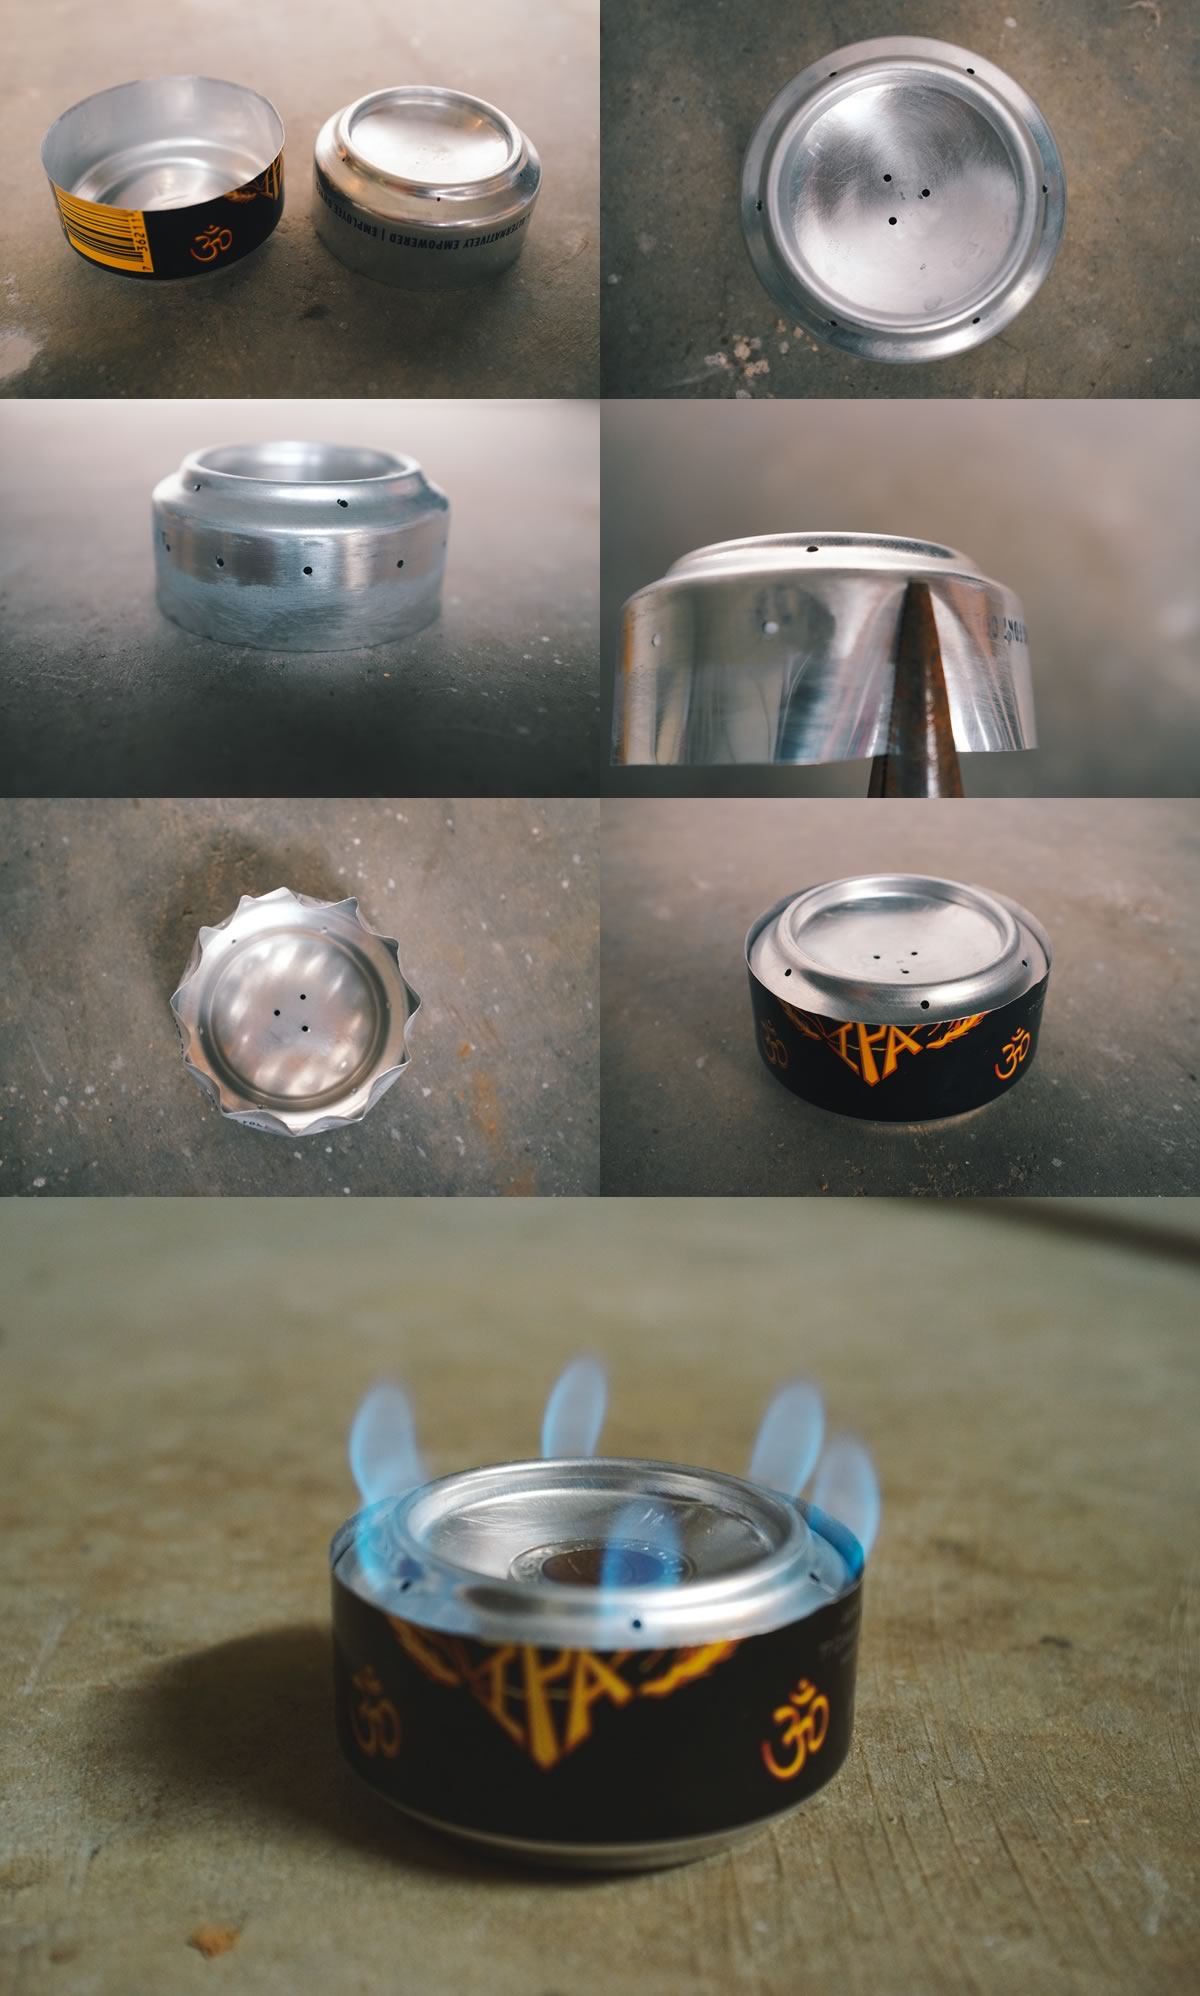
Directions – From top left
- Cut two bottoms from two cans top 1 1/8″ and second one for the bottom at 1 1/4″
- Using a 1/16″ or slightly smaller drill bit add 6 evenly spaced holes to the top section (right at bend); add three more that a coin will cover in the middle bowl
- Add 12 more about 1/4″ from lip (slightly less than 3/4″ apart)
- Place needle nose pliers over each hole and bend inward
- This is what the top section will look like when facing down
- Insert top section into bottom
- Add fuel through penny holes, then cover with coin; add a splash of fuel around edge next to holes and light; once primed, the jets will ignite; requires pot stand
#4. The Sideburner Can Stove

Although this starts to get slightly more difficult to construct, it’s worth the effort. This stove is fun to watch prime. Once you ignite the fuel and the can starts to warm up, each of the jets ignites sequentially. This is the stove I took on my last bikepacking overnight. I based mine on this design, although mine is slightly taller.
Pros: Burns fuel efficiently; nice array of jets
Cons: Requires a can stretcher to make
How to make the Sideburner Stove
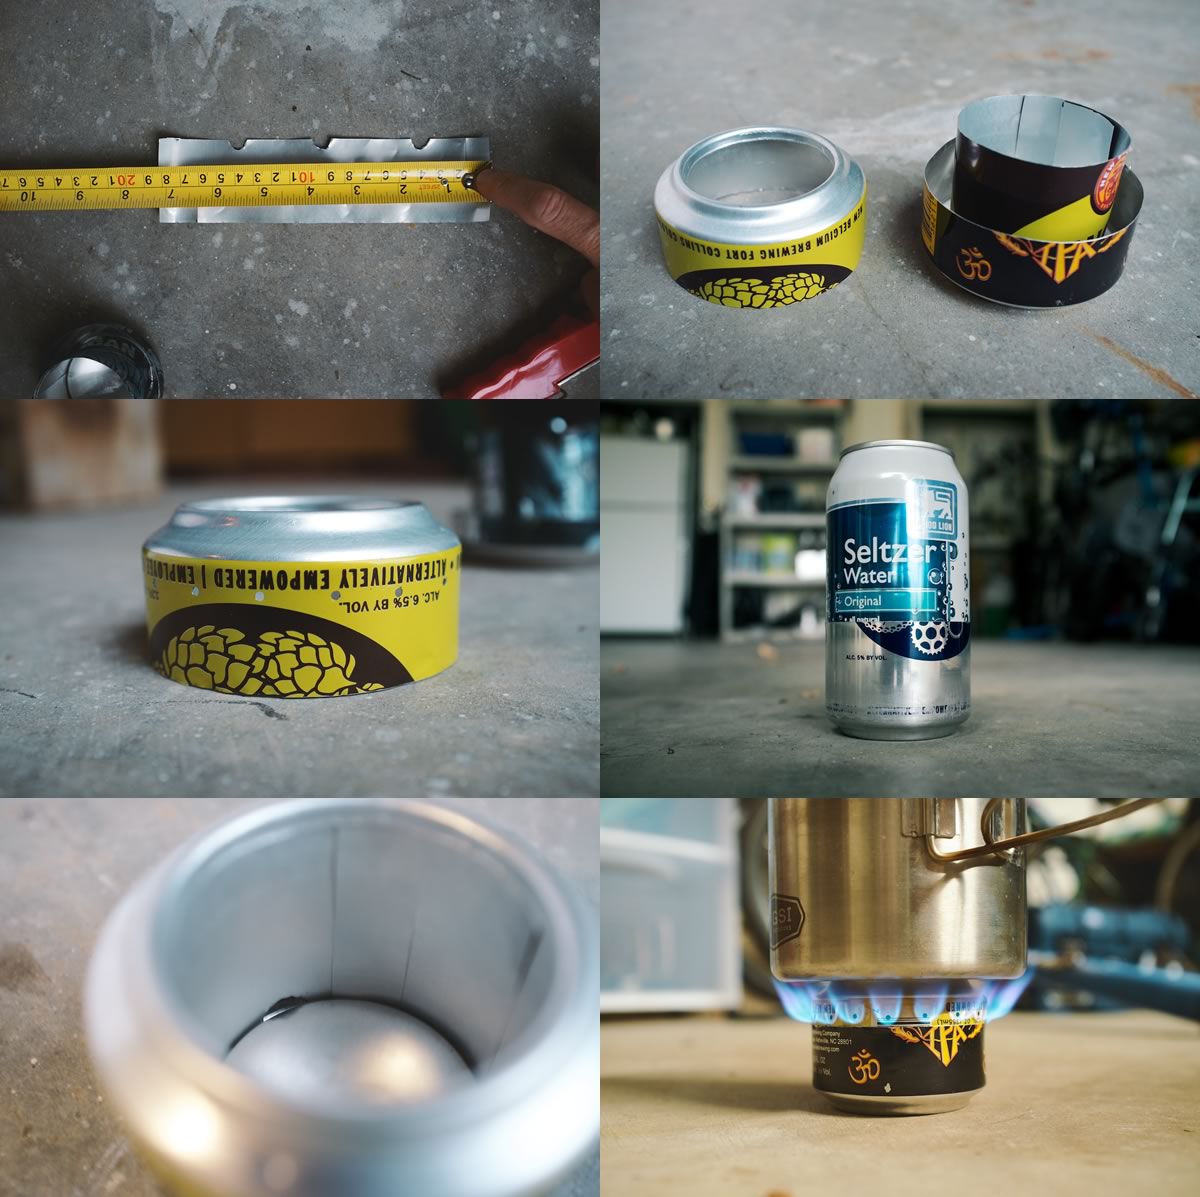
Directions – From top left
- Cut inner chimney to the specs in this template
- Cut one bottom section from one can (1 1/4″) and another for top (1 1/4″); remove inner bowl of top section by scoring and removing with pliers
- Drill 24 holes (use this template – you can cut out strip as noted and tape to can to mark)
- Use can stretcher to stretch bottom of can (click here to see how to make a can stretcher)
- Insert sections together (they will barely line up once bottom is stretched) with chimney in between (vent holes on bottom); getting the sides together takes a little patience and delicacy. Also, make sure the chimney piece lines up when you put the final squeeze on the 2 halves
- Add fuel and light; once the stove warms up, the jets will ignite and you can set pot directly on top
#5. Simple Pressurized Can Stove
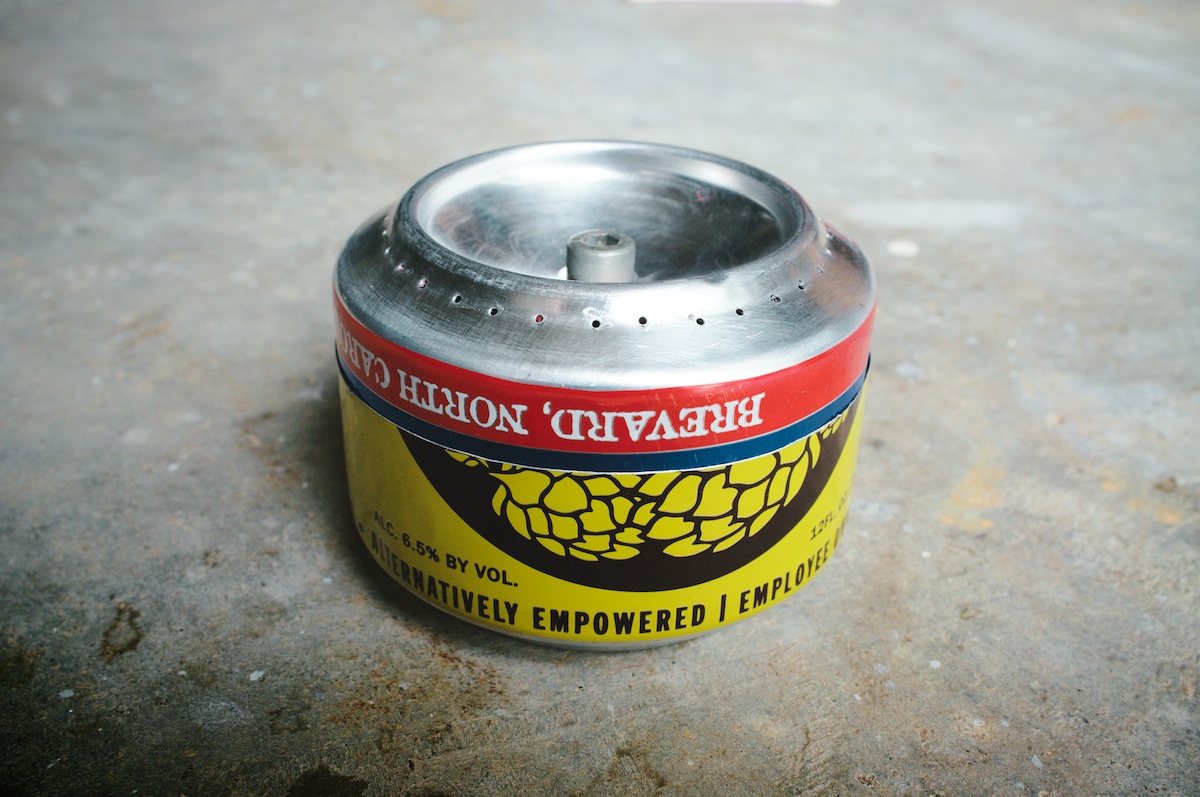
This stove is neat for the fact that it actually vaporizes the fuel. The primer pan heats up air around the stove and the alcohol vaporizes, ignites and pressurizes the jets. This kid makes something similar and calls it the Atomizer. There is a slight element of danger to this one.
Pros: Burns very hot and has a great look
Cons: Requires a primer pan and a pot-stand
How to make the Simple Pressurized Stove
Directions – From top left
- Take one can and tape this template to top and mark out holes as shown
- Drill holes using a 3/64″ bit or use a tiny pin;
- Then add appropriate sized hole for rivnut (I used an m5)
- Cut the first bottom portion of a can for the top section to 1 1/8″ and another (bottom) to 1 1/2″
- Using can stretcher, extend the bottom section
- Coat inside of bottom with high-temp JB Weld
- Add fuel through rivenut hole, then replace bolt; light by adding some fuel to ground under stove, or use a priming pan; flames will heat stove and vaporize fuel igniting the jets
- A pot stand is necessary; I used an Esbit click stand
Testing the Stoves
All of the stoves were tested using 50 ml (about one fluid ounce) of denatured alcohol boiling 250 ml of water. My favorite is probably the sideburner stove. I like it because it does not require a pot-stand and it is fairly efficient. Second would be the Penny stove, however, I don’t like the idea of having to keep up with a penny or coin. I could see my self misplacing that.

YAC Small
YAC Tall
Tom’s Stove
Penny Stove
Sideburner
Pressurized
Do you have another good design? If so, send me a comment… I actually enjoy making these things, so I’d love to try another.
FILED IN (CATEGORIES & TAGS)
Bikepacking Gear
Camping Gear
Bikepacking Food
bike-touring-gear bike-touring-stoves myobgPlease keep the conversation civil, constructive, and inclusive, or your comment will be removed.
We're independent
and member-supported.
Join the Bikepacking Collective to make our work possible:


