


$28 Military Sustainment Pouch Mini Panniers (MYOBG)
US military sustainment pouches are tough and inexpensive, and with a couple simple hacks, they can become practical, budget-friendly mini-panniers. As part of our Budget Bikepacking Build-off, we tested this concept in the field. Check out this tutorial on how to make military sustainment pouch mini panniers…
Whenever we cover panniers or update our Mini Pannier Gear Index, someone inevitably suggests using US military sustainment pouches as a budget-friendly alternative to accomplish the same task. As part of Virginia’s Budget Bikepacking Build-off, we put this idea to the test and discovered a few simple hacks to use repurposed materials and transform these simple and affordable bags into functional mini-panniers. Read on for details and a full tutorial.


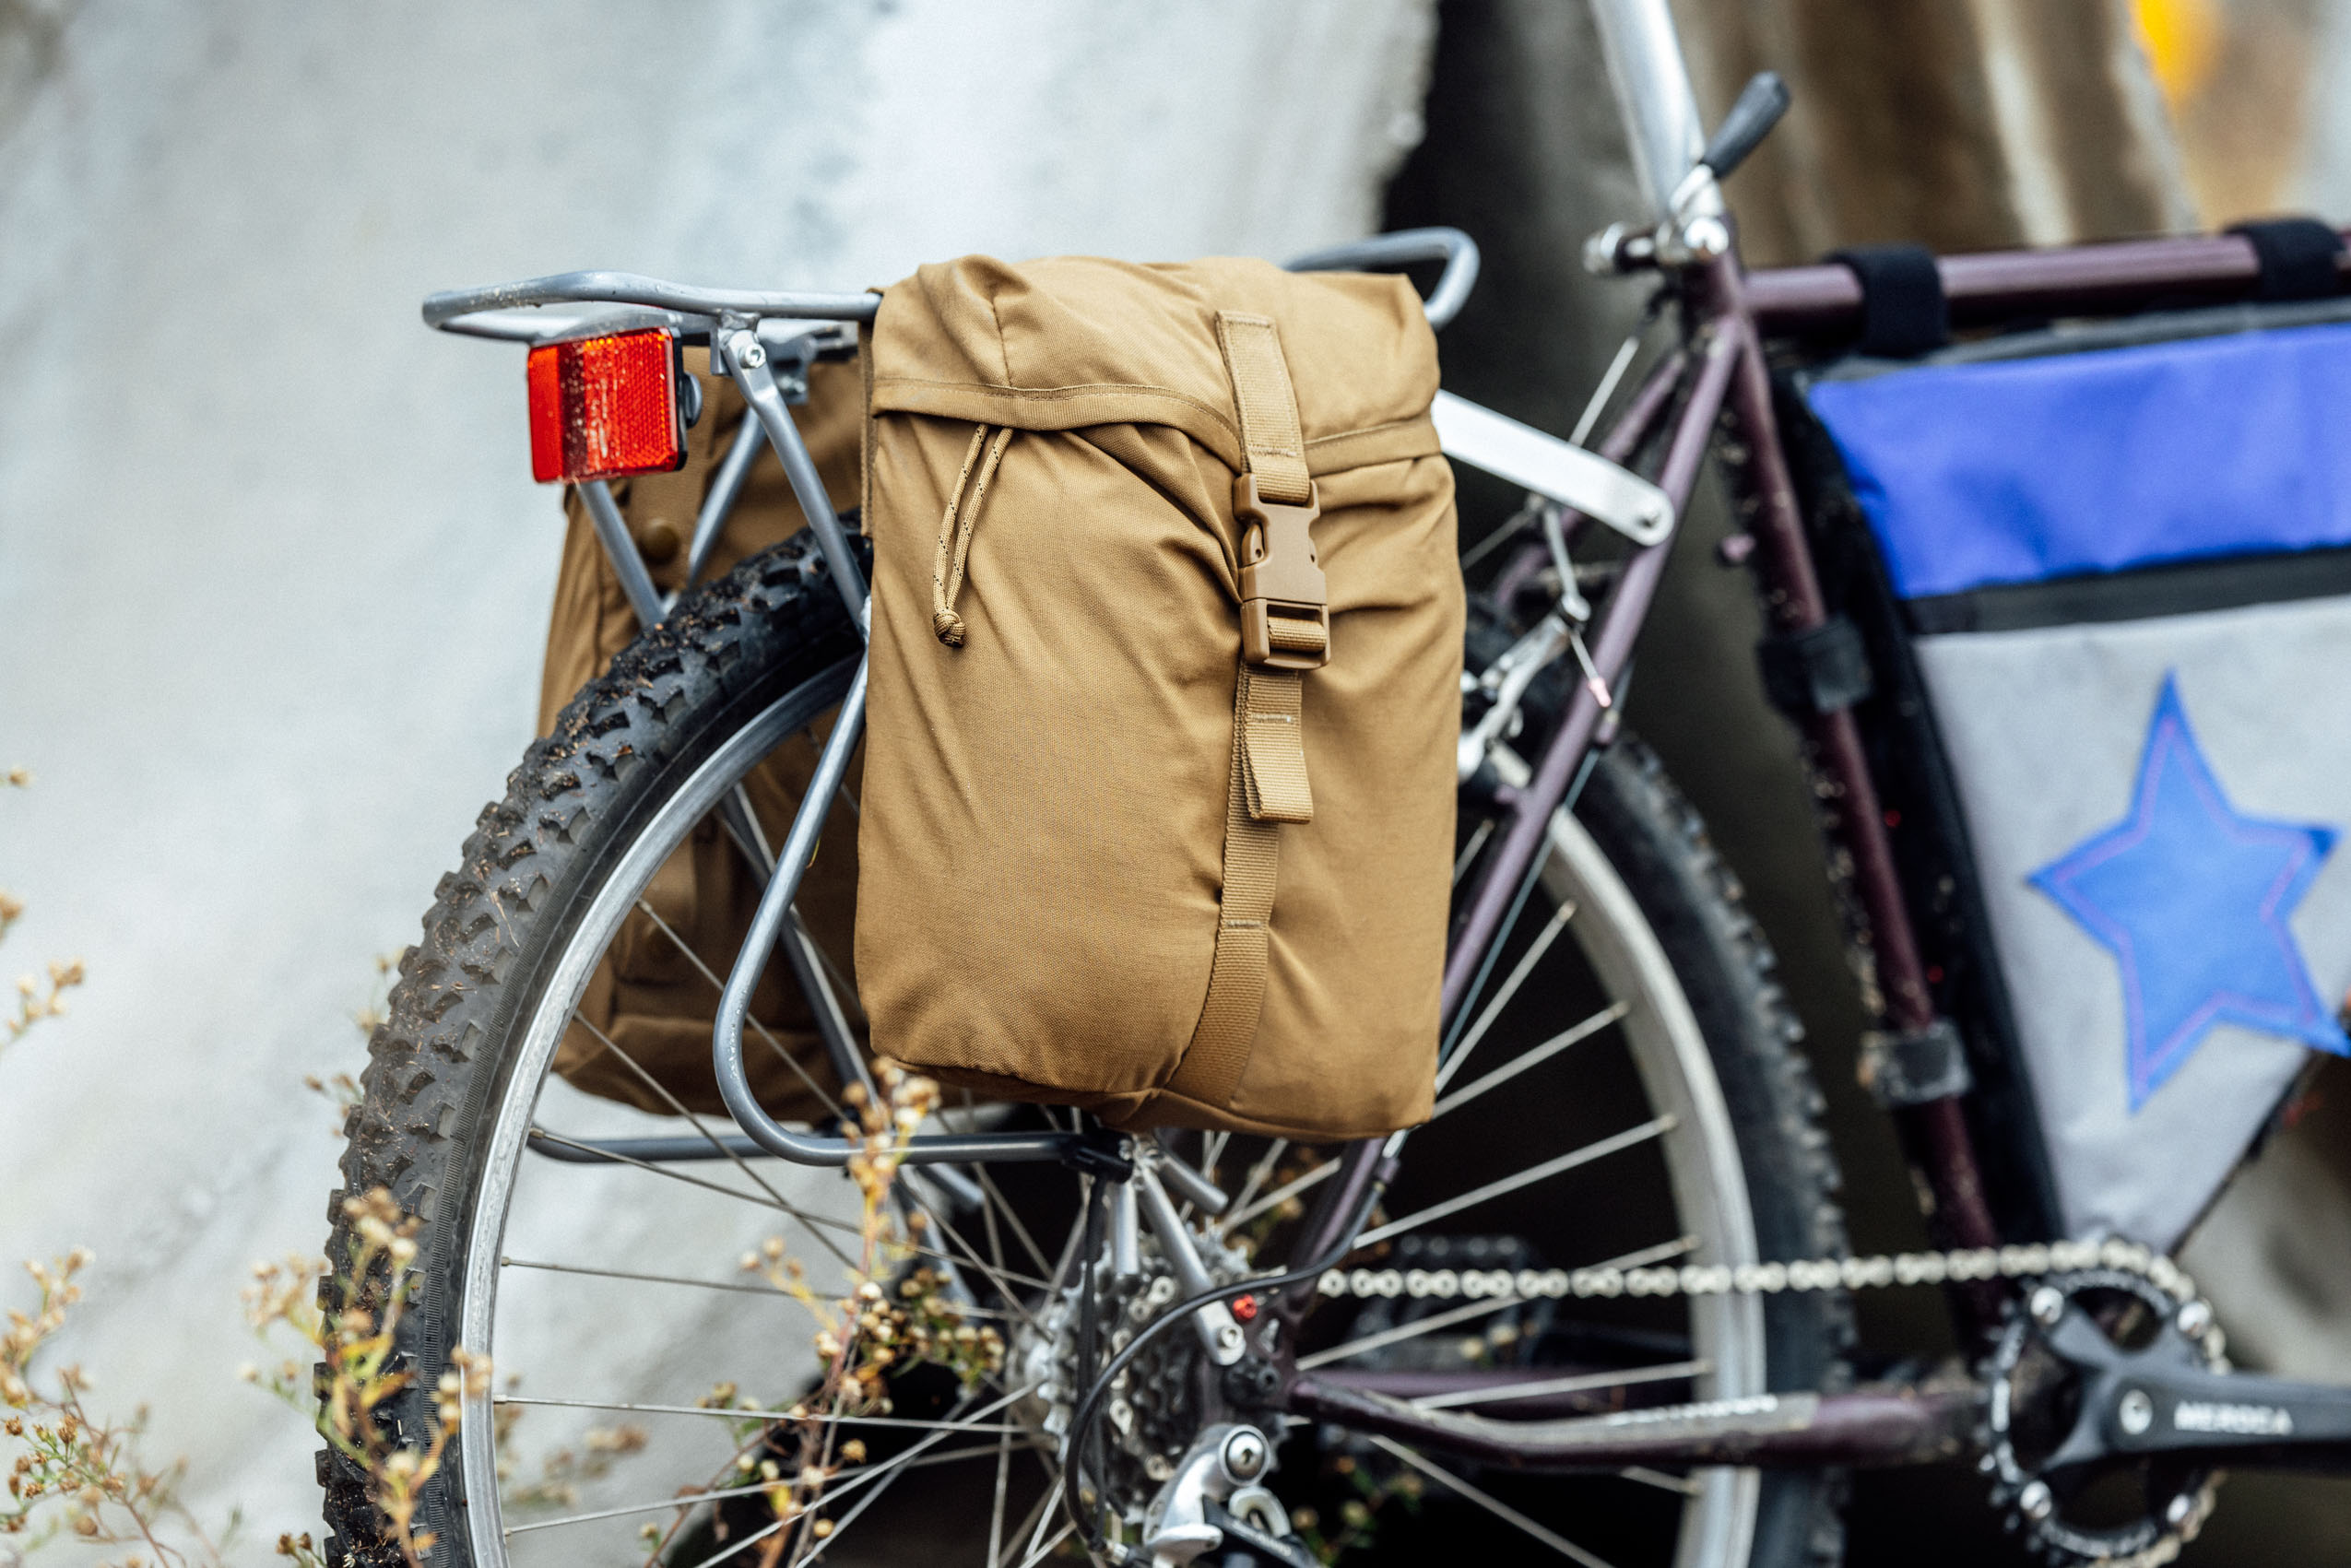
The oddly named military sustainment pouch is a single-compartment, durable bag designed to attach to a load-bearing pack, thus adding extra storage capacity for essential items like food, clothing, and shelter. These pouches are part of the official MOLLE II rucksack system and are commonly used in pairs and attached to each side of a backpack. Constructed from rugged 500D Cordura, the most common US Marine Corps (USMC) version measures approximately 22cm long, 30cm tall, and 11cm wide, providing about 7 liters of storage capacity while weighing just 200 grams—an ideal size for a mini pannier. Even better, they’re tough, made in the USA, inexpensive, and readily available at military surplus stores. We picked up a “grade 2” pair for just $28 on this website, which were in flawless condition.
The USMC Sustainment Pouches are pretty simple. They have no internal structure and are made with a two-part closure that includes a fold-over lid with a compression strap and plastic buckle and an interior drawcord cinch closure. The only other features are four rear snap dome straps for MOLLE/PALS attachment and a drain hole at the bottom. Fortunately, the dome straps and snaps are pretty sturdy. You could simply strap them onto a rack and ride off, however, we figured out a couple of easy modifications to add structure to the pouches and make them much more stable and secure.
1. Add Backing Sleeve
The first order of business is to add a backing sleeve to the interior of the pouch. This is fairly easy since the pouch seams are stitched using a grosgrain ribbon on the sides. Start by turning the pouch inside out, then measure the width between the grosgrain seams. We used some scraps of exterior vinyl fabric we had on hand, so there was no reason to cap the seam, but if you’re using a fabric that could fray, you may want to leave allowance to fold it over or use another piece of grosgrain to tidy it up. We also folded over the bottom part of the bag to create a stitch along the bottom, although this is unnecessary and you could just stitch the two sides, which would sufficiently hold the backer board in place.


2. Add Backer Board
Since this was for the Budget Bikepacking Build-off, we opted to use reclaimed/free material for the backer board—a political yard sign that would have gone to the landfill after election day. However, if you wanted to make something even more useful, you could use a folding cutting board, which could also be used in your camp kitchen, or a piece of closed-cell foam that could double as a sitting pad. Once you cut your material of choice to size, simply slide it into the sleeve. This adds a significant amount of structure to the otherwise floppy pouch.


3. Make Lower Cinch Cord
We found that there was no modification needed to the dome snap straps for attaching to the top rack rails. The straps seem sturdy, and the buttons stay secure, even on bumpy rides. However, you still need to secure the bottom of the panniers to keep them from flopping around. You could use one of the lower straps to secure it to the bottom of the rack, as long as the placement of the strap and the rack upright or strut matches up. However, ours didn’t, so we decided to add a simple cord using the built-in drain hole at the bottom of the pouch.


It’s kind of hard to explain how this works in words. Essentially, you make a loop that threads through the toggle, into the bag via the drain hole, around a metal ring, and back through the hole where it loops around the toggle to secure it in place. See the photos for a better visualization of how it functions. Note that we fabricated the rings from a scrap piece of steel, but you could use a keychain ring, or any other ring to accomplish the same task.

This was a very simple process that took all of an hour to complete. The end result is surprisingly impressive. The sustainment pouches are the perfect size for mini panniers, and while they may not be waterproof, they seem like they’ll be plenty durable and capable of tackling big trips.

Have you used military sustainment pouch mini panniers or modified military bags to use as bikepacking bags? Let us know. And if you have any questions or additional ideas, please leave us a note in the conversation below!
Please keep the conversation civil, constructive, and inclusive, or your comment will be removed.
We're independent
and member-supported.
Join the Bikepacking Collective to make our work possible:


