


A DIY Approach to Surfing Baja’s Cape Loop


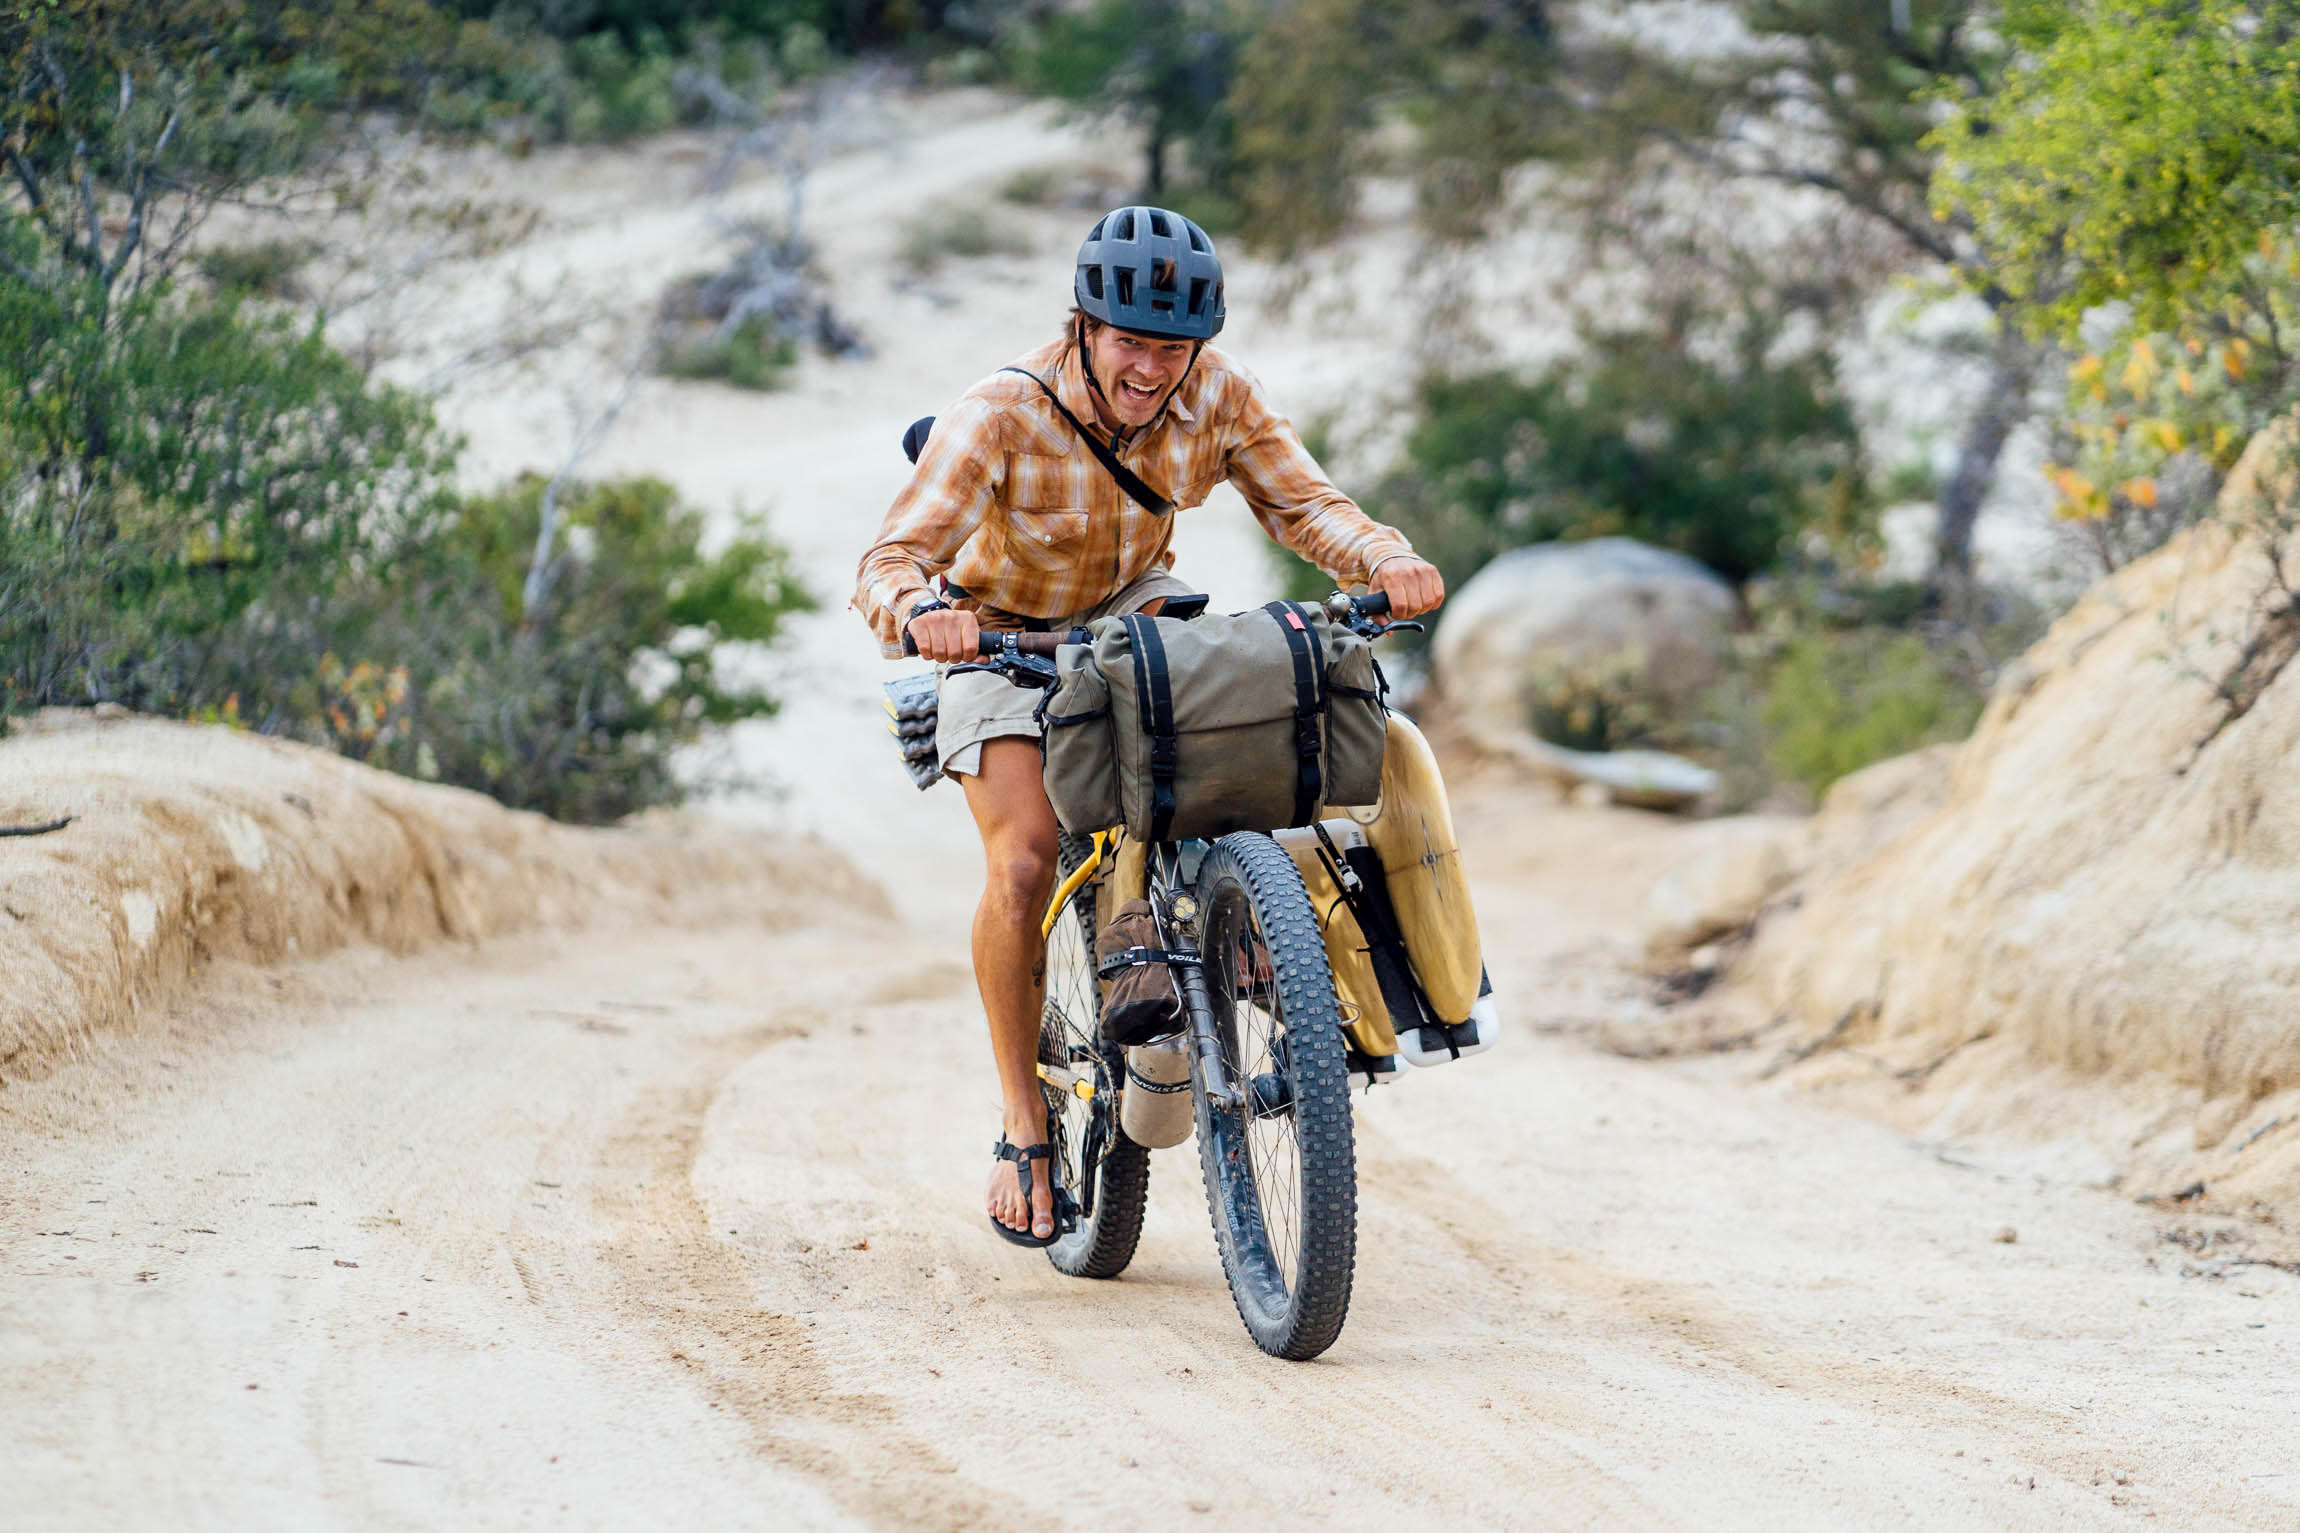
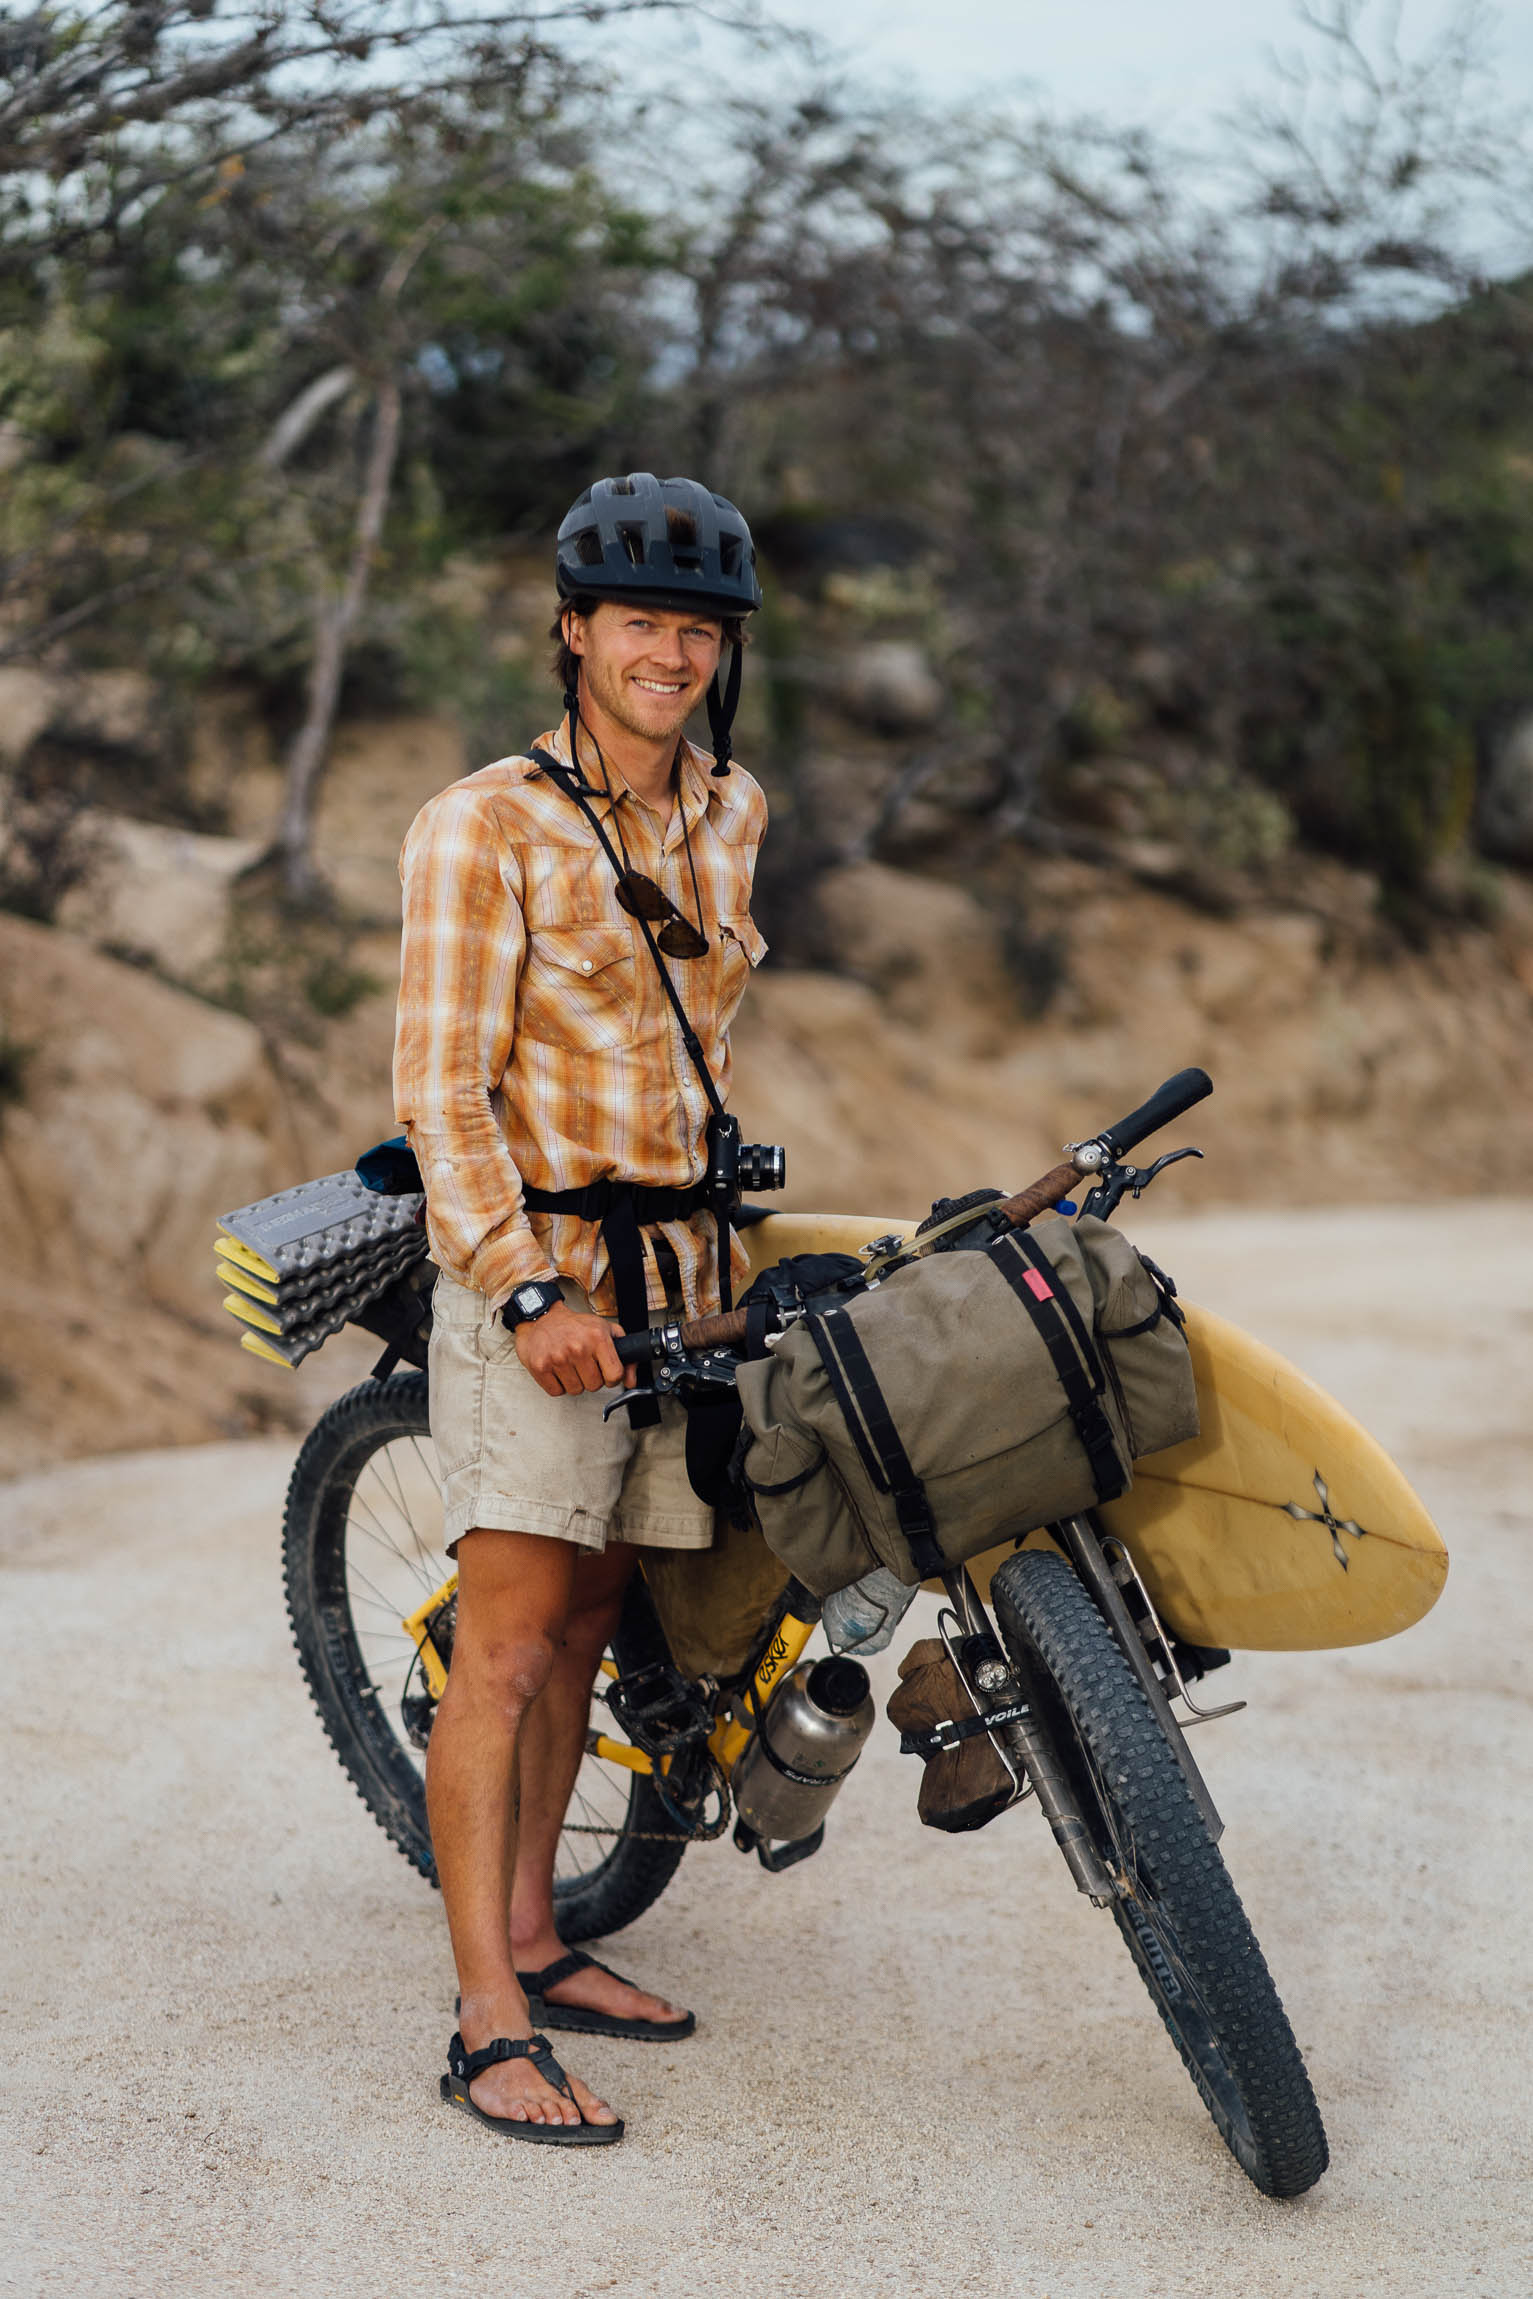
On a $100 budget, Dan Stranahan bought a used surfboard and built a homemade rack to haul it on his bike so he could ride between surf spots on the Baja Divide’s Cape Loop. Find his guide to sourcing a cheap board, making a DIY rack, and finding the best waves in Baja here…
PUBLISHED Jun 18, 2020
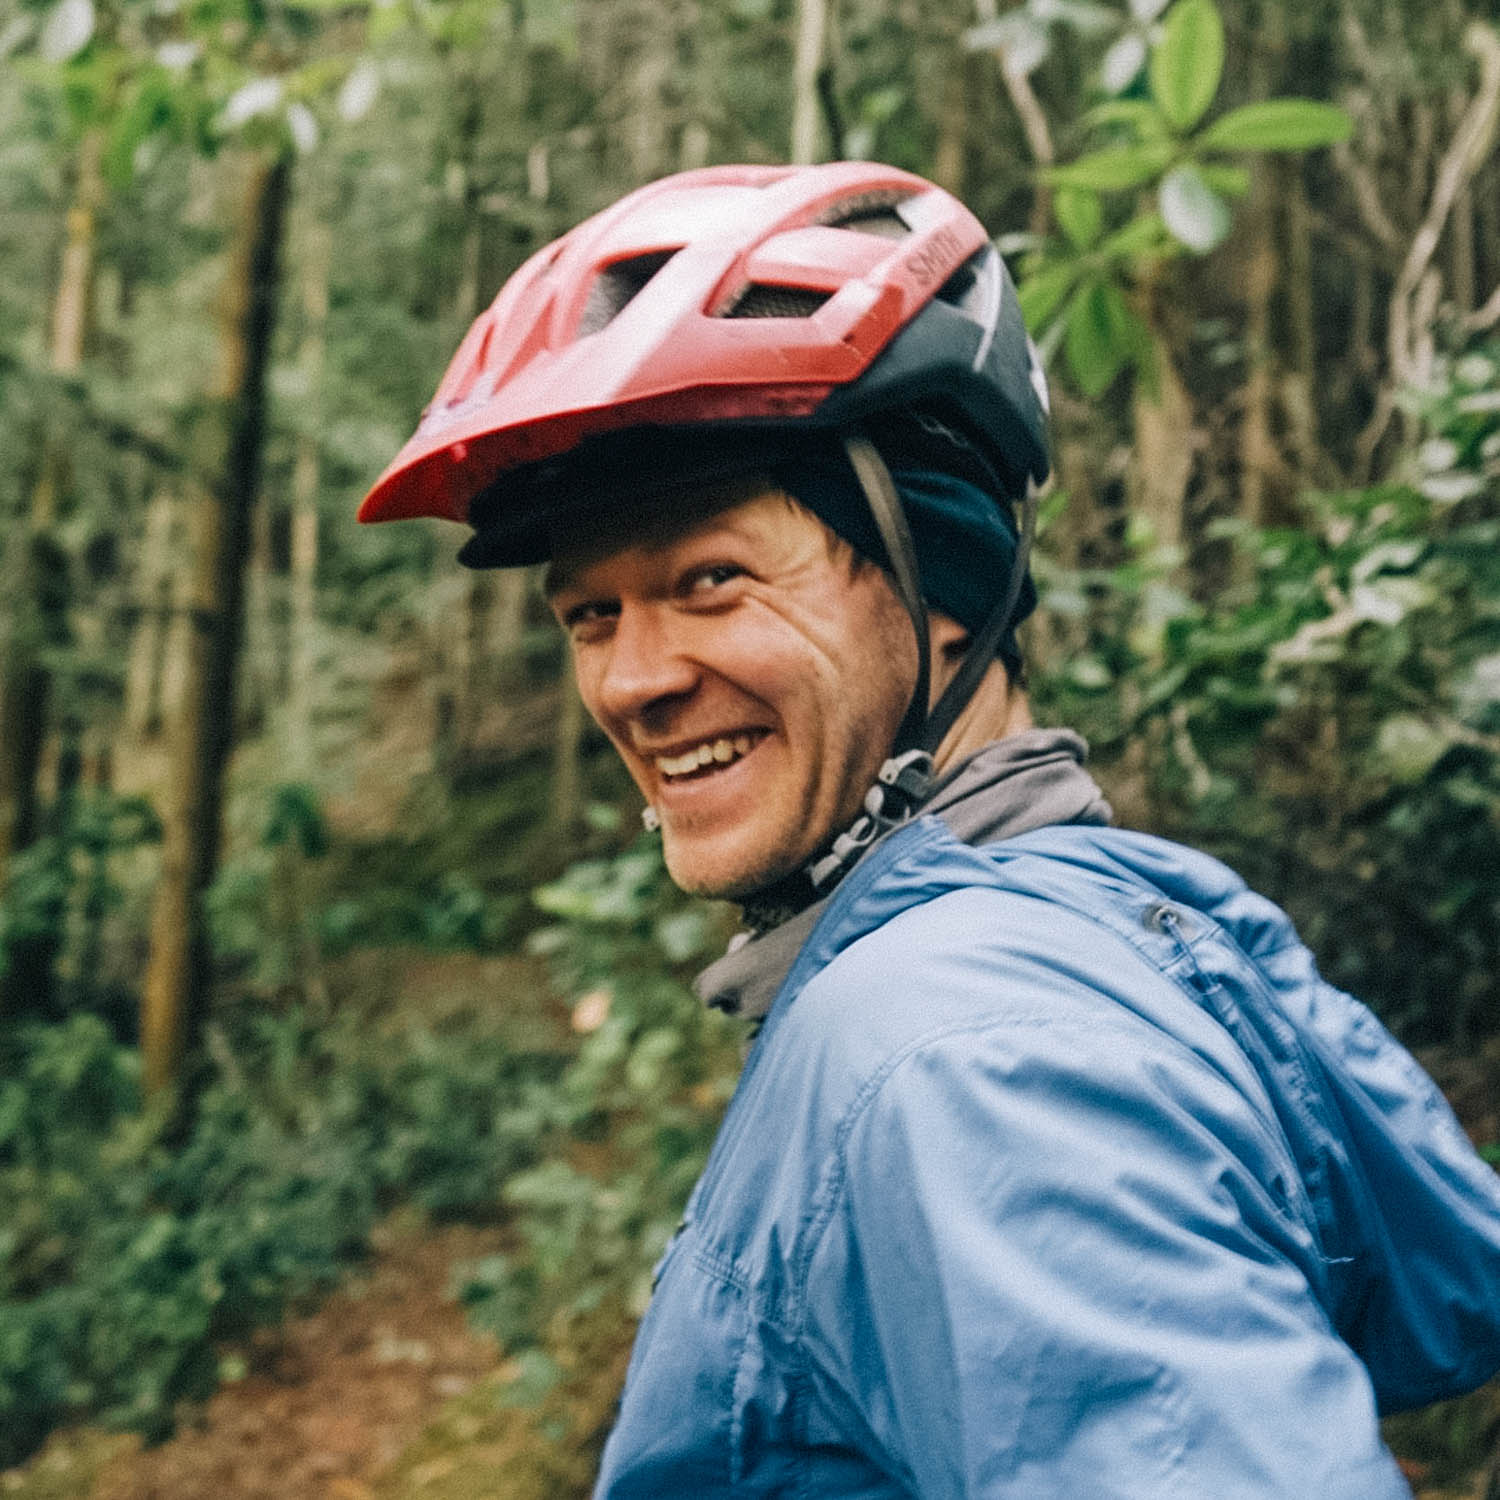
Words and photos by Dan Stranahan, with additional shots by Sophie Degroot and Cass Gilbert
I’ve been messing about in the water much longer than on two wheels. And in a roundabout way, it was surfing that led me to mountain bikes later in life. On Washington’s Olympic Peninsula—where I grew up—surfing was an incredible way to be in nature: sitting in the chilly water cloaked in a thick, warm suit, watching gray whales breach mere feet away in the shadow of snow-capped coastal mountains. It couldn’t get more magical!
Sadly, while at college in Los Angeles, I was quickly disenchanted by the competitive crowds and SoCal surf culture, so I turned to mountain bikes for solace and solitude. But I never stopped loving surfing, and my desire to combine a surf trip with an off-road bike tour had been bubbling in the back of my mind, waiting for the perfect moment ever since. Upon finishing the Baja Divide about a week early, I knew that moment had arrived and I made it my mission to figure out how to haul a surfboard around the Cape Loop on the cheap.
Finding a Board
Predictably, there’s not much of a surf scene in La Paz, Mexico, given its shelter from the Pacific Ocean. However, there’s a surf shop called 4Street just a few blocks from the Hotel Pension California, a popular basecamp for Baja Divide Riders. They were also willing to graciously tolerate my construction project in their courtyard. The folks at 4Street were kind, helpful, and sold me some wax and Solarez for fixing dings, though I quickly learned that I would need to visit a coastal surf town such as Todos Santos or San Jose Del Cabo to find a board within my budget. Aguila offers a $9, 1.5-hour bus ride to Todos Santos, so the next day I made the round trip.
I visited a couple of shops in Todos: La Katrina and Todos Santos Surf Shop. Todos Santos Surf Shop had several used boards from $100 and up, and La Katrina didn’t have anything used in the shop, but I was told the owner had lots of boards and is happy to assist travelers. Unfortunately, he was out of the shop that day and I couldn’t catch him on the phone. It was starting to feel like a wild goose chase, but I decided to check Todos Santos Ding Repair just in case. This is where I met Ruben, who was keen to hear about the bike adventure and show me a few boards in his rack. Luckily I found one that was a good fit. It was the right size, and beat up enough that I wouldn’t worry about it on the trail. A short while and $40 later, I had a leash and a fun looking board that would be watertight after some minor repairs.

Construction
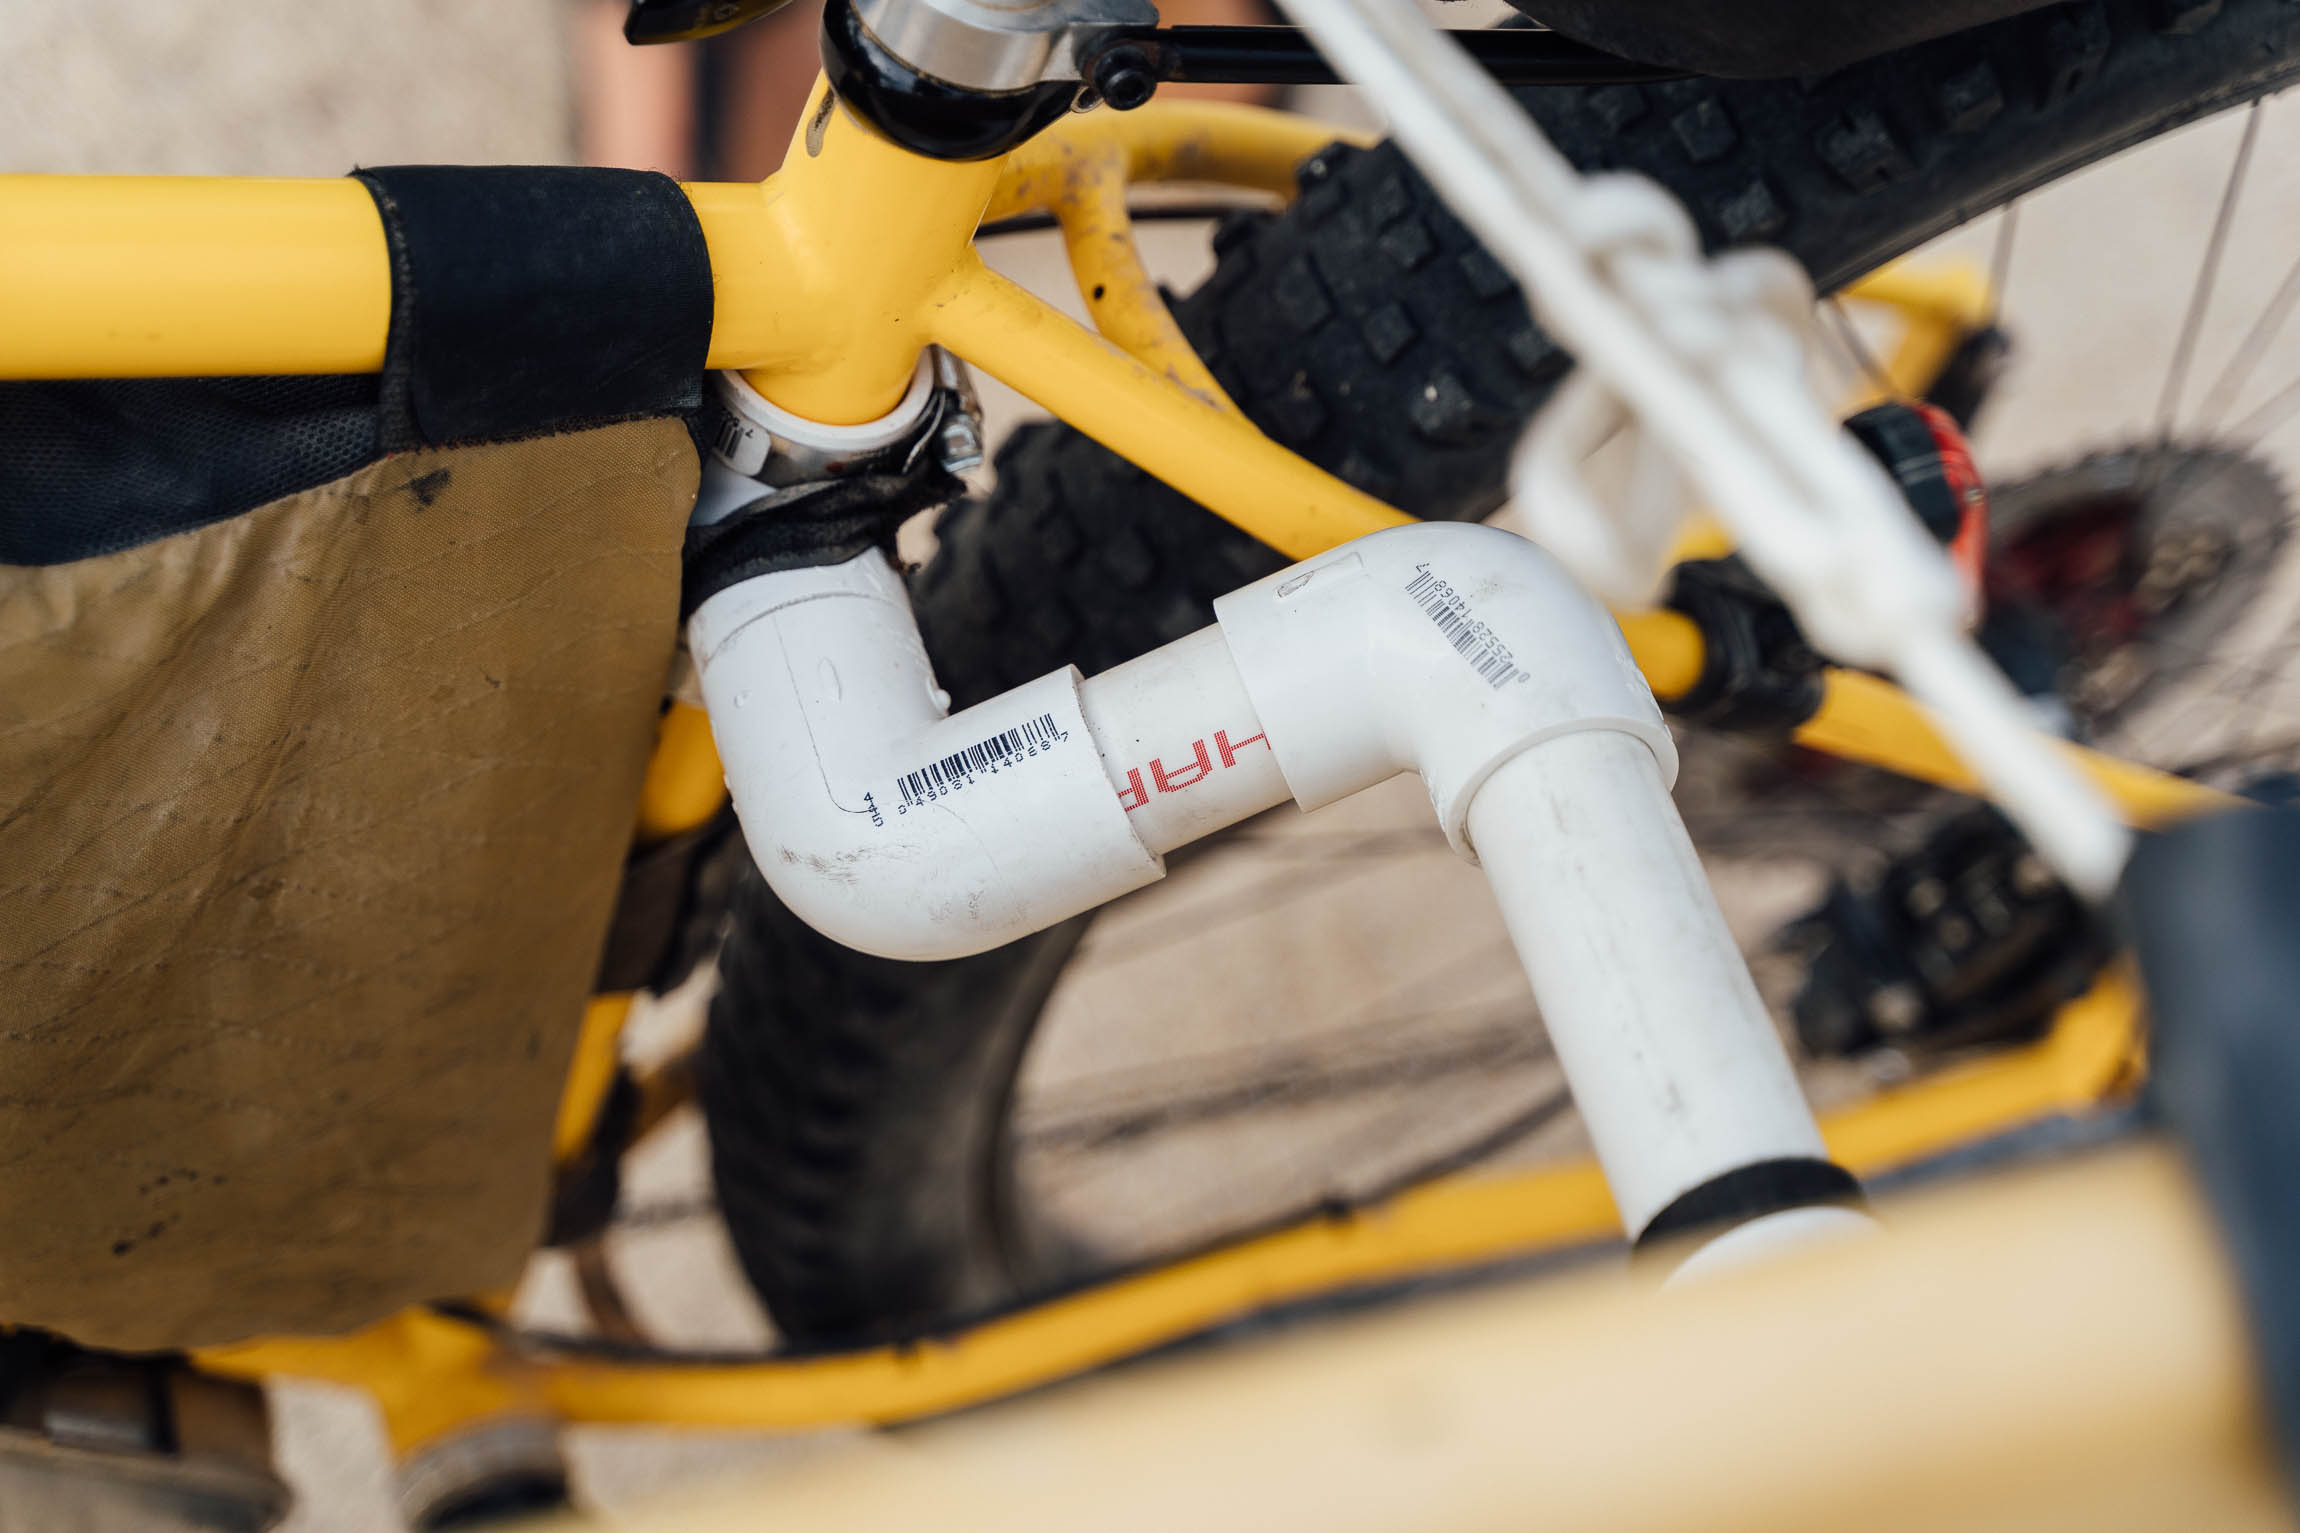
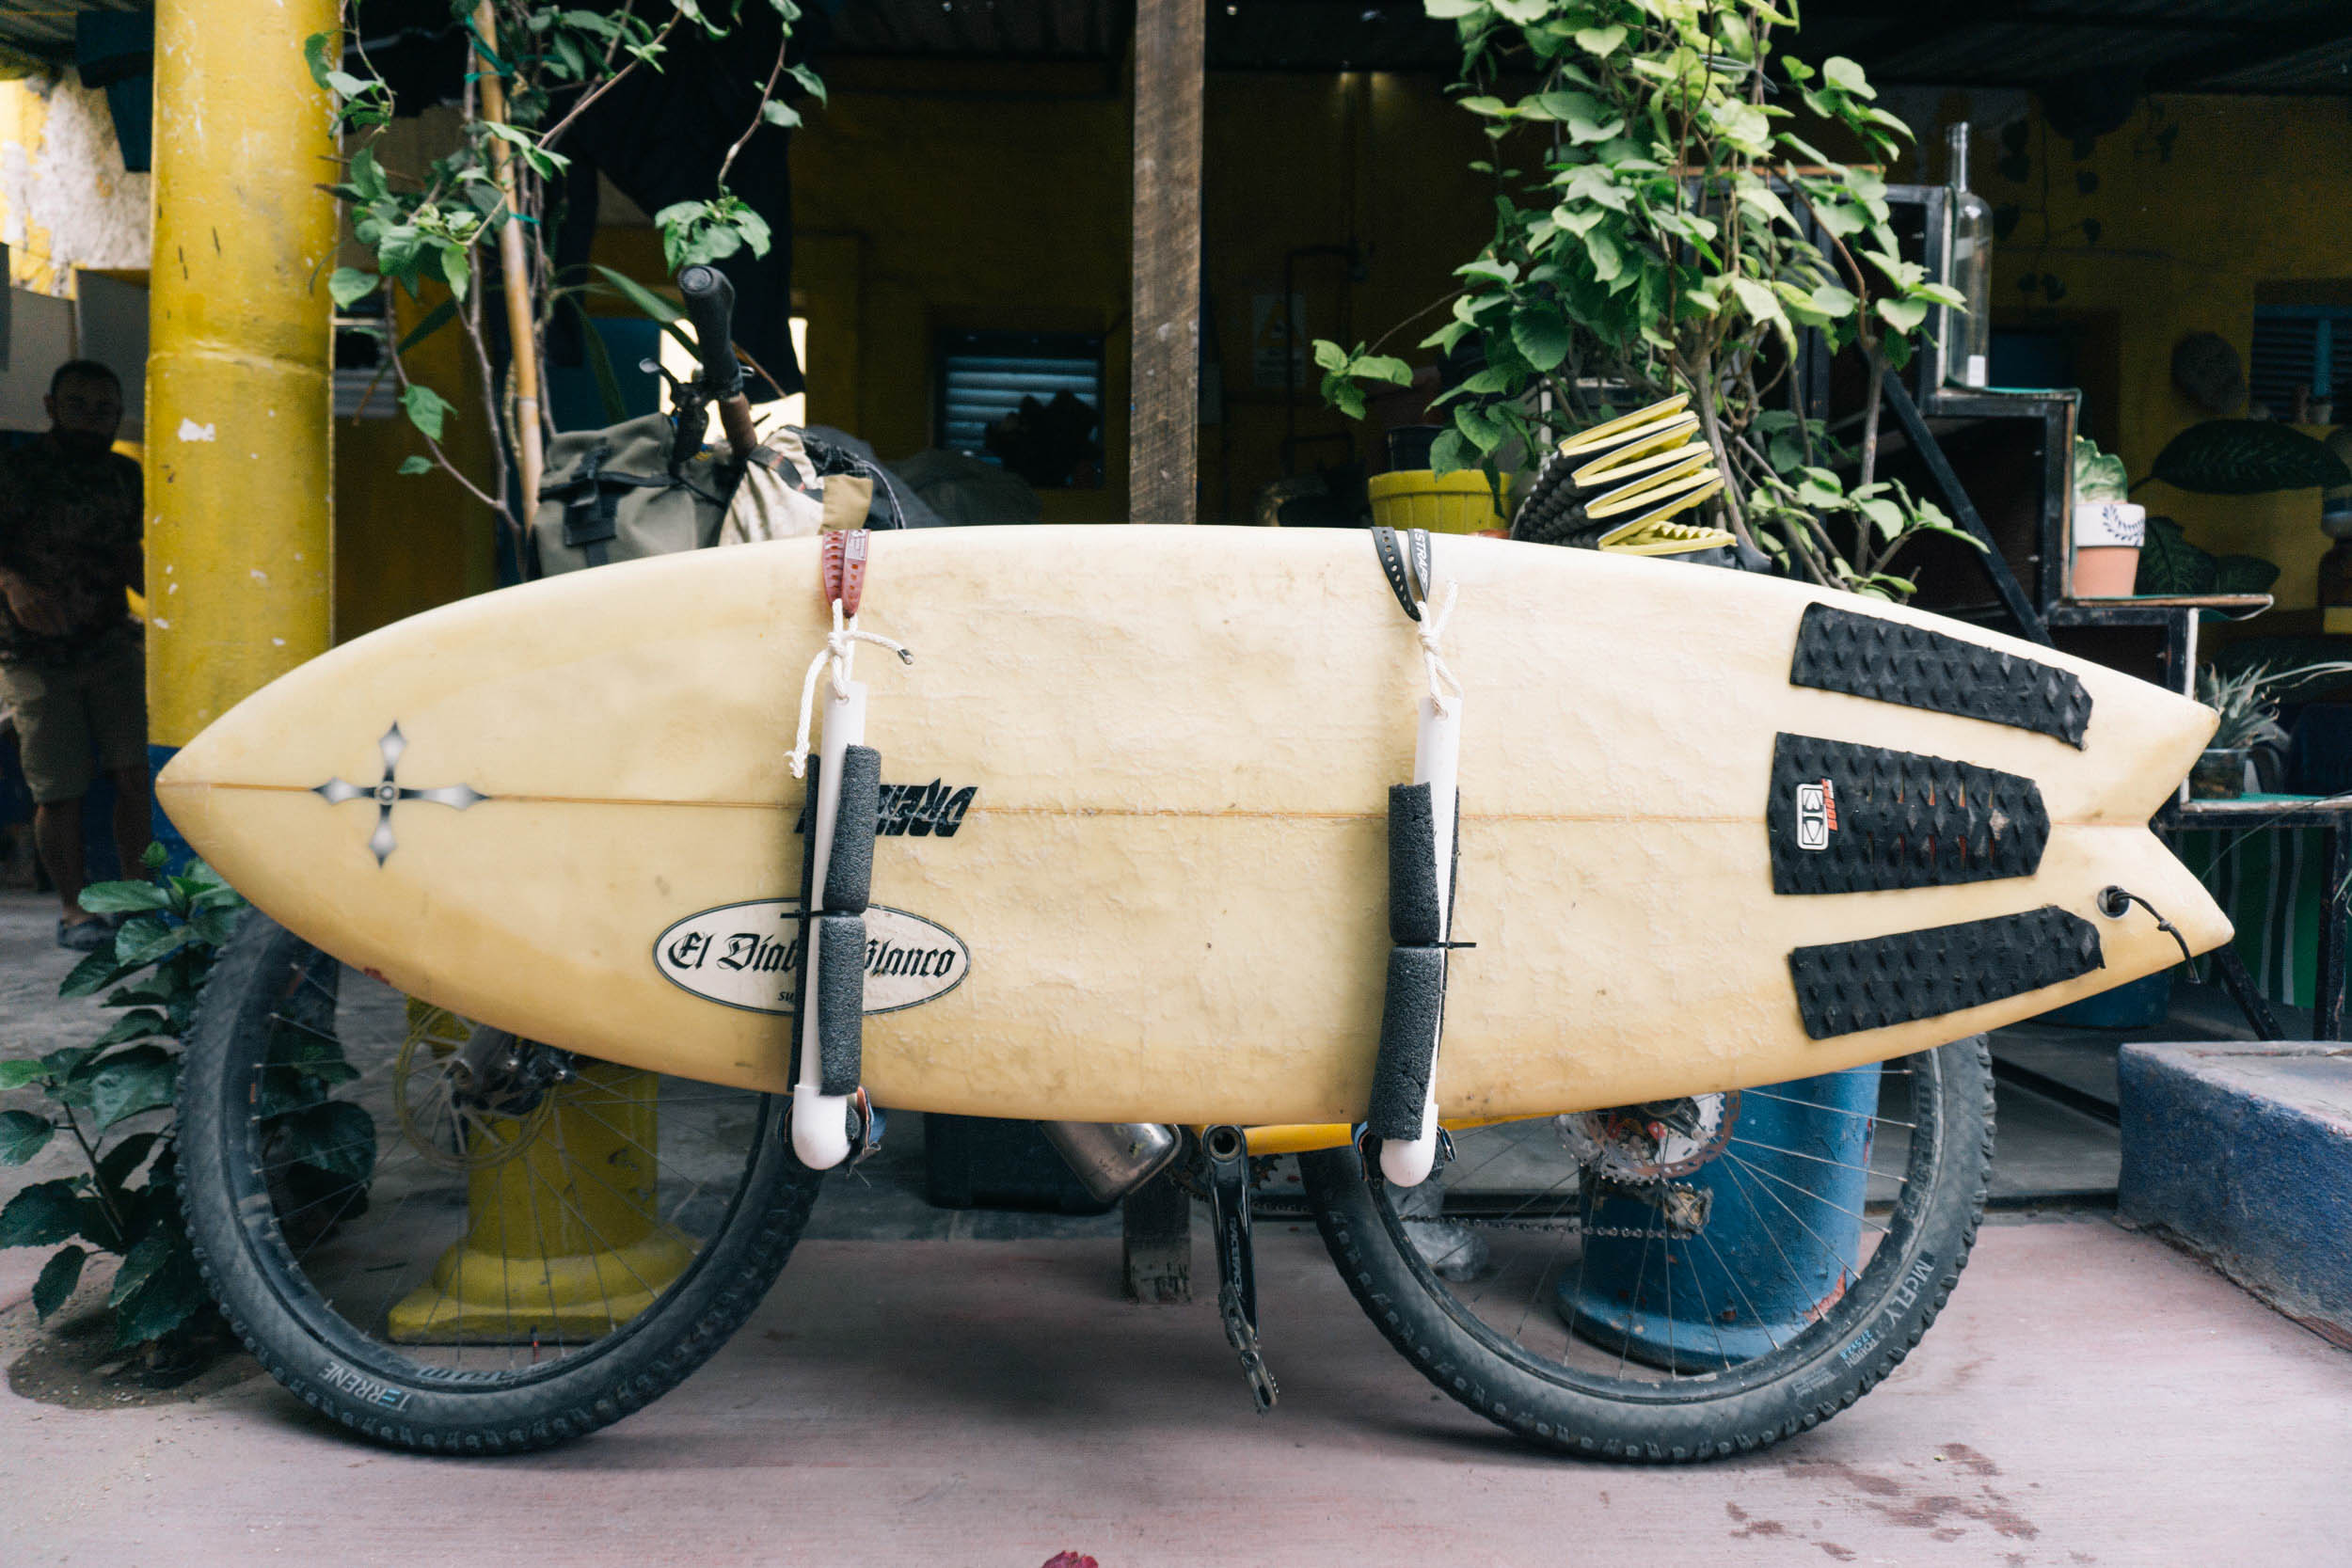
Now that I had a board, it would be much easier to start building the rack. Home Depot in La Paz had all the supplies, though I later found out there was the aptly named Plomba y Banos just a few blocks from the hotel that had most everything needed for the rack. After sifting through some online DIY surf rack articles (all of which were geared toward short trips from home, not off-road bike tours) I ended up basing my design on a delightfully early internet blog post found here. By the end, I had modified the design a fair bit to accomodate for pedal clearance given the modern angles of my Esker Hayduke.
It’s also worth mentioning that I later found this video from Korduroy.tv that shows a cross brace connecting the front and back Us of the rack that I think would have added a lot more stability off road. However, by permanently attaching the two Us of the rack, it no longer breaks into two small pieces that can easily be packed into a bike box, etc. My workaround was to wrap a rope around the front and rear rack supports (see photos) which stabilized the rack well enough for me, and made it easier to remove and pack when needed.
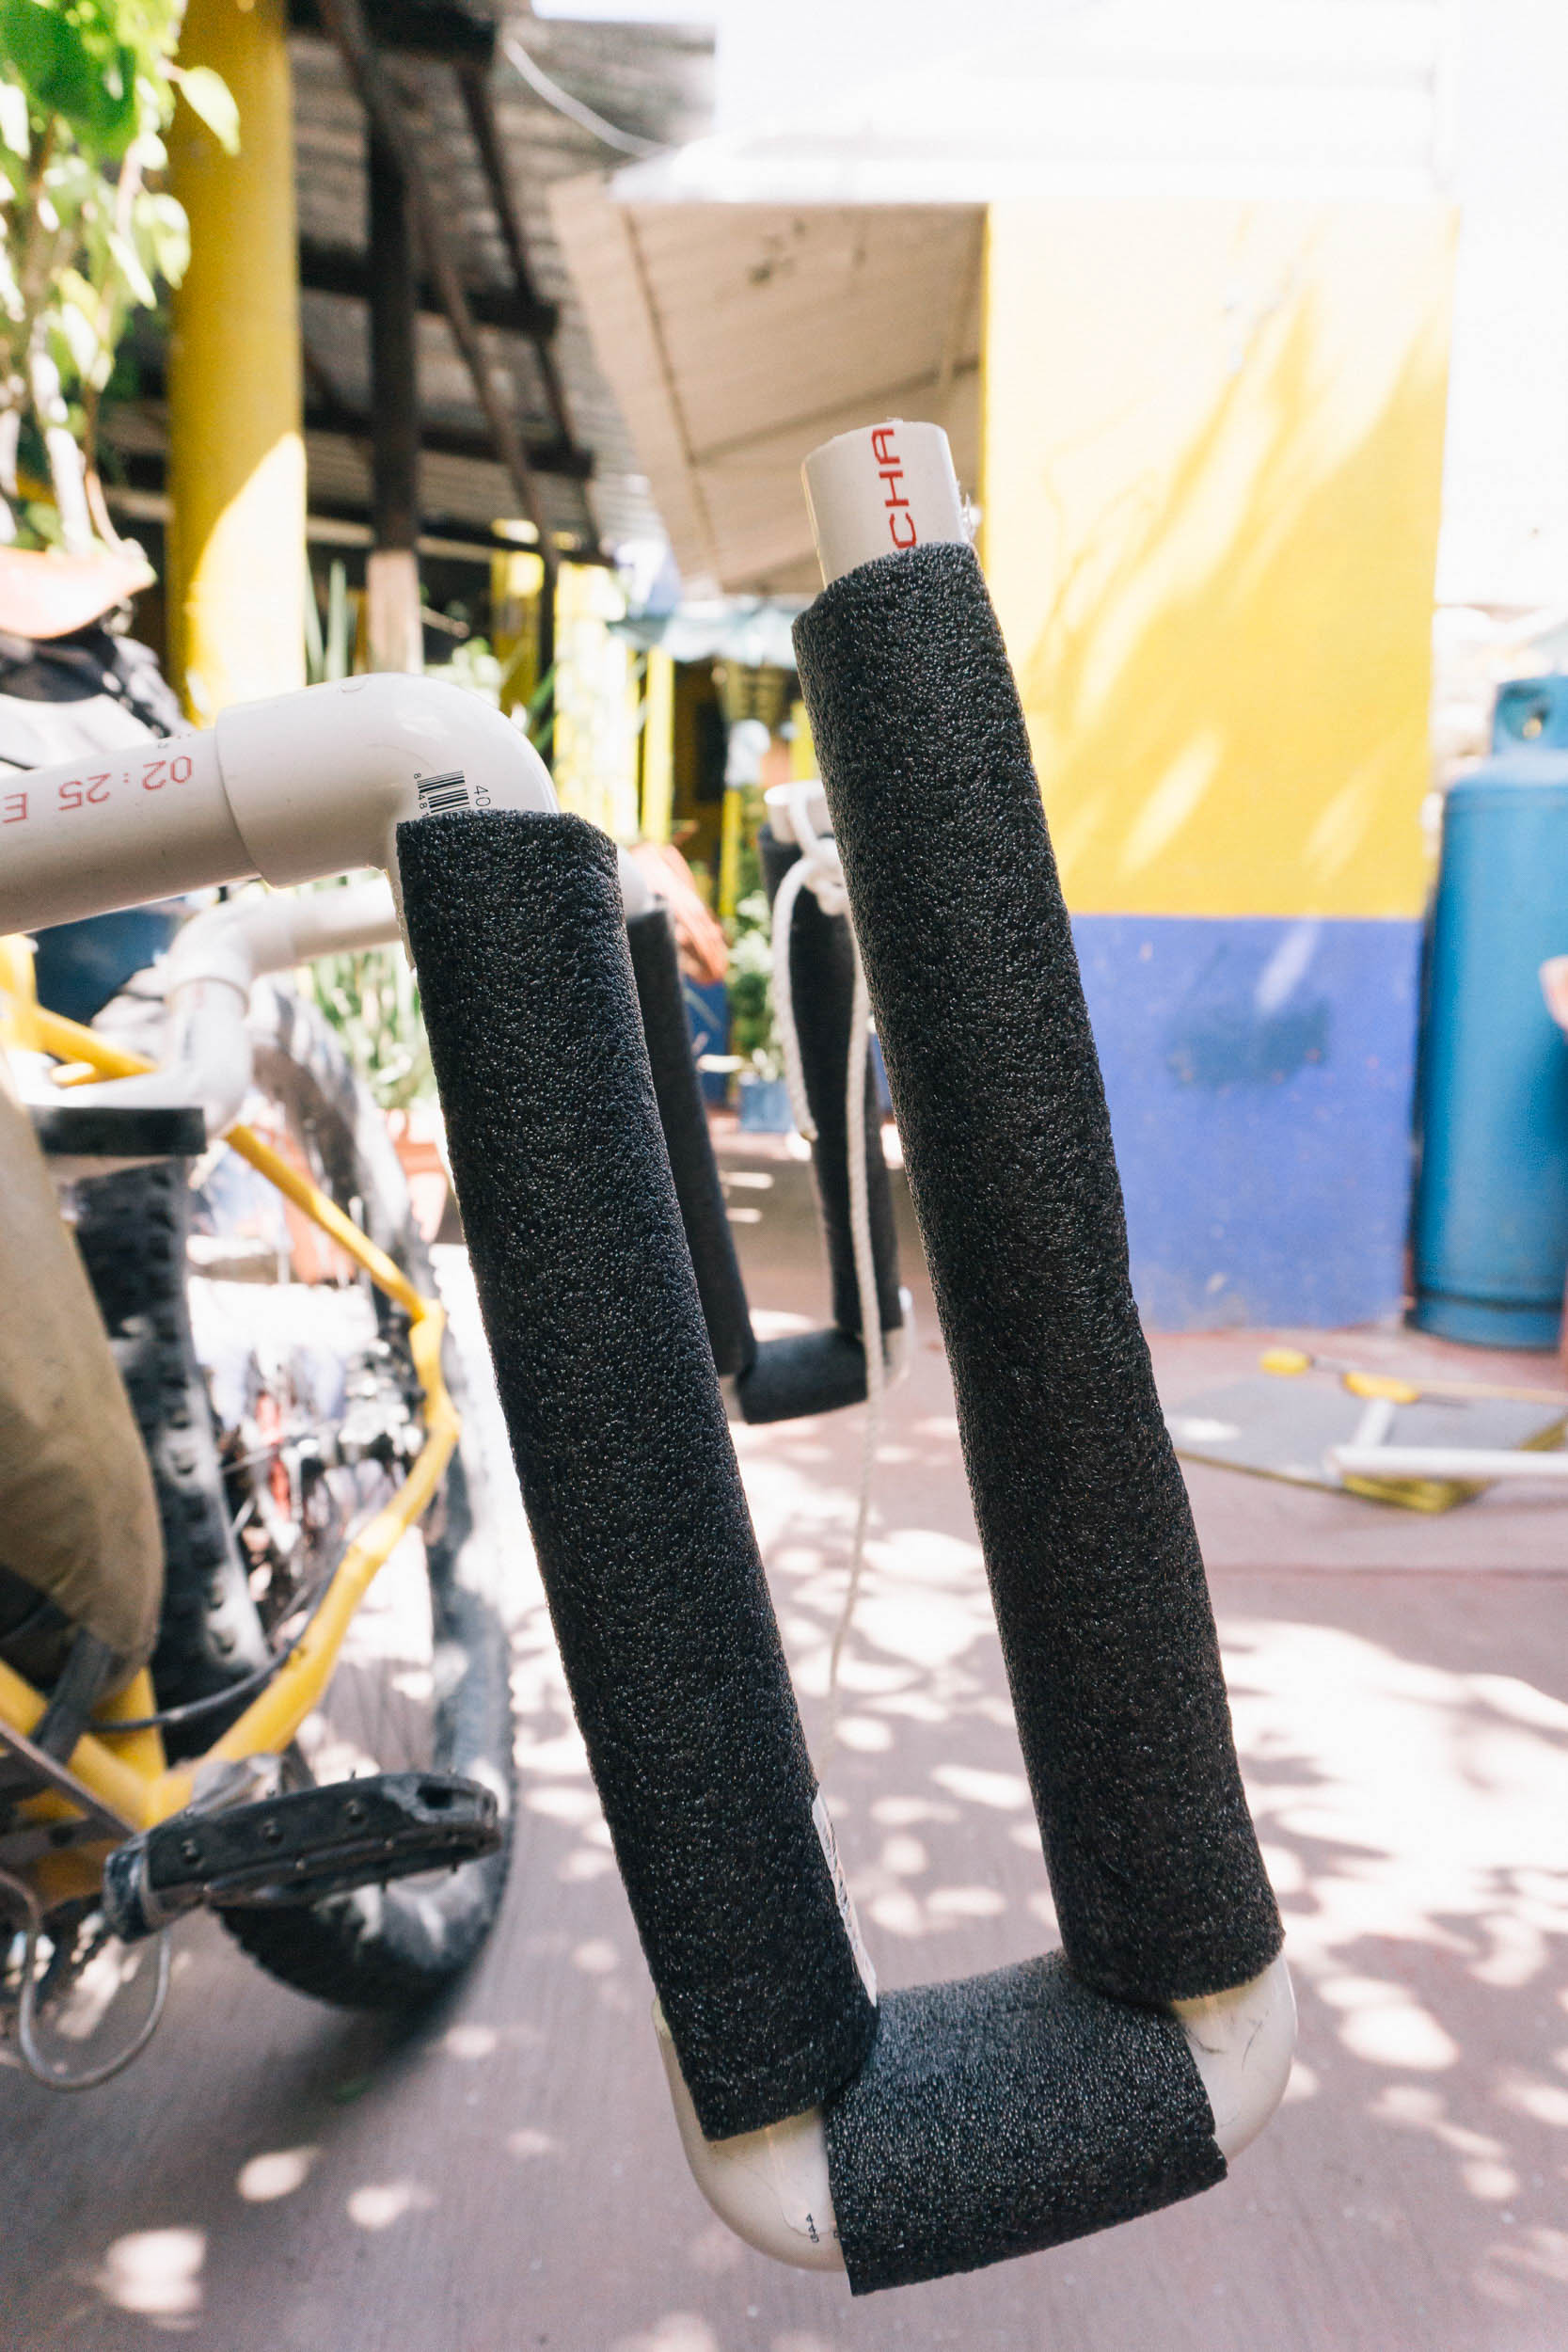
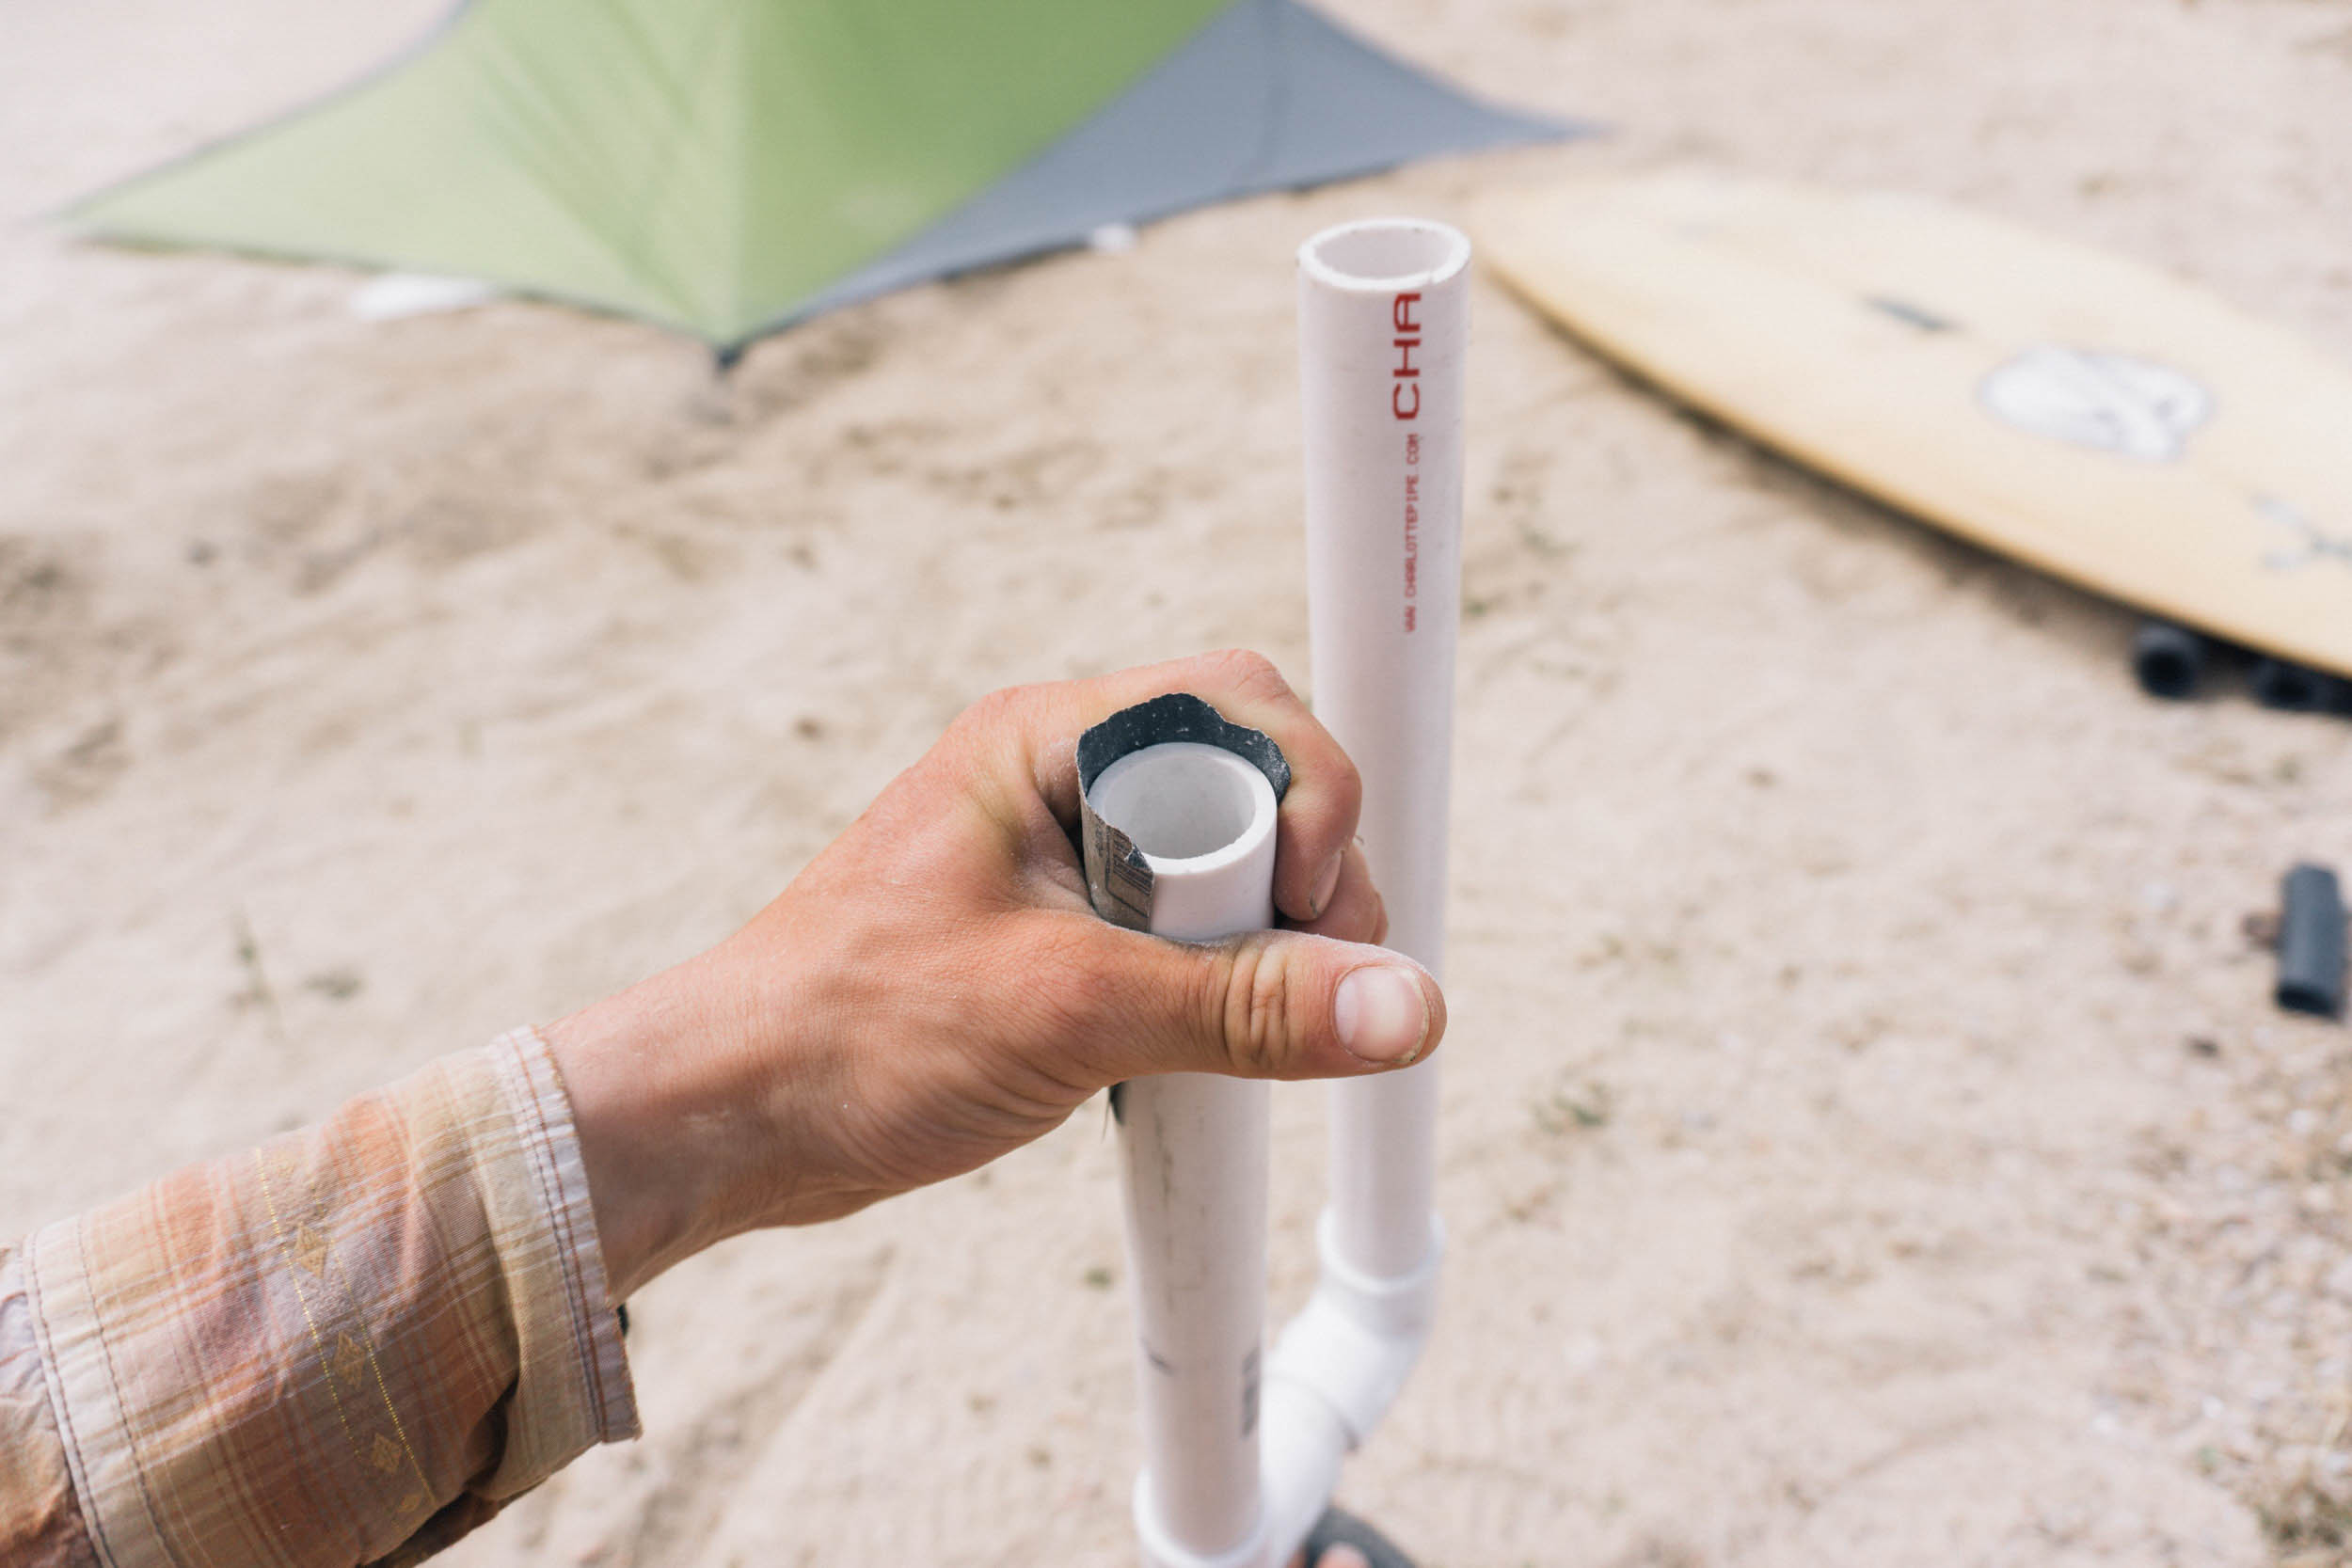
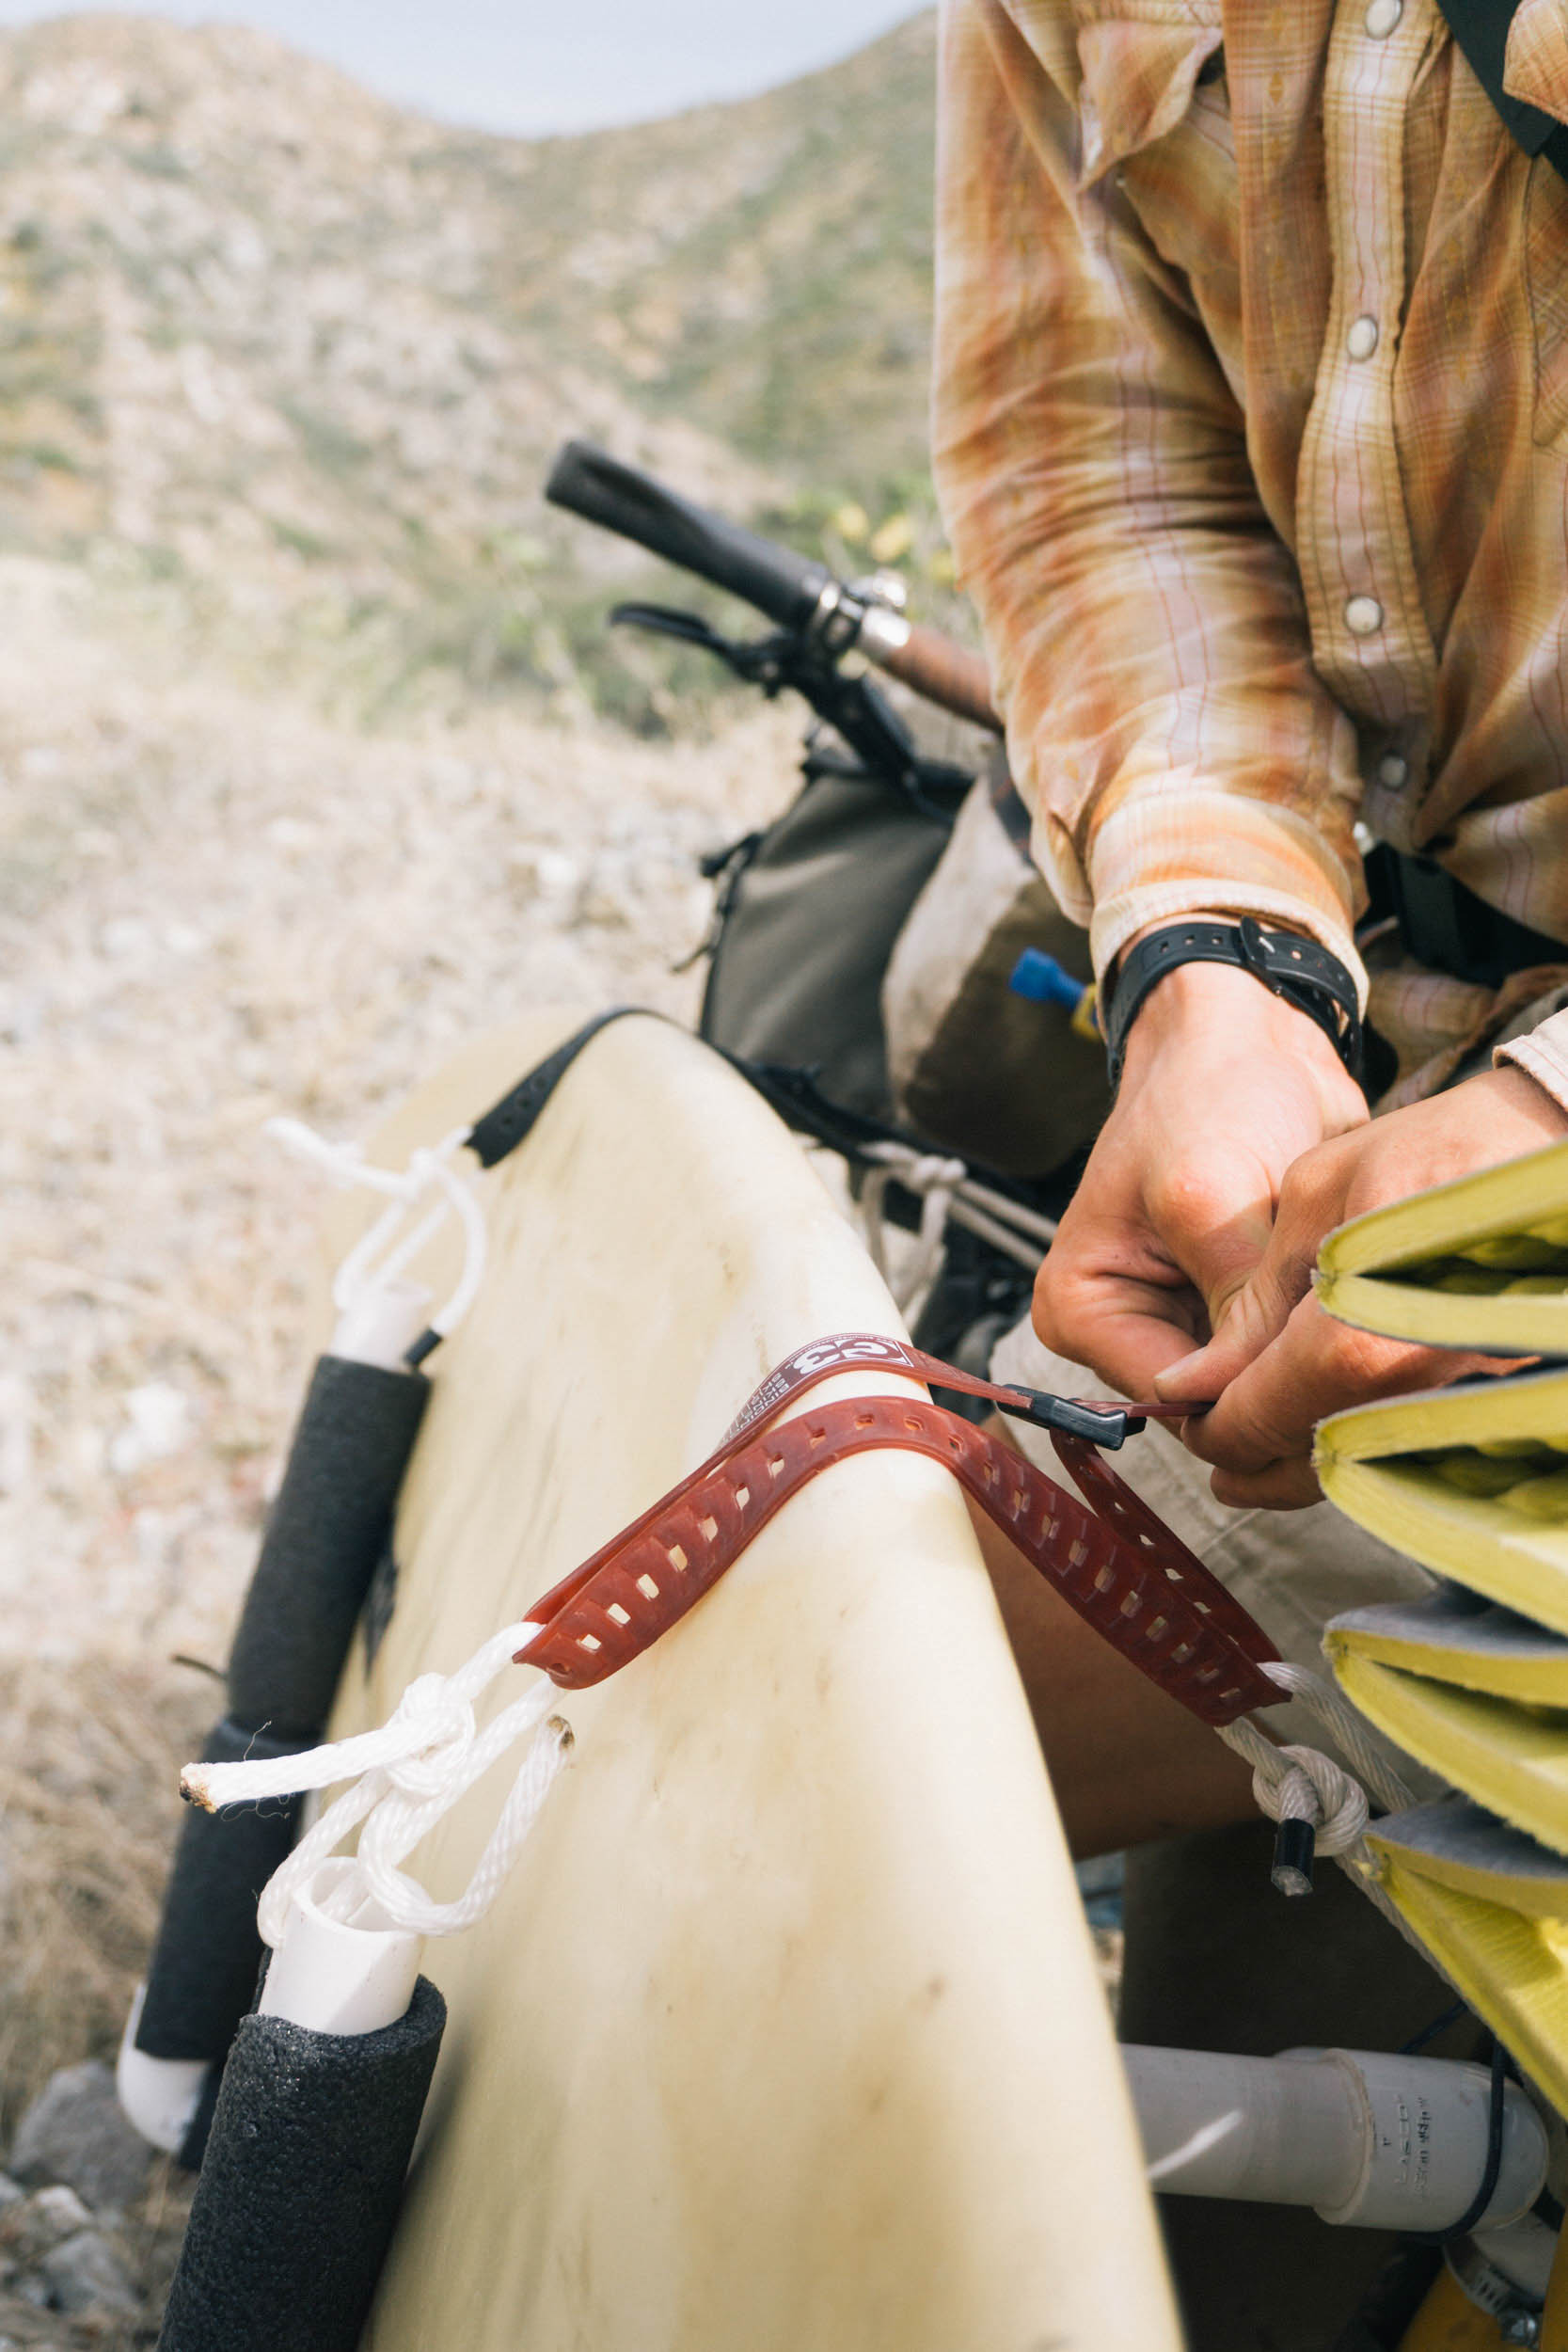
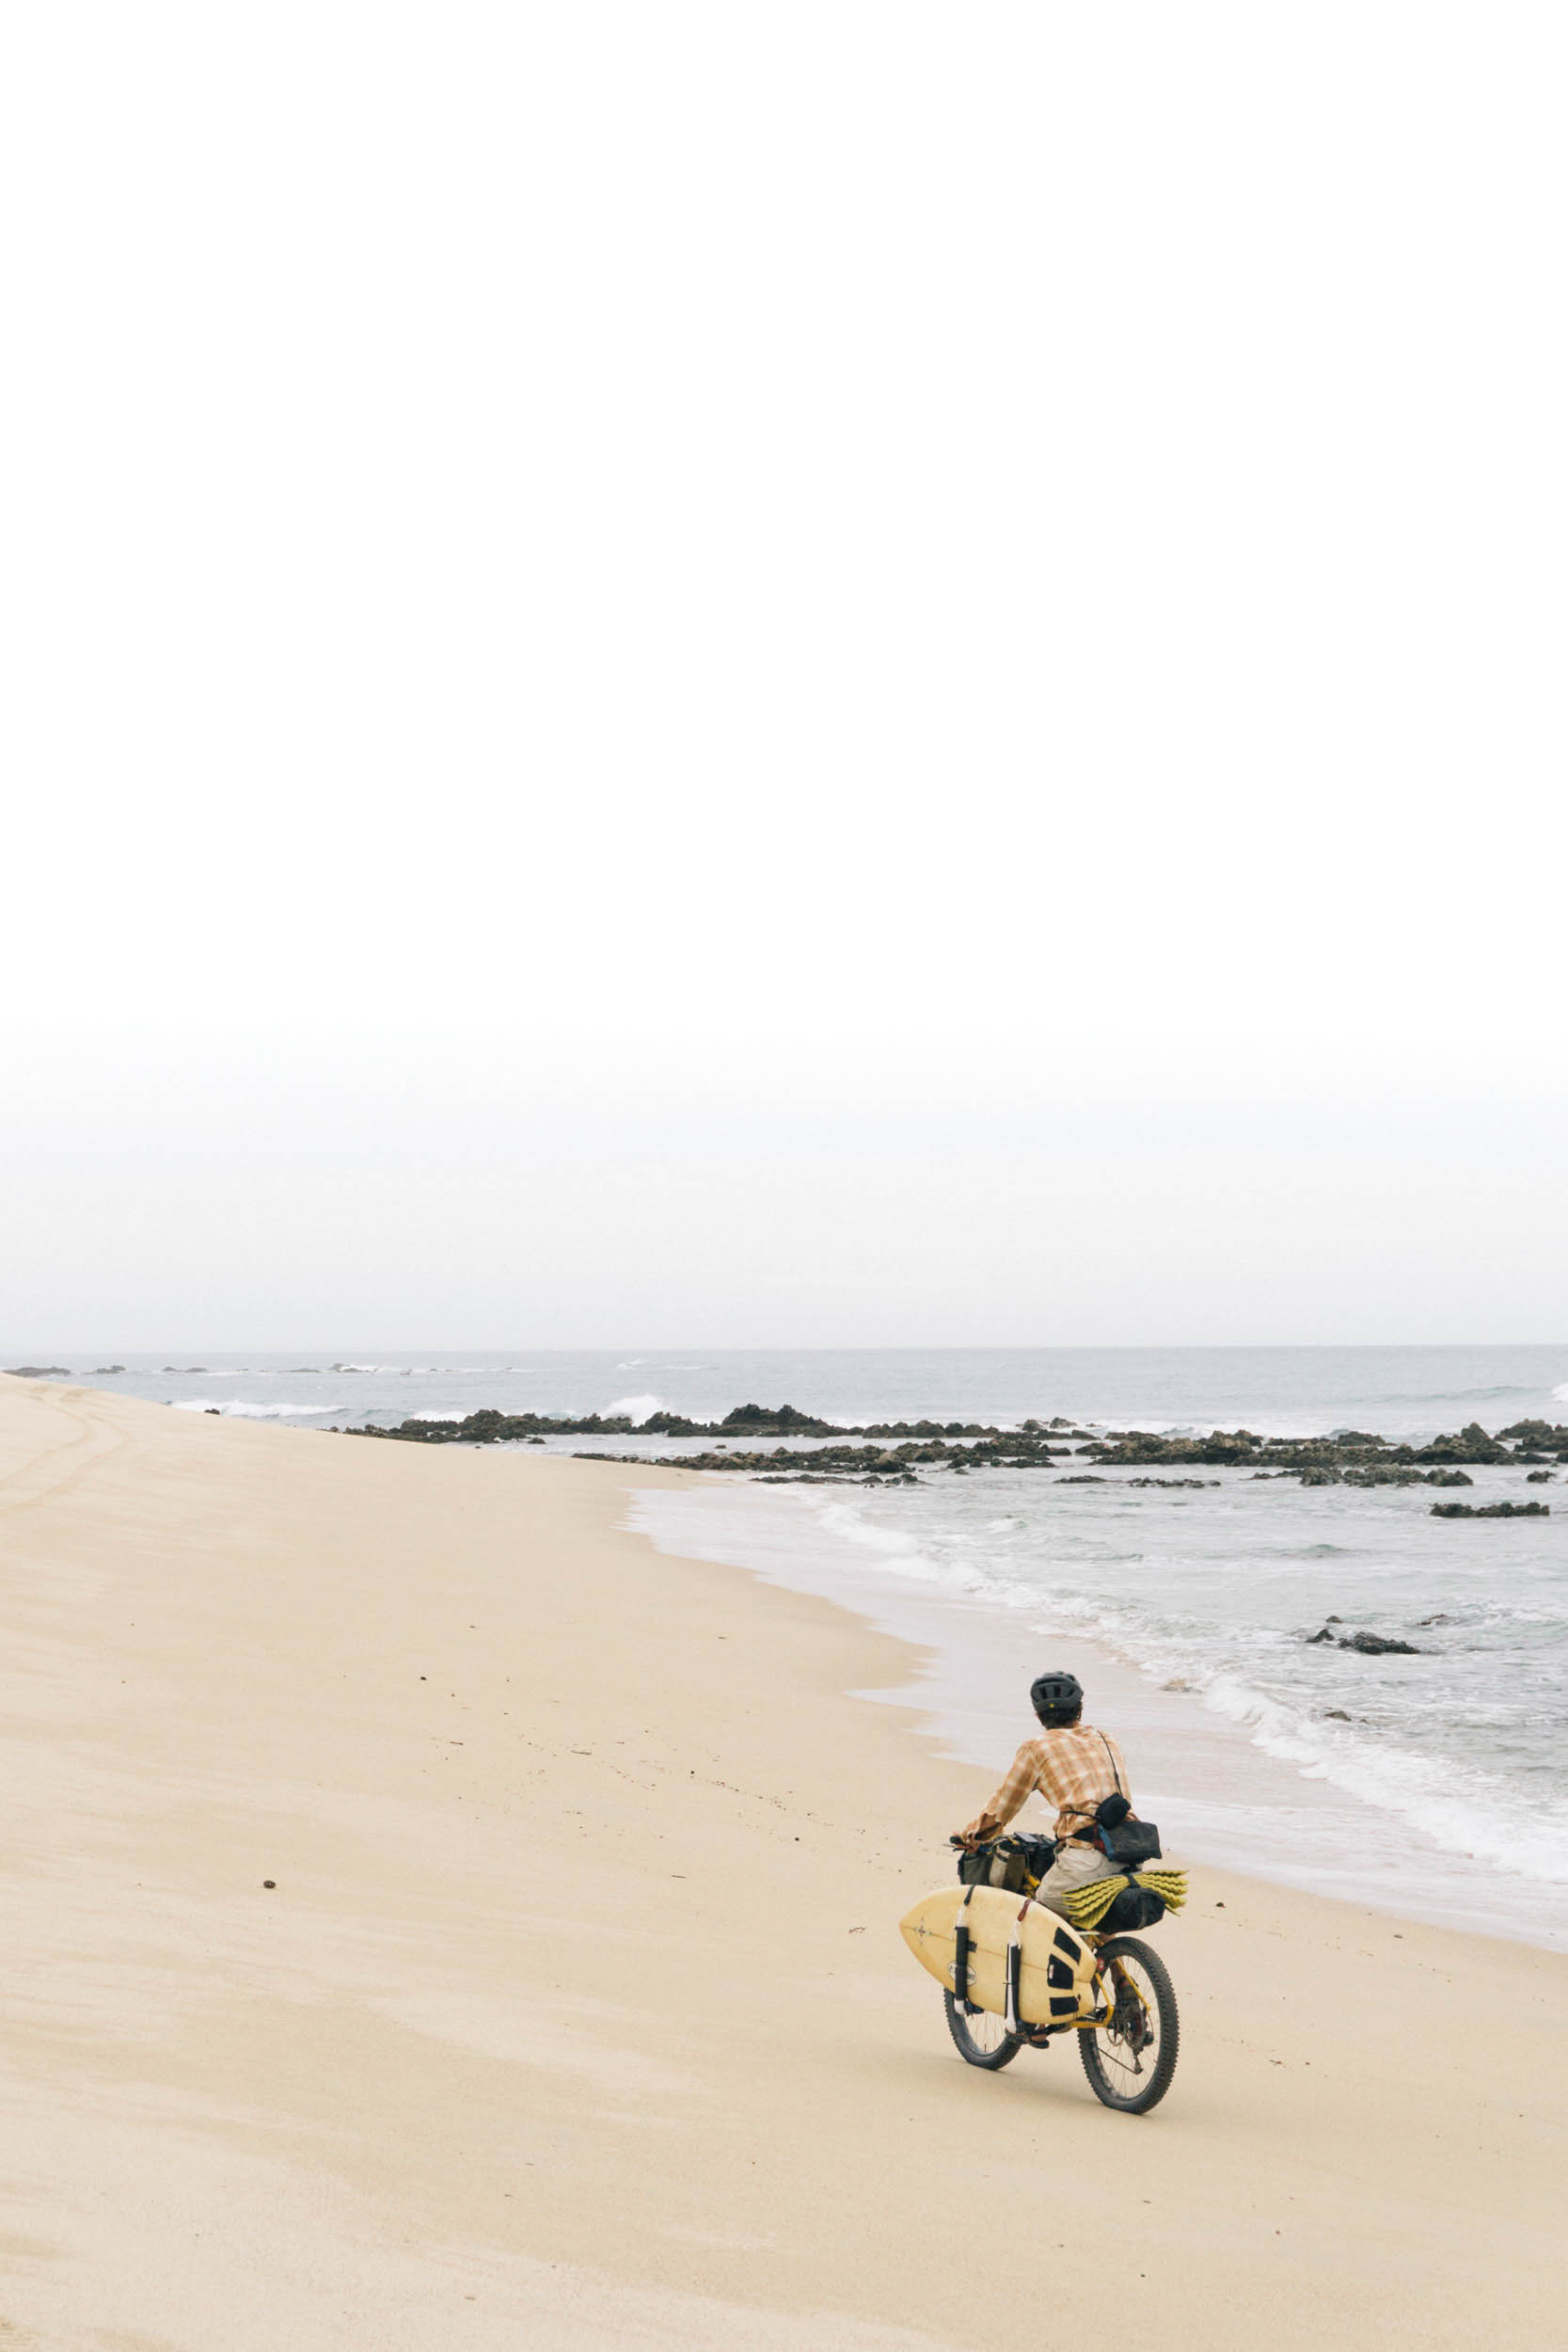
To make the rack removable, I refrained from gluing the connection between the PVC T-joint hose clamped to the frame, and the rest of the rack. That way I could easily remove the rack for packing, or if I wanted to ride singletrack, or any other reason you might not want to ride around with a plastic sidecar. While the rack was in use, the ski straps that held the board in place also pulled the rack back toward the bicycle frame and kept the U structures secure in the unglued T-joints. If you look closely at the photos, you’ll also see a thin cord going from the rear rack strut to my seatpost rail. Without the cord holding the strut up, after a few miles gravity and vibration would cause the strut to rotate downward in the unglued T-joint, and eventually interfere with my pedal stroke. The ski straps secured the board well, were easy to adjust, and I already had them for the additional water bottles I needed up north.
In total, the surfboard, fins, leash, wax, tools, and supplies for the rack cost me about $90. Not bad considering airline fees and prices of other options such as the Extra-Cycle Leap Kit or the Farfarer Trailer from Frances Cycles! Albeit the finished product is a bit of a mess of straps and rope, it worked well enough. Once adjusted, it would last about 20-40 miles before having to make minor adjustments again. Ah, just like the rigging on a boat!
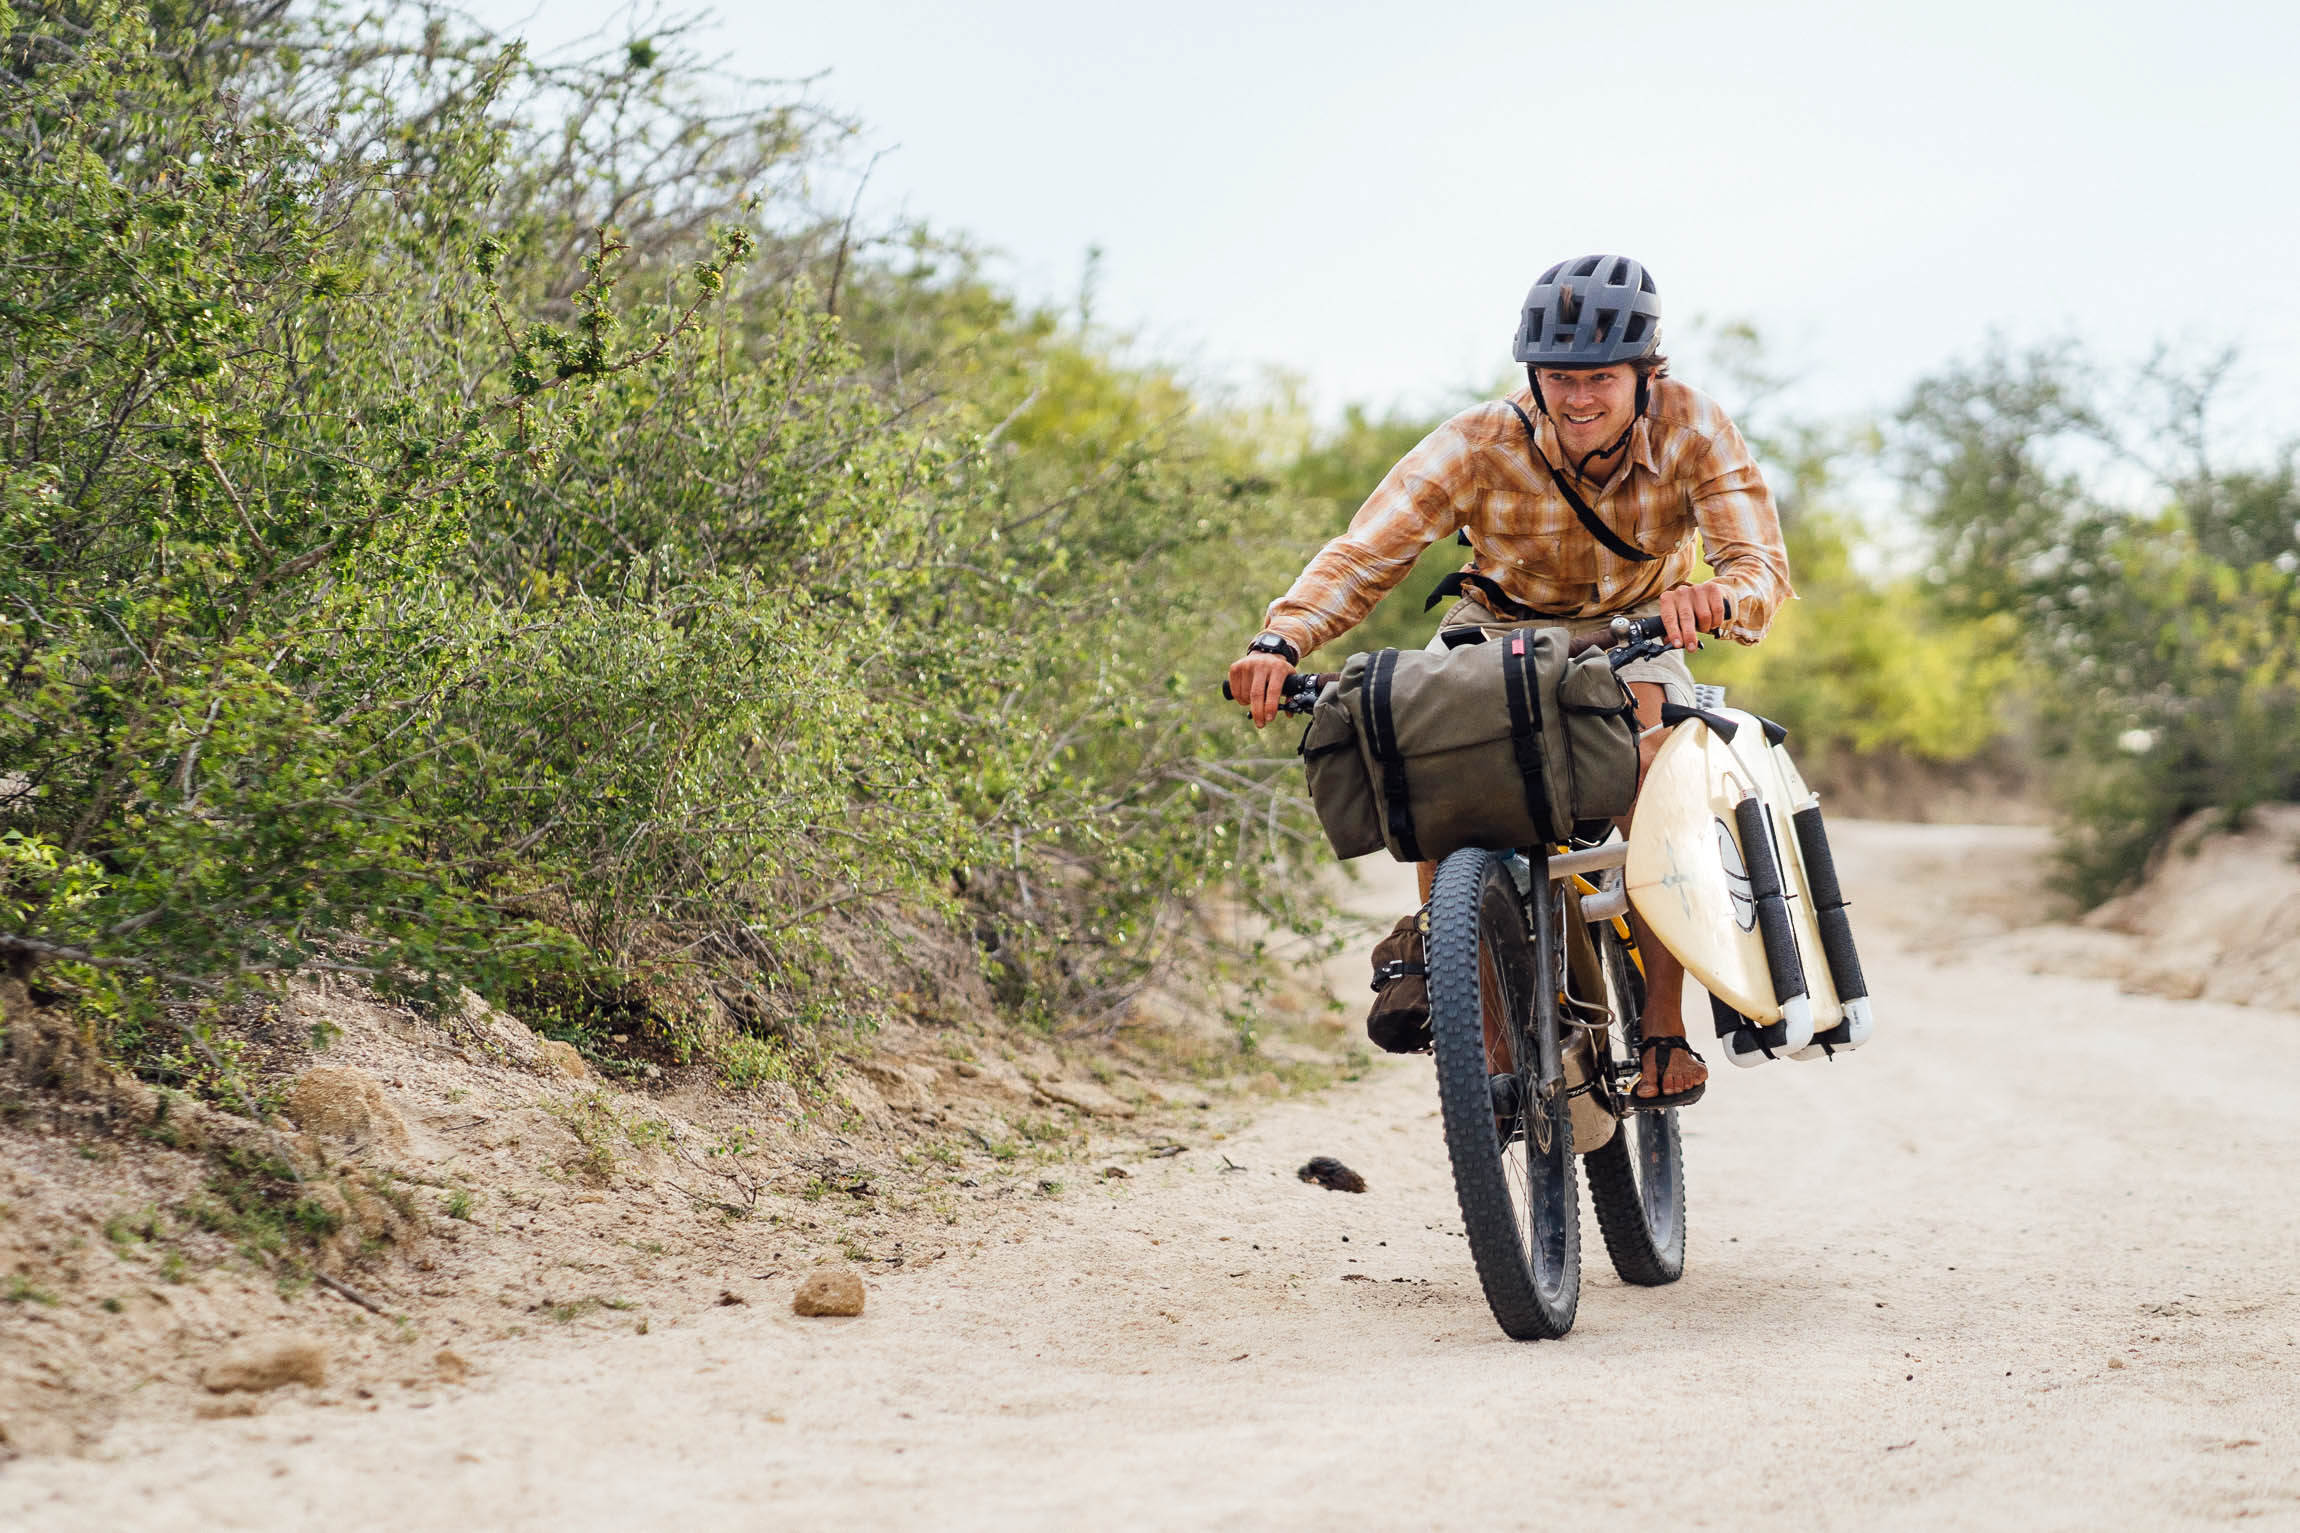
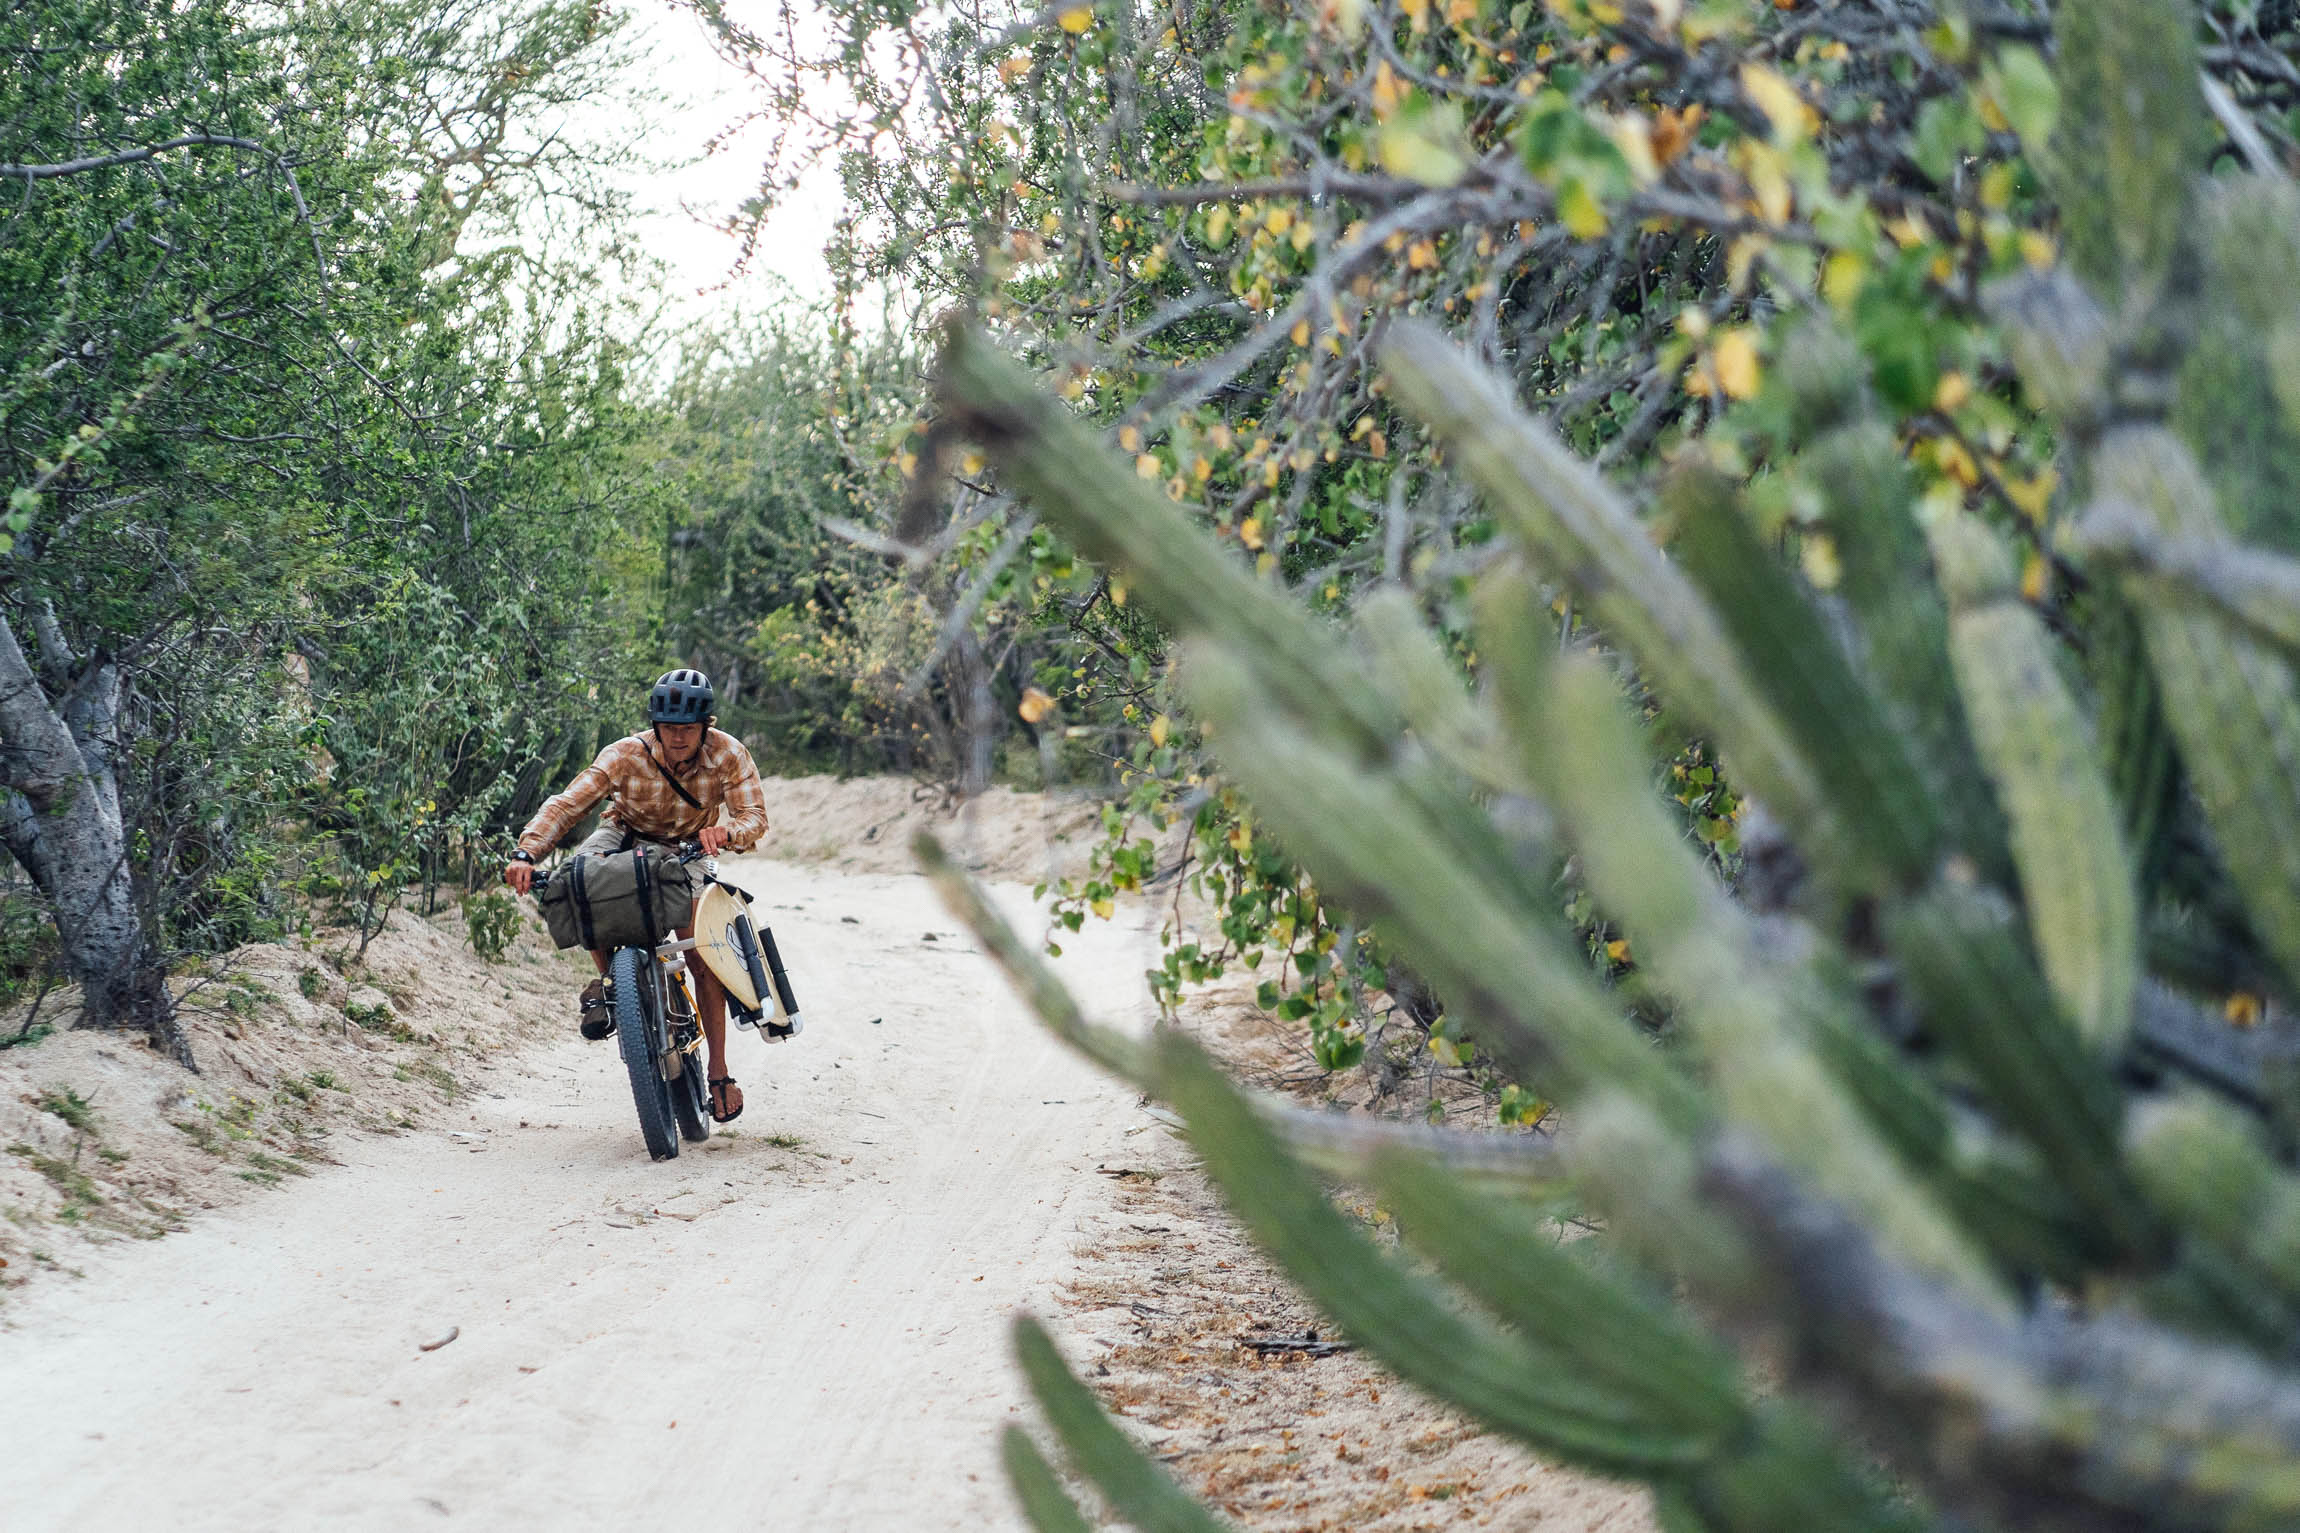
Riding with the Rack
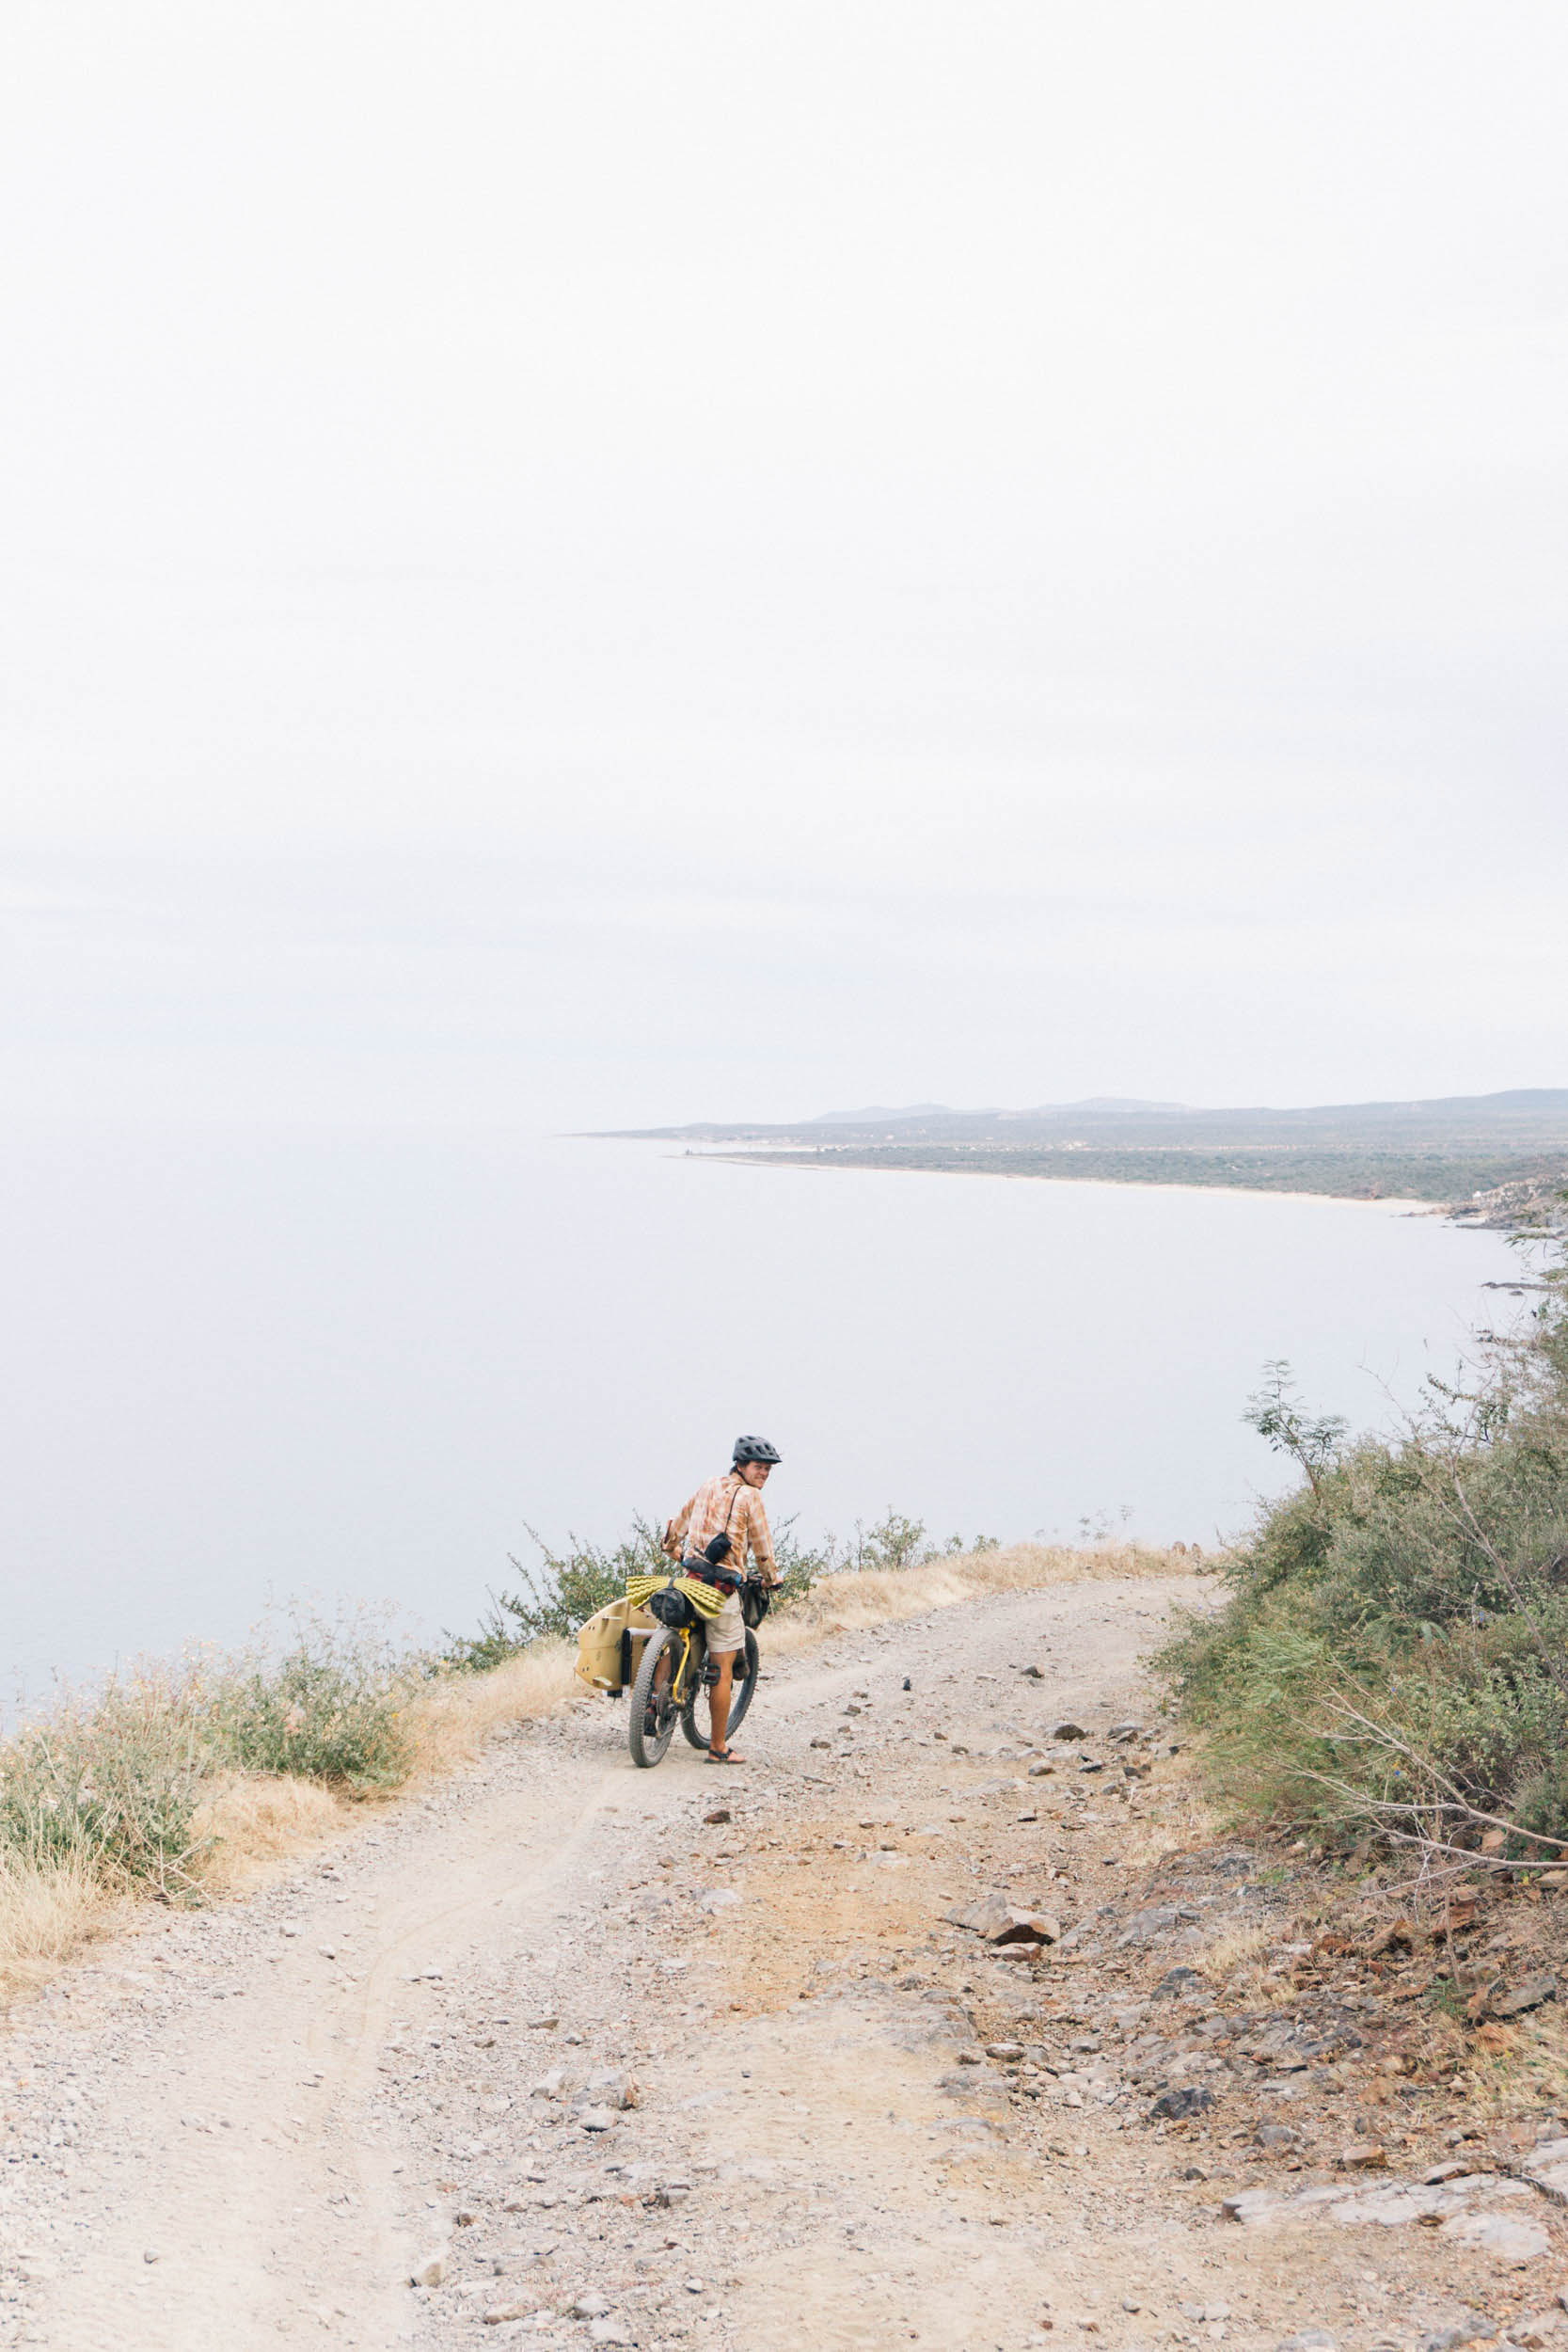
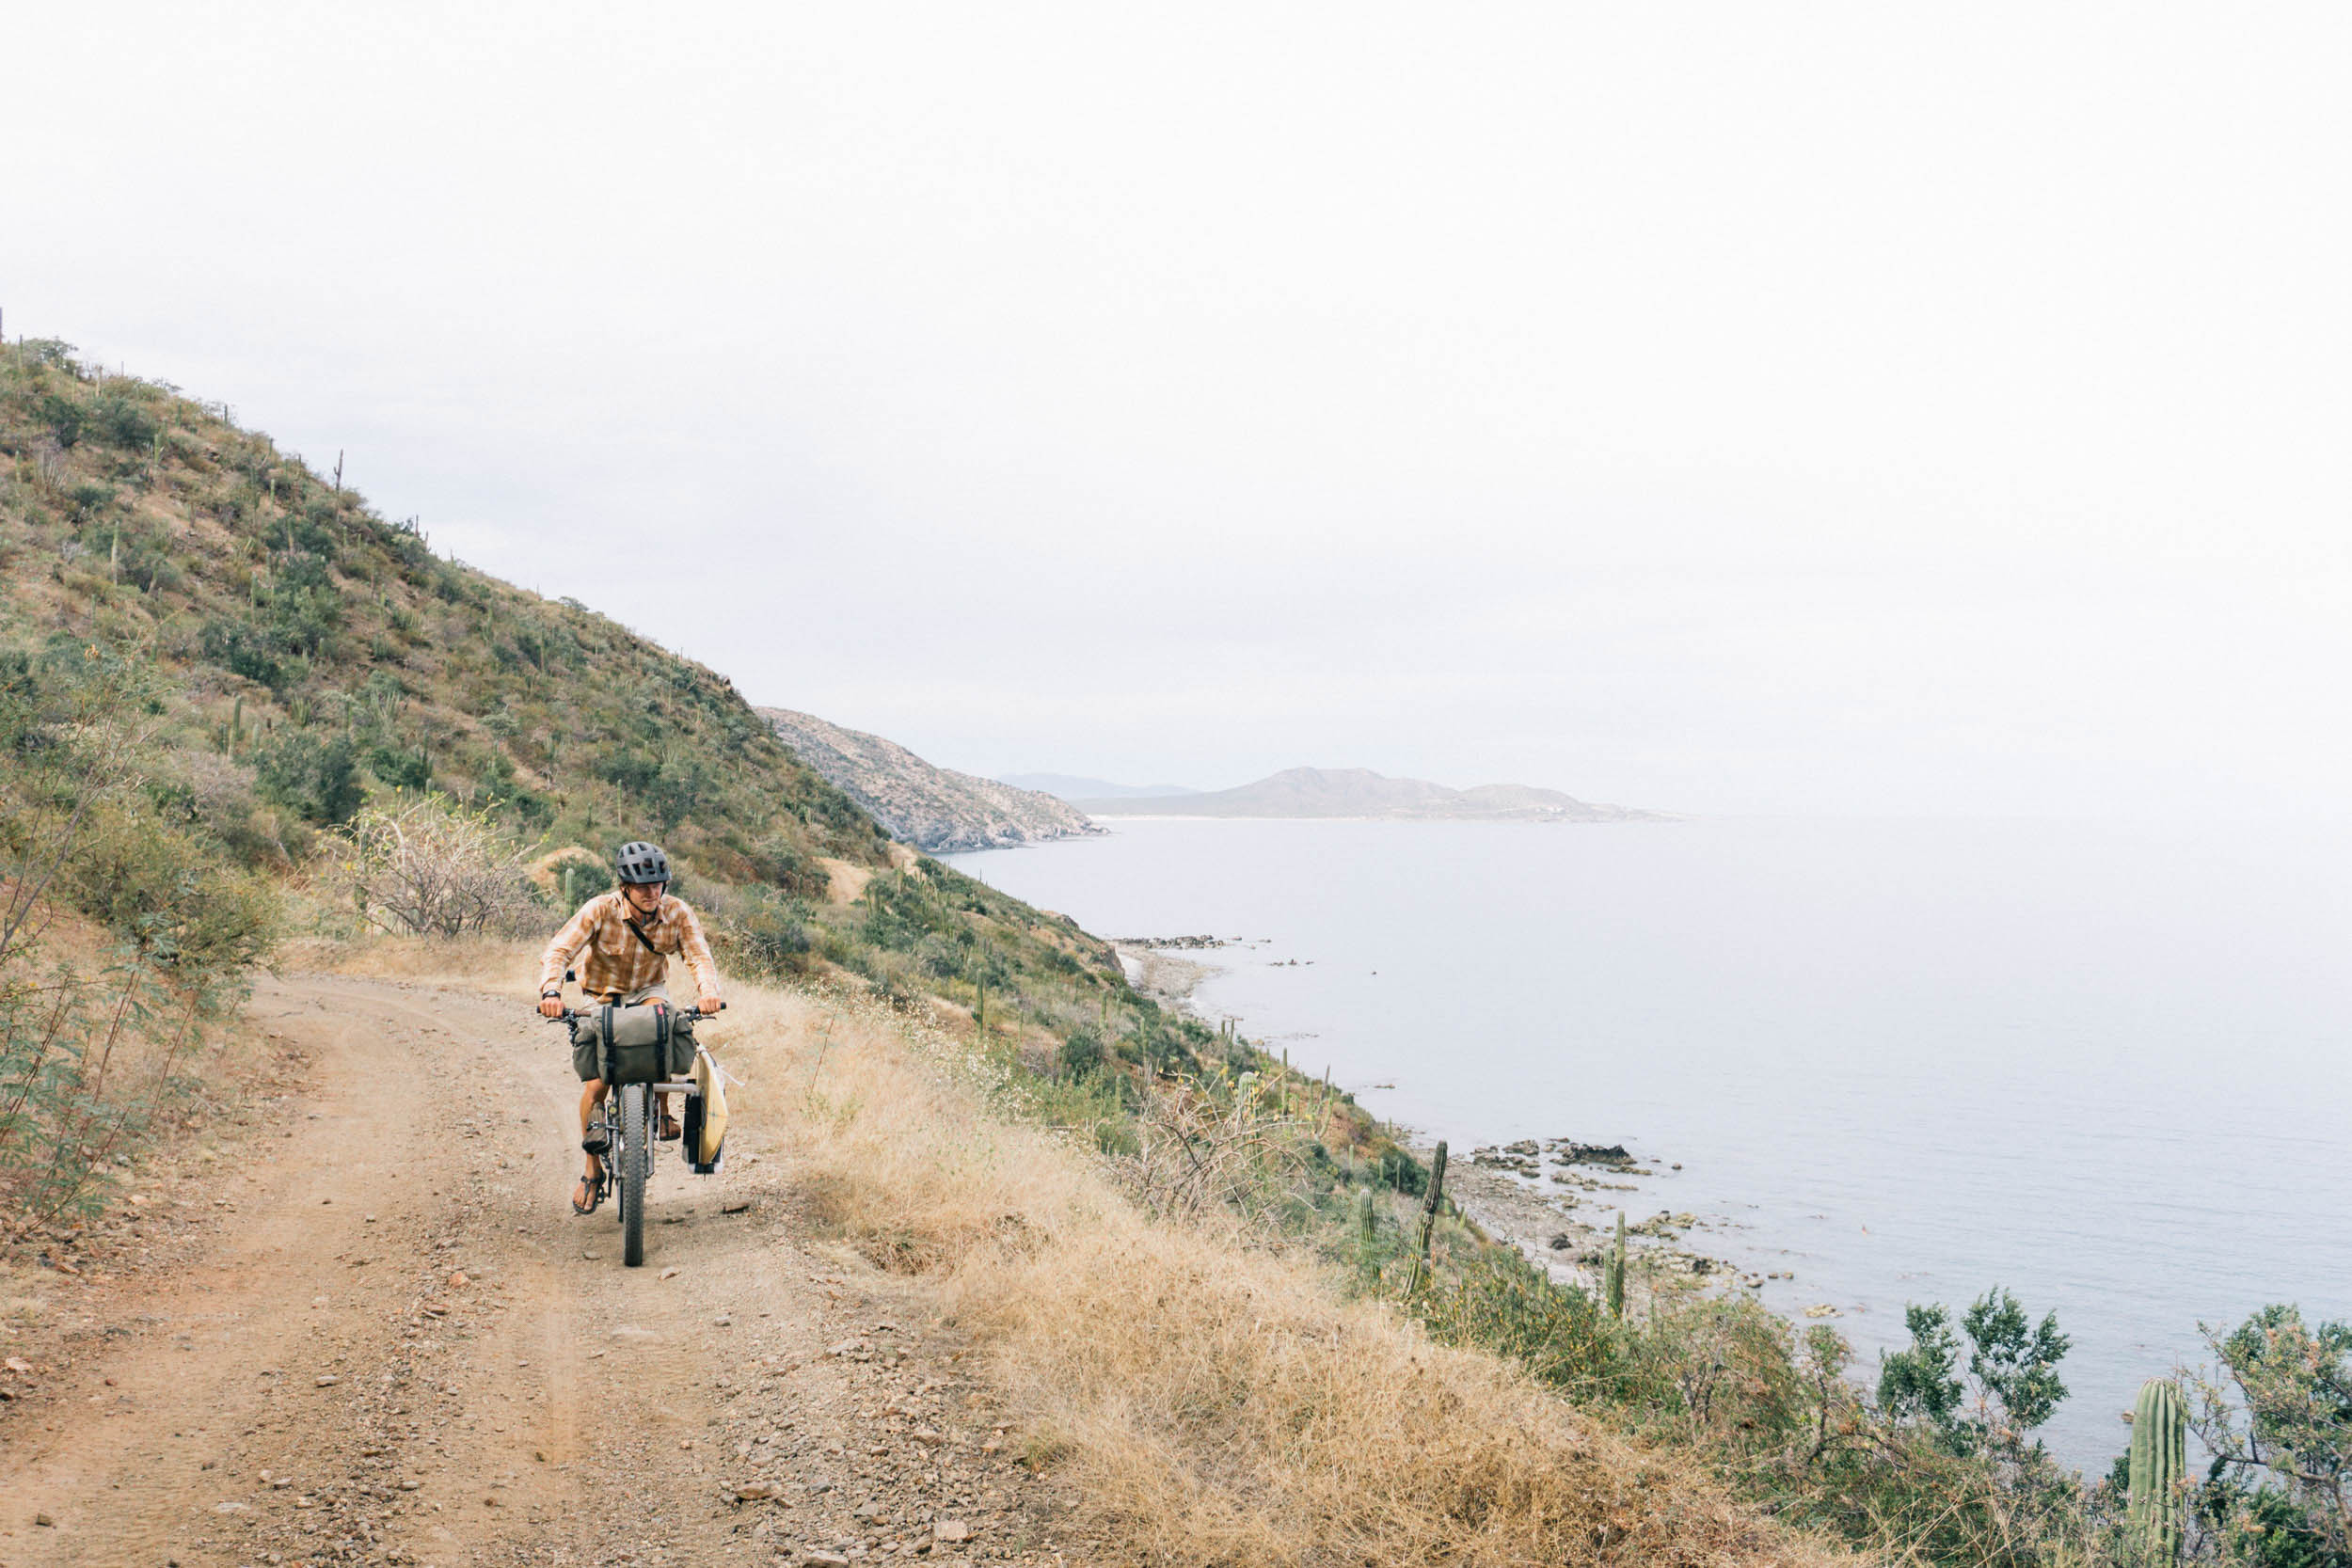
The first time I rode down the busy street outside our hotel with the board, I chuckled at how I could feel myself leaning the bike ever so slightly to compensate for the weight of the board on the other side. However, that feeling quickly disappeared after a few miles and the board felt normal, the load being well balanced from front to back. Generally sharing a similar profile with the bike, the board also didn’t catch the wind as badly as I thought it would, even on the windier days. You may have noticed the board limits the ability to stick your foot out on the surfboard side and catch yourself, which lessened my confidence in left hand corners, but I adjusted to it over time. On the plus side, the outer edges of the rack largely protect the board in a fall. I had to slow down a little on the descents, but I still had fun. It climbed better than expected and I don’t think I walked my bike any more than I would have without the board. Of course, a bigger board might change this, and I don’t think I’d want to bring a surfboard much over 7’.
If I were to build another one, I might try adding the cross brace shown in the Korduroy.tv video, though I’m not sure it’s worth the sacrifice in packability. I would also try using strips of tube to pad the inside of the T-joints where they sit against the frame. Ideally this would create a little more grip and protect the frame’s paint, although my frame didn’t suffer any major marks when I took the T-joints off. A couple of days into the journey, I noticed a few small dents in my board where it made the most contact with the rack. So, I’d recommend adding several layers of padding to the rack where it’s most needed. If I had one, I’m sure a board bag or sock would have helped as well! With a bit more time and resources, and creativity, I’m sure the design could be refined. So, don’t hesitate to think outside of this article and let us know what you come up with!
Geography and Weather
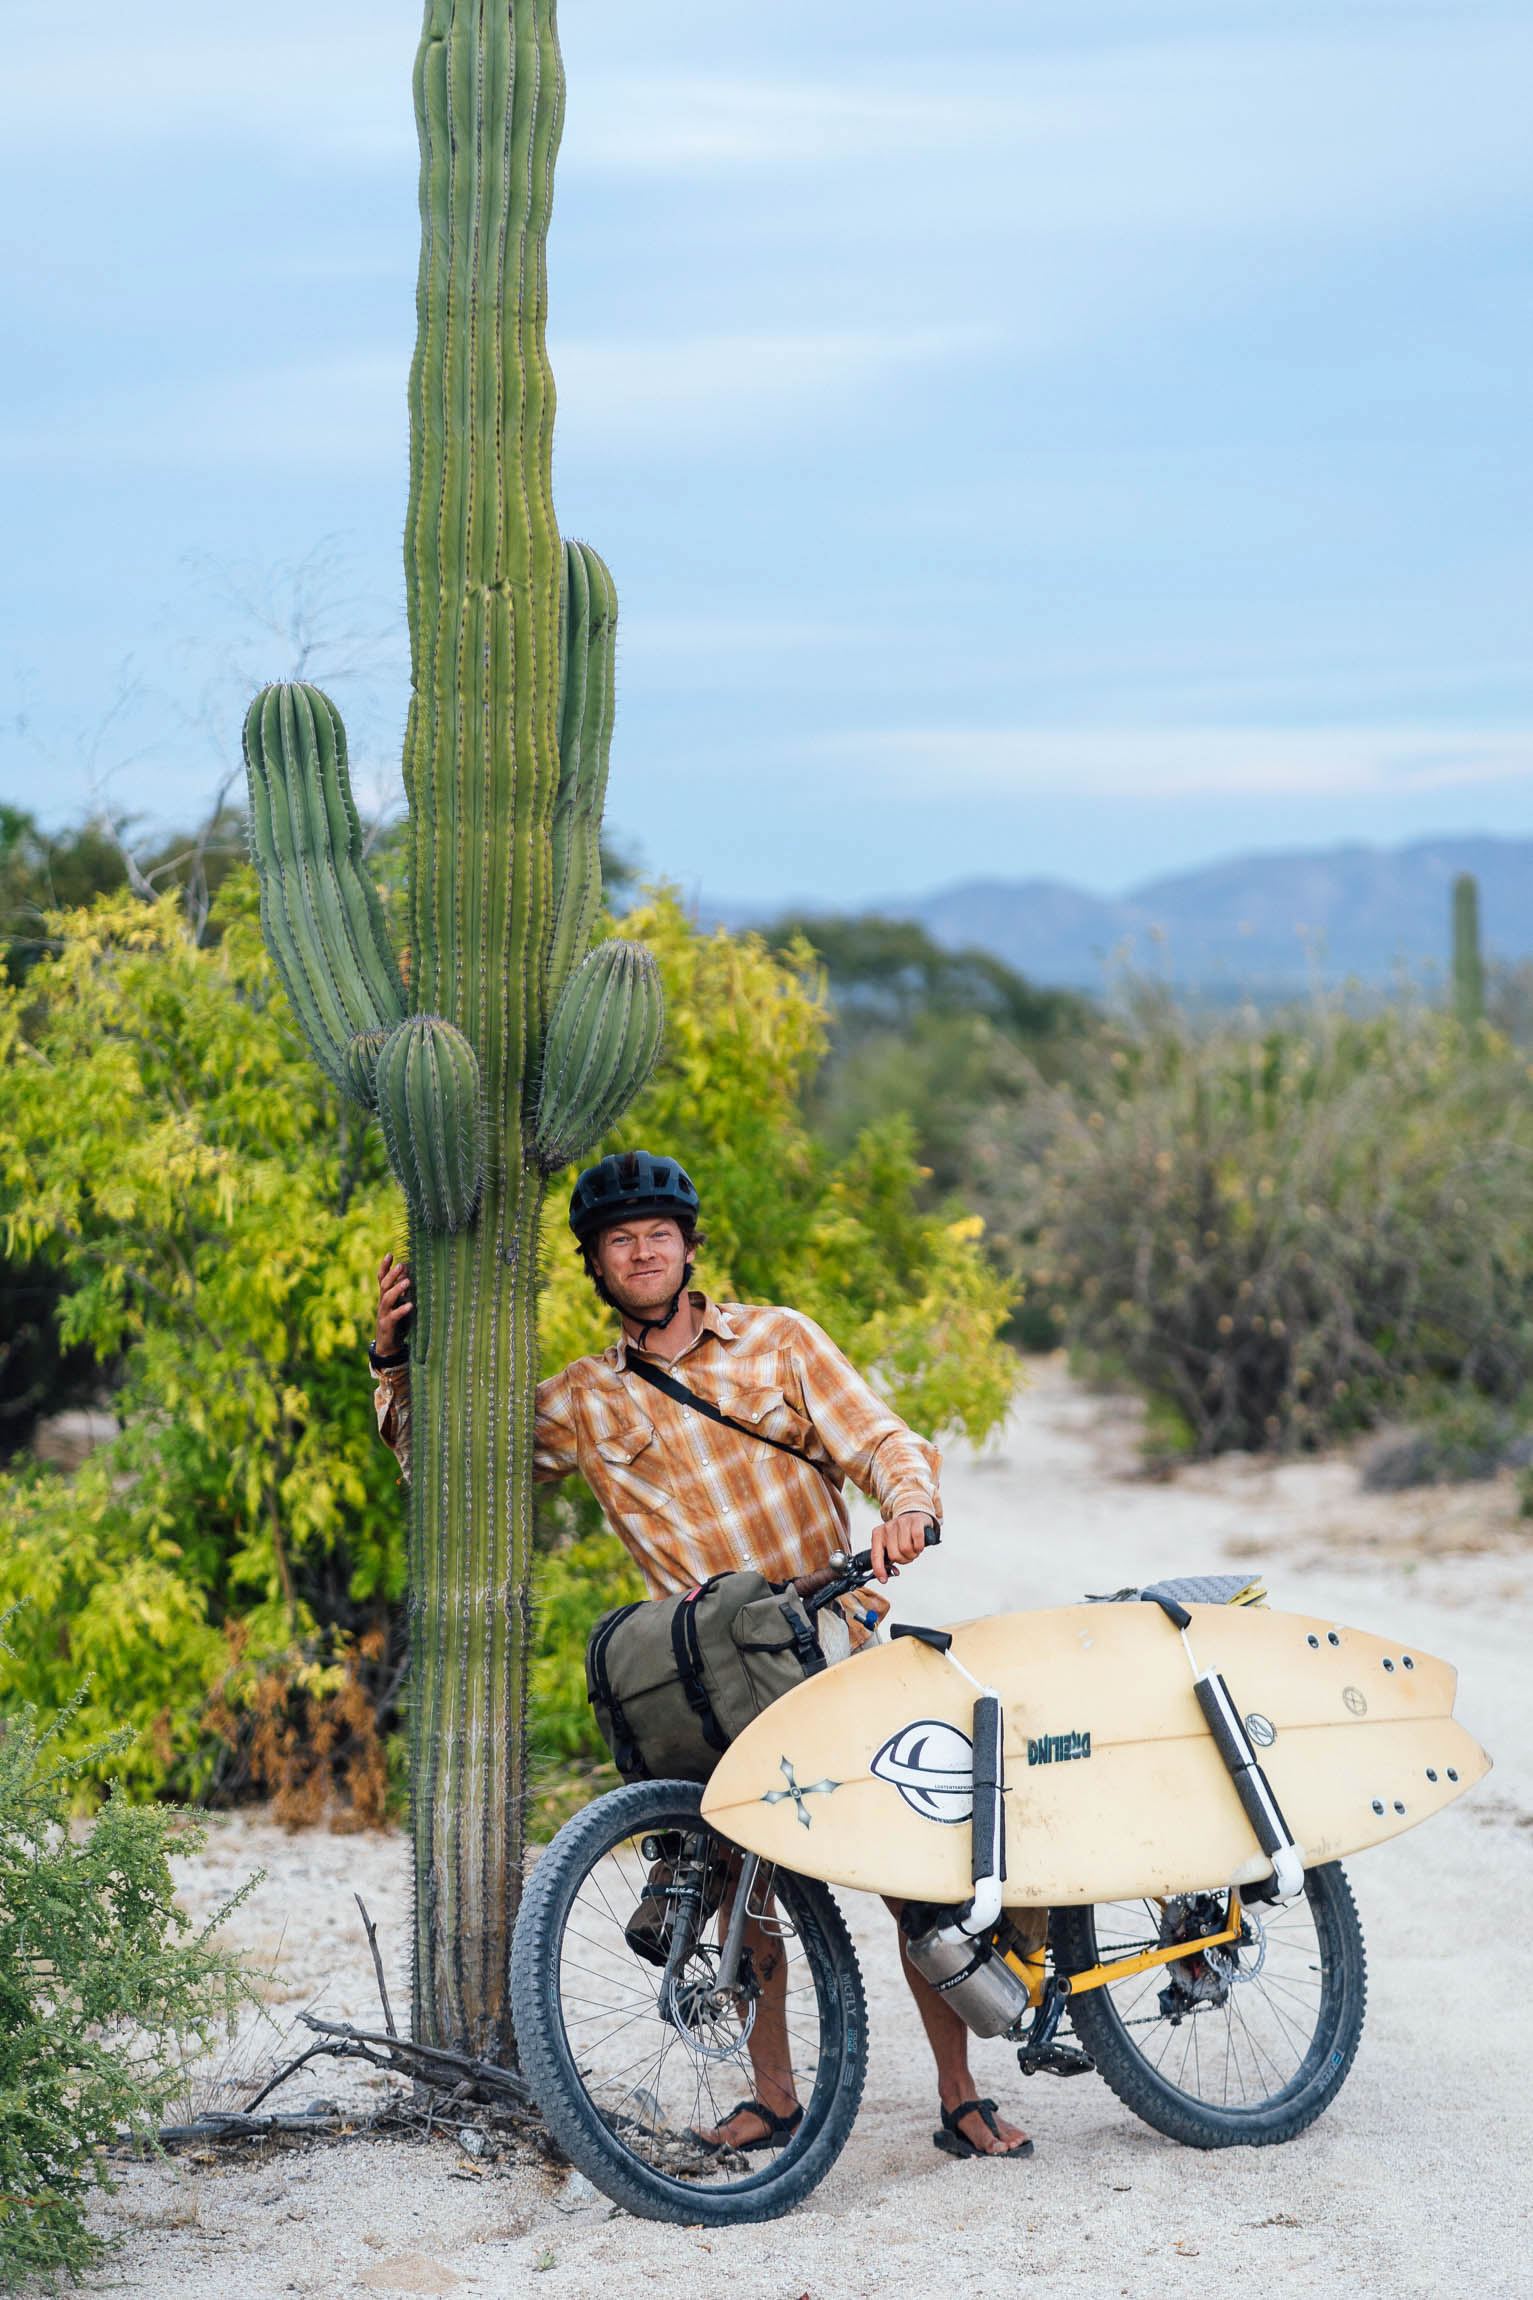
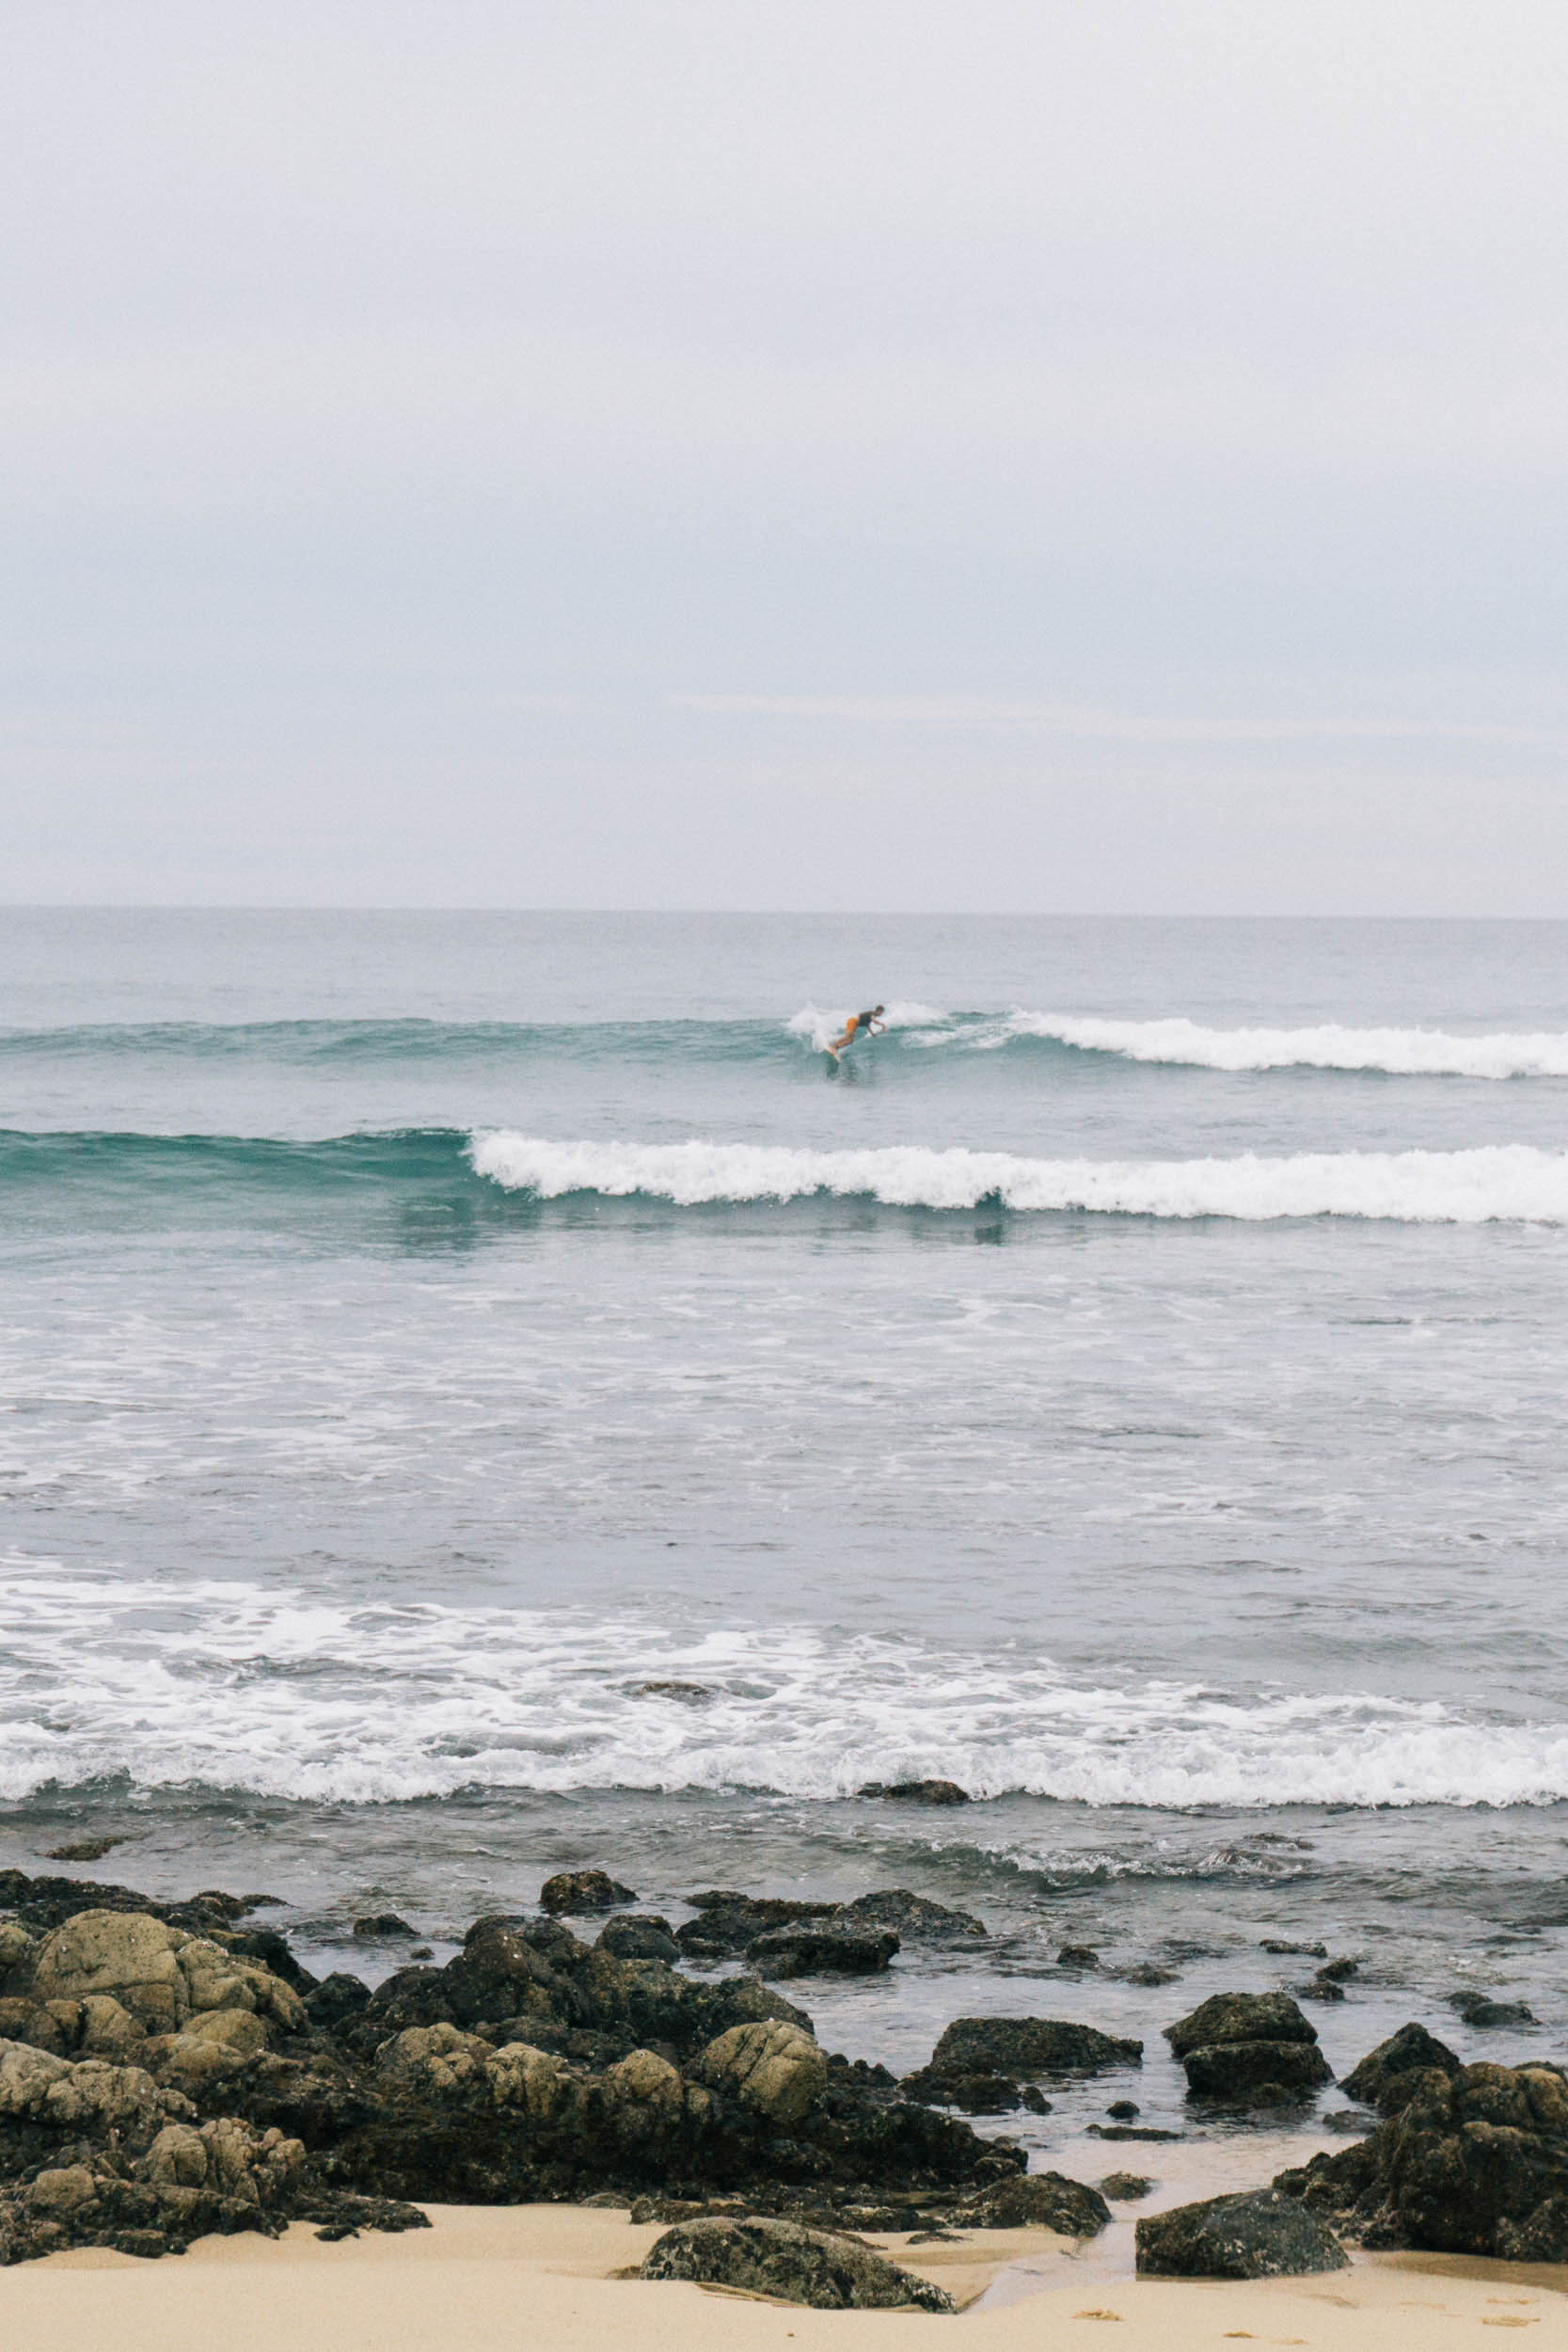
If you look at the Cape Loop route, you’ll notice that most of the coastal riding is on the Sea of Cortez side where there is little surf, so I’d recommend venturing off route at a couple of points to find waves. The two general zones with the most surf are the stretch of coast known as The East Cape, that goes from San Jose del Cabo to Cabo Pulmo, and the West Cape, with most spots being between El Pescadero and Todos Santos. There are some breaks between Todos Santos and San Jose, however we heard it was especially narrow and busy between San Jose and San Lucas, so we skipped this section of coast in favor of staying on the Cape Loop from San Jose to Todos Santos. In hindsight, we’re glad we did, as this was a highlight of the route despite being inland!
Baja has two primary surf seasons: winter, when the Pacific coast gets more northwest swell, and summer, when south swells light up the East Cape and many spots on the Pacific side of Baja Sur. If you’re riding the Baja Divide closer to fall or spring, your odds of south swell (and surfing on the East Cape) will be a little higher. The beauty of surfing the Cape Loop is that if the waves are crumby on one side of the Cape, you’re likely to find better surf on the other, so check the forecast once you’re down there (I like Magicseaweed) and plan accordingly. If there’s more northwest swell, you can turn off the route near El Pescadero and spend more time on the Pacific side. More south swell, and you can follow the coast road between Cabo Pulmo and San Jose like we did. If you follow this road, just make sure to load up on food and water in Cabo Pulmo as there are no reliable services until San Jose. I wouldn’t count on it, but if the surf is good it’s likely you’ll meet surfers returning to town soon with water to spare.
On the East Cape, the right point called Nine Palms draws traveling surfers of all abilities, though there are many other spots to the north and south of Nine Palms that I’ll leave up to you to find. In Todos Santos, we were greeted with lots of wind and little swell, so we didn’t do much surfing on the Pacific side. However, the surf is generally consistent, supporting a couple surf shops, schools, and board rentals in and around Todos Santos.
DIY: How to build a Bike Surf Rack
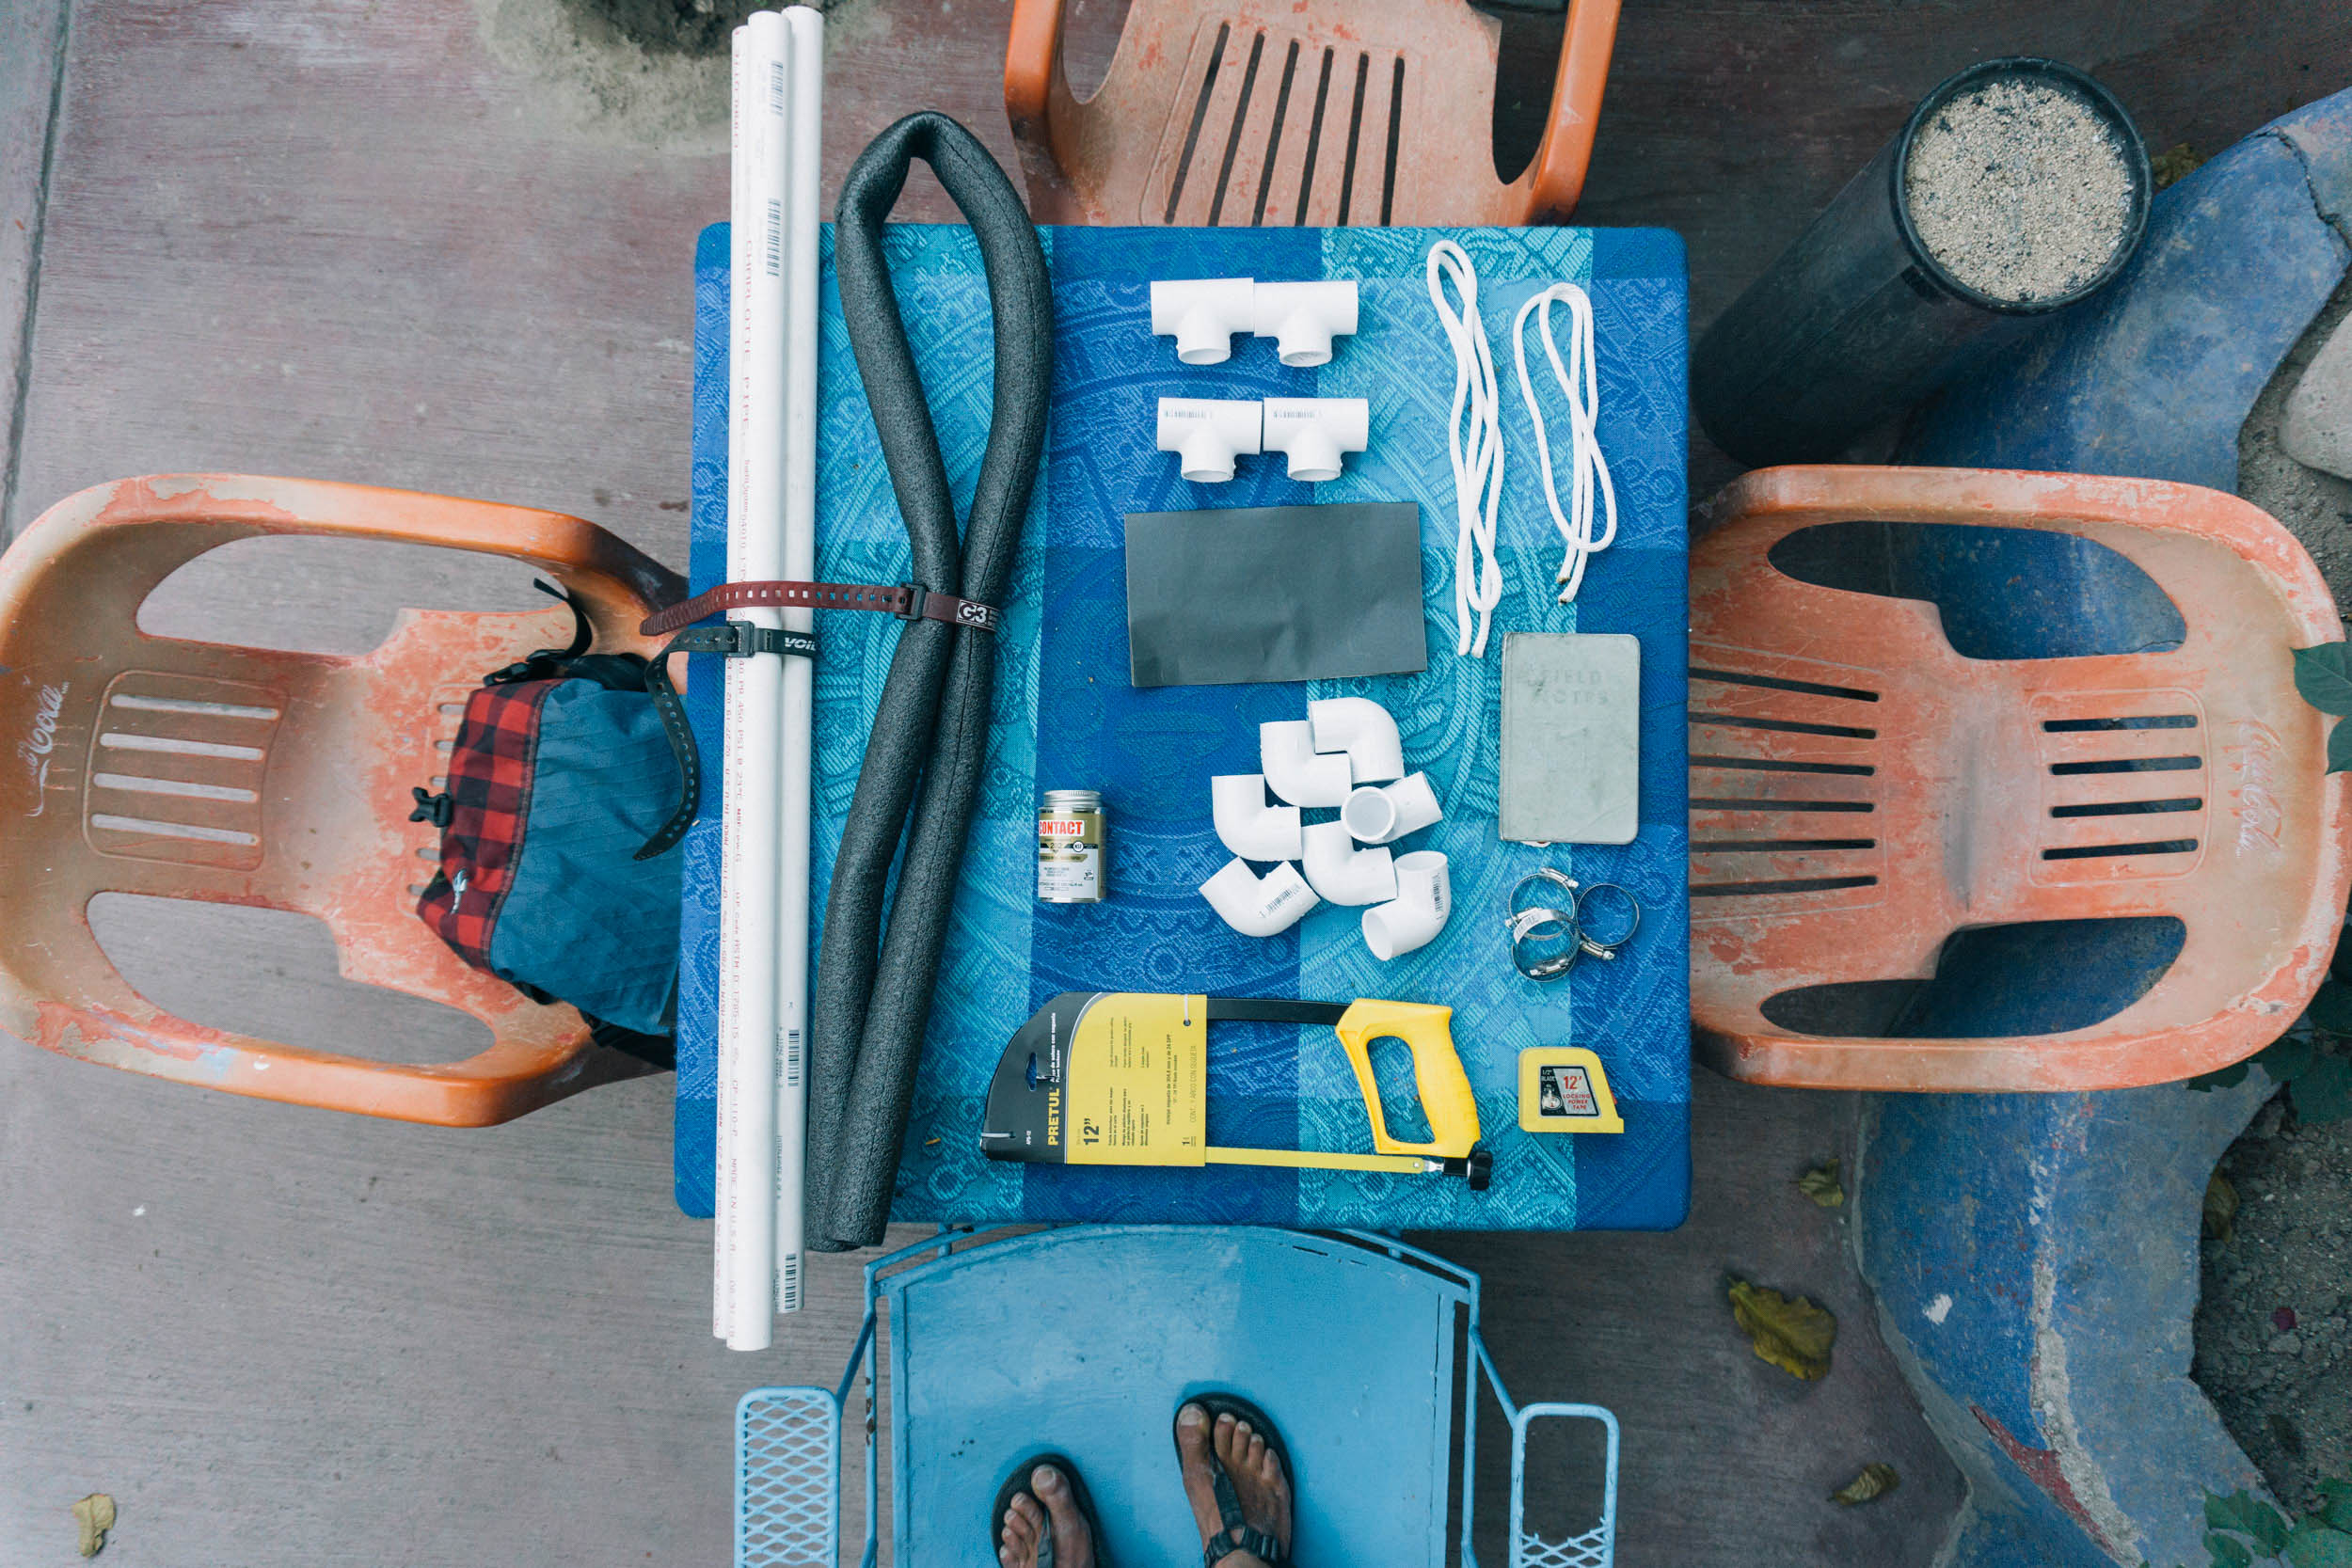
Materials
- 8 feet of PVC pipe (inner diameter = outer diameter of frame tubes, greater than ⅛” thick)
- 6-8 90-degree PVC elbows
- 6 feet of Pipe insulation or other padding
- 2 PVC T-joints
- Contact cement for PVC pipe
- About 2 meters of 8mm-ish thick nylon rope (static, not stretchy)
- Hose clamps to fit PVC diameter
- Two ski straps
- Duct tape
- Zip ties
Tools
- Knife
- Lighter
- Hacksaw
- 100-200 grit sandpaper
- Screwdriver/wrench for hose clamps
- Measuring tape
- Marker
- Rag
- Knotty know-how: The Square Knot, Bowline, Trucker’s Hitch, and Half Hitch all came in handy
Steps
First, a note about precision: I have not listed any measurements because yours will likely be a little different. This is far from an exact science. You don’t have to be a master pipe cutter to make a surf rack!
1. Determine where the T-joints will attach to your frame, considering bag straps, braze-ons etc., and what size T-joints and tubing you will use given the outer diameter of your frame tubing. This works best with round steel frames. If you find a crafty workaround for irregular aluminum frames, I’m sure many would like to know!


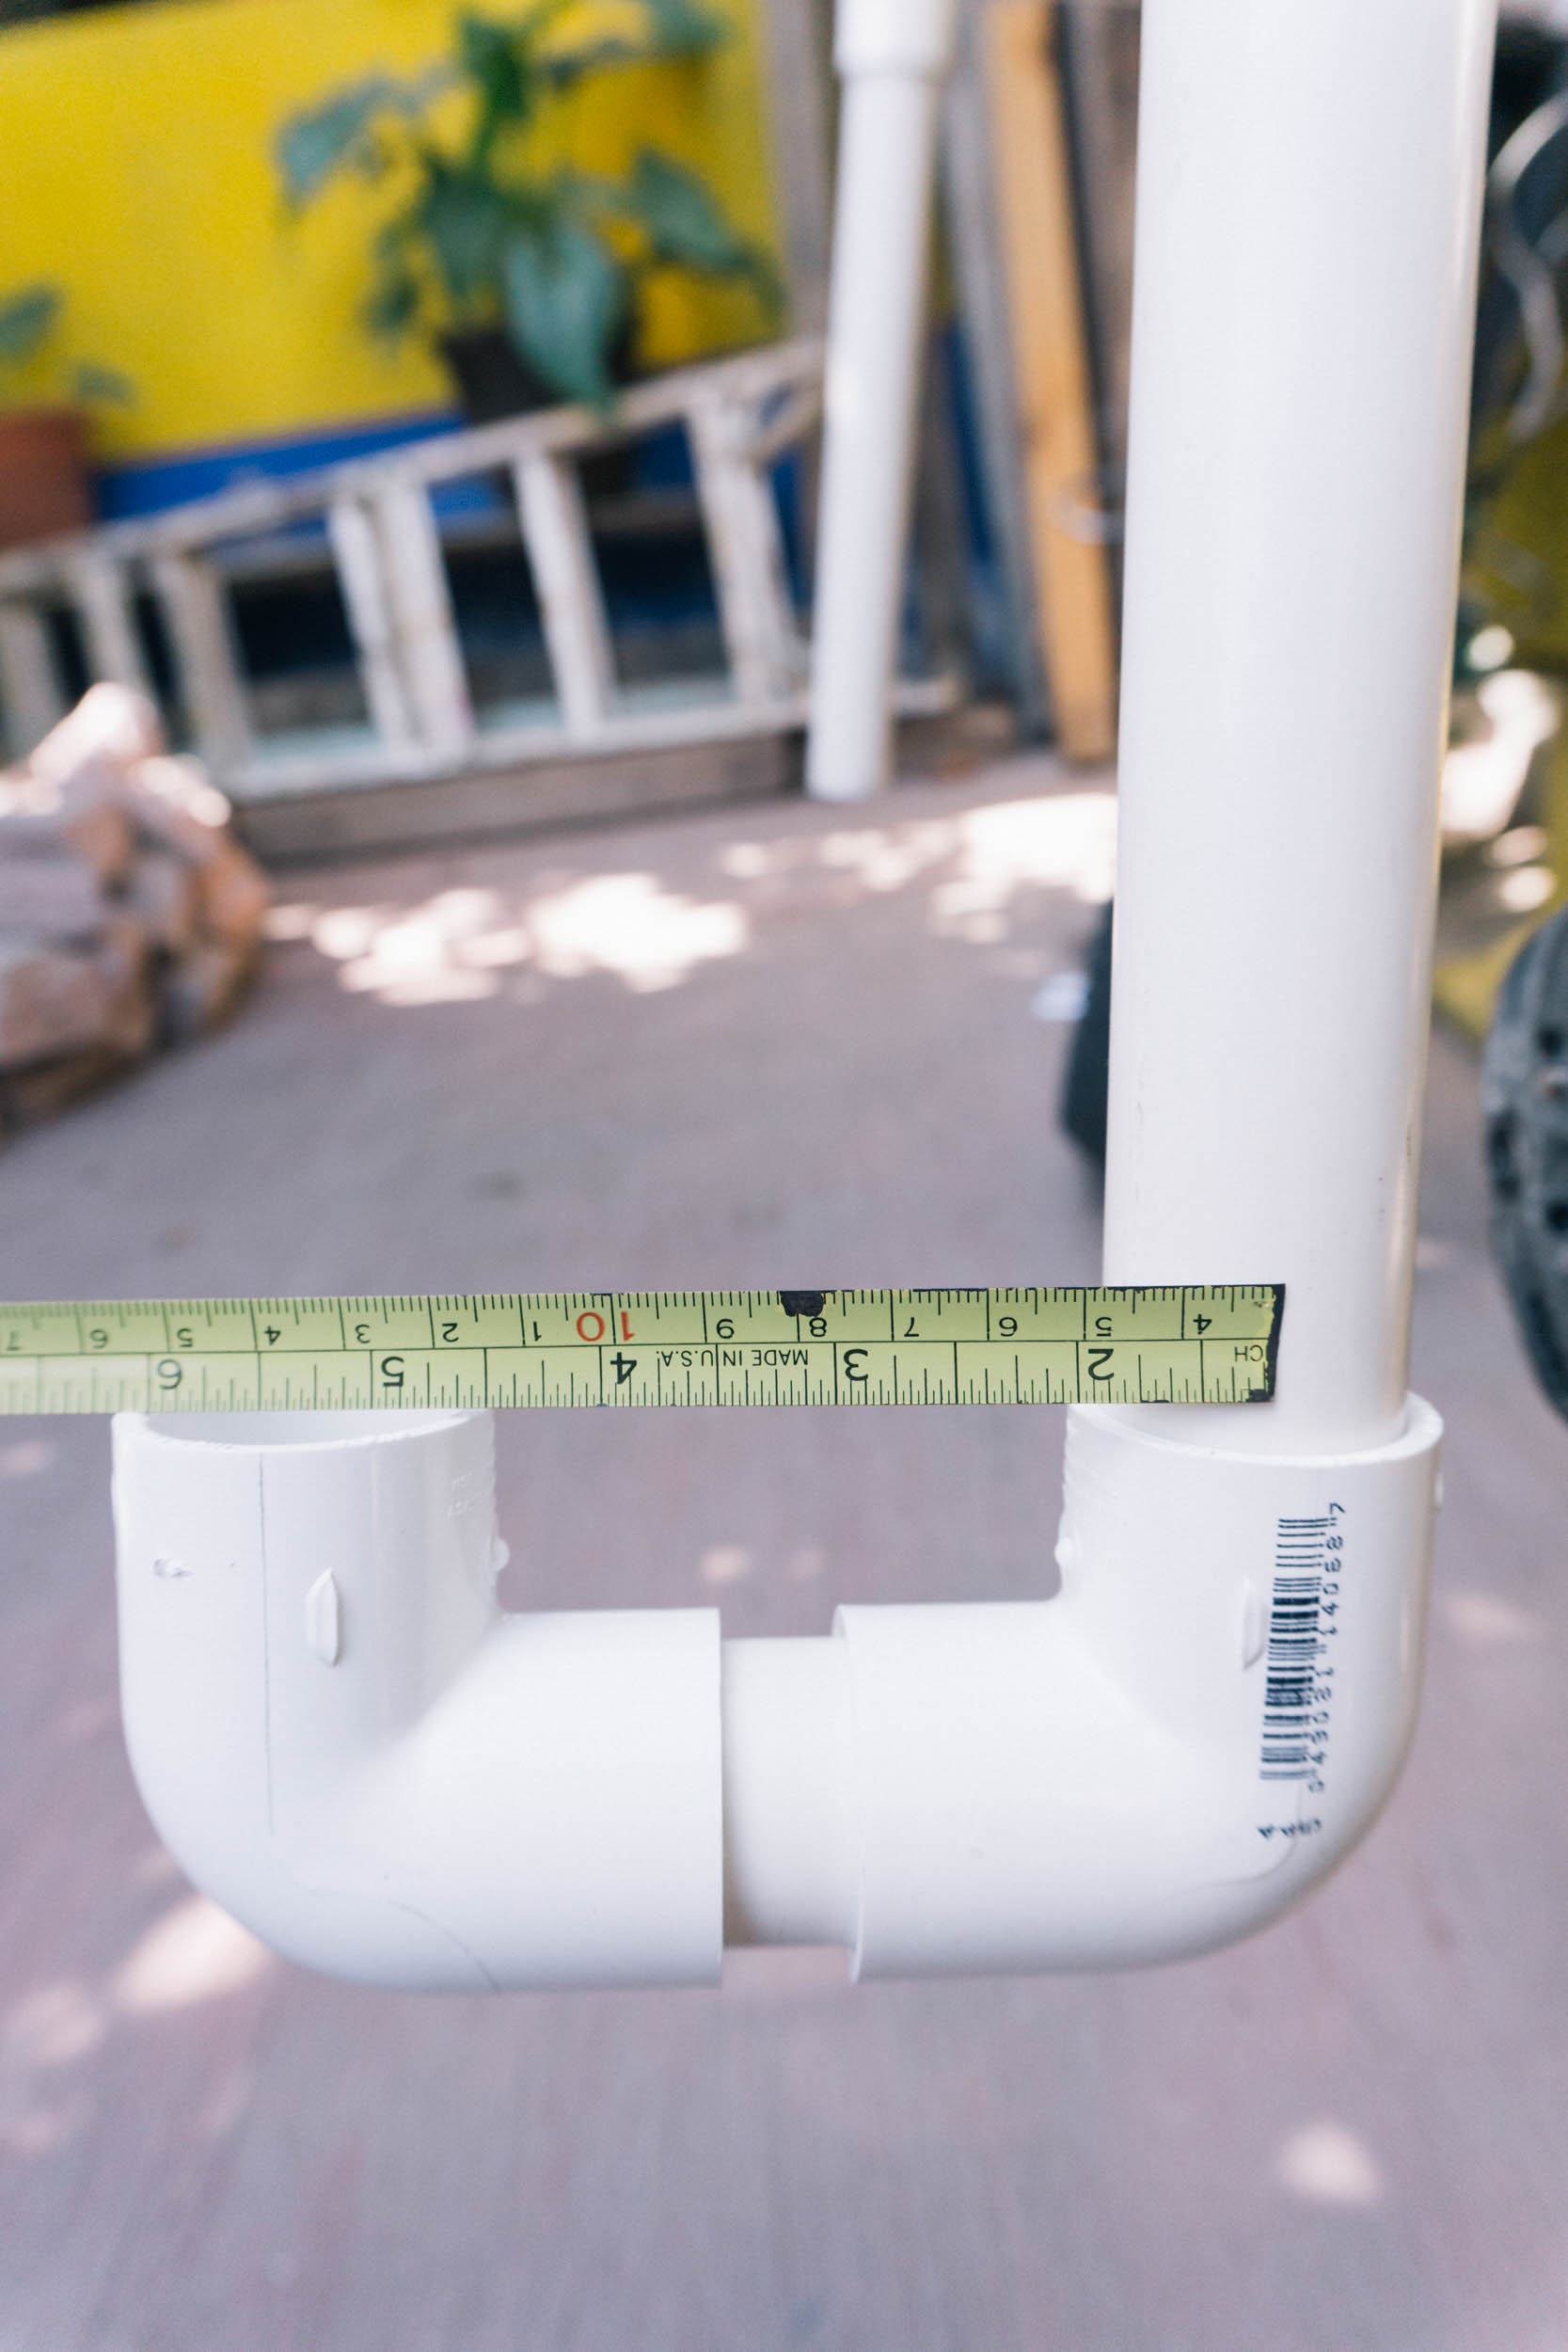
2. Mark where you will cut the back third of the T-joint off, make your cut, and then hose clamp the T-joints to your frame.
3. Measure from your frame to the outer edge of your pedal, then add a couple of inches to determine the length of your rack supports.
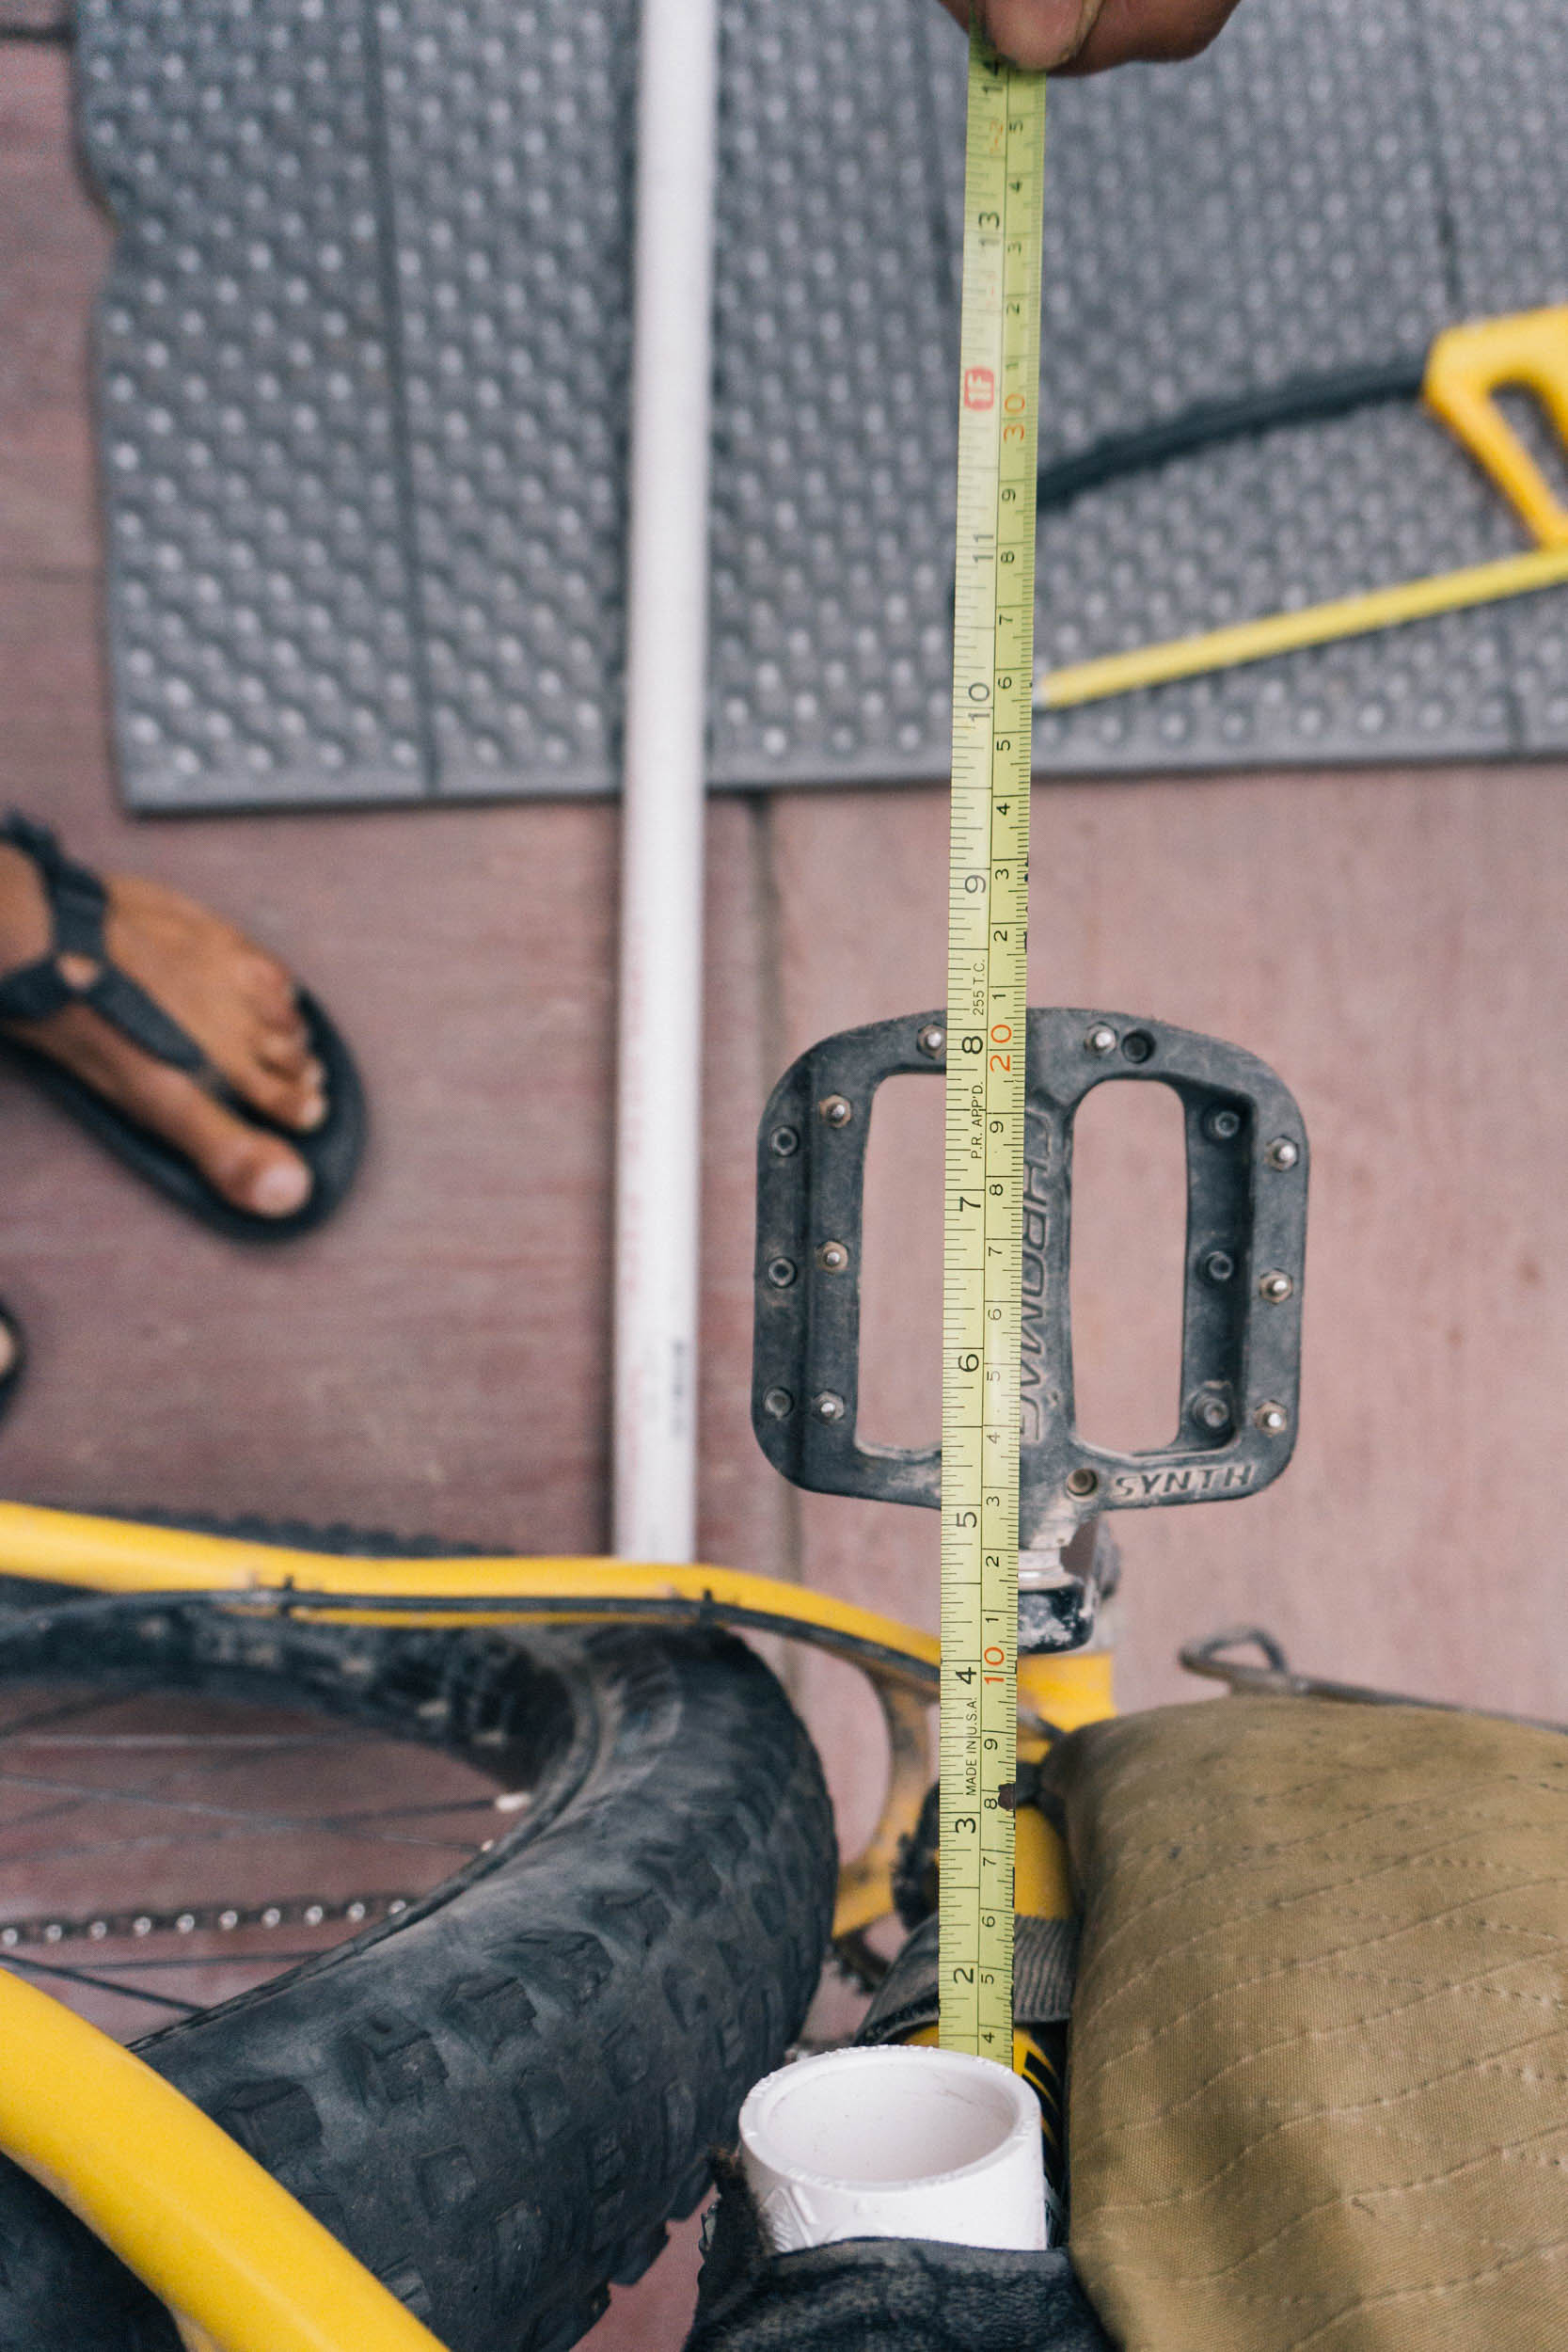
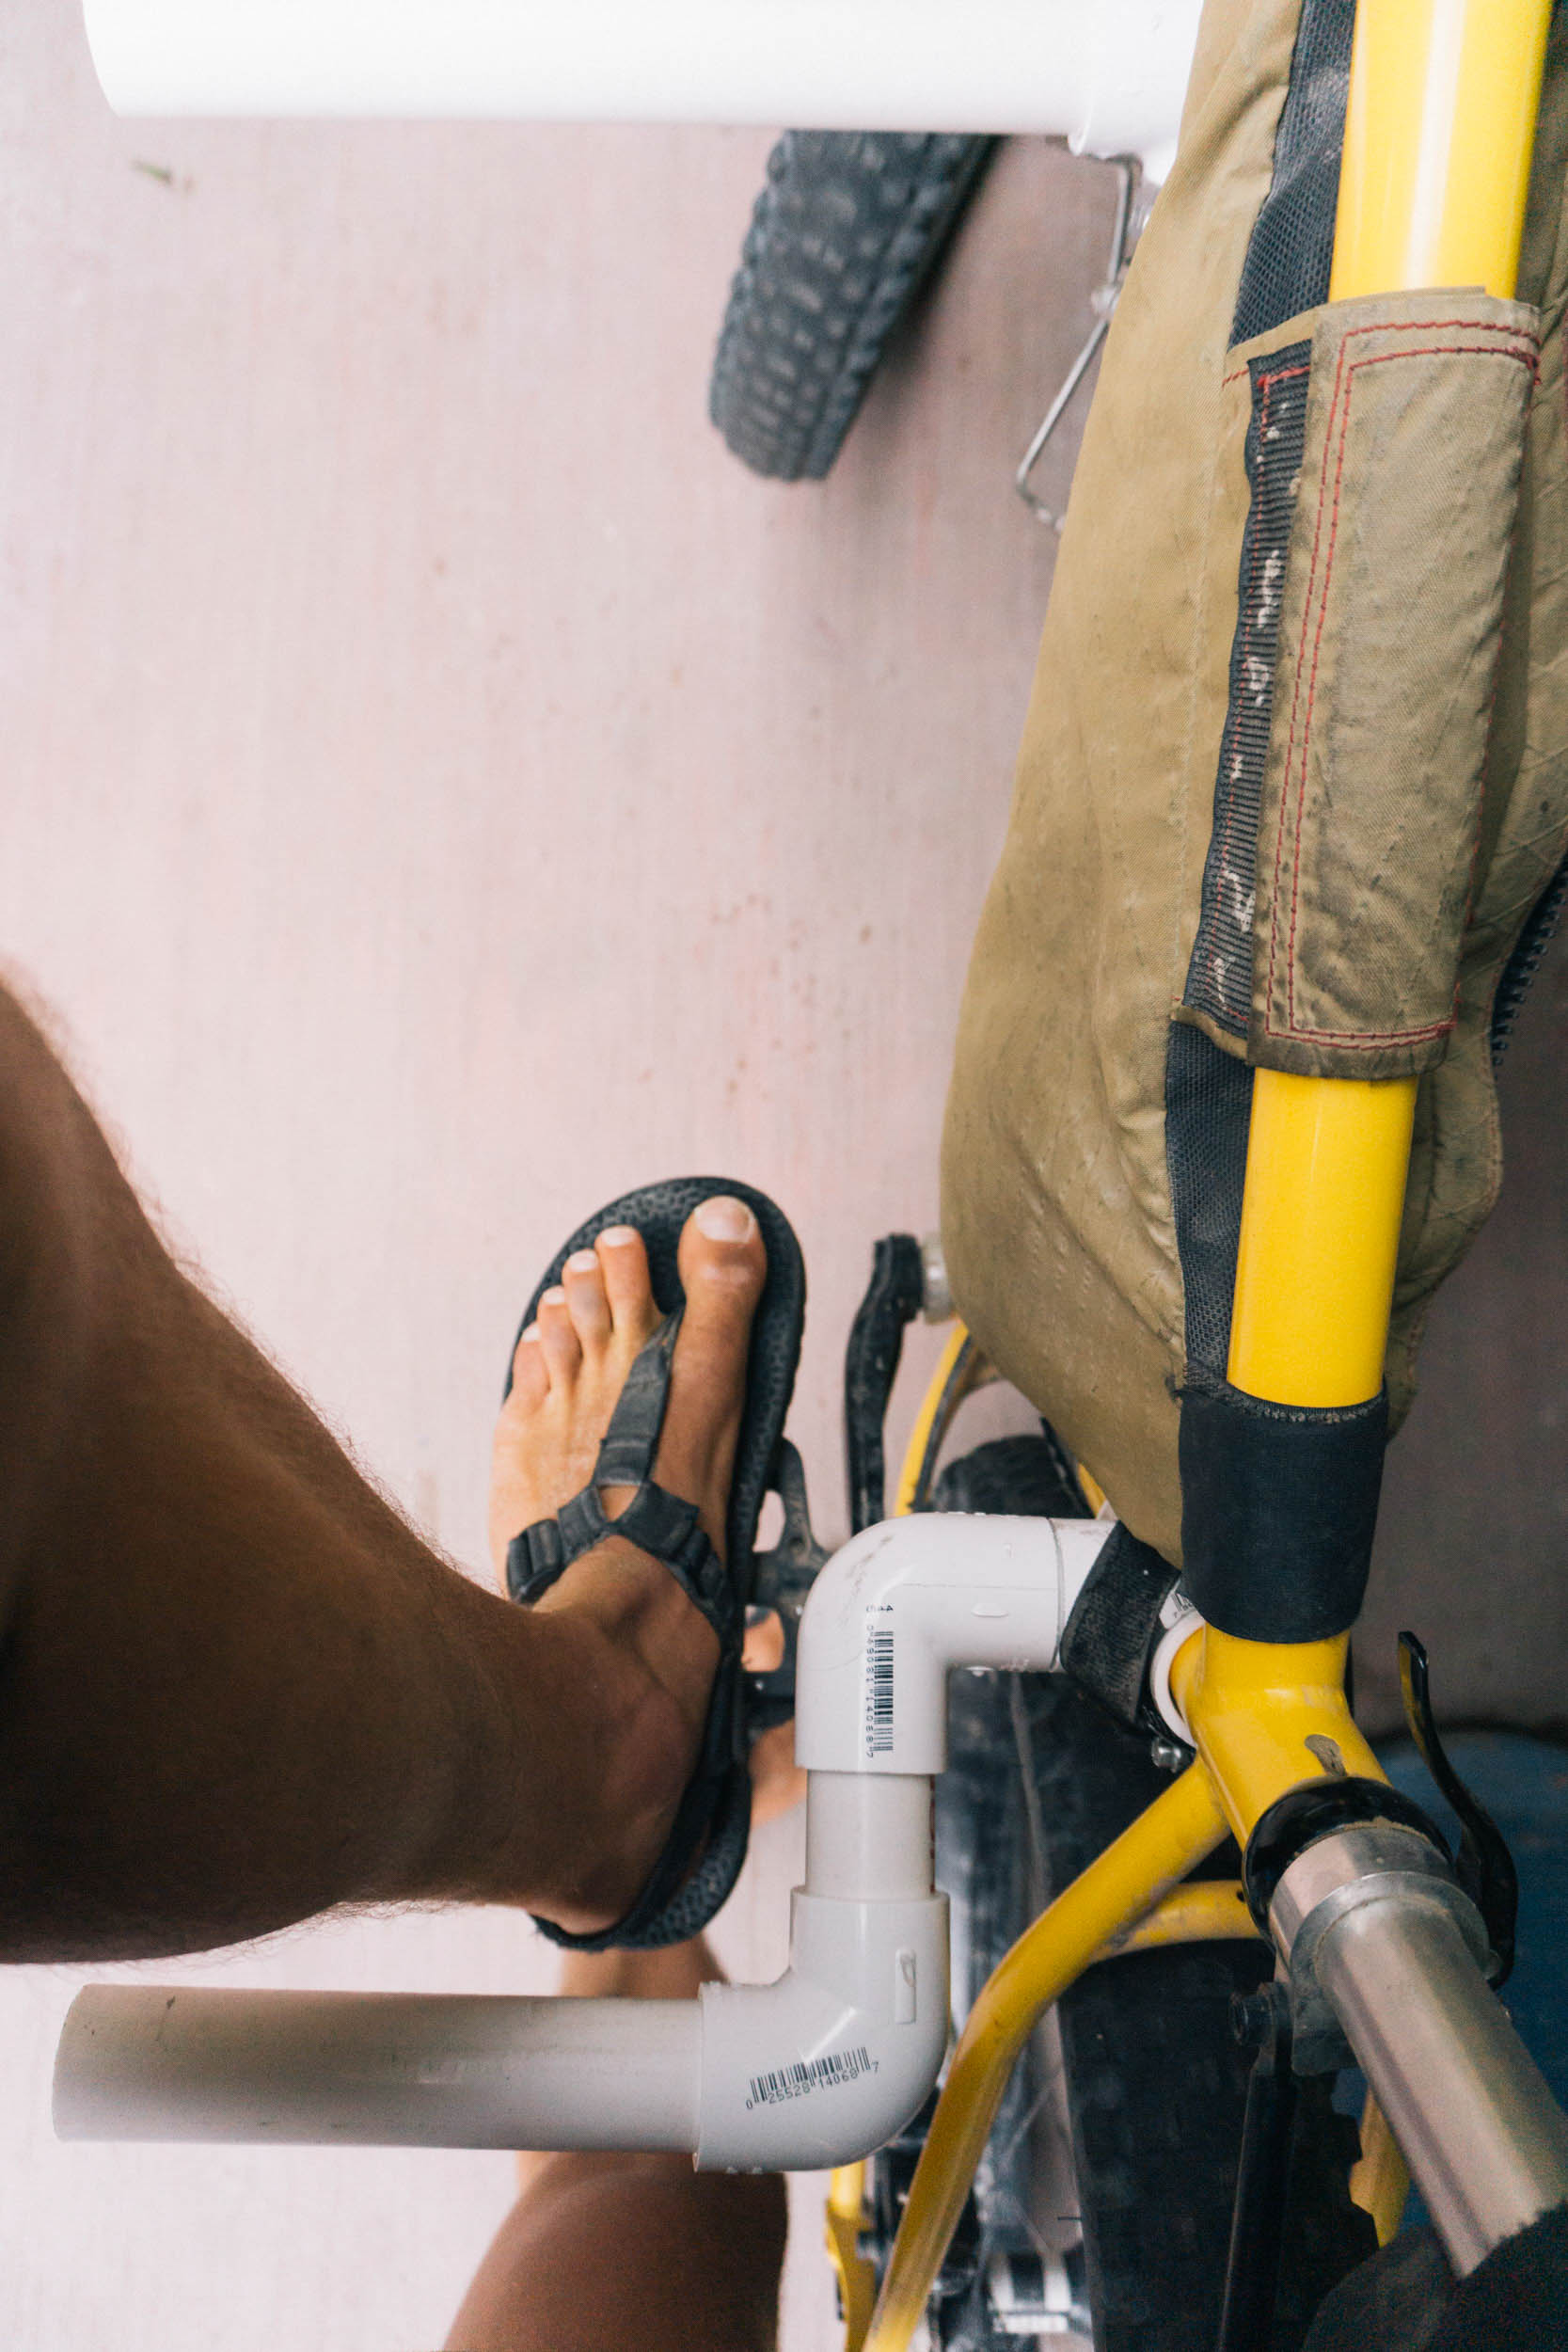
4. Sit on your bike and make sure you have clearance throughout your pedal stroke. If not, you can use the PVC elbows to make an S-bend in your rack support like I did. Cut your rack supports to length.
5. Dry fit your rack supports and make sure they stick out roughly the same distance, and far enough past the pedal.
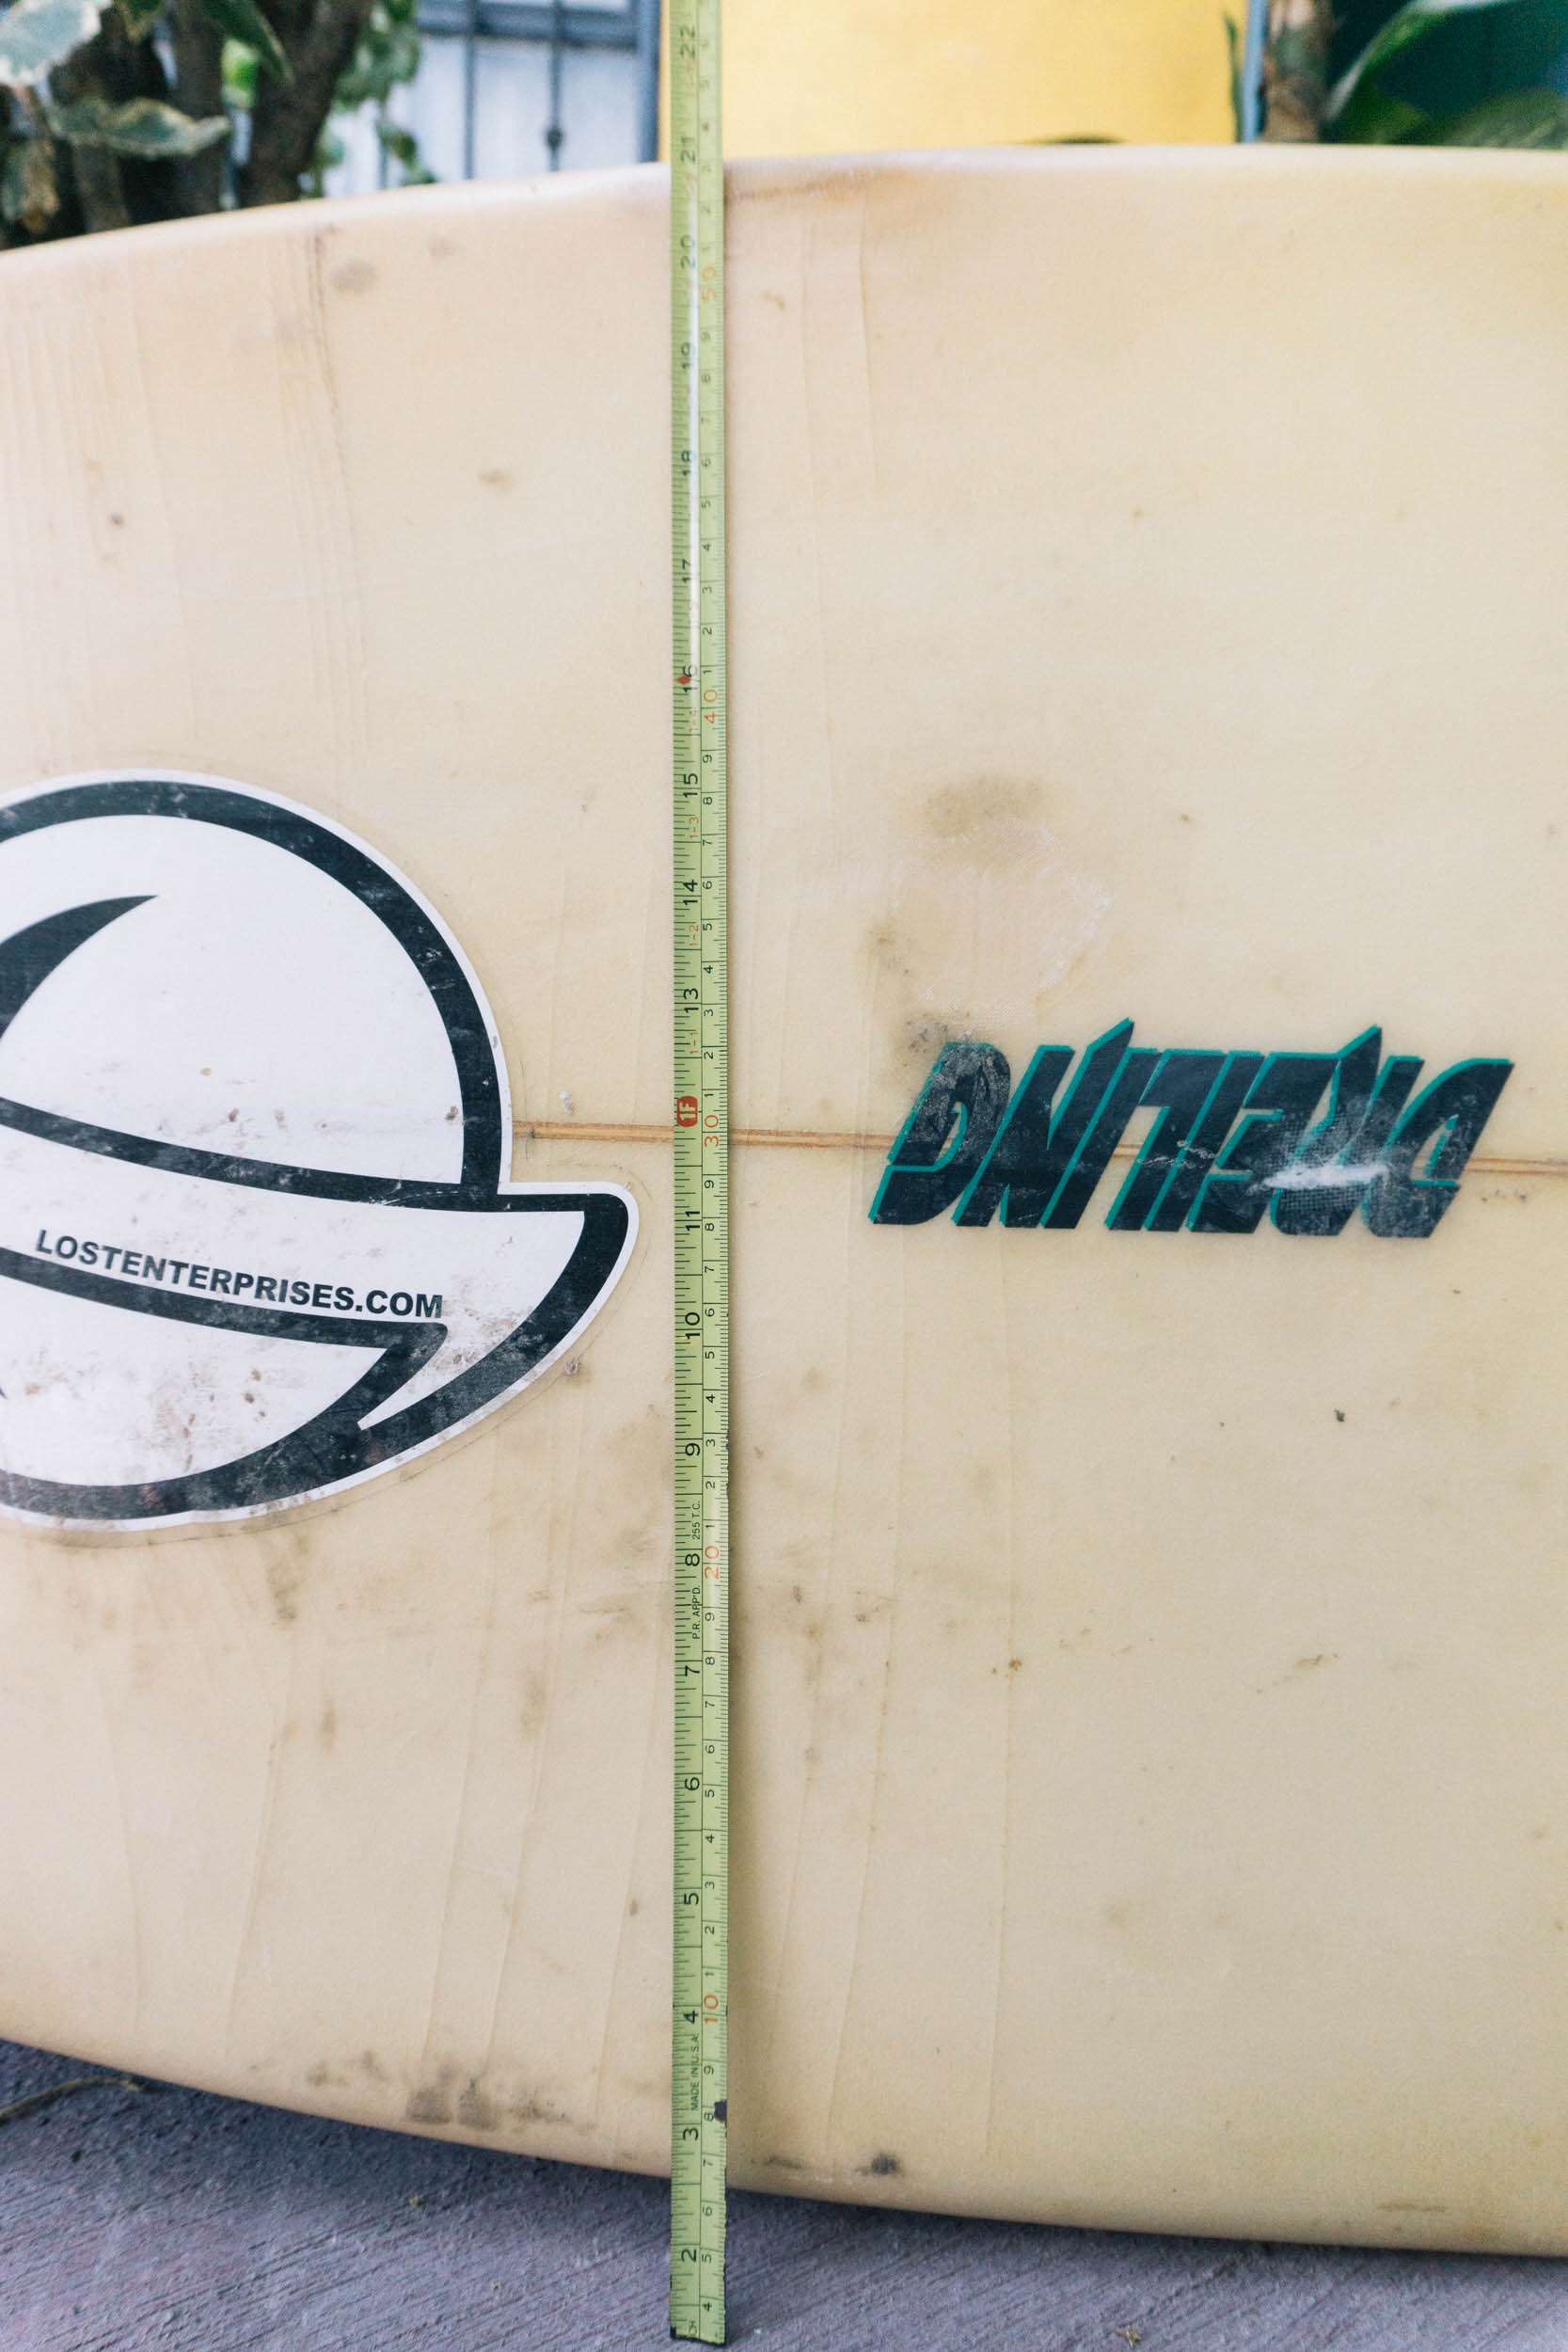

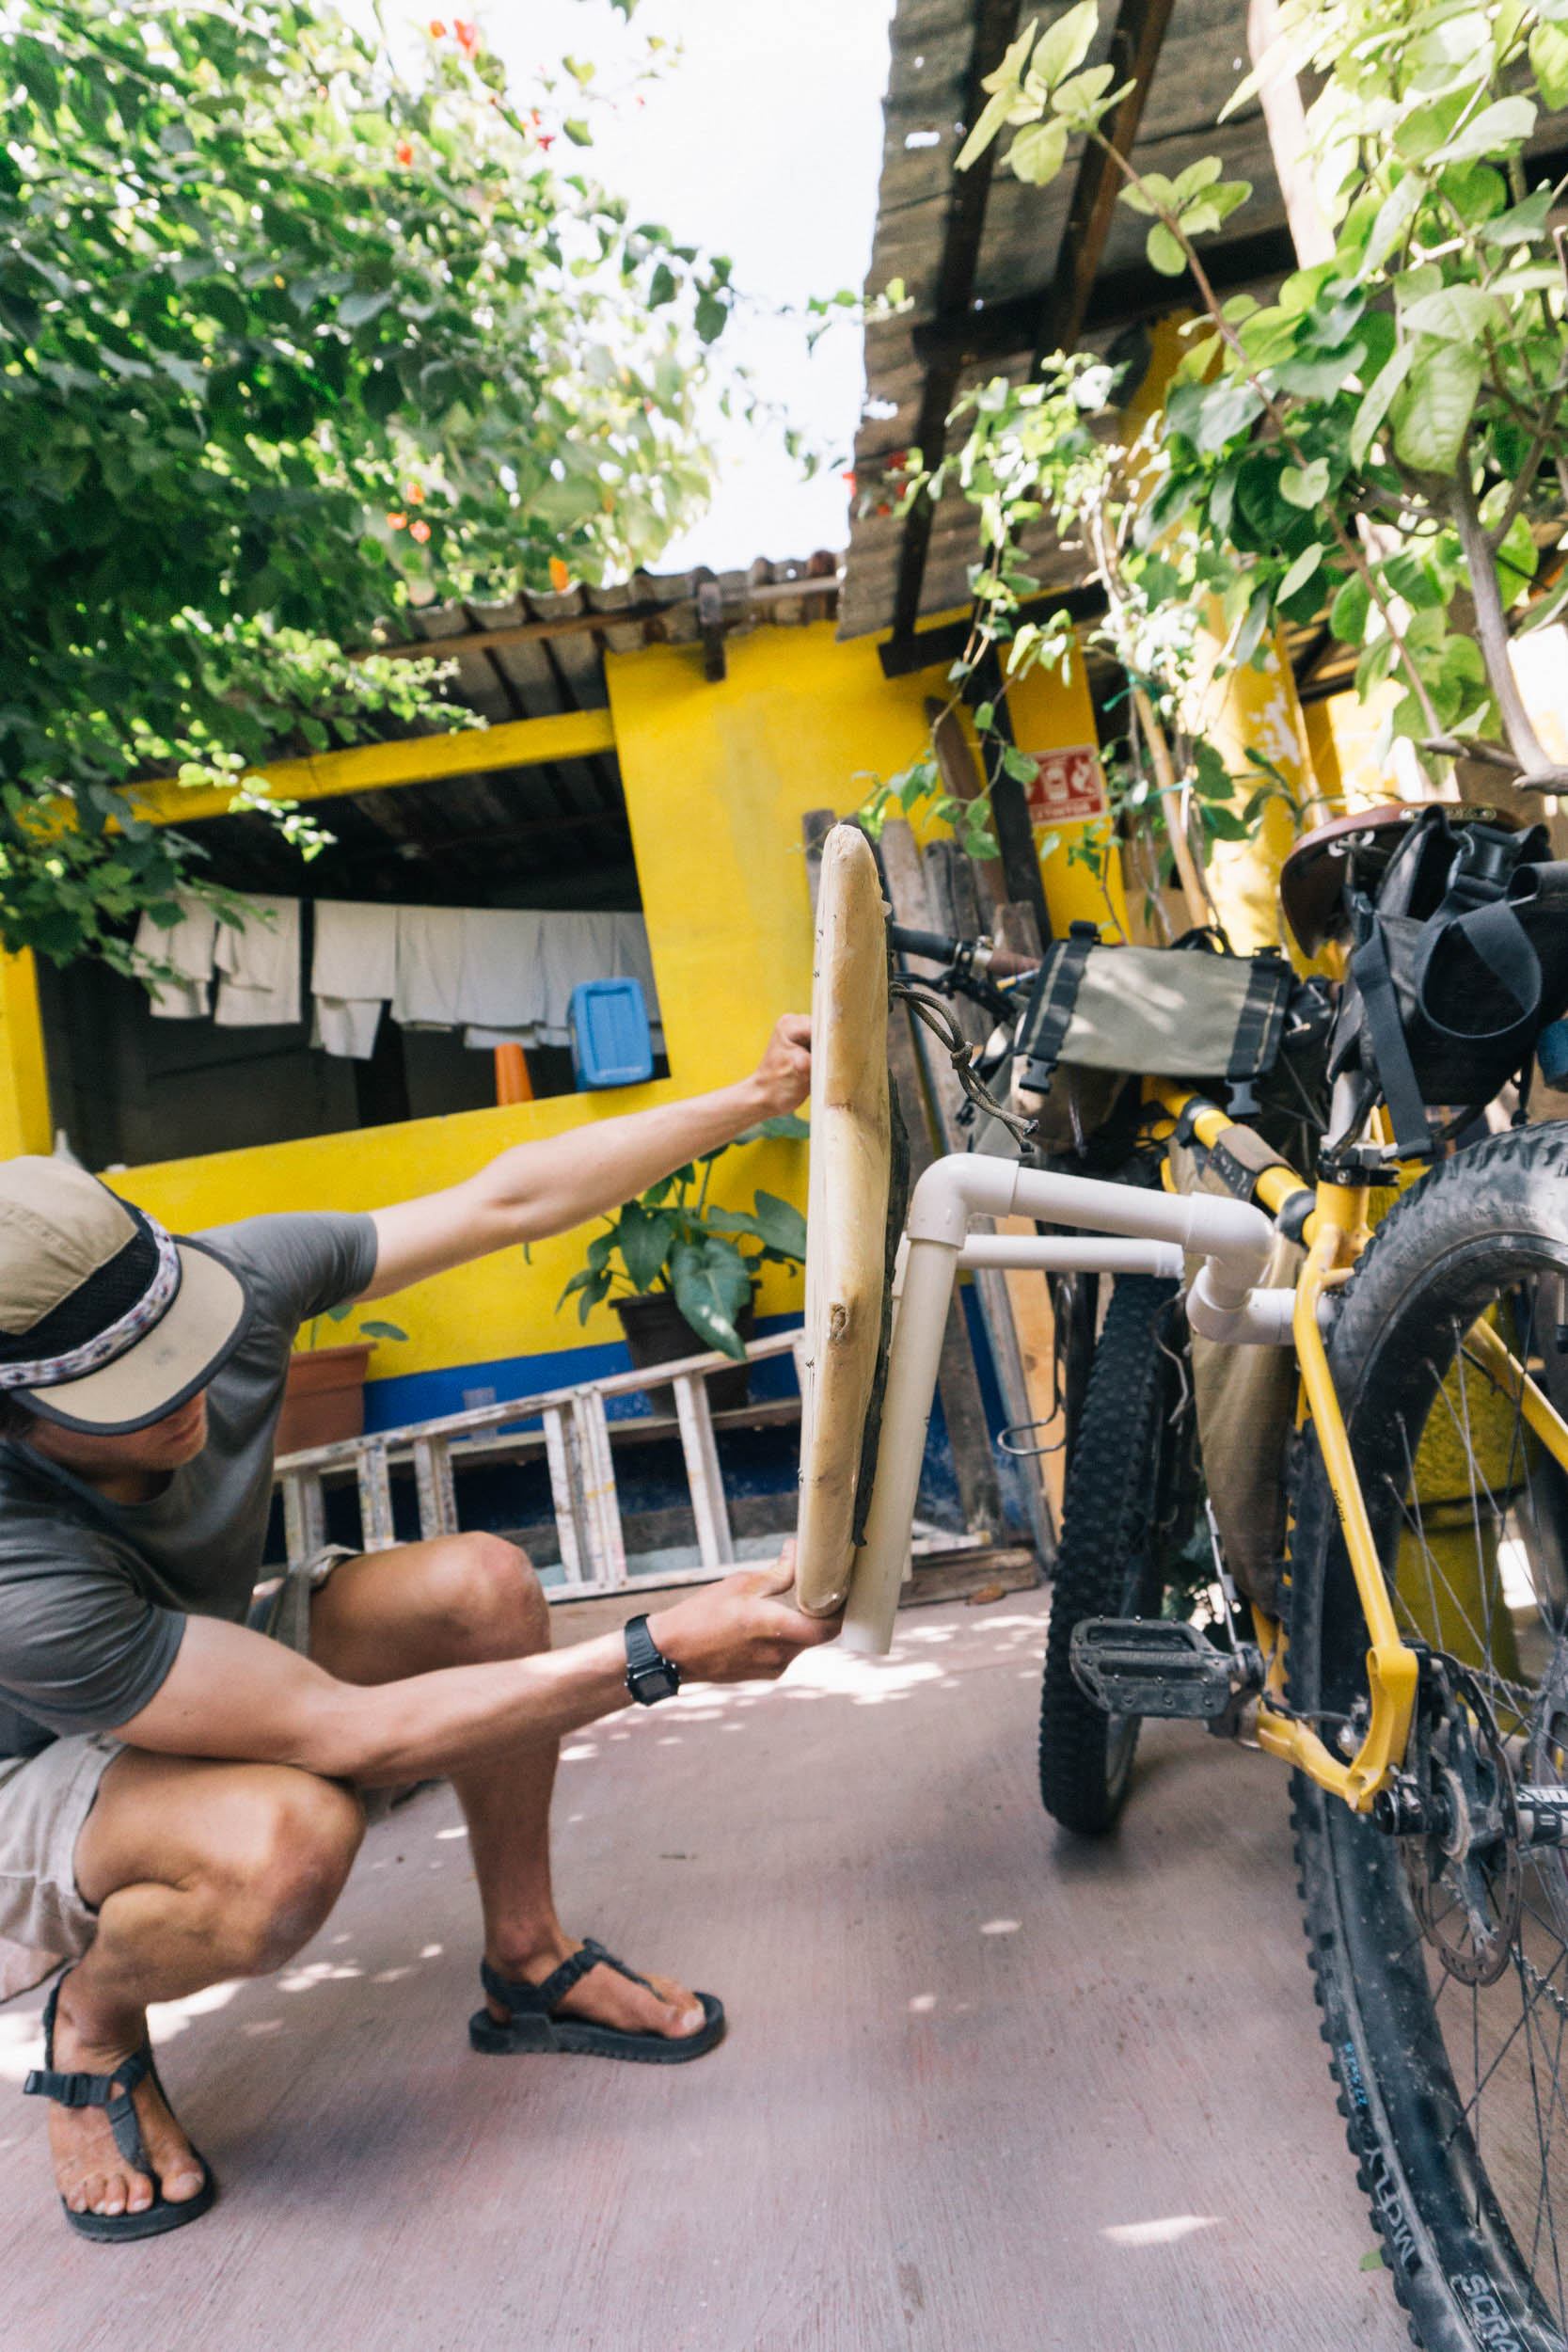
6. Measure the width of your surfboard at its widest point to determine how deep to make the U shaped board holder. I made mine a little over half the width of the board, and was happy with the result.
7. Cut the inner sides of the U and dry fit them, making sure they can be aligned so the Us will be level with each other.
8. Measure the thickness of your board at its thickest point to determine how wide to make the U. I made mine about ½” wider than the board’s thickness, and that worked well. If anything, it could have been slightly narrower.
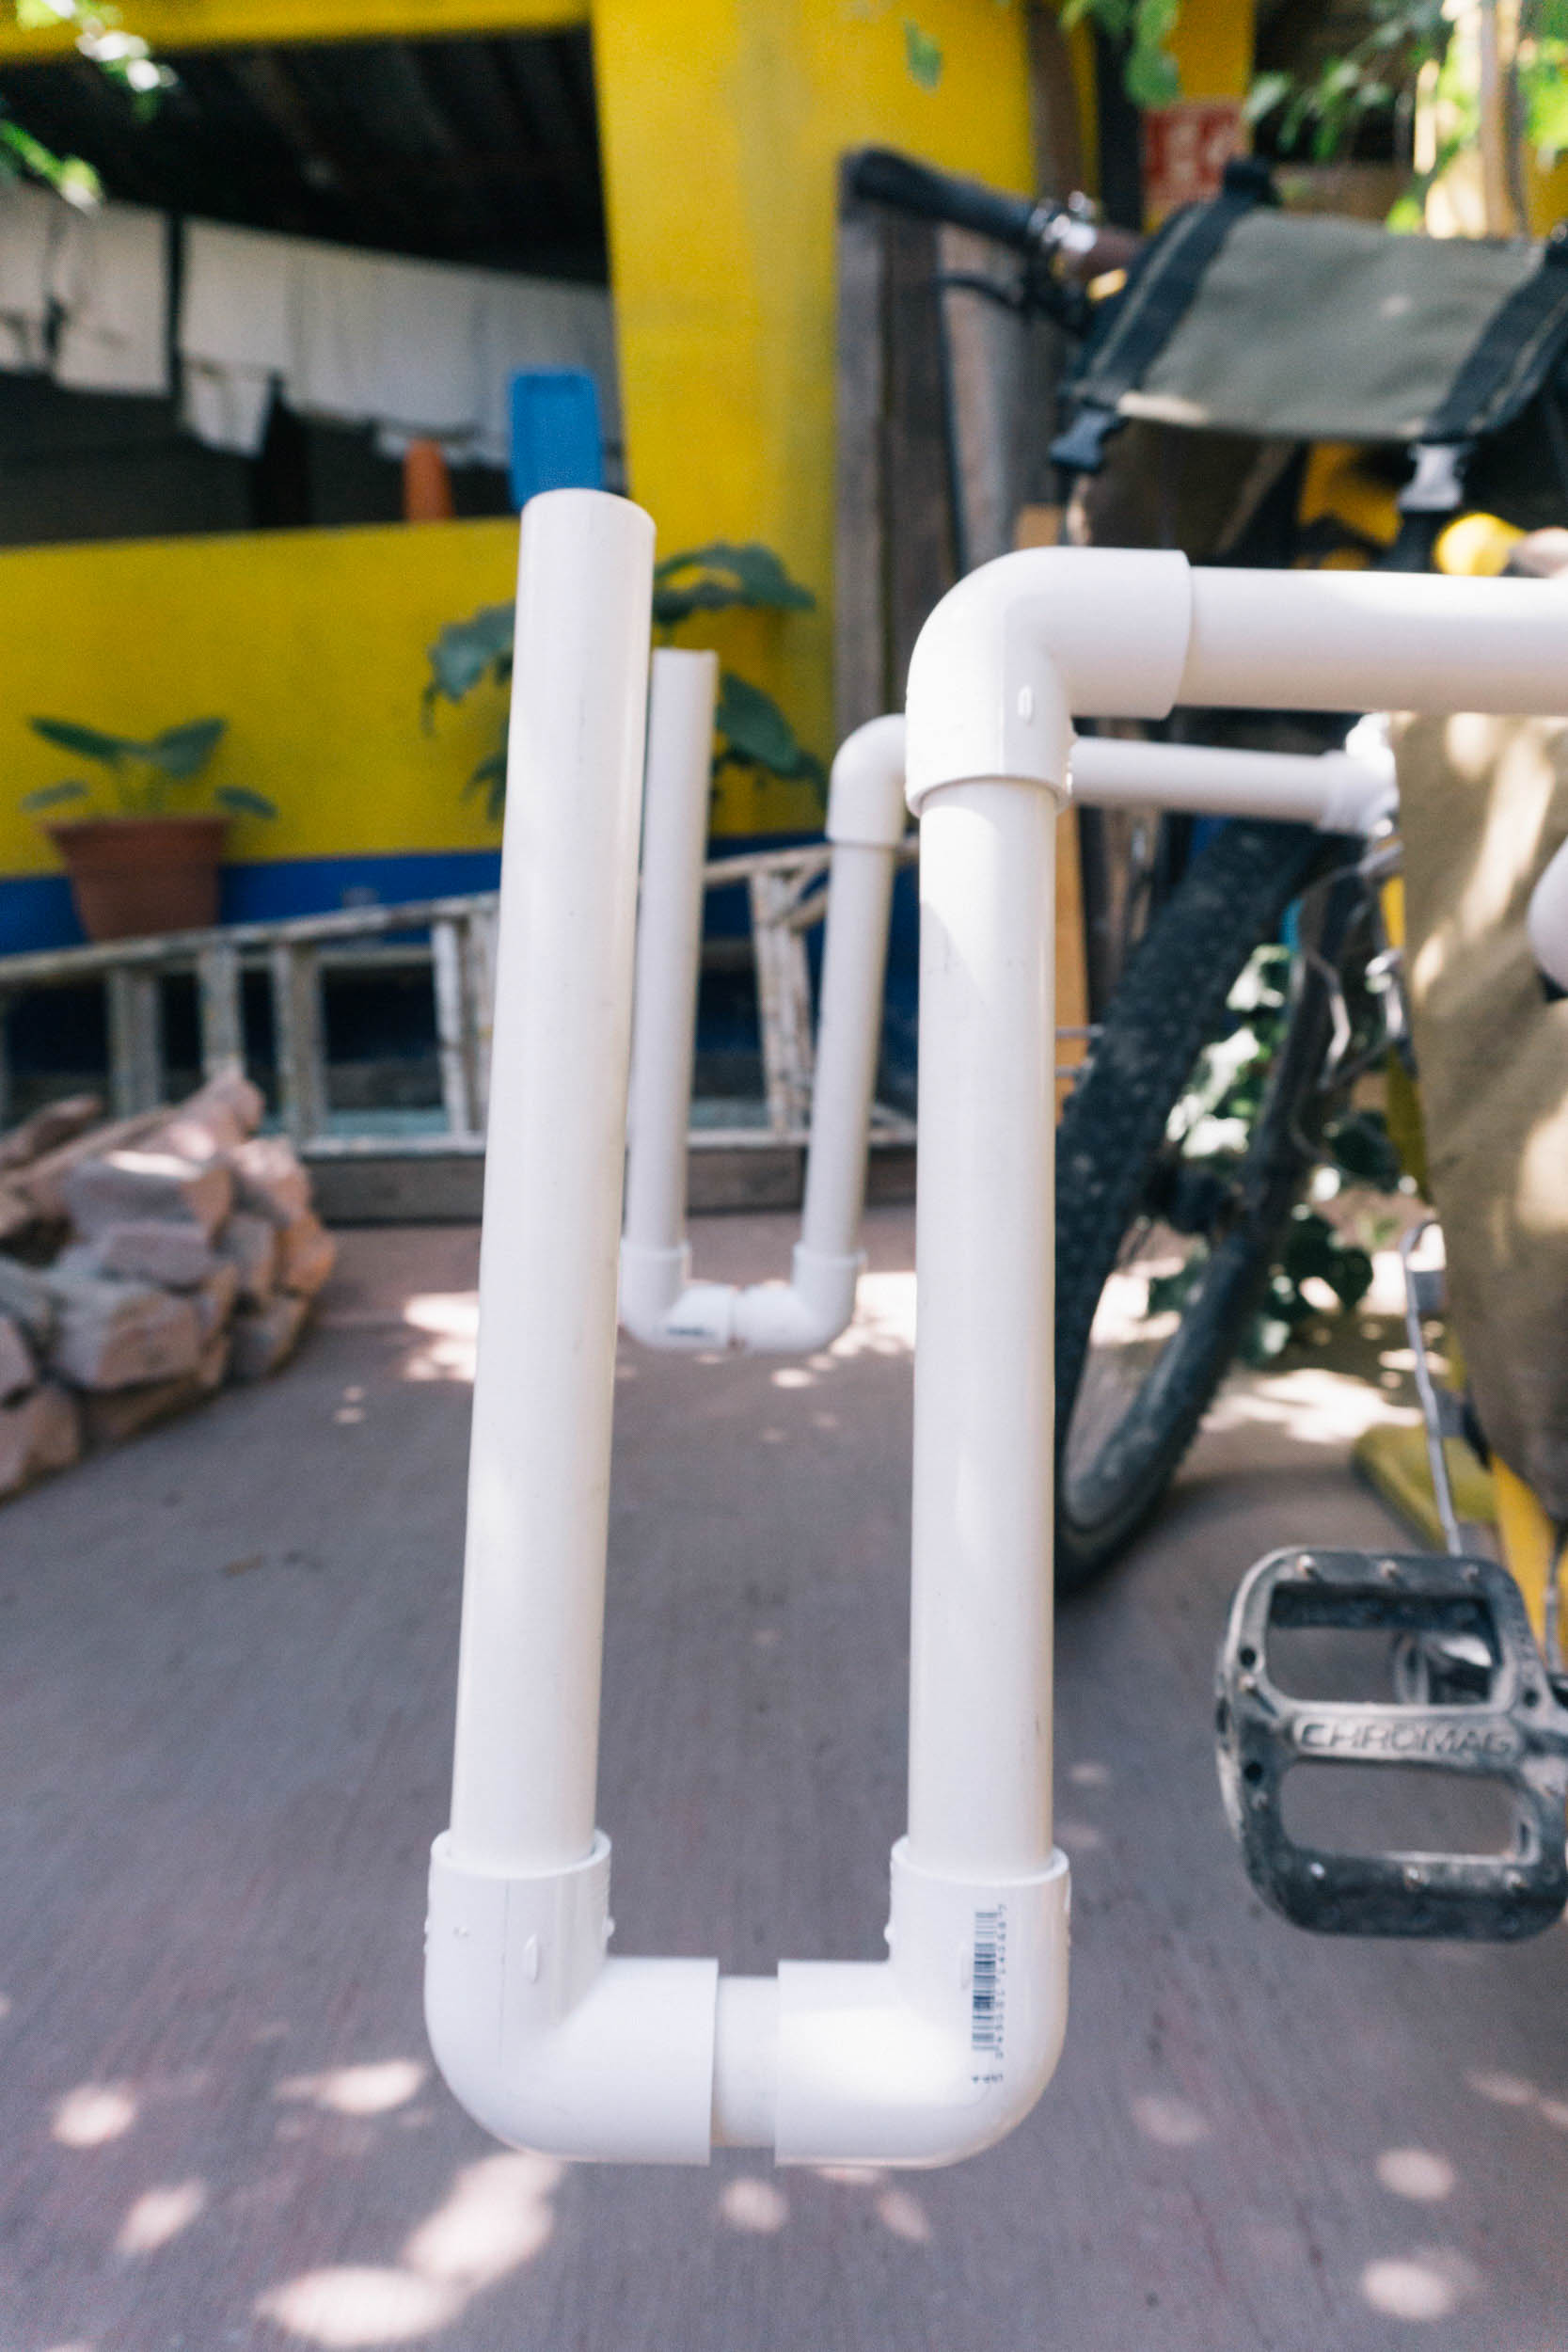
9. Cut the lower pieces of the U, and dry fit.
10. Cut the outer edges of the U about 2” shorter than the inner edges, and use a drill or knife to carve out a hole in the tops of these pieces.
11. Dry fit everything, making sure the board fits snugly and sits roughly level with the ground. You can see that my board sits roughly at the height of my bottom bracket. This was far enough up to clear rocks, etc., but not so high that it really affected my center of gravity.
12. Next, use a section of rope to tie loops in the holes on the rack and around your frame. Connect these loops with ski straps to complete the straps that hold both rack and board in place.
13. Pad the rack, paying attention to where the board presses against the rack when fully strapped in, and add padding accordingly.

14. Go for a test ride with everything dry fit, and make sure you’re happy with it! Use a marker to make tick marks across joints so they can be quickly aligned when it comes time to glue (alas, I wish I actually did this and hadn’t thought of it just now).
15. Sand all joints to be glued, wipe away dust, and glue one joint at a time, being careful to fully insert tubes and align each joint quickly before the glue sets.
16. Pedal off toward the coastal horizon!
About Dan Stranahan
Dan Stranahan is an avid mountain biker, visual storyteller, and bicycle advocate based in the Pacific Northwest. He has designed programs for his local bicycle co-op, contributes to regional route development, and is often found modifying his bikes and gear to ride into the unexpected. Find more on Instagram @danstranahan.
Please keep the conversation civil, constructive, and inclusive, or your comment will be removed.