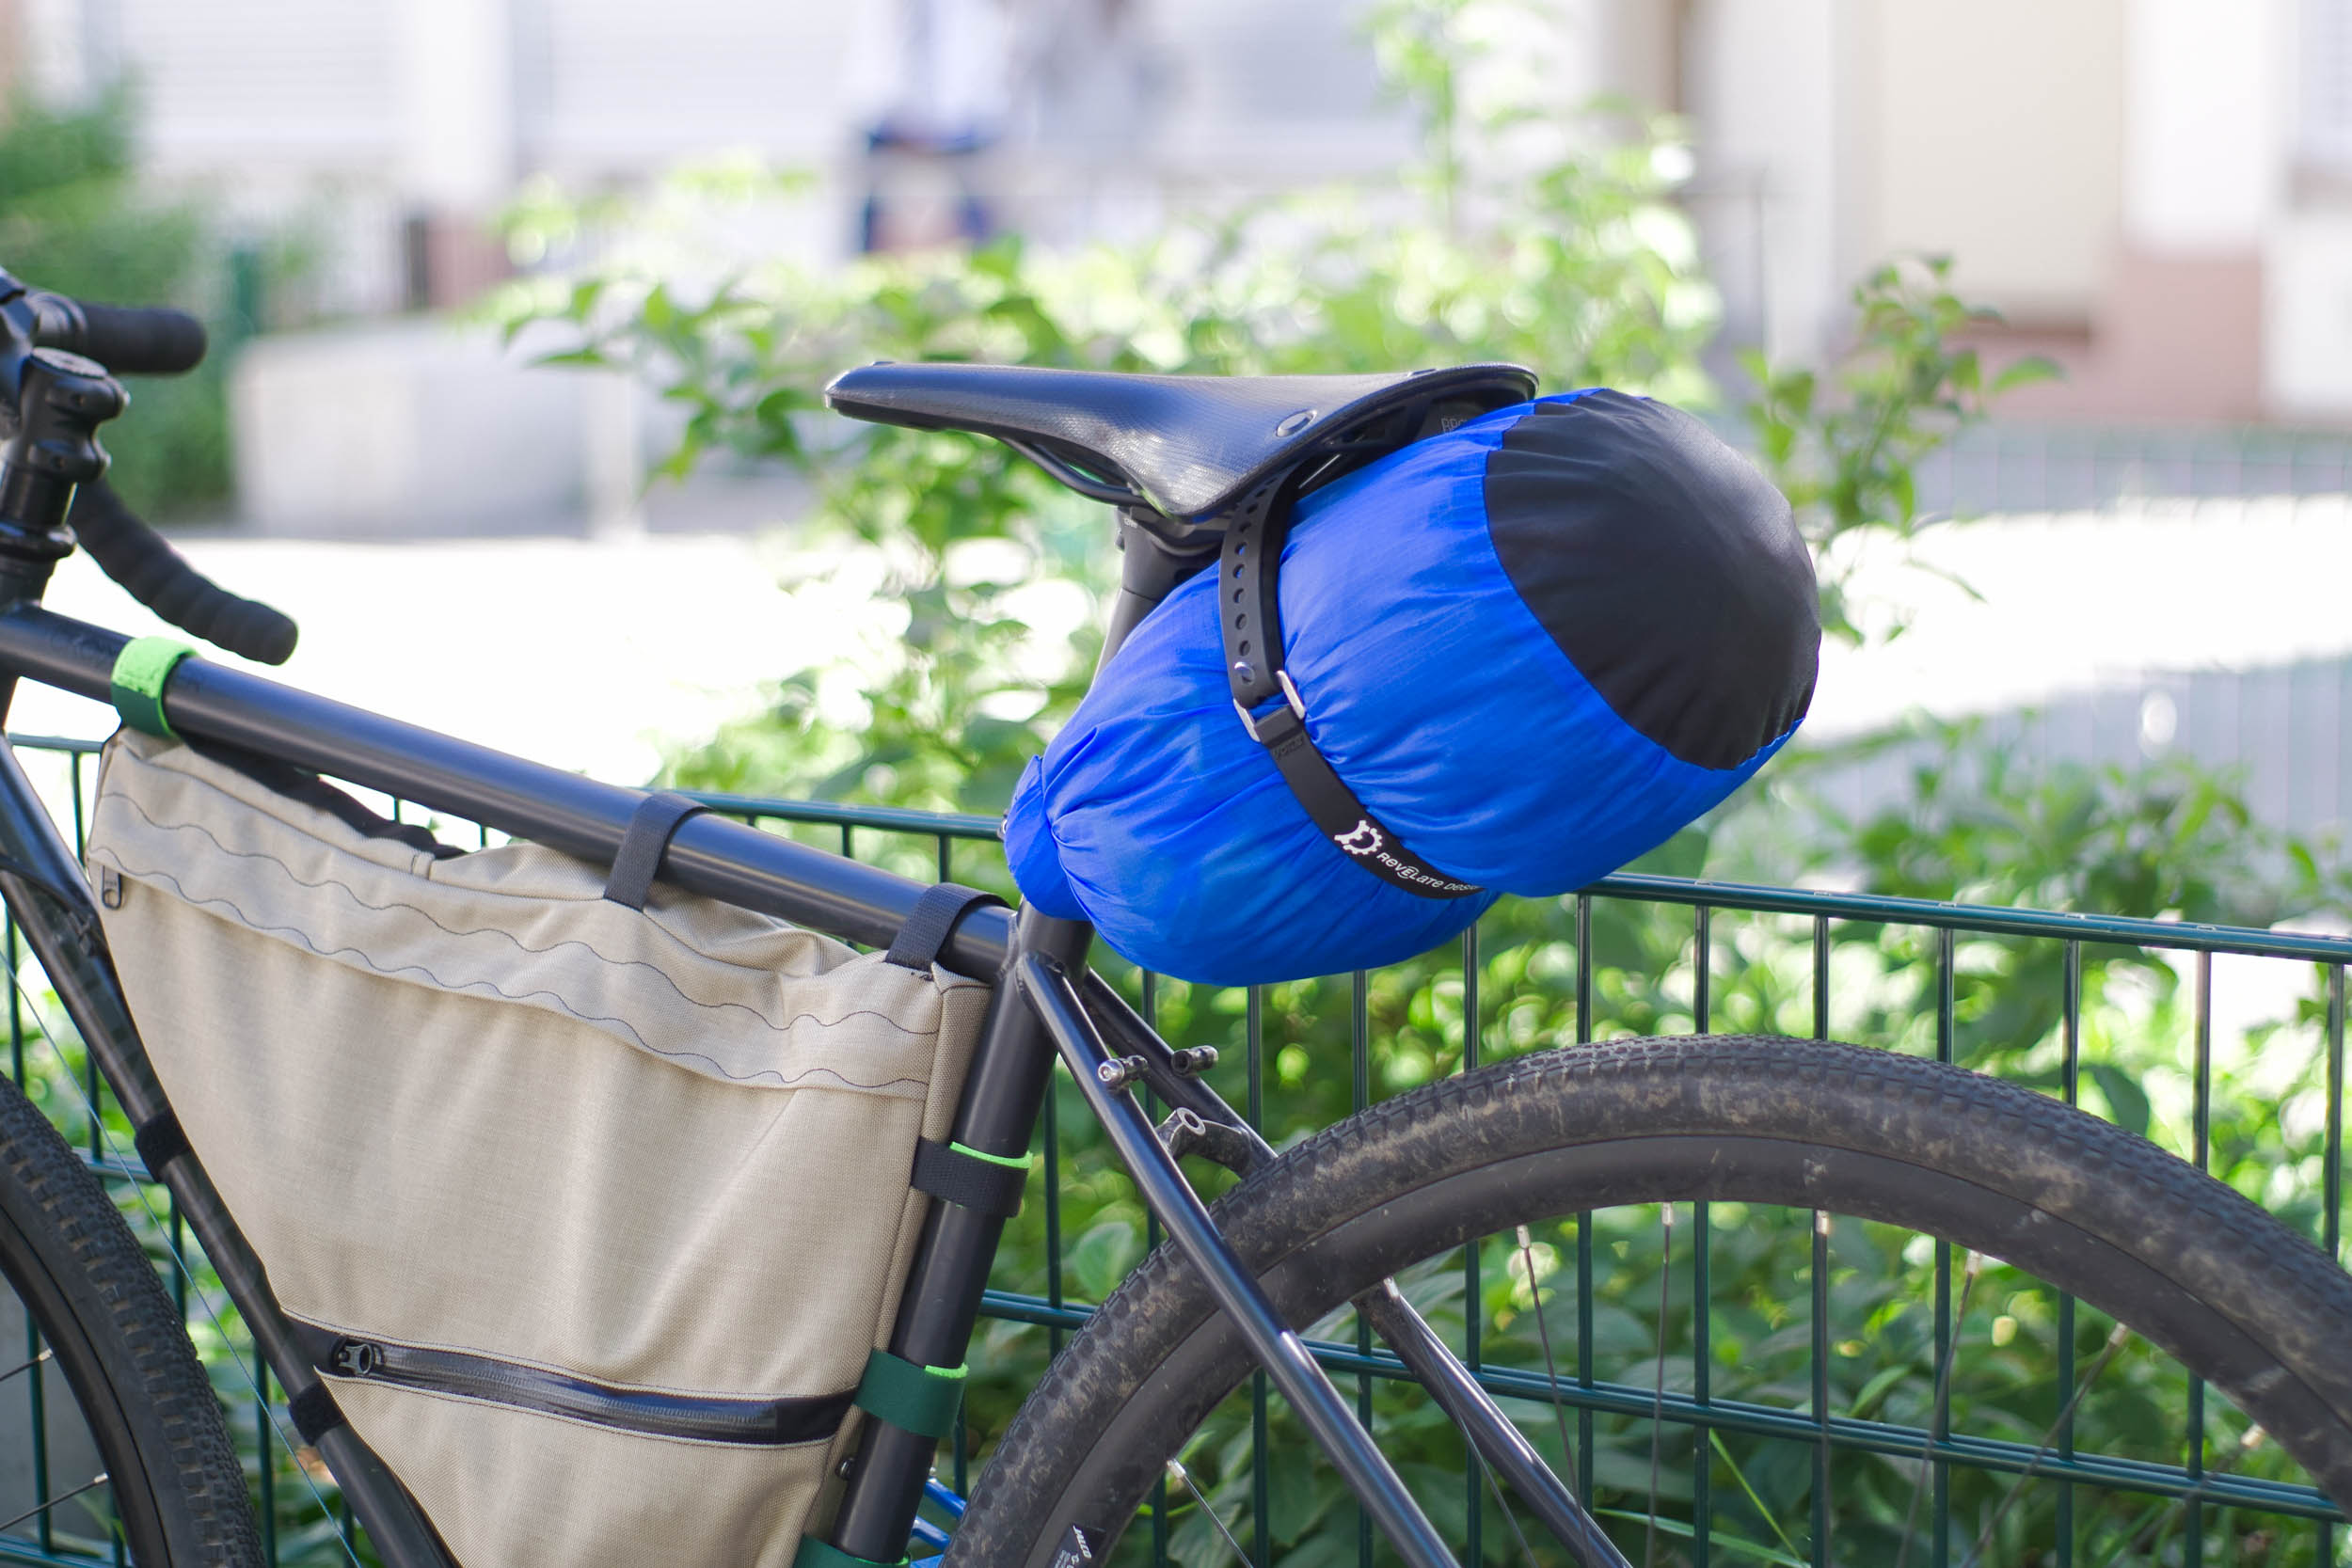
Make Your Own Wood Bike Rack (DIY)
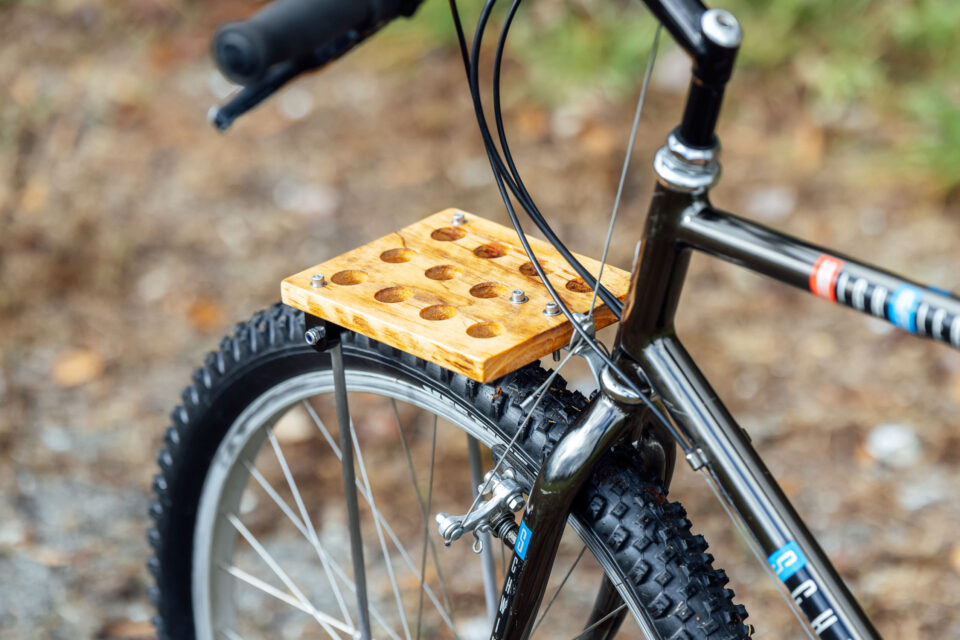
To complement his Budget Bikepacking Build-Off rig, Logan created this Make Your Own Bikepacking Gear (MYOBG) wood bike rack DIY tutorial, providing a step-by-step guide for making lightweight front and rear platform racks with wood or another material of choice. Find it here…
PUBLISHED Jan 20, 2025
At this point, there are an astonishing number of bike racks on the market, each touting its unique feature combinations and measurements. Still, I think the most refined and useful type of rack is a minimal platform rack, providing the ability to accomplish one elegantly simple task: strap or attach something on top of it, be it a dry bag, basket, or crate. The Old Man Mountain Elkhorn and the Tumbleweed T Rack come to mind as two well-engineered specimens, each offering a decent bang for their weight and a solid set of features. However, not everyone needs three-pack mounts, axle kits, or the ability to attach panniers, and their pre-engineered heights might not be the best fit for every bike. In addition, not everyone wants to shell out a couple hundred bucks to get one. This is where a custom or DIY rack might be a fitting solution.
There are several reasons someone might build or commission a custom rack for their bike, the most obvious being the ability to achieve a perfect fit. In an ideal world, every bike I own would have a custom rack designed specifically for it. By tailoring the length of the struts, you can minimize the material used to make the rack and position the platform as low and close to the bike as possible, optimizing its center of gravity when loaded with gear and improving overall stability and handling. That’s the ticket.

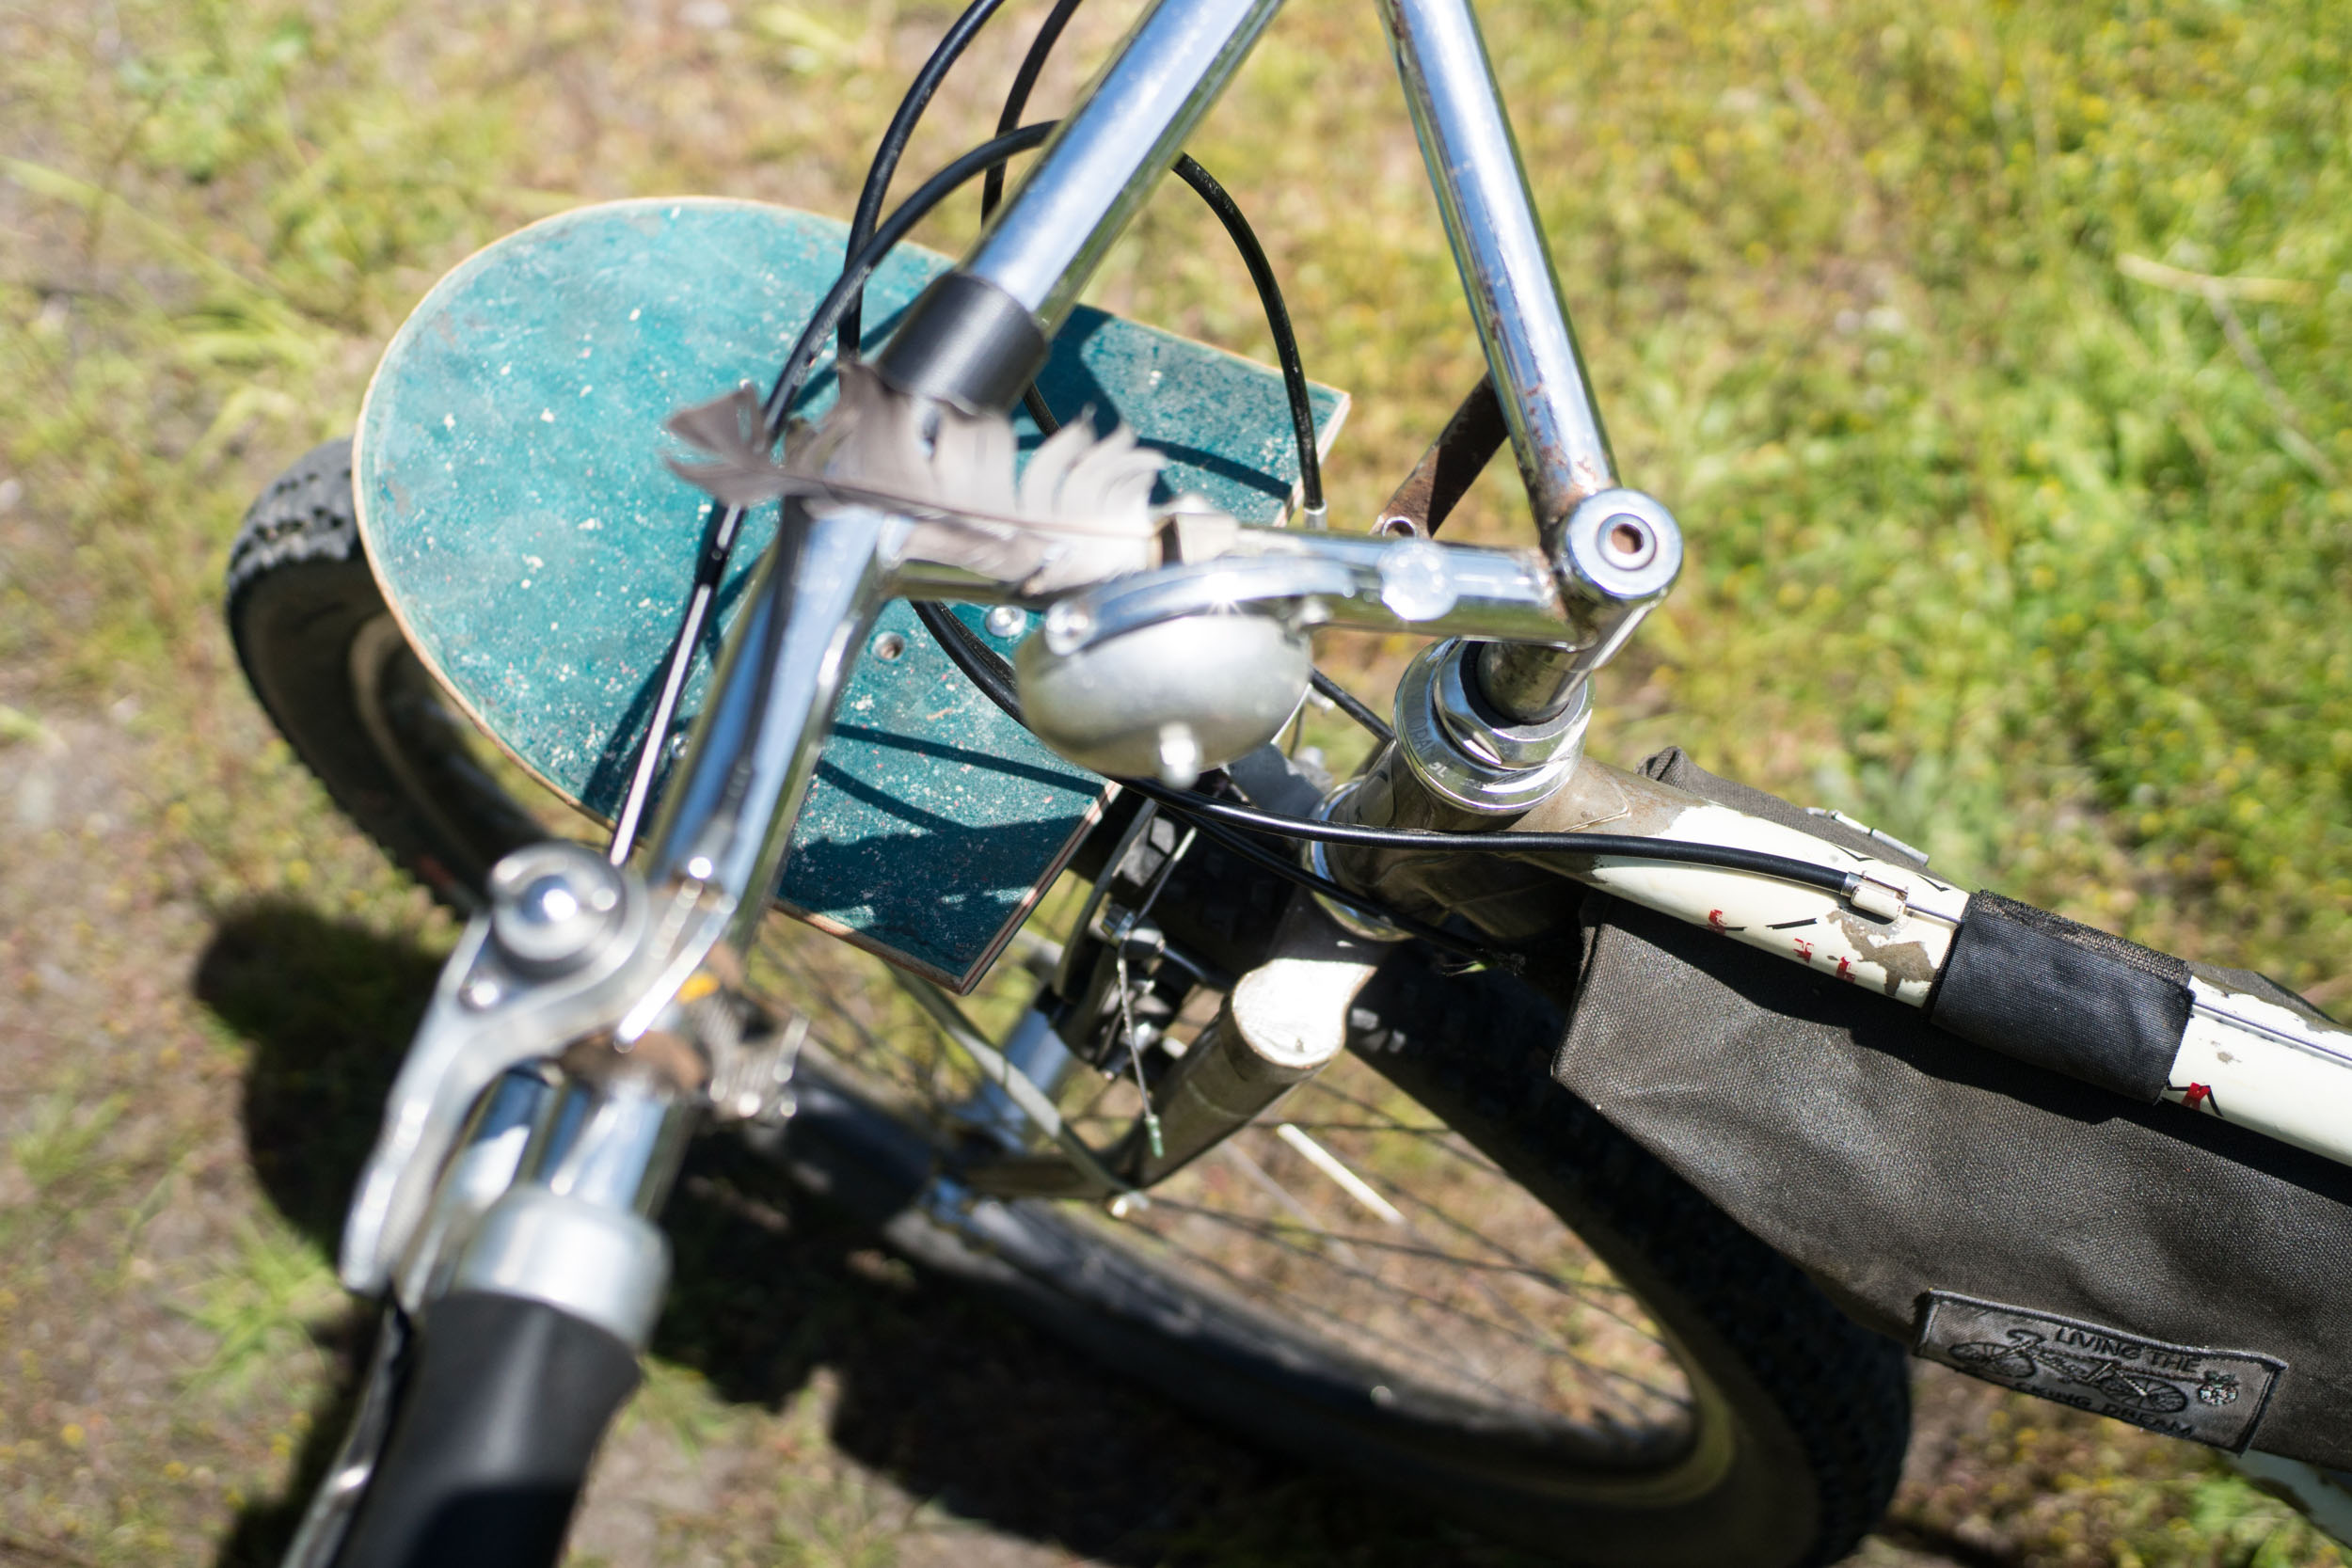
With that in mind, I was inspired by Dan Stranahan’s skate deck rack (see the Further Reading grid below) and set out to create the most straightforward, affordable, and light platform racks possible for my Budget Bikepacking Build-Off. To save money, I opted to use repurposed materials and a basic $17 OEM rack strut kit. For the sake of simplicity, the rear rack needed to securely hold a dry bag, and the front rack would serve as a sturdy support for a basket. The result exceeded my expectations, so I decided to share this tutorial for anyone interested in building something similar.
What you Need
Here’s a general list of what I used to make the front rack and rear rack. Note that the front rack requires that your bike has a fork crown bolt hole.
Universal
- Saw to cut wooden platforms or a different material you choose; I used a chop saw
- Drill and bit for the bolt holes
- 1” Forstner bit or hole saw for “drillium” (weight-saving holes)
- Bench vise or sturdy clamps
- Knipex pliers wrench – medium or large sized; a pair of pliers would also do the trick
- File to finish metal brackets
- M5 bolts of various lengths and matching Nyloc nuts
- Finish coating for the platforms; I used tung oil as it’s what I had on hand
Front Rack
- Flat steel stock for making the L-bracket; you could also buy one of these diving board rack attachment kits from Rivendell or Velo Orange could be used instead
- Rack strut kit, or two if you’re making front and rear racks; I bought this kit for $17, which includes compression hardware and two 32cm strong steel rods; you can find longer 420mm struts at Rivendell that don’t include the compression hardware
- Wood for platform or other material such as a piece of aluminum, plastic, or other relatively flat stock; the piece of scrap hardwood I used measured about 6×8”
Rear Rack
- Flat steel stock for making the U-shaped fitting to attach to the seat stay rack bosses
- Rack strut kit, or two if you’re making front and rear racks; I bought this kit for $17, which includes compression hardware and two 32cm strong steel rods; you can find longer 420mm struts at Rivendell that don’t include the compression hardware
- Wood for platform or other material such as a piece of aluminum, plastic, or other relatively flat stock; the piece of scrap hardwood I used measured about 6×13”
1. Measure and Cut the Platforms
Start by repurposing an old piece of wood or some other material. A skateboard deck is one example since they’re made to be outside, and their layered hardwood construction provides a durable and sturdy platform. Plastic, aluminum, or another structurally stable and water-resistant substrate could also work. I had a sharp-looking scrap of unidentified Appalachian hardwood on hand that seemed perfect.
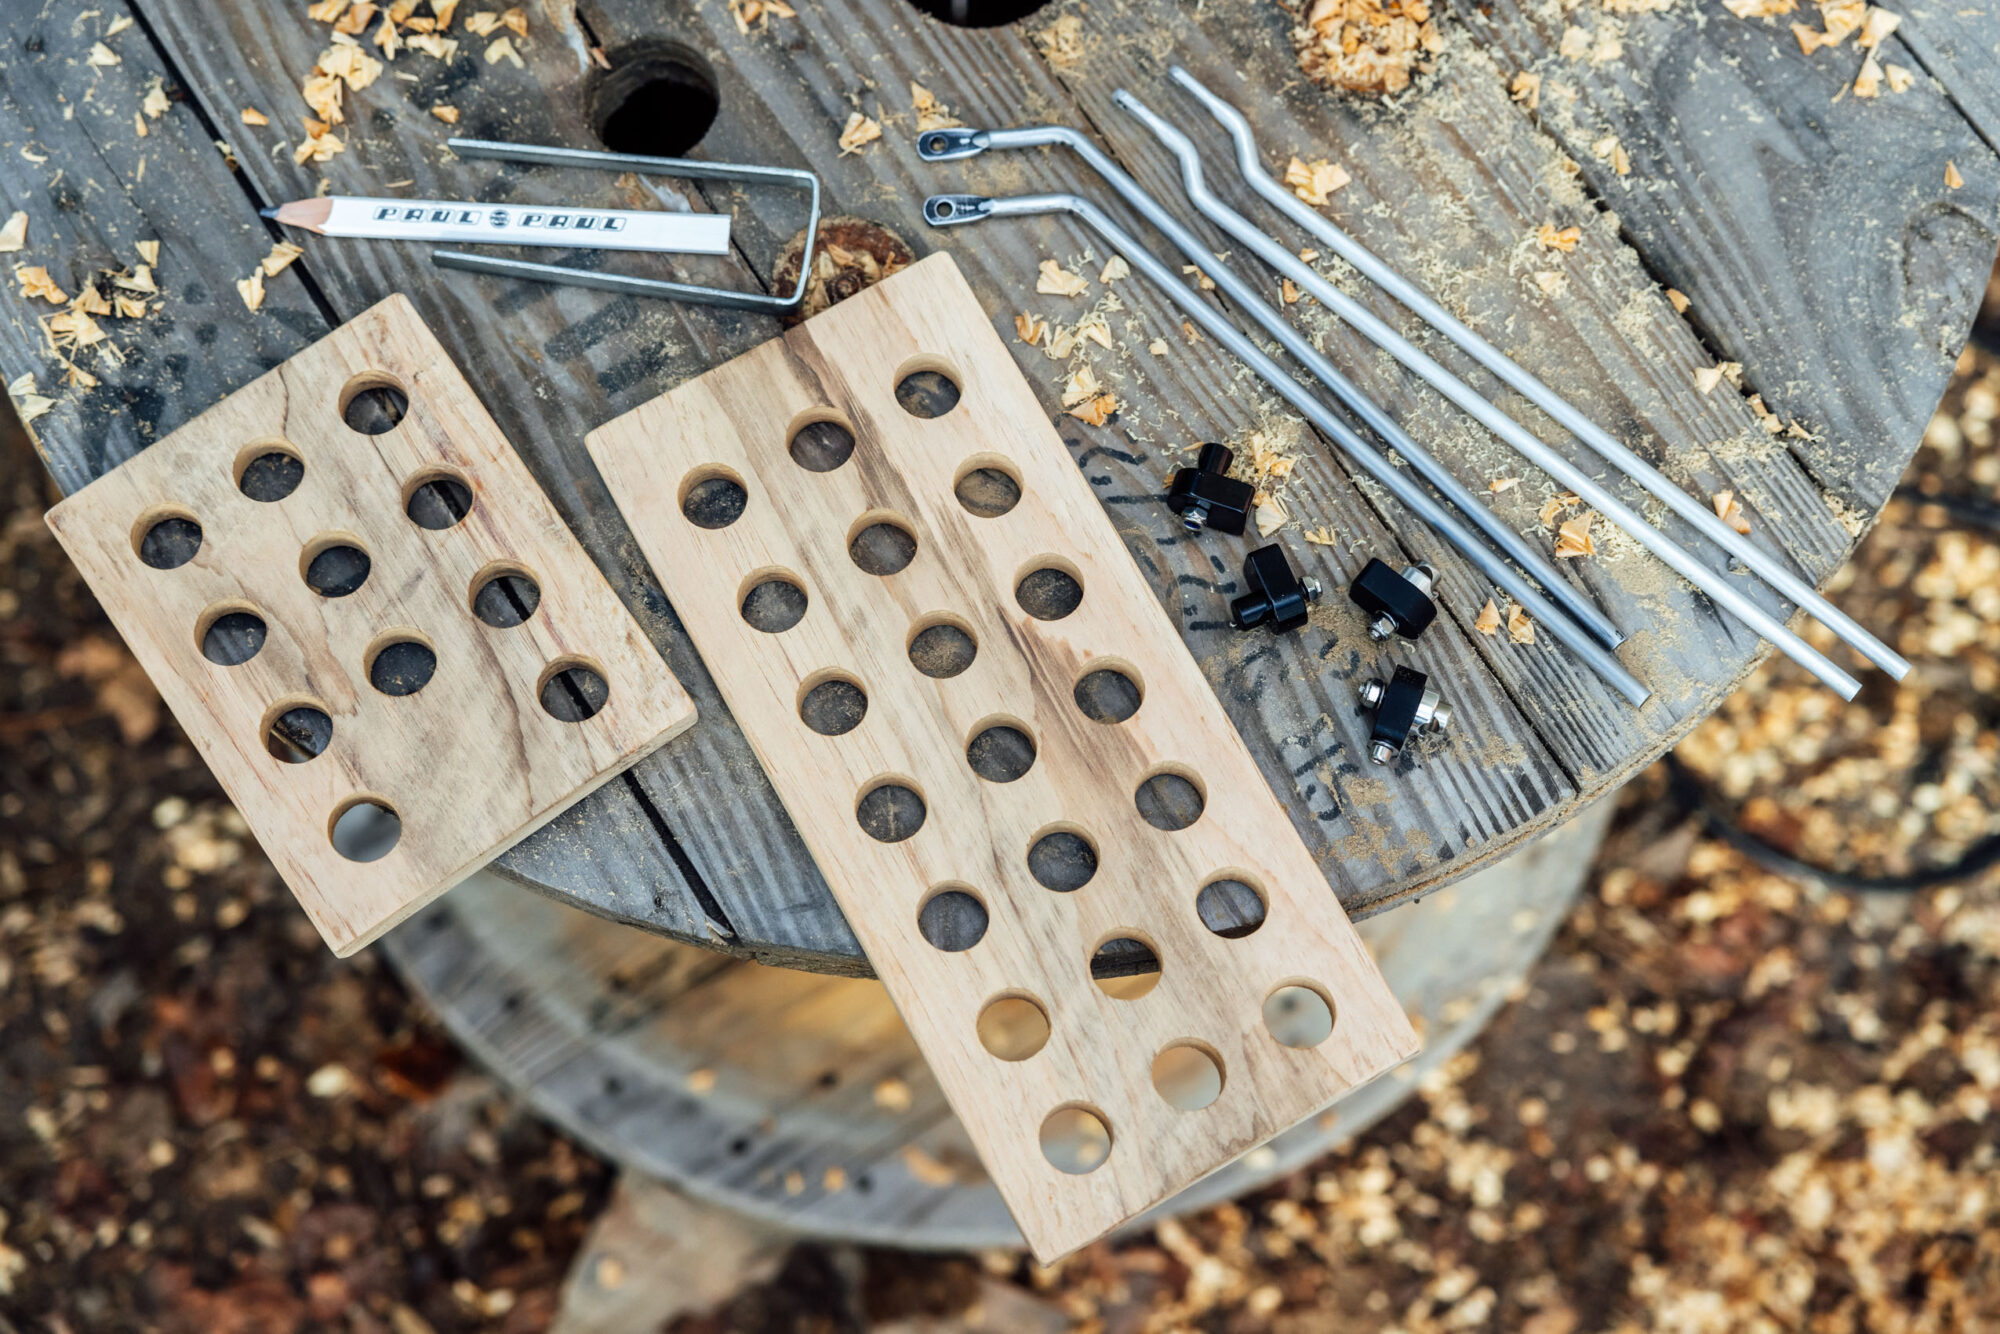
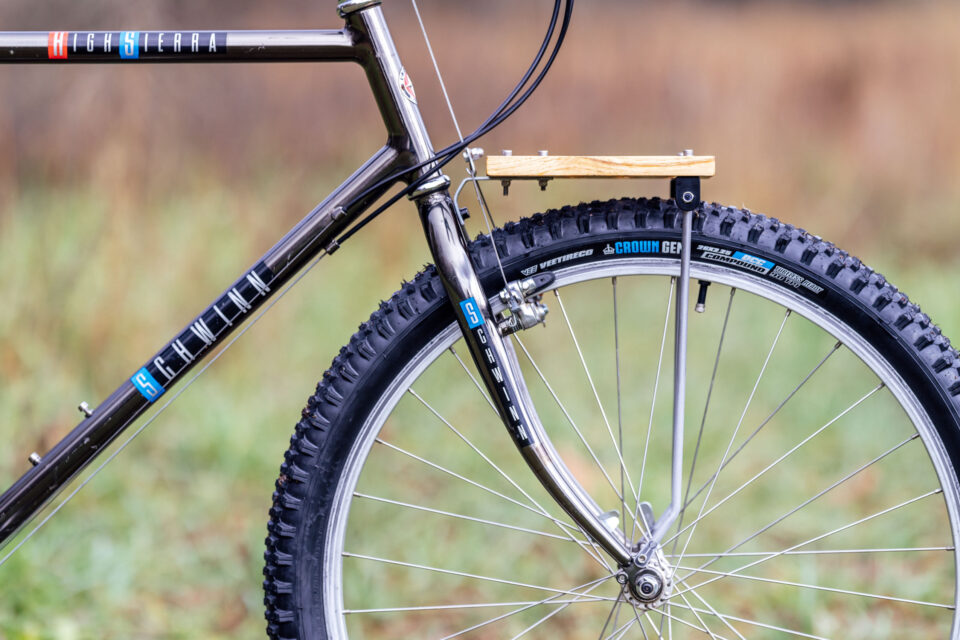
Once I sanded the surface of the entire board, I measured and cut a piece for the front rack deck to about 6” wide by 8” long. That seemed like the ideal size to support a basket and the perfect width for the strut spacing when connected to the rack mounts on the 100mm-spaced fork. Note that you’ll want to make it a little wider if you have a Boost-spaced fork.
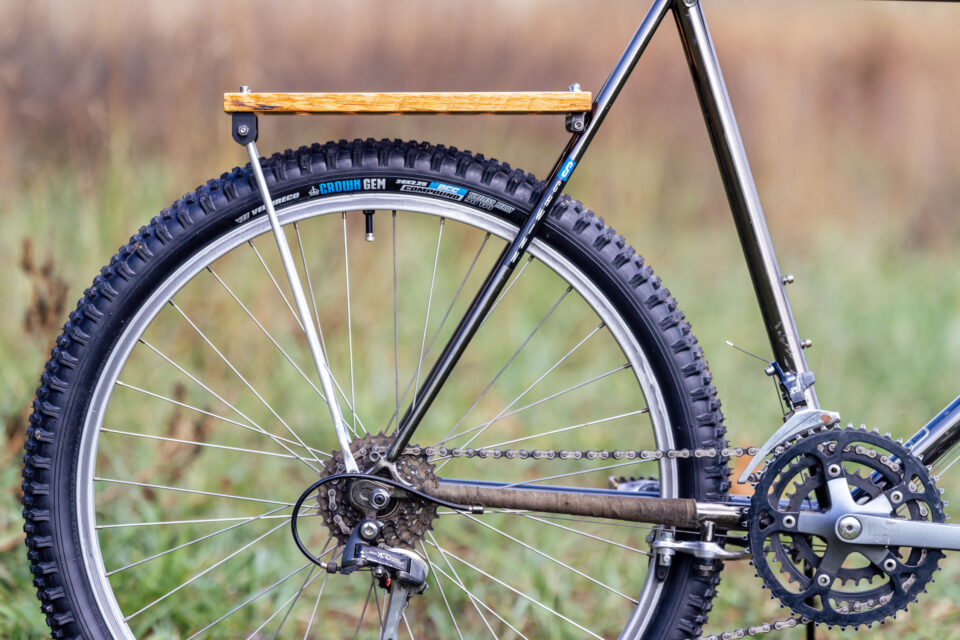
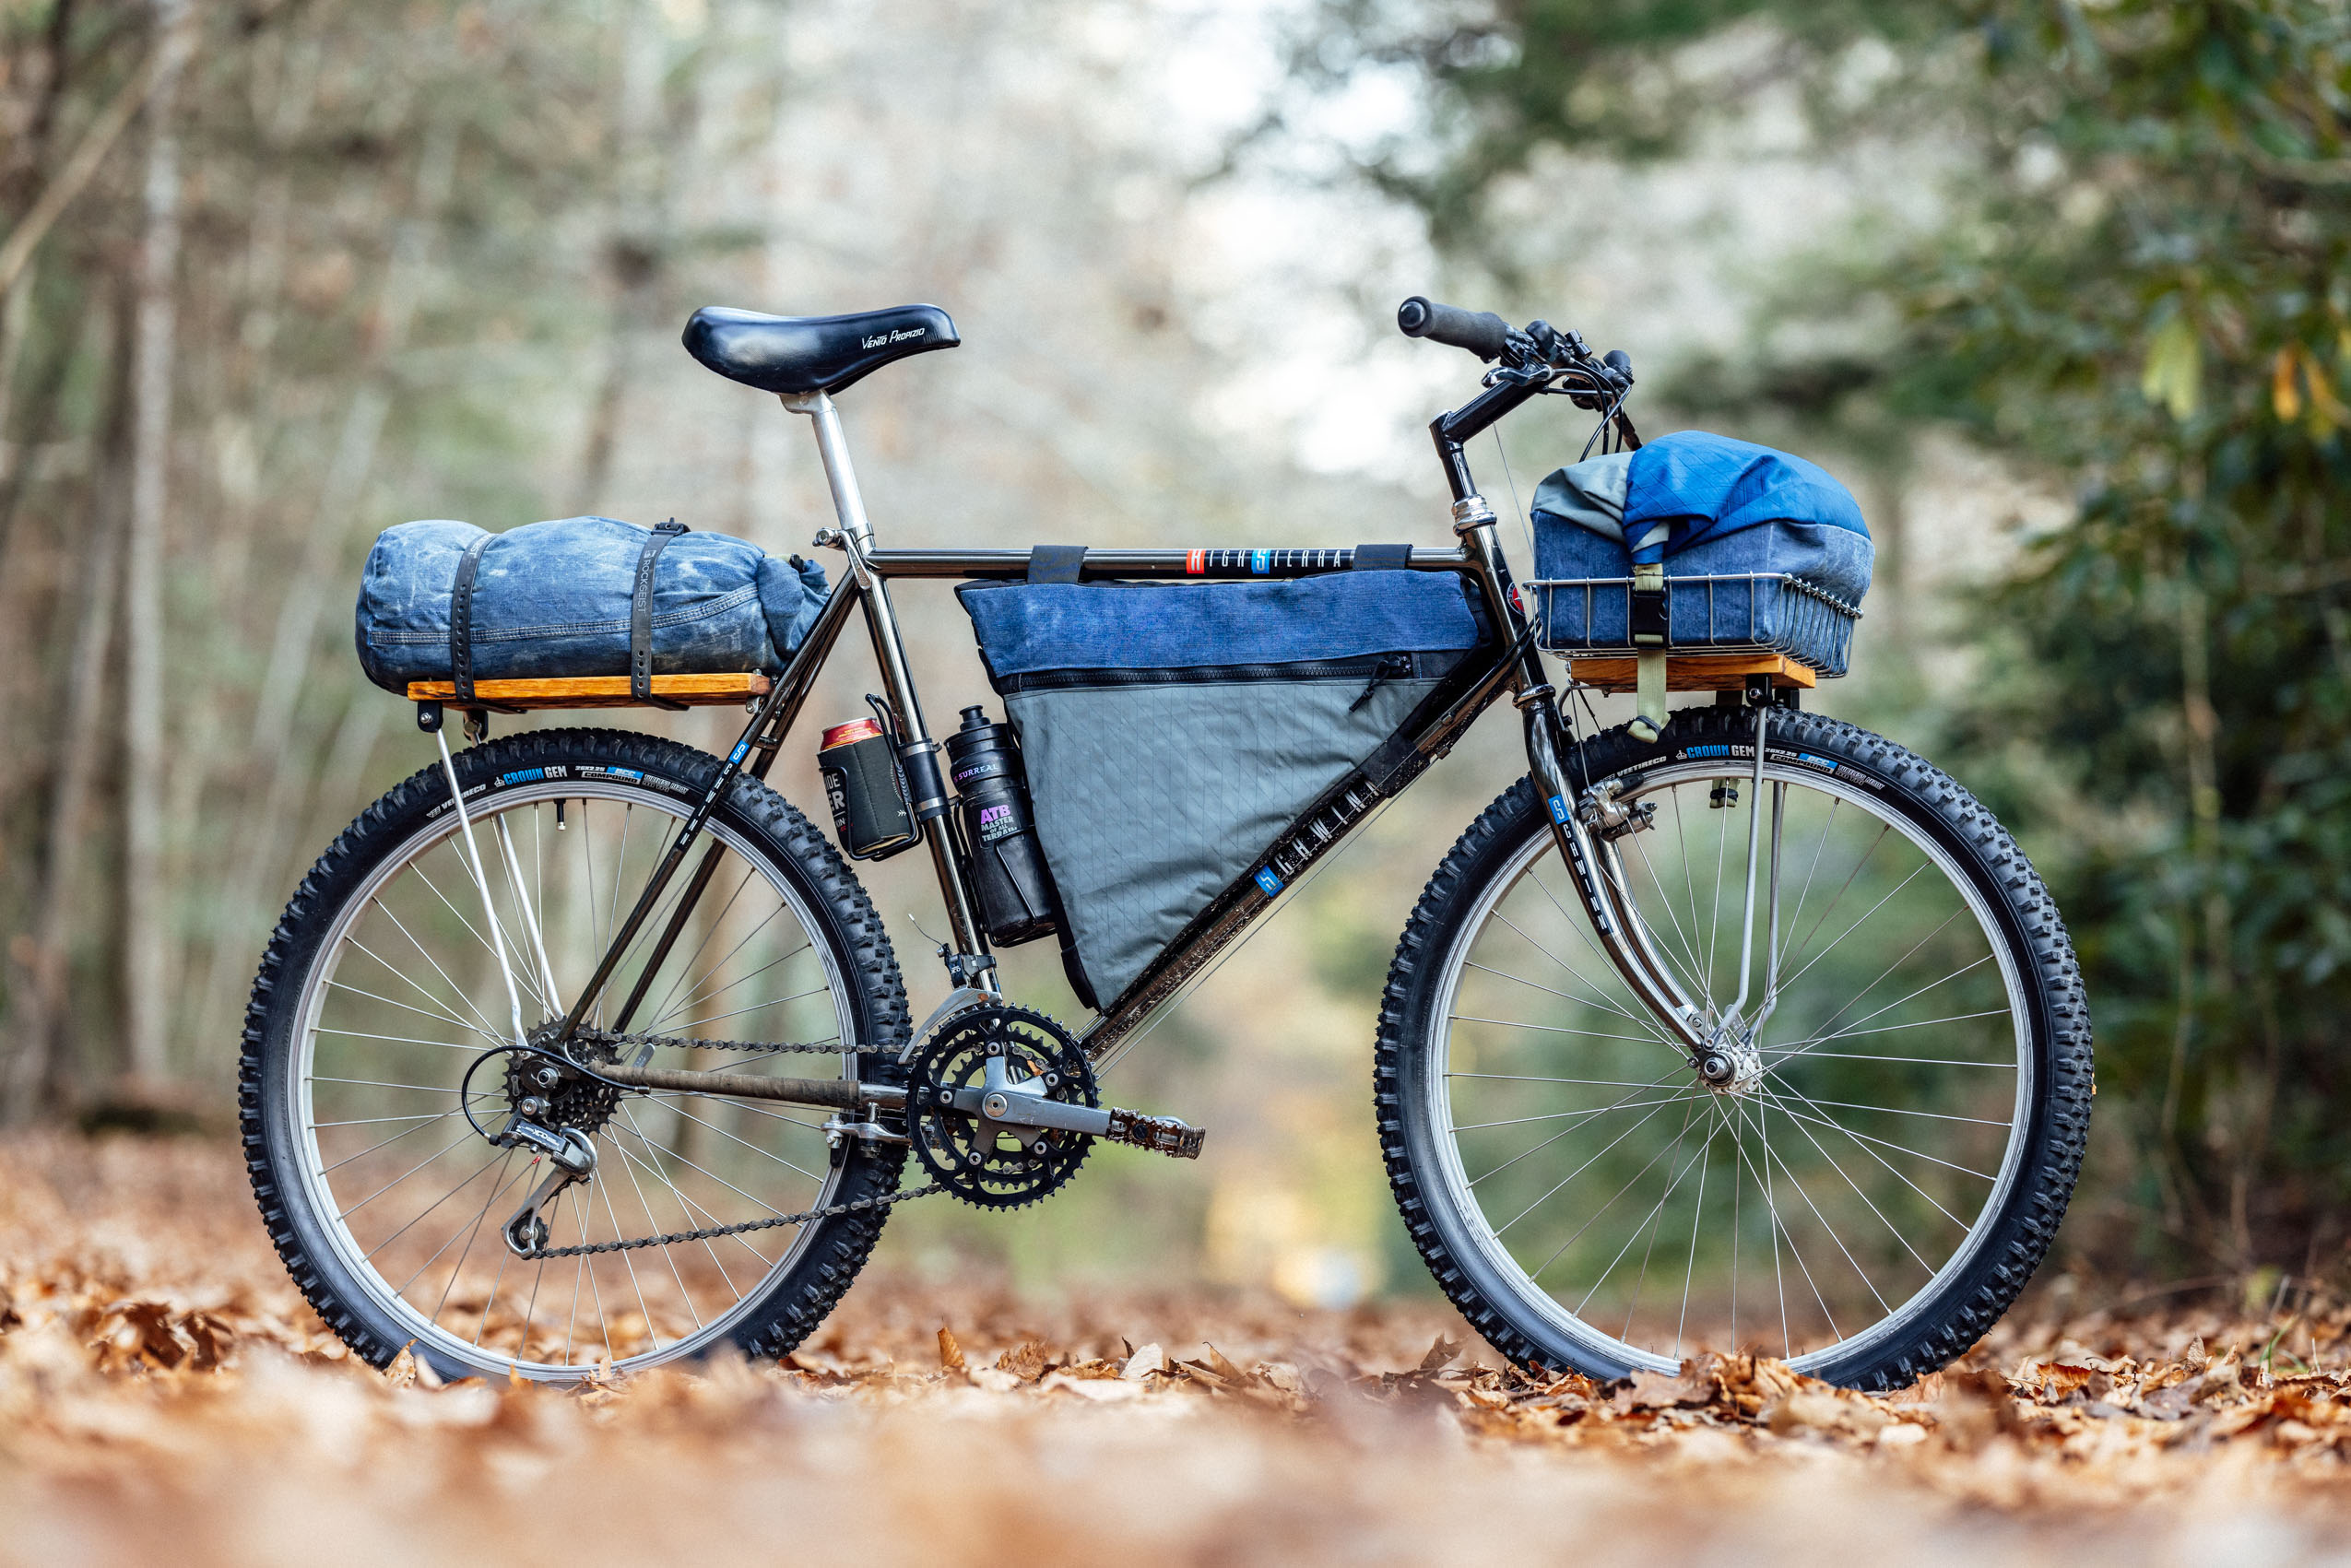
Using the same width, for good measure, I made the rear rack platform 13” long, which was generous enough to support my relatively chunky DIY waxed-denim rack-top bag.
2. Drillium!
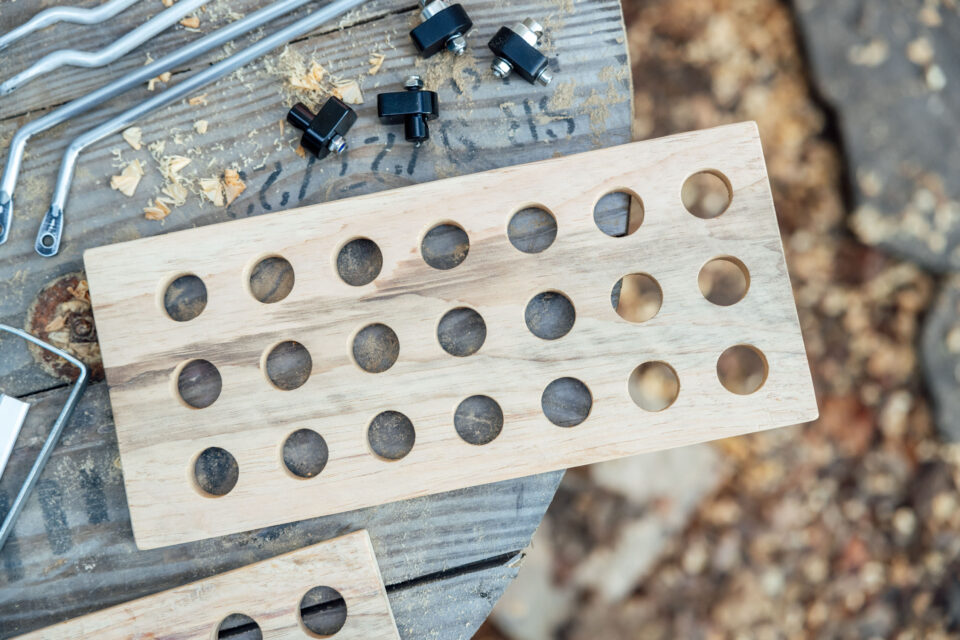
The next step was to remove a little weight. For the uninitiated, drillium is a technique popularized in the ’70s and ’80s—mainly by time trialists—that involved drilling holes into bike parts to reduce weight. While it eventually proved counterproductive—people realized that drag from the holes negated the aerodynamic benefits and canceled out the performance gains from the weight reduction—it still has its uses and can even be somewhat aesthetically pleasing. In this project, it worked well, removing a significant amount of material from the wooden rack decks.
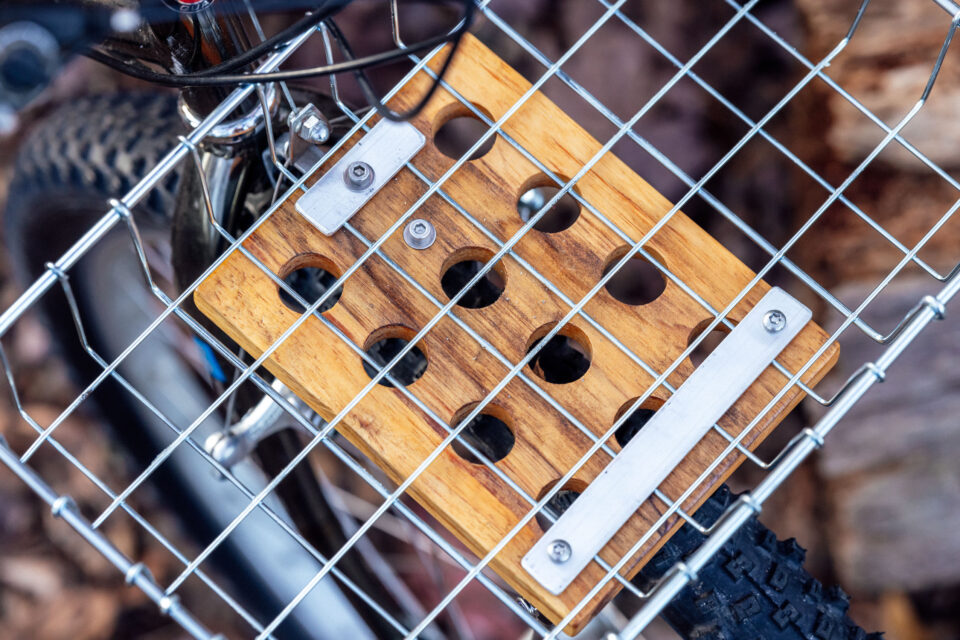
The drillium pattern I used is based on a 1.75” center-to-center grid to create a visual balance for 1” holes. I used a Forstner bit to drill the holes and achieve a relatively clean and smooth finish. You could also use a hole saw.
3. Finish Platforms
Once I finished drilling, both platforms were properly sanded and brushed with three coats of tung oil. That’s what I had on hand, but since I haven’t tested these in the rain, I can’t make any claims as to how they’ll hold up. Based on some light research, I think they would be fine, but you might consider something like spar varnish or another exterior finish, especially if you see rain riding in your forecast.
4. Make Front L-bracket
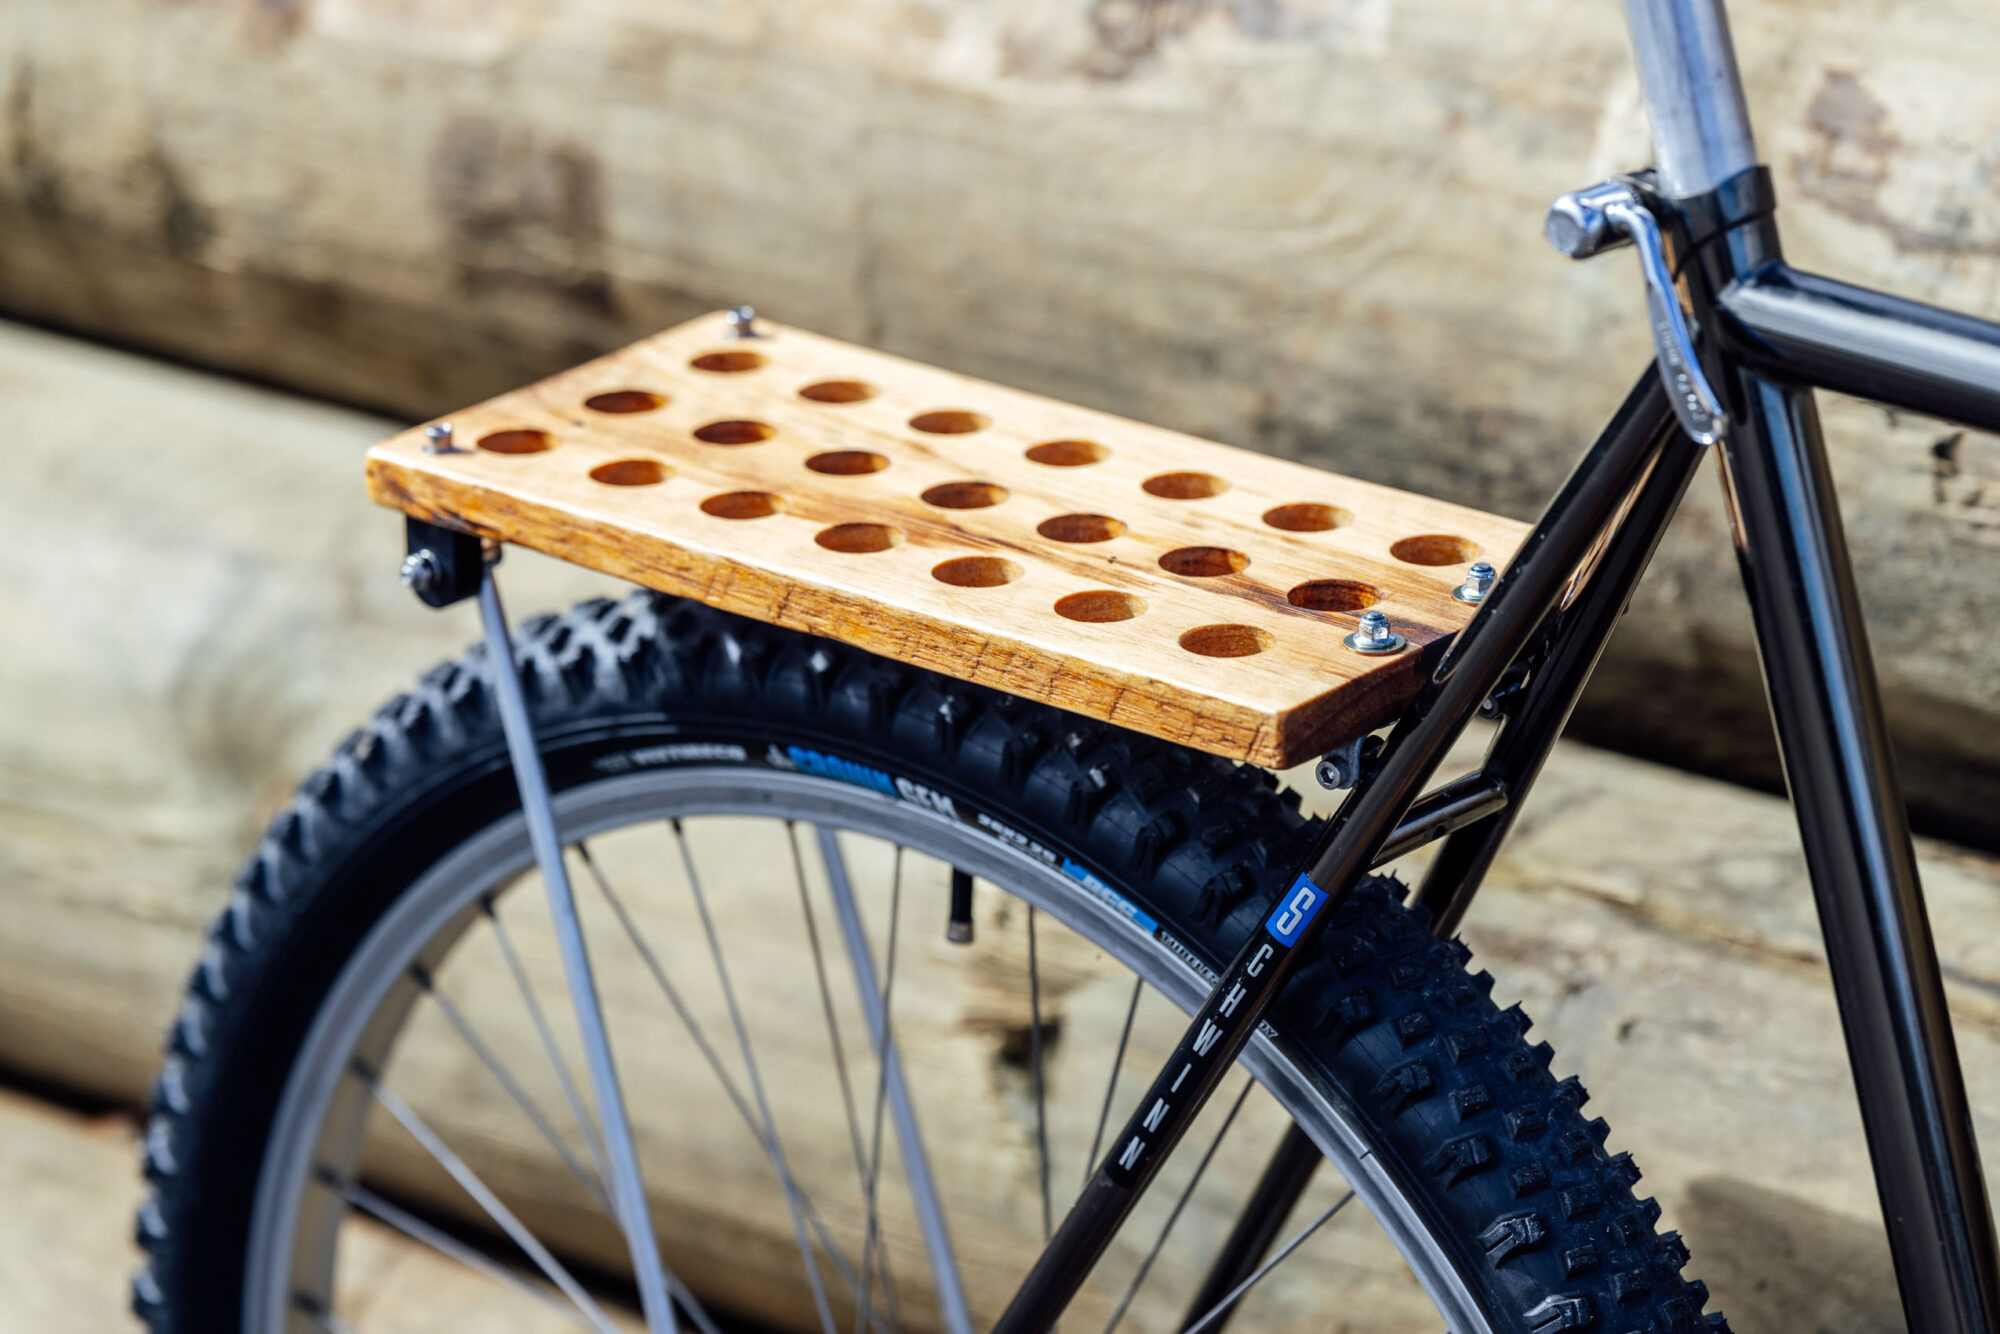
The next step was to make the two brackets that attach the platforms to the bike. I found a single piece of steel about a half inch wide and a little an eighth of an inch thick. I think it was some sort of garage tool hanger, and it was long enough to make both of them. You should be able to find similar steel stock—although maybe slightly wider—at your local hardware store or online to make these.

For the front bracket, the exact shape and length will depend on your bike’s geometry, the location of the fork crown bolt, and whether you need to work around rim brakes. I started by resting the platform on the tire near where I wanted to place it, then took a few measurements to get an idea of the upright dimension of the bracket and then the horizontal length. From there I bent it in the bench vise and held it in place again. I repeated that a few times and marked where to cut it with a pencil. Once the brace was bent and sized properly, I filed down the edges and drilled holes for the M5 bolts.
5. Make Rear U-brace
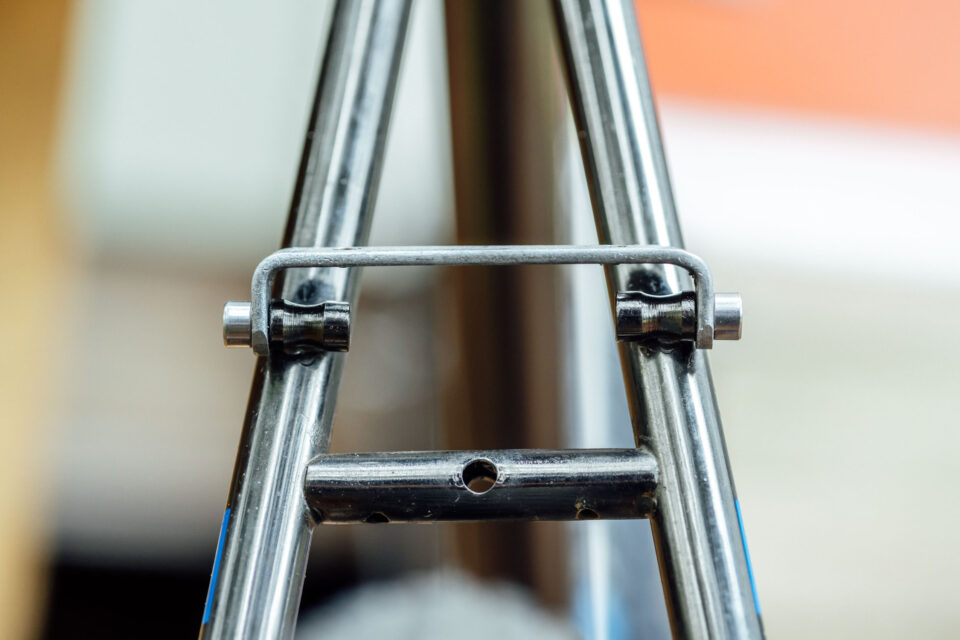
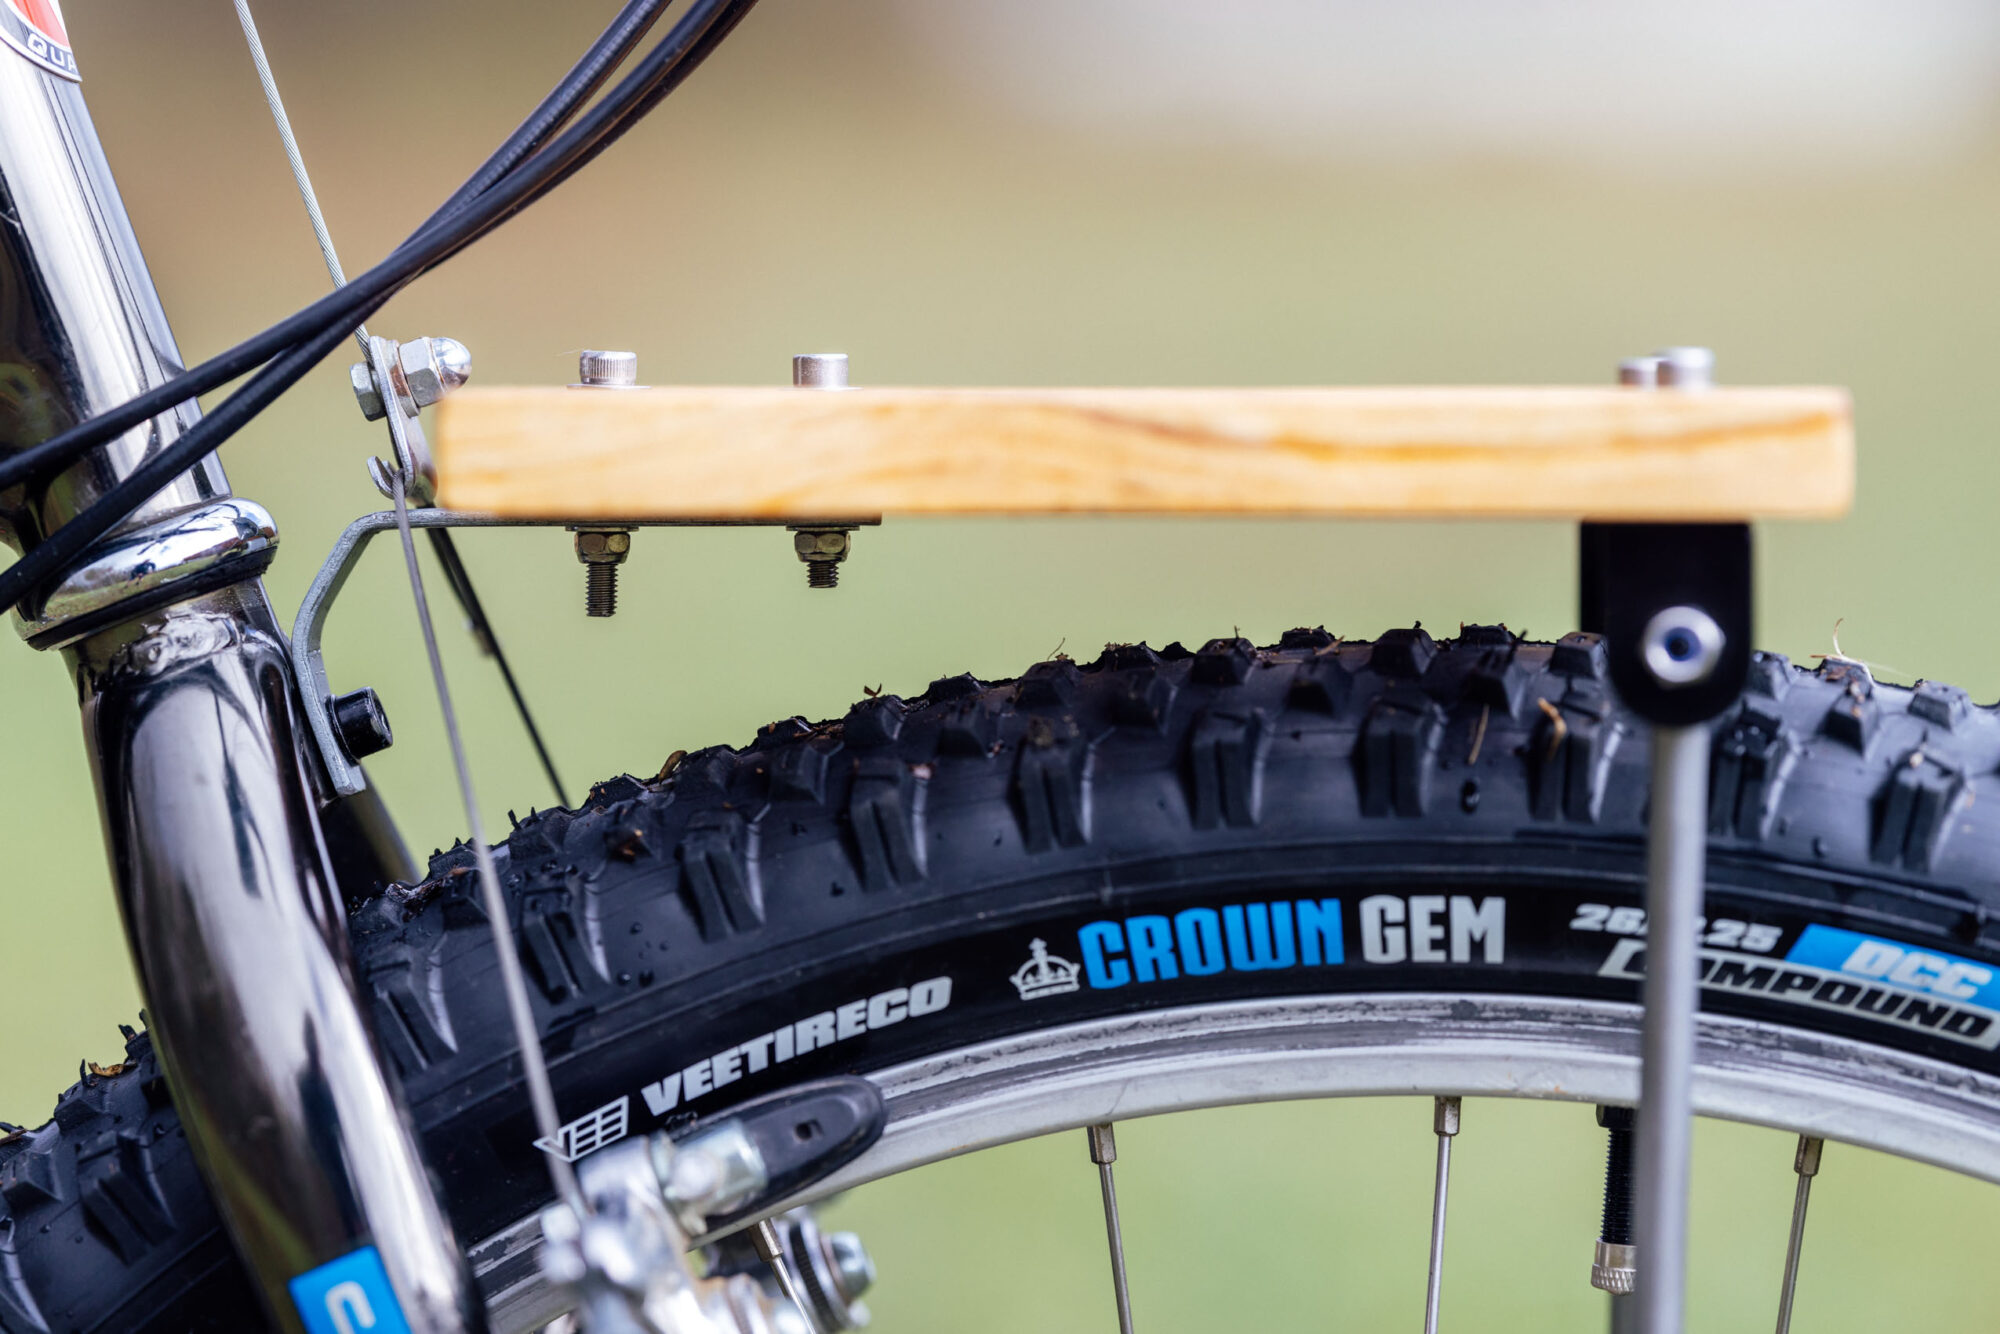
Making the U-brace that supports the front of the rear rack platform was more straightforward. That being said, this technique isn’t going to work for all bikes. On a bike with 700c wheels, for example, the seat stay barrel mounts will likely reside below the top of the tire. For that reason, a simple U-brace like this one will probably only work with older 26″ tire-equipped mountain bikes. However, it’s not hard to visualize how you could make a longer U-brace with angular bends to function in a similar manner.
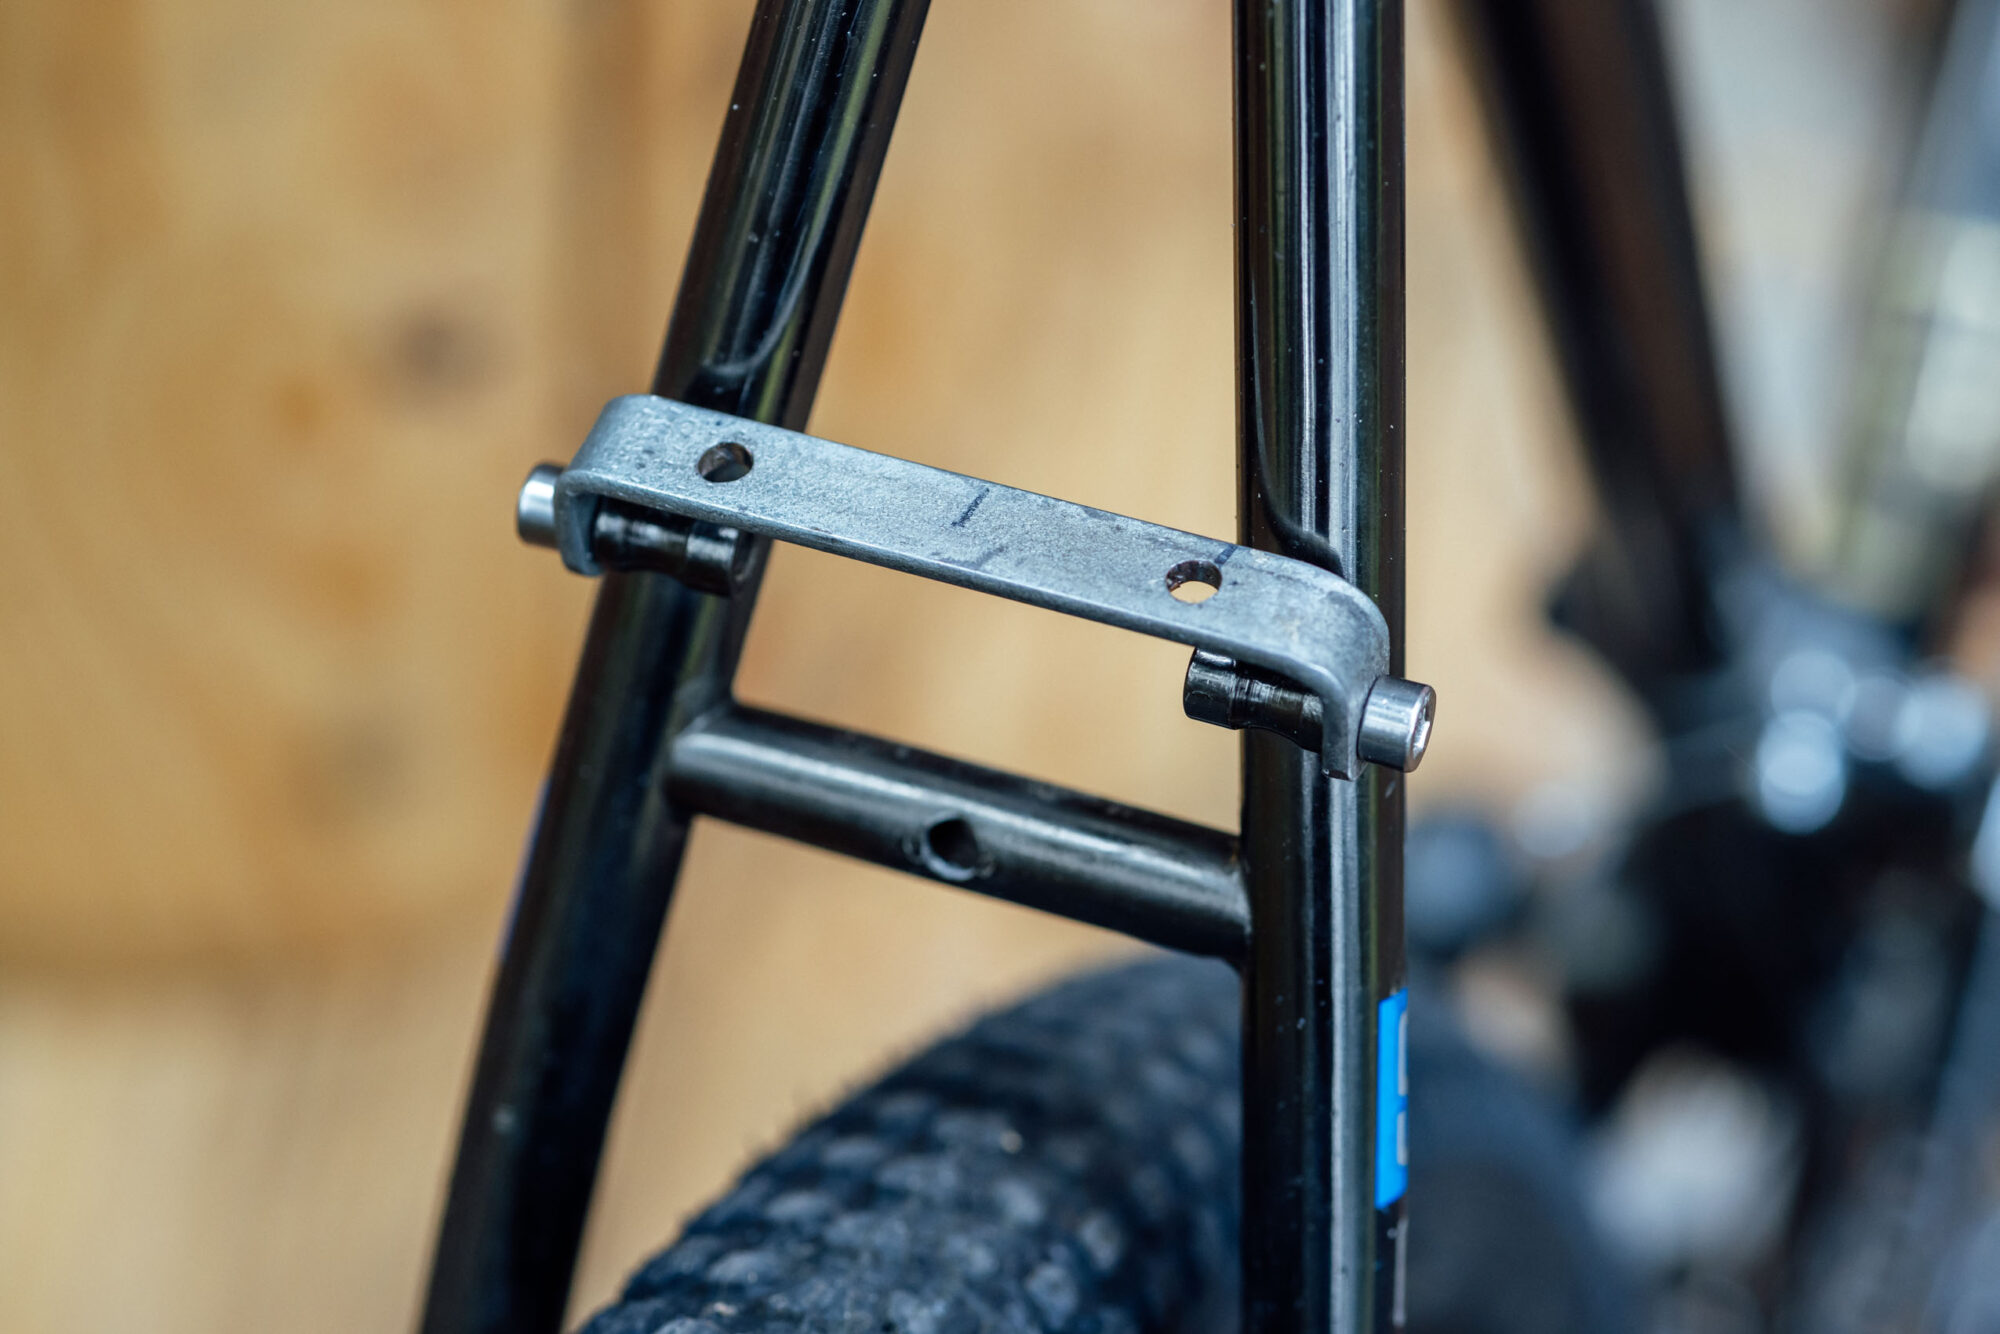
To make this U-brace, I held up a piece of the bar stock and drew three lines: two to mark the bends and one where it needed to be cut to the right length. Once I cut off the excess material, I used a file to round off the edges and drilled two holes where bolts would pass through and thread into the barrel mounts on the seat stays. After that, I clamped it in the bench vise and made each bend using the Knipex Pliers Wrench. It took a few passes to get it just right.

Lastly, I drilled two holes in the long part of the brace to secure it to the platform using two longer M5 bolts and Nylon nuts. This is where I made a mistake. Not thinking it through, I made the holes too close to the outsides of the bracket, which made the nyloc nute interfere with the barrel mounts. For the sake of time, and since I had already drilled the platform, I just reversed the bolts and put the washers and nuts on top of the platform—which looks a little sloppy. In hindsight, it only needed one hole/bolt smack in the middle. I’ll probably putty the holes in the platform and drill a center bolt hole in the bracket, eventually.
6. Attach the Compression Hardware
Once I triple-checked placement and got the brackets bolted onto the platforms, I attached the rack hardware to the outer corners of each piece of wood. This was a little tricky as I had a hard time finding the perfect size bolt—if too long, the bolt can bottom out in the machined aluminum fitting. After rummaging through several drawers, I finally found a couple that worked using two washers. Note that the large barrel heads on the bolts I happened to have on hand could damage a rack bag over time; I’d recommend using pan-head bolts instead.
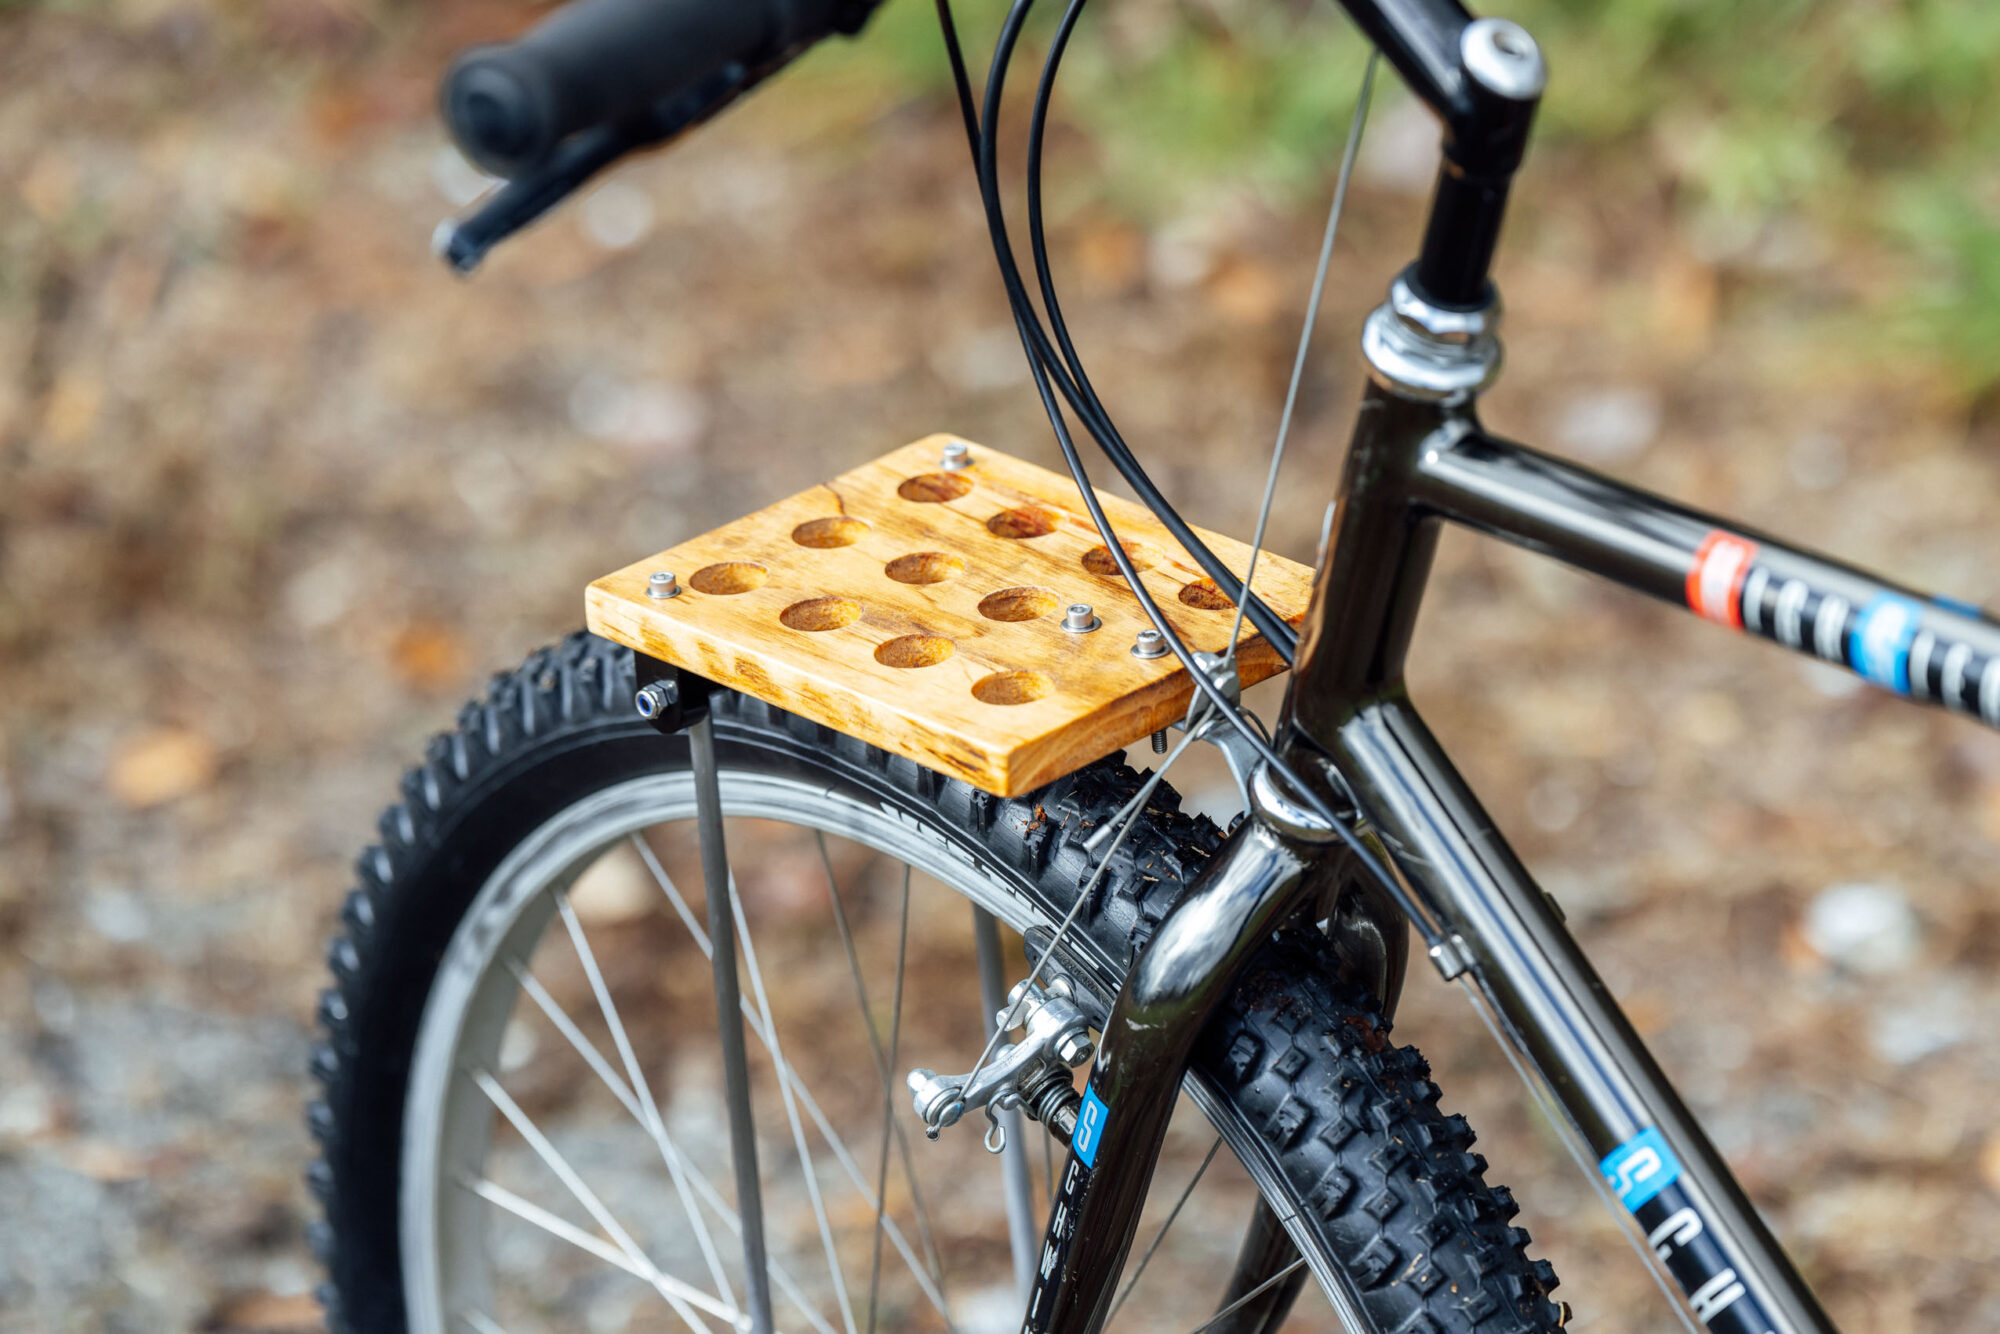
7. Size the Struts and Assemble
Next, I attached the riser struts to the bike’s lower rack mounts, bolted both platform/bracket assemblies to the bike, and figured out where I needed to cut the struts. I had actually sized them up previously, and as expected, none of the struts needed any trimming. I was extremely lucky in that regard. Note that there are longer struts available, which are linked from the “What You Need” list above.
8. Basket Mod
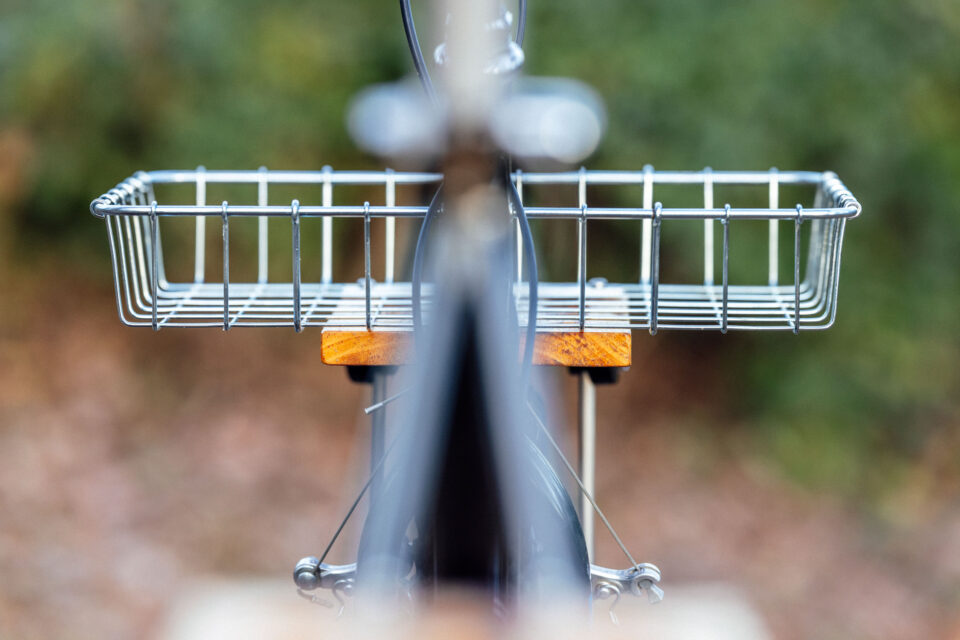
One thing I factored in while planning the bolt placement and size of the front rack was how it would interact with the bottom of my new Wald 137 Half Basket. I wanted to attach it slightly more elegantly than zip ties or straps. To accomplish this, I used two pieces of aluminum bar stock left over from Virginia’s rack strut on her Build-off bike. I essentially cut them to length, drilled matching holes, and made them overlap part of the wire grid, effectively clamping them into place.
Wrap up and Results
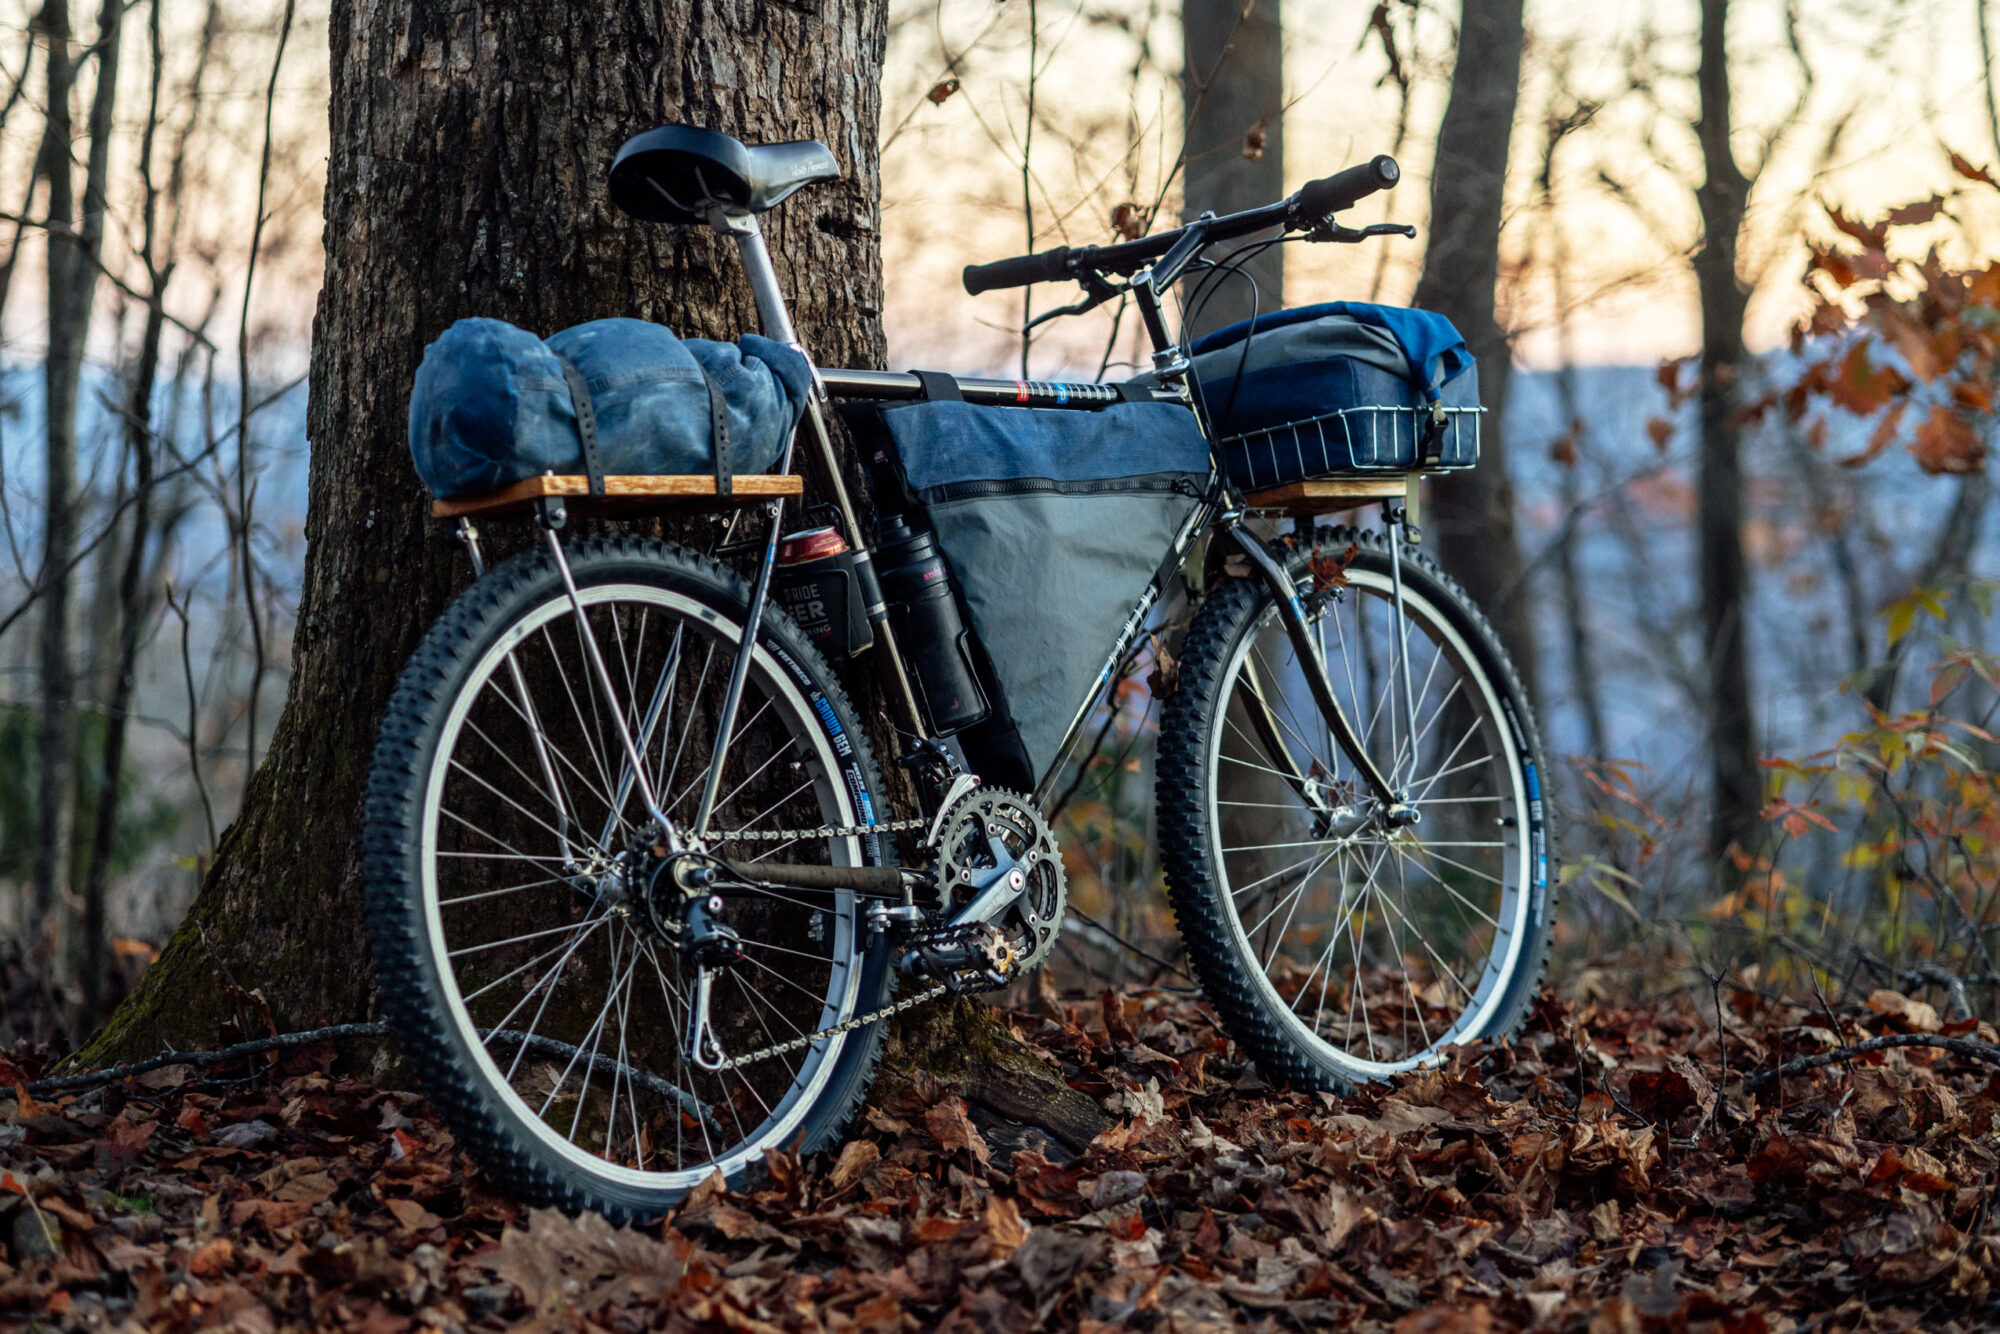
I think this entire process took about three hours or less, so let’s just say about an hour and a half per rack. The resulting DIY wood bike racks turned out much better than expected, and I wouldn’t hesitate to take these on a longer tour. They’re solid and very stable, and with three coats of tung oil, the wooden platforms seem like they’d fare well in the weather.
Note in the photos above that the front rack weighs a little more than the rear—sans basket hardware. This is because the front used solid steel struts, and the rear has aluminum ones, which are just some I had lying around. Still, despite those chunky struts, the front rack weighs less than the 649-gram Tumbleweed T Rack and the 638-gram Old Man Mountain Elkhorn. Granted, they don’t have the useful three-pack cage mounts on the uprights, but they were a fraction of the cost and not really that difficult to make.
Any pointers or thoughts about making a wood bike rack or DIY bike racks in general? Leave a note in the conversation below, and if you have a photo of a rack you made, please pop that in there as well!
Further Reading
Make sure to dig into these related articles for more info...
Please keep the conversation civil, constructive, and inclusive, or your comment will be removed.


