


Relentless Mule Rack Review


Earlier this year, Relentless Components launched the Mule Rack, a unique, weld-free rack designed to carry heavy loads with a wide range of mounting options for cages, panniers, and dry bags. Neil has been testing it since July, and in this video, he shares his thoughts on this distinctive cargo solution. Find his full Relentless Mule Rack review here…
PUBLISHED Dec 24, 2025
The latest rack we’ve been testing is the Relentless Mule Rack, a unique design made from weld-free sheet metal that can accommodate loads of gear. Plus, where you mount things to the rack is entirely up to you. It’s pretty cool, and I’m excited to share my thoughts in our latest review. Watch it below and scroll down for the written version with plenty of photos and a set of pros and cons.
Who and What Is Relentless
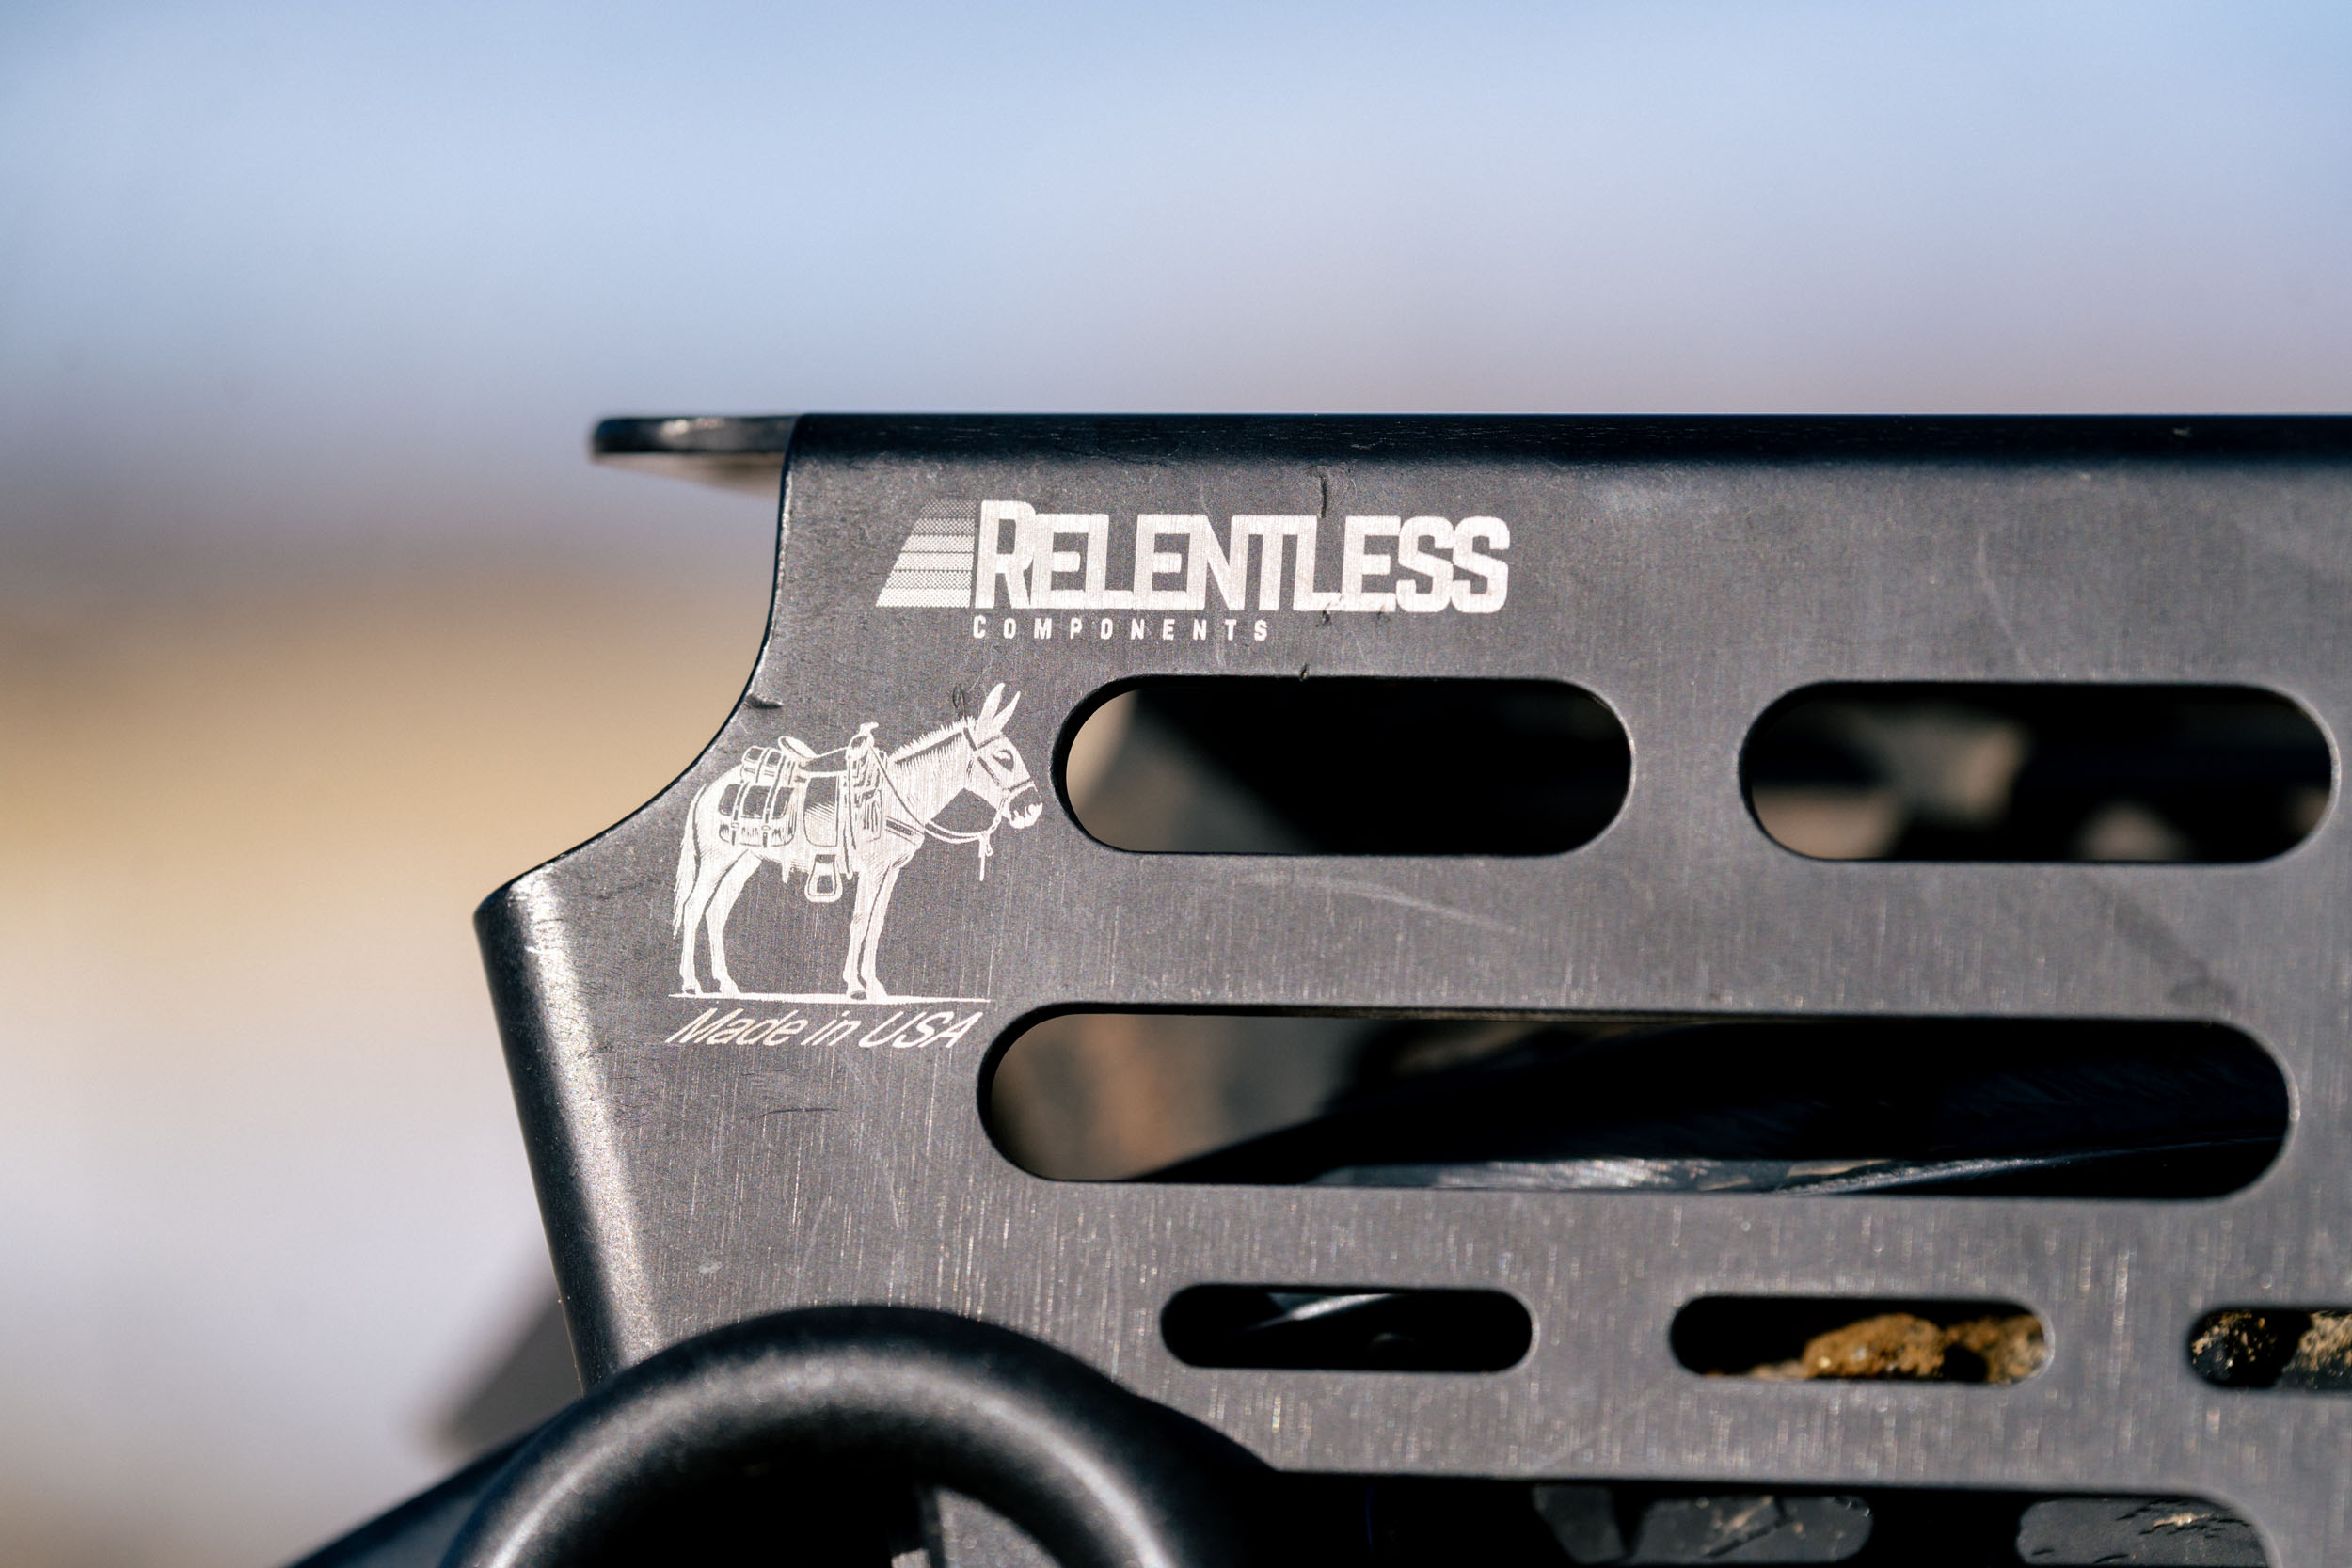
First and foremost, Relentless Components is very much a one-person band: Sean “The Mailman” Mailen. Sean is no stranger to loaded riding, whether that means lining up for events like the Tour Divide and other races or heading out on trips with friends. He has always been a bikepacker and an engineer, and that overlap has shaped much of his career since graduating from the University of Tennessee with a degree in mechanical engineering.
A large chunk of that time was spent at Salsa Cycles, where Sean landed a job right out of college. During his time there, he helped develop bikes and cargo solutions that have since become staples in the adventure cycling world. His fingerprints are on products like the Salsa Minimalist Rack, Wanderlust Rack, Alternator Rack, and Down Under Rack, as well as the Anything Cradles, Anything Cages, and the Woodchipper bar. He also worked on bikes such as the Warbird and the Cutthroat. All this to say, he’s more than qualified to design something like the Mule Rack.


Today, Sean works at MRP in Grand Junction, Colorado, where he designs suspension and drivetrain products. He mentioned that he always wanted to keep evolving some of the ideas he worked on during his time at Salsa. And as any designer knows, the urge to tinker never truly goes away. Relentless Components became a way for him to keep that passion alive, even as a second job alongside his full-time work.
The Relentless Components web store is intentionally minimal, offering just a few products: the Slingshot, Slingshot accessories, and the Mule Rack. That focused approach is not uncommon in this space. I think of Skyler from MICA in a similar light. Simple does not mean basic. More often, it means an incredible amount of time spent refining a single idea and obsessing over the details. Sean is also a busy guy, and many of my conversations with him have happened late at night or early in the morning, which speaks volumes about the time he pours into this project.
That said, the MULE rack has been in the works for nearly a decade. The original concept, nicknamed the “Cheese Grater,” dates back to 2016. That early prototype was made from laser-cut sheet metal and bent using a few two-by-fours. Sean believed in the idea, but without the time to pursue it properly, the project was shelved.


Fast forward to 2024, when Brett Davidson, a bikepacker and friend of Sean’s, and now Relentless Components’ sole ambassador, needed a rack that would not break after destroying far too many over the years. Sean dusted off the concept and built a new prototype. Brett and his partner, Diana, put it to the test.
After hundreds of miles, with both failures and successes, Sean went back to the drawing board and built another version. That rack went straight back to Brett and Diana for a Baja Divide test. It worked better, but Sean was not done. He wanted it lighter, stronger, and better all around.

After extensive real-world use and many hundreds of FEA simulations—computer-based tests used to predict how a product handles stress, vibration, and load without relying solely on physical prototypes—Sean landed on a final production design. The result is a rack that Sean believes can handle just about anything a bike trip can throw at it, while still offering something genuinely unique in the industry.
Specs
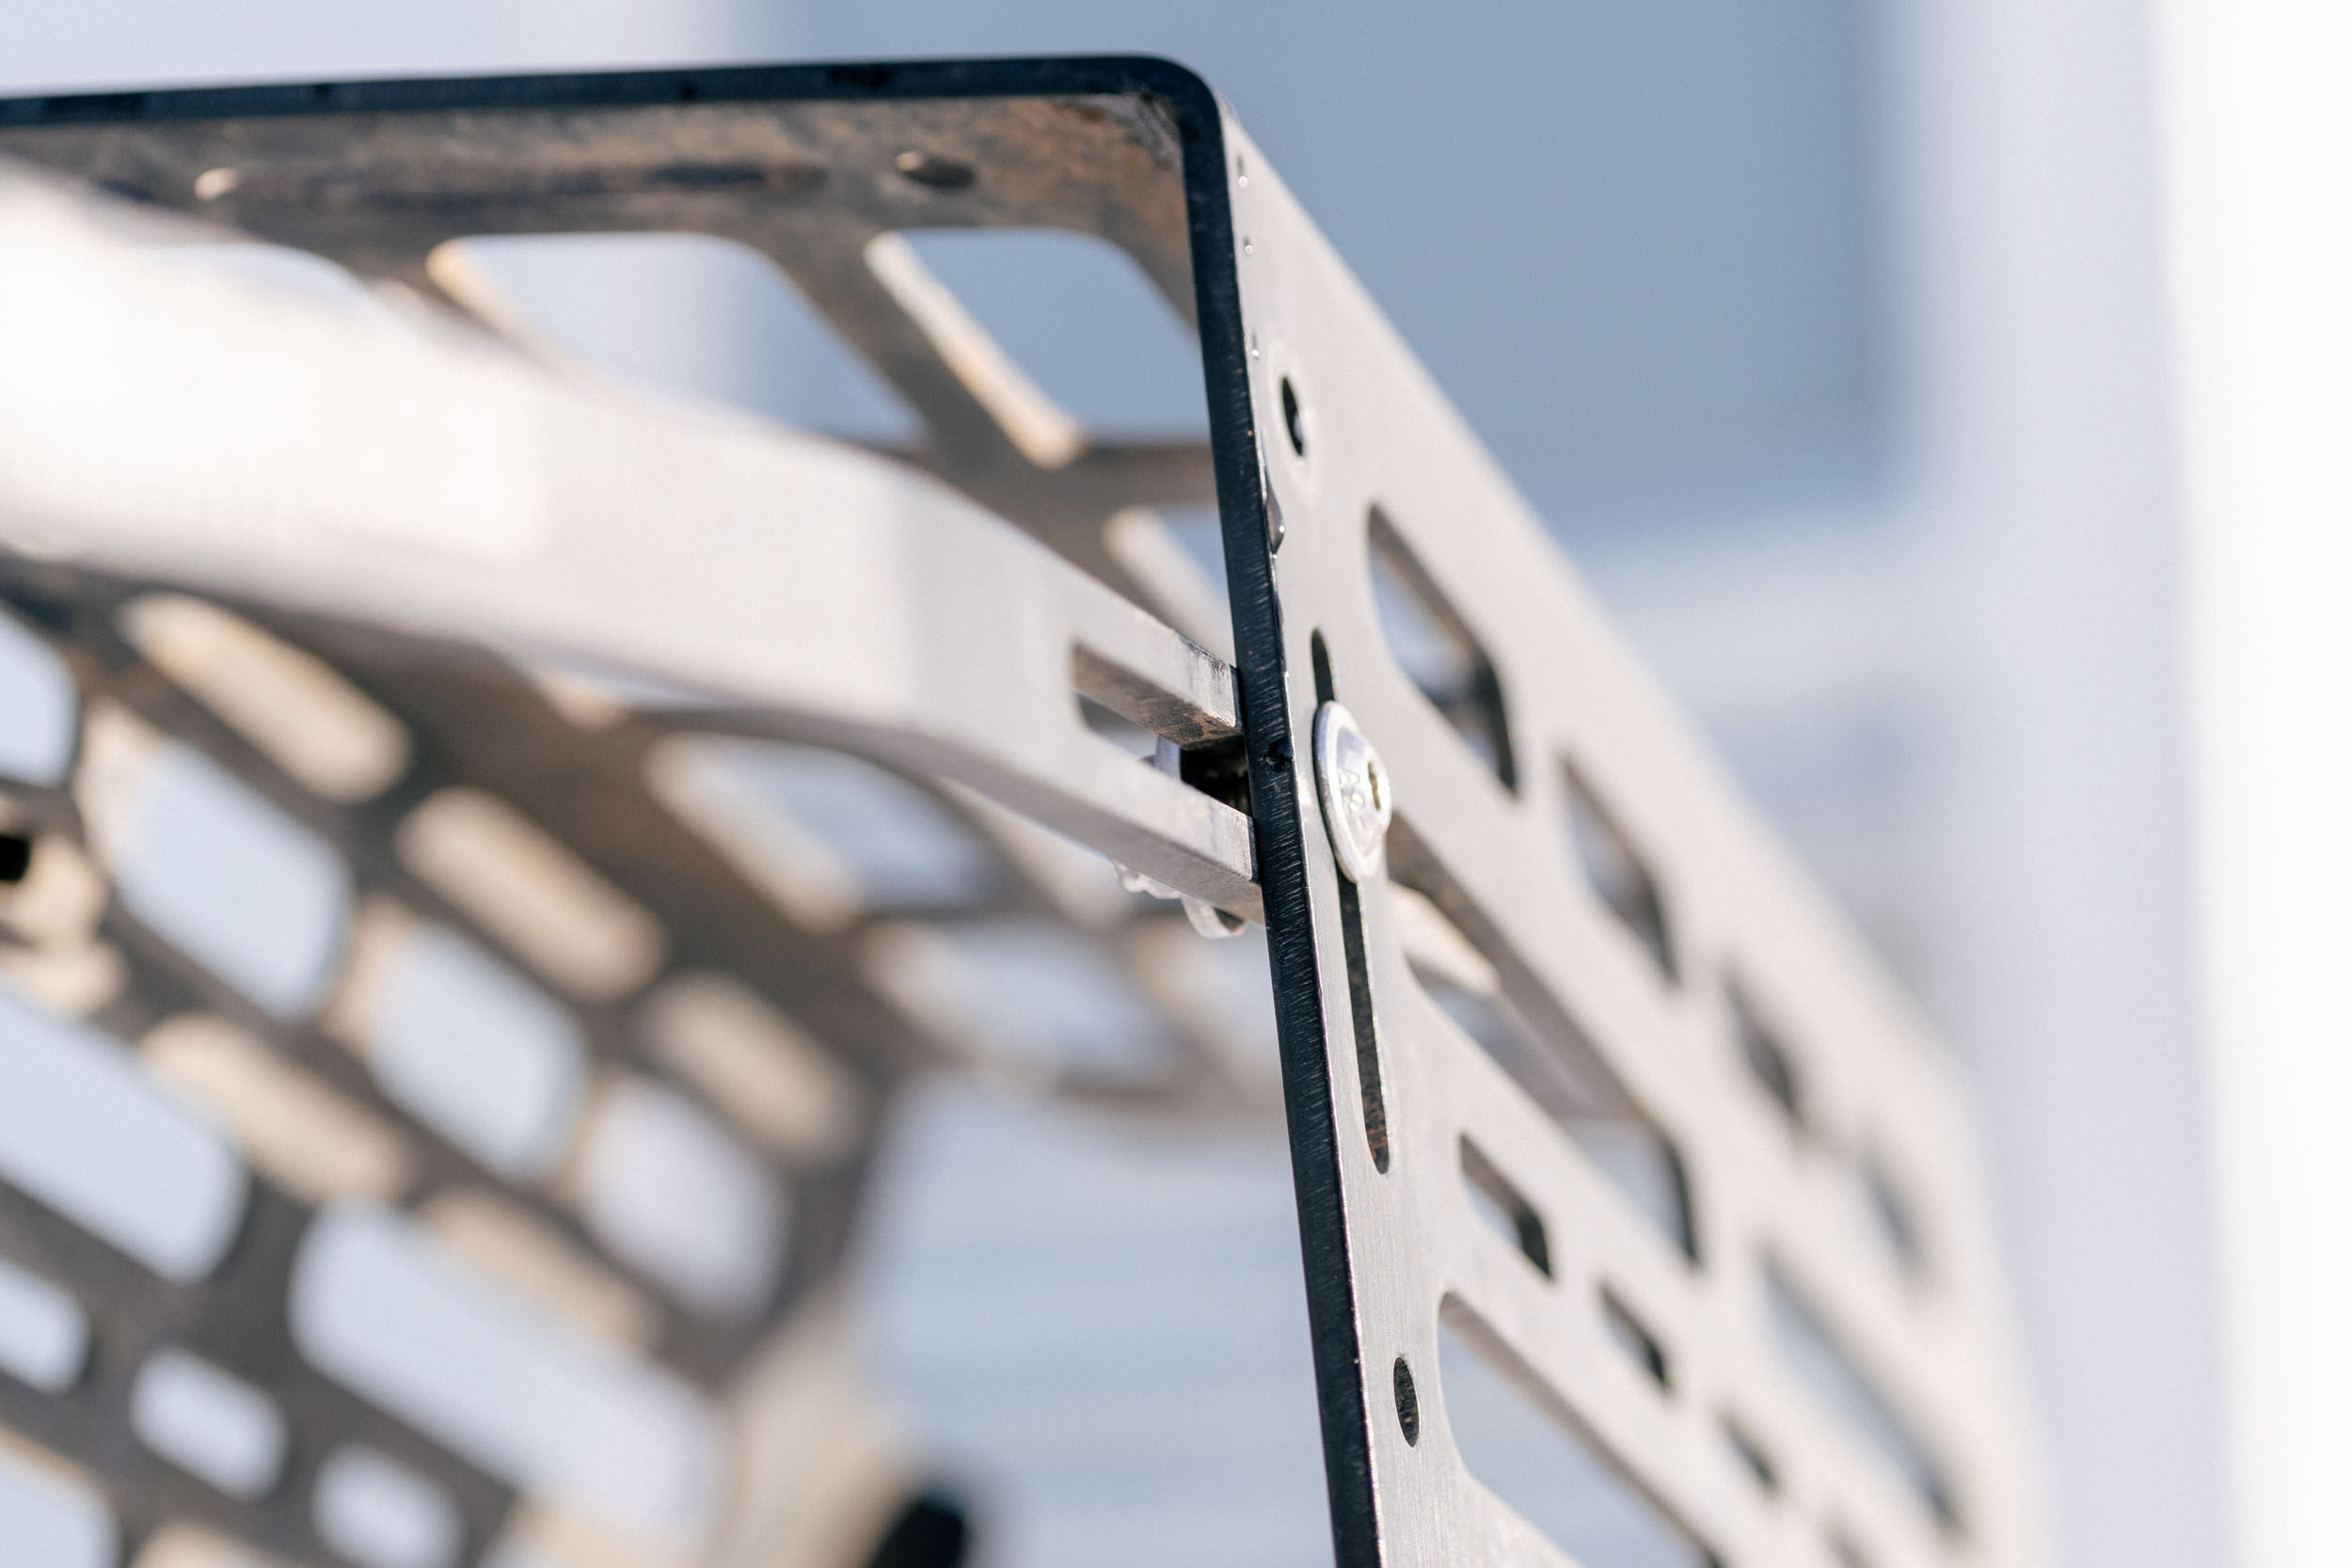
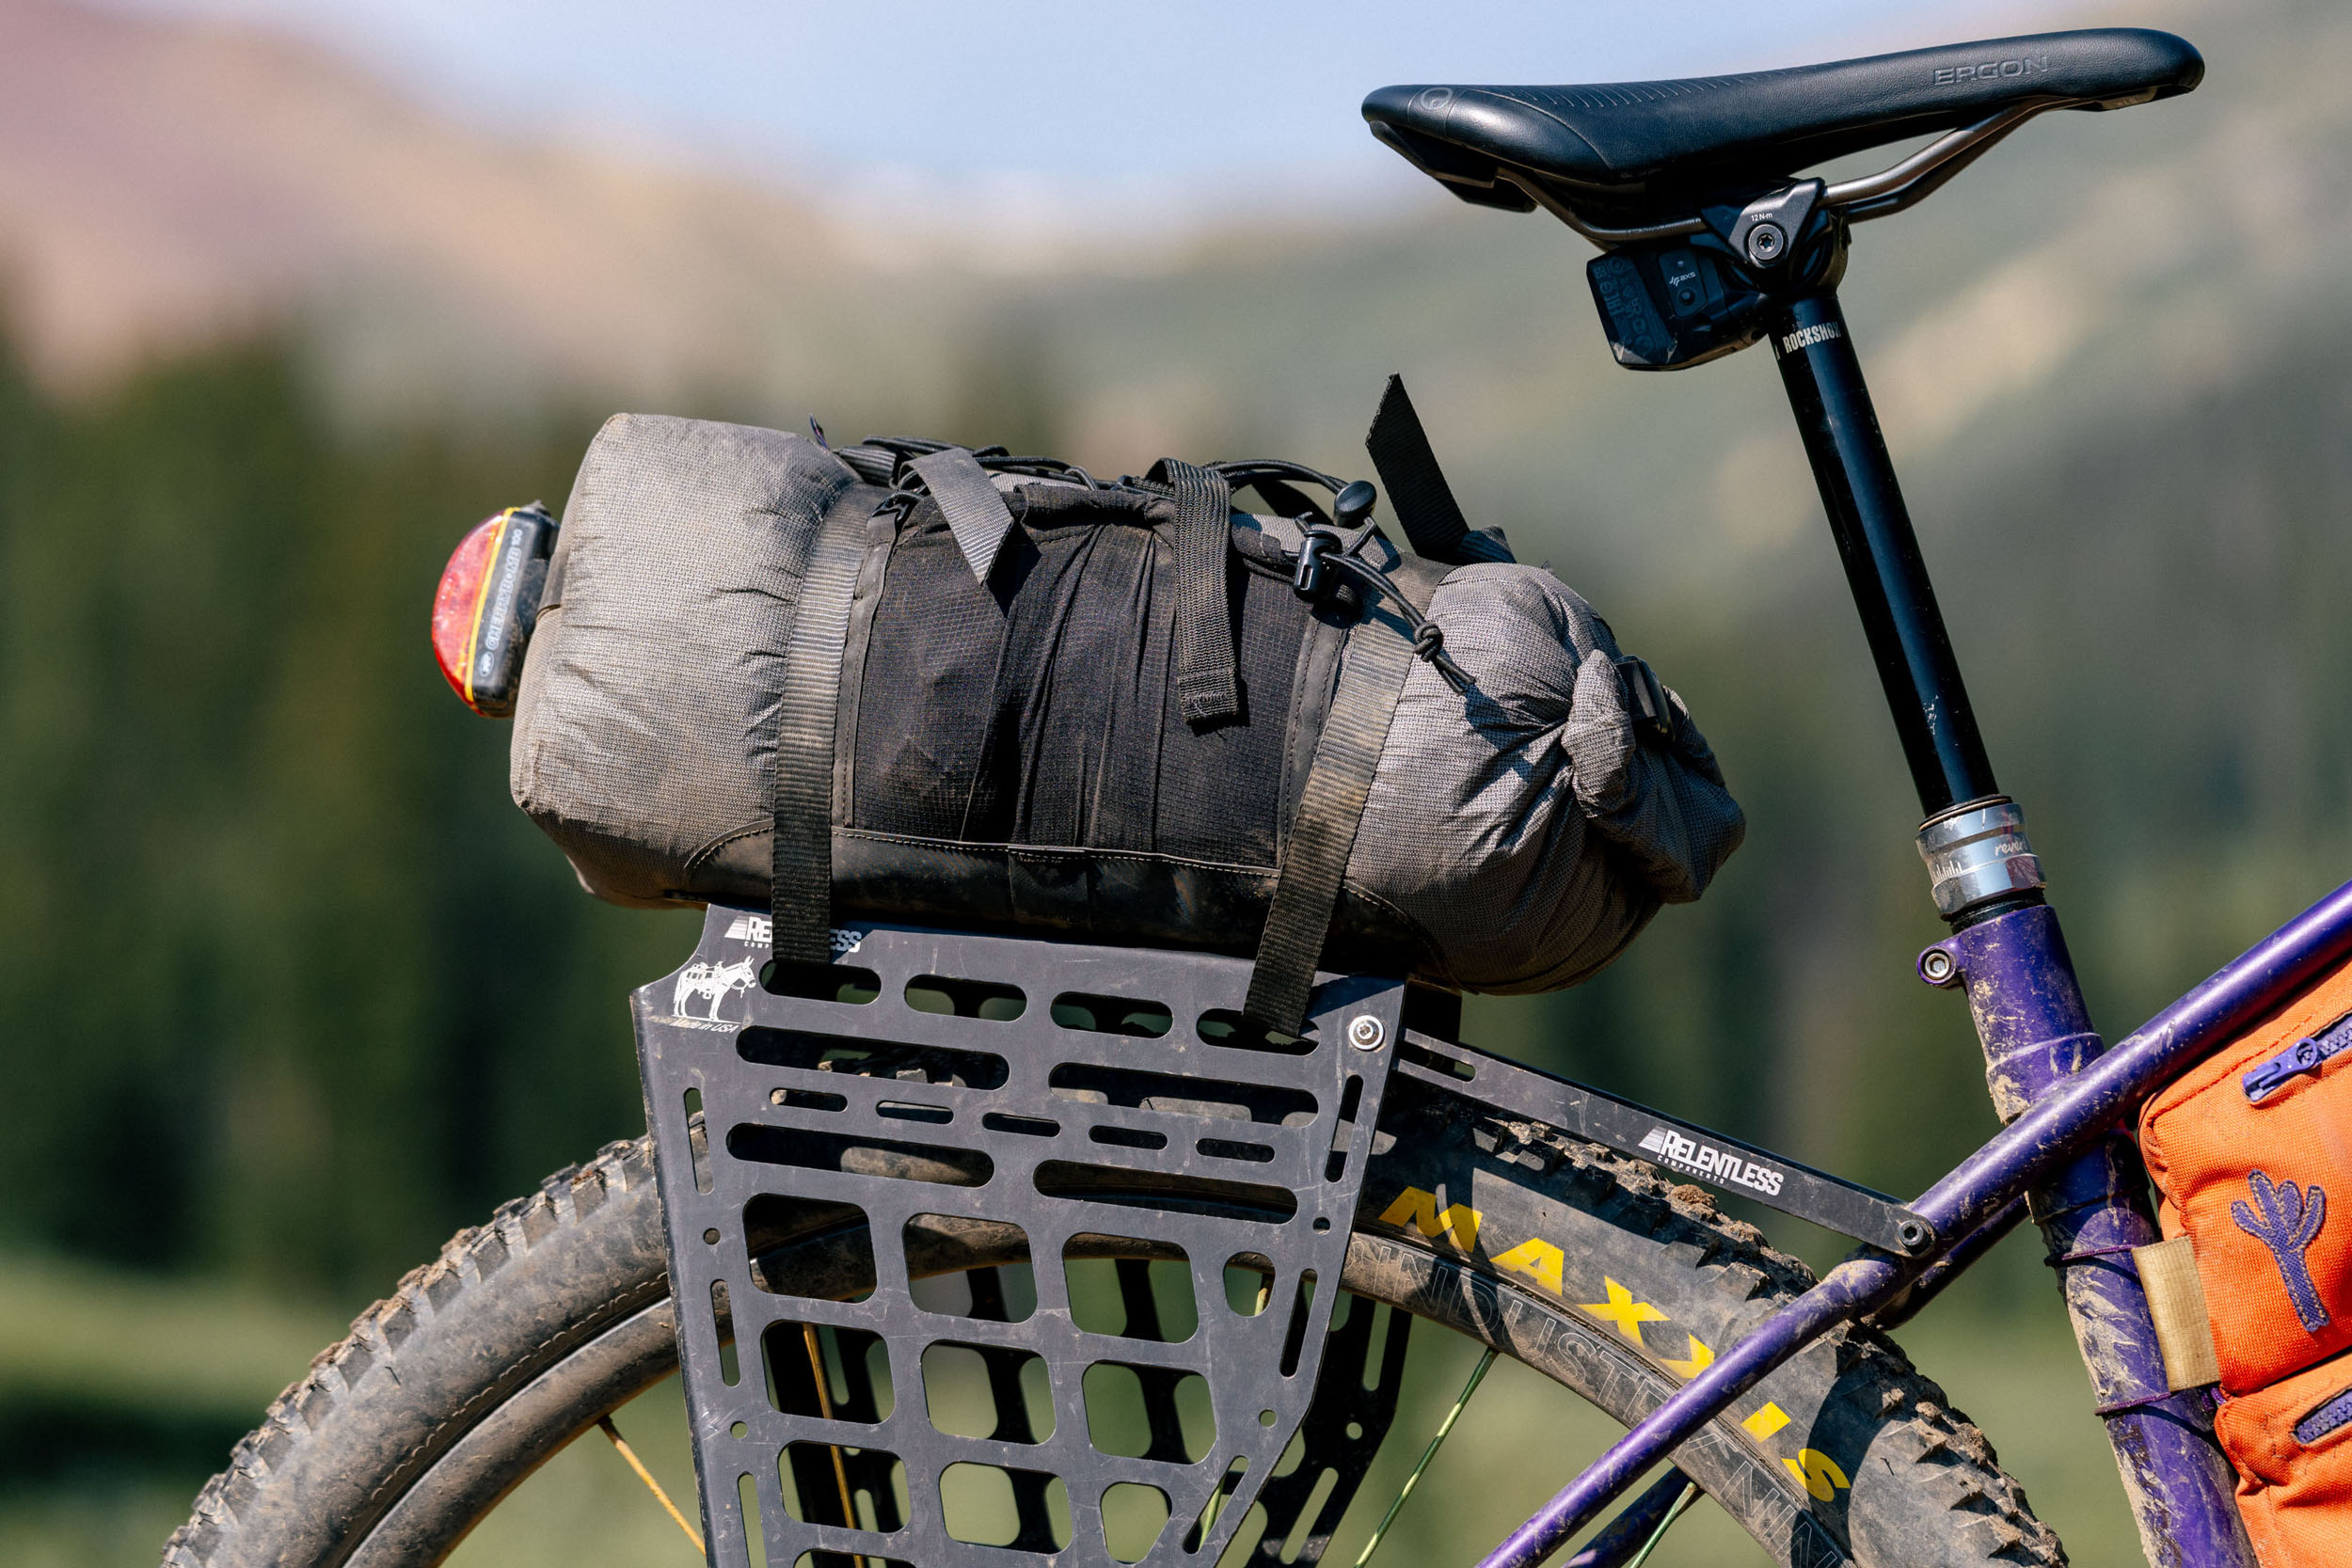
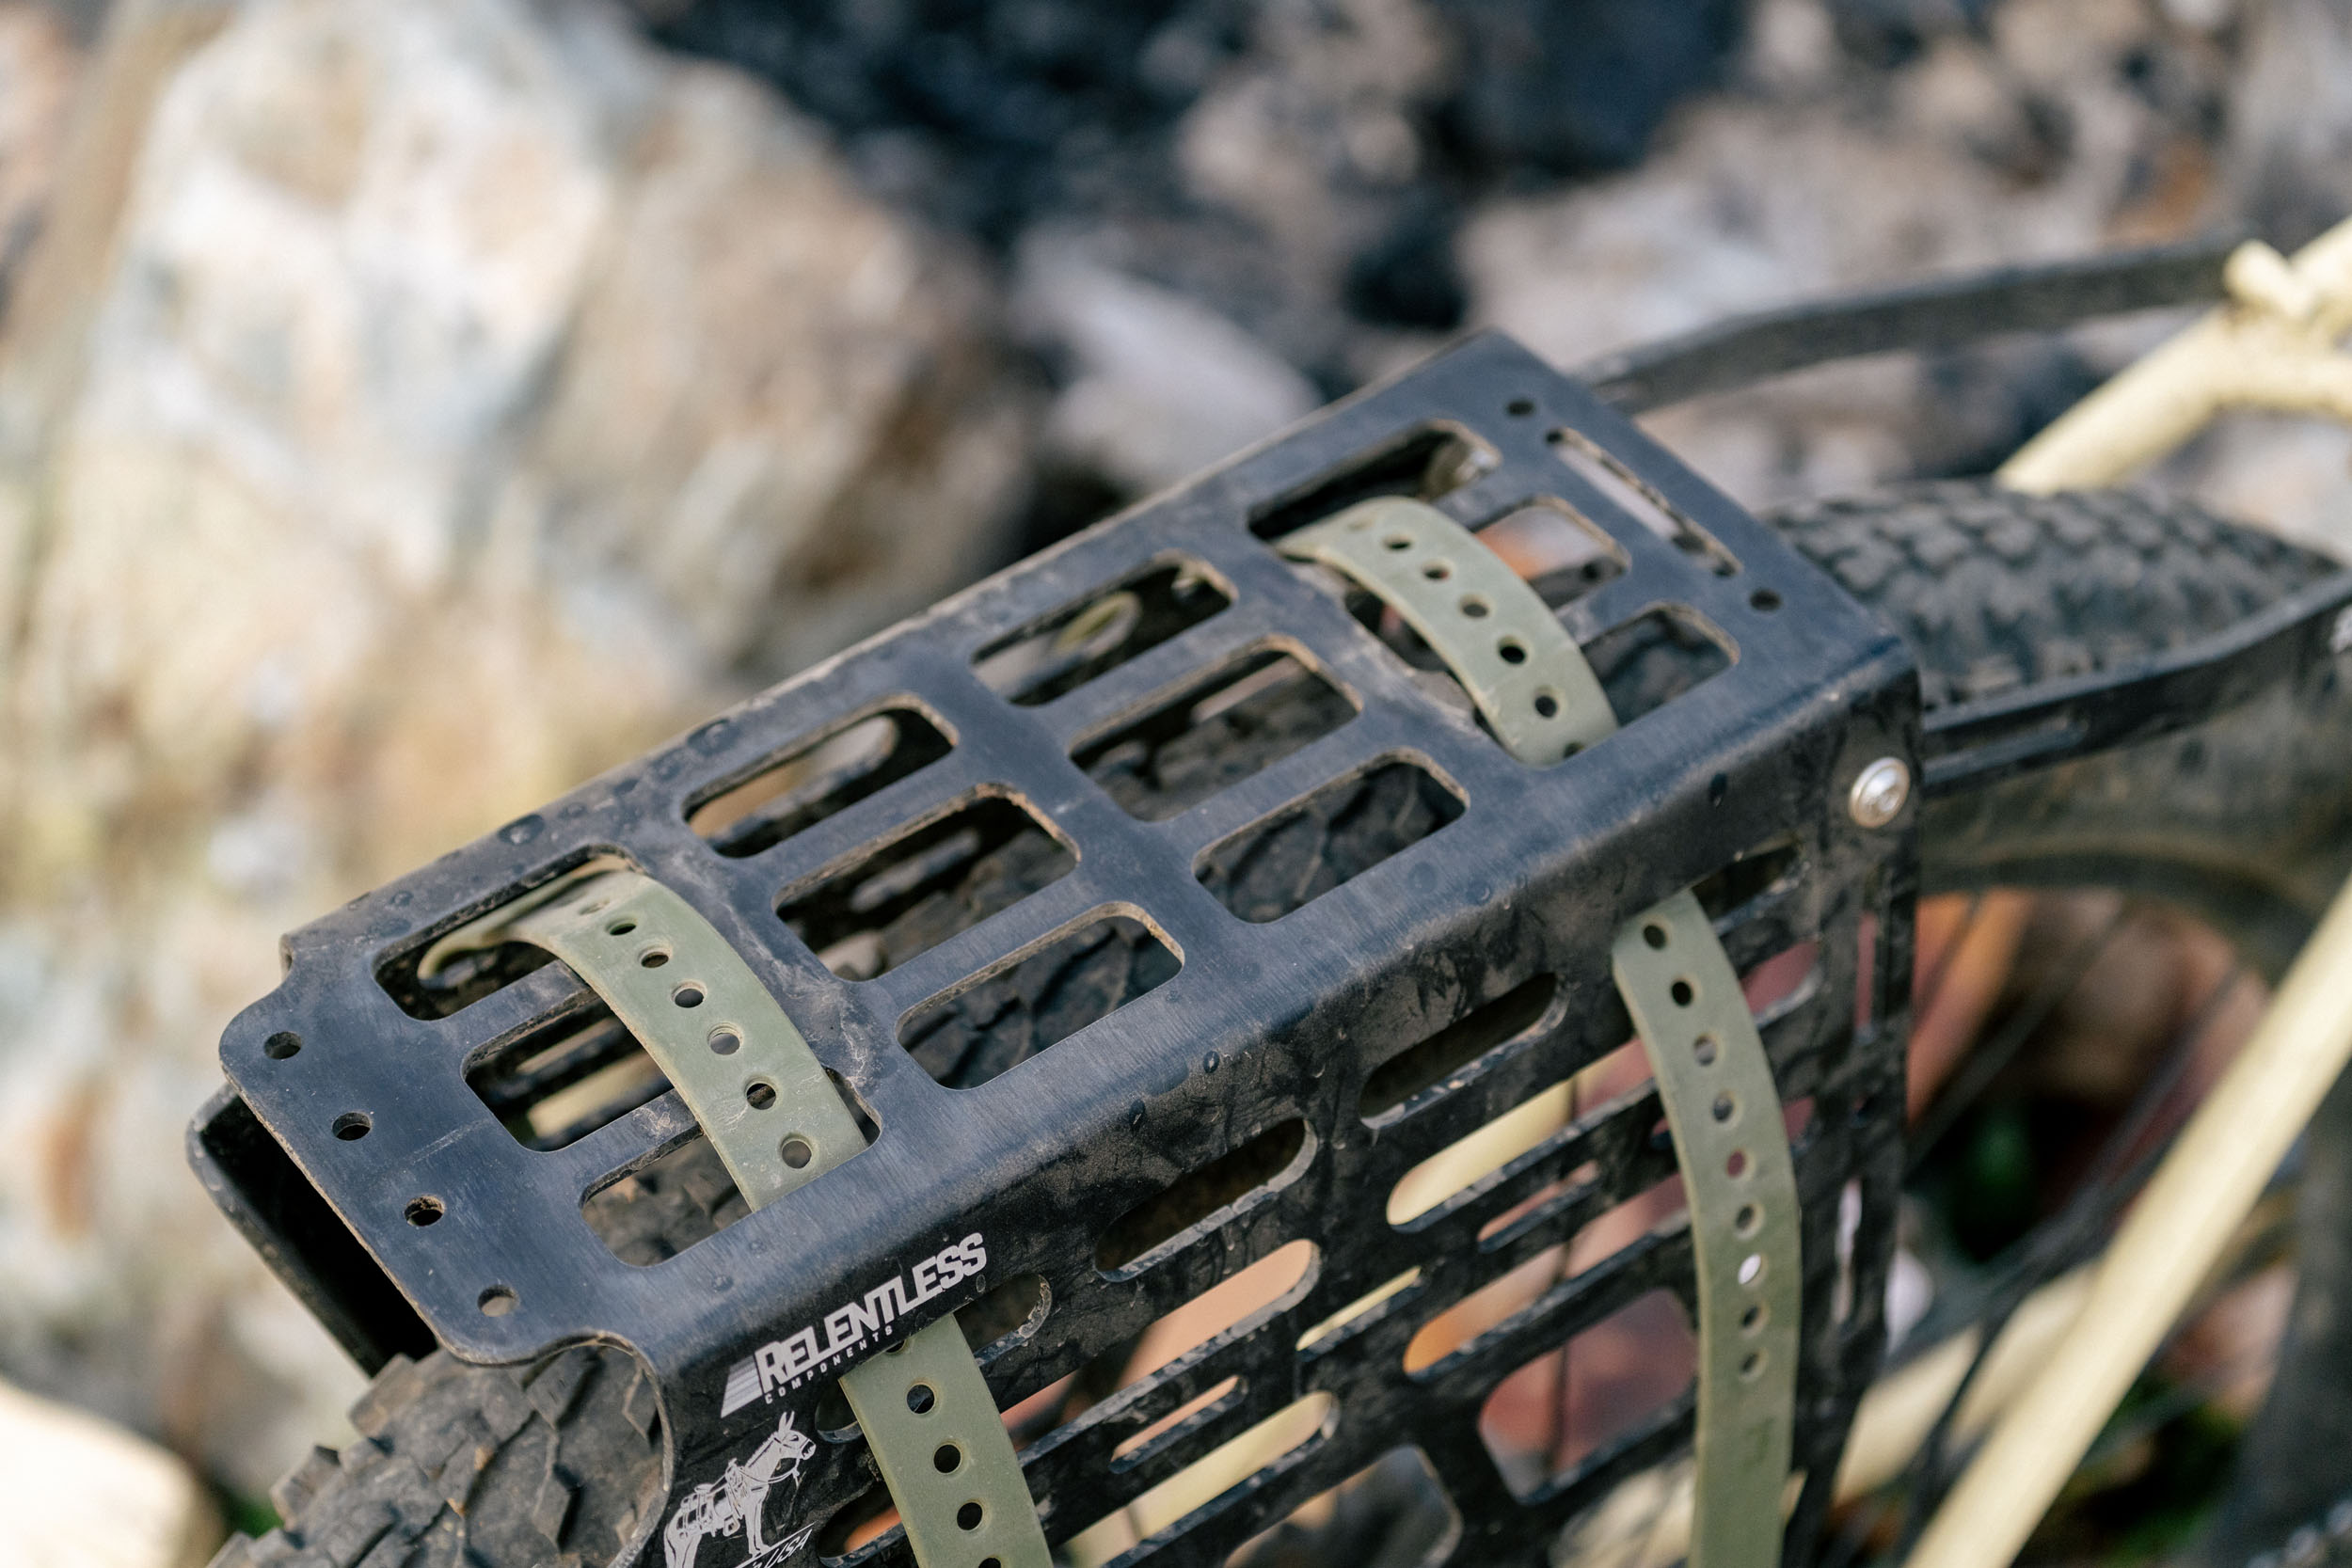
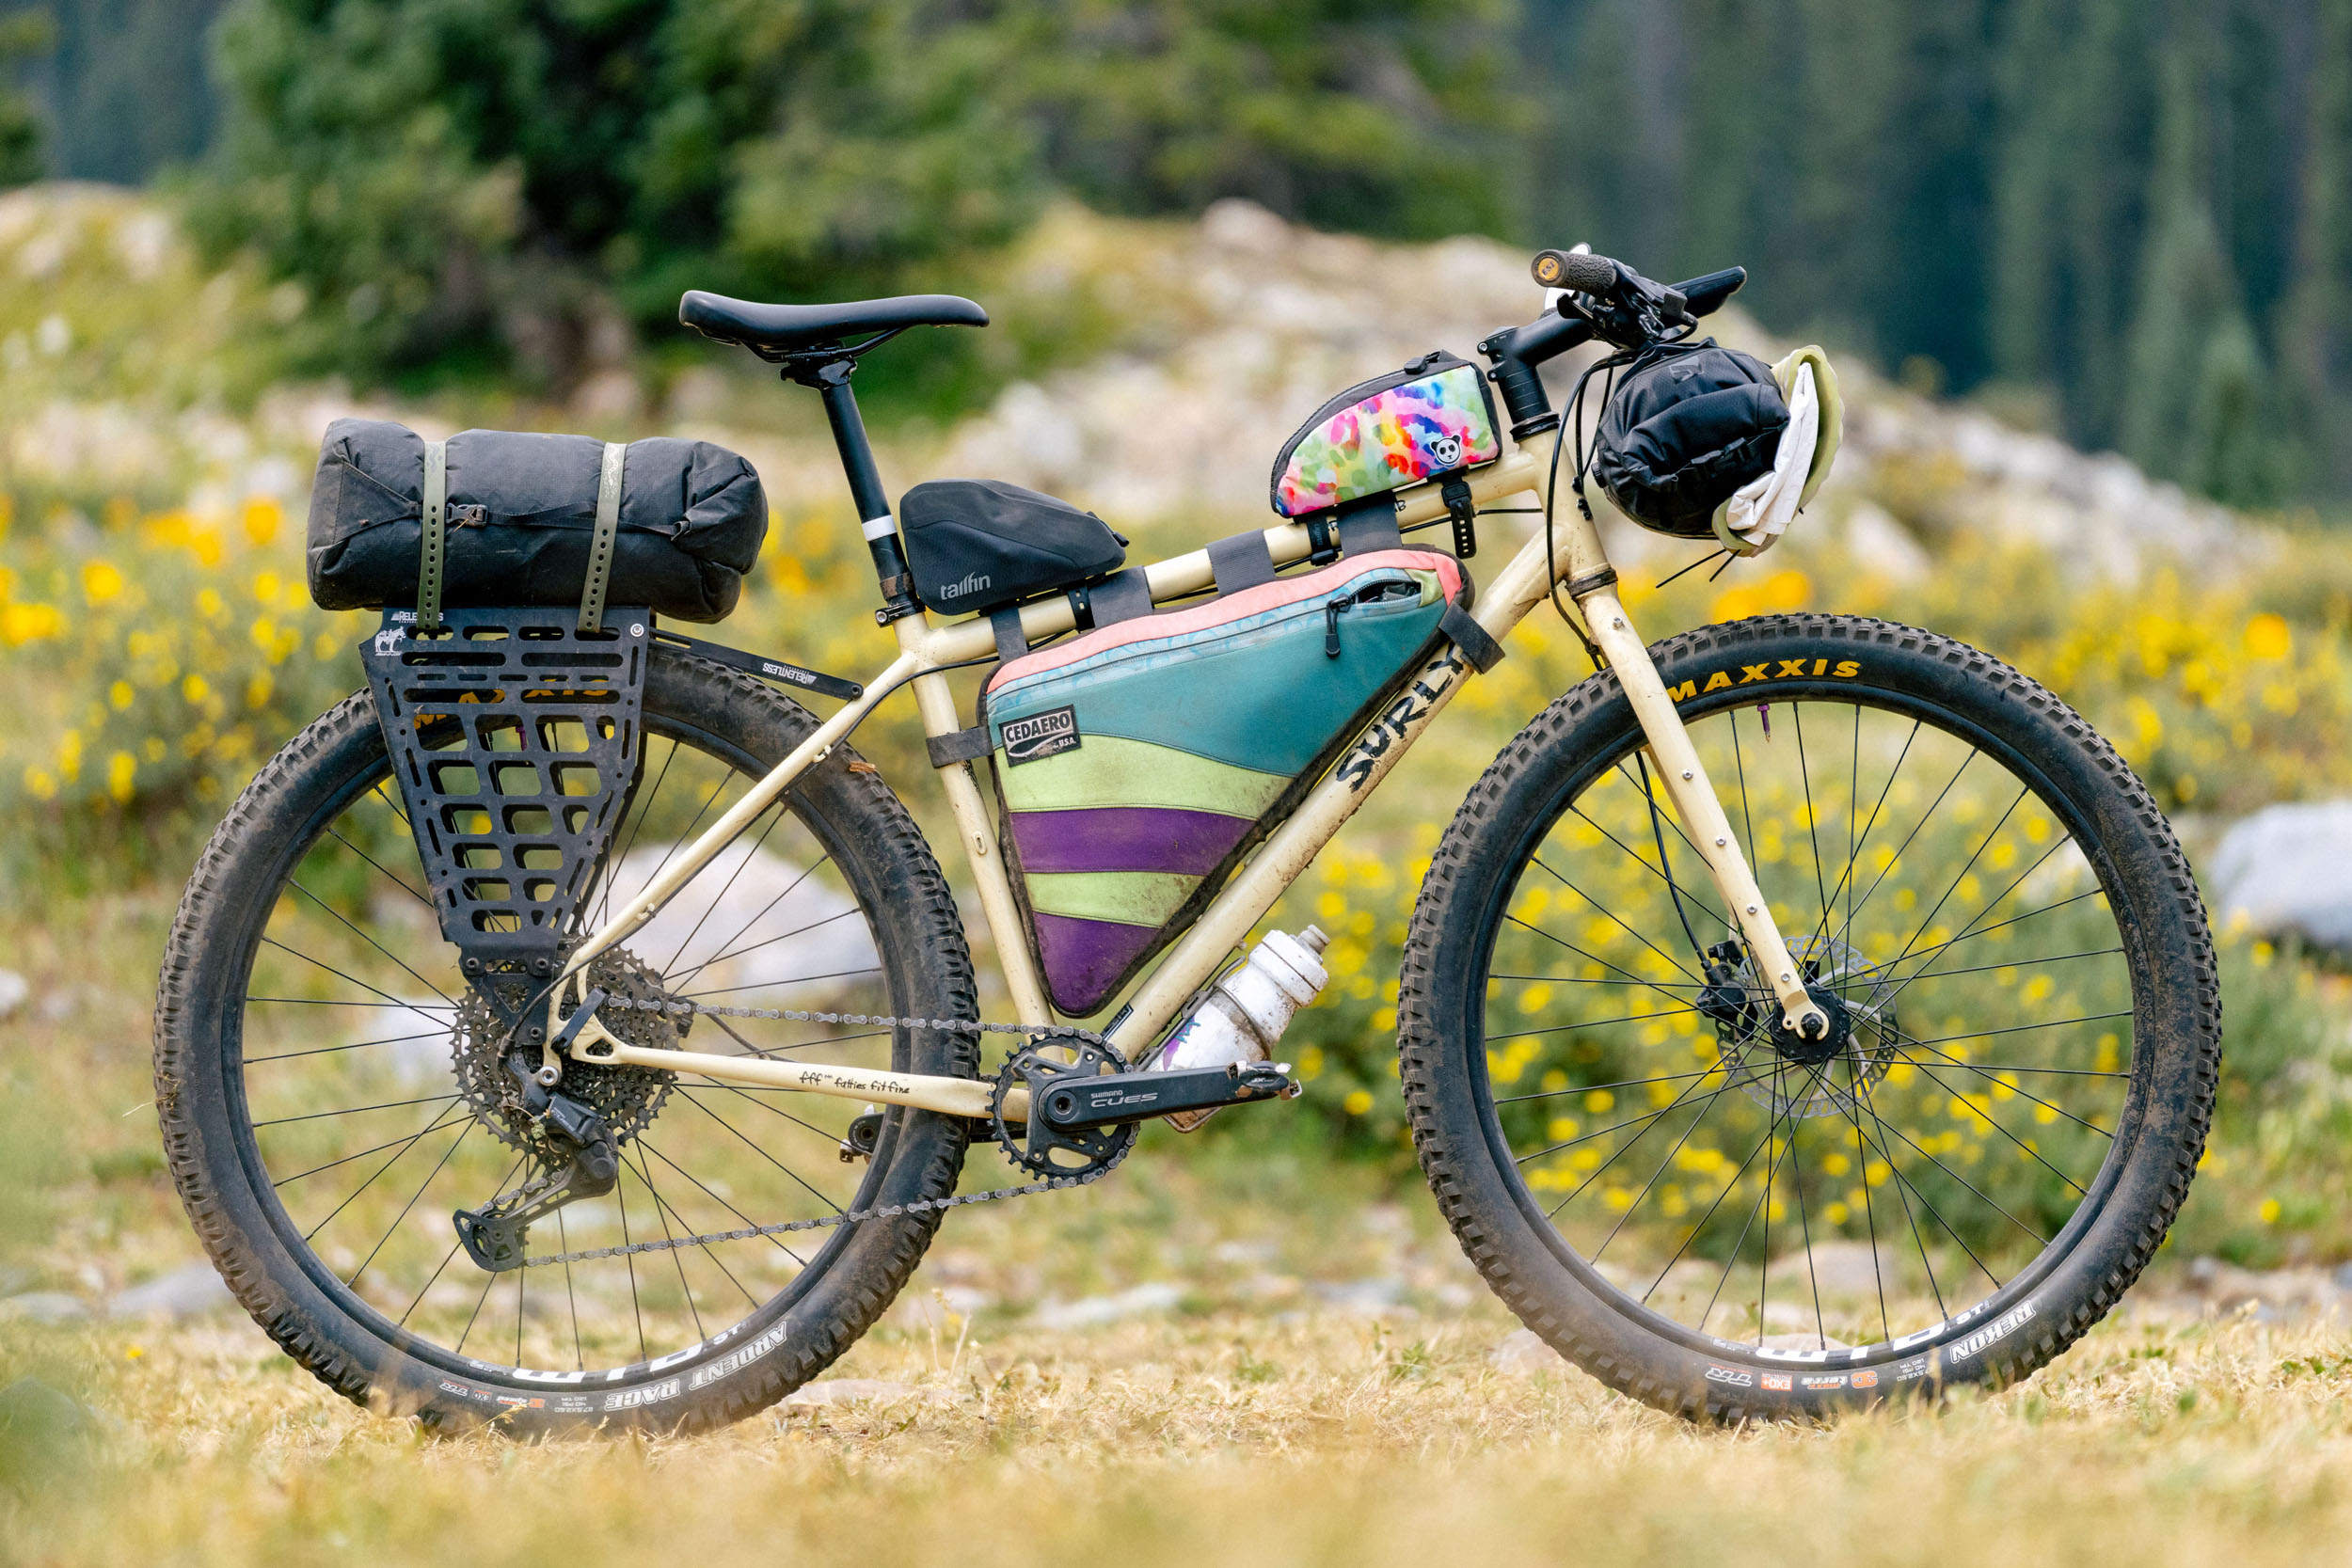
The Mule Rack is a rear-specific rack made from laser-cut 3mm+ 5052 aluminum. As you can see, it features strategic cutouts that loosely mimic a MOLLE-style system. From there, the rack is CNC-bent, heavily deburred, tumbled, and anodized.
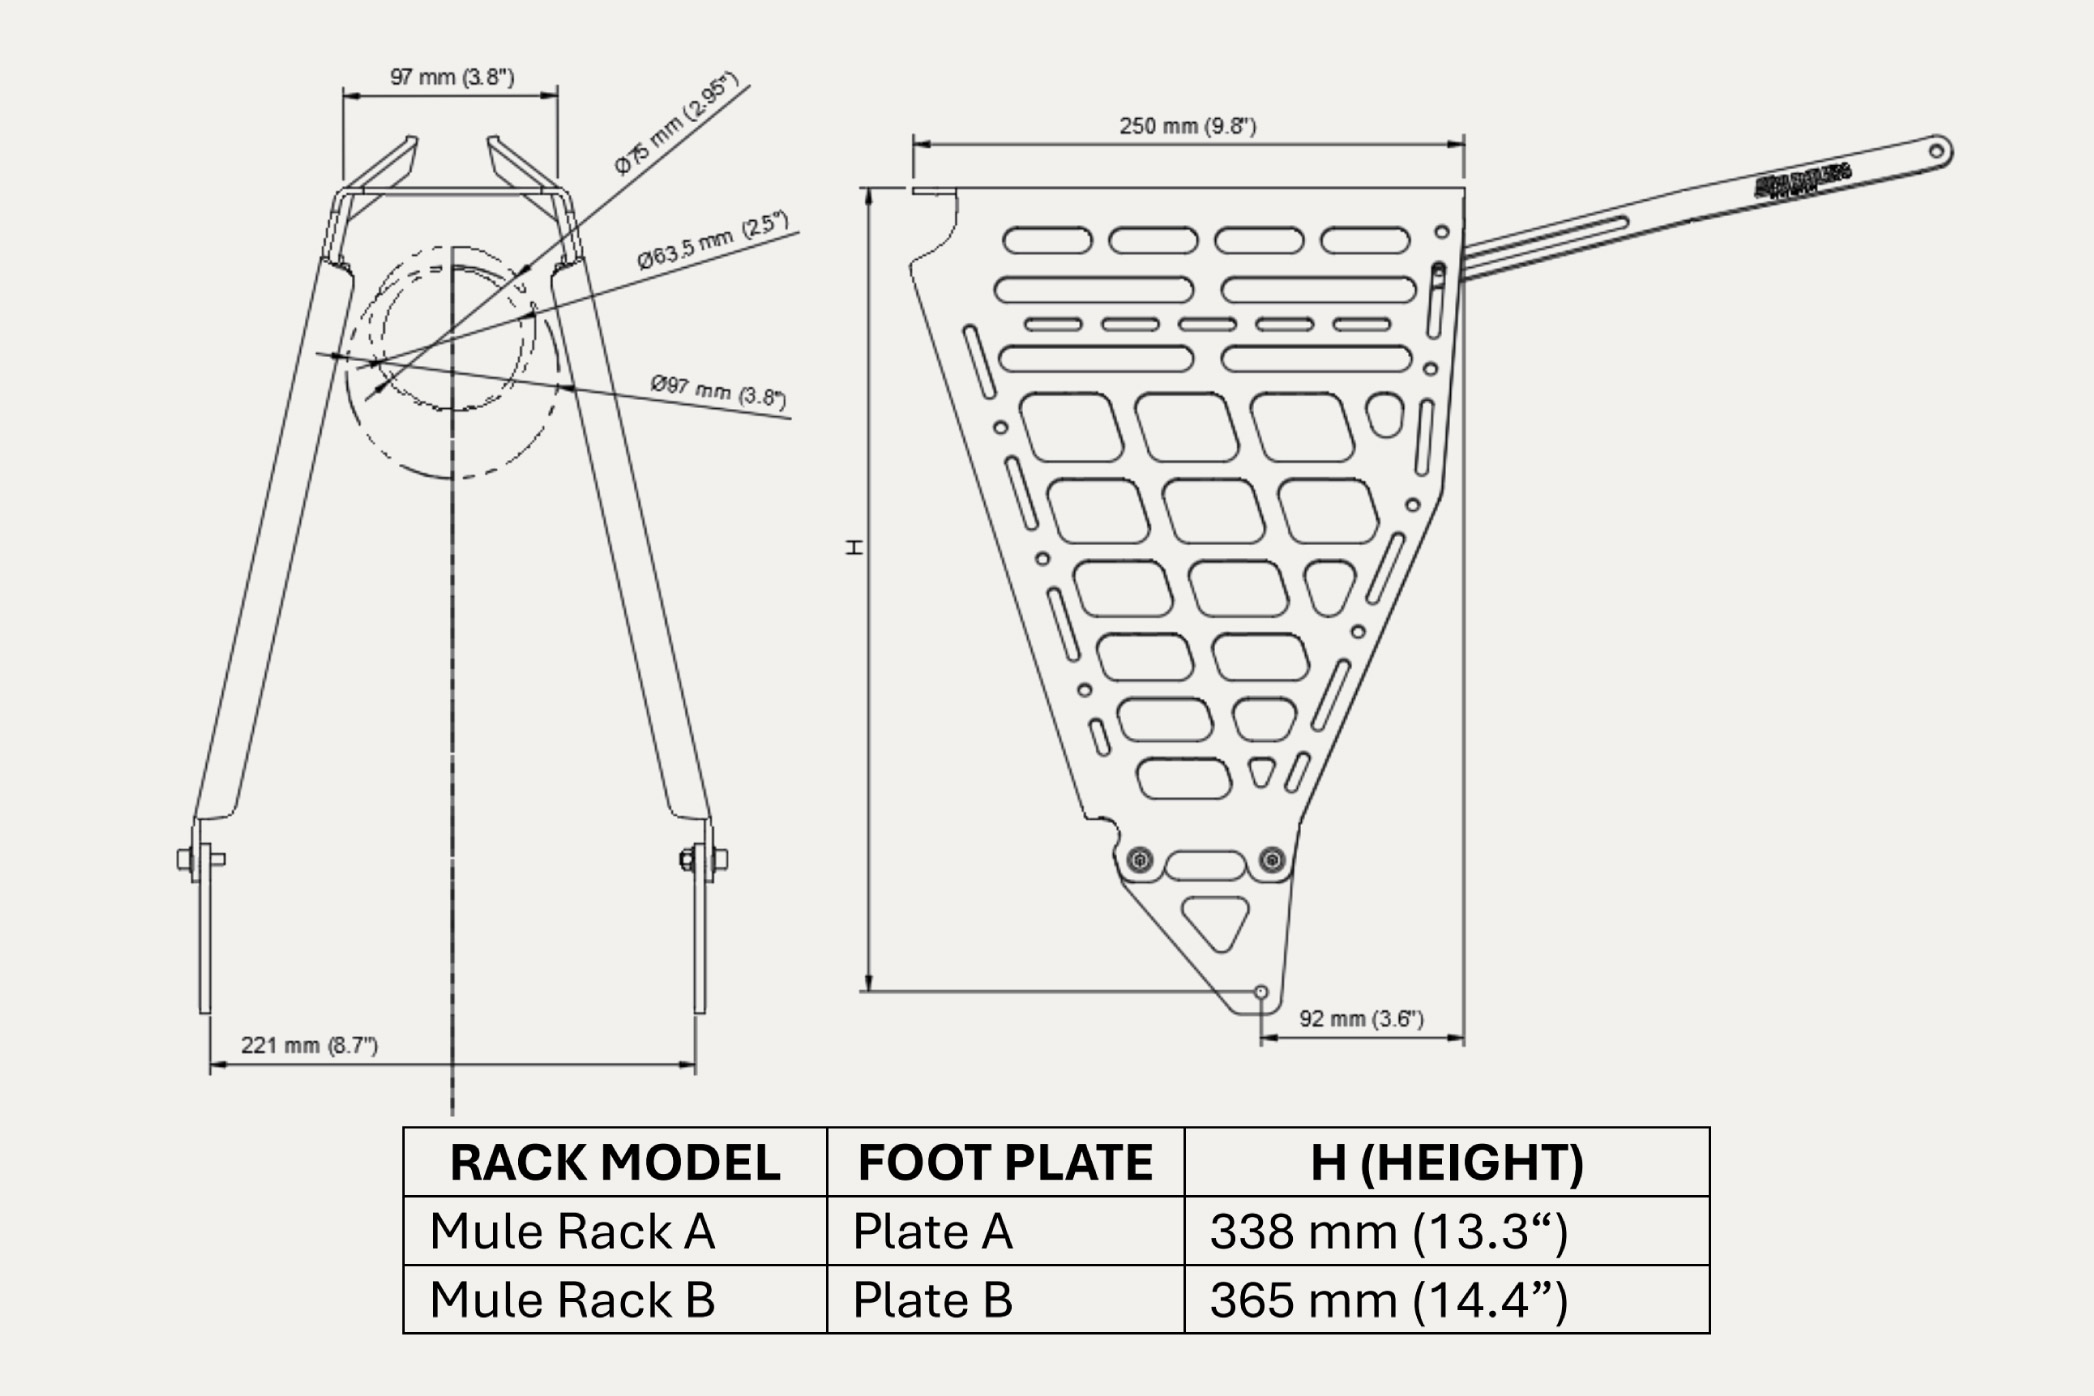

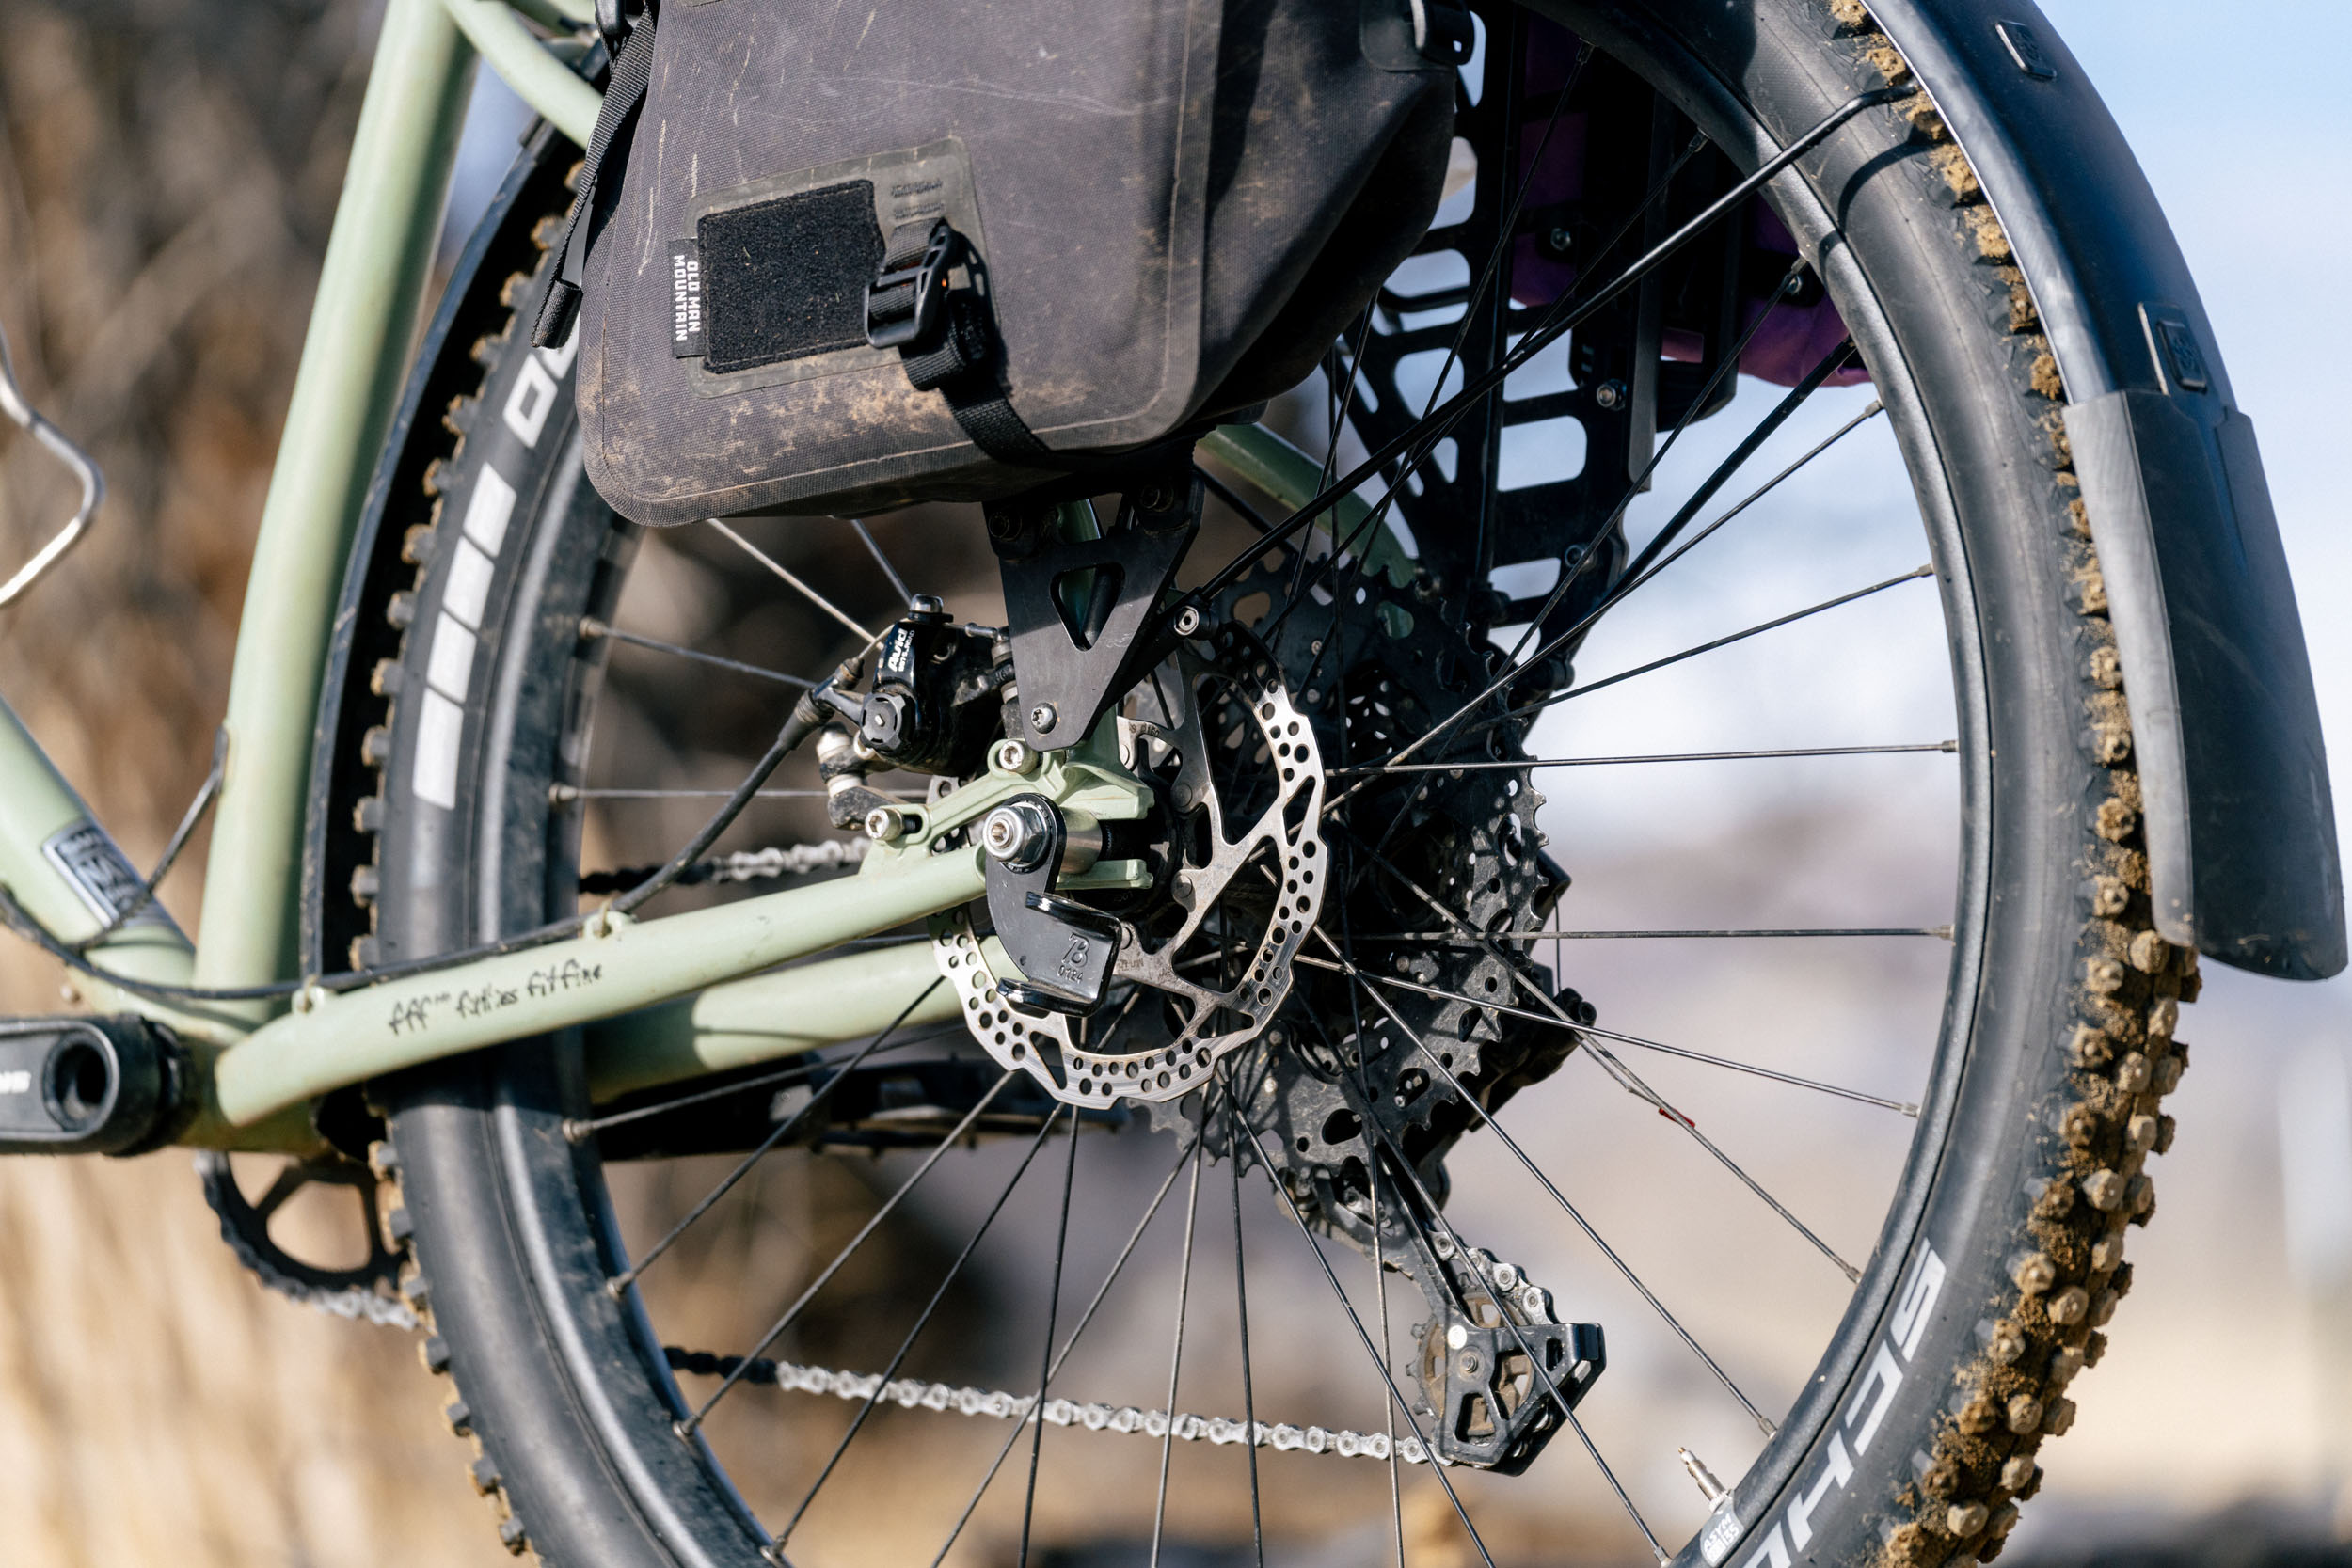
The rack arms are also made from 5052 aluminum, but in a slightly thicker gauge at around 4.5mm. The mounting feet are machined from 6061-T6 aluminum and come in two foot plate versions. Foot Plate A is designed for sliding dropouts and typically uses an M6 bolt interface. Foot Plate B is intended for standard M5 rack mounts. Foot Plate A sits slightly lower at 338mm, while Foot Plate B raises the rack to 365mm, which is the setup I used.

The rack ships with all of the necessary hardware, most of which is stainless steel. A nice touch is that nearly all of the hardware can be found at a typical hardware store if you ever lose a bolt. That said, the rack doesn’t include extra hardware. If you plan to mount additional bottle cages or cargo cages to the rack, you will need to source your own M5 bolts, small washers, and lock nuts. More on that soon.


As for tire clearance, this will depend on your frame and where the rack mounts sit. However, Relentless lists compatibility with up to 29 x 3.0” tires, but it’s also optimized for smaller sizes. Bottom line, it’s made for modern-day bikes, with a lot of mud clearance.
With all hardware, arms, and Foot Plate B installed, the rack tipped the scale at 939 grams. It’s not exactly light, but it is far from excessively heavy, and it’s frankly lighter than it looks. The Mule rack carries a maximum load rating of 27 kilograms, or 55 pounds.
Installation
I ended up putting this rack on a handful of bikes. I ran foot plate B on all of them since I don’t currently have a bike with an M6 dropout interface. Sean sent both just in case, but the rack ships with either one. One thing I really love about this rack is how easy it is to dry fit. You can throw it on a bike just to see if it will work, without juggling separate struts or playing the guessing game. Sure, it doesn’t pack flat for travel, but being able to dry-fit it quickly makes it easy to understand compatibility right away.


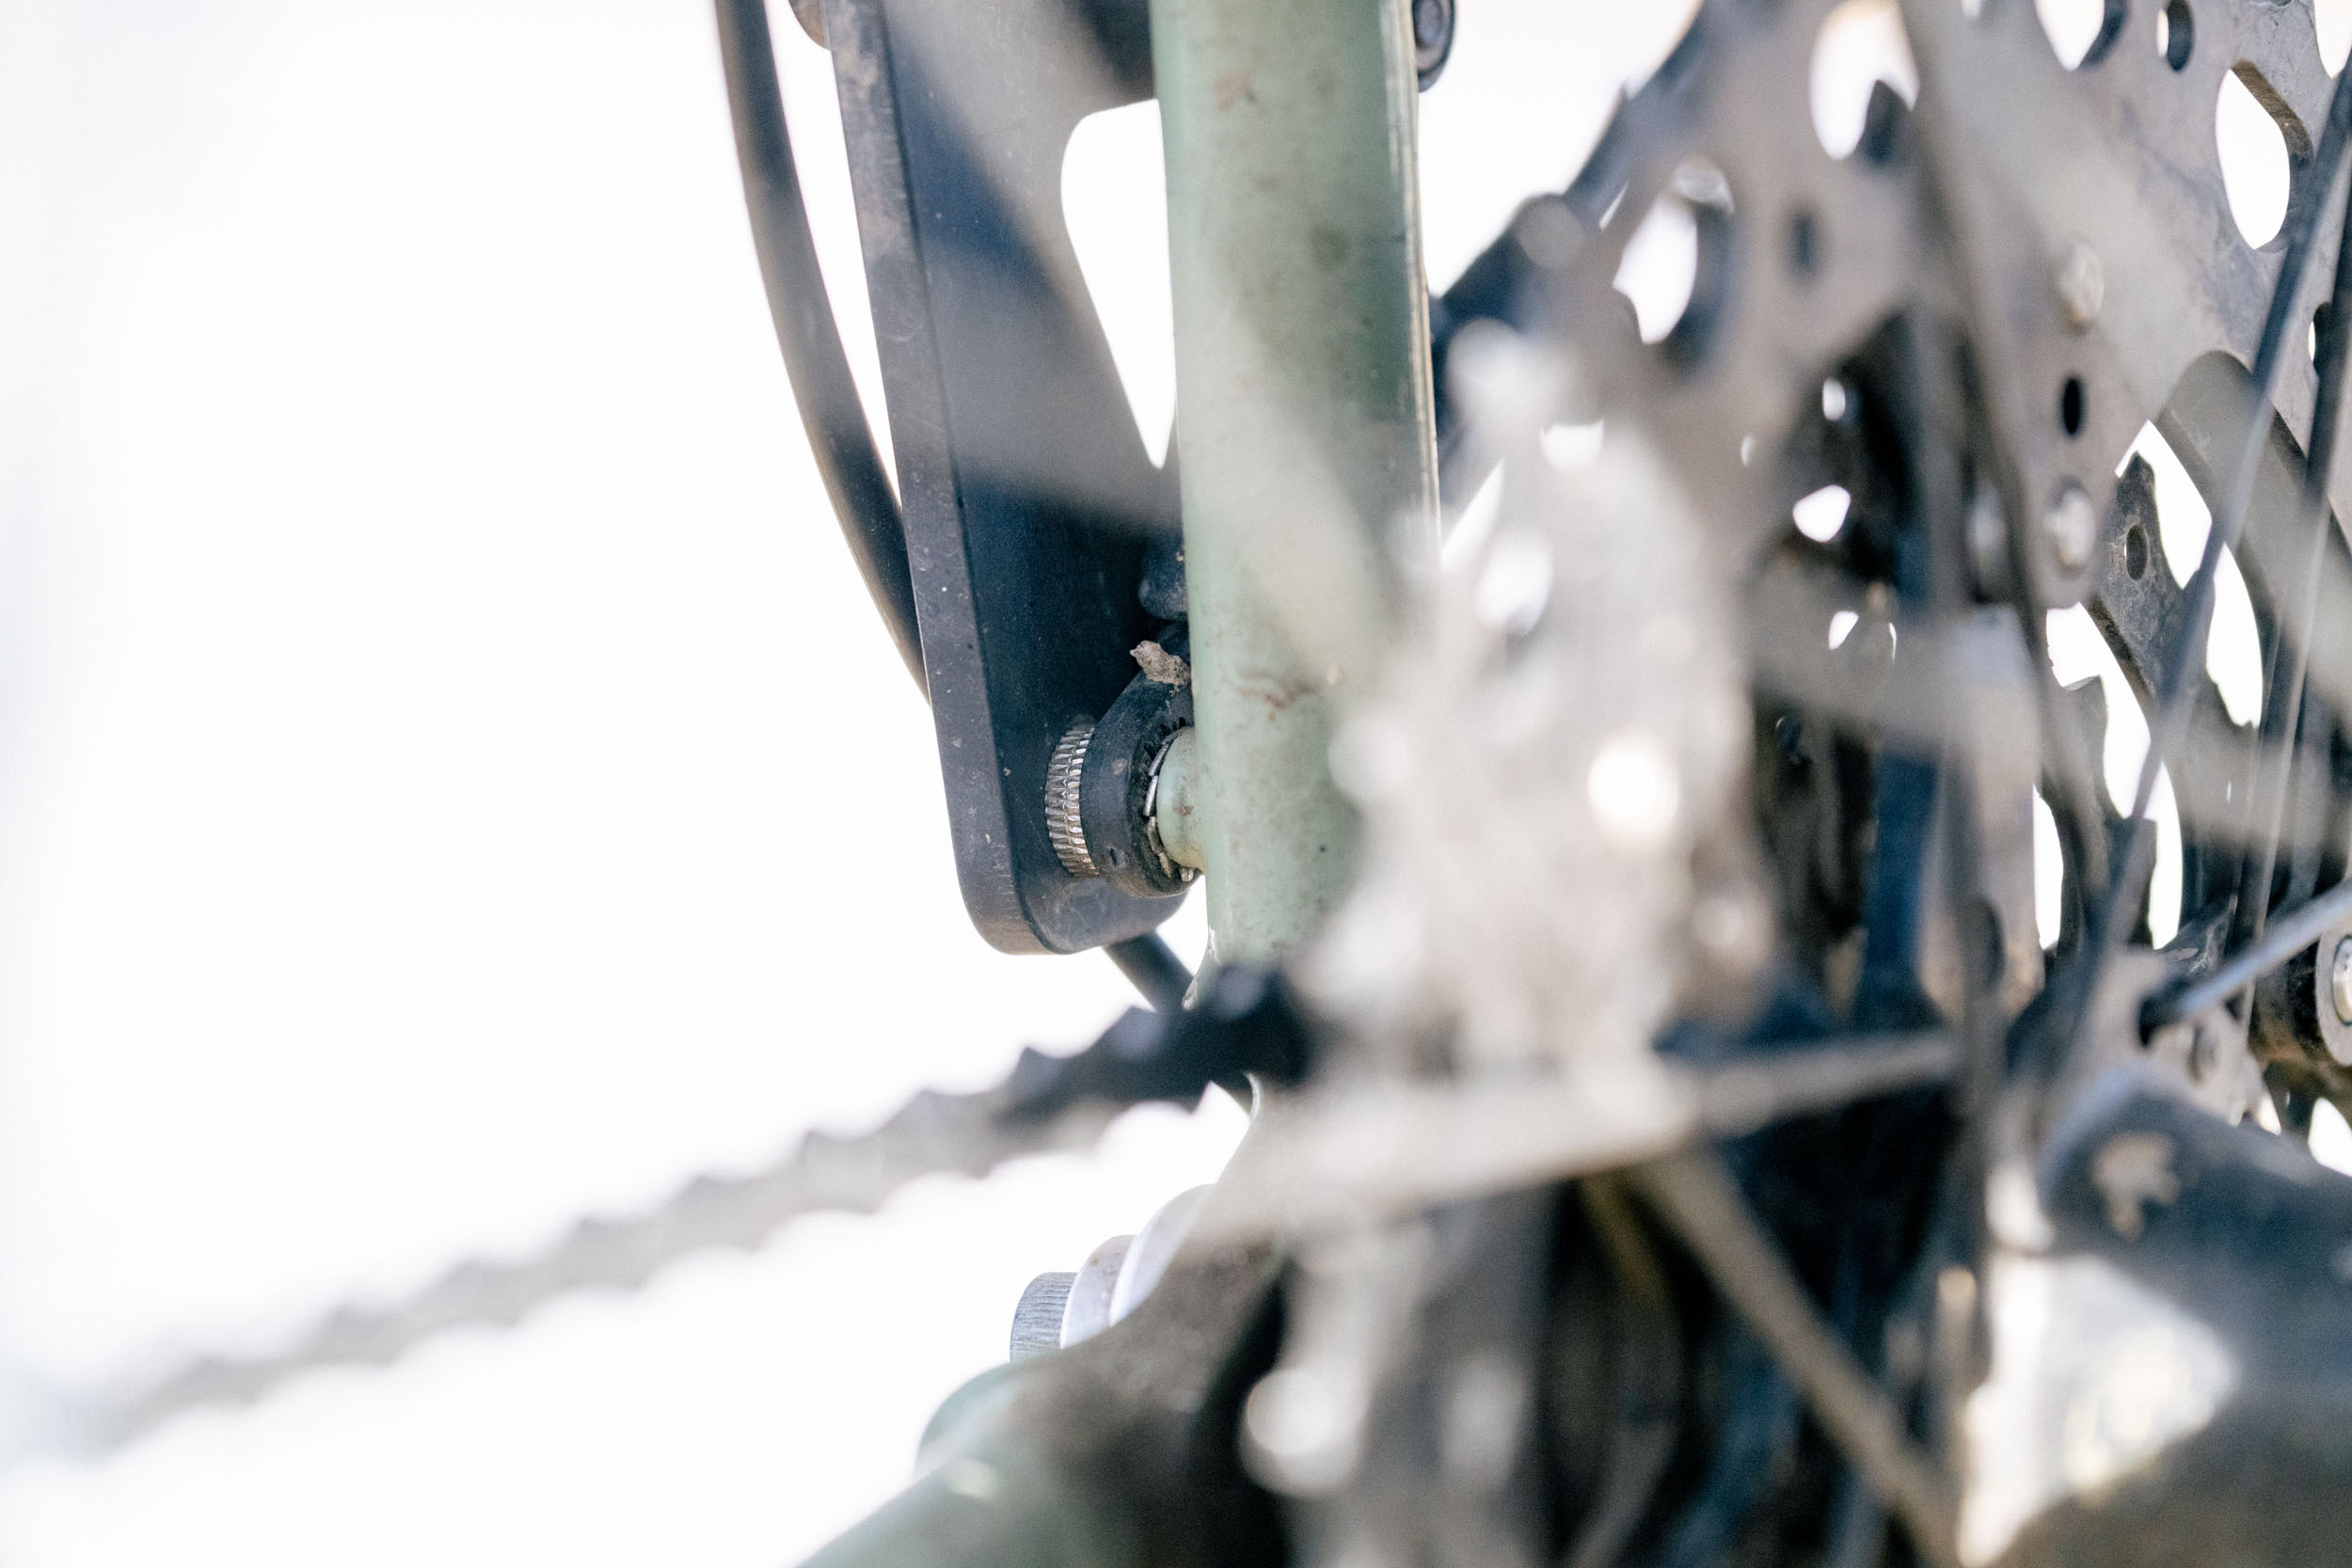


Another big plus is that there’s no need to cut struts, which I really appreciate. That is always a headache. The only tools you need are a 3mm and 4mm hex key and an 8mm wrench. As a bonus, the rack itself has a fair amount of flex; after all, it’s a big sheet of metal, which helps it adapt to different frame widths. Out of the box, it measures roughly 221mm wide at the bottom of the rack, so it could be wider or tighter, but once tightened down, it’s as solid as it gets.
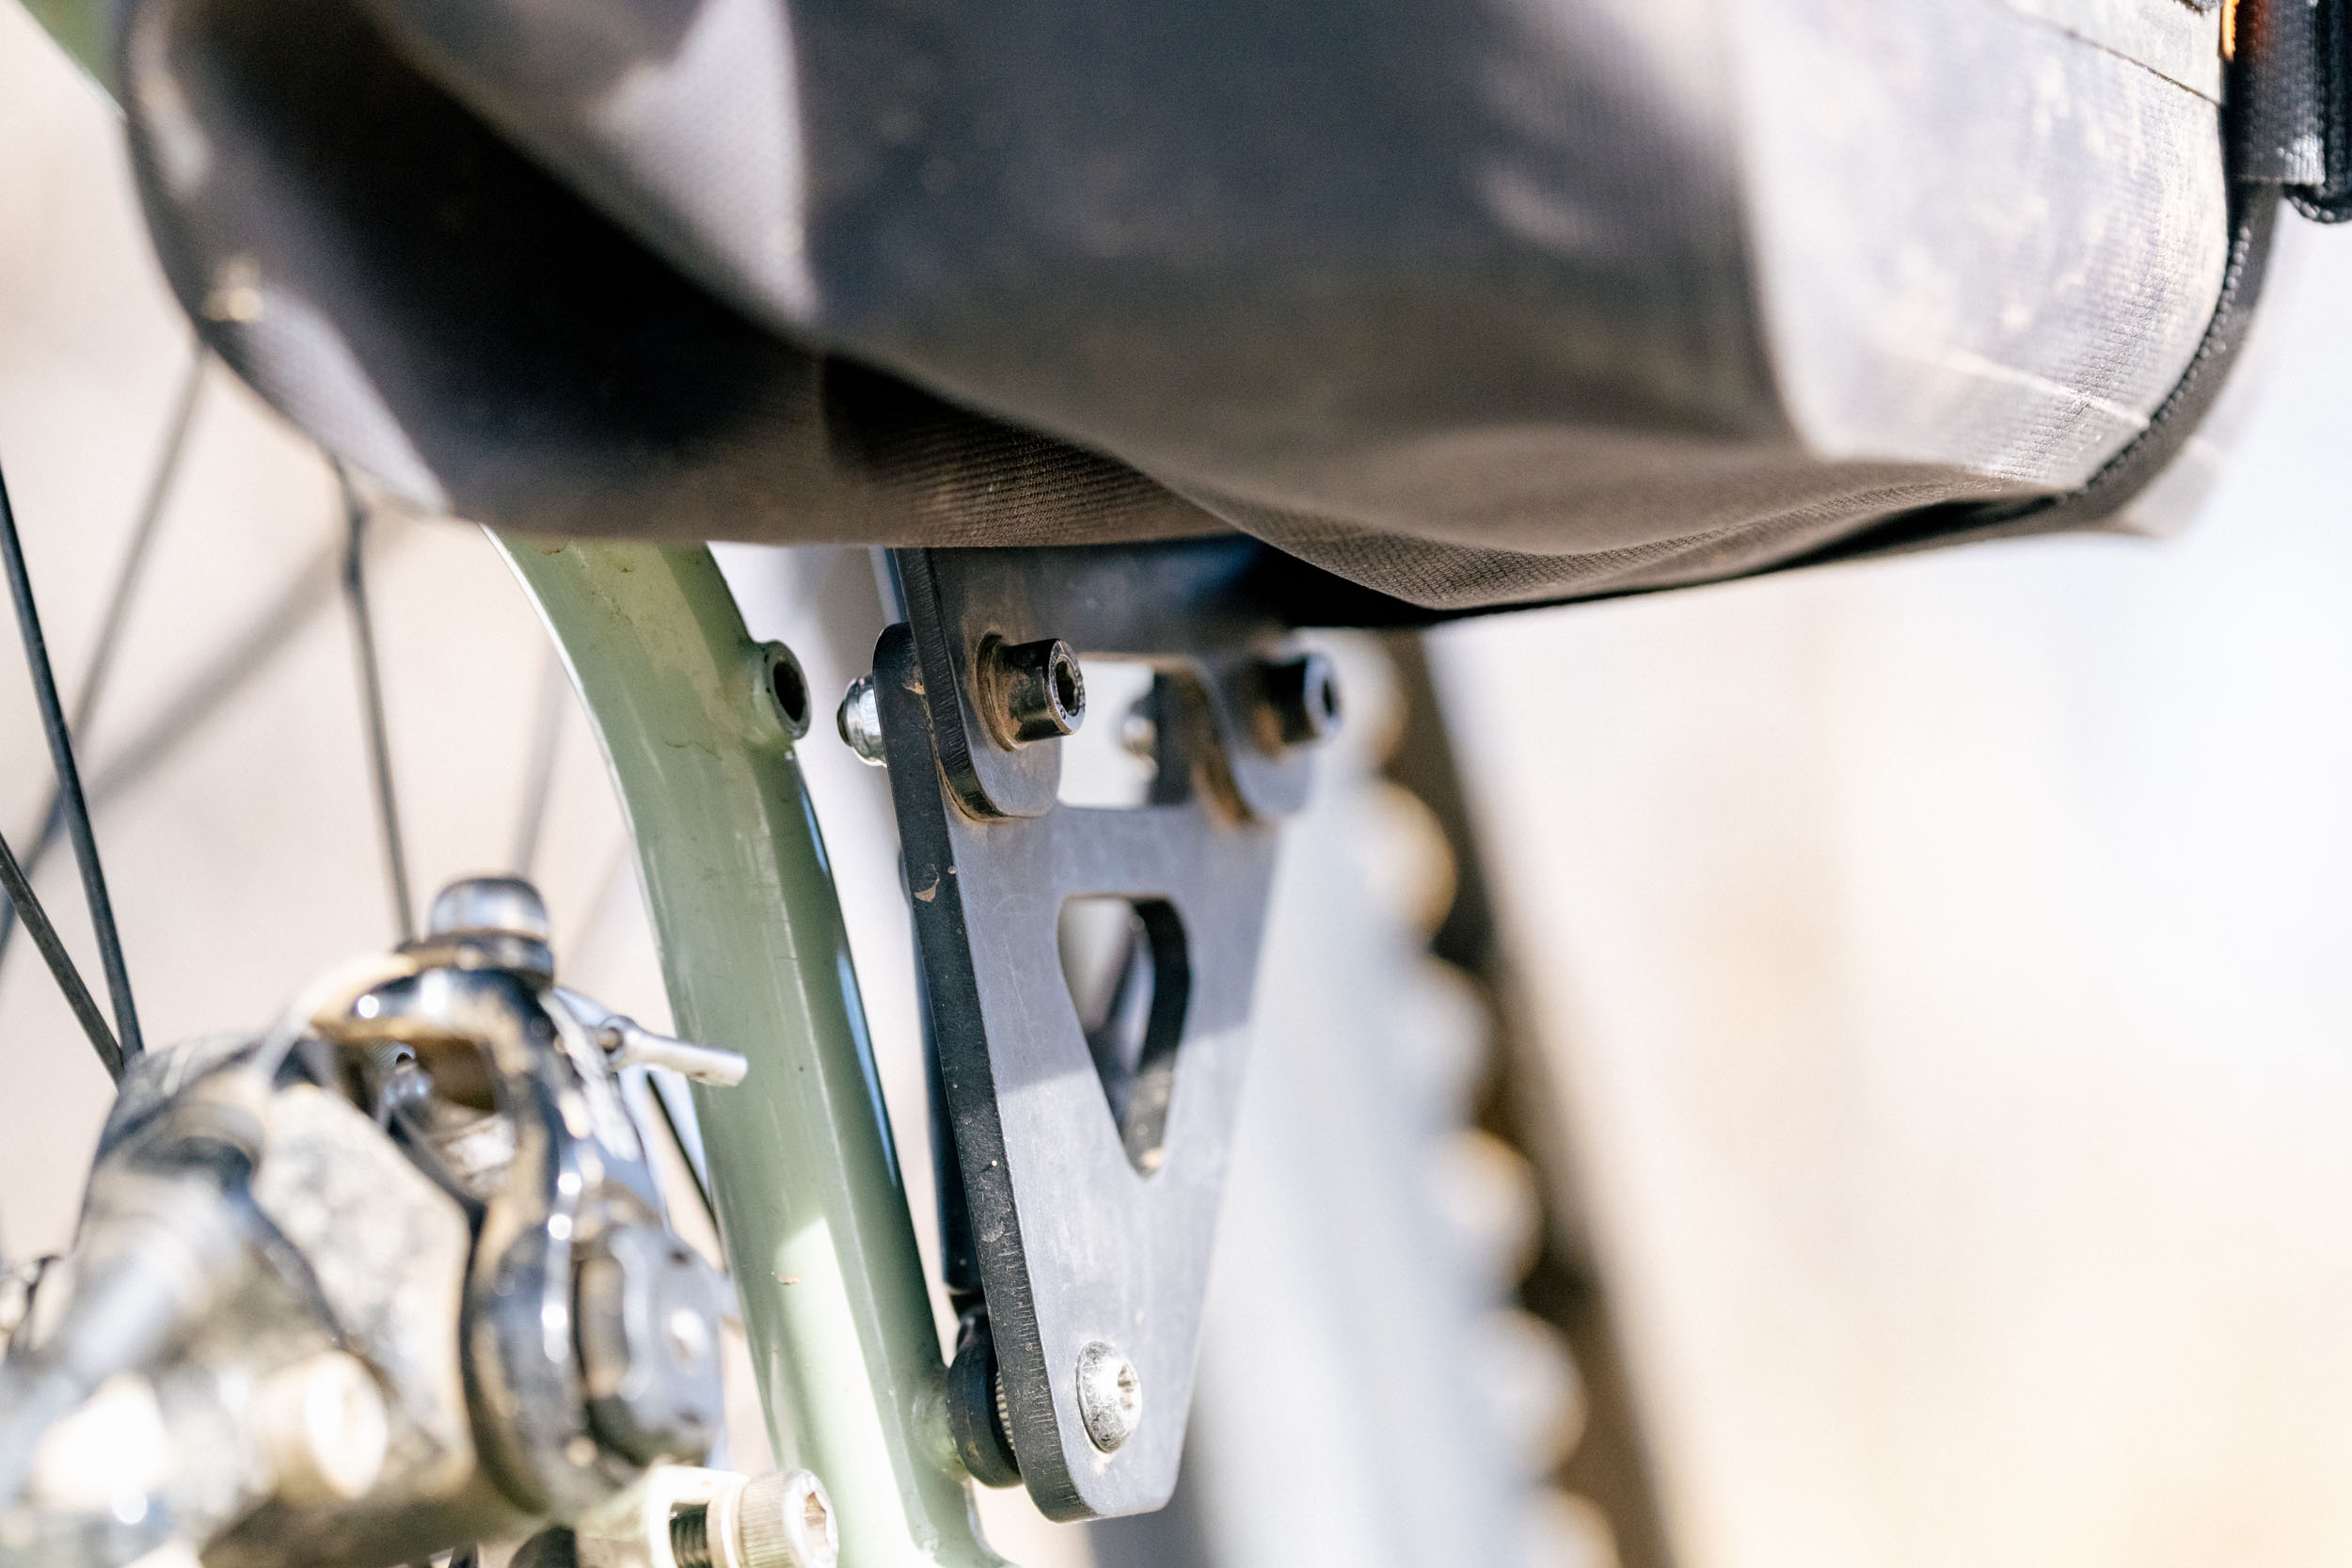
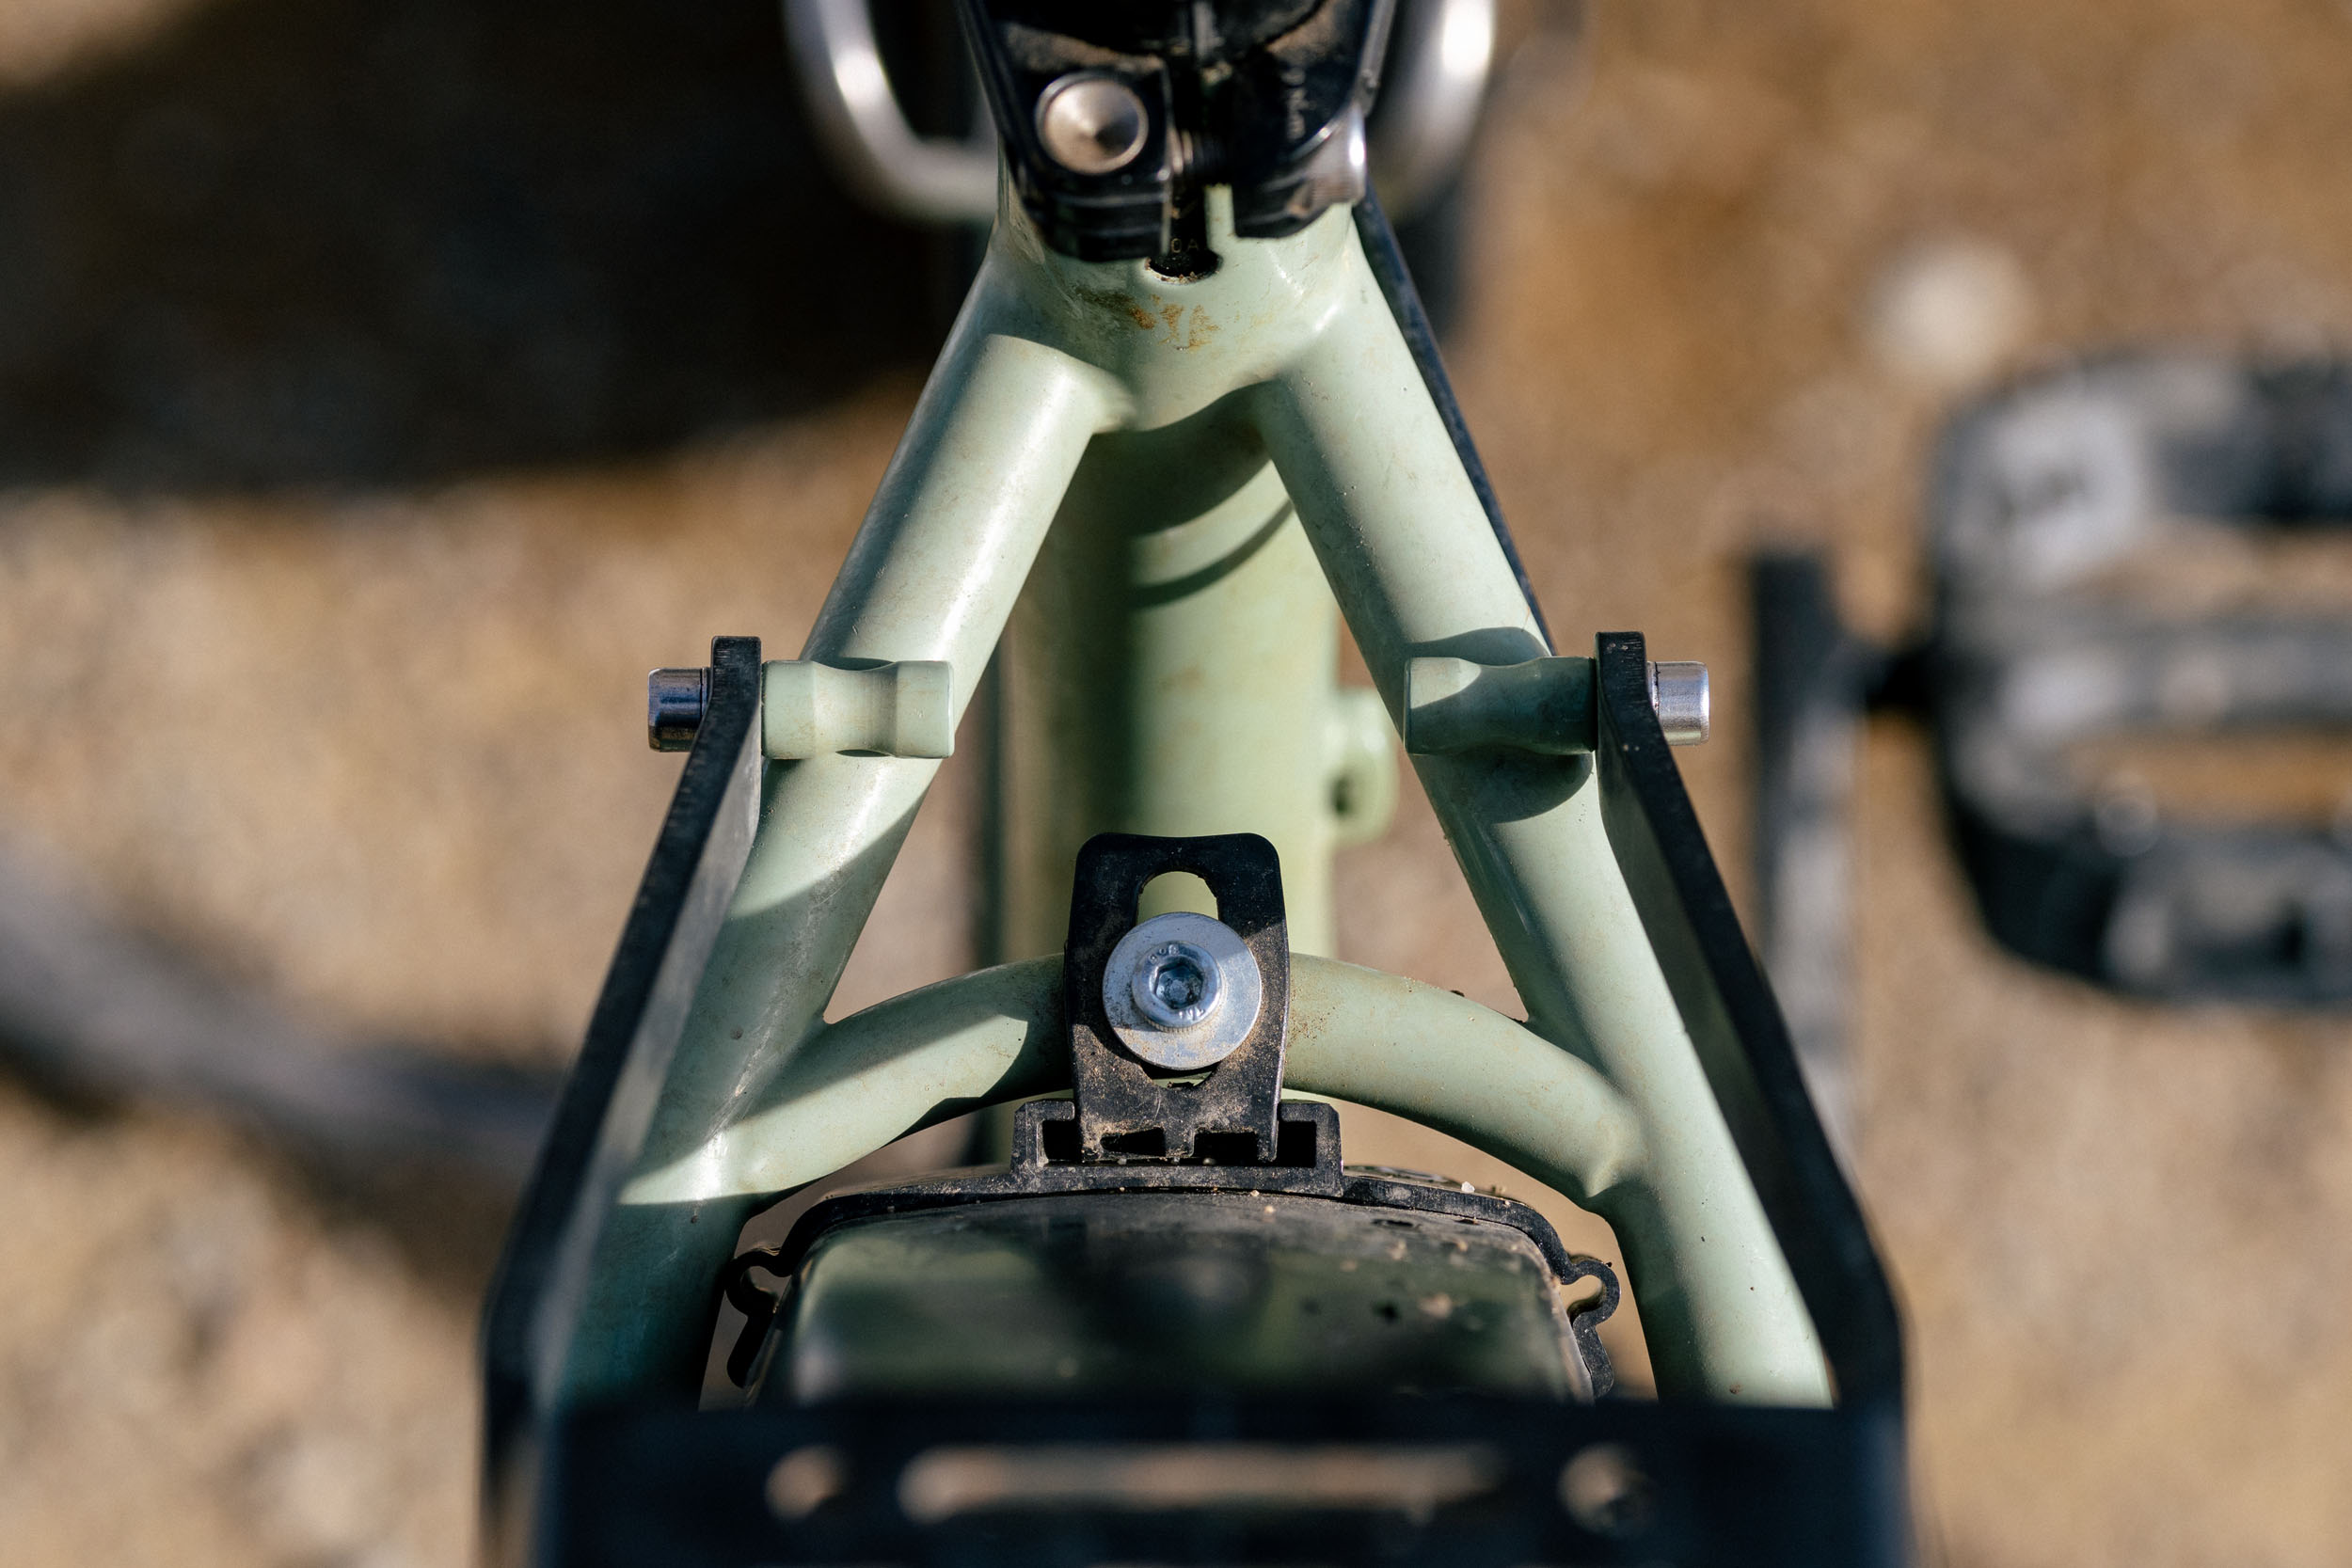
When installing it, I like to loosely attach the feet near the dropouts first, then figure out where the arms will land. You can also dry-fit the rack first and do this step beforehand. Either way, the process is straightforward. The rack has multiple holes and vertical slots on the front, which serve as mounting points, making it much easier to fit to different bikes, and is the reason you don’t need to cut the arms, which I appreciate.


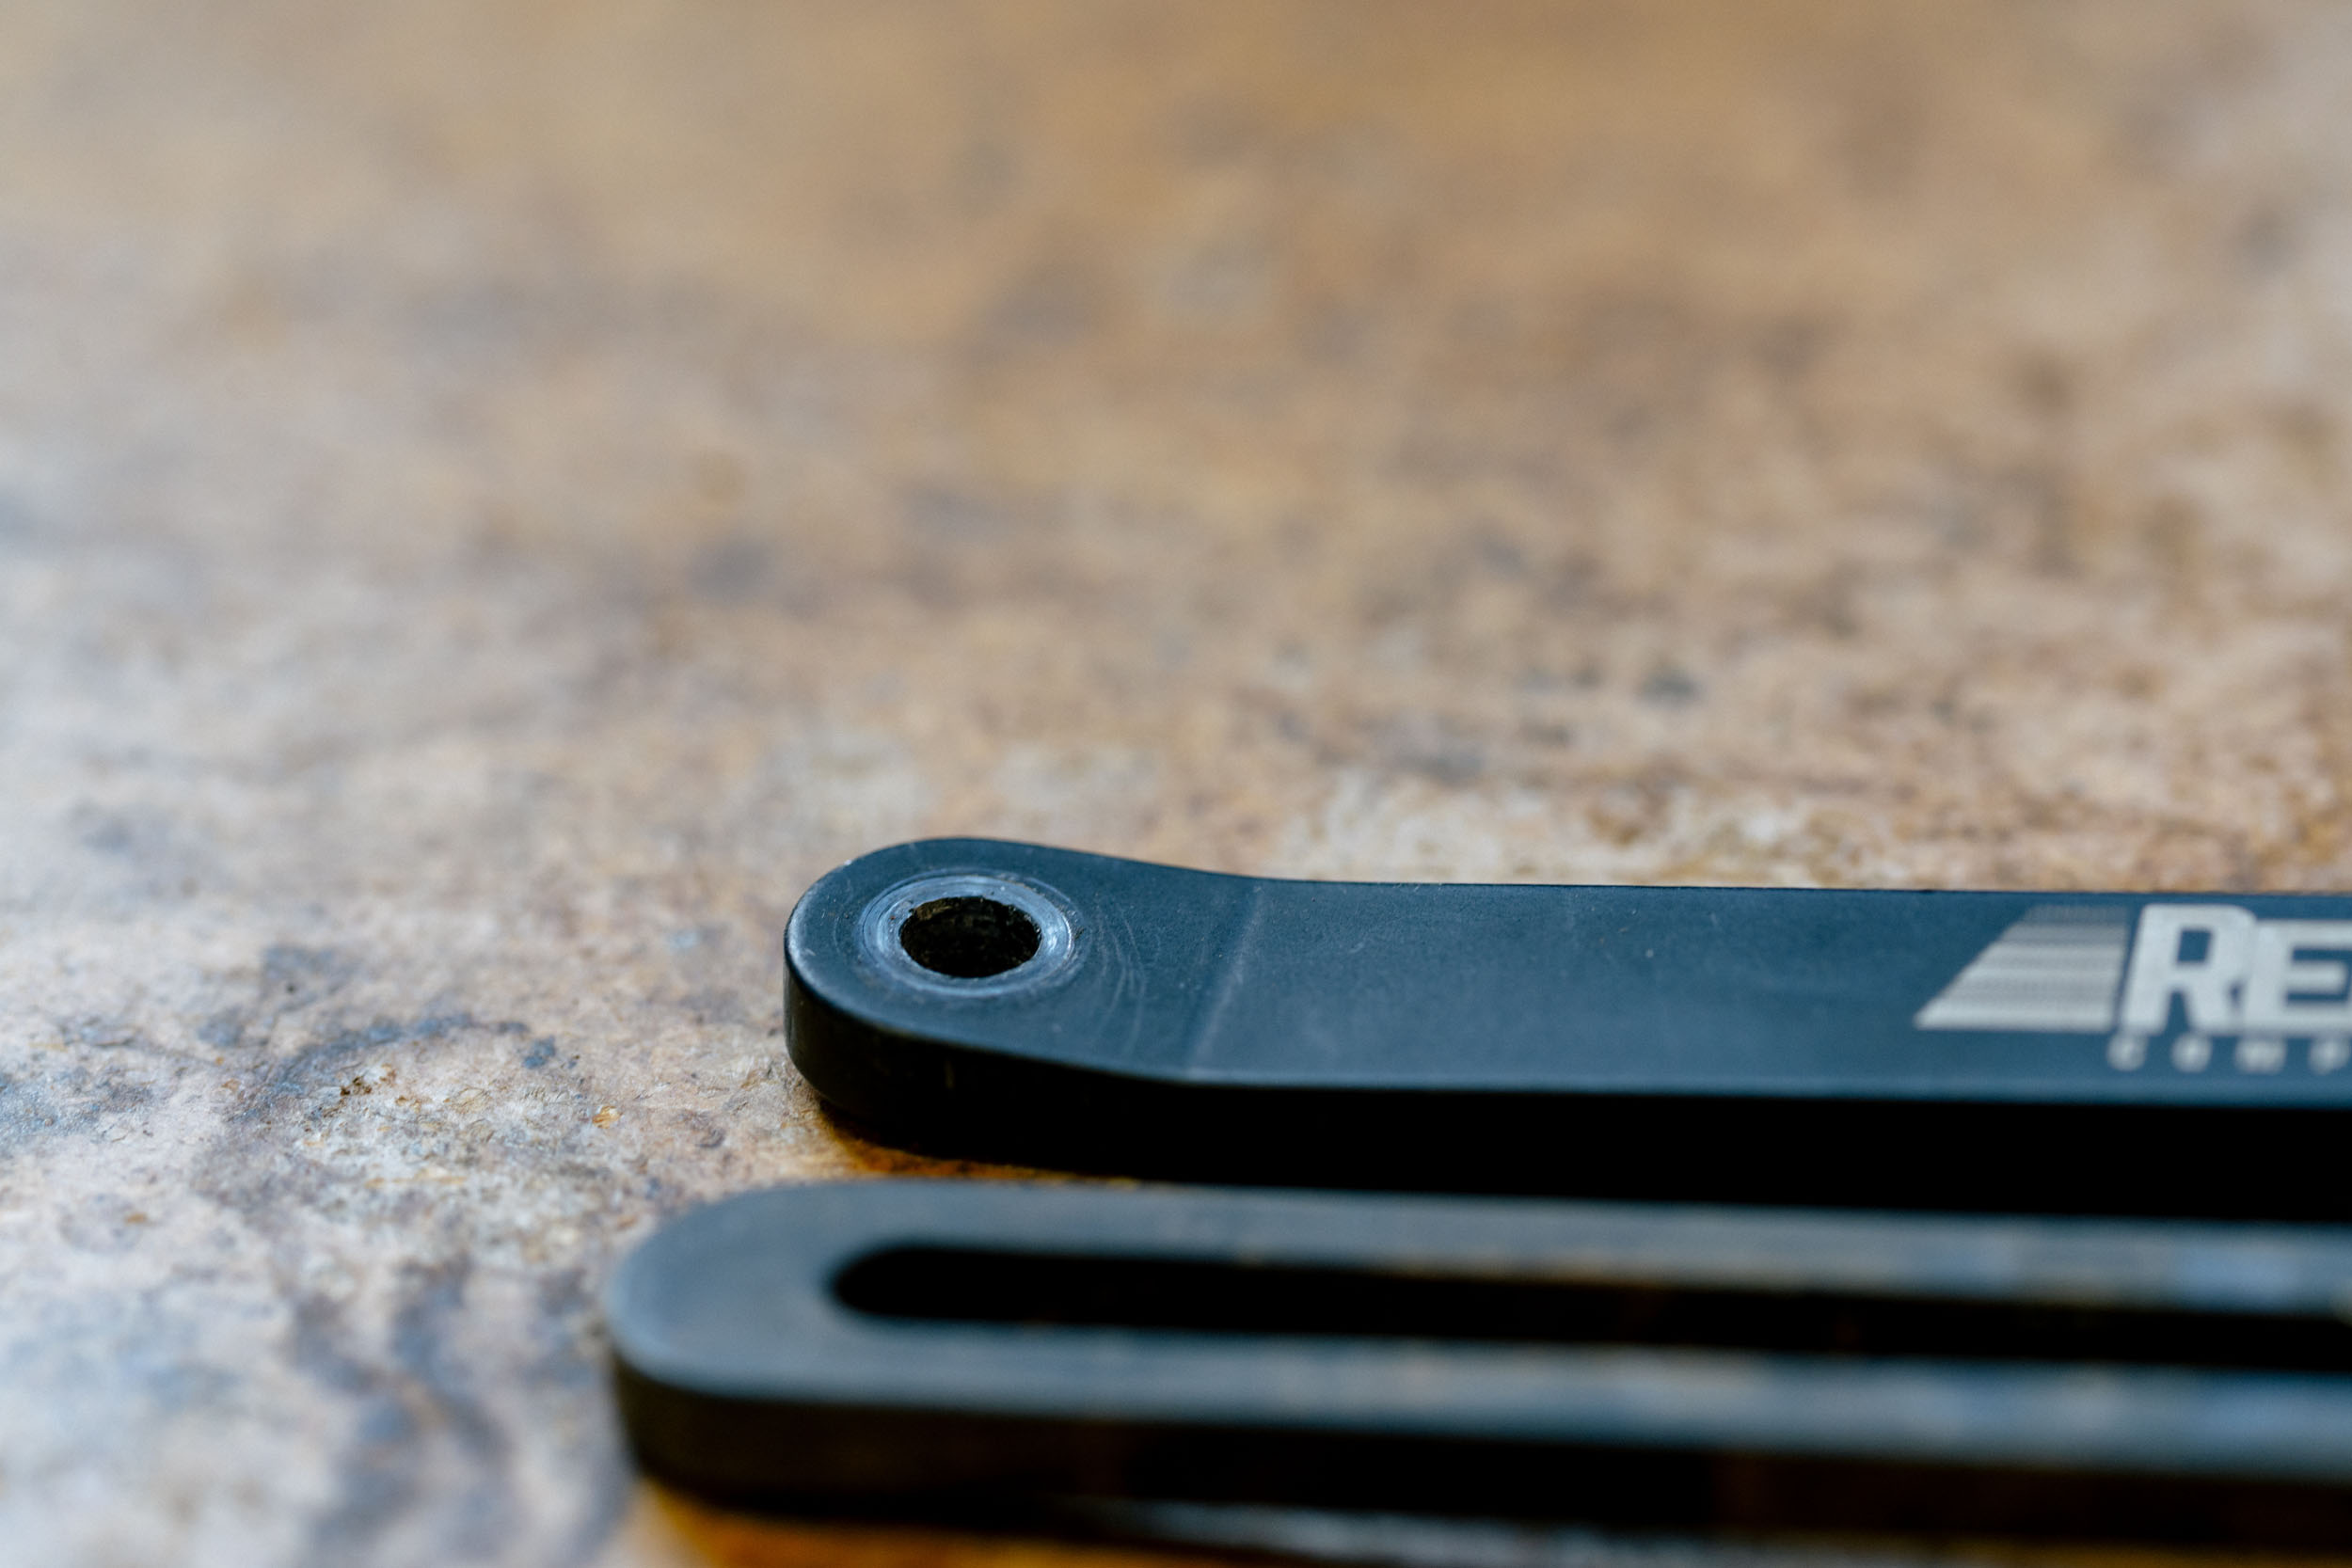
Once I know where the arms need to go, installation is simple. Push the button-head bolt through the rack, slide the arm onto the bolt from the inside, then add the washer on the outside of the arm, followed by the lock nut. One thing to watch out for is the button-head bolt itself. It is fairly soft, and I found it easy to strip if you’re not careful. I like the low-profile head since it doesn’t dig into anything, like a pannier, but I wouldn’t mind seeing a slightly more durable bolt or a 4mm hex interface here.
The arms also offer a good amount of fore-and-aft adjustment at the rack side, which makes leveling the rack or dialing in its position really easy. Once I have the rack sitting level, I tighten down the feet first, then the mounting points near the seat tube or seat stays, and finally the 8mm lock nut. At that point, the rack feels absolutely rock solid; it’s one of the sturdiest-feeling racks I have ever mounted on a bike.
I’ll note that most of the rack mounts I used were straight out of the frame, but I did test it on seat stay mounts with a bit more angle. It took a little extra force to tighten the arm down, but it worked and doesn’t look horrible. Generally speaking, though, it works best on mounts without an angle, or when used with a seatpost clamp mount.
In Use
As I mentioned earlier, I used the Muel rack in various configurations over roughly six months. It joined me on several bikepacking trips and saw daily use on commutes, and I had zero issues. That said, I never came close to the rack’s maximum weight rating. Still, based on how it performed, I am confident it would have handled terrain like the Utah trip I rode this fall, especially compared to the Trek Checkpoint rack I used on that route, which ended up breaking.
My first trip with the rack was on the Surly Bridge Club I reviewed earlier this year. I mounted a simple dry bag on top. I took it on a mixed-terrain trip north of Crested Butte that included rough forest service roads and a bit of singletrack. Nothing extreme, but enough to be a good test. With 27.5 x 2.4 tires, the rack fit and held up perfectly, and the install was seamless. It just felt like it belonged.


I left the rack on the Bridge Club for commuting, as that bike has been my primary commuter for the past few years, and I used some panniers on it for the summer. Eventually, I moved it over to my custom Goodday Curiosity Gila Monster hardtail. This setup ran 29 x 2.4 tires in the rear, paired with fairly low-mounted rack bosses, and I still had plenty of clearance. That trip was on the Tilton Traverse, which I also made a video about. It’s a rugged route with plenty of rough dirt roads and a solid amount of singletrack. Once again, I ran a simple dry bag on top, and the rack stayed rock-solid the entire time.


I also bounced the rack between a few other bikes, including the Surly Grappler, which has been my dedicated winter commuter. Even with fenders installed, the rack worked without issue. I threw it on a couple of other bikes just to see how it looked and fit, and each time it worked as expected, just with a few adjustments in the arms.
During this period, I was also testing a variety of Old Man Mountain FLiP cage bags. I mounted those cages directly to the back portion of the rack. I paired them with additional cargo cages or water bottle cages. That setup worked really well. I also experimented with a few mini panniers, such as the Old Man Mountain Ponderosa Panniers, which worked great. The cutouts paired well with the velcro attachment on those bags, and there are a good number of connections at the bottom to make a lower connection work. Relentless Components notes that mini panniers work, but standard hook-on commuter panniers aren’t compatible.
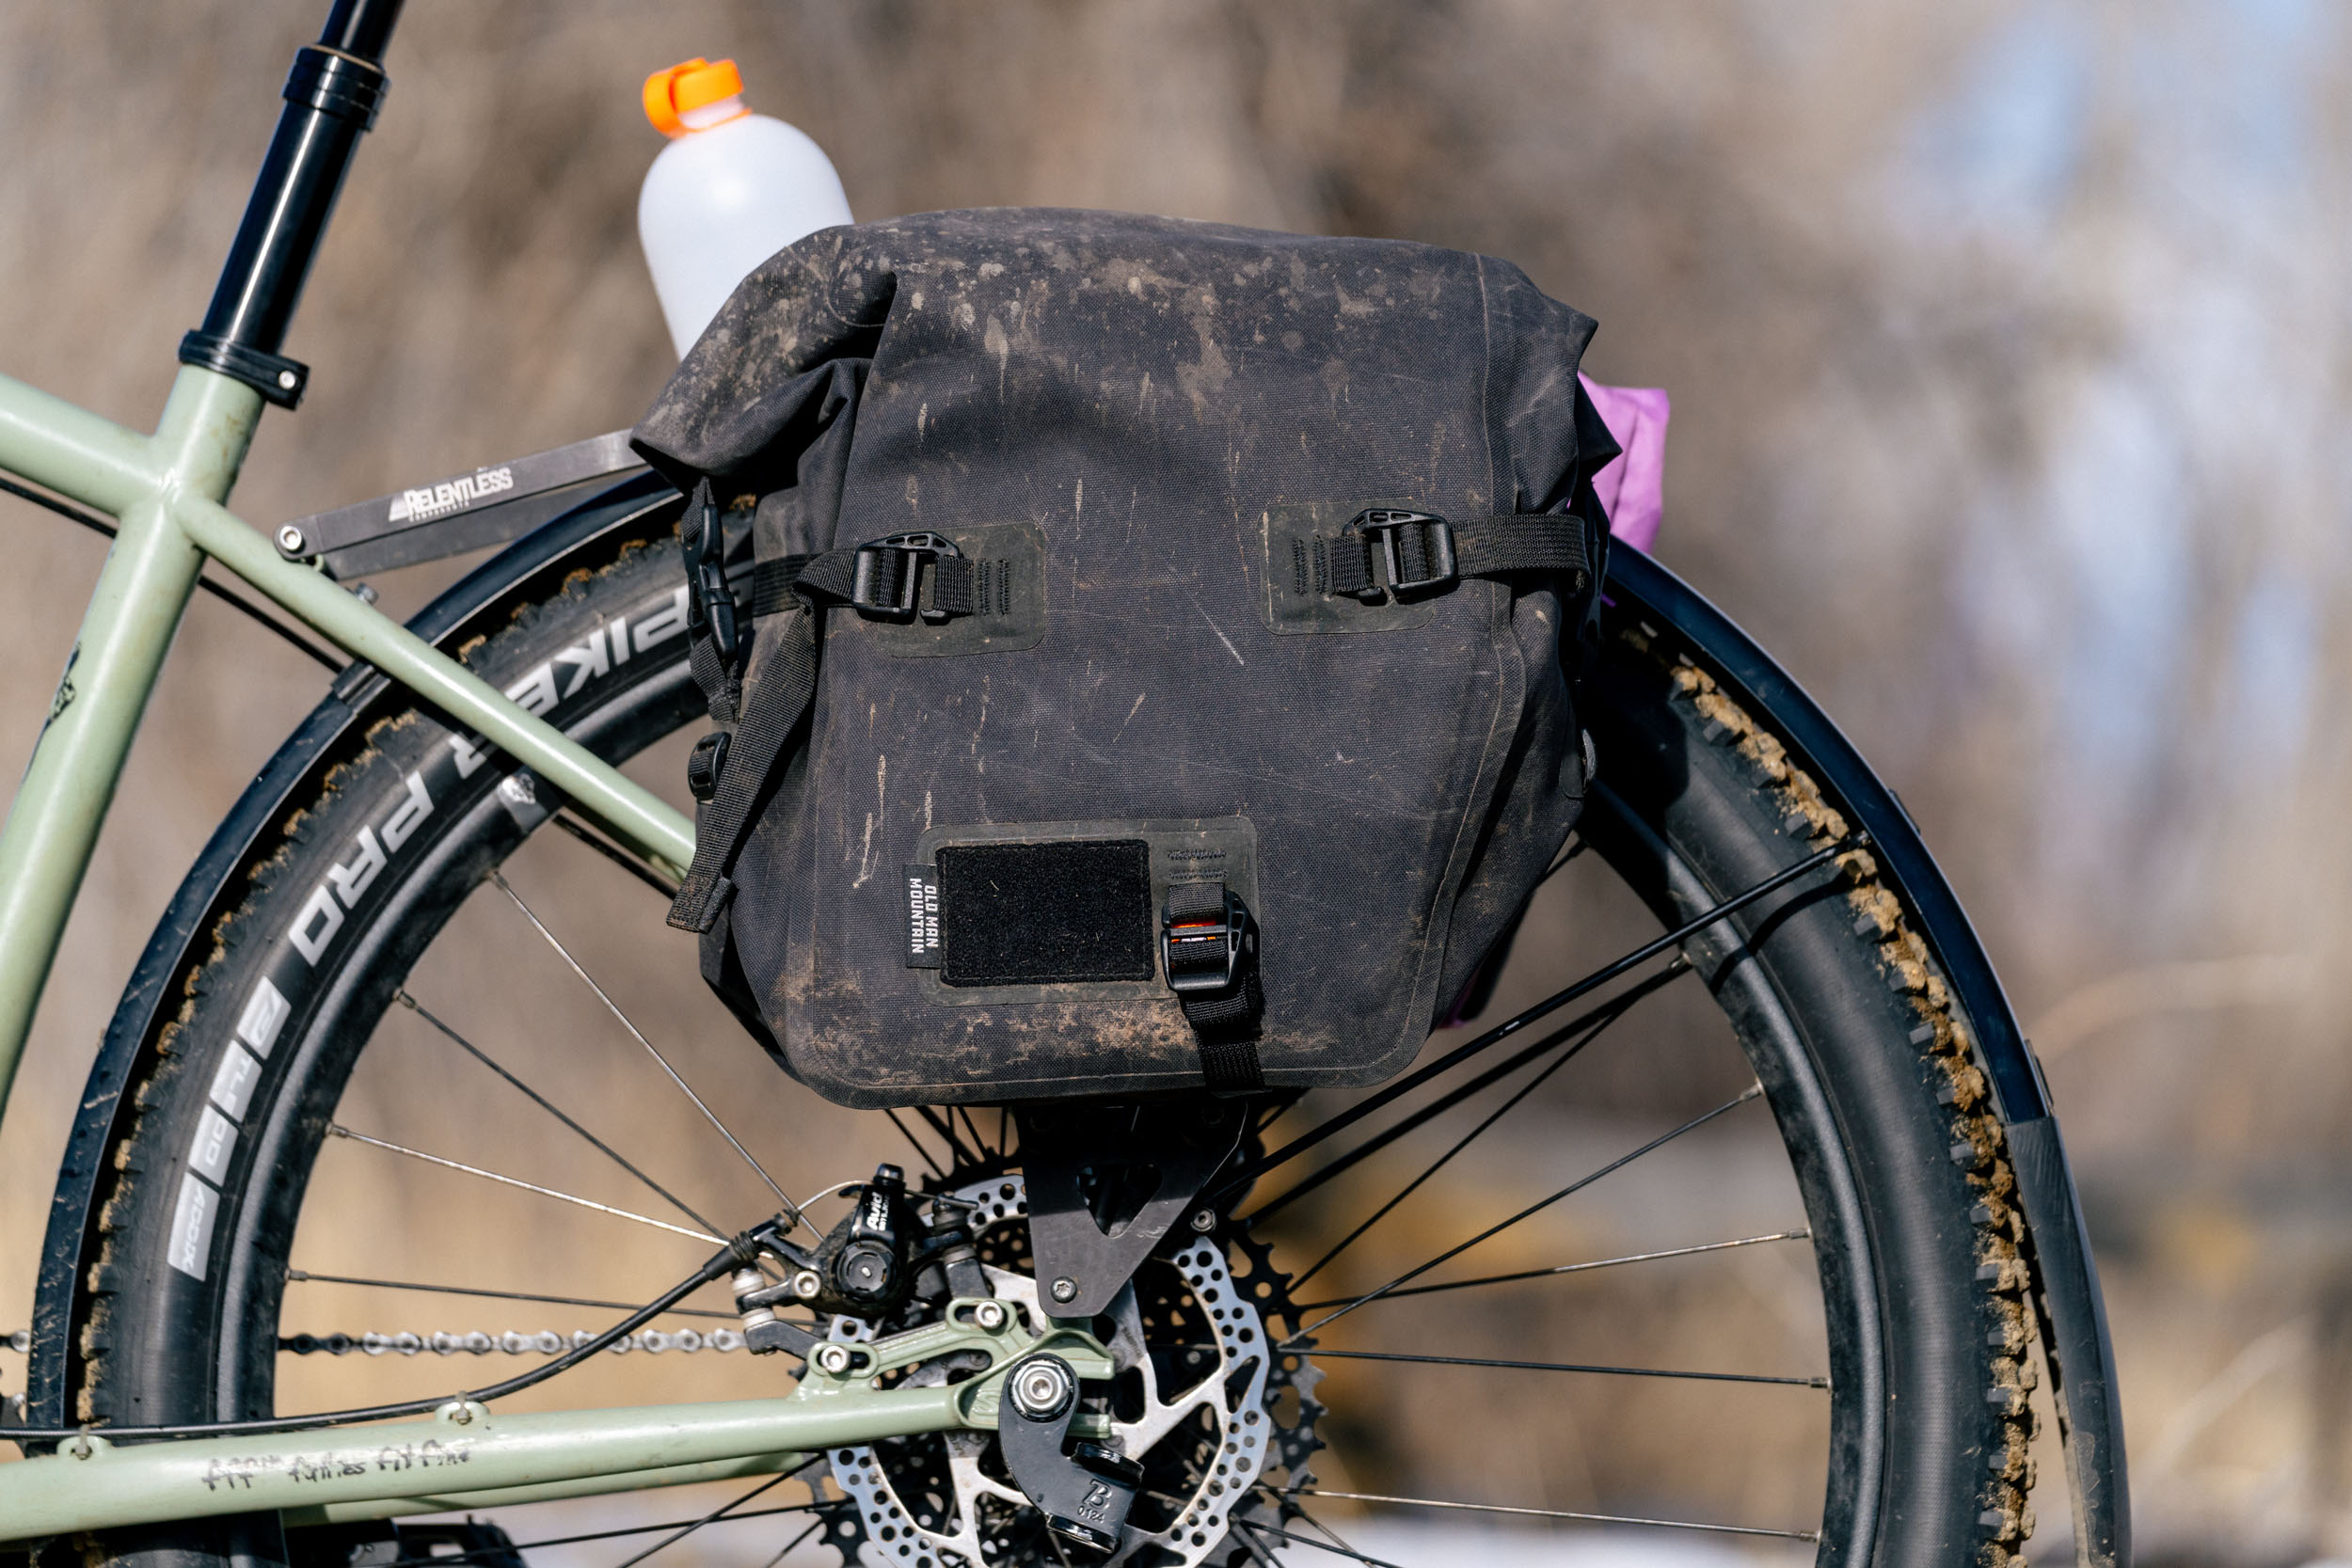


I’ll note that installing a cargo cage isn’t always straightforward. You often have to get a little creative, and it’s not as easy as installing a bolt into a braze-on, especially once the rack is already installed. The same goes for mounting panniers, but I guess that’s the downside of having so many mounting options and variations. But the upside is that you will never need to worry about, say, a braze-on breaking or a bolt cross-threading in your rack.
Sean also shows examples of simply strapping cargo directly to the sides using TPU straps, which seem to work well. I could see this rack being a great companion for someone doing trail work or just needing to mount something in a pinch using those straps. Still, personally, I prefer the cleaner look of running cages on the sides. This has me somewhat wishing there were more mounting holes closer to the center of the rack so a bottle could live in the middle, paired with a dry bag on top. That said, with a little creativity, you can already make something similar work using the MOLLE-style cutouts.

Overall, across a bunch of bikes and a wide mix of bags and mounting options, the Mule Rack performed extremely well. If you want to add more to the sides using straps or cages, all you really need are straps or a handful of button-head bolts, small washers, and locking nuts, which, if you are anything like me, you probably already have sitting in a parts bin.
- Model Tested: Relentless Mule Rack
- Actual Weight: 939 grams (33.12 oz)
- Place of Manufacture: USA
- Price: $235
- Manufacturer’s Details: Relentless Components
Pros
- Extremely solid, zero movement under load
- Weld-free design built for rough terrain
- Easy install with no cutting required
- Versatile mounting options for panniers, cages, or dry bags
- Great weight capacity
Cons
- Heavy compared to minimalist rack systems
- Installing hardware/panniers can be tricky
- Pricey
- Doesn’t pack flat
- Extra hardware needed for cages and accessories
Wrap Up
I constantly get comments on the YouTube channel saying things like, “Oh, look, we’ve come full circle.” And sure, in a way, we have. Racks are seeing a significant increase in interest after soft bags were dominant for years. I know I certainly have used more racks over the last three seasons. But in reality, what Sean has created here is a direct response to real problems that led to the creation of soft bags: racks that break. The Muel rack is designed to handle the rigors of off-road terrain without the common failure points Sean and others have experienced firsthand with other racks, especially designs that rely heavily on welds.
He also felt there were limits to soft bags, which simply aren’t big enough when you are carrying heavy loads or trying to haul extra water across long stretches between sources. So, while the industry continues to chase lighter and more minimalist solutions, the Mule rack goes in the opposite direction. It is indeed a mule. It is a heavy-duty rack with seemingly endless options for mounting cargo. If you are looking for durability, capacity, and flexibility, this feels like a very worthy setup that is built for the long haul.
Now, let’s talk about price. The Mule rack costs $235 USD. That is not cheap, but it’s worth noting that Relentless Components is a tiny operation, and these racks are produced in relatively small quantities. On top of that, the rack is made in the USA, but Sean has been upfront about the impact of recent aluminum tariffs, which have significantly increased material costs. Aluminum is the primary material, and while he has absorbed what he can, some of that increase inevitably gets passed on to the consumer. That said, there is a three-year warranty that covers manufacturing defects, and here is the big one: material failures under normal use.
What do you think? Let me know in the Conversation below!
Further Reading
Make sure to dig into these related articles for more info...


Please keep the conversation civil, constructive, and inclusive, or your comment will be removed.