


Cooking the Peru Great Divide: How to Thrive in the Andes


After bikepacking the Peru Great Divide through the high Andes, Sam Rice compiled this comprehensive guide to making the most of your meals out on the route. It includes everything from how to plan your kitchen to resupply strategies and a selection of deliciously easy original recipes. Find the full feast for the eyes here…
PUBLISHED Apr 1, 2025
Additional photos by Tom Norman
Perhaps it’s the allure of tracing 1,000 miles of rugged dirt roads through impossibly steep valleys. Or watching condors soar overhead as their reflections dance on high alpine lakes. Or maybe it’s the feeling of true wilderness. The kind of wild that demands your full attention and captures your spirit. Whatever it is, the Peru Great Divide route has a way of getting under your skin and staying there. And I should know. I’ve been dreaming of riding in this corner of the Andes for the last five years.


But dreams and romanticizing aside, the Peru Great Divide is a challenging, high-altitude roller coaster of a route. At times, it’s backcountry heaven, a playground of awe and astonishment. At others, it’s pushing through snowstorms at 5,000 metres above sea level, with freezing hands and a starving body, questioning every life choice that led to this moment.
The internet overflows with talk of this route: gear lists meticulously crafted, elevation profiles analyzed to death, and endless chatter about dealing with soroche, altitude mountain sickness. But in all the pixels spilled about preparation and perseverance, there’s a curious void when it comes to one of the most fundamental aspects of high-altitude bikepacking. FOOOOOD!


How do you actually keep yourself fed when you’re burning through calories like a furnace, and the only store for 80 kilometers sells nothing but crackers and suspicious-looking meat in a can? This is a food guide to filling that void. A guide to understanding not just where to find food in the high Andes, but how to transform the random contents of a high-altitude bodega into meals that can fuel the kind of effort this route demands. Because let’s face it: even the most carefully selected bike and gear won’t get you far if you can’t figure out how to keep your engine running.

NOTE: While riding the Peru Great Divide, Tom and I both chose to follow a vegan diet. Although I’m not vegan day-to-day (but Tom is), we chose this eating strategy because it made cooking together easier, and from experience, greatly reduced the chances of sickness. Therefore, the recipes you’ll find in this guide will all be vegan, with notes on how/when to include meat and dairy where possible.
Your Body Will Be A Furnace
Before we dive in, here’s some real talk you ought to know. On the Peru Great Divide, your body’s energy demands will likely outpace what you can realistically consume. The combination of 1,400+ metres of climbing per day, adjusting to altitude, disrupted sleep, and limited food options means you’ll probably be operating in a consistent caloric deficit. This isn’t meant to discourage you; it’s simply reality.


This prolonged energy deficit has real consequences. Physically, you’ll experience diminished recovery, persistent fatigue, and potentially weakened immunity. Mentally, your decision-making and emotional resilience may take a nosedive, and that spectacular view you suffered for might not deliver the euphoria you expected.


The solution isn’t to avoid the deficit entirely (nearly impossible on this route) but to minimize it. Prioritize nutrient-dense foods and protein when available, and plan strategic rest days in larger towns for proper refueling. Yes, that means eat everything in sight when you roll into town. Your body can handle temporary energy shortfalls, but providing recovery opportunities is crucial for both completing the route and actually enjoying the experience of riding it.

Before you Arrive: Planning Your Kitchen
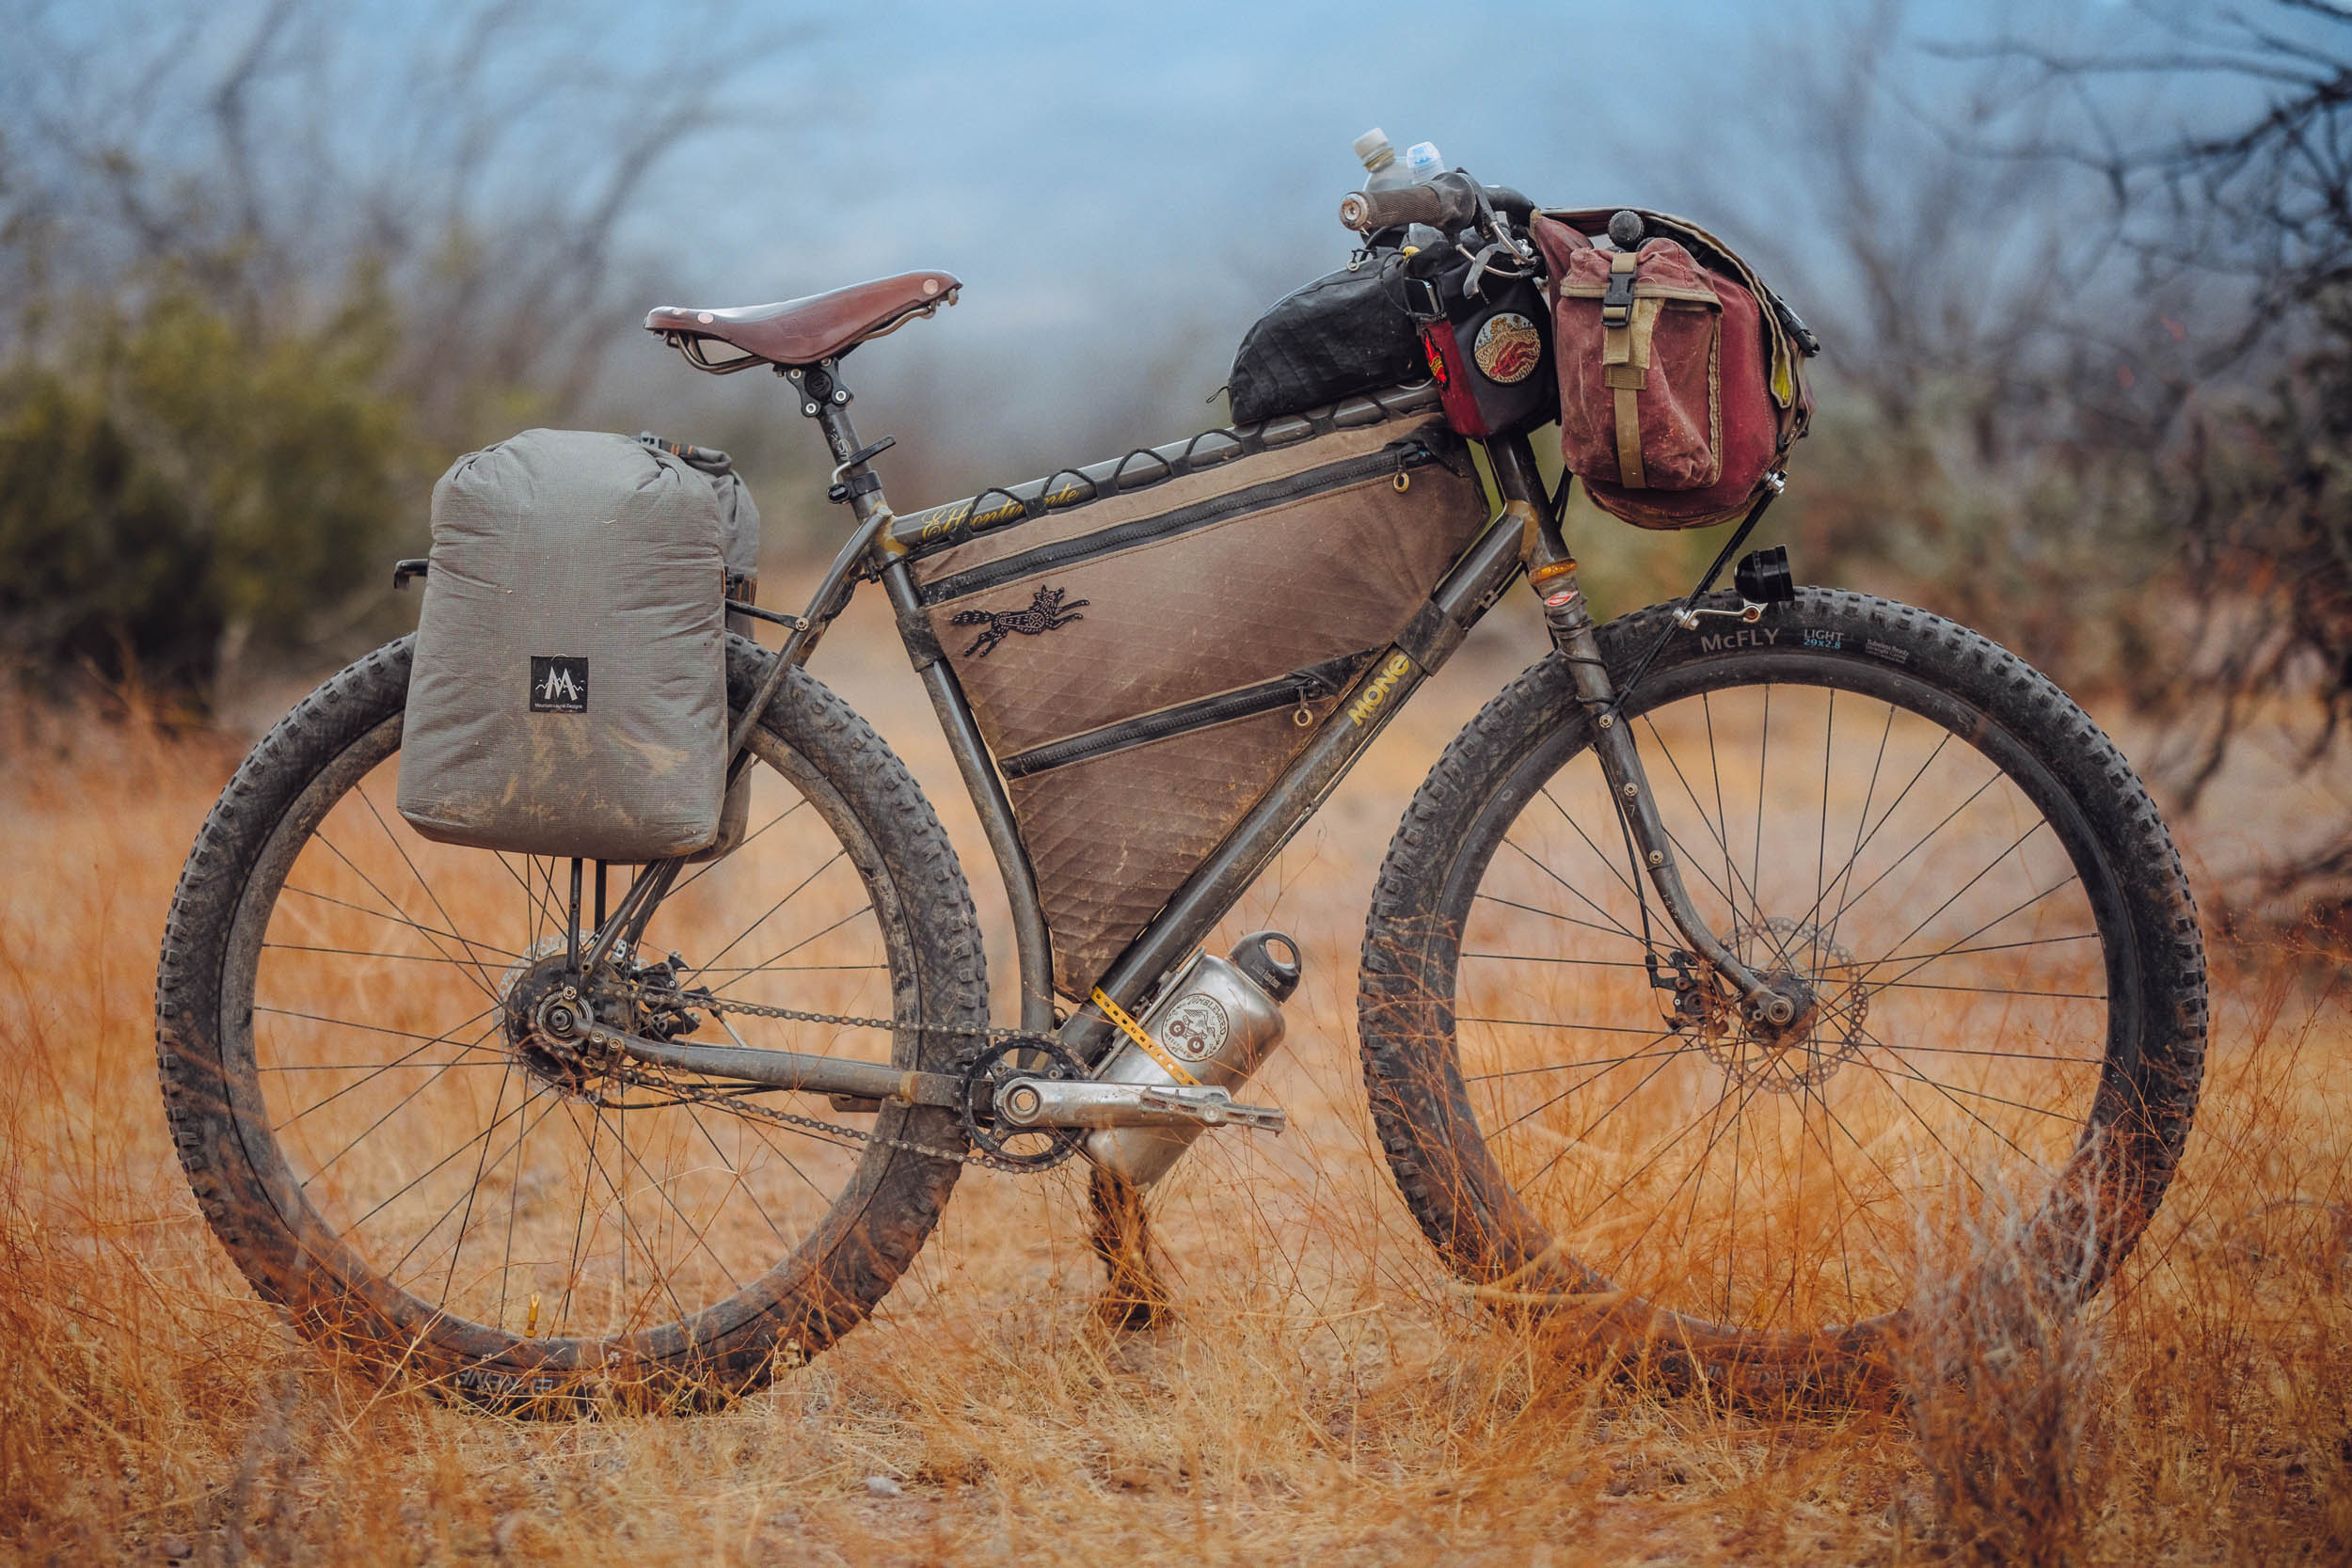
Among the myriad gear decisions you’ll face before tackling the Peru Great Divide, choosing the right stove is crucial to success. Broadly speaking, the stove world is broken into four main categories: alcohol stoves, twig burners/biomass stoves, gas canister stoves, and universal fuel stoves.


Each system has its pros and cons. However, after years of testing almost every stove system in the market while creating The Bikepacking Cookbook, I’ve settled on an alcohol stove for 90 percent of my trips. Its low weight, ease of use, and clean-burning flame make it a joy to cook on. It’s what I used in the Andes, and it’s what I would recommend you use too (more on why below).
Types of fuel in Peru
For most bikepacking trips, I’d say the best stove is simply the one you already have and feel confident using. However, when selecting a stove specifically for the Peru Great Divide, fuel availability along the route is the most critical factor. In this case, I would strongly advise you to pick your stove based on fuel availability.
Biomass/Twig Burners
With much of the route at 4,000 to 4,900 metres above sea level through sparse, rocky areas, biomass stoves aren’t ideal. Yareta and scrubby bushes exist but are protected. At lower elevations, options improve, but relying on biomass limits you if (for whatever reason) you can’t descend a pass.


Gas Canisters
The unicorns of the Peruvian Andes. Found in major outdoor hubs like Huaraz and Cusco but unavailable elsewhere. If you use a gas stove, stock up in these cities and prepare to carry multiple canisters. Prices are 35 to 45 soles ($9 to $12 USD).
Universal Fuel/Liquid Fuel
Gasoline is available in almost every town with a road, making multi-fuel stoves a good option. Even small villages usually sell fuel in recycled bottles. Quality varies wildly, so expect everything from surprisingly clean to, “Is that soil?” Fortunately, your MSR Whisperlite or similar stove won’t be particularly picky. The downsides? Weight, maintenance, and the constant petroleum smell.

Alcohol/Spirit Burner
Alcohol fuel is broadly available in Peru, even in small mountain towns. Ask for alcohol medicinal at pharmacies. Bottles cost around 8 to 12 soles ($2 to $3 USD).
The concentration is about 70 percent, which will burn cleanly enough, though it’s not ideal. The flame isn’t as hot as other stoves, so expect longer cook times at high elevations. However, the simplicity, availability, and lightweight make alcohol my top recommendation for riding in the Andes (and South America generally).
Pro tip: Grab a one-liter bottle in bigger towns to save on plastic and stretch your supply for 8 to 12 days. Less plastic waste is always a win!
Our Resupply Strategy
When you’re grinding through the Peruvian Andes, food isn’t just fuel—it’s an obsession. Understanding the rhythm of resupply options is essential to keeping the bonk goblins at bay. Our resupply and eating strategy consisted of four main components.
Step One: Haul From Home
Having ridden a few remote dirt tours in my time, I’ve discovered a few specialty food hacks that have become essential parts of my pack list on these big trips. For the Peru Great Divide, I brought the following ingredients from home in the UK:
Spice paste
I’ve become a huge fan of carrying spice pastes on tours. They last for a long time, store incredibly well, and are packed with flavour. I decanted a 350-gram jar of Pataks Rogan Josh spice paste into a 500-millilitre Nalgene container in the UK and stored it in my handlebar bag. It lasted over a month and was unbeatable for creating quick veggie curries when the sun dipped and the cold set in.
Note: Spice pastes come in a bunch of varieties. Just make sure you check the ingredients if you have dietary requirements and decant them into a 100-percent sealable container. Spilled curry paste in your bag isn’t fun for anyone!


Powdered products
You likely already know this, but in case you don’t, powdered products like peanut butter, hummus, milk, and mashed potatoes can be absolute lifesavers for your taste buds. Depending on what’s available in your region, I’d suggest bringing some of these along to offer a bit of variety to your snacks and meal times. We took powdered peanut butter and used it in our oats in the morning with powdered soy milk. What a treat!
Note: We also found powdered milk products in Huaraz, here.


Step Two: Major Cities = Major Flavour
Think of the larger cities like Lima, Huaraz, and to a lesser extent, Oyon and Huancavelica, as your major resupply and food hubs. Before you leave the cities and rejoin the trail, be sure to also load up on all the items that rural bodegas are unlikely to have. We resupplied on the following in every larger town or city:
Rolled oats and chia seeds
Perfect for cold soaking overnight, chia seeds are a great source of protein, and oats are just all-round good for you. Check out the recipes below for more.
Dried fruits and quality nuts
Used for trail mix and as a breakfast topper, grabbing some quality nuts and dried fruits was worth their weight in gold for us.
Olives
Abundant in the larger Peruvian markets, olives can really transform a dish. However, they’re seldom found in the rural bodegas, so we made sure we had a good supply of them when we could. I even created a recipe around them (see below).
Quinoa
Even though Peru produces 106,000 tonnes of quinoa per year, the majority of it is for export. Therefore, outside of the larger cities, it can be tough to find. We sometimes found it in the local bodegas, but only about 40 percent of the time.


Step Three: The Bodega Lottery
Let’s get real about bodegas along the route. These aren’t your quaint neighborhood corner stores with 16 varieties of energy bars and sports gels. They’re often just a room in someone’s house with a random assortment of things for sale. Some days, you’ll hit the jackpot and find a surprisingly well-stocked shop with (semi-fresh) bread, pasta, decent vegetables, and maybe even some Oreos. Other days, you’ll stare blankly at shelves holding nothing but expired crackers and cola to fuel a kindergarten birthday party.
But if you’ve followed the steps above, you won’t be phased. You just need to use your “bodega vision” and figure out what you can make by combining what you’ve packed and what you can purchase.


Reliable Staples:
These are the items you’ll find in most bodegas along the route, and they’ll largely make up the bedrock of your meals:
- Pasta (usually spaghetti or small shapes)
- Basic tomato sauce (often sweet and quite watery)
- Potatoes (so many varieties)
- Onions (often a lucky dip as to colour)
- Crackers (so many damn crackers)
- Avocado (great on bread with some salt)
- Seasoning packets (the flavor saviors by Lopesa)
- Sweet breads and pastries (good morning fuel, if a bit stale)
- Basic snacks (chips, cookies, candies)
- White Rice (the perfect base for meals)
- Basic canned goods (tuna and mystery meat products)
- Eggs (often sold individually)
Step Four: Eating + Drinking Out
When you’re on the trail, you’ll likely be making all of your own meals. But when the opportunity comes to sit back and enjoy the vibe of a local eatery, you absolutely should. We made some wonderful connections en route with local restaurant owners and street vendors, each introducing us to a unique part of Peruvian gastronomy. Heads up: emoliente might be the best thing about bikepacking in Peru, and I encourage you to drink your bodyweight in the stuff!
Here are some of our favourite dishes and drinks you can find all over the country:
Chaufa: Peruvian-Chinese Fried Rice
This ubiquitous fusion dish combines fried rice with eggs, vegetables, and soy sauce, making it perfect for hungry bikepackers seeking carb replenishment. Available in most towns for 10 to 15 soles.


Pan con Palta
A simple yet satisfying sandwich of fresh bread and creamy avocado. Found in almost every tiny village for just 2 to 3 soles, it provides healthy fats and carbohydrates in a portable format. We mainly enjoyed them for breakfast.
Pollo a la Brasa (Roasted Chicken)
If you eat meat, the Pollerias across Peru will blow your socks off. Perfect roast chicken roasted over charcoal. Say no more. But don’t fear if you’re veggie/vegan. The Pollerias are also home to the best fries, so we often just ordered rice, fries, and salad.


Drinks
There are many interesting drinks to sample around the country, too. Find a few standouts below:
Emoliente
A traditional Peruvian herbal drink served hot from street carts. It’s made with barley, flaxseed, herbs like horsetail and alfalfa, and medicinal plants. At just 2 to 3 soles (less than $1), it’s not only a nutritional powerhouse but also a cultural experience.
Juggerias
These fresh juice stands are your secret weapon for vitamin replenishment. Found in most markets and street corners in larger cities, they offer blended fruit combinations and taste unreal. We particularly liked the carrot and ginger cold press.
Kiwicha
This ancient Andean grain drink packs an impressive nutritional punch with complete protein, iron, calcium, and magnesium. Look for it at morning street stalls throughout Peru’s cities and towns. It’s delicious.

RECIPES
Banging Breakfast Bircher
Serves: 2 | Prep Time: 5 Mins | Cook Time: Zero!
Hot Tip: If you don’t do milk, seek out good alternative milk powders like coconut, soy, or oat milk.
Mornings at camp can be pretty hectic. You’ve got to pack up your sleep system, curse at the condensation on your tent, and repack your bags. This all takes time, even for veteran bikepackers, so we developed this no-cook overnight oat recipe to speed things up. Simply chuck all the ingredients in a silicone zip-lock bag, leave it overnight, and top with your favourite treats in the morning.
INGREDIENTS:
- 3 handfuls of rolled oats (don’t use instant oats, they suck!)
- 3 sporks of chia seeds
- 250ml (8.5oz) of water
- 3 sporks of milk powder powdered oat, soy, or coconut milk works great, too
METHOD:
- Add the milk powder to your silicone zip-lock bag along with 250ml of water.
- Stir well and ensure there are no lumps. Lumpy milk is gross!
- Add the oats and chia seeds and mix with the milk well.
- Seal your bag and leave it to soak overnight! Don’t forget to stash your food somewhere safe if you’re sleeping with animals.
- The next morning, top with some extra nuts, seeds, and maybe some powdered PB – enjoy.


Dirtsloth’s Roast Pepitas
Serves: 2 | Difficulty: Easy | Ready in: 10 minutes
A perfect trail snack loaded with protein, healthy fats, and a satisfying crunch. Pepitas (pumpkin seeds) are available in larger cities like Huaraz and provide an excellent energy boost between meals. This simple pan roasting method enhances their natural flavor and makes them irresistibly addictive. Just be sure to save some for the trail.
INGREDIENTS:
- 300g raw pepitas (pumpkin seeds)
- 1 tablespoon of oil
- Salt to taste
- Optional: chili powder, cumin, or other spices
METHOD:
- Heat your pot over medium flame, add the oil, followed by the pepitas
- Stir constantly to prevent burning. Burnt pepitas aren’t great.
- When they begin to turn golden (about 5-7 minutes), remove from heat, sprinkle with salt and any other seasonings. Do this while they’re still hot.
- Allow to cool completely before separating and storing in ziplock bags. Enjoy by the handful whenever you need an energy boost!


Black Olive + Quinoa Stew
Serves: 2 | Difficulty: Medium | Ready in: 30 minutes
It’s ironic, but quinoa can be quite difficult to find in small Peruvian towns despite being native to the Andes. So when you do find it, this hearty stew makes excellent use of local ingredients and provides a dense protein kick – perfect for recovery after a long day in the saddle.
INGREDIENTS:
- 200g quinoa
- 1 onion, diced
- 2-3 cloves garlic, minced
- 1 bell pepper, diced (if available)
- 1 sachet of Lopesa Oregano
- 1 sachet of Lopesa Tuco Tallarin
- 1 carton/can of tomato sauce
- 500ml cups water
- Handful of black olives
- Salt, pepper, cumin to taste
METHOD:
- In your pot, sauté onion, garlic and pepper in oil until translucent.
- Add in the quinoa, stir and fry for 1 minute. This makes the quinoa a little nutty – yumm.
- Add water, stir and leave to simmer until the quinoa is cooked. Roughly 20 mins, but at altitude, who knows!?
- When the quinoa is ready, add the tomato sauce, Lopesa seasoning sachets, and black olives. Leave on the heat to warm up for a while.
- Season to taste with salt, pepper. Dive in!


Veggie Curry in-a-Hurry
Serves: 2 | Difficulty: Easy | Ready in: 20 minutes
When the local bodega hasn’t delivered much apart from some simple veggies and rice, this quick curry just slaps. Using the spice paste you packed, this recipe delivers big flavor with minimal ingredients and zero fuss. Feel free to DM me with love hearts and thumbs ups when it saves your soul up a mountain.
INGREDIENTS:
- 1 onion, chopped
- 2-3 cloves garlic, minced
- Any available vegetables (potatoes, carrots, bell peppers work well)
- 2 heaped sporks of curry paste (hauled from home)
- 1 carton of tomato paste/sauce
- Whatever spices you brought: cumin, chilli flakes, etc.
METHOD:
- In your largest pot, sauté onion and garlic until fragrant.
- Add chopped vegetables, starting with the hardest ones. Potatoes, carrots, etc.
- When the vegetables begin to soften, add the curry paste, stir and fry for a couple of minutes. Now you’ll smell the flavours.
- Pour in tomato sauce, pop a lid on, and cook until vegetables are tender and sauce thickens slightly. About 15 minutes.
Pasta alla Bodega
Serves: 2 | Difficulty: Easy | Ready in: 15 minutes
If you’re into pasta and tomato sauce, you’ll love Peru. These two ingredients are available in most rural bodegas, so when you’re tired, this will likely be your go-to dish. But just because it’s easy doesn’t mean it can’t be tasty with a few simple additions.
INGREDIENTS:
- 200g pasta (whatever shape is available)
- 1 onion (minced)
- 3-4 cloves garlic, thinly sliced
- 2 boxes of tomato sauce
- 1 sachets of Lopesa Oregano
- 1 vegetable stock/bouillon cube
- Any available vegetables (tomatoes, bell peppers, chilli)
- Optional textured soy protein (found in Huaraz) or, if your diet allows, canned tuna.
METHOD:
- Add your stock cube to your largest pot and boil pasta according to package directions. Remember, it takes longer at altitude.
- Once the pasta has been boiling for half the recommended cooking time, take it off the heat and set aside.
- While the pasta continues to cook, heat oil in a separate pot, add the onion and sliced garlic and cook until golden. Don’t burn them!
- Add any fresh vegetables and sauté until soft. Then add the tomato sauce and bring to a simmer.
- Check the pasta, and when cooked, drain it and add to the sauce. Stir well to combine, season to taste.


Final Thoughts
So there you have it. My guide to cooking and eating the Peru Great Divide. While the food challenges are real, they’re far from insurmountable, and with proper planning, creative cooking, and a flexible attitude, you can maintain good nutrition while experiencing everything the Peruvian Andes has to offer.
Interested in learning more about food and nutrition while bikepacking? Head over to TheBikepackingCookbook.com, where you’ll find our 88-page digital cookbook. Designed to help take the stress out of cooking on a bikepacking trip, it’s filled with 26 trail-tested recipes, dozens of tips and tricks, and heaps of inspiration to transform your bikepacking meals from campsite calamity to trailside triumph.
Further Reading
Make sure to dig into these related articles for more info...


Please keep the conversation civil, constructive, and inclusive, or your comment will be removed.