


A Winter Bikepacking Guide by Dave Gray


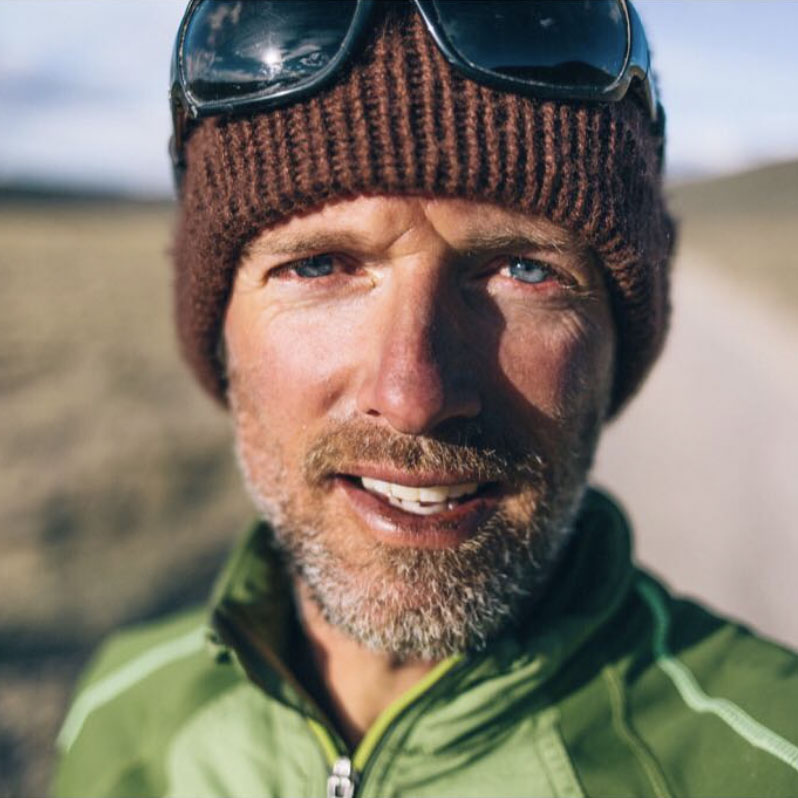
As a cyclist with over two decades of all-weather commuting, and a veteran of ten Arrowhead 135s – Minnesota’s winter ultra race – we asked Dave Gray, former Surly product designer and general off-grid survivalist, to share his packlist and tips for winter bikepacking…
PUBLISHED Dec 16, 2021
Originally published in 2016
Given the growth in popularity of fat bikes over the last few years, the notion of winter bikepacking is spreading beyond the domain of ultra races – like the Iditabike and the Arrowhead 135 – and into the realm of exploratory tours. After all, with 4-5 inches of tire at your disposal, the winter wonderland now offers a whole new world of multi-day riding; from riding through a muffling duvet of snow, to cosying round a fire, traversing frozen rivers, and connecting snowmobile tracks and groomed trails.
As with any extremes in temperatures and conditions, this style of bikepacking demands extra respect and consideration. Whether you’re racing or not, honing your packlist and skillset is especially important when embarking on snowy escapades. And when it comes to winter riding experience, in all its many forms, Dave Gray, the lead designer behind the Surly Pugsley, certainly has a few thoughts…
9 Winter Bikepacking Tips
Like anything else, winter bikepacking has its own set gear necessities, considerations and refinements. Given that locals always have their own take on the subject, we asked Dave to share some general tips on winter riding with us, and talk us through what he might pack on a typical winter trip, and the philosophy behind his choices.
1. Layering is key
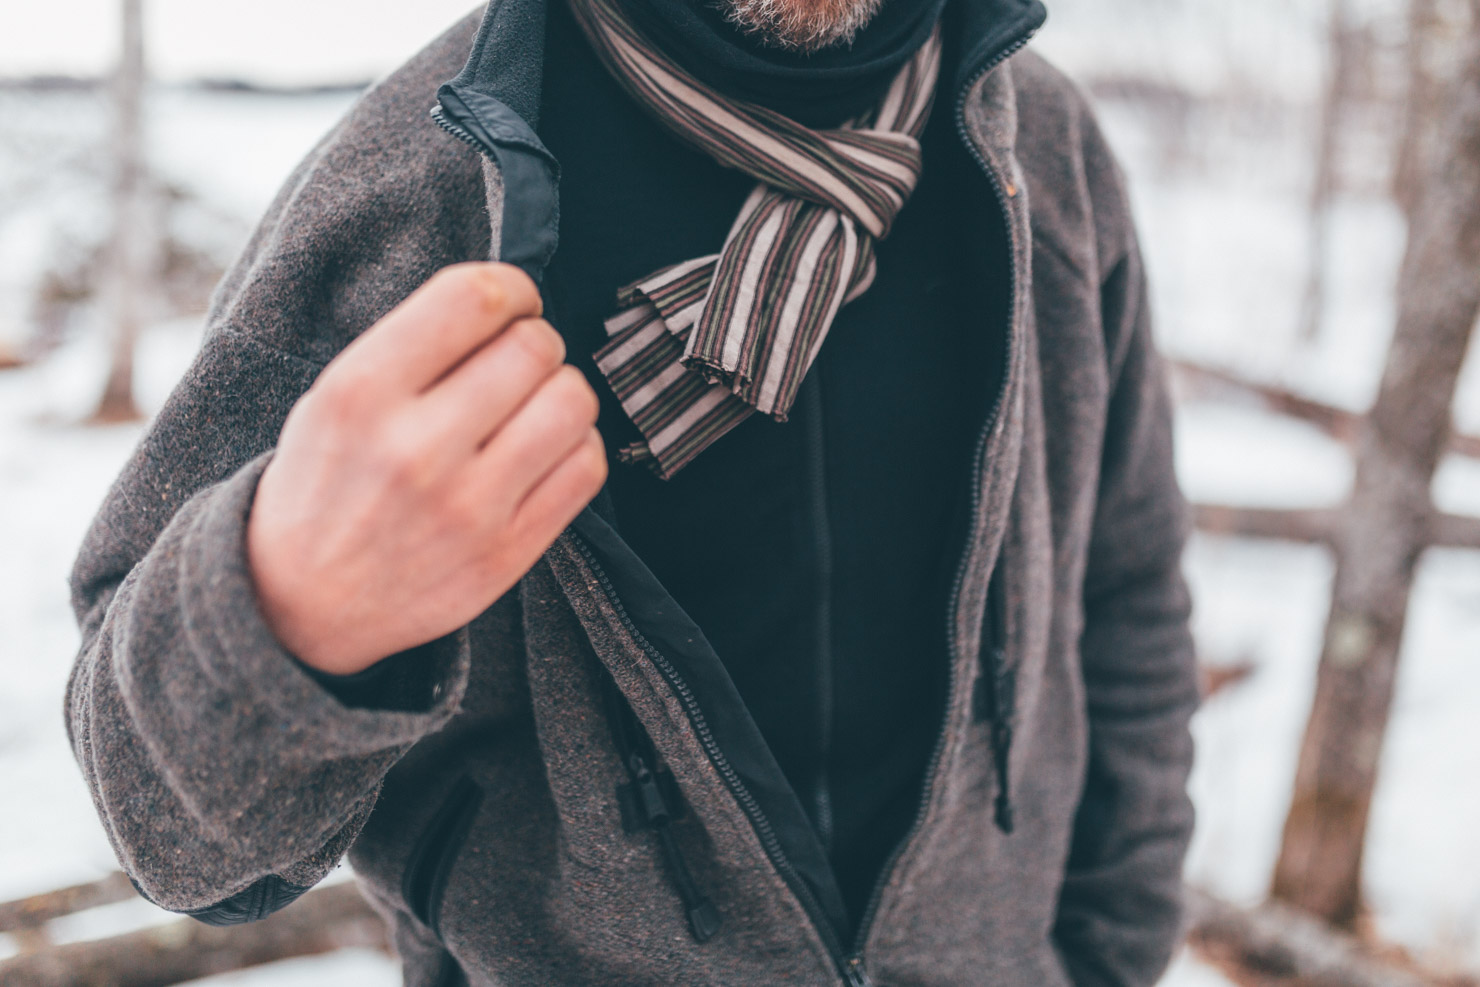
This is a big deal with it comes to winter bikepacking. The prevention of overheating – and sweating – is one of the most important tactics that can be used to keep insulation dry and working most effectively. As such, a layering system allows the addition and removal of clothing to regulate body temperature. Several thin insulating layers will be warmer than one thick layer, because layers trap air between them, and still air acts as an insulator.
When it comes to winter riding, cotton kills. It traps moisture, dries slowly, and retains very little insulating value when it’s wet. Cotton can, however, be a very effective wind-blocking outer layer in cold/dry conditions. Traditional anoraks, used in arctic climates, are made from lightweight cotton.
As for wool, it is an incredible material for winter garments. It can be found in many different weights and knits. And it retains much of its insulating value if it gets wet. Thin merino wool base layers wick moisture away from the body, while providing warmth and comfort. Mid-weight layers add insulation and carry moisture to the outer layers. Outer wool layers should be rougher and tougher than inner layers, so they won’t be damaged from contact with branches and the inevitable crash.
Additionally, outer layers must breath and allow moisture to escape. A shell that doesn’t breath will trap moisture inside it and compromise your insulation. ‘Breathable’ plastic membranes stop working when the pores in the fabric get clogged with dirt and oil. That typically doesn’t take very long. Buyers, beware: don’t believe the hype. Synthetic shells are, however, essential for blocking wind, rain, and wet snow. And they help to hold in warmth. But I know they must be managed carefully (vented or removed) when I’m overheating and perspiring.
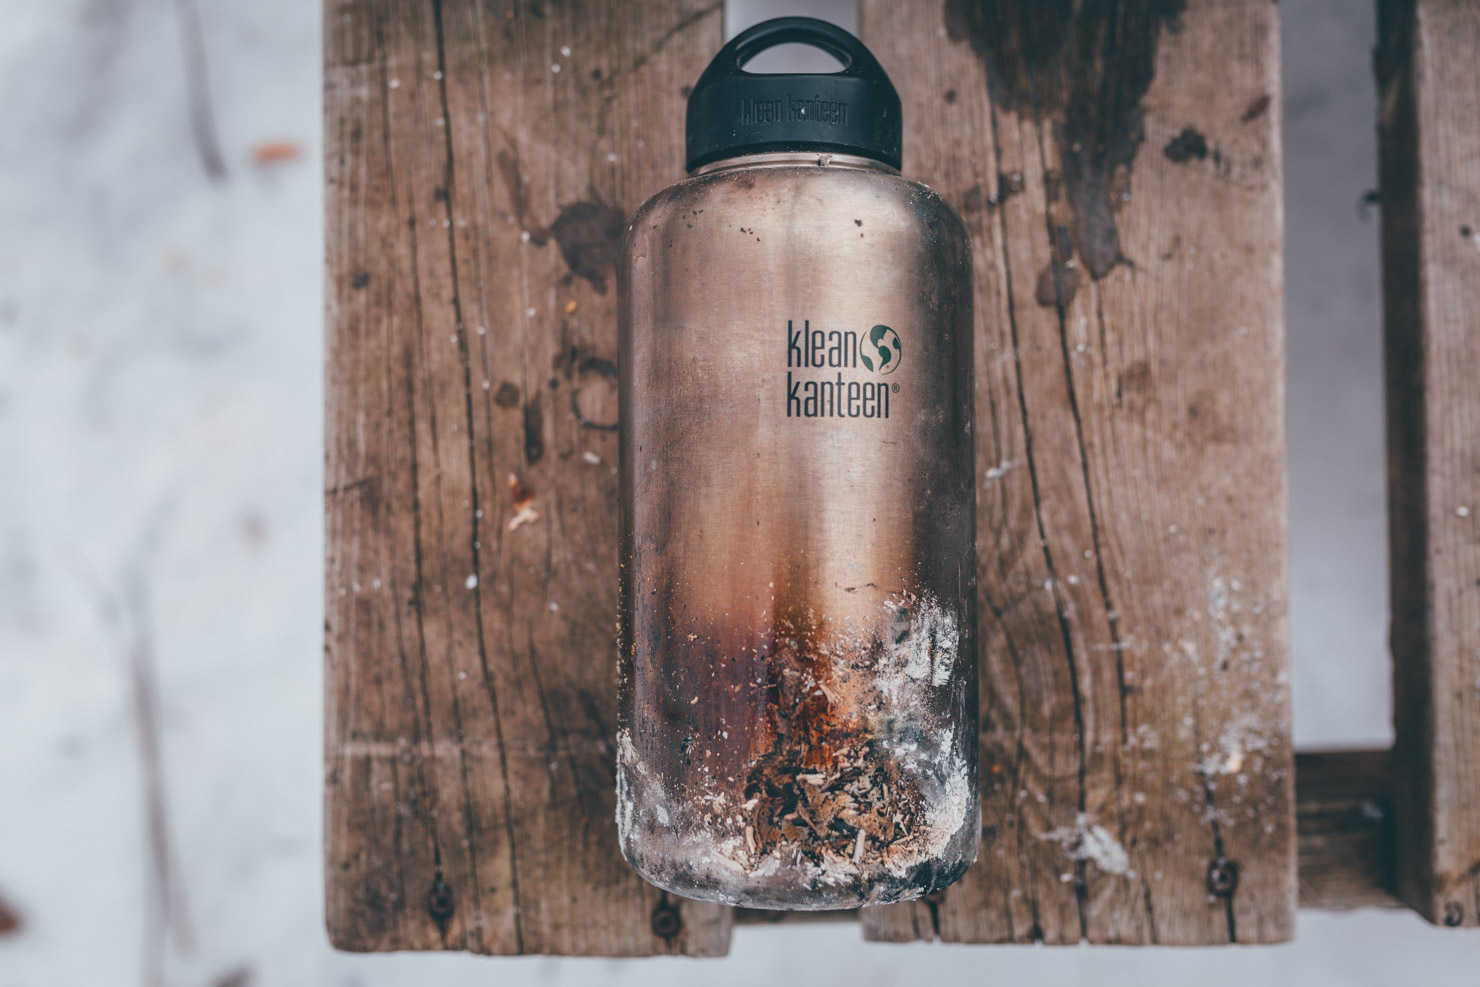
2. Kleen Kanteens
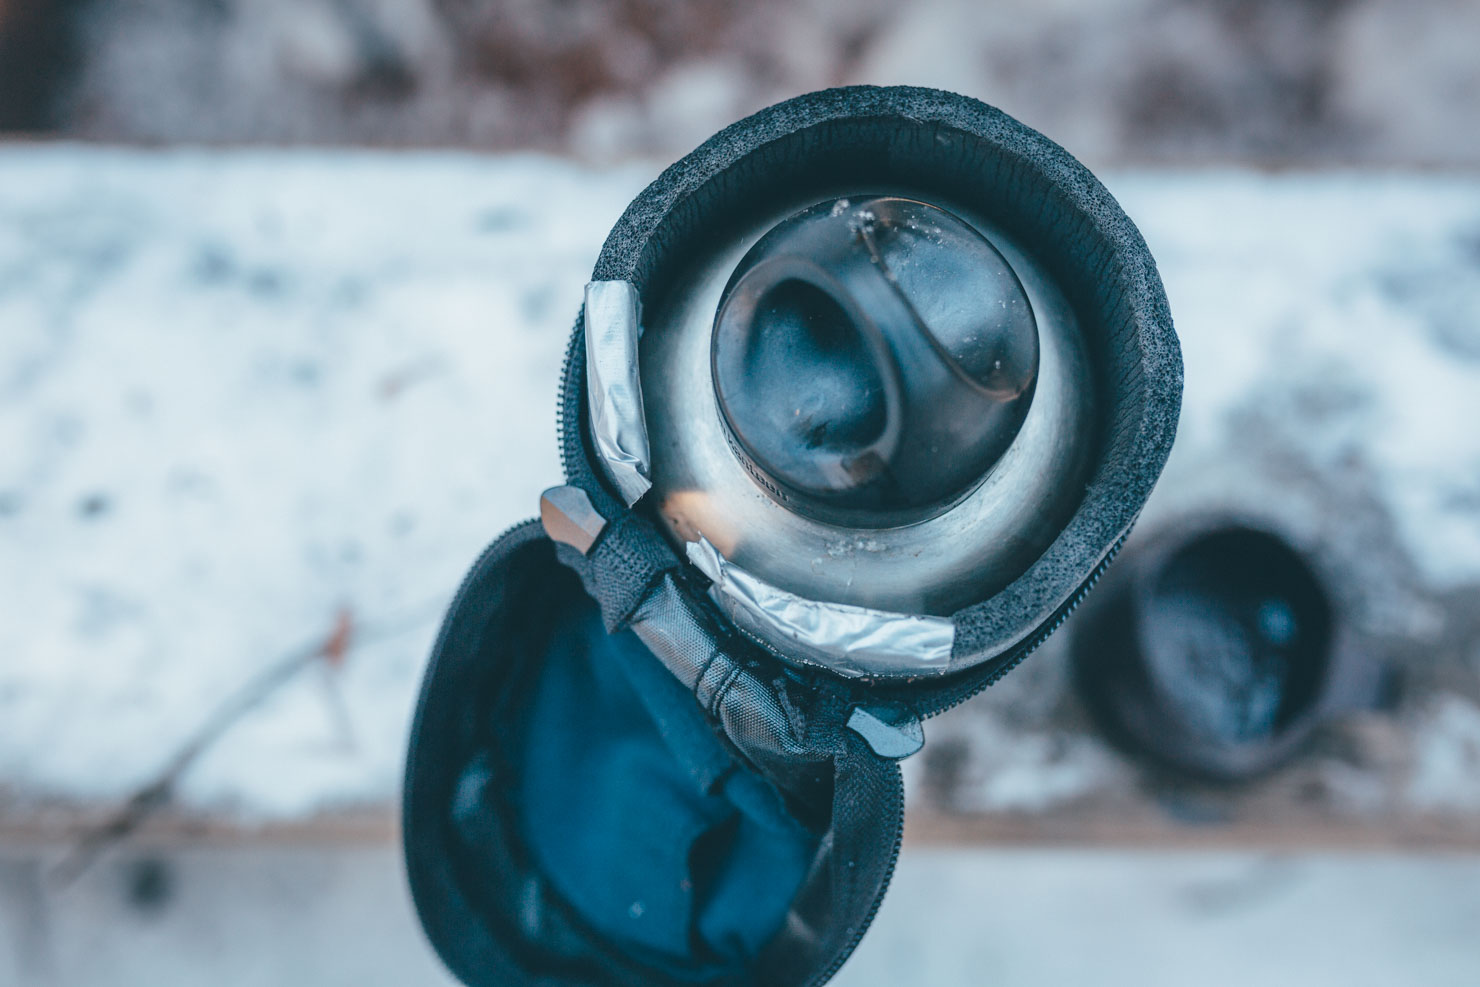
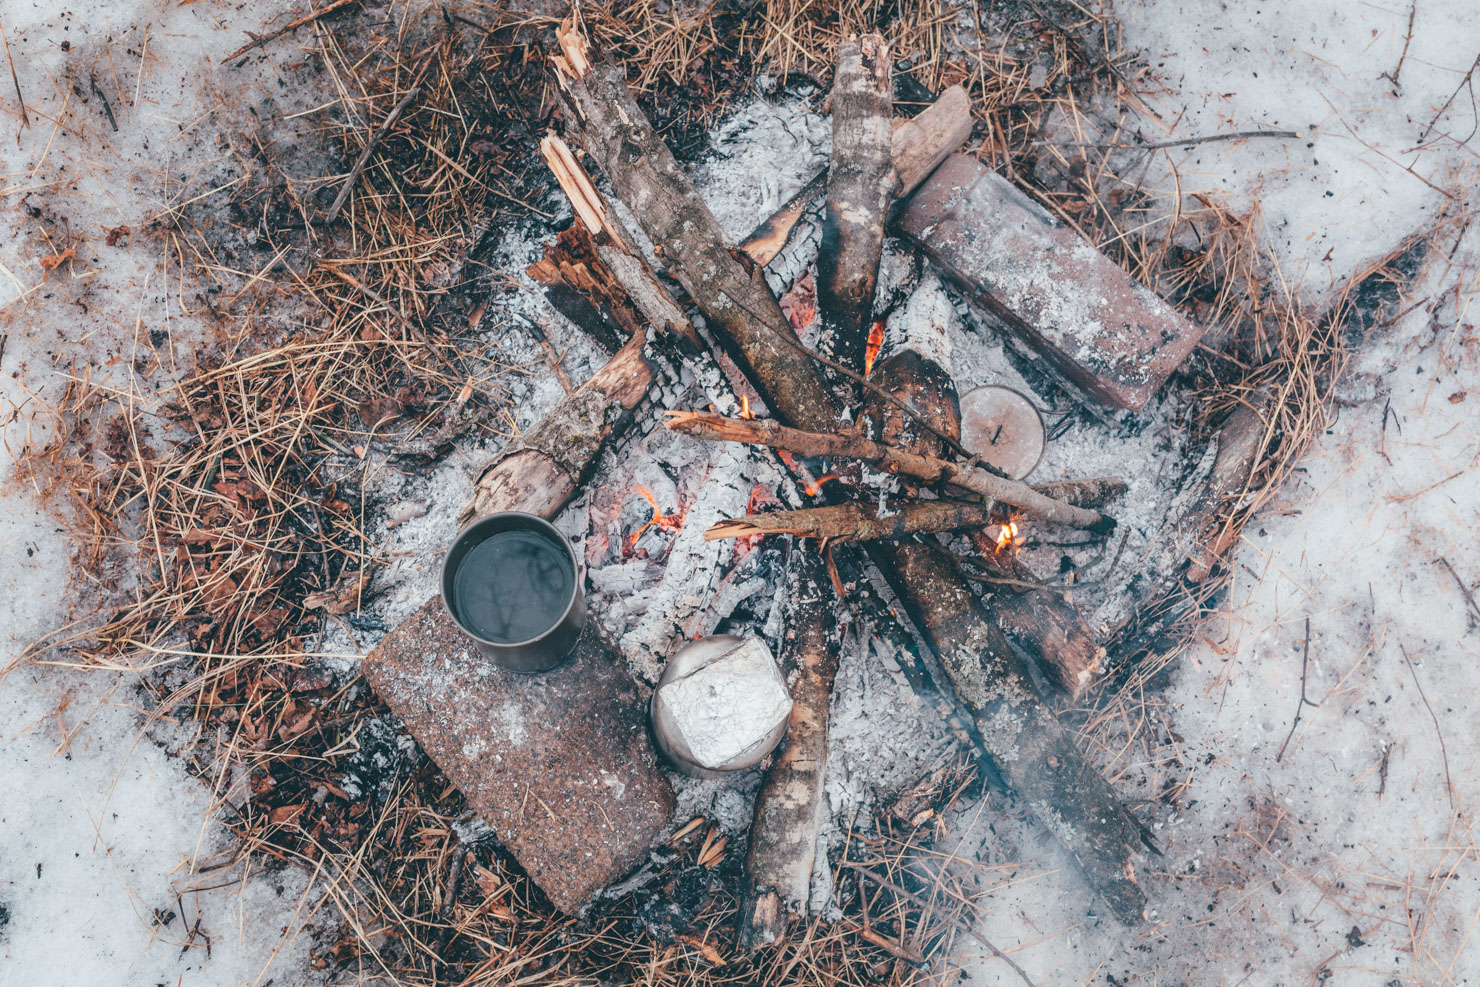
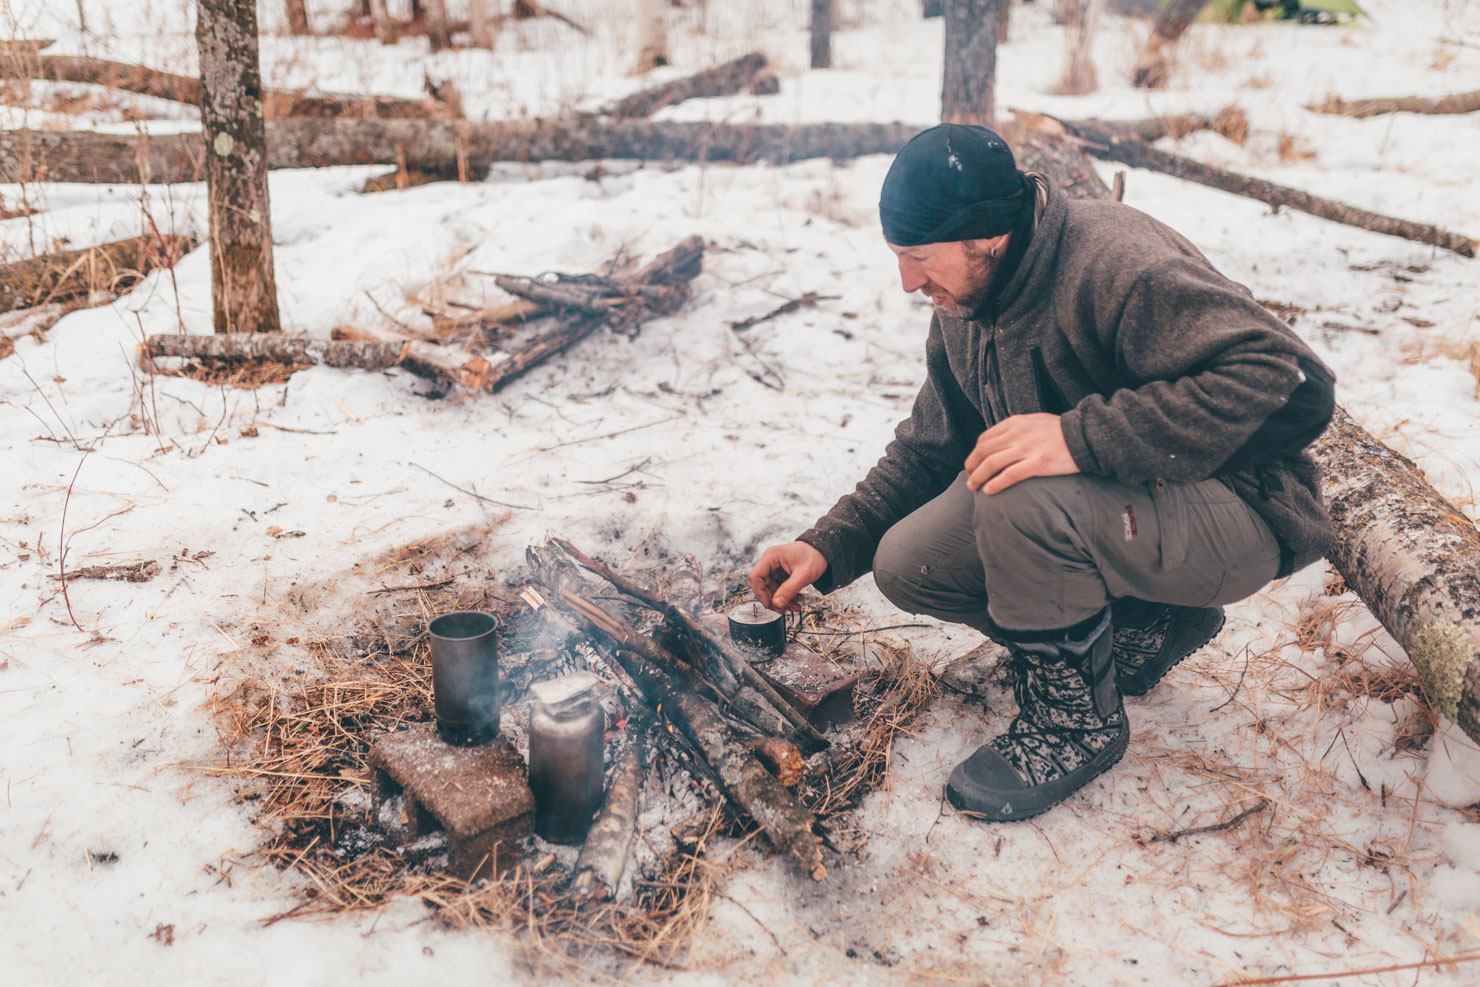
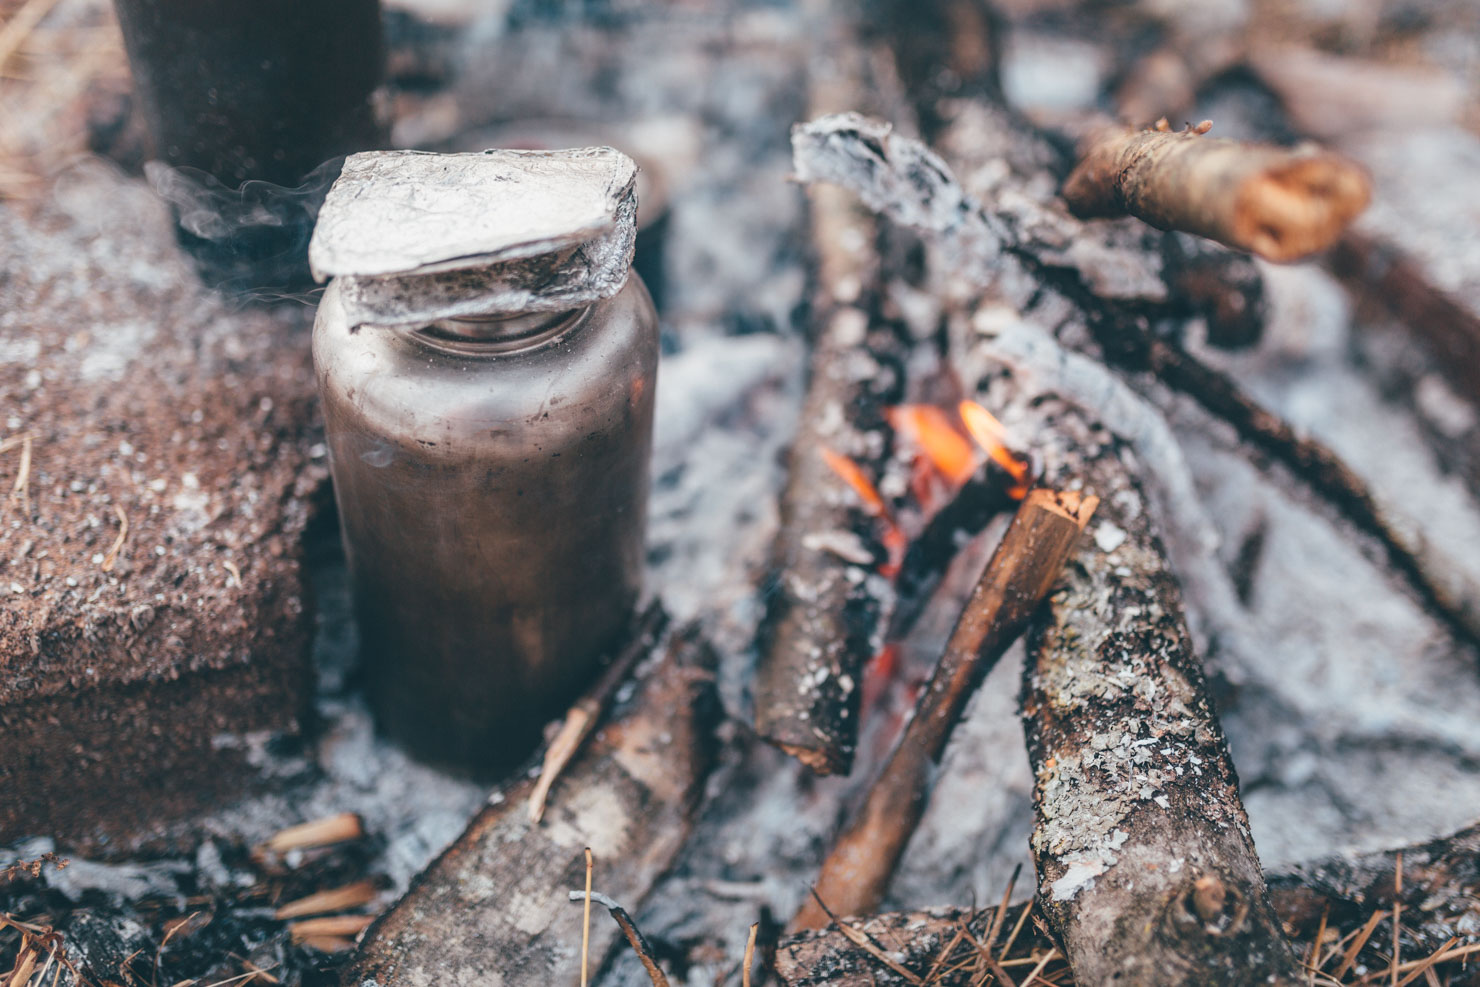
Single-wall Klean Kanteens can be insulated using off-the-shelf insulated water bottle bags/cozies. And it’s pretty easy to make an insulating bottle cozie from closed-cell foam and some duct tape. I prefer to carry single-wall unfinished Klean Kanteens, because they can be placed in a fire or on a stove and used to melt snow and warm/boil water. Widemouth models are preferred, in case water freezes over and needs to be cracked.

3. Use lithium batteries
Lithium batteries are less affected by cold than alkaline batteries. They are more expensive than alkalines. But you won’t be thinking about the money you saved on your alkaline batteries when they fail in the field, due to cold temperatures.

4. Carry a reflective tarp
I usually carry a reflective tarp to use as my ground cloth when I’m sleeping. It reflects body heat that would normally be lost into the ground beneath the pad. Otherwise, it can be used as a heat reflector, to warm my backside and create a microclimate when I’m next to a fire. It’s also robust enough to be used as a makeshift shelter, if the need arises.

5. Don’t forget some aluminum foil
I always carry a folded sheet or two of aluminum foil… roughly 12” x 24”. It can be used for cooking food, reflecting light and heat, and as a cover for my Klean Kanteen or small cookpot while it’s sitting in the fire. It can be used dozens of times. It weighs very little and takes up little space. And when it has come to the end of its useful lifecycle, it can be recycled.
6. Regarding knives
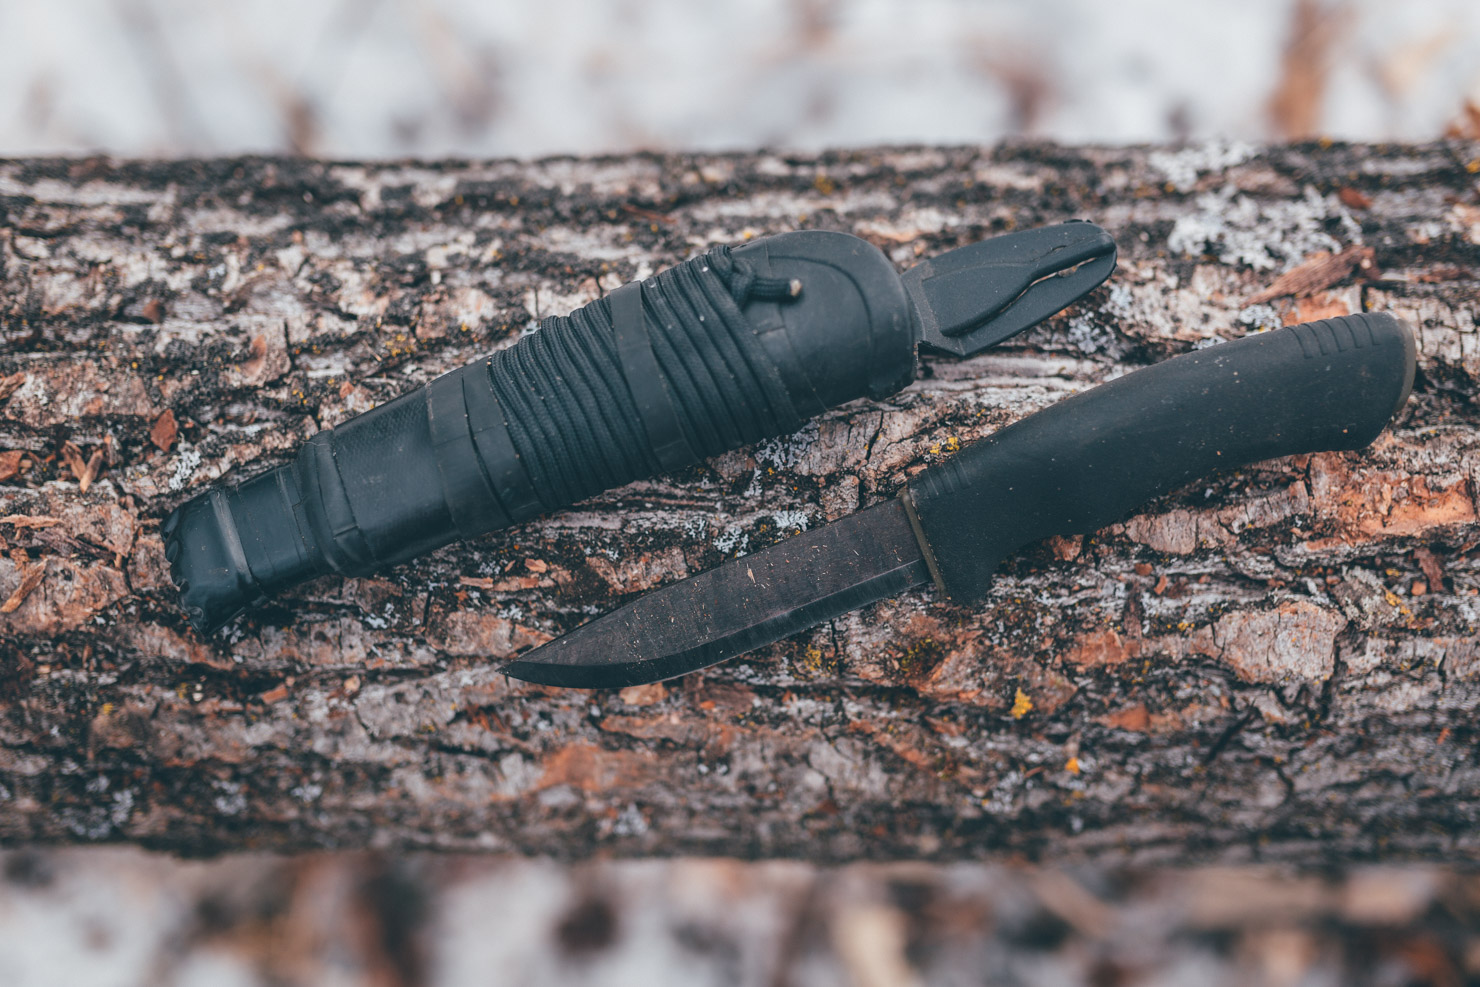
On our trip in Duluth, I had my Mora Bushcraft knife (carbon steel blade), my Opinel 7 folding knife (carbon steel blade), my Leatherman Squirt PS4, and the full-size Leatherman multi-tool that lives in my bike tool kit. If I’m on my bike, there’s a very good chance that all 4 knives will be with me.
The Mora is used primarily to process firewood… shaving and splitting. It usually stays in my daily-carry survival kit. I love my Mora knives. It’s hard to beat Swedish steel. The sheath is the stock plastic Mora unit, with 550 cord, electrical tape, Gorilla Tape, and sections of inner tube affixed to it. The Opinel is my front-pocket everyday-carry knife. It’s legal to carry most places. I use it most on a daily basis. Good size, inexpensive, easy to sharpen, and holds a nice edge. The Squirt PS4 is always on my key lanyard, along with two micro LED lights… one red, one white. I probably use the scissors, screwdrivers, and bottle opener more than I use the blade, but it’s nice to have.
7. Regarding saws
I generally pack a Bahco Laplander with a 180mm (7”) blade and an Oregon folding saw with a 135mm (5.25”) blade. The Oregon is my everyday-carry tool. It has a permanent spot in my kit, because it’s small, lightweight, and sharpens easily. The Bahco gets added when I anticipate the need to saw larger logs, for larger fires or potential shelter-building tasks.
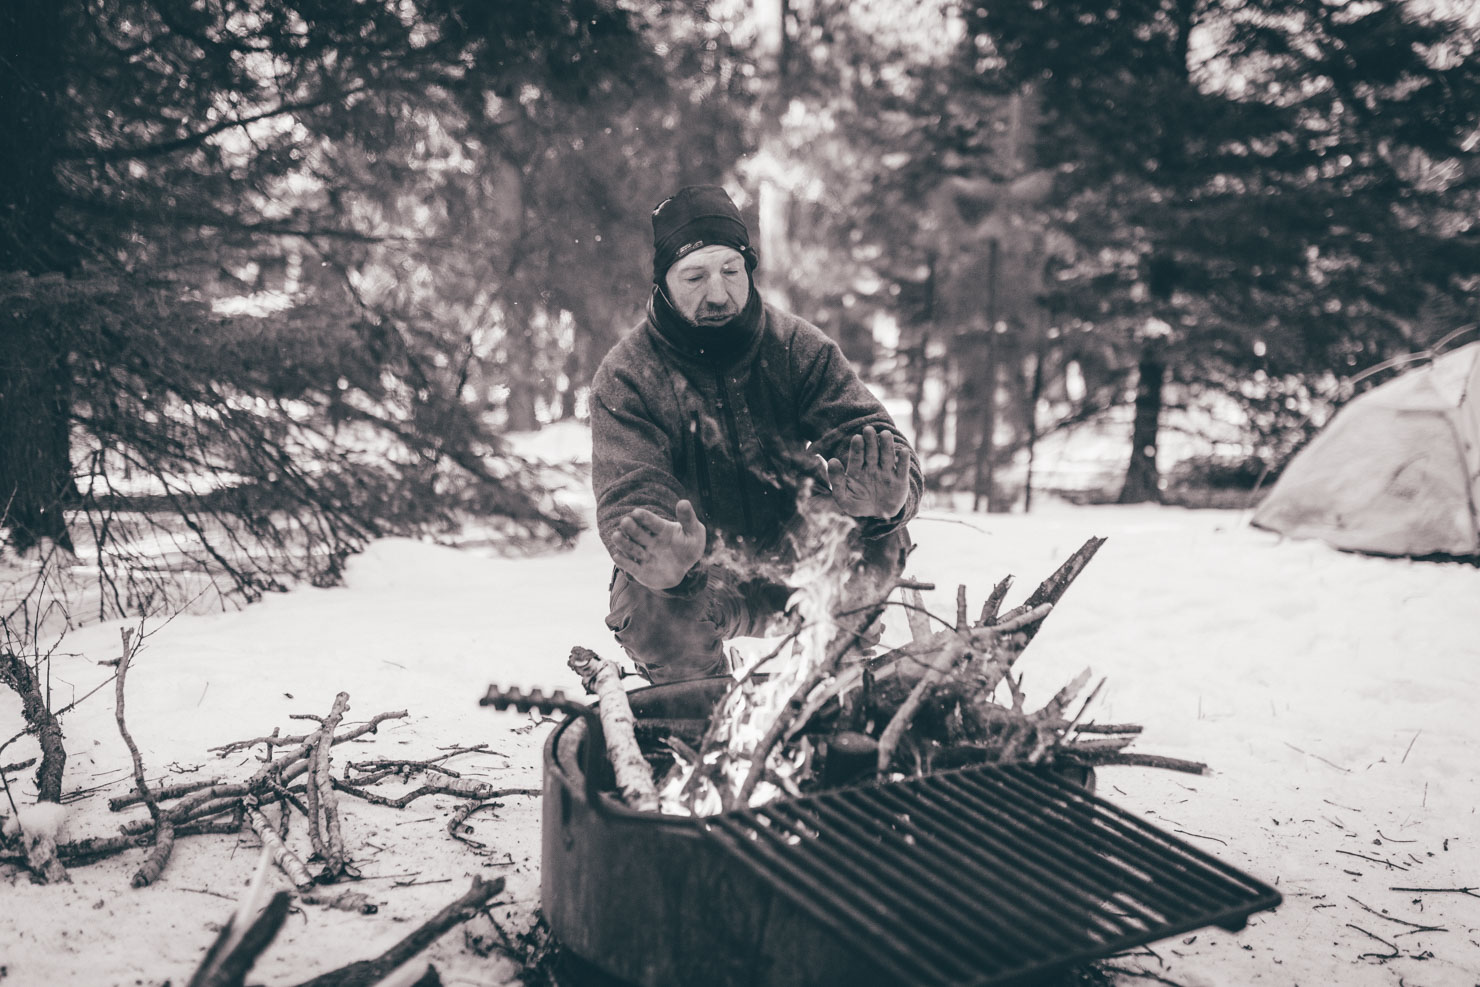
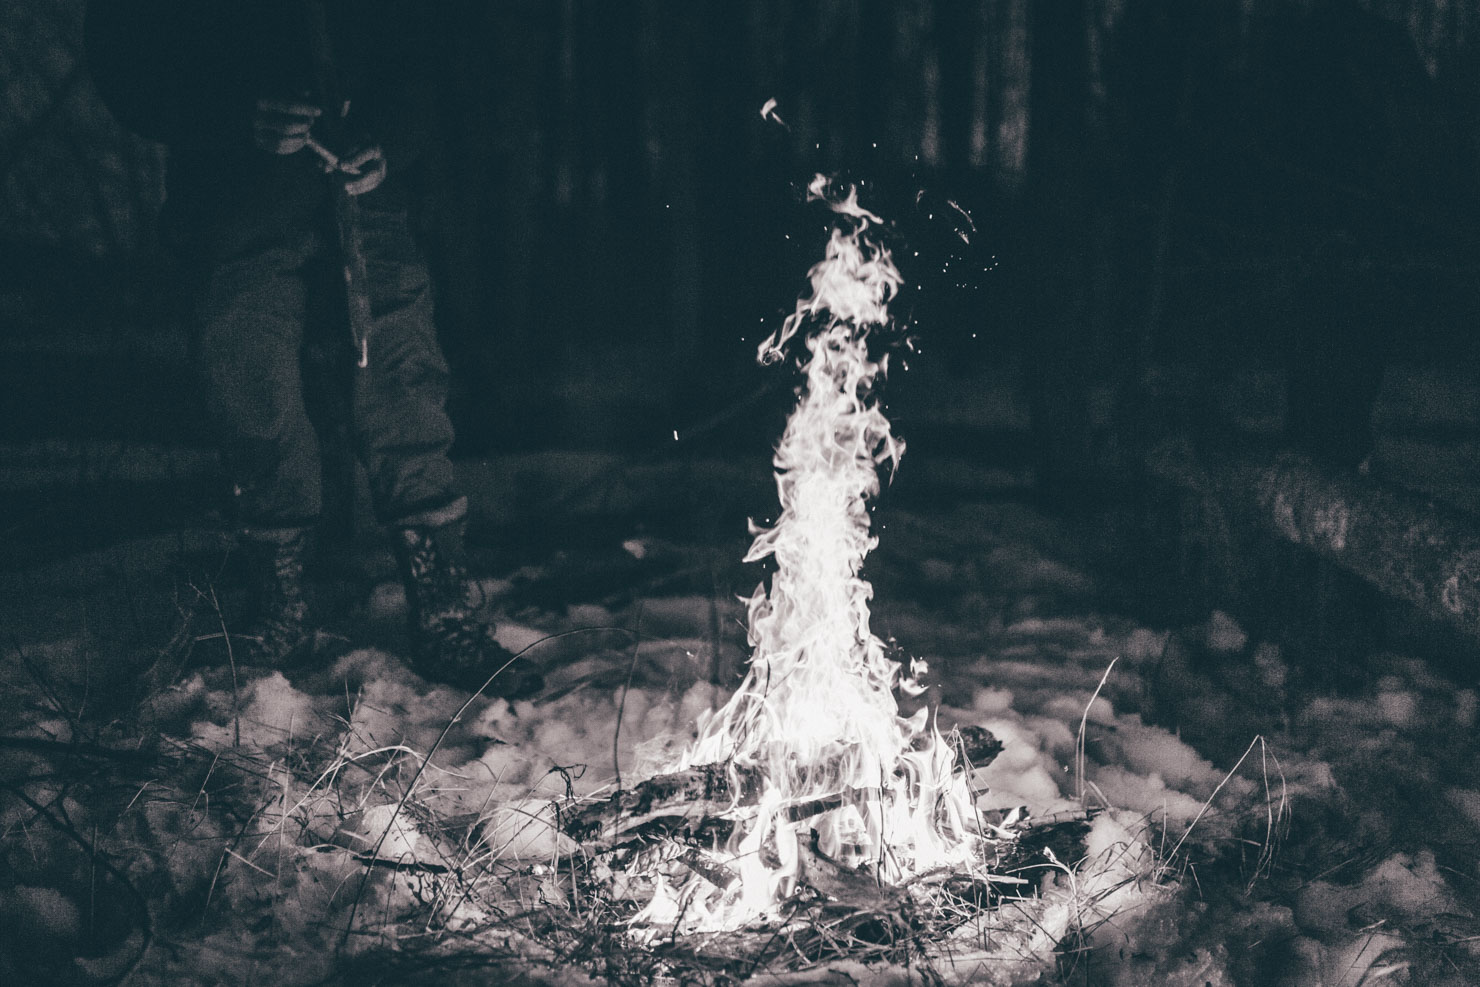
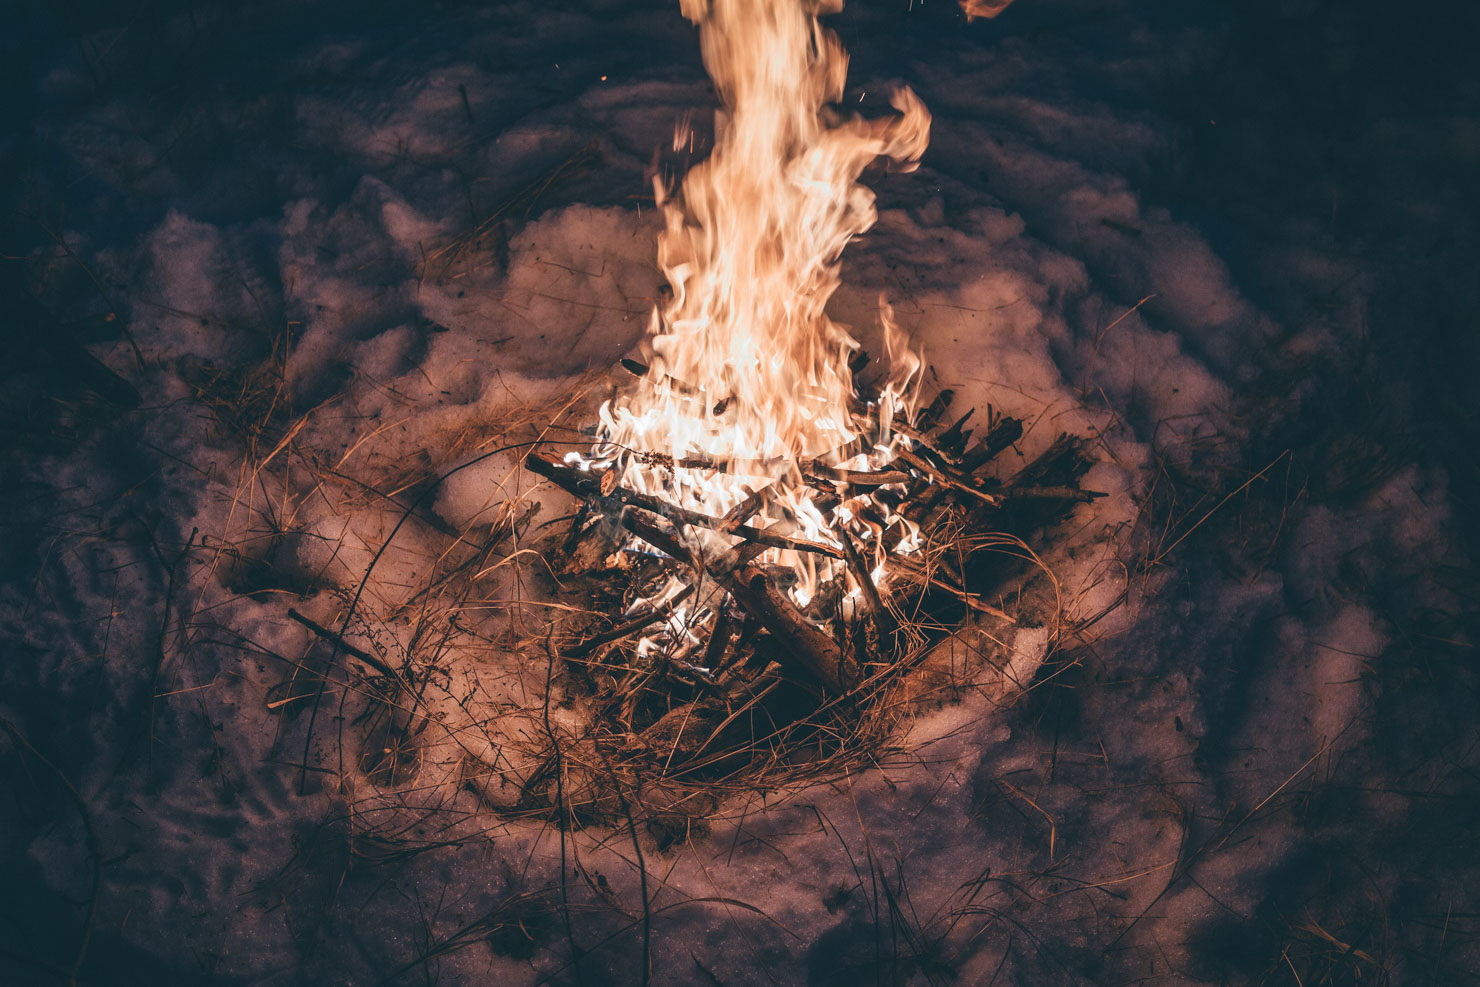
8. Fire building
Gather more wood than you think you’ll need, and have plenty of small stuff around to generate a lot of heat quickly. I’ve watched dozens of fire attempts fizzle when the builder (myself included) tries to add wood that is too big.
Every fire should be a one-match fire. Don’t light it until you are confident that you have put everything in place to guarantee success on the first go. A few extra minutes of preparation on the front end can be the difference between success and failure. Remove as much snow as you can from your fire area. Pack down what you can’t move, to give yourself a stable base to build upon. Then create a 2-3 layer lattice of criss-crossed sticks – 1” in diameter is about right – on top of your snow, ice, or frozen dirt. Your lattice is now your platform to build your fire. It provides a means for oxygen to get to your fire from underneath, and it keeps your fire away from moisture while it’s getting established.
Make sure your wood is dry. Frozen green/wet wood often breaks like dry wood. It can be deceiving.
To produce some prime firebuilding wood, split some of your logs, lengthwise, using an axe or a sturdy knife and baton. I never ride or hike without a 4-5” fixed-blade knife in my kit – mainly so I can split wood if I need to. Seasoned wood that’s wet on the outside will likely be dry on the inside. And there are more fibers exposed to ignite when you split a piece of wood into several thin pieces. It may be the only means to procure dry wood, in some cases. The act of splitting wood will likely warm you up a bit, too. So practice batoning logs the next time you build a fire, even if you don’t need to. Learn how to make a featherstick, too.
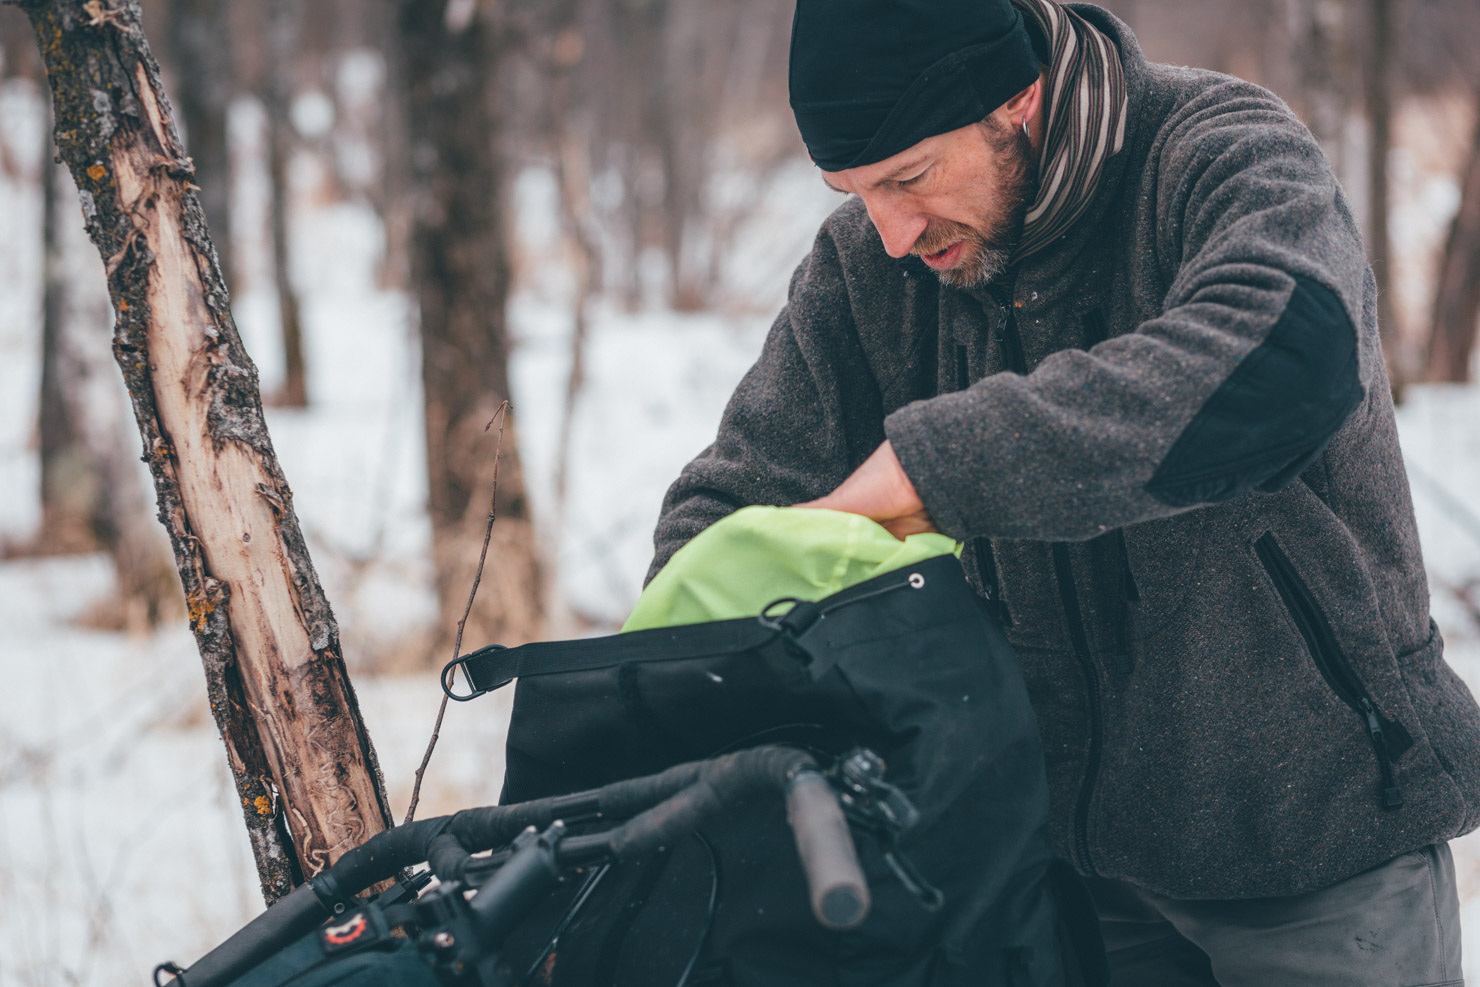
9. Mindful packing
Be mindful of what you’ll need to access while in transit. My shelter, ground cloth, sleeping bag, and camp-specific items are usually buried deep and packed tightly. Snacks, water, riding layers, tools, lights – and anything else that might be utilized while riding – are placed in easily-accessible areas on the bike or on my person, in pockets. Buckles can be hard to fasten and adjust with cold fingers, so bags that use compression straps shouldn’t be used to store those items that you might need to use frequently. Uncompressed zippered or Velcro’d bags tend to work better for those oft-used pieces of gear. Racks and rack bags can be good alternatives to compressed seatbags and handlebar bags for these reasons.
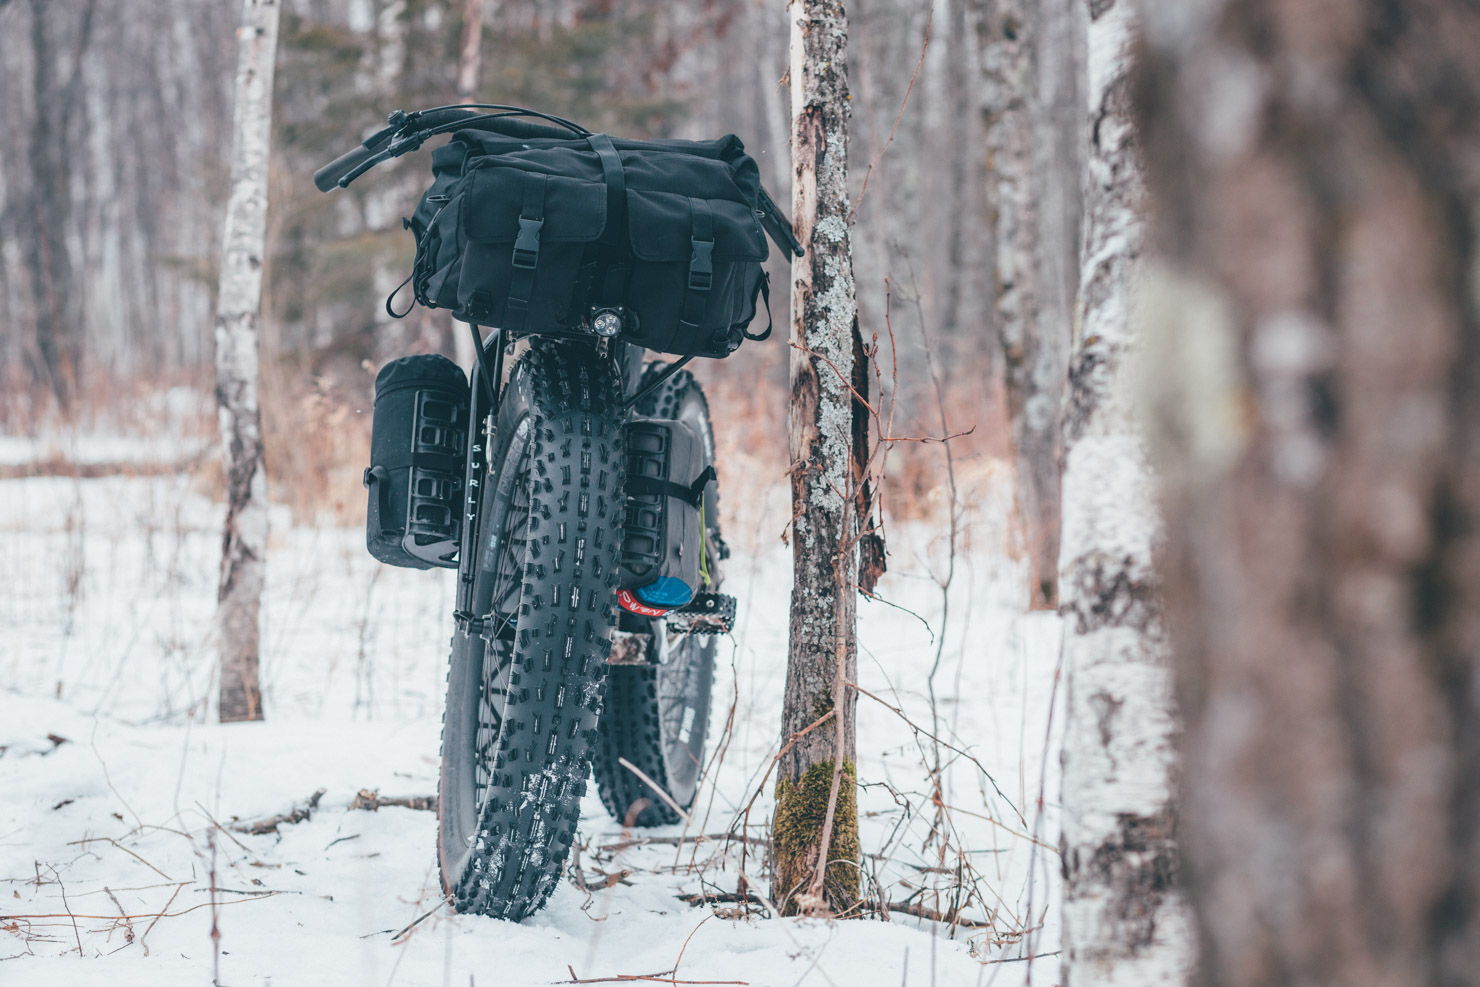
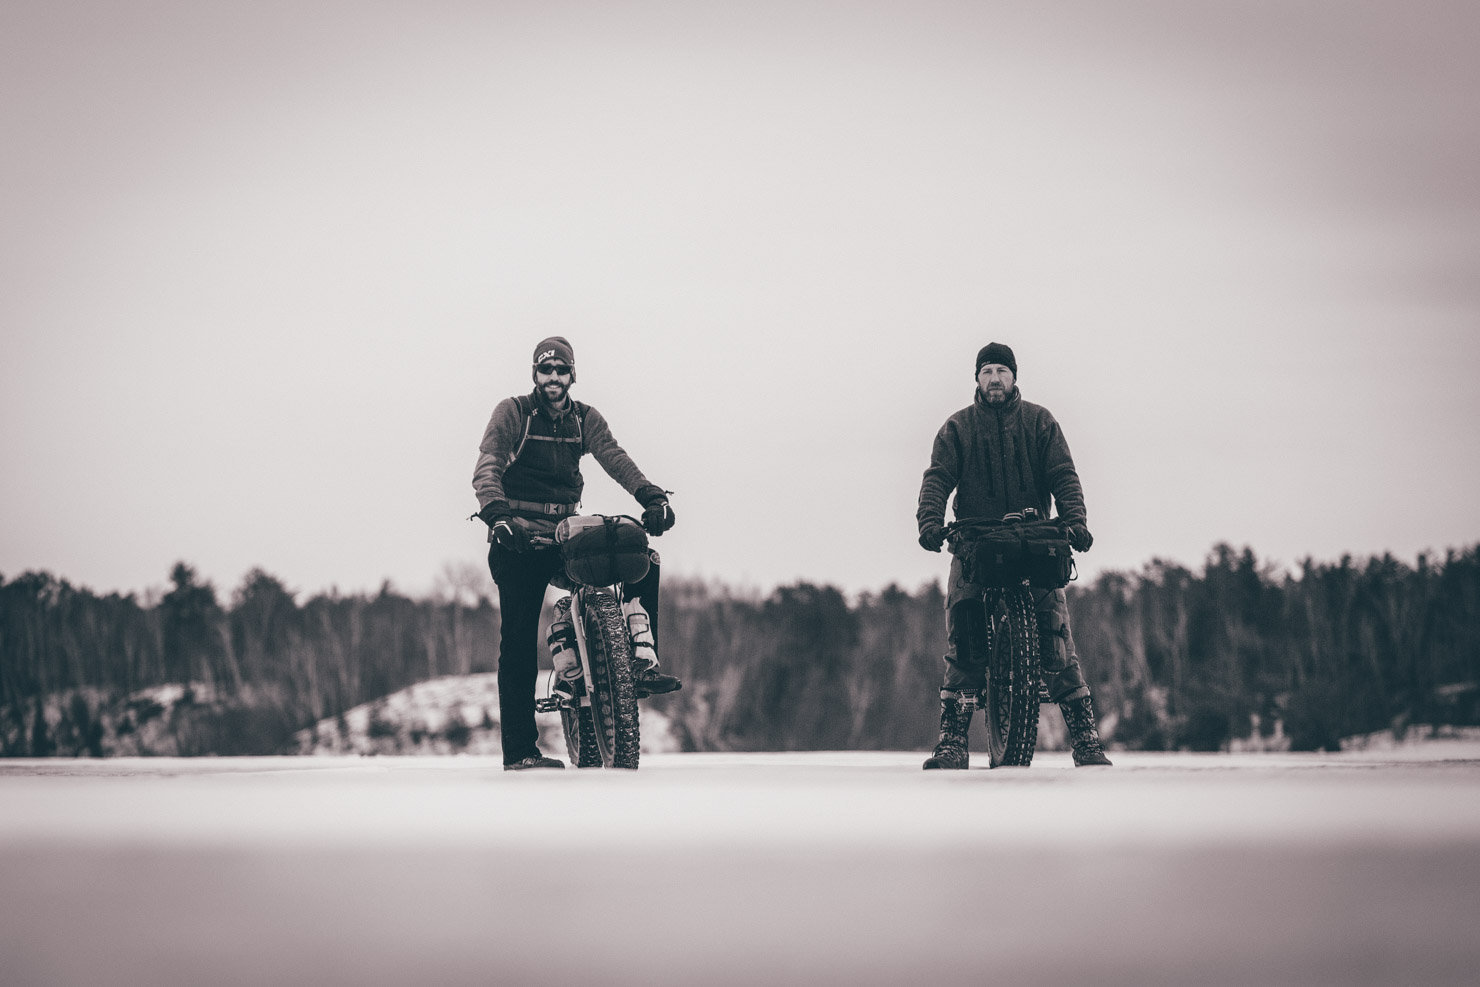
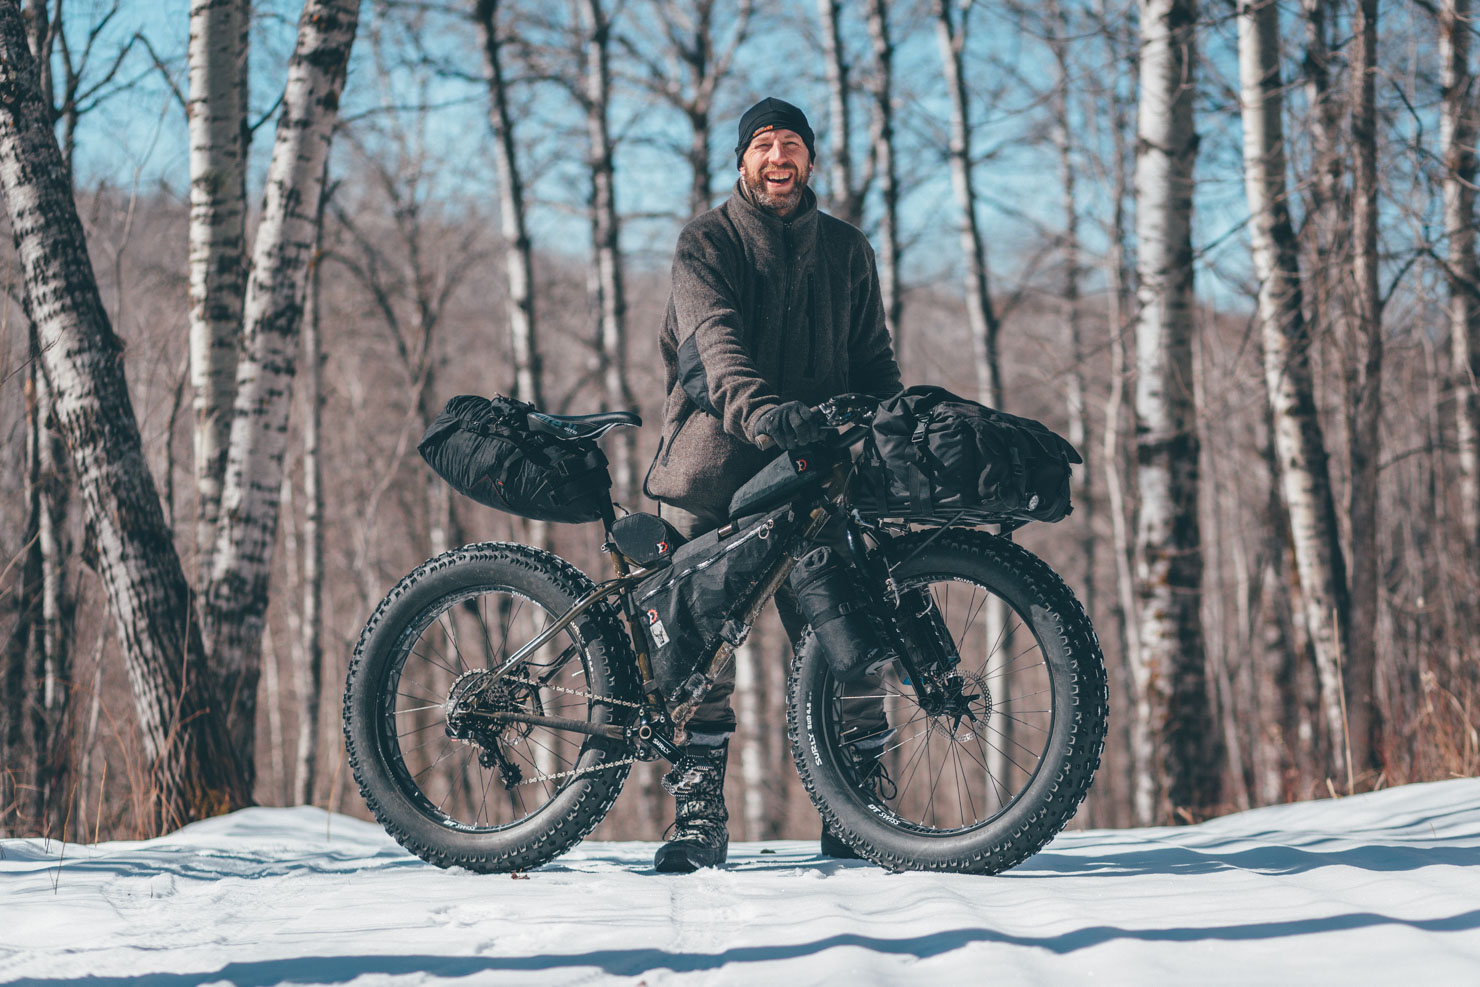
The Bike
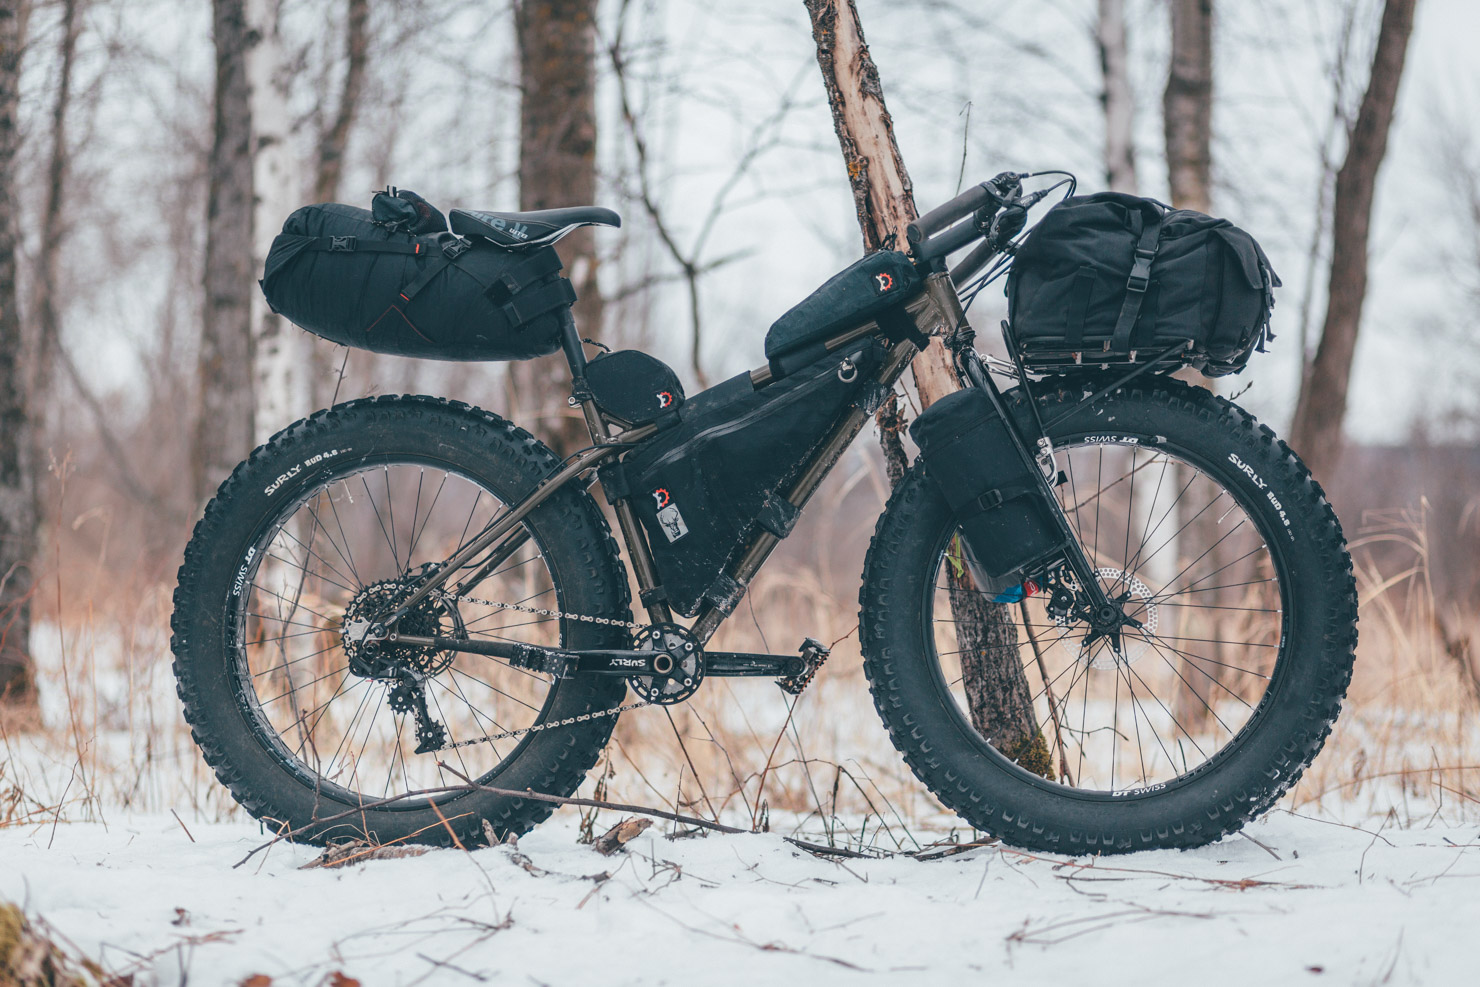
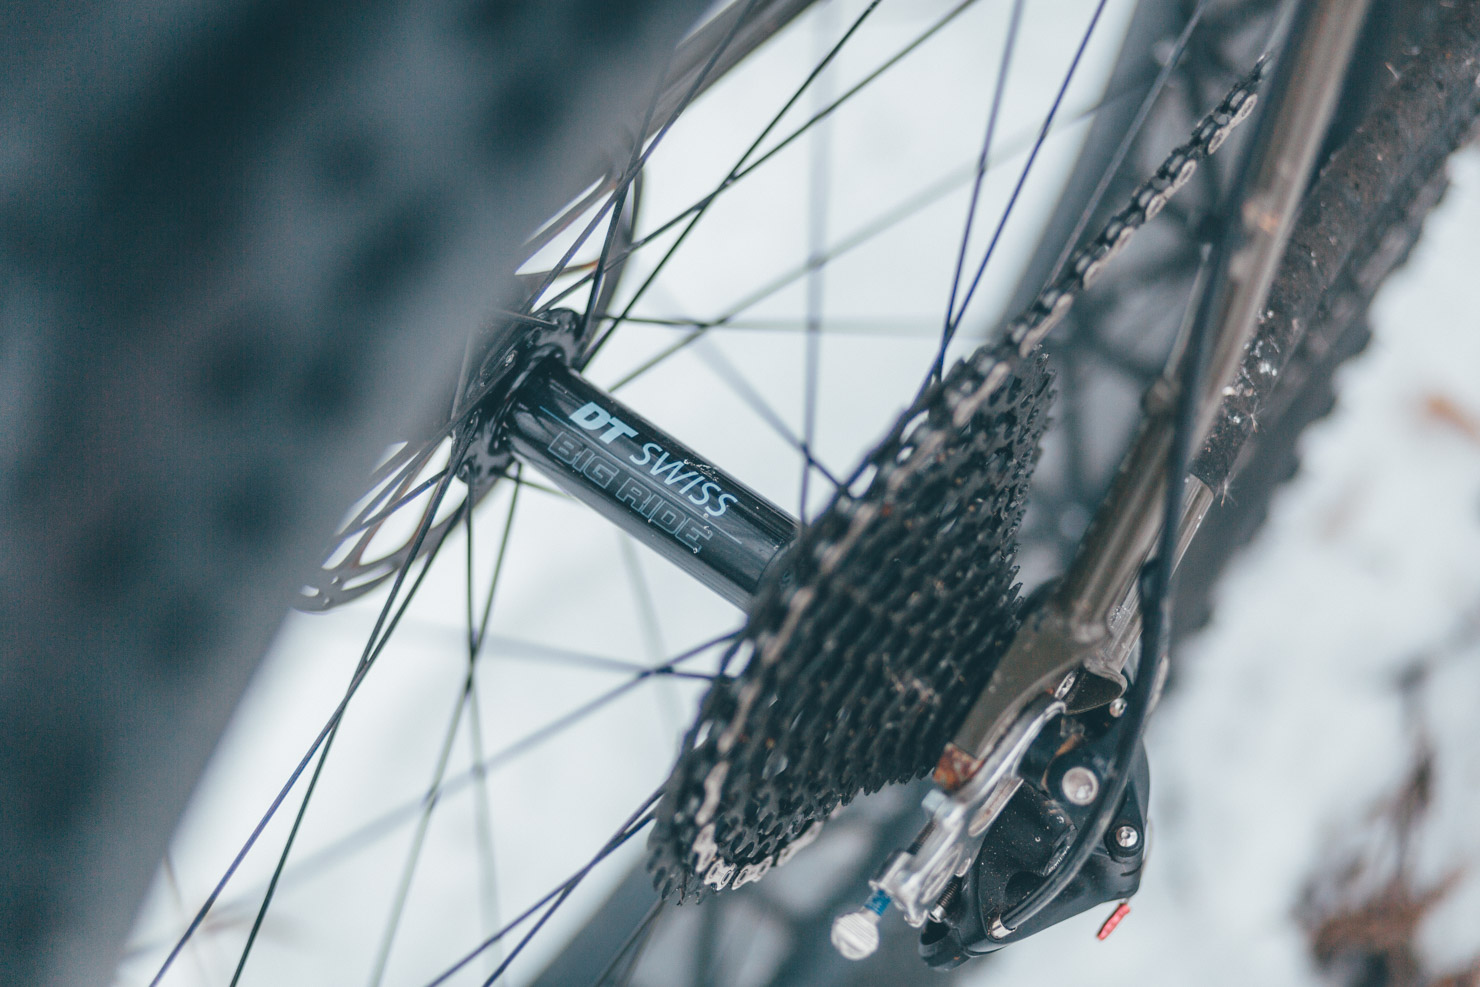


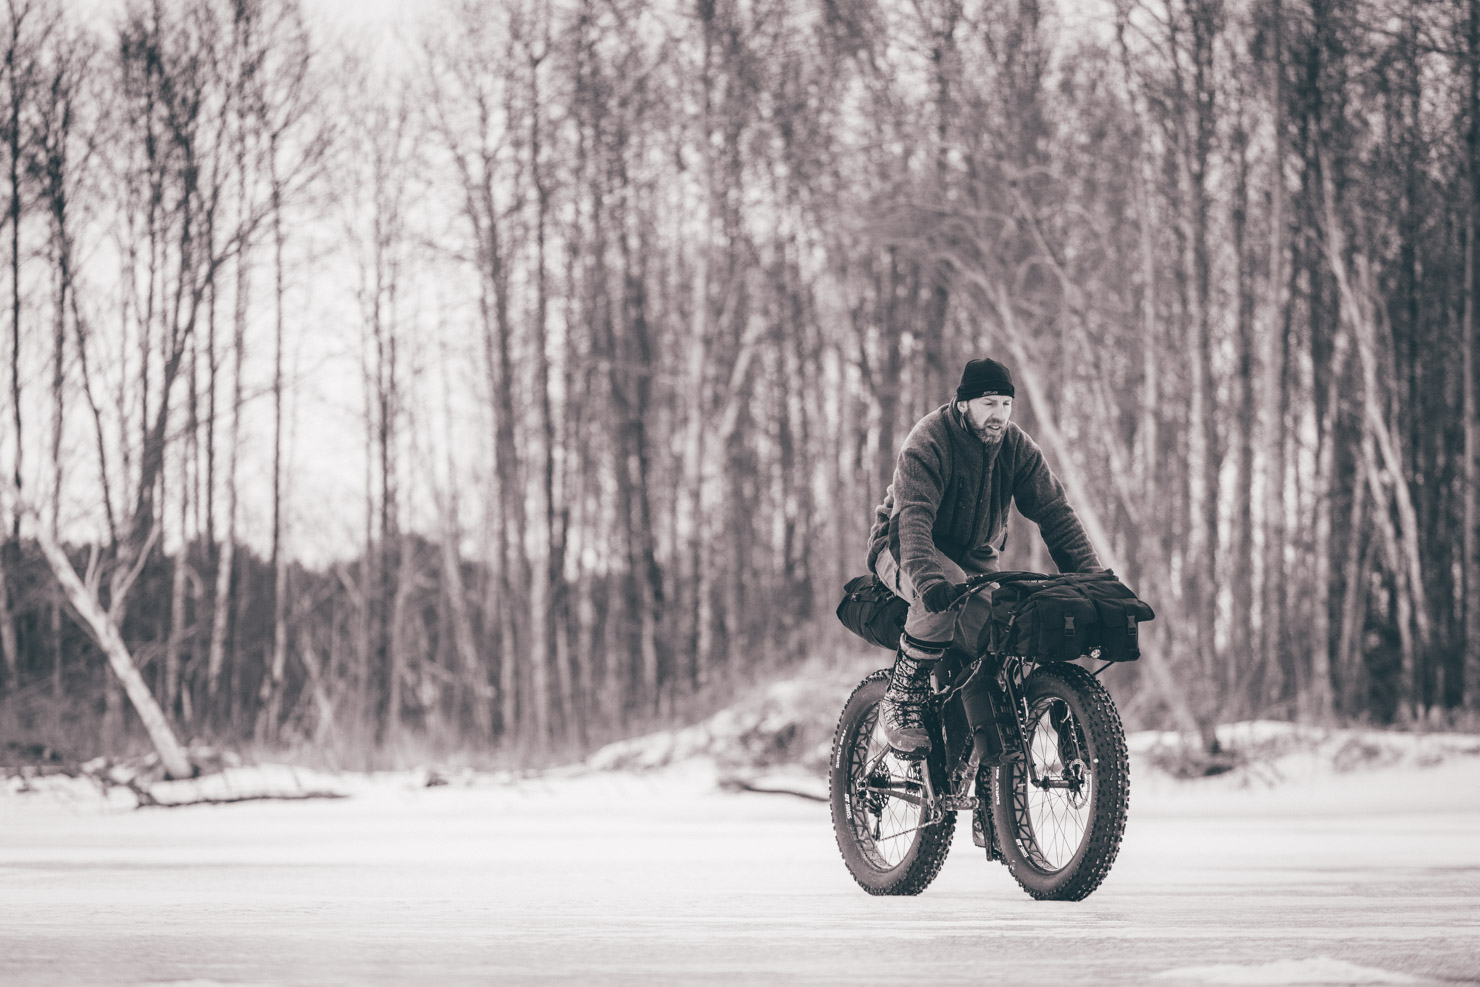
For our winter ride, Dave rode a pre-production Surly Ice Cream Truck in his preferred – and easily camouflaged – powder coat hue. He used a combination of Revelate soft bags, along with Surly’s Porteur House bag atop of a 24-Pack Rack. In terms of gearing, he ran a 26t Surly stainless 58mm BCD ring, mounted to a Surly O.D. Crank, with a SRAM 10-42t 11spd cassette. A Microshift thumbie proto did the shifting. DT provided the wheels… DT 350-equivelent hubs laced to their 80mm rims, using DT Comp spokes and alloy nipples. Dave says, “DT was kind enough to send me some pre-production ICT-spec’ wheels for last year’s AH135 race. I don’t trust anything but DT hubs in the extreme cold. Their ratchet-ring drive system is amazingly dependable in all conditions. I have run Rohloff hubs at low temperatures, after thinning the hub oil with their cleaning solvent. But I wouldn’t use a Rohloff in extreme cold. Too much drag inside the hub and potential for clickbox freezing. My only cold-weather failures, with my Rohloff, were due to a frozen clickbox.”
As for general setup advice, Dave recommends replacing heavy grease in pedals and hubs with a lighter version, to reduce drag. And clean and polish your bike: less snow will stick to it, it will weigh less, and there’s less chance of bearing contamination from adhered melting snow. Thumbshifters work better than trigger shifters when wearing heavy gloves and mittens; and mittens are warmer than gloves. Platform pedals and non-bike winter boots have the potential to keep your feet warmer than clipless shoe/pedal systems. “Bike-specific shoes and boots have stiff soles that don’t allow your feet to flex as much as they do in non-bike shoes and boots… while riding and while walking around camp. Plus, there’s a chance that you already have some good winter footwear in your gear pile. You might save some cash and keep your toes warmer, if you use what you already have. Don’t be afraid to adjust tire pressure to match trail conditions. Most riders tend to run tire pressures too high, compromising float and traction in loose conditions.”
Dave’s Winter Packlist
We asked Dave to share his winter packlist – which, as you can see, is an incredibly thorough collection of gear. Treat it as a good starting point/check list to be adapted and honed for your own needs, factoring in local conditions before making your final selection. As a ballpark figure, we had lows of around 0F (-18c) in mind when we wrote this. Note that Dave’s packlist isn’t aiming to be a race-light setup. Rather, it’s a time-tested suggestion that caters for whatever conditions he’s expecting. Or not, as the case may be.
CLOTHING – inside layer to outside layer
- Feet: WSI Heatr liner socks, plastic grocery bags (as budget vapor barriers), Fox River Ragg wool socks, Vasque winter boots
- Legs: ExOfficio boxer briefs, Janewear fleece tights, RaceFace knickers
- Torso: Ibex merino wool short-sleeve base layer, Ibex merino wool long-sleeve base layer, Surly merino wool full-zip jersey, Empire Wool and Canvas full-zip Grey Fox coat
- Neck: merino wool Buff, Surly merino wool scarf
- Head: Pearl Izumi headband, WSI Flippy Hat, Walz wool cycling cap
- Hands: Defeet wool gloves, ragg wool mittens, REI mitten shells
Items I always carry: Dermatone for my face, and plastic bags, used as vapor barriers, worn on my feet between my thin liner socks and my thick wool socks.

Sleeping
- Sleeping bag; I choose a sleeping bag rated for the lowest temps anticipated… or lower. Sleeping bags rarely work effectively down to their published ratings. In cold, dry weather, down works well. Synthetic fill is recommended if there’s a potential for rainy or otherwise-humid weather.
- Insulated sleeping mat; for comfort and warmth, I typically use a Nemo Astro Insulated Lite. Pneumatic pads work fine, but their valves can freeze from the moisture introduced while inflating them. Warm the valve by a fire or stove to thaw it if it freezes open or shut.
- Ground cloth; I like to bring a reflective tarp to use as a ground cloth under my sleeping pad. It can serve as a heat reflector when I’m sitting or standing around the fire. And it will work as a shelter, if one is needed in a pinch.
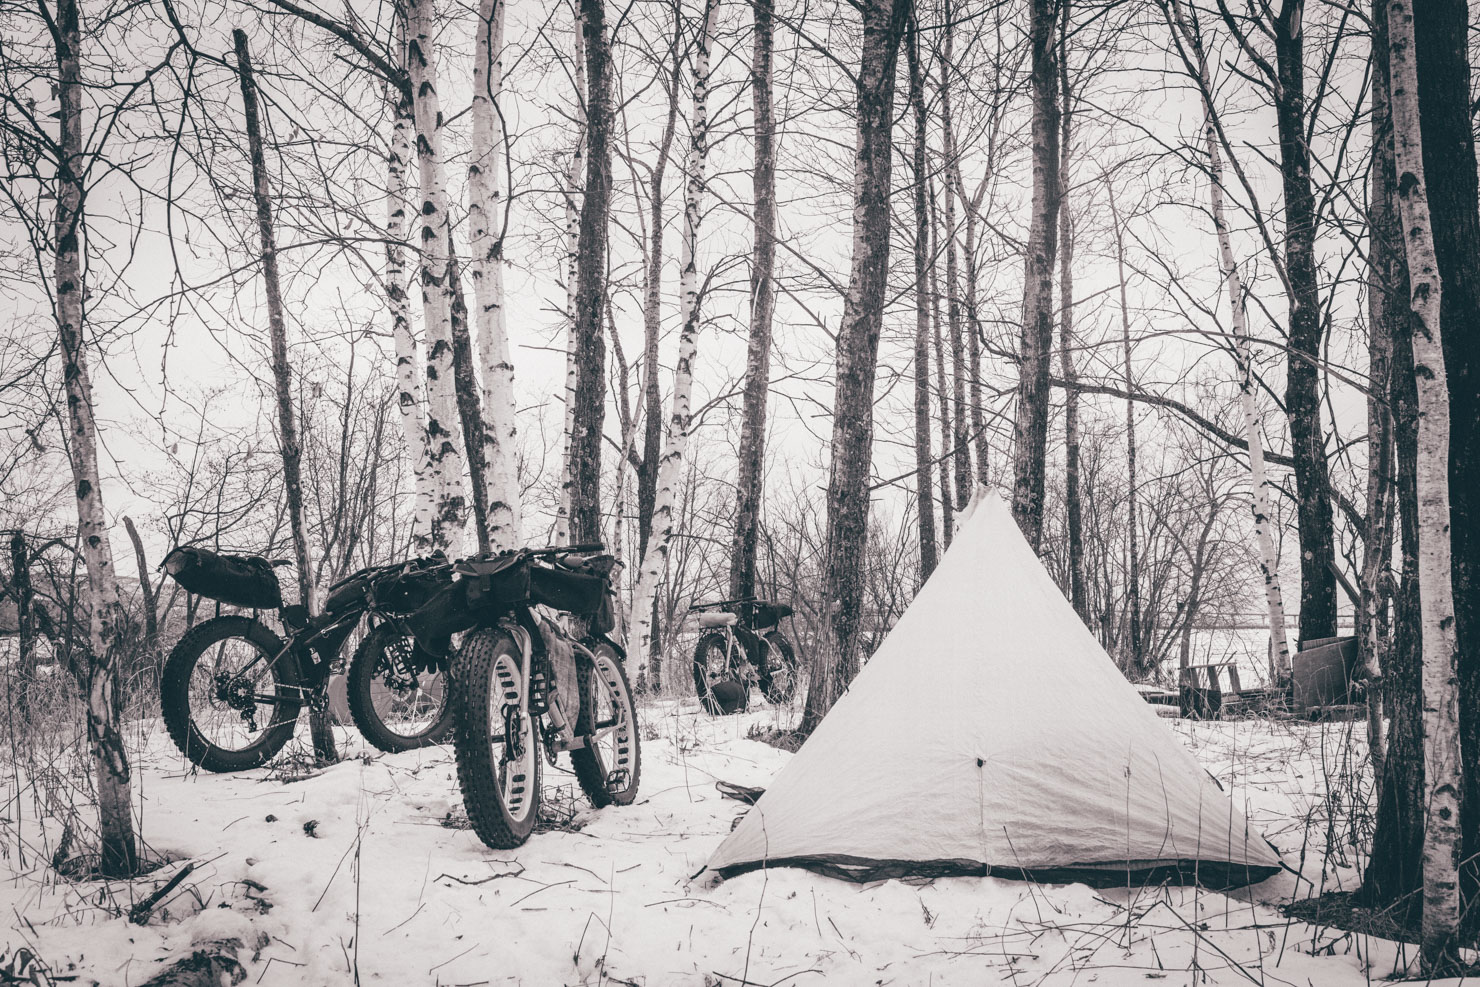
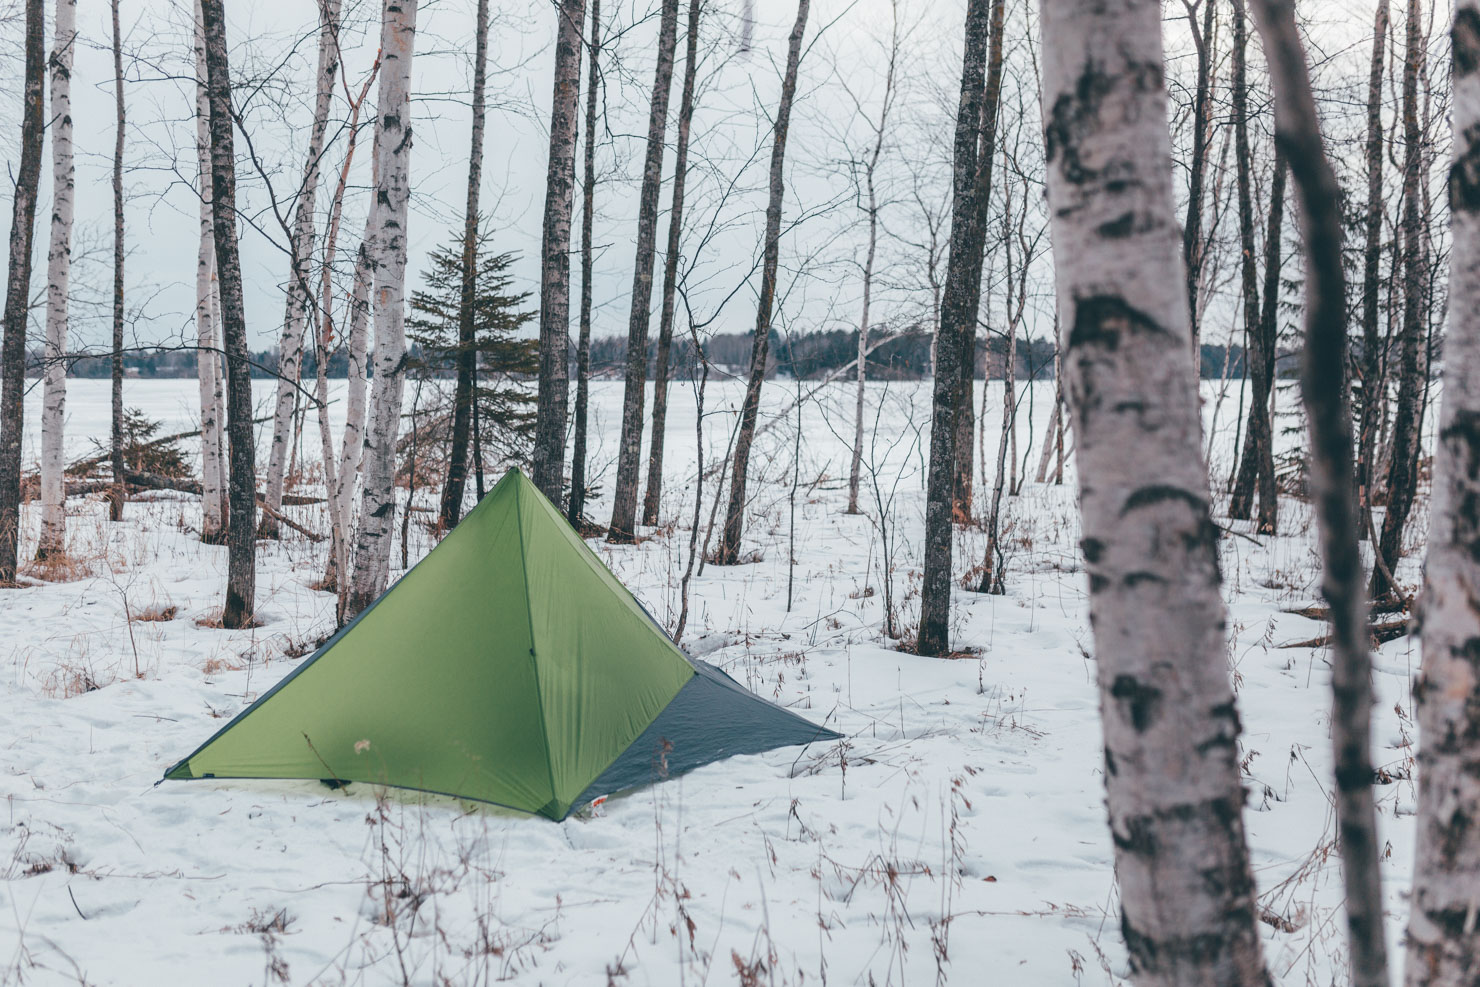
- Shelter; I use lots of different shelters – usually tarps or tarptents – from Nemo, Golite, Equinox, Kifaru, and others. I prefer floorless shelters, because they are lightweight, easy to set up, and I don’t have to worry about tracking snow into my tent… because it’s already in there. And, if the weather is really nasty, I can pee inside my shelter.
- Large nails; work better than most tent stakes when the ground is frozen.

Kitchen
- White gas stove; these typically work best in cold temps, especially, if you are just trying to melt snow and/or boil water. Butane canisters need to be kept warm (put them in a pocket or between torso layers to warm them) for canister stoves to work well, or at all. Alcohol stoves don’t work well in cold temps because the alcohol won’t properly vaporize. Esbit stoves work pretty well in any condition, but they don’t put out the heat of a white gas stove. Wood stoves are a good option where dry biomass is plentiful. And an open campfire is great, if conditions and regulations permit it.
- Insulated water containers; capacity depends on the trip, but I find that 2 liters of insulated water storage is sufficient for my needs where fresh water and/or snow are readily available for replenishment. Widemouth; easier to break ice in cold temps. Best stored upside down.
- Cookpot; I prefer to use titanium or stainless steel, because science suggests that cooking in uncoated aluminum vessels may not be good for my brain, long-term. I rarely carry a pot that holds more than 1 pint, because I carry paint-free stainless steel Klean Kanteens (18oz, 27 oz, 40oz, or 64 oz) that can be used to heat water, as well.
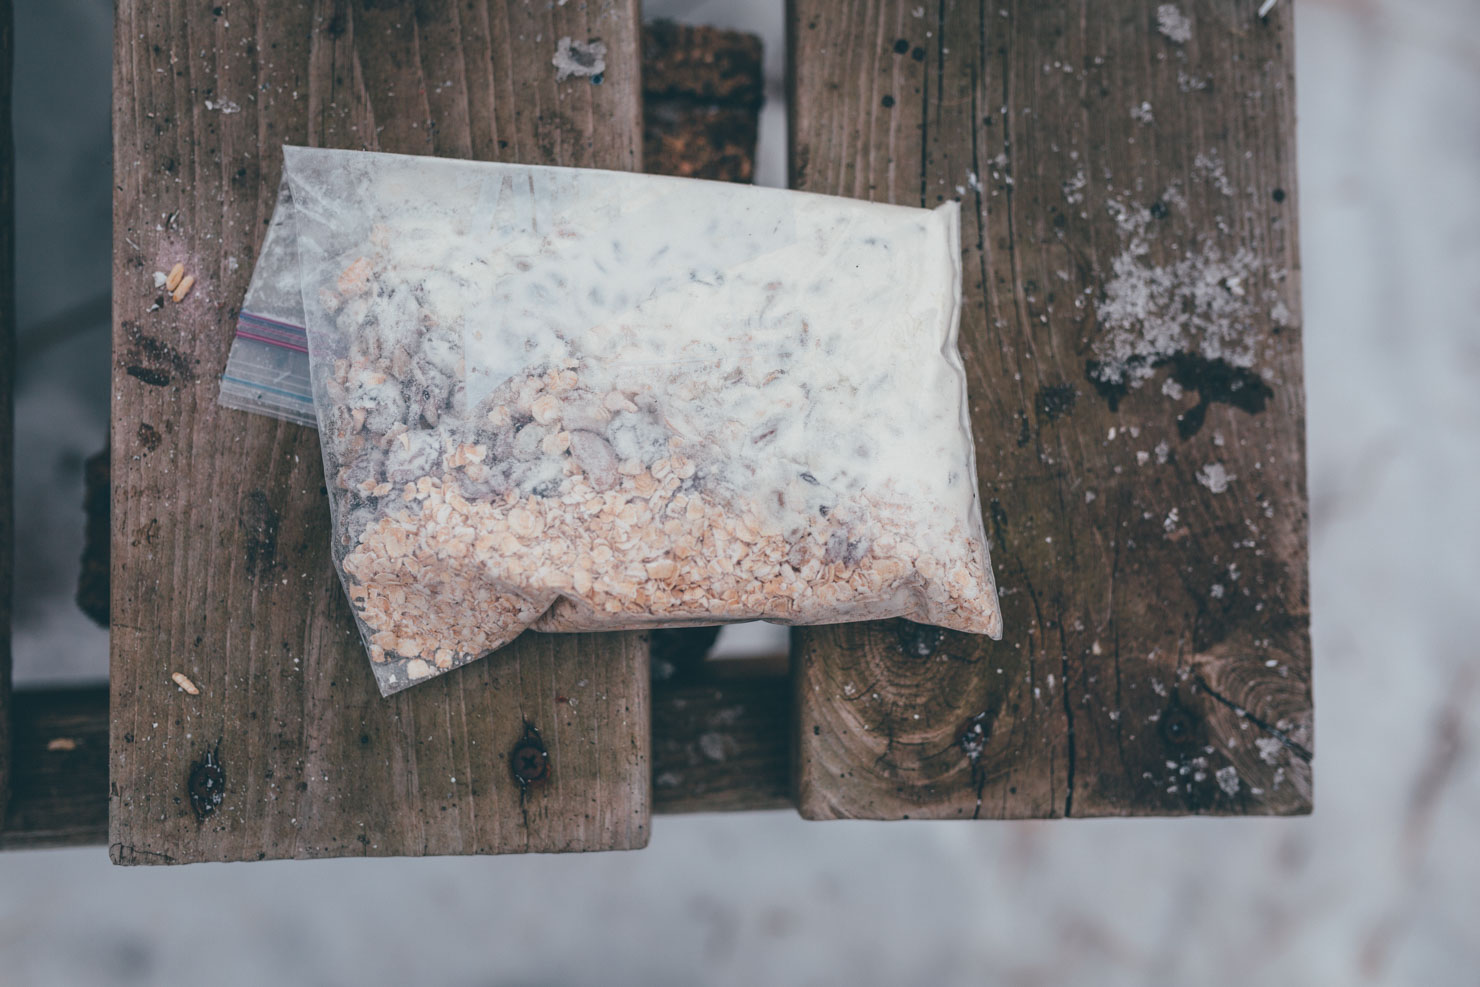
- Long-handled spoons are nice for eating out of those deep dehydrated food pouches.
- A folding plastic cup nests nicely into my kit, weighs very little, and insulates my hands from hot liquids.
- I always have a 5” Oregon folding saw in my kit. It’s small, light, and sharpens easily. I’ll add or substitute a 7” Bahco Laplander folding saw when I anticipate the need to cut more/larger wood for fires or shelter-building.
- Seattle Sports Foam mat; for sitting on around the fire.

On winter cooking
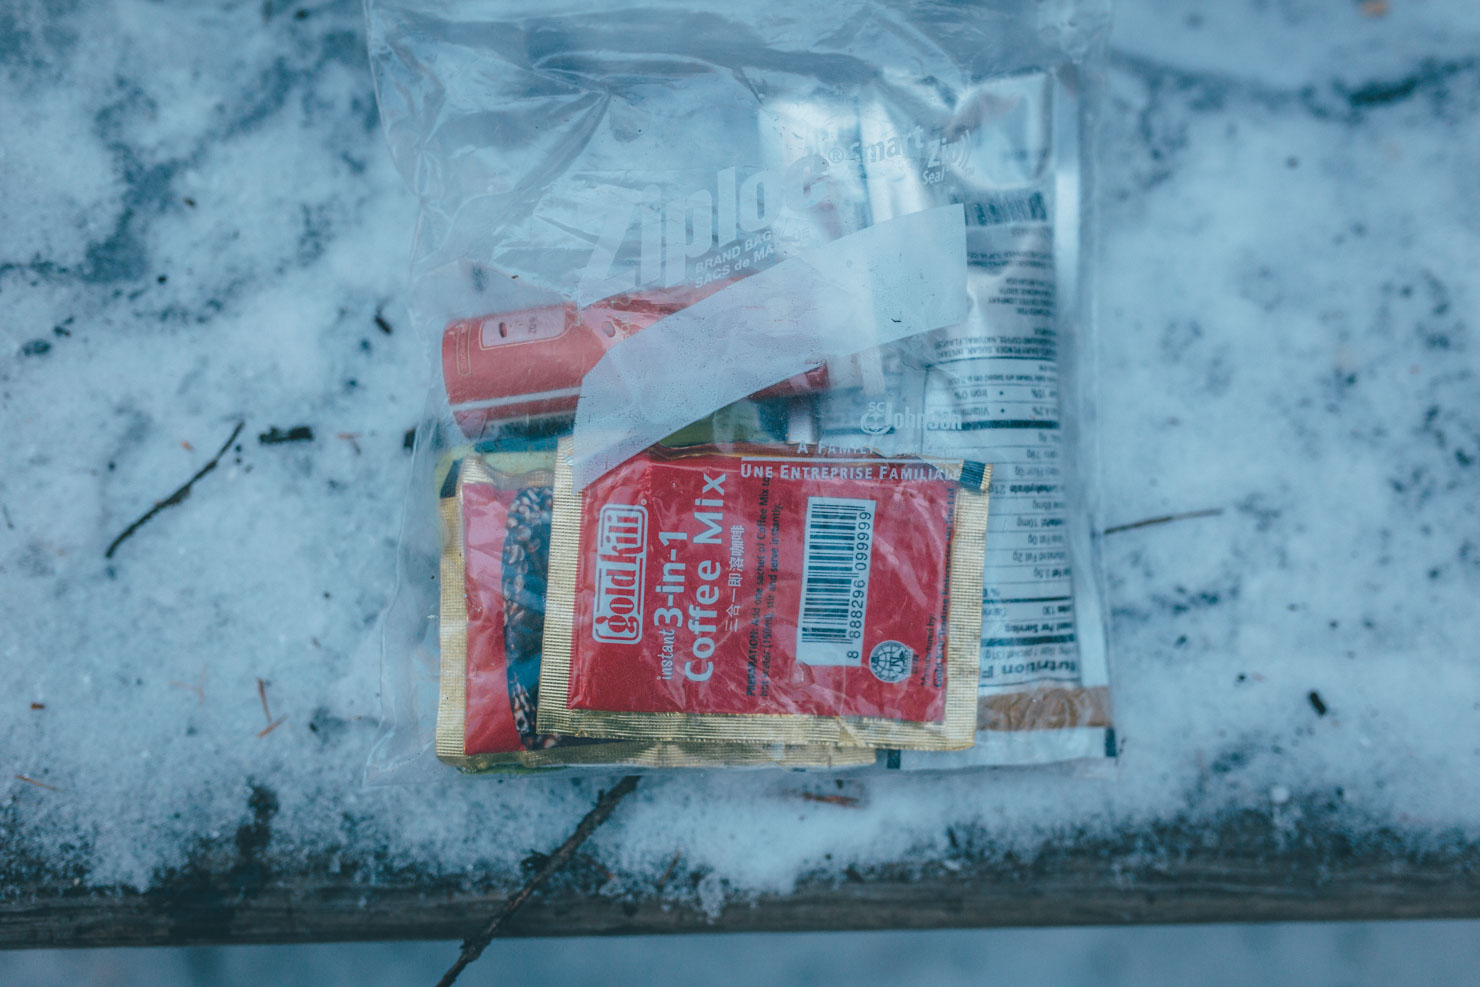
If I’m not just rehydrating my meal with boiling water in the provided plastic/foil pouch, a zip-loc bag, or a screw-lid plastic container, I’m probably cooking in aluminum foil or on a stick over a fire. I hate scrubbing pots.
I often pre-cook bacon at home and simply warm it in foil at mealtime. I don’t warm it at all if I’m using it as a high-calorie/high-fat trail snack in the winter. Bacon doesn’t freeze solid, so it’ pretty easy to eat, even in cold temps. Any meat can really be carried and cooked in foil. I find that it’s the best way to keep the meat from drying out – that way you don’t lose all that good fat in the fire.
I’ve been making ‘pemmican’ – a concentrated mix of fat and protein – for the last six months. I don’t use berries, just rendered fat and dried beef. I individually vacuum-pack pemmican bars (cast in 7 oz. silicone baking molds); each has 265 calories. I often add a pemmican bar to my dehydrated entrees to boost the calorie content, and to add a little more flavor and richness. What’s more, you don’t have to refrigerate pemmican. It can be carried on packing trips, year round. Olive oil packets and sticks of butter are densely packed with fat and calories, too. They can be a good addition to a meal. But they may loosen you up a little more than you bargain for, if you overdo it.
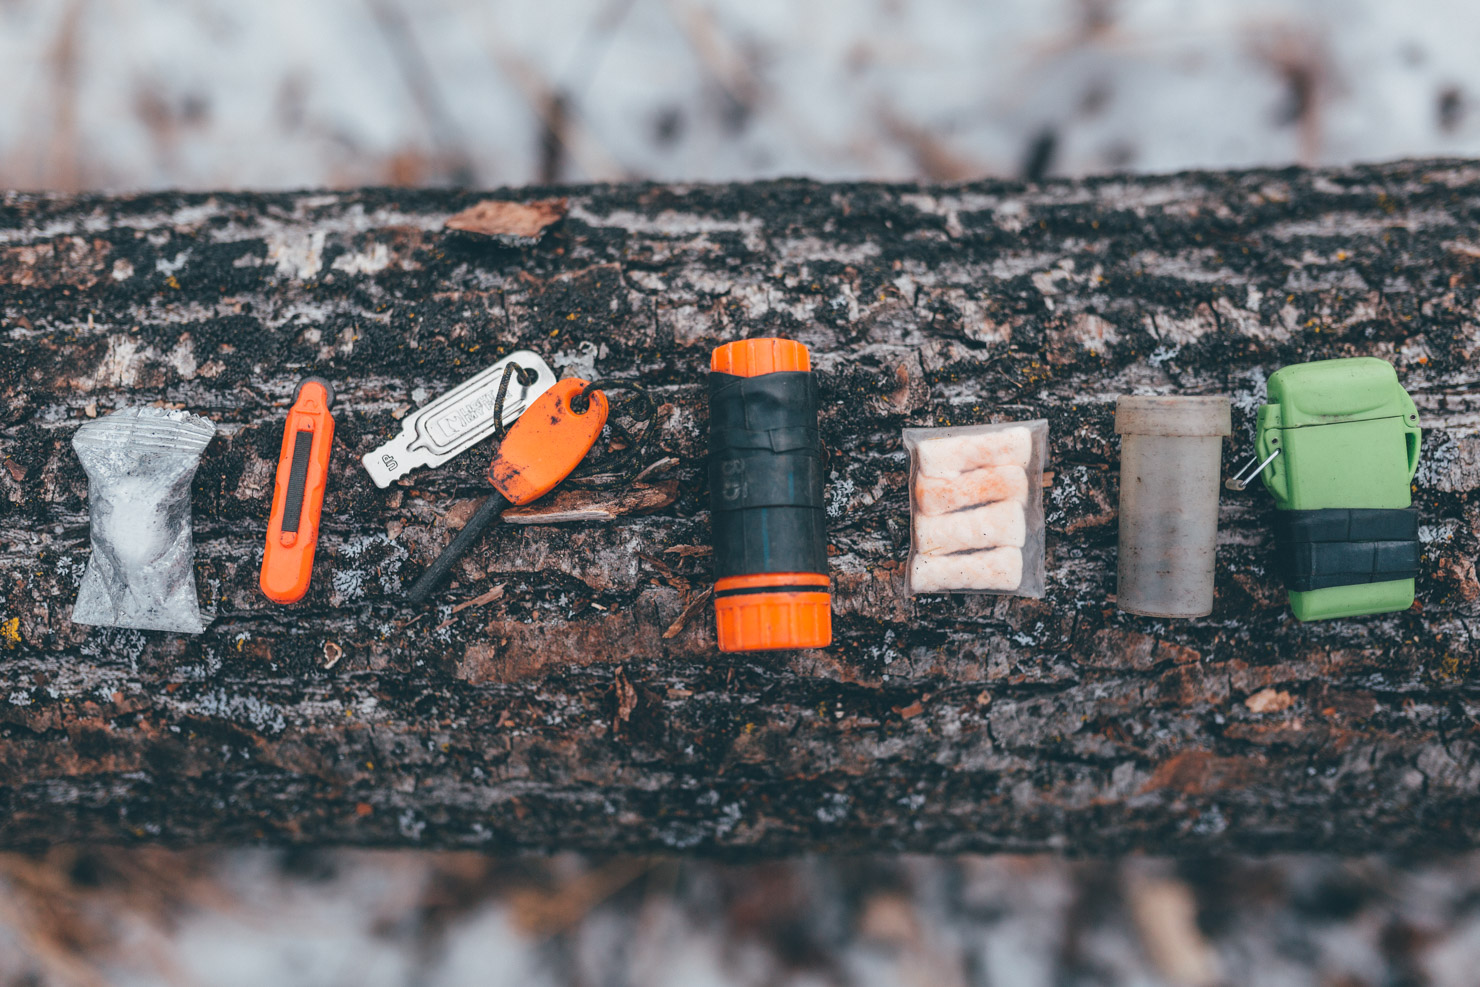
First Aid, Repair, Survival and Fire Building
- First aid kit :pain relievers, anti-inflammatory meds, anti-diarrhea meds, adhesive bandages, tweezers, super glue, topical ointments for minor cuts and scrapes, and sunscreen (Dermatone works as a sunscreen, barrier cream, and moisturizer).
- Mylar “space blanket” and ultralight plastic poncho can be used for building emergency shelters or worn to keep out wind, rain, snow, cold, etc.
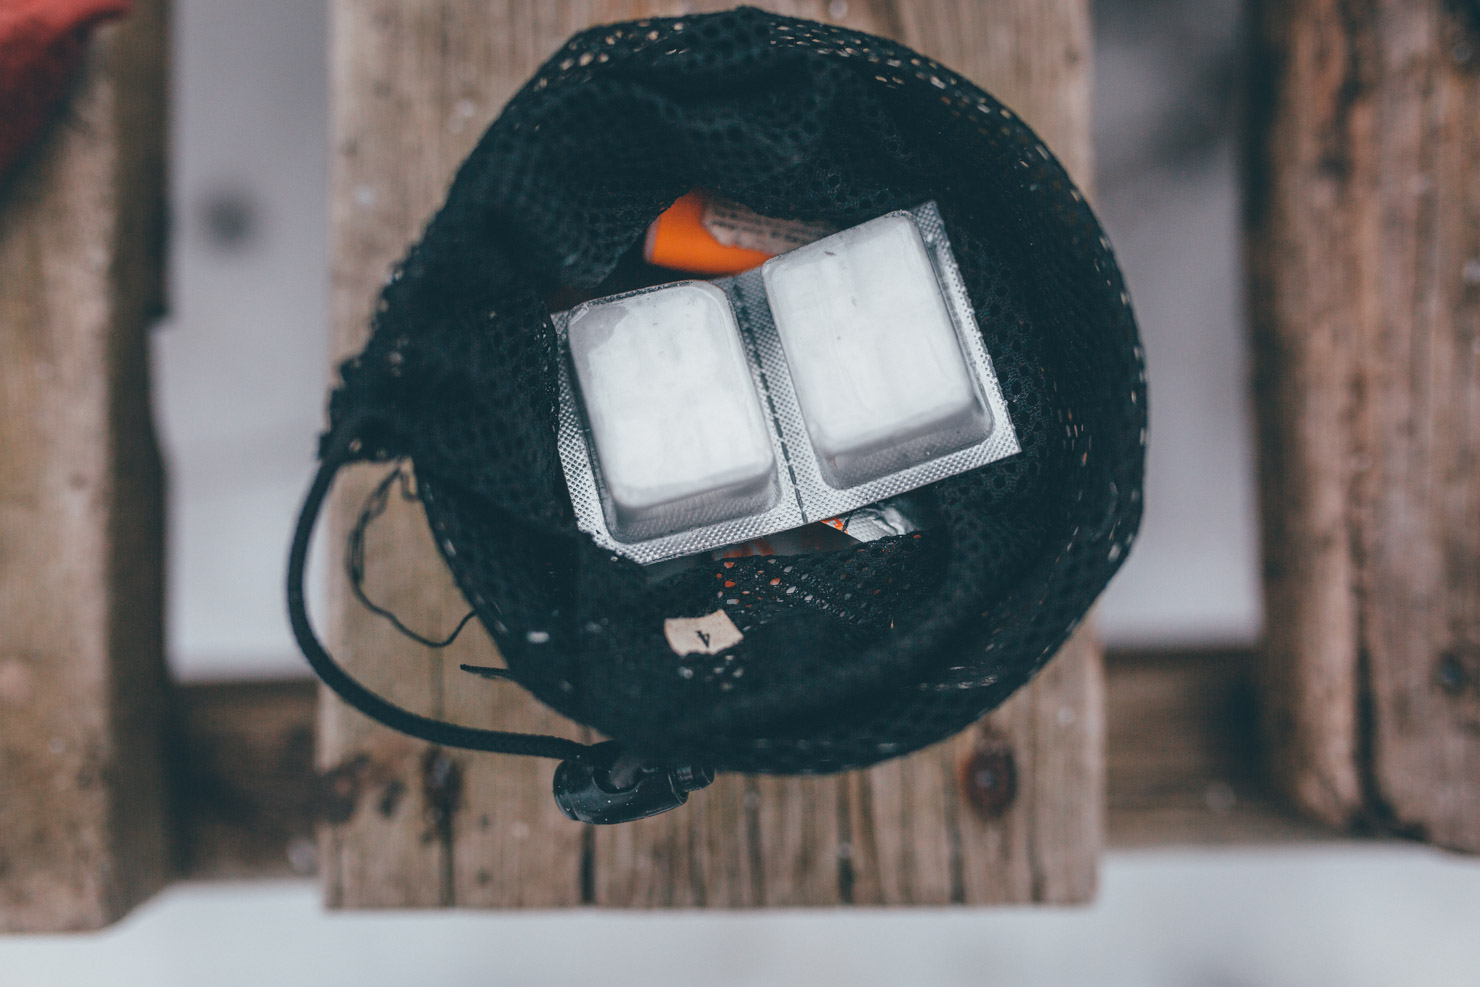
- Water treatment: MSR Aquatabs (sodium dichloroisocyanurate)
- Sewing kit: assortment of needles, bobbin wound with heavy-duty polyester thread, safety pins, nail clipper (for cutting thread, fishing line… or fingernails).
- Fishing/snare kit: 6# fishing line, assorted sinkers, assorted hooks, copper wire.
- Fire kit: spare lighter (I always have a butane lighter in my pocket, as well), ferro rod, flammable firestarting bits (purchased and homemade), flint sparker, char cloth.
- Assortment of cordage, tape, rubber bands, and glue: 550 paracord, bank line, accessory cord, duct tape, electrical tape, sections of inner tube (for banding things together or starting fires), chunk of hotglue, and a tin of pine resin.
Pine resin and hot glue are for making repairs to equipment or fabricating things, as solvent-based glue may not cure in cold temps. They can be melted with a fire, or in the case of the glue sticks, a lighter. Pine resin can be harvested when you have access to evergreen trees. I carry mine in a little tin that I can put directly on the fire. The glue is in its stick form. I cut it in half, lengthwise, so it melts easier with a lighter flame.


Electronics and Miscellaneous
- Headtorch; I prefer headlamps with red and white LEDs. Red light works better for maintaining night vision. White light is necessary for navigating while hiking or riding. Carry spare batteries (lithium batteries work best in cold temps).
- Cell phone; carried fully charged and turned off, for emergency use. I don’t use it for anything else.
- Olympus TG-4 waterproof/shockproof camera; plus a wide-angle lens, a telephoto lens, and spare batteries (keep batteries in your sleeping bag at night).
- Compass and whistle; worn on a lanyard around my neck
- Area maps
- Toiletries: toothbrush, toothpaste tablets (these don’t freeze), toilet paper, dental floss (can also be used for sewing)
- Handkerchief; used for blowing my nose, as a napkin, as a bandage, as a sling, as cordage, to pick up hot pots from the fire, as a water filter, as a washcloth, etc…
- Minimalist wallet; containing cash, a credit card, and my driver’s license.
Where to go
Riding is almost always better than pushing your bike. And a fatbike – especially one that is loaded with gear – will not float over deep snow. Seek out groomed trails and fire roads that are travelled regularly. Talk to local riders who live and ride in the area you intend to explore. Most cyclists enjoy sharing knowledge of their local trail systems. “I tend to ride and camp near my home most of the time. In the heart of the snow season, I can always find plenty of trail options that lead to winter camping opportunities, in and around Minneapolis. If I’m seeking more snow or colder temps, I head north,” says Dave.
For specific locations, Minnesota’s Duluth holds enormous potential, complete with snowmobile trails, groomed singletrack and frozen river riding – a breakdown of our 2 night winter route is coming soon. Opportunities abound in Alaska, including the White Mountains and a trip to the iconic Knik Glacier. Winter riding apparel and tire specialists 45NRTH have a website, Ride Groomed, that tracks groomed trails across the US. Be especially aware of fat biking etiquette on groomed ski trails; specifically, avoid riding where your tires leave a trough of more than an inch. And give way to snowmobiles, staying to the far right of the trail. Make sure you’re well versed with IMBA’s guidelines.
Over in Europe, Scandinavia is also rich in potential, including riding the Southern Hallingdalsløypa ski route, and other forays in Norway.
More about Dave Gray
As the 2nd Surly employee hired, Dave was with Surly for 16+ years. He was the design lead on the Pugsley project and the Big Dummy – though he stresses that every Surly bike is the result of collaboration with all the engineers on the team.
Dave rides to work every day of the year – which is saying something, given work takes place in Minneapolis. “Weather is not a factor … ever,” as he puts it, in his own matter-of-fact and unassuming way. Every ride is an opportunity to test new products and refine gear. “I own appropriate bike commuting clothing for every condition. I estimate that I’ve ridden roughly 140,000 miles to and from work since I started bike commuting, daily, 22 years ago. I’ve completed bike commutes with broken cranks and broken pedals (pedaling 10+ miles with one leg), bent wheels, flat tires, bent forks, bent and broken frames, broken seatposts, broken hub axles, seized freehub bodies, non-engaging drive mechanisms, missing chains, and most other types of failures you can imagine. I have to admit that I did fail to complete a commute once. After an unprecedented series of flats on a ride home, I ran out of spare tubes, patches, tape, glue, and anything else that might repair my punctured tubes. All the bike shops and hardware stores were closed, so I called my wife to pick me up and drive me the rest of the way home. The other option was to ride on the rims, but I couldn’t justify destroying my wheels just to stave off the feeling of defeat. Had it been a life-or-death issue, I certainly would have ridden on the rims or filled the tires full of grass, paper, leaves, plastic bags – or whatever else I could find – to get me home.”
As for his fat tire CV, Dave started riding motorcycles in the snow when he was 12 years old. Ten years later, he started riding mountain bikes in the snow. “It was an easy transition for me. And when the opportunity to develop fat bike components presented itself, I’d already logged a decade of Minnesota winter rides. I had no doubt that we could develop products that would ultimately improve on the soft-condition bike-riding experience. I was fortunate to be in the right place, at the right time, to help push fat bikes a little closer to the mainstream of cycling culture.”
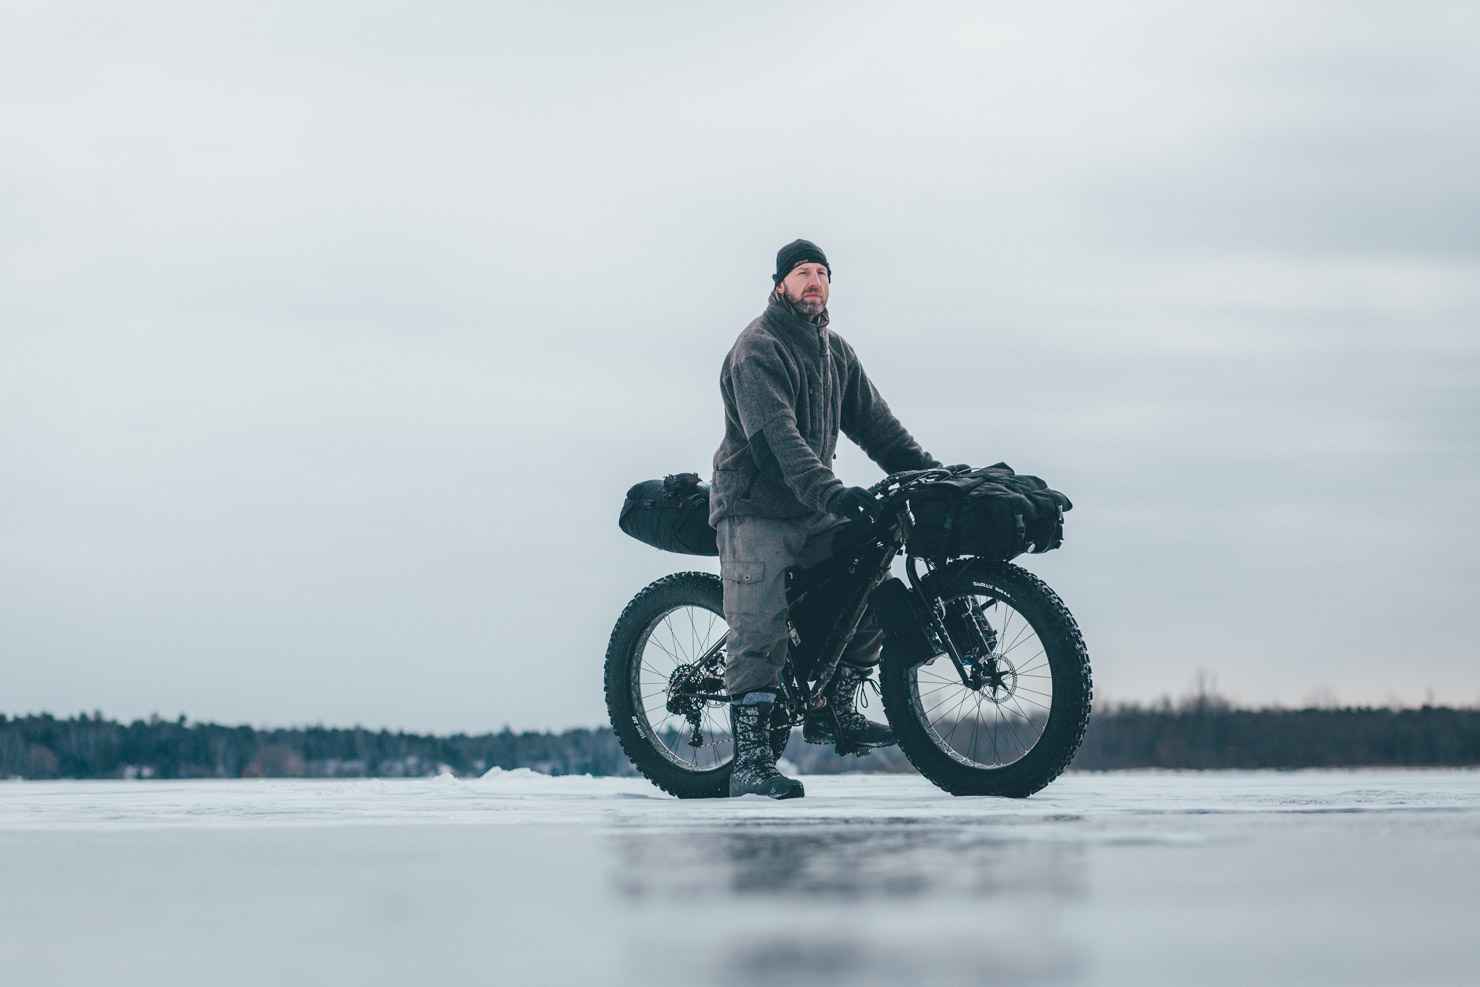
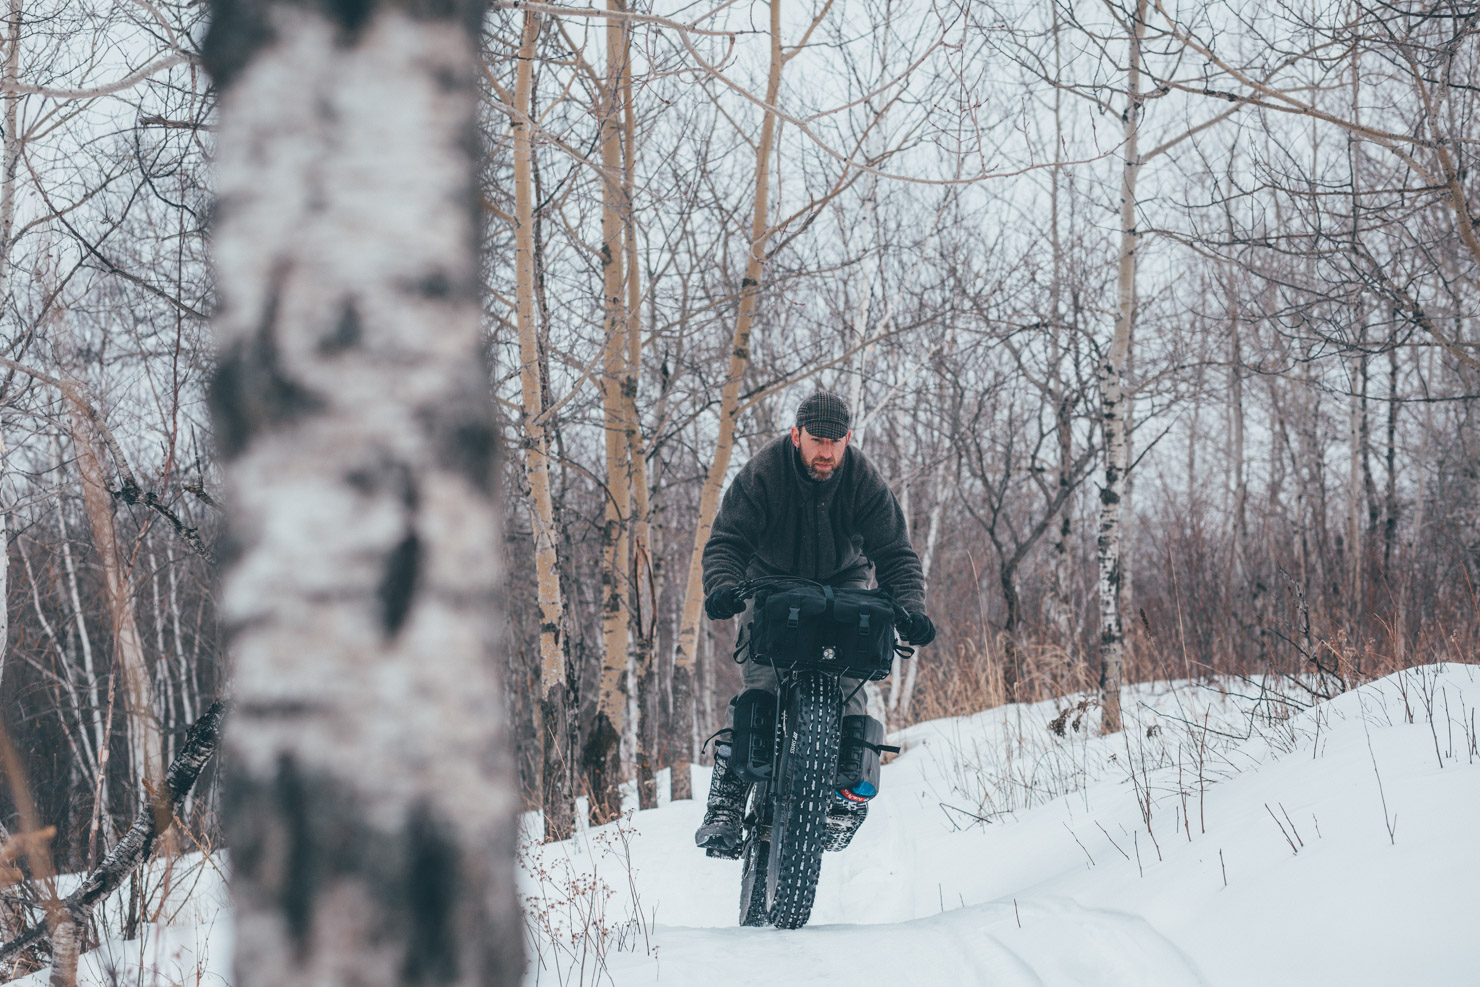


The images for this post were taken on a winter bikepacking trip in Duluth, Minnesota, where we experienced temperatures down to 0F (-18C). Thanks to Dave Gray for his insights, Hansi Johnson for suggesting the route, and Paul Zeigle for organising the trip.
Have any winter riding tips to share? Or good places to ride? Let us know in the comments below!
Please keep the conversation civil, constructive, and inclusive, or your comment will be removed.