


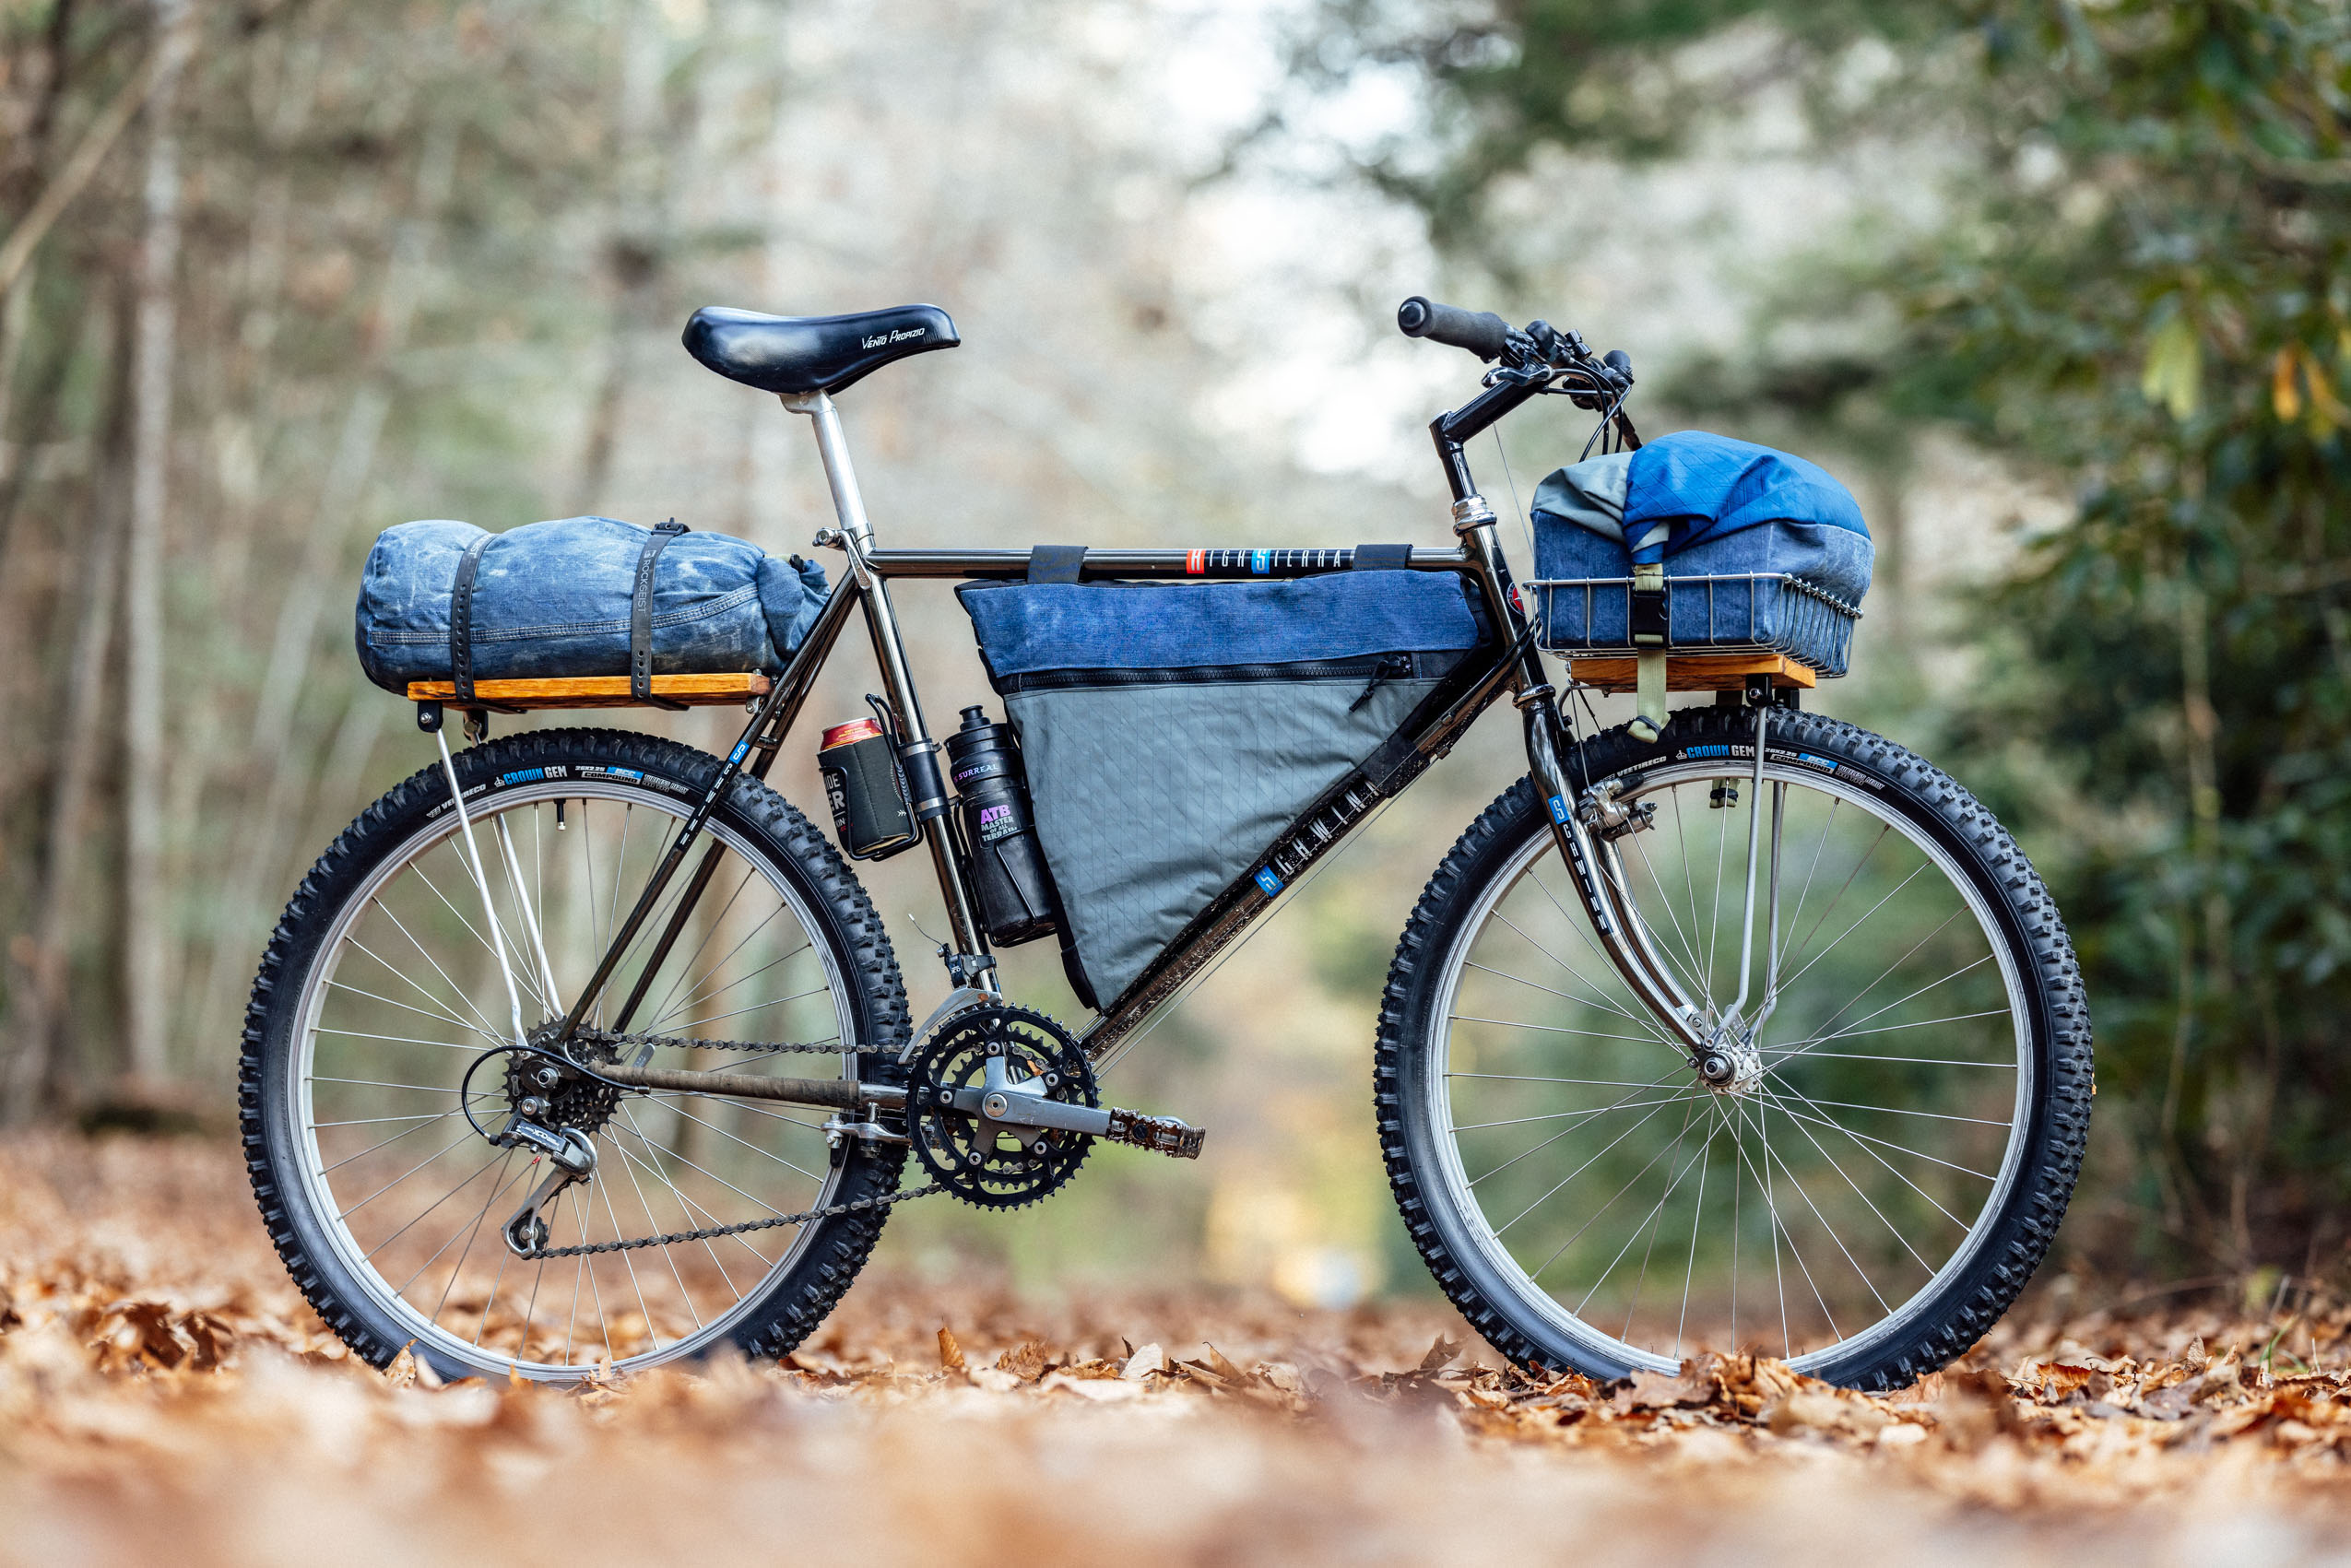
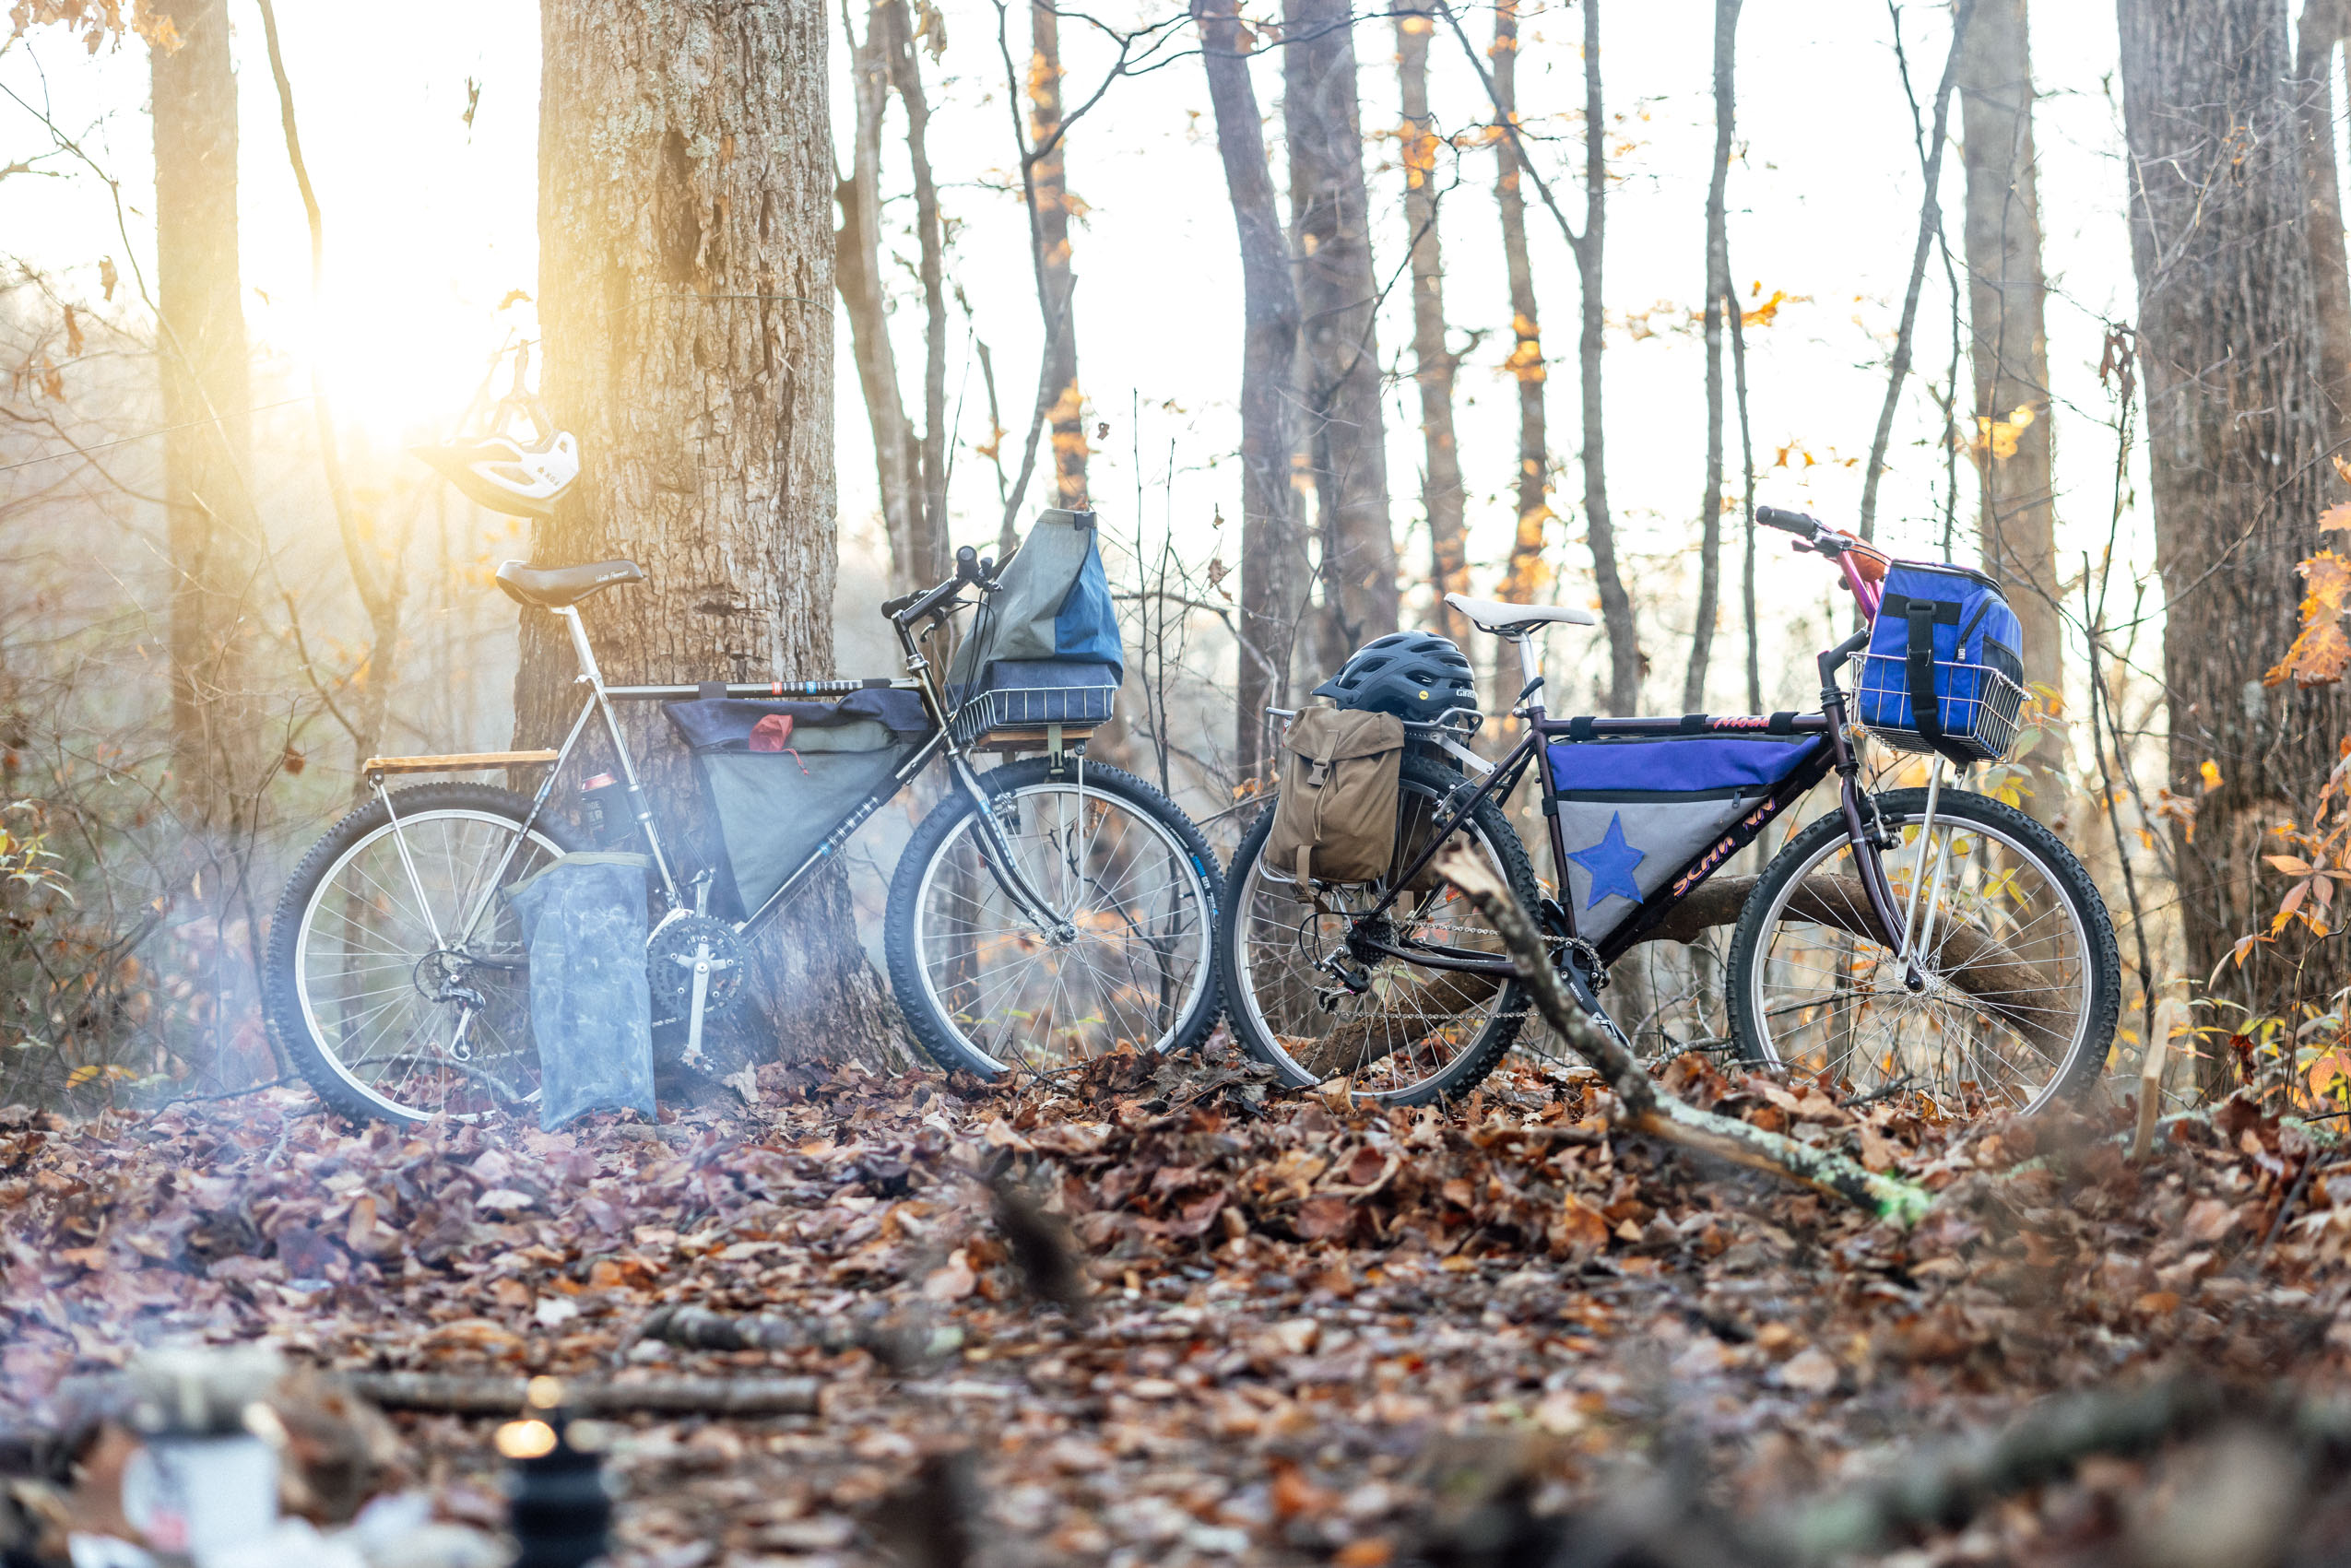
Budget Bikepacking Build-Off: Logan’s 1988 Schwinn High Sierra


For his Budget Bikepacking Build-Off, Logan takes a black chrome 1988 Schwinn High Sierra, decks it out with DIY racks and bags, and loads it up with a kit that includes a self-made camp kitchen with a DIY spork. Find a detailed write-up on his sub-$500 kit, complete with details and a full gallery of photos from a shakedown overnighter here…
PUBLISHED Jan 14, 2025
Budget Bikepacking Build-Off Rules: 1. Spend no more than $500 on your bike, bags, and camping gear. 2. No freebies or components from your parts bin. 3. No pro deals. Pay full asking price for new and used gear. 4. Buy local whenever possible. 5. Take the finished build out for an overnighter as a real-world test.
To address the elephant in the room, I’m well aware that our Budget Bikepacking Build-Off is somewhat silly. Since all of us participating already own a bike (or several) and a full complement of bikepacking gear, we’re essentially buying equipment we don’t need just to make content for this site. However, as I see it, there’s a greater purpose at work. The root of the idea is to show what’s possible. To inspire folks who are starting from scratch. To show options when budgetary constraints are the hurdle prohibiting people from trying a multi-day bike trip. We’ve long espoused the use what you have gospel, but it’s supremely helpful for newcomers to see it in action, learn how to accomplish things on a finite budget, and contradict the idea that it’s necessary to buy the latest, greatest, and most expensive bike, bags, and camping gear to make it happen.


For me, the process behind the Build-Off was equally as rewarding. It was a means of forcing myself to consider the bikepacking puzzle from a different perspective in order to see what’s possible, be creative, and negotiate budgetary obstacles. It was also a reminder of the challenges we all face by the rising costs of materials, products, and, well, absolutely everything—and the need to reduce our impact and the amount of landfill-bound junk snowballing from our consumer culture. Believe me when I tell you that it’s very hard to stay under the $500 allowance and still create something that’s trustworthy, beautiful, and interesting.
However, that’s exactly the direction I wanted to push this project. In fact, I originally proposed the series concept to the team with name Concours de Rummage, taking inspiration from the sophisticated builders challenge called Concours de Machines. I wanted the Budget Bikepacking Build-Off to hinge on a fundamental creative premise by encouraging participants to enlist a makeshift DIY approach, use found and reclaimed materials, and find clever solutions to common problems. However, I realized that’s just my style and approach, and there are infinite interpretations to a capable low-cost touring kit. In the end, we all found different ways and motivations to tackle this challenge, and that made it even more interesting.
The Blank Page
For me, the most difficult part of the Build-Off was getting started. It took many moons to find the right bike. Living in the small town of Brevard, North Carolina, the local pool of used bikes—whether at thrift stores or on Facebook Marketplace—is fairly limited. Plus, older mountain bikes from the ’80s and ’90s are often on the smaller side, and tracking down a frame in the XL-XXL range proved to be especially challenging. To complicate matters, Hurricane Helene struck just as I finally found a contender.
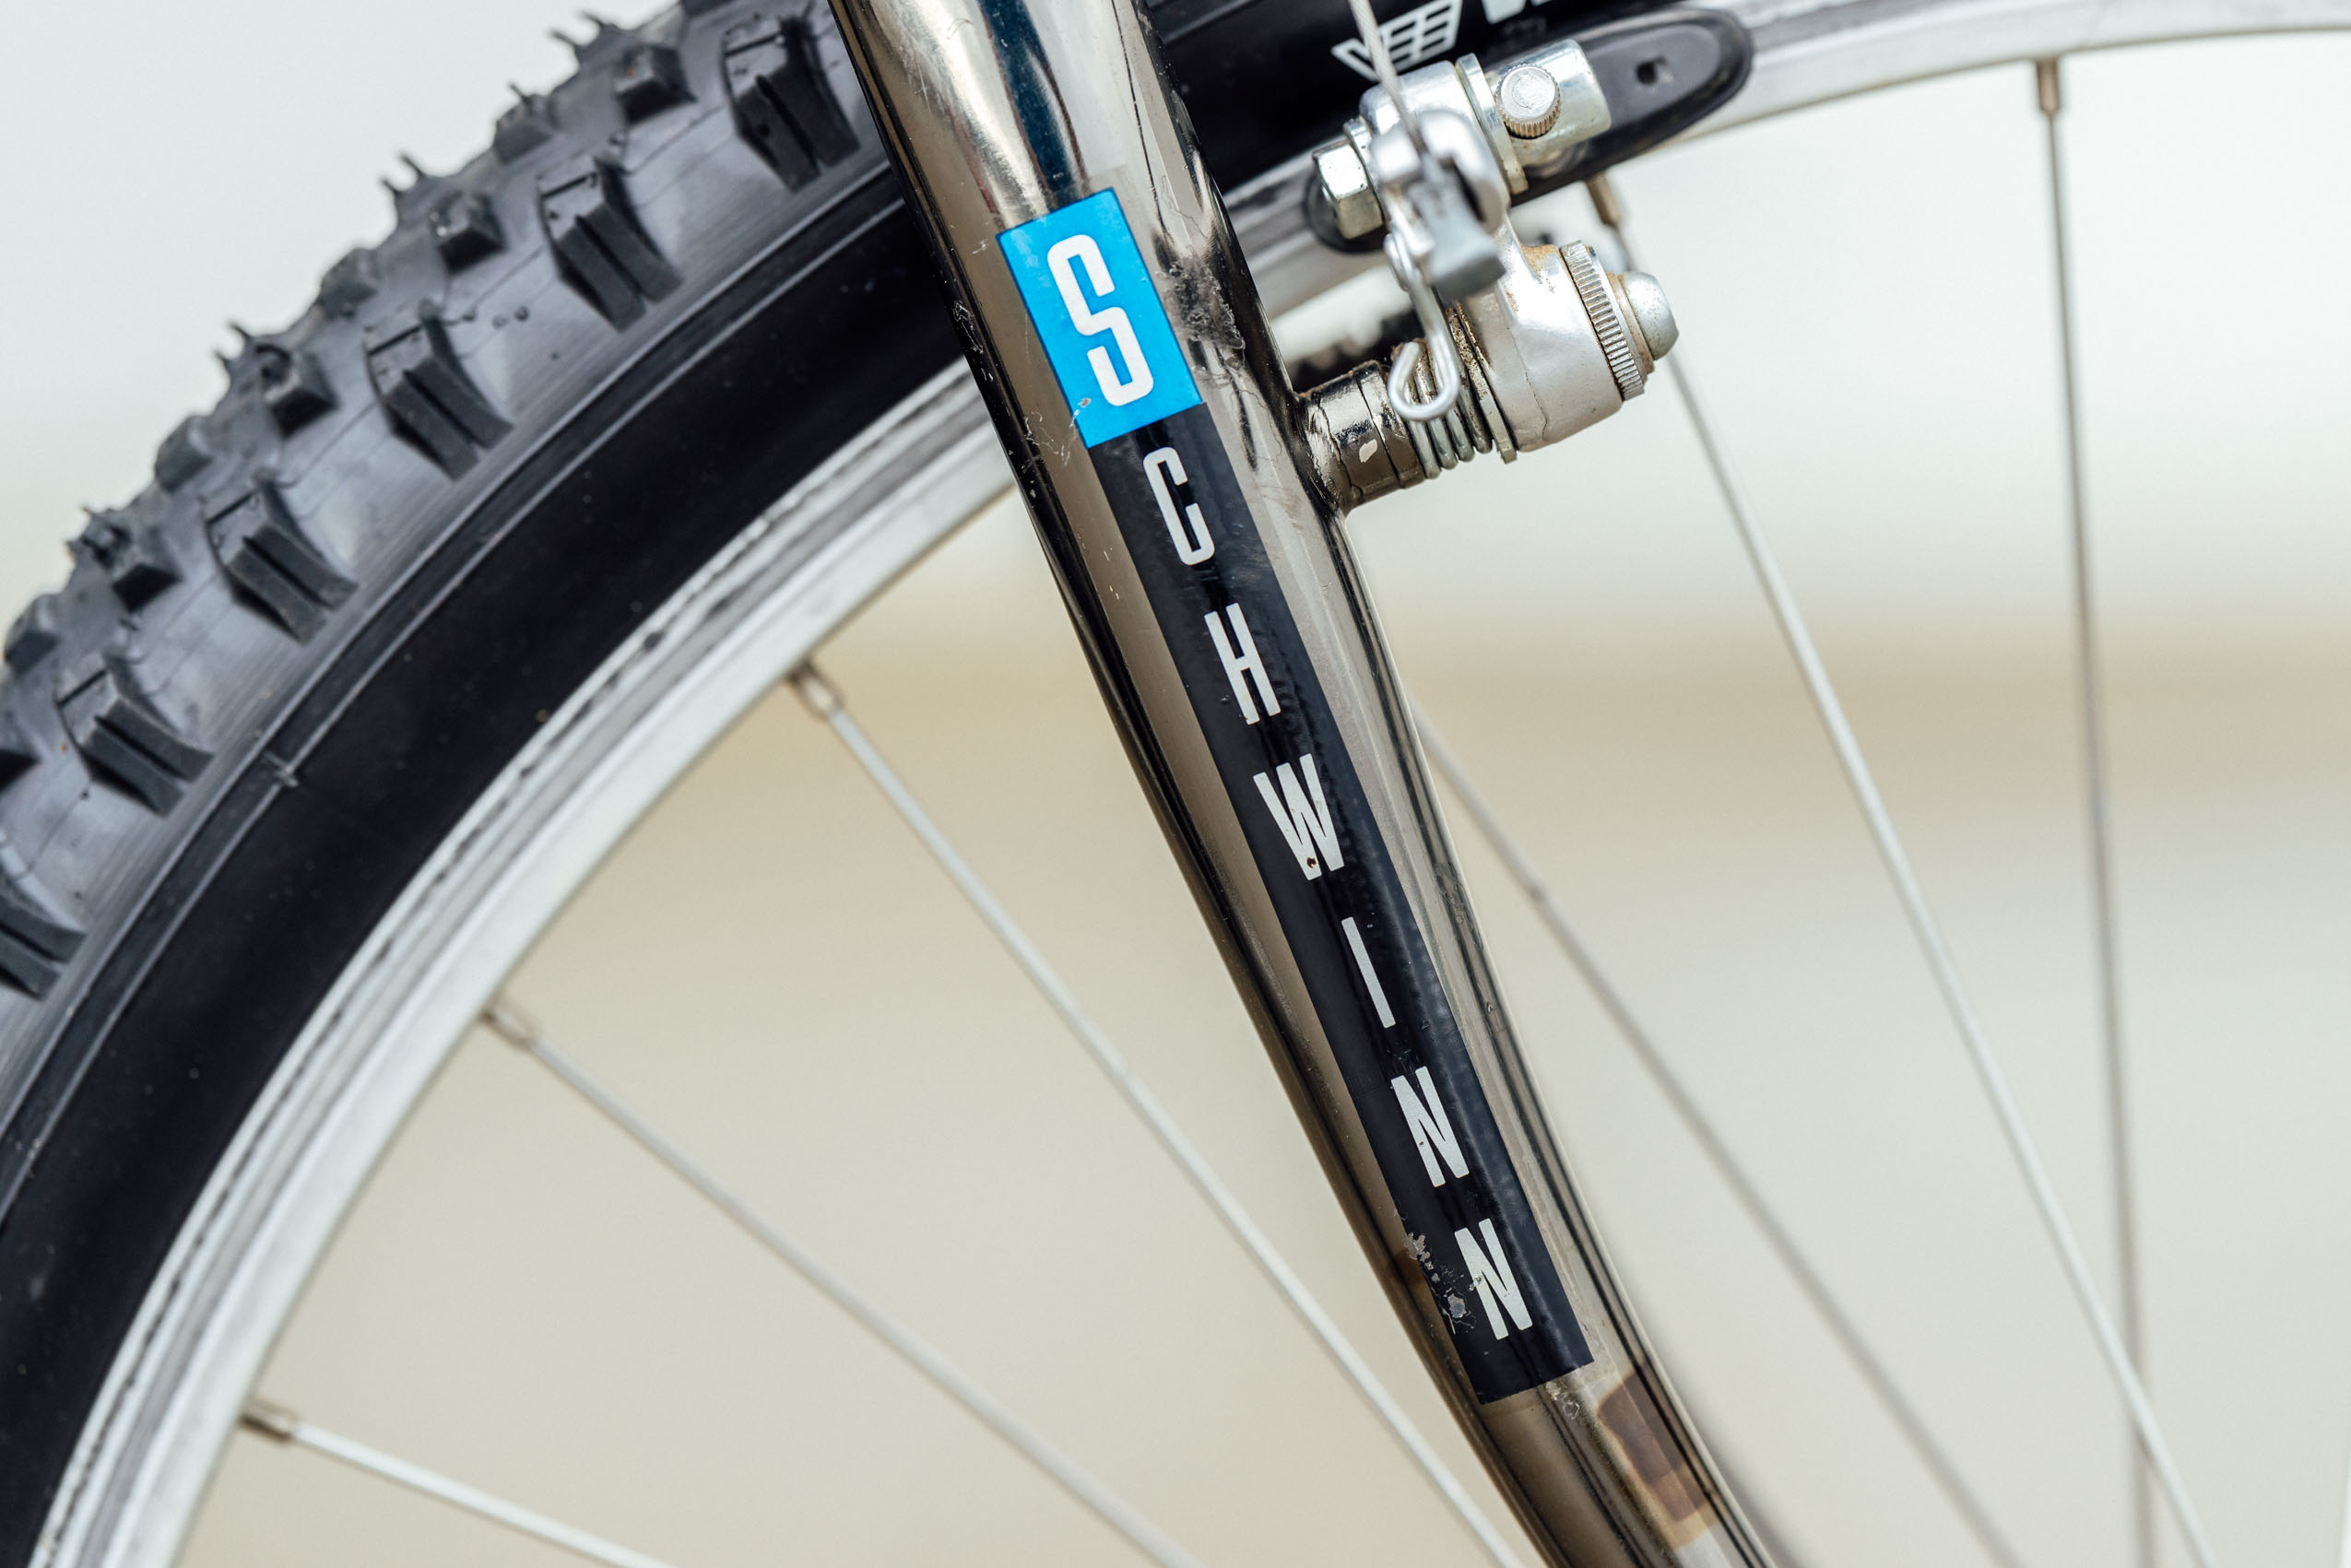
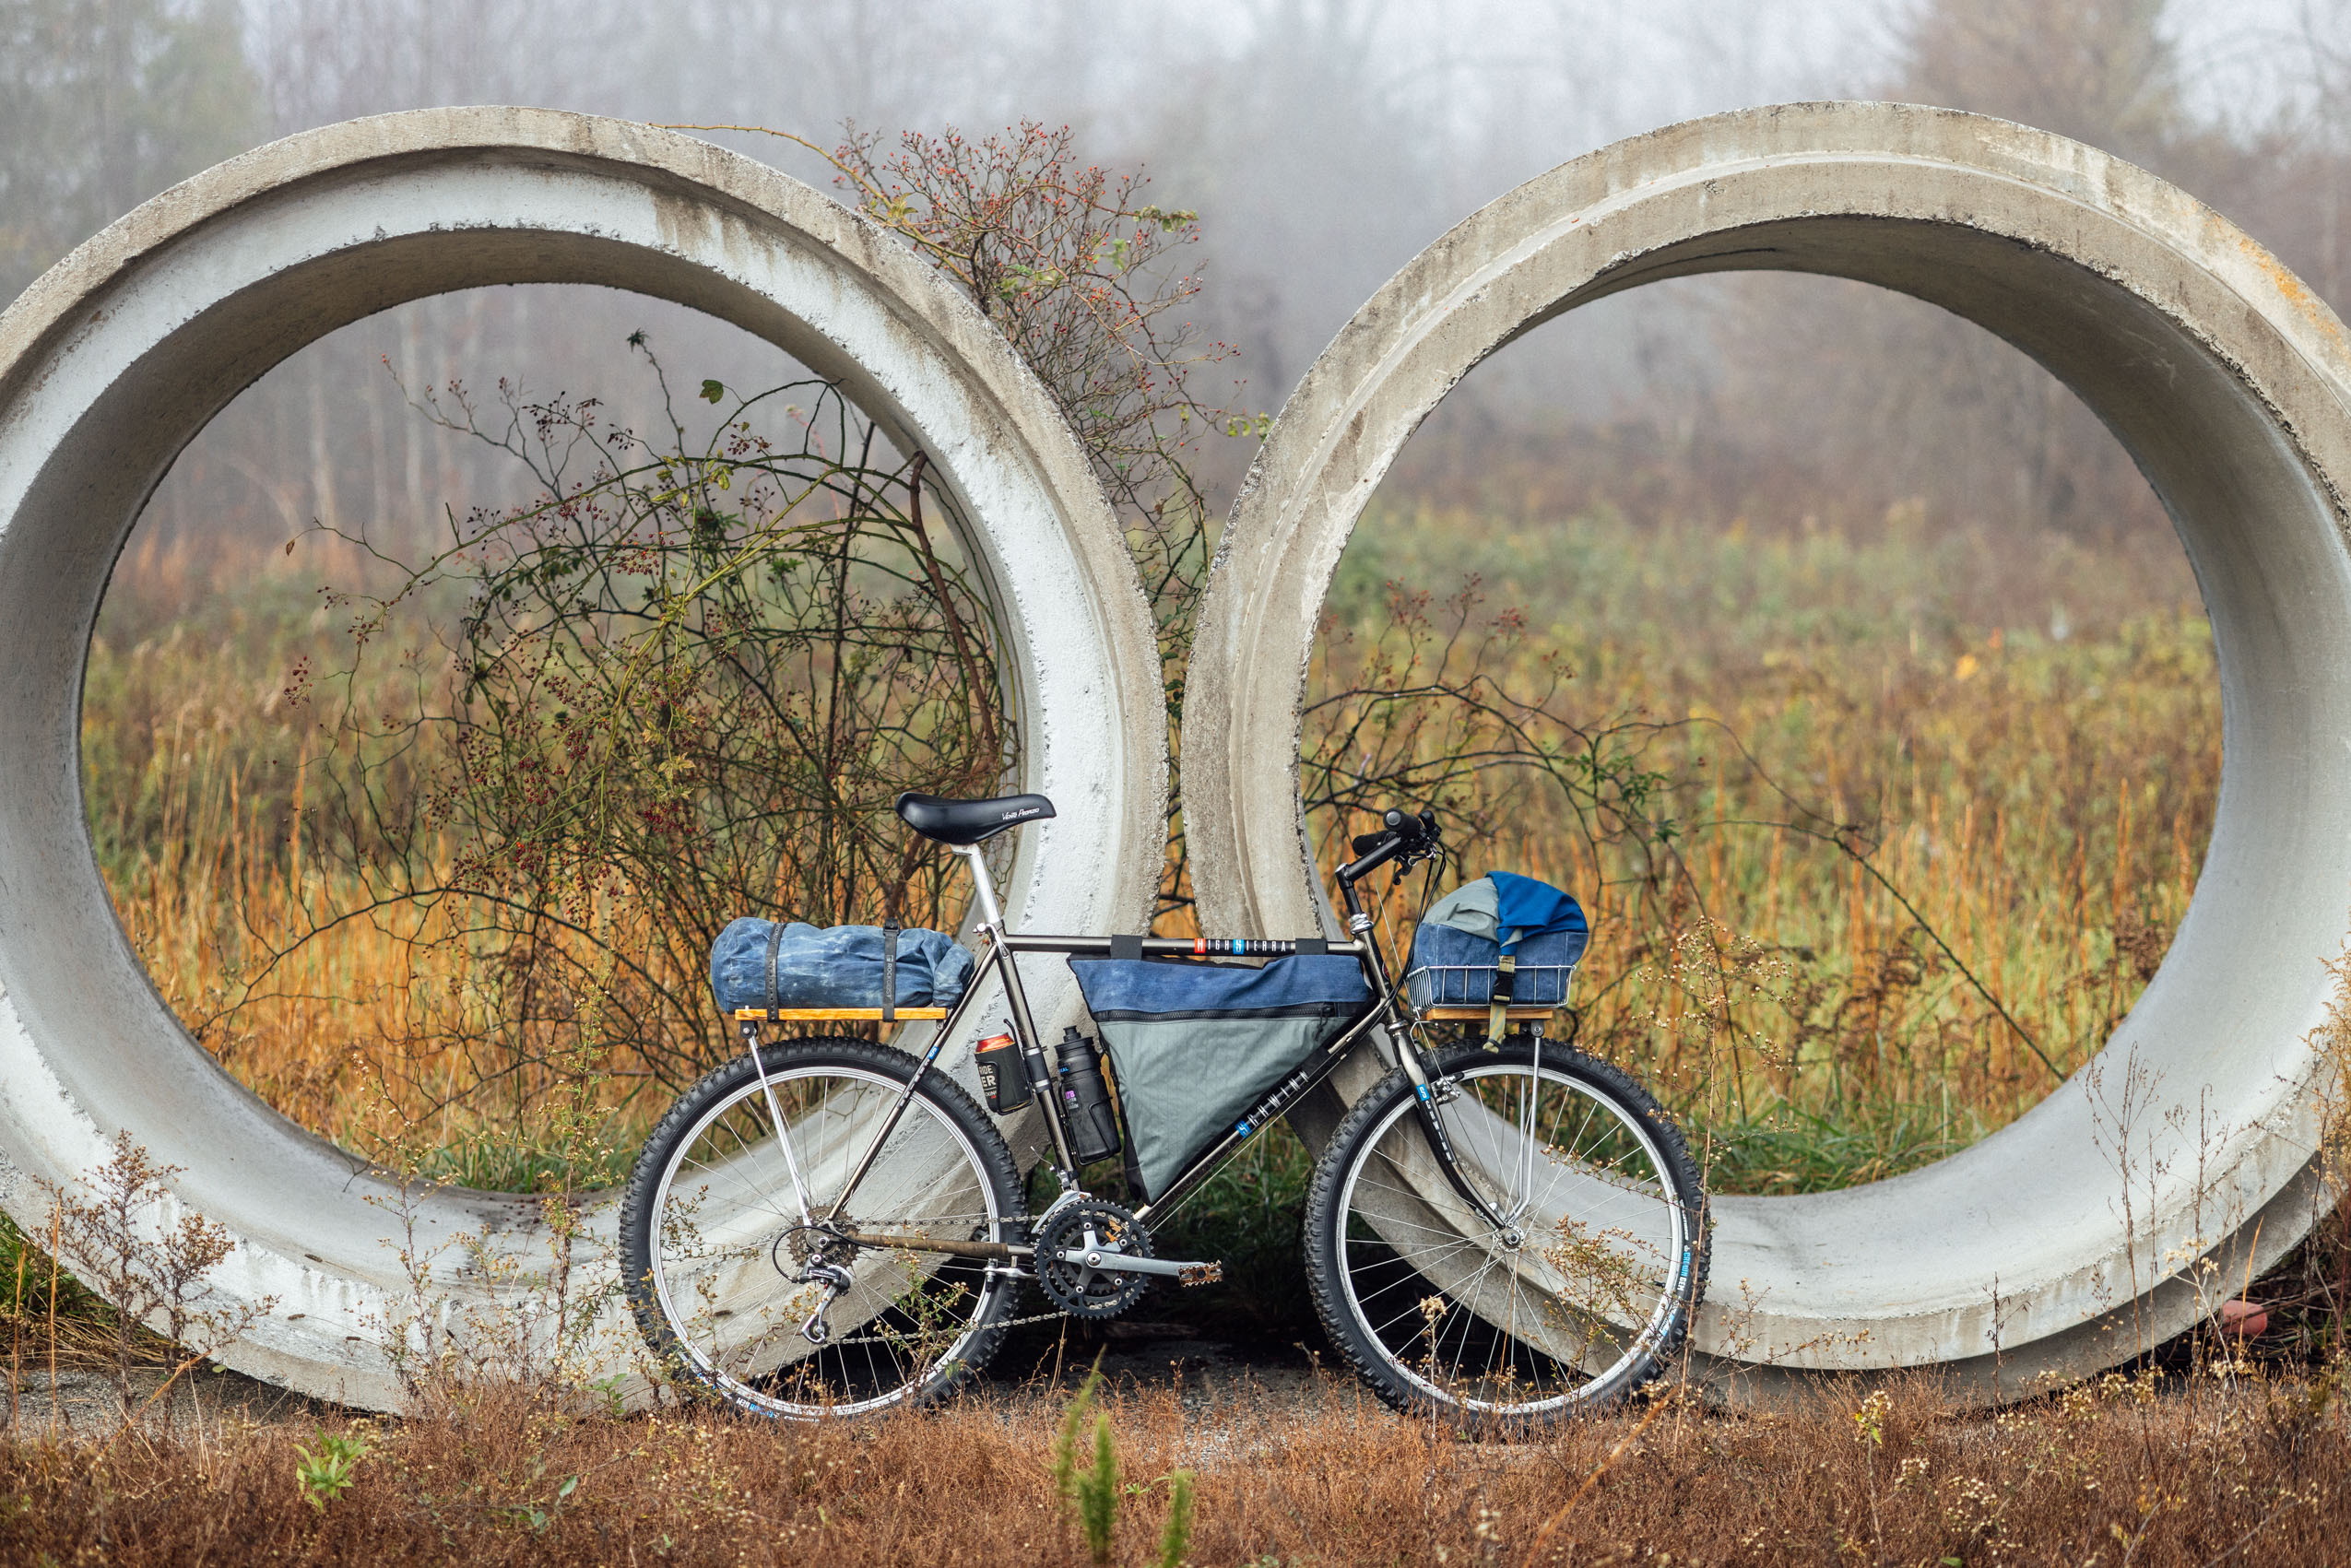
The week leading up to the disaster, I spotted a 22” 1988 Schwinn High Sierra on Marketplace, messaged the seller immediately and arranged to meet them that Thursday in Tennessee, just over the North Carolina border. Mother Nature and Father Climate Change had different plans. An unprecedented system of tropical moisture became the pre-game show before Helene arrived, dumping record-setting rainfall in the region, making the trip impossible. By Friday, when Helene actually hit, communication with the seller (and all the outside world) went completely silent. Internet connectivity was out for a week, the region was decimated, and it would be nearly a month before the roads connecting western North Carolina to Tennessee reopened and allowed vehicular access. Thankfully, the seller was incredibly patient and held onto the bike for me until I could make the journey nearly a month later. And I’m glad he did. This 22” Black Chrome beauty was in great condition, considering its vintage, and it’s a great representation of the long history of off-road adventure cycling, a perfect canvas for a Build-Off bike, in my eyes.

A 1988 Schwinn High Sierra
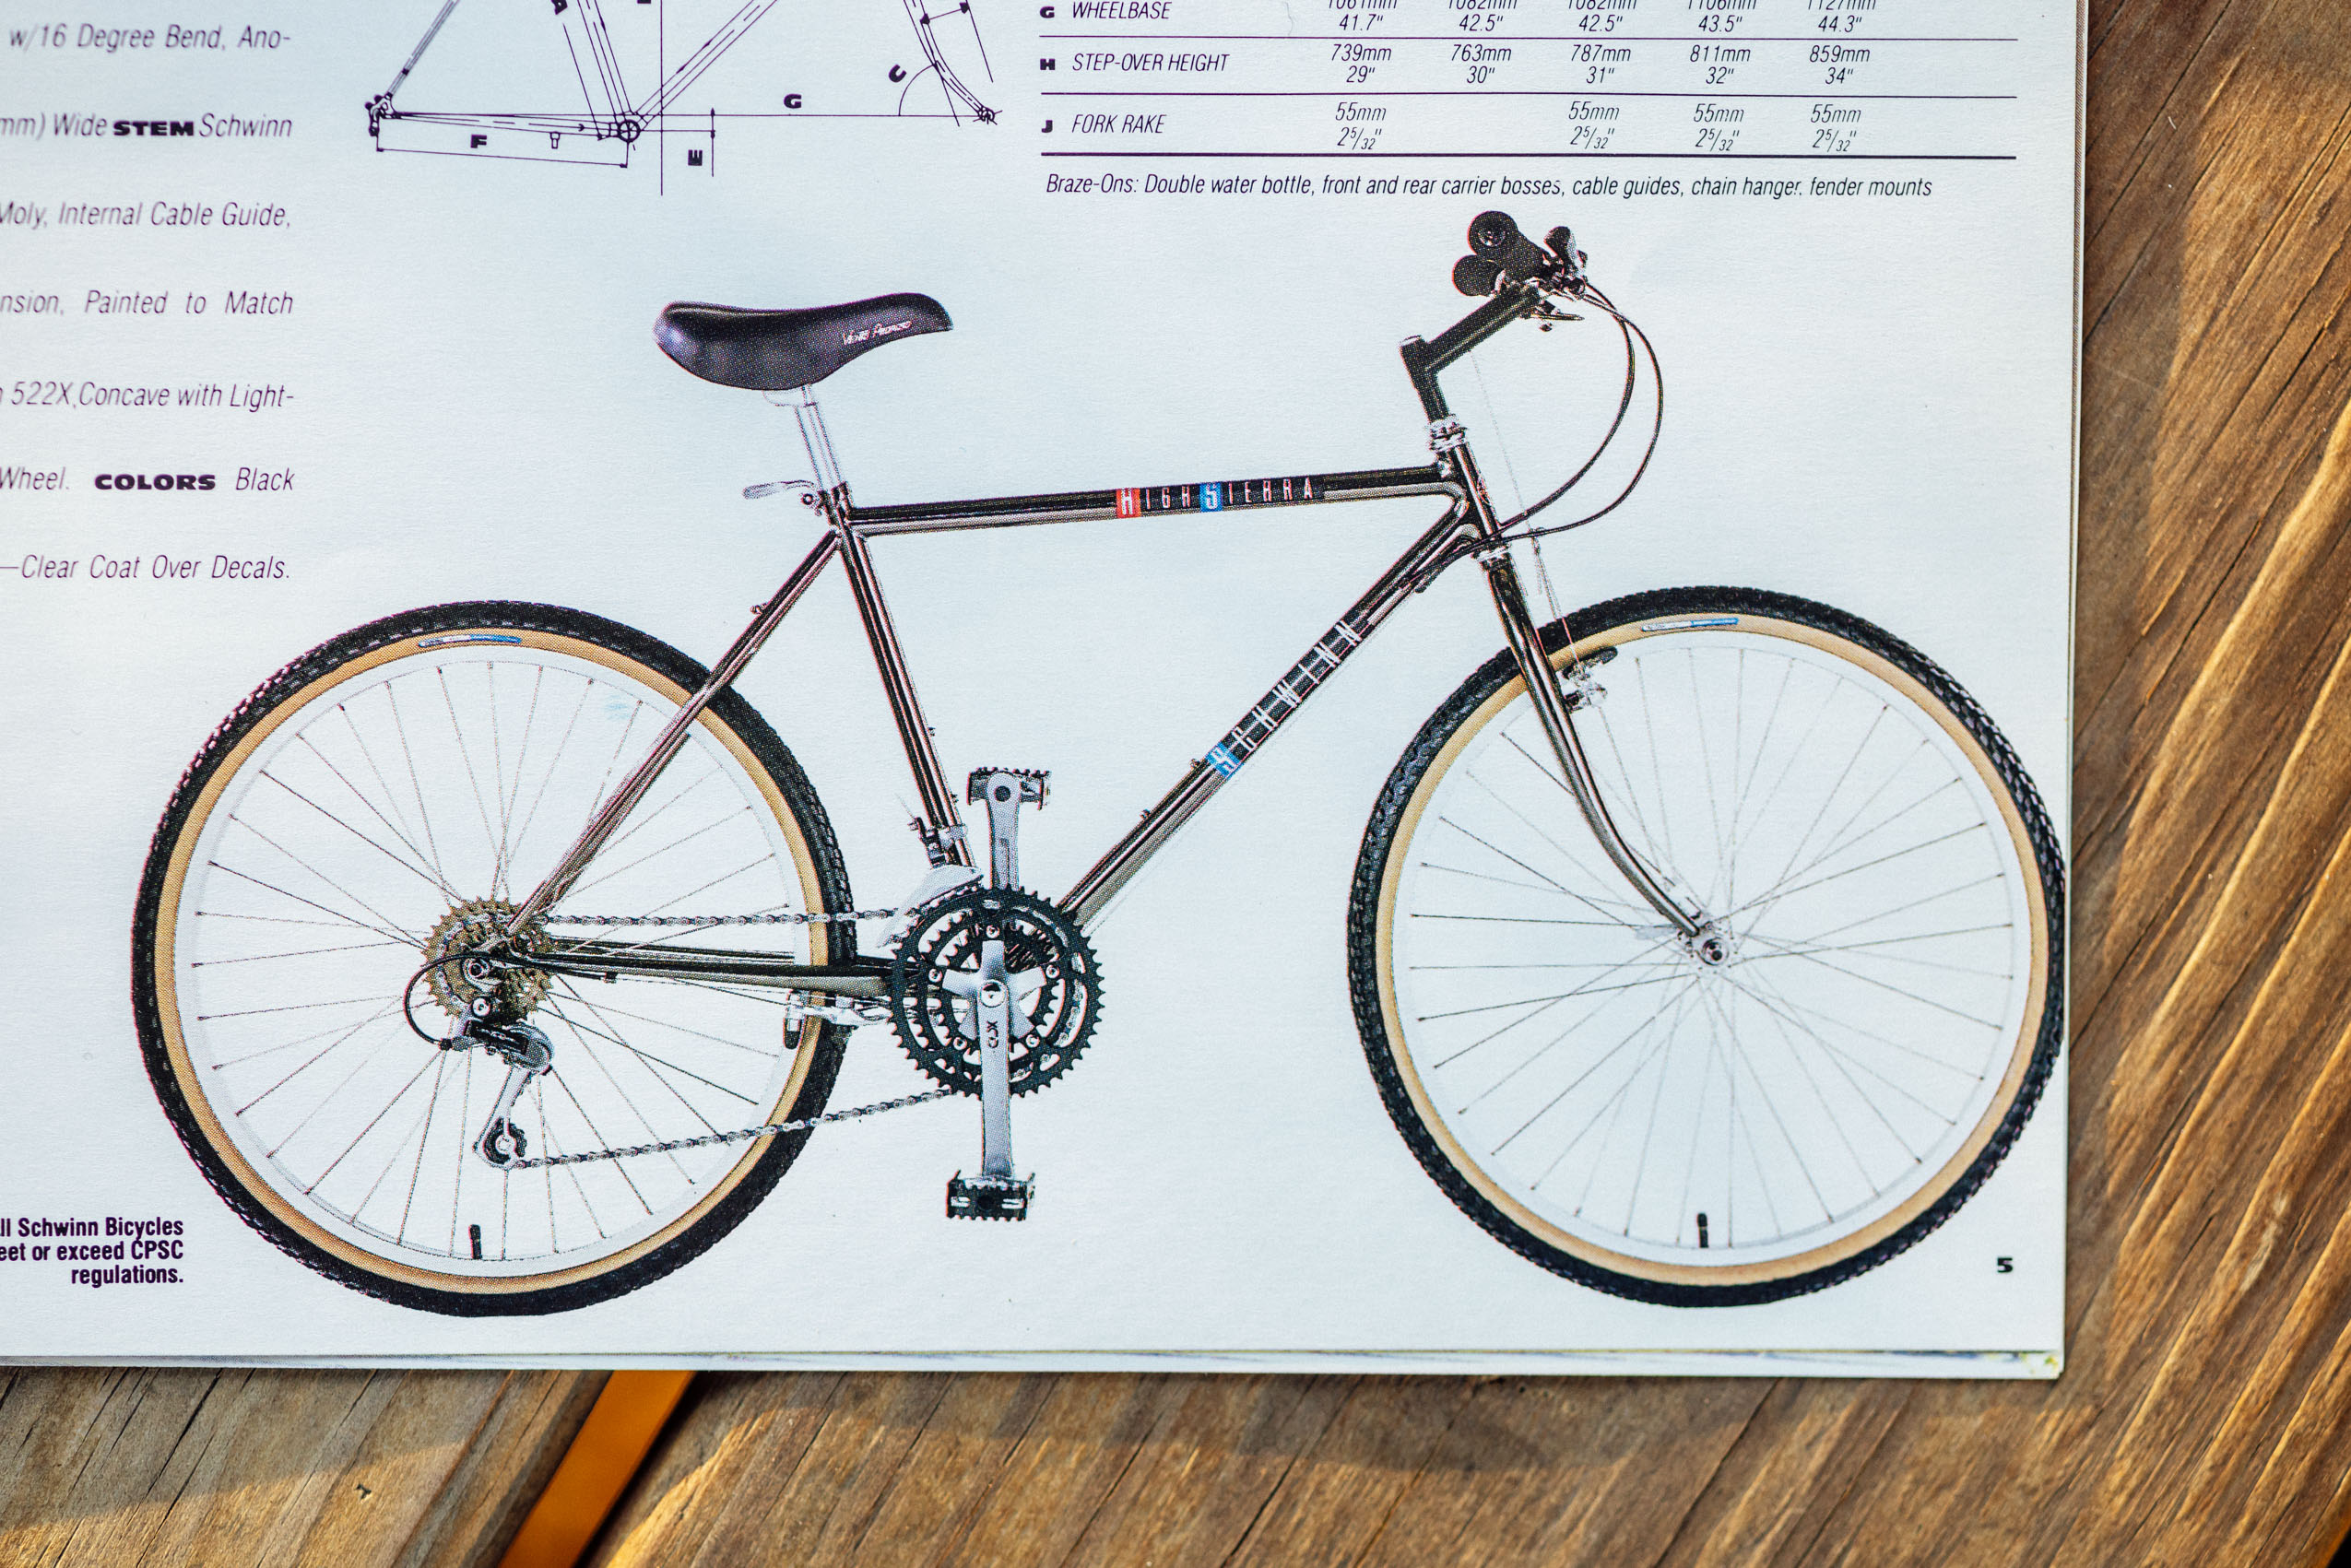
Originally used in 1963 to define a road bike, Sierra has a long and meandering history as a Schwinn bike model name. After its asphalt-centric beginnings, Sierra was reinvented in 1983 as the cornerstone of Schwinn’s All-Terrain Bike (ATB) lineup. By 1984, the Sierra and new High Sierra were officially rebranded as mountain bikes, becoming the flagship off-road models in Schwinn’s catalog, with the High Sierra sitting at the top of the MTB category. Schwinn reverted to the ATB terminology a year later with the introduction of the Cimarron as their premium 1985 off-road offering. Despite this shift, the High Sierra remained a staple in Schwinn’s lineup from 1984 to around 1996, typically positioned as the second or third tier model in the range.

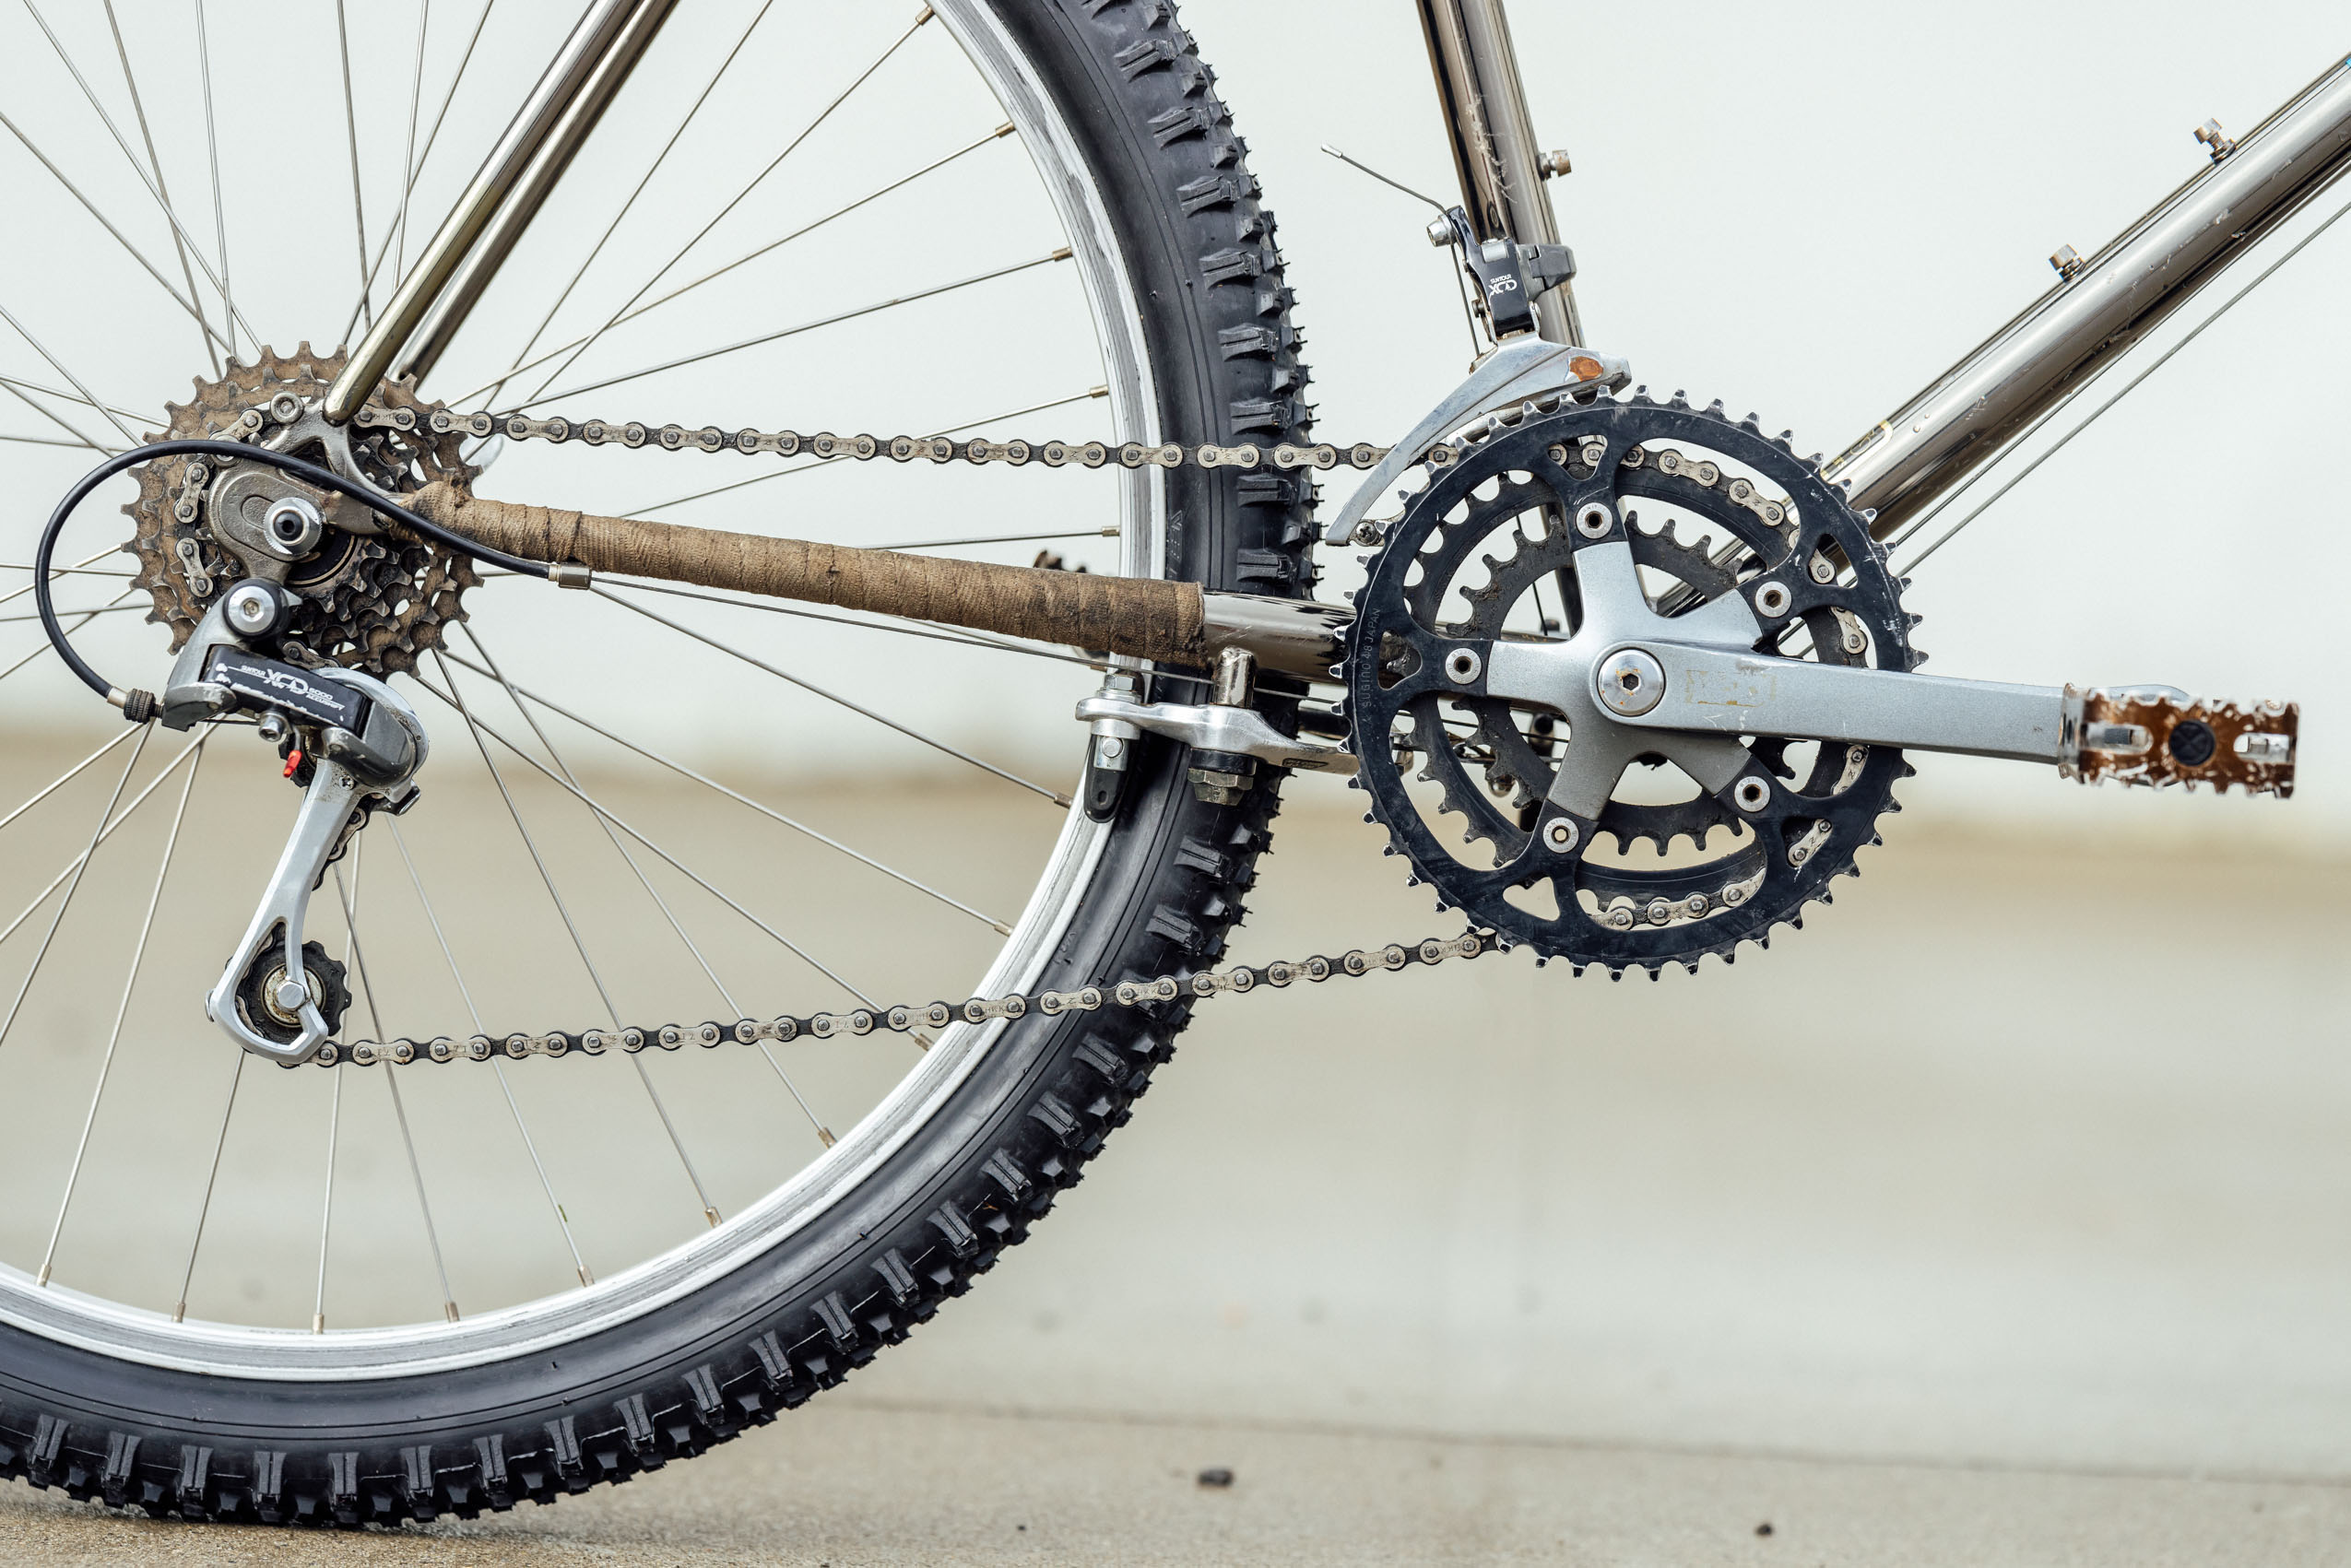


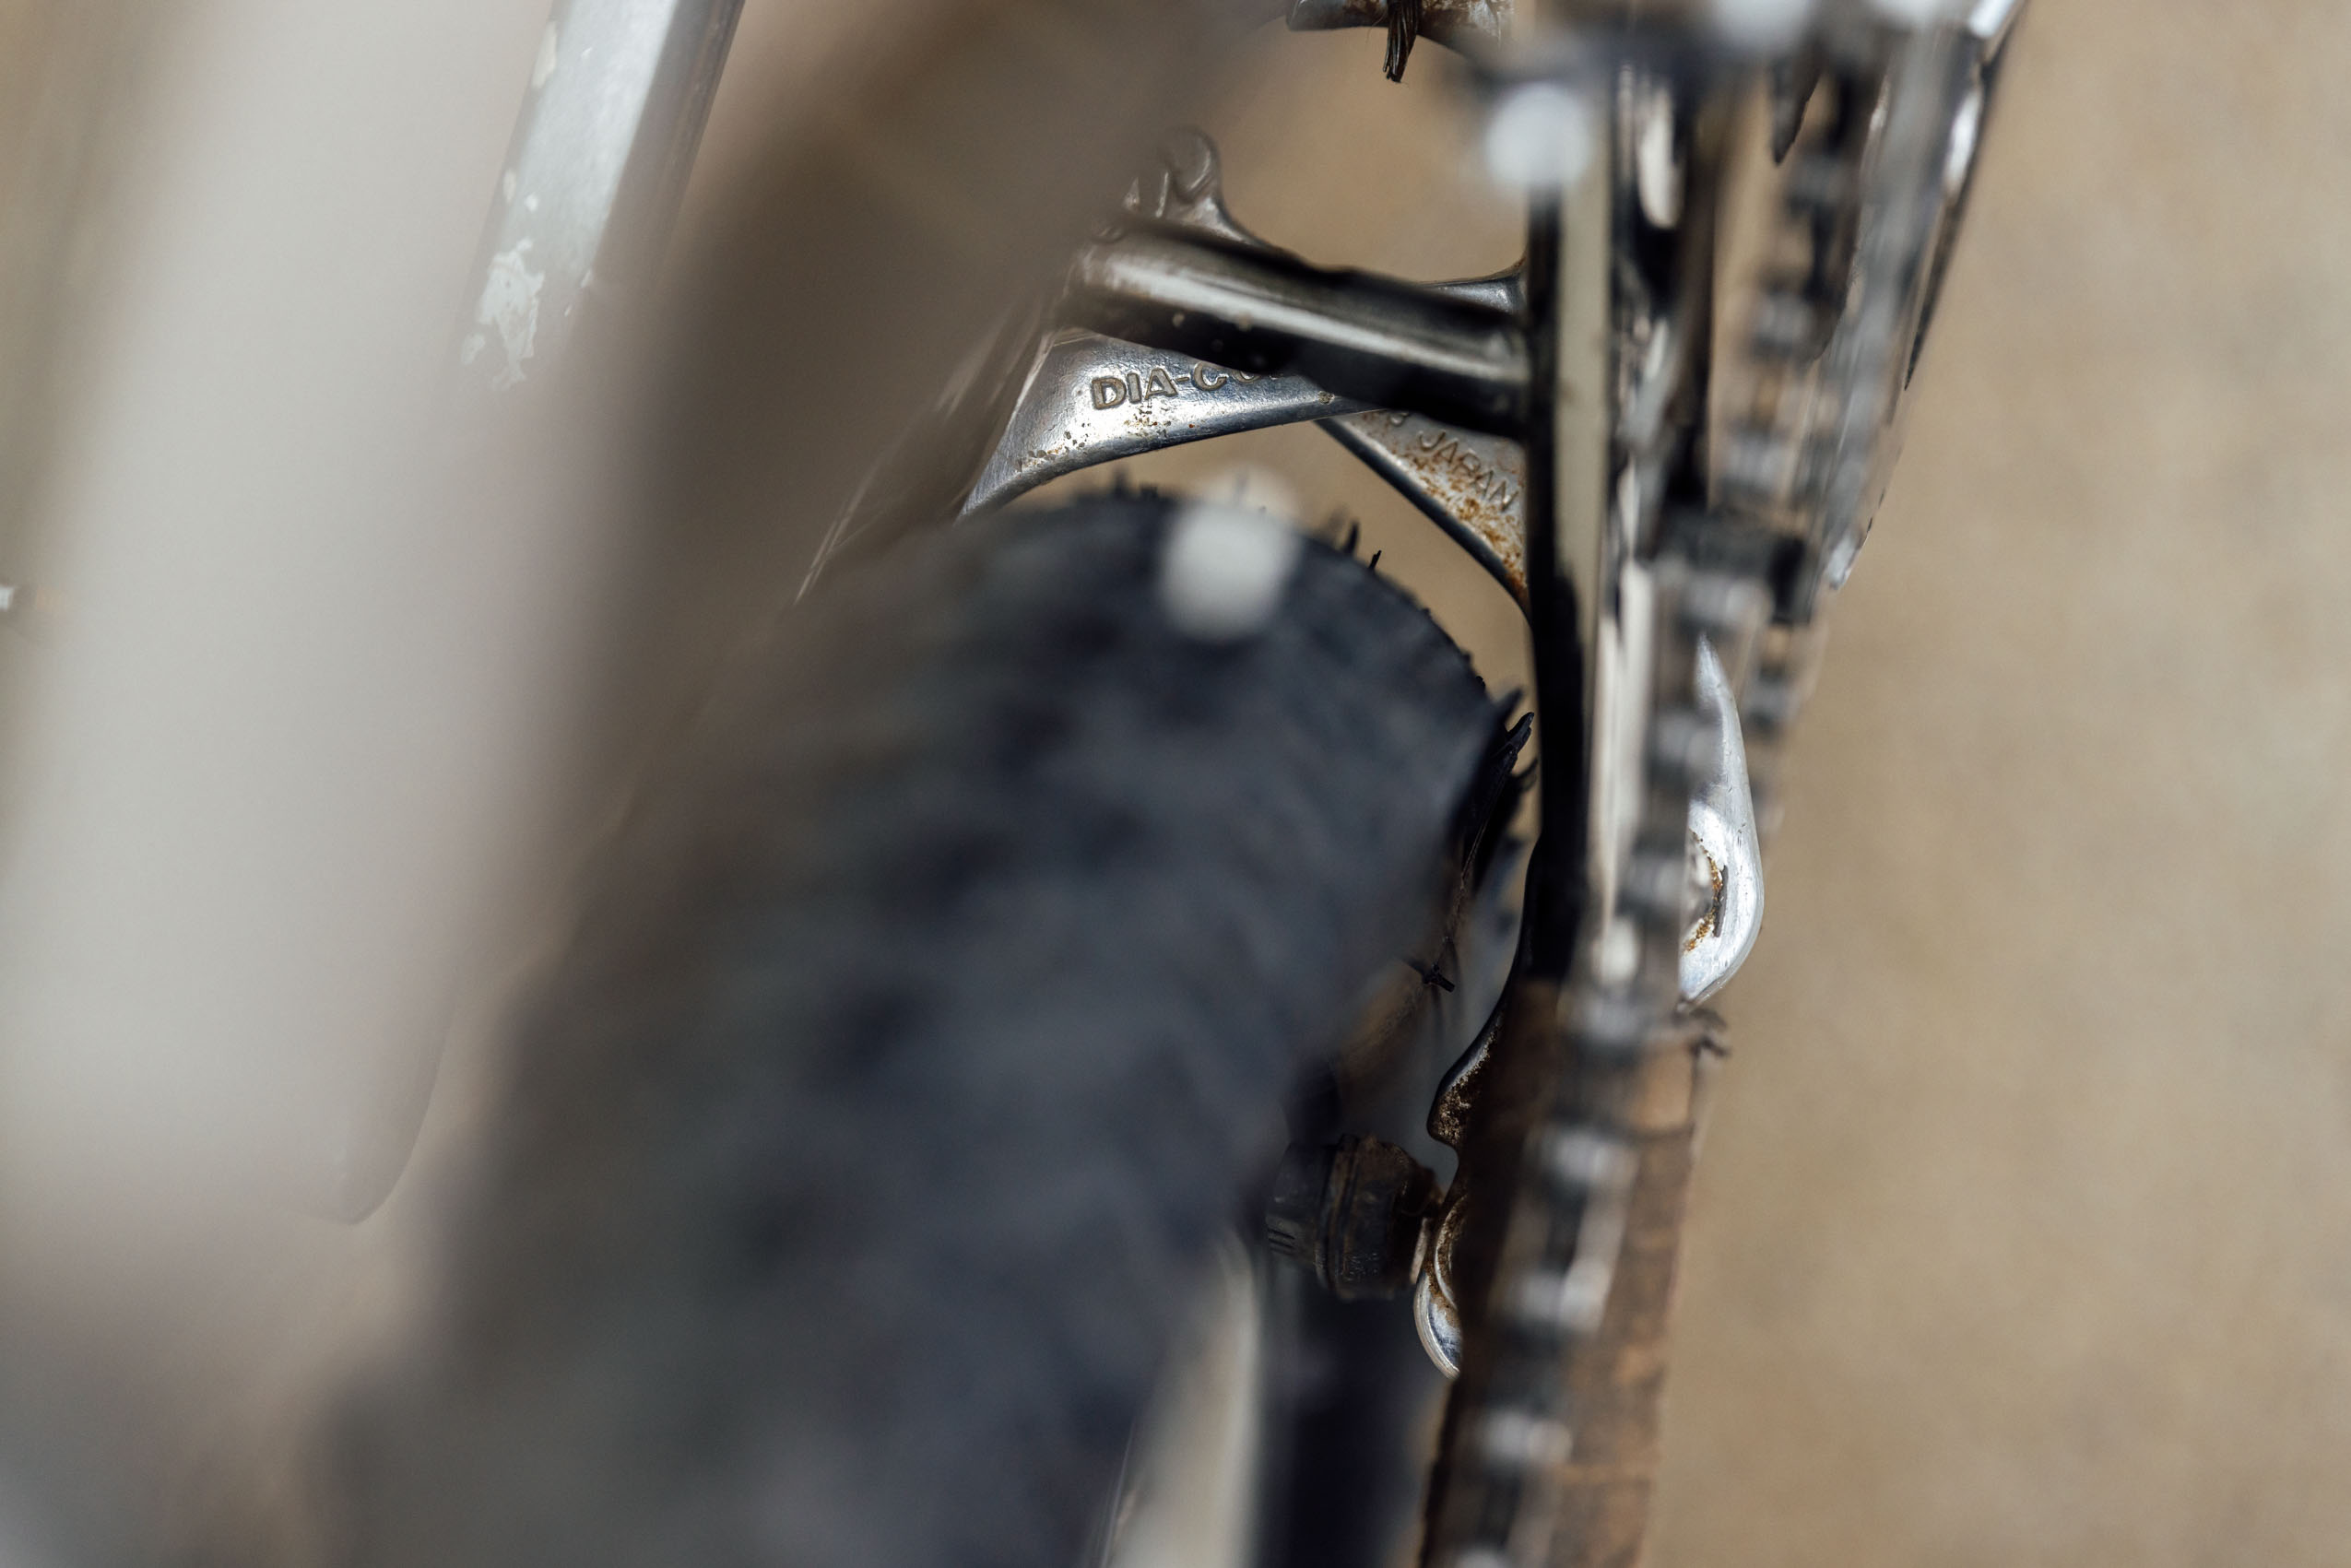


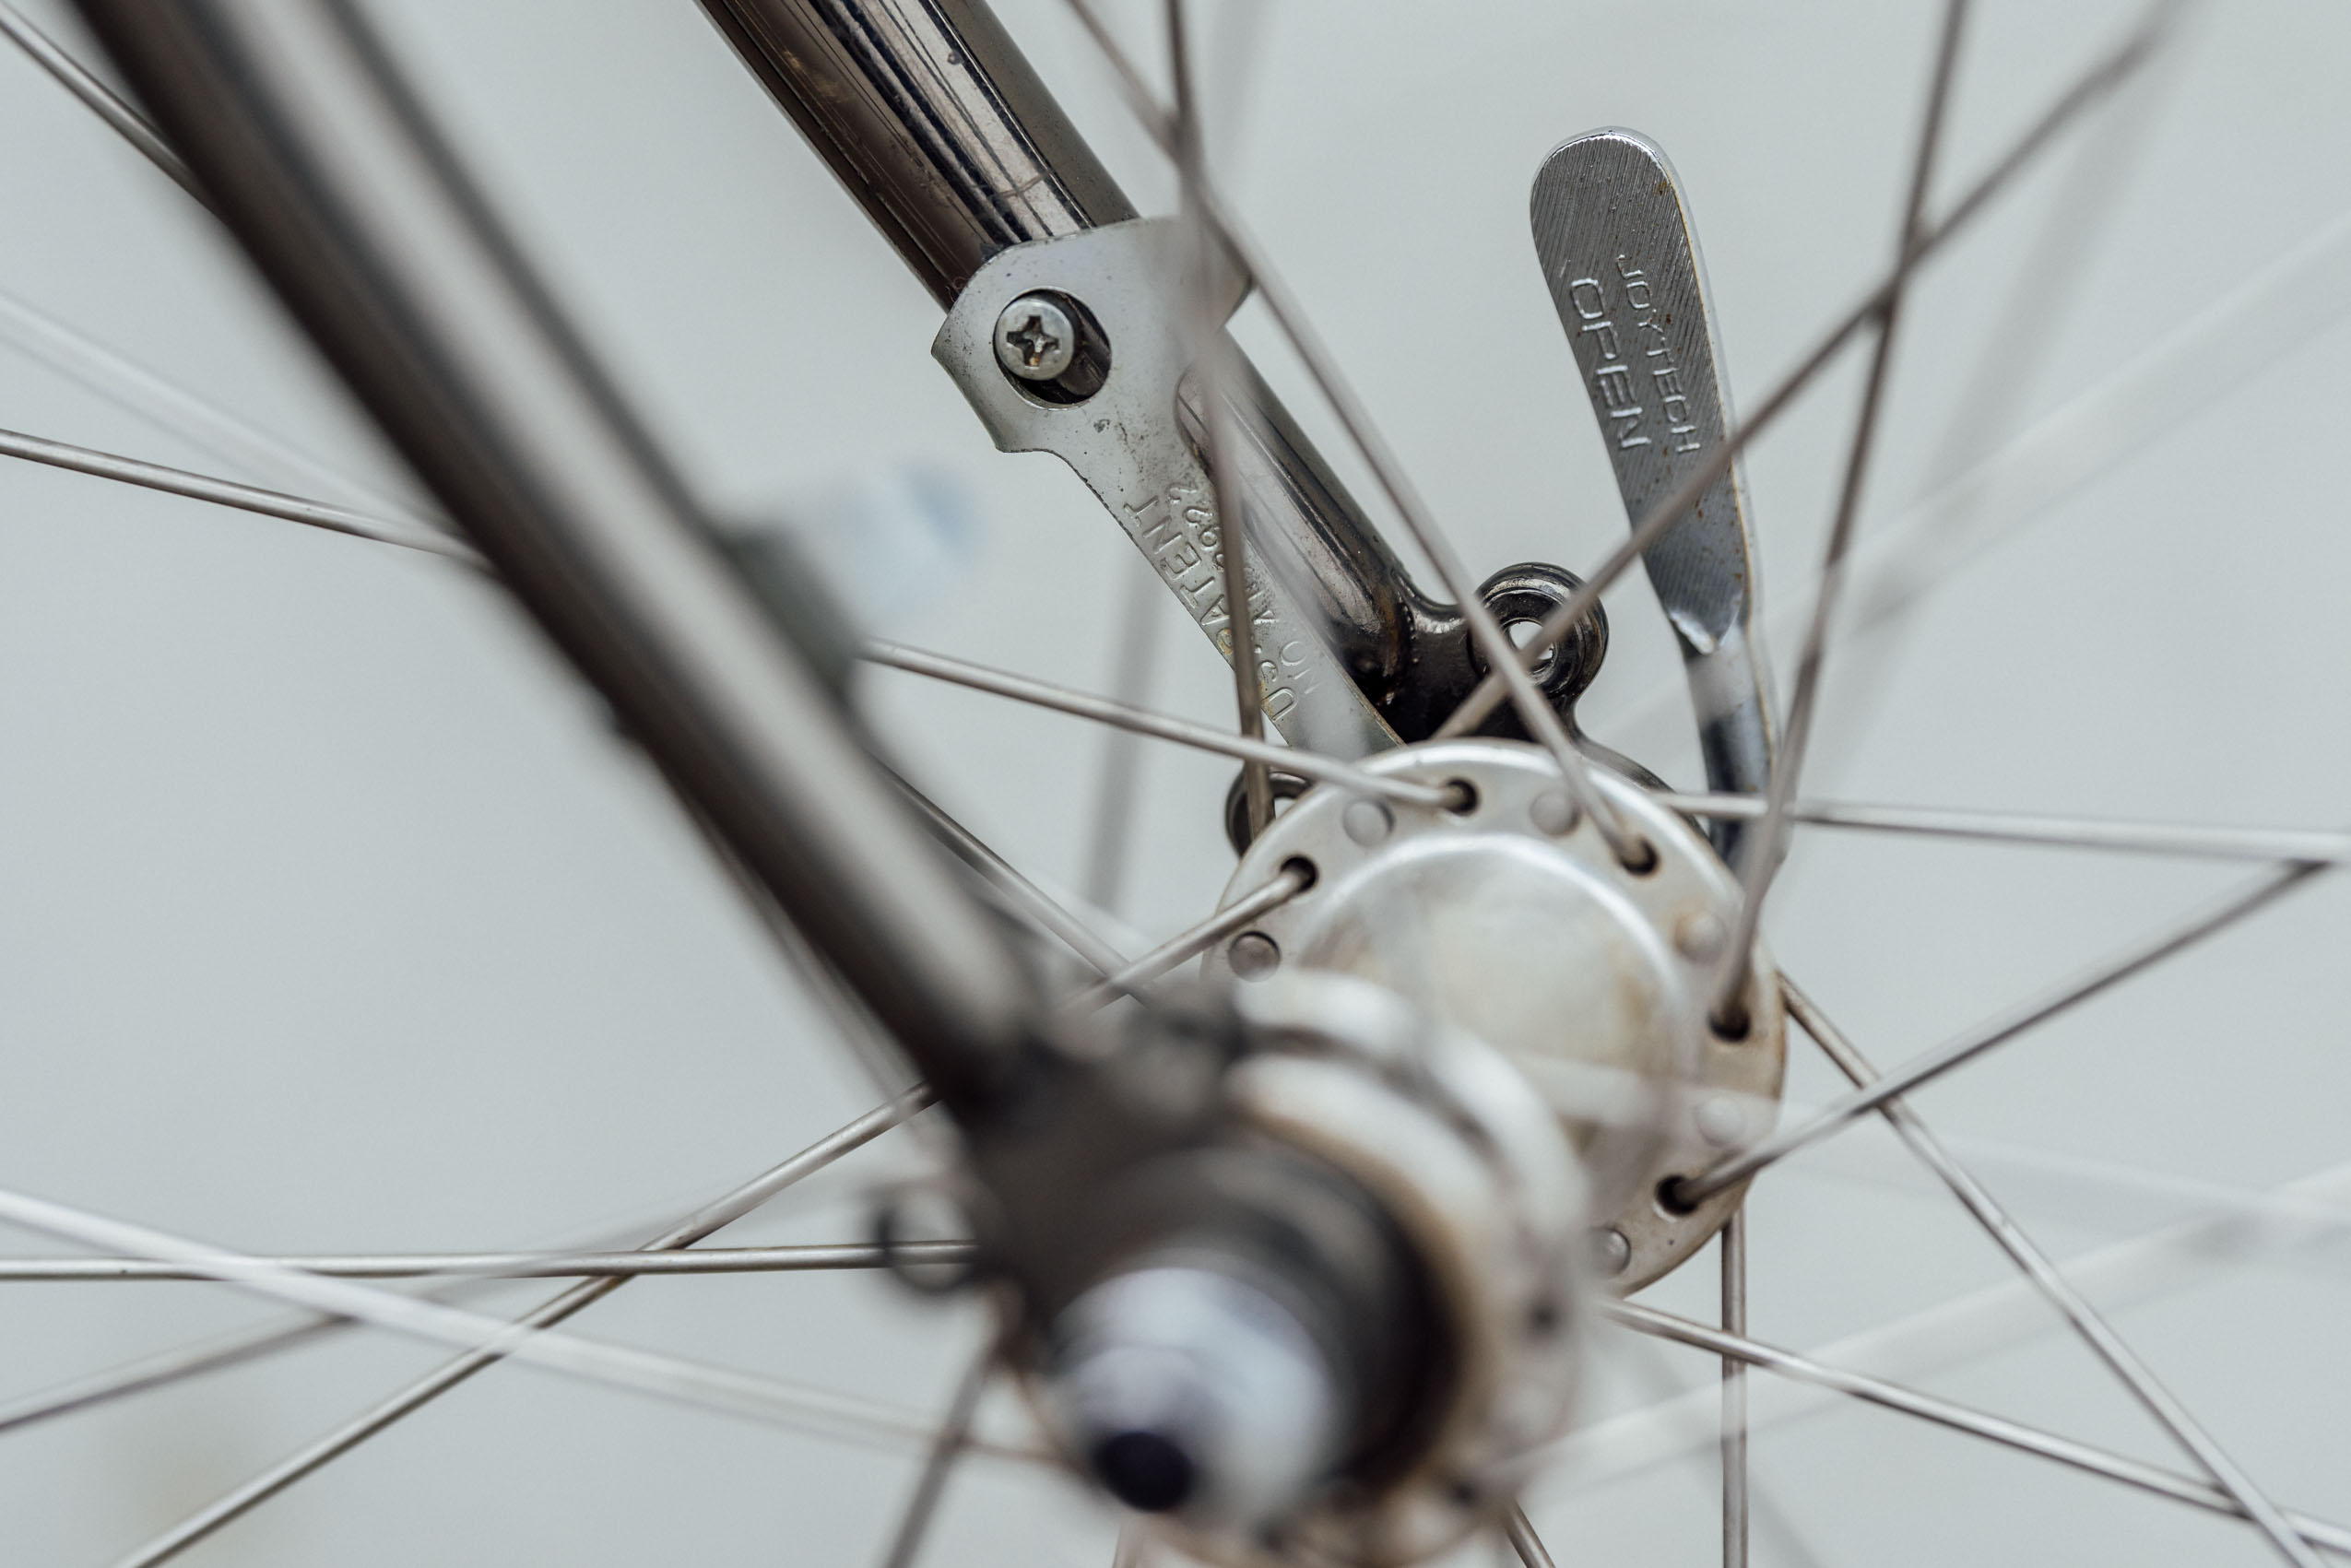


The High Sierra was third in line in Schwinn’s 1988 ATB catalog, with the Project KOM (“King of the Mountain” made specifically for the “World ATB championships”) and slightly higher-end Cimmaron appearing on the first few spreads. However, I’d argue that the ’88 High Sierra stole the show, featuring a striking Black Chrome fillet-brazed chrome-moly frame with triple-butted main tubes and an ovalized seat tube and fork blades. The build was equipped with SunTour XCD-6000 derailleurs, Accushift shifters, a Dia-Compe 983E front cantilever brake, Dia-Compe 284II mini-power levers, and the unique Advantage 990 under-chainstay rear canti brake.


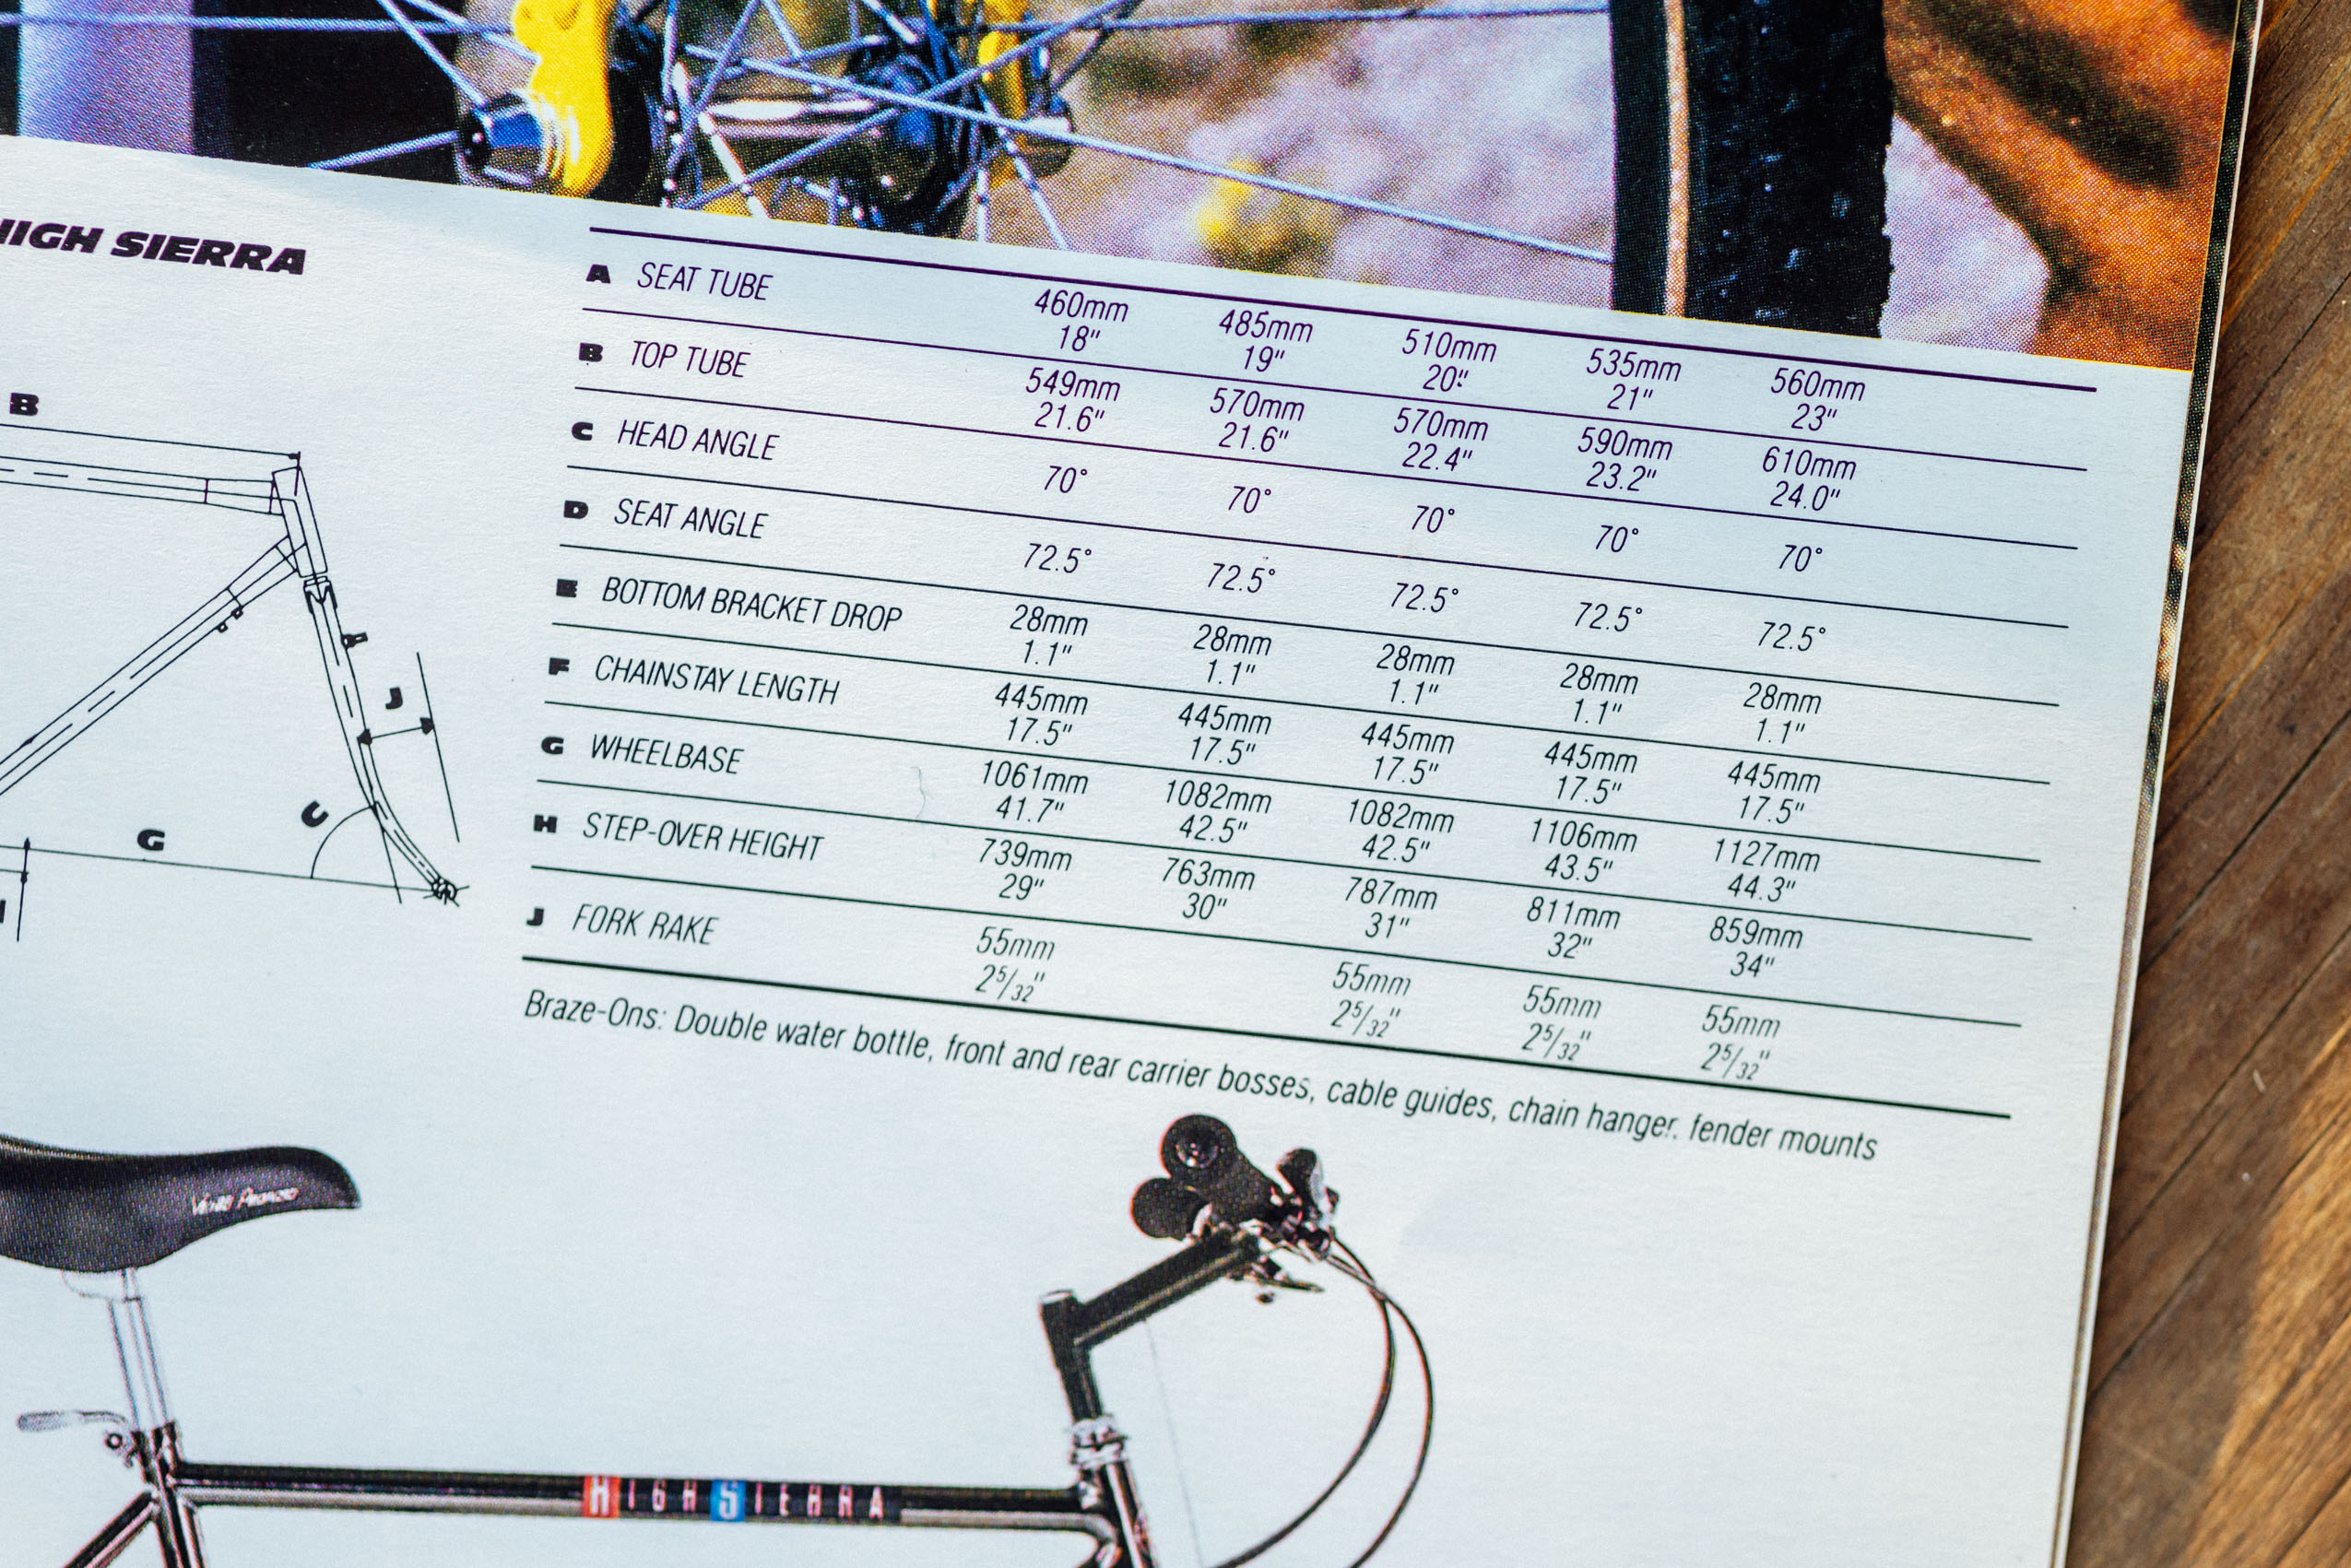
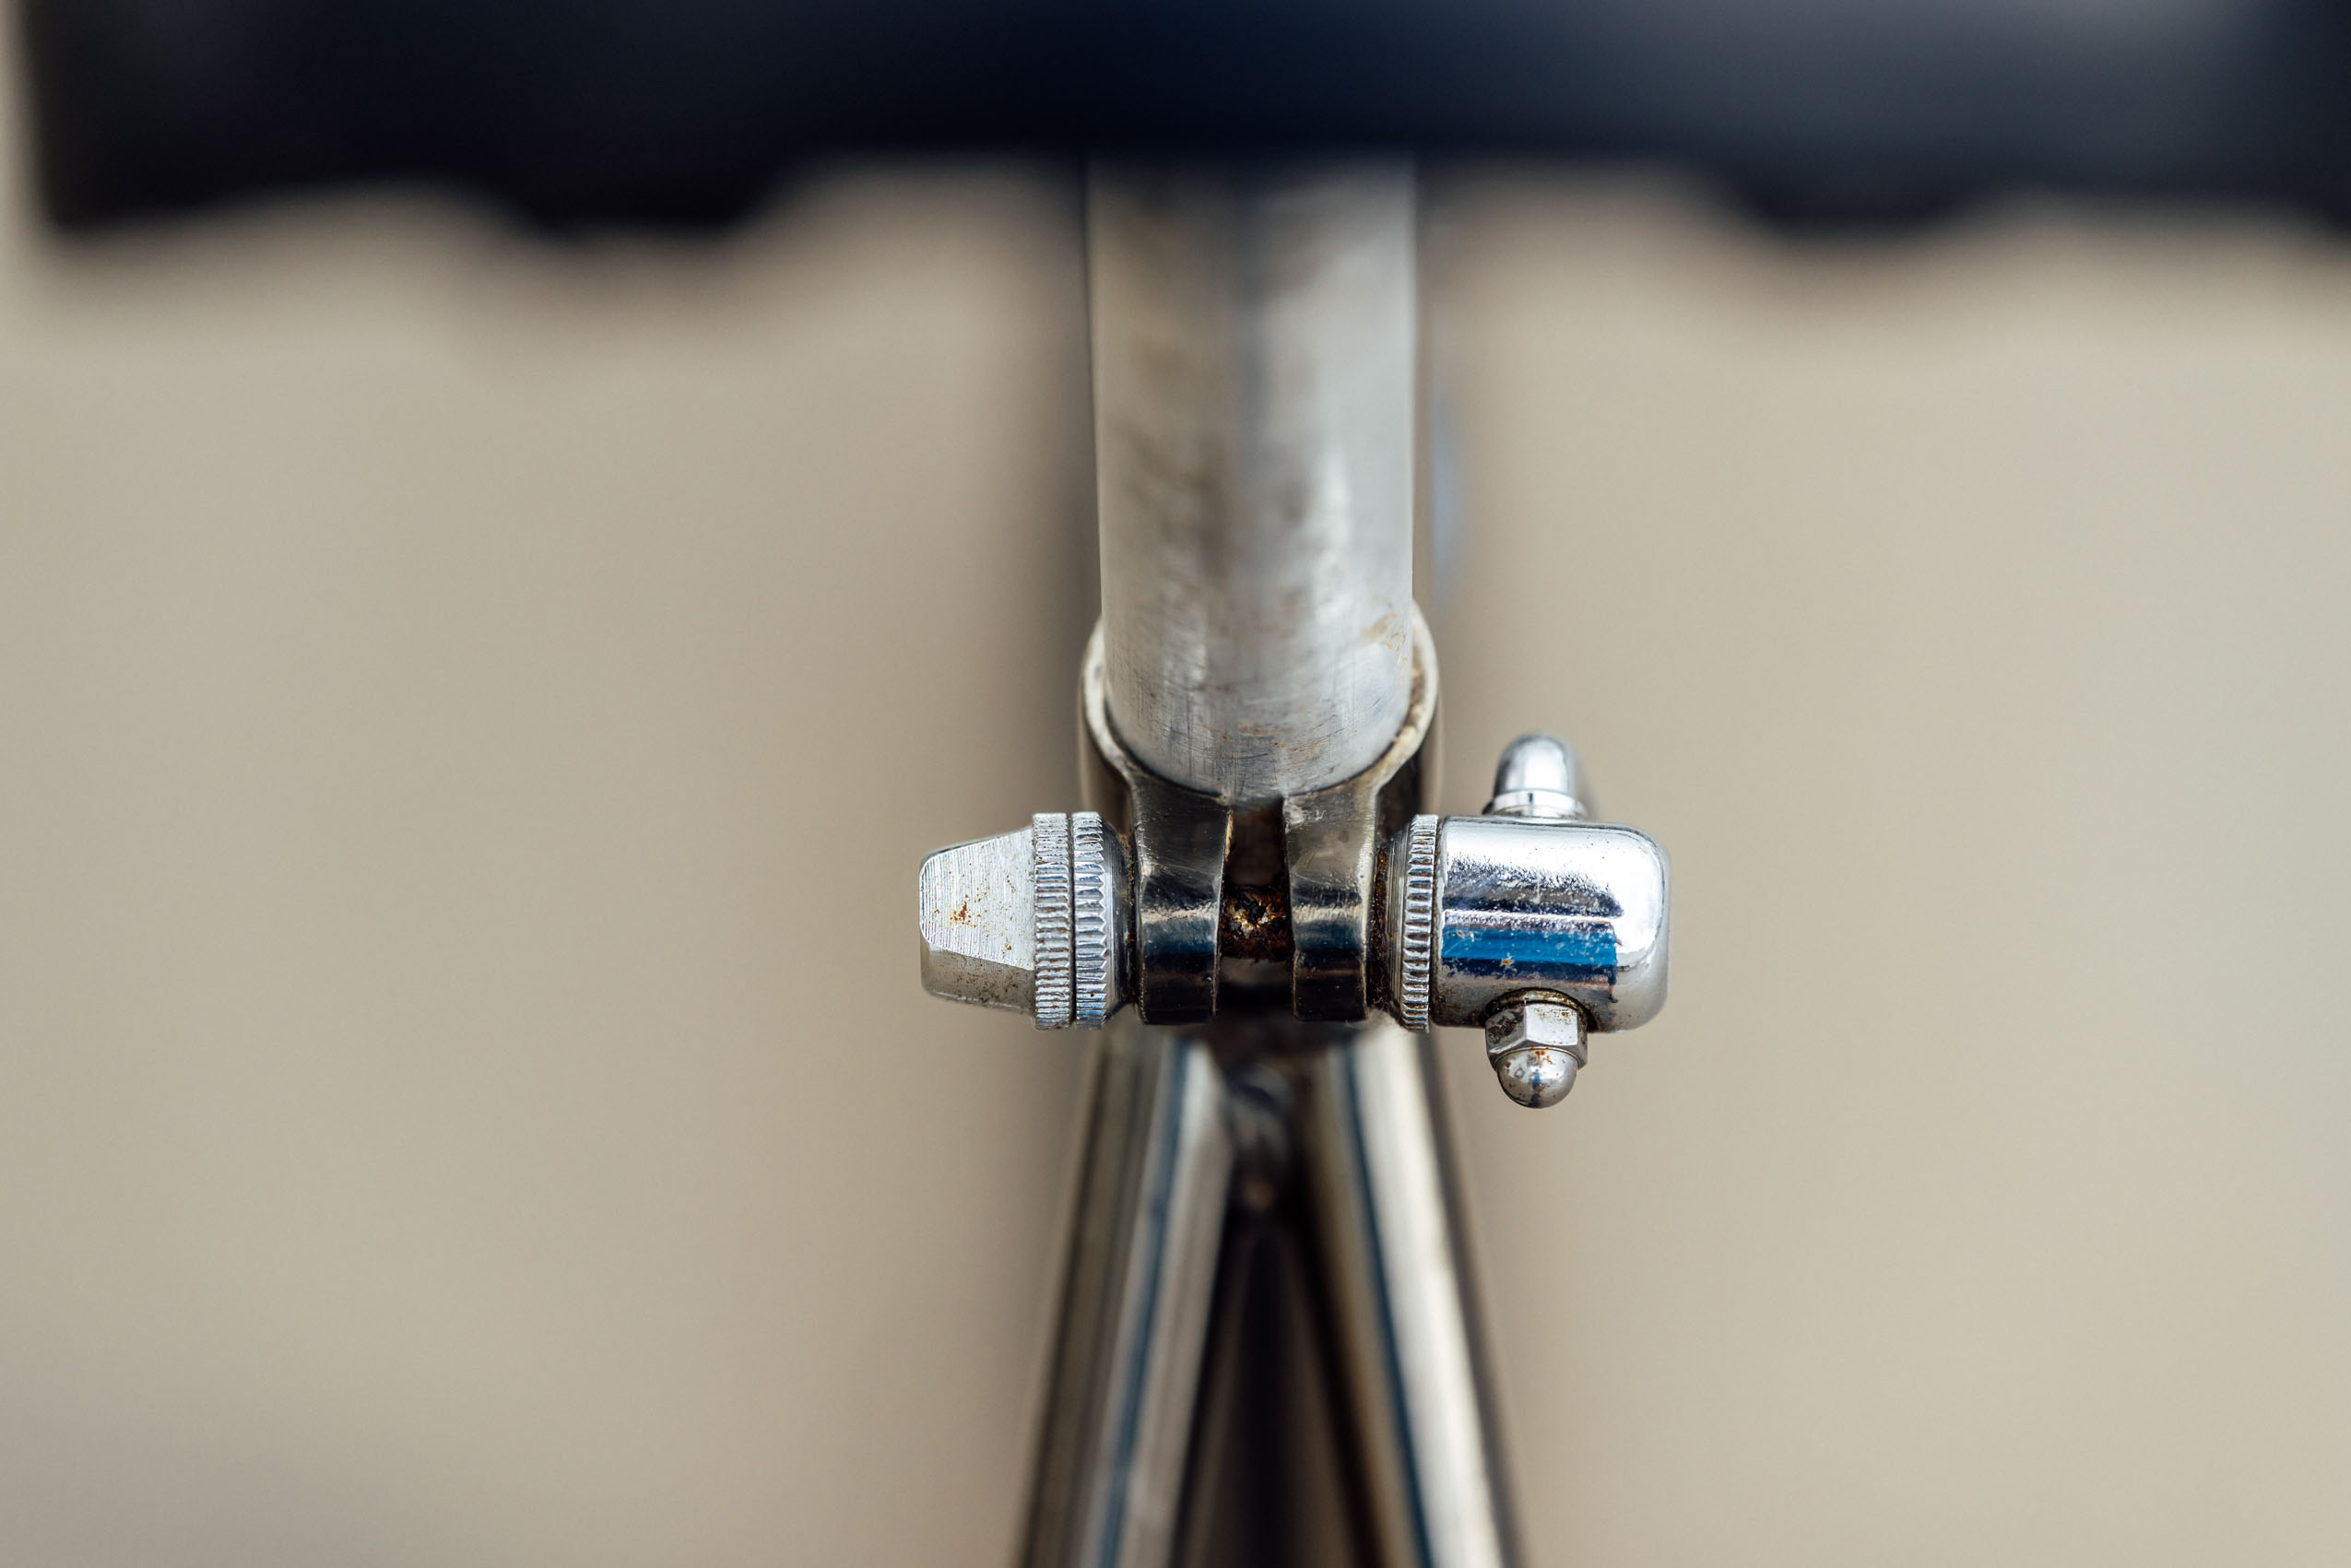
Fortunately for me, this particular 1988 High Sierra was in pretty good shape and 100% rideable when I bought it for $150. Save for a pair of slick tires, it had all the original components, including the 16° black-anodized aluminum ultra-narrow 24” handlebars, a Schwinn Team Issue stem with internal cable guide, and lightweight Weinmann 522X concave rims. There really wasn’t any need for replacement parts, although I put a set of larger knobbier tires on it for aesthetics and proper toughness. That being said, it’s worth highlighting my thought process when sourcing a used bike. It’s pretty easy to chew through a budget if you need to replace parts, so I was keeping a close eye on older rigid mountain bikes that were either priced under $100 and needed some upgrades or bikes in the $150 to $250 range that needed very little in the way of upgrades or replacement parts.
Racks and Bags
Before the bike was even in my possession, I already had ideas brewing about how I’d build a bag system for it. Over the past couple of years, most of my bikepacking setups have included a rack-top bag, so that was a no-brainer. All I needed was a rack. I opted to make my own rear rack using an OEM rack strut kit paired with scrap hardwood left over from my shop buildout. I added some “drillium” to reduce weight, and to keep things symmetrical, I decided to whip up a matching basket carrier for the front as well. I’ll be posting a full tutorial on these racks next week, but you can get a rough idea from the photoset, and be sure to stay tuned.
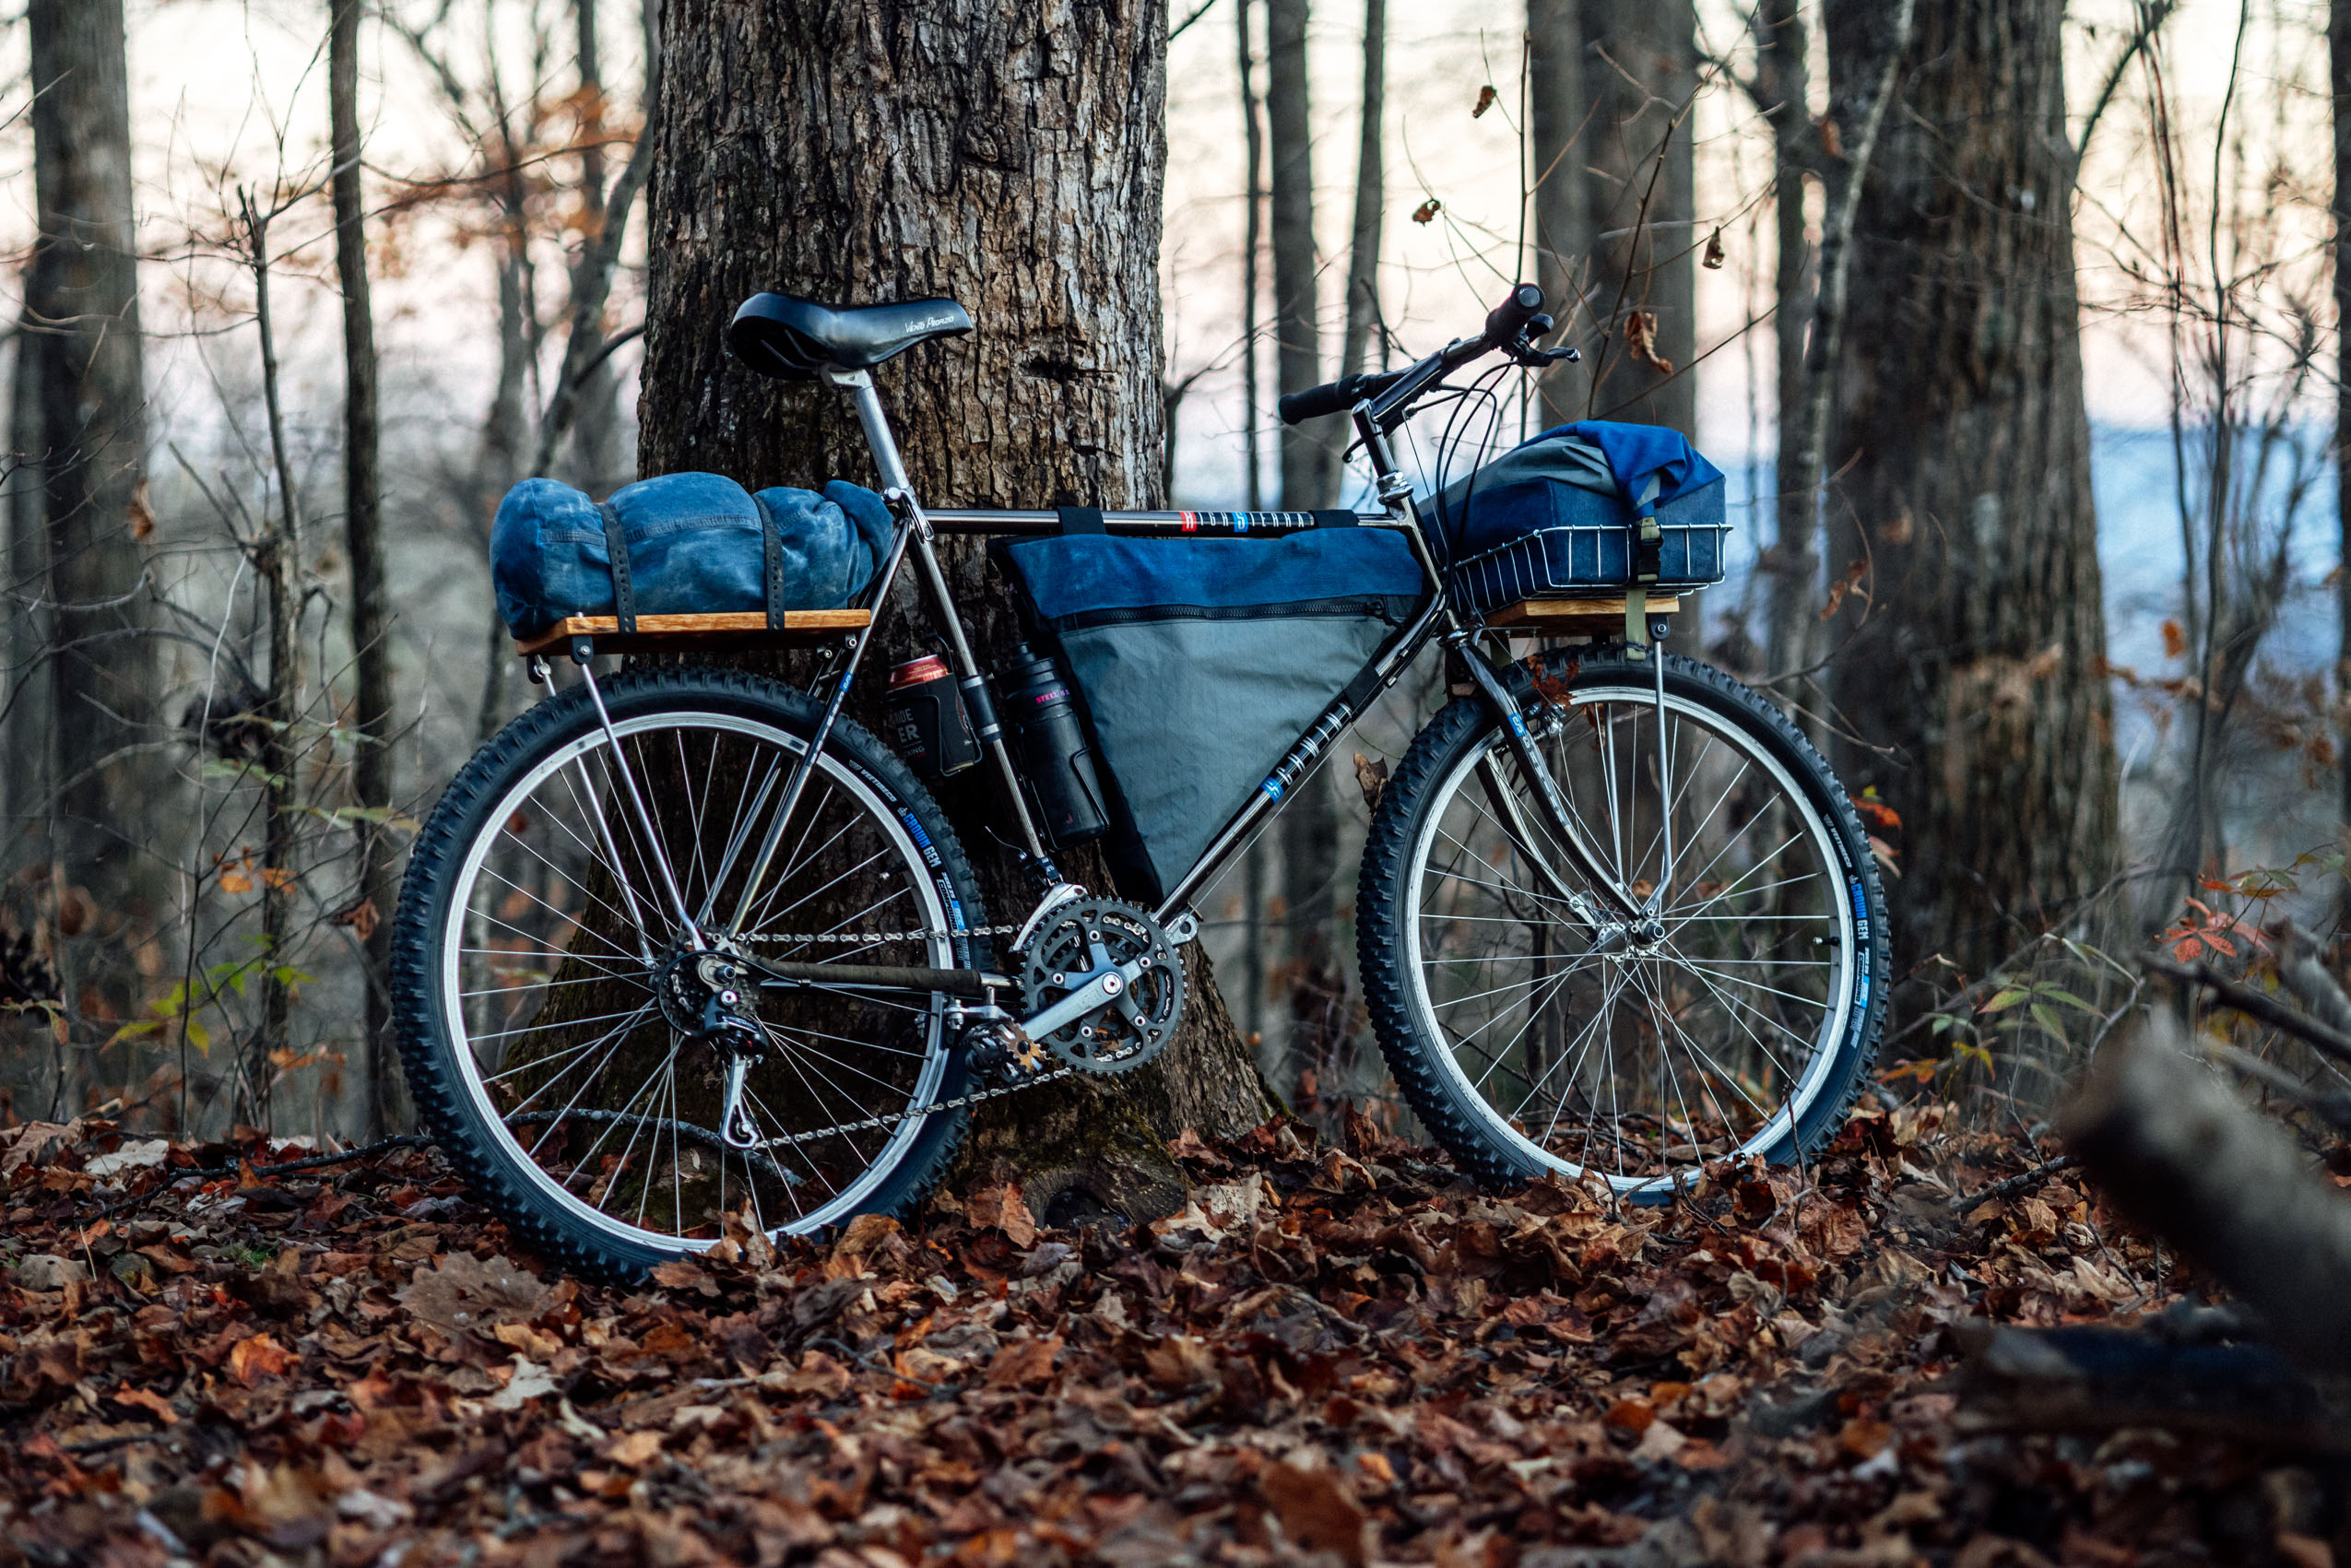


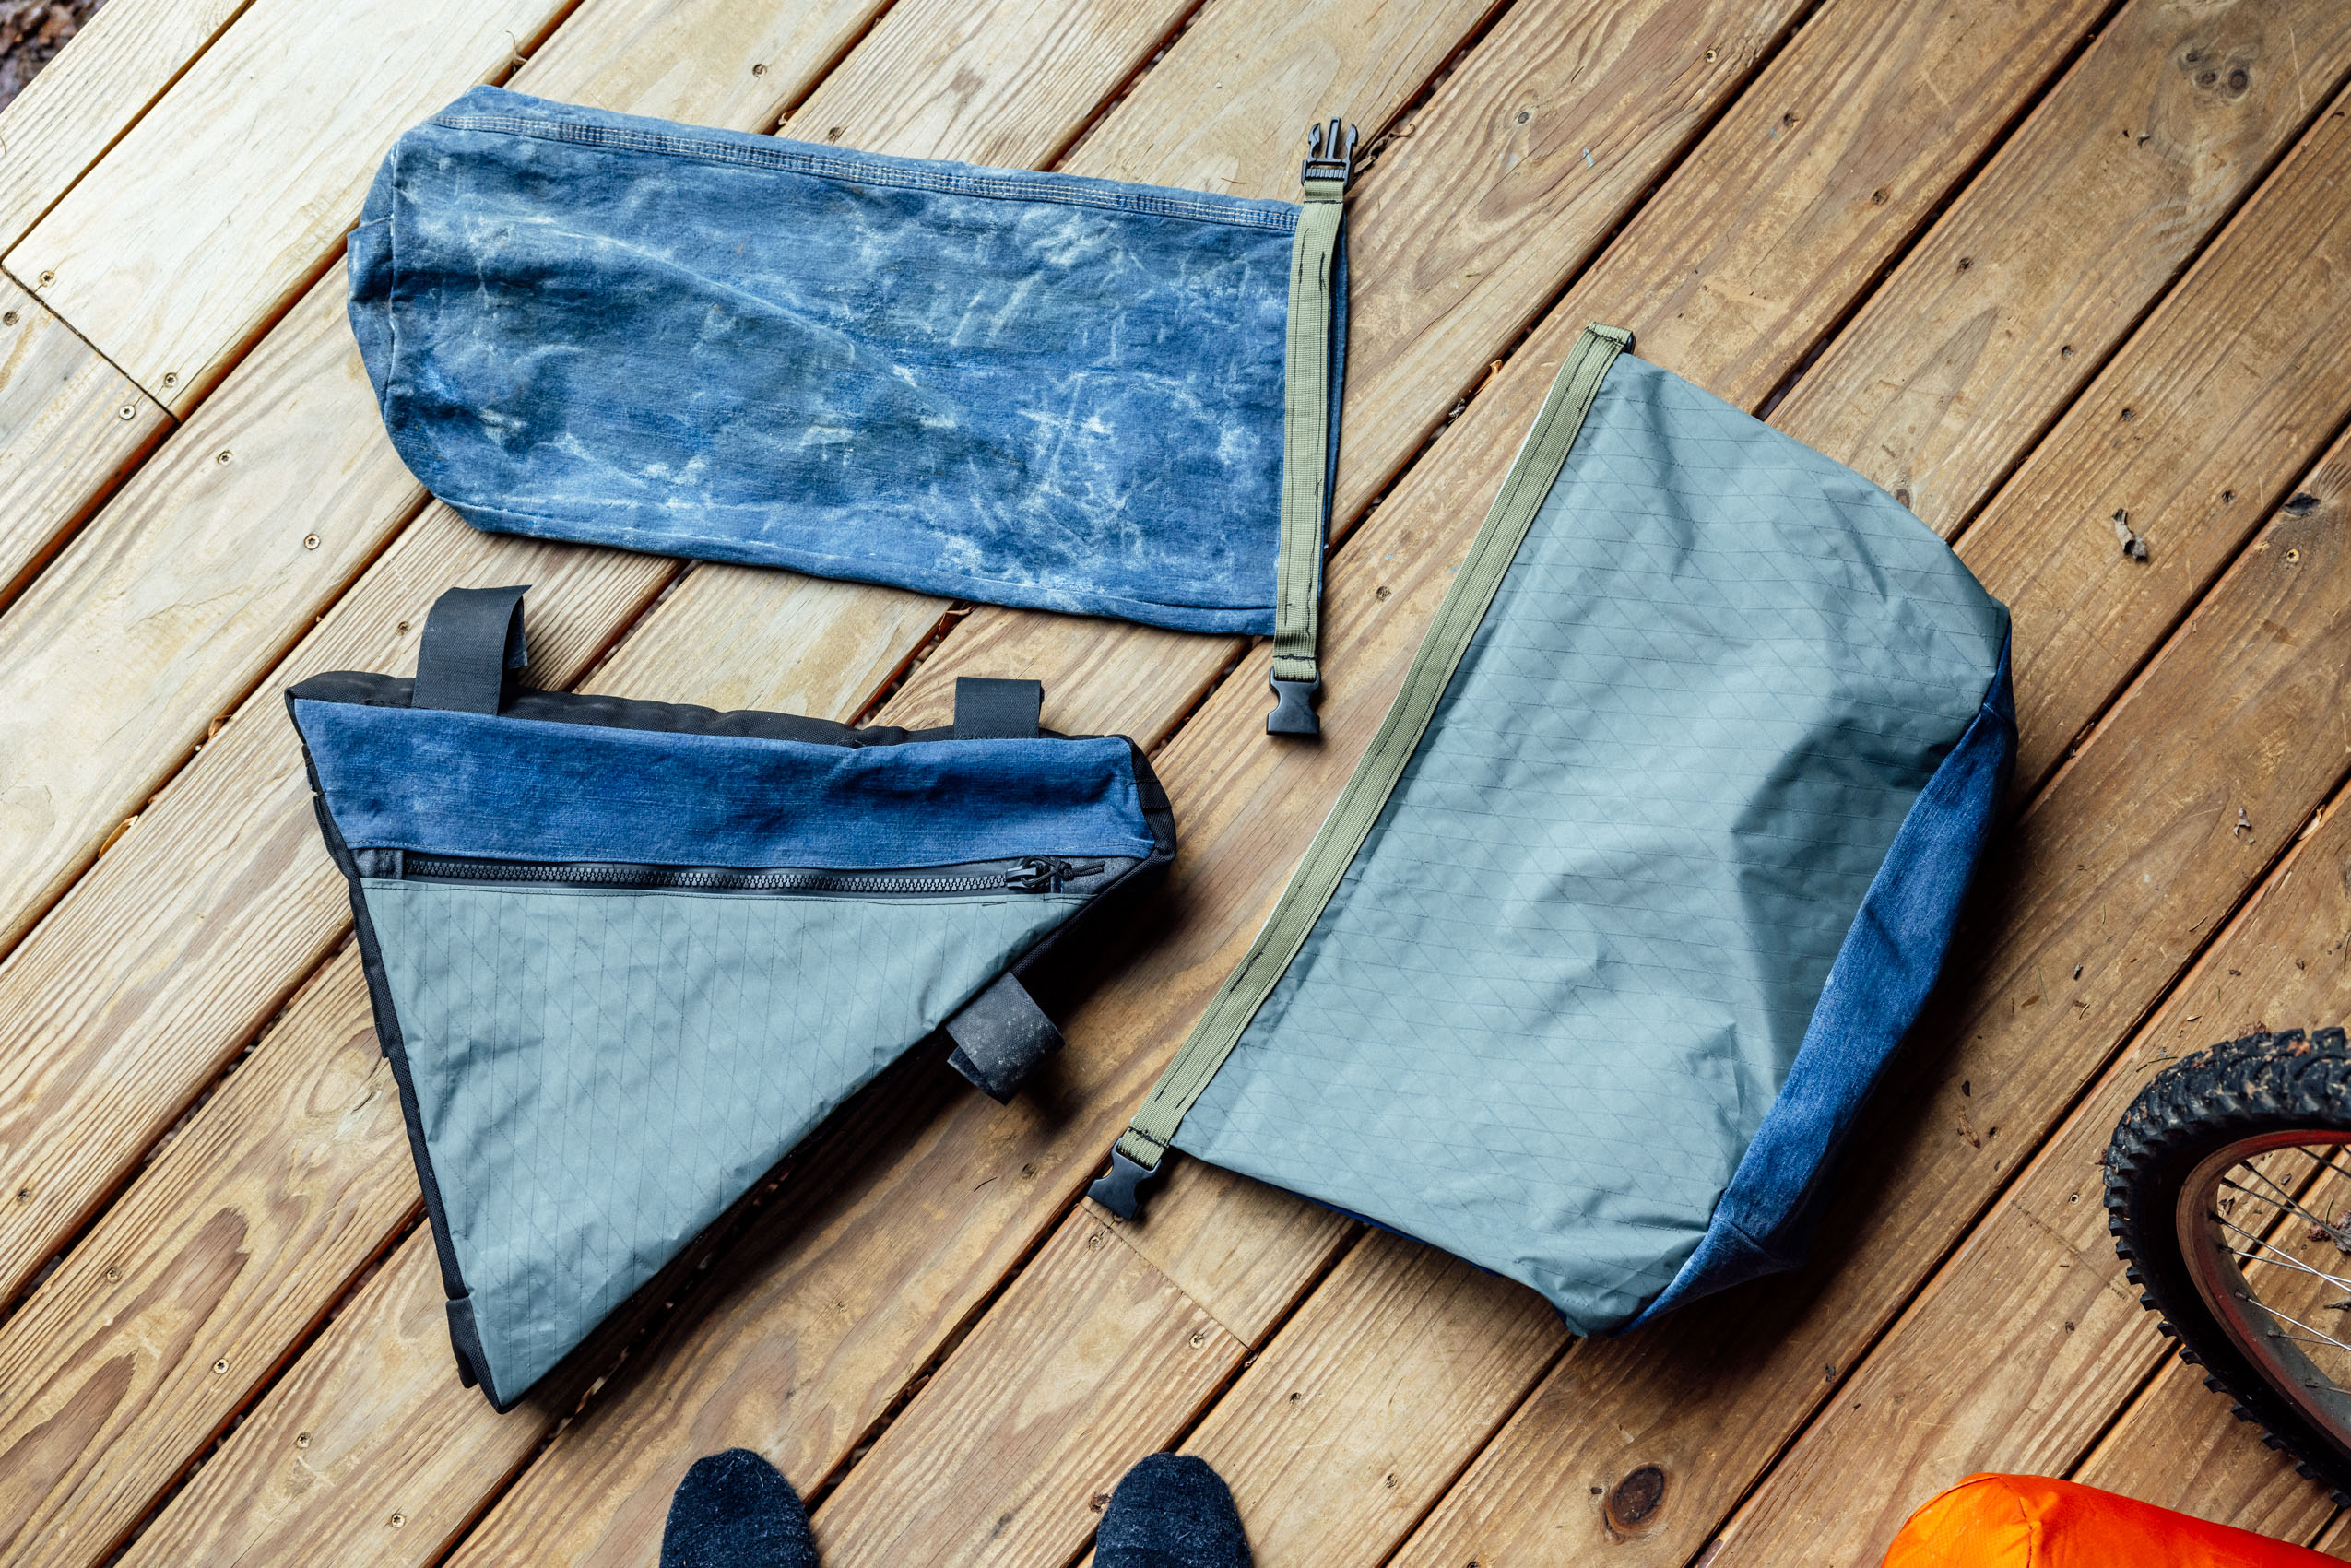
For the bags, I repurposed a $5 pair of size 44 blue jeans from our local thrift store after envisioning a waxed jean-leg stuff sack for the rack-top bag—tutorial for that’s also coming next week. There was plenty of material left over, which became the foundation for a Wald 137 basket bag, a frame bag, and a tool roll—more on that later in this post. To give the cotton denim a nice-looking, highly water-resistant finish, I treated it with a bar of Otter Wax.
As you can see in the photos above, I deliberated on the frame bag a bit, weighing out whether to make a half-frame shape or a wedge. The wedge won out, and I was able to make it using repurposed Cordura perimeter fabric, straps, and a zipper from my old Kona Sutra frame bag I burned with an iron several years ago. Obviously, not everyone is going to have that as an option, but using an old backpack could provide the same base materials. I used the blue jeans—complete with the pocket being a non-driveside knife sheath—and some leftover X-Pac I had on hand for the side panels.


Camping Gear
Staying within the budget got far trickier when I started looking into used camping gear—easily the most expensive, heavy, and bulky items in a bikepacking kit. I found several inflatable sleeping pads on Facebook Marketplace for $20 to $30 that needed patching, but to avoid buying another pad, I sourced a used Nemo Tensor for $70.75, accounted for that, and used one like it I already owned.

After watching and waiting for used sleeping bags to come available on Marketplace, it became pretty clear that one of the most common and affordable models that pops up regularly is the North Face Cat’s Meow. I’m pretty sure I had one of these in my backpacking days in college, but I had forgotten how bulky they were. To be fair though, I wanted a 20° model as I knew we’d be camping in the cold, so I had to settle for what I could find within my $50 budget.

The bag didn’t come with a compression sack, so I was pretty proud of myself when I figured out how to repurpose a thick polyethylene bag—likely part of the packaging from a suspension fork—and a nylon belt to create a DIY compression sack. It worked perfectly, squishing the sleeping bag down to a manageable size that fit neatly in my basket bag. The poly material seems durable enough for now, though I imagine it might start to show some wear and tear after a month or so of use.


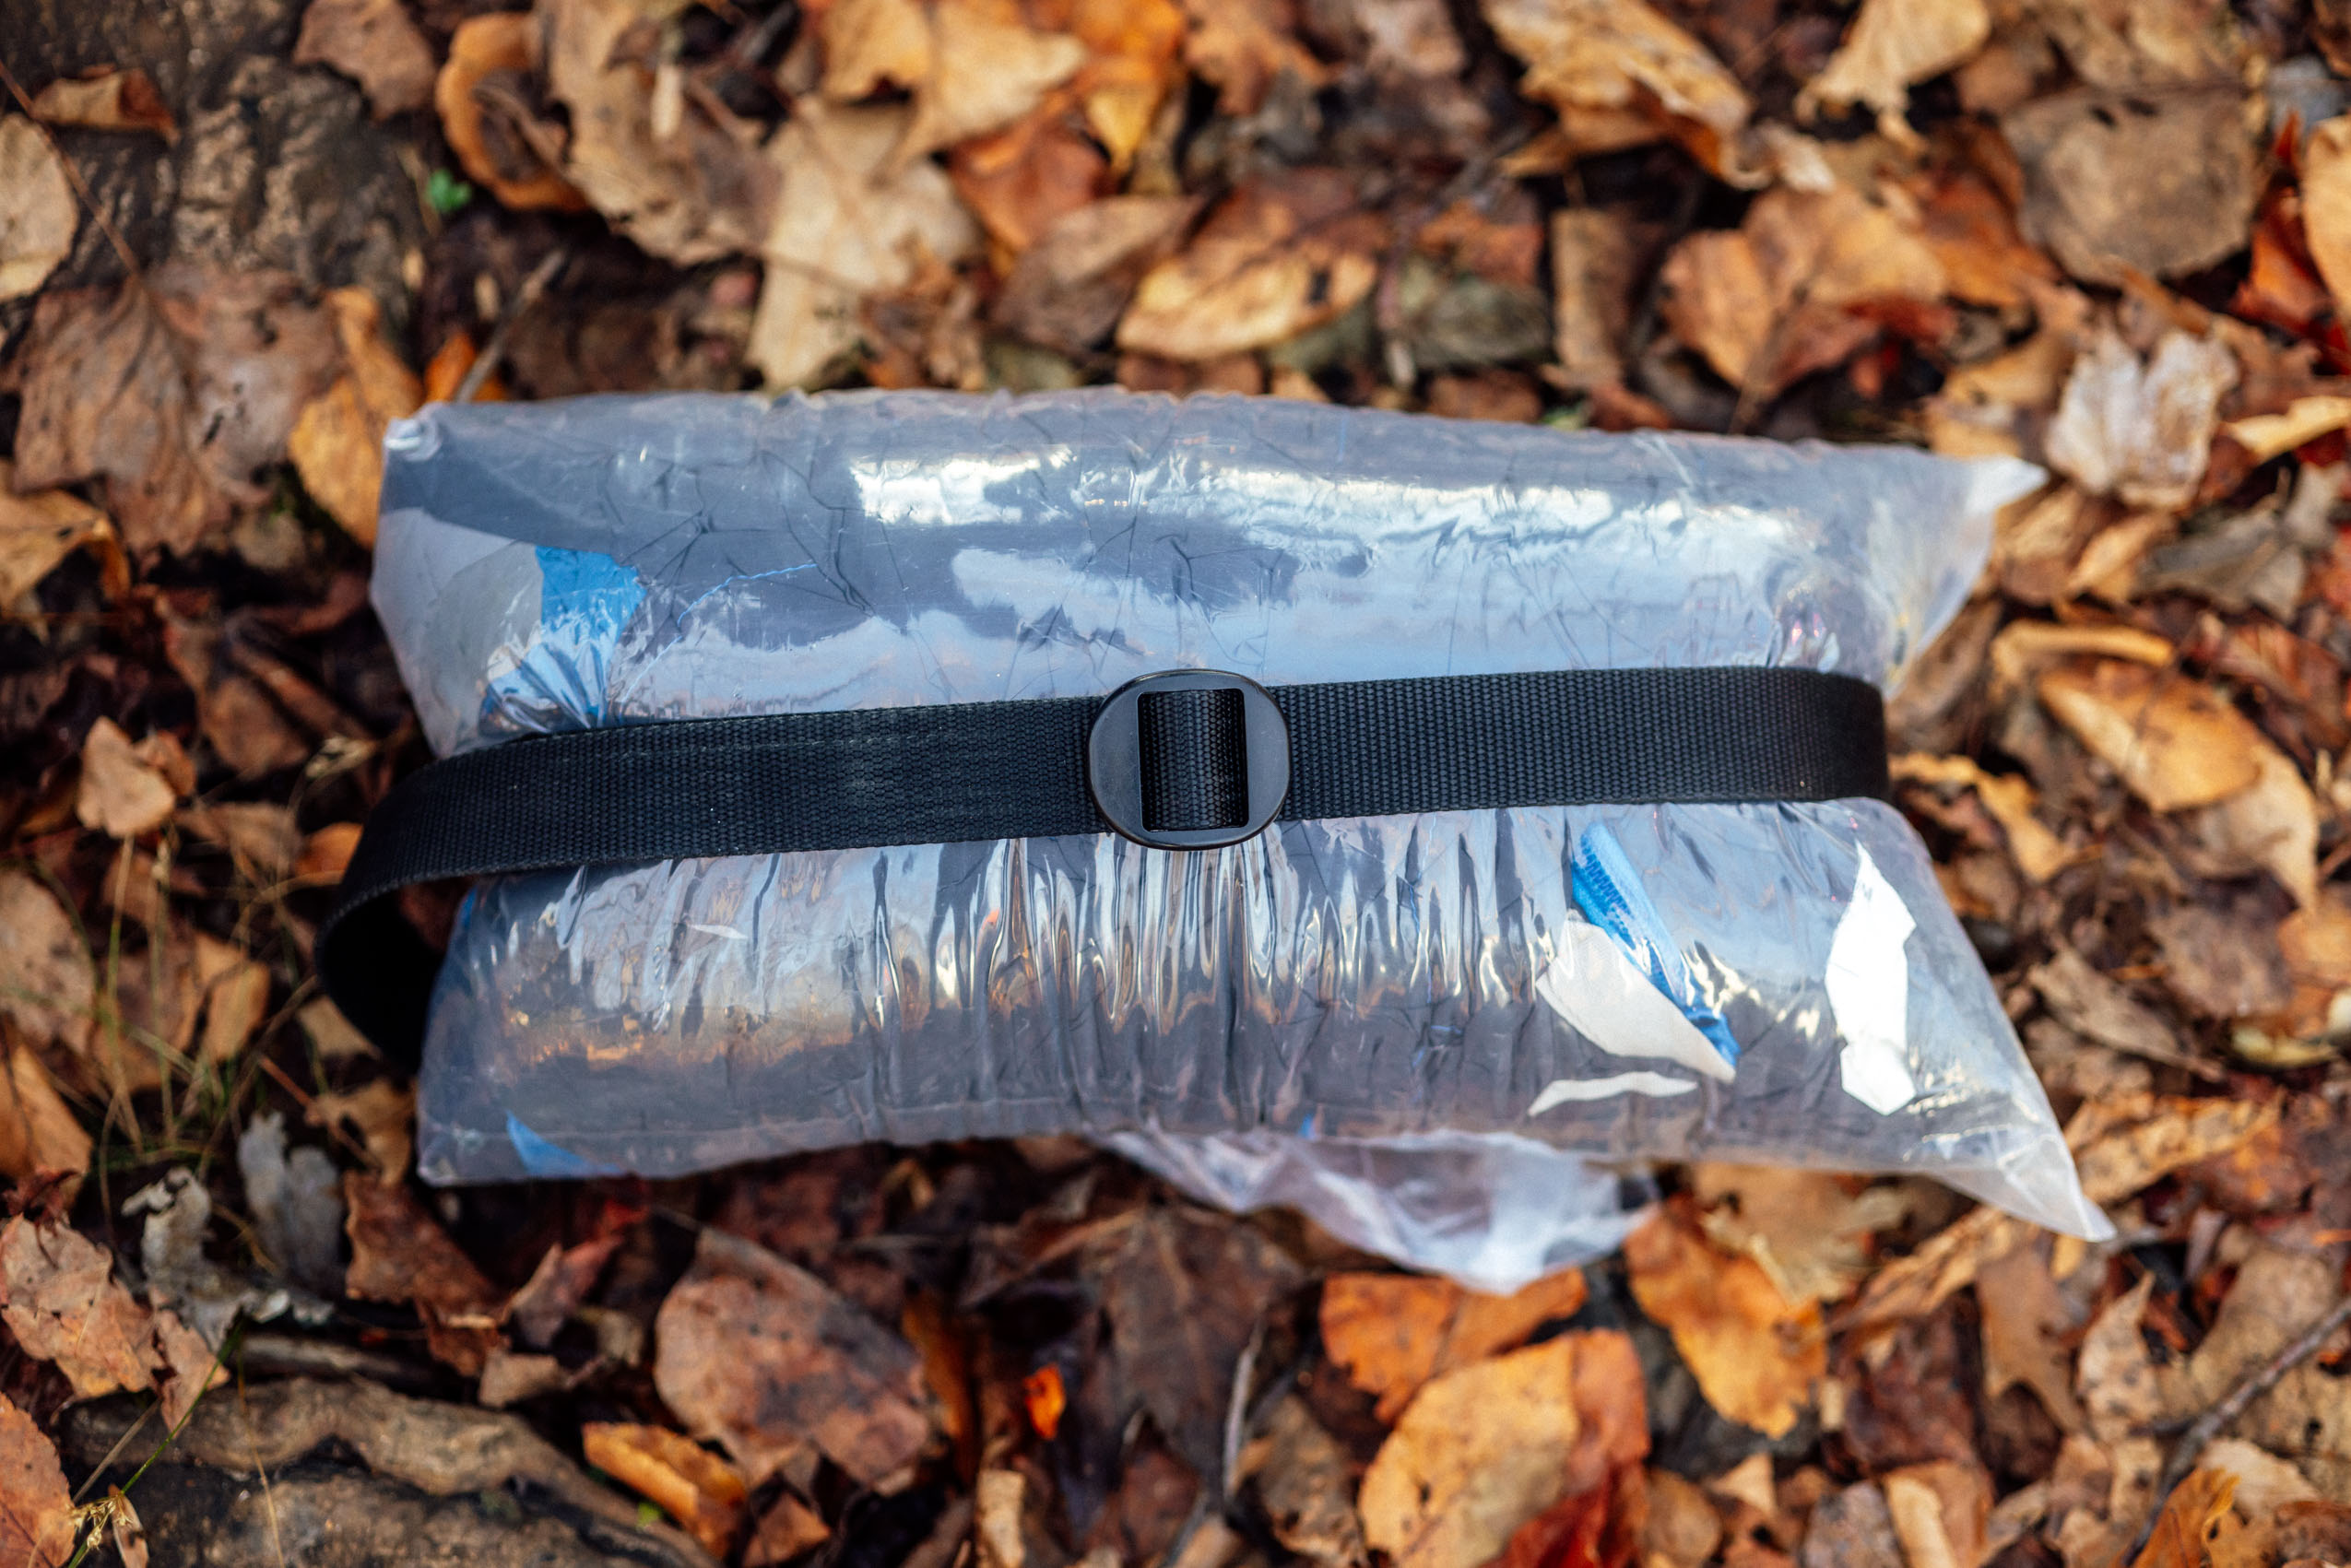
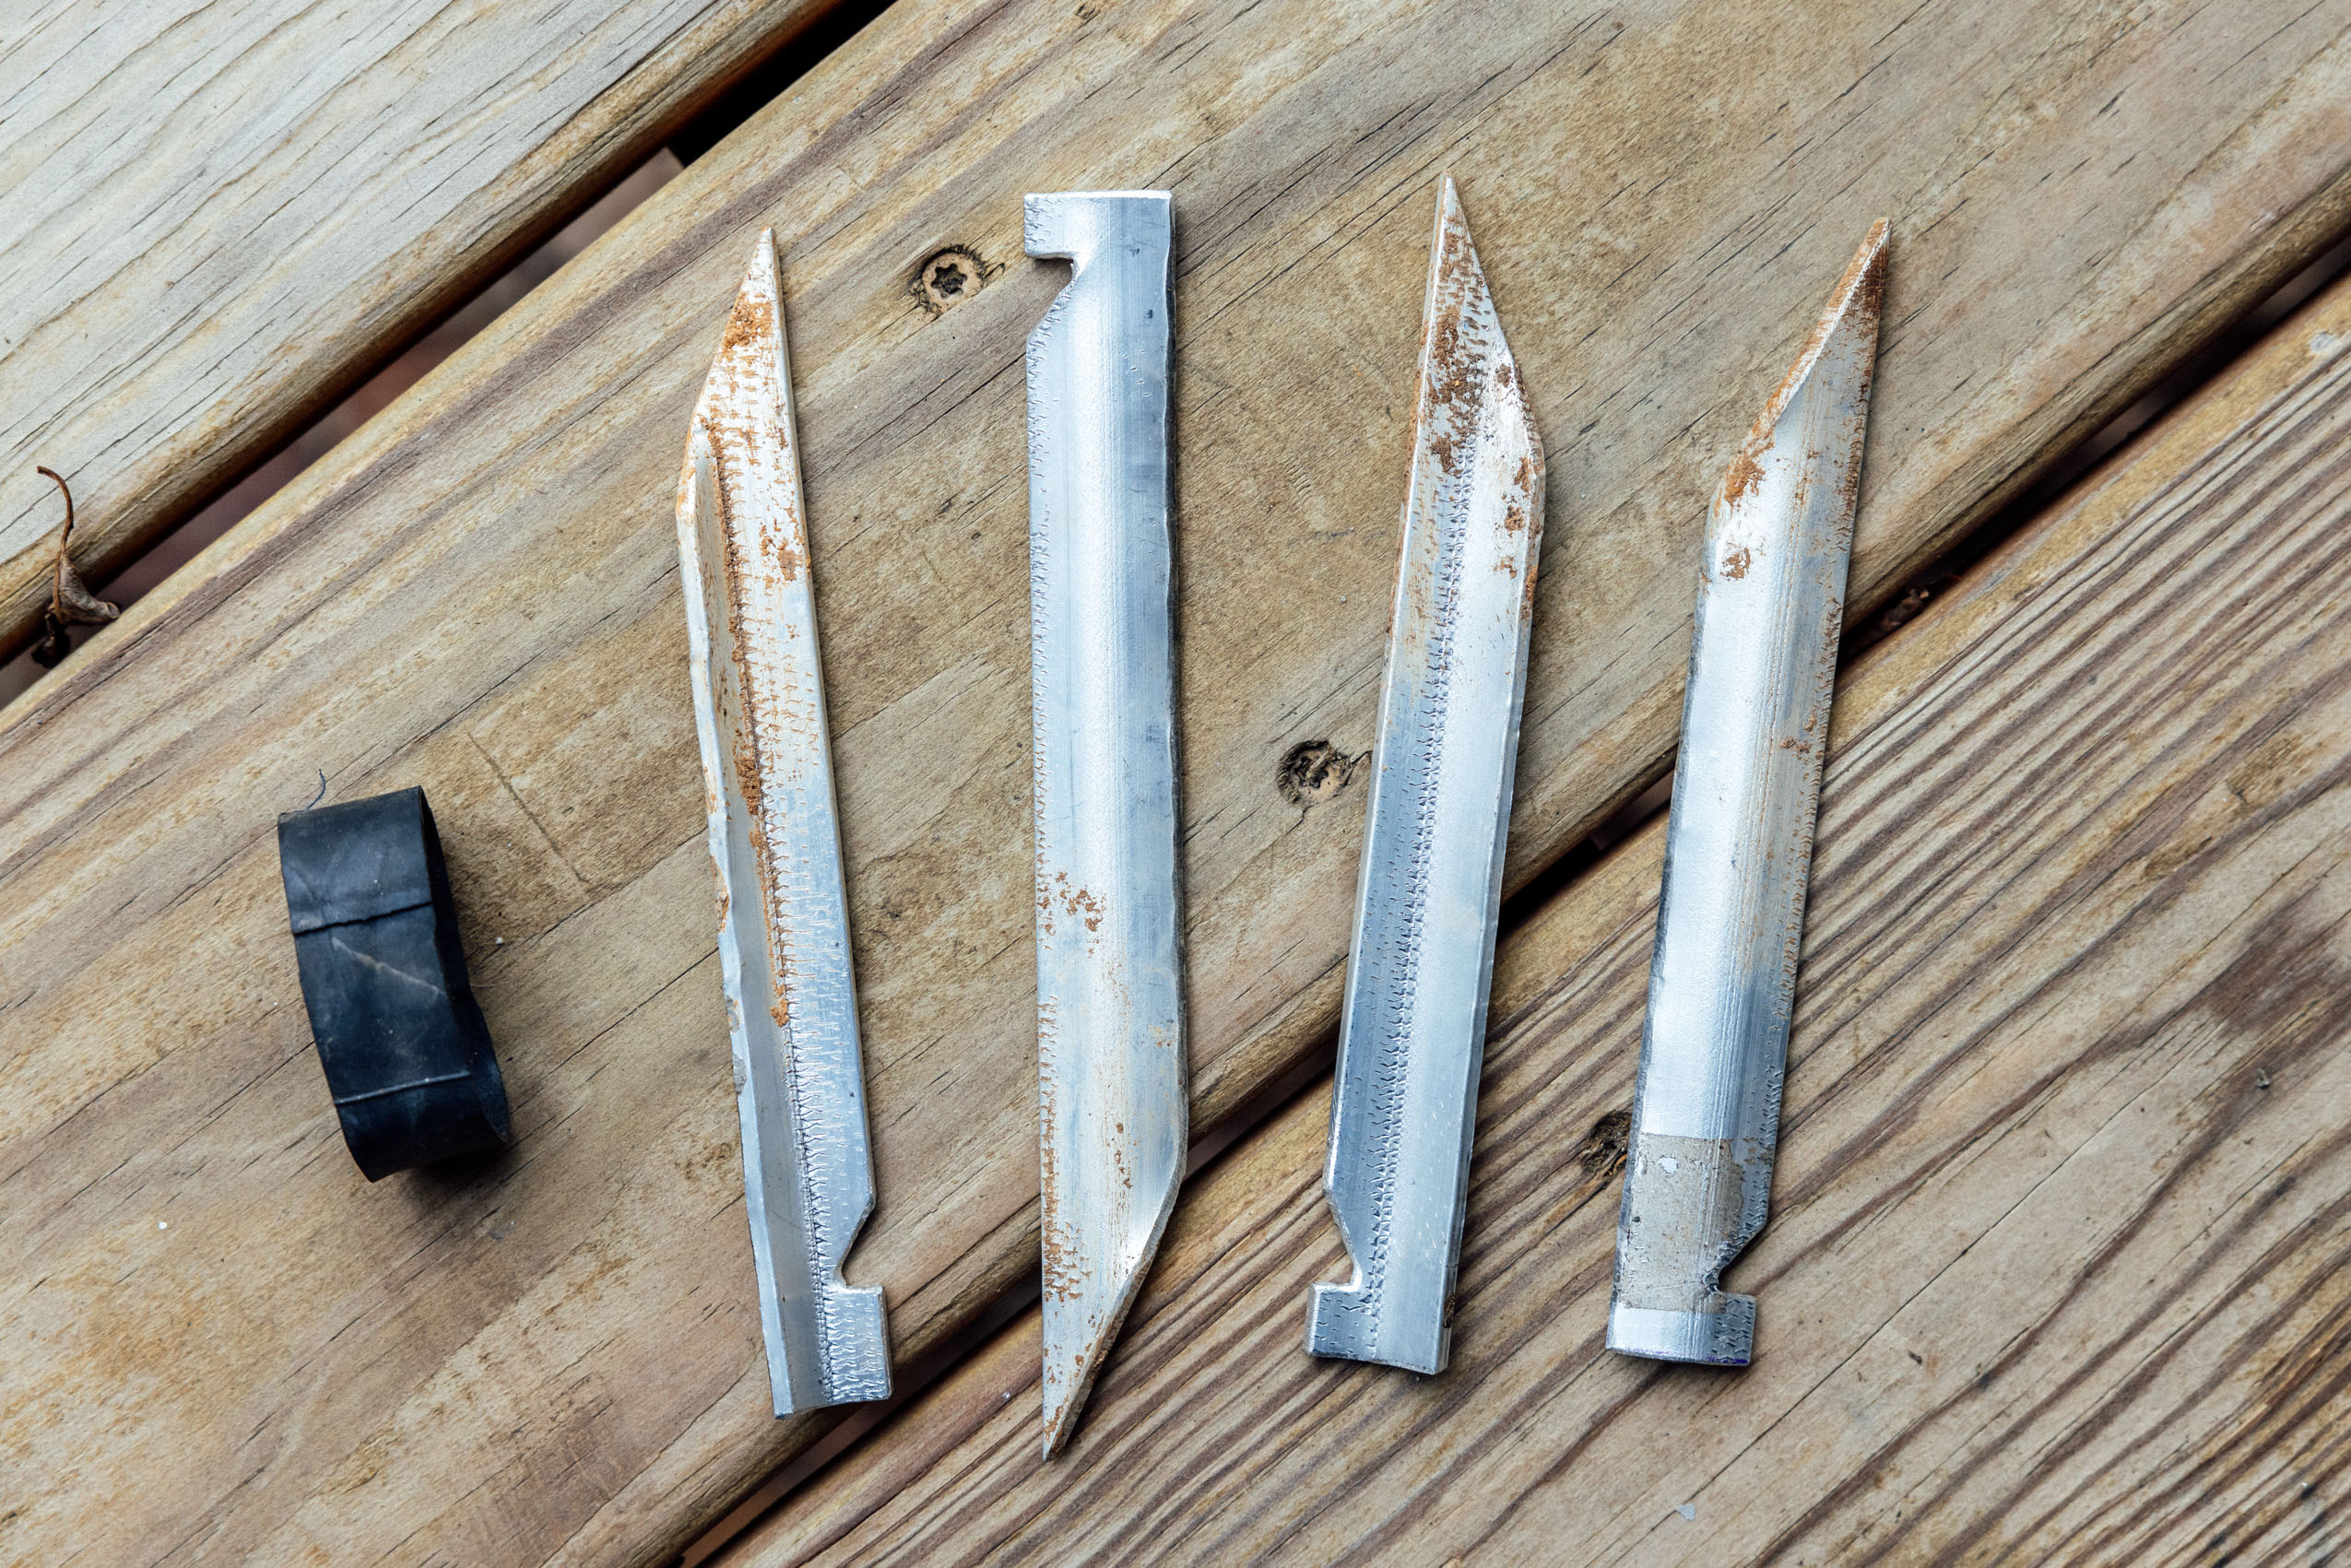
Aside from the pad, sleeping bag, and a reclaimed piece of Tyvek I used as a groundsheet, the only other component of the sleep system I carried was a borrowed DIY tarp. I’ll talk more about that in the Further Budget section below, but since the tarp didn’t come with stakes, I decided to make some using leftover flat aluminum bar that Virginia had purchased to make her rack strut. This turned into a fun little side project, and I ended up with four sturdy, lightweight stakes. I cut them with a hacksaw, then clamped each one in a bench vise and hammered out a contour to prevent bending when pounded into the ground. To keep them organized, I used a rubber band made from a piece of discarded inner tube.
DIY Camp Kitchen
Out of this entire kit, I might be most proud of this $4.50 camp kitchen. To salvage every last dollar, most of the team avoided bringing a kitchen and opted to pack a burrito or something that didn’t require cooking, but I wanted to cobble one together to see how it would perform.
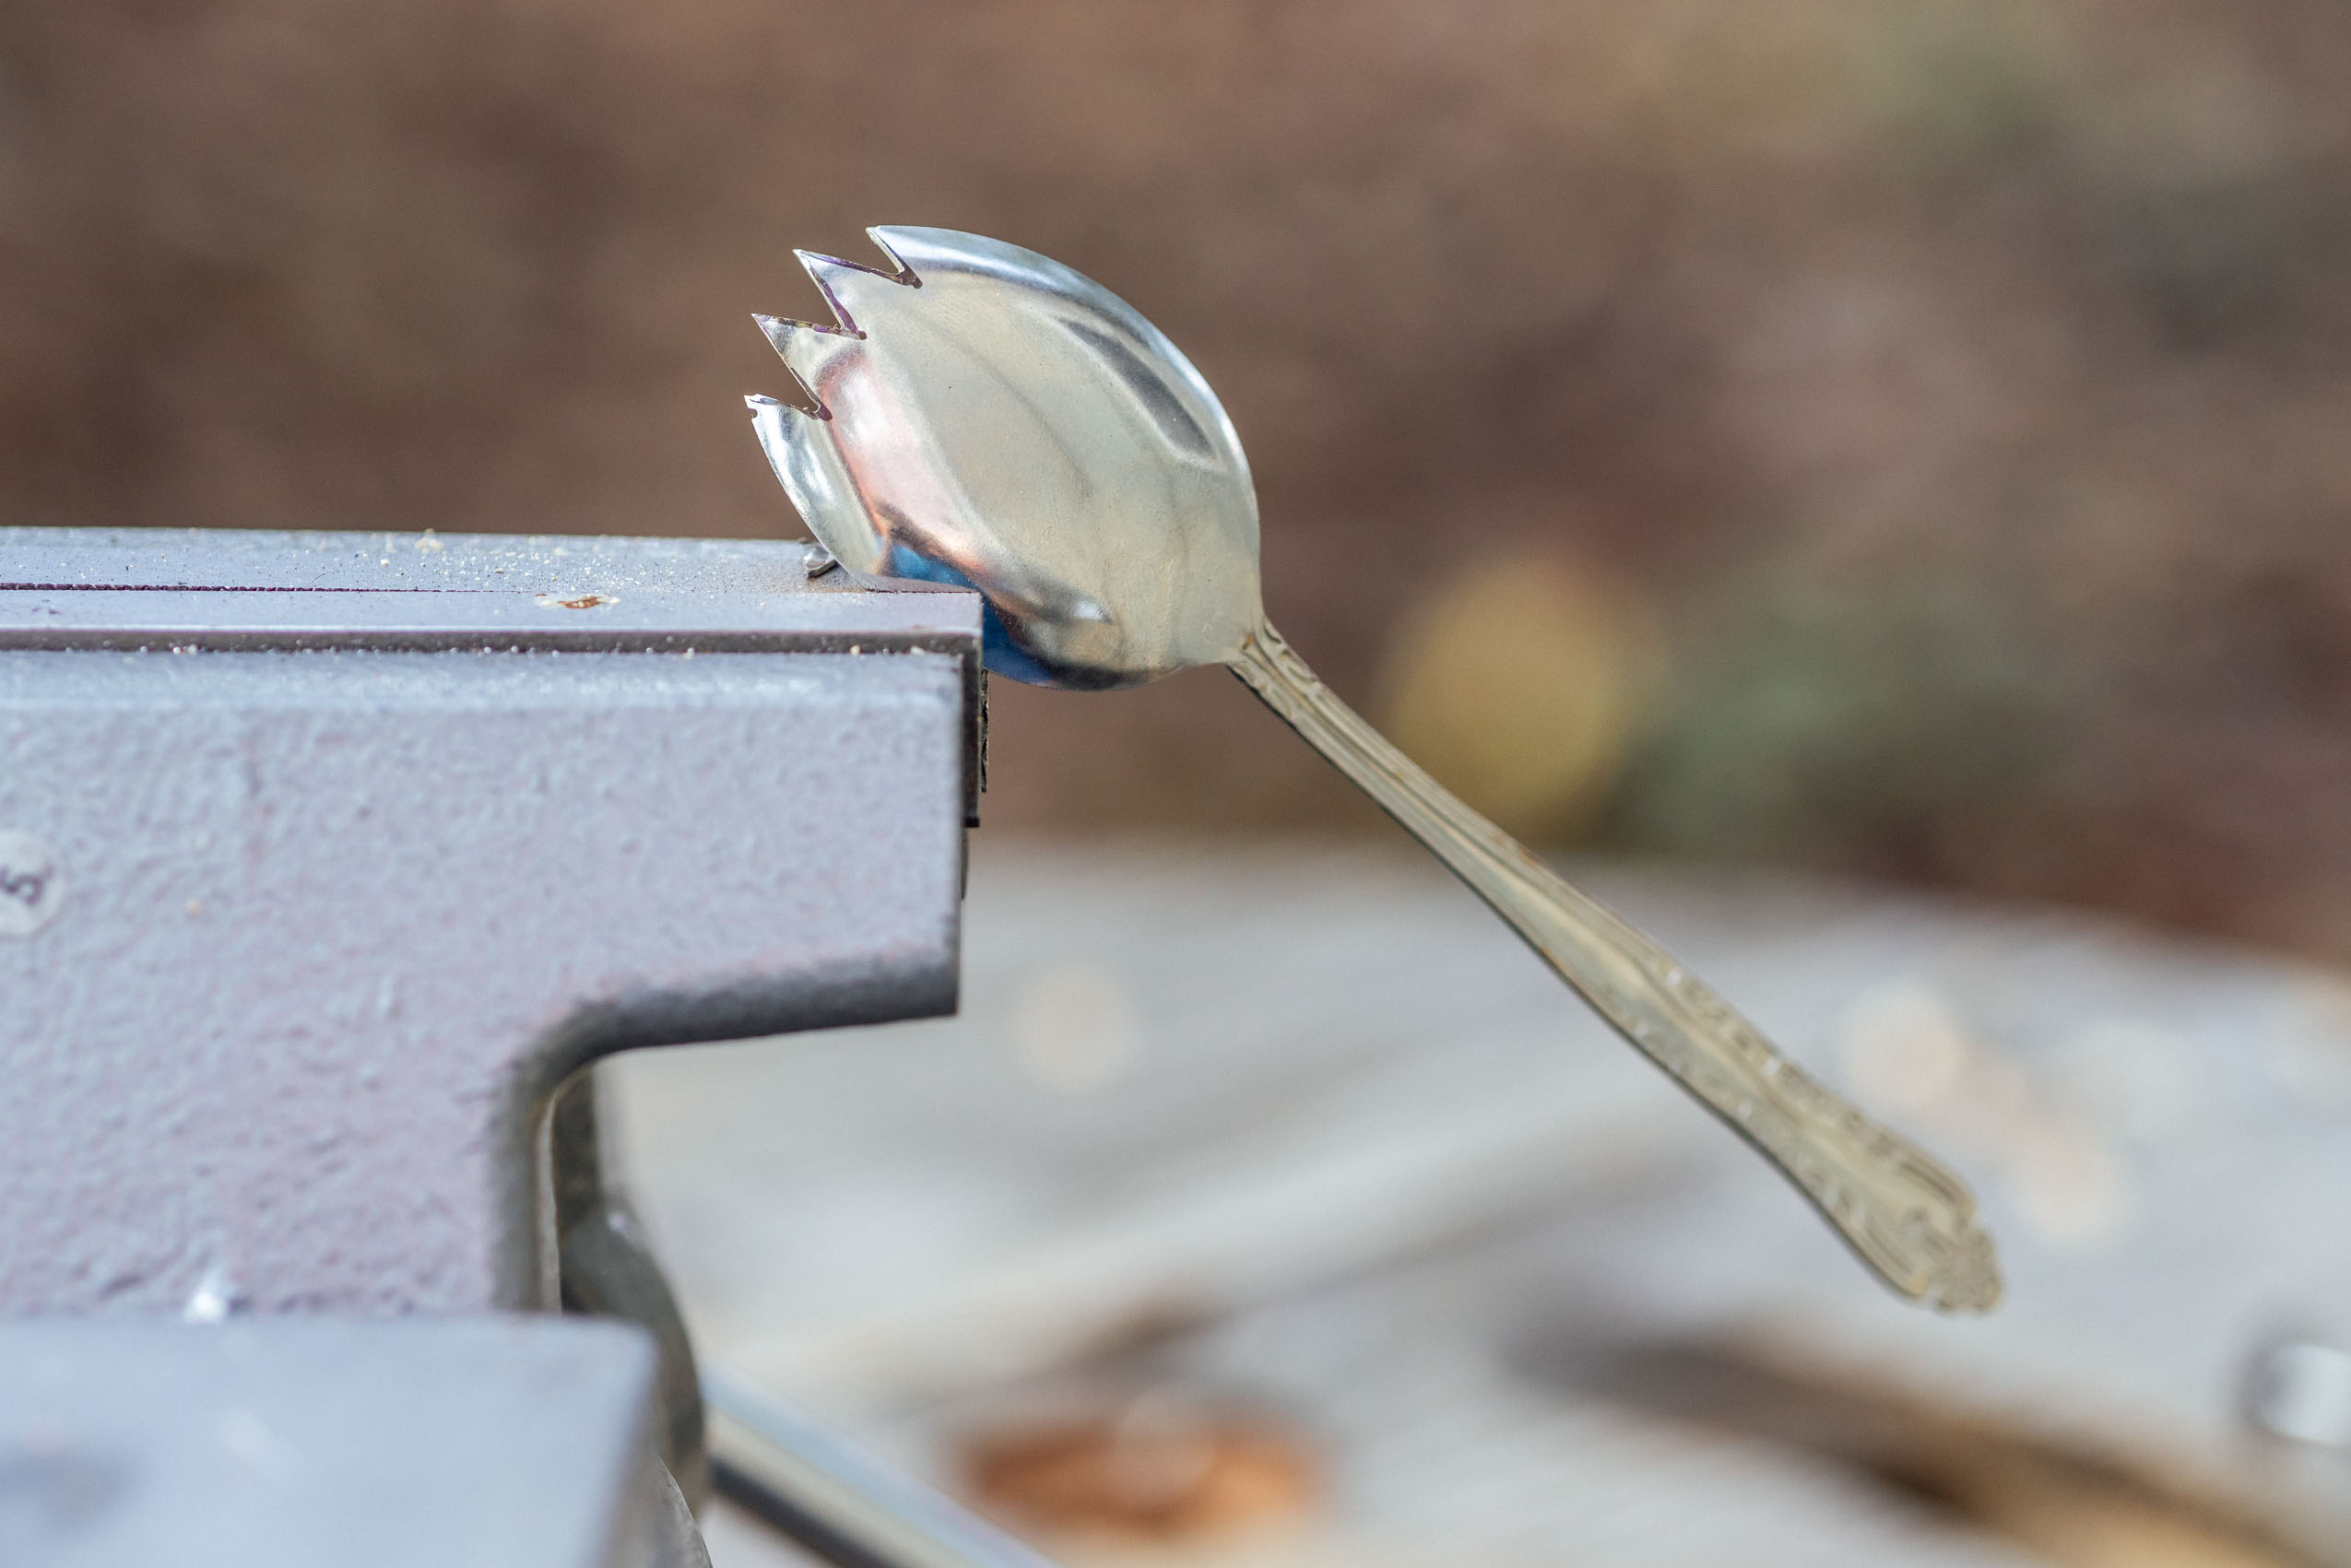


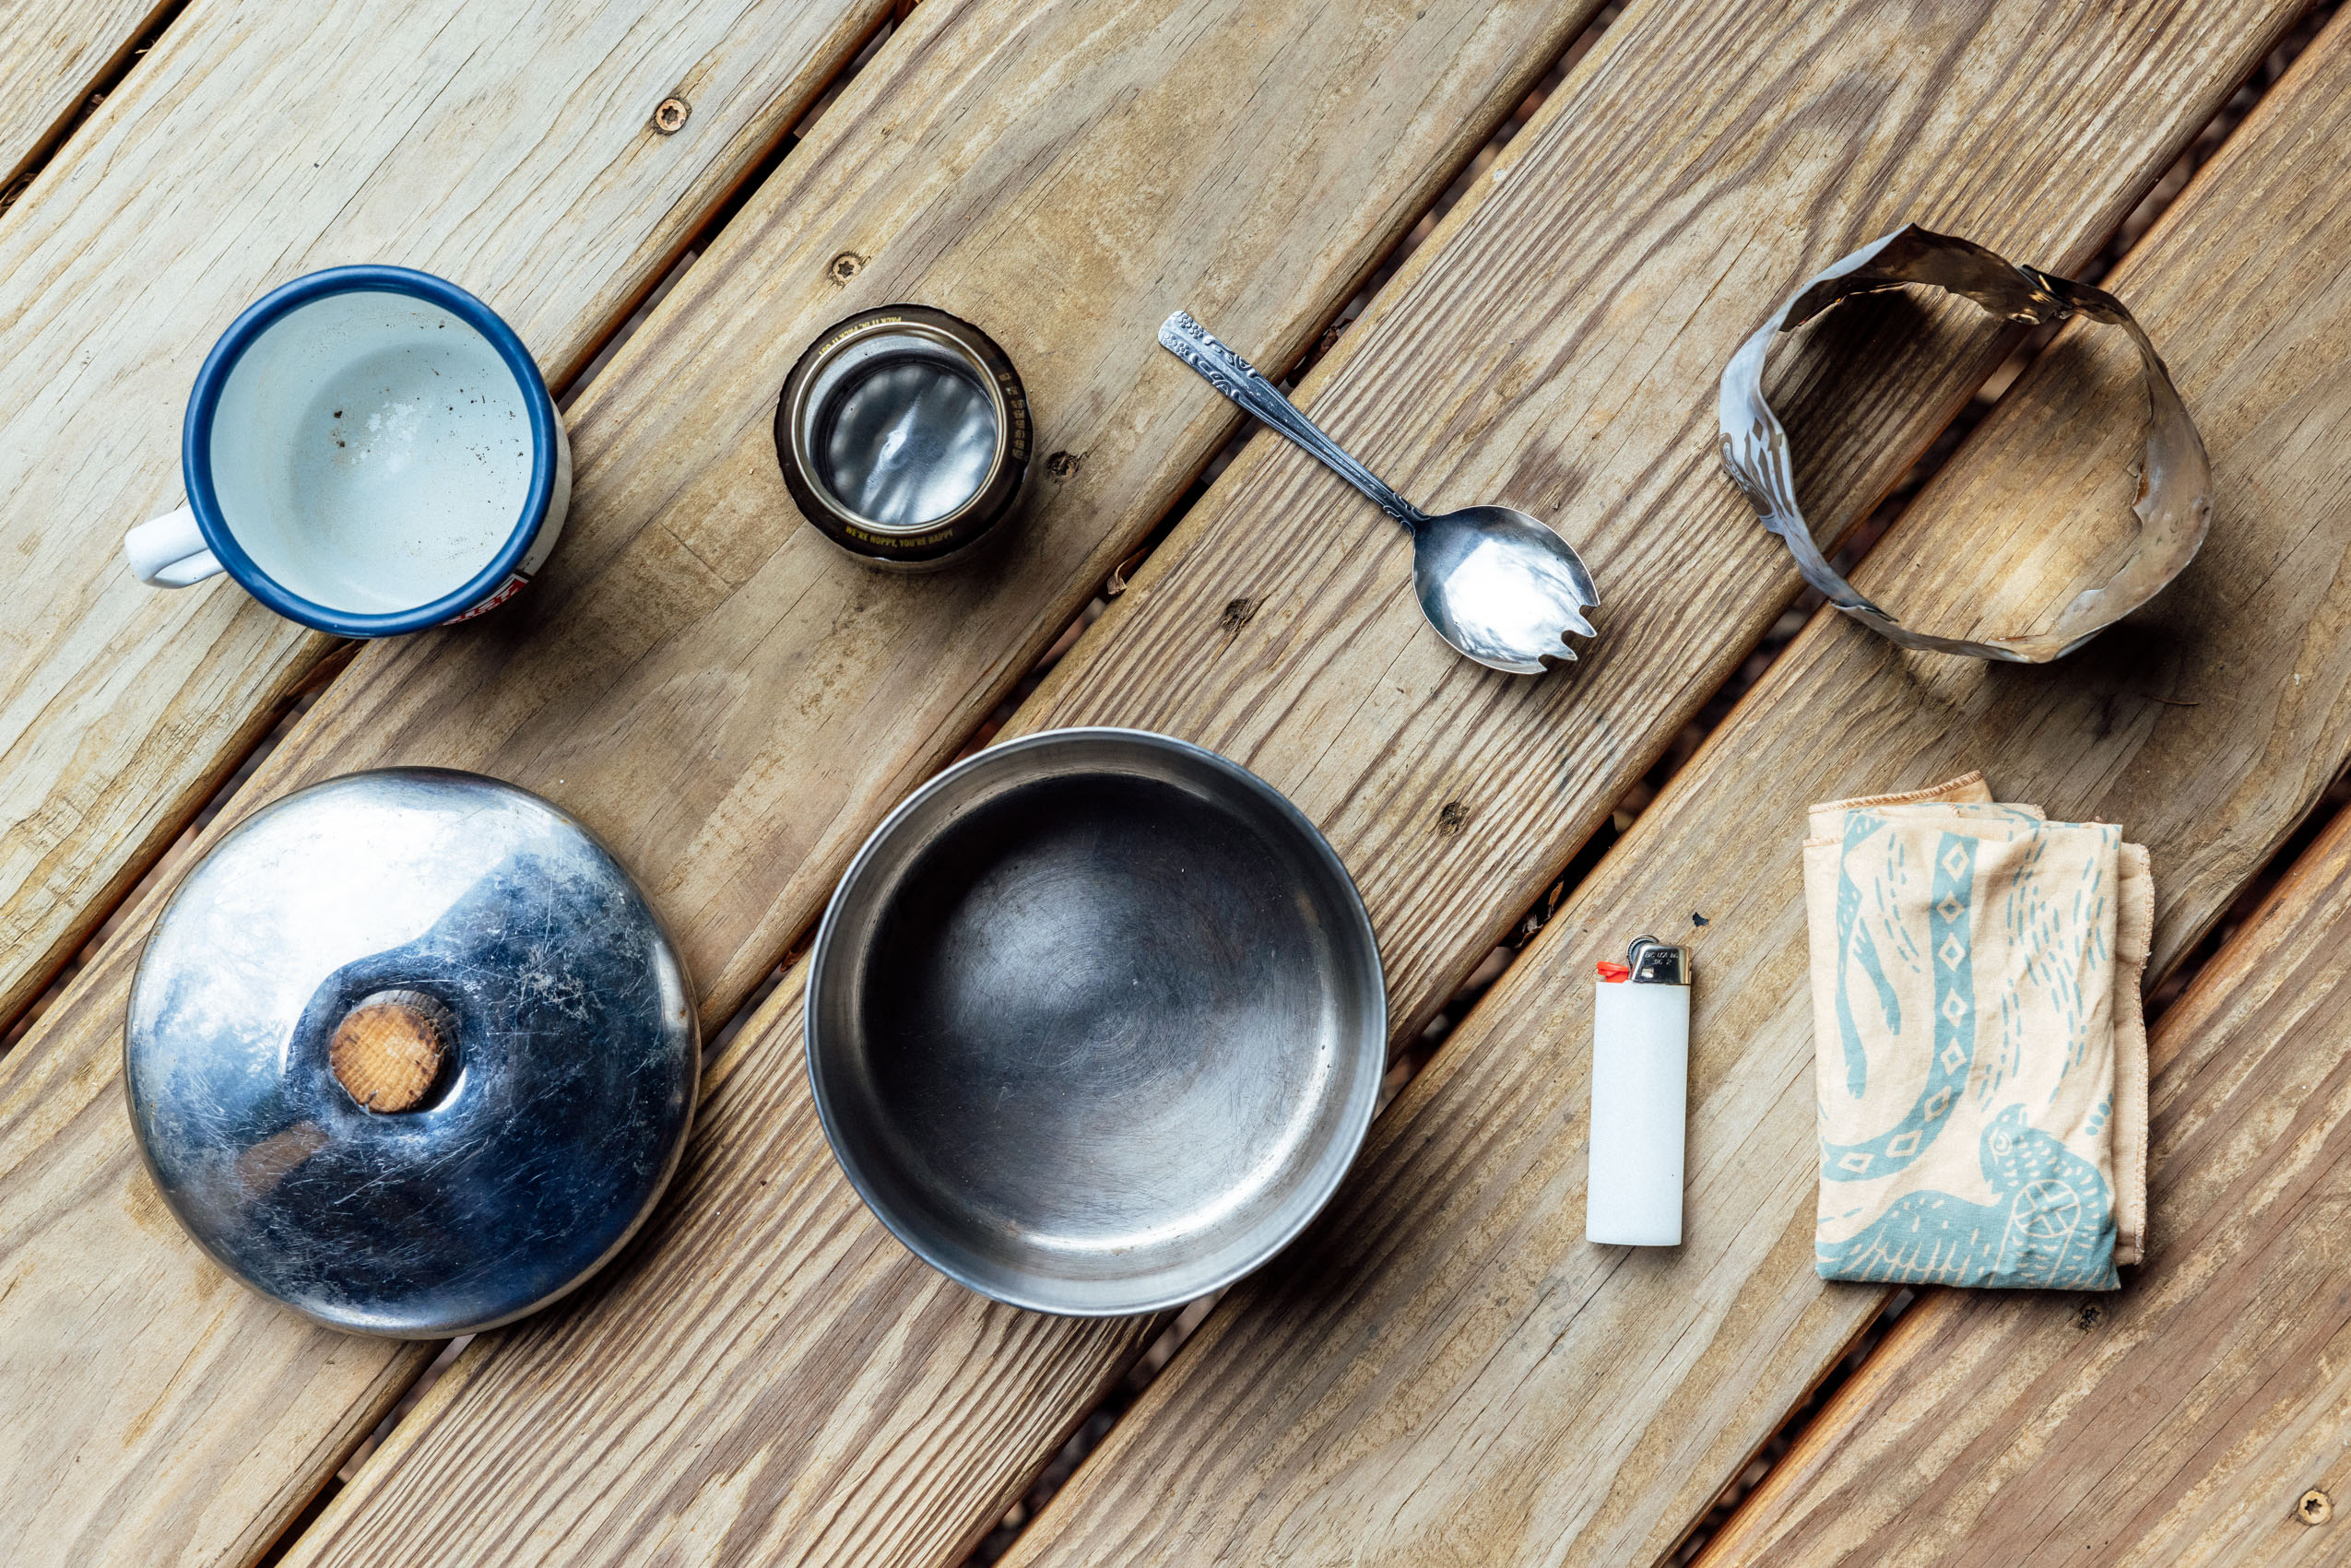

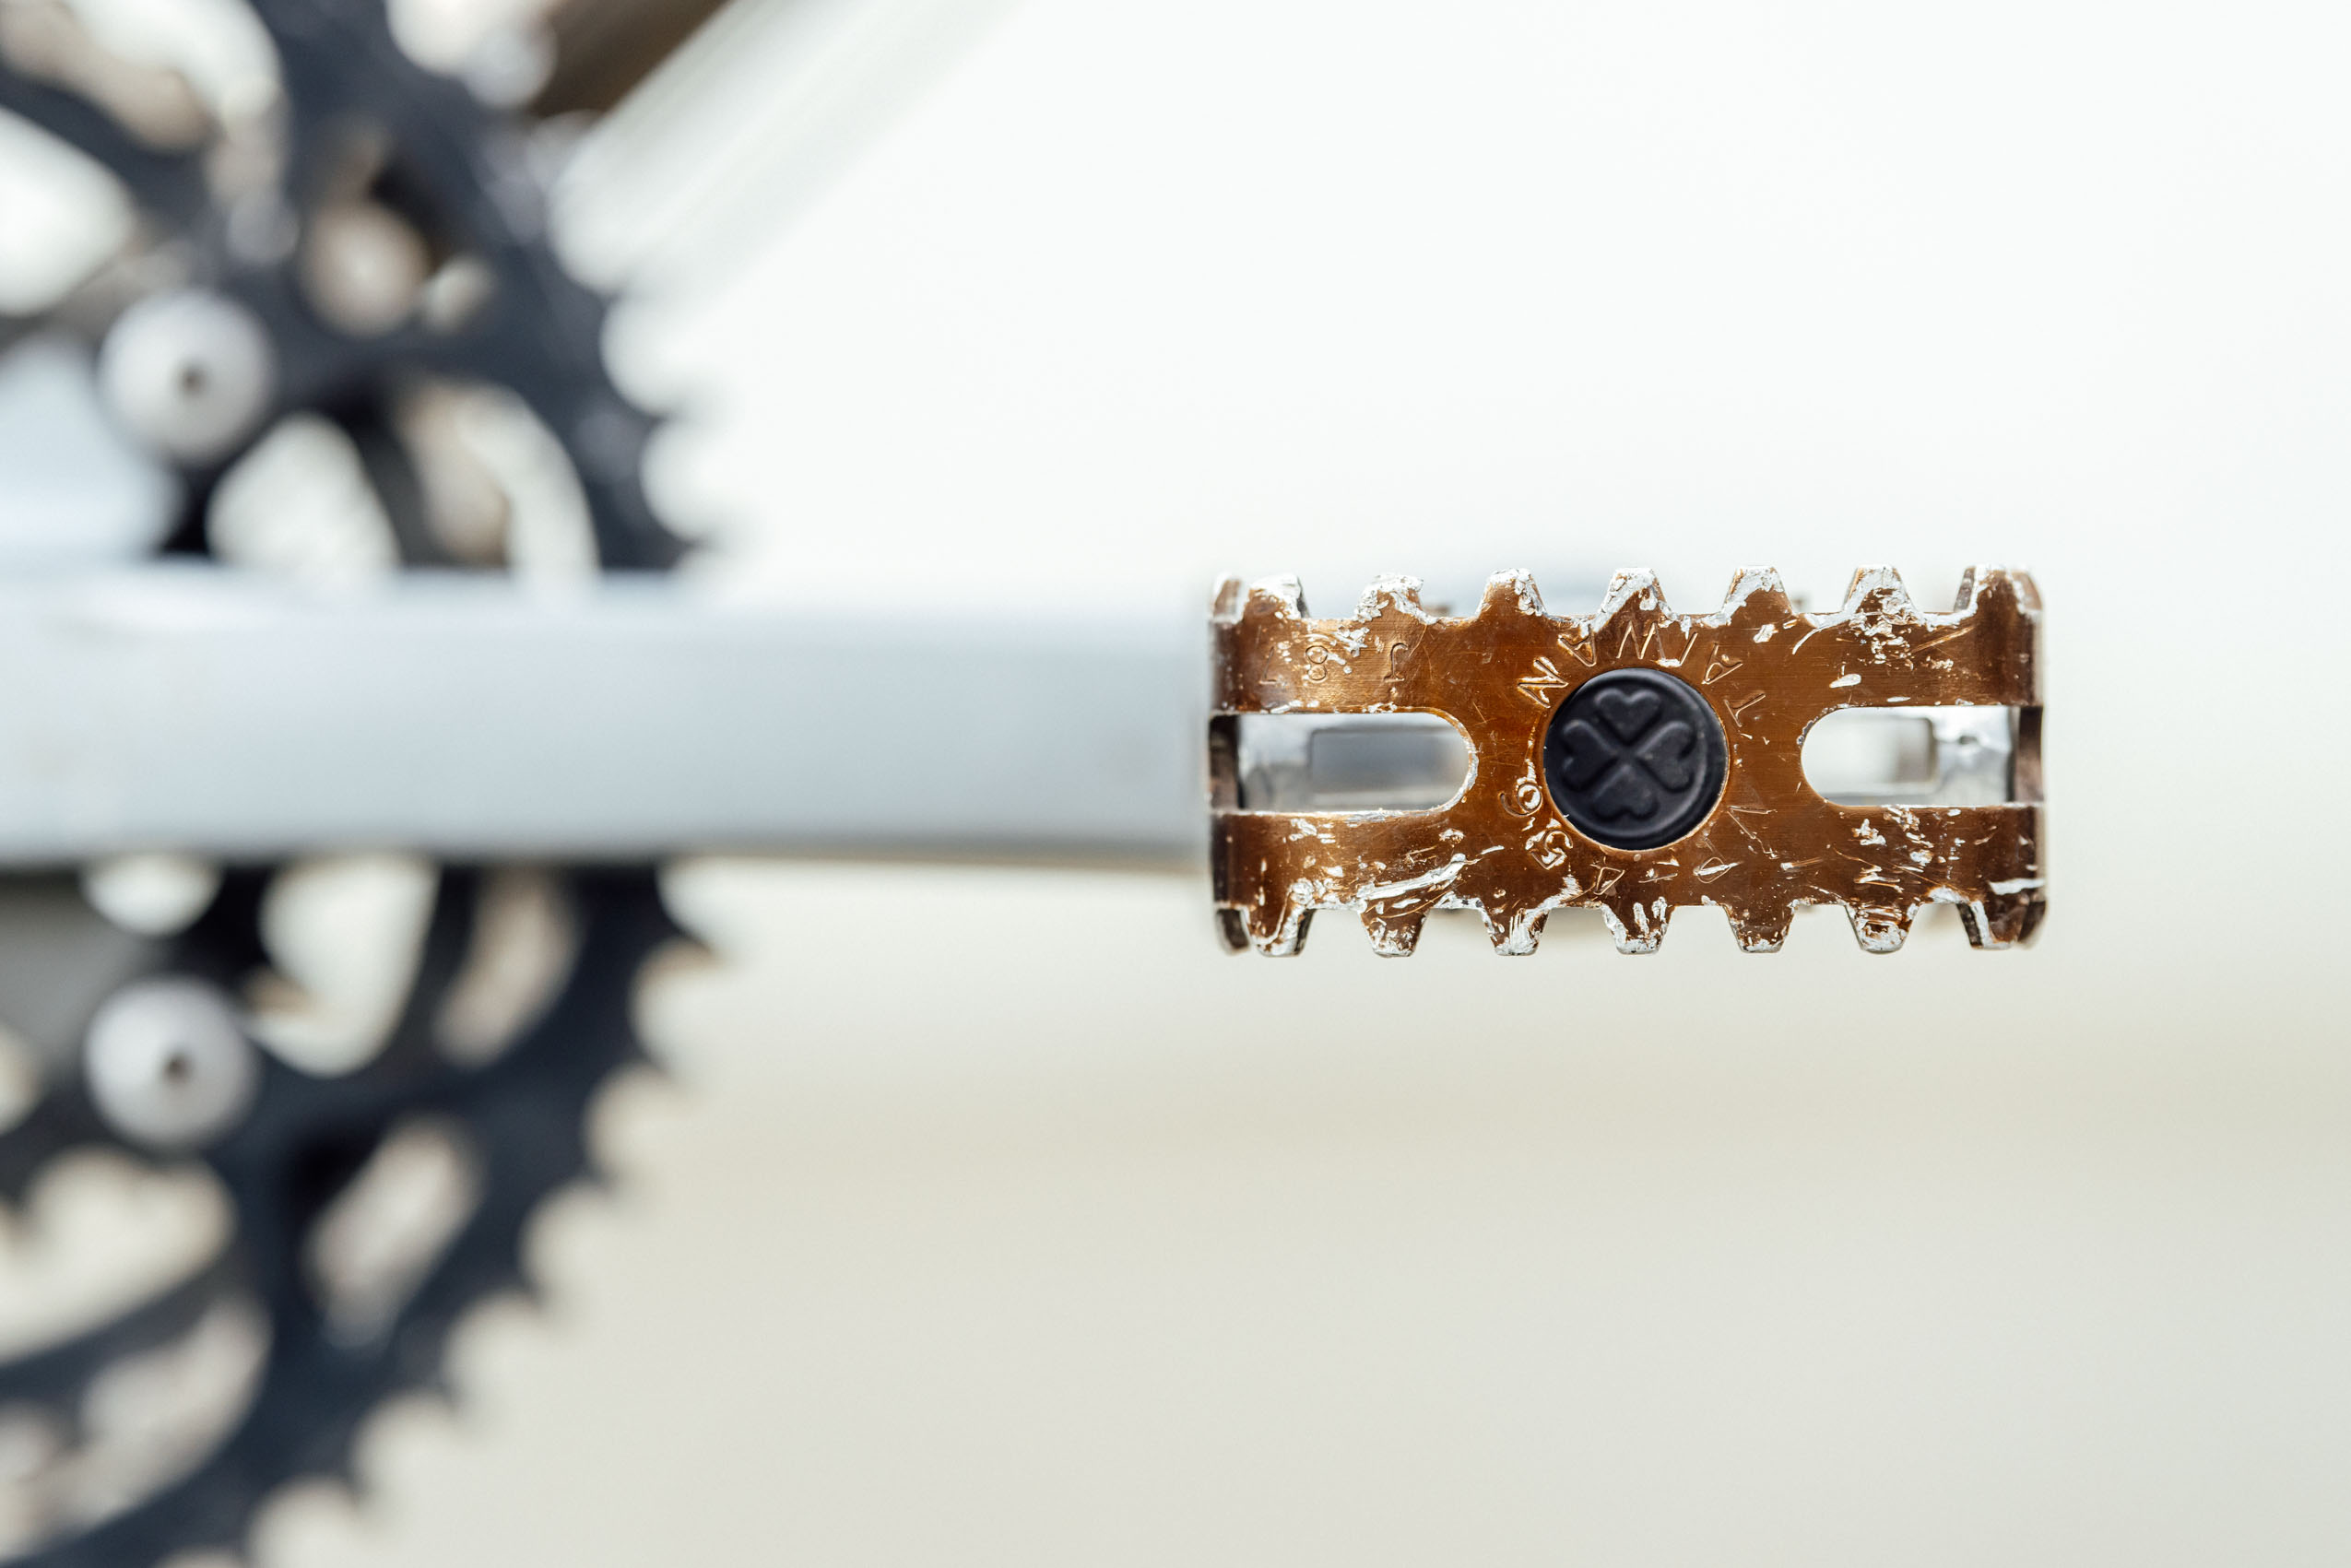
I picked up the three main components in my DIY camp kitchen from a local thrift store: a $1 enamel camp mug, a $2 pot/lid, and a $0.50 spoon I converted to a spork for the fun of it. Aside from the spork mod, which was accomplished via a hacksaw and file, I removed the pot lid and replaced it with a small piece of wood I cut off the end of an old rake. That gave it a lower profile to fit in my frame bag. The stove is a standard DIY can stove, and the windscreen/pot stand was made from two cans. Aside from the flimsy windscreen/pot stand, which I’d ultimately replace with something sturdier, it all worked great, and the pot was the perfect size to make morning coffee during our campout.


Budget
That sums up most of what I made and brought, save a couple items I’ll cover below. With that, here’s budget rundown. Note that I had a lot of the materials on hand that were used to make the bags. They were leftover from projects I worked on in 2013 and included scraps of X-Pac, wax, webbing, buckles, etc. The general consensus with the team was that this shouldn’t go against budget since I was using leftover material, but I went ahead and assigned some value to it based on research.
Bike
- $150 – 1988 Schwinn High Sierra on Facebook Marketplace
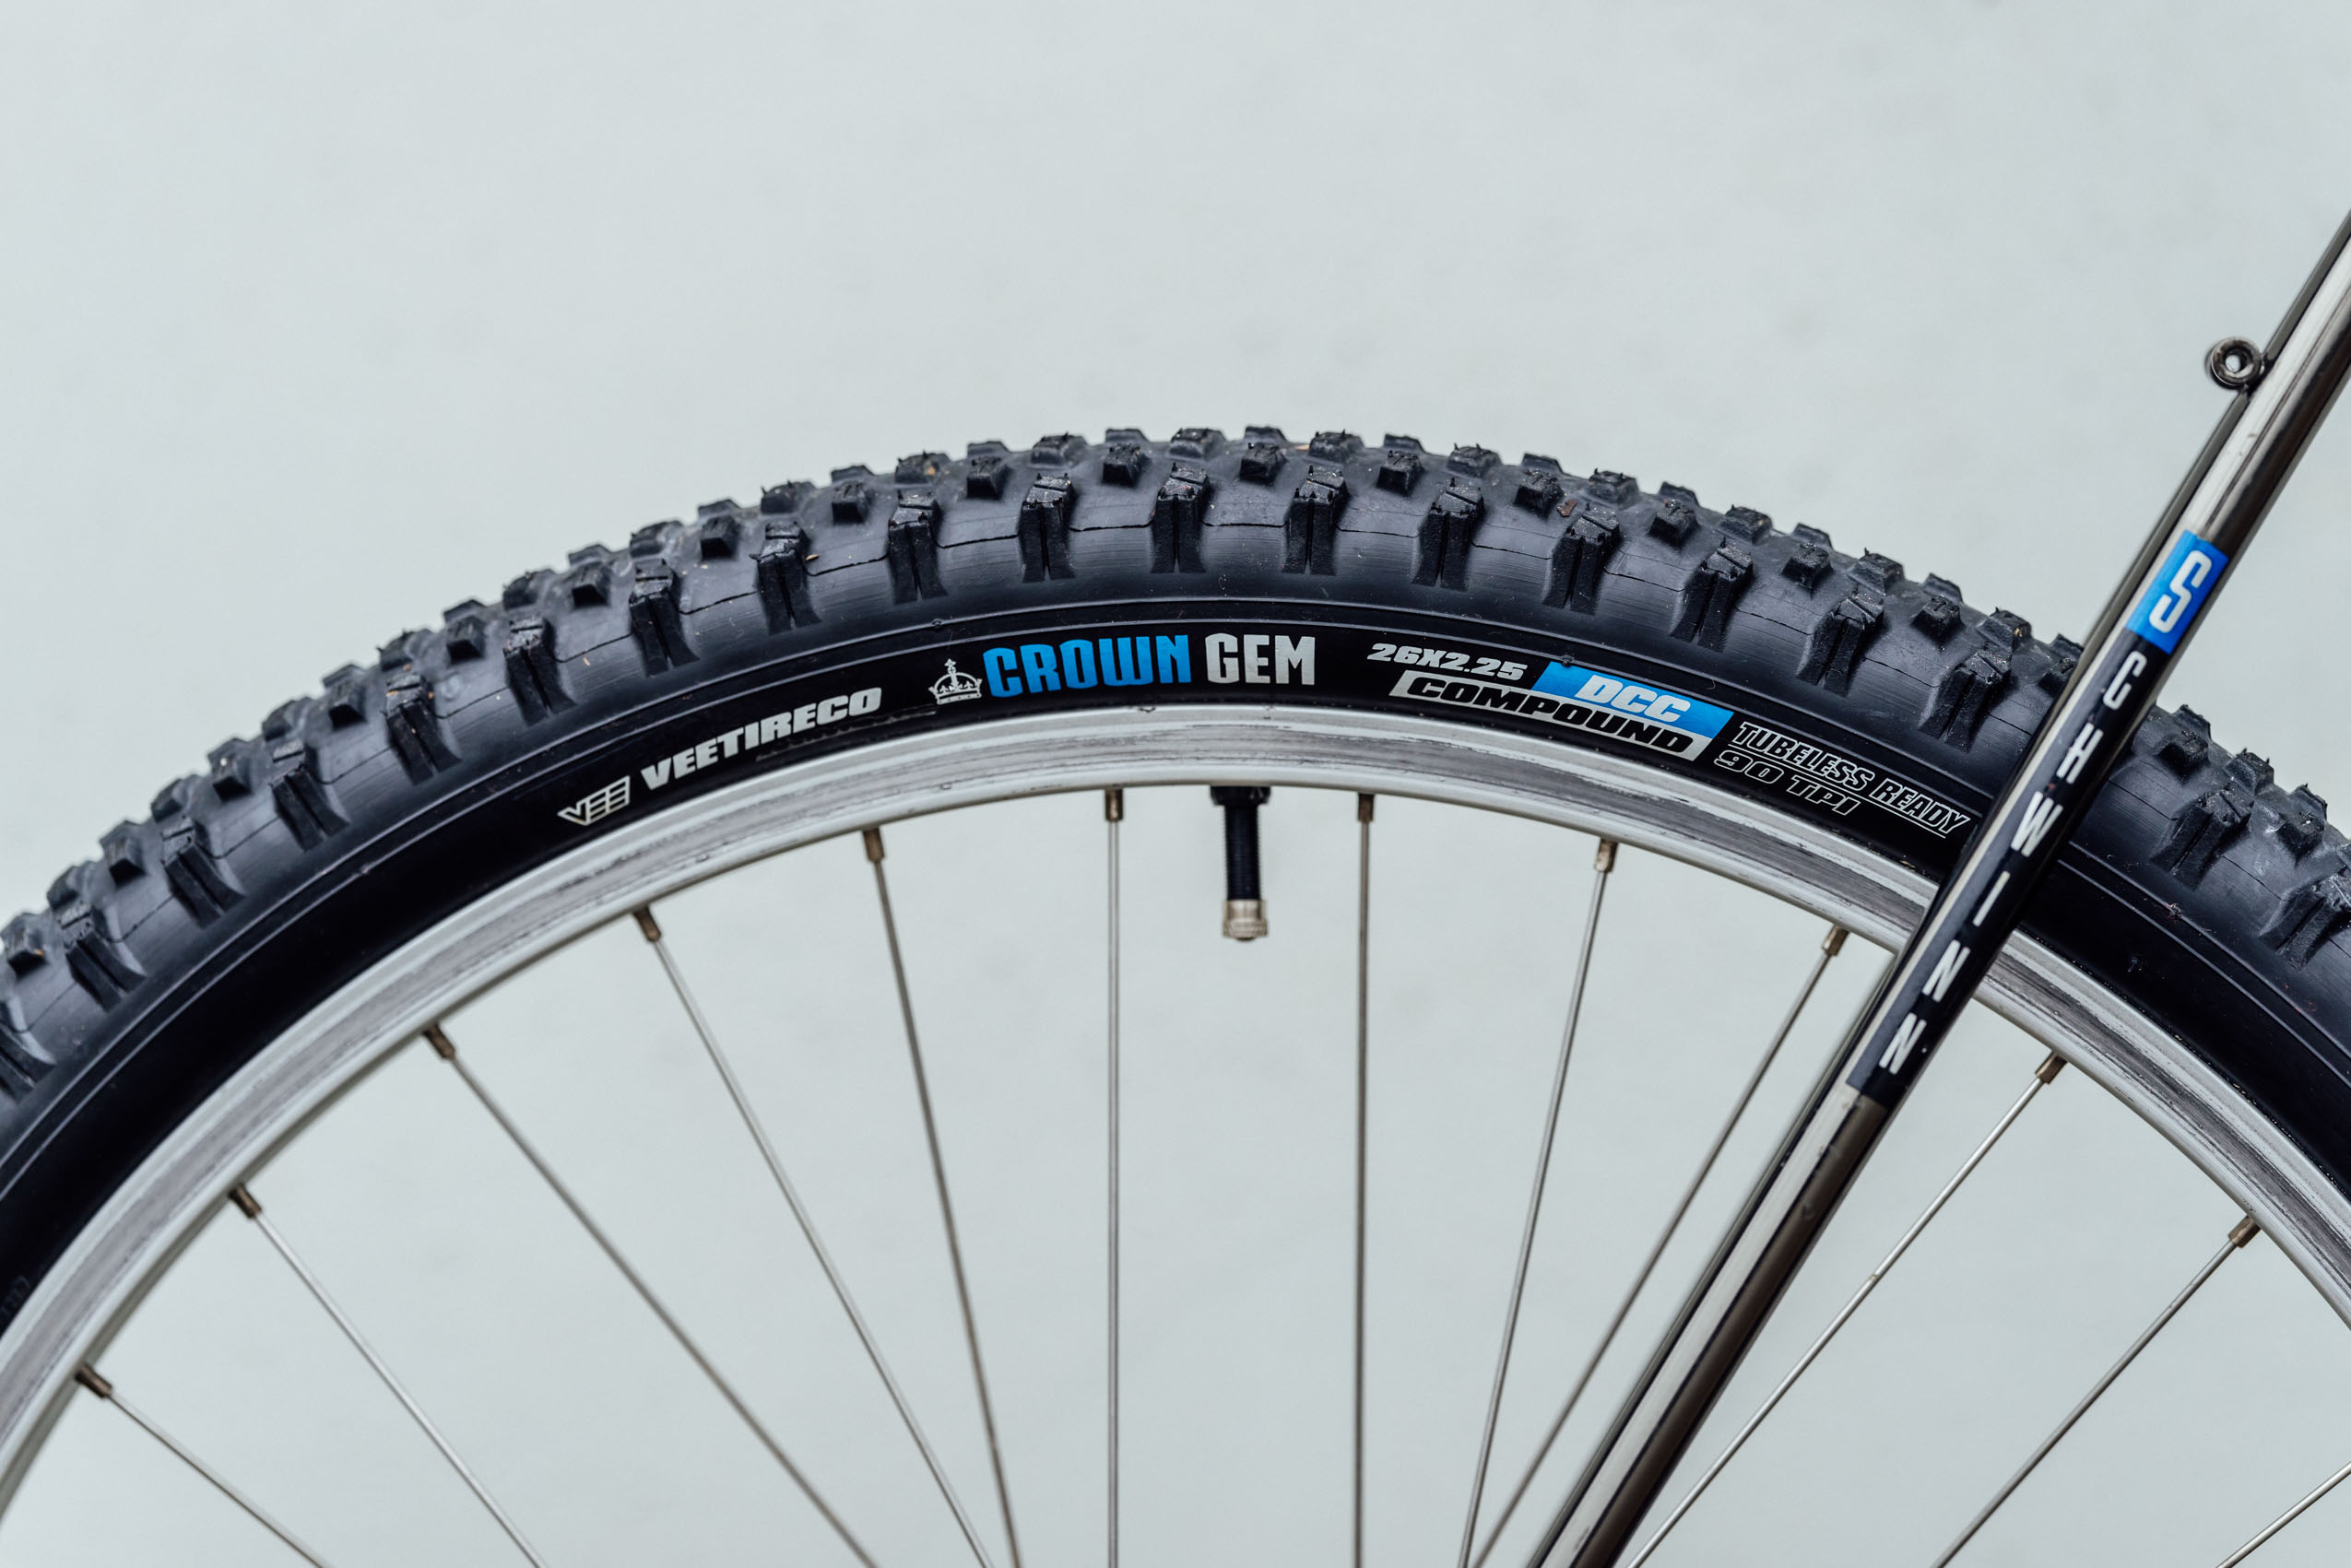
- $91.55 – Vee Crown Gem Tires from Walmart
Racks
- $35 – Wald Half Basket
- $34 – 2 x Rack Rear Strut Kit
- $0 – Reclaimed wood
- $0 – Found steel bar
- $16 – 2x Voile Straps
Bags
- $5 – Jeans from Goodwill
- $13 – 1/2 yard X-Pac from Ripstop by the Roll
- $10 – Miscellaneous scraps
- $0 – Repurposed materials from junked pack
- $0 – Repurposed political sign
- $20 – Otter Wax
Camping
- $0 – Borrowed tarp*
- $50 – The North Face Cat’s Meow 20° sleeping bag from Facebook Marketplace
- $70.75 – Nemo Tensor Insulated sleeping pad (could have purchased a cheaper pad, but I didn’t need another pad at this point, so I found a pad on Marketplace that was the same as one I already own. This price included shipping.
- $0 – Sheet of Tyvek leftover from construction on my shop
Camp Kitchen
- $1 – Denatured alcohol
- $1 – Mug from thrift store
- $0.50 – Spoon from thrift store
- $2 – Pot/lid from thrift store
- $0 – Can Stove
——————————————
$499.80
Further Budget and Wrap Up
So, there you have it, I came in barely under budget and completed the challenge in accordance with the rules. However, I also admit that I failed in what I was hoping to accomplish. Reason being, I wanted to have a complete proof-of-concept bikepacking kit that included the bike, bags, tools, camping gear, and everything I would need tackle not just an overnighter but a larger multi-week trip. In my opinion, there are a few upgrades that I would still have make to this kit to get it ready to roll out on a big trip. Obviously, I didn’t include these in my build as they weren’t necessary for me to complete the challenge. And I would have gone over budget.


First, while the High Sierra was fine to ride as is, there are a couple of modifications I’d make based on my own preference and fit. That includes wider bars. The tiny 610mm bars that came stock on the High Sierra are way too narrow for my taste. There aren’t too many wide handlebars out there with a 25.4mm clamp area, but after some research I found the 740mm Steve Potts Camper, which would be a pretty good fit. The Magic Mothbar Cass had in his Editor’s Dozen is another interesting option. I added pricing for those below for reference.

Also, we didn’t require participants to account for a tool kit in the Budget Bikepacking Build-Off rules. The rationale for this is that we assumed cyclists experimenting with bikepacking would likely have a few things on hand, a multi-tool and mini pump included. However, I went ahead and sourced a used set of tools that makes an excellent and comprehensive budget kit. Find that below. I also used the leftover pocket area of the jeans to make a simple tool roll to contain it.
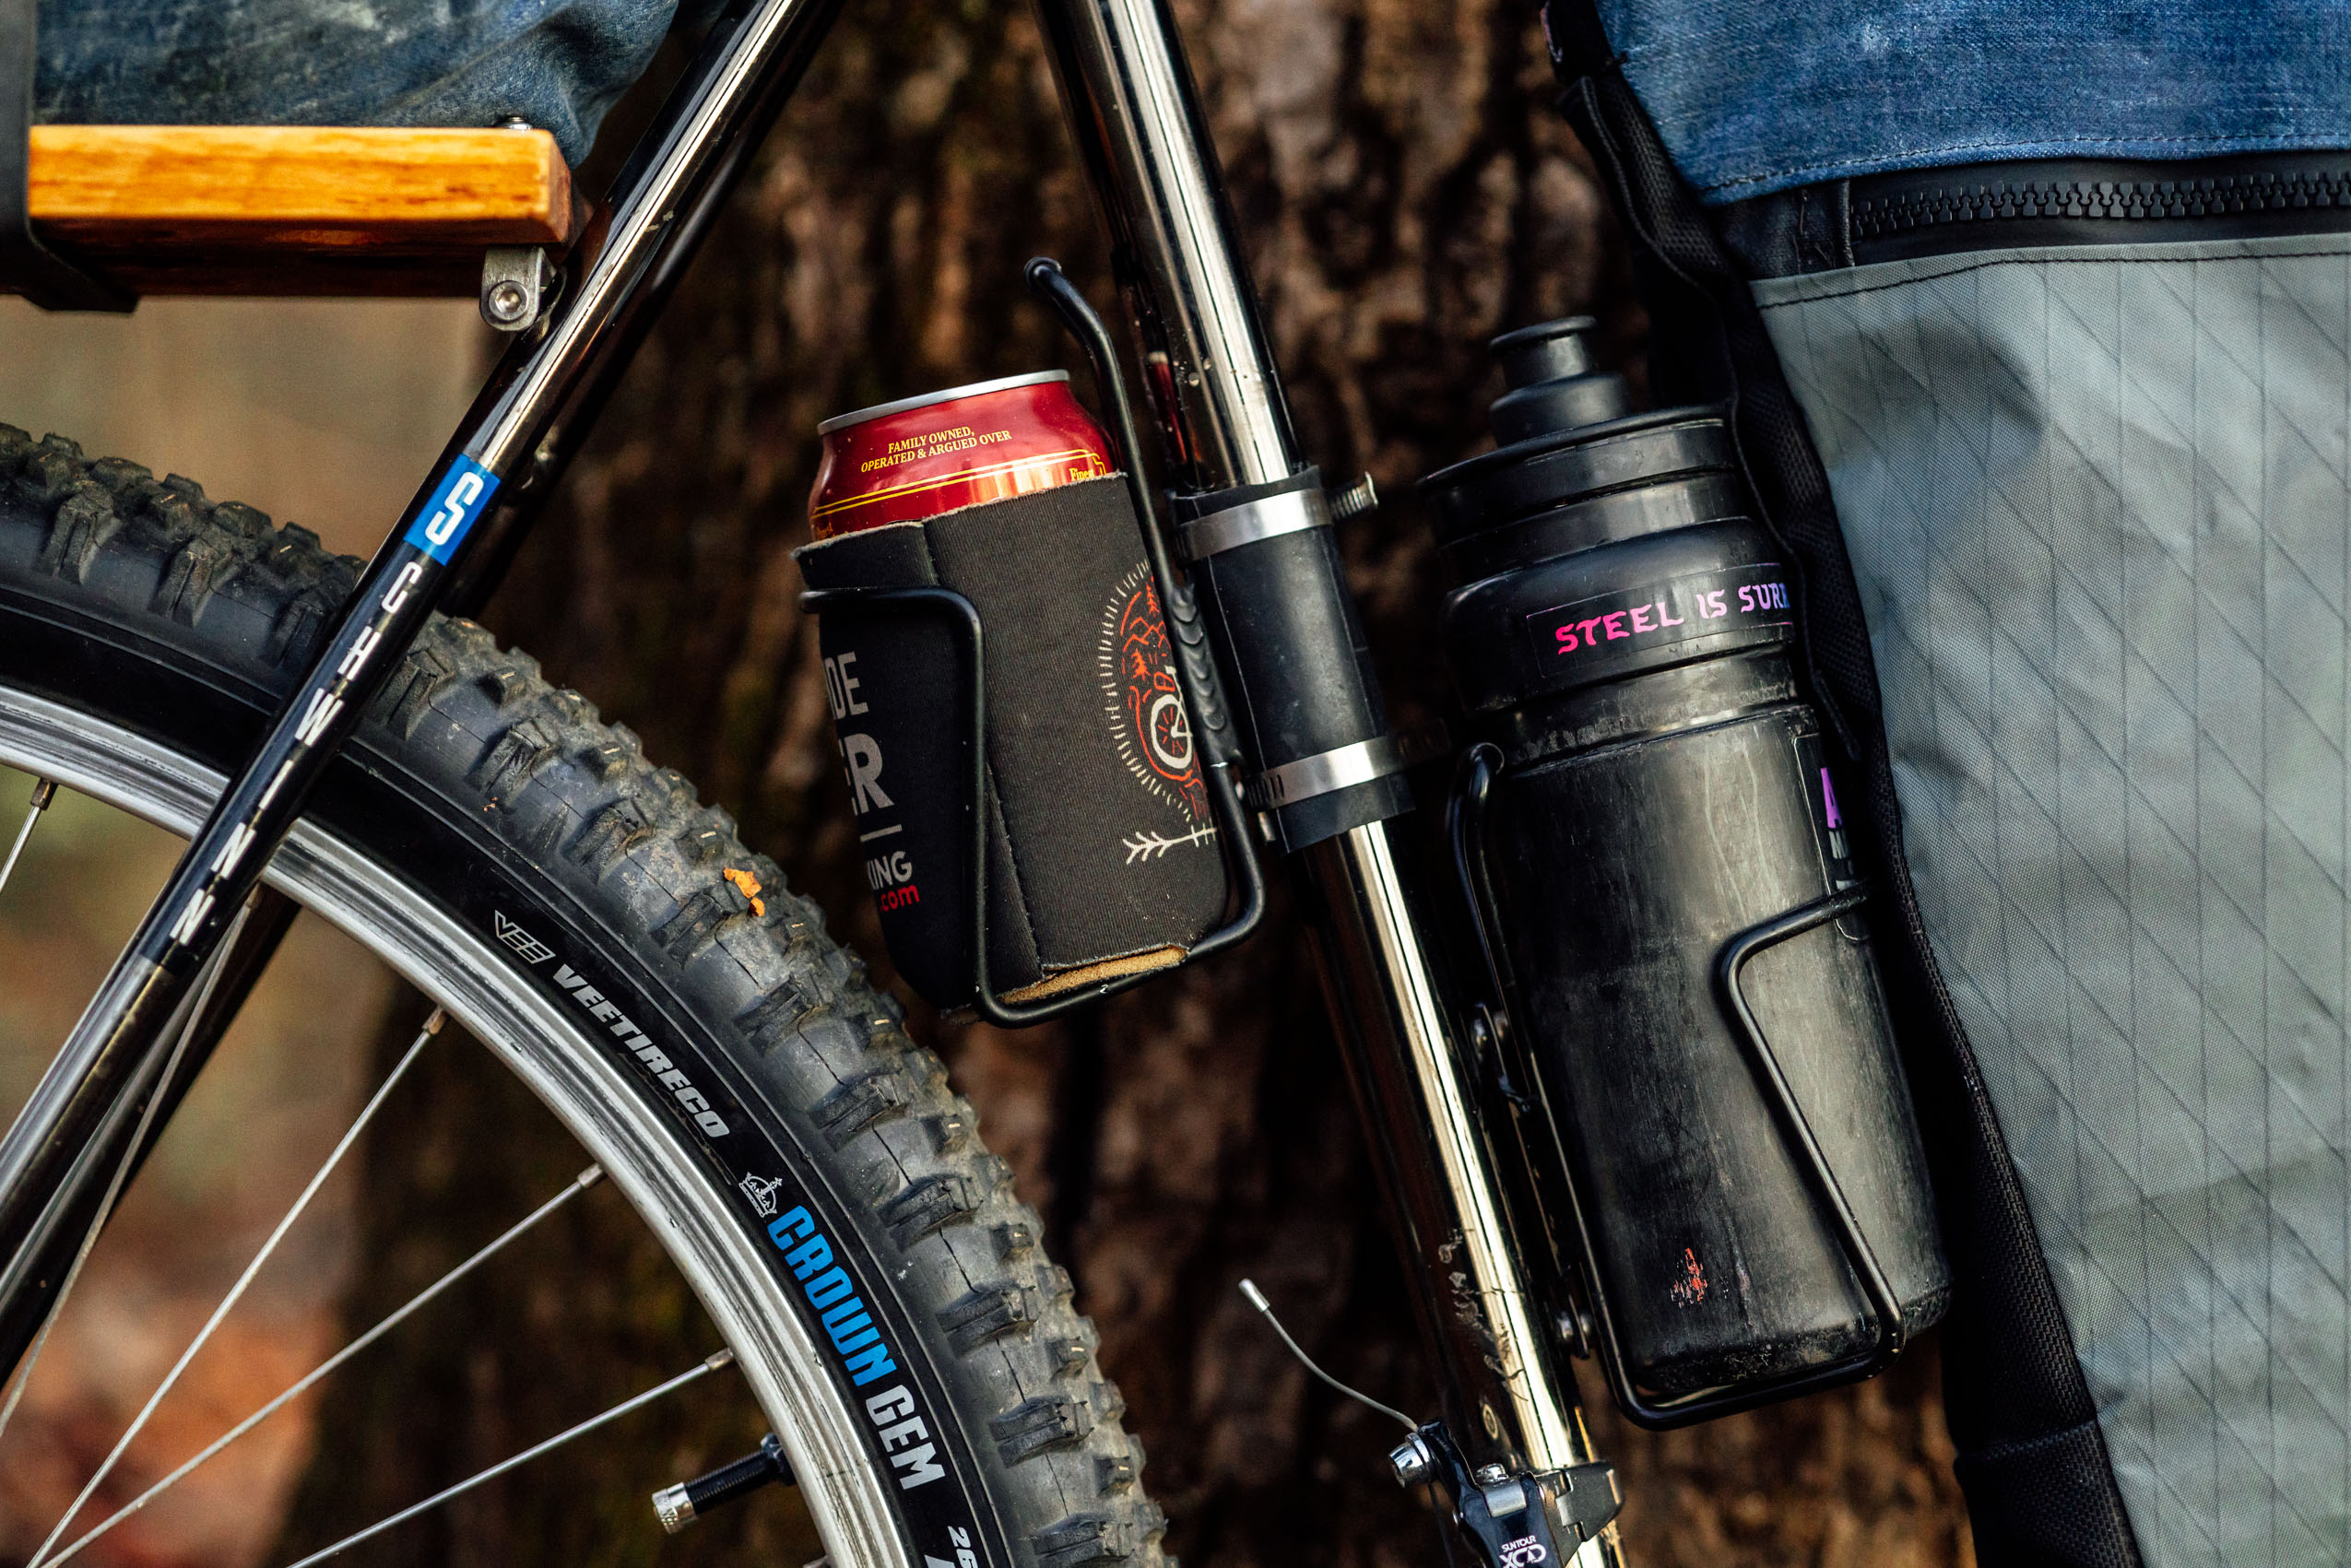
Other upgrades would include making a tarp of my own, maybe a Hite Rite (or other dropper post), and setting up the tires tubeless—which I ultimately did; I personally have no desire to go on a tour with tubes in 2025, or ever again, for that matter.
Upgrades ($134-154)
- $44 – Hite Rite
- $90 to $110 – Steve Potts Camper or Magic Mothbar
Tubeless Setup ($20)
- $11 – Tubeless Schrader Valves
- $9 – Sealant
Camping ($80)
- *$80 – We borrowed a friend’s DIY tarp for the challenge; estimated materials cost at approximately $80 for reference
Tools ($55)
- $26 – Crank Bros M19 multi-tool
- $10 – Leatherman tool
- $10 – Blackburn Pump
- $4 – Tire Lever
- $3 – Tubeless plugs
- $2 – Plugger
——————————————
$289 to $309
As you can see, to truly modify this bike and kit into a capable multi-month dirt touring setup, a few extras are needed, bringing the total budget to around $788 to $808. In my opinion, that’s still quite reasonable for a dirt-road worthy, all-inclusive setup. That said, I fully acknowledge the privilege of having access to tools needed to make all the components, a scrapped pack, leftover materials, and a sewing machine—not everyone has these resources at their disposal. However, I hope this kit and process inspire others to think creatively and resourcefully when assembling a bikepacking rig. Despite the fact that a solid 30 to 40 percent of the content we produce here on the website is about gear, much of it new, you truly don’t have to buy new things. Many of the materials I used can be substituted with other repurposed fabrics and hardware, and there are countless ways to approach this challenge, resulting in a reliable and personal setup you can be proud to pedal off into the sunset.
Thanks for reading. Feel free to ask any questions about the build below, and stay tuned for tutorials on the racks and blue jean rack bag next week, followed by the basket bag the week following. And there are more Build-Off bikes to come!
Further Reading
Make sure to dig into these related articles for more info...

Please keep the conversation civil, constructive, and inclusive, or your comment will be removed.