


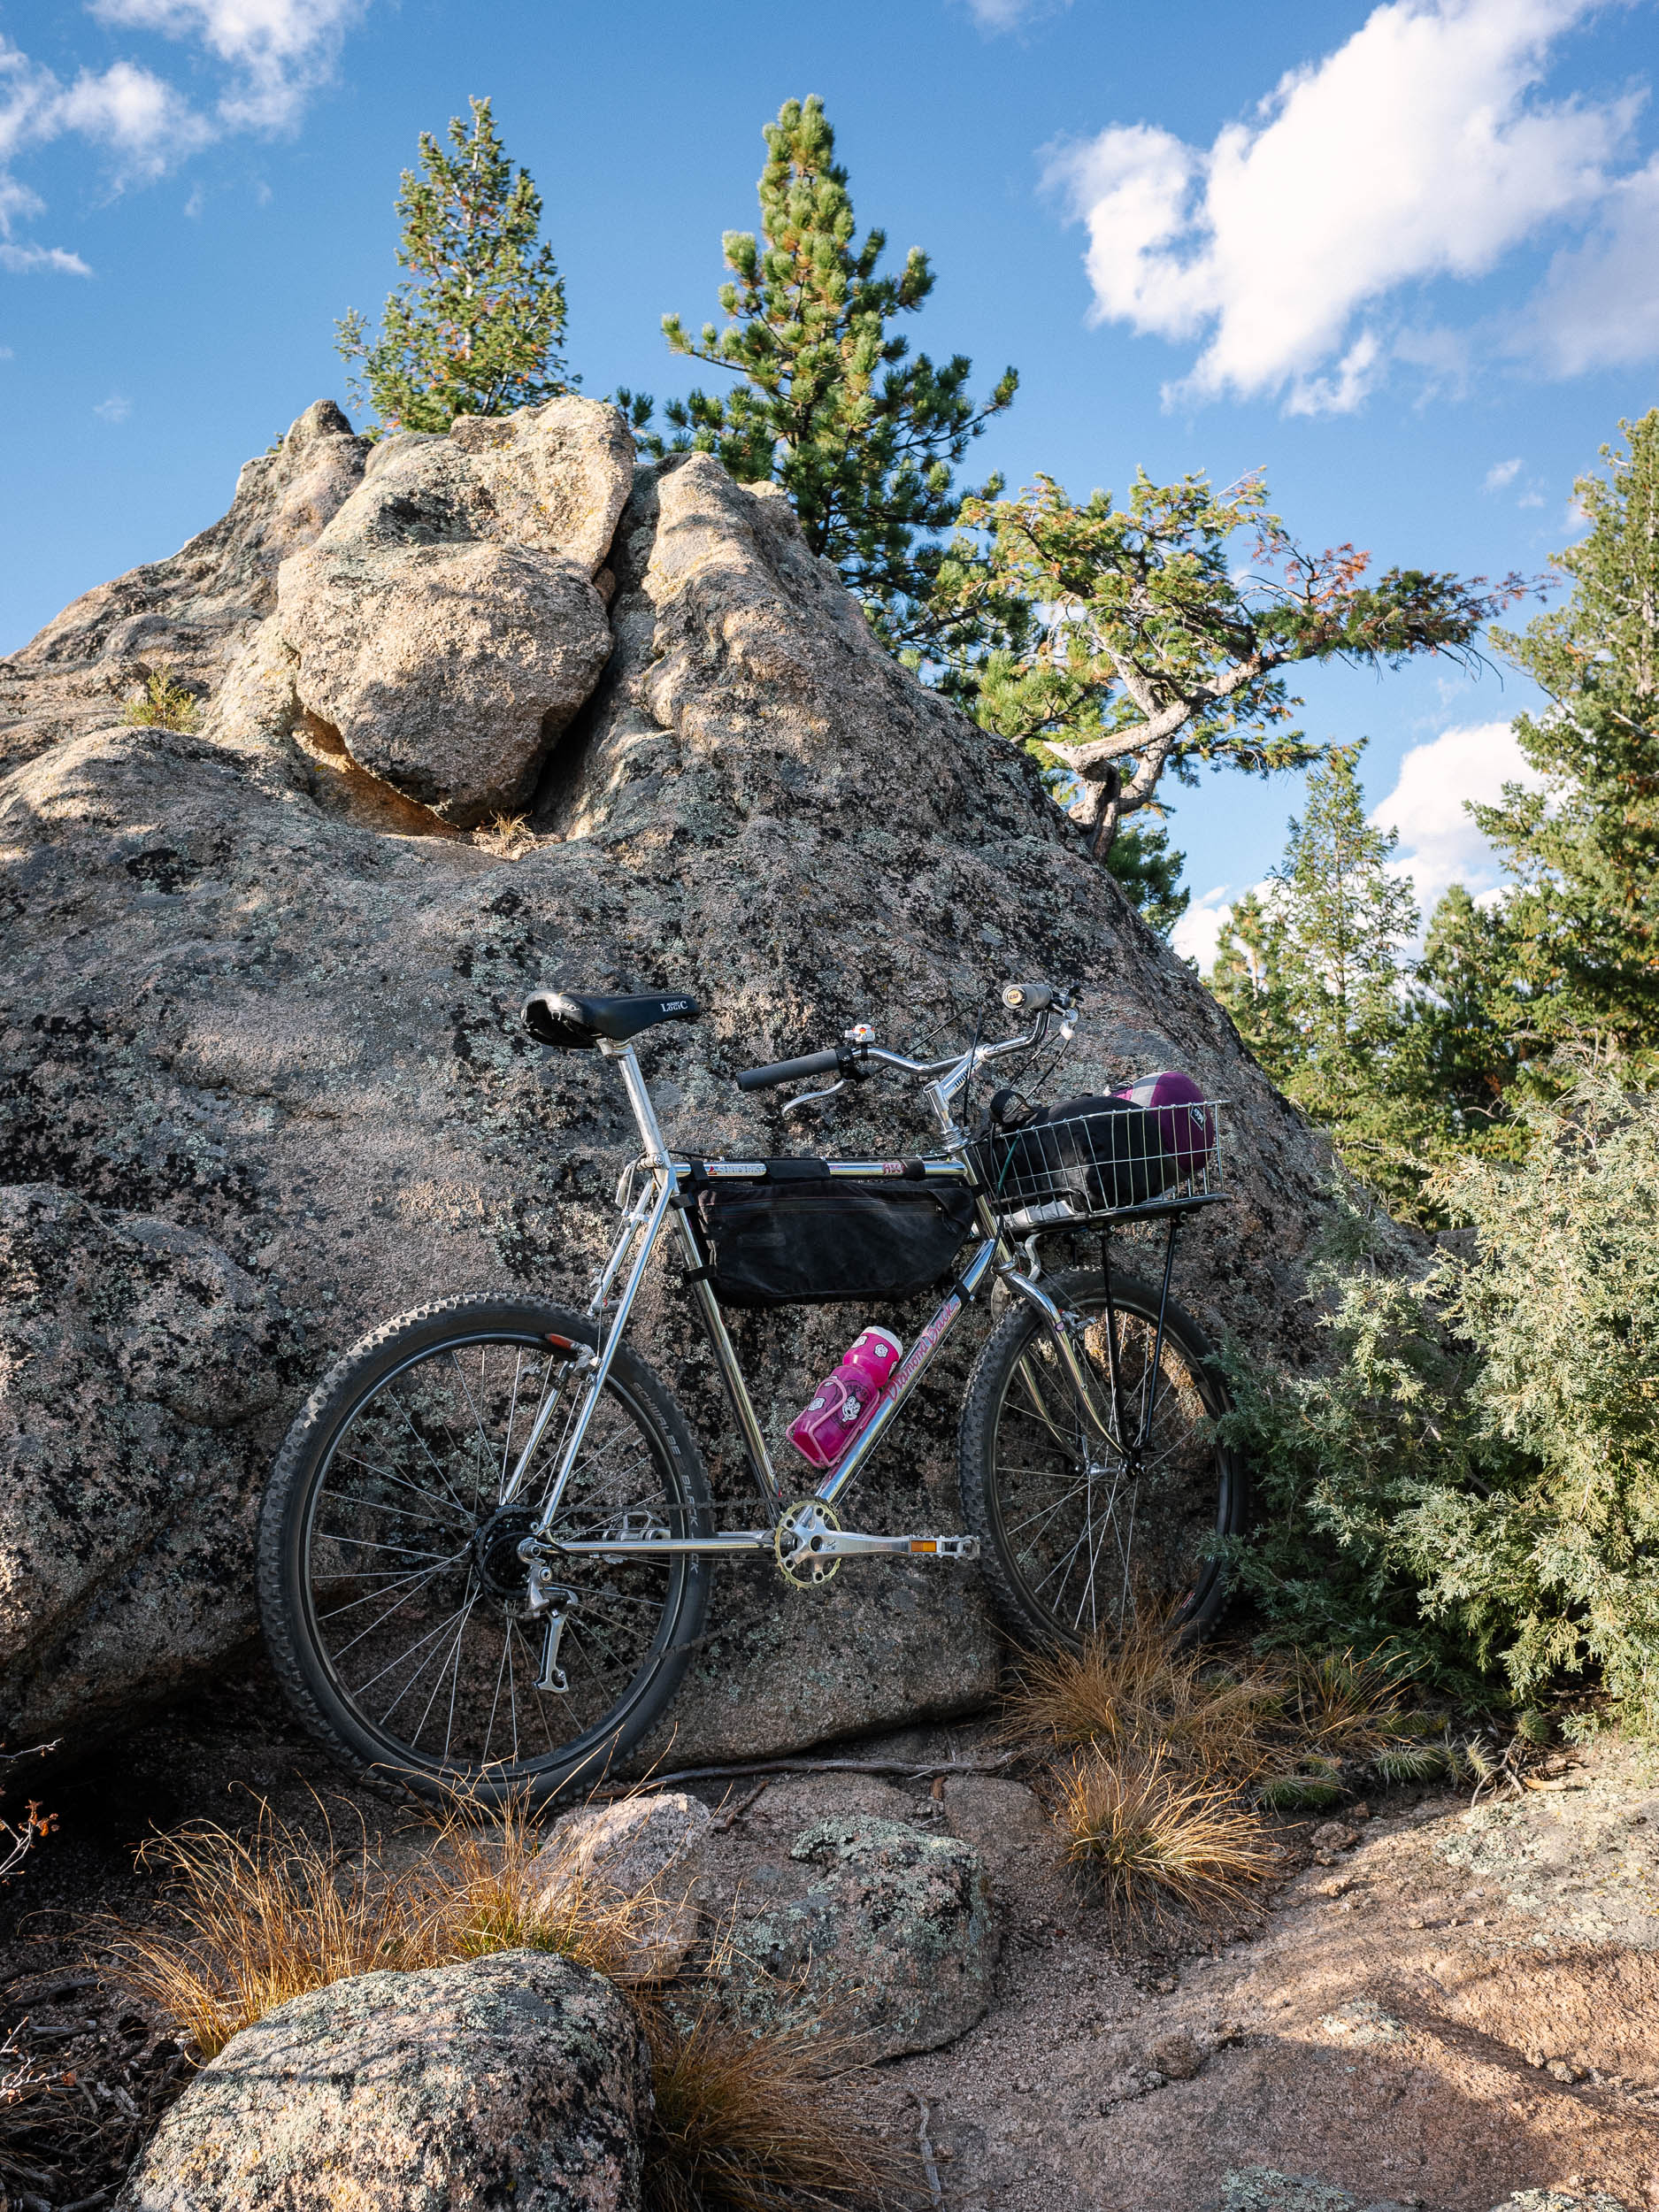
Budget Bikepacking Build-Off: Lucas’s 1986 Diamondback


Long in the works, we’re excited to introduce our new Budget Bikepacking Build-Off series, which challenges our editors to put together a bikepacking rig and camping kit for under $500. Kicking off the competition, Lucas shares his 1986 Diamondback Ascent basketpacker, fresh off an overnighter in the mountains of Colorado. Find his bike’s story, a build kit, and a photo gallery here…
PUBLISHED Oct 27, 2023
Welcome to the Budget Bikepacking Build-Off challenge, through which several members of our team will share the bikepacking rigs and camping kits they pieced together on a strict $500 budget. As much as we enjoy keeping up with the latest and greatest, finding ways to make bikepacking more approachable to a broader audience also moves us. Whether it’s sharing DIY tutorials in our ever-growing Make Your Own Bikepacking Gear (MYOBG) series, presenting weekly Reader’s Rigs from around the community, or highlighting economical bikes and gear through reviews and dispatches, we love opportunities to repurpose old stuff and help lower bikepacking’s barriers to entry.
Budget Bikepacking Build-Off Rules
- Spend no more than $500 on your bike, bags, and camping gear.
- No freebies or components from your parts bin.
- No pro deals. Pay full asking price for new and used gear.
- Buy local whenever possible.
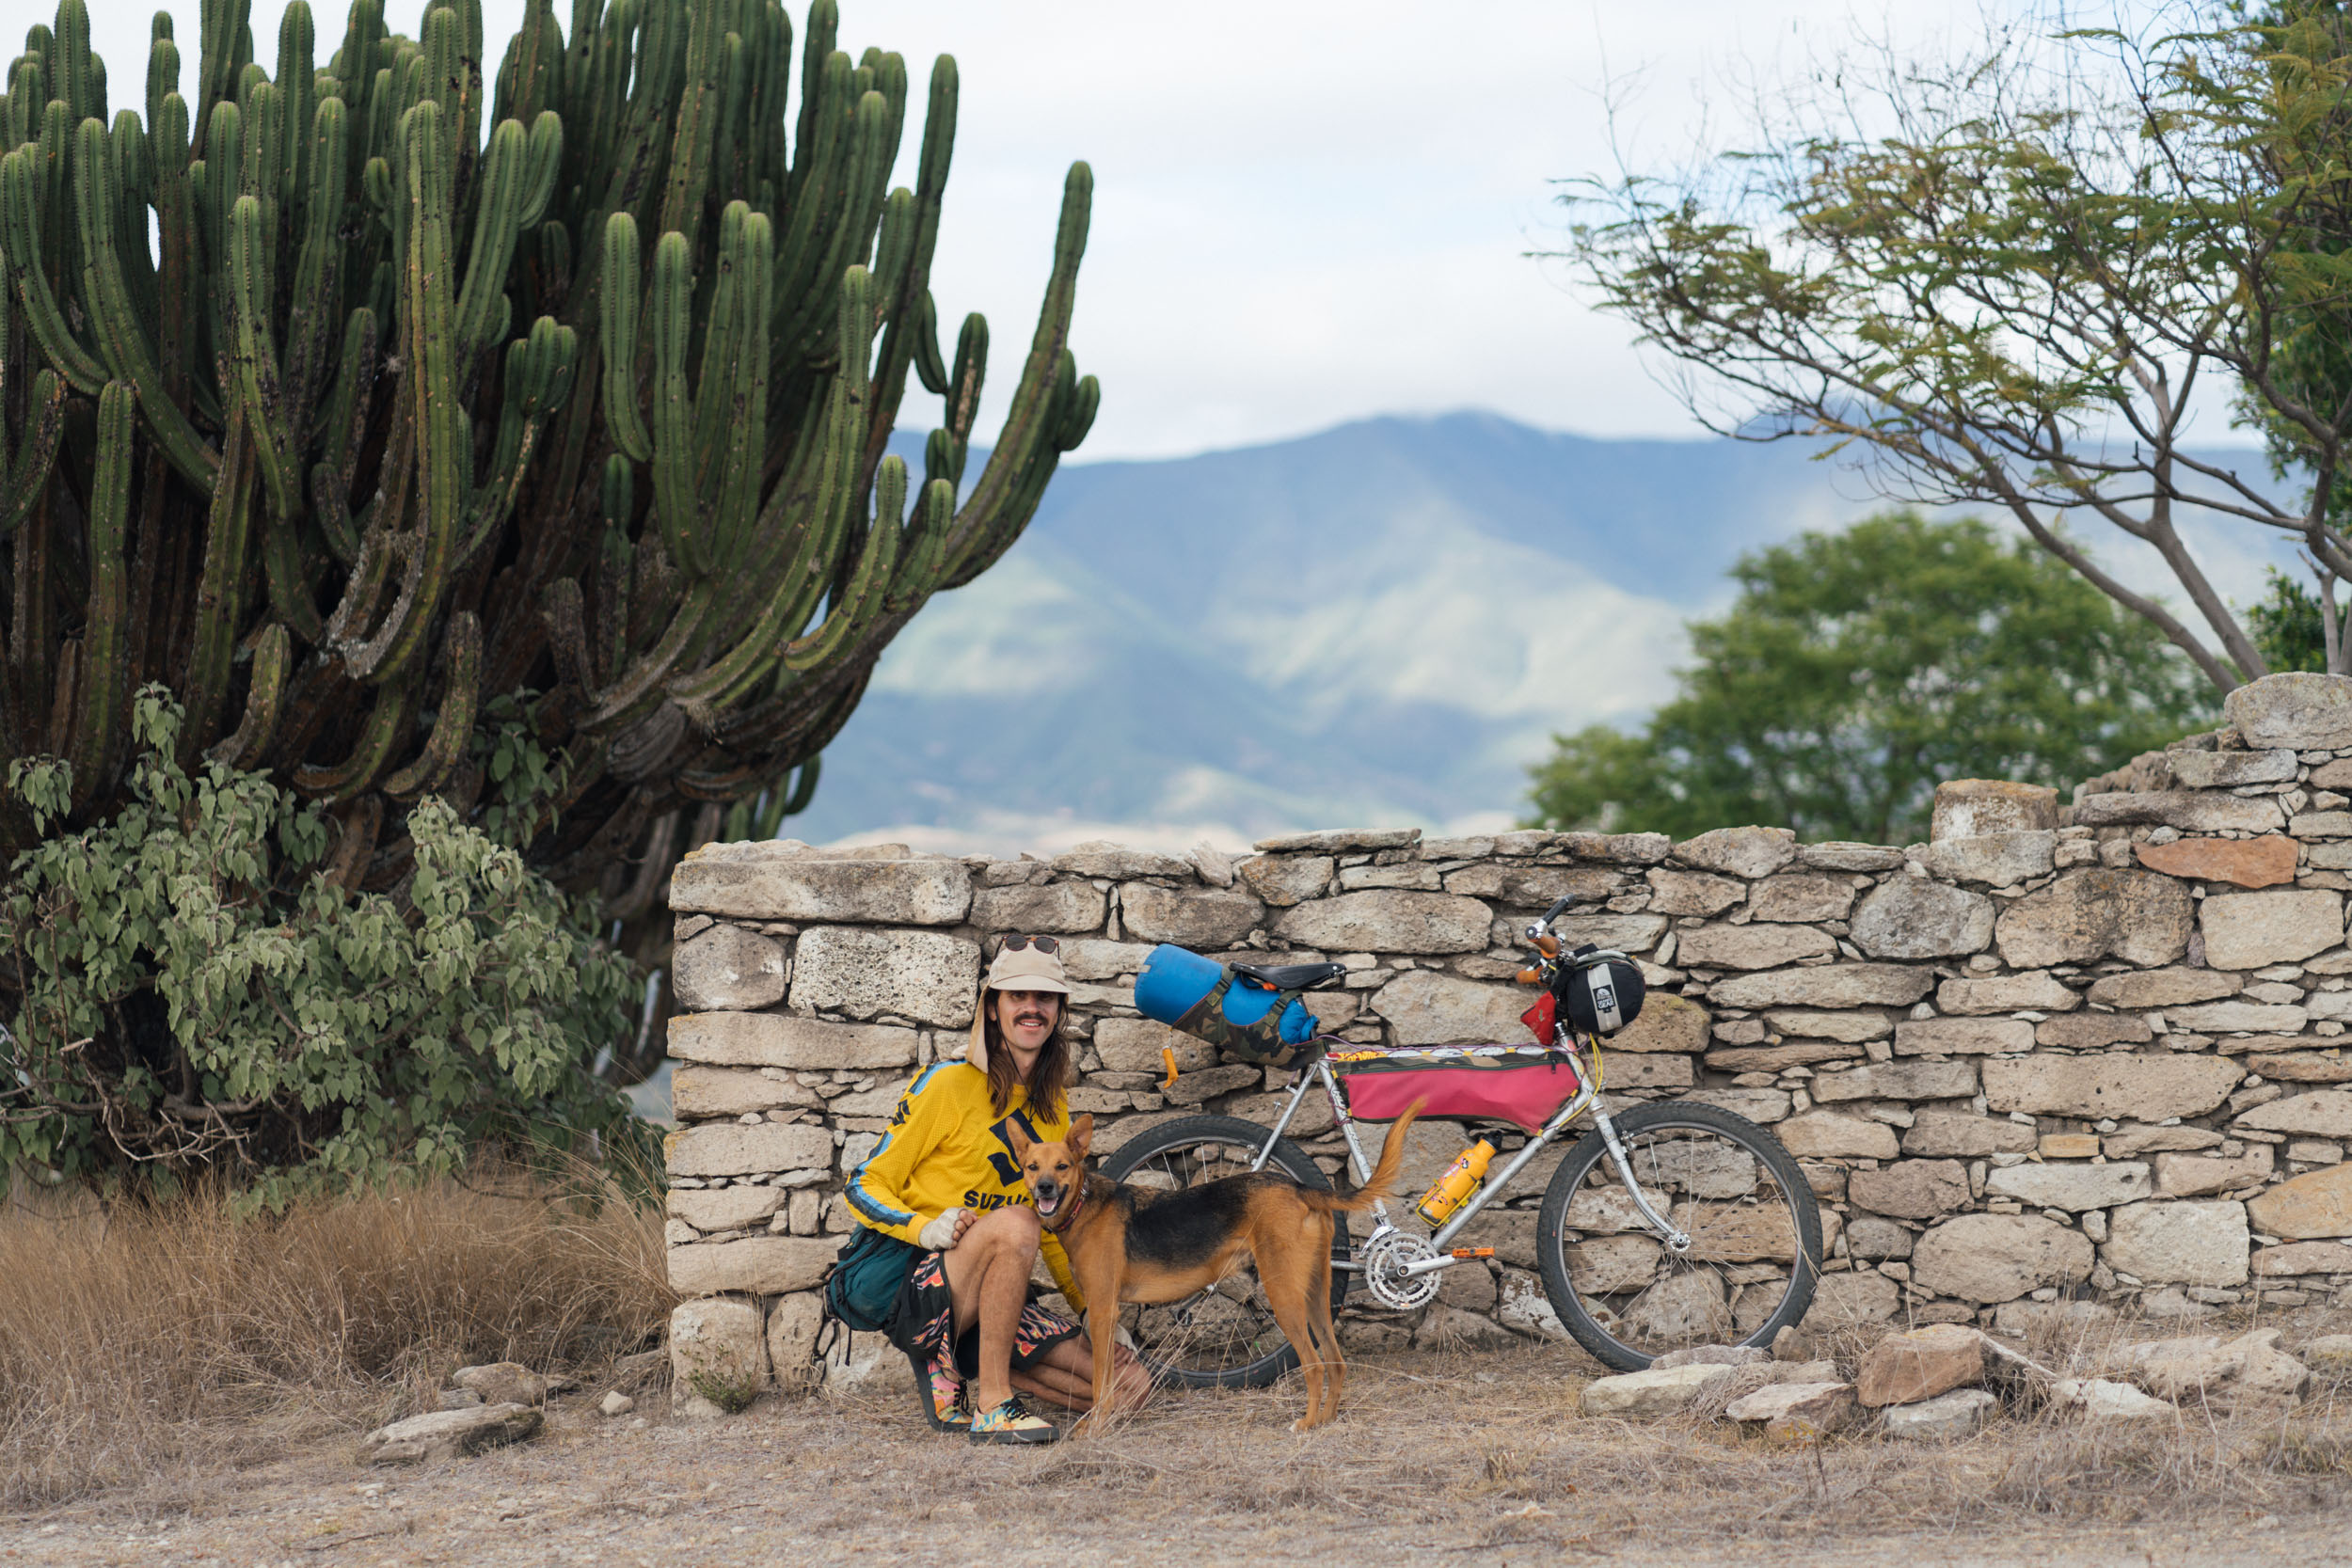
- Take the finished build out for an overnighter as a real-world test.
As part of this new series, we’ll present submissions from the BIKEPACKING.com team throughout the months ahead. Once the full array of bikes is on display, we’ll ask our Bikepacking Collective members to deliberate and help us crown the winning rig. With participants working on builds that suit their home turf in several unique regions and countries, you can expect an eclectic mix of bikes to follow. Without further delay, let’s dive right in. Find my inaugural entry and the story behind it below.
Choosing a Bike
From the moment we started scheming this affordable bike build-off well over a year ago, I had a clear vision of a 1980s or ’90s mountain bike with a front rack and big ol’ basket. Even though I have difficulty fitting on long-and-low 26ers from that era at 6’3″ (190cm) tall, they’re widely available, easy to wrench on, and can generally be found for relatively little money with a bit of patience, making them ideal for this challenge. My love of ever-practical Wald baskets is no secret to regular readers of the site, and there’s no easier way to pack for a night under the stars than chucking a bunch of stuff into a basket and pedaling off.
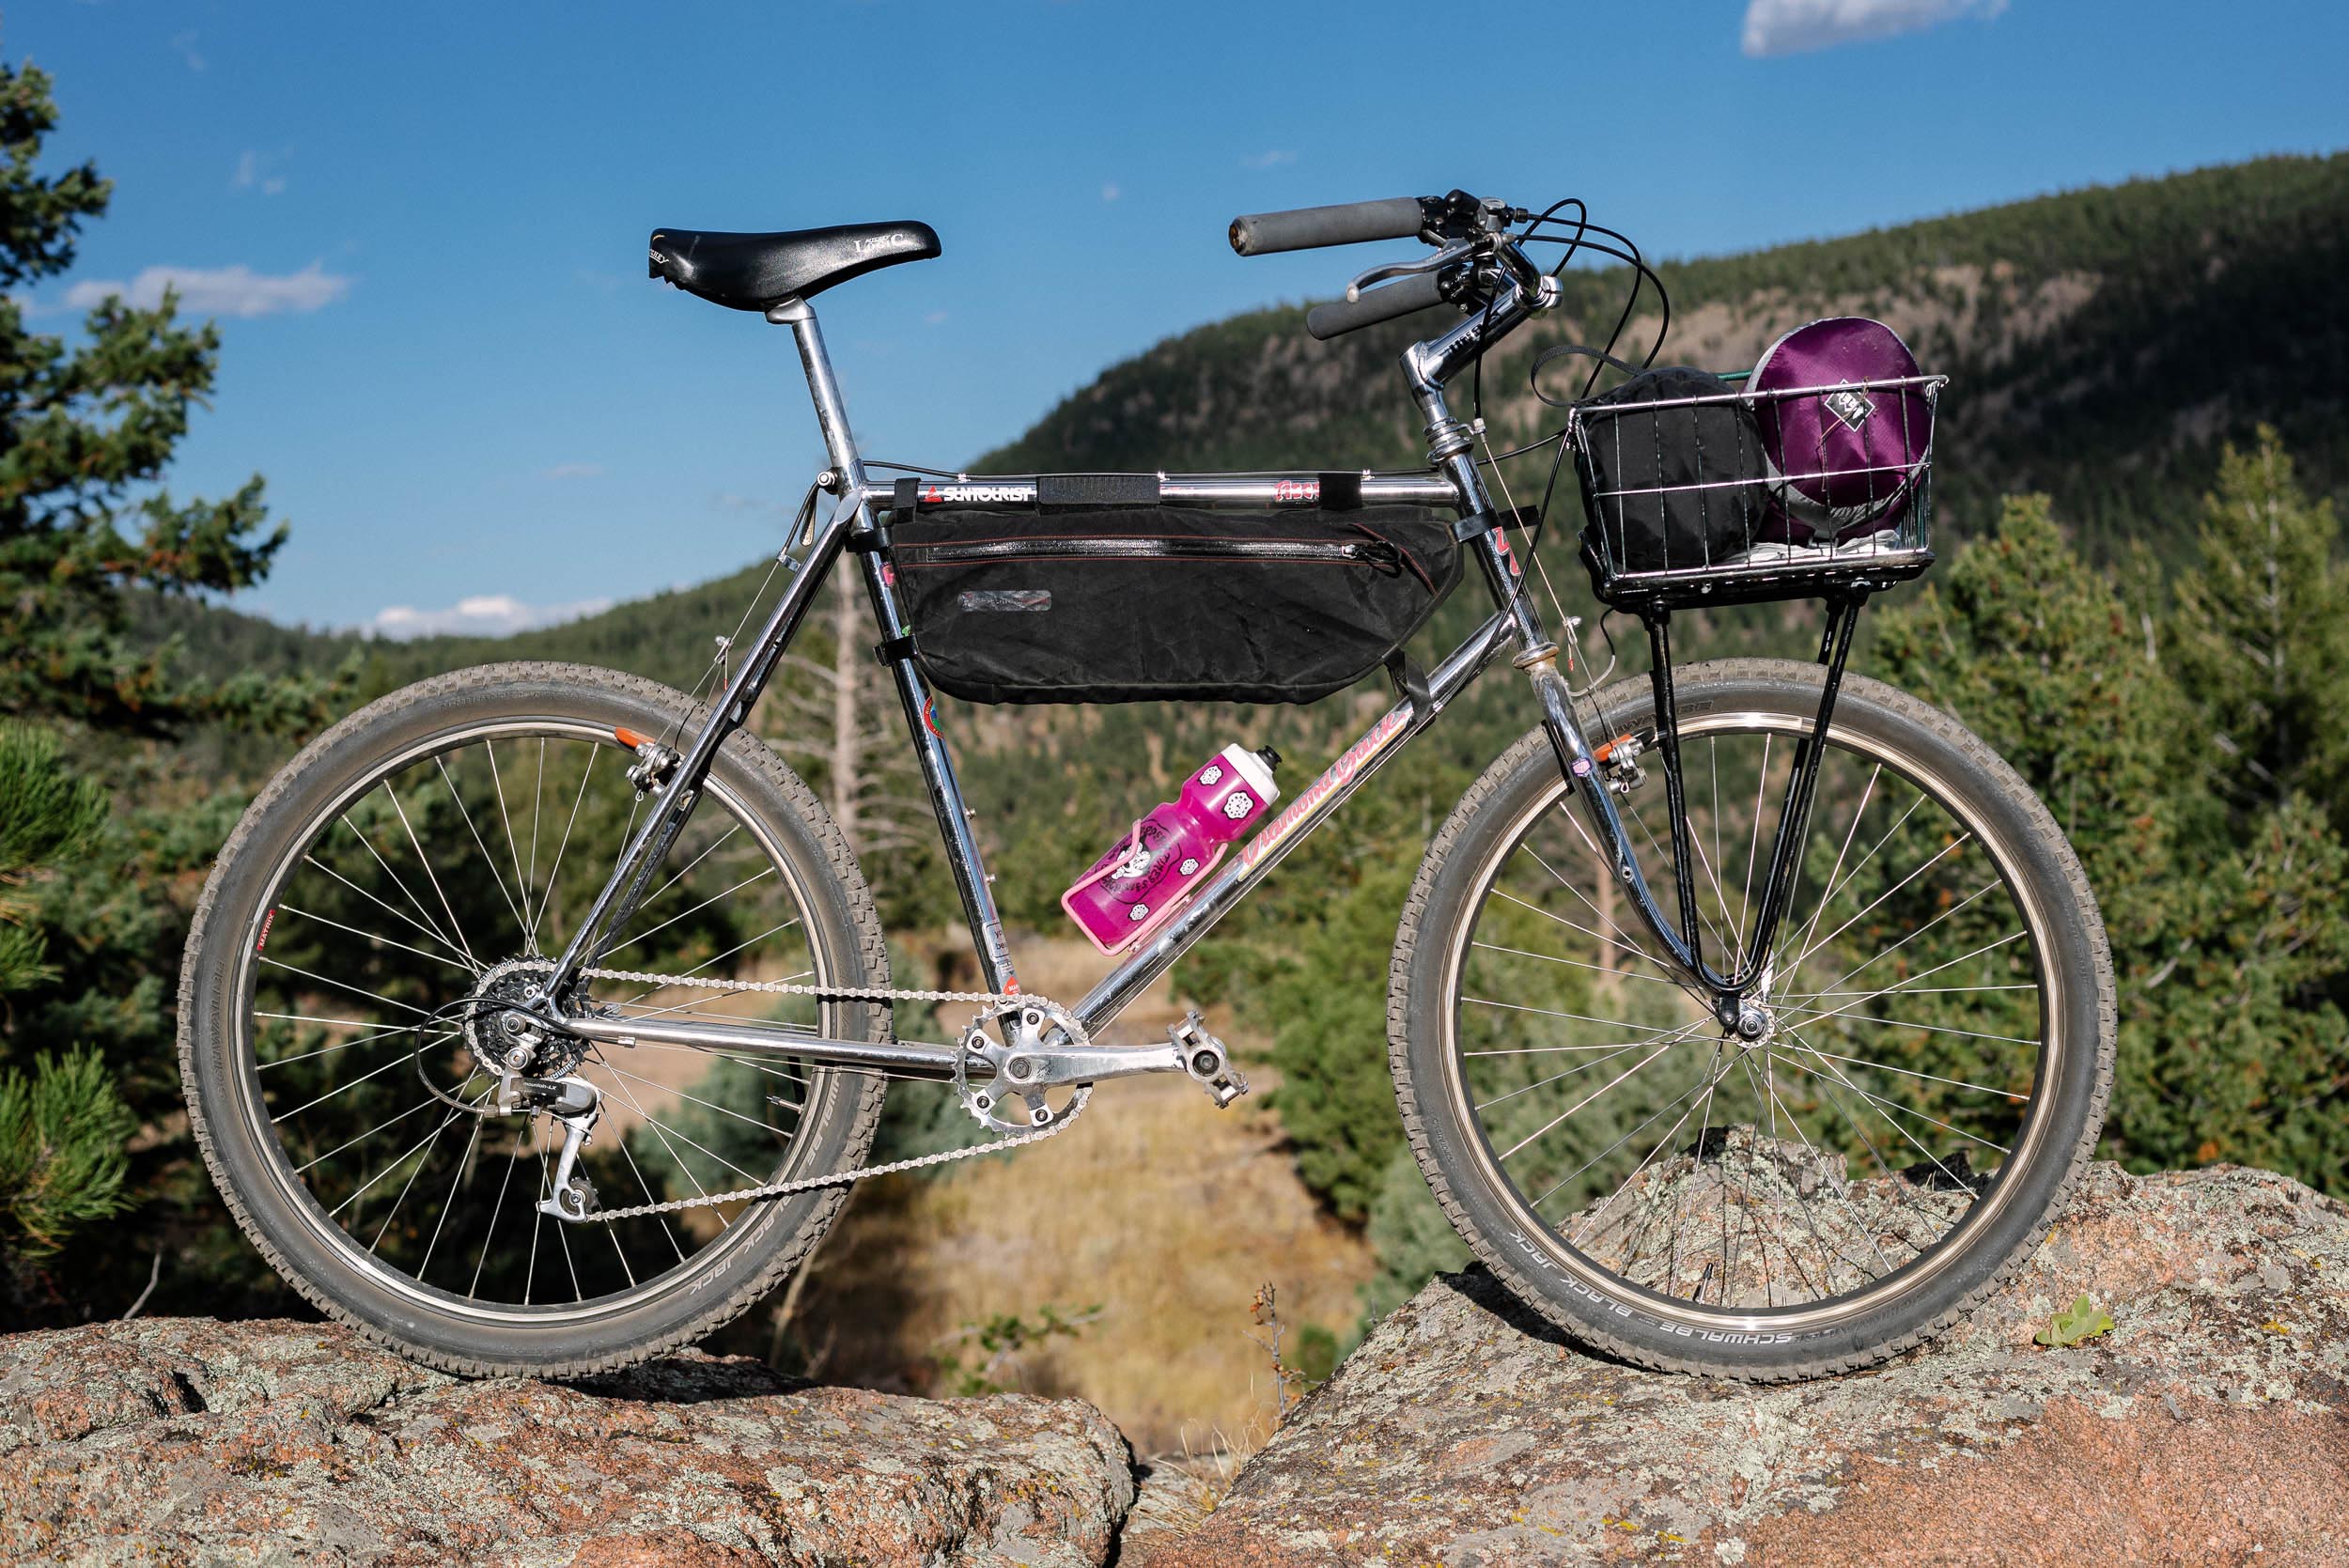
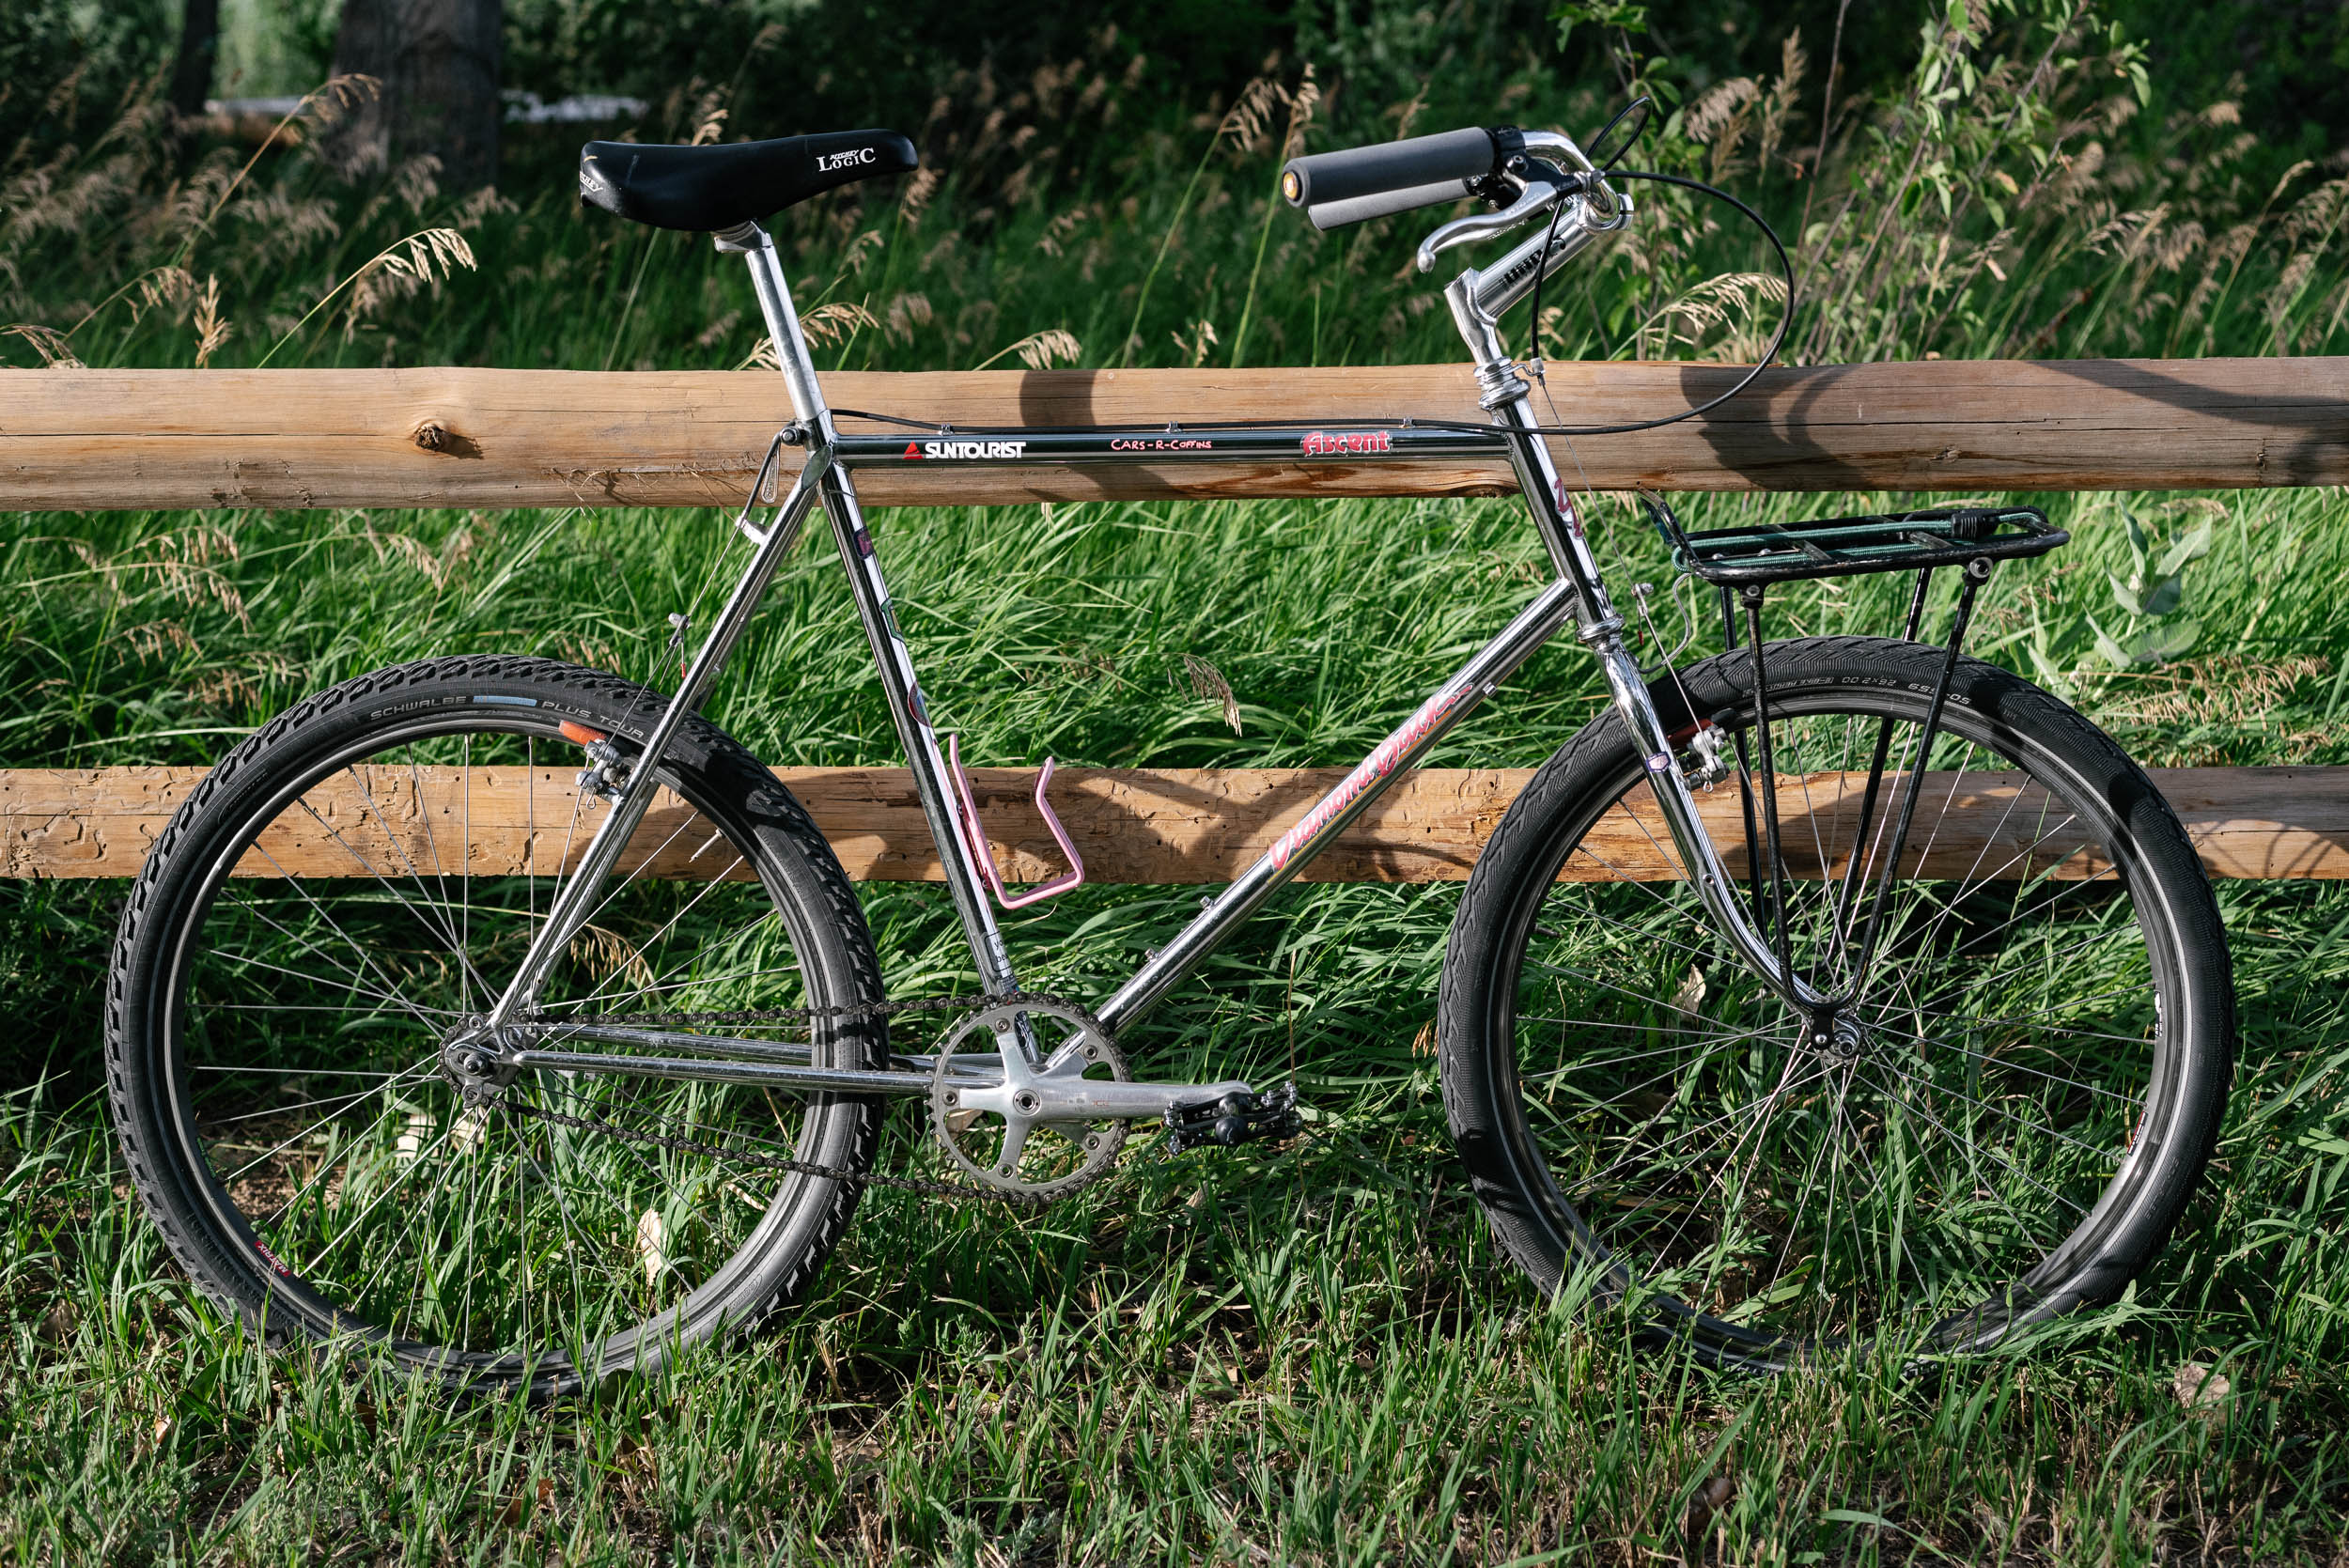
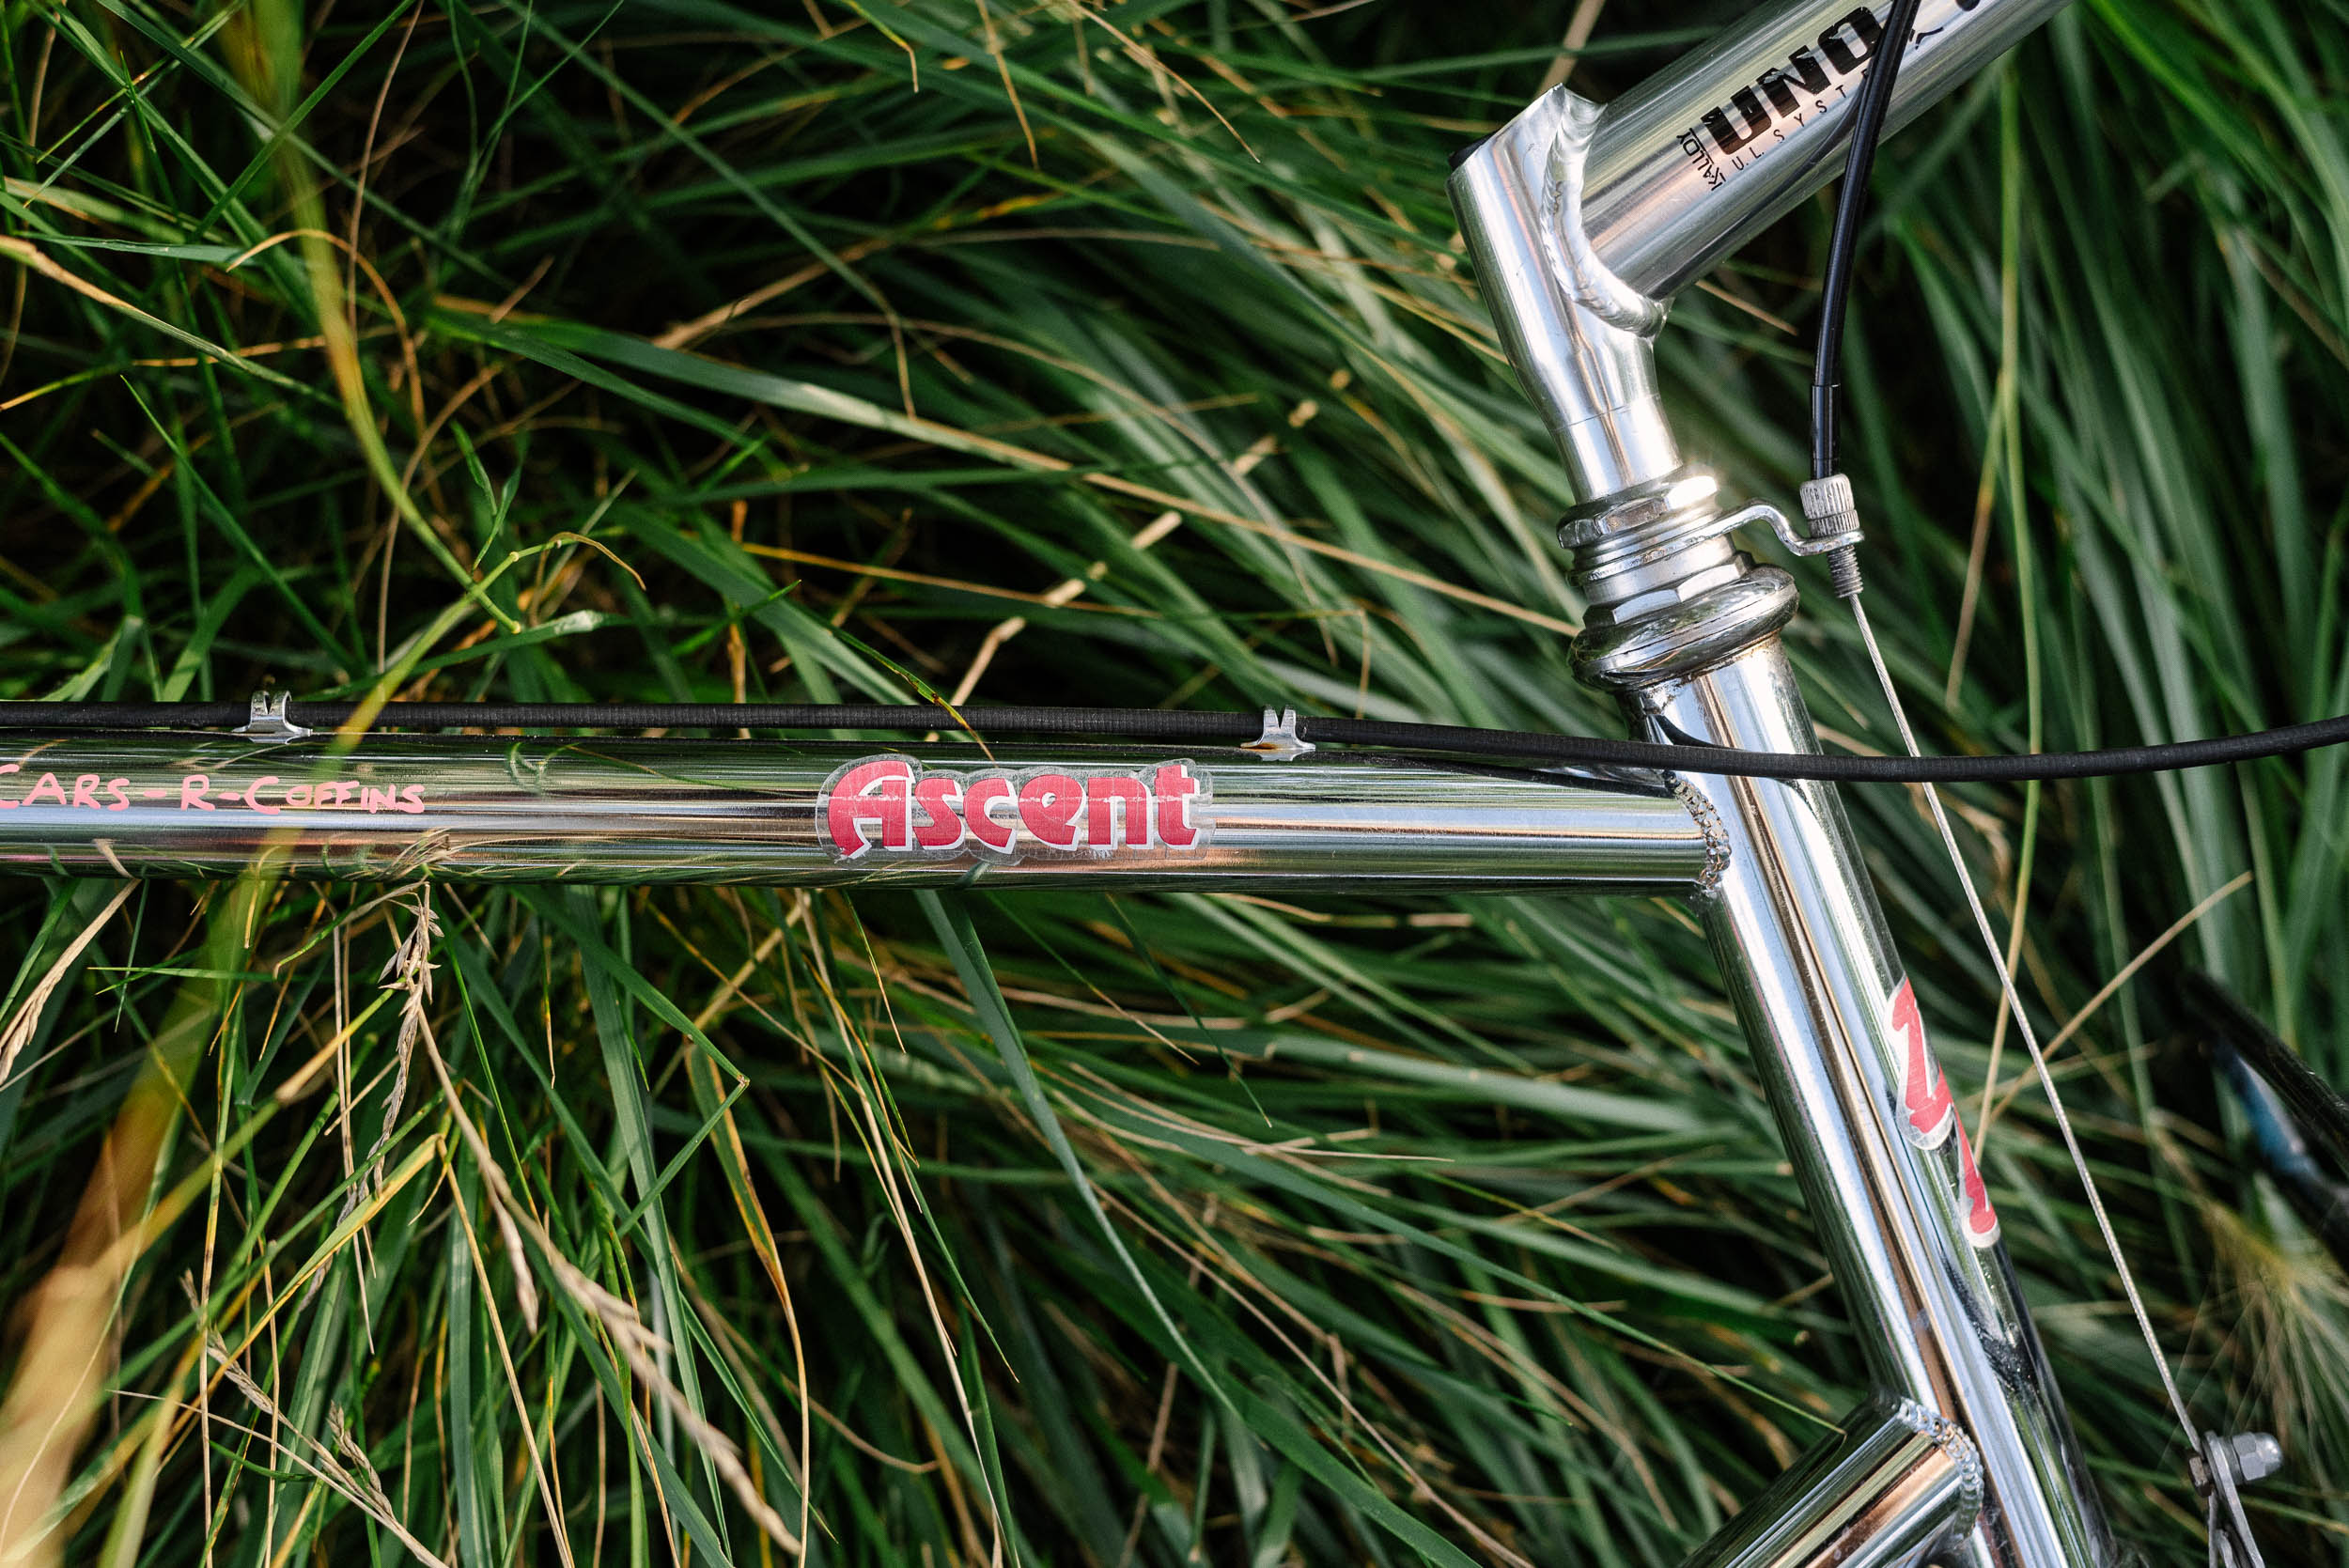
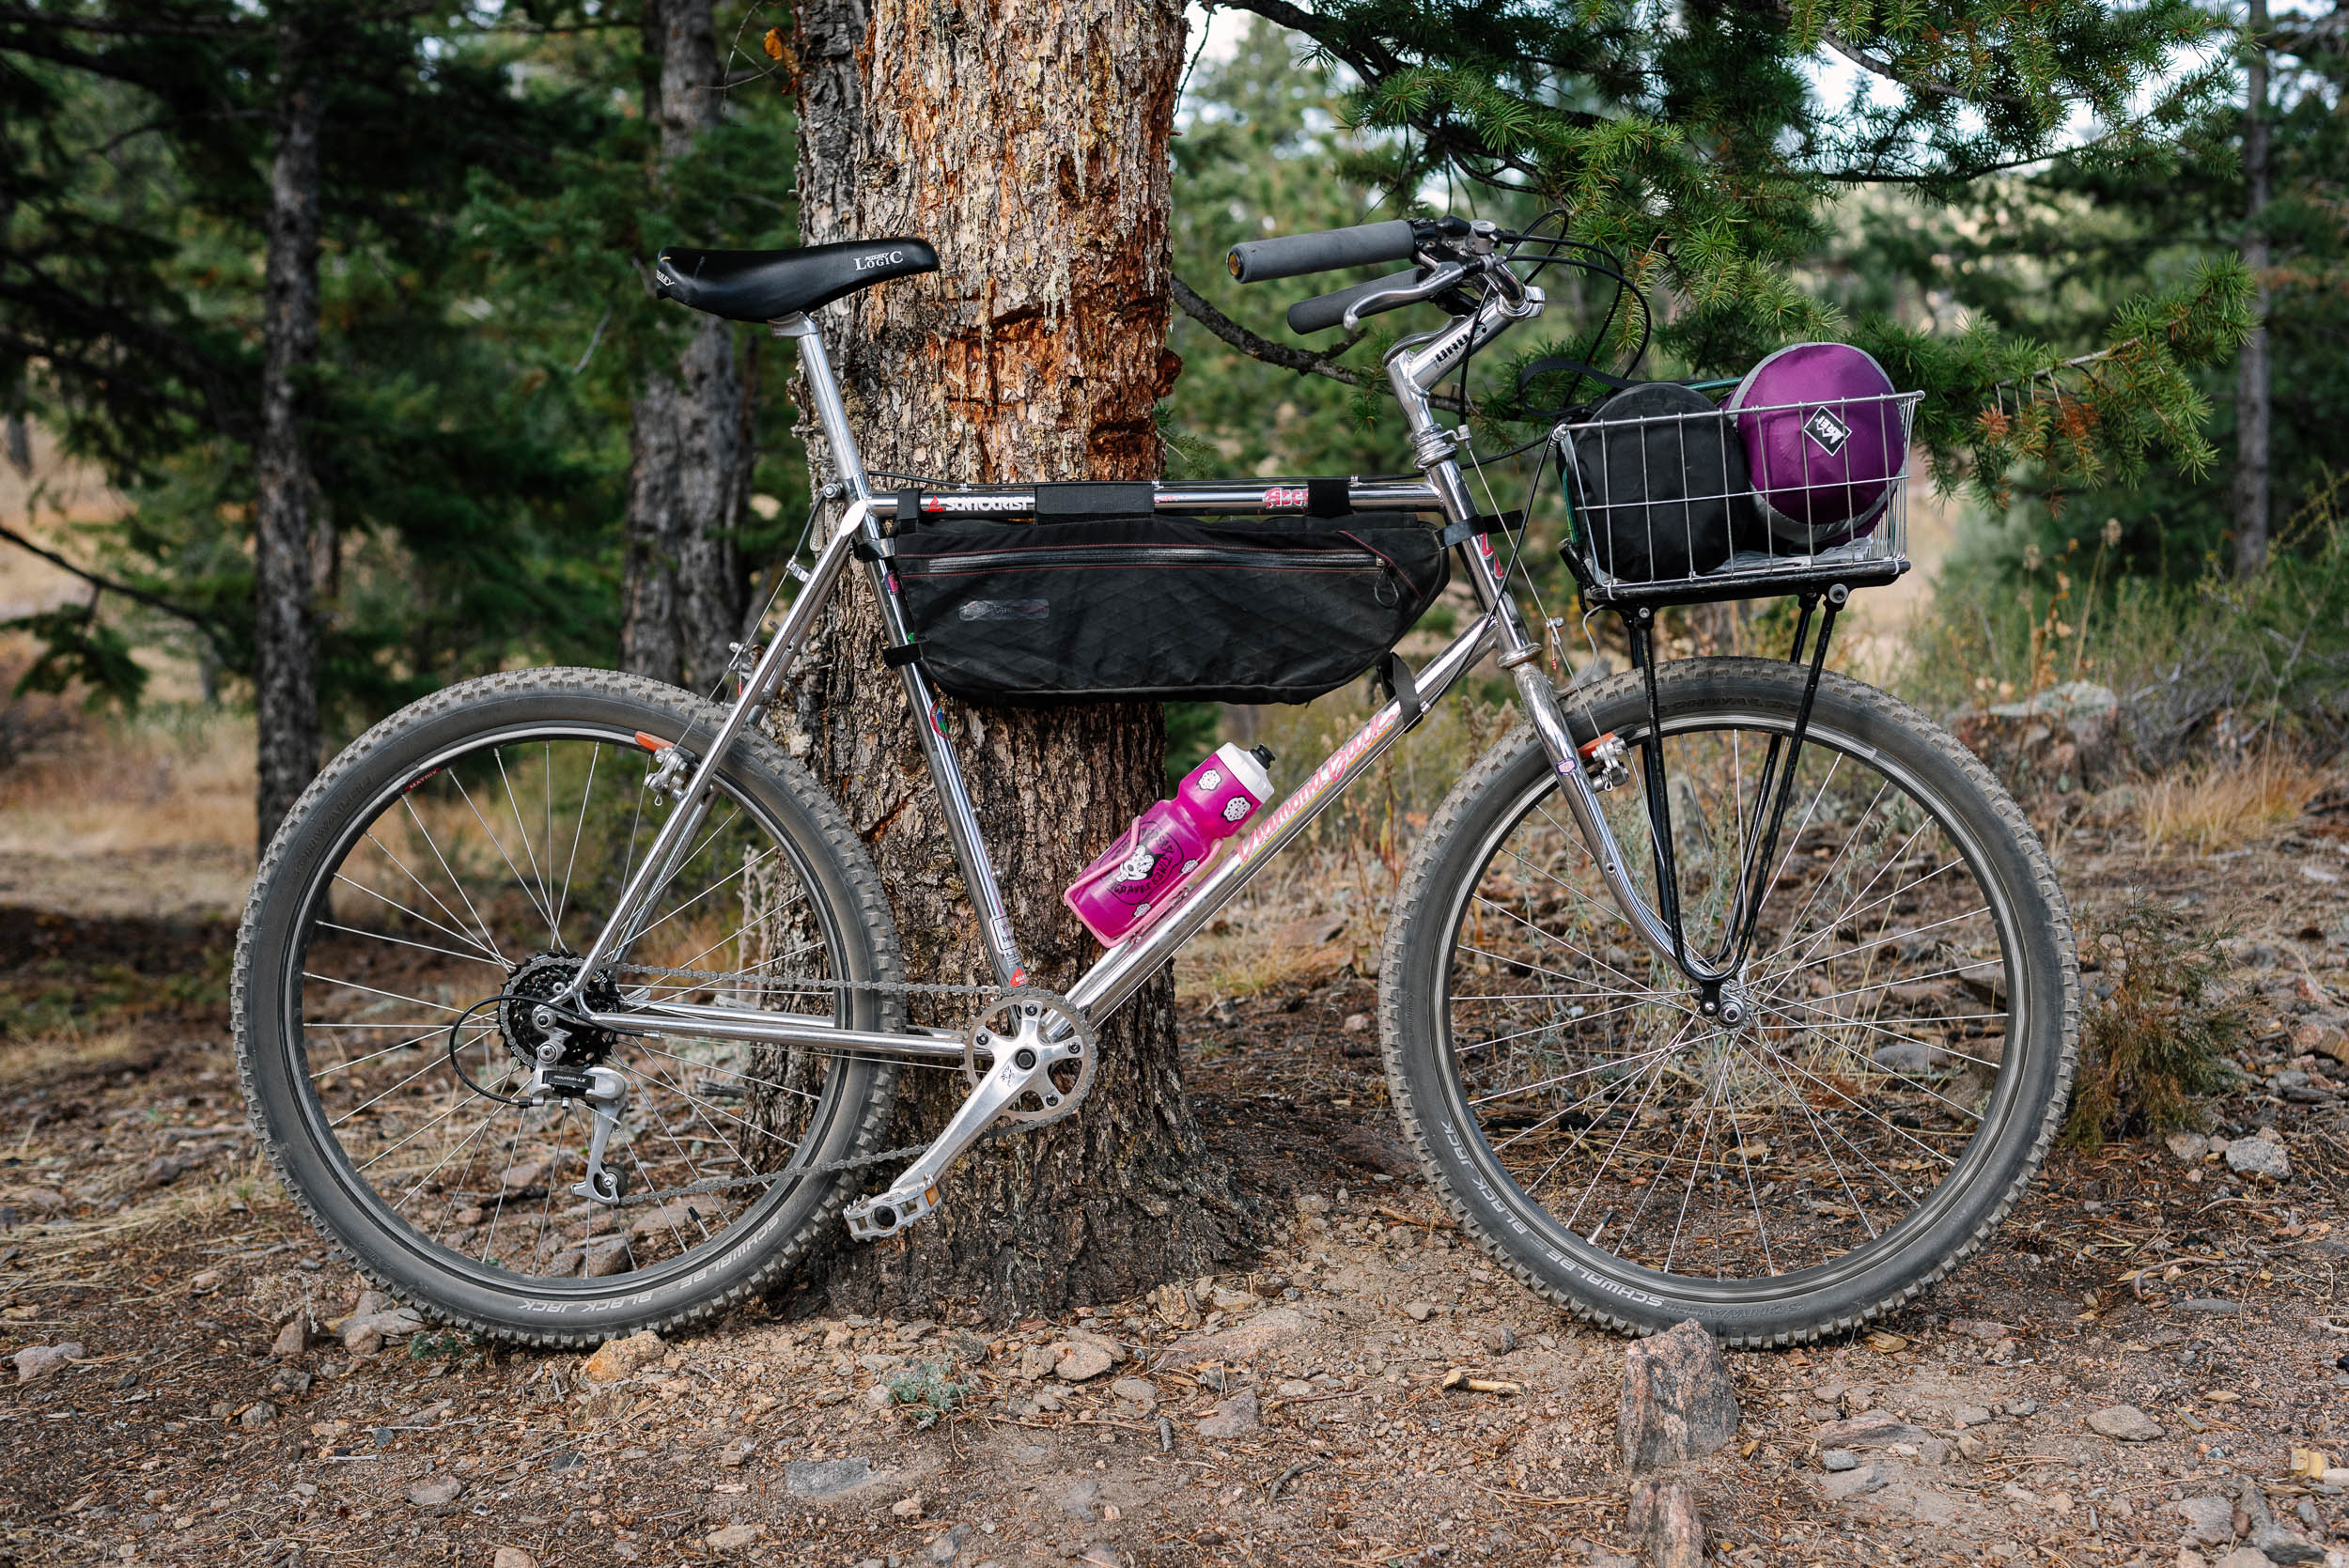
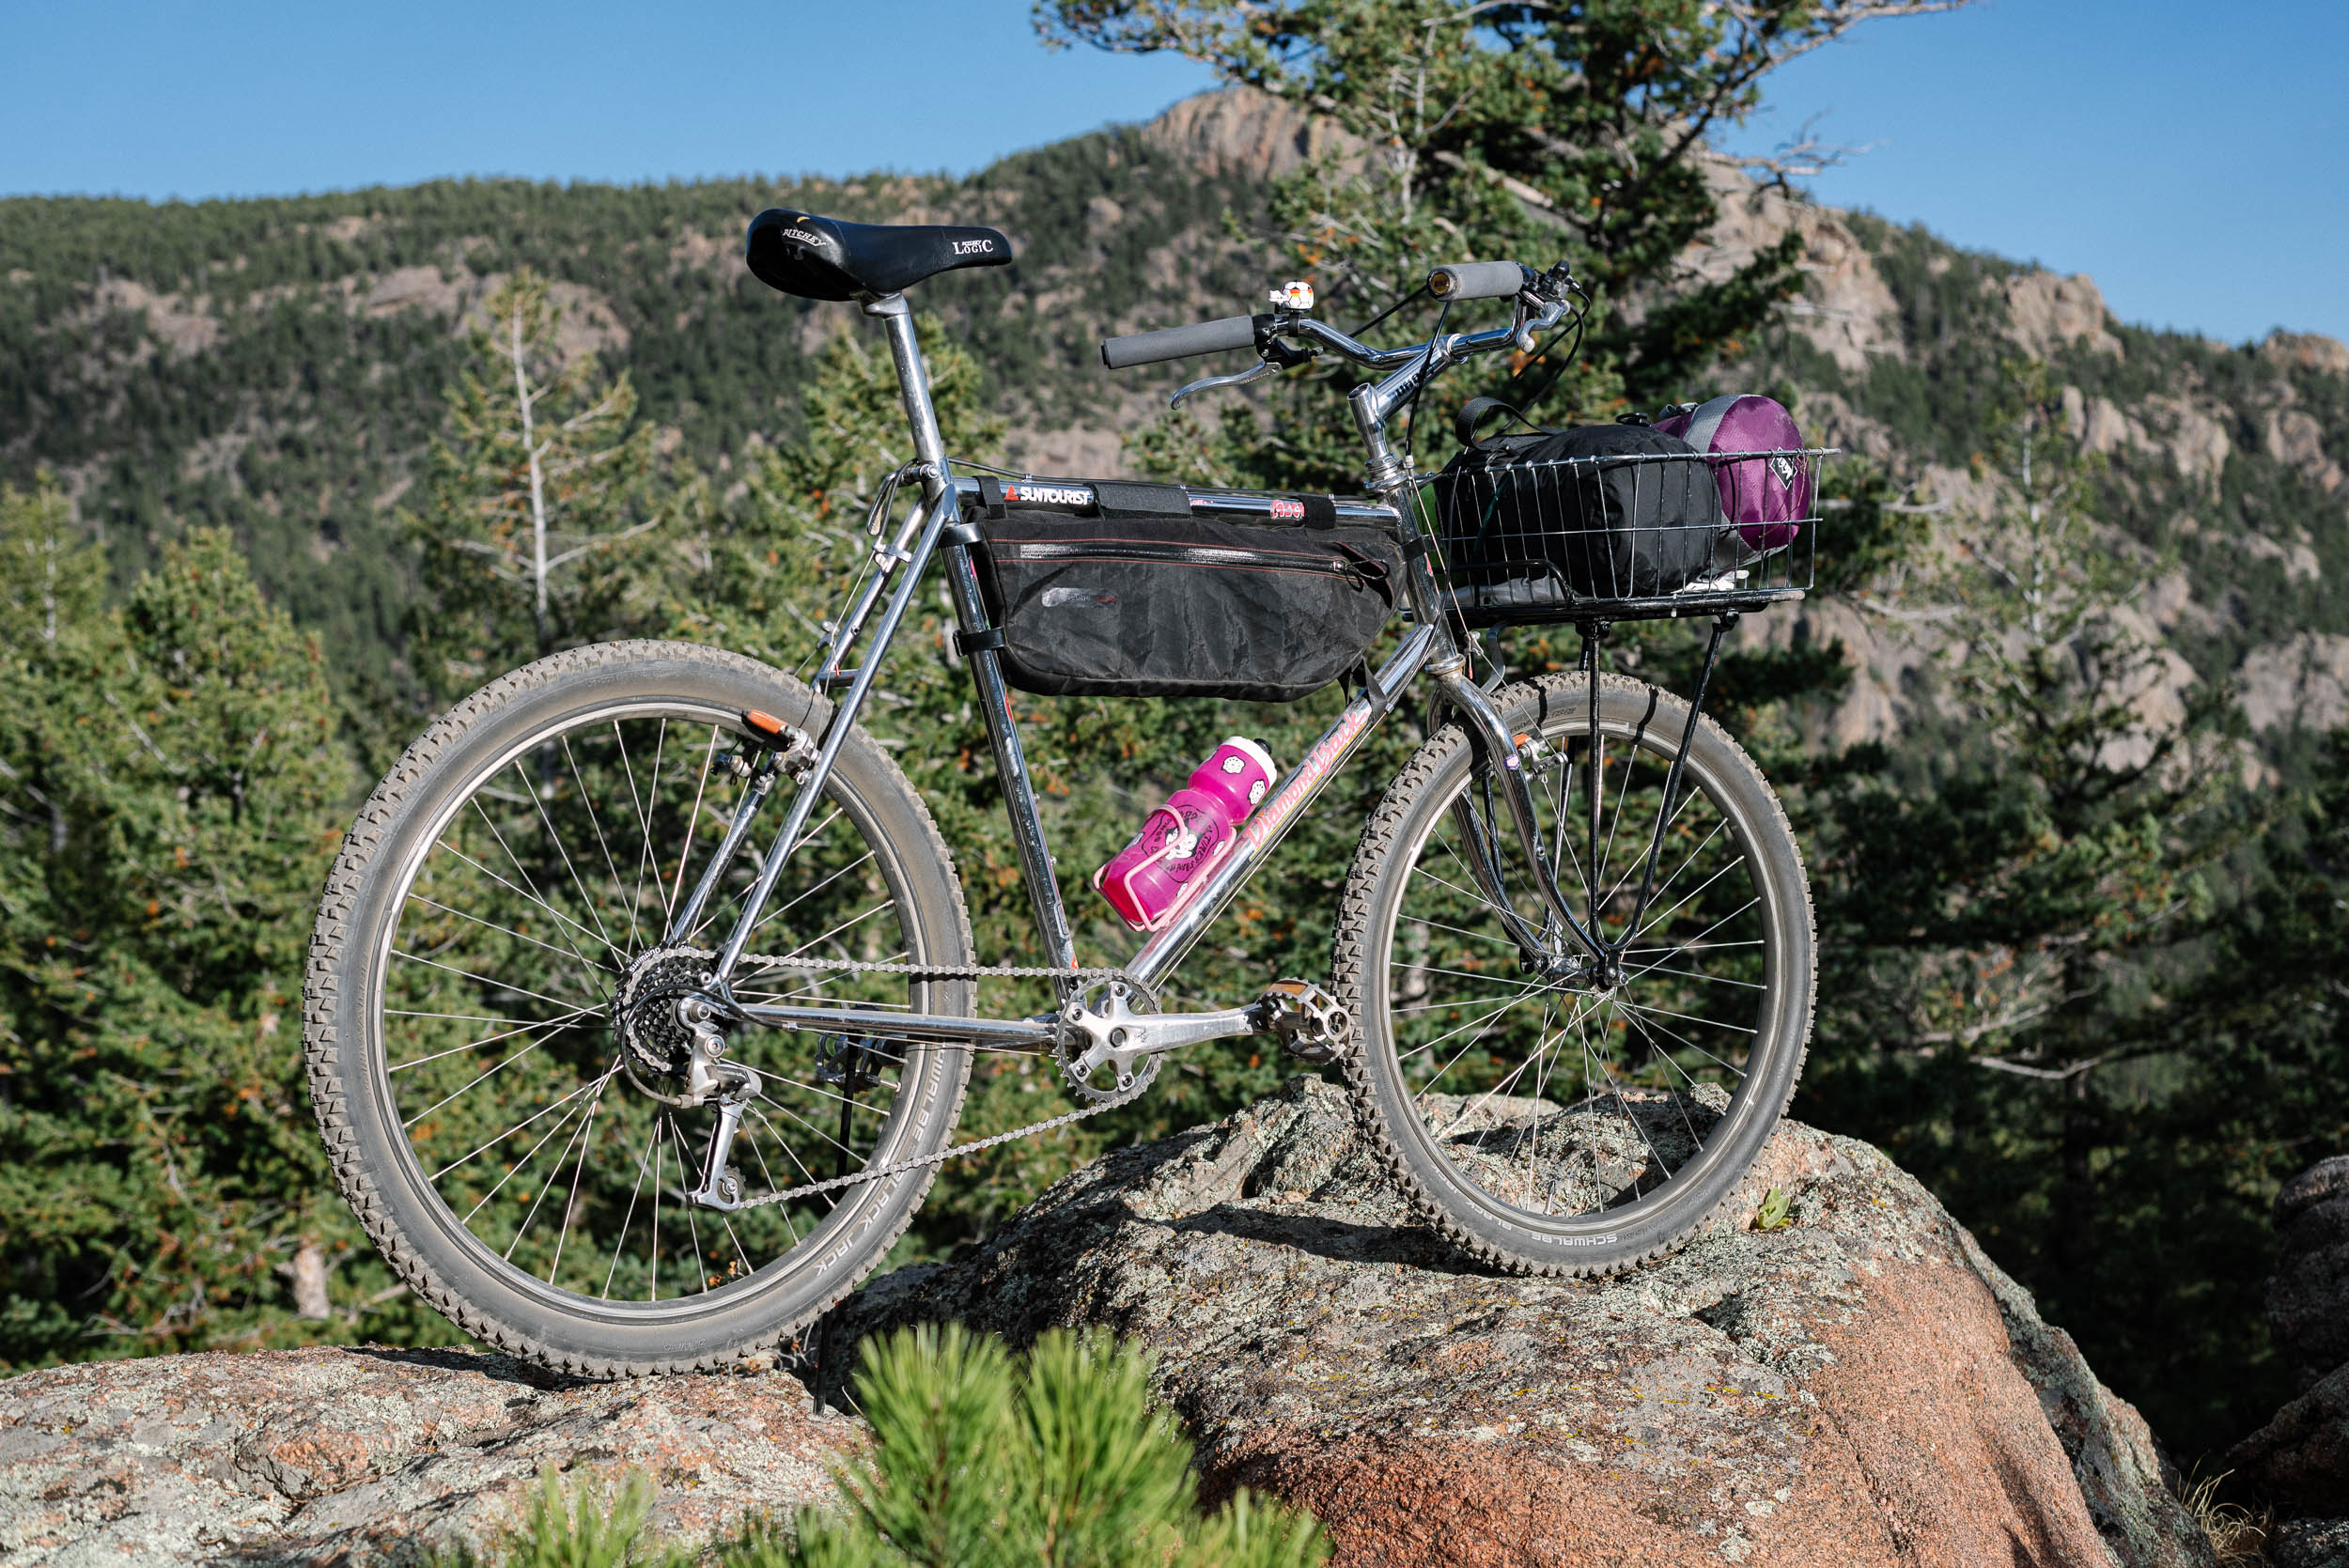
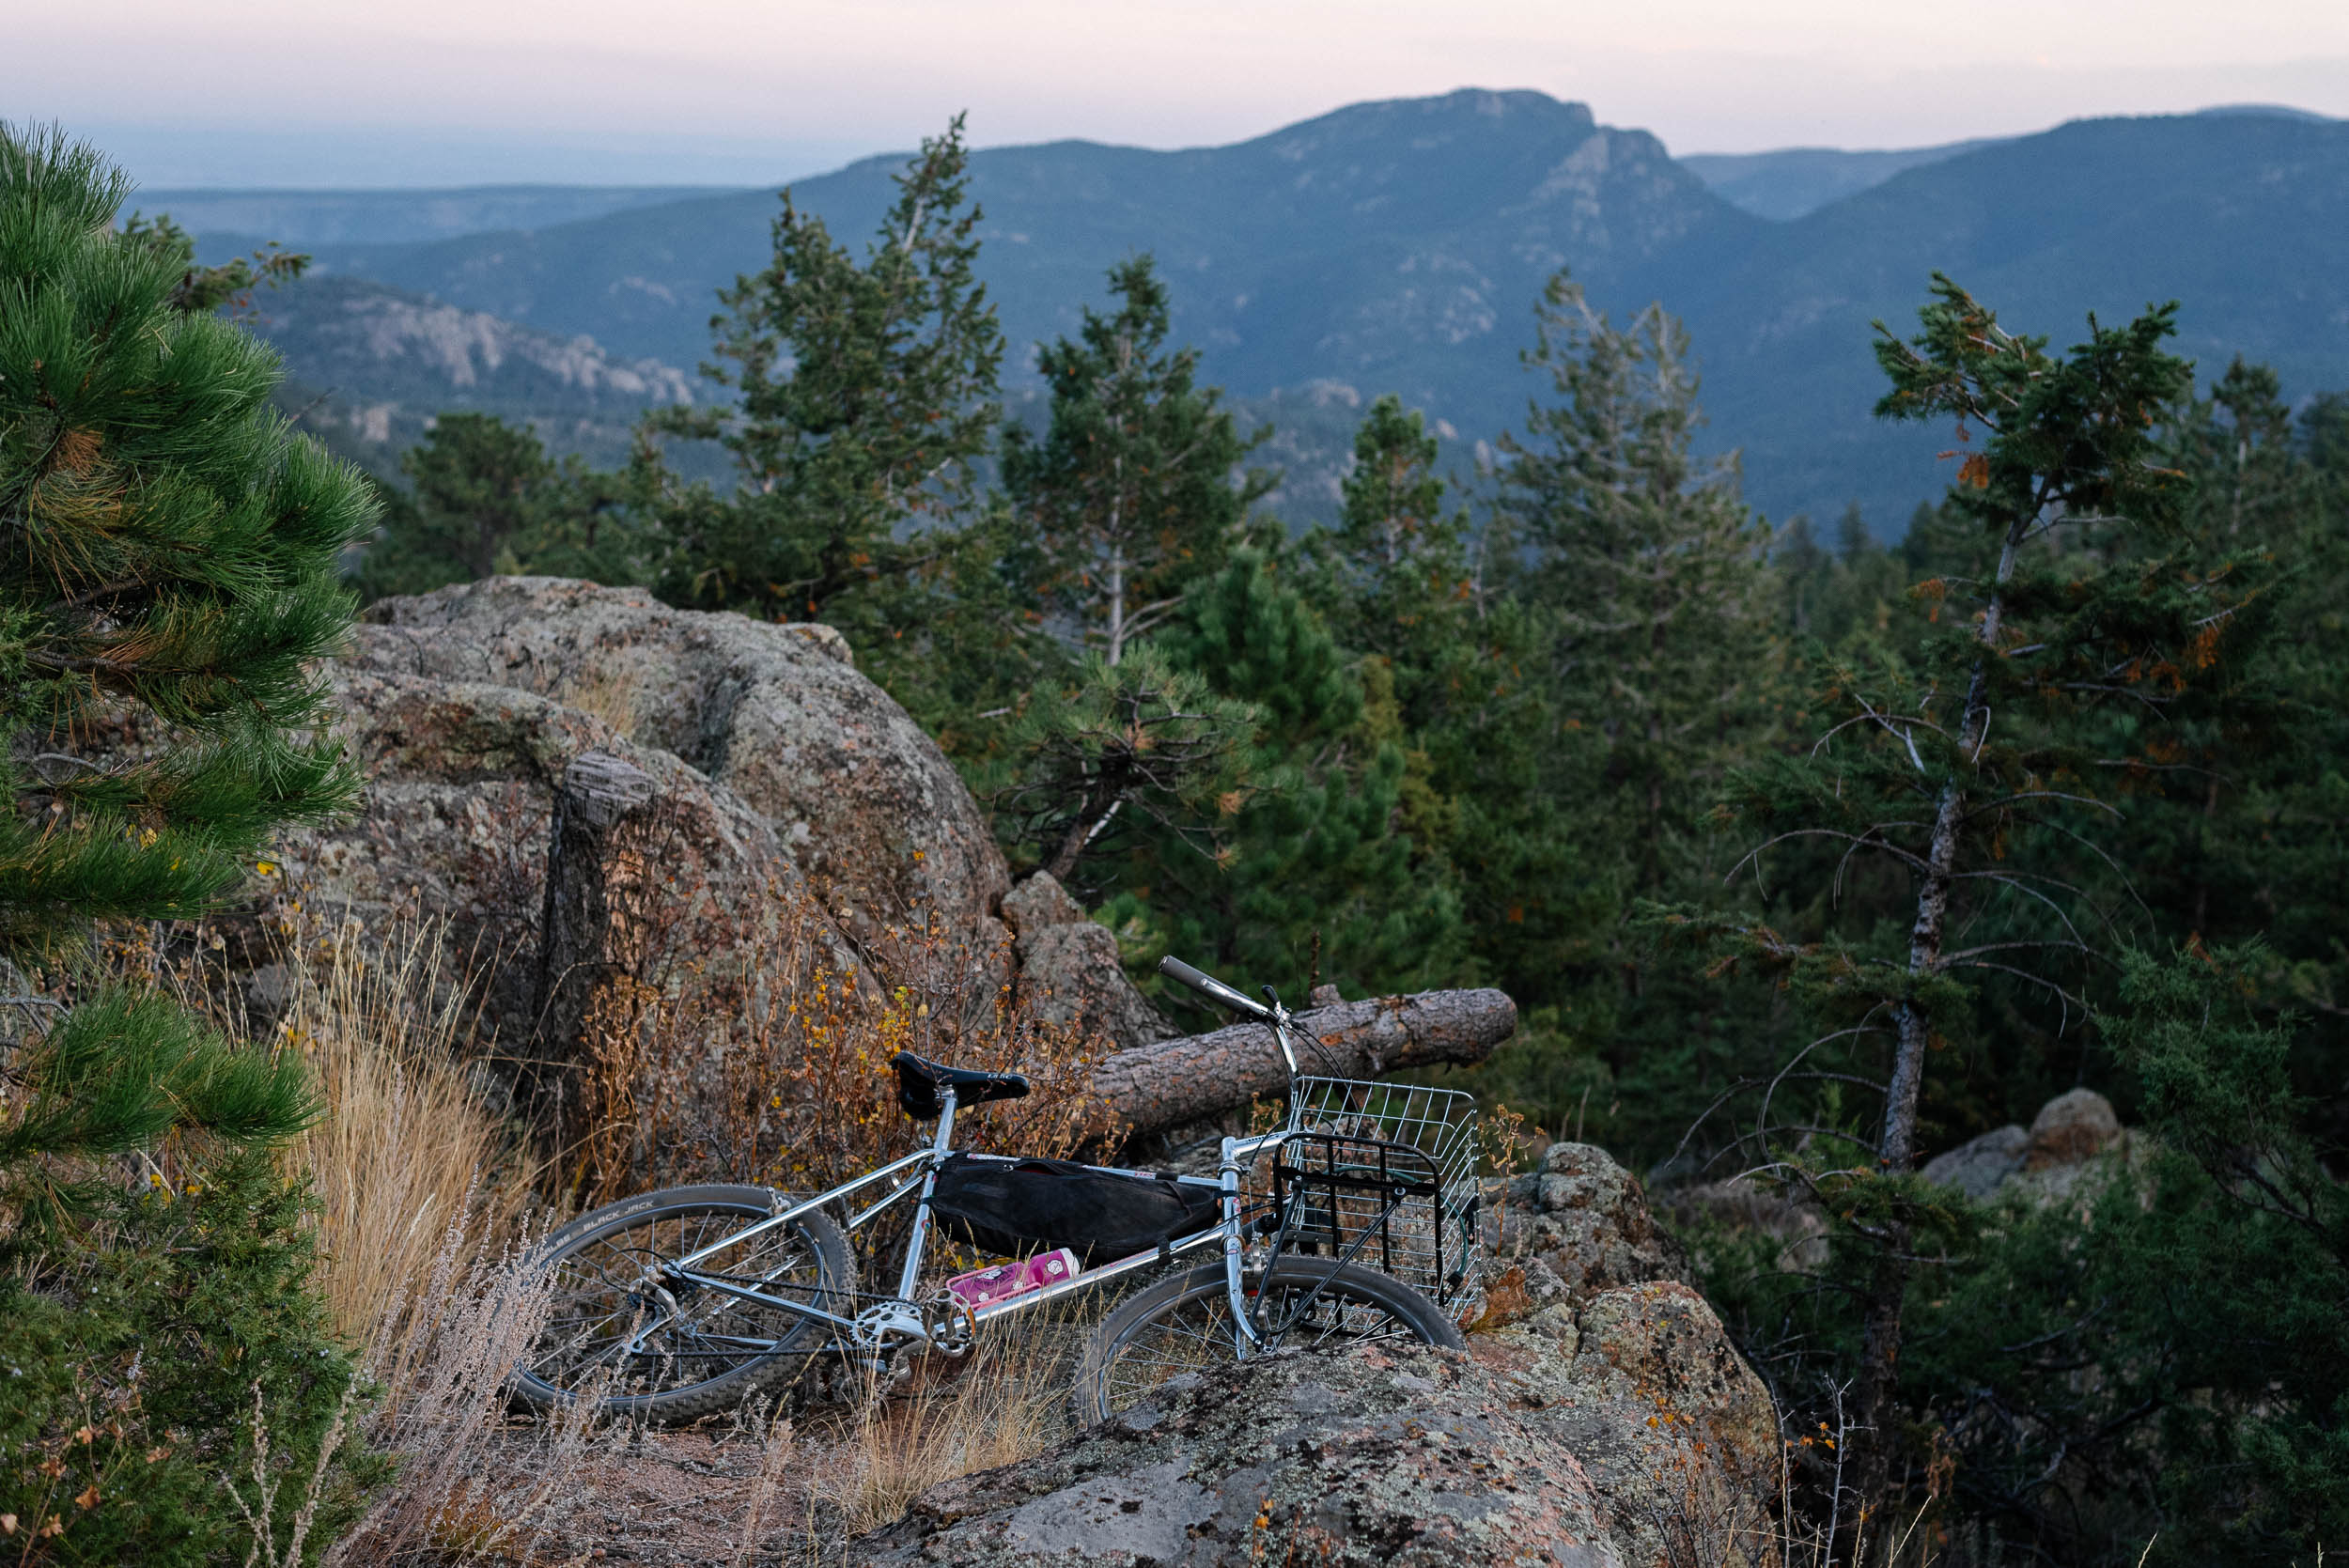
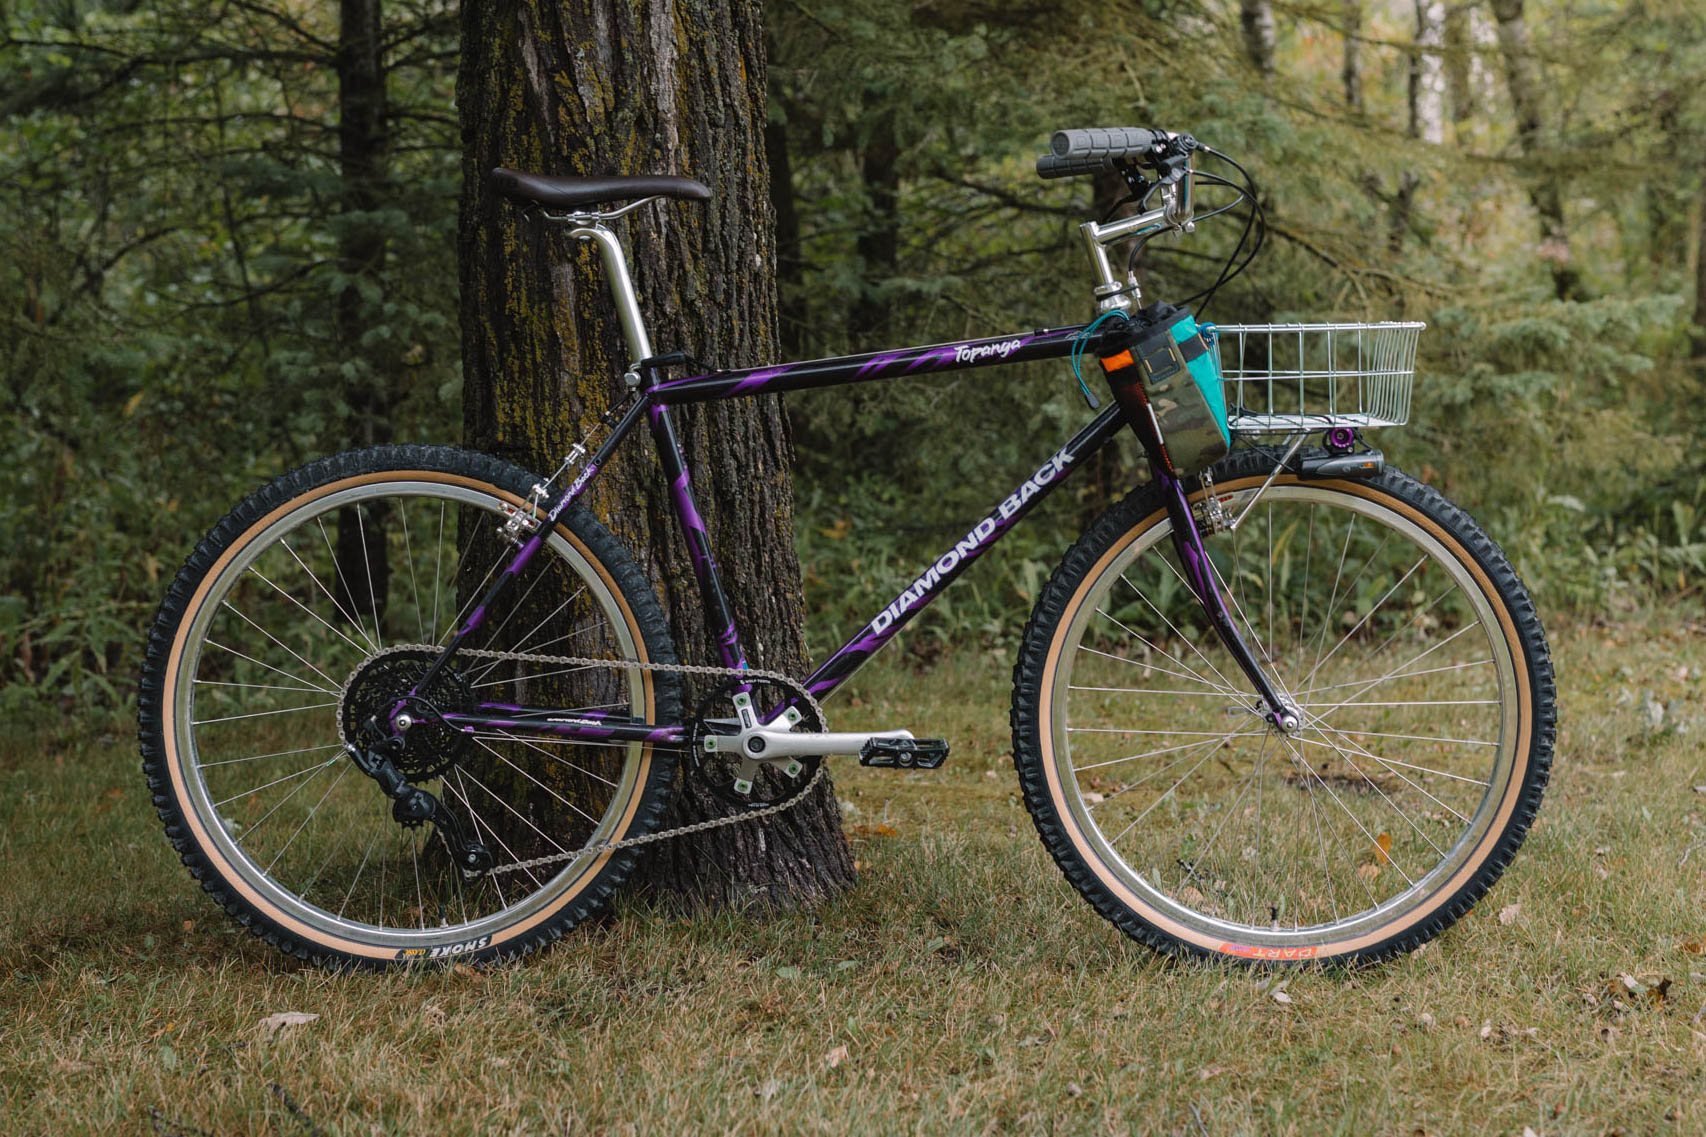
My submission to the Budget Bikepacking Build-Off, the shiny chrome 1986 Diamondback Ascent pictured here, is the third or fourth frame I picked up with the idea of building for the competition. As it turns out, the options in the Boulder/Denver area were nearly endless once I started hunting for a cheap, tall 26″ mountain bike! In my search, I picked up a Specialized Hardrock Ultra, a Diamondback Sorrento, and a Miyata Triple Cross before ultimately going all-in on the Ascent. The others were easy to release back into the wild to other area bike geeks with ambitions for rebuilds of their own.
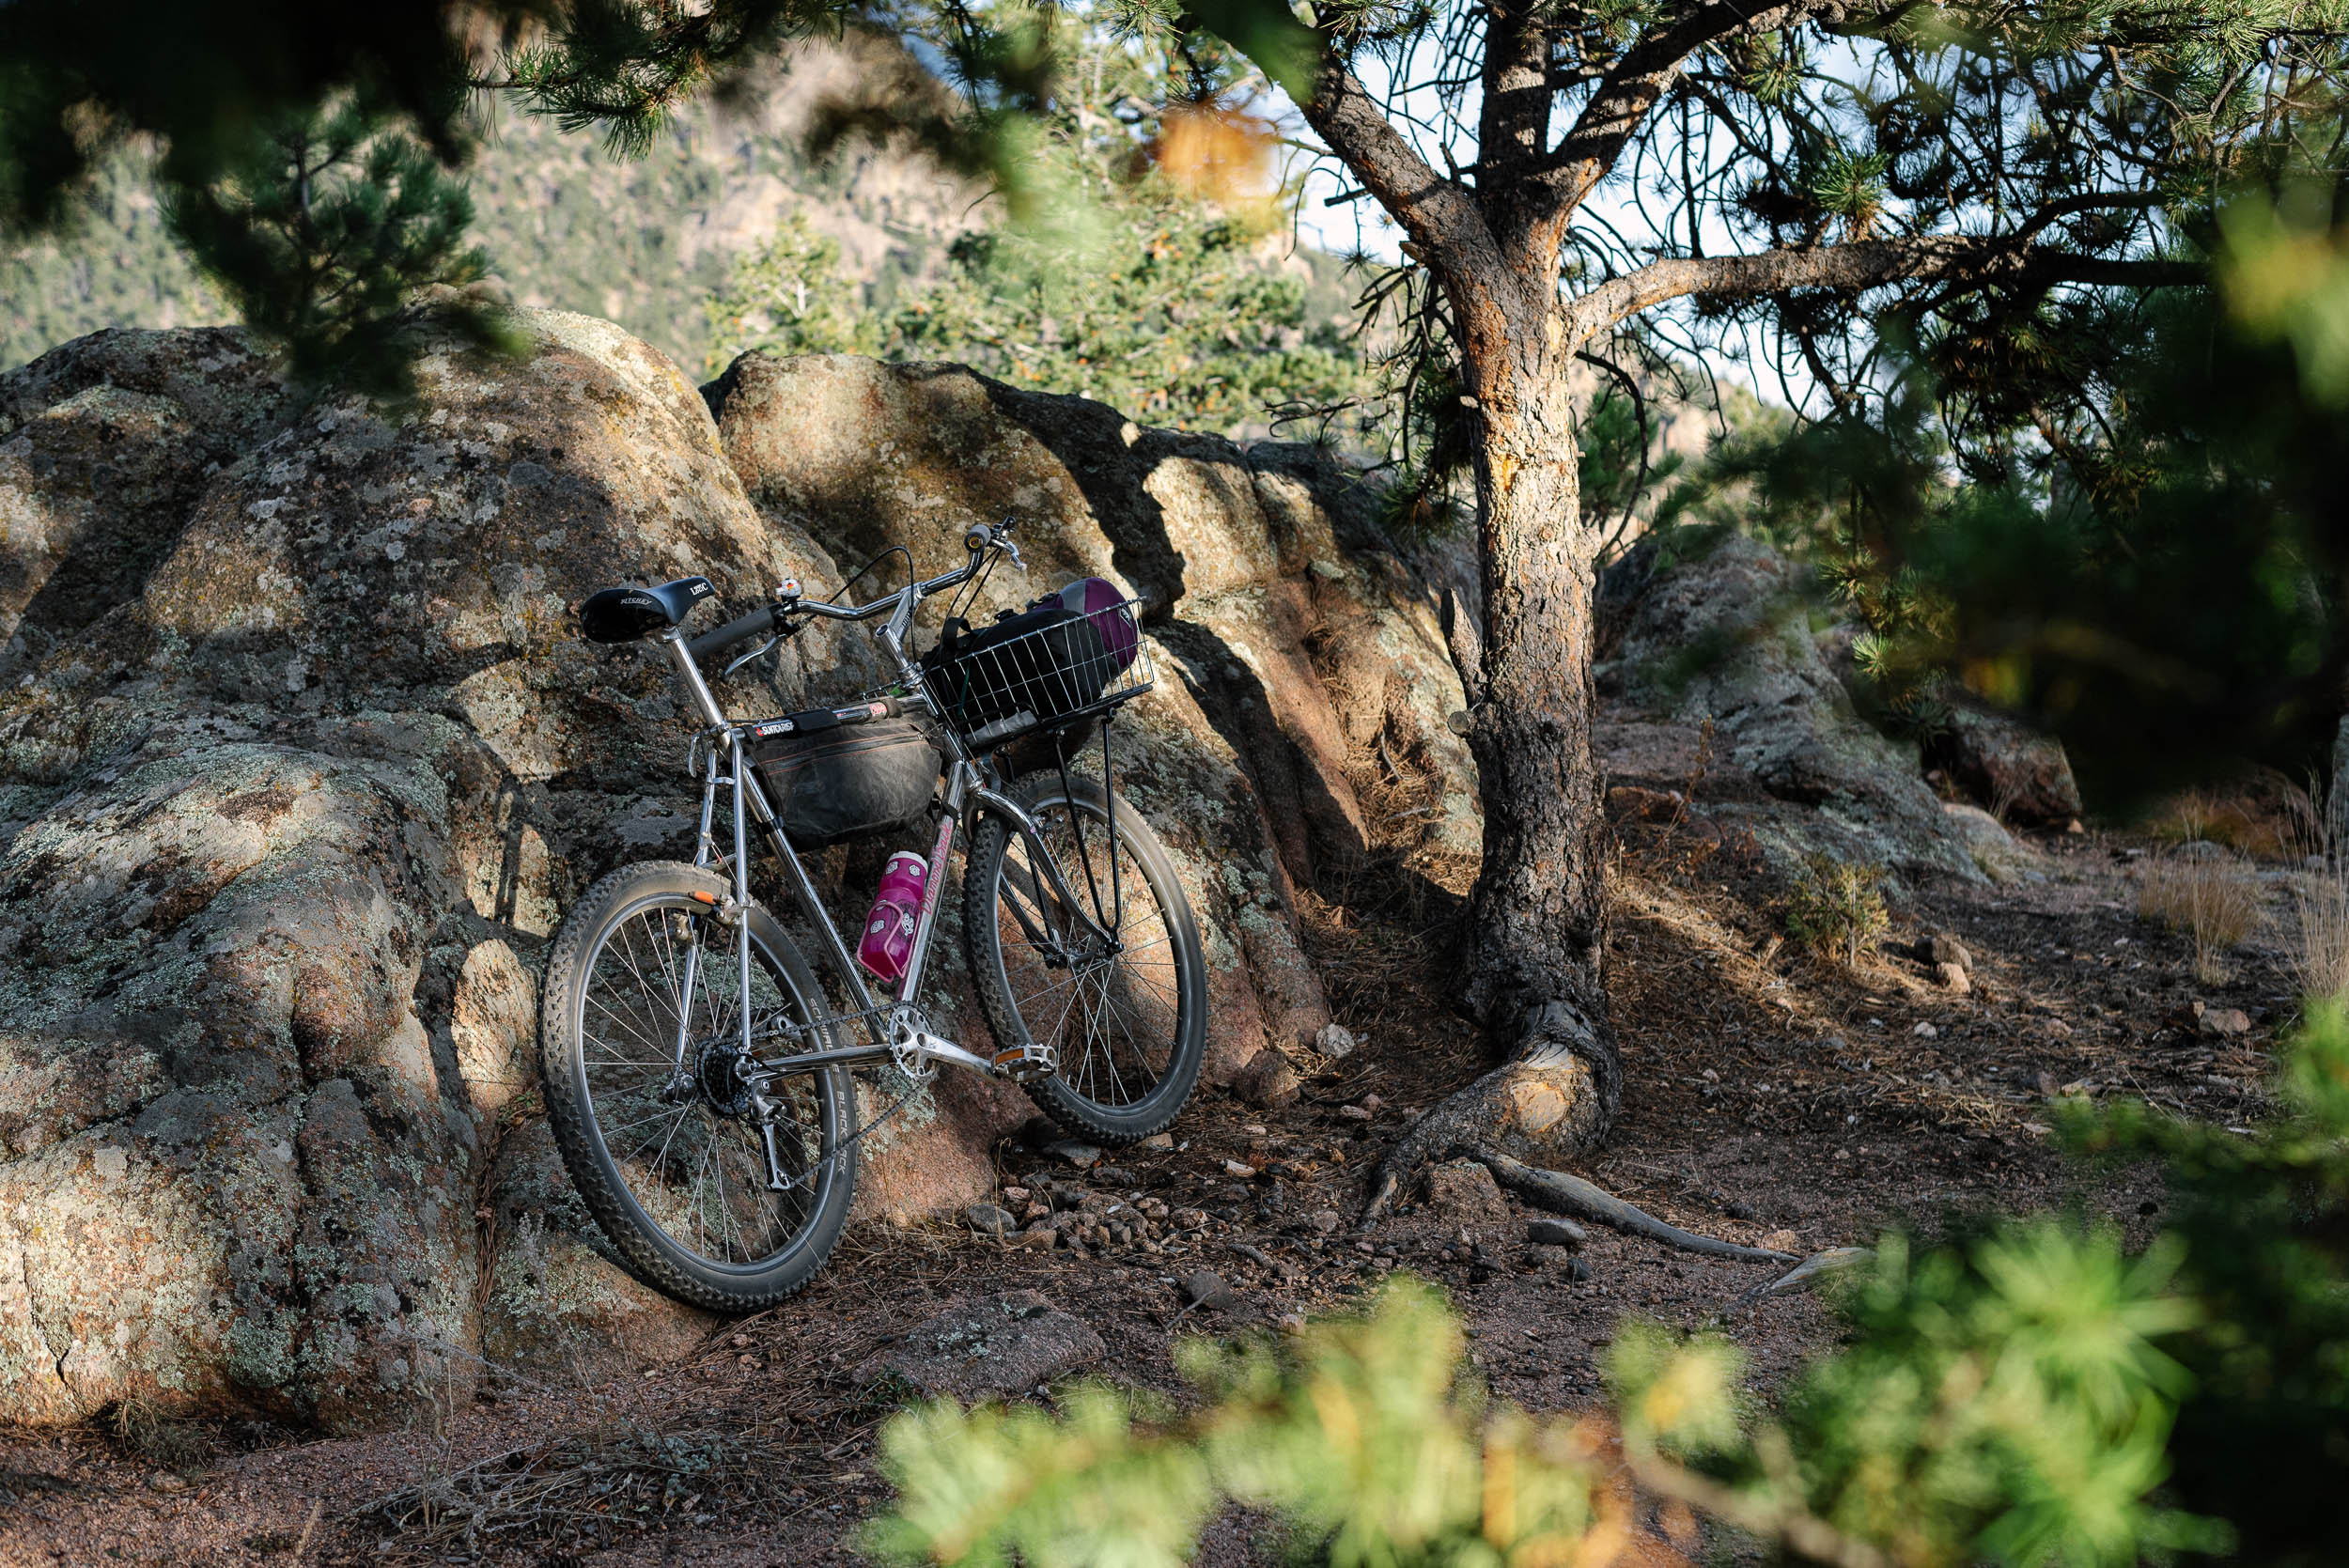
Beyond it being the tallest bike I found, the obvious reason I went with this Diamondback Ascent was its modest price. I paid a whopping $100 for the complete single-speed bike (as pictured above “Choosing a Bike,” Dura-Ace cranks and all) in April of this year and rode it in that form for several months, adding only a fresh pair of grips and the front rack. I knew I had a keeper because, despite having a handful of objectively nicer bikes at my disposal, I simply had too much fun ripping around on the Ascent to ride anything else most of the time.
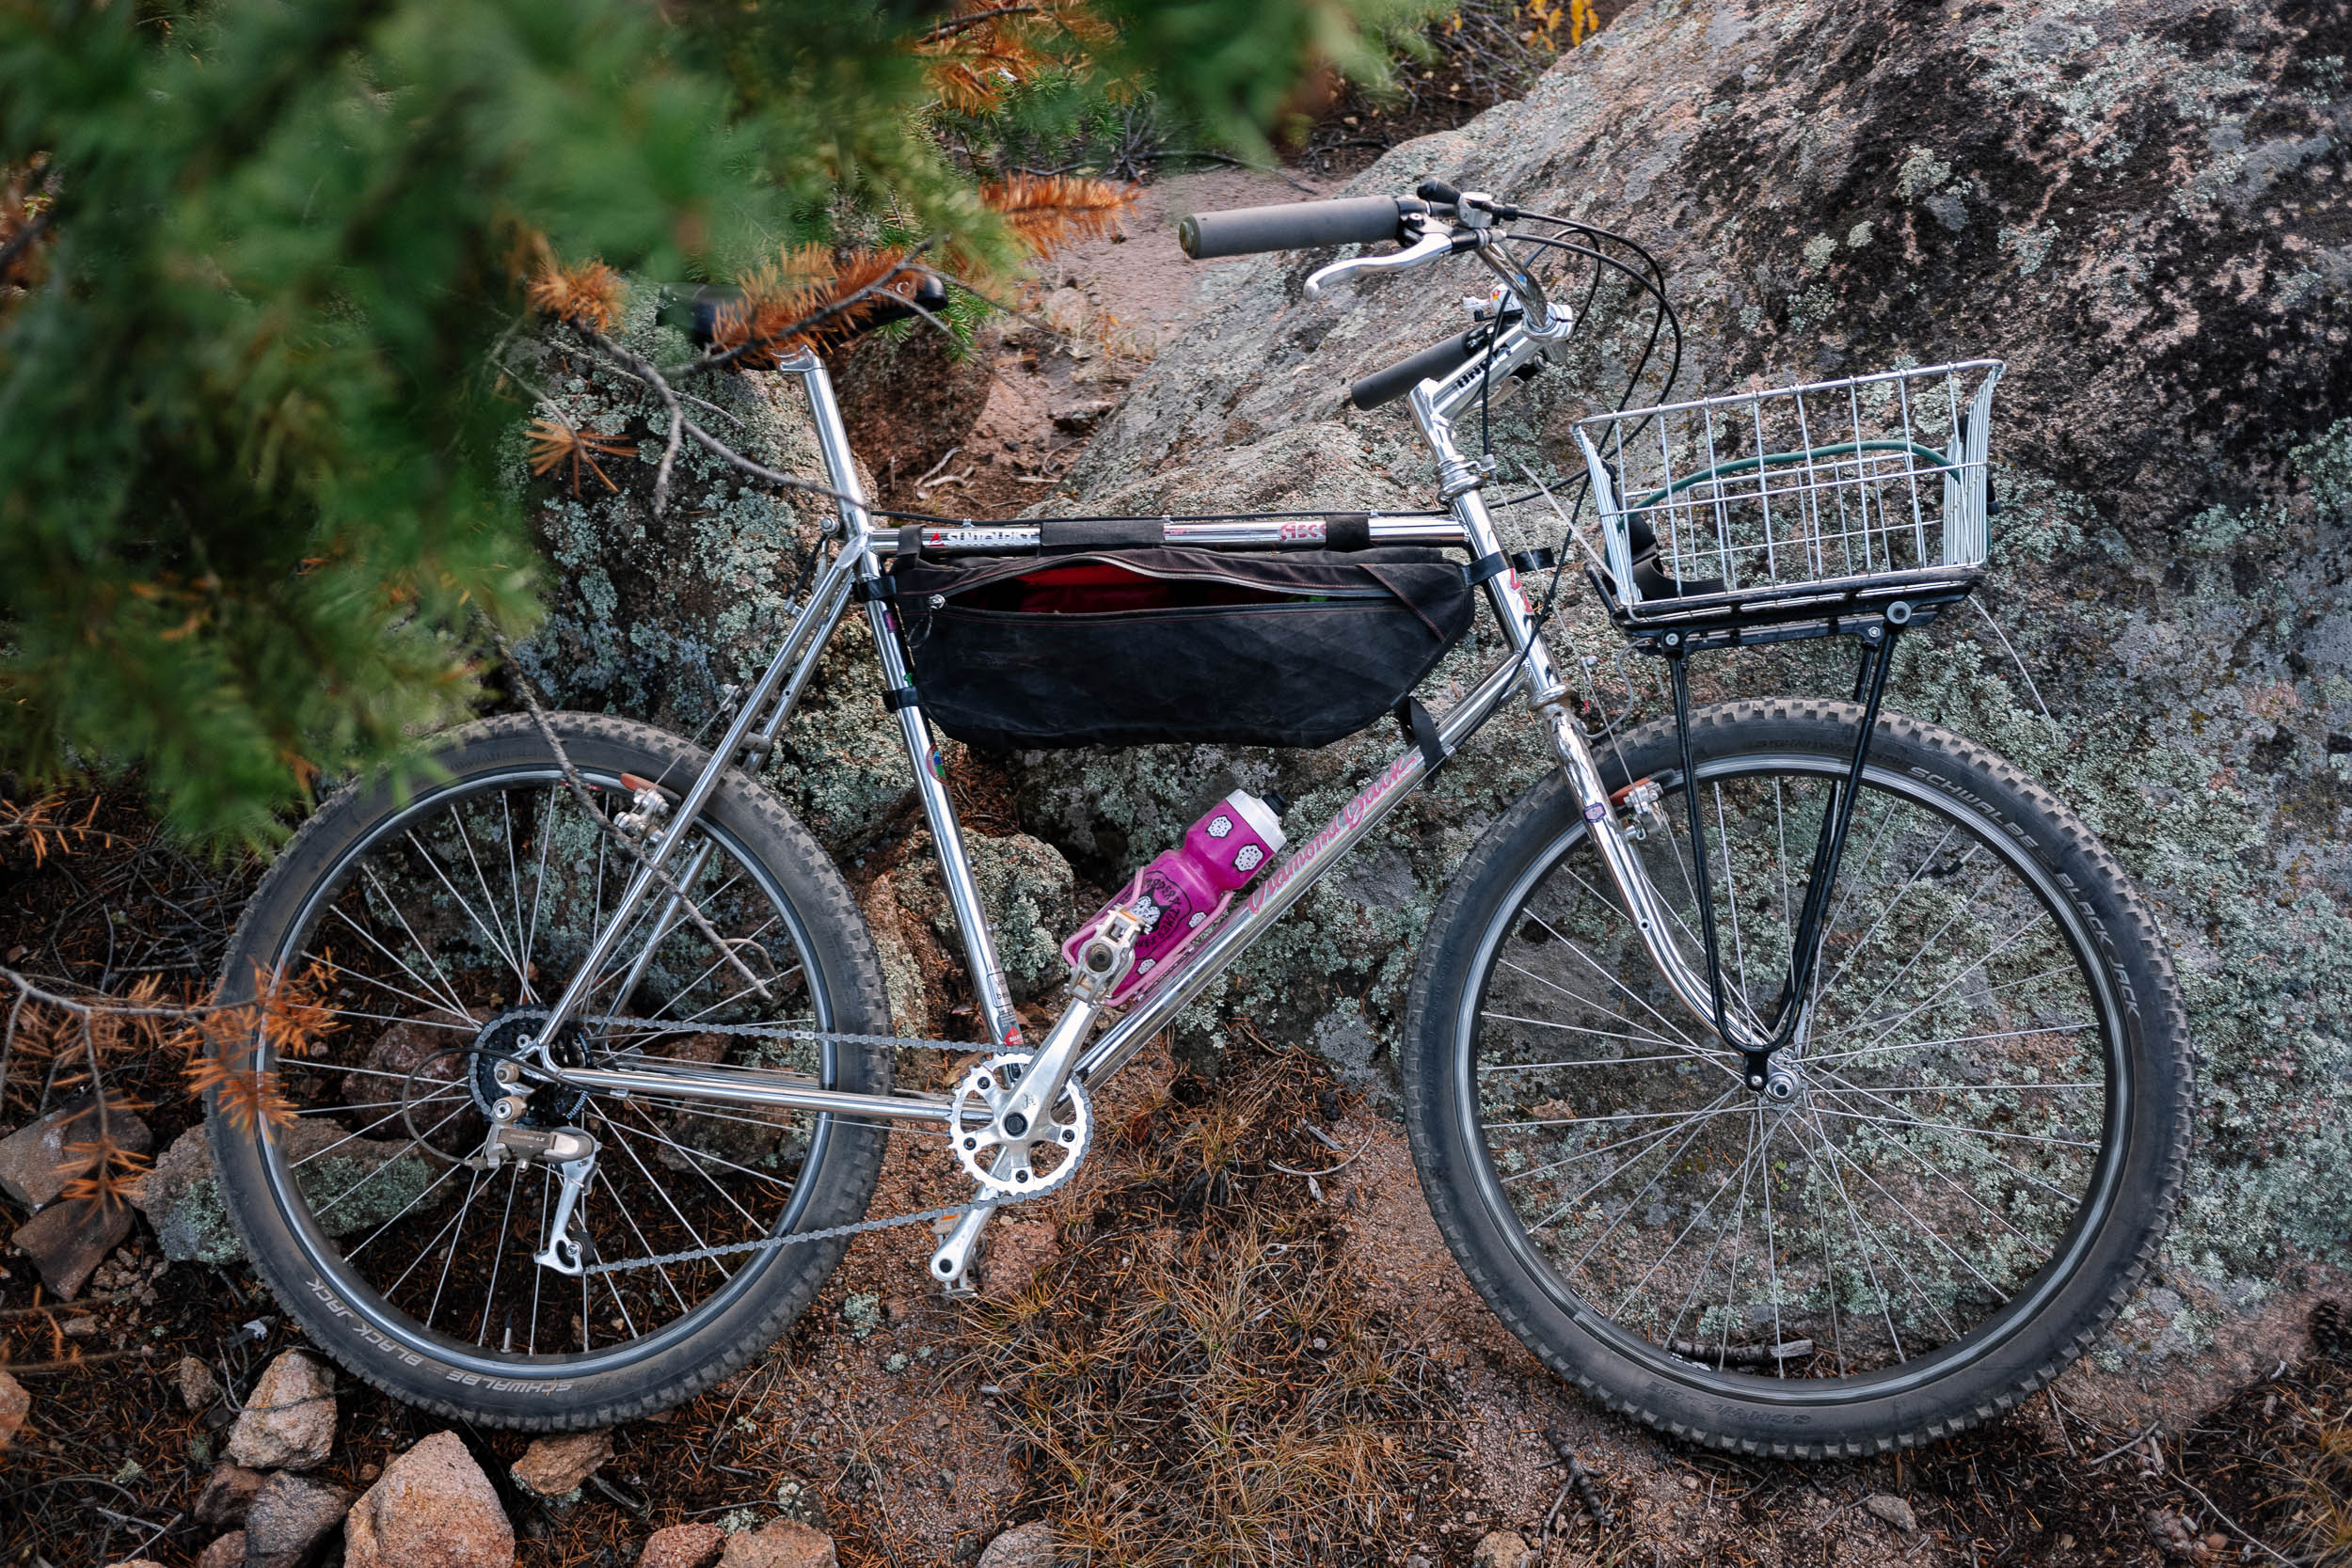
1986 Diamondback Ascent Build Kit
The Ascent wasn’t exactly trail-ready as purchased. As a first priority, I needed to add some gears, mount burlier tires, and expand its carrying capacity before I could feel comfortable riding out for an overnighter. Thankfully, given its low price, I had plenty of flexibility to do so, but it would have been all too easy to blow the $500 limit out of the water if I hadn’t carefully chosen my components (and camping gear, but more on that later).
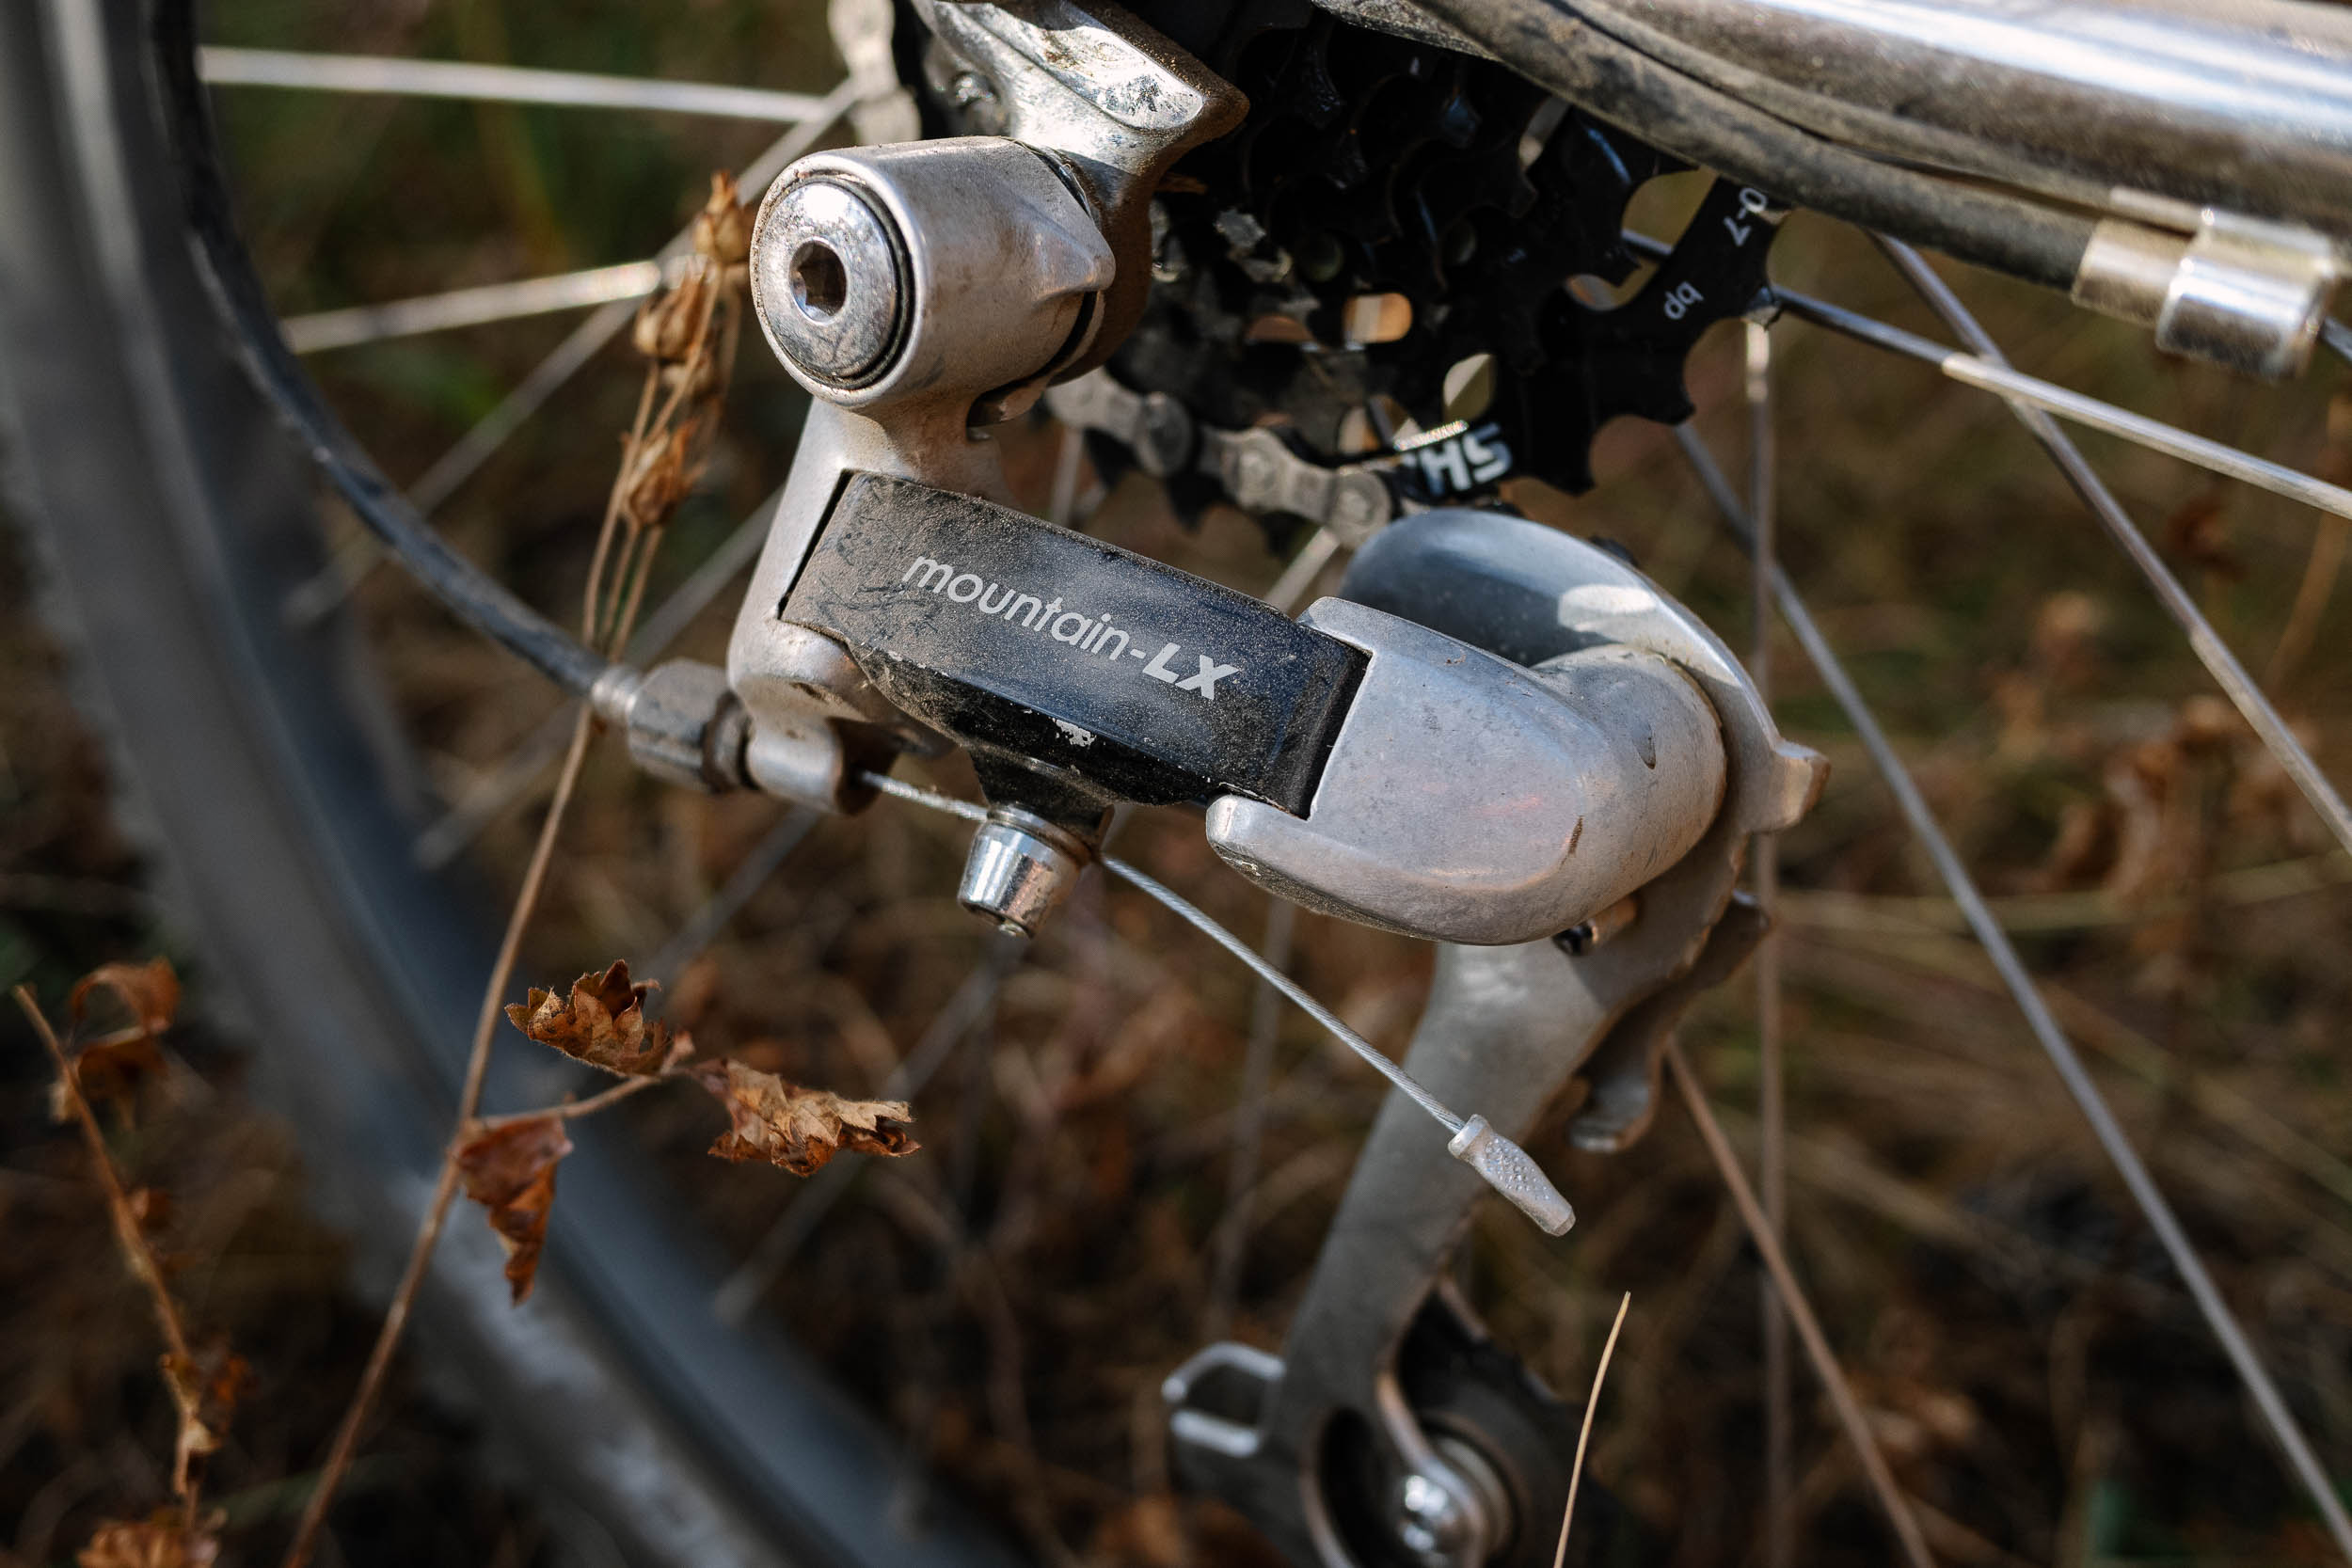

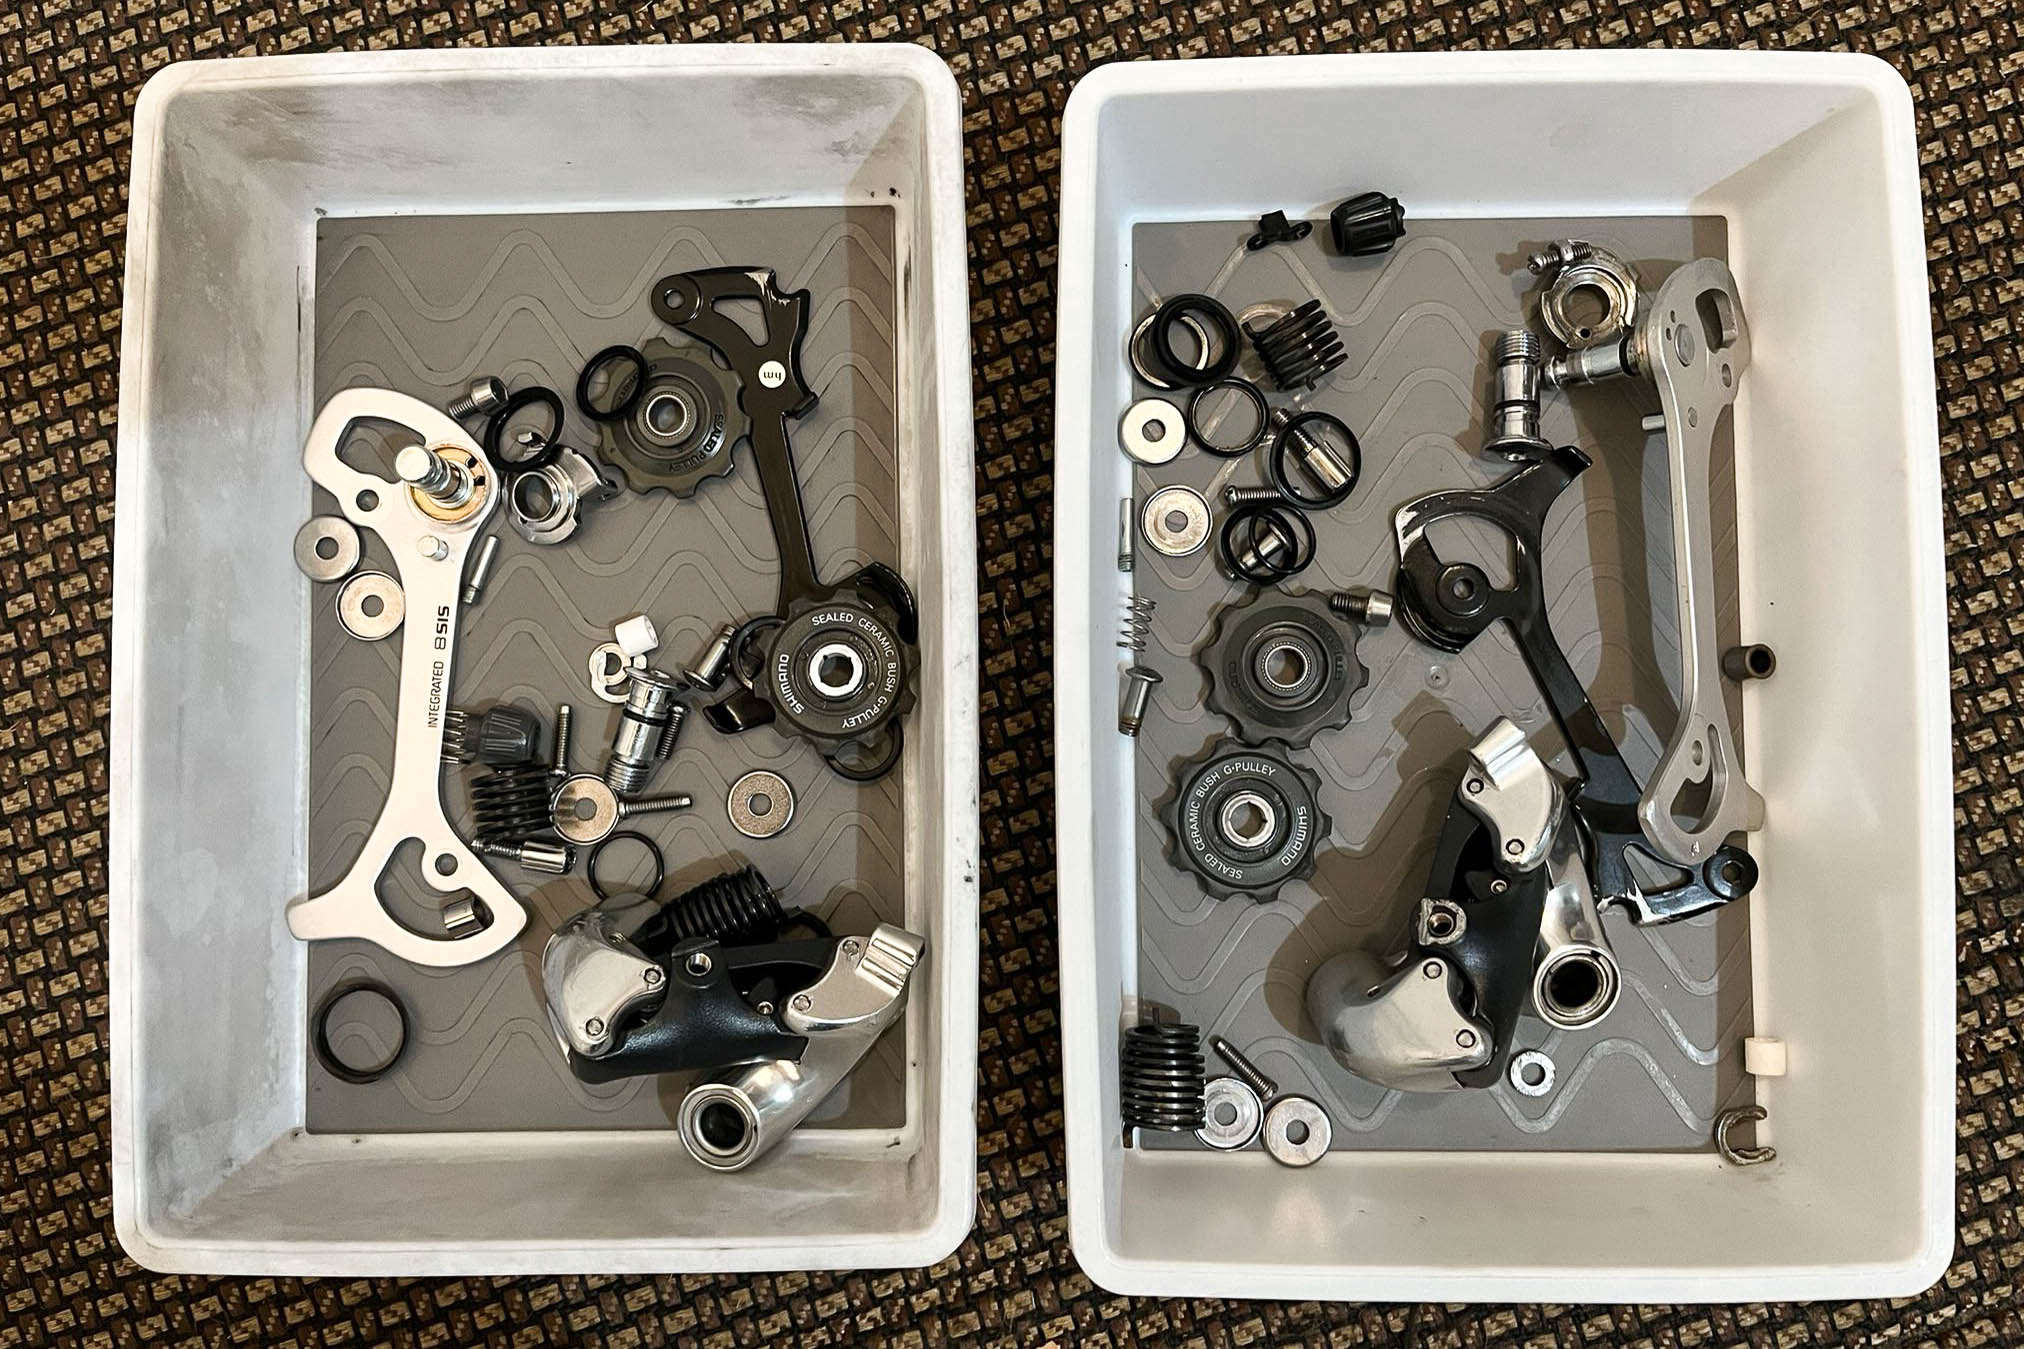
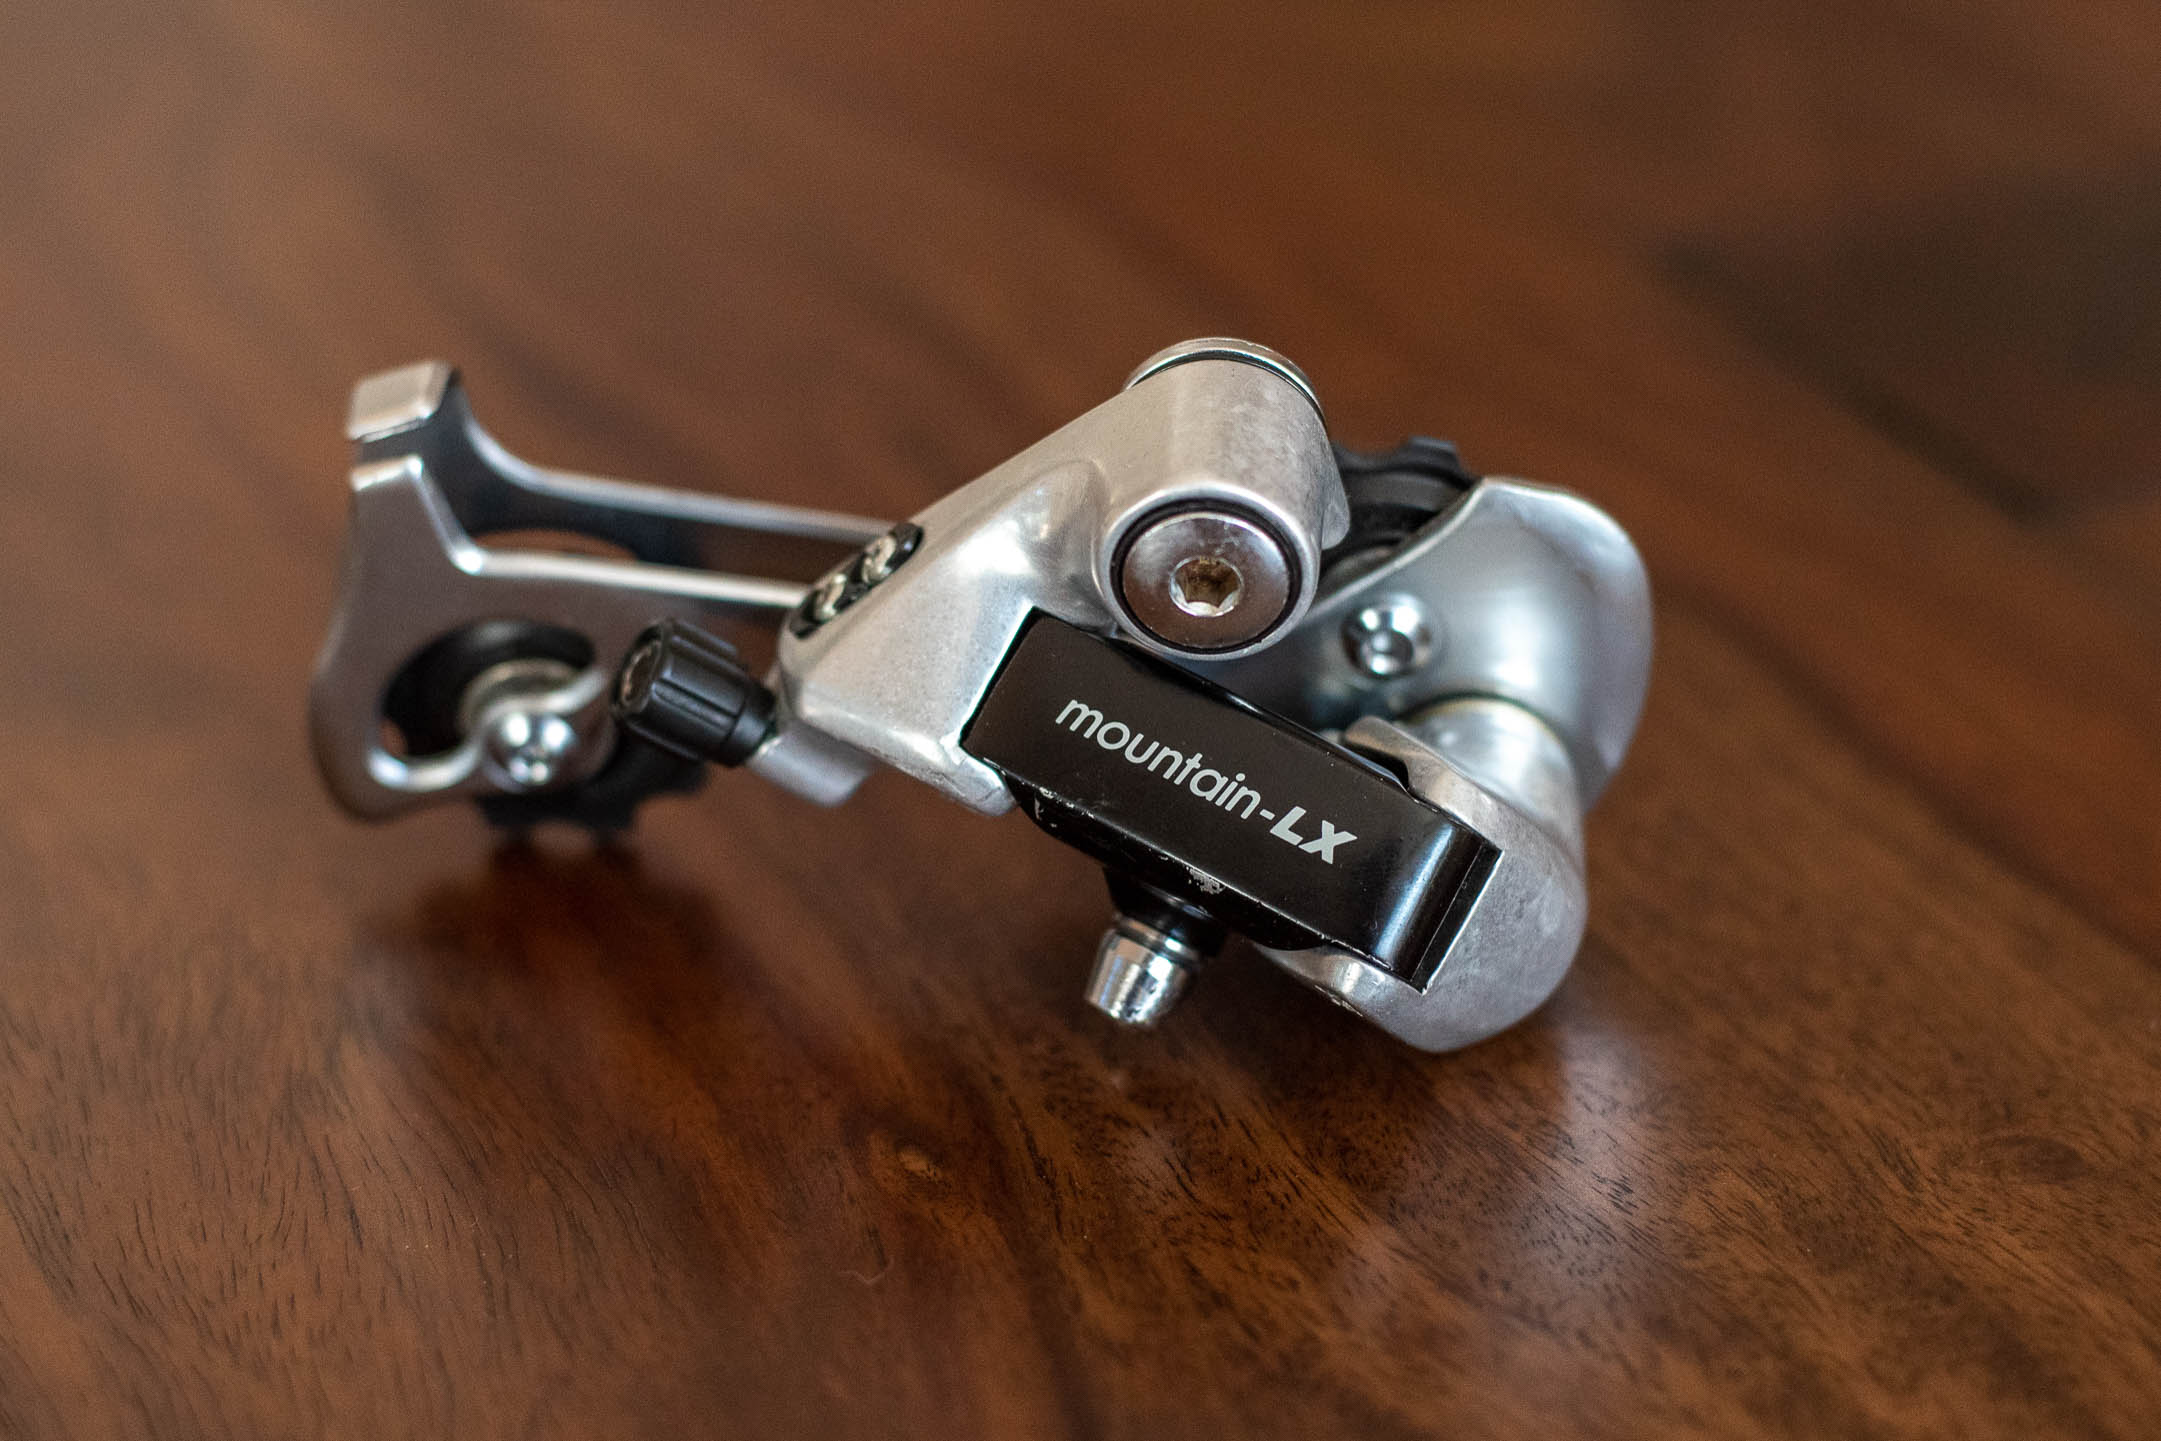
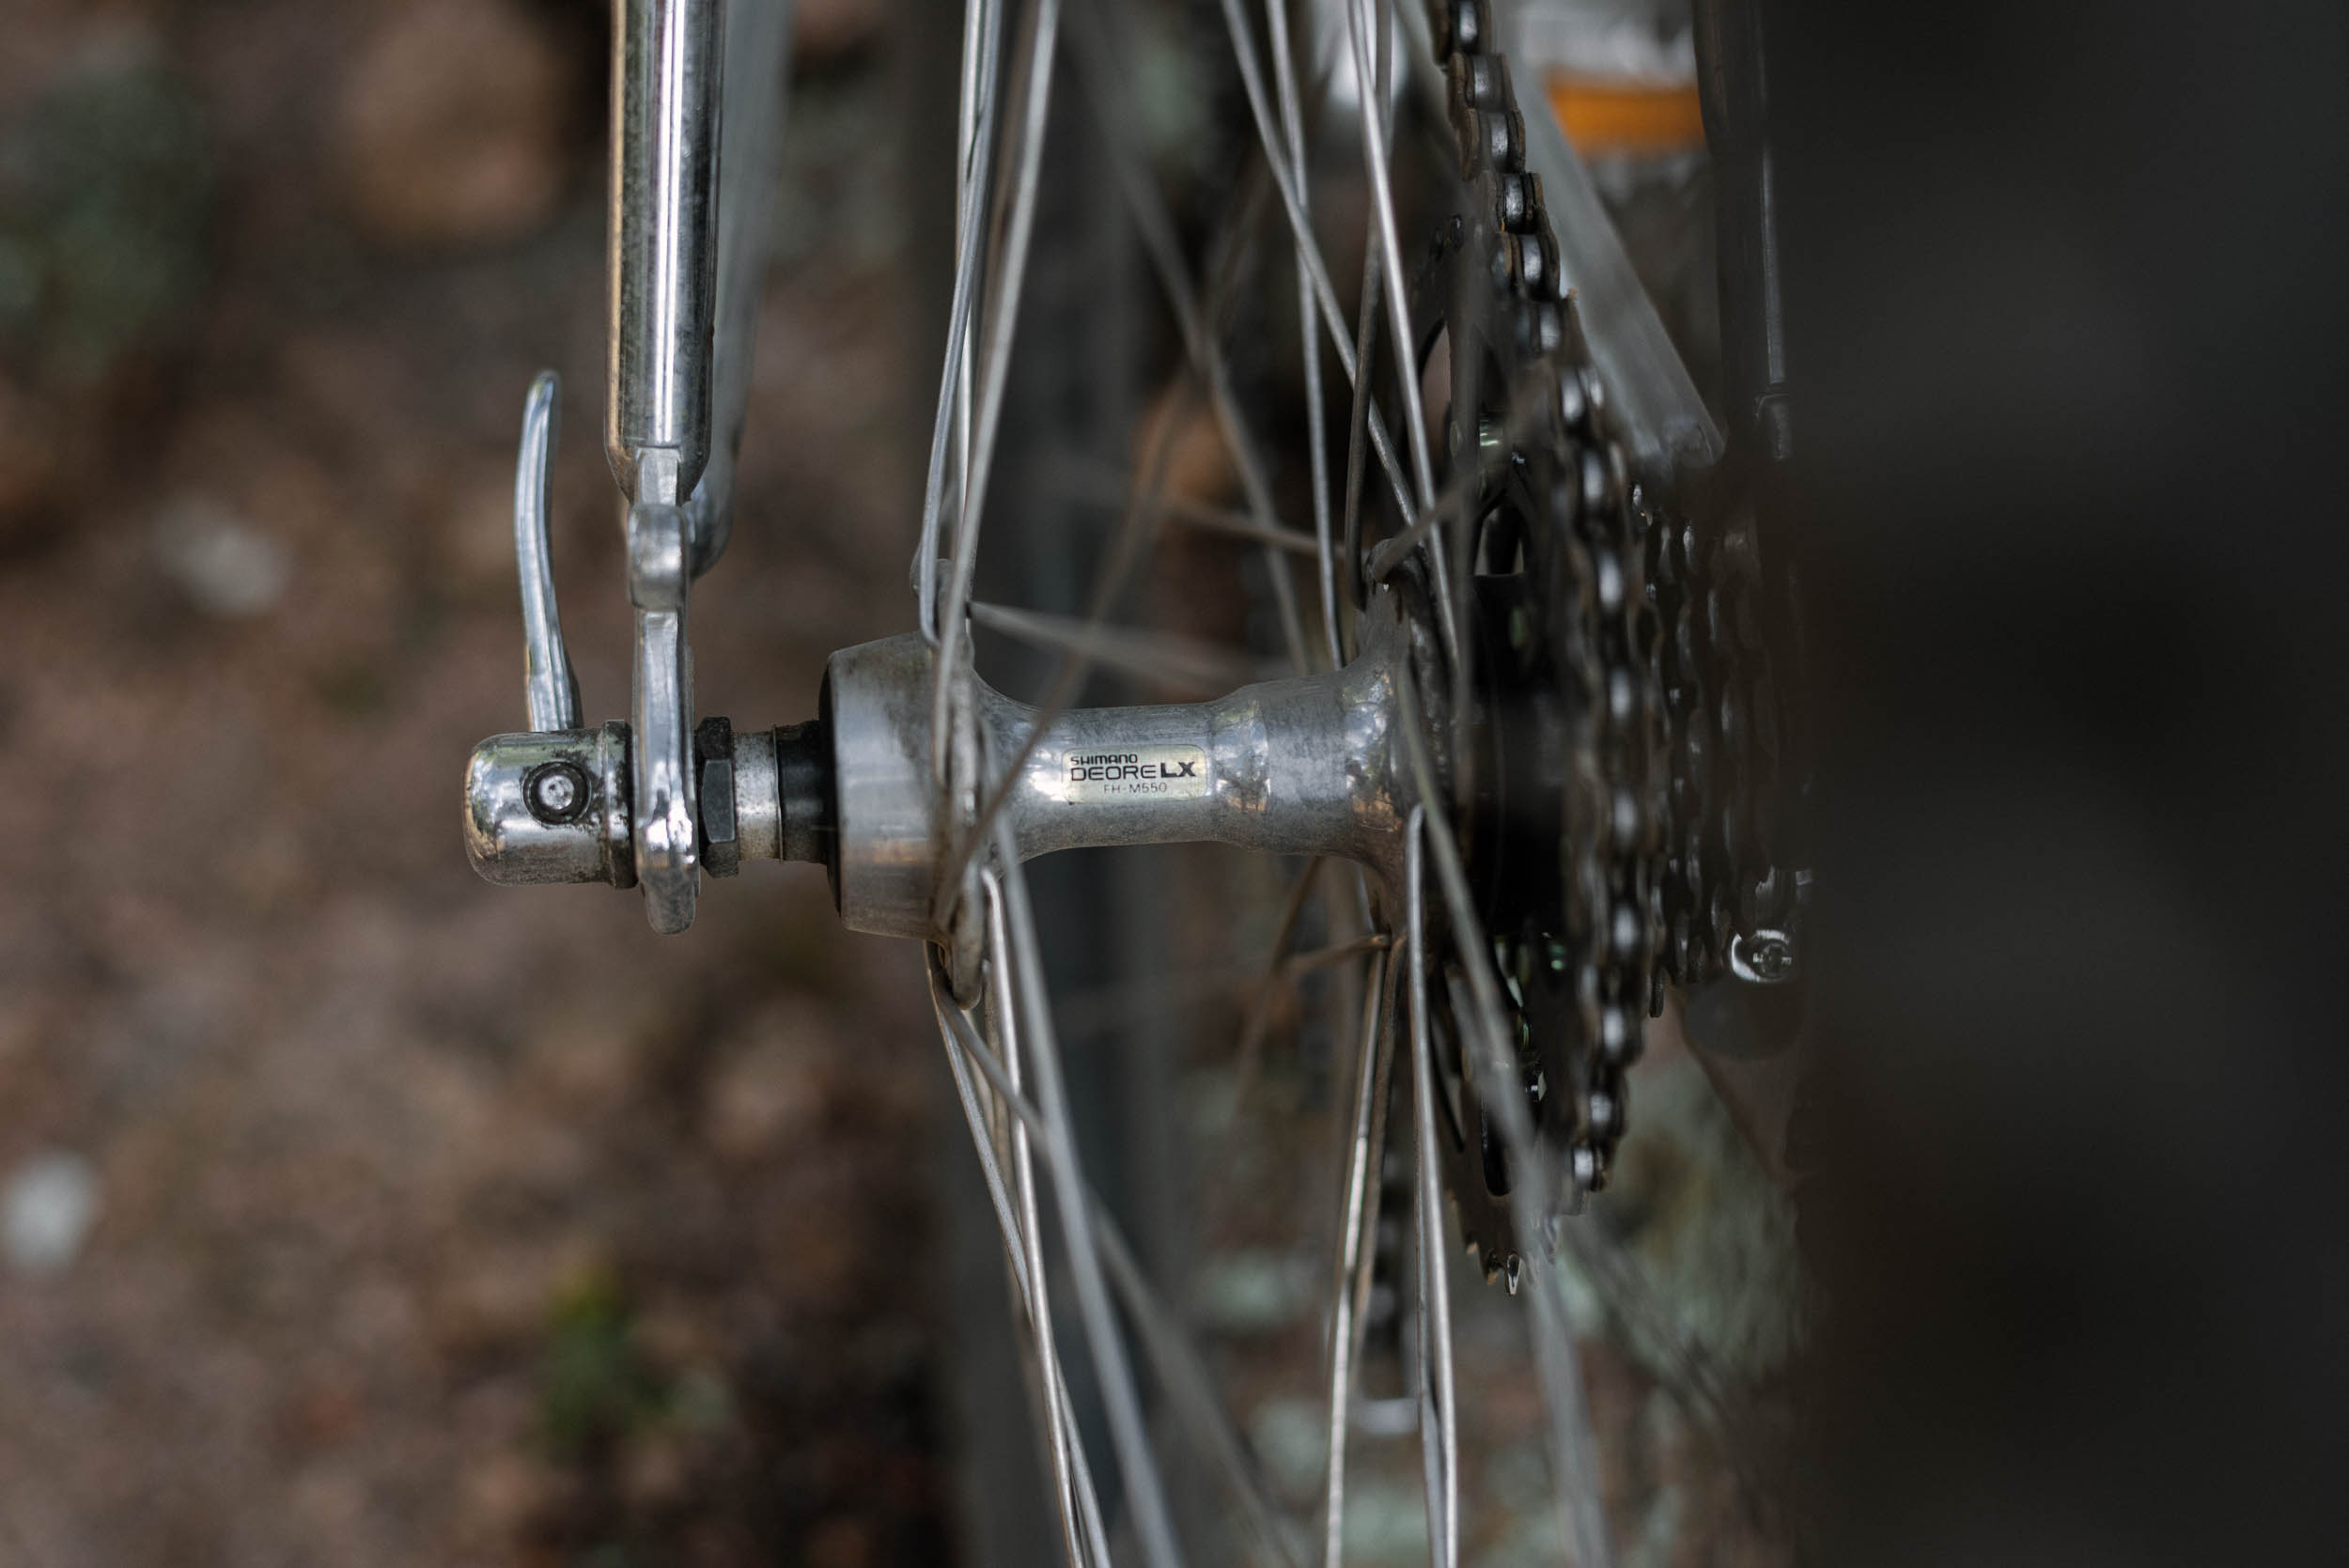
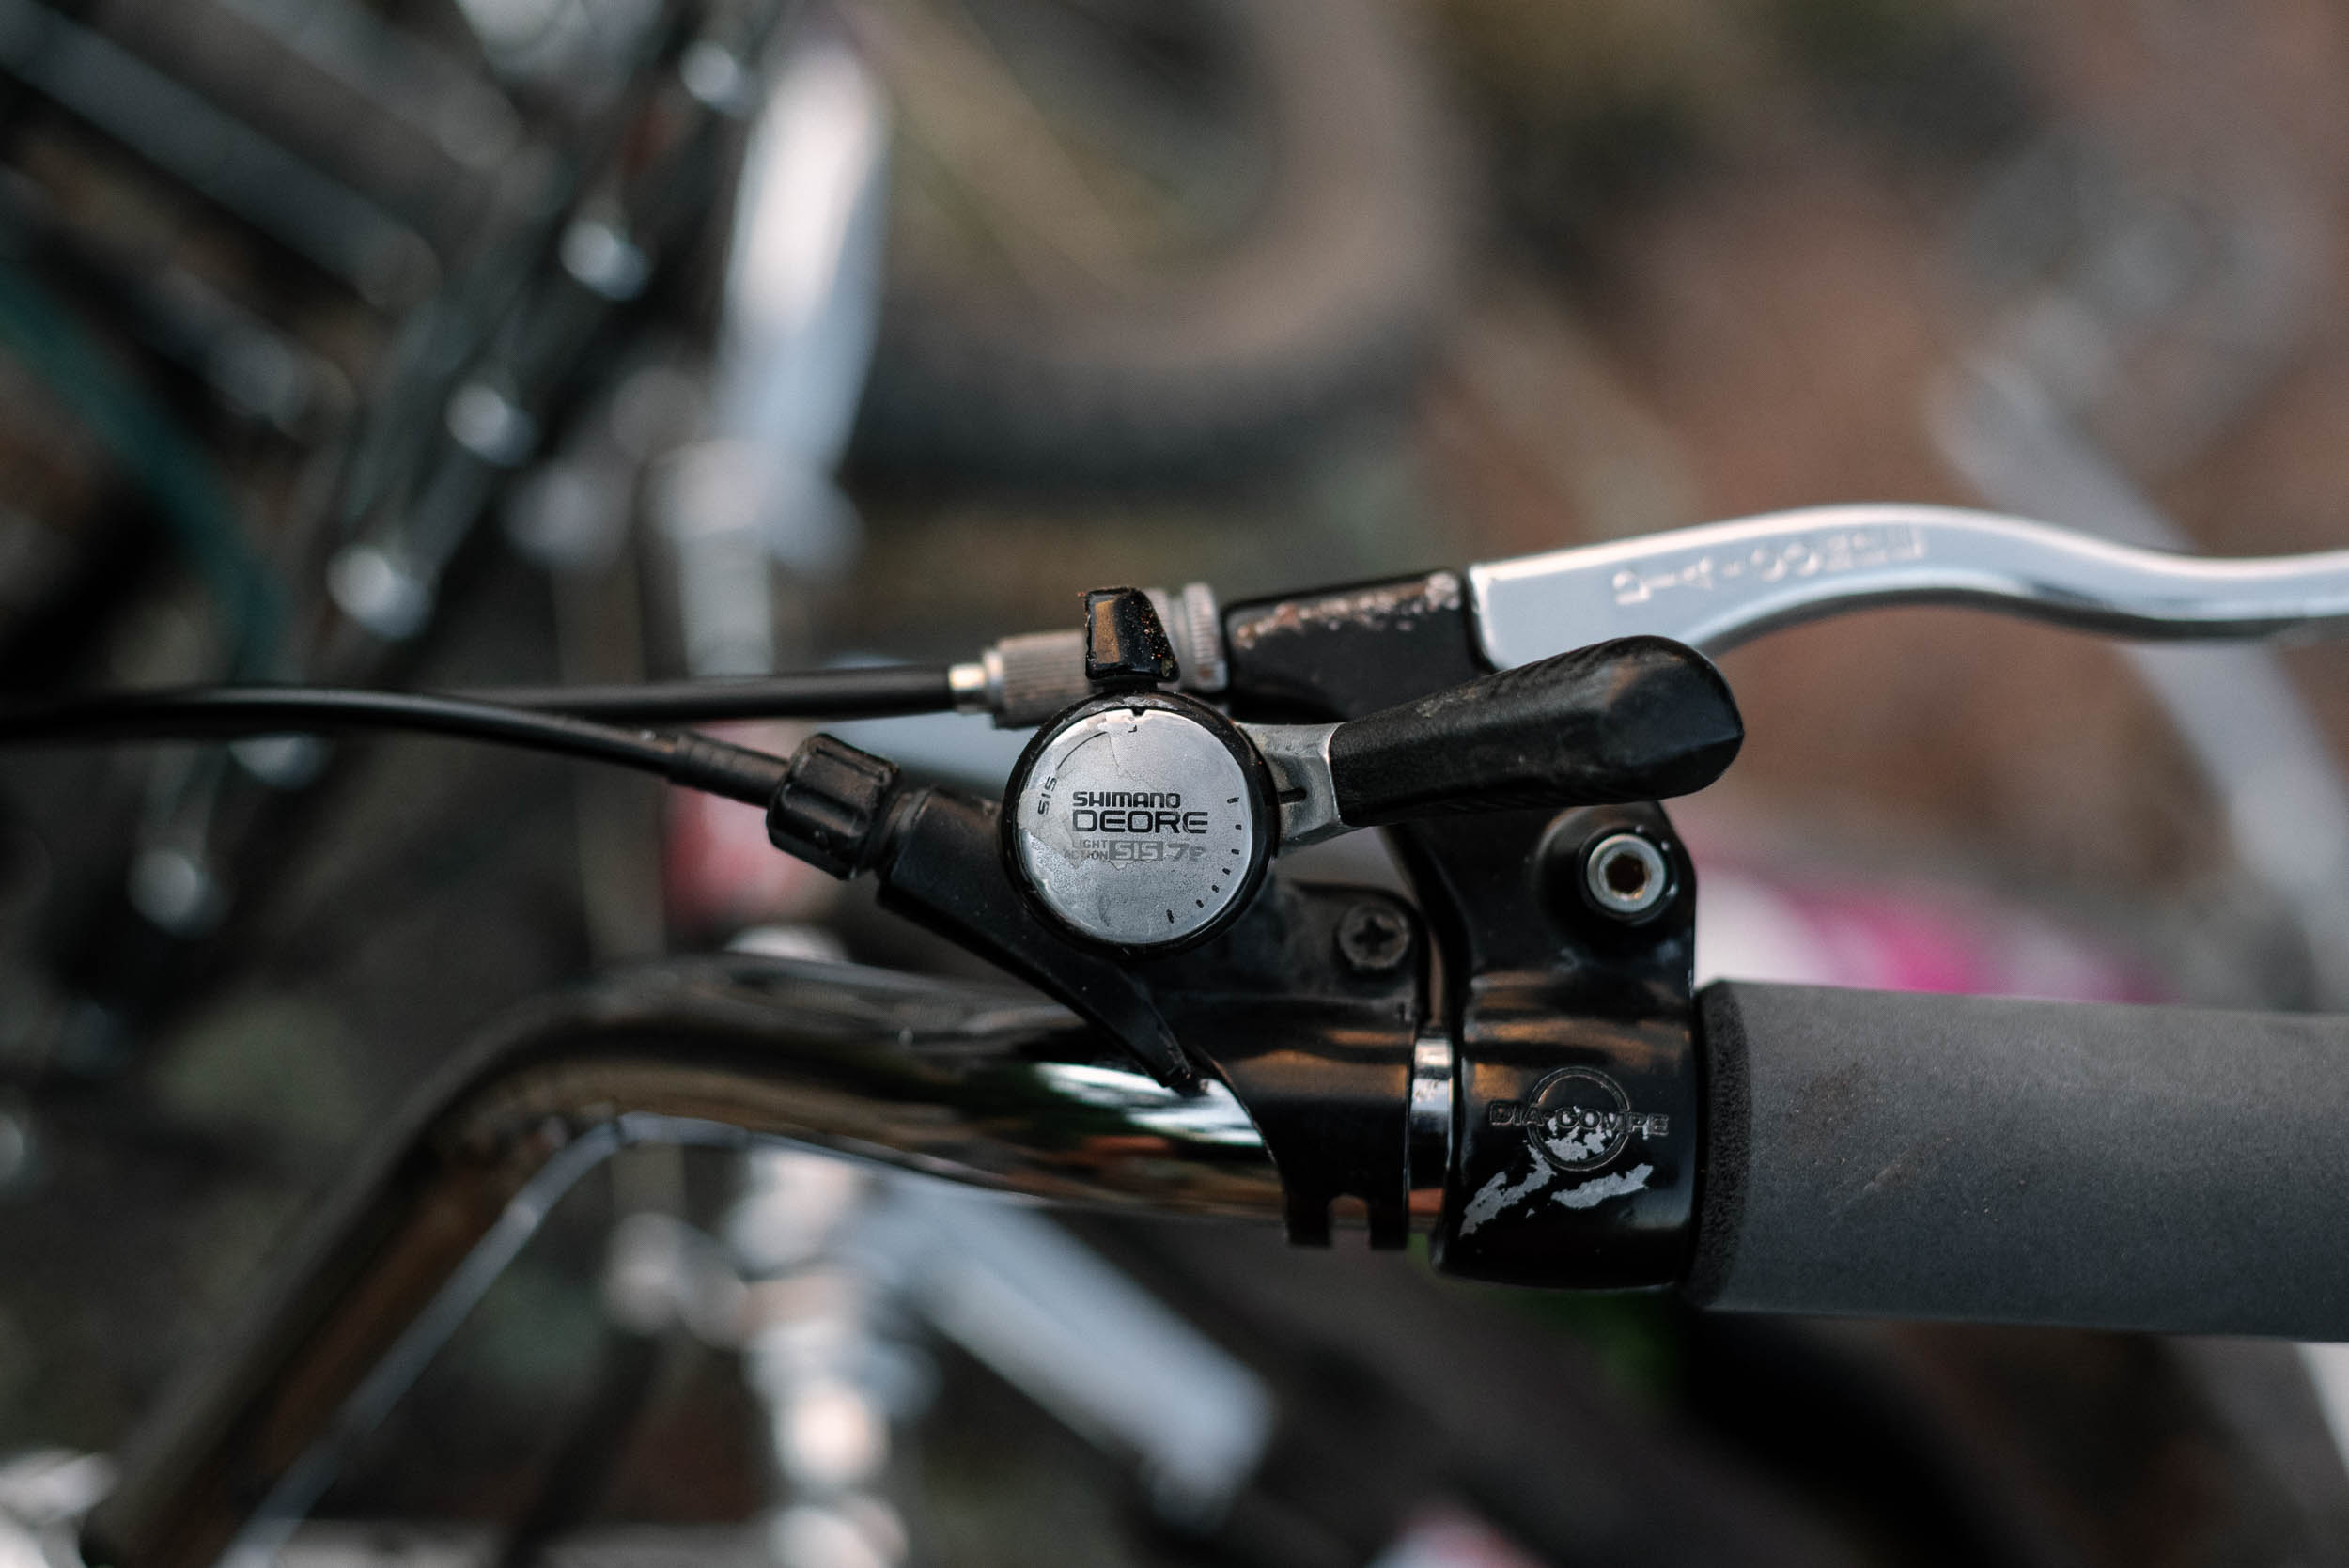
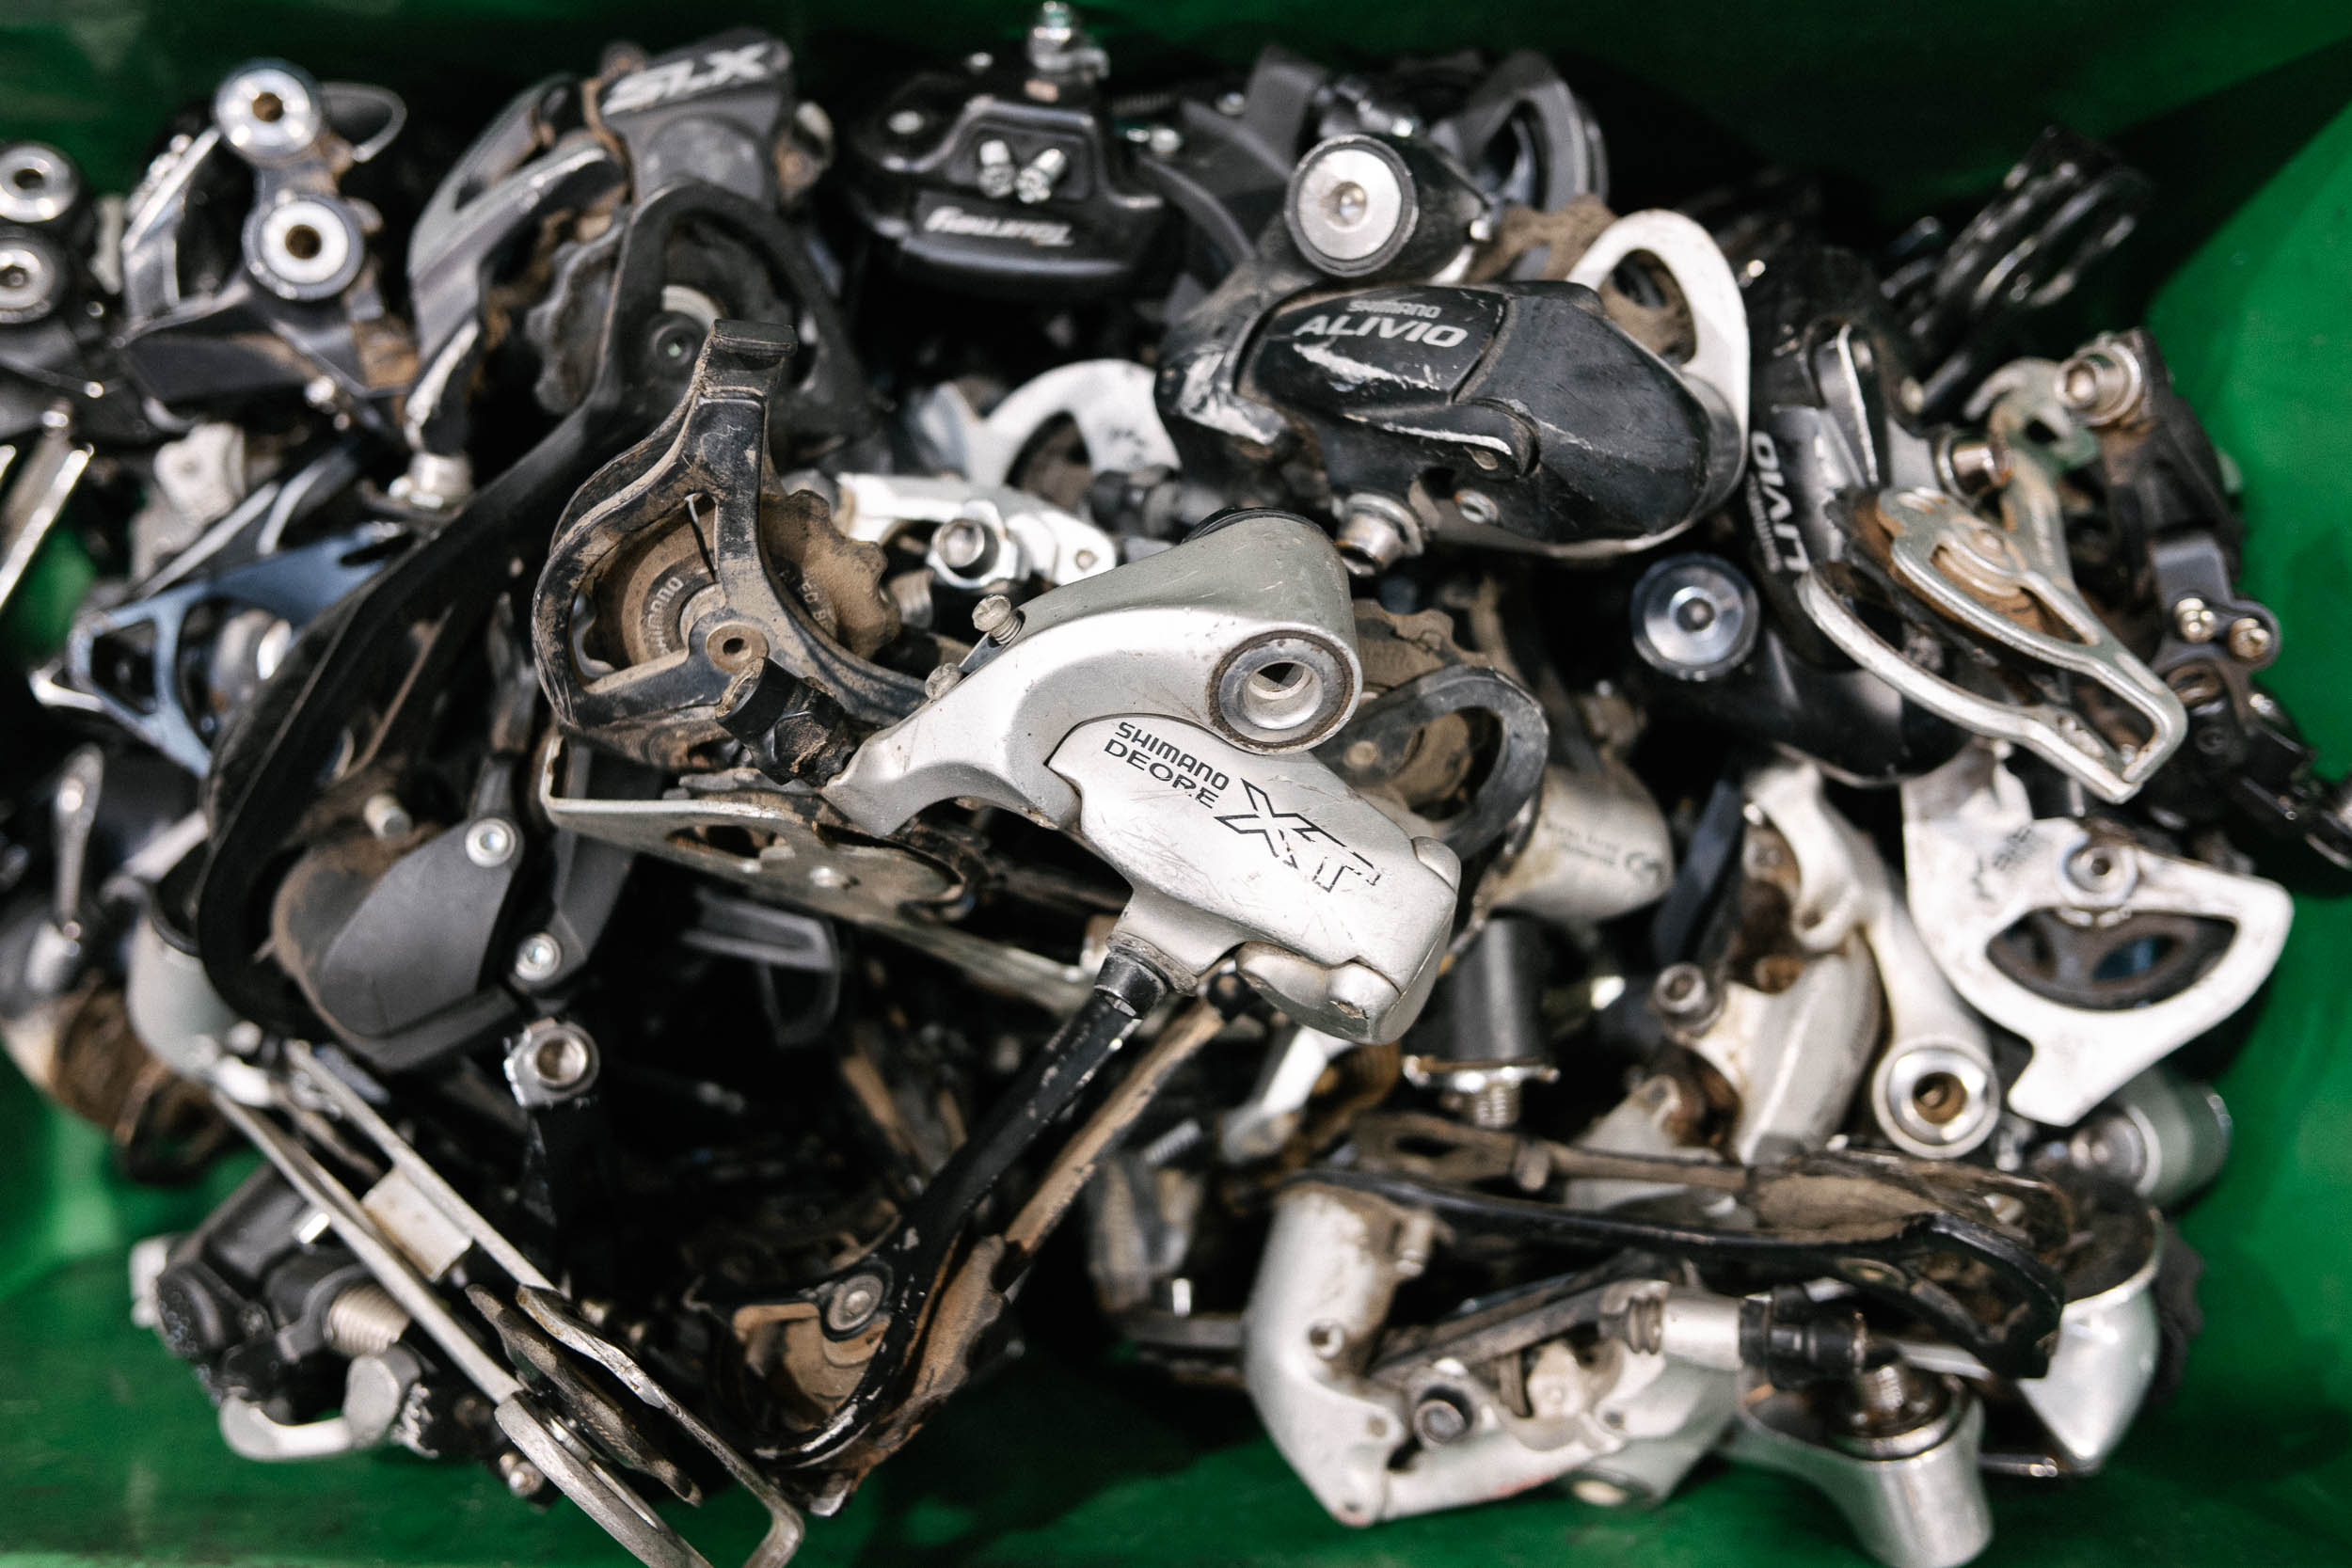
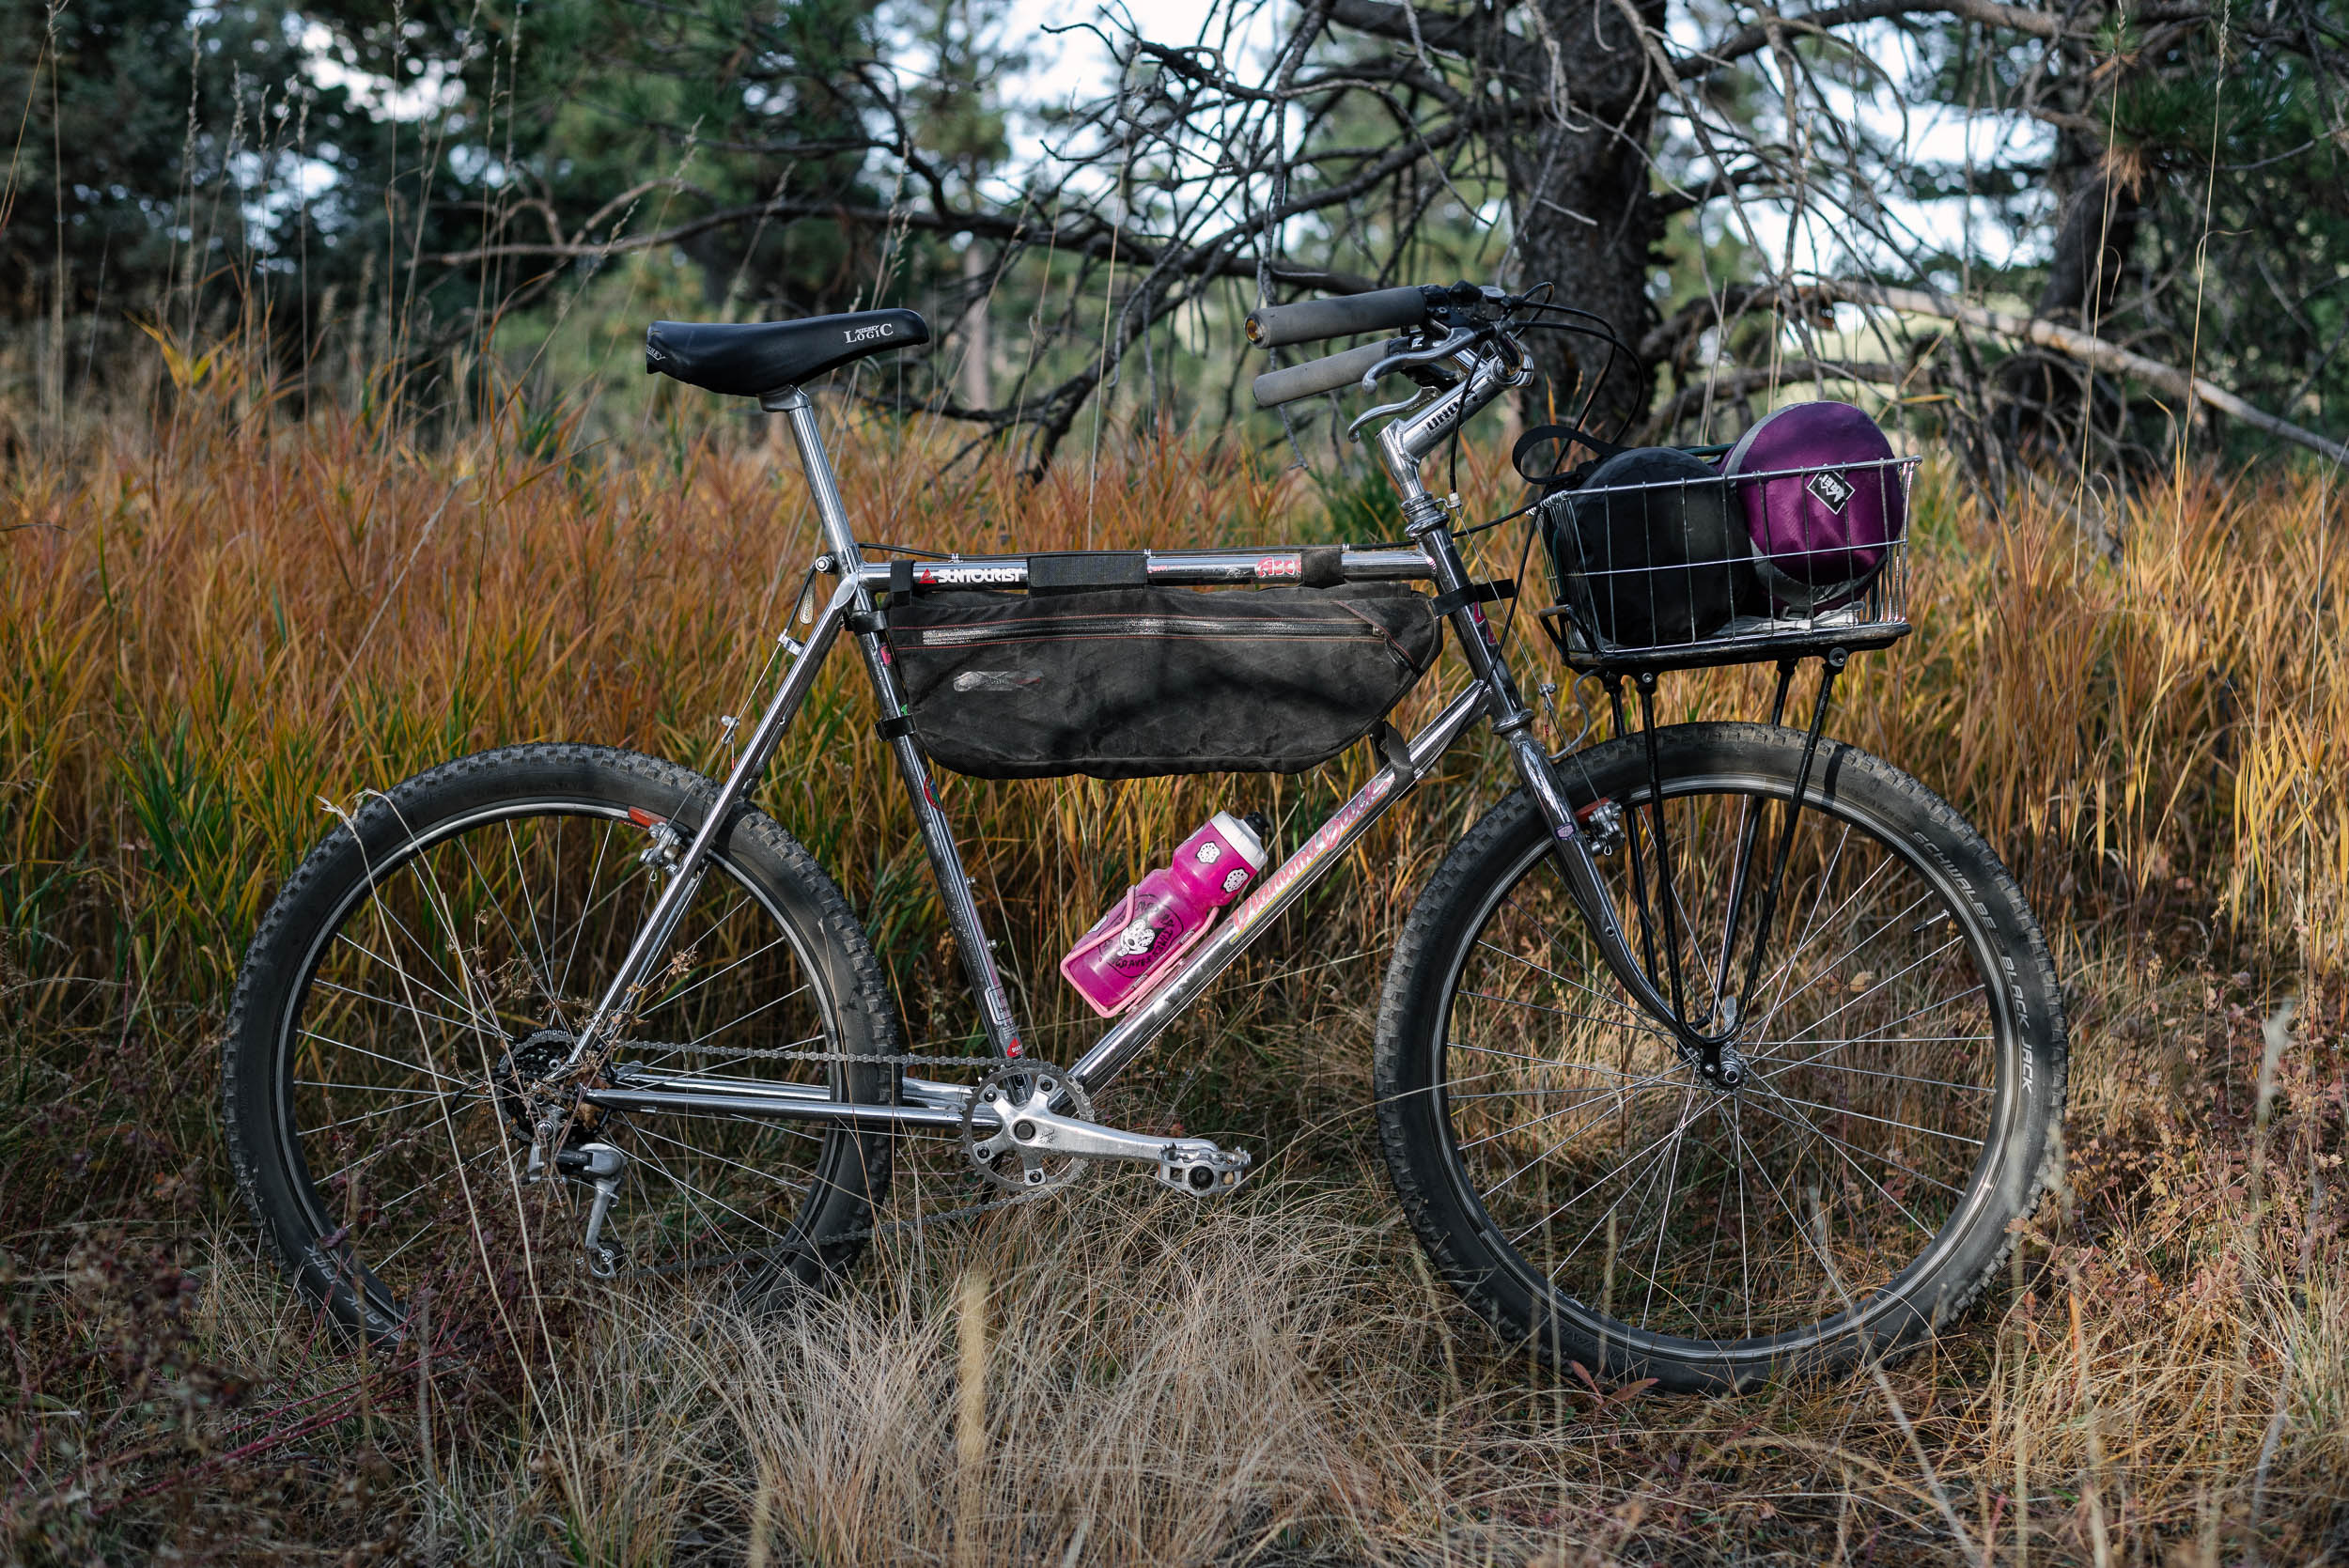
To keep the project on budget, I mostly relied on inexpensive secondhand parts that I could clean up or rebuild into a fully functioning state. Disassembling old mechanical parts, learning how they work, and giving them a new lease on life has even become something a hobby in the past couple of years—anything to help reduce my screen time—so I was excited about an excuse to find some used bits in rough shape and restore them to their former glory for this project. At about $15 total for both, the crusty seven-speed Shimano Deore thumb shifter and Mountain LX rear derailleur cost me next to nothing, cleaned up beautifully, and now shift smoothly.
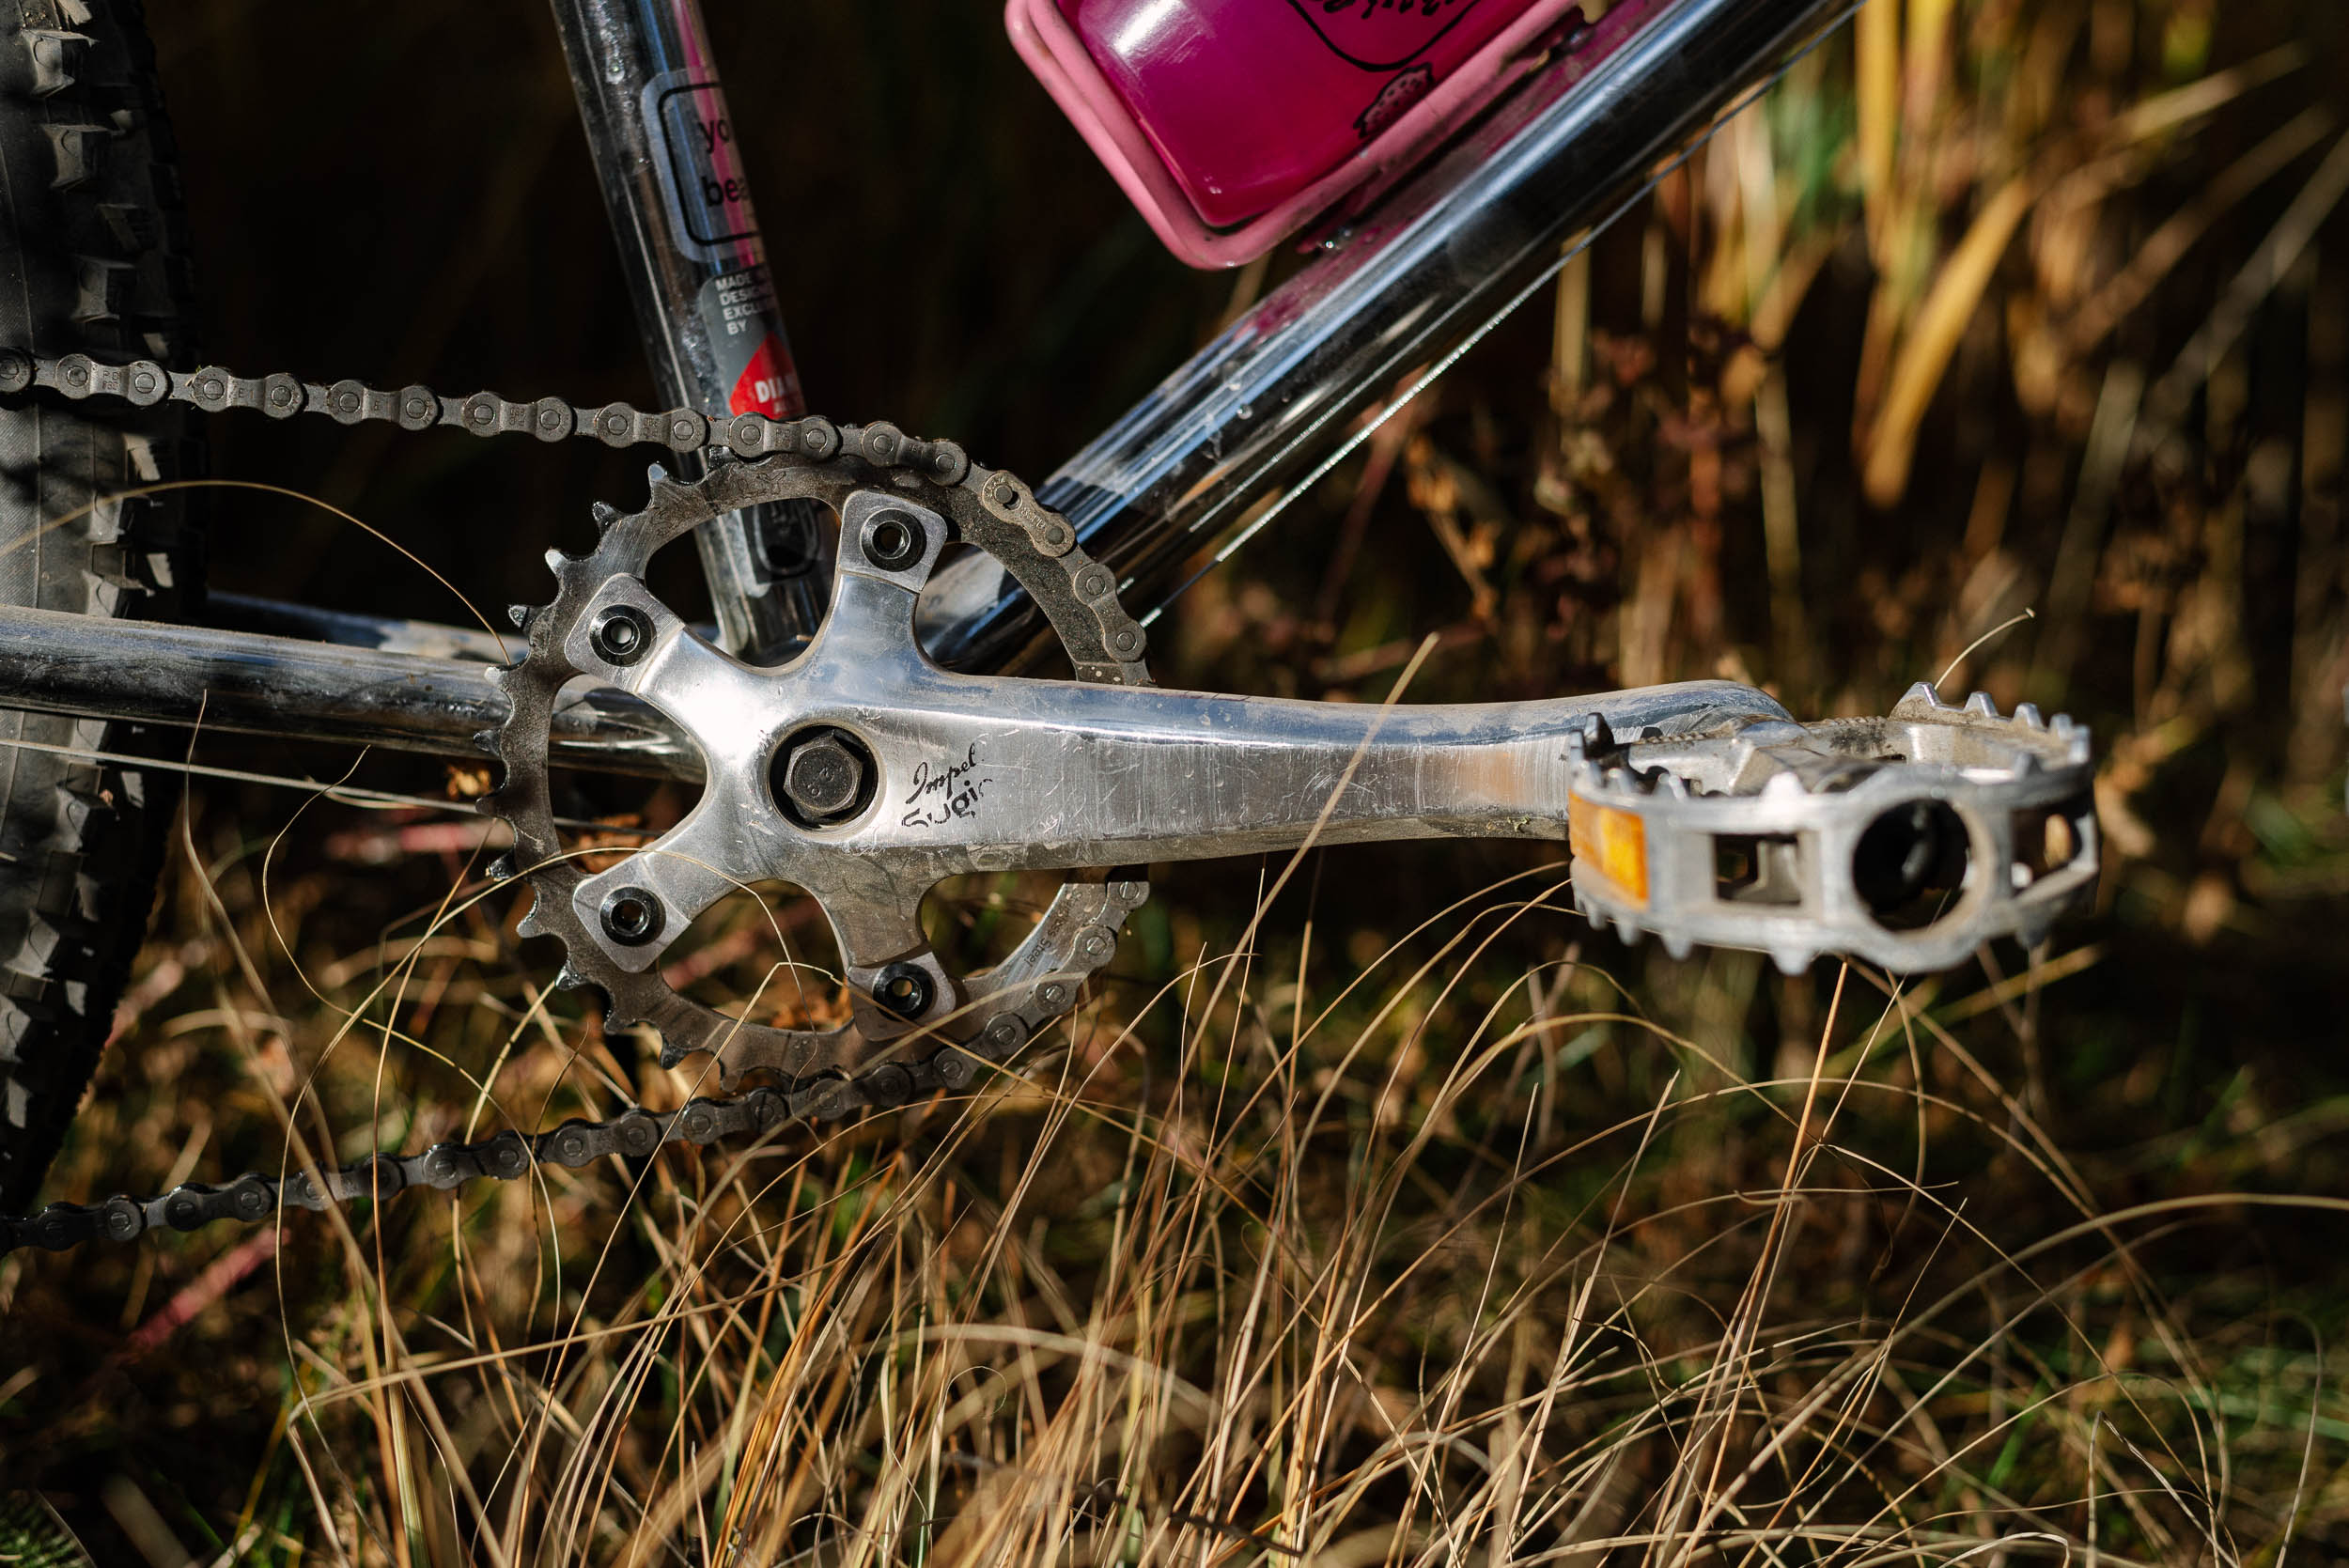
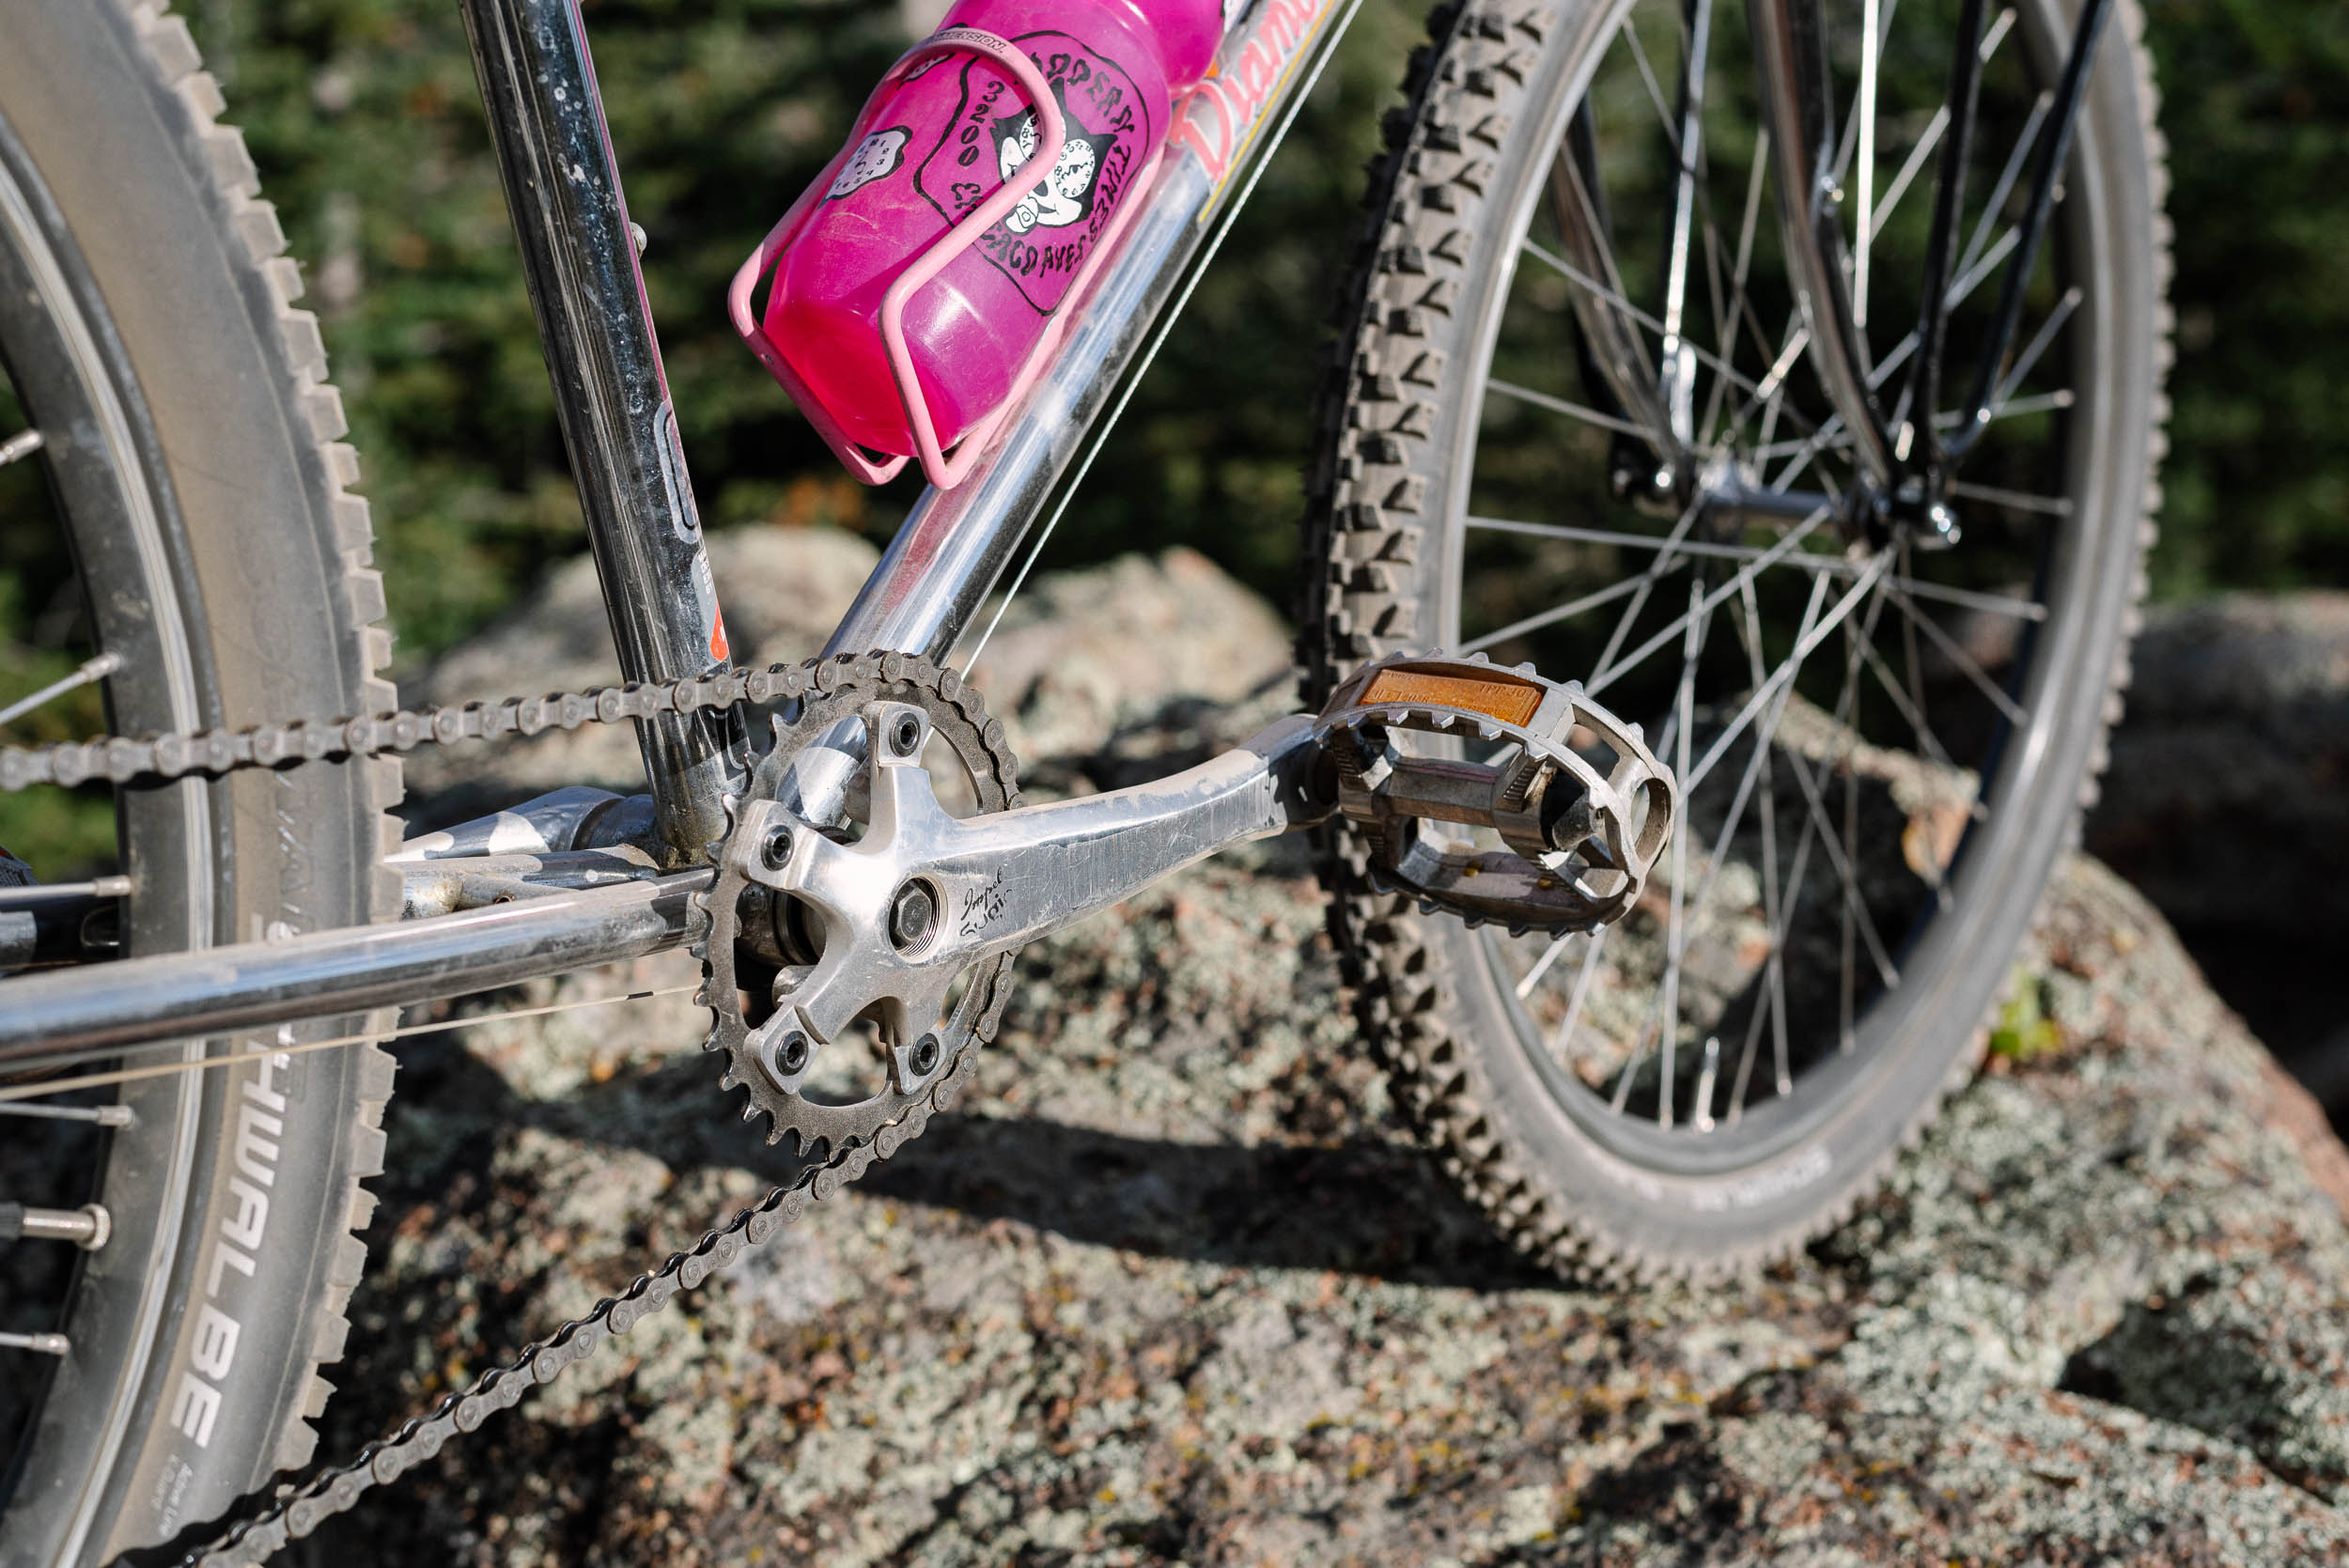
Many of the parts on the original build were rock-solid and needed only a light cleaning. The wheels spun true, the headset was smooth enough, and the bar/stem combo put me in a comfortable (if a little too laid-back) position. The Dia-Compe 980 brakes were adequate but admittedly a little dodgy on some mountain descents. I swapped out the Dura-Ace crankset, single-speed kit, and Octalink bottom bracket for something more sensible, settling on a new seven-speed cassette, some $10 cranks with a matching 94 BCD Surly chainring, and a cheap BB in the correct length (which I’ve already forgotten).
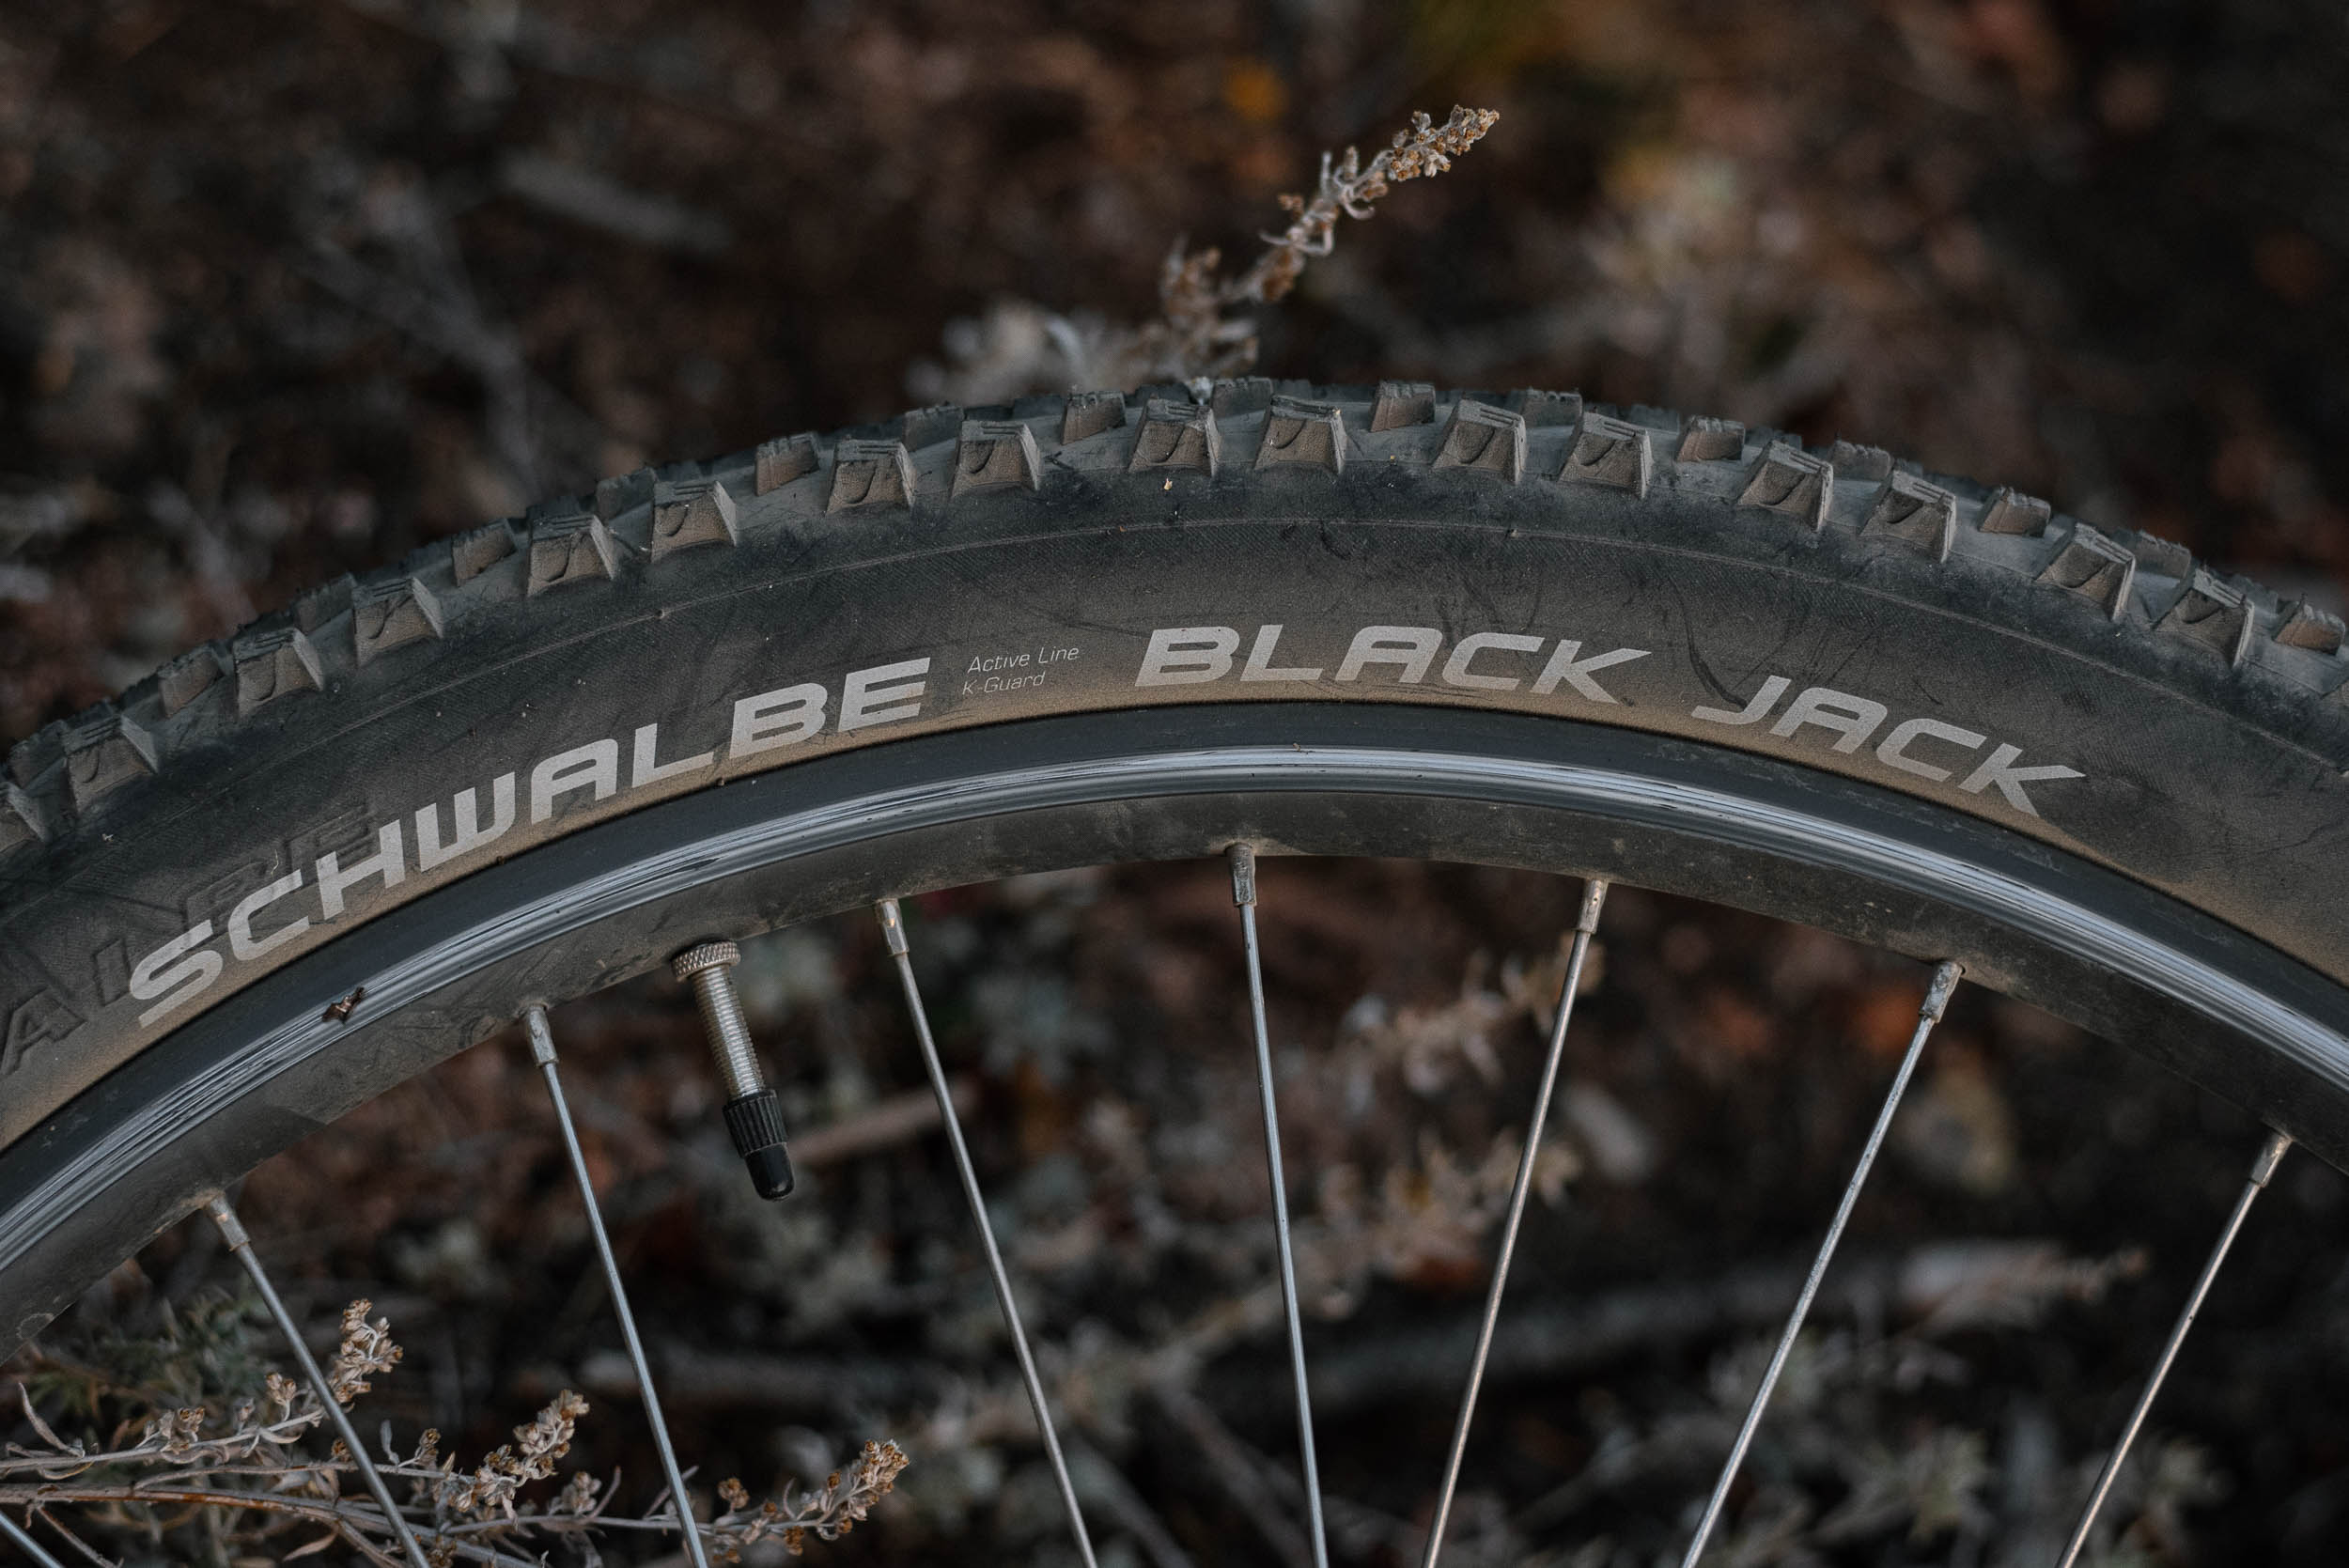
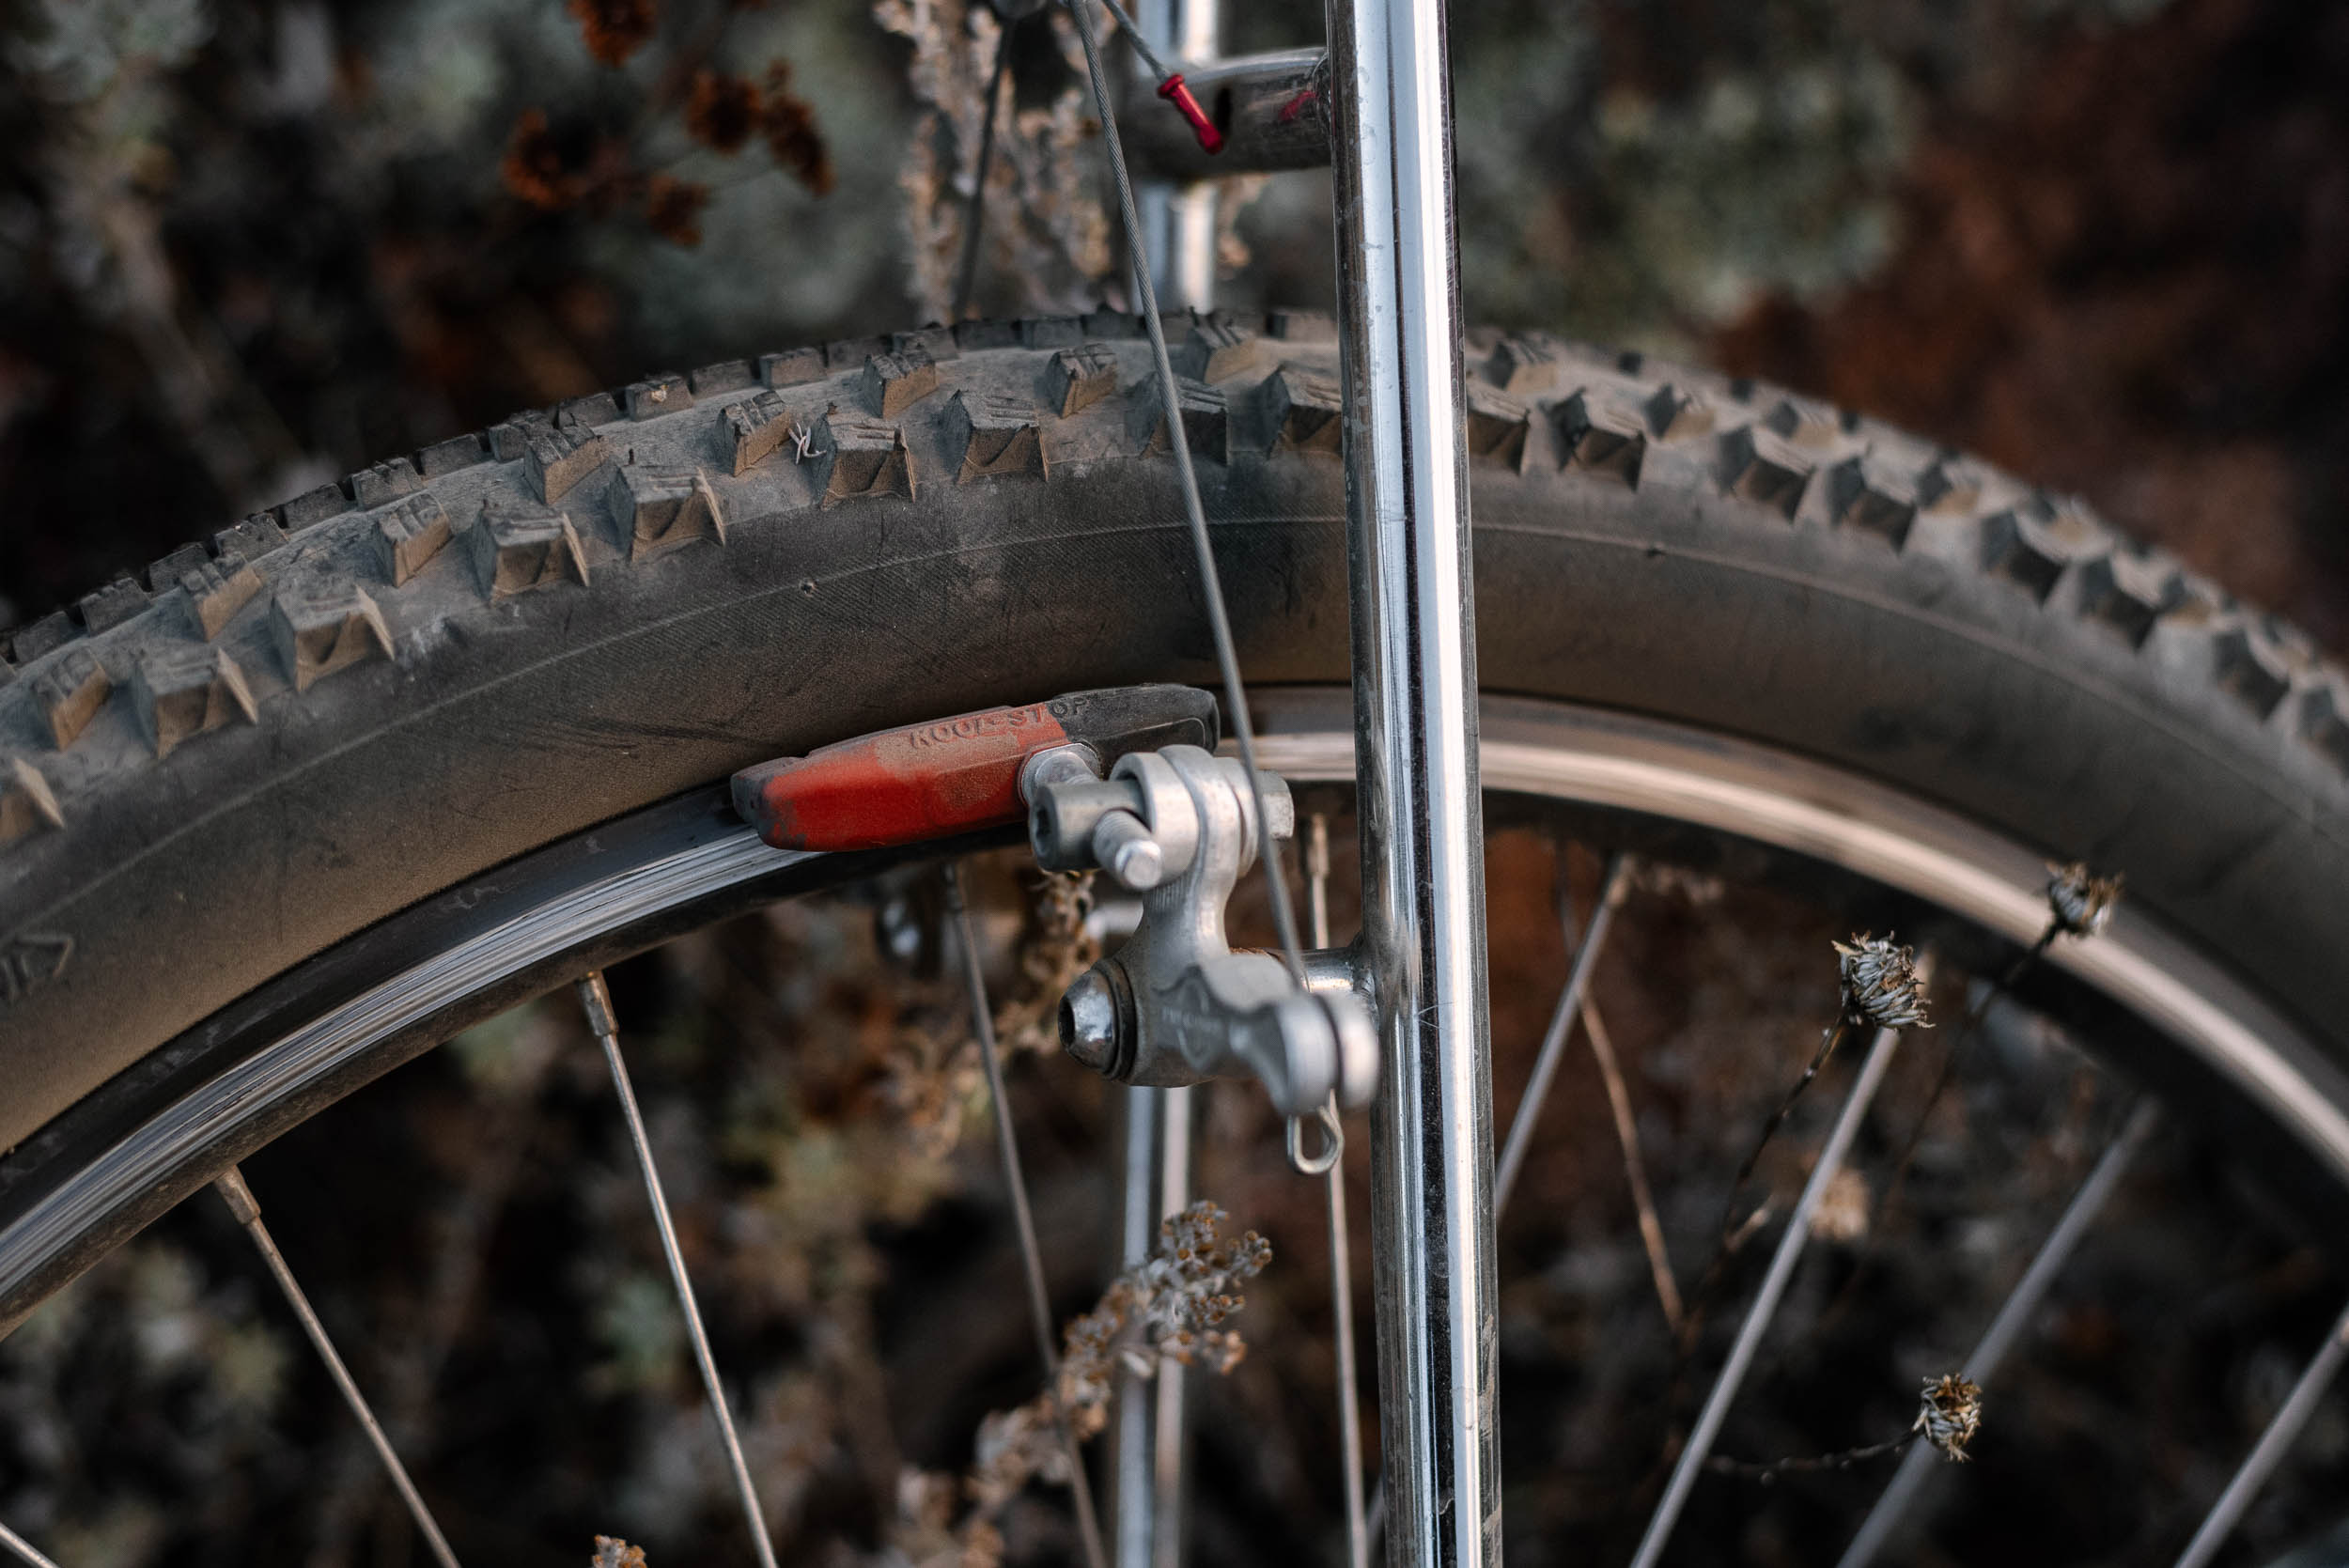
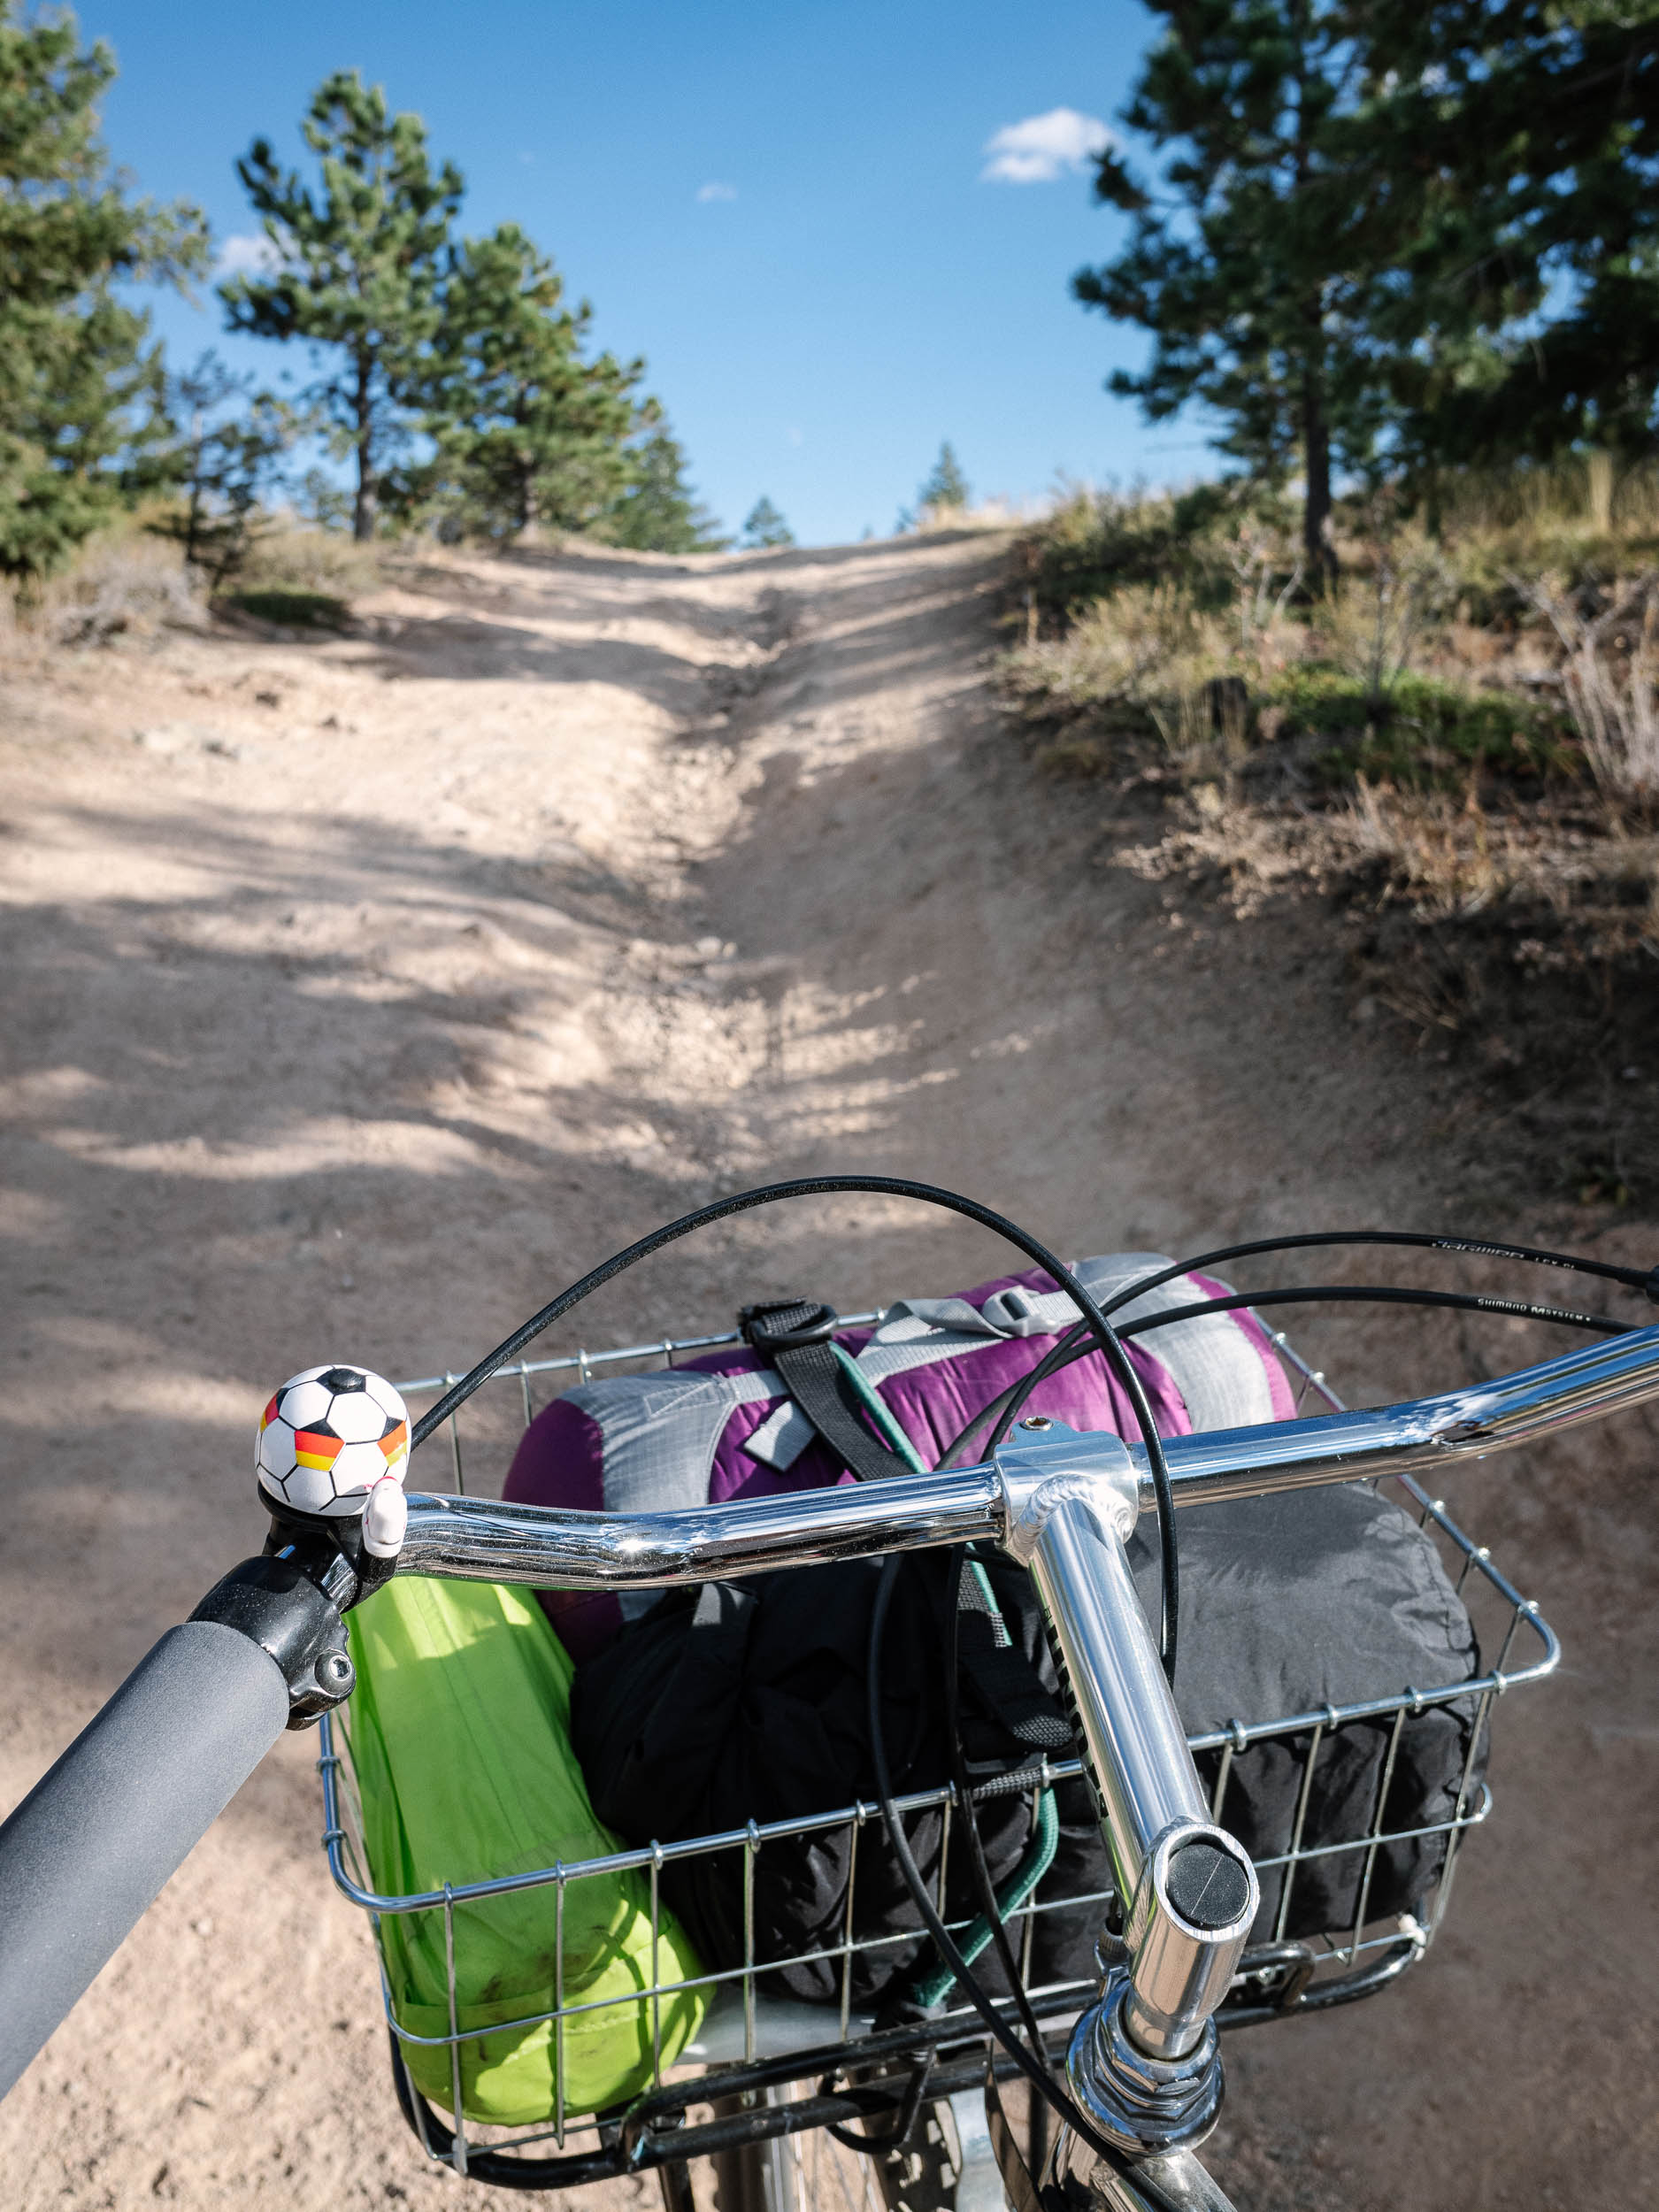
Finding a matching set of used tires in good shape proved surprisingly tricky, so I sprung for a fresh set of 26 x 2.10″ Schwalbe Black Jacks for a little under $40. They barely fit, and they’re not great tires, but I’m happy with them as an inexpensive all-around option. The front rack was a steal at $20, and with a little bit of questionable strut bending (don’t look too closely), it fit perfectly on bike’s front end to provide a sturdy platform for my Wald 139 basket and a lighter payload. I stumbled upon the Revelate Tangle frame bag for just $25 in a Facebook group, which happened to be for sale by a friend whom I could meet for coffee and pick it up (thanks again, Justin!). Find the detailed build kit below:
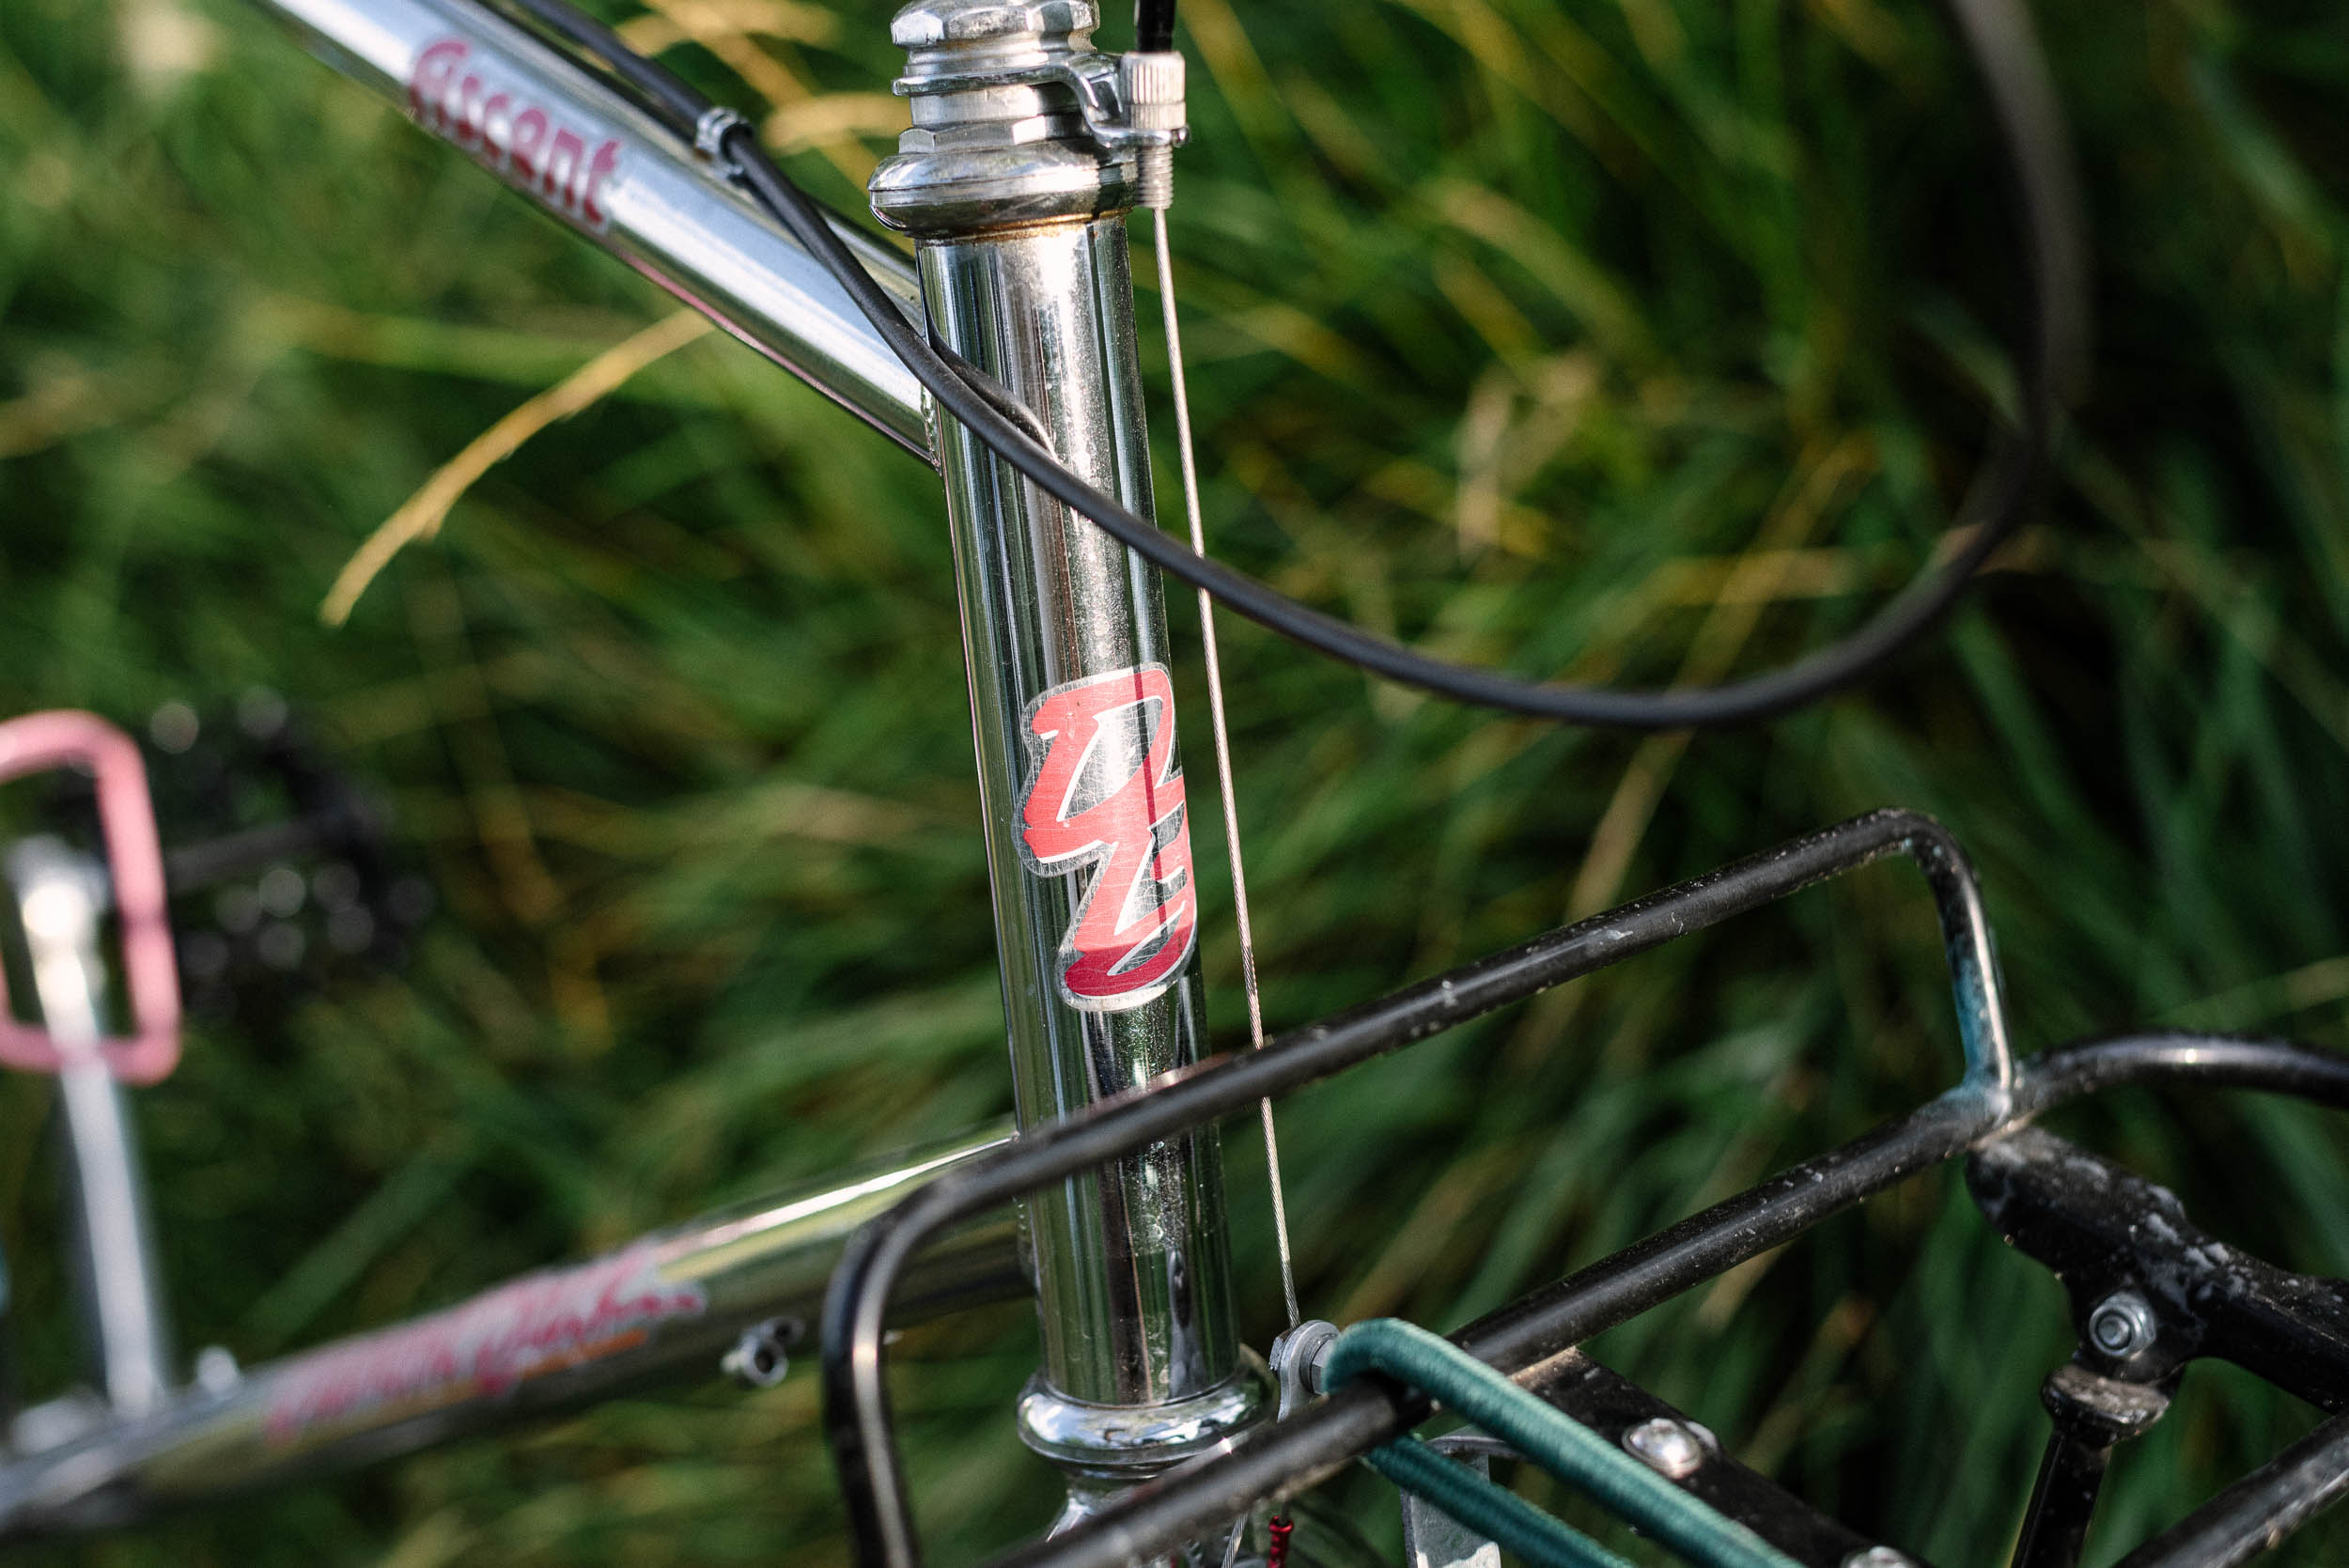
- Frame/Fork: 1986 Diamondback Ascent
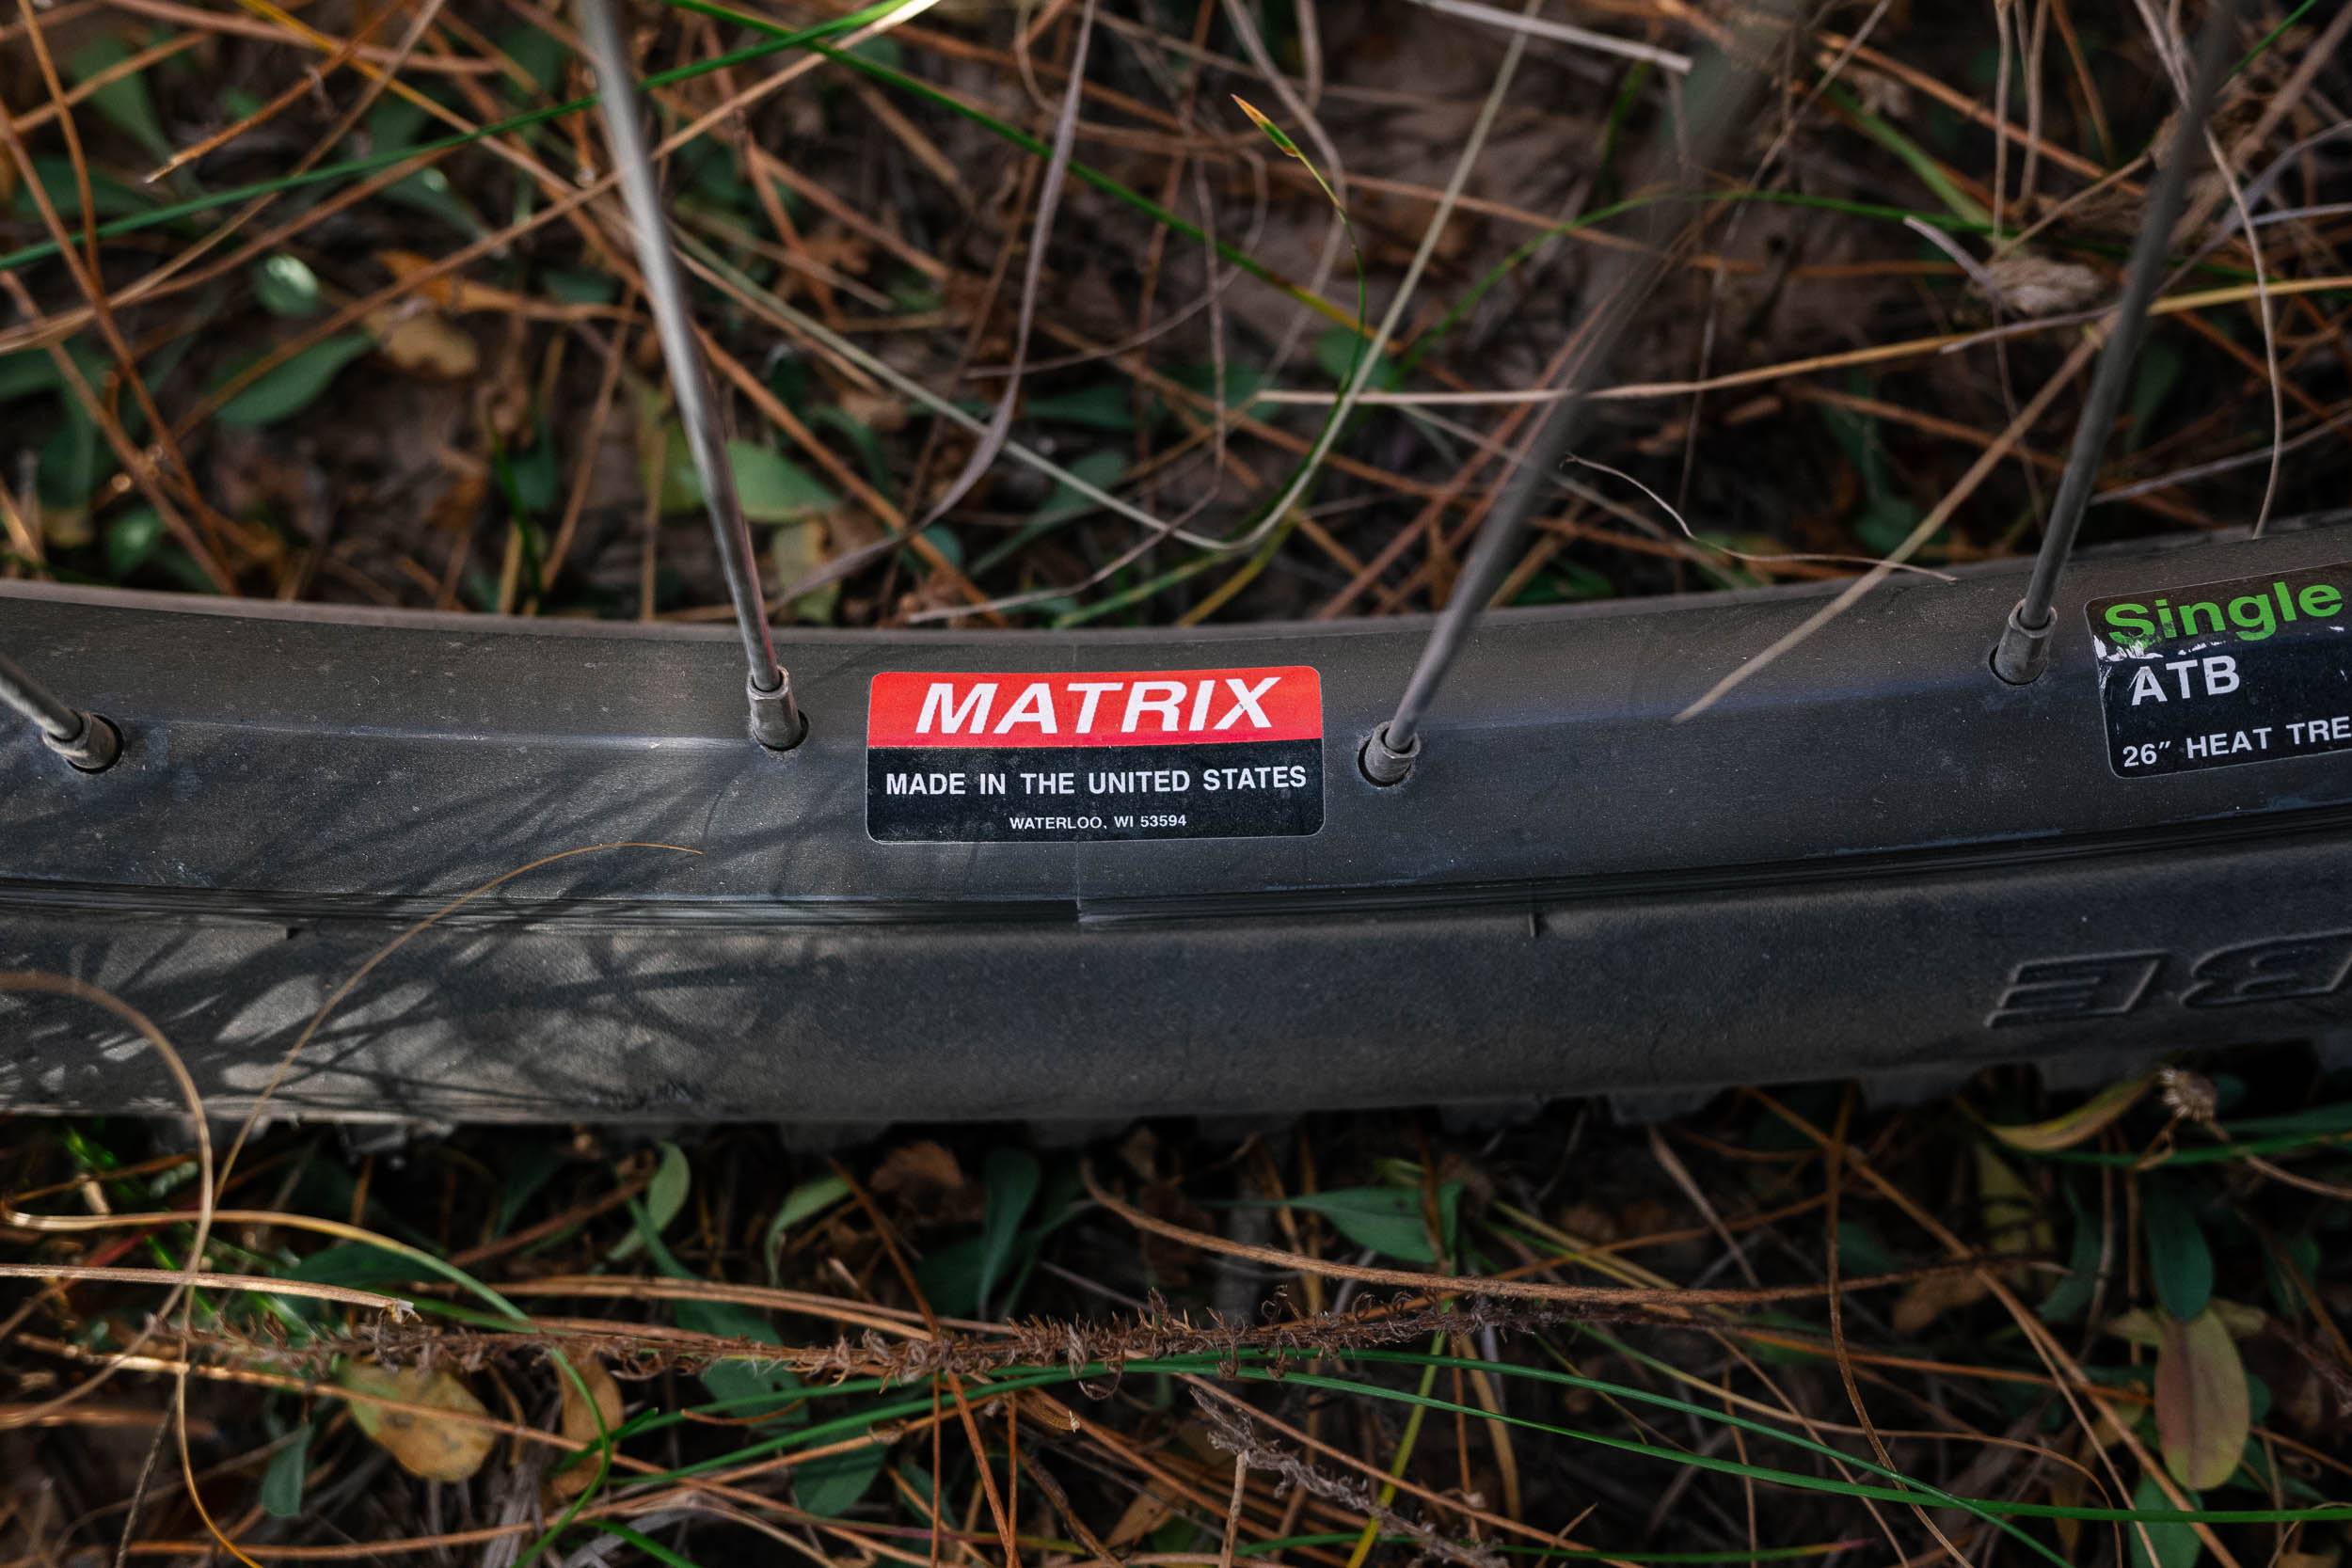
- Rims: Matrix Single Track ATB
- Hubs: Shimano Deore LX
- Tires: Schwalbe Black Jack 26 x 2.10
- Handlebars: Wald, maybe?
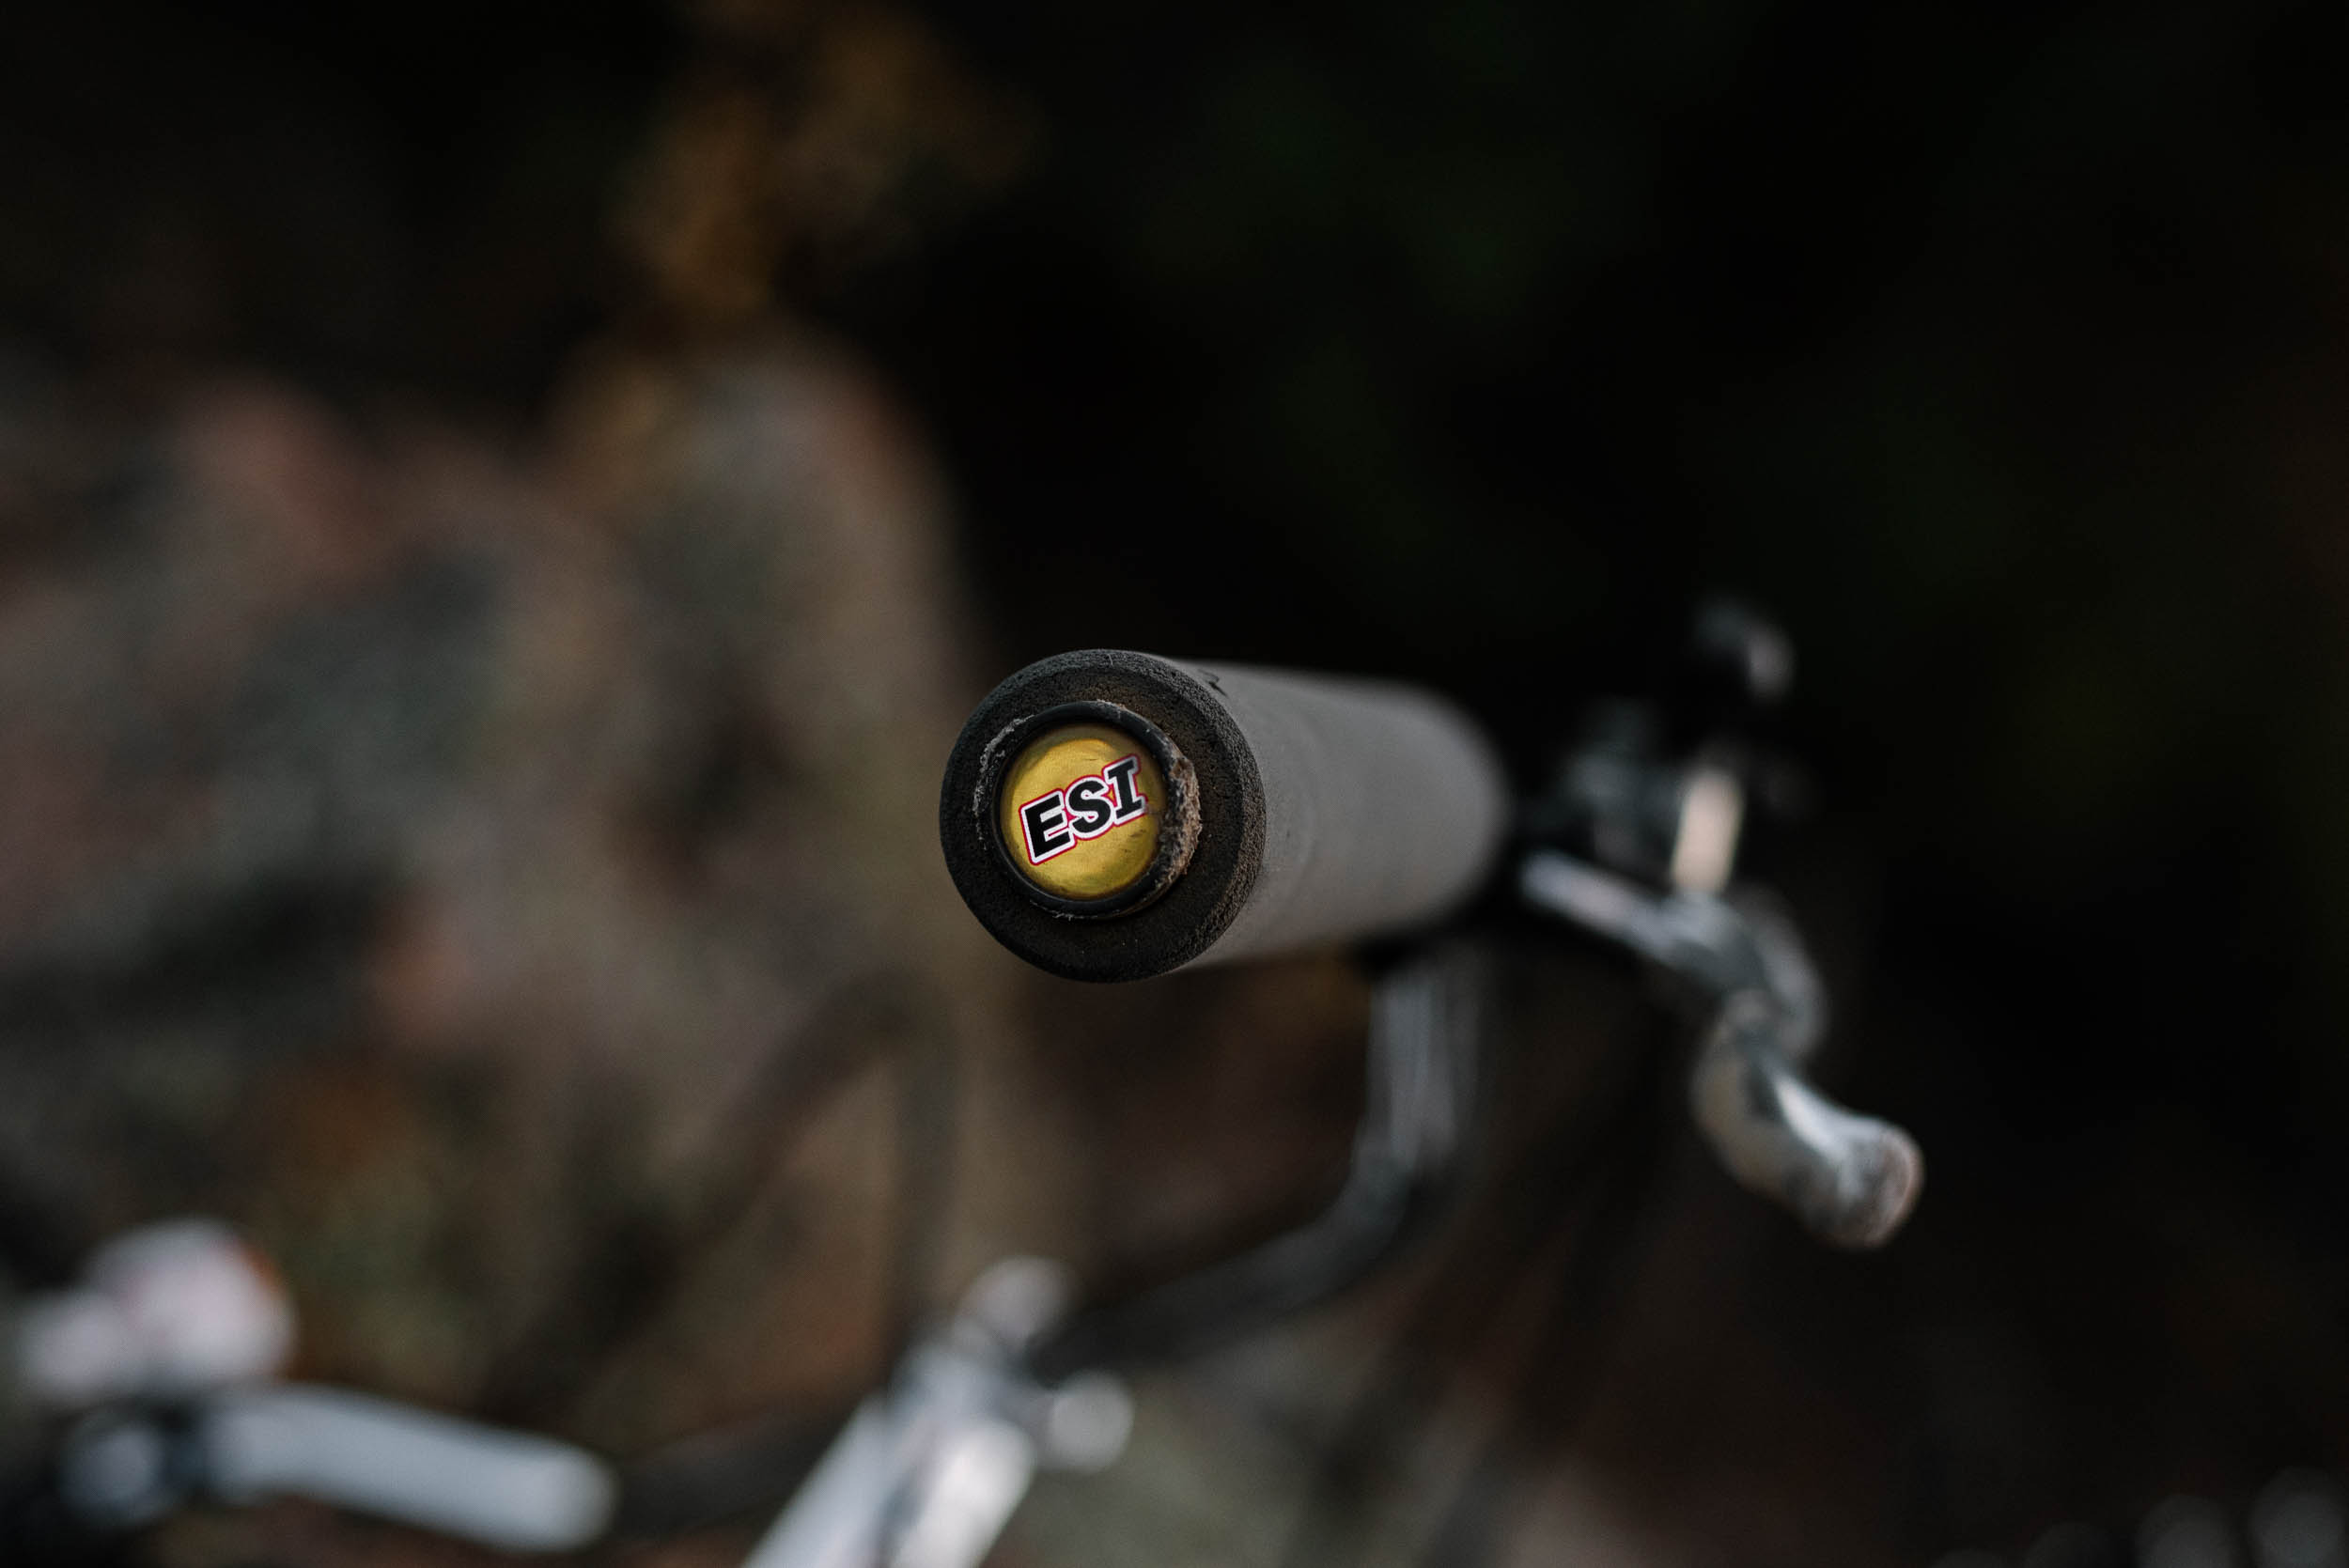
- Grips: ESI Chunky XL
- Headset: Tange
- Crankset: Sugino 94BCD, 175mm
- Chainring: Surly Stainless, 32T
- Pedals: VP-707 Bear Trap
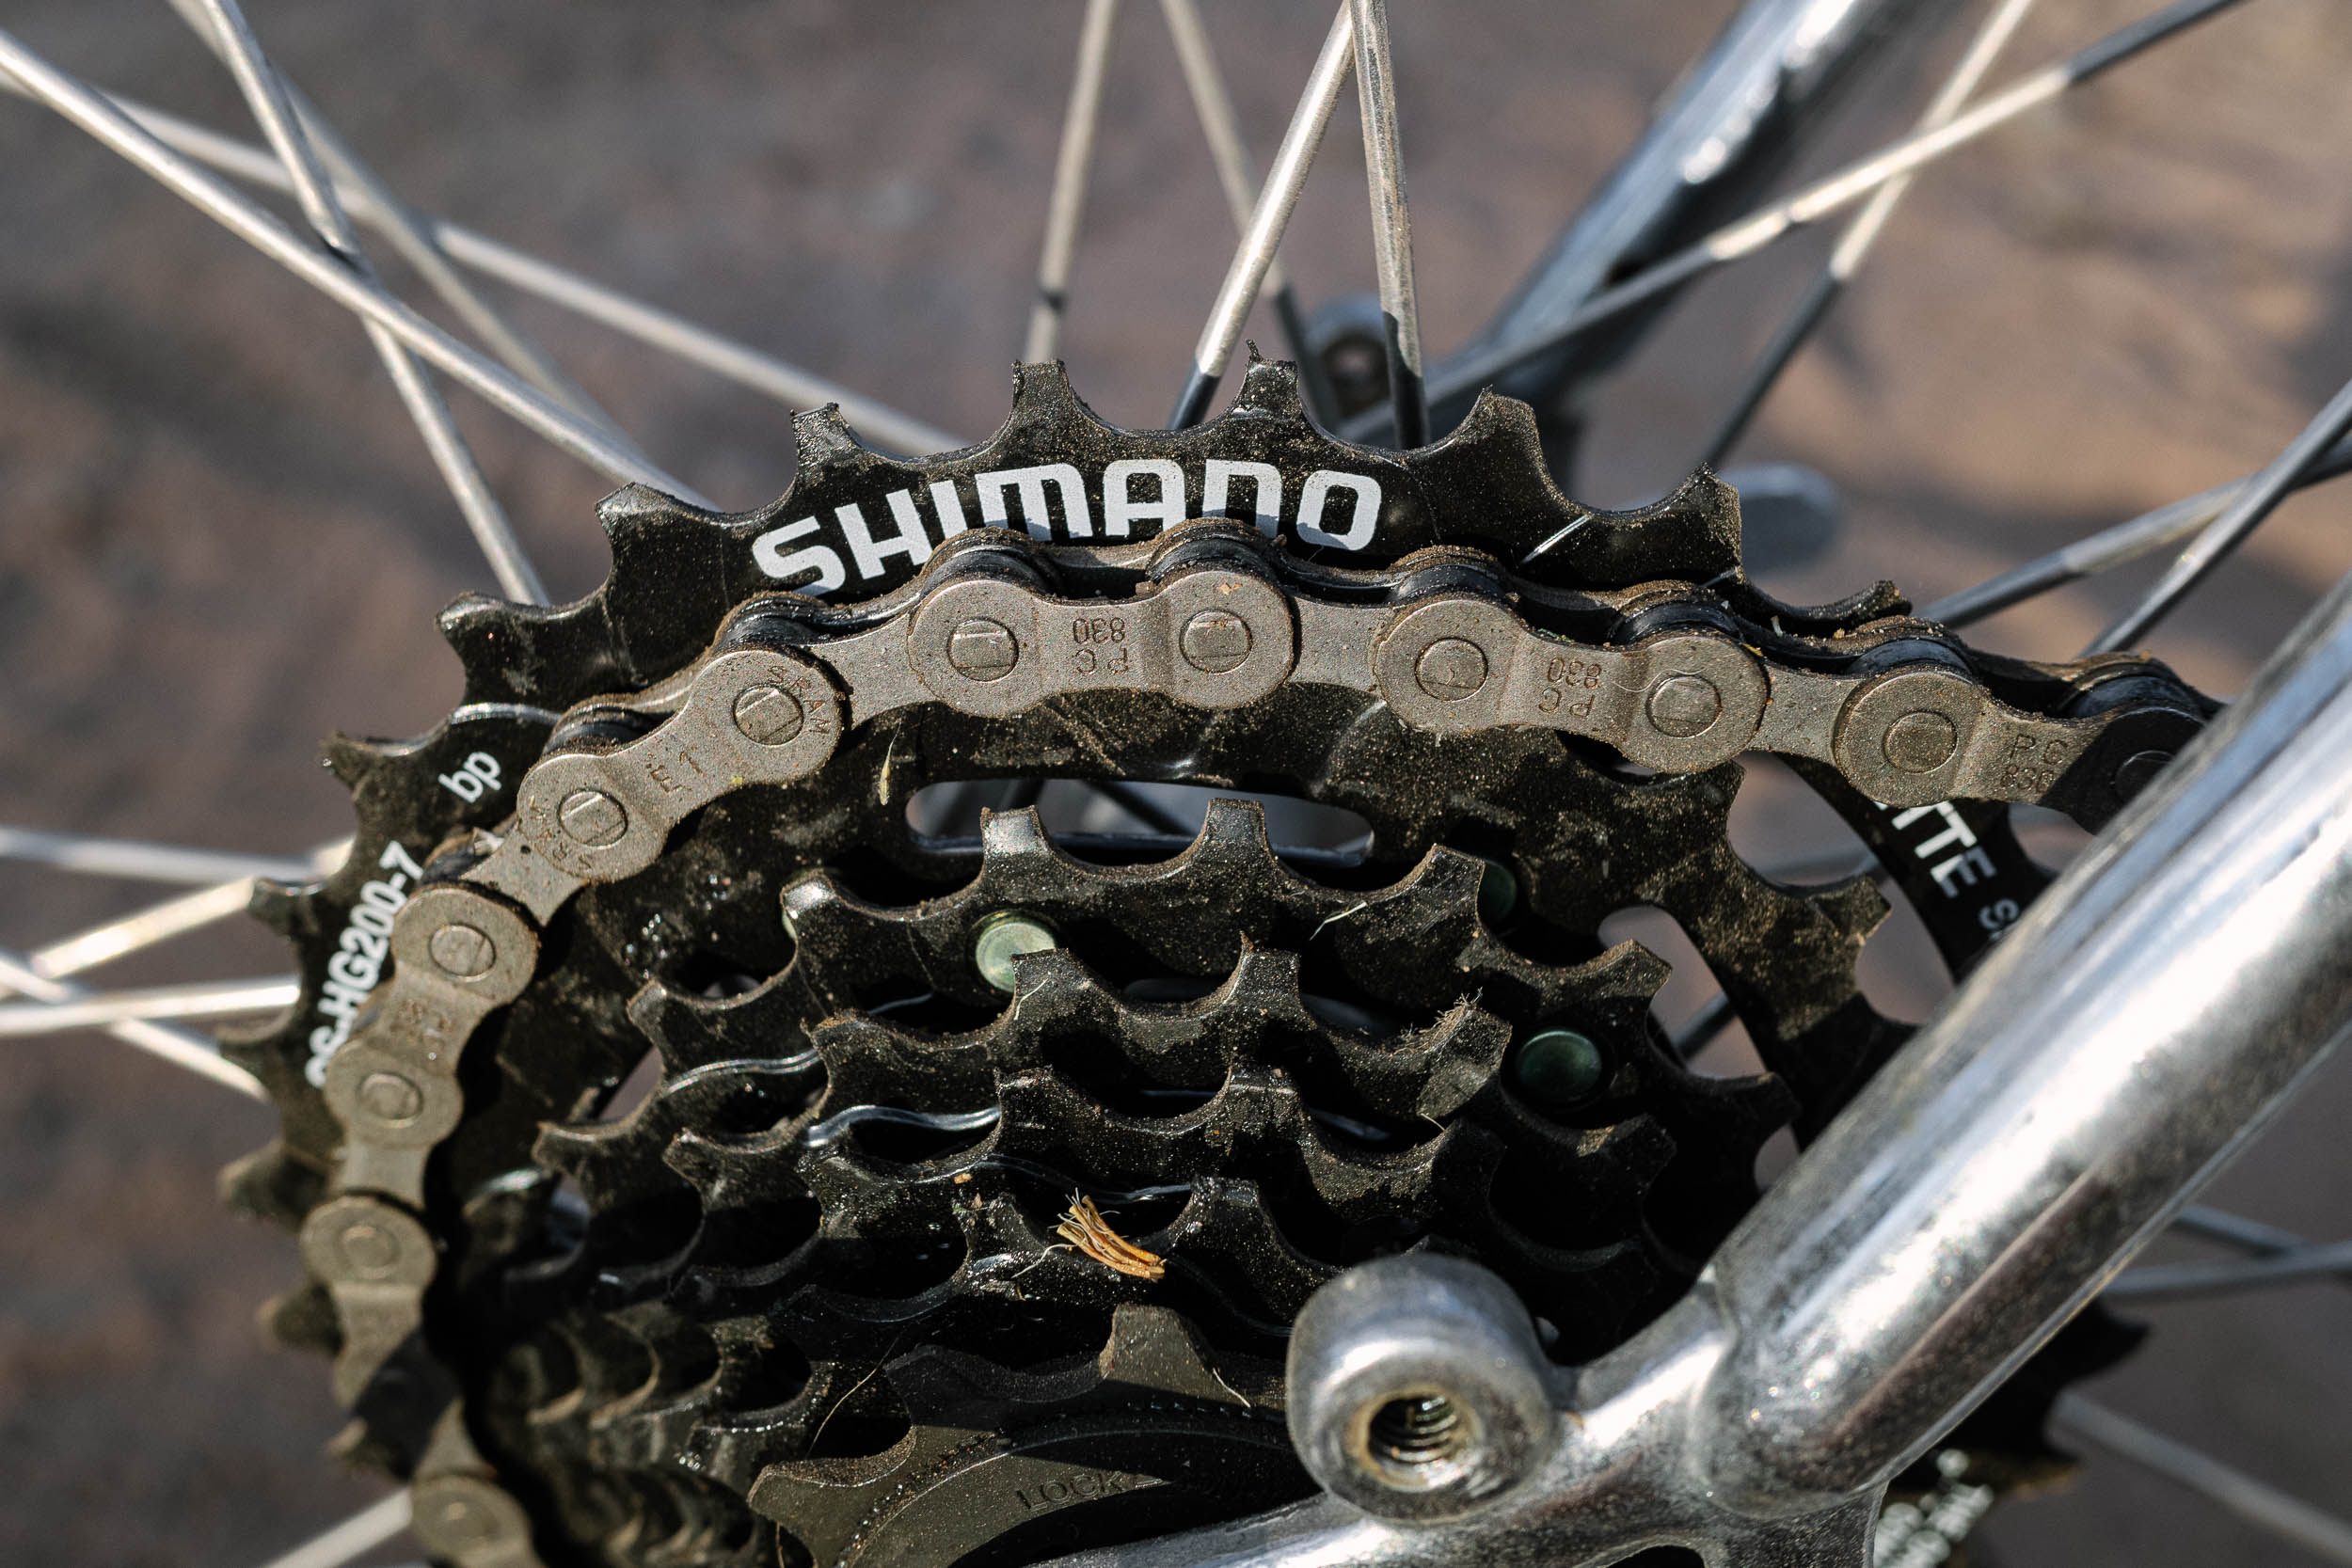
- Cassette: Shimano CS-HG200-7 (11-32T)
- Chain: SRAM PC-830 8-speed
- Derailleur: Shimano Mountain LX, 7-speed, long cage
- Brake levers: Dia-Compe
- Brakes: Dia-Compe 980 w/ Kool-Stop pads
- Shifter(s): Shimano Deore Thumbie, 7-speed
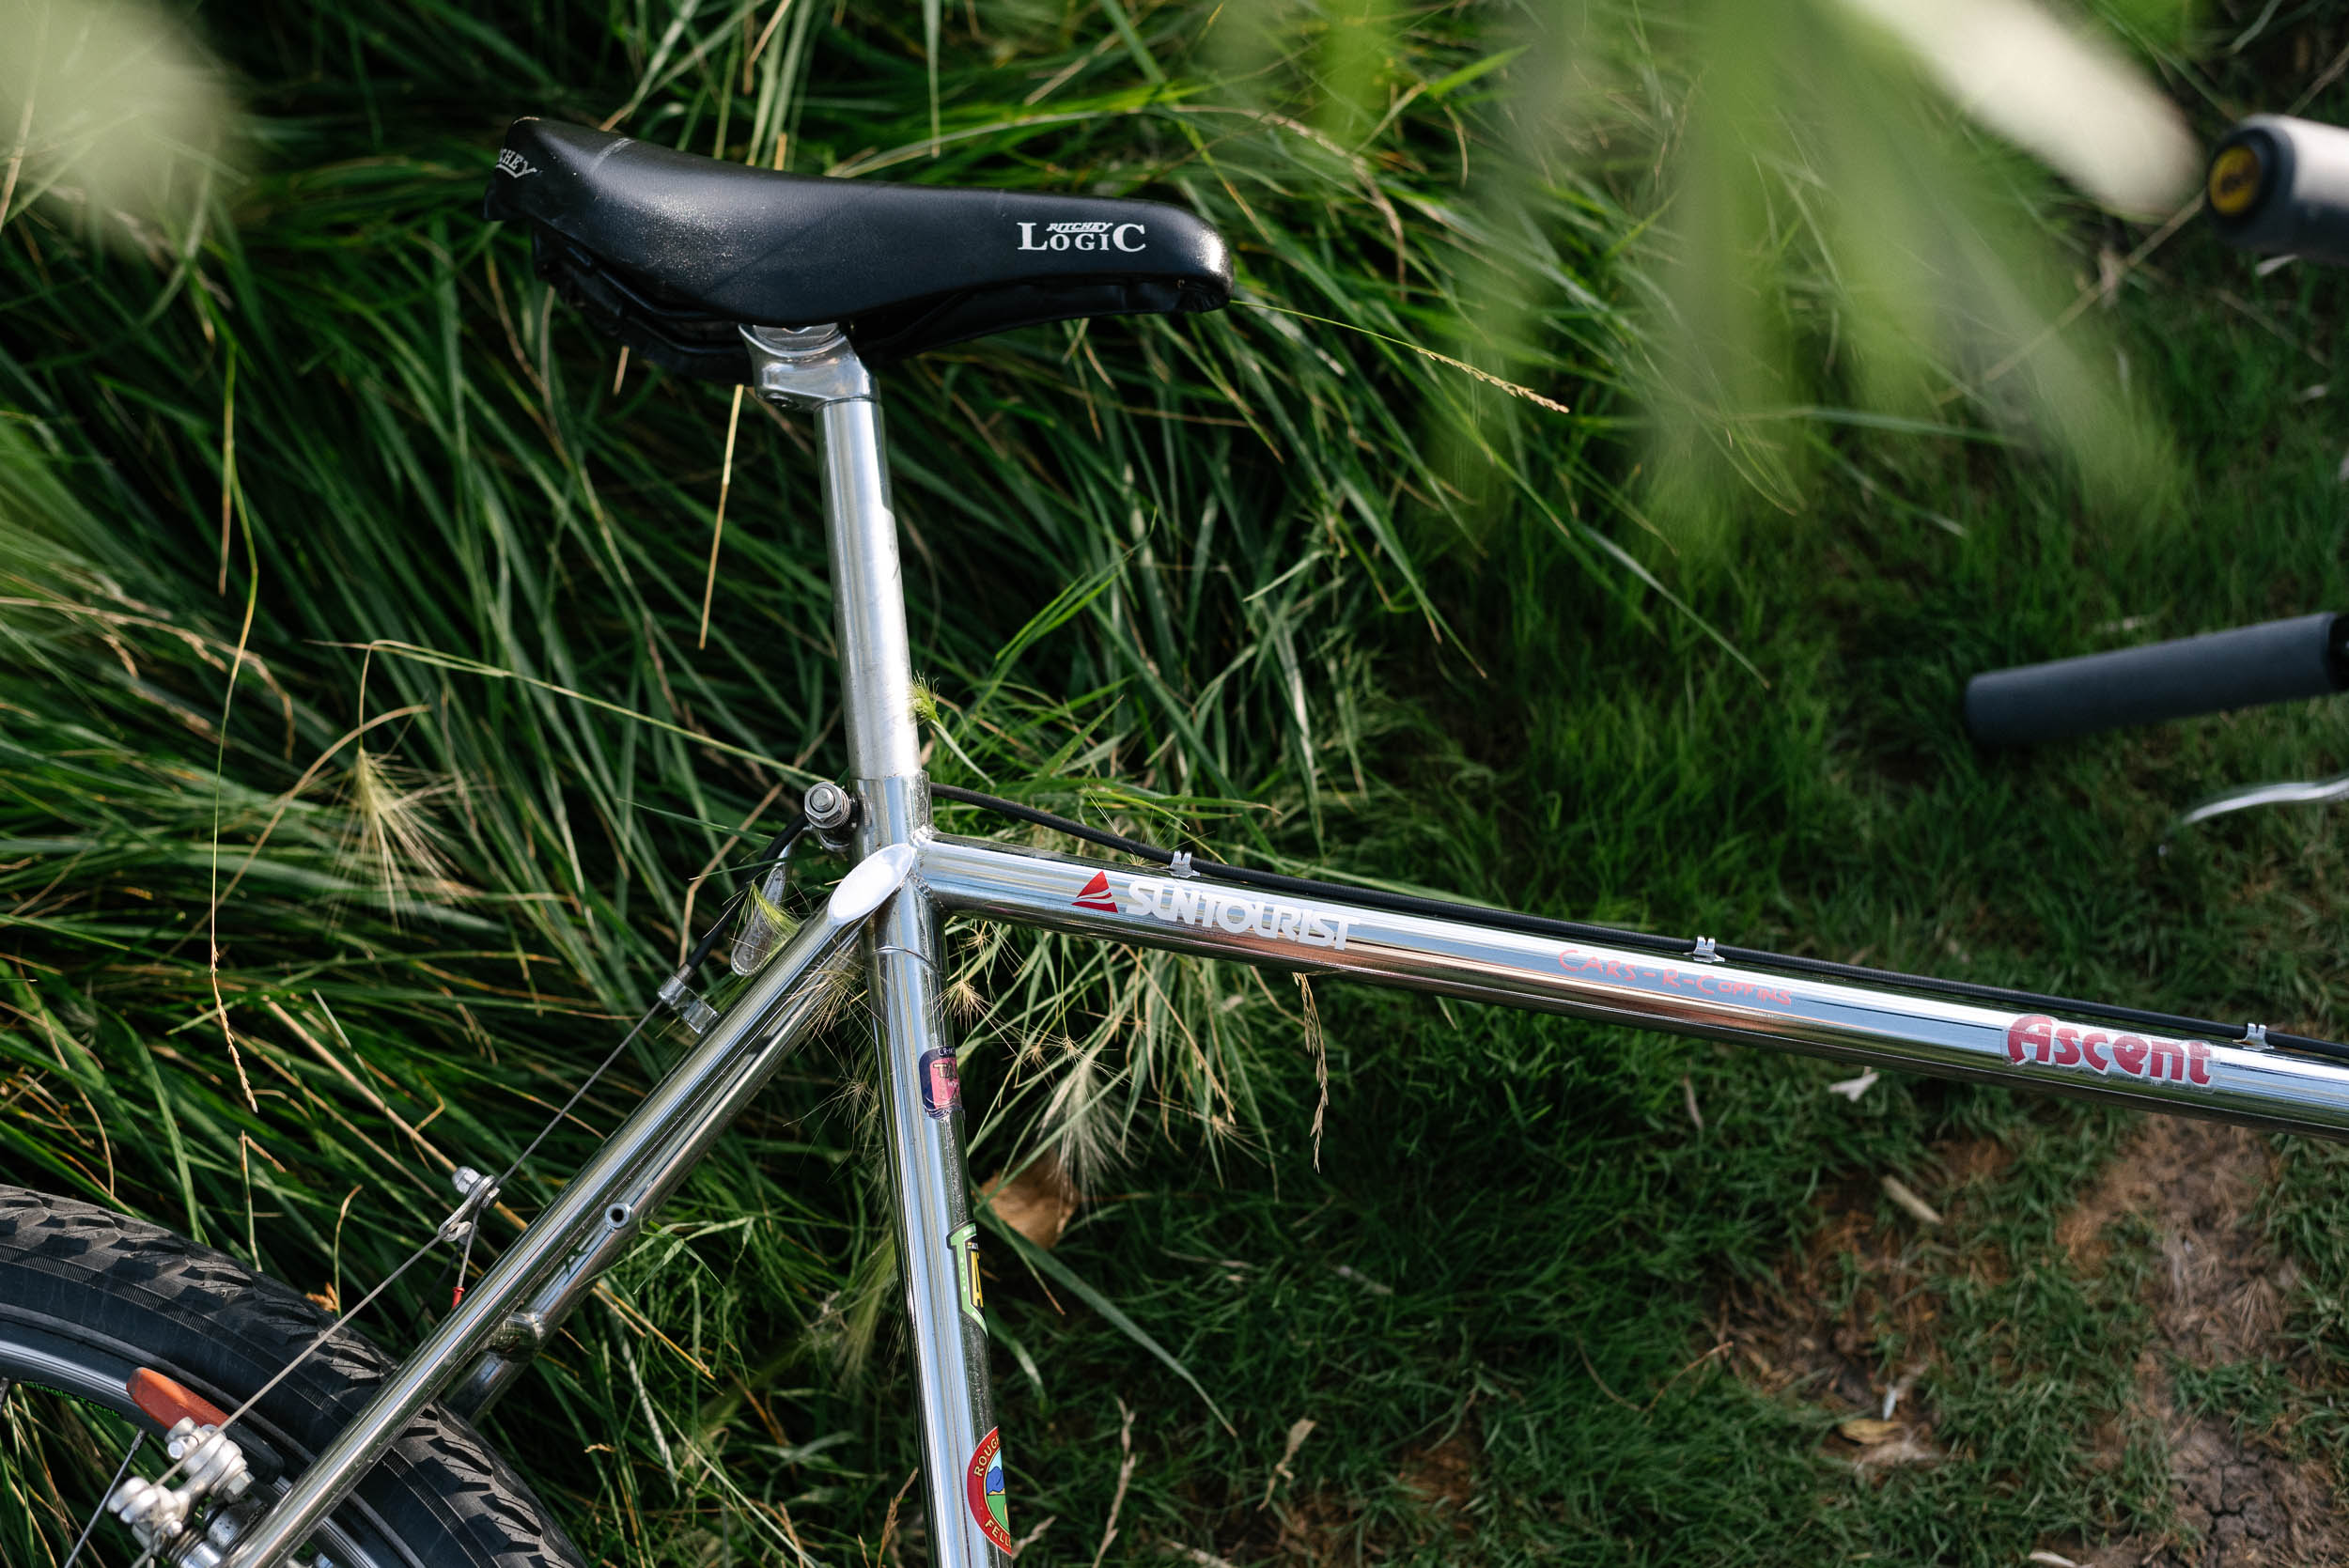
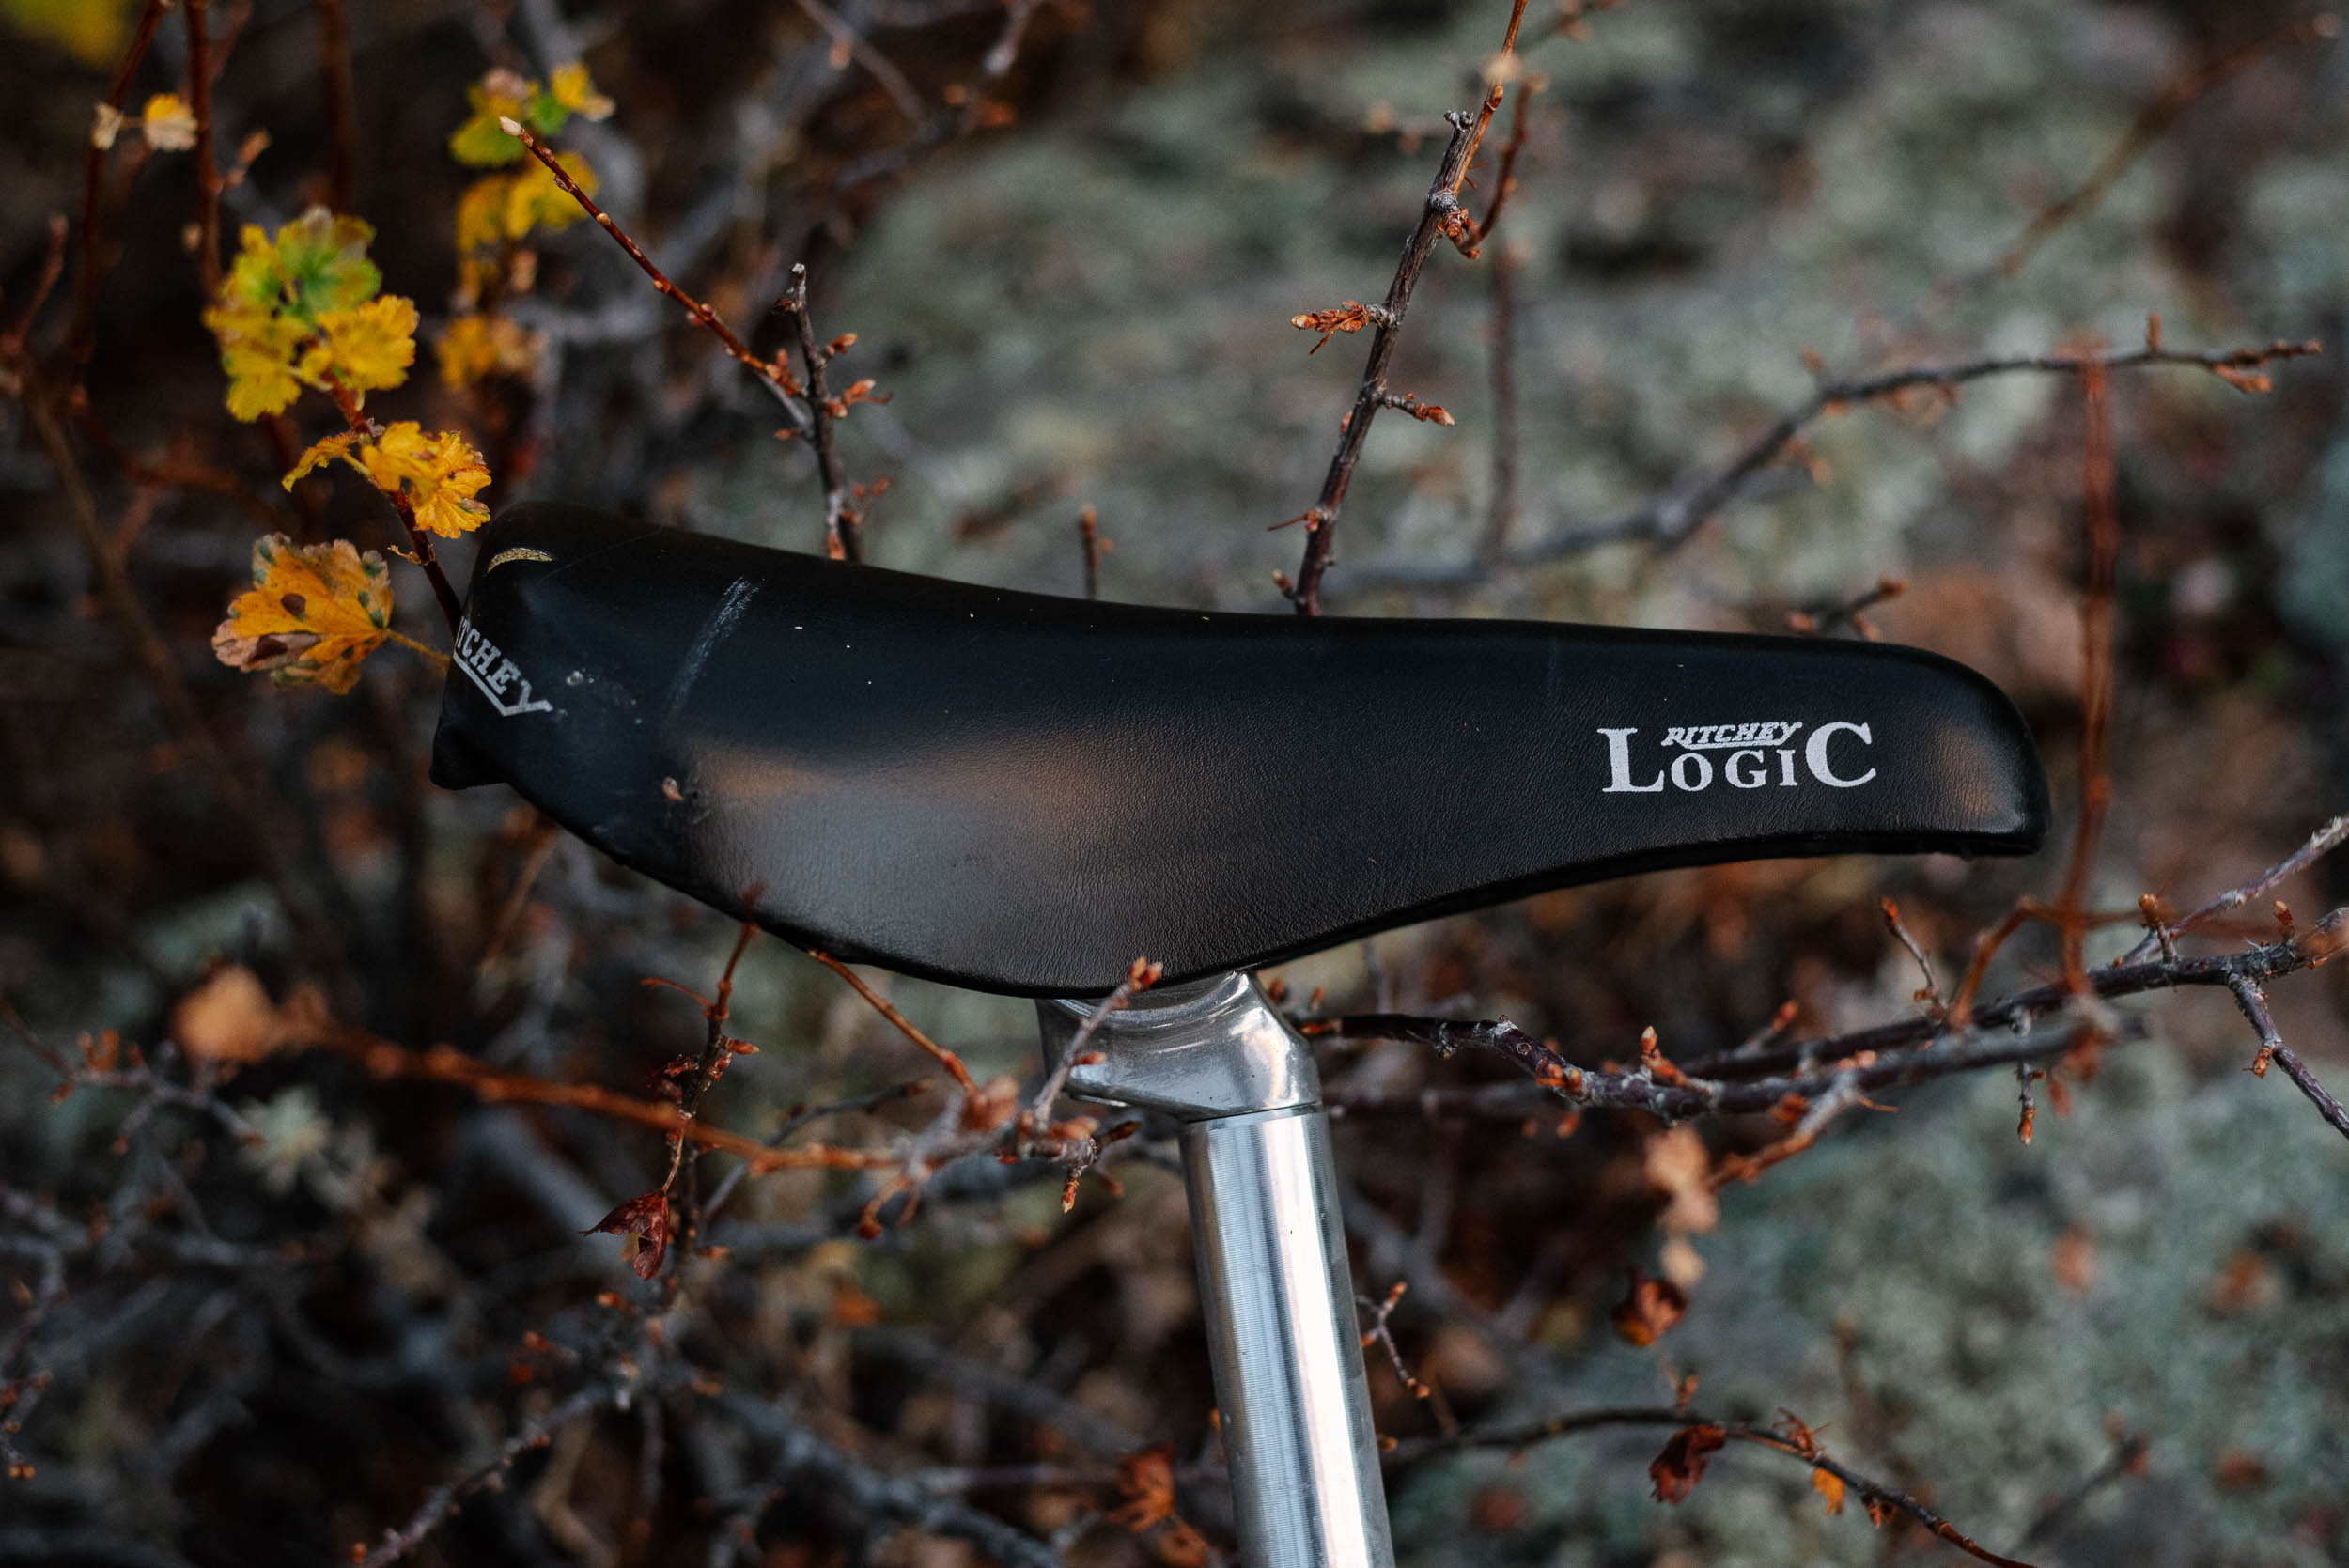
- Saddle: Ritchey Logic
- Seatpost: Unknown
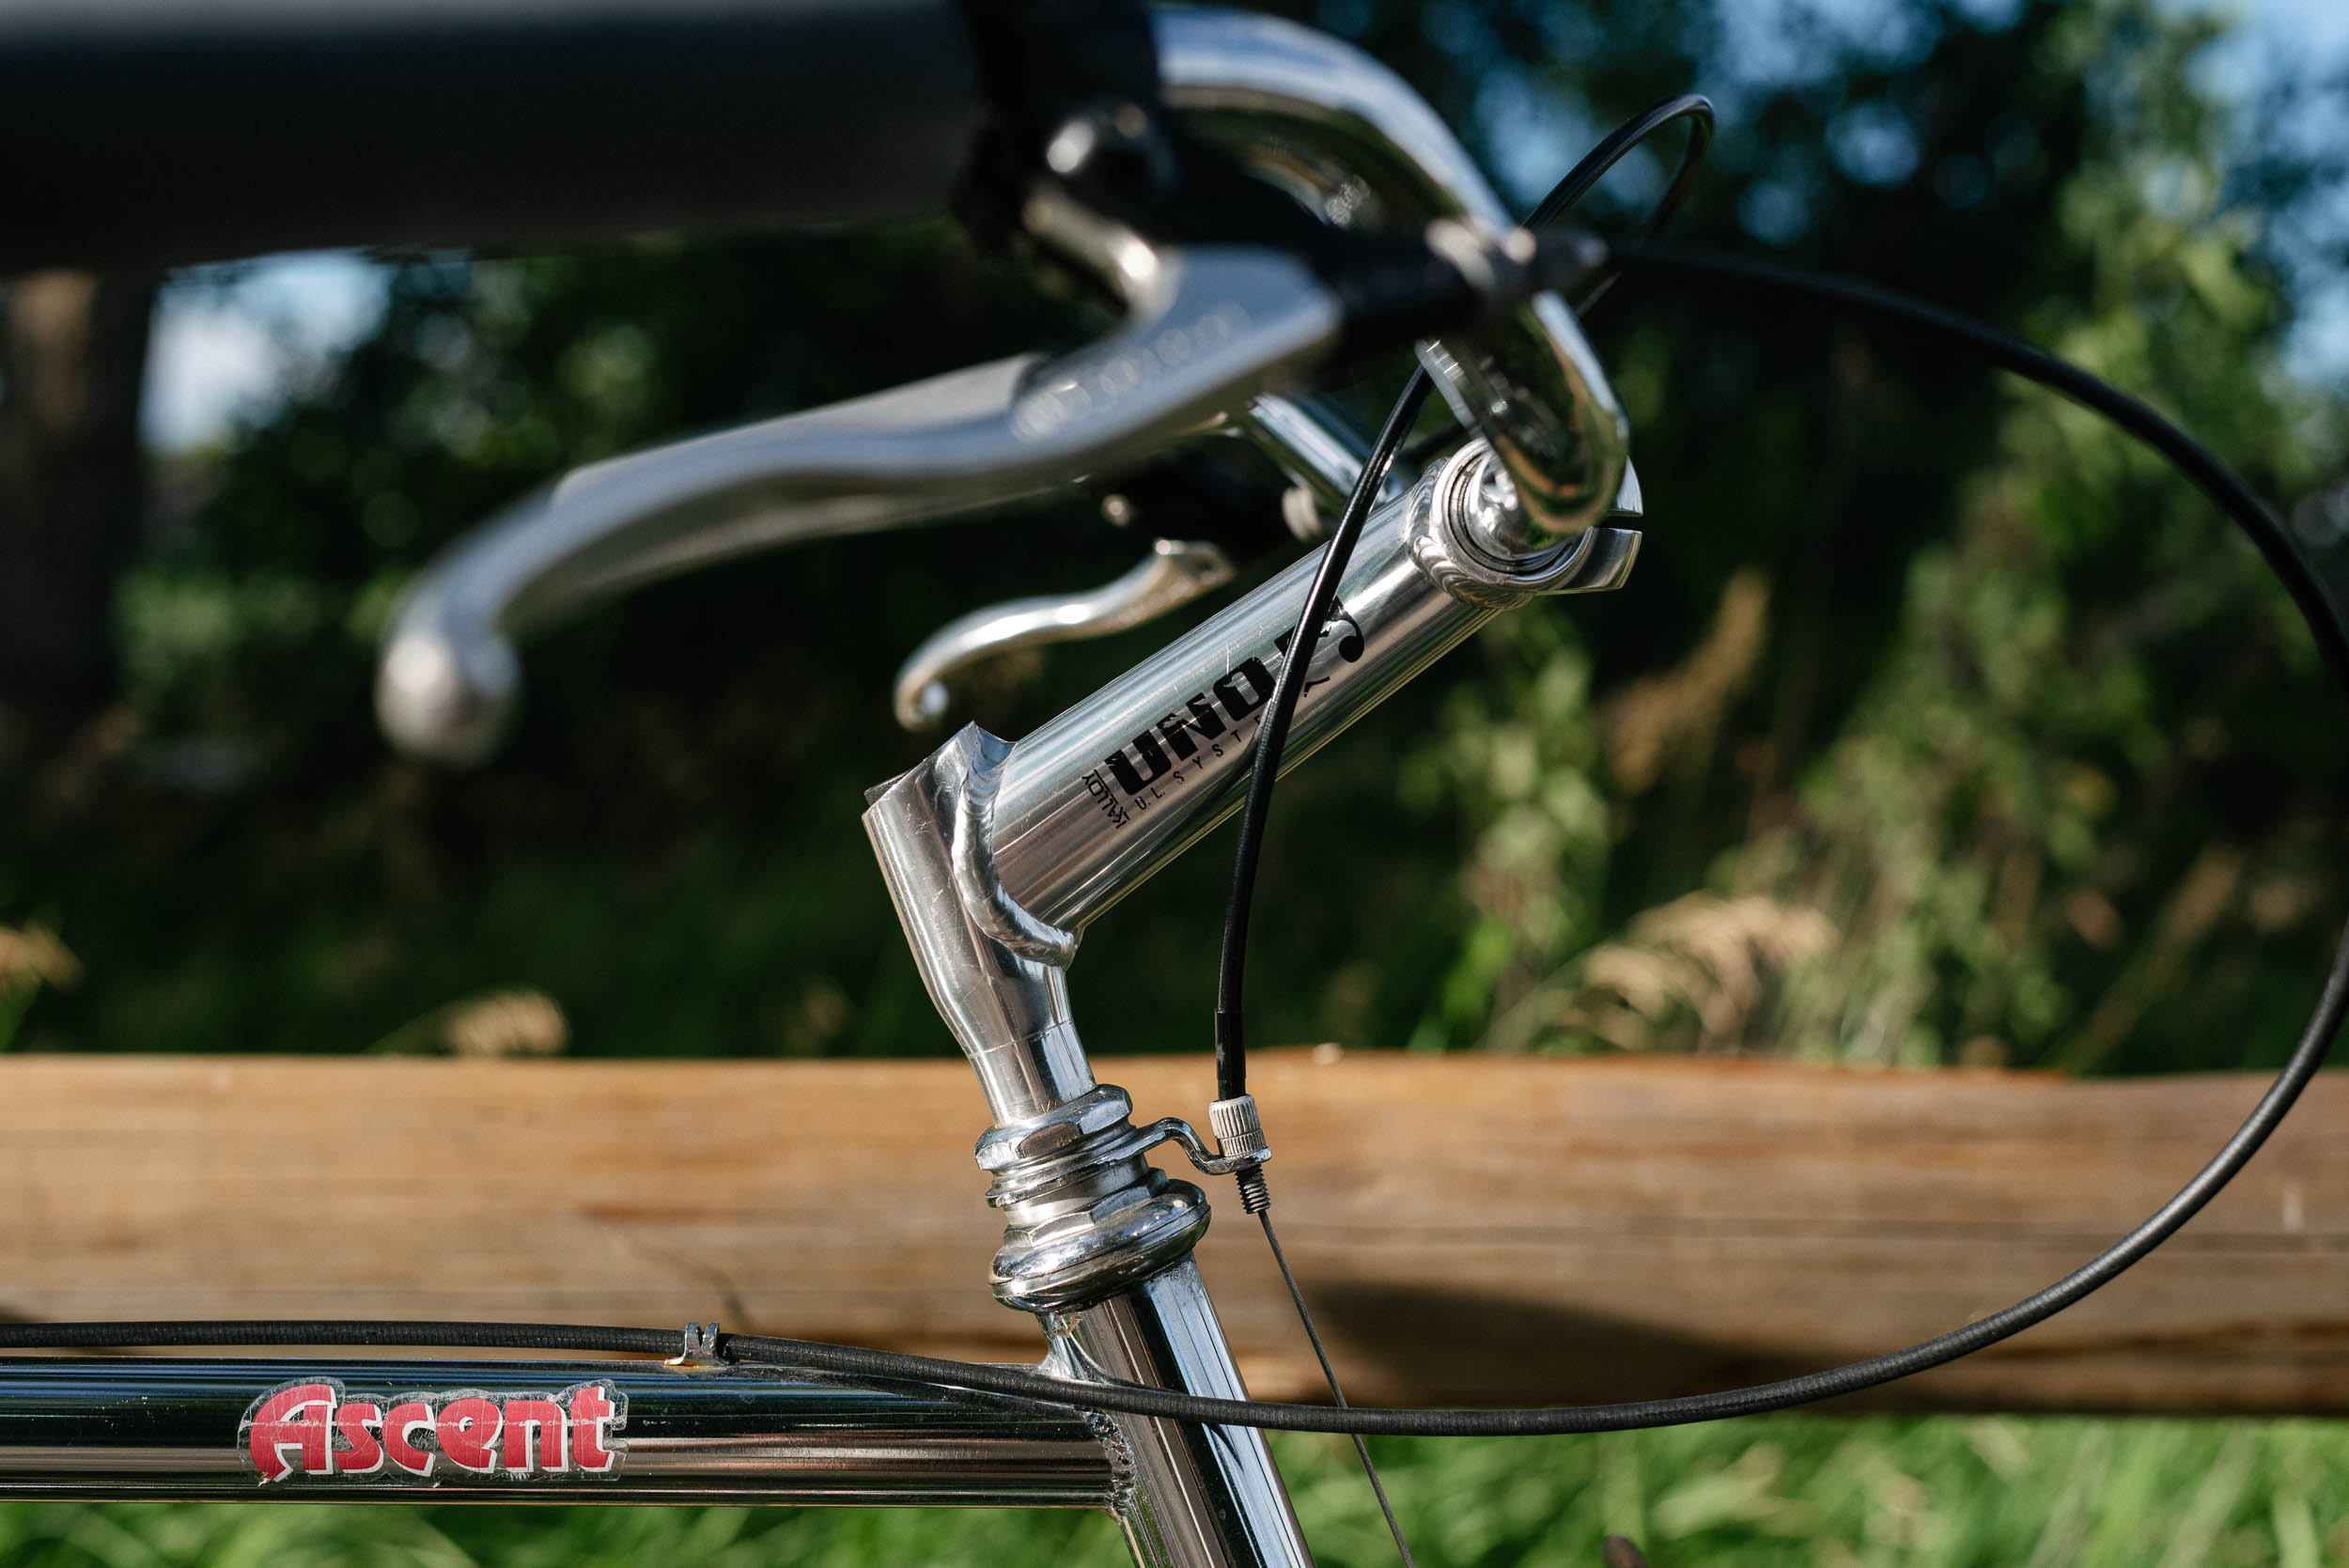
- Stem: Kalloy Uno
- Frame bags: Revelate Tangle Bag
- Front rack: Minoura KCL-3F Porteur Carrier Rack
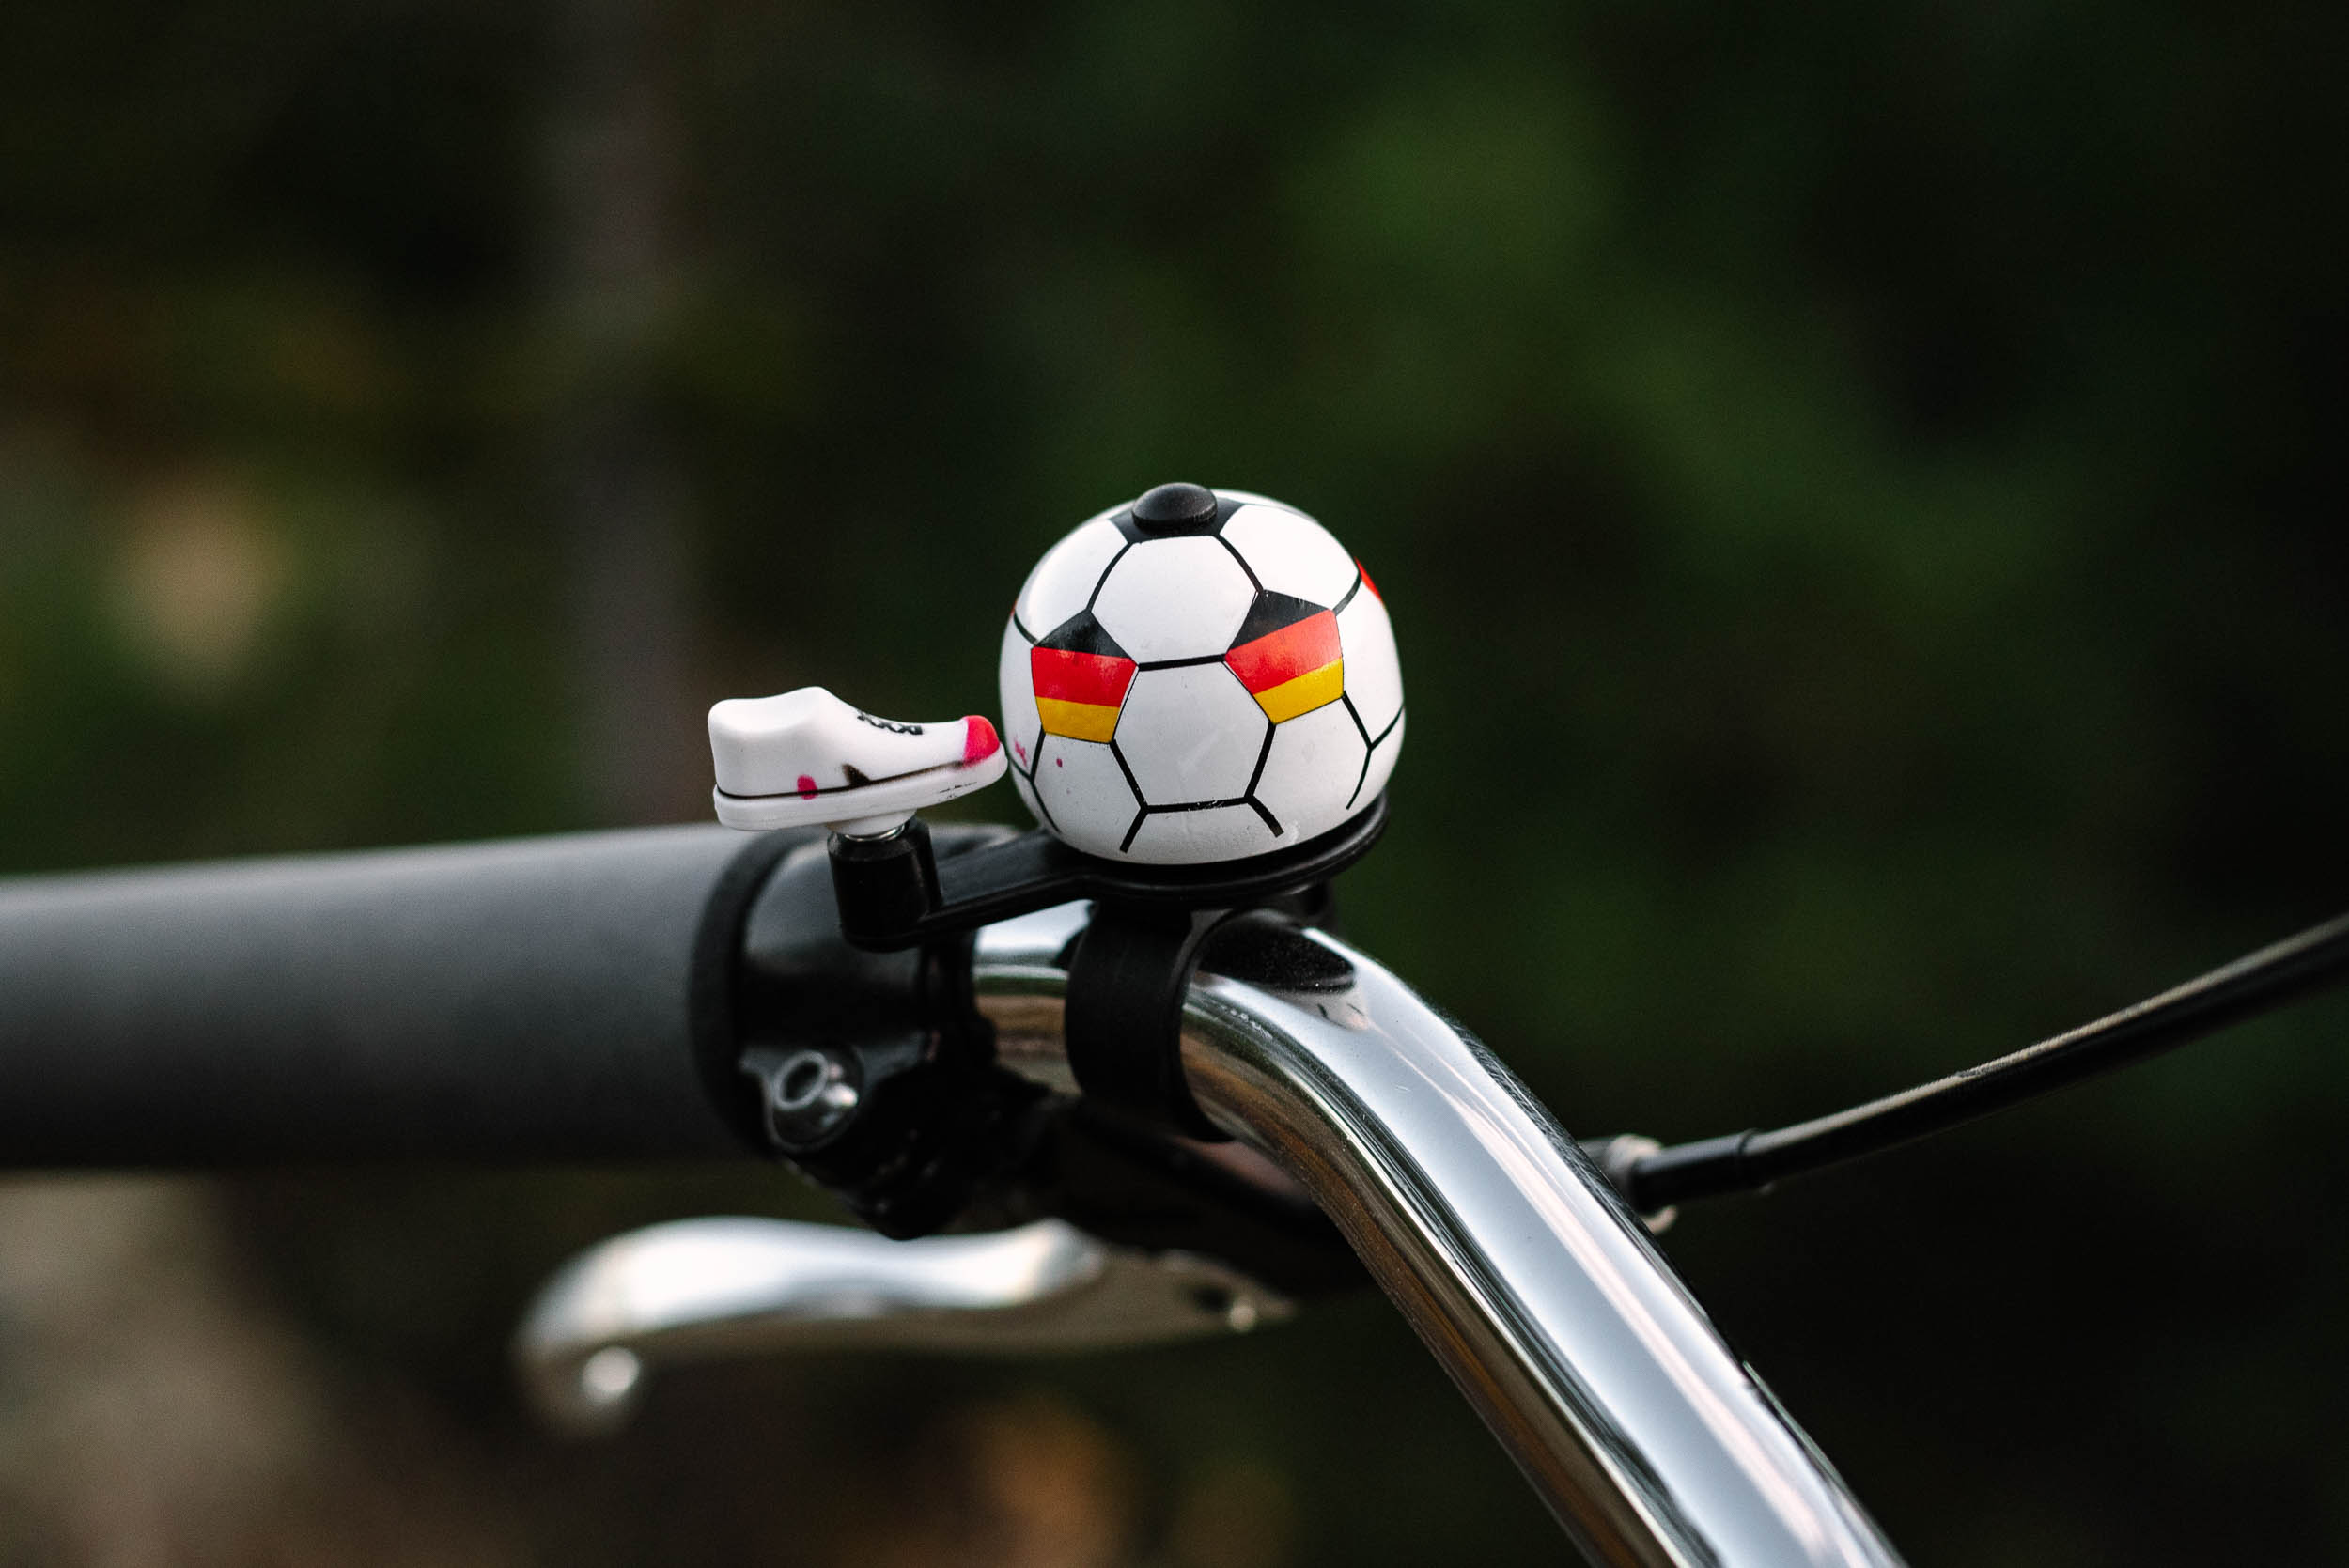
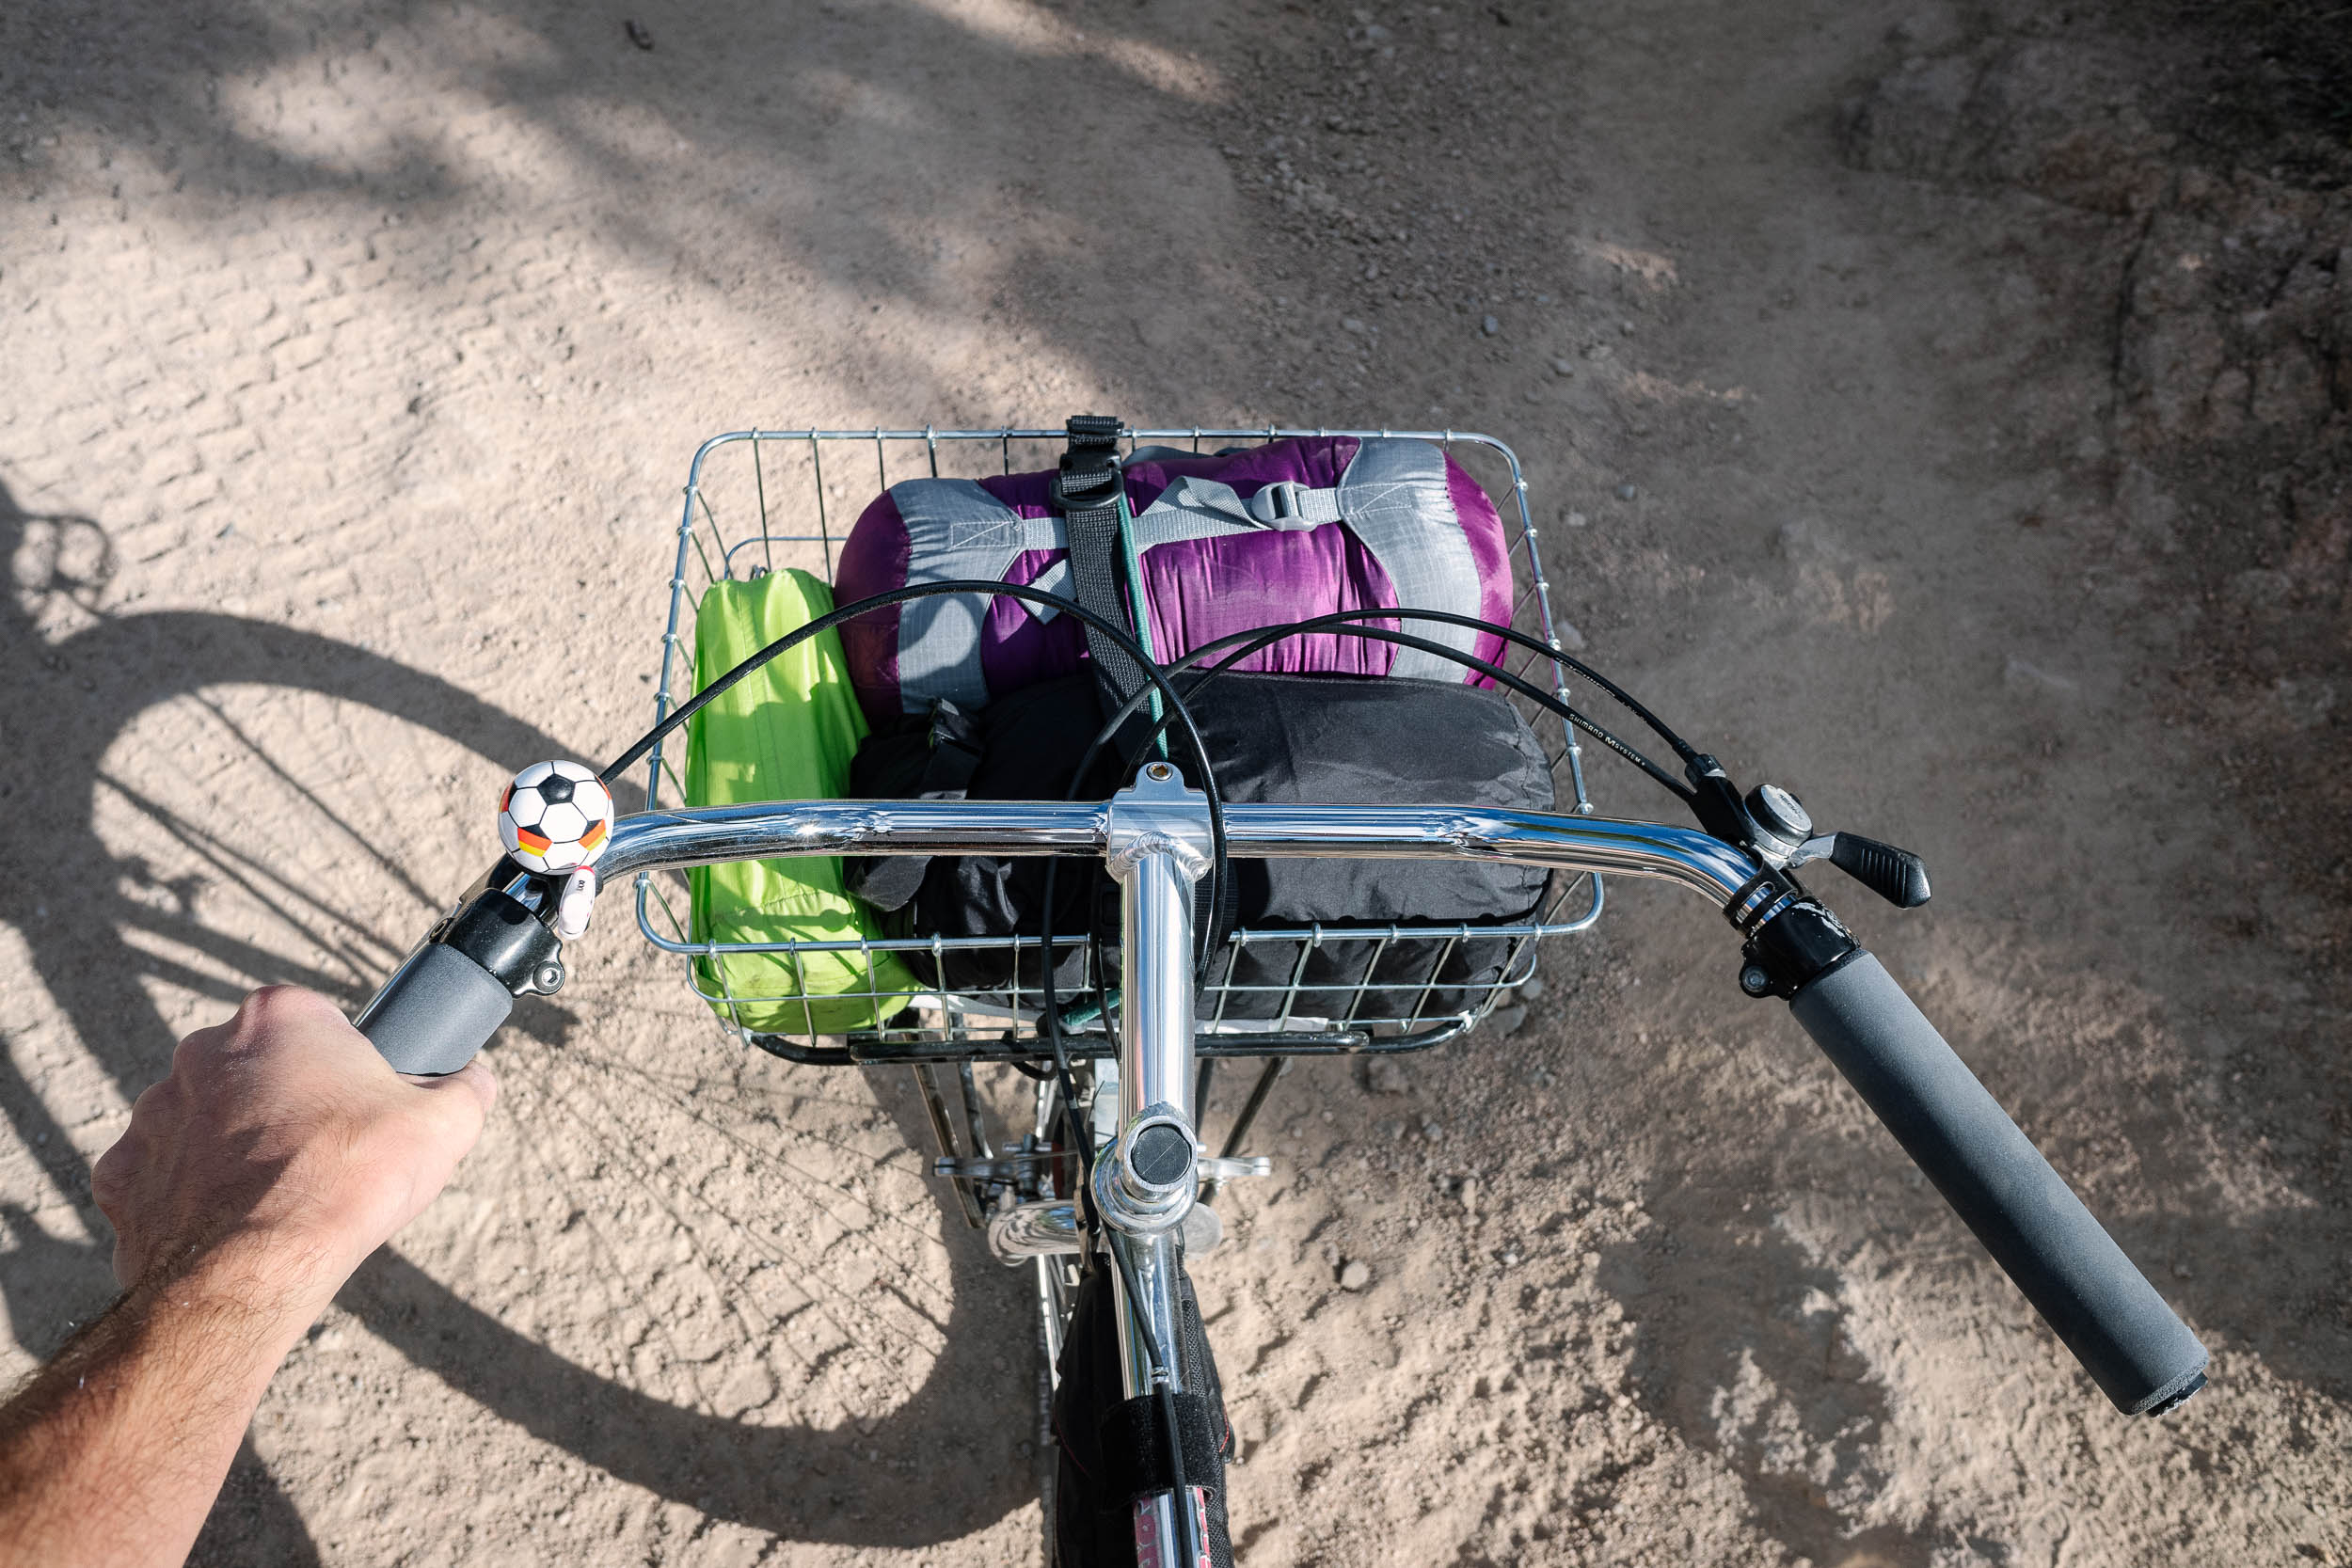
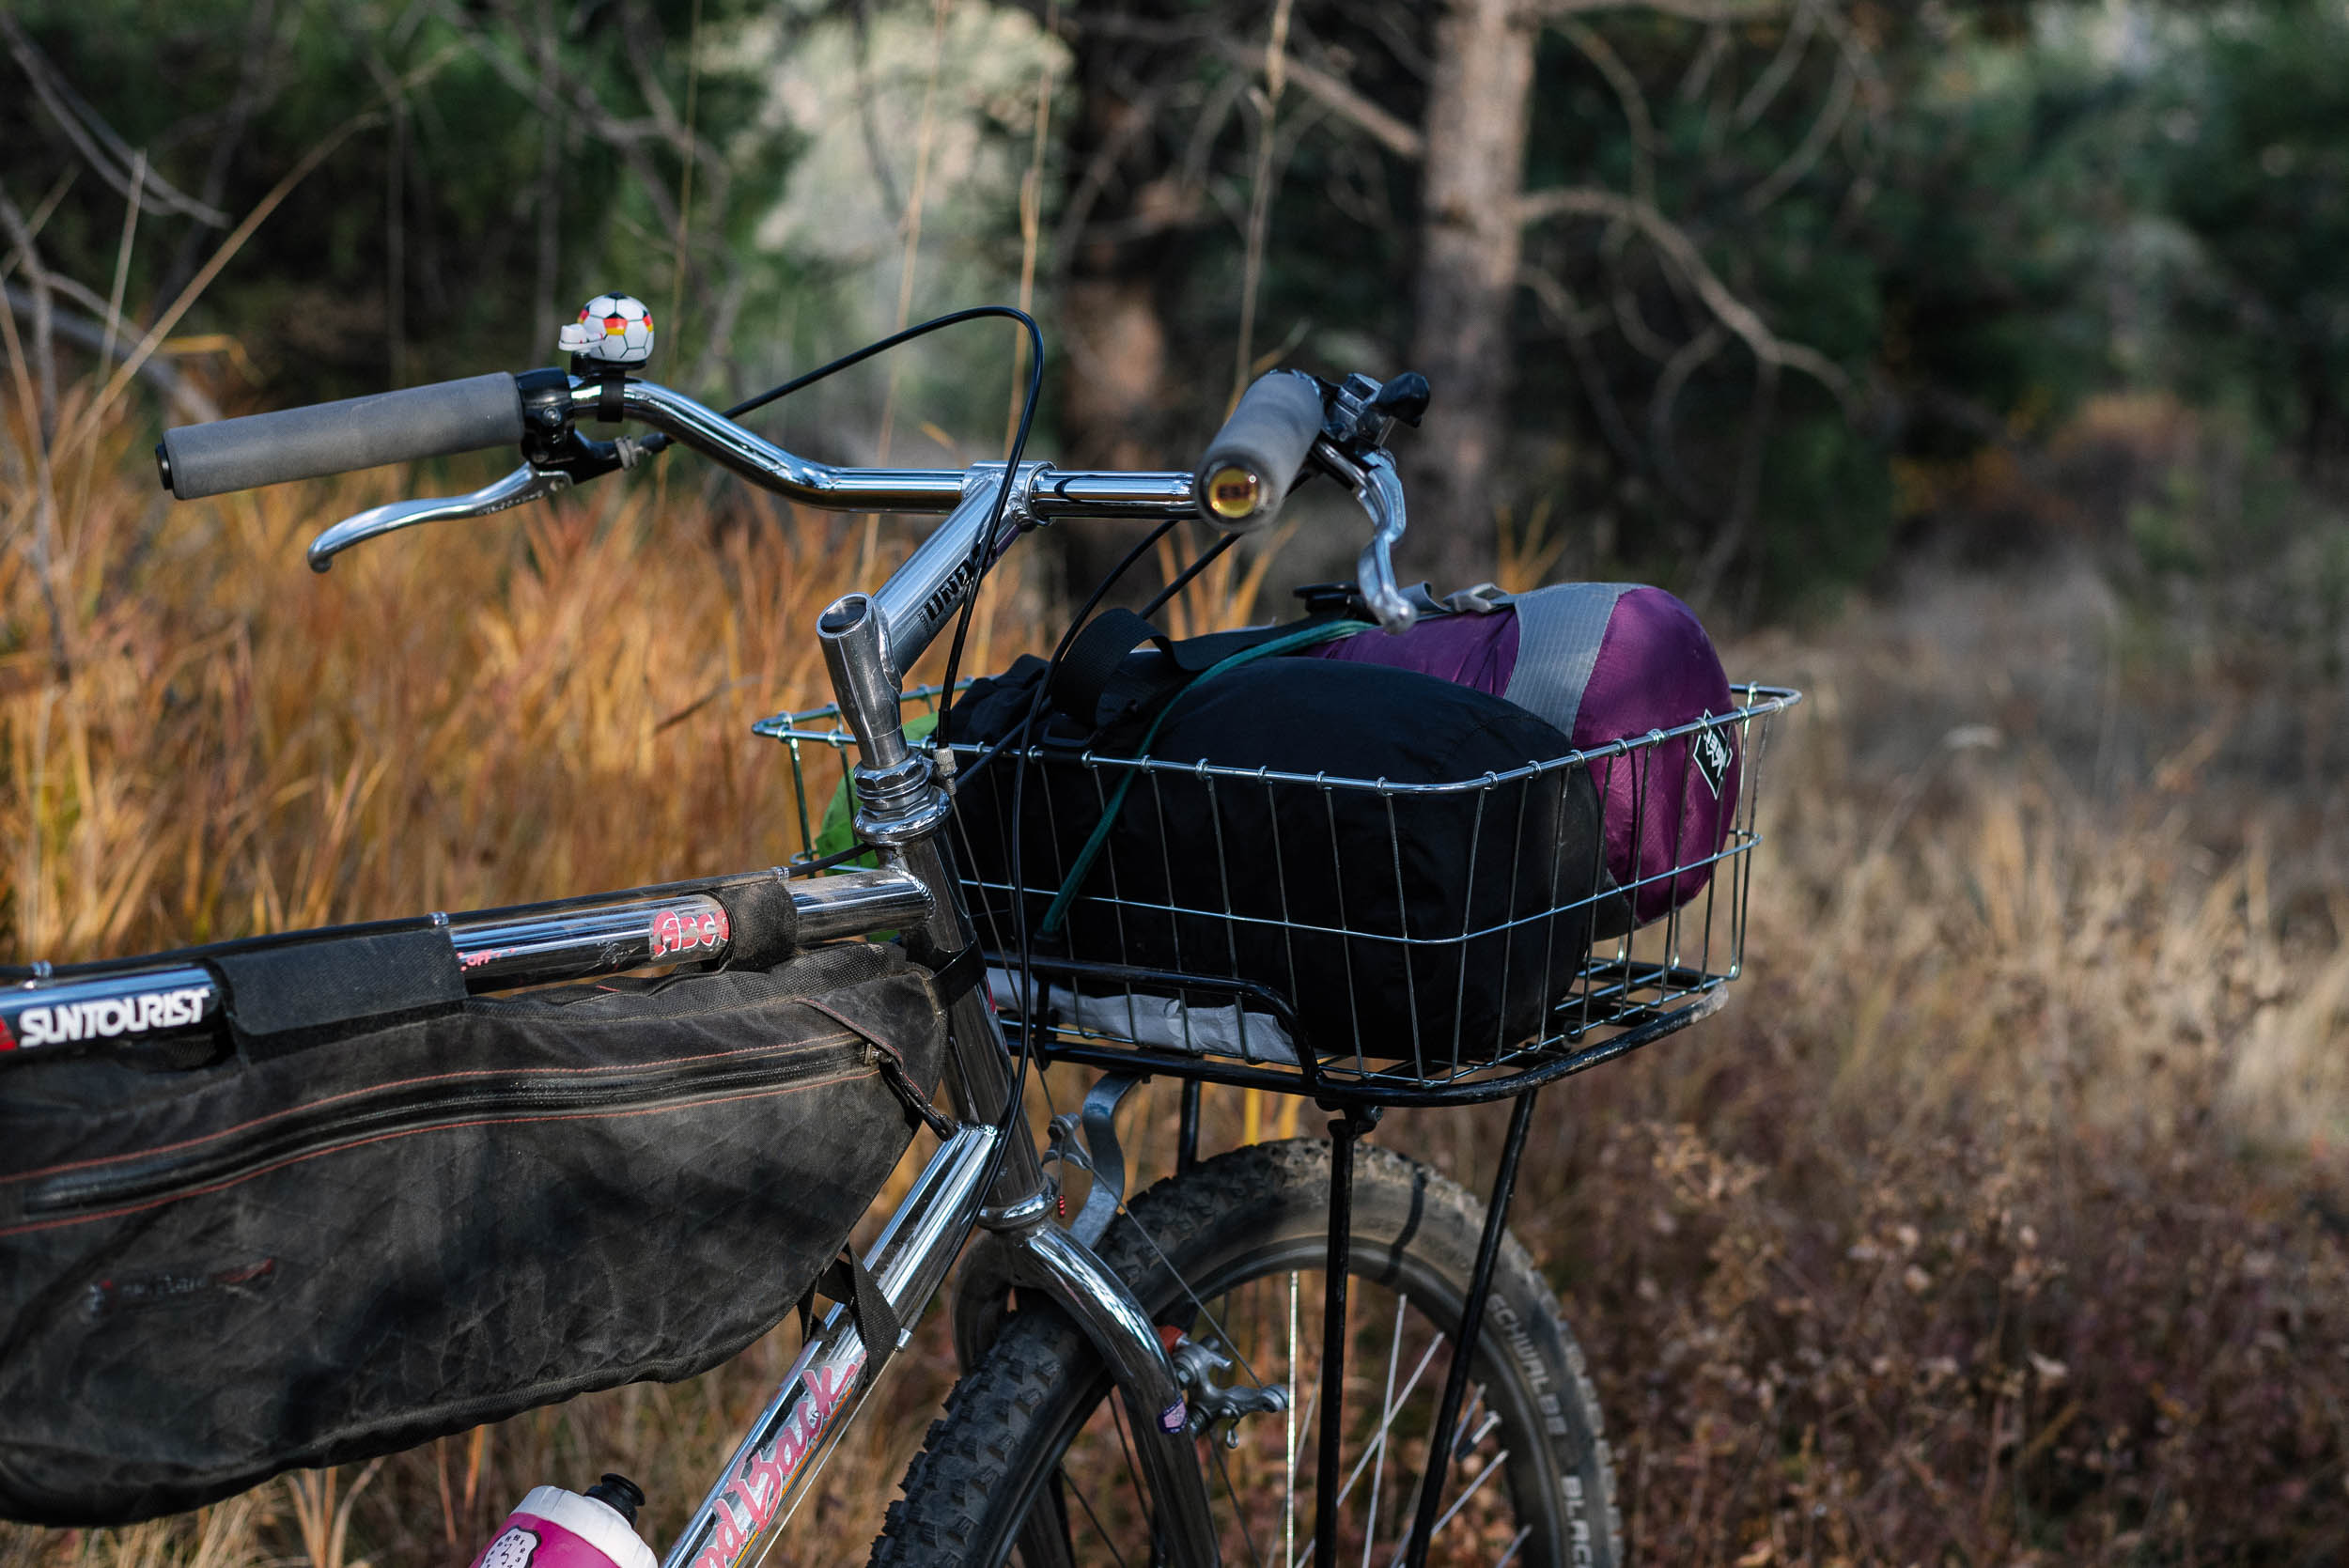
- Other accessories: Wald 139 Basket, German Soccer Ball Bell
My total cost for the build was $262 as you see it here. All things considered, I’m very pleased with how it came together at its price. The Diamondback was more than up to the task of hauling me and my gear out into the mountains for a night, and I wouldn’t hesitate to take it out for a longer trip over the right terrain. The 32 x 11-32 gearing range was less than ideal on both ends of the spectrum, but running a wider-range drivetrain—something like a microSHIFT Advent, for example—didn’t quite seem attainable within my budget. I got used to the saddle, too, but man, that thing is hard as a rock! The soccer ball bell performs abysmally, but I bought it for a few euros while living in Germany and have been waiting for the right project to unveil it. The tiny shoe brings me joy every time I use it, even if it’s mostly useless as a bell striker.
Component Highlights
Although there’s nothing particularly flashy on this build, I nonetheless grew to love a handful of components and accessories. In particular, the following bits stood out for their performance and utility:
Minoura Porteur Carrier Rack
Eminently useful, a porteur rack is ideal for hauling a rack bag (such as the ILE Porteur Rackbag, a personal favorite that’s sadly out of budget) or a basket. The one I found for cheap has some lovely patina and has served me well for hauling a wide variety of cargo.
ESI Chunky XL Grips
While it’s true that ESI grips wear out relatively quickly, there’s some magic to the comfort they provide, especially in the extra-large size. Paired with the generously backswept Wald bars, they offered a couple of comfy hand positions and plenty of cushion to soak up bumps.
Wald 139 Basket
I’ve gone back and forth between preferring the smaller Wald 137 and oversized Wald 139 over the years, but the experience of commuting on this bike for a few months has me squarely back in the jumbo Wald 139 camp. It’s exceedingly practical for everyday life and loaded touring alike.
Shimano Deore LX Hubs
It’s hard to beat old Shimano stuff. Especially for being 30+ years old, the Shimano Deore LX hubs are buttery smooth after a quick service, and I have a feeling they’ll live on for another few decades. They don’t make ’em like this any longer.
In Praise of Bike Co-Ops
Building up my Diamondback without breaking the bank was only possible with the help of a few area bike co-ops. We’re fortunate to have several great co-ops here in the Colorado Front Range, and I’ve spent many hours at them digging through bins for parts and spares to suit various projects, almost always finding exactly what I needed (and some things I didn’t that mysteriously ended up in my basket anyway).
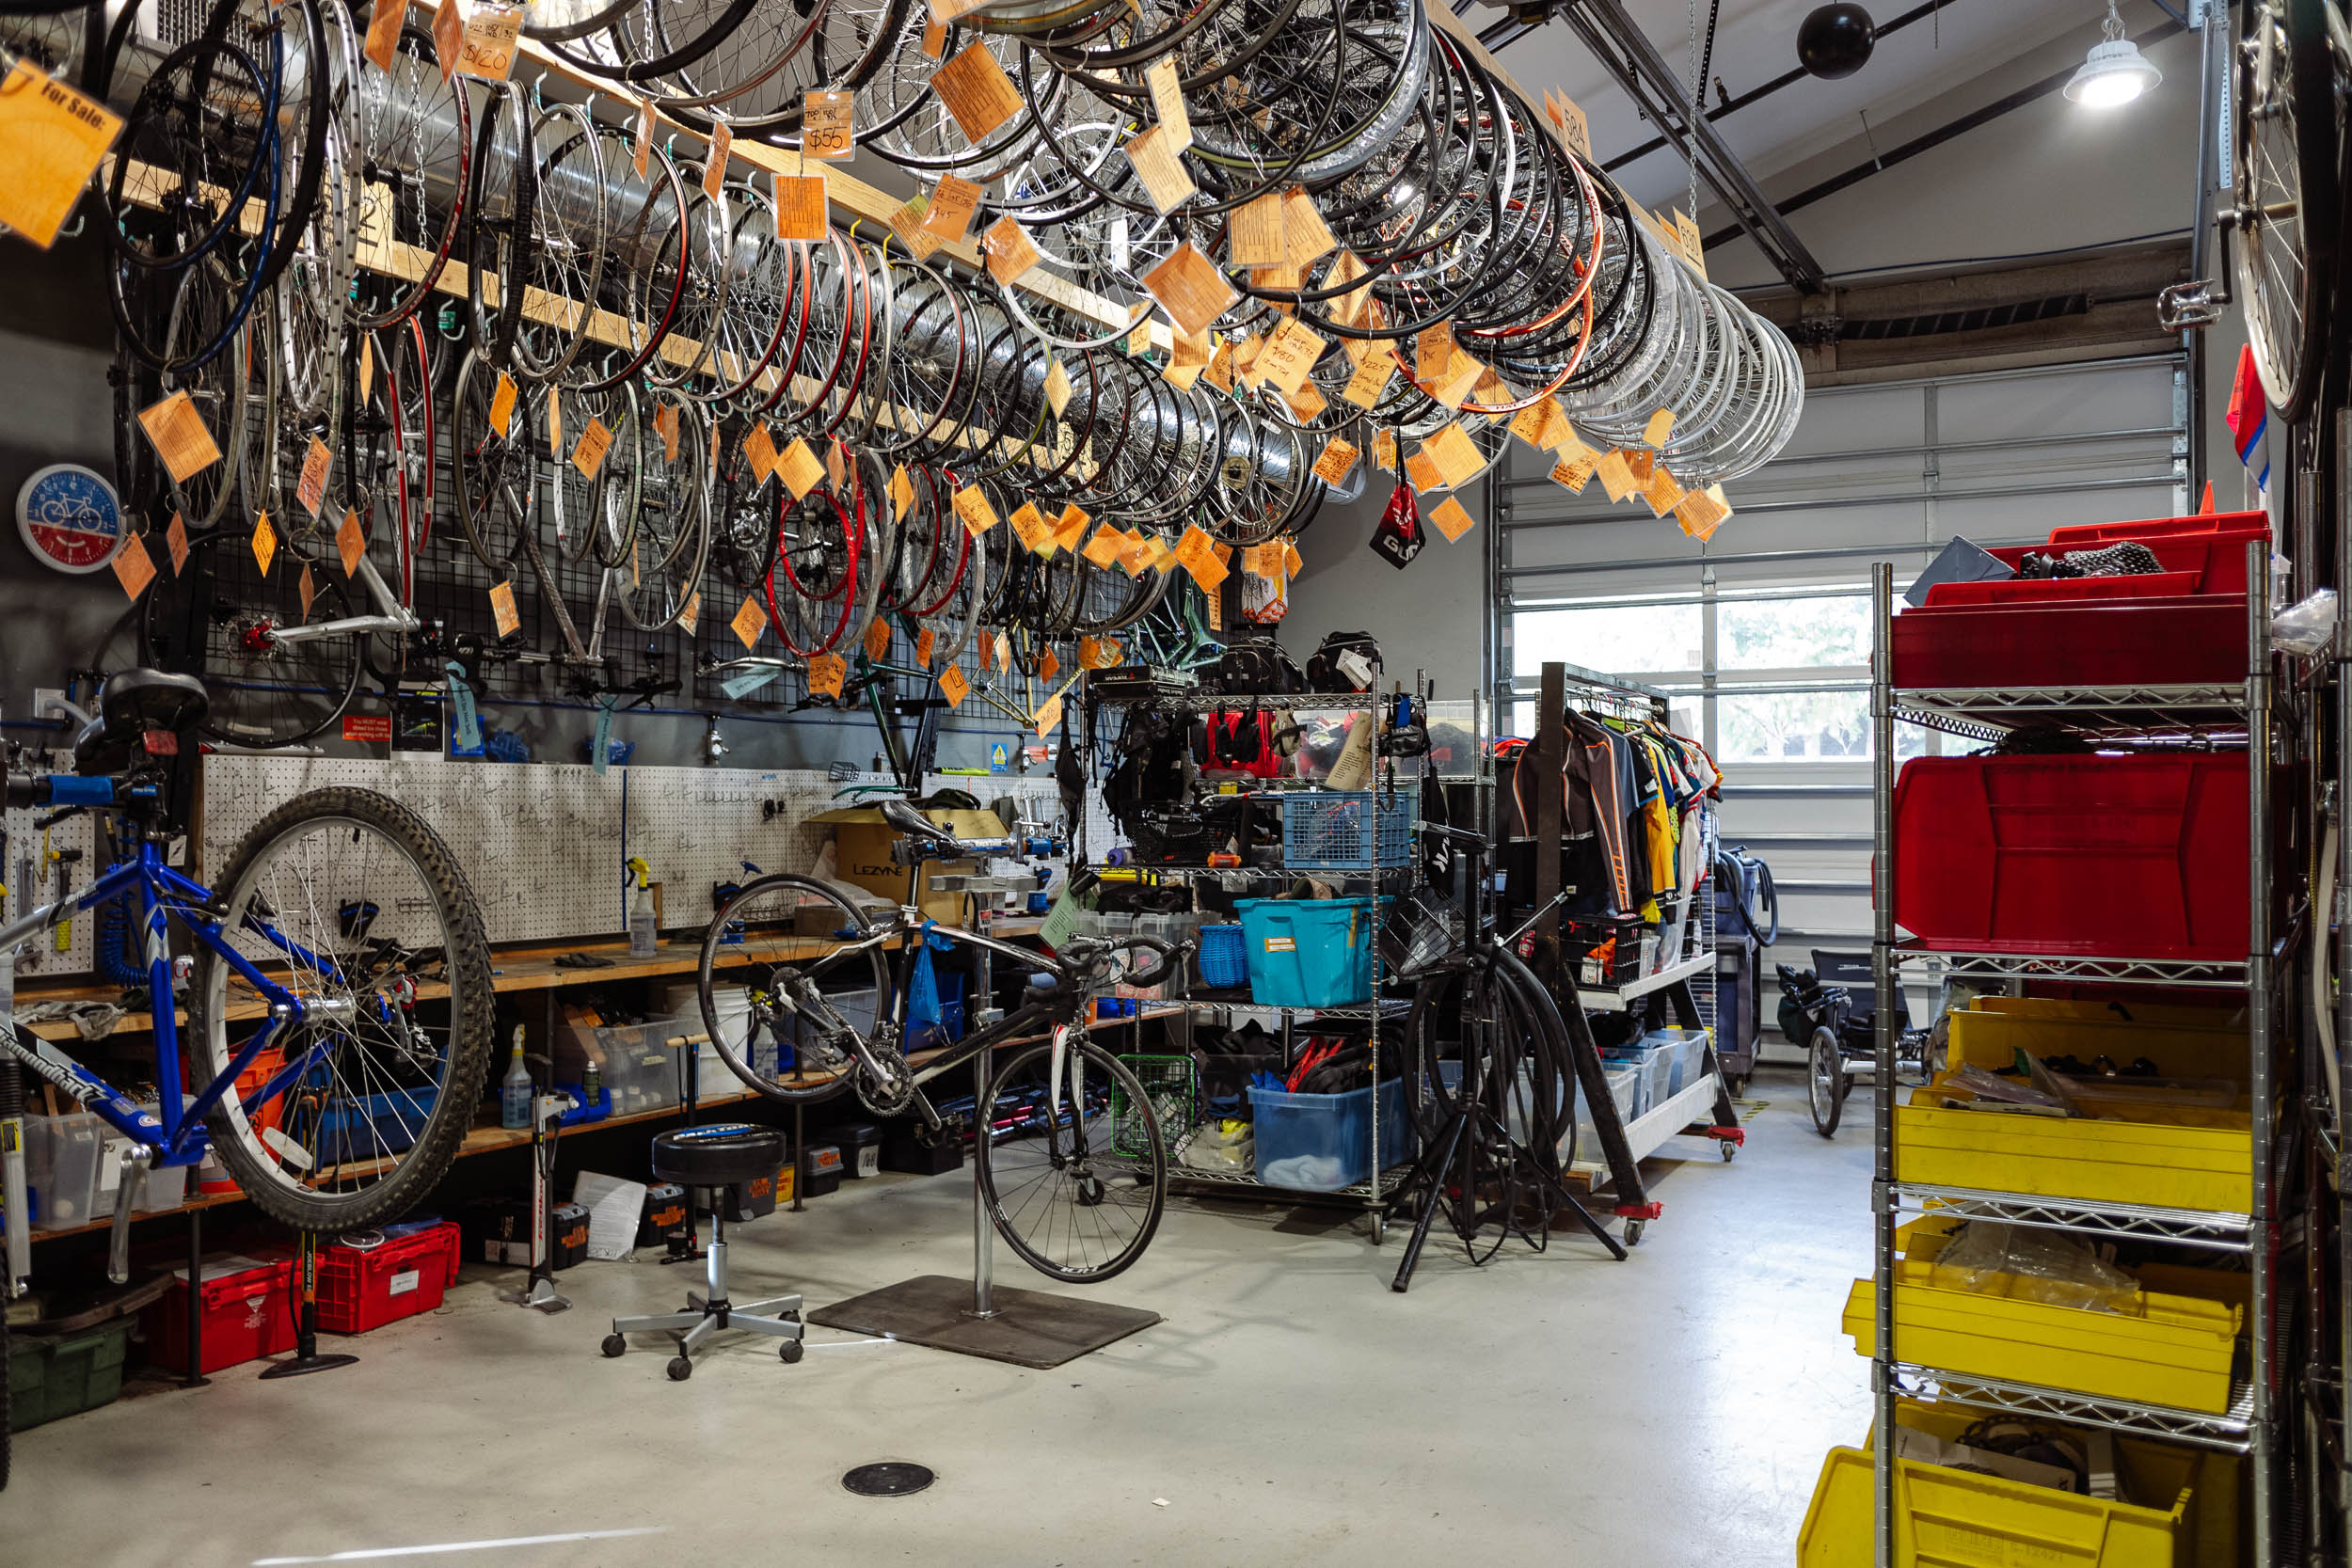
For folks visiting or living in the area, I highly recommend Community Cycles in Boulder and Bikes Together and Lucky Bikes Re-Cyclery (they’re readers of the site and a particularly friendly crew) in the Denver area. All of them have heaping piles of brakes, seatposts, derailleurs, hubs—you name it—all at fair prices. Plus, they’re run by a mix of passionate staff and volunteers who offer various education/outreach programs to engage the community. Buying from them is an excellent way to find obscure bits and bobs and support their work simultaneously.
Finding Camping Gear on a Budget
A lot of outdoor gear is prohibitively expensive these days, which can undoubtedly feel like a major for hurdle for folks just getting started. If you’re in the market for camping gear, don’t let the retail prices of new gear put you off; there are many great resources for finding new and used equipment at more sensible price points. I’ll share a few below.
One easy route for this project would have been to browse around a site such as Amazon or AliExpress, which offer nearly endless options for inexpensive new gear that would likely serve you perfectly well. However, I try to make a point of not buying from those sites, and I felt better about repurposing old gear rather than buying new products that I don’t have any real need for beyond the scope of the build-off.
In search of used gear, I turned to my local Facebook Marketplace and Craigslist, both of which abound with surprisingly affordable, quality gear. I acknowledge that I’m fortunate to live near two cities full of people interested in the outdoors, so finding good gear on a realistic budget turned out to be a more manageable piece of the puzzle than I anticipated. And, similar to the nearby bike co-ops, I also have access to some excellent secondhand gear retailers, such as Wilderness Exchange and FERAL in Denver.
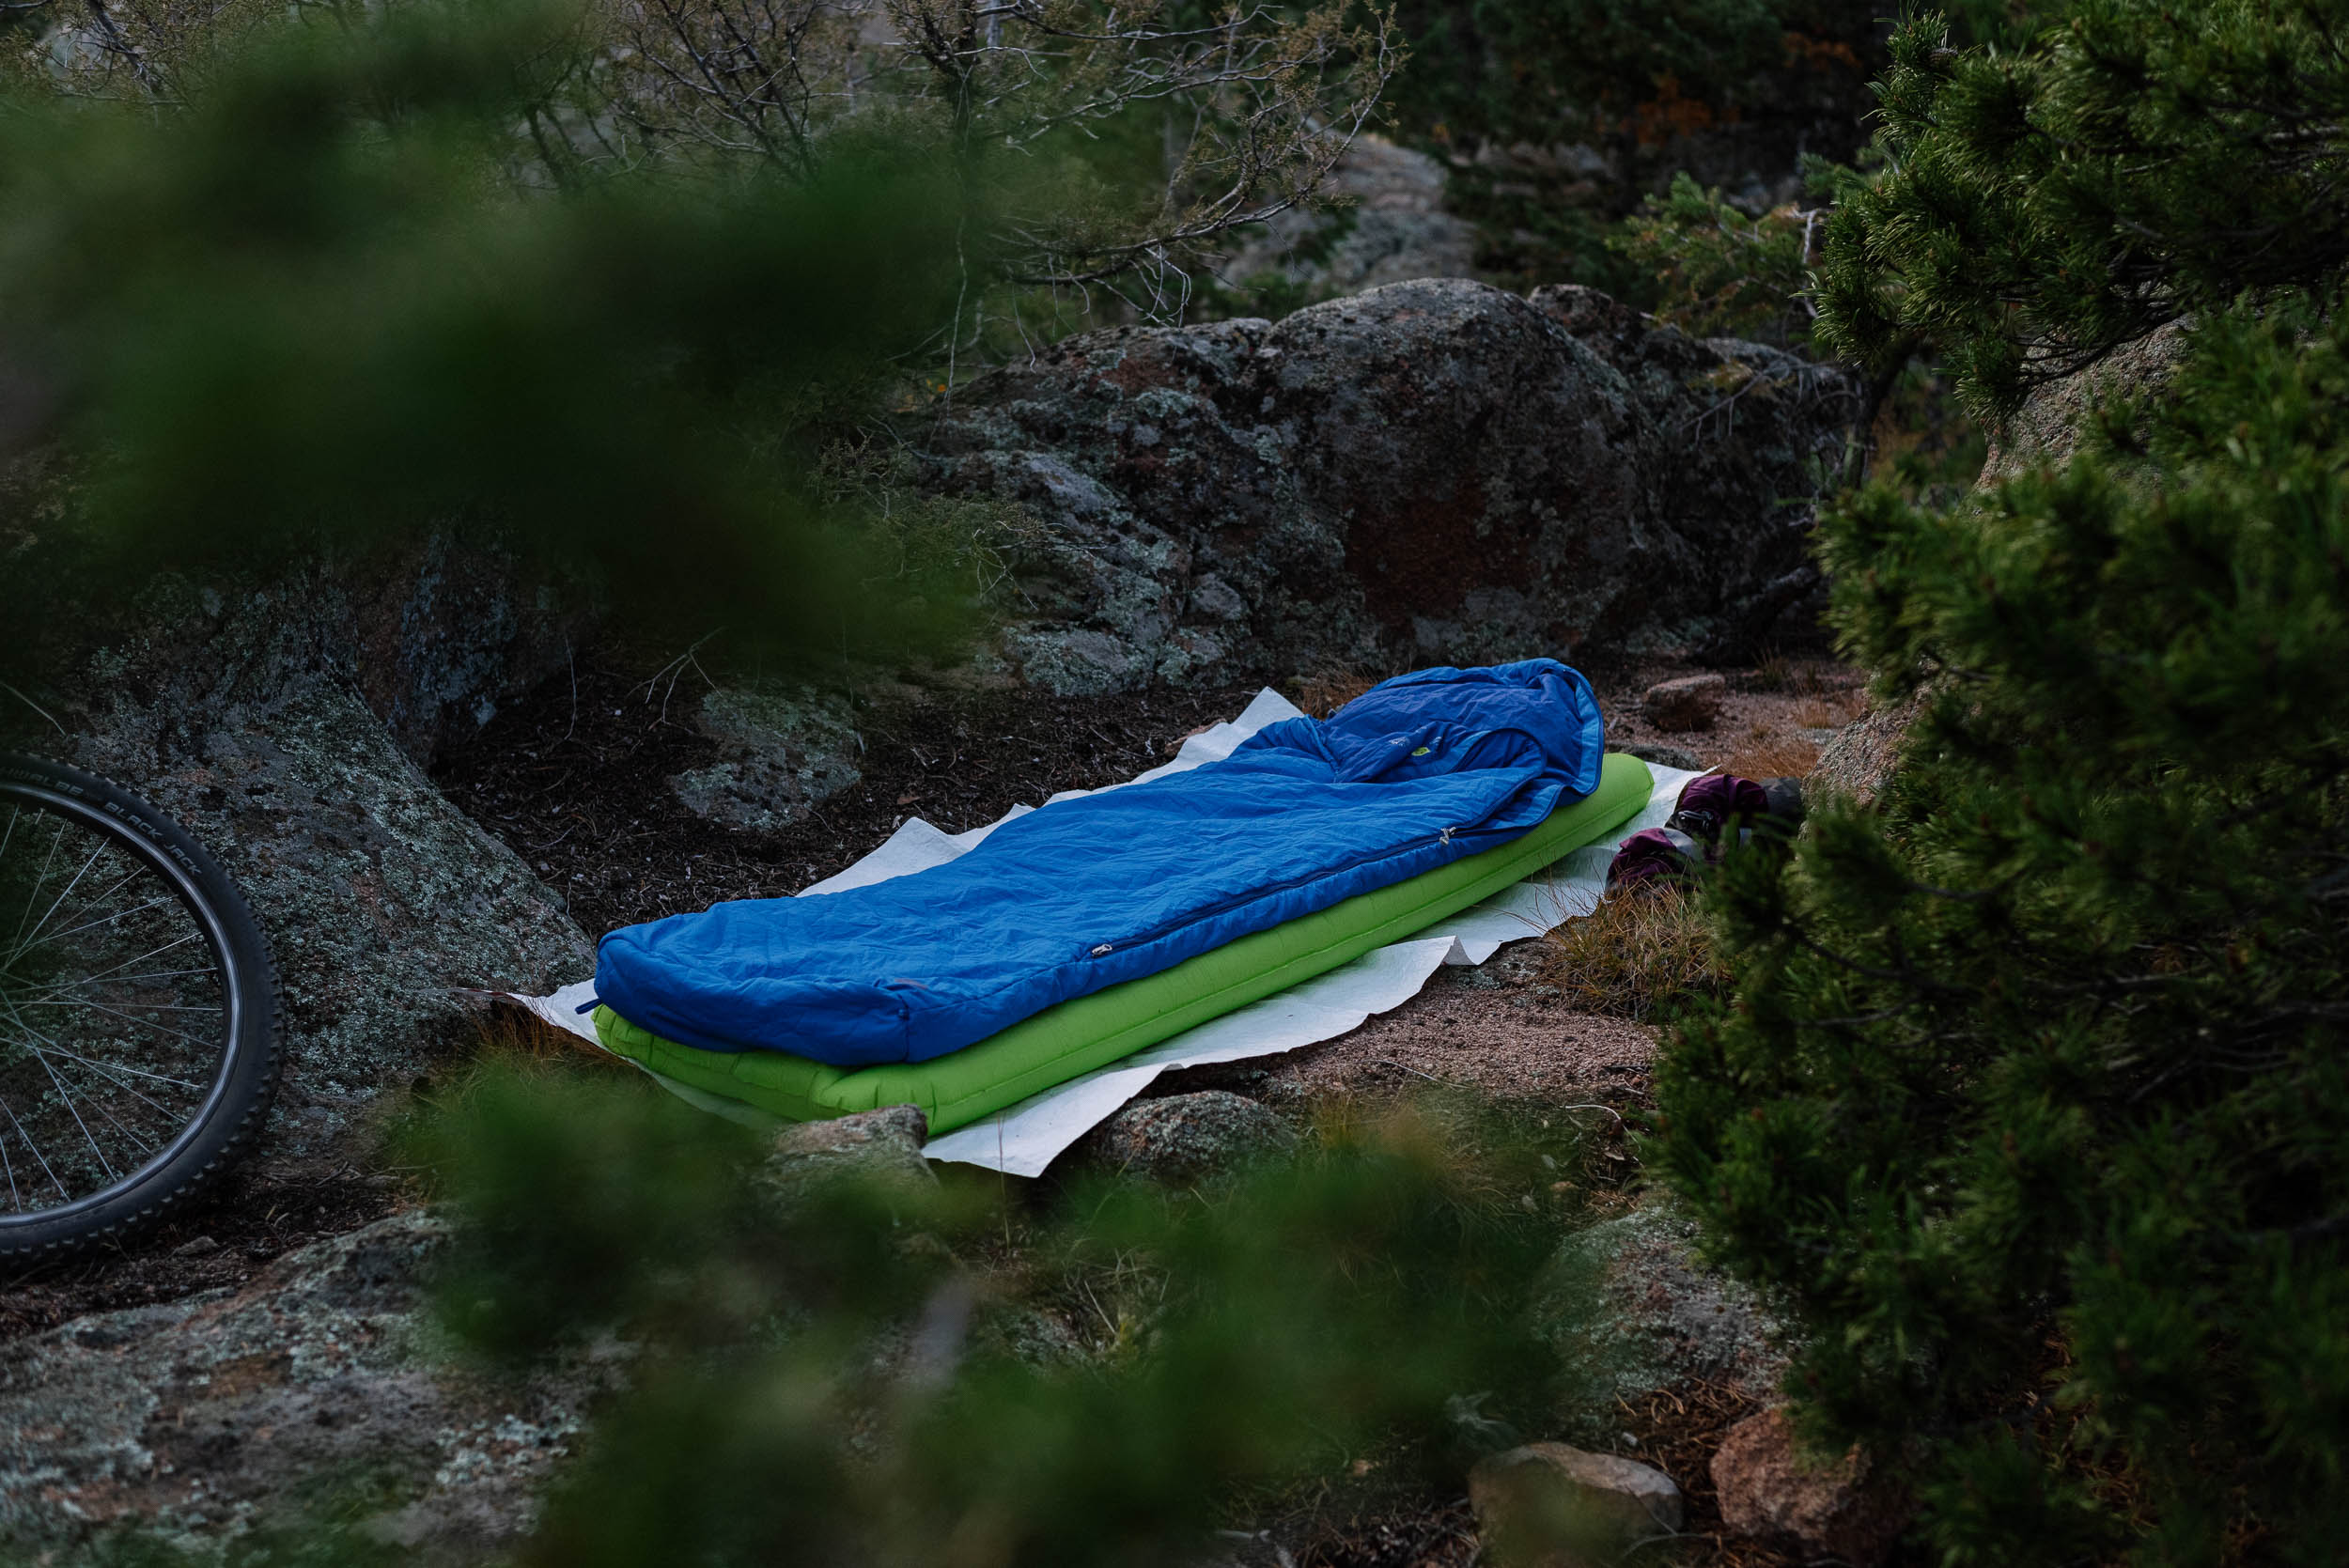
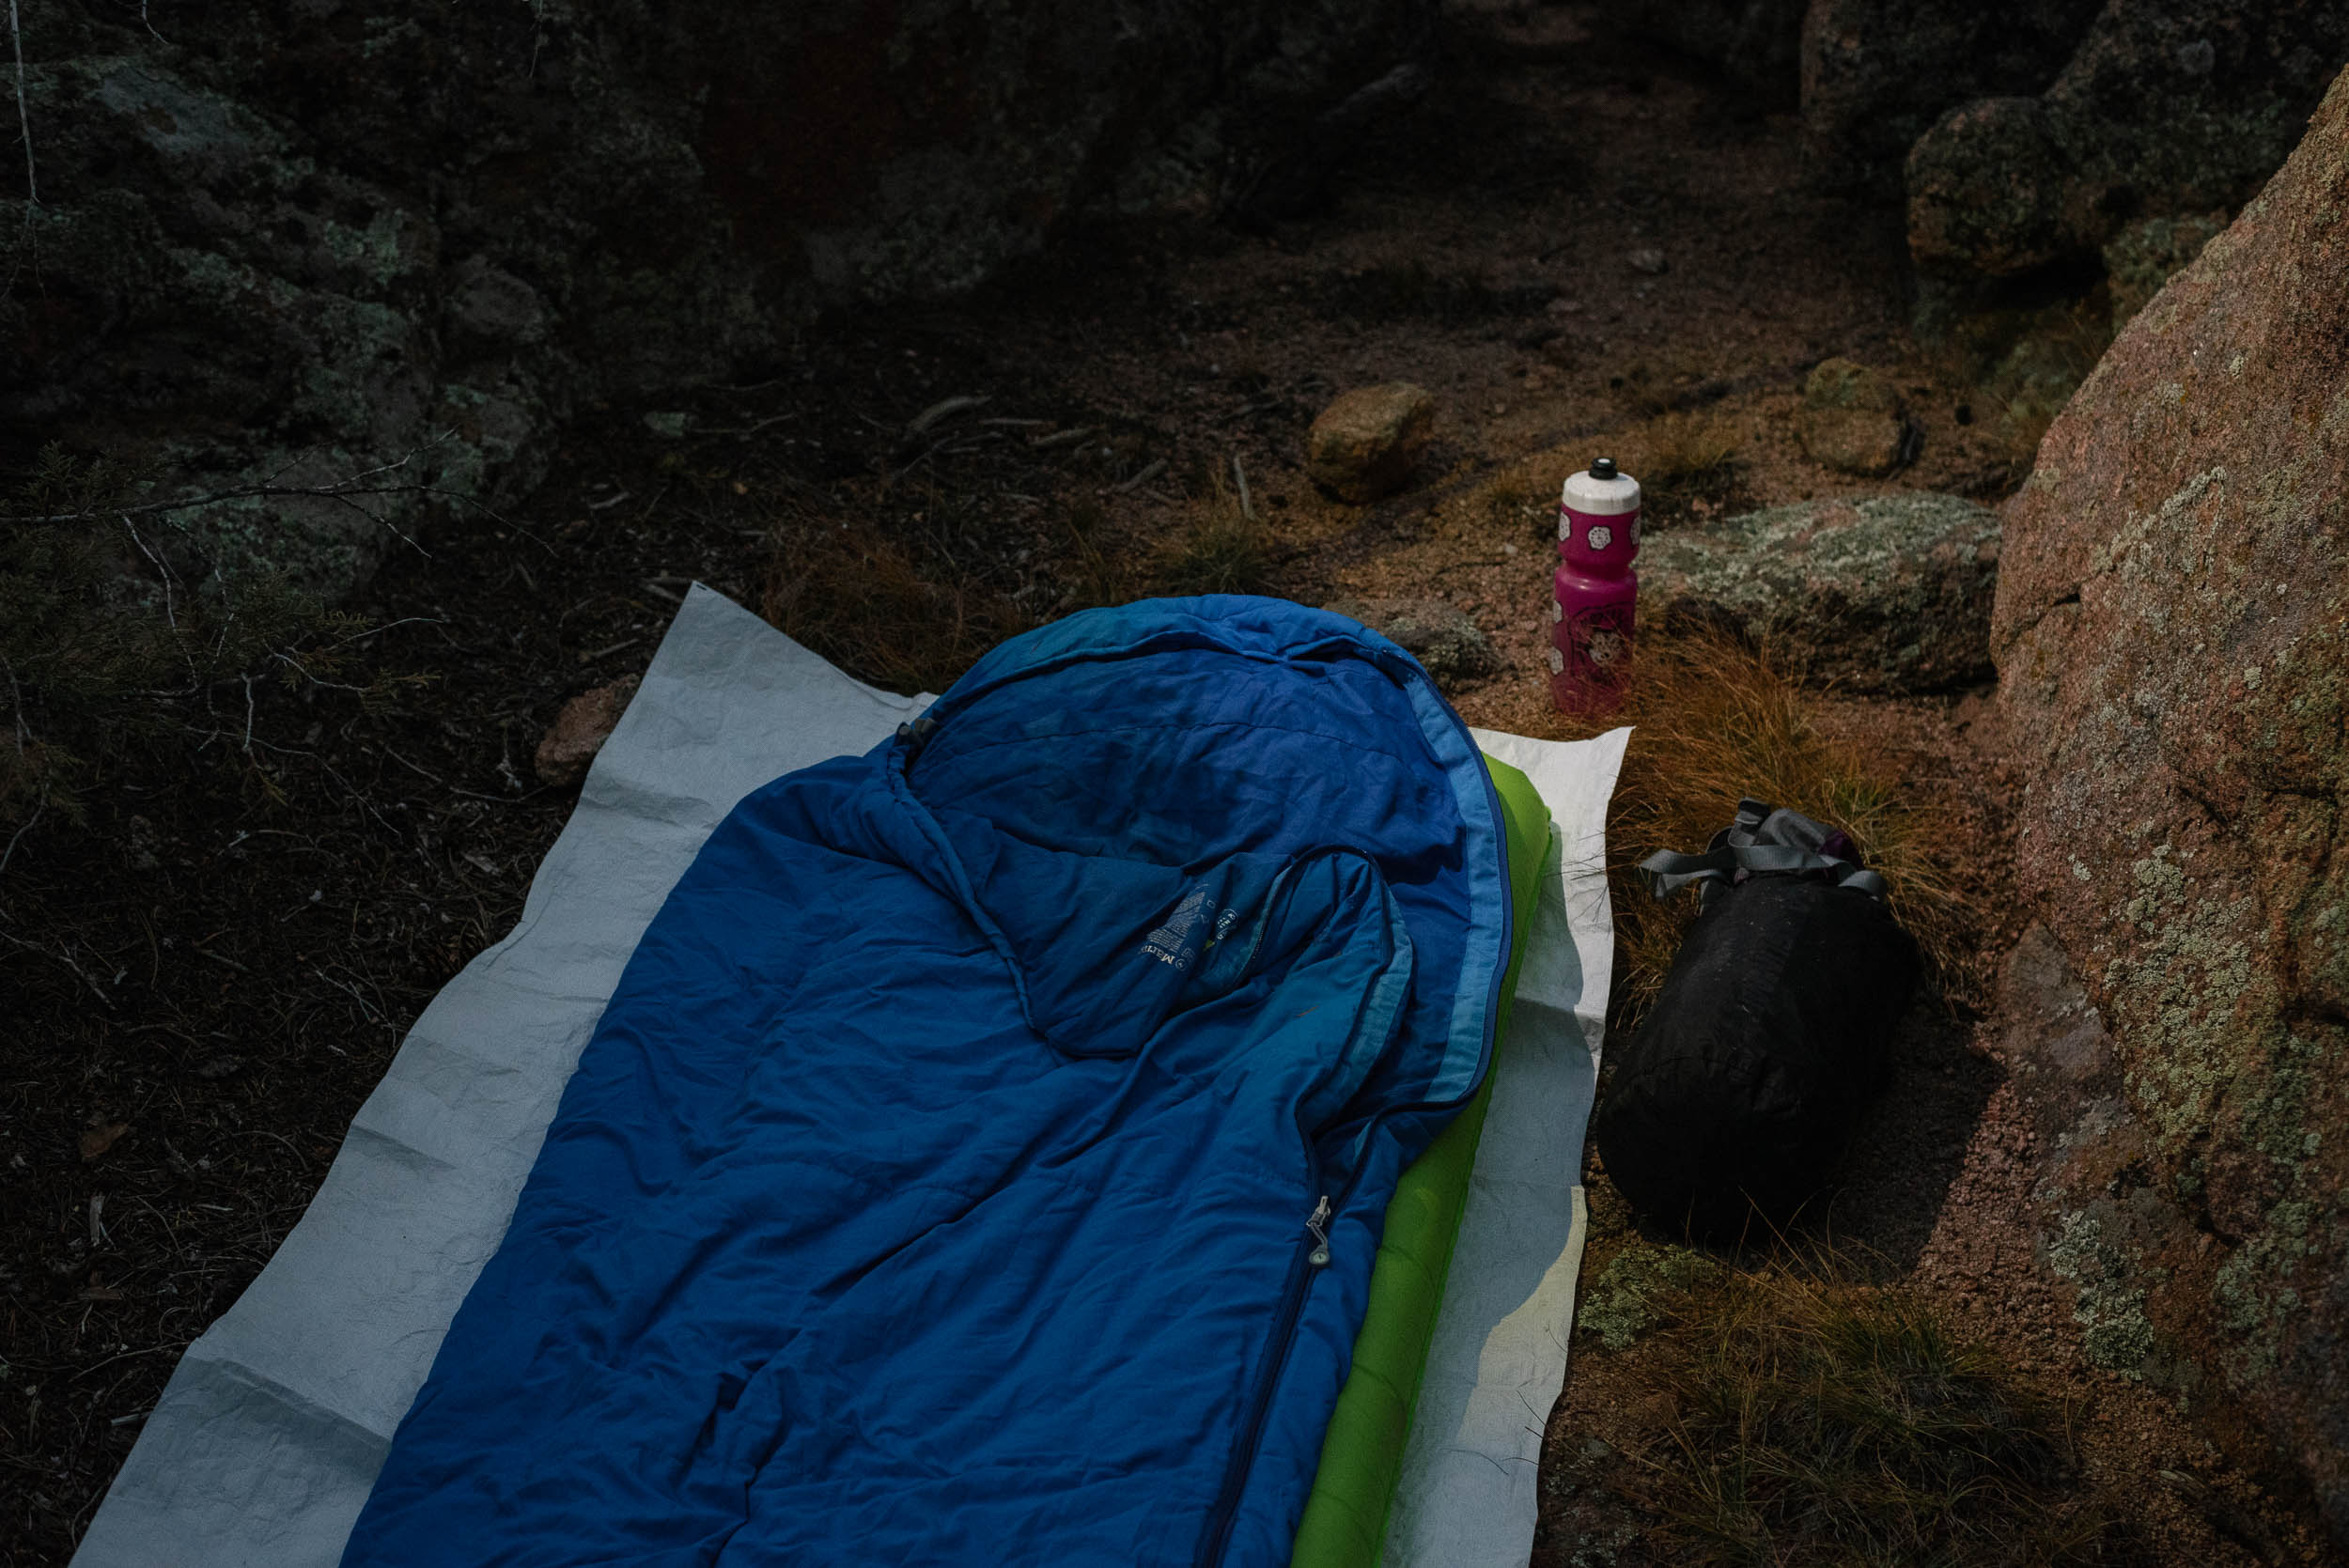
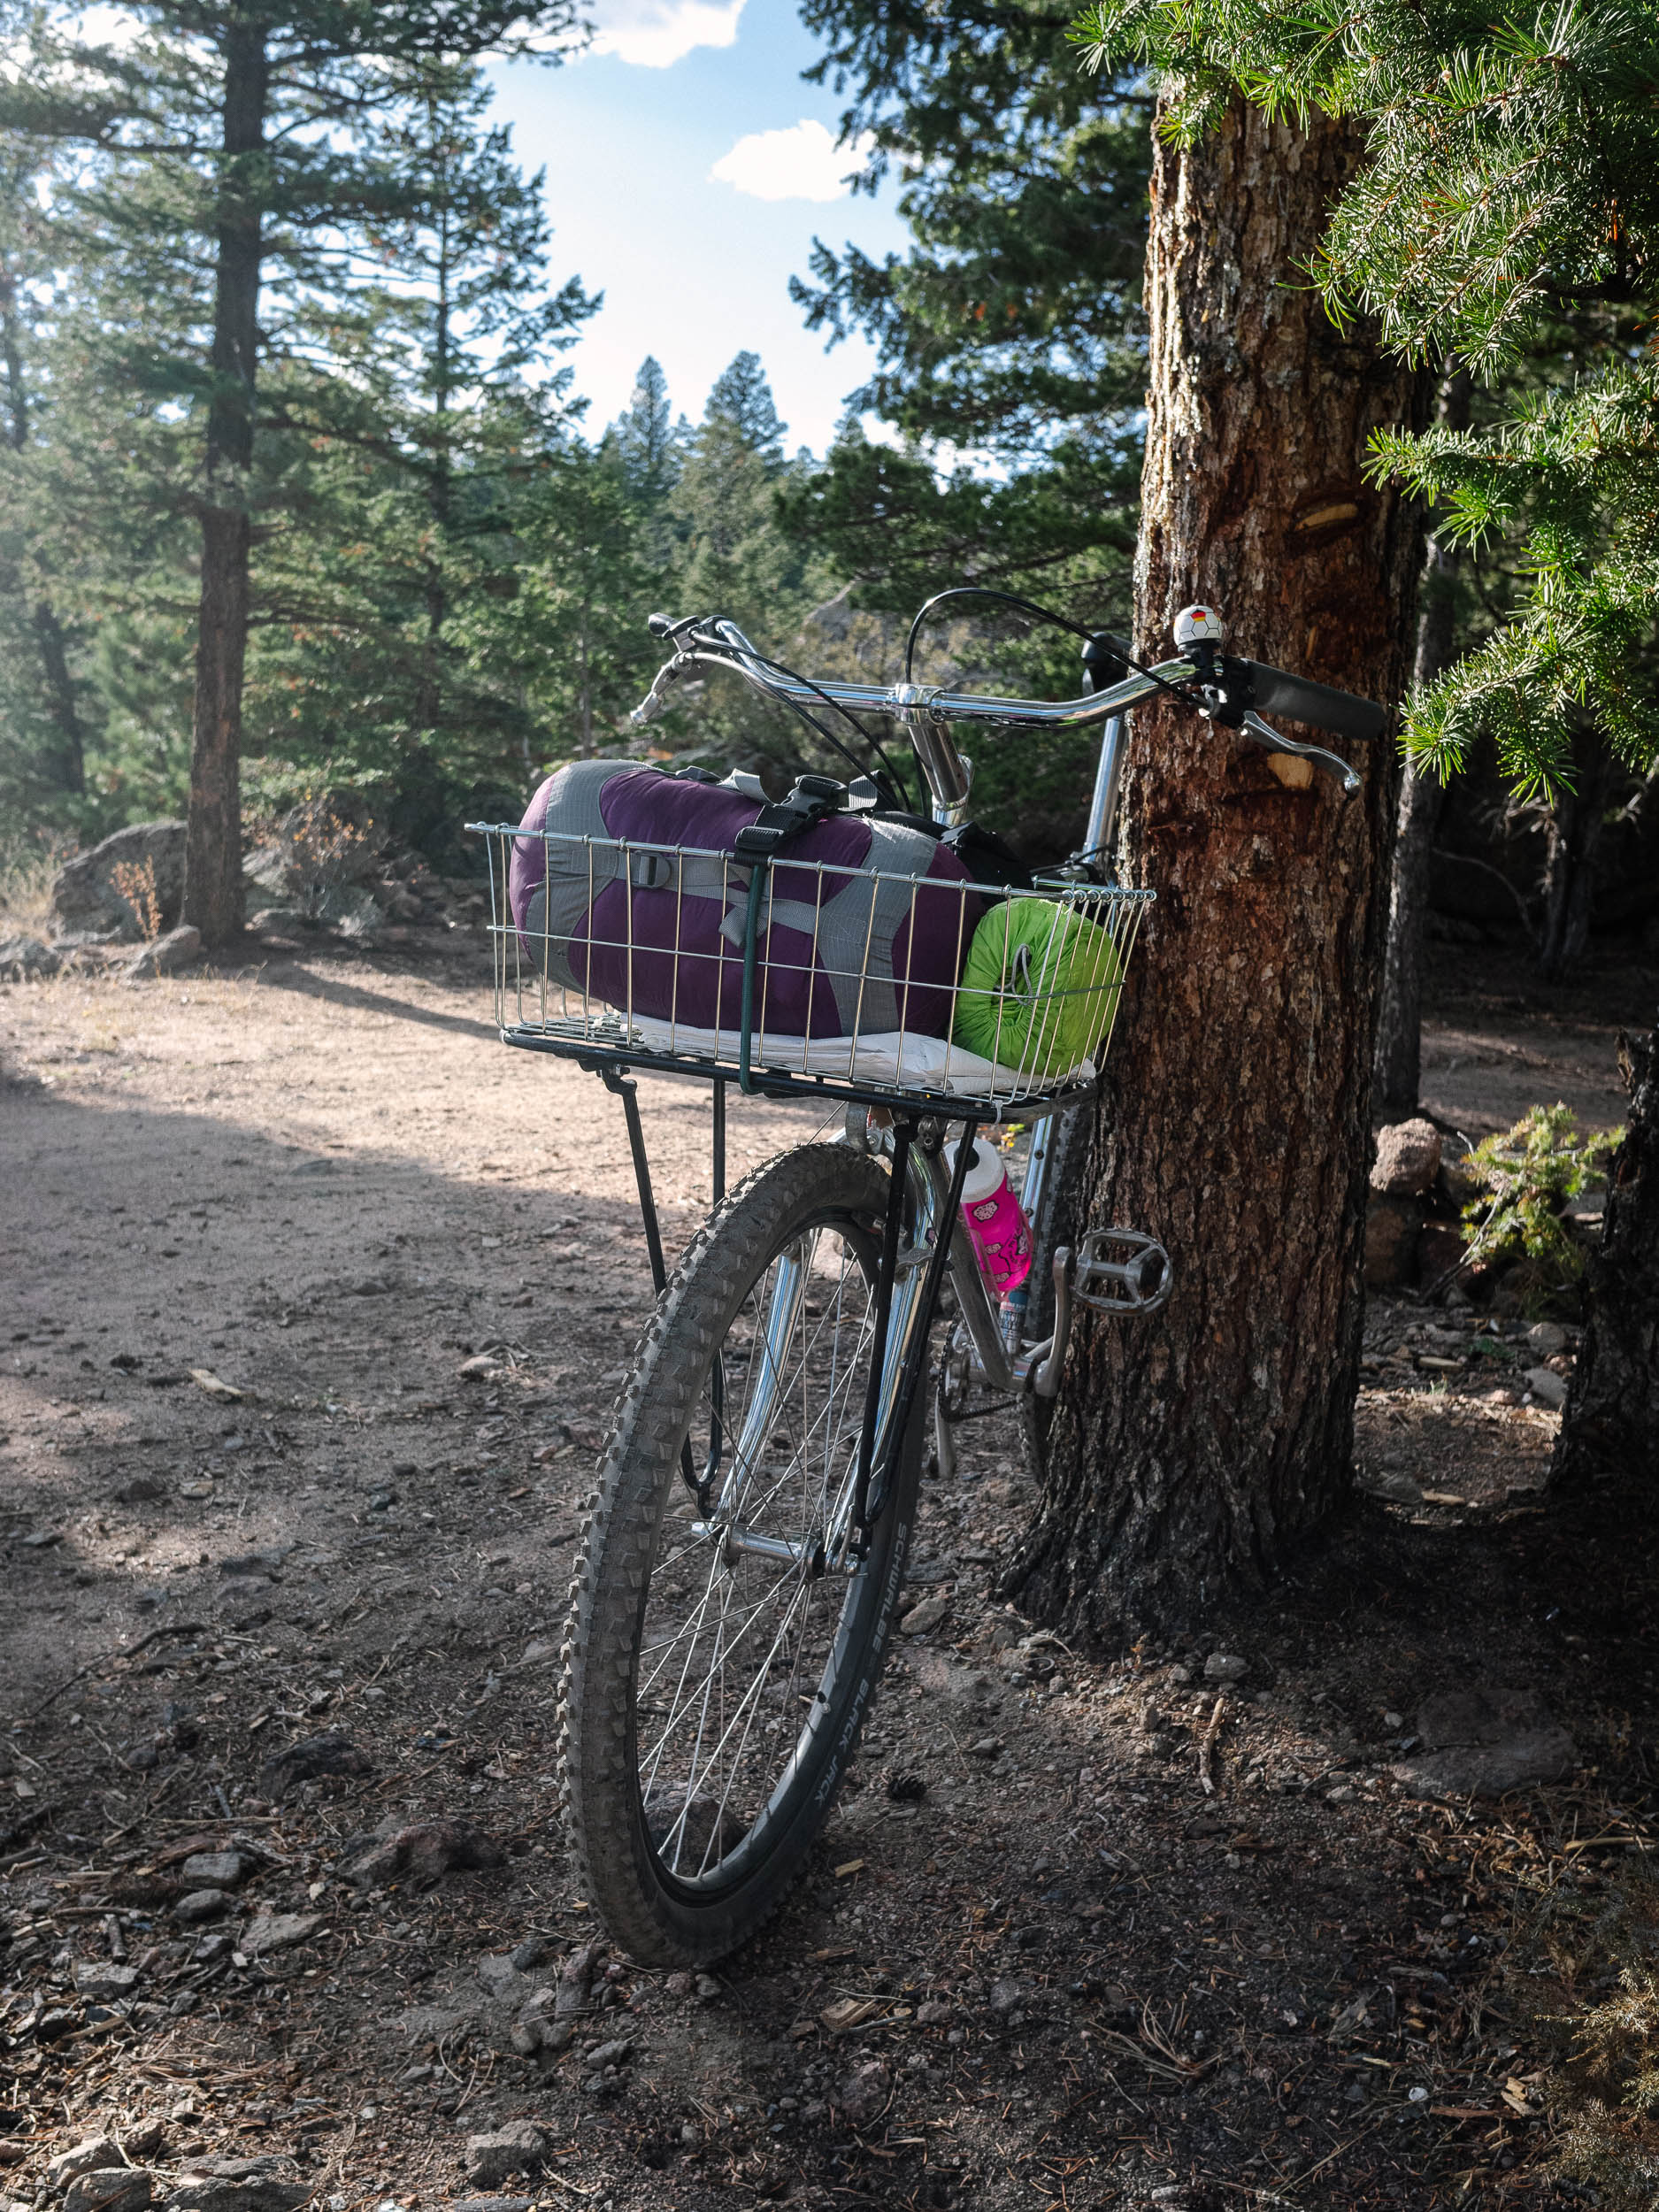
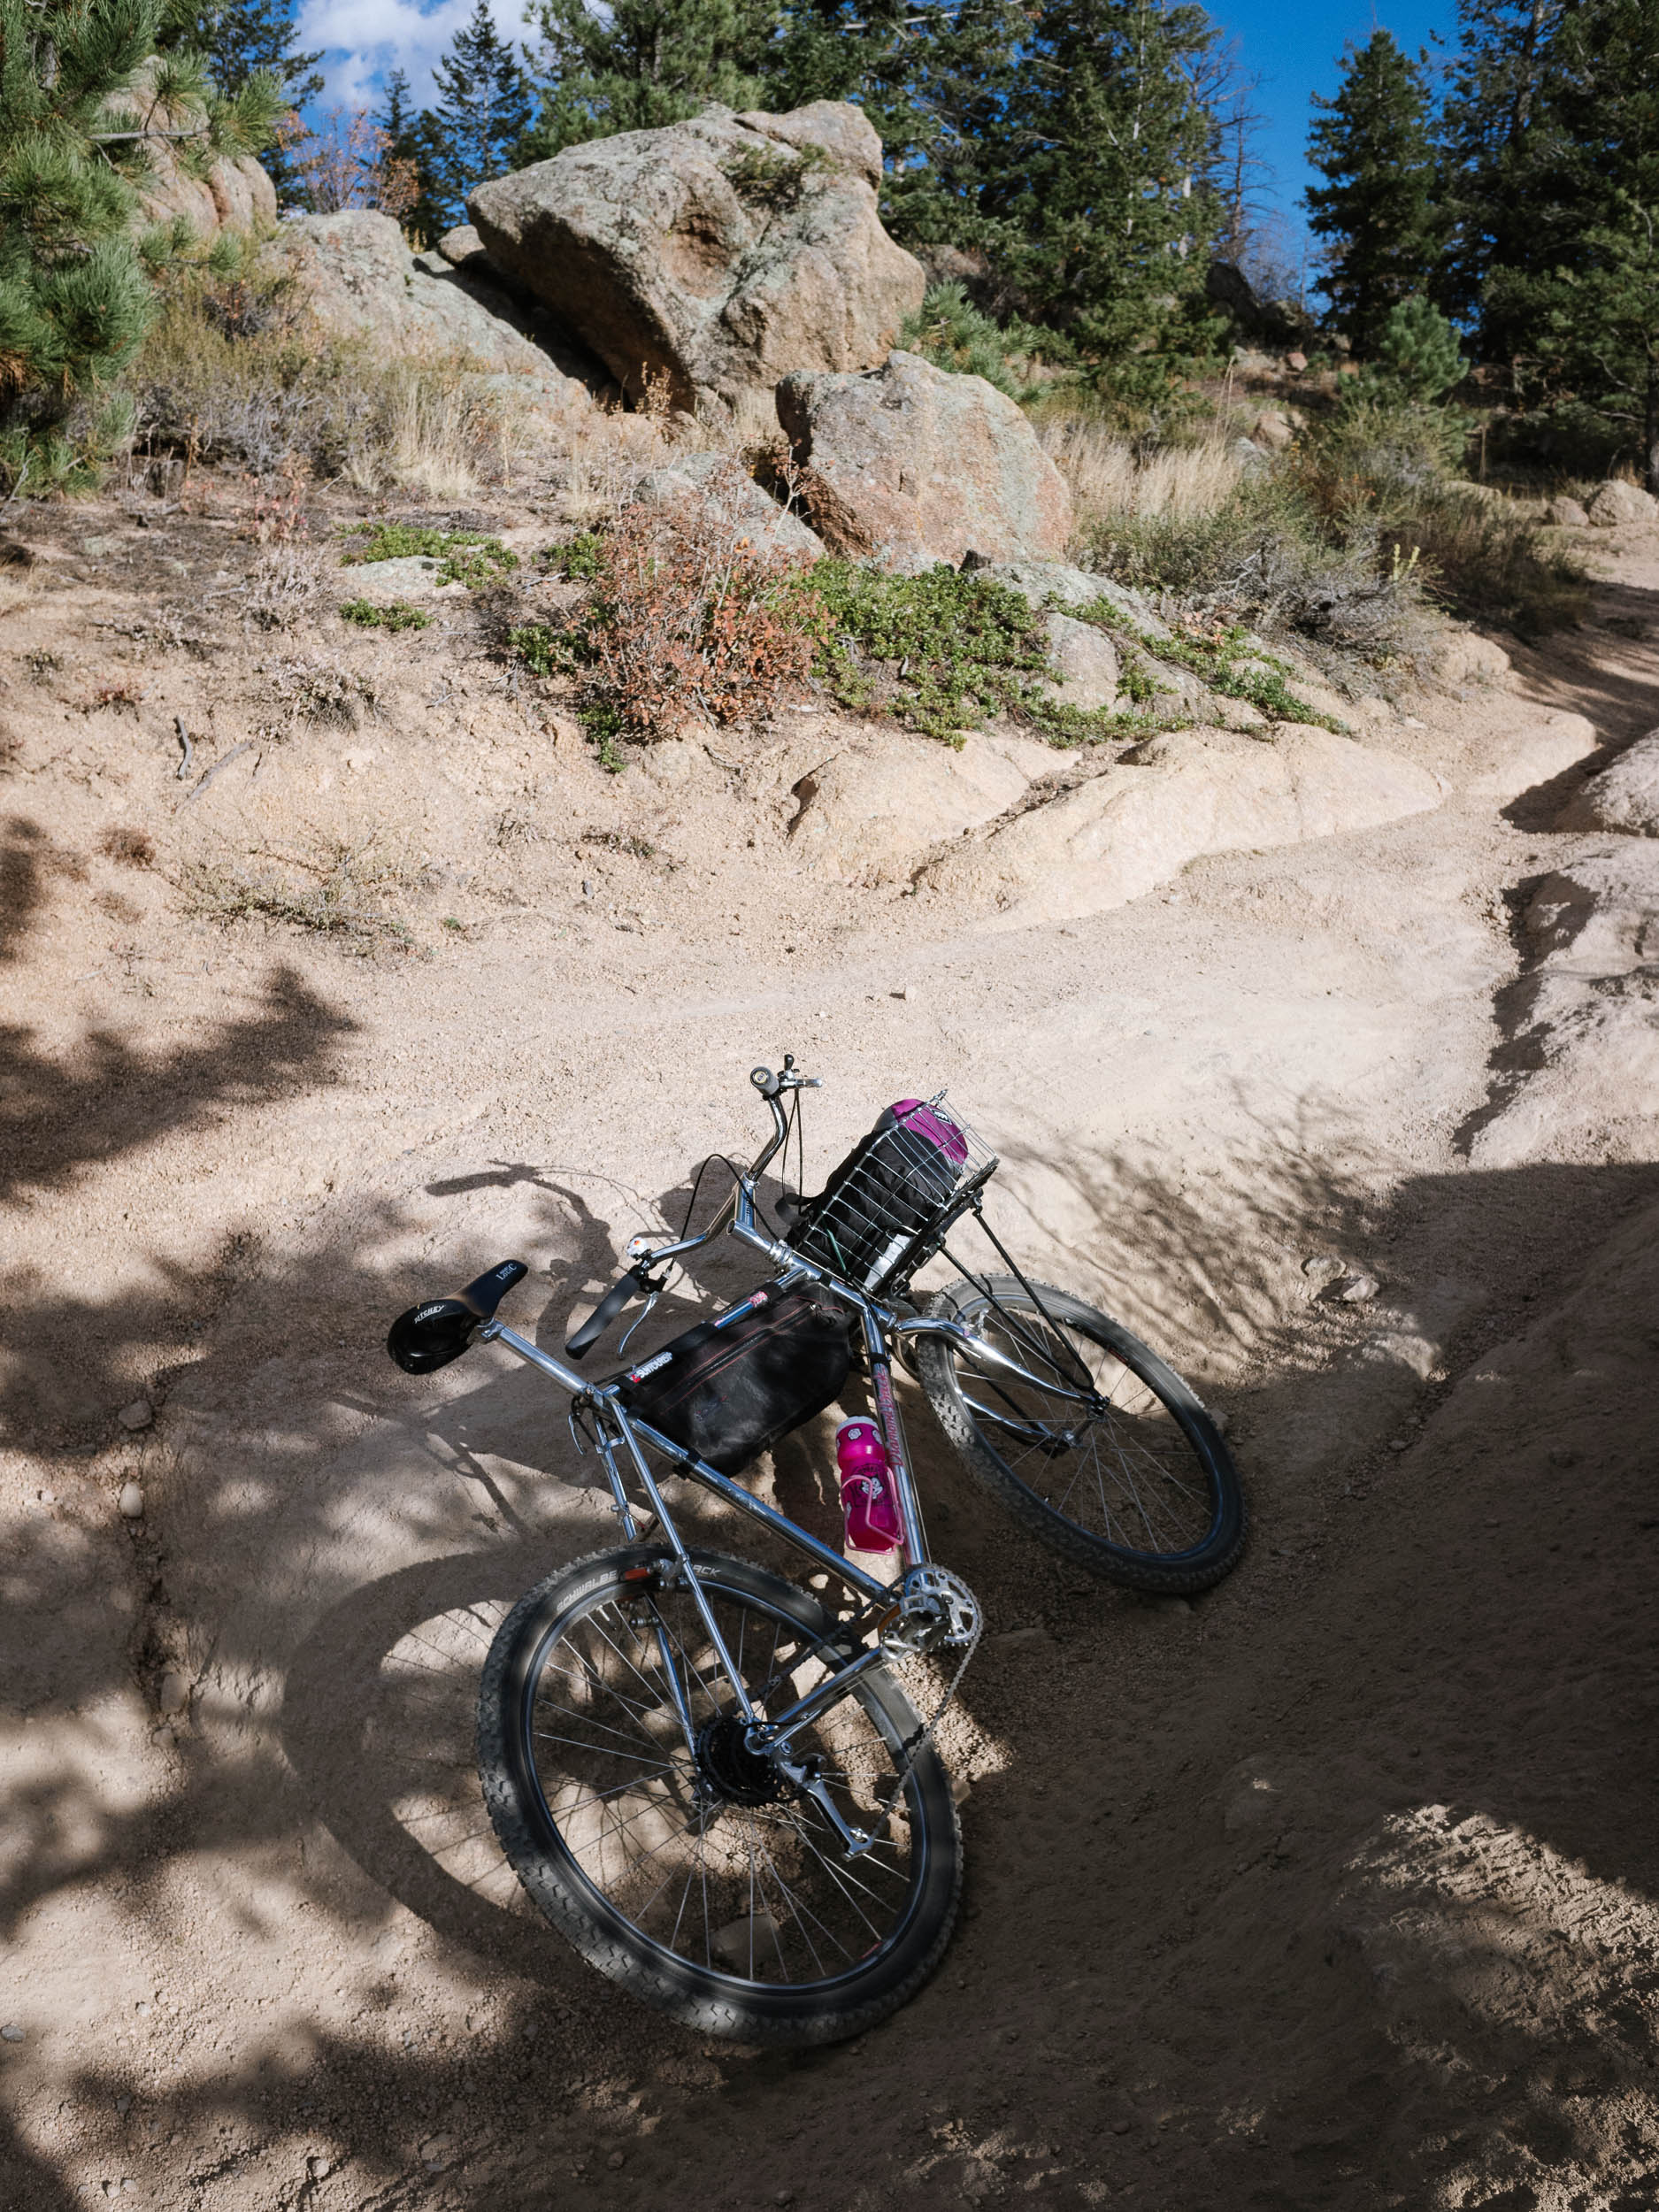
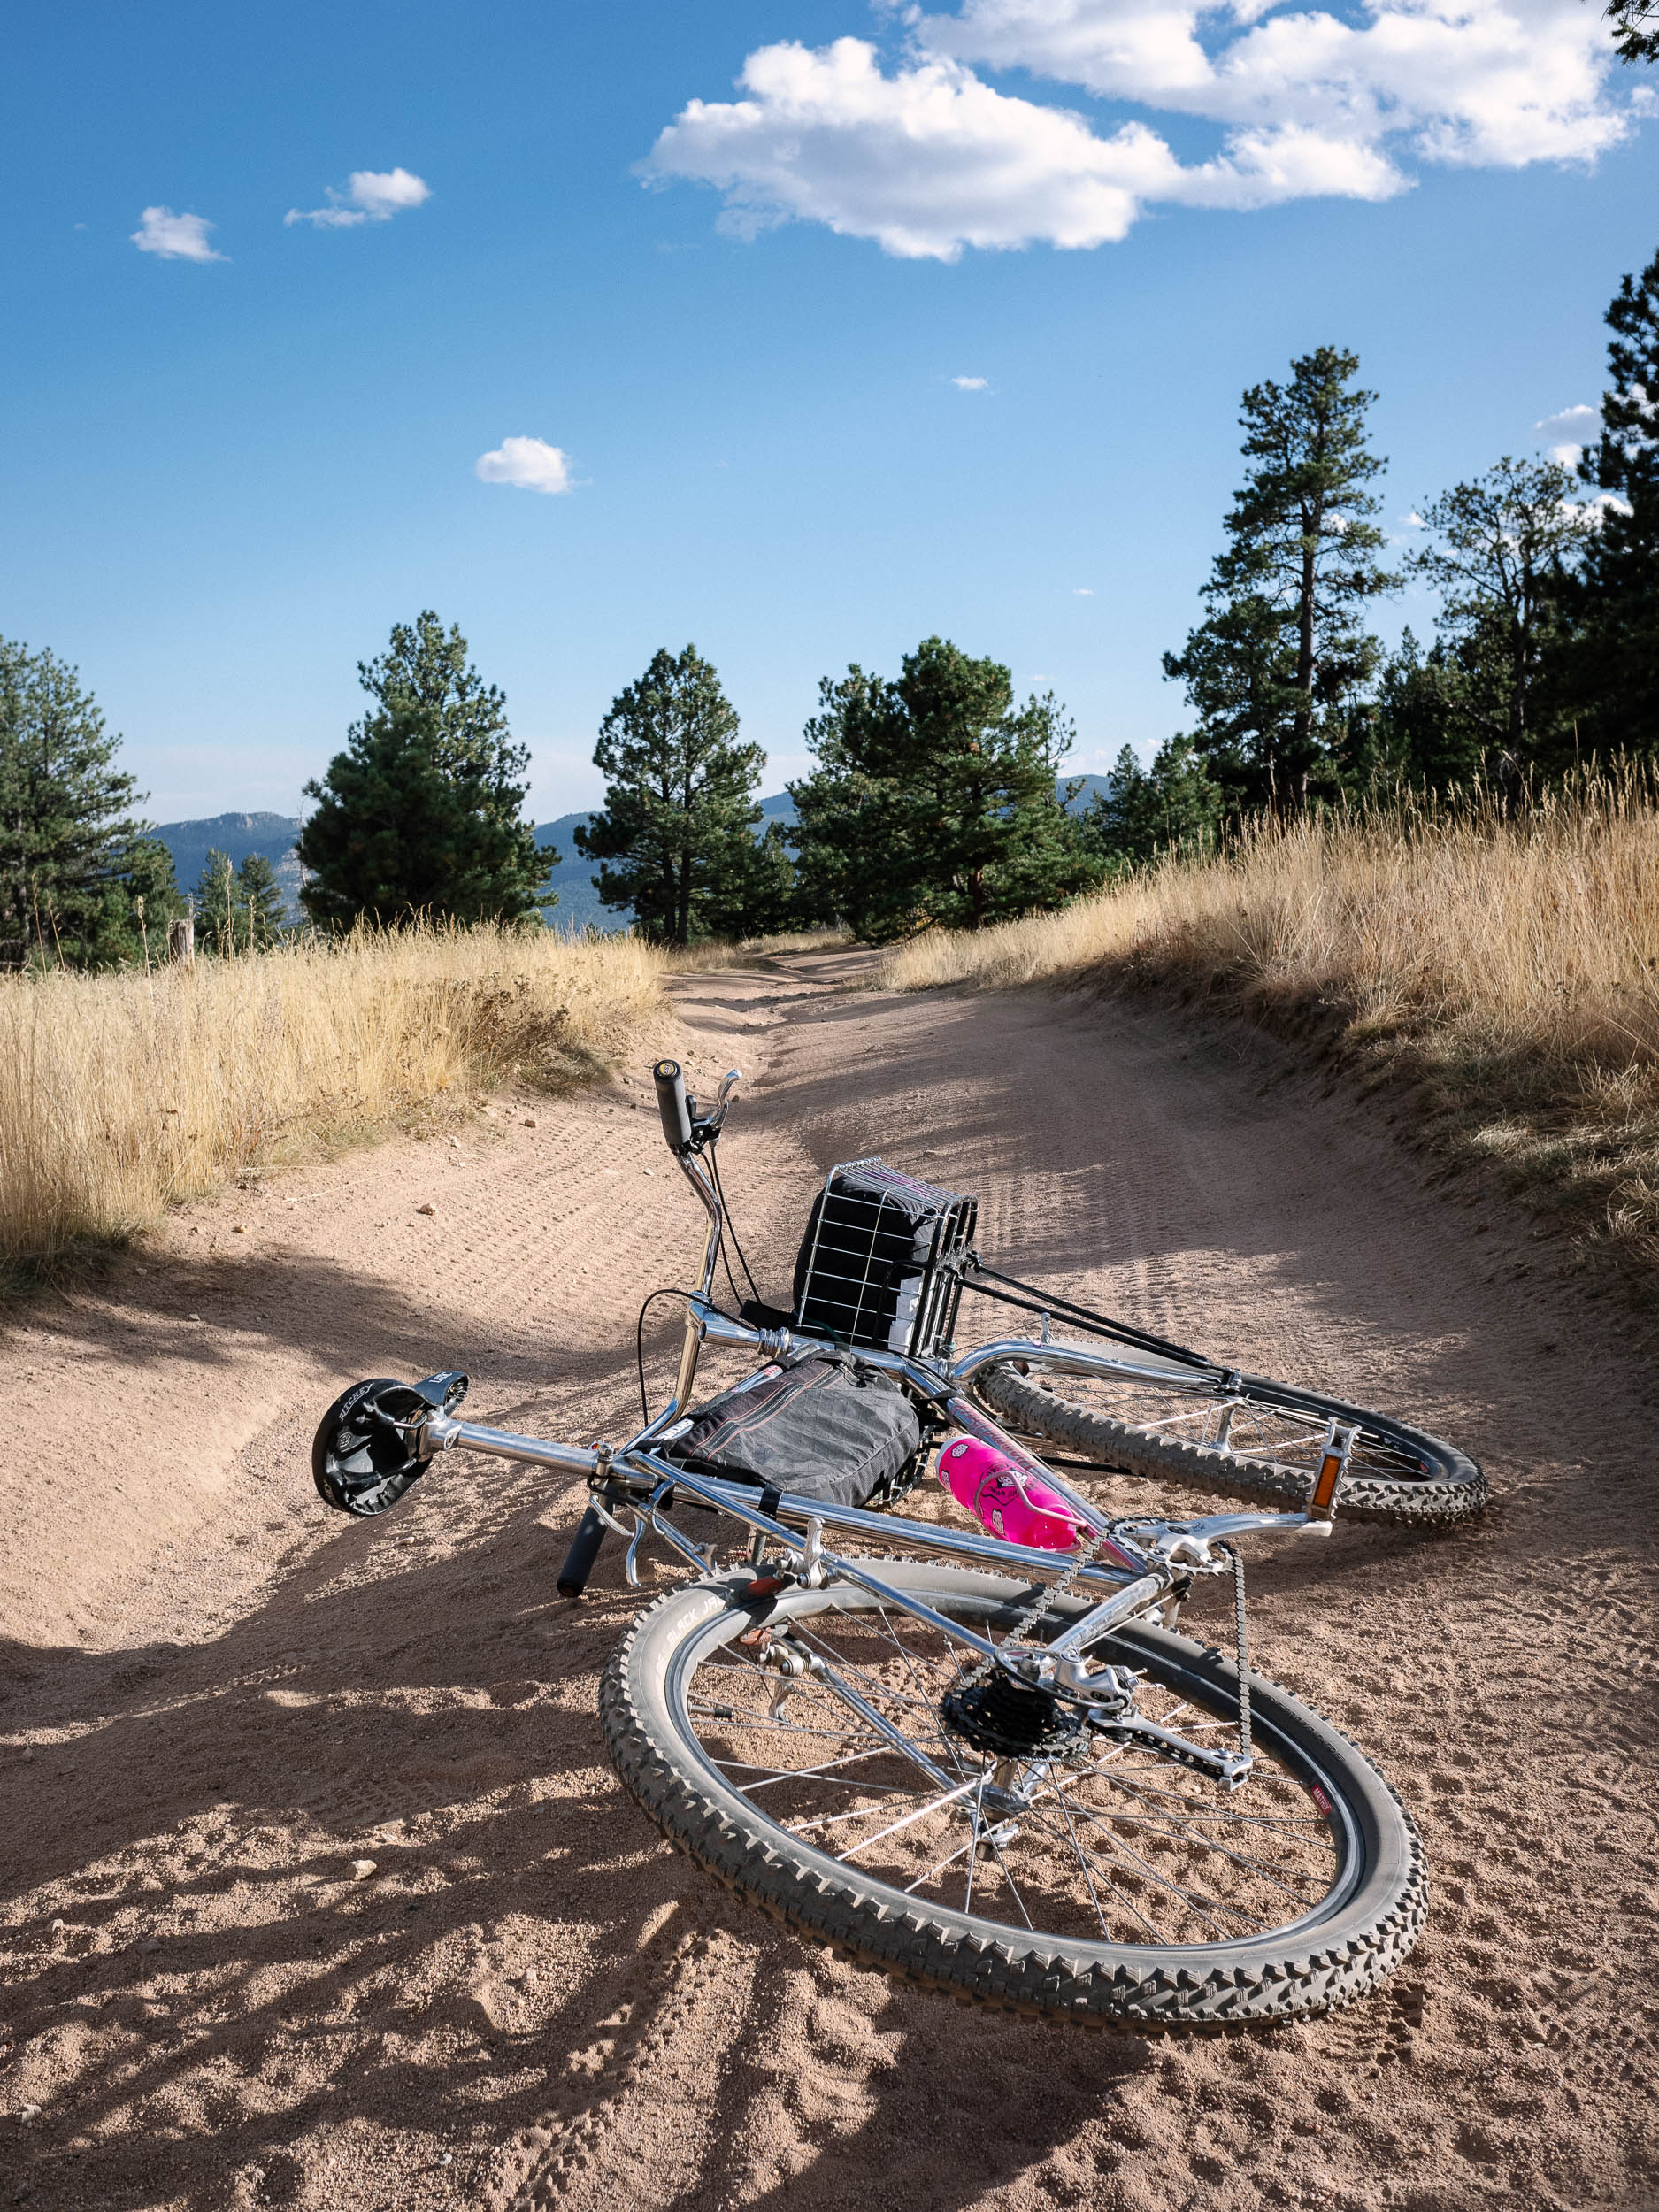
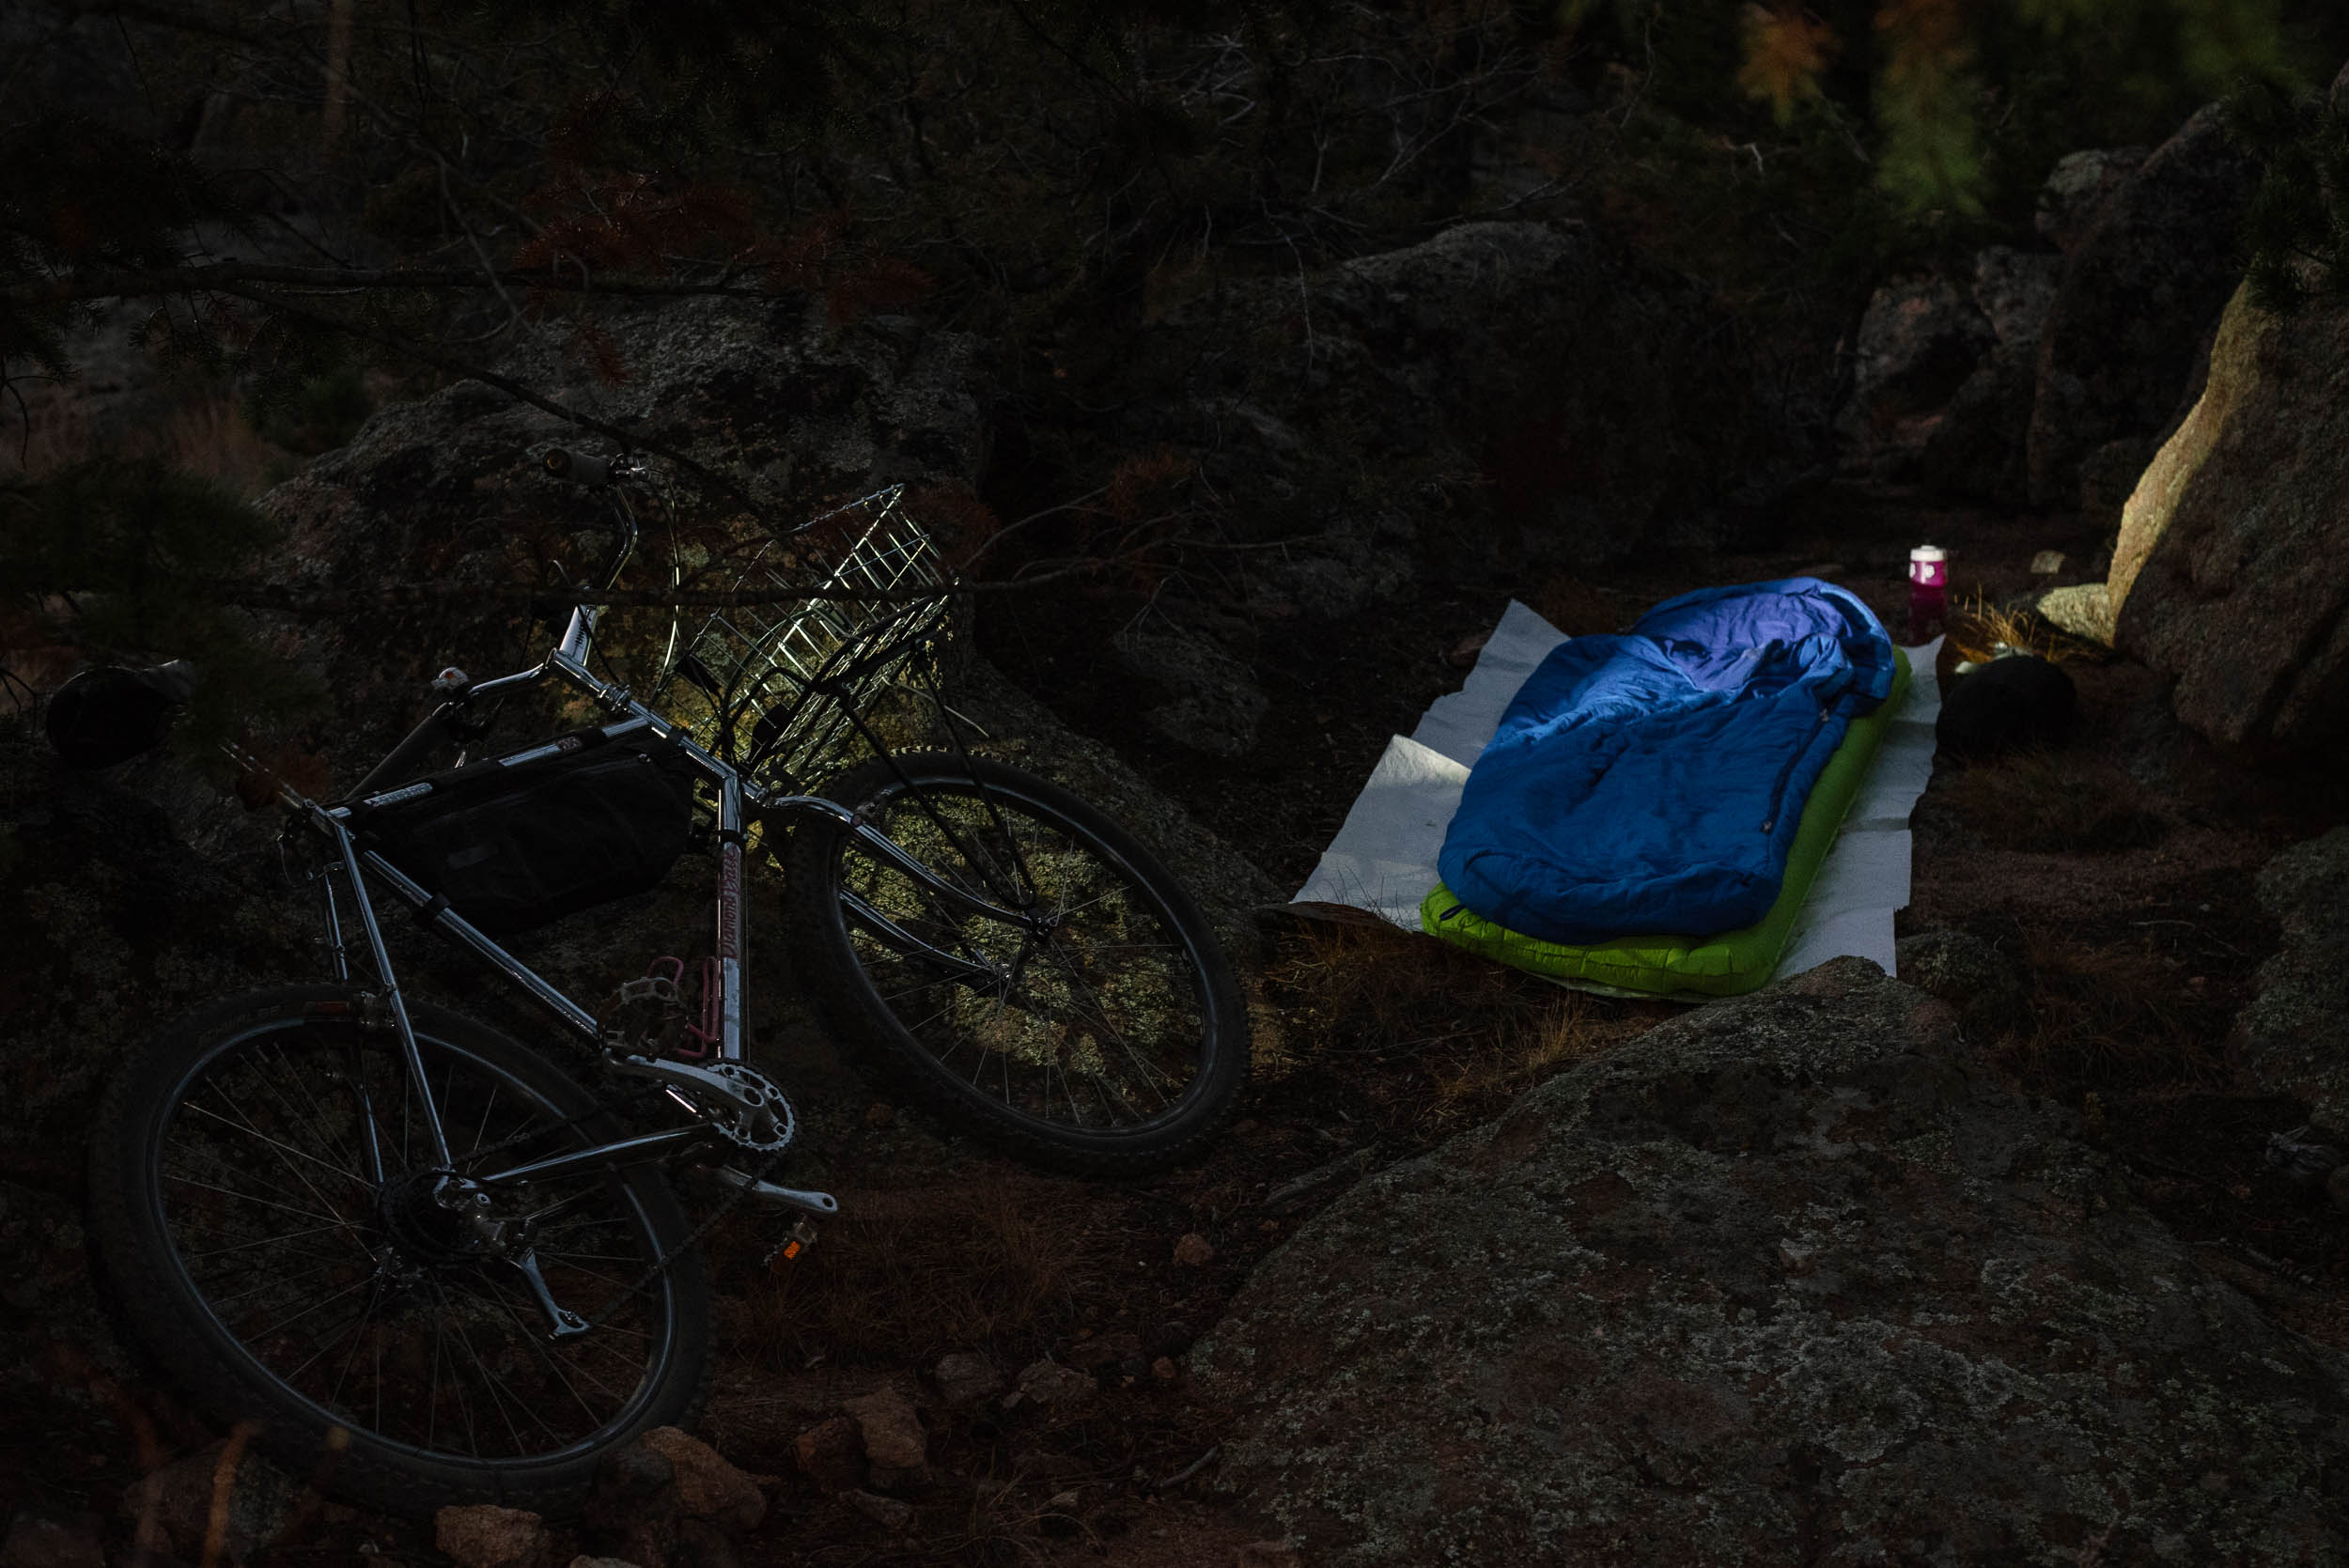
Because I love sleeping out whenever possible, I opted to forgo a tent, though I’ll note that still have the leftover budget to buy one. I ended up buying a used Marmot sleeping bag, Big Agnes sleeping pad, inflatable Sea-to-Summit pillow, a couple of stuff sacks, and a fresh Tyvek ground sheet for a total of $133. I found out the hard way that the pillow has a slow leak, but I’m otherwise happy with everything. I had a beautiful ride on some new trails, enjoyed a sunset burrito with a view, and slept comfortably in a cozy little spot nestled out of the wind between some rock outcroppings. My gear was all totally adequate and fit neatly into my basket. Success!
Total Spent + Build-Off Takeaways
My grand total for the bike, bags, and camping gear was $395, leaving me another $105 to invest in upgrades and accessories. If I had to spend the full $500, I’d likely go for a better saddle, a duffel bag for the basket, a new front brake hanger, and a tarp or bivvy. Of course, that budget doesn’t account for any of the clothes I wore on my trip, but it’s safe to assume that most first-time bikepackers will already have an adequate jacket, shoes, helmet, etc. Still, those things certainly add up, and a closet full of high-end outdoor clothing is an advantage all of us in this competition will have.
To be sure, $395 is still a sizable chunk of change for someone testing the waters of bikepacking, but I sincerely believe the Diamondback is plenty capable of taking me to all kinds of places, and I wouldn’t hesitate to take it out on an extended tour. It’s probably not the bike I’ll take on my next big getaway, but that’s only because I’m already so deep down the rabbit hole of bikes and ultralight gear.

Reflecting more broadly on this experience, building up a bike with limited means and pedaling it all over the place for the past six months was a welcome breath of fresh air in my cycling life. It put me in a beginner’s mindset that shook up my perspective and challenged my expectations and assumptions about what I truly need. I had more fun on the Ascent than I’ve had on bikes that cost ten times as much, and I enjoyed the experience of photographing it with the same care that I would a high-end show bike. I’ve been on a gradual (albeit roundabout) path of shedding excess bikes and gear and working toward owning only long-lasting, repairable things, and this project has helped accelerate that trajectory. I’m grateful to have gone back to basics these past months, and I eagerly anticipate seeing the other submissions. Stay tuned!
We’ll have more Budget Bikepacking Build-Off submissions from the rest of the team in the months ahead. For now, we’d love your feedback and photos of your budget builds in the conversation below!
Further Reading
Make sure to dig into these related articles for more info...

Please keep the conversation civil, constructive, and inclusive, or your comment will be removed.