


Make Your Own Ultralight Pogies


In this Make Your Own Bikepacking Gear (MYOBG) tutorial, Greg Maino shares a simple 10-step guide to creating lightweight pogies that are designed to be perfect for chilly mornings and wet rides alike. Find it here, complete with a materials list, detailed photos, and step-by-step instructions…
PUBLISHED Nov 14, 2022
Words and photos by Greg Maino (@igmaino)
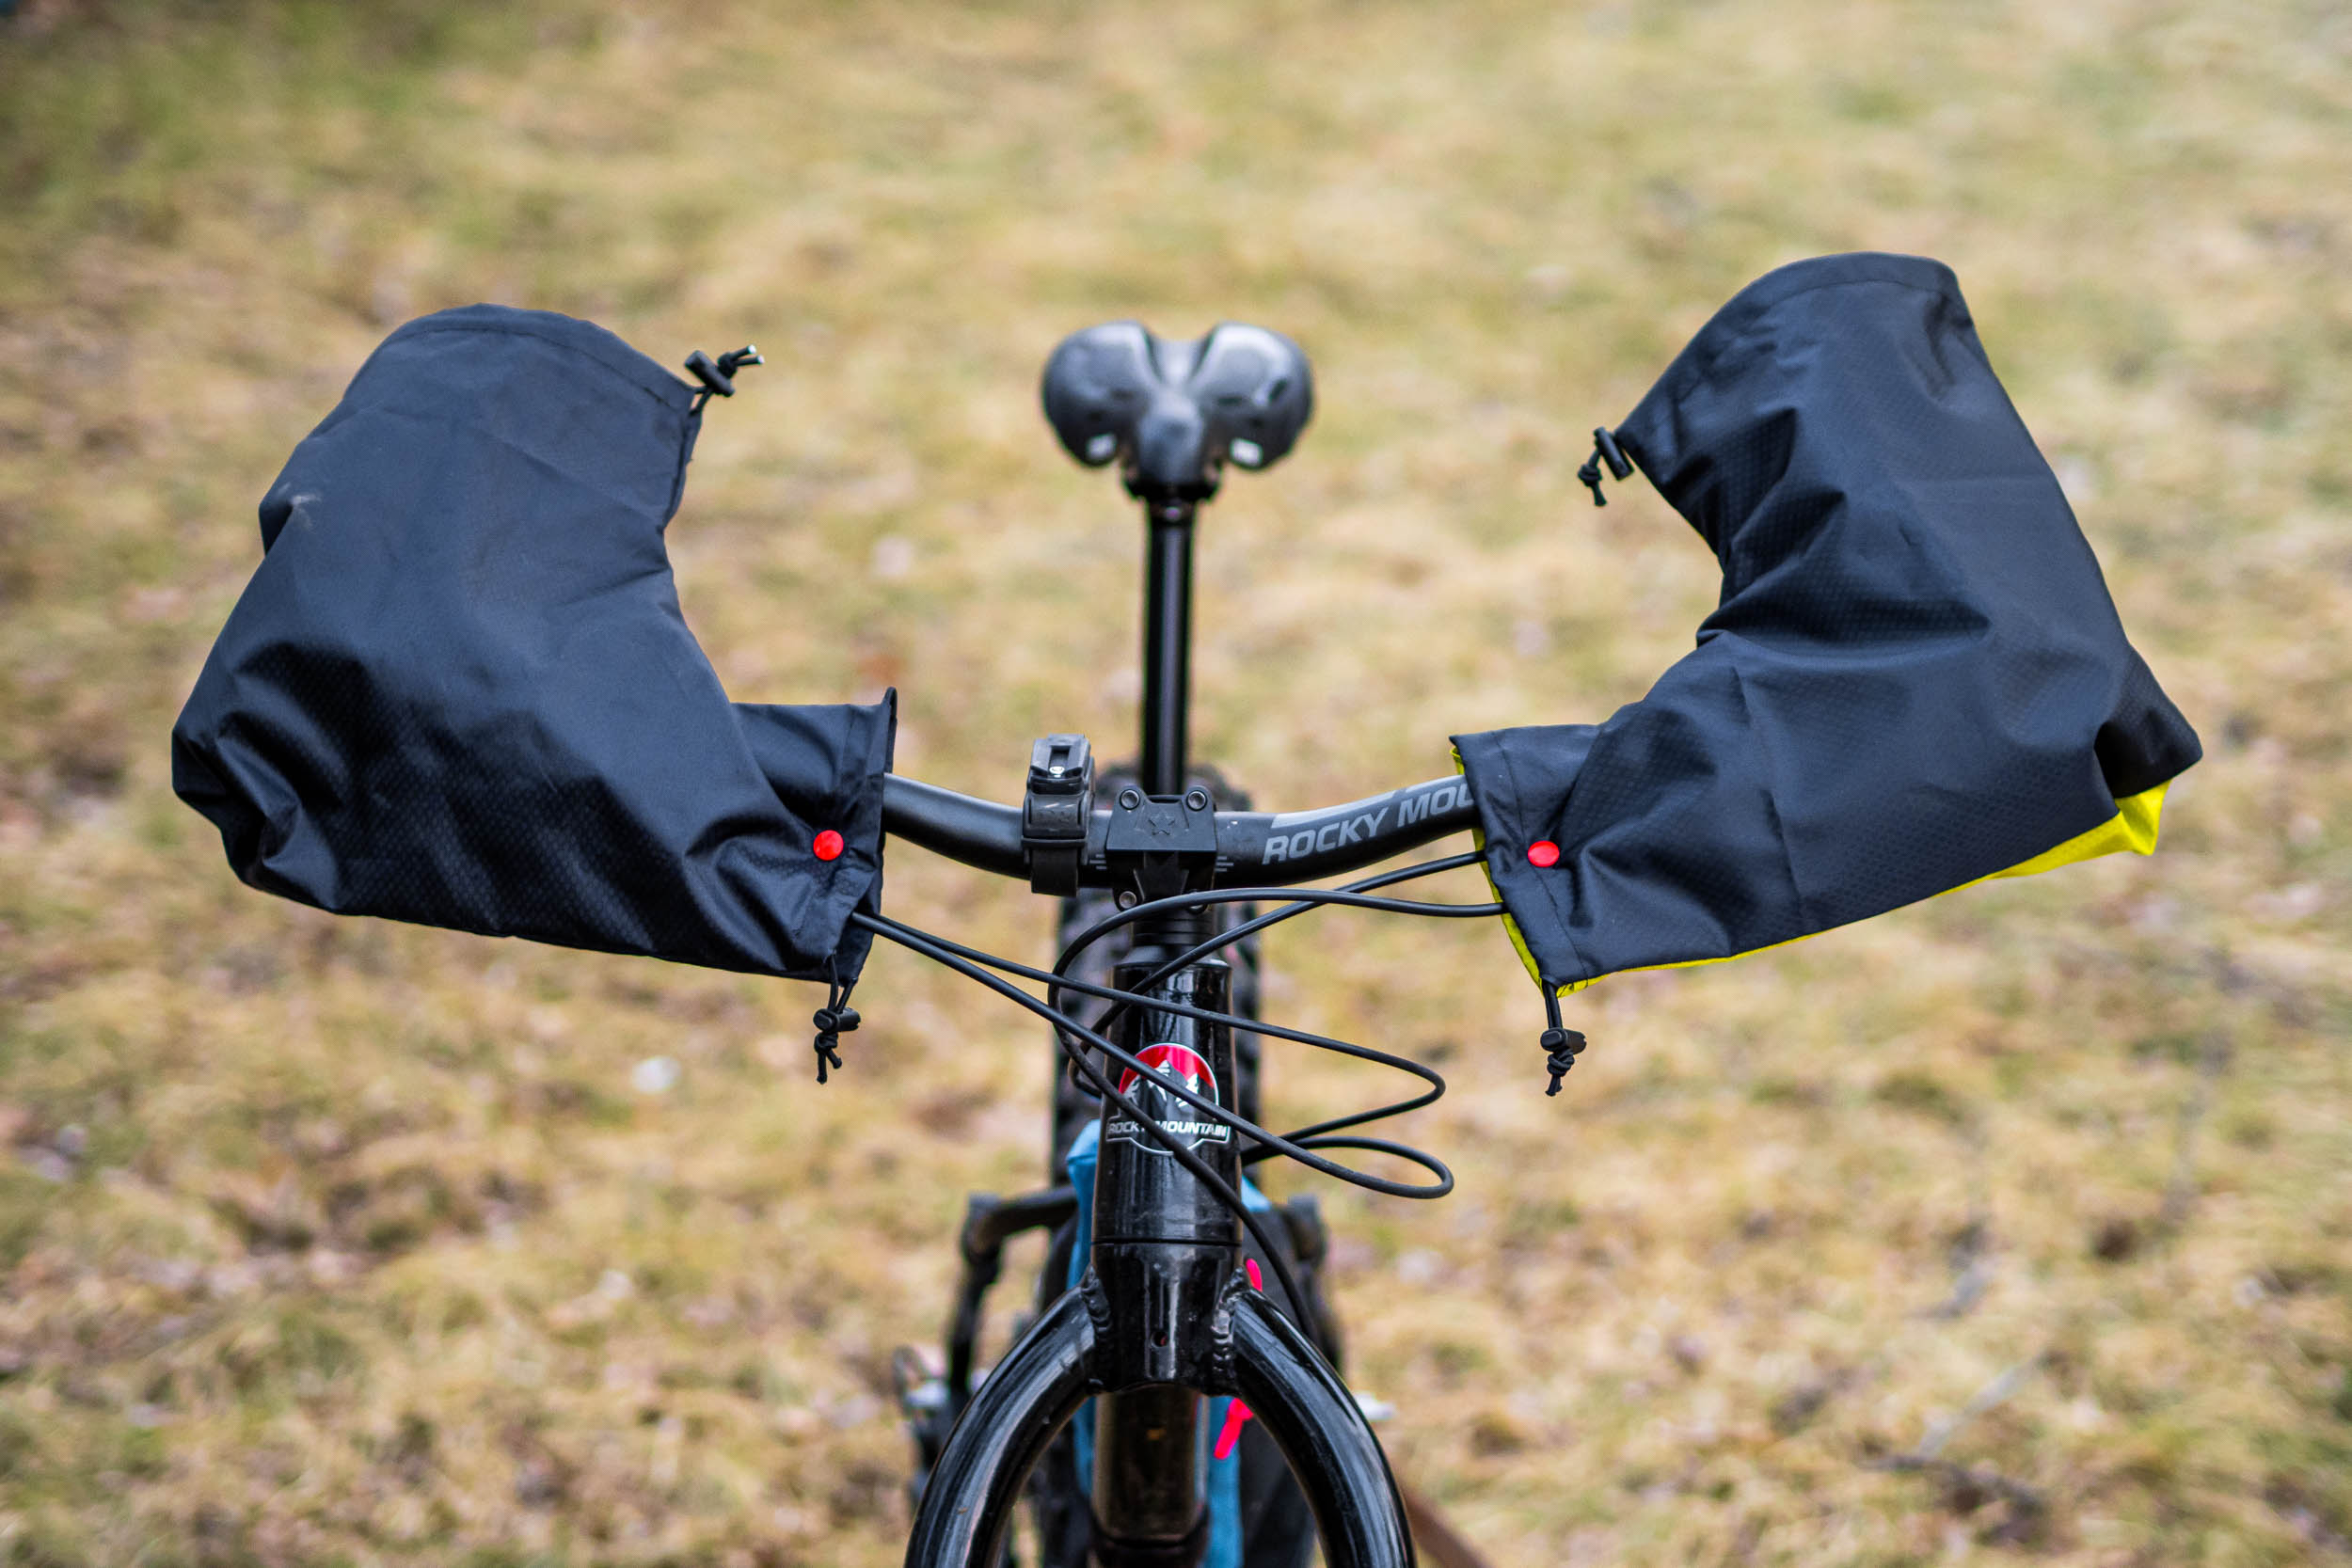
I got into making my own gear about two years ago. Initially, I wanted to sew my own frame bags. But, since catching the MYOG bug, I’ve started looking for any excuse to break out the sewing machine. A recent project was a set of ultralight water-resistant pogies. Last summer, I headed to Iceland for a two-week bikepacking trip, and I wanted something small and light that I could break out on windy, rainy stretches to keep my hands warm and dry. I saw the Pogie Lites from BikeIowa, and thought I could make those. So, I grabbed my winter pogies, made a template based on their dimensions, and got to it.
Despite having made a full set of bags for two of my bikes, I’m not really that great at sewing. This project is not difficult and is perfect for both beginners and experienced sewers looking to create a relatively unique but high-utility item. I’ve used these pogies mostly for fall and early winter commuting. They’re great for cool mornings or wet rides. Also, while they are intended primarily for use on flat bars, I’ve found they do work on drop bars that have internally routed cables. Note that if your use would be primarily with drop bars, I would recommend flaring the wrist opening slightly.
Stuff You’ll Need
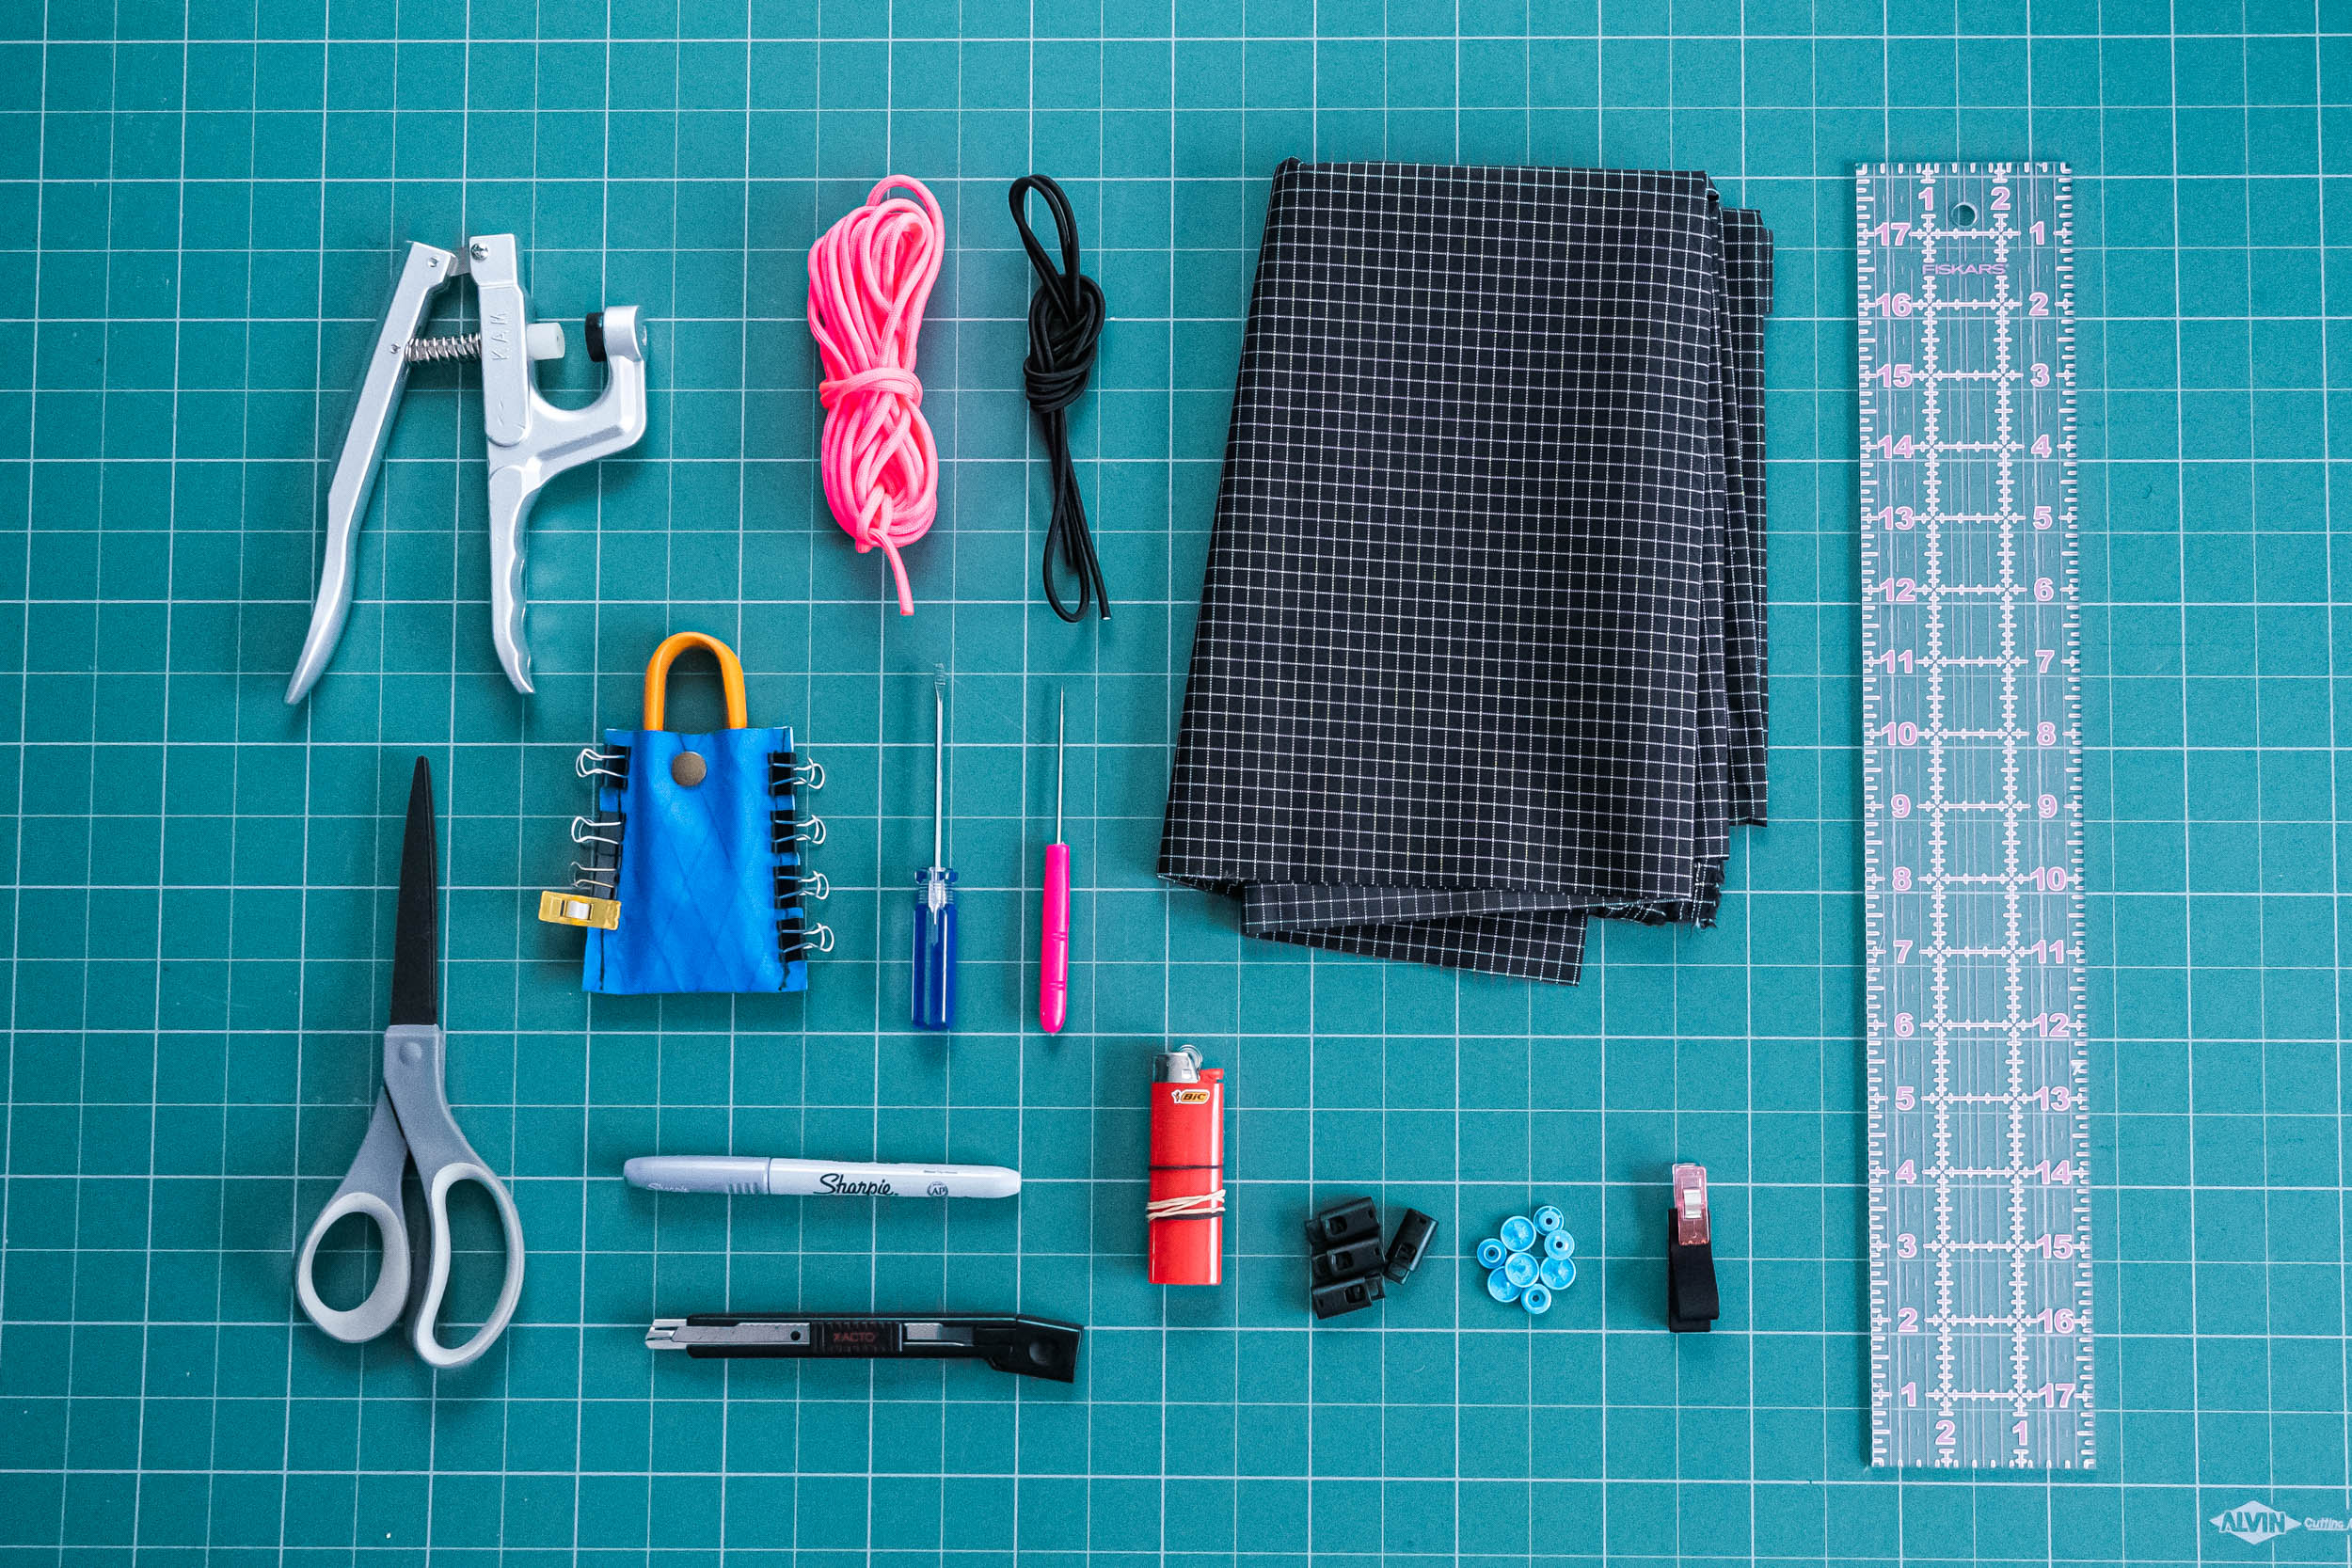
- Lightweight Coated Fabric: I like the HyperD 300 from Ripstop By The Roll. It has a PU coating on the back and, while light, still has enough structure so the finished pogie holds its shape, making it easier to get in and out of. For this tutorial, I’m using a PU coated Dyneema Gridstop Fabric.
- Cord Locks (4).
- 550 Paracord: You could use thinner cord or shock cord as well. I like the 550 size as it provides a nice structure for the wrist opening allowing easier entry/exit.
- Shock Cord (bungee cord): I used ⅛” shock cord, but you could use something smaller.
- Webbing or Grosgrain.
- Snaps: here I’m using KAM Snaps Plastic Snaps.
Step 1 – Create & Cut Out Your Pattern
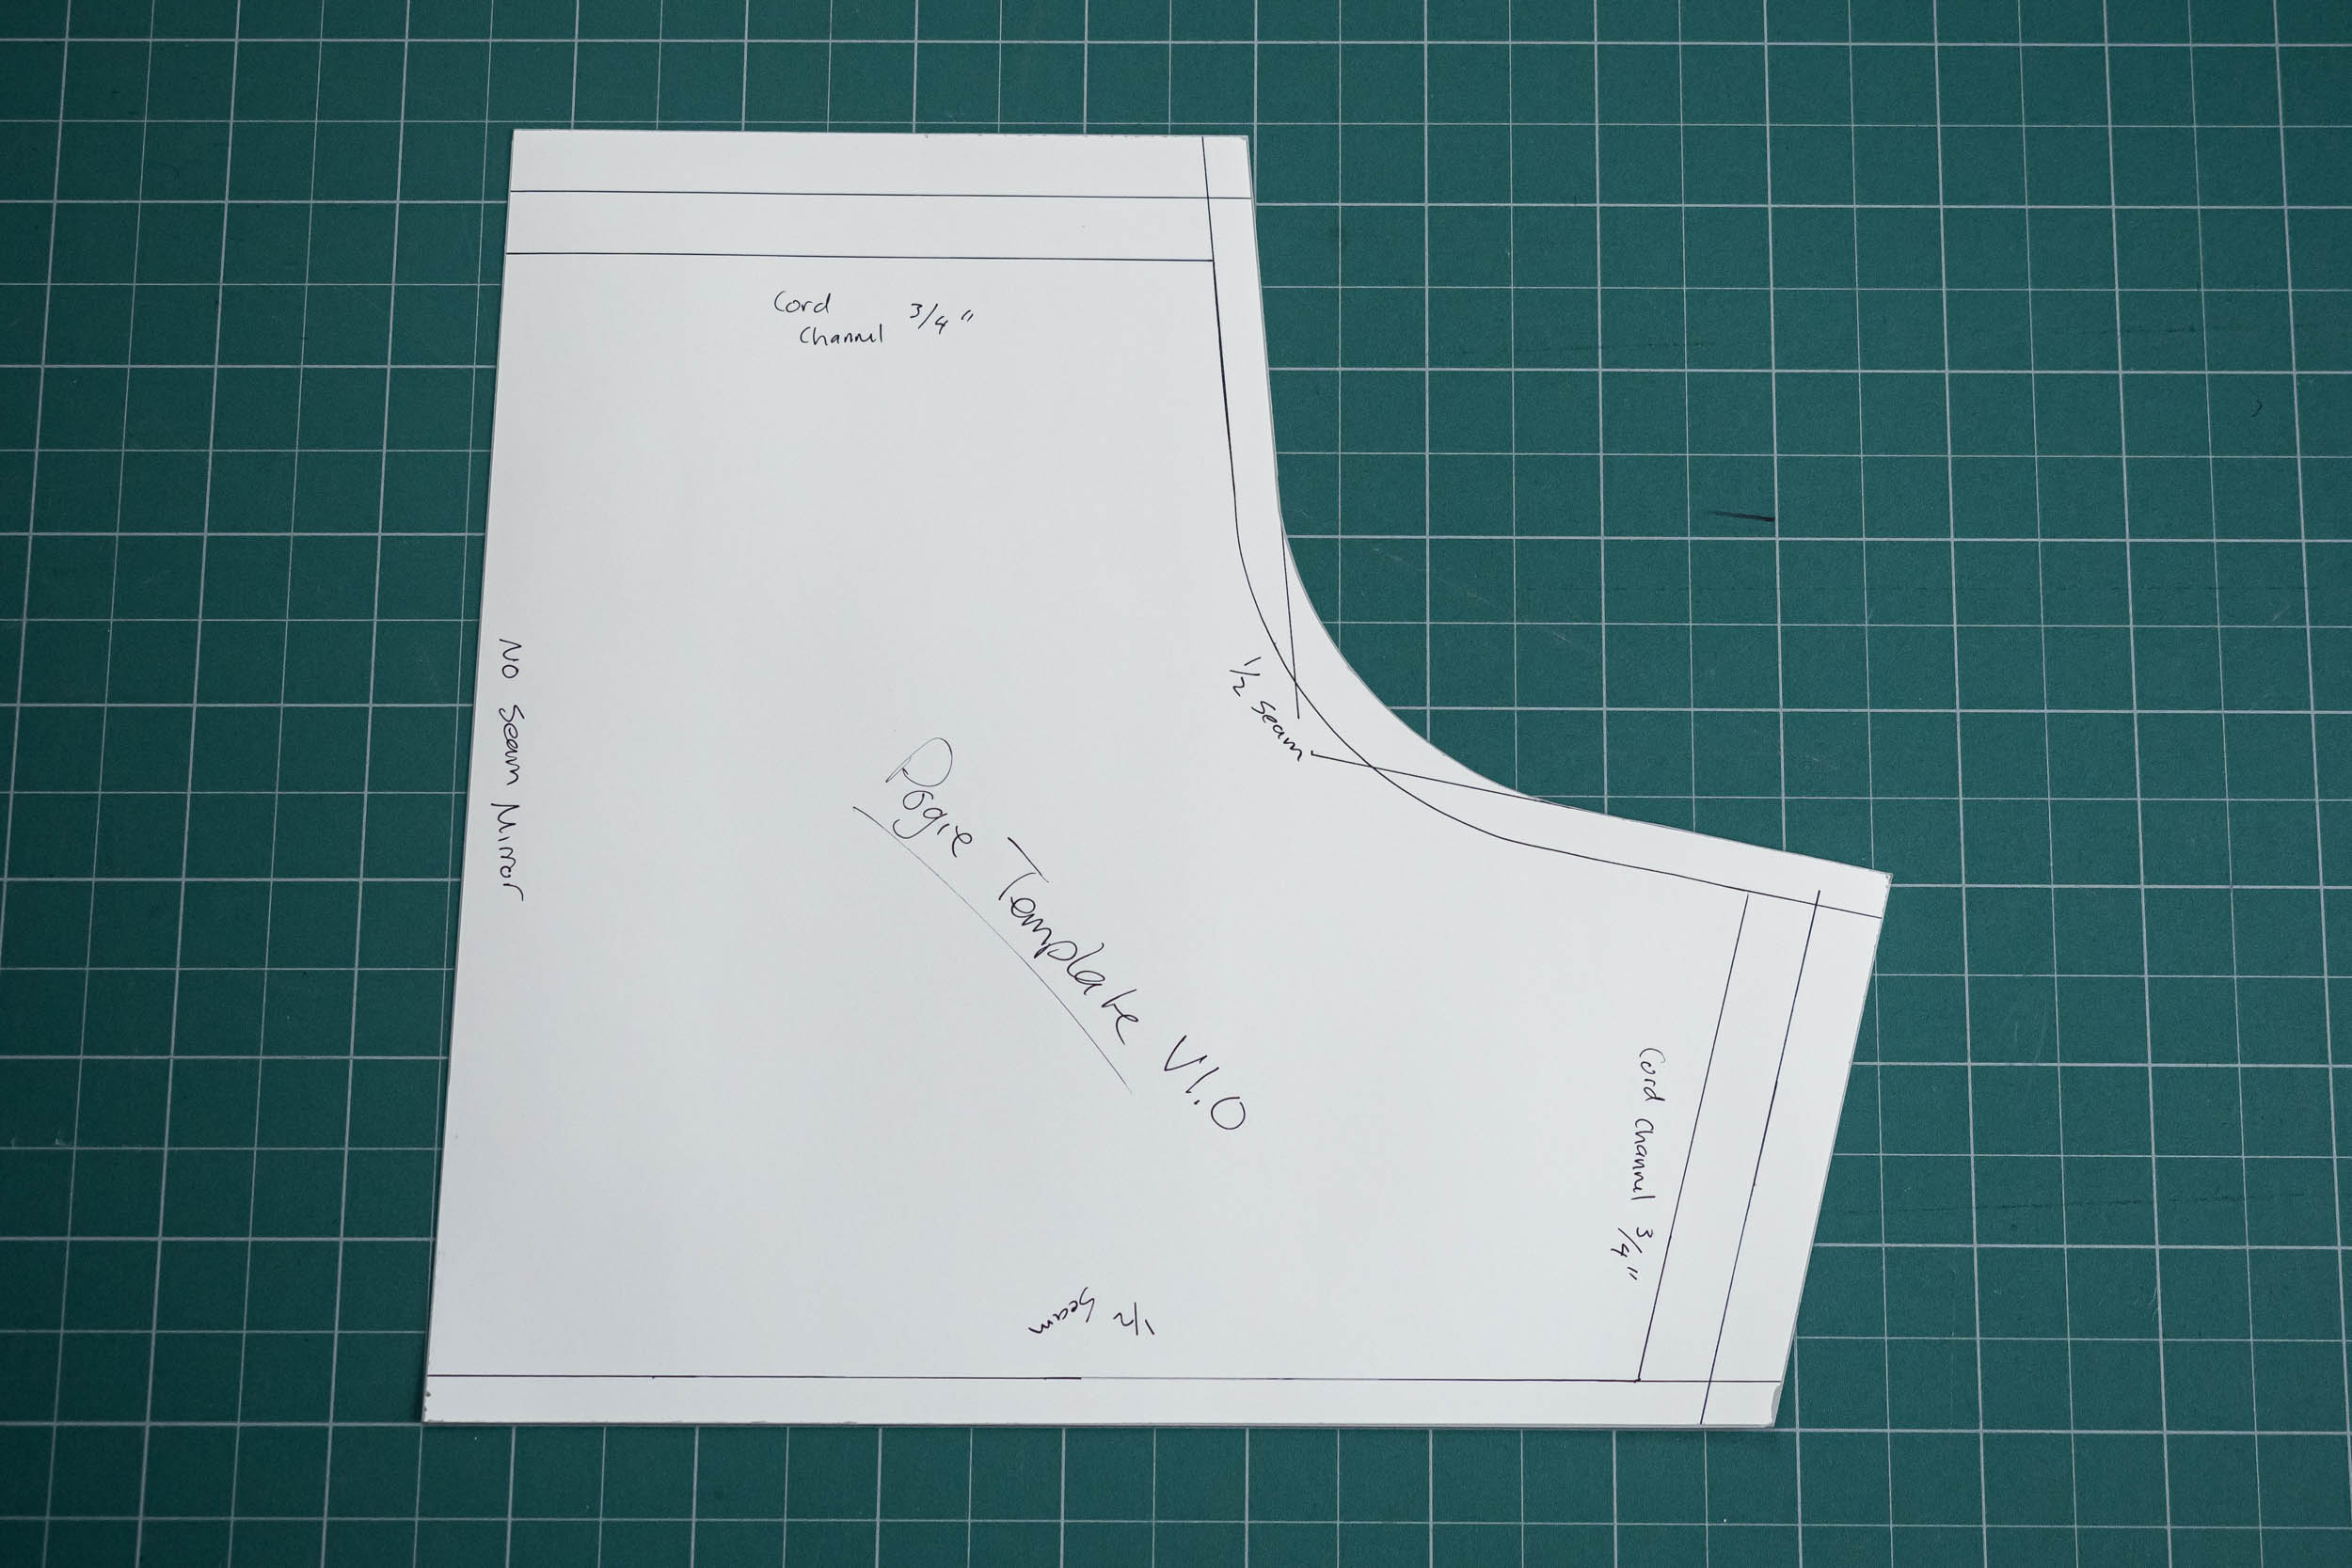
Download the pattern here. Print both halves of the pattern on 11×17 paper at 100%. Cut out the two parts and tape them together. The dimensions are based off of a popular winter pogie that I already owned.
You can also use the photo of my template to create your own (grid is 1×1 inch), and don’t be afraid to experiment and test out your own designs. Newspaper and tape are great for prototyping. If you are going to flare the wrist opening to work better with drop bars, now is the time to make the modification.
Step 2 – Transfer Pattern To Fabric

The pattern provided is only one-half of what’s necessary. When transferring the design to your fabric, you will need to trace the first half, then flip along the “mirrored” edge, and trace the other half.
If you are using smaller sections of fabric, you can always trace these halves separately and sew them together along the “mirrored” seam. Just remember to add in your seam allowance before cutting to ensure the finished dimensions are accurate. A “seam allowance” is a small amount of excess fabric between the seam and the edge that will be hidden inside. This design uses a ½” seam allowance on the sewn edges.
Step 3 – Cut Out Fabric
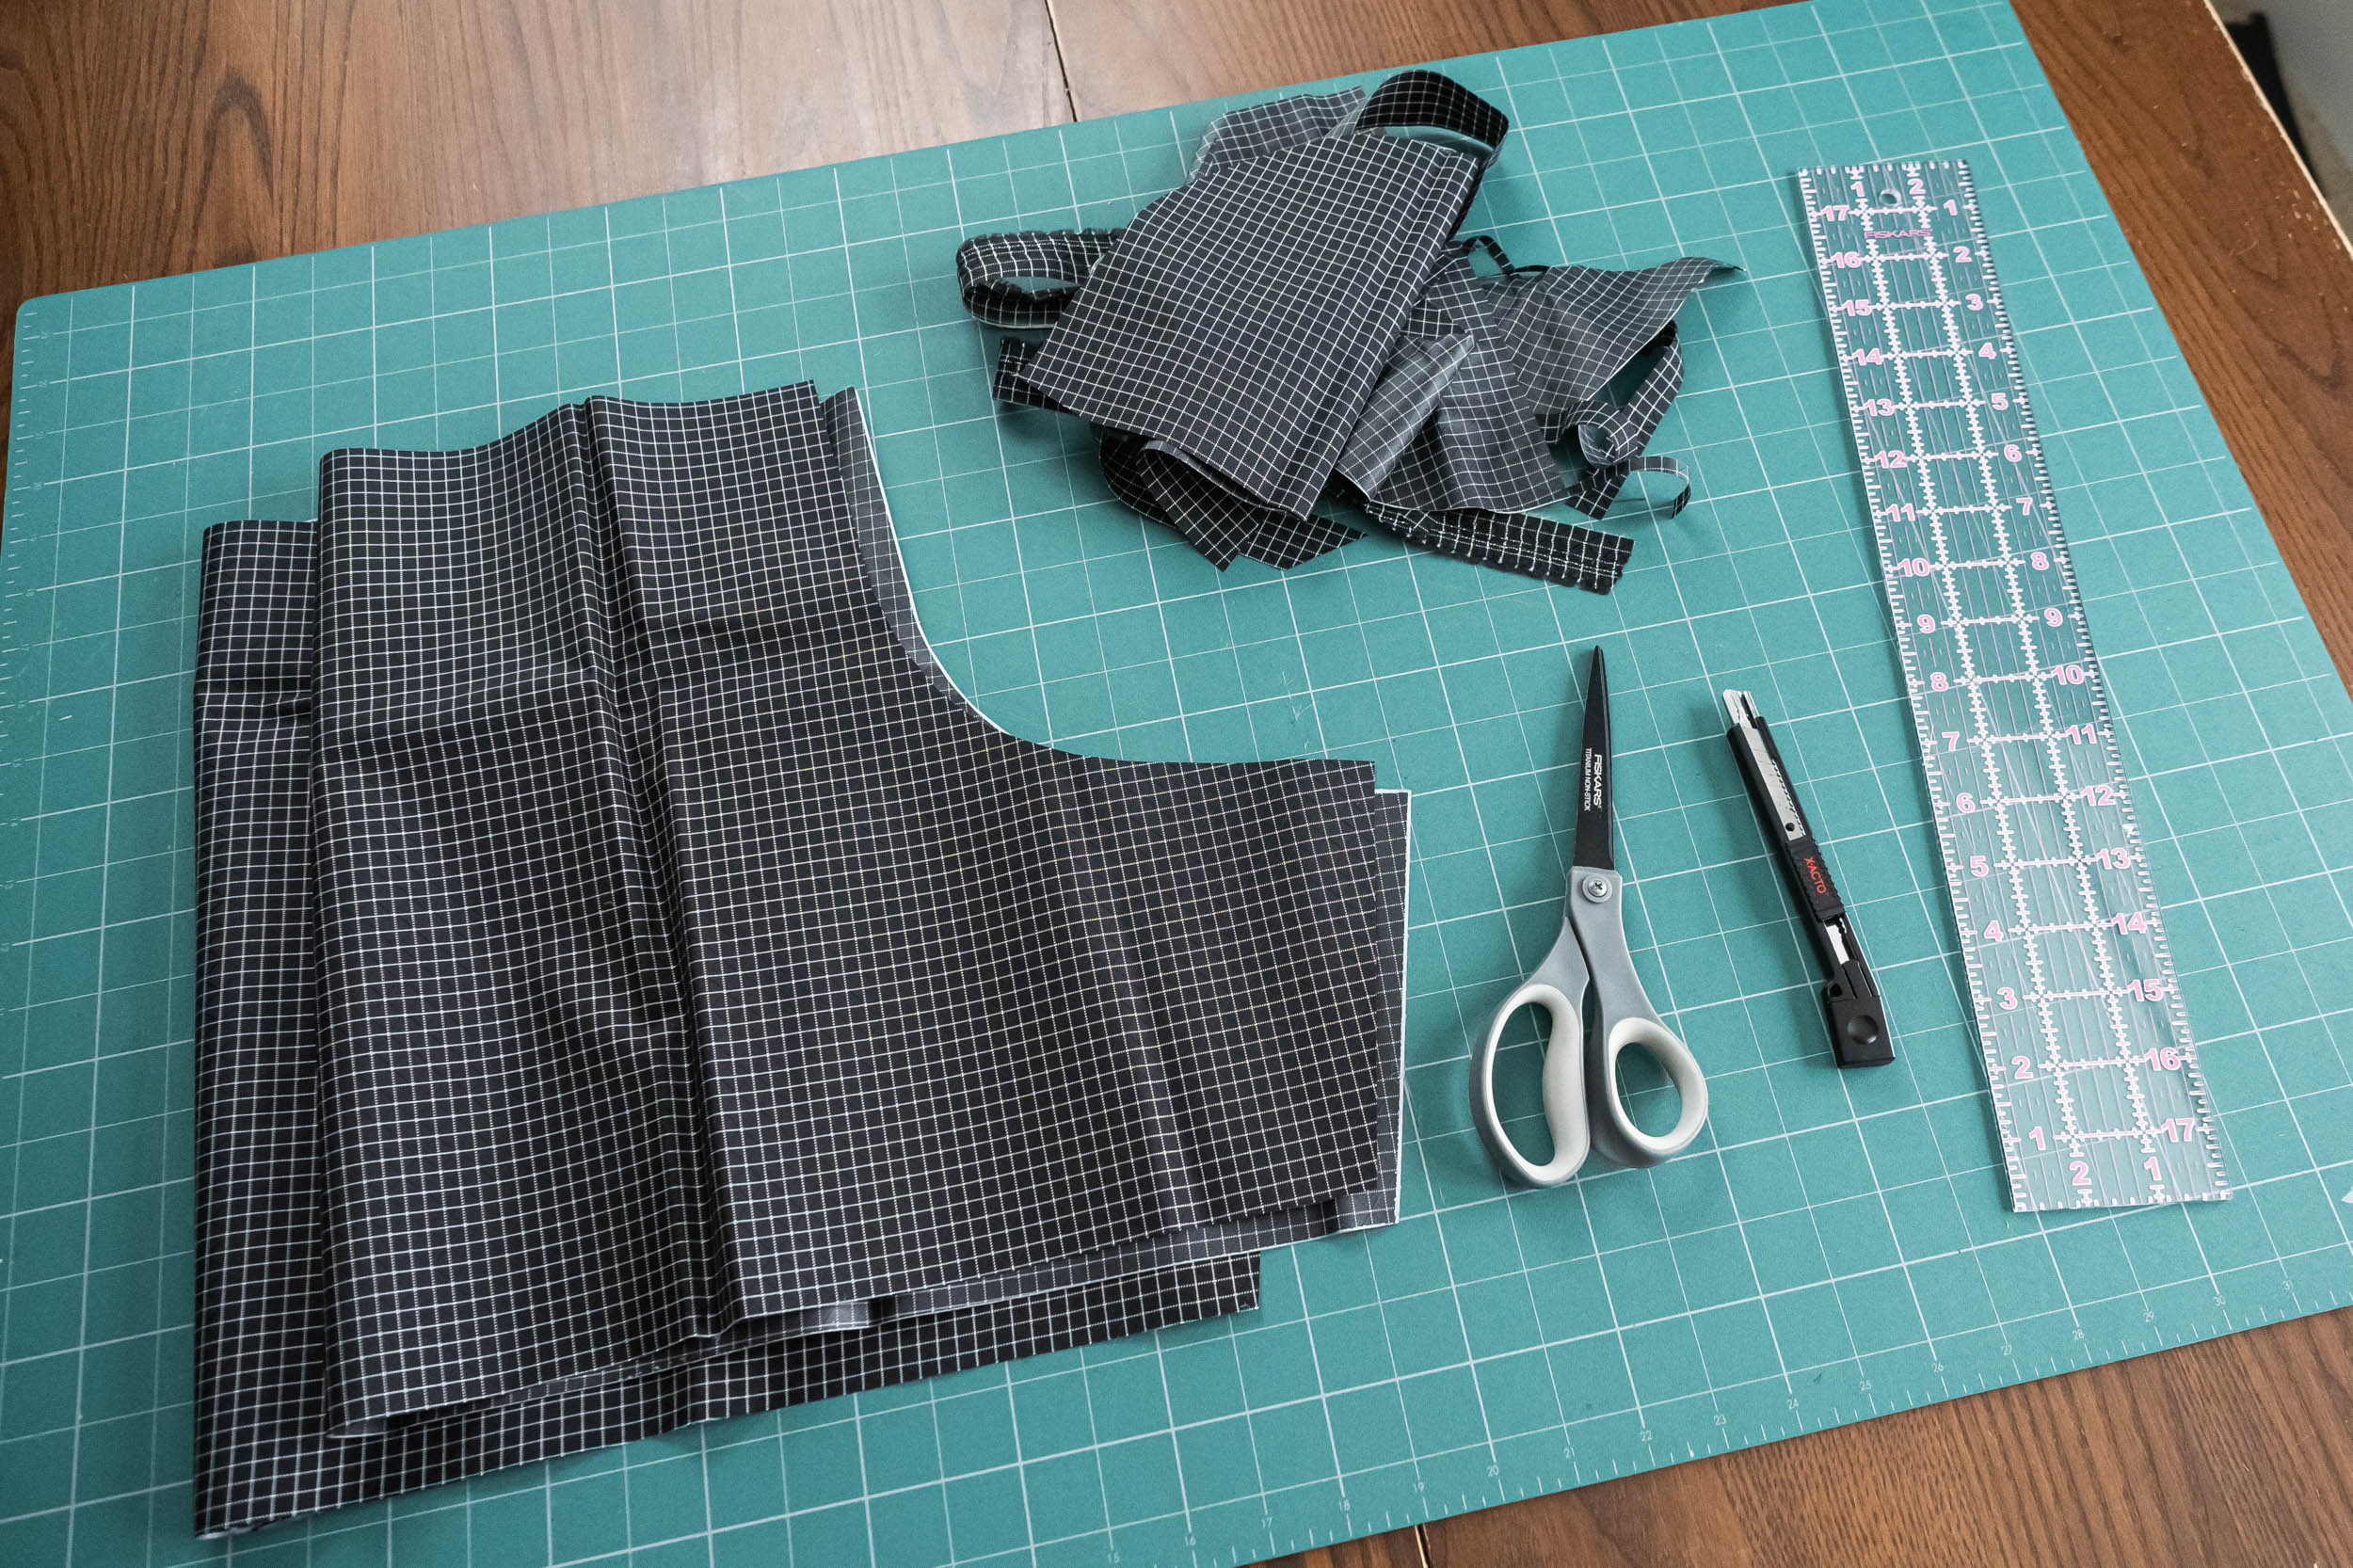
This step is pretty straightforward. The template provided includes seam allowances and is ready to cut after being traced. If making modifications, or using your own design, remember to include your seam allowances and additional fabric for your cord channels before cutting out the fabric. Always double-check your work before cutting.
Step 4 – Mark Your Seam Allowances and Cord Channel Guides
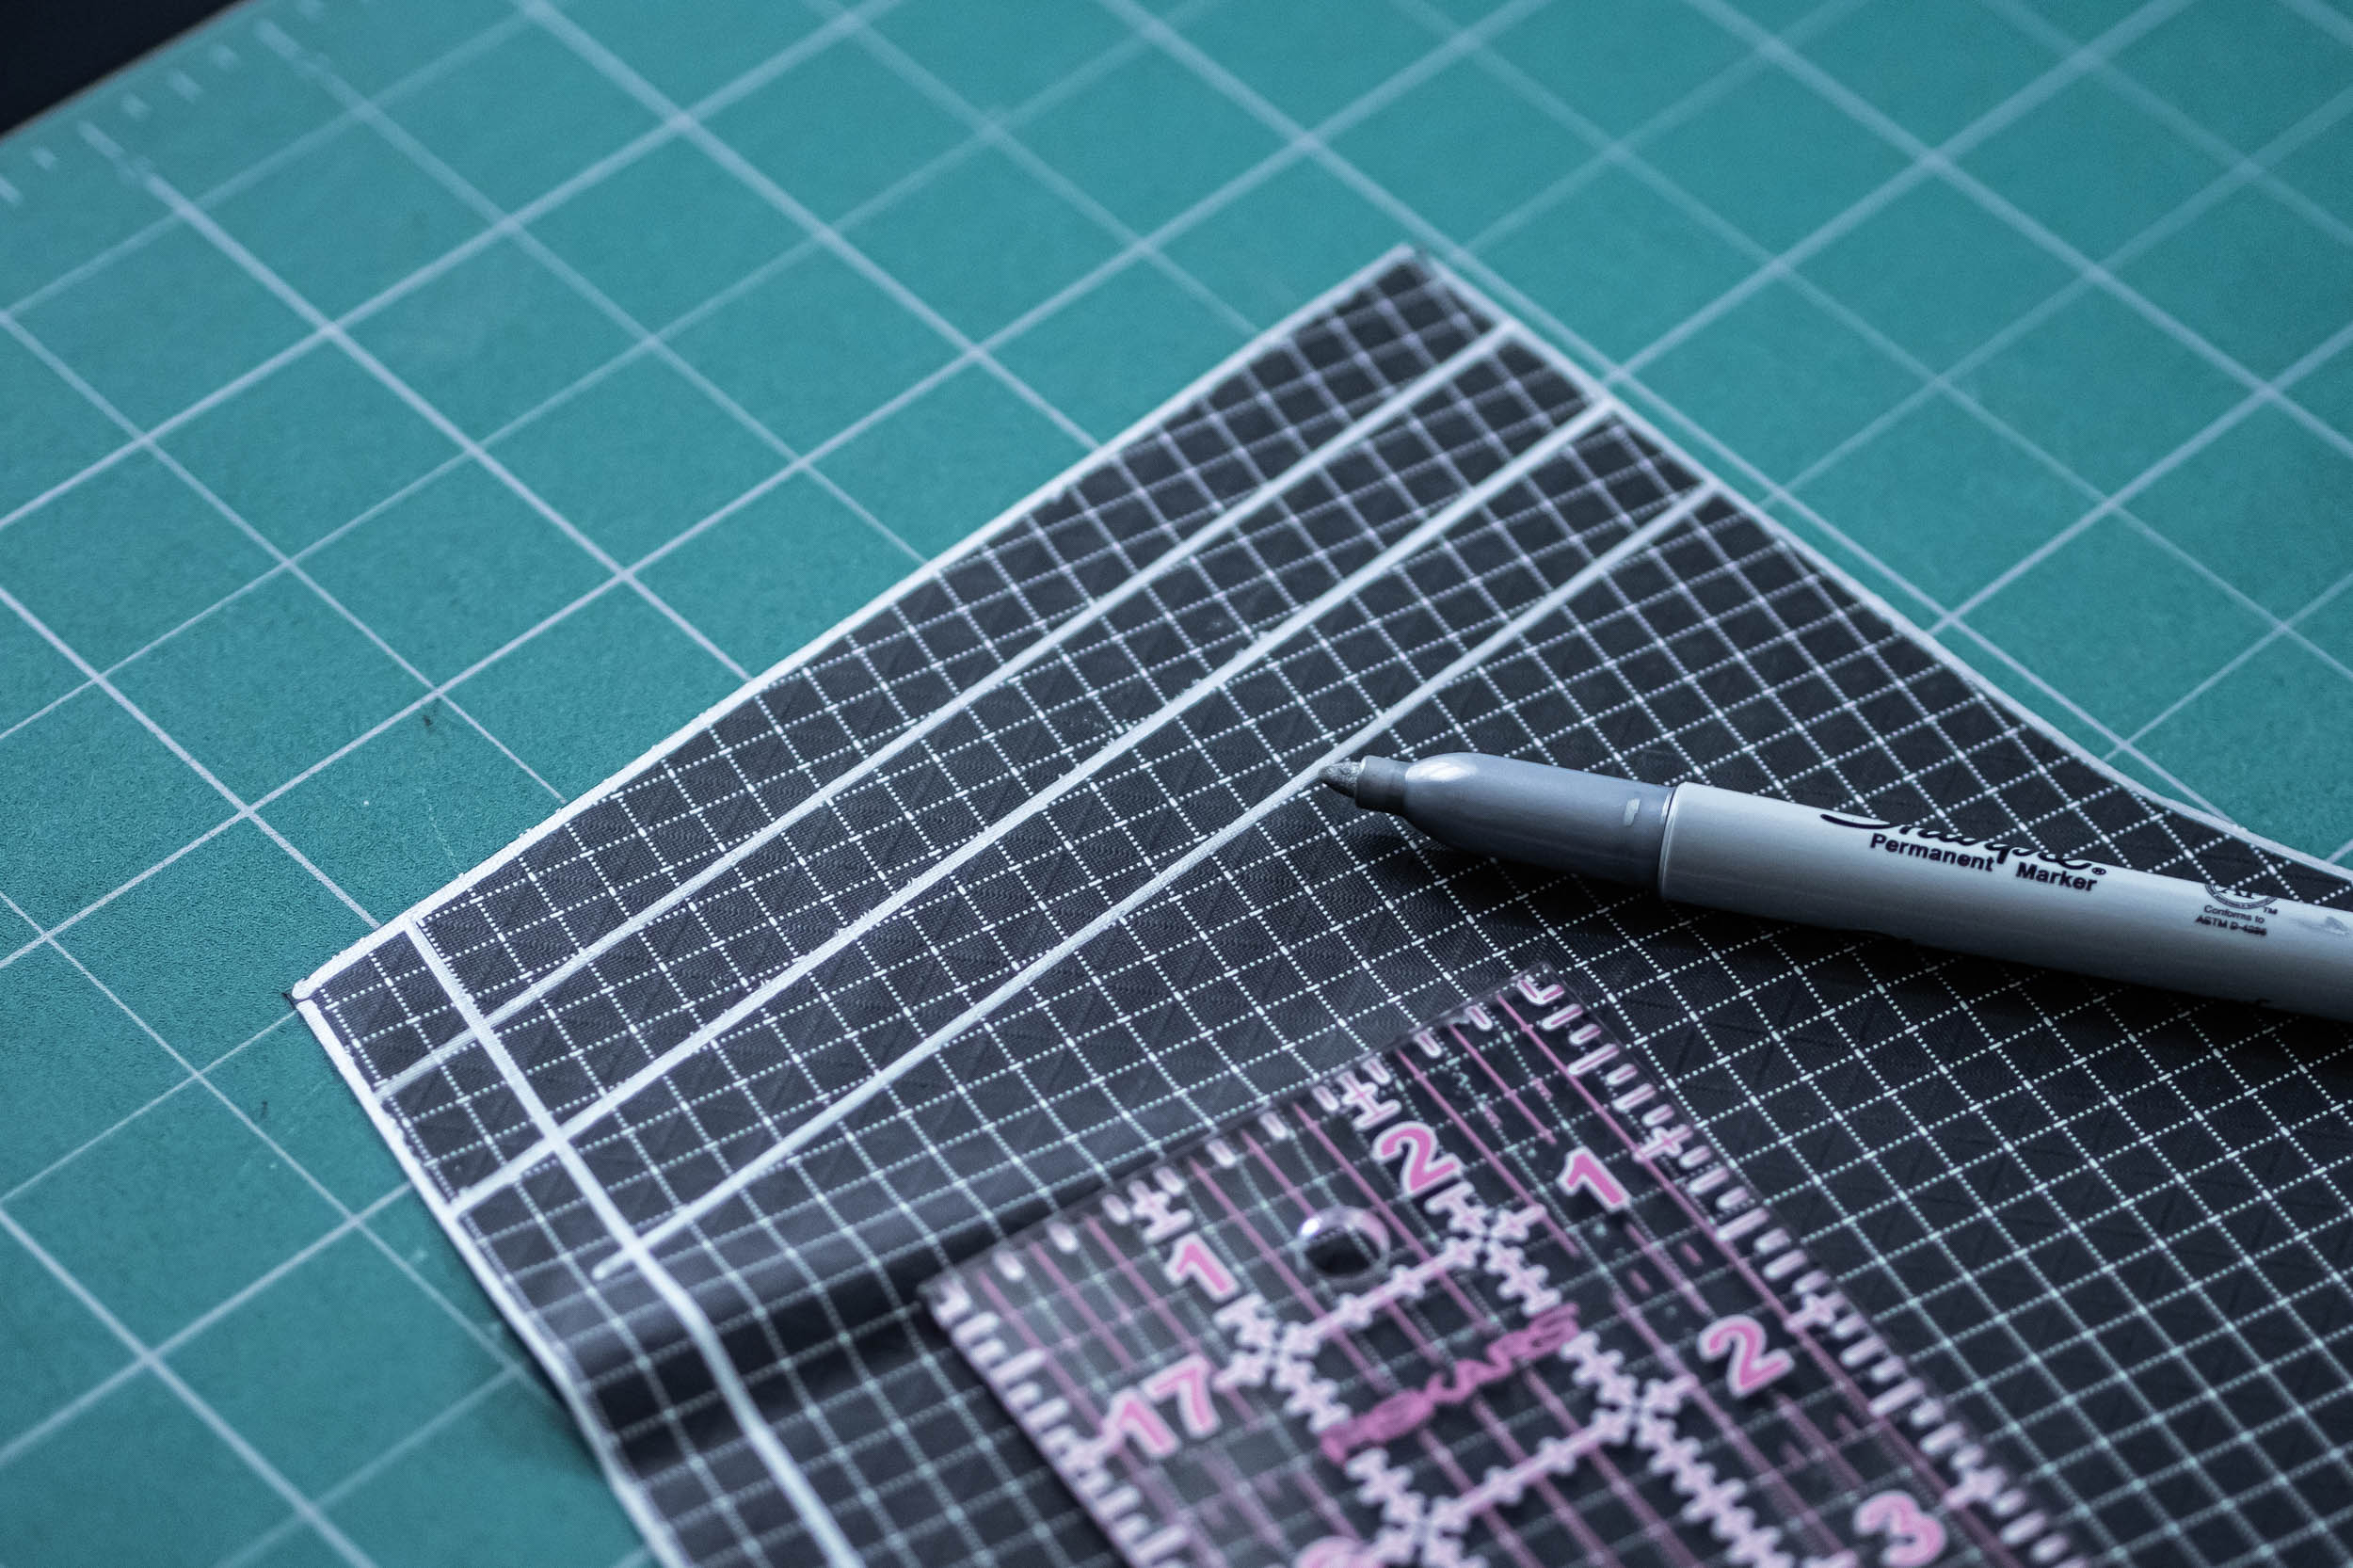
I like to use a contrasting marker or pen to mark my seam allowances (½ inch) and create guides for my cord channels, three lines ¾ inches apart measured starting from the fabric edge.
Step 5 – Fold and Sew Cord Channel Corners

In this step, we will fold in the corners on the sides that will have cord channels. The bottom of the fold should line up with the bottom (third) guideline. I like to sew these down as it makes the next step easier. Do this for all six sides (three on each pogie) that have cord channels.
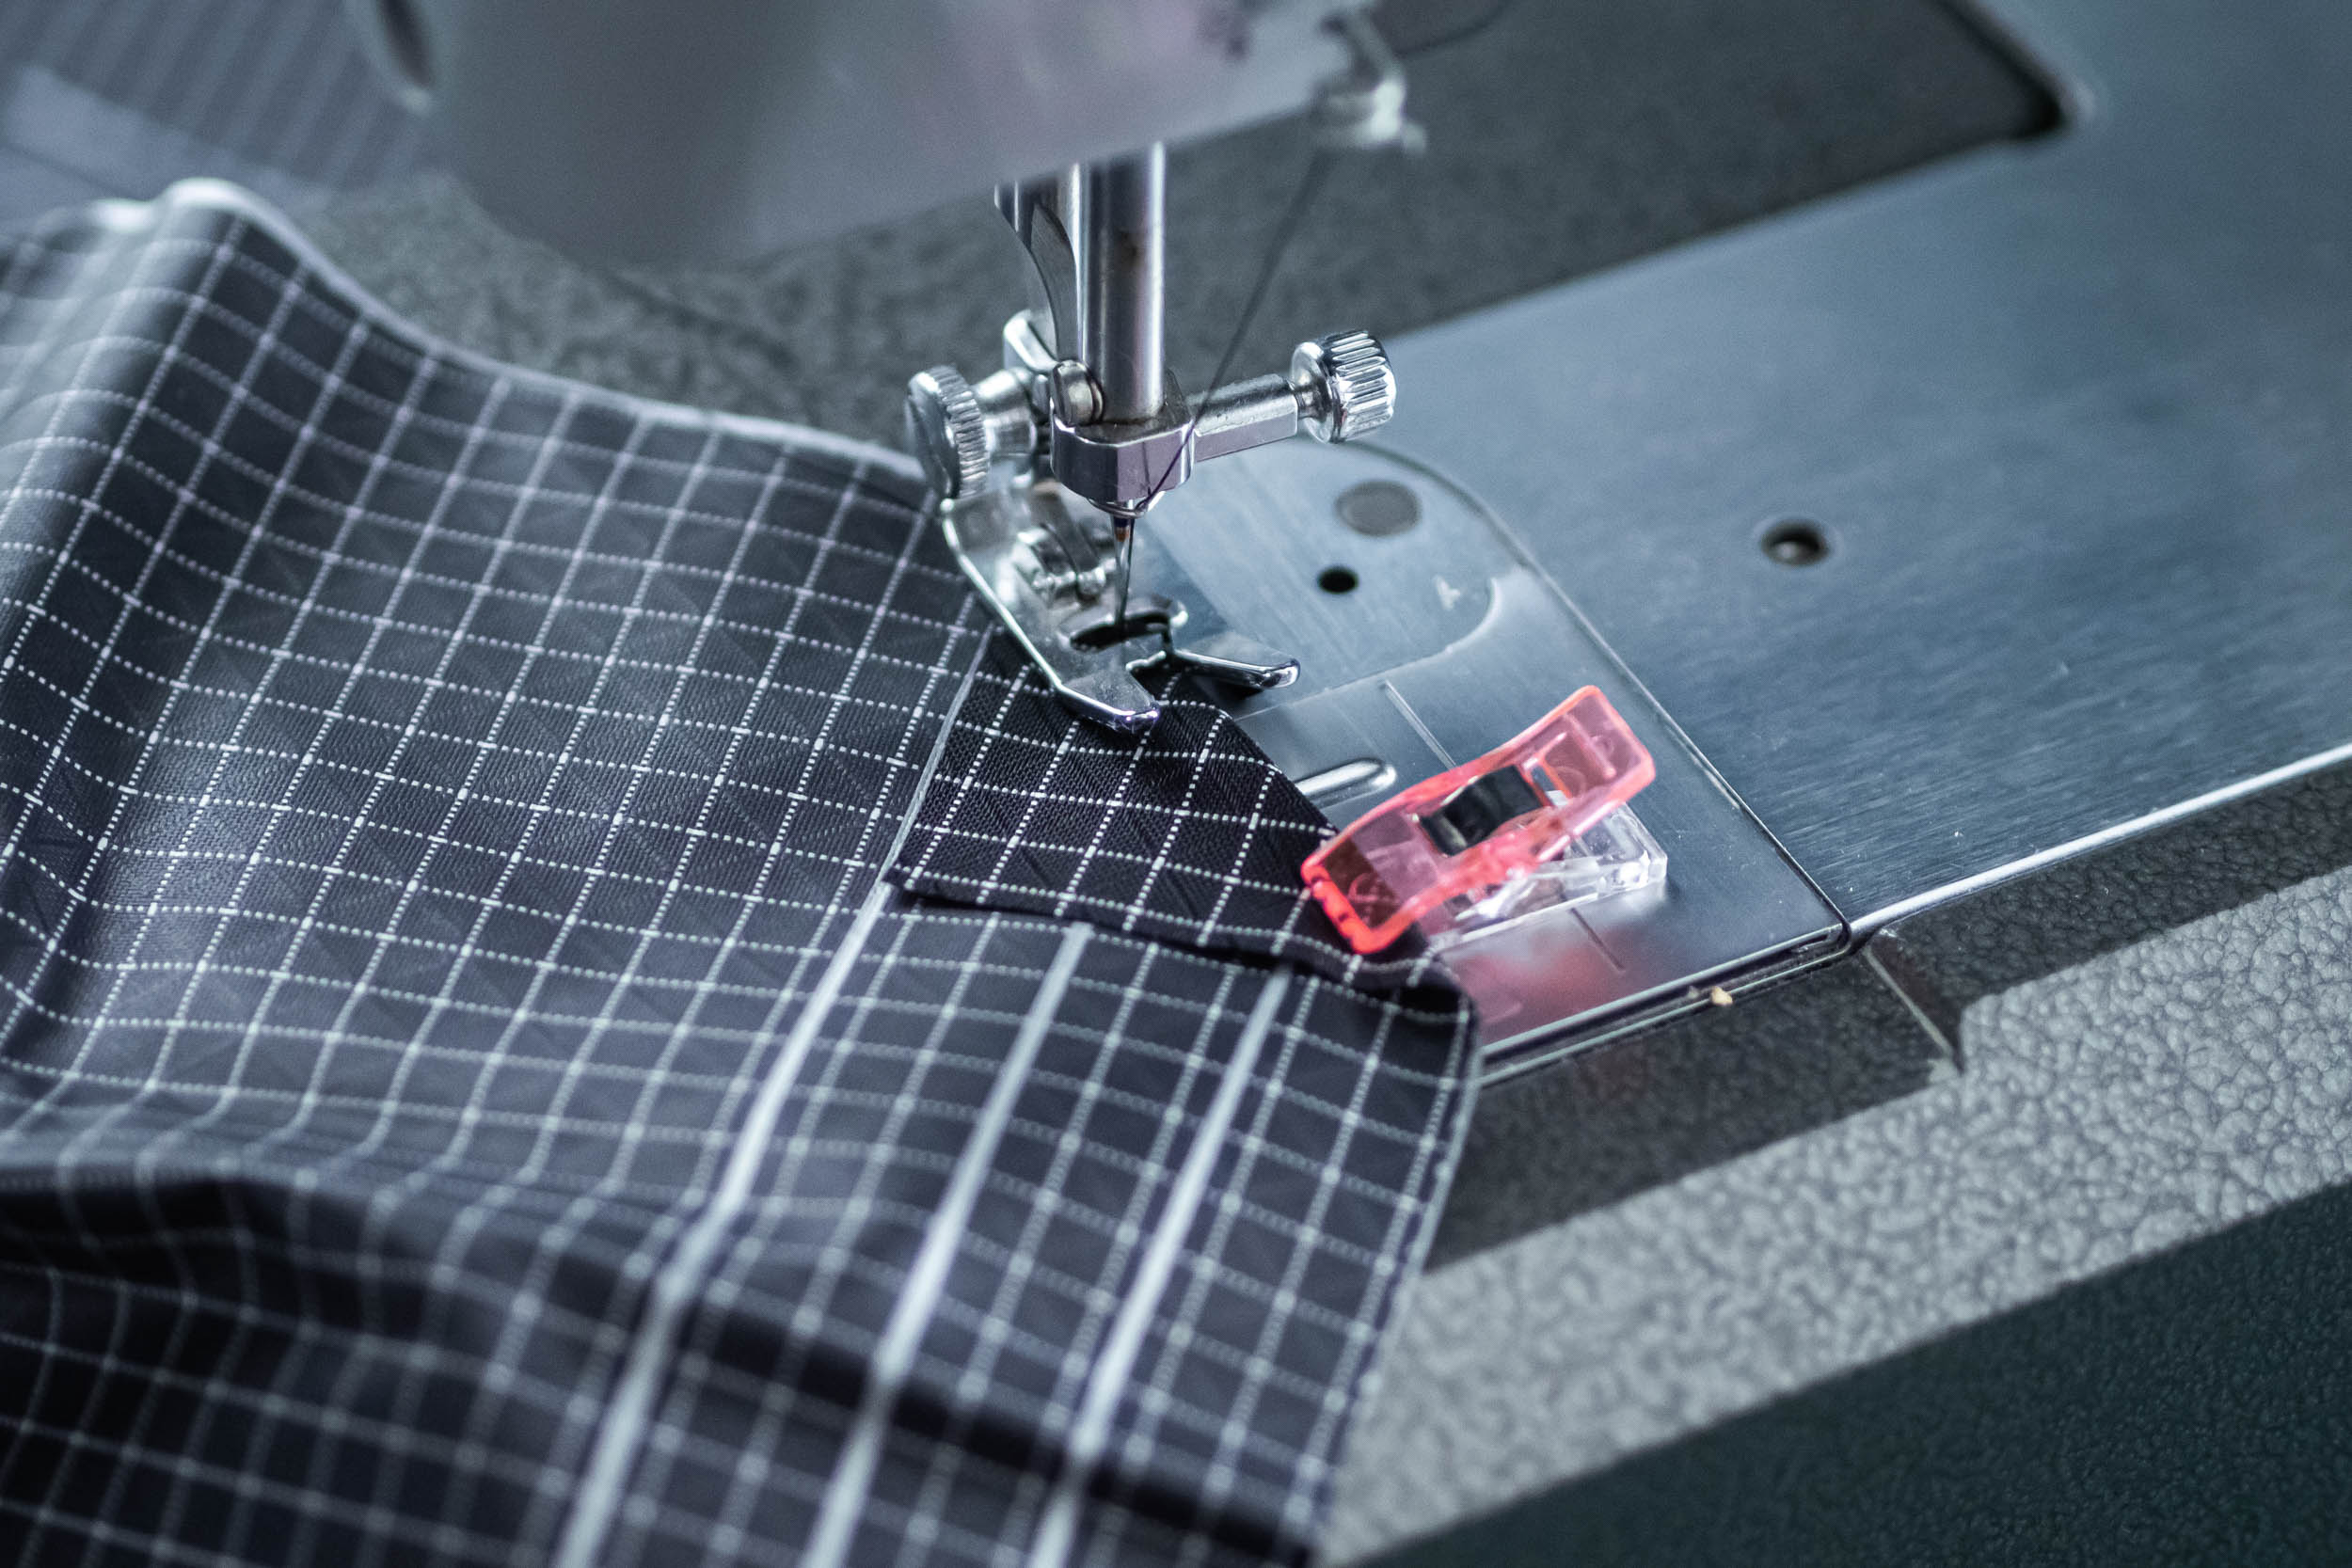
Step 6 – Fold and Sew Cord Channels
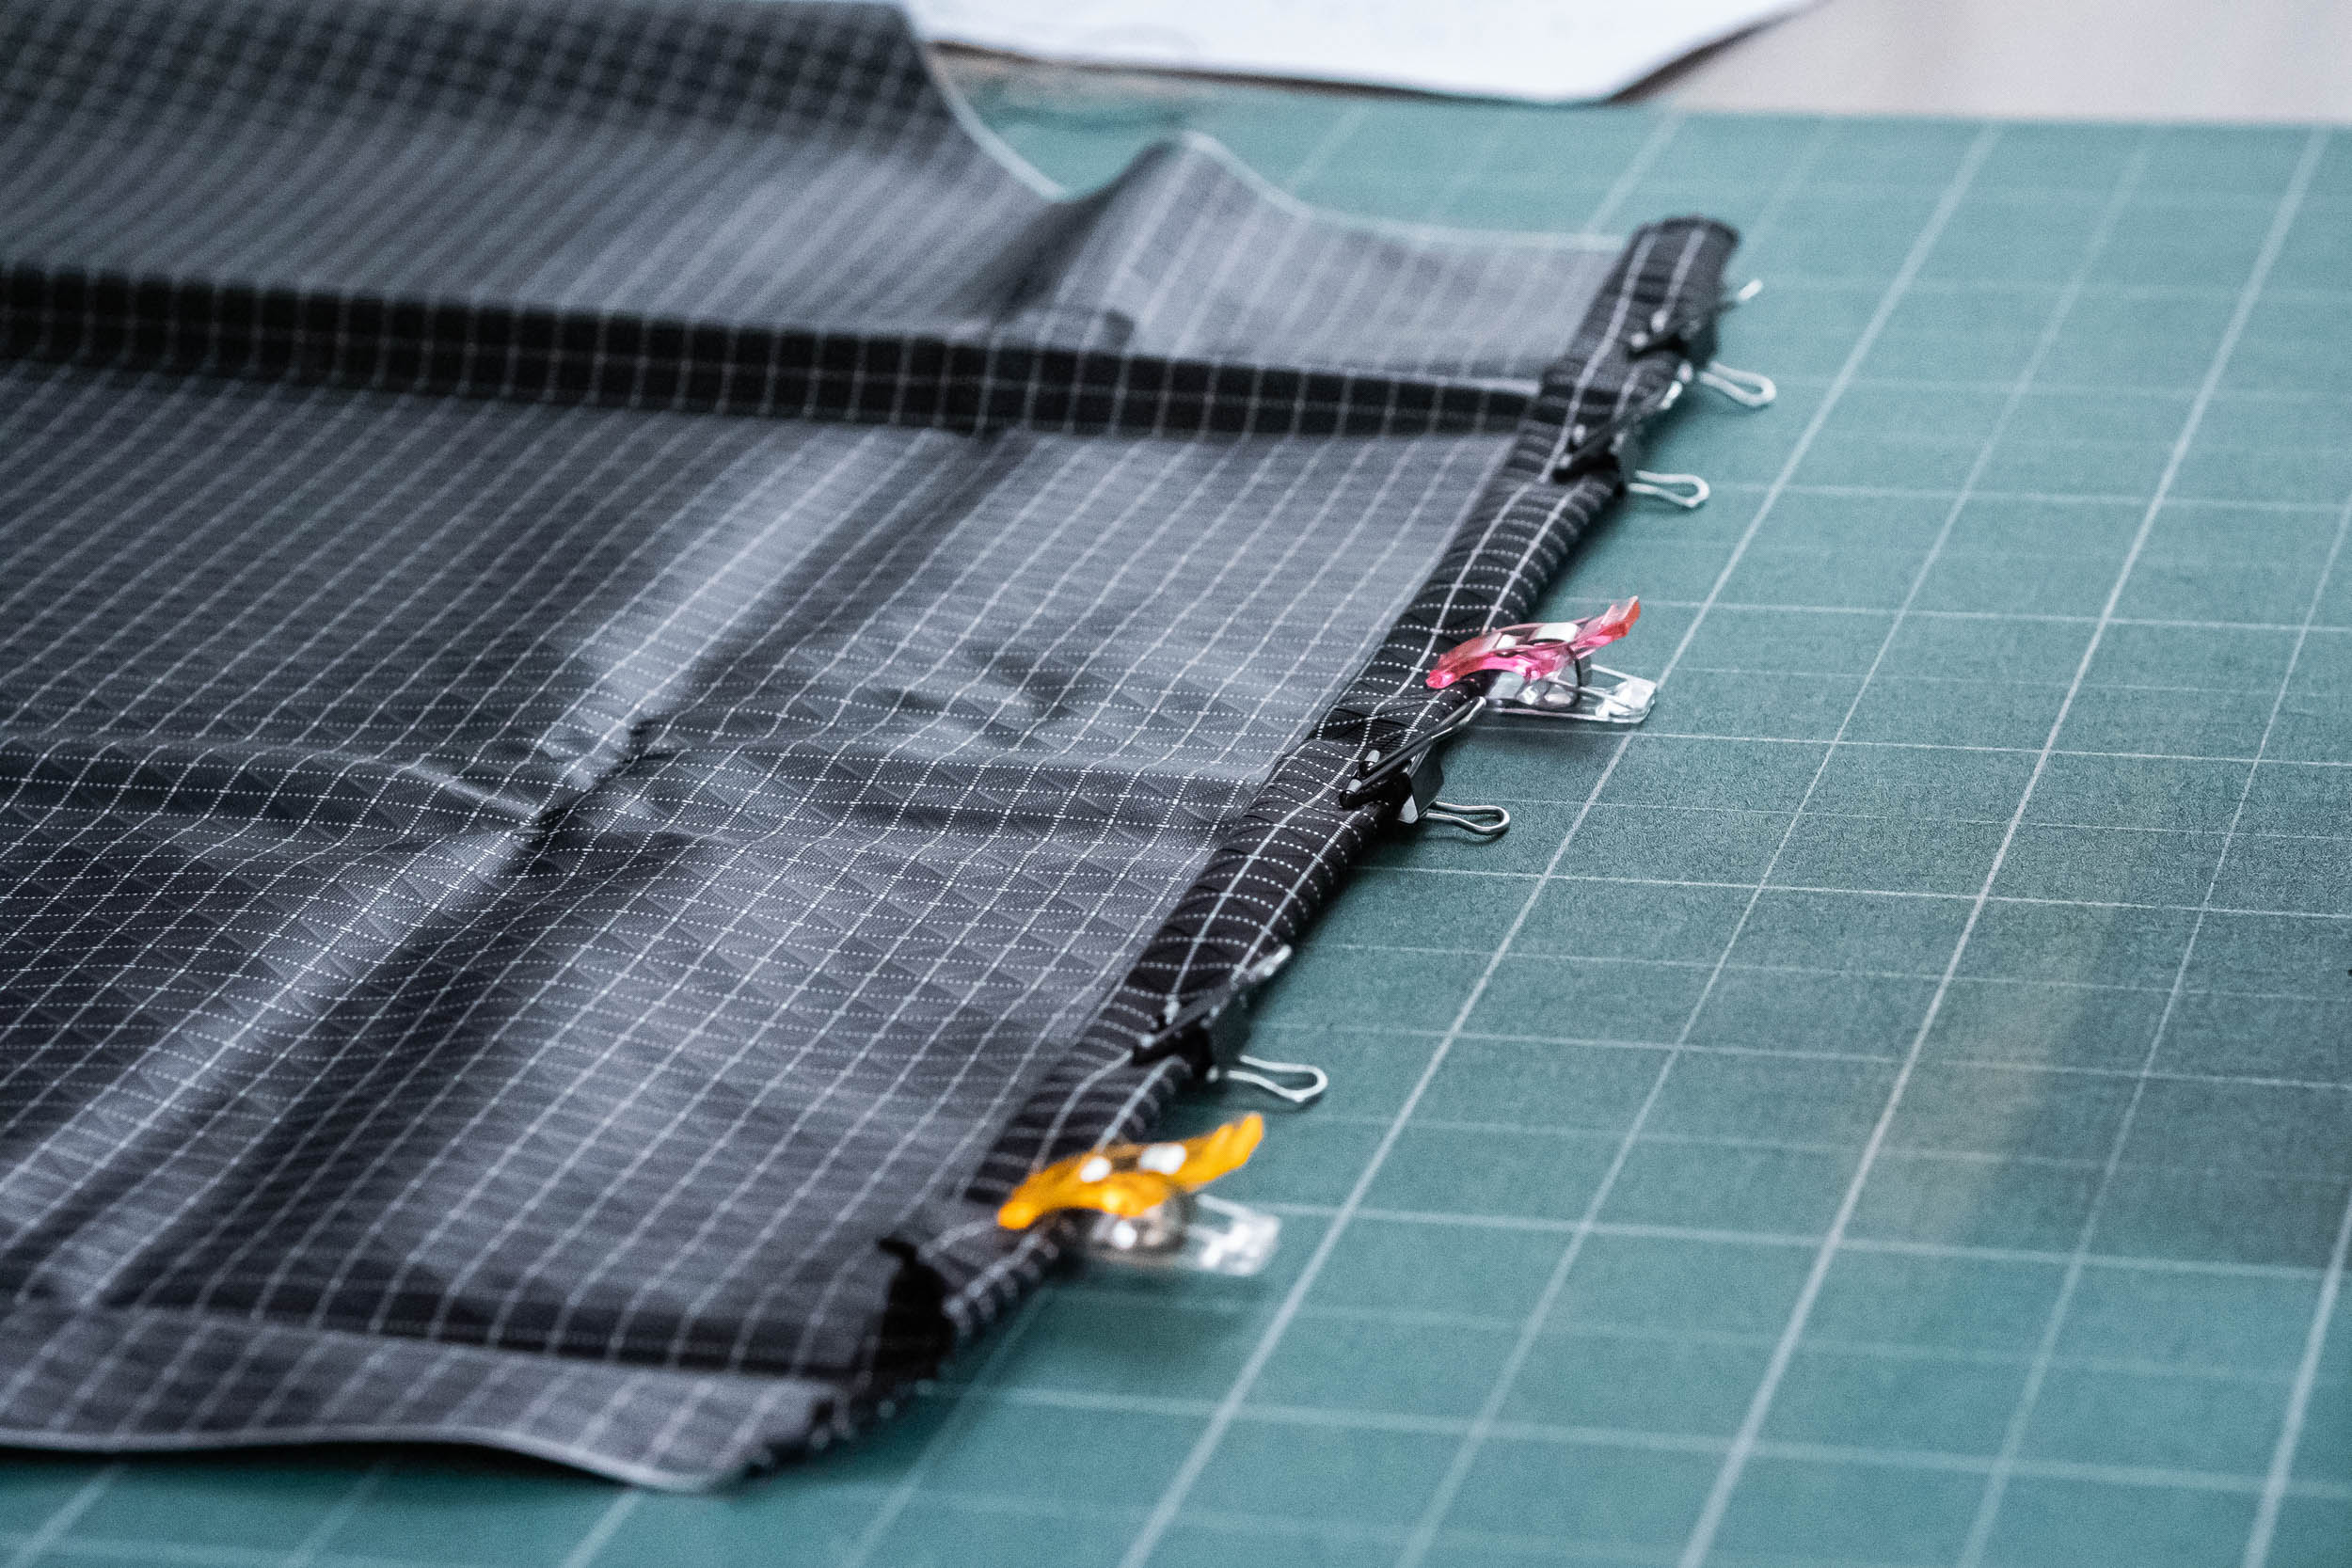
In this step, we will be sewing the channels through which the paracord will pass. This will allow you to cinch down the openings if desired, but the primary reason is to create some structure around the opening to allow the user to more easily get their hands in and out of the pogie.

Fold the top edge down twice, ¾” at a time, using the guidelines to ensure everything is straight. Clip everything in place and then sew along the bottom edge as close to the fold as you can. Do this for all six sides.
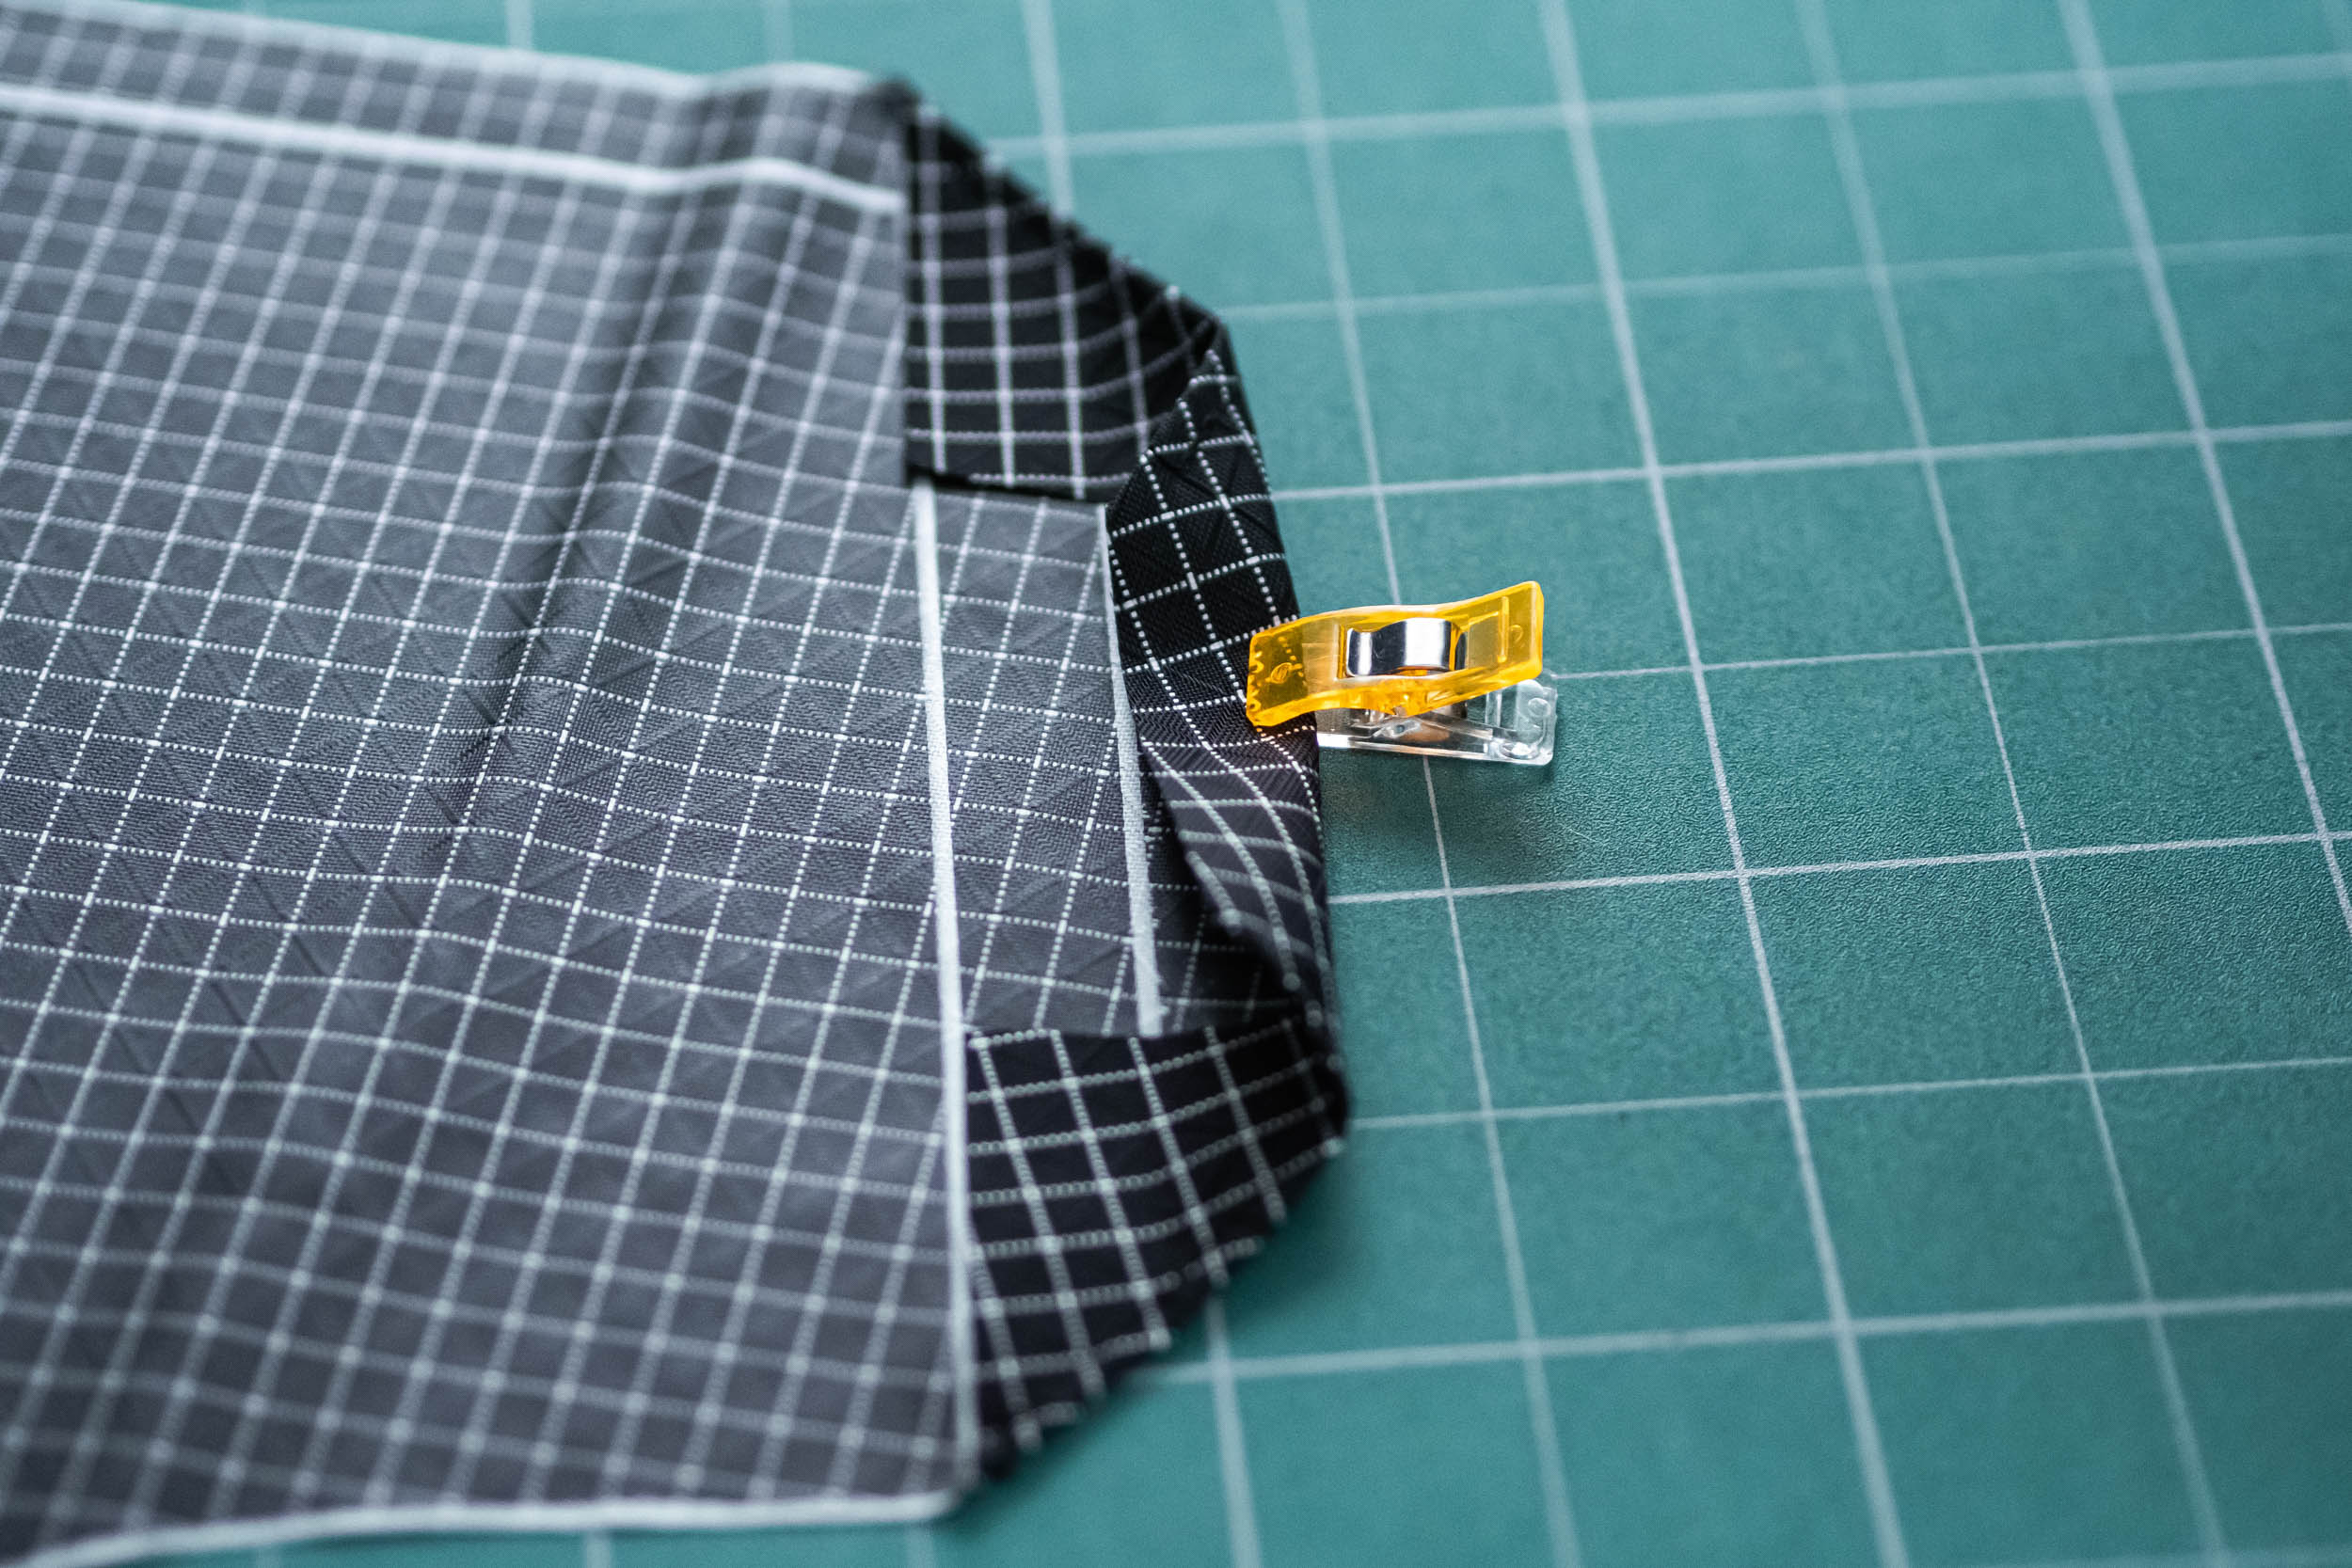
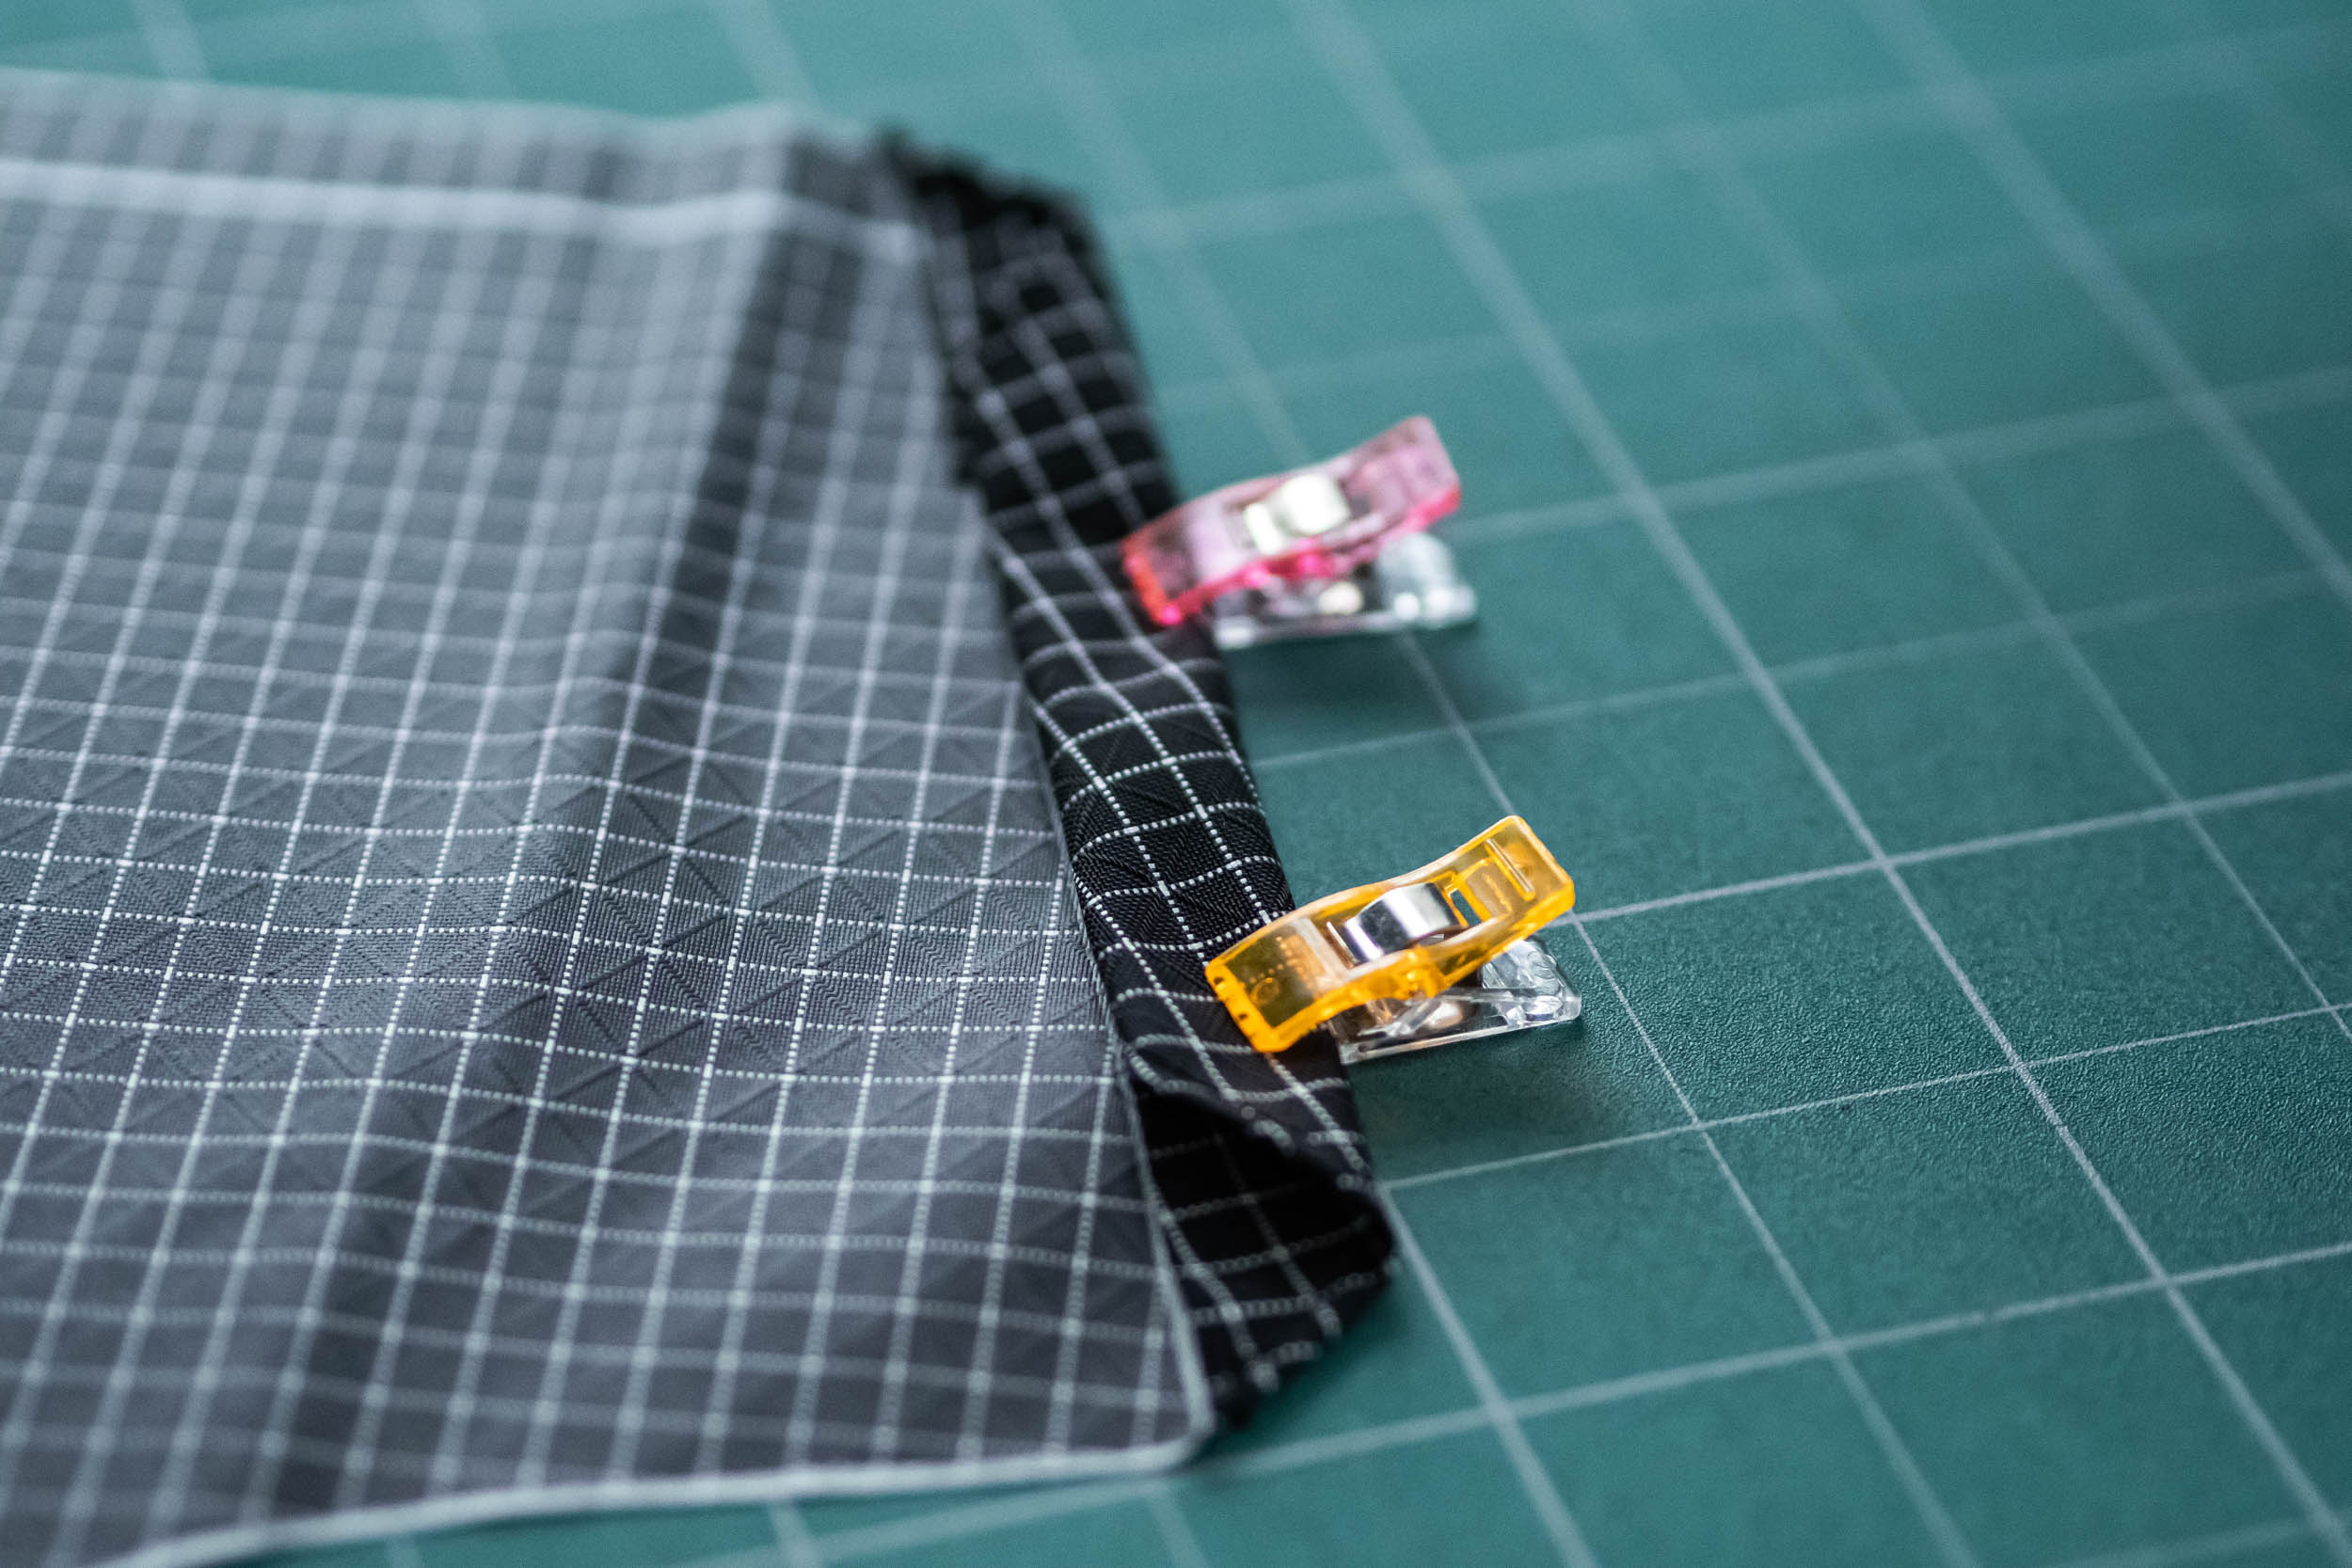
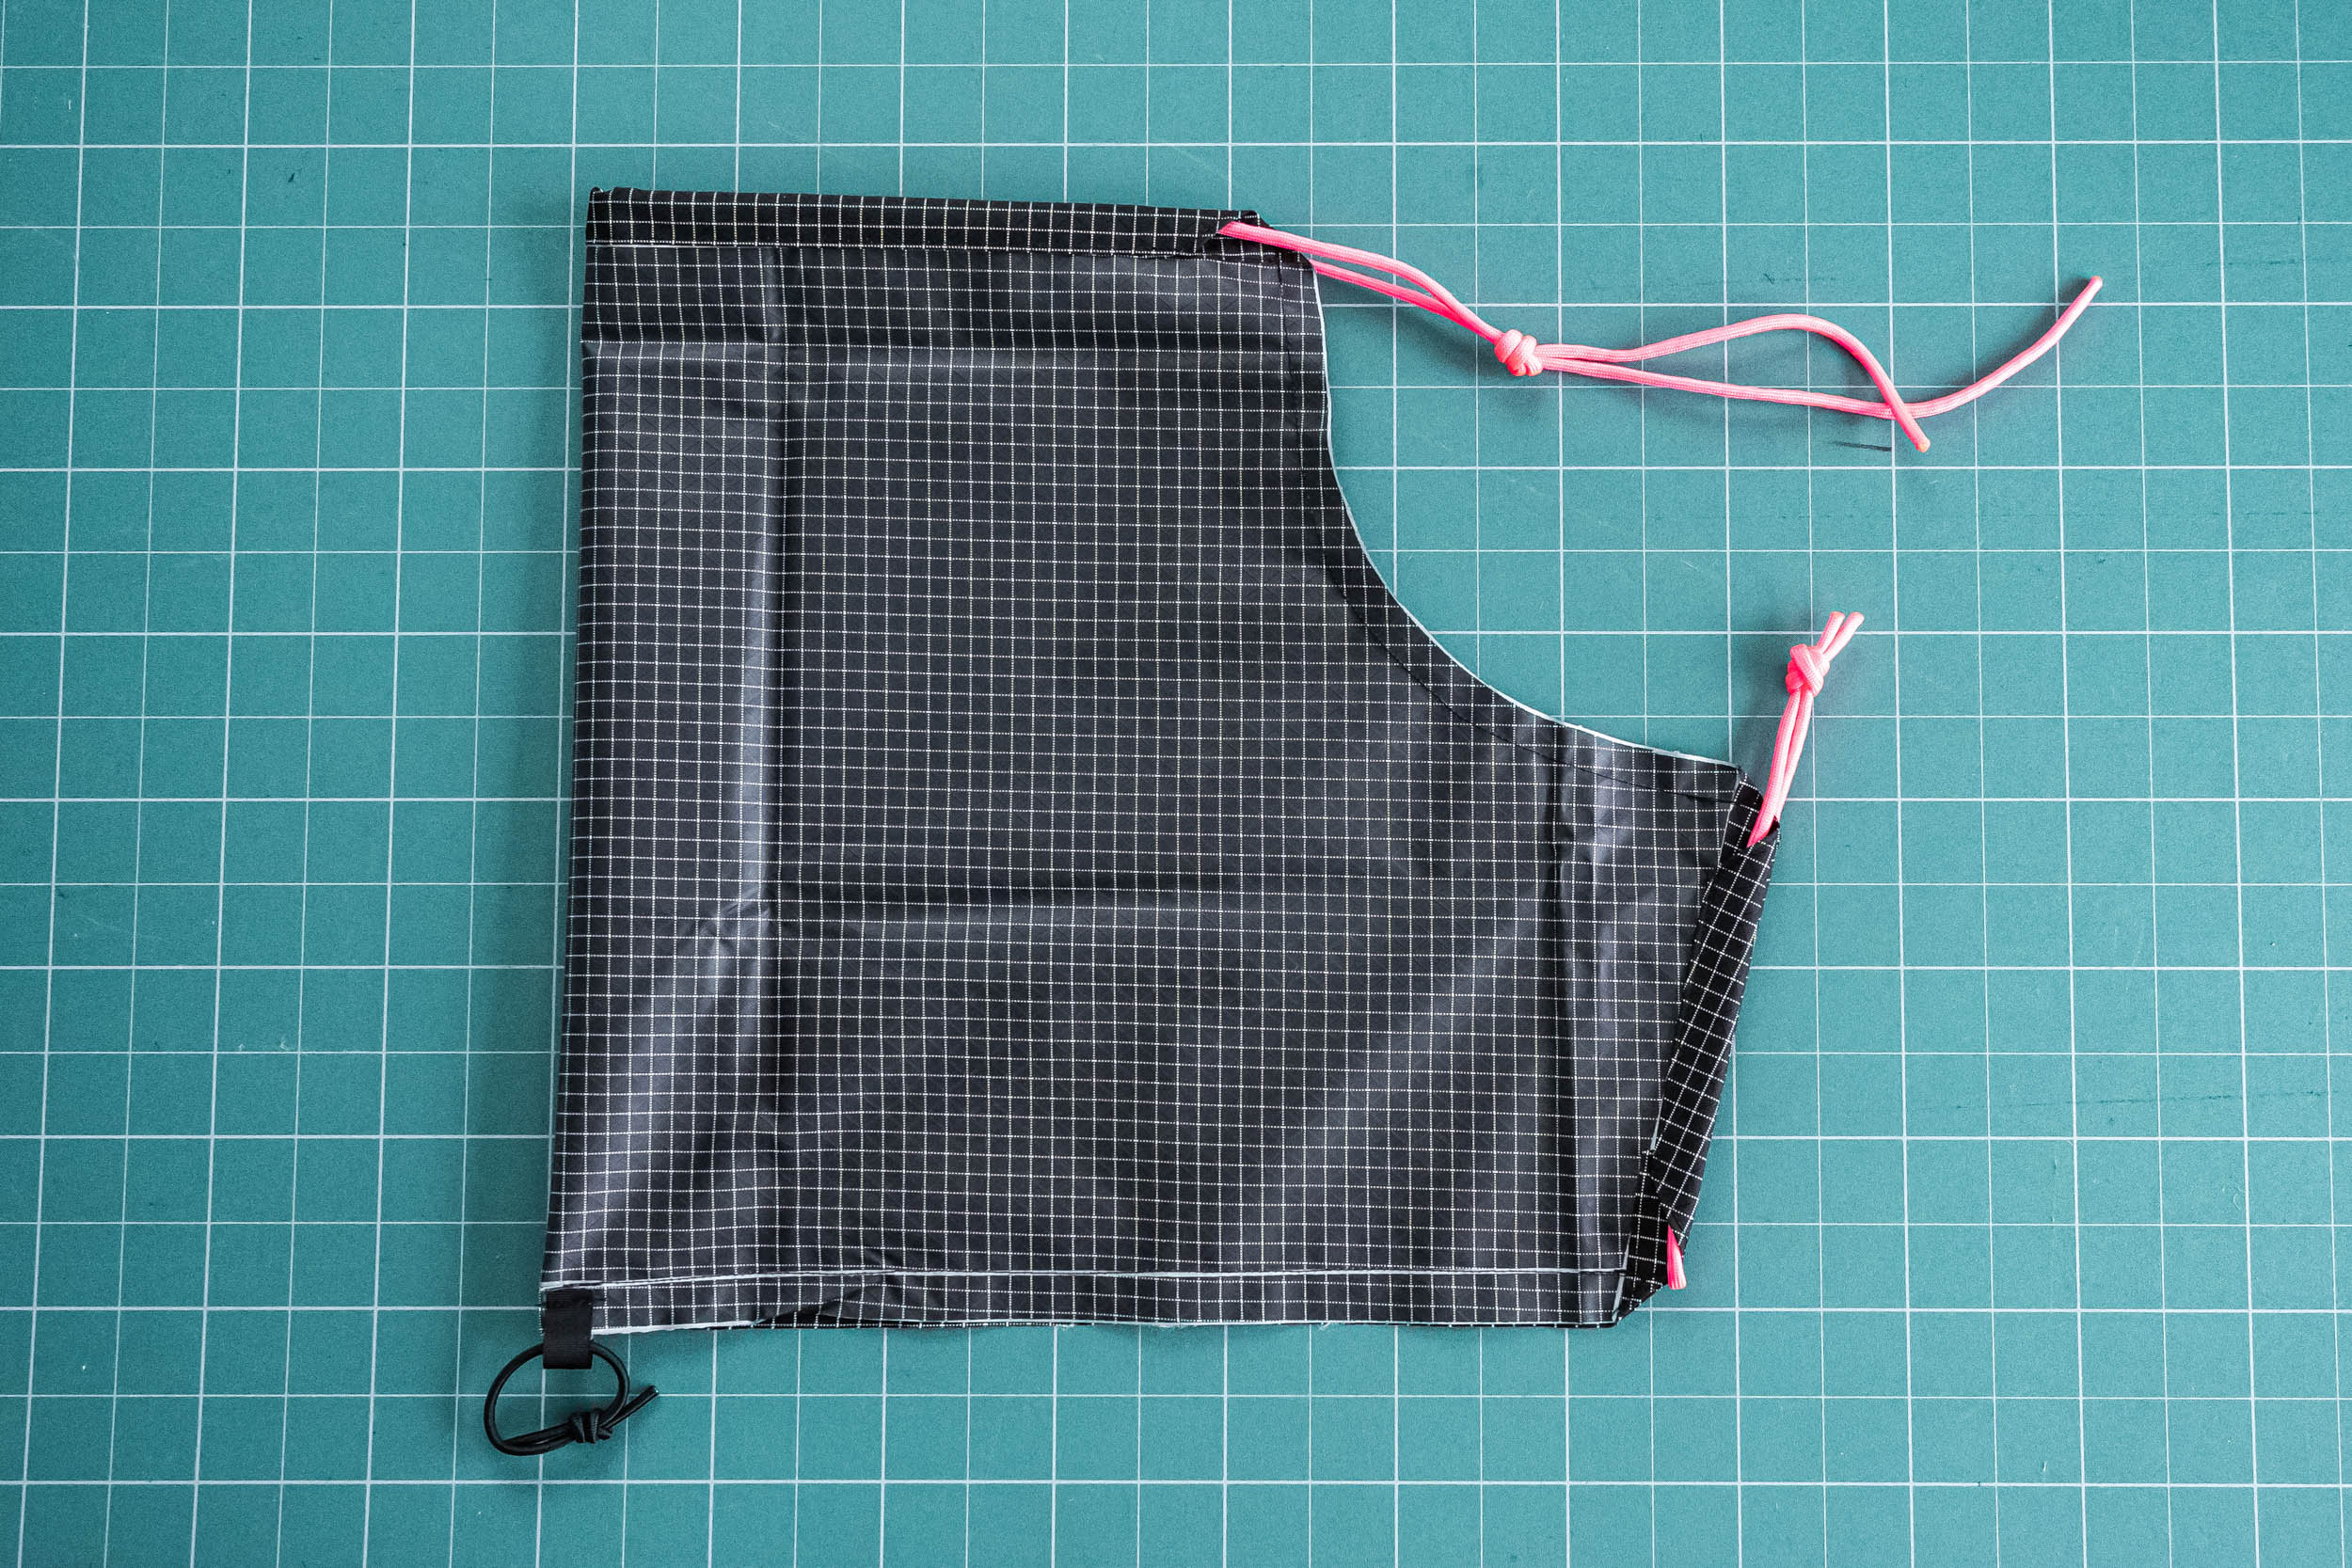
Step 7 – Fold and Sew The Two Halves Together
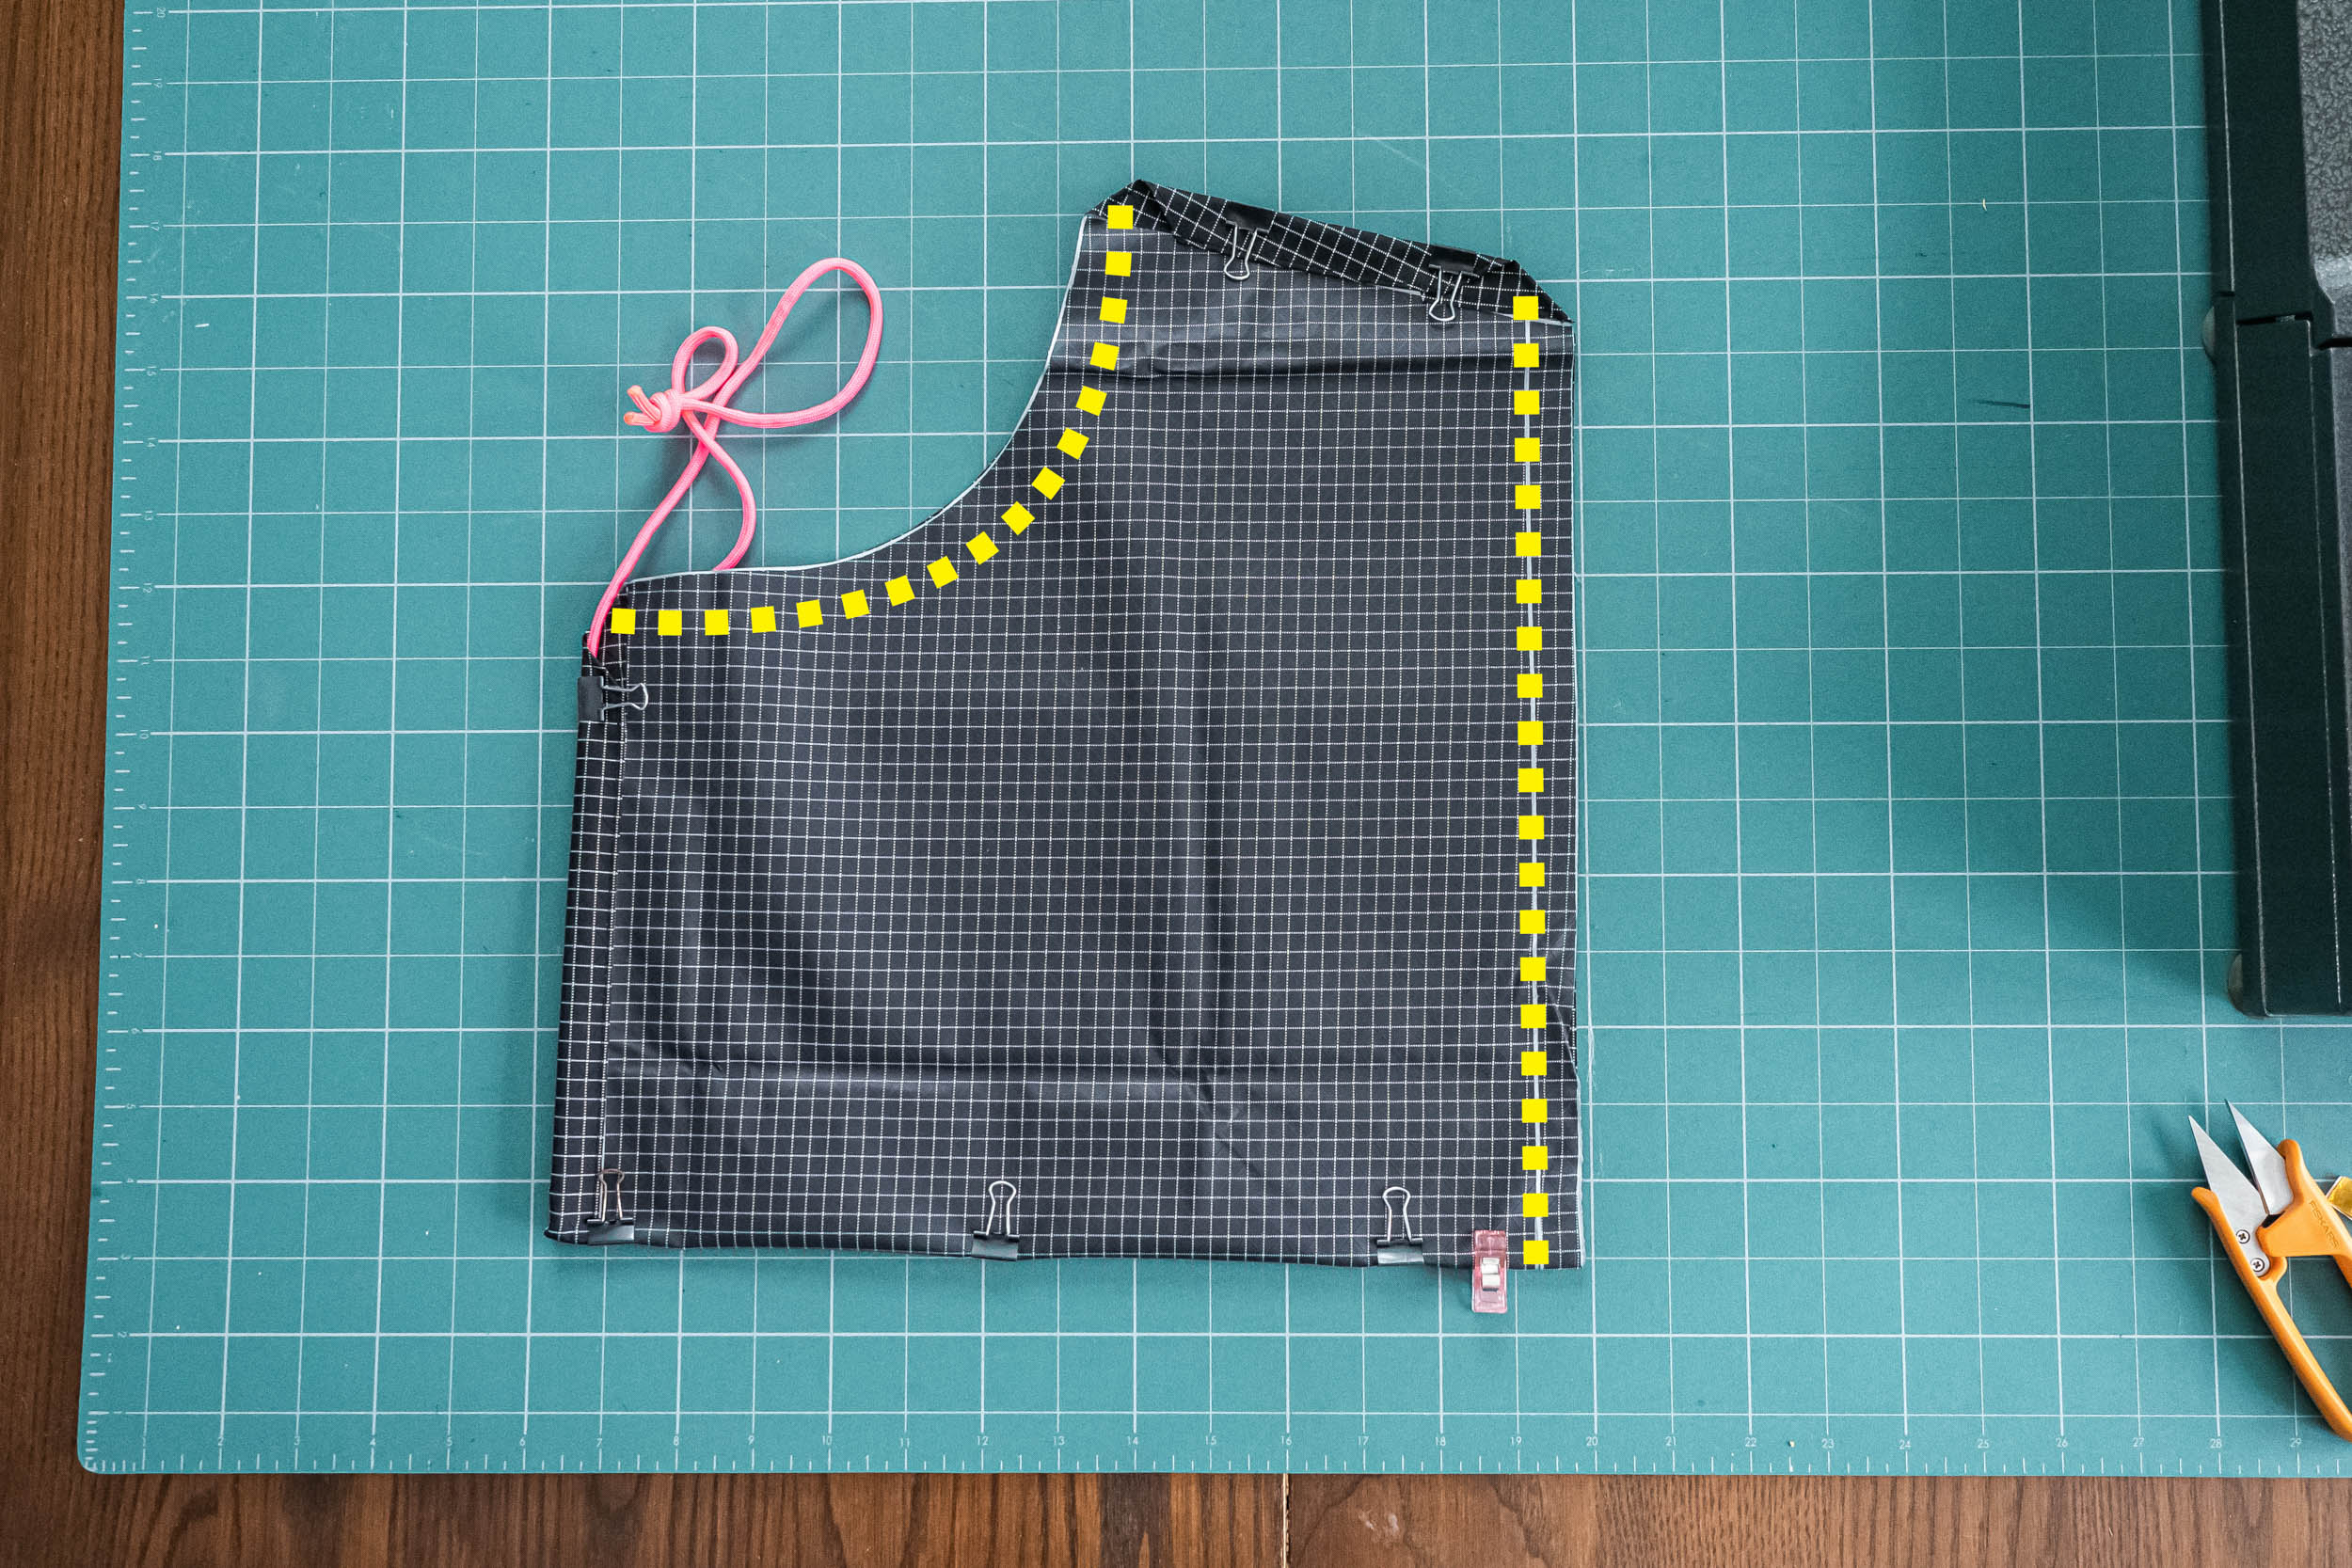
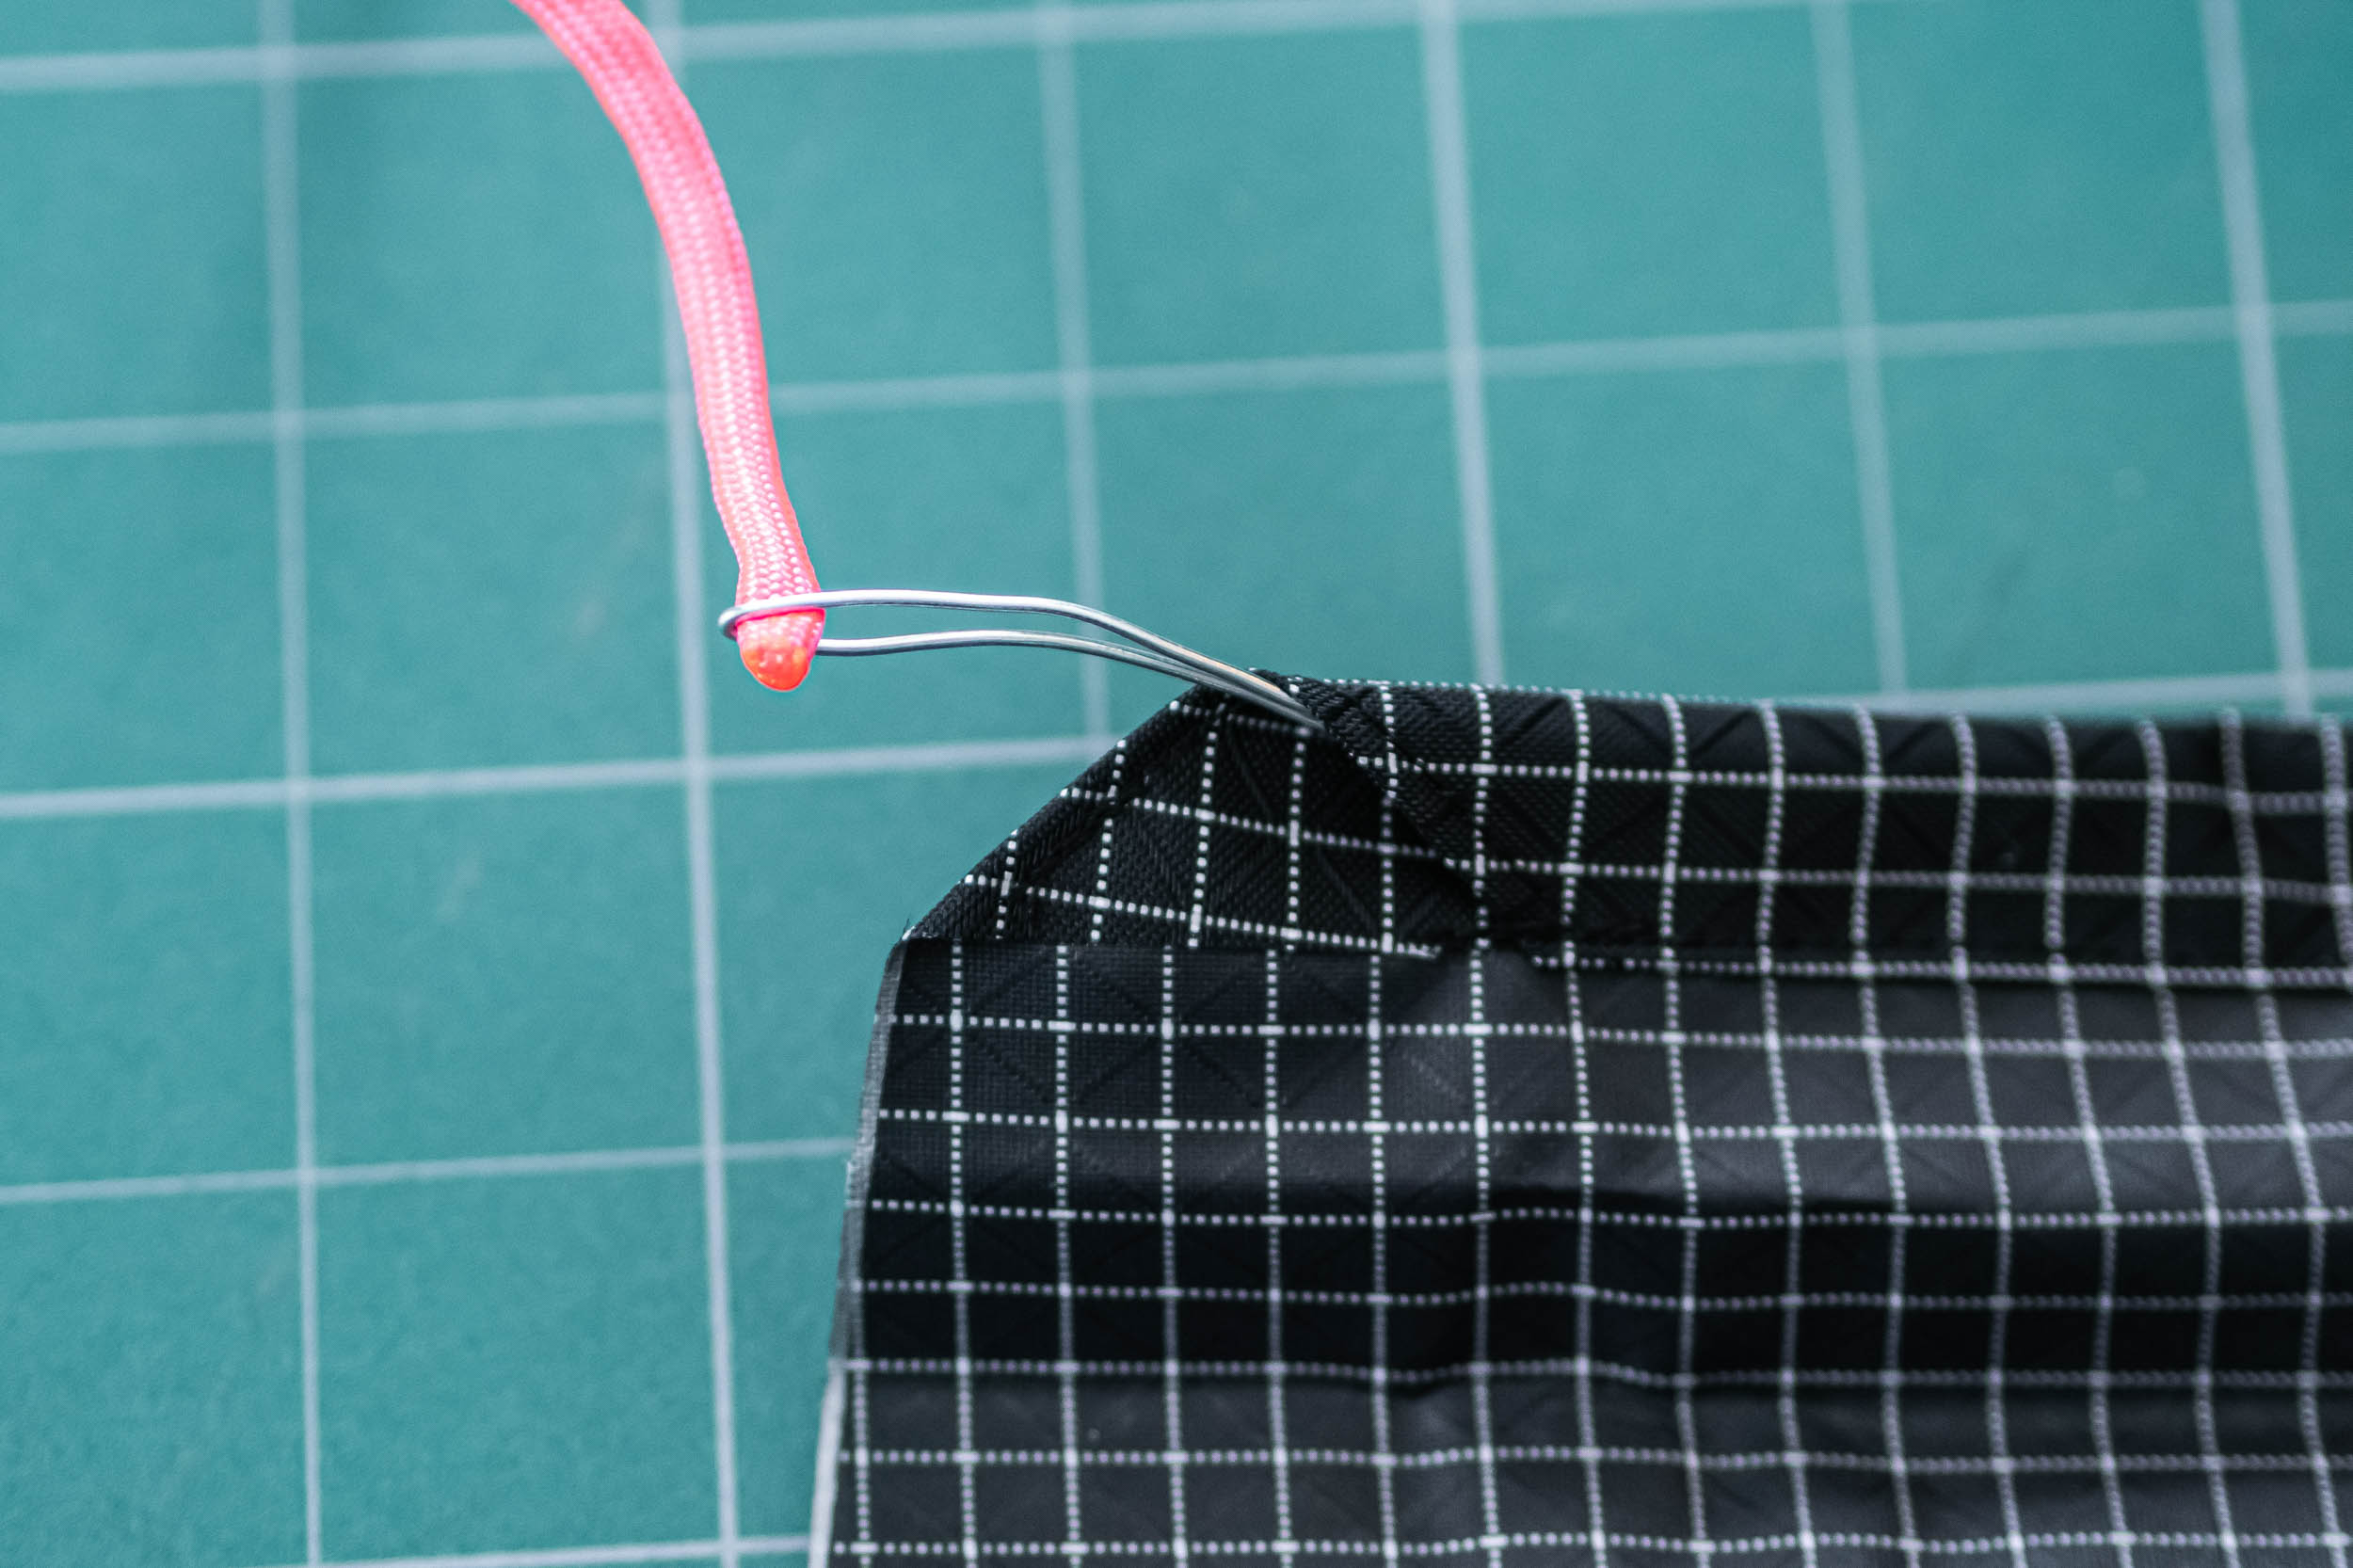
Here, we will be sewing the long edge that will face away from the rider while in use, as well as the curved edge. I like to thread my paracord through the long edge before sewing, as it is easier to do while the cord channel is straight. I used some thin gauge picture framing wire to pull the cord through. Tie the ends together to keep it from coming out.
Fold in half. Align the edges. Pin or clip everything in place. Then sew the long straight edge first with ½ inch seam allowance. The straight edge is easier to sew than the curved edge, and securing it first will make sewing the curved edge easier. Next, sew the curved edge again using ½ inch seam allowance.
Step 8 – Add The Internal Security Loop
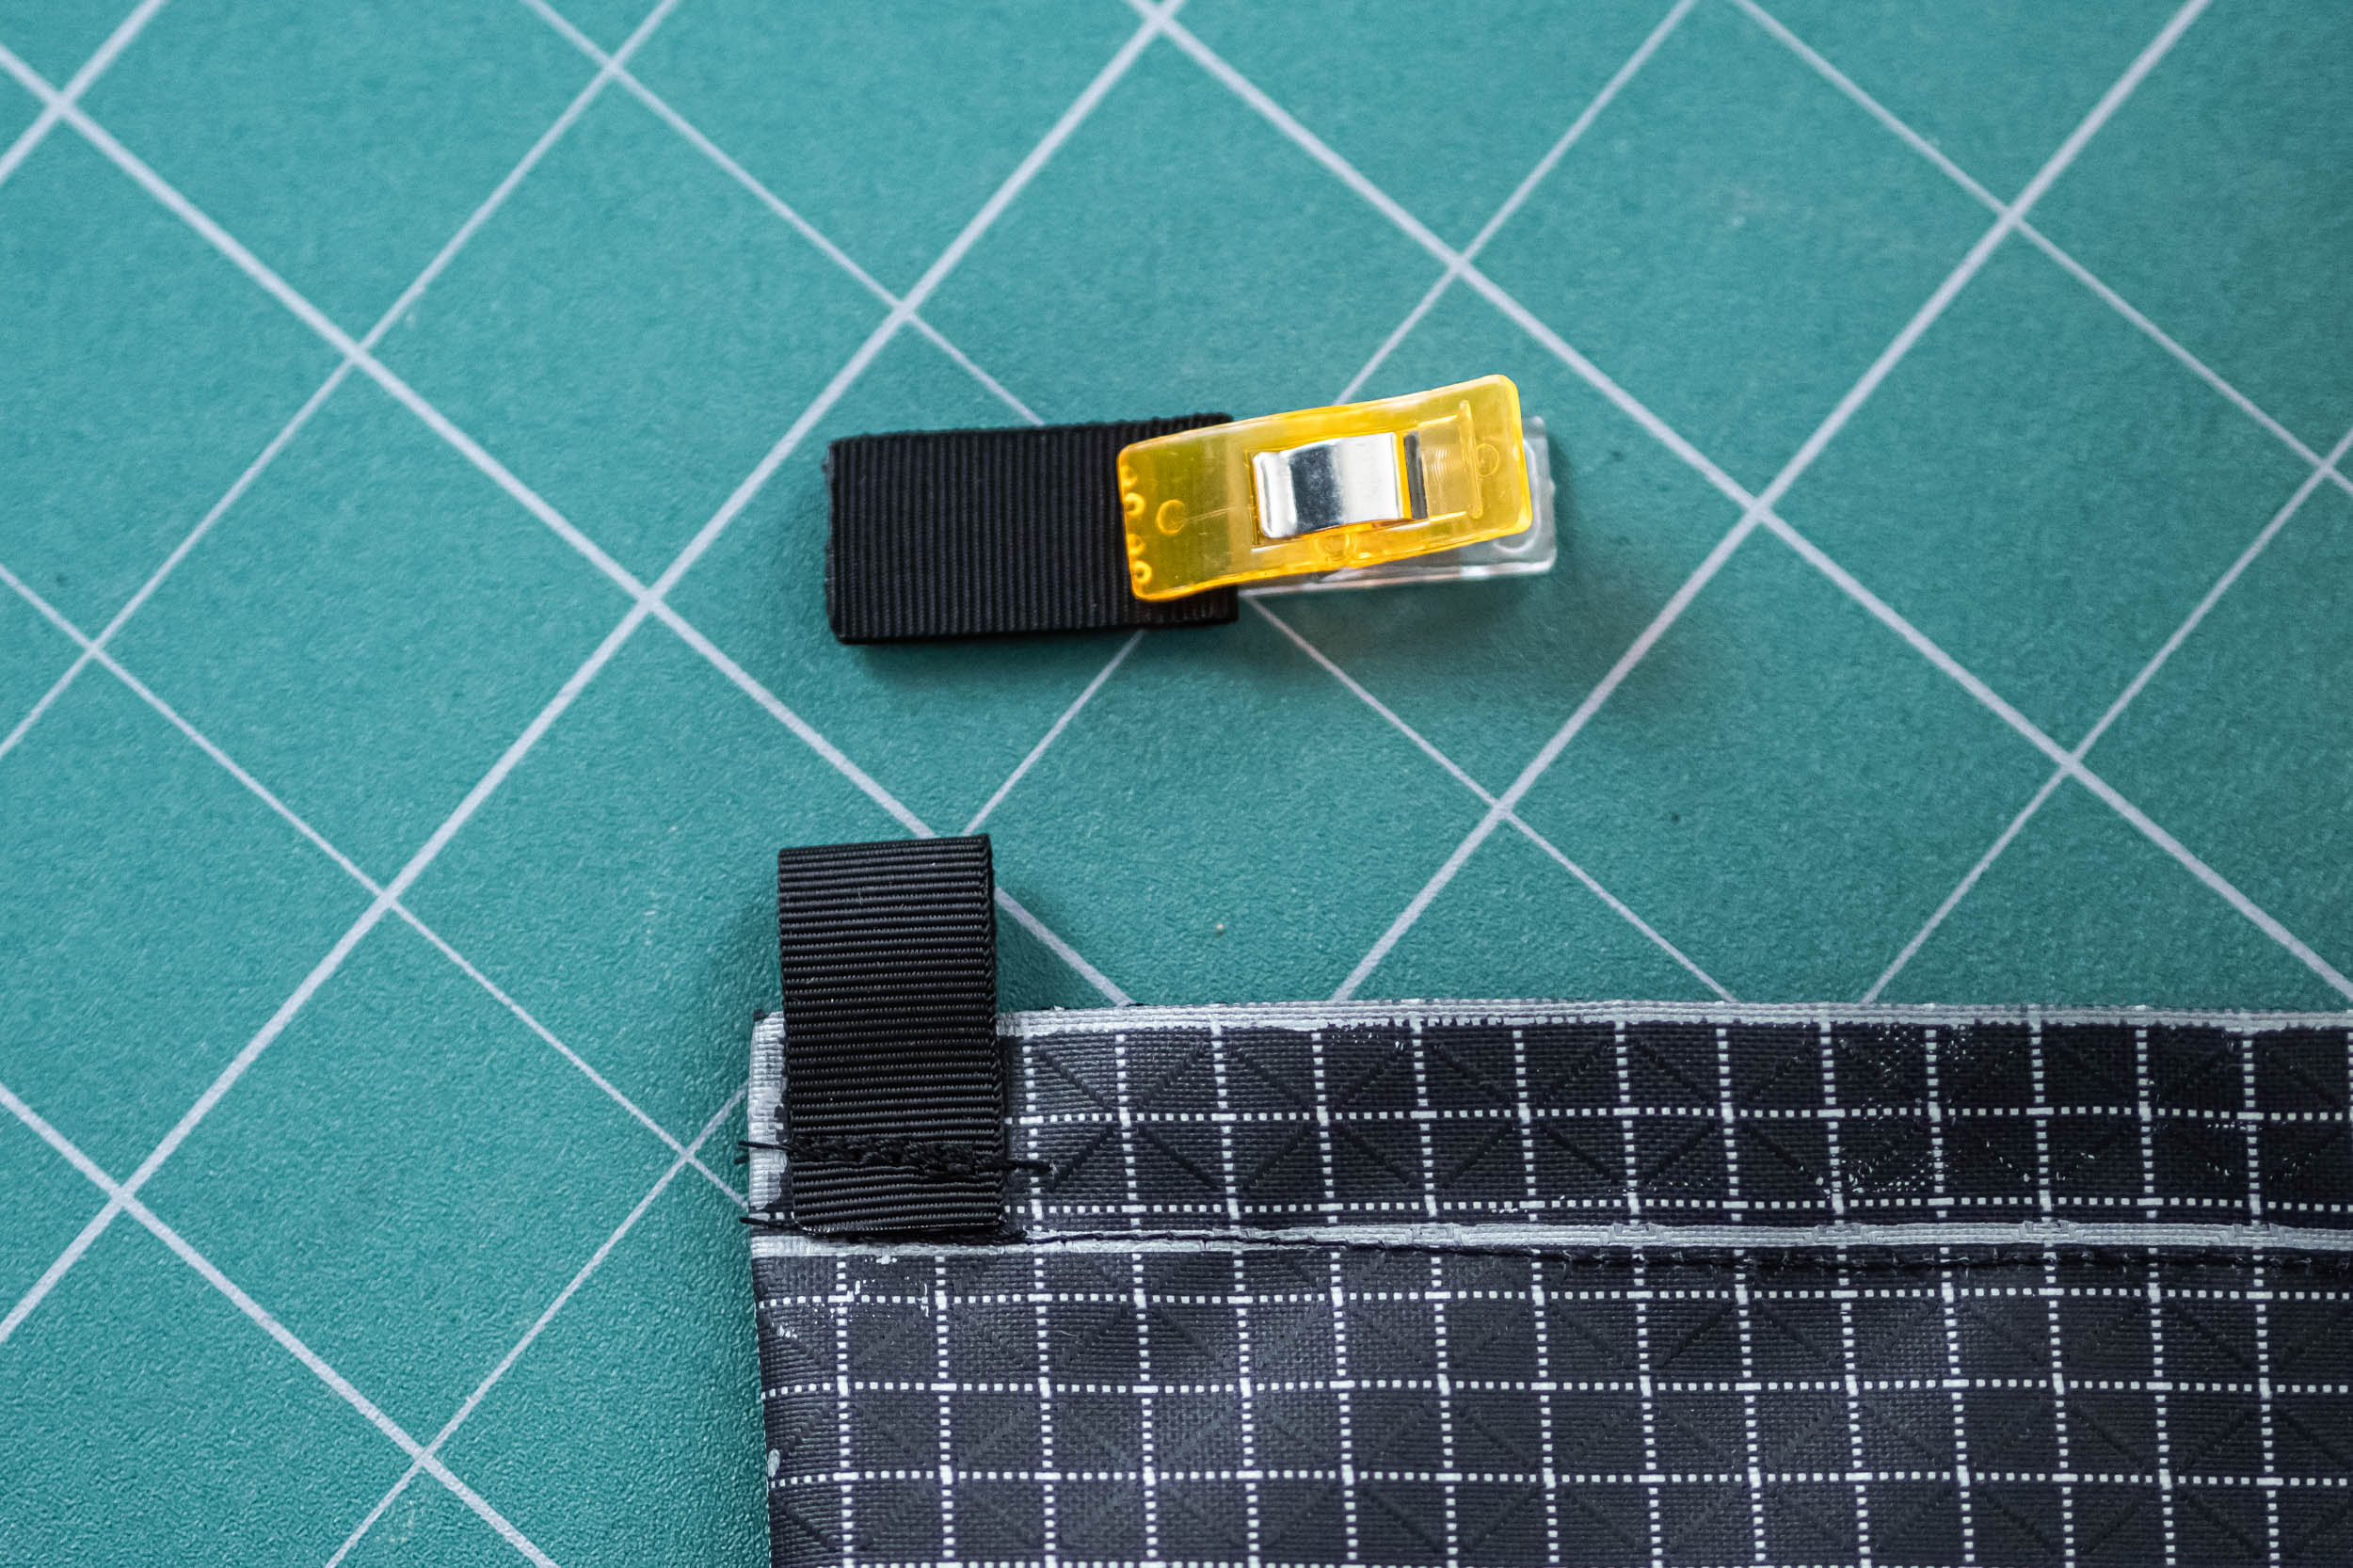
While the pogie is still inside out, sew a small fold of webbing or grosgrain ribbon to the seam allowance in the corner opposite the curve. Then add a small loop of shock cord. This loop is intended to secure the pogie to the handlebar. In use, I moved my grips in slightly, leaving a small gap between them and the bar end plug. The shock cord loop fits nicely inside this gap and is out of the way. If your bike setup differs, you may have to get creative.
Step 9 – Turn Pogies Right Side Out, Add Cord Locks, and Add Snaps To Handlebar Opening
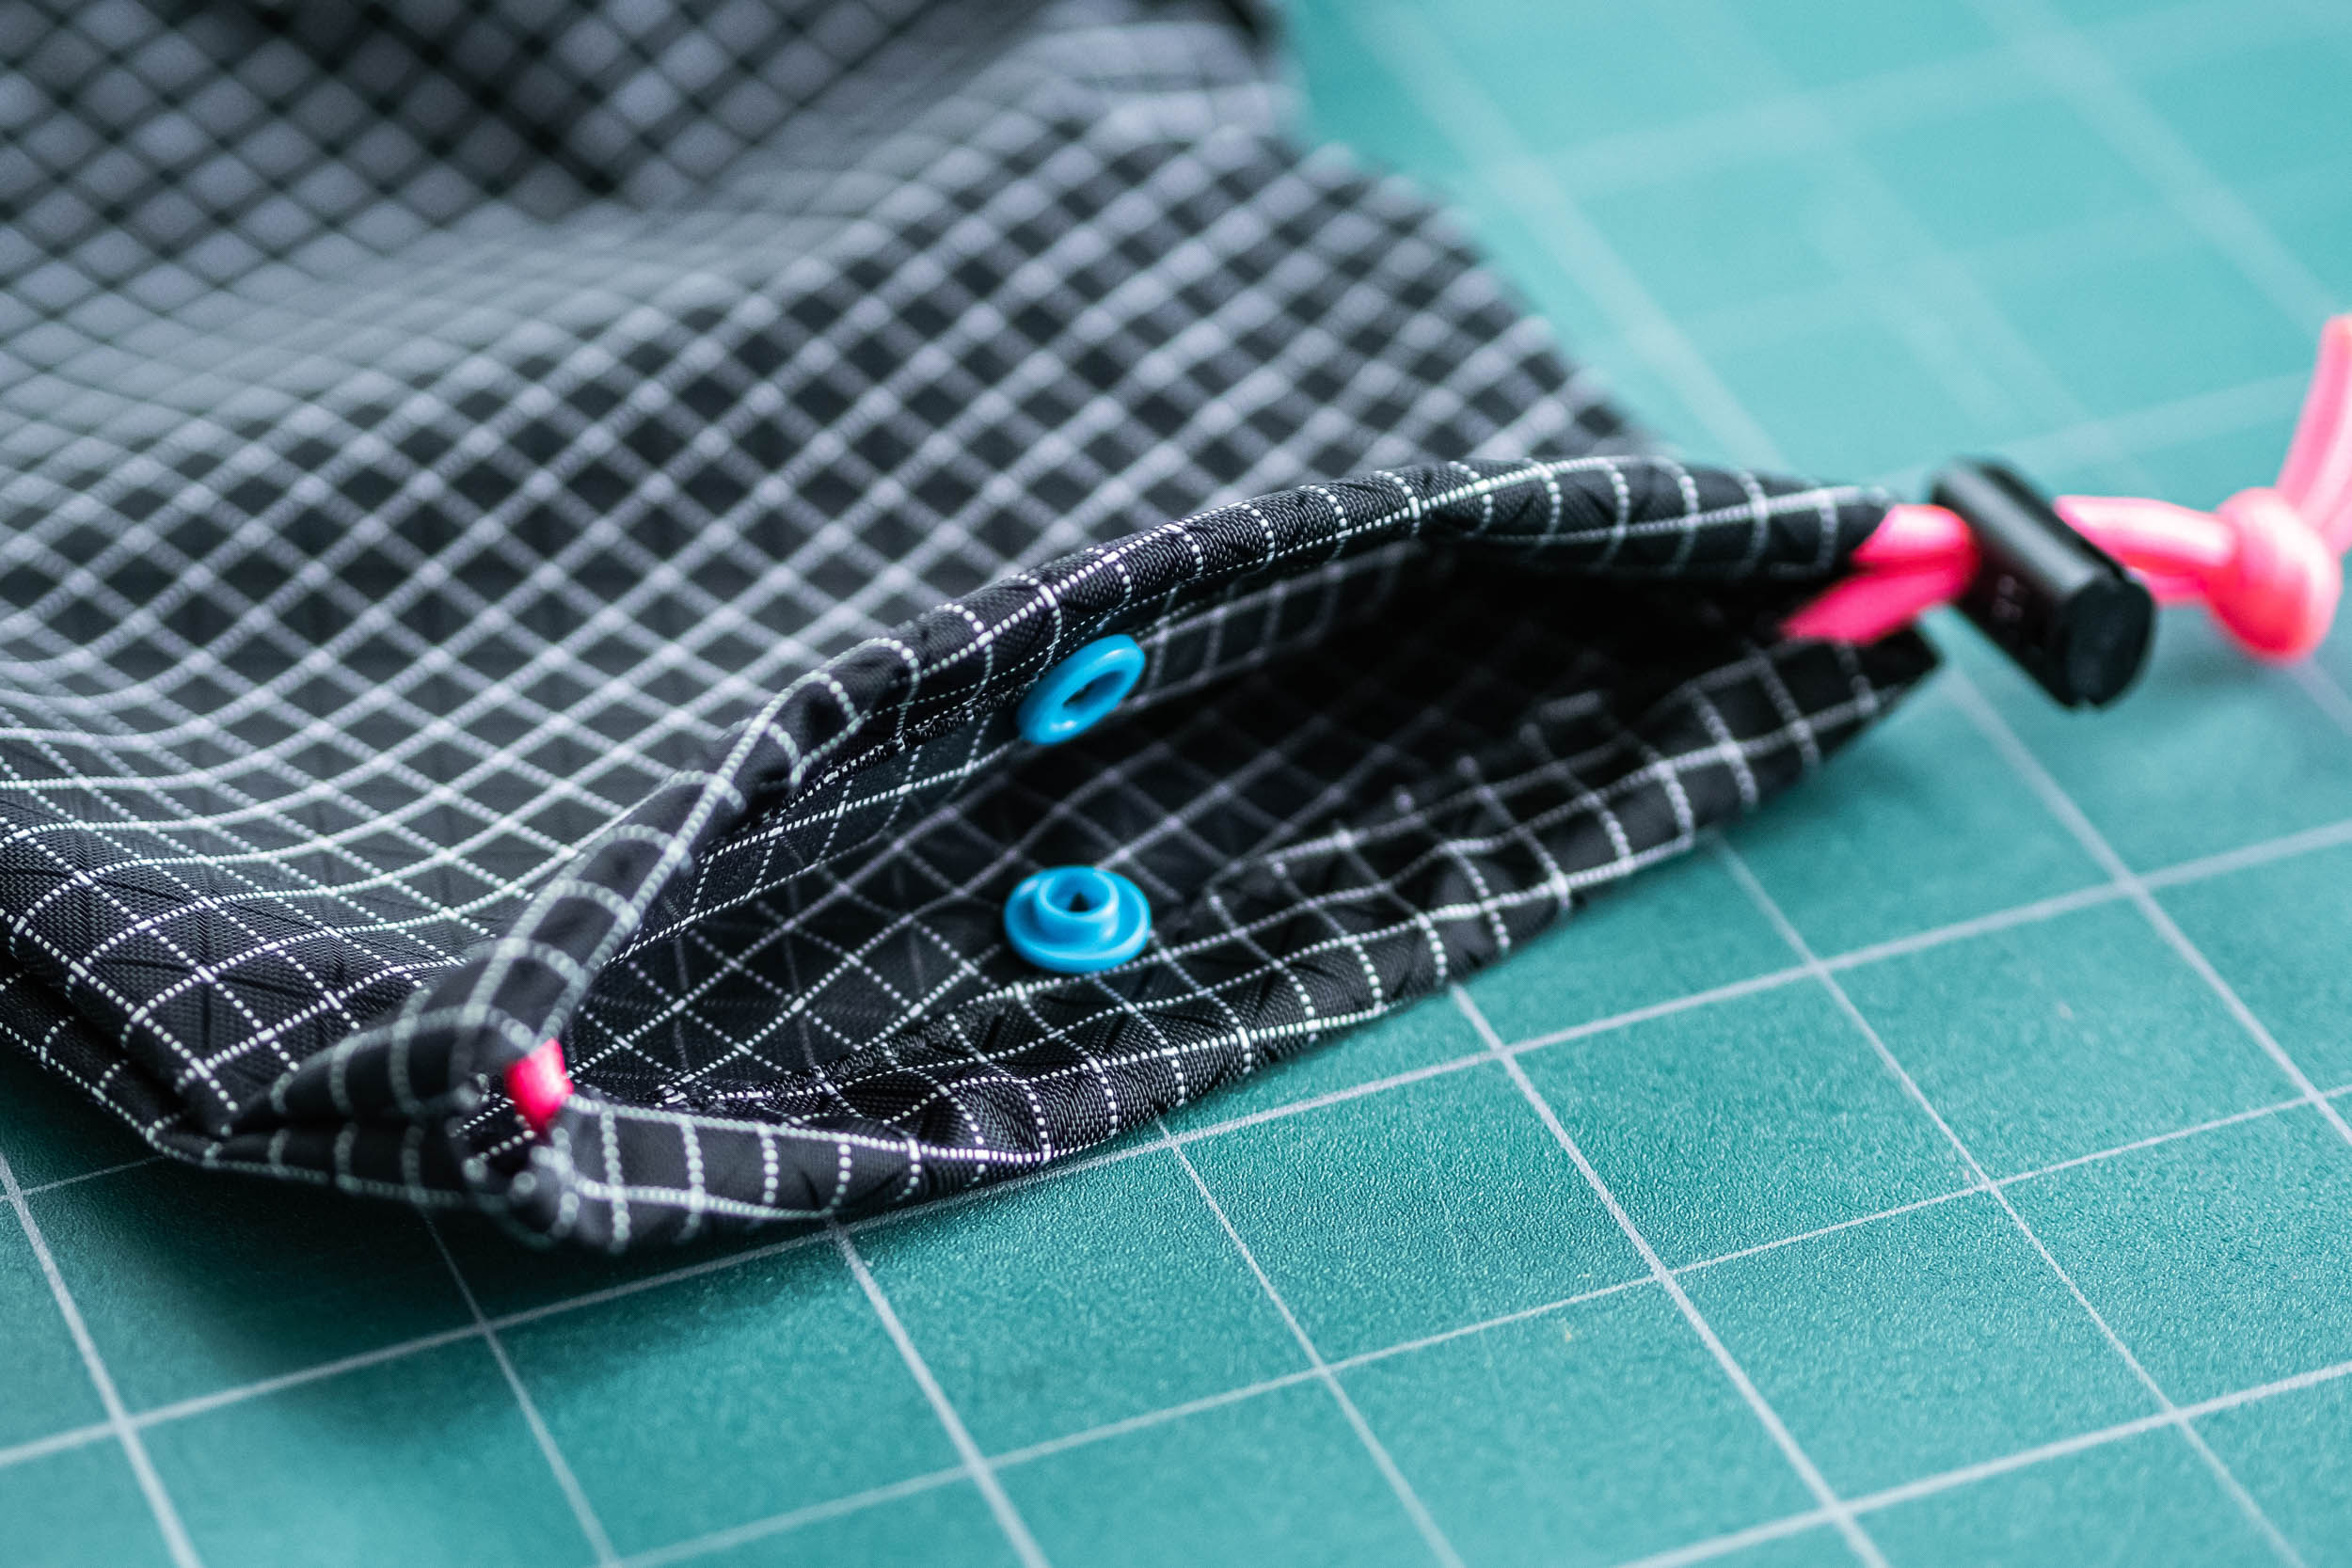
The snaps are not critical, but they do help hold the pogies in place and keep the wind out. Here, I’m using plastic KAM snaps with the standard length stud. Place the snap close to the opening, but not so close that it interferes with the cord channel.
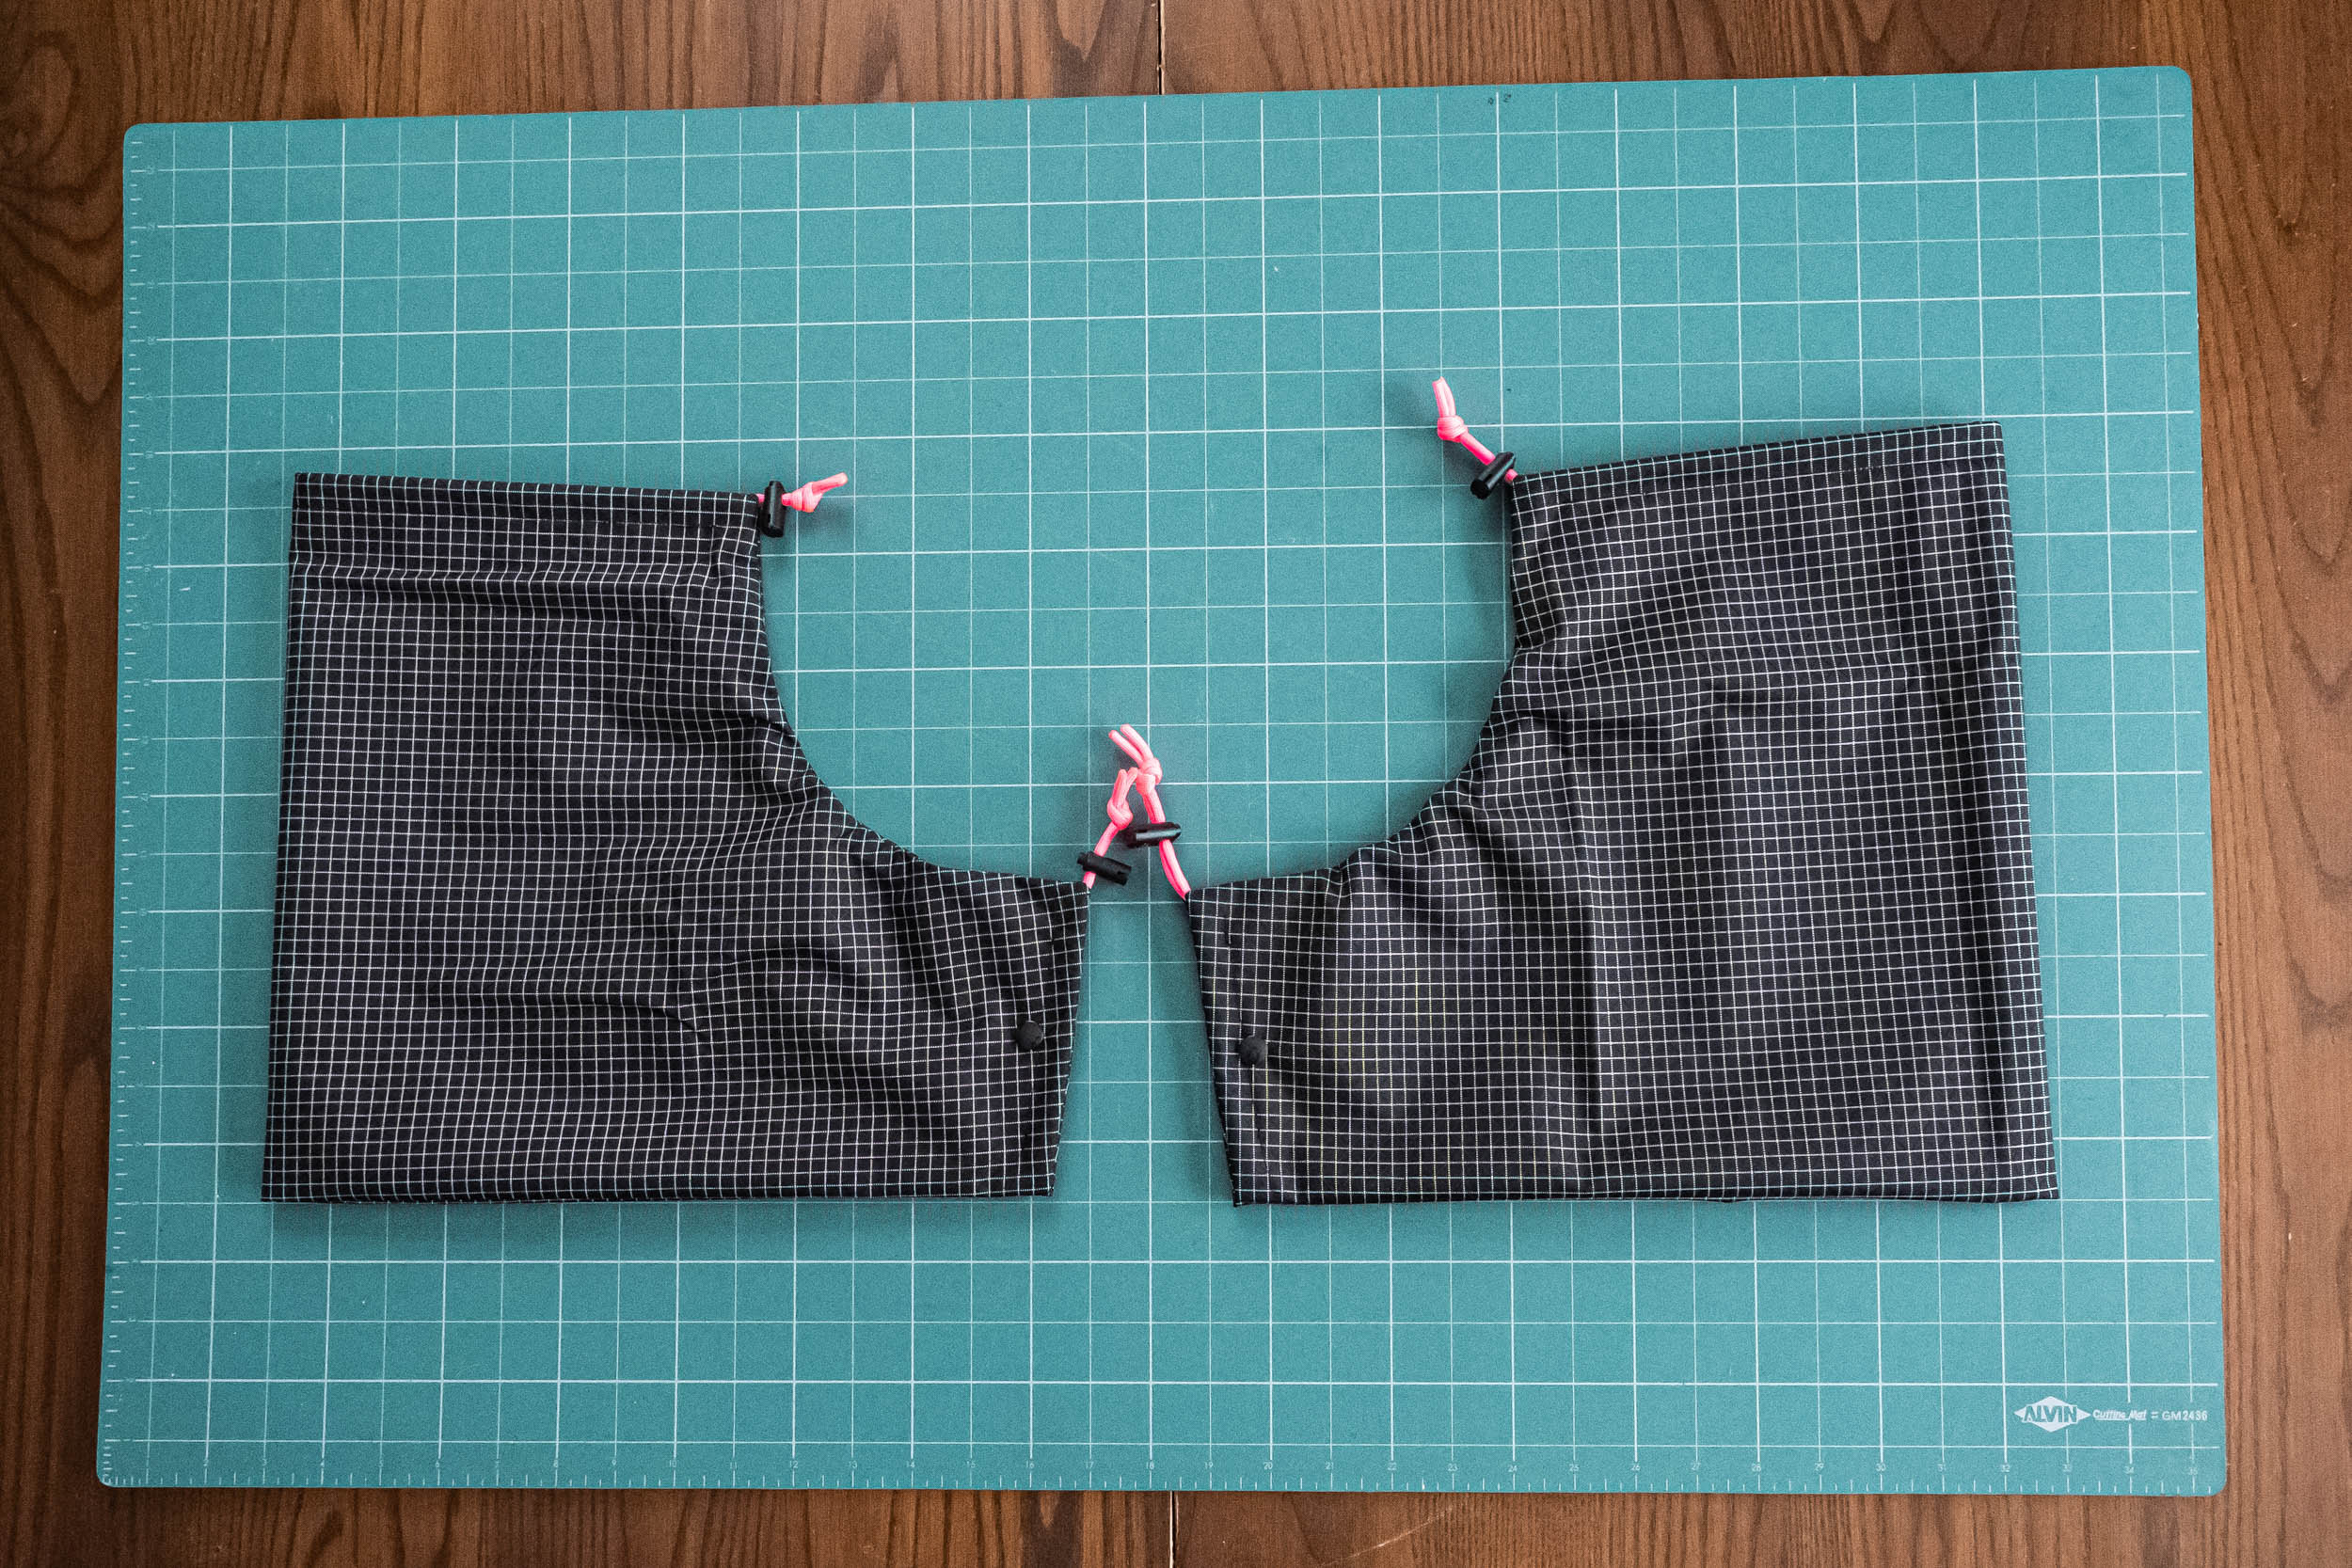
Step 10 – You’re Done… Enjoy!
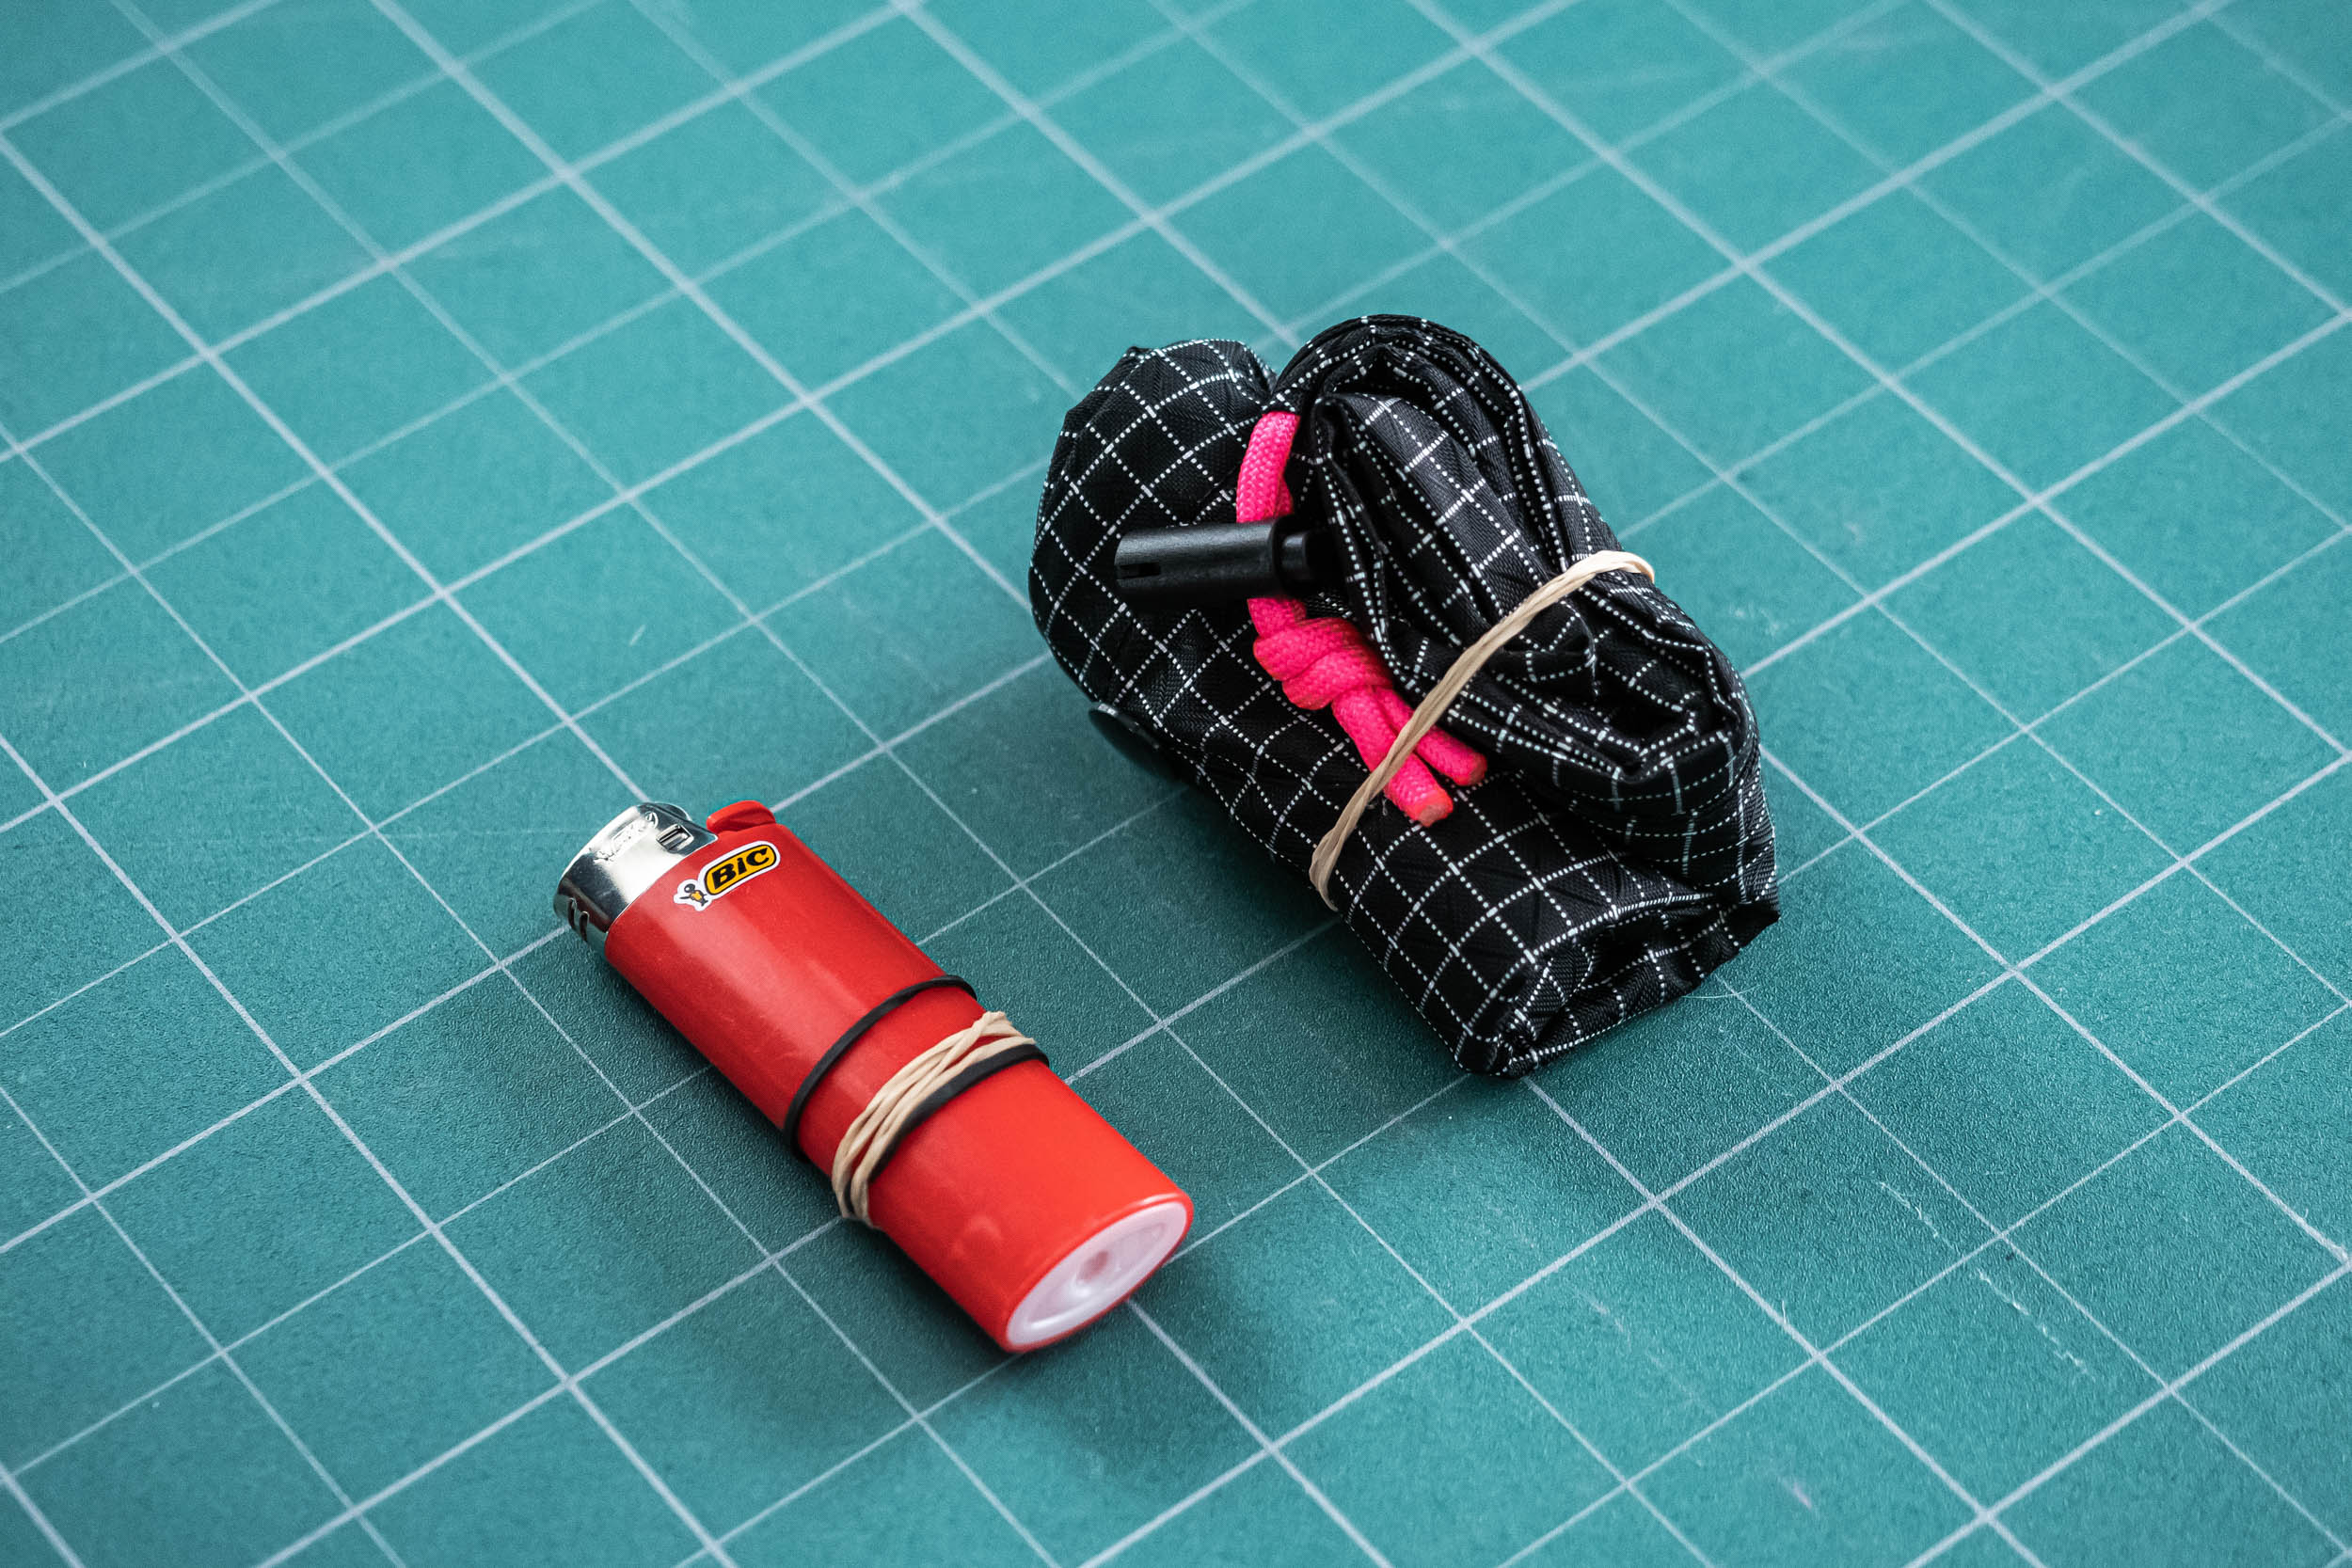
That’s it! Congratulations on making your own ultralight pogies. Have a photo of the finished product? Please share it in the conversation below. I’d love to see what you came up with!


About Greg Maino
Greg Maino is a Michigander living in Vermont who enjoys getting outside with his wife and two sons. He also loves helping others get outdoors and works with the Vermont Bikepackers to host introductory bikepacking trips and a free bikepacking gear library. You can find him on Instagram @igmaino.
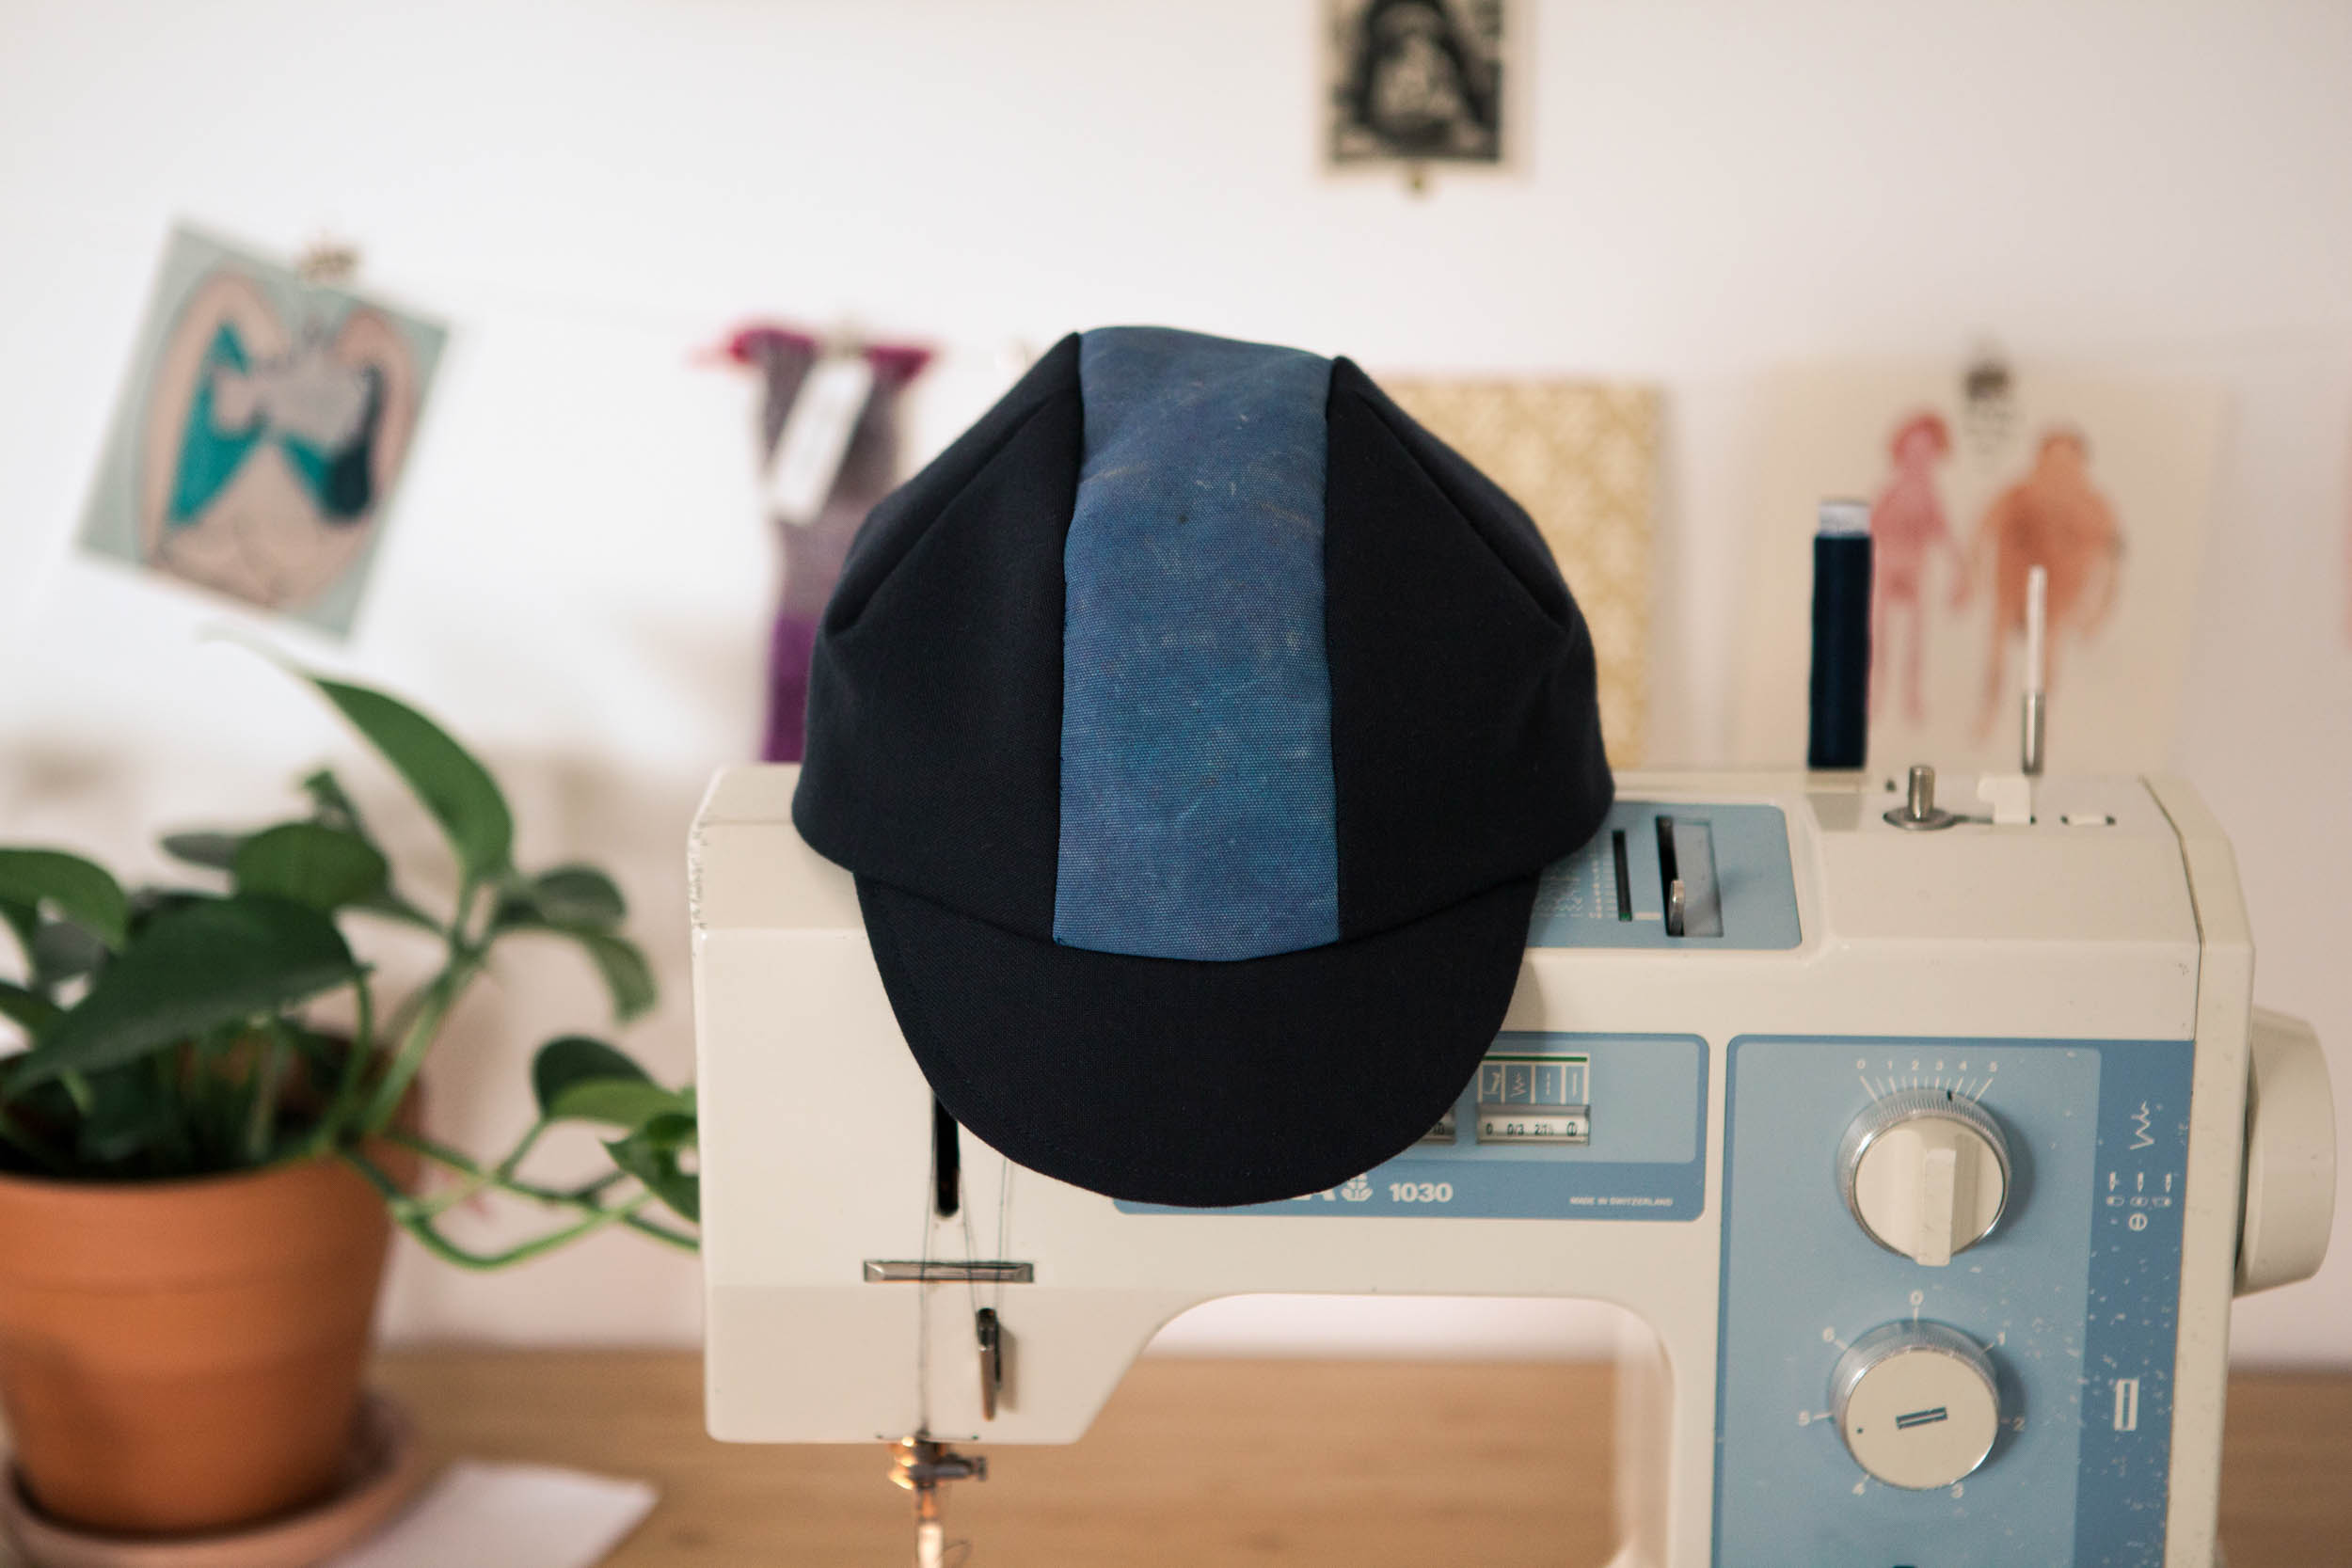
As much as we enjoy keeping up with new and innovative bikepacking and camping gear from large and small brands, we’re equally excited about the endlessly fascinating (and more affordable) world of making your own gear, whether that’s a bikepacking bag, a cycling cap, a surfboard-hauling rig, a hop-can stove, or even just a hand-carved spoon. If you’re interested in putting together a DIY guide to making your own gear, please share it with us by filling out the submission form here!
More MYOBG
Make sure to dig into our library of MYOBG tutorials at #MYOBG with a few linked below. Also,you can learn more about pogies in our roundup here.
Please keep the conversation civil, constructive, and inclusive, or your comment will be removed.