

 Mountain Bike (MTB)
 Gravel Bike
 All-Terrain Bike (ATB)
 Fat Bike

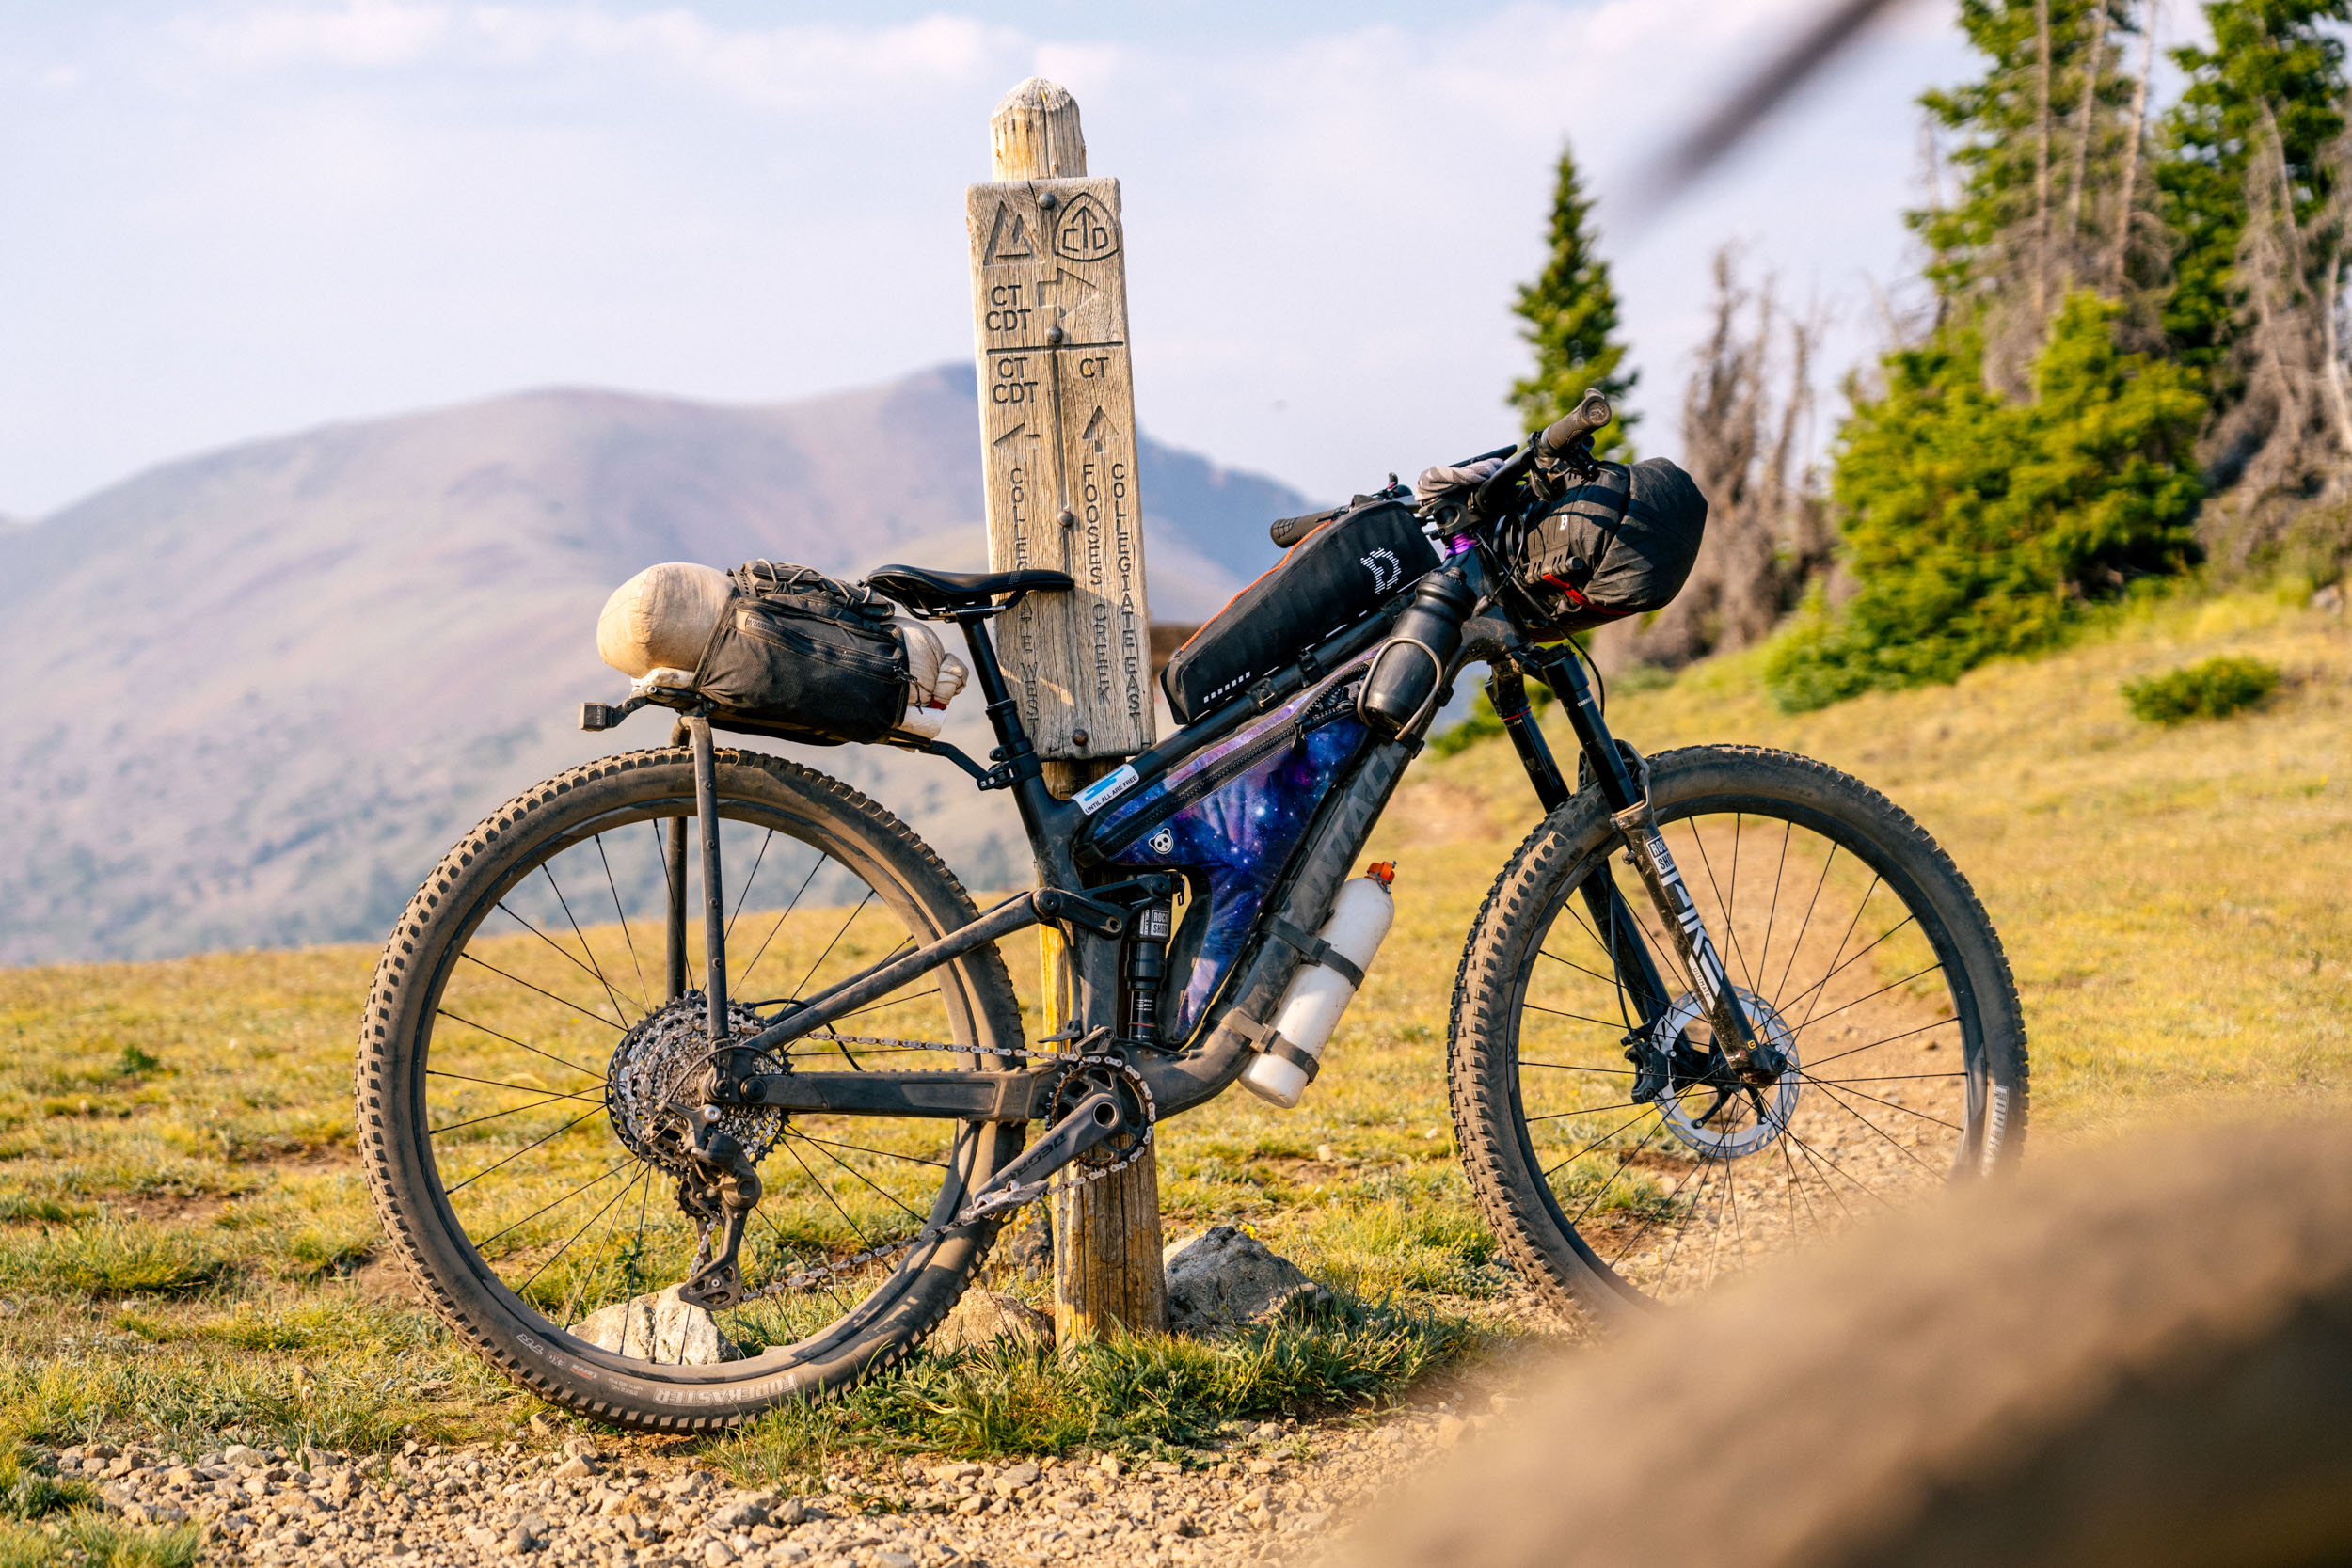
How I Packed a Full-Suspension Bike for the Colorado Trail

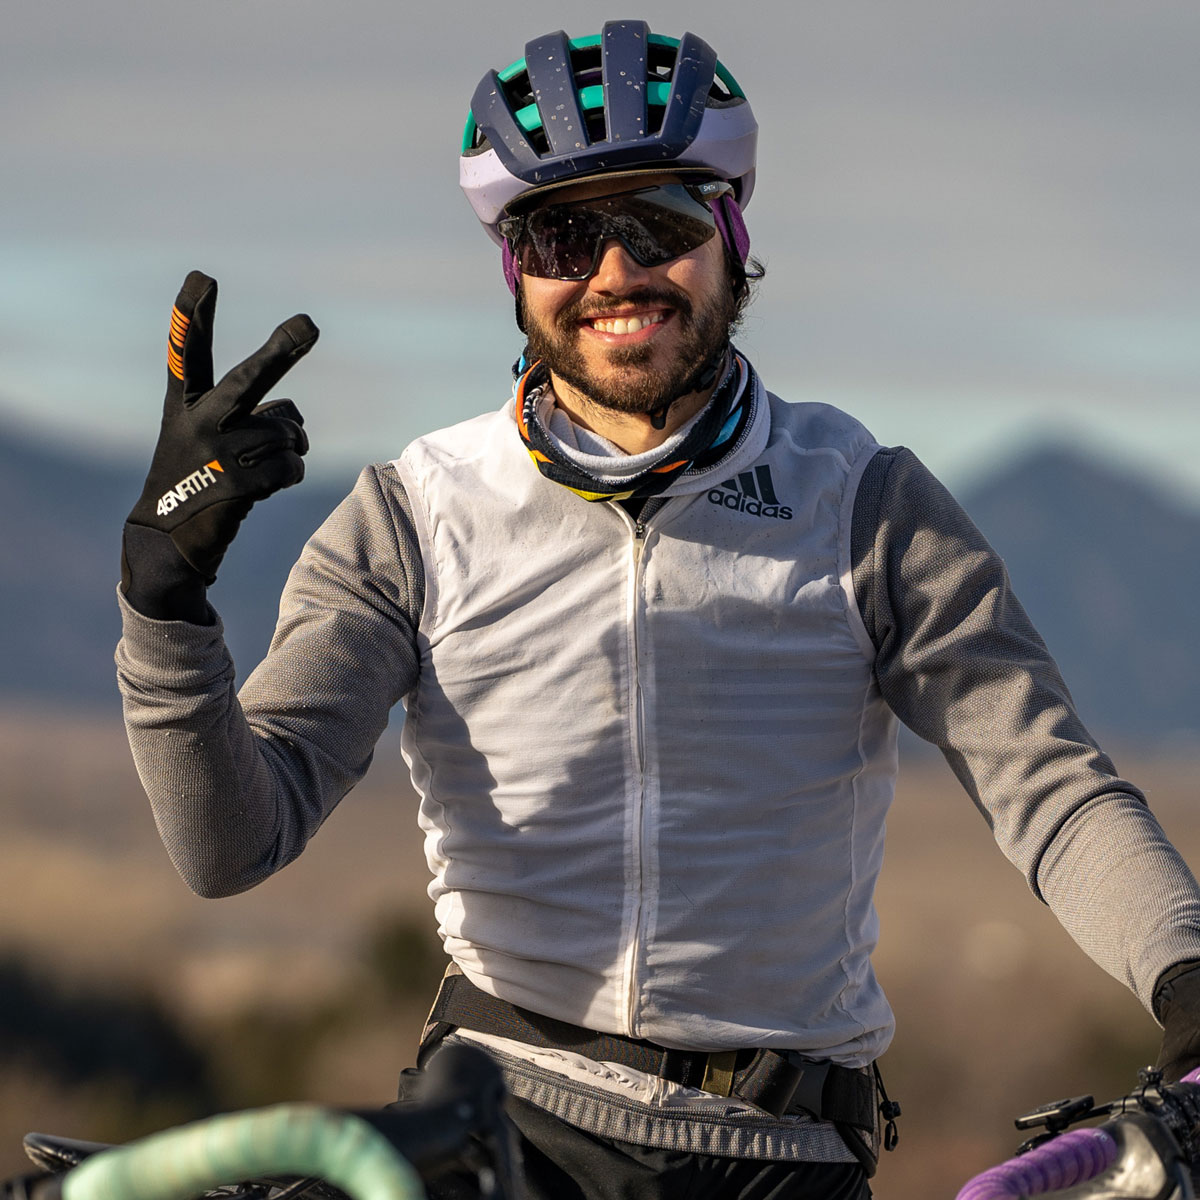
Neil’s latest video features an in-depth breakdown of the bike and gear he brought on the Colorado Trail this year. Walking through every part of his system, it’s a comprehensive guide to how he packed a full-suspension rig for big days of aggressive, loaded riding. Watch the video below for all his insights…
PUBLISHED Jul 10, 2026
I’ve often said that for big bikepacking trips on singletrack, a full-suspension bike is the way to go. The problem is, they’re simply not as easy to pack. I’ve done plenty of bikepacking on trail, which, to me, is the purest form of bikepacking. Sharing miles with backpackers on remote, rugged trails is about as close as it gets to what bikepacking feels like at its core: avoiding roads, chasing trails, and linking together big vistas. It’s a thing of beauty, and it’s my favorite form of cycling.
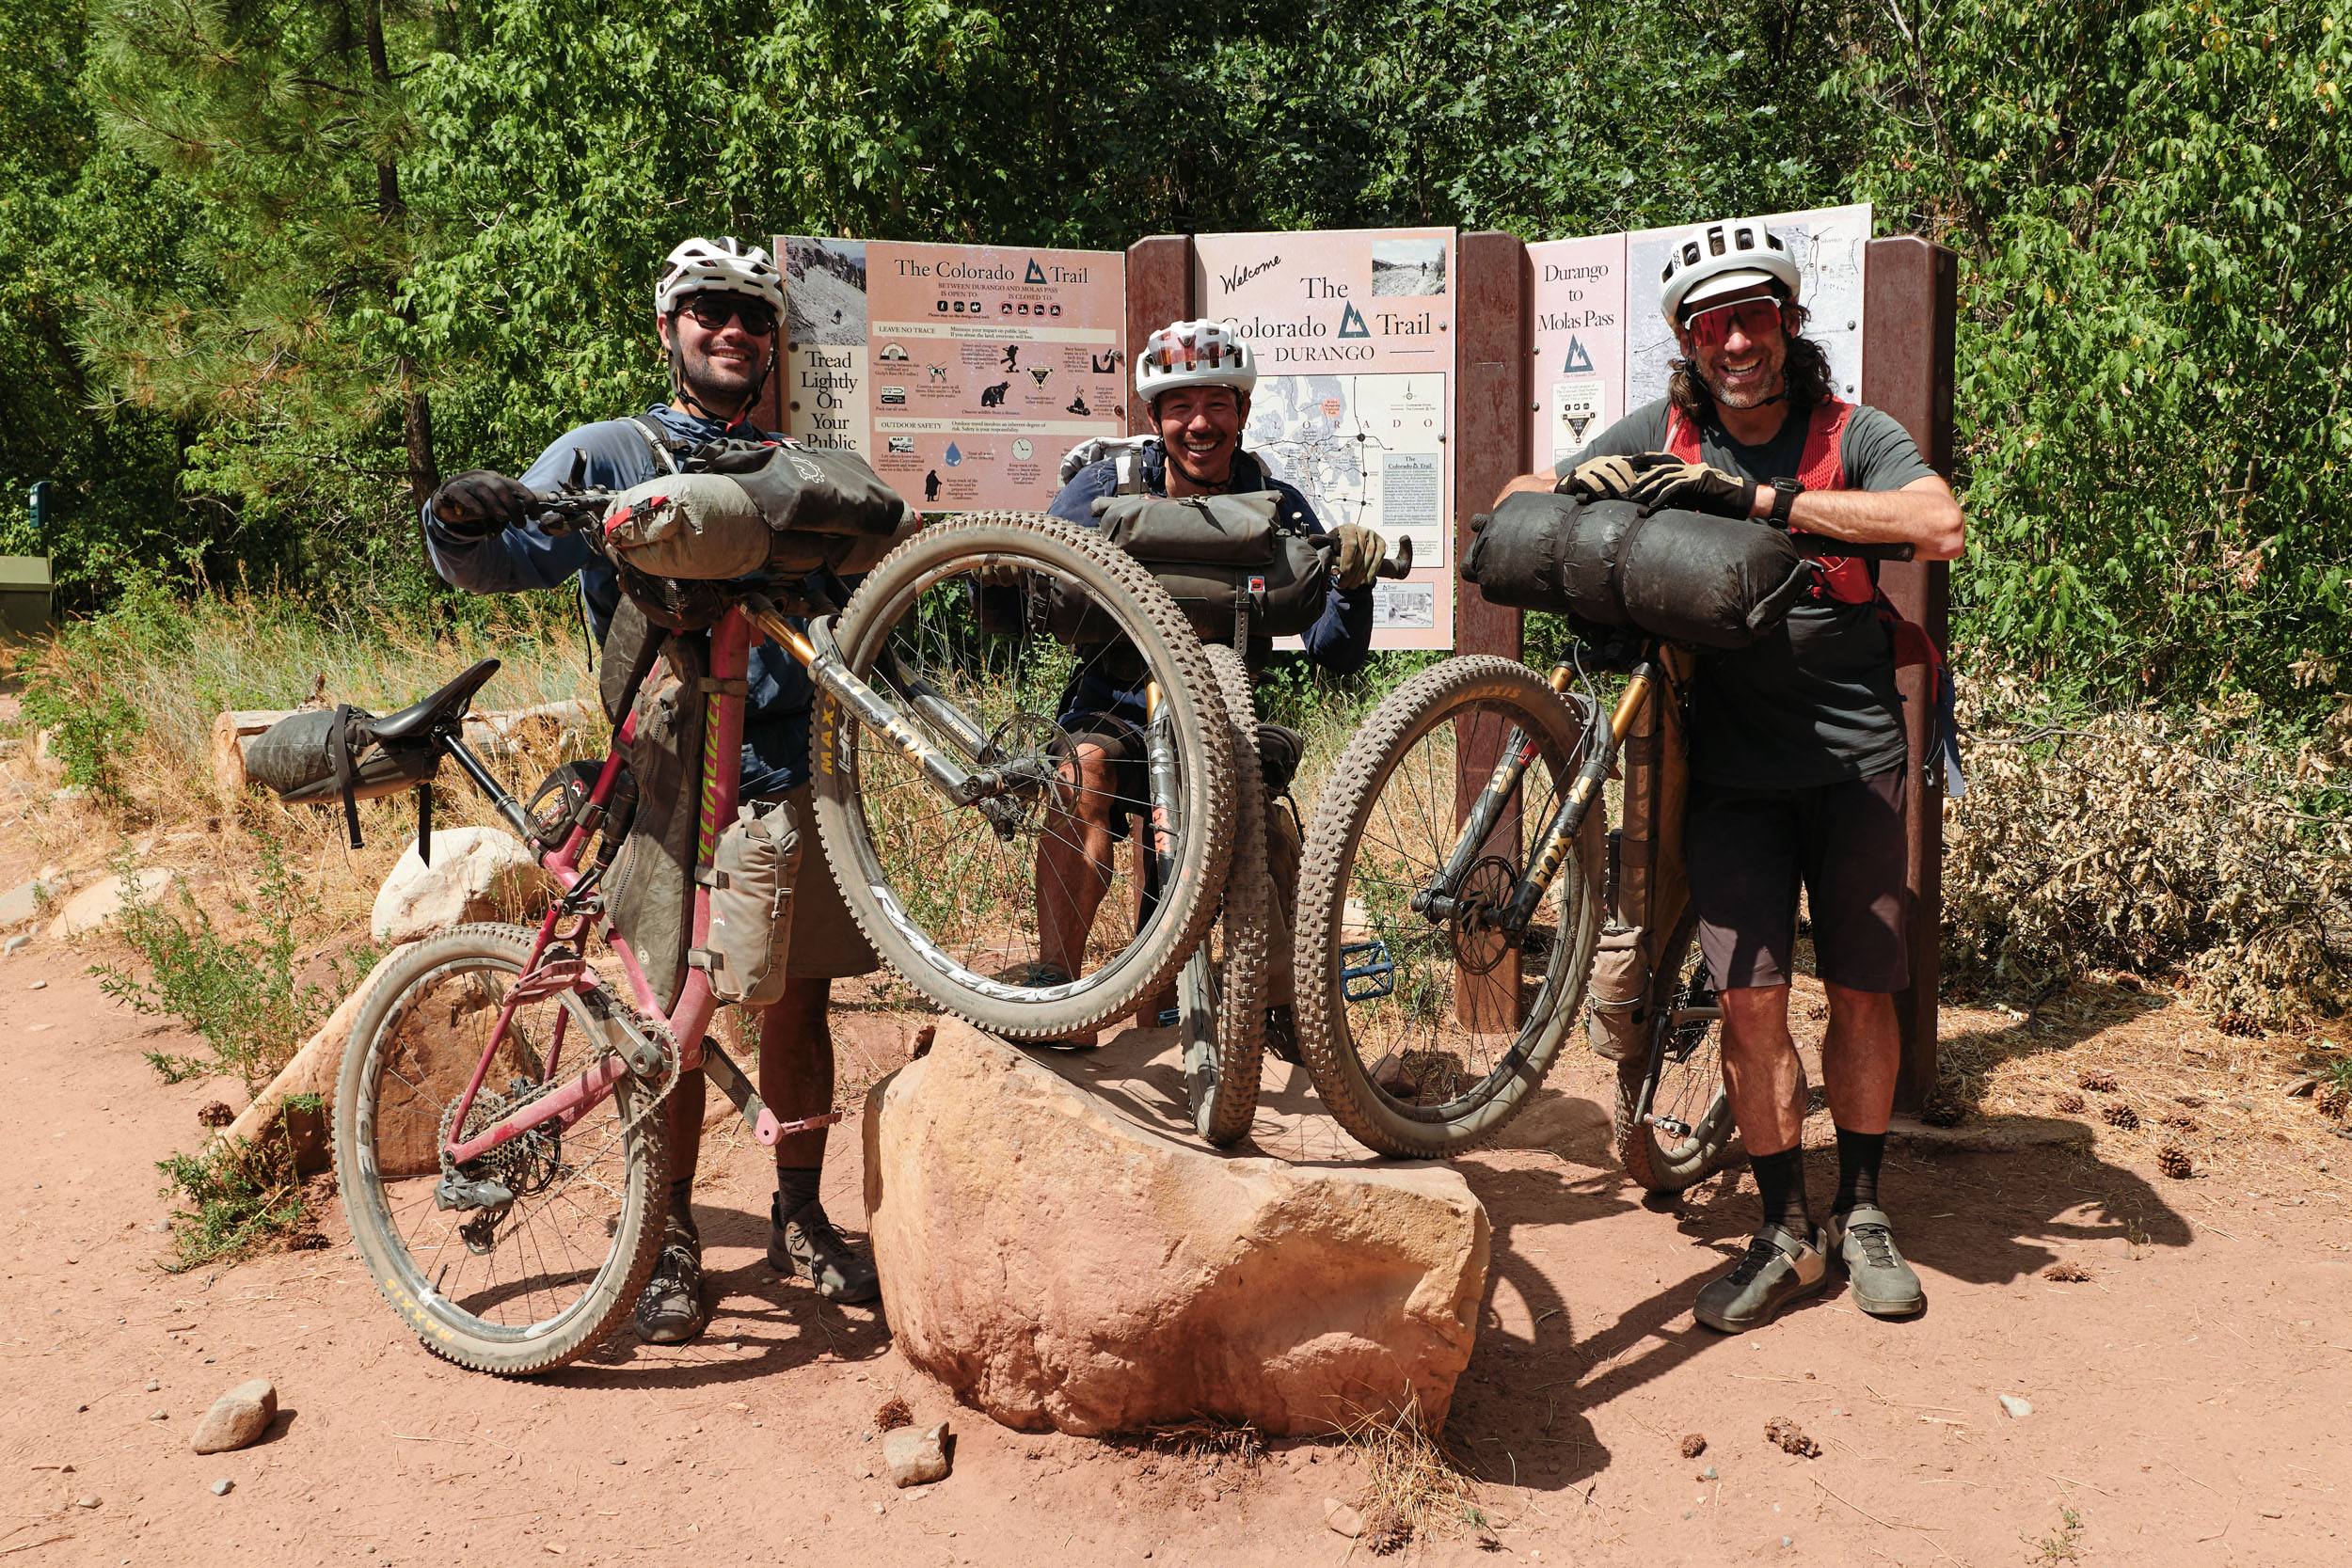
Because of the nature of this type of riding, everything on the bike needs to be a bit tighter, lighter, and more dialed. While the Colorado Trail itself hasn’t changed much, the way I pack a bike for adventures like this has. Not only am I carrying more gear these days, but the bike itself is larger, longer, and heavier. Here, I’m going to share what I packed, how I packed it, and some of my favorite pieces of gear from a recent six-day ride on the Colorado Trail. Check out my full setup in the video below, followed by a written version with photos.
The Bike
This year, I decided to buy a Santa Cruz Tallboy from Contender Bicycles in Utah. Santa Cruz didn’t have anything available for media in my lead-up to this trip, and I needed to get a bike frame to test a bunch of parts. So, I reached out to Contender, and they were a pleasure to work with.
When Santa Cruz launched the new Tall Boy, I was eager to test it. I’ll speak more about the bike in a full review later this summer, but the 130mm rear travel paired with a 140mm fork, the frame space, and the move from VPP suspension to a four-bar platform all intrigued me. Santa Cruz wanted to improve this bike’s pedaling efficiency, and they did so through changes to this new model. It feels incredible while pedaling up through rocky terrain, but it still opens up and feels like a big enough bike when descending. It’s a true trail bike that handles the weight well and can also be my everyday trail bike during the summer.
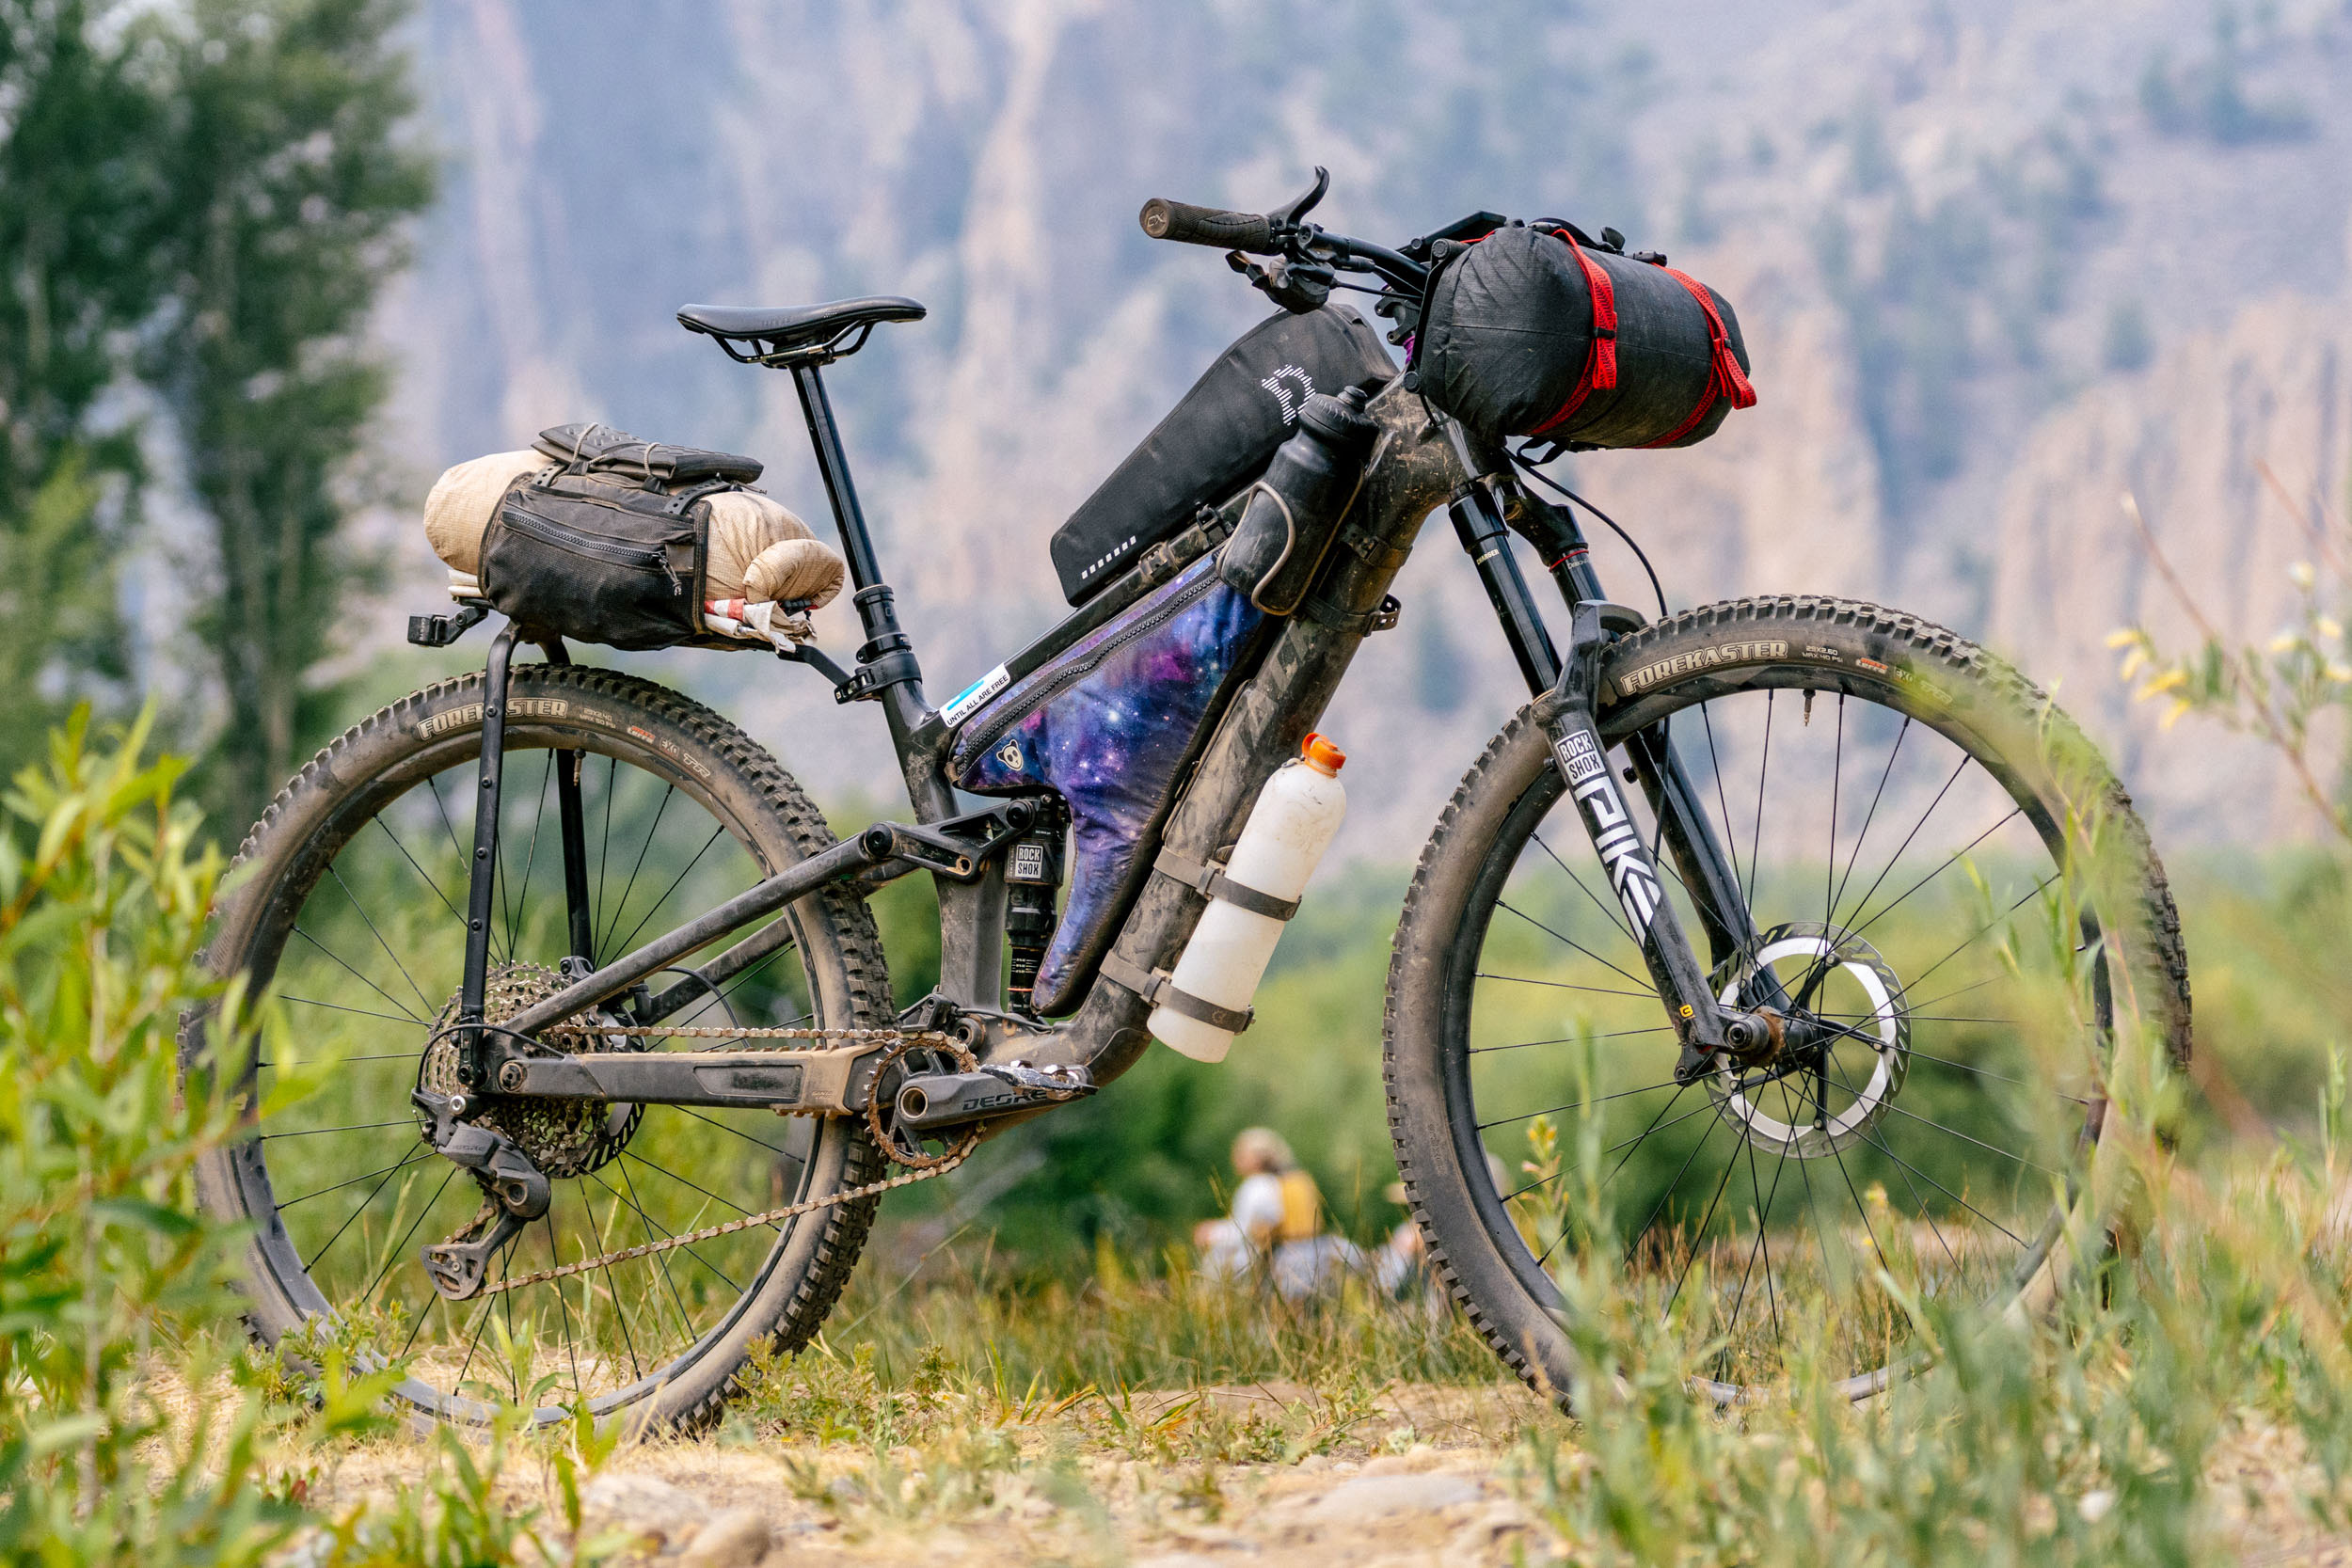
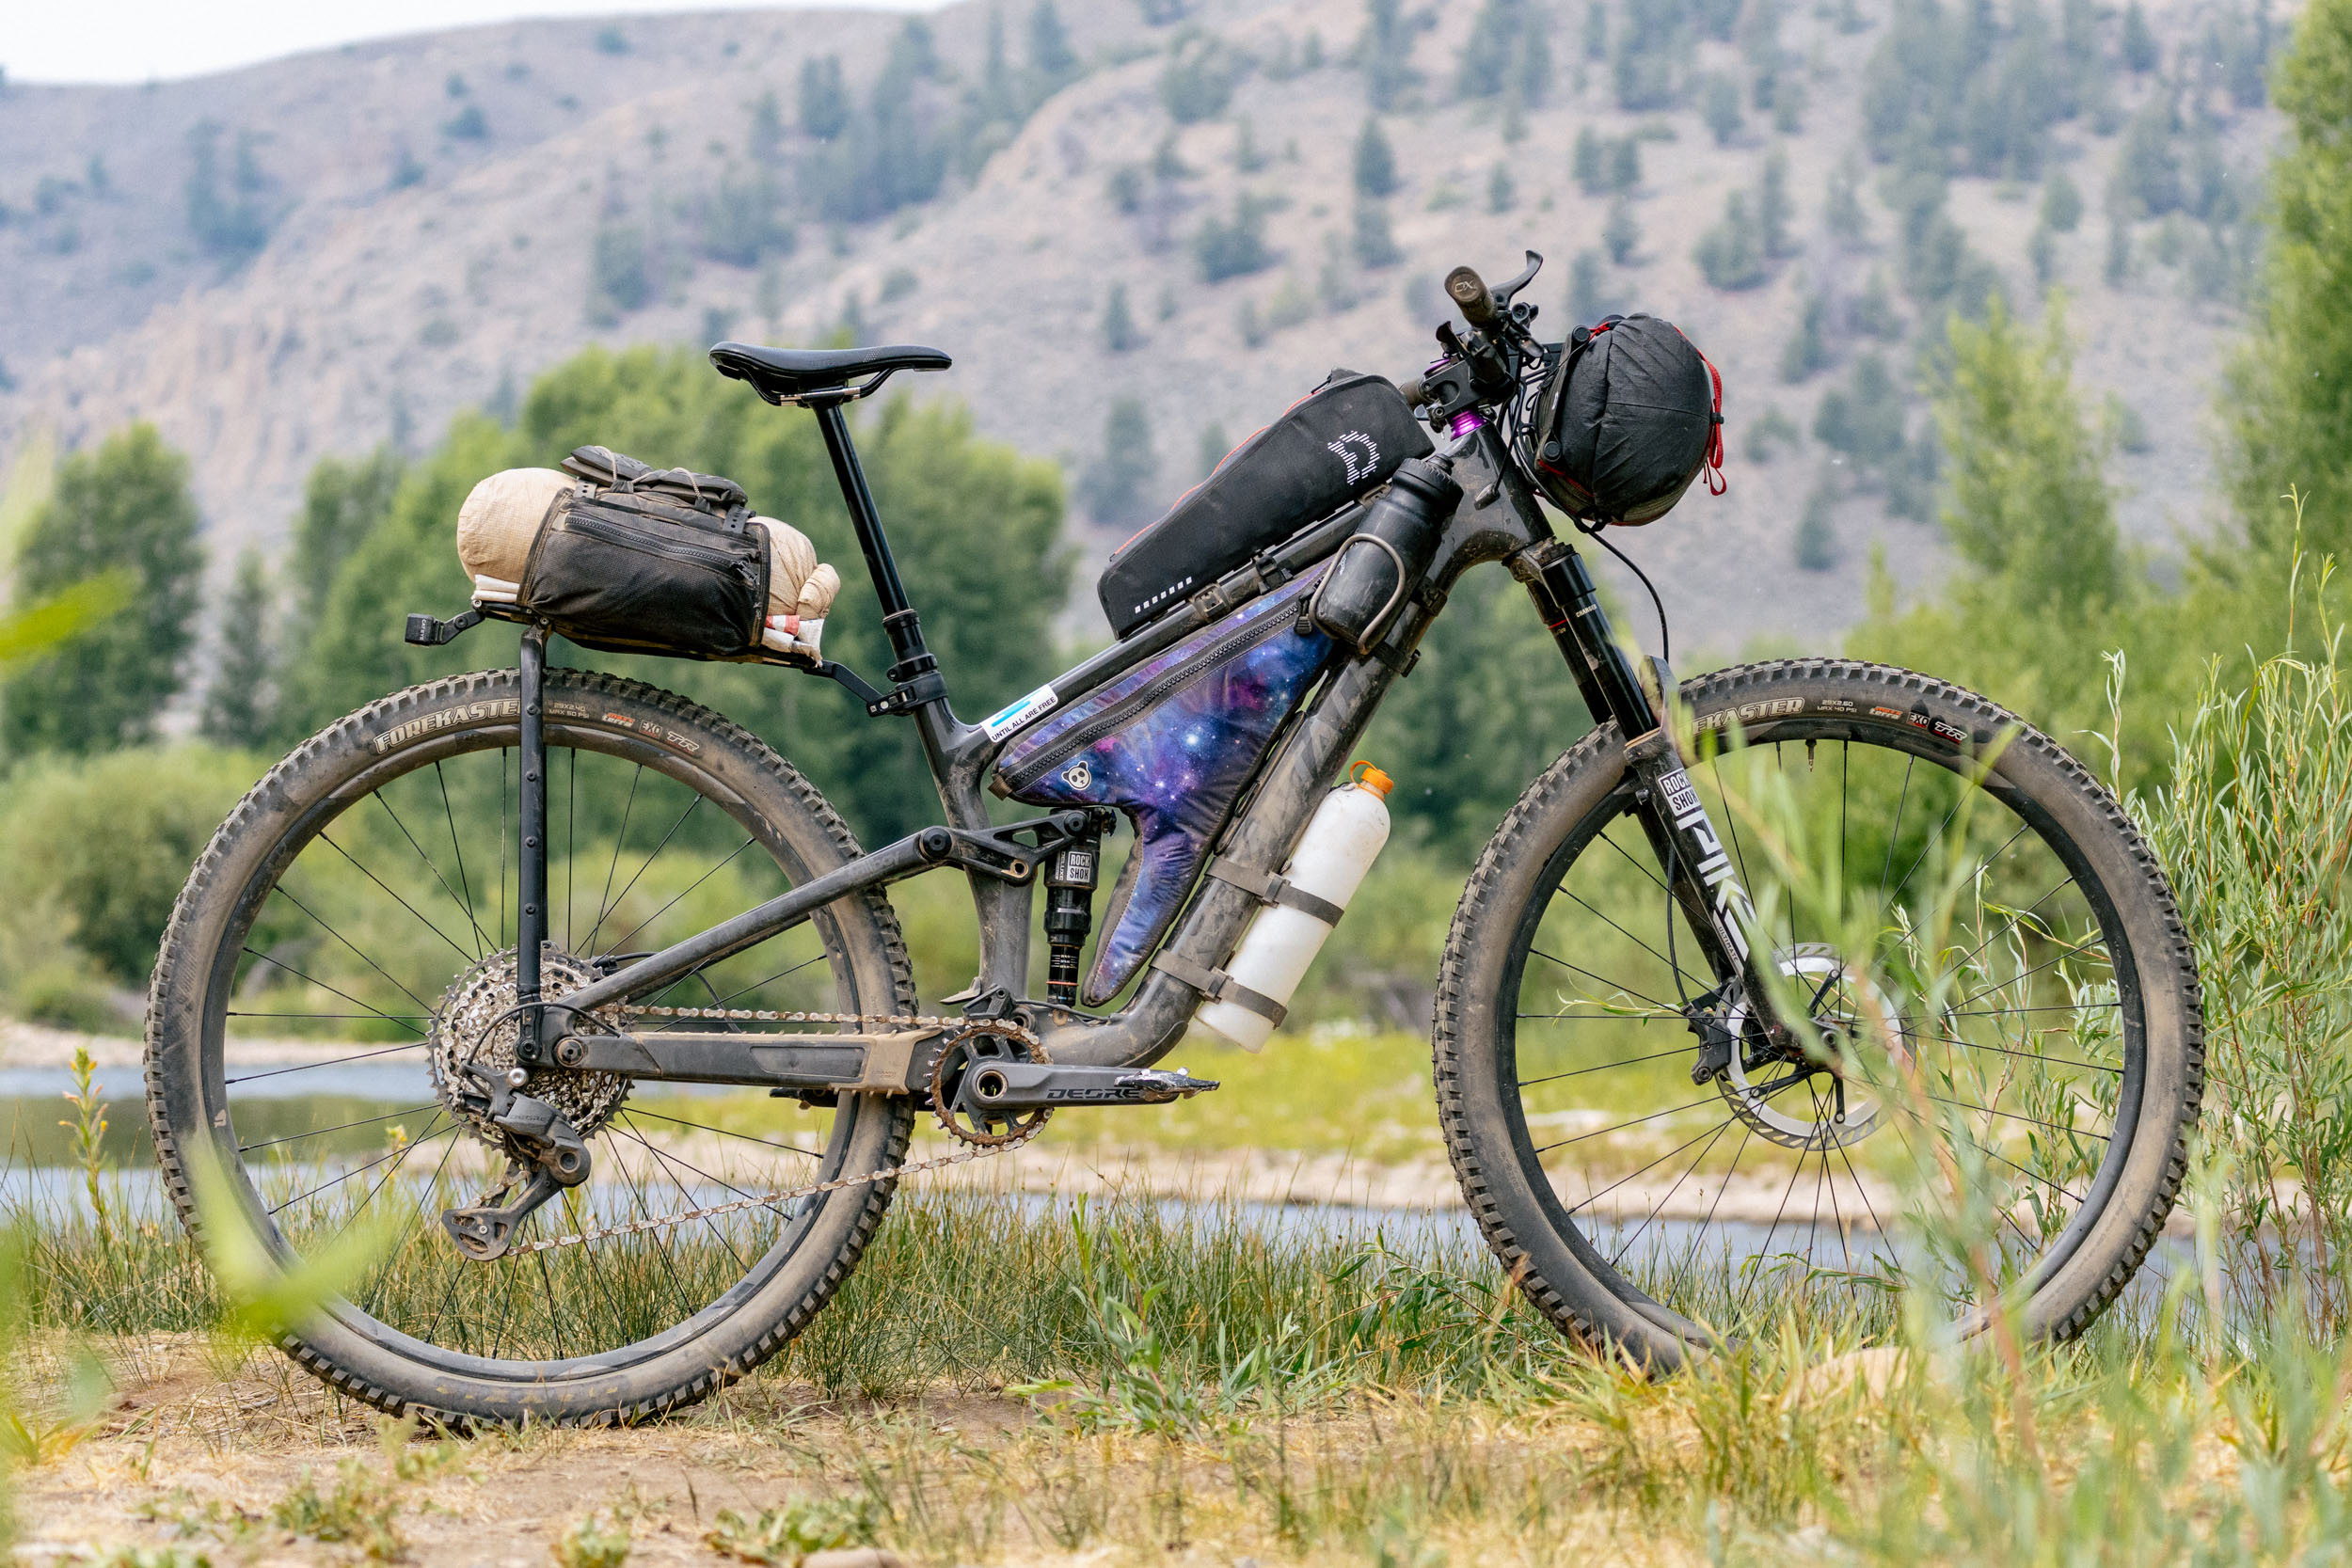
One of the beautiful things about this bike is the in-frame storage. That was one of the reasons I was so intrigued by the Tally Boy. The Glovebox storage system is massive, and that goes a long way when you’re working with a full-suspension frame where the shock takes up valuable packing space. I was able to fit my entire repair kit inside, which is extensive. To maximize frame space, I used a frame bag from Rogue Panda that works with the Santa Cruz Glovebox. Because the lower mounting point is only attached to the Glovebox door, I can still open it, push the bag back, access the sleeves inside the downtube, and pull them out. It’s a slick system. The only thing I would change is adding a small piece of tape or something similar to the Glovebox lever to get a little more leverage when closing it.
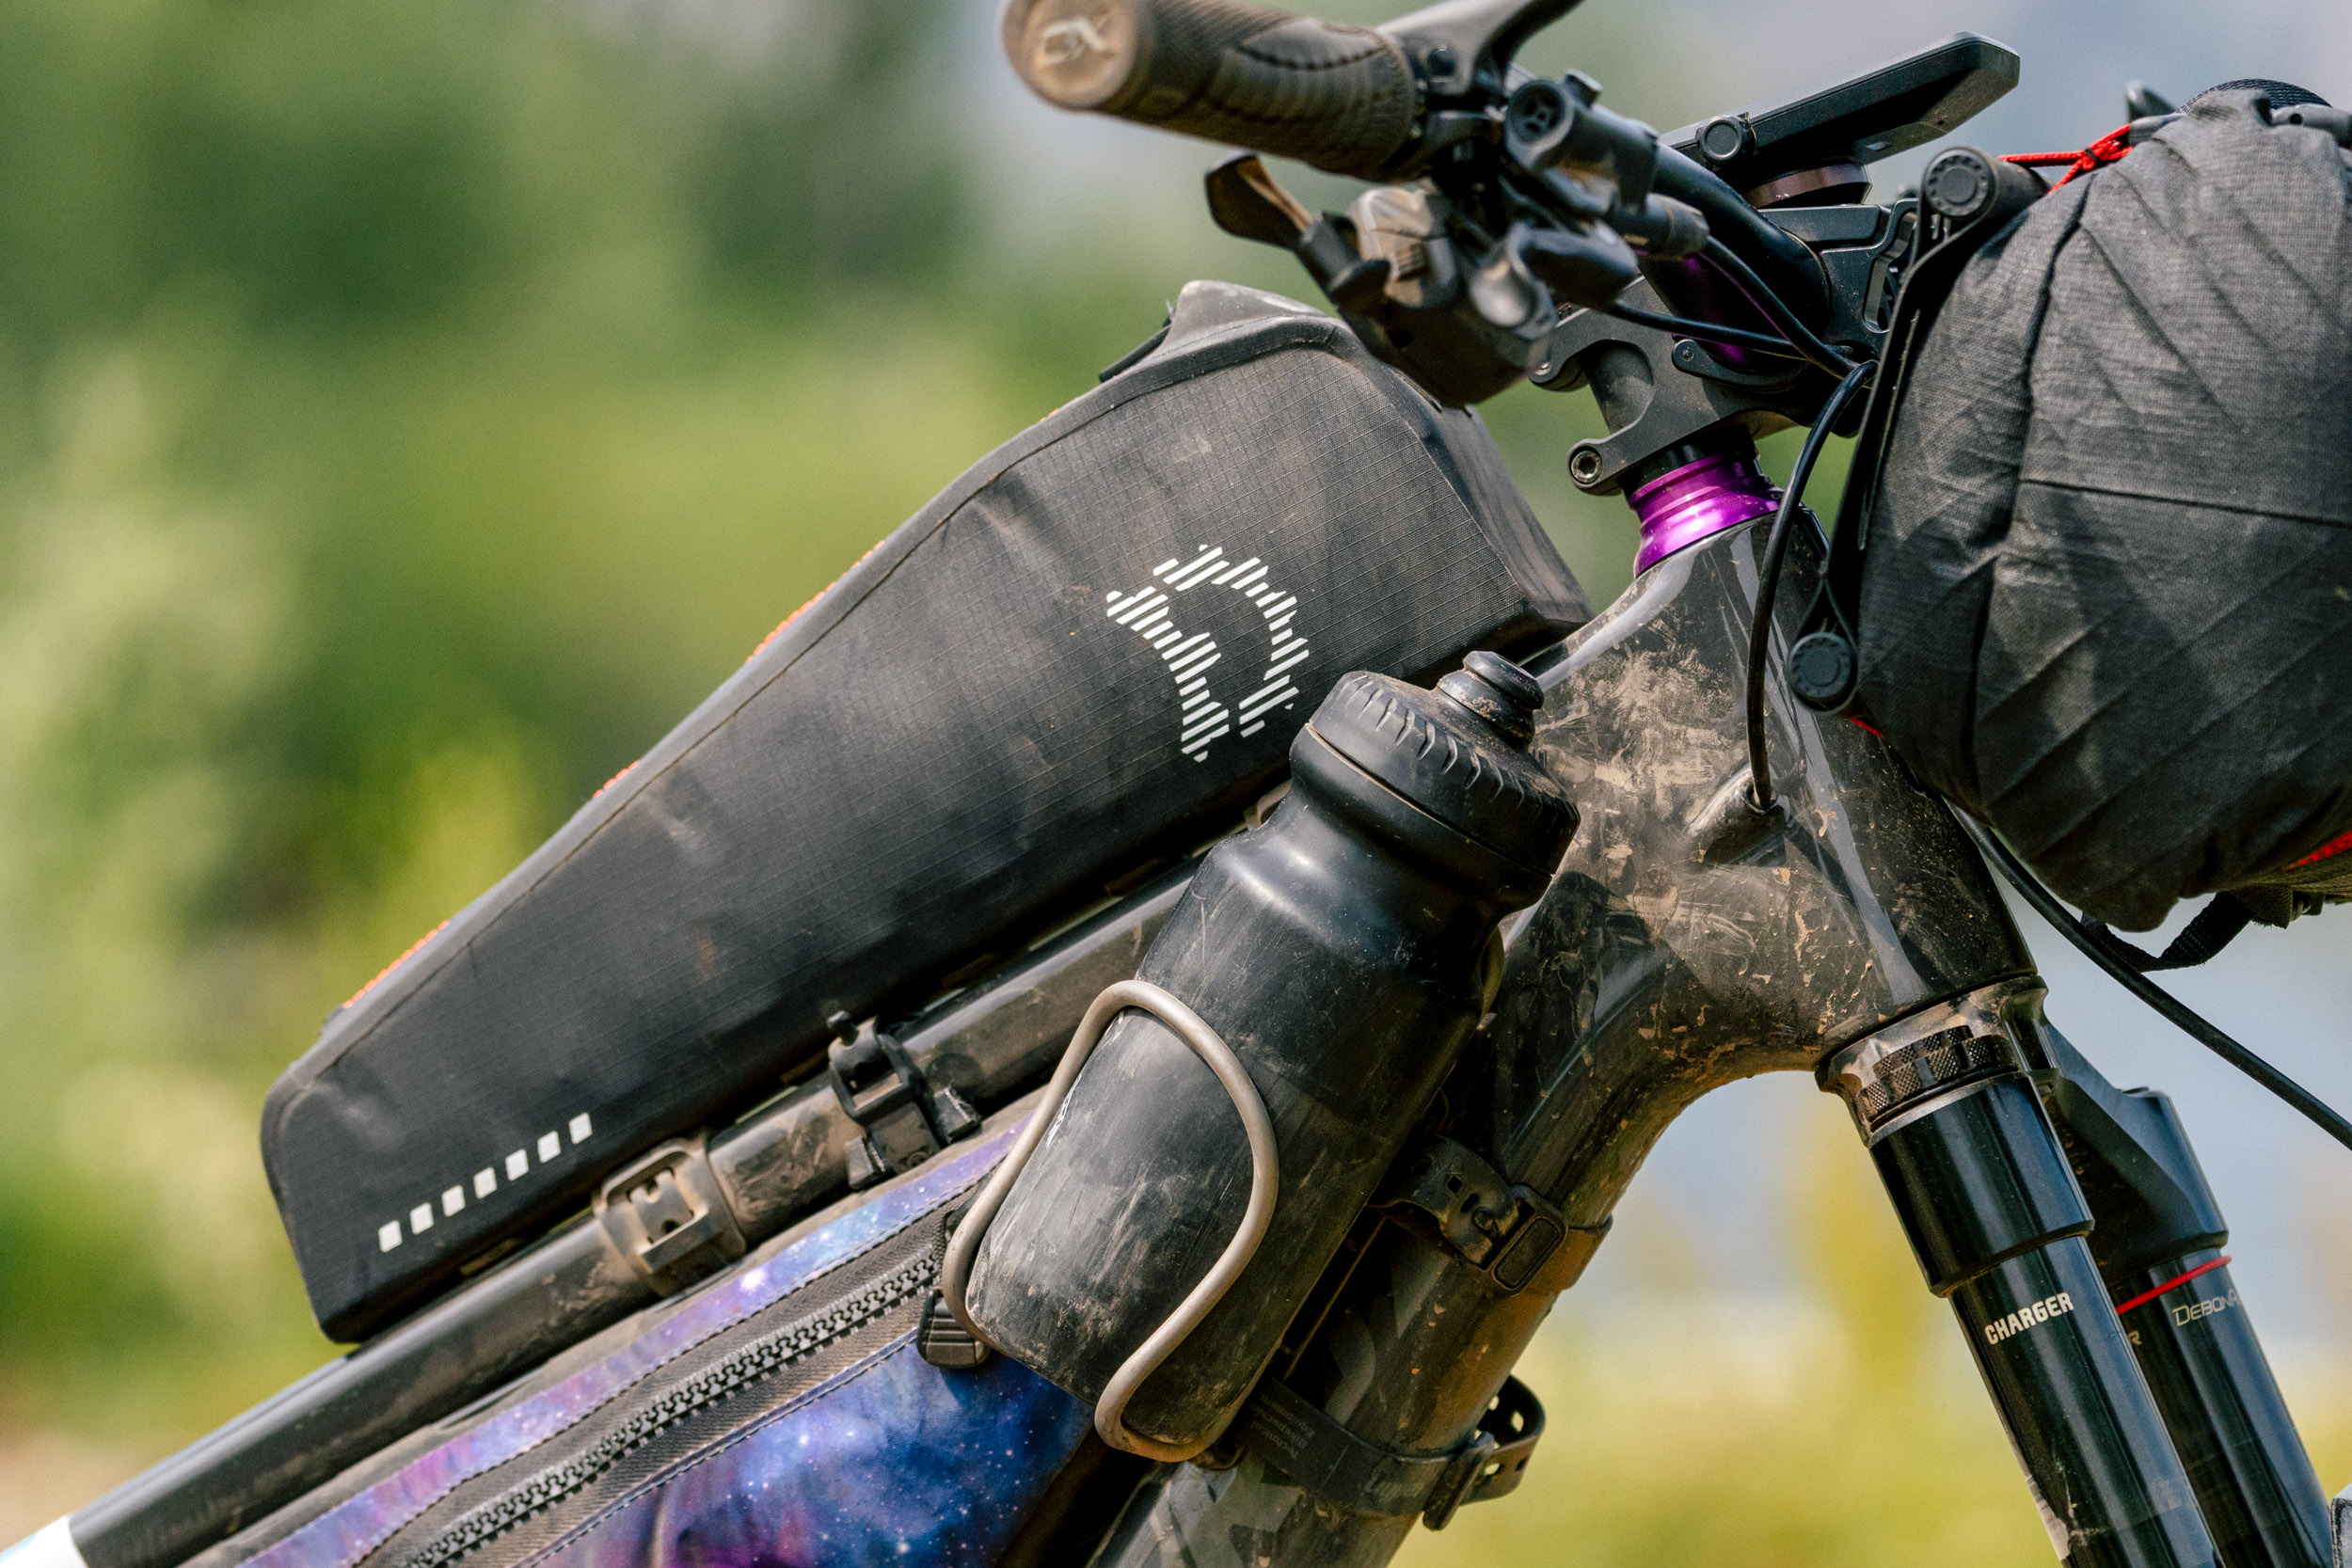
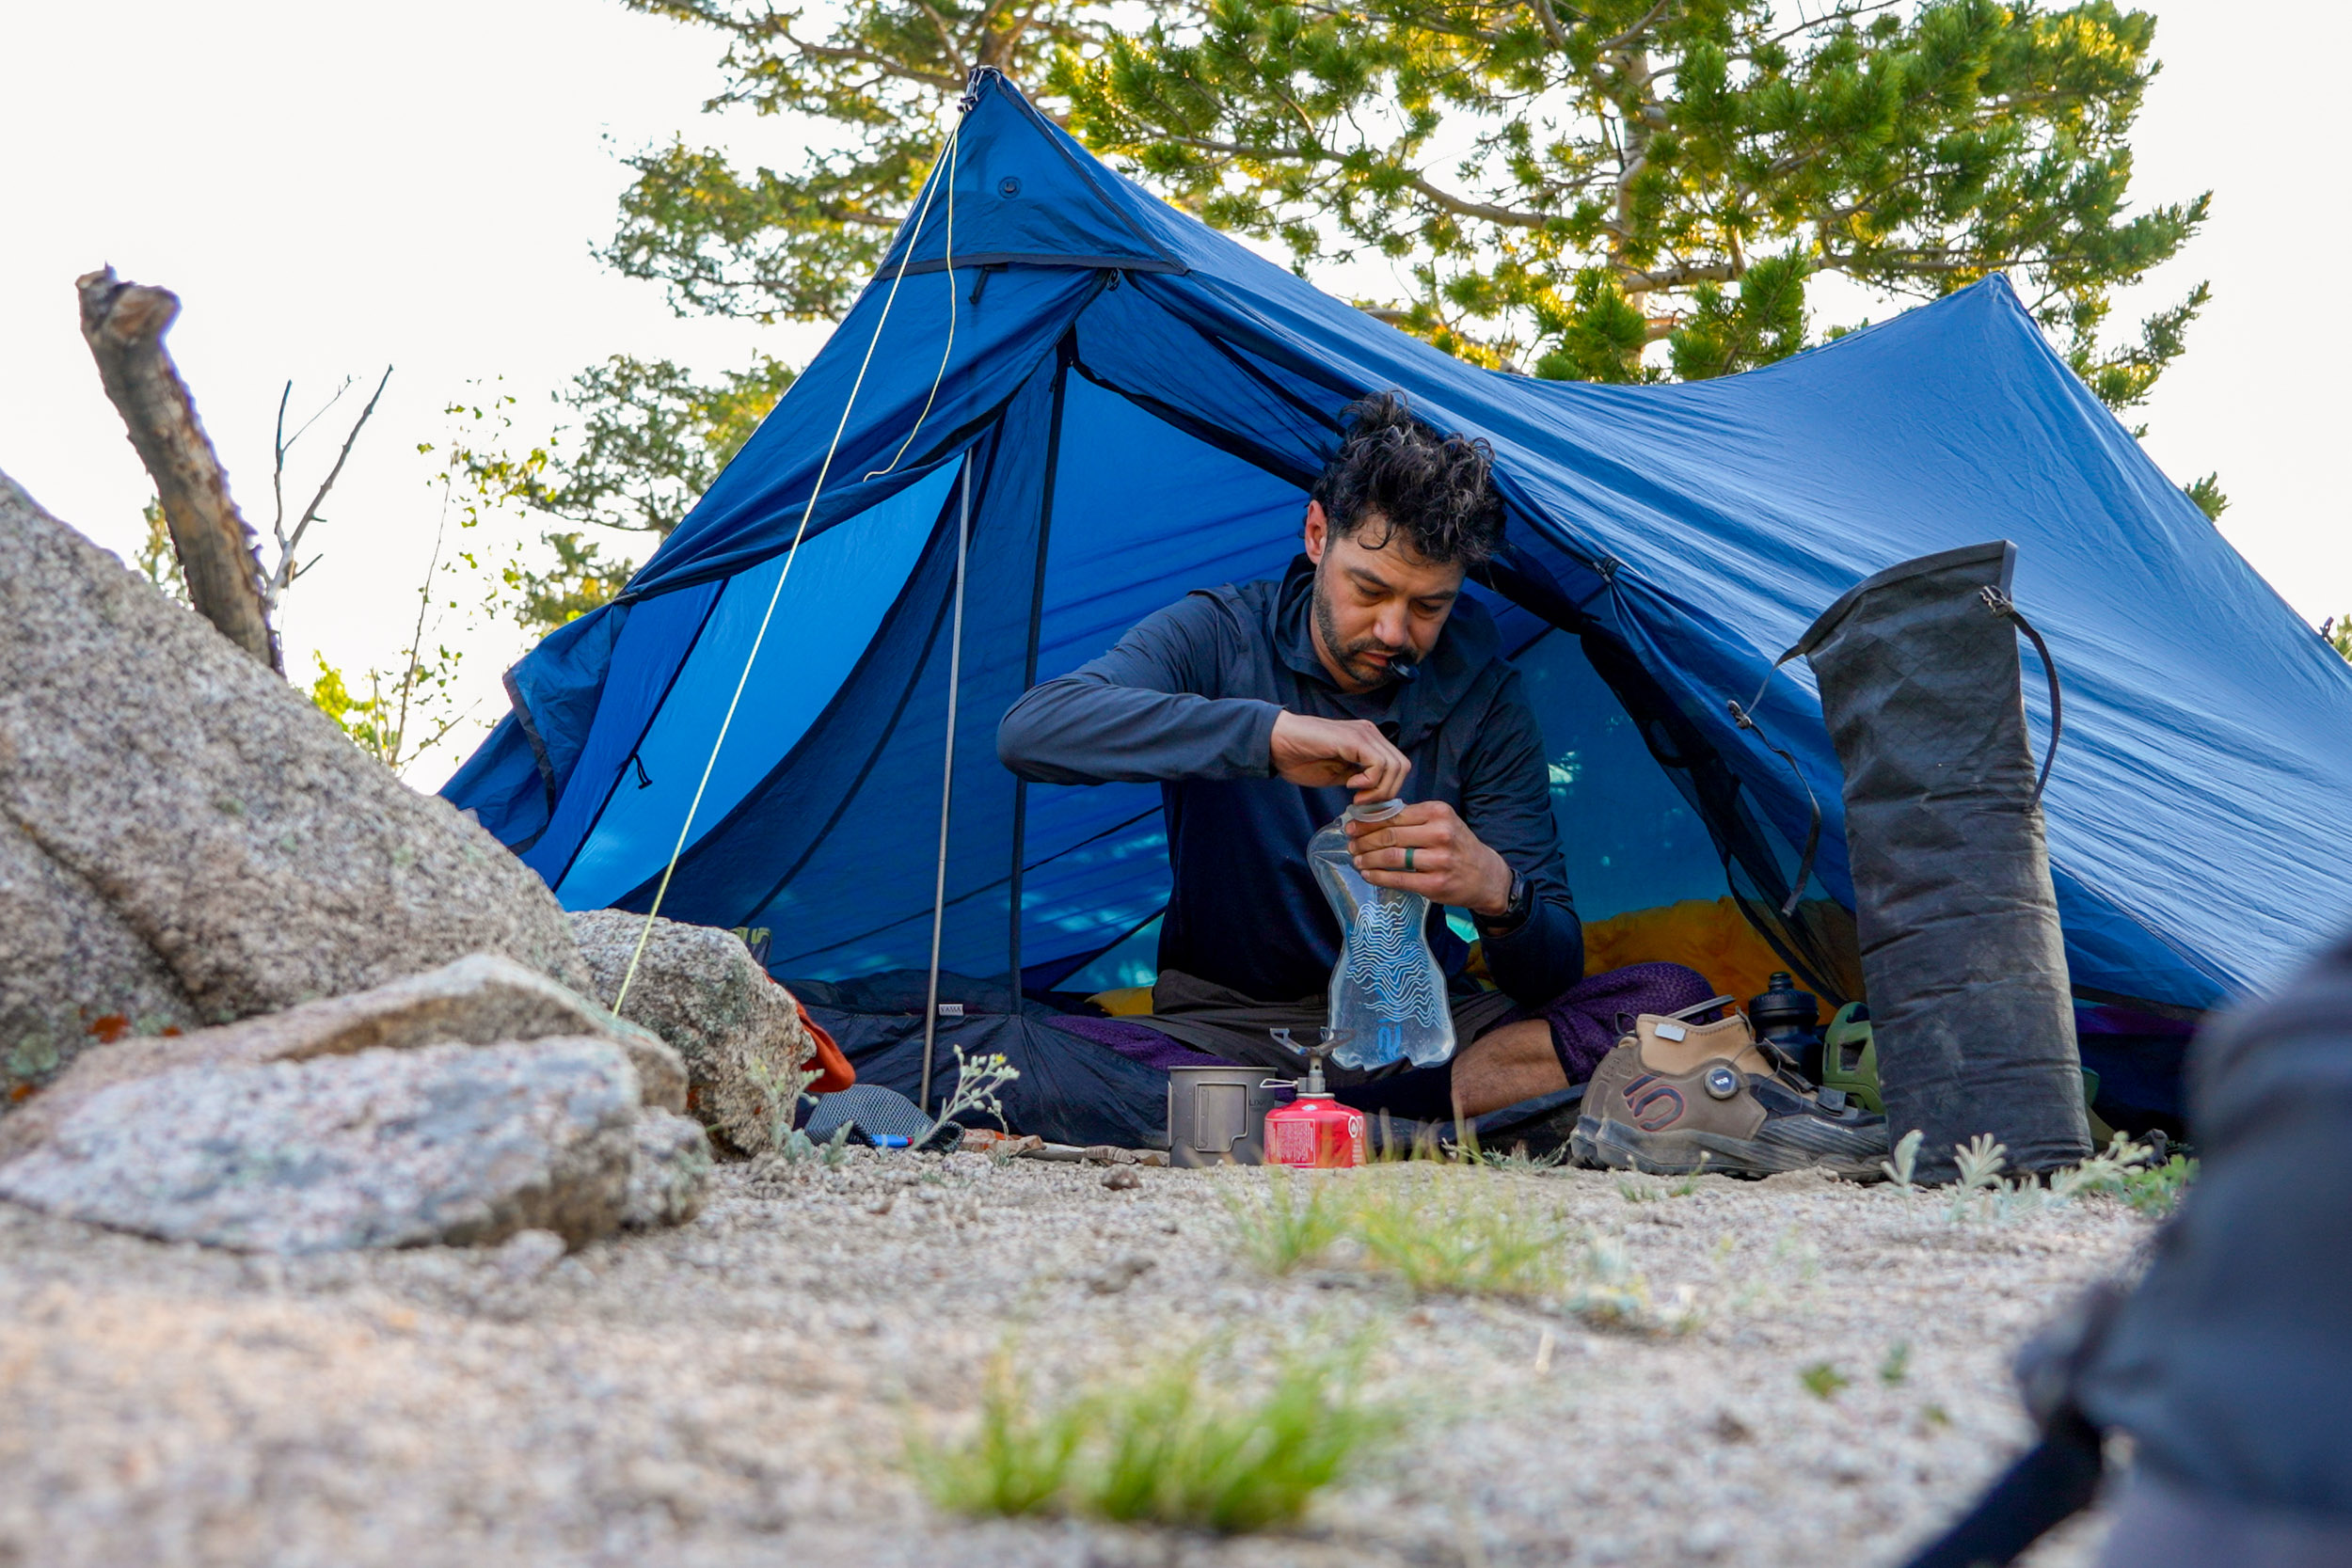
Speaking of the frame bag, Nick and his team did an excellent job, and I’ll talk more about this one soon. Inside the bag, I kept my poop kit, tent poles and stakes, and my catch-all kit. The catch-all holds things like medicine, a toothbrush, toothpaste, headlamp, earplugs, and other small essentials, along with my stove. I also used it to house extra food, my sun shirt or t-shirt, and two empty hydration bladders.
One of those was a Platypus 1L bladder, and the other was a 750mL CNOC/Sawyer filter setup, which was a standout on this trip. The bladder has its own cap, so in theory it can be used without the filter. When I’m not using it, I can wrap the small bladder around the compact filter, and it packs down well. Plus, paired with the CNOC Hard Bottle that I keep on the downtube, the two share the same cap, and the Sawyer threads onto that bottle, giving me some redundancy in case the bladder breaks. For water I’m more skeptical of, I also carry Aquamira Part A and Part B in the frame bag. Either way, I’m stoked on this system. It was one of my favorite pieces of gear on the bike. On the non-drive side of the frame bag, I kept some important everyday items: wallet, spoon, chain lube, sunscreen, and chapstick.
With regard to on-frame water storage, I mounted the Tailfin HydroMounts on the top of the downtube and angled them facing out. Over the last six or seven months, I’ve been testing a few systems that allow me to carry water up near the front of the bike without attaching anything to the bars. I tried the Botched Dragonfly setup and a Minoura cage mount, but they never worked all that well for my needs.
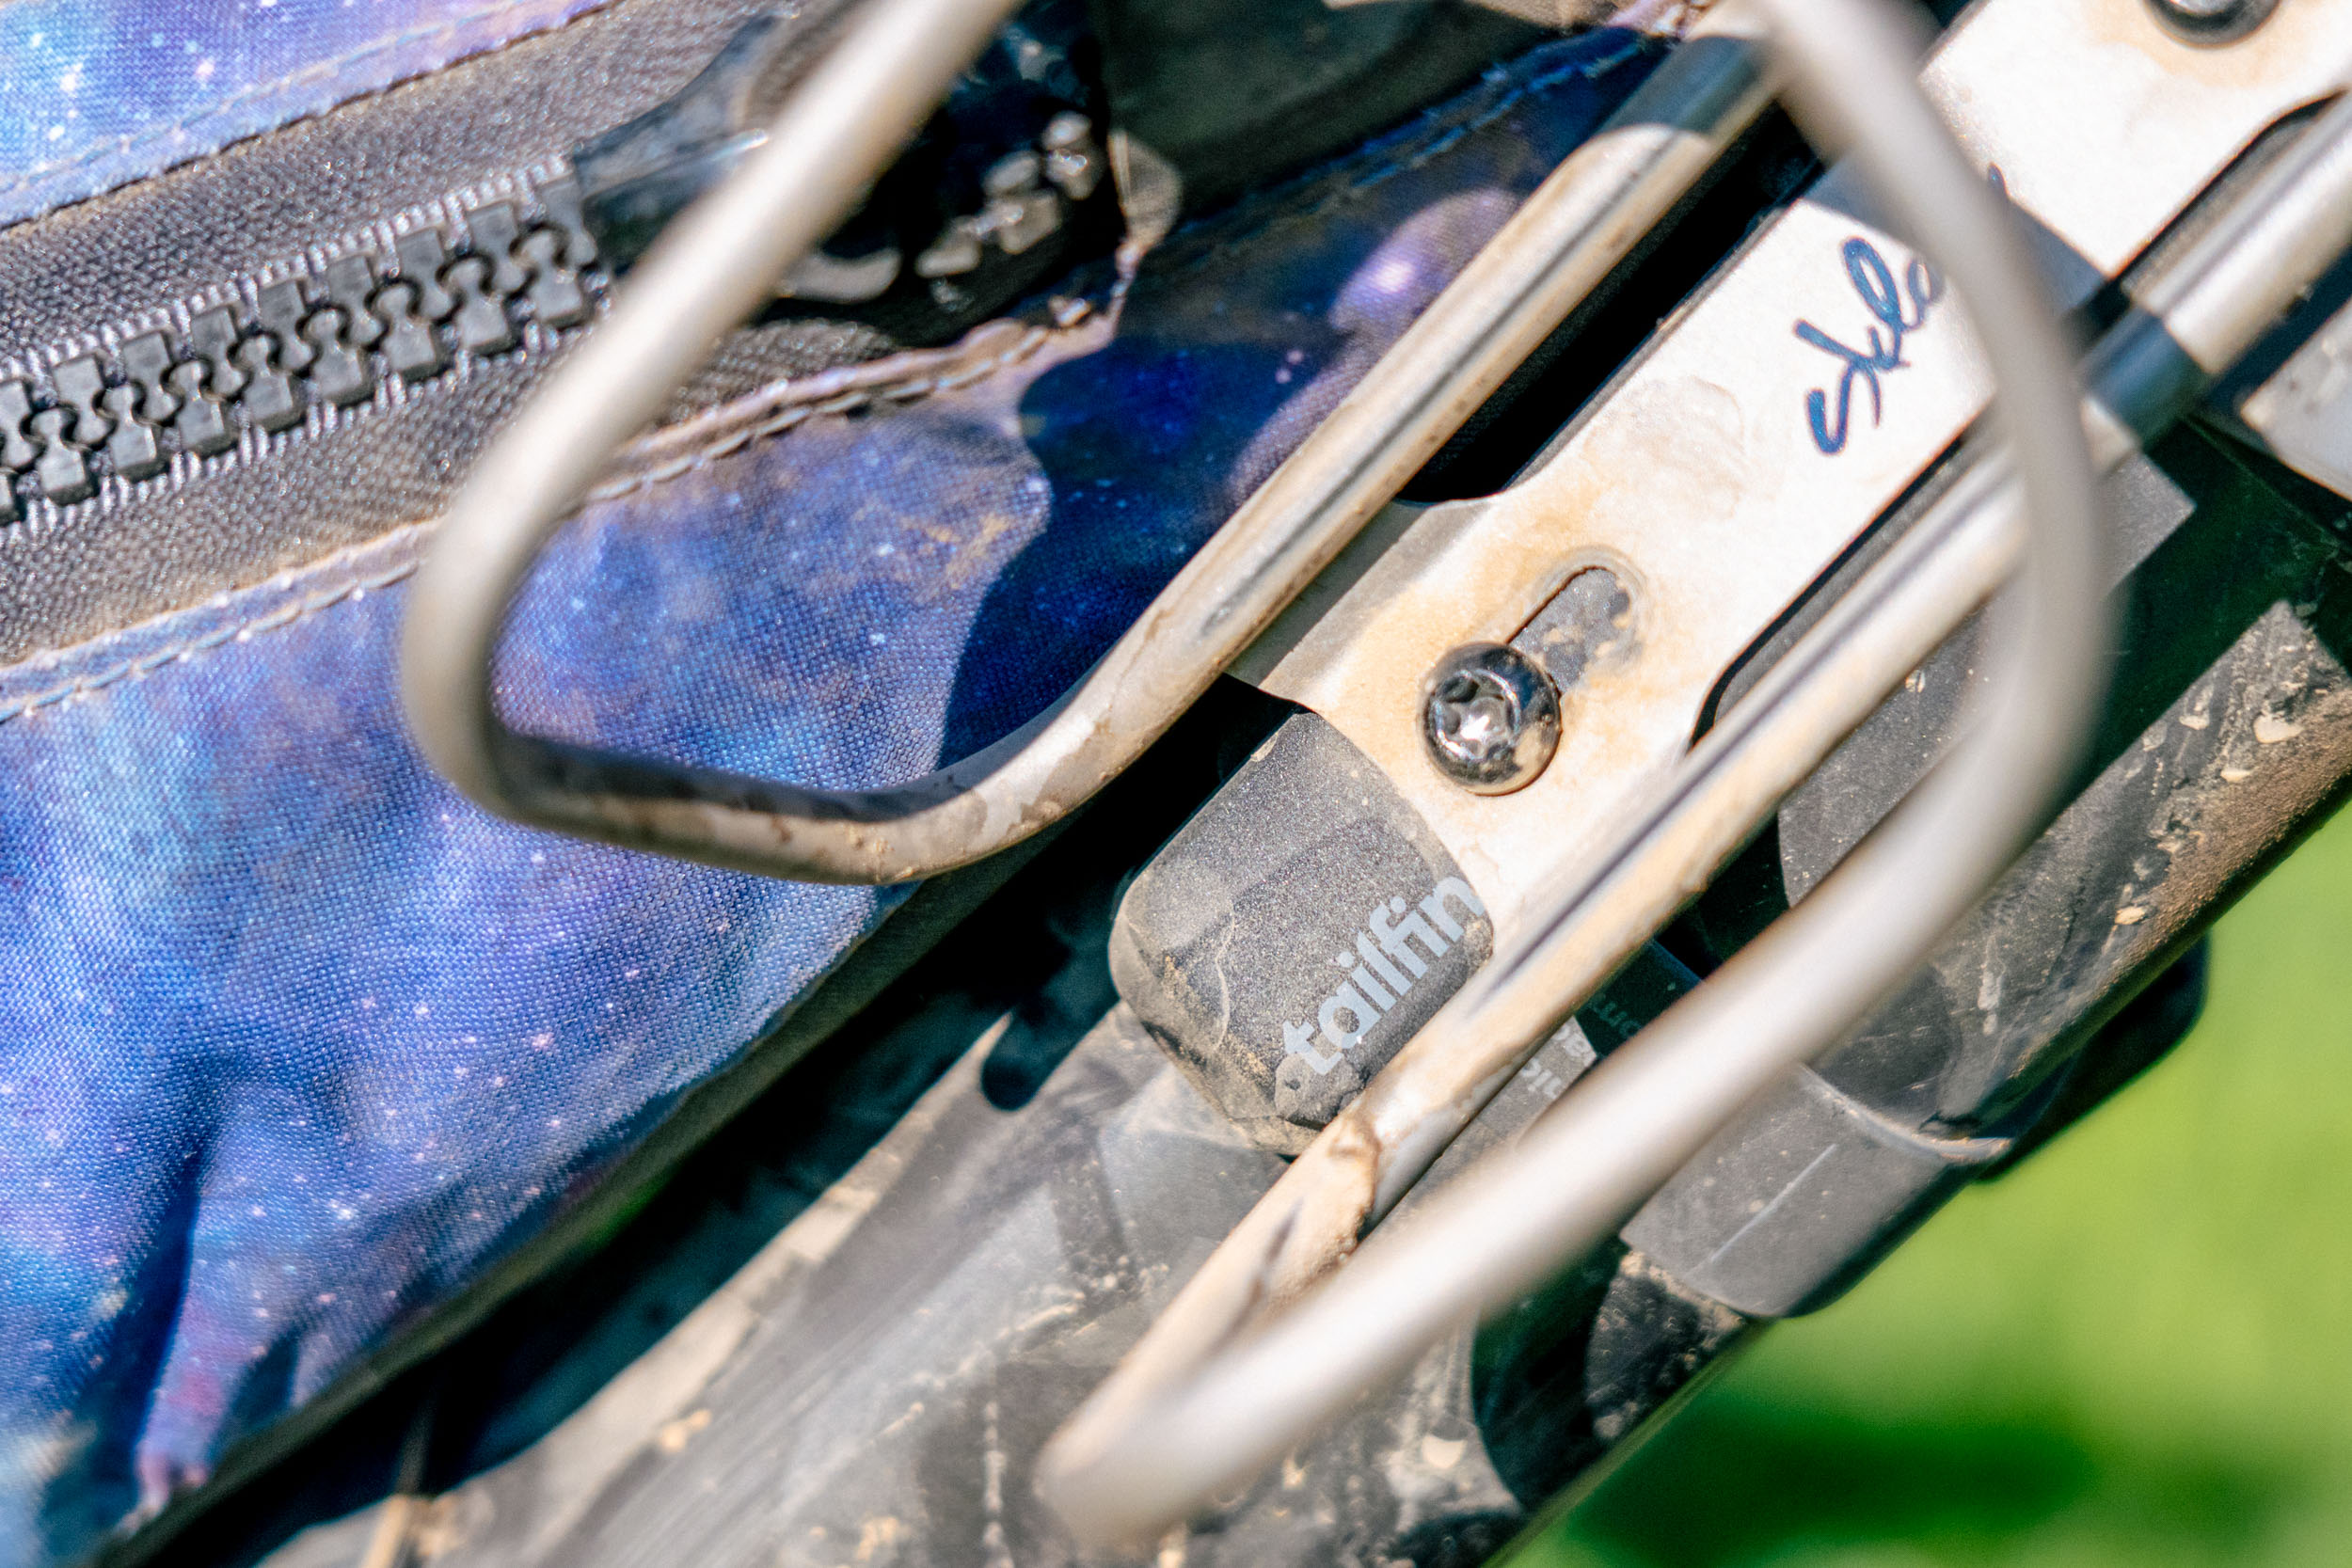
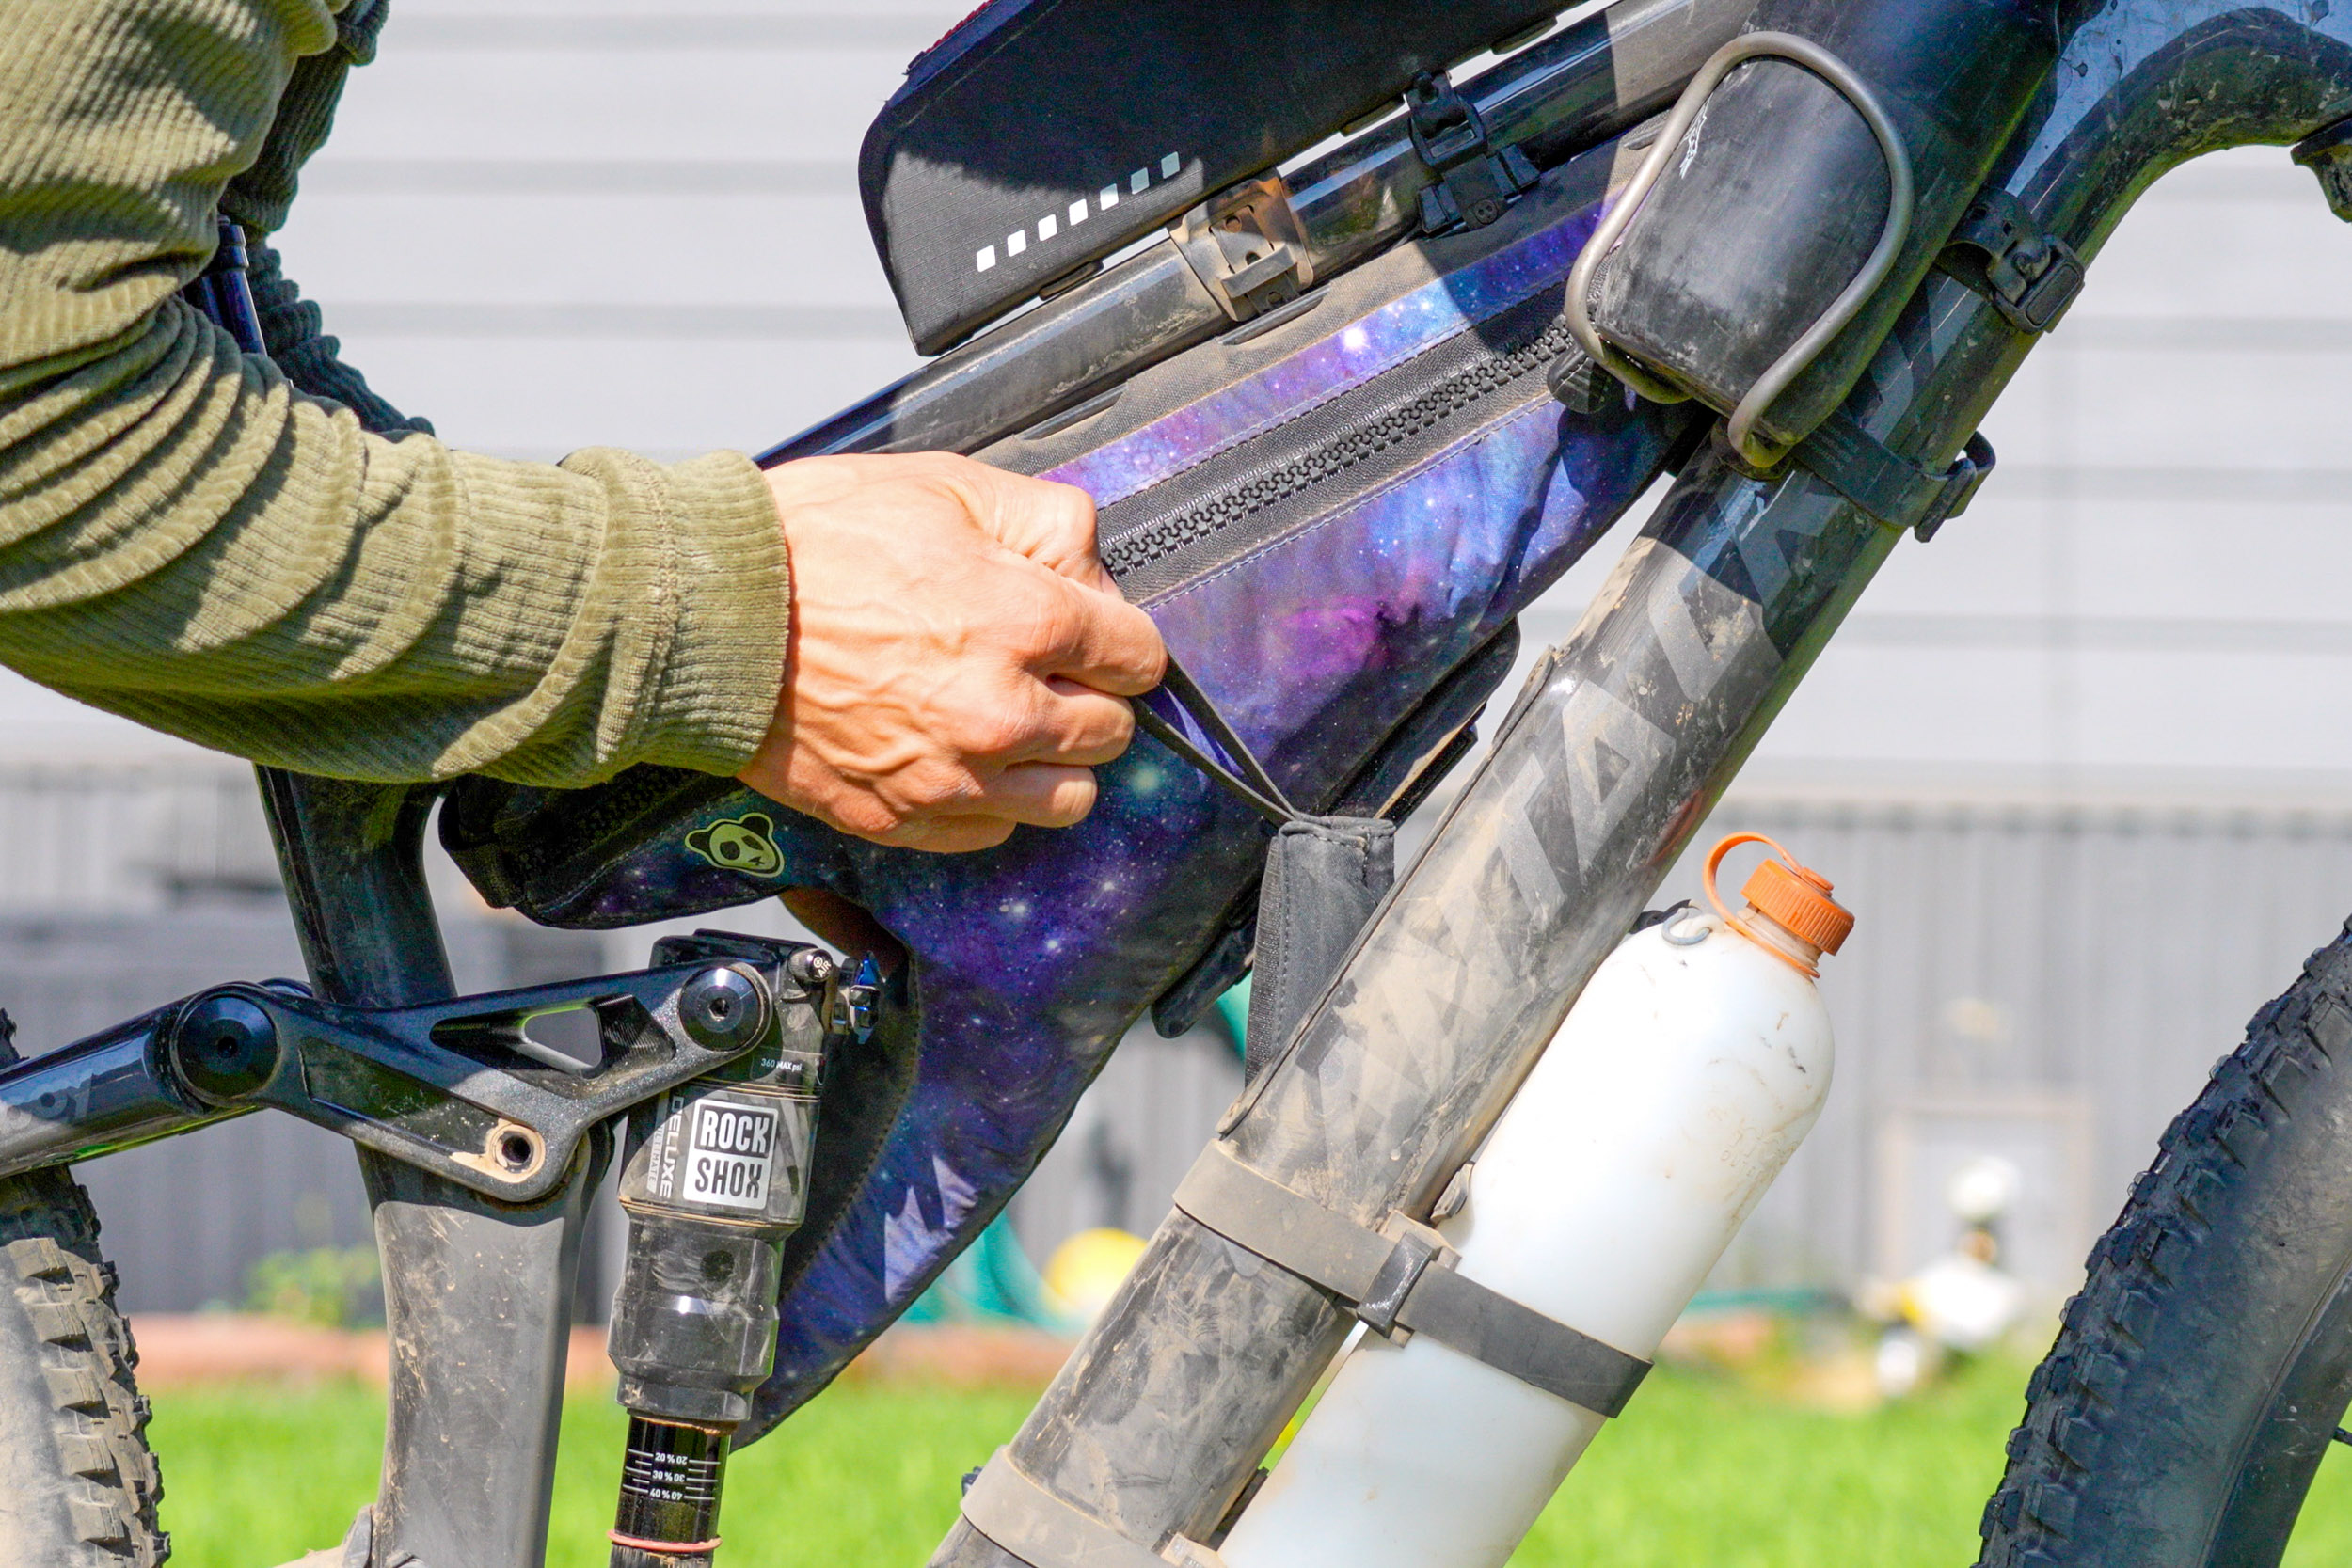
The Tailfin system, however, was incredible. I strapped one mount to each side, tied them together, and they never moved. They became an excellent way to store water while keeping it easily accessible. I used small bottles here, but I have no doubt that if I lowered the mounts a bit, I could have fit larger bottles without issue. Finally, on the top tube, I had the new Revelate Designs Extended Play Bag. This bag carried all the snacks I needed; it has a massive amount of space, mounts to the top tube without slipping, and comes with a huge molded-tooth zipper. It’s built to last and built to carry it all. It’s a great tool for the job.
Rear Cargo
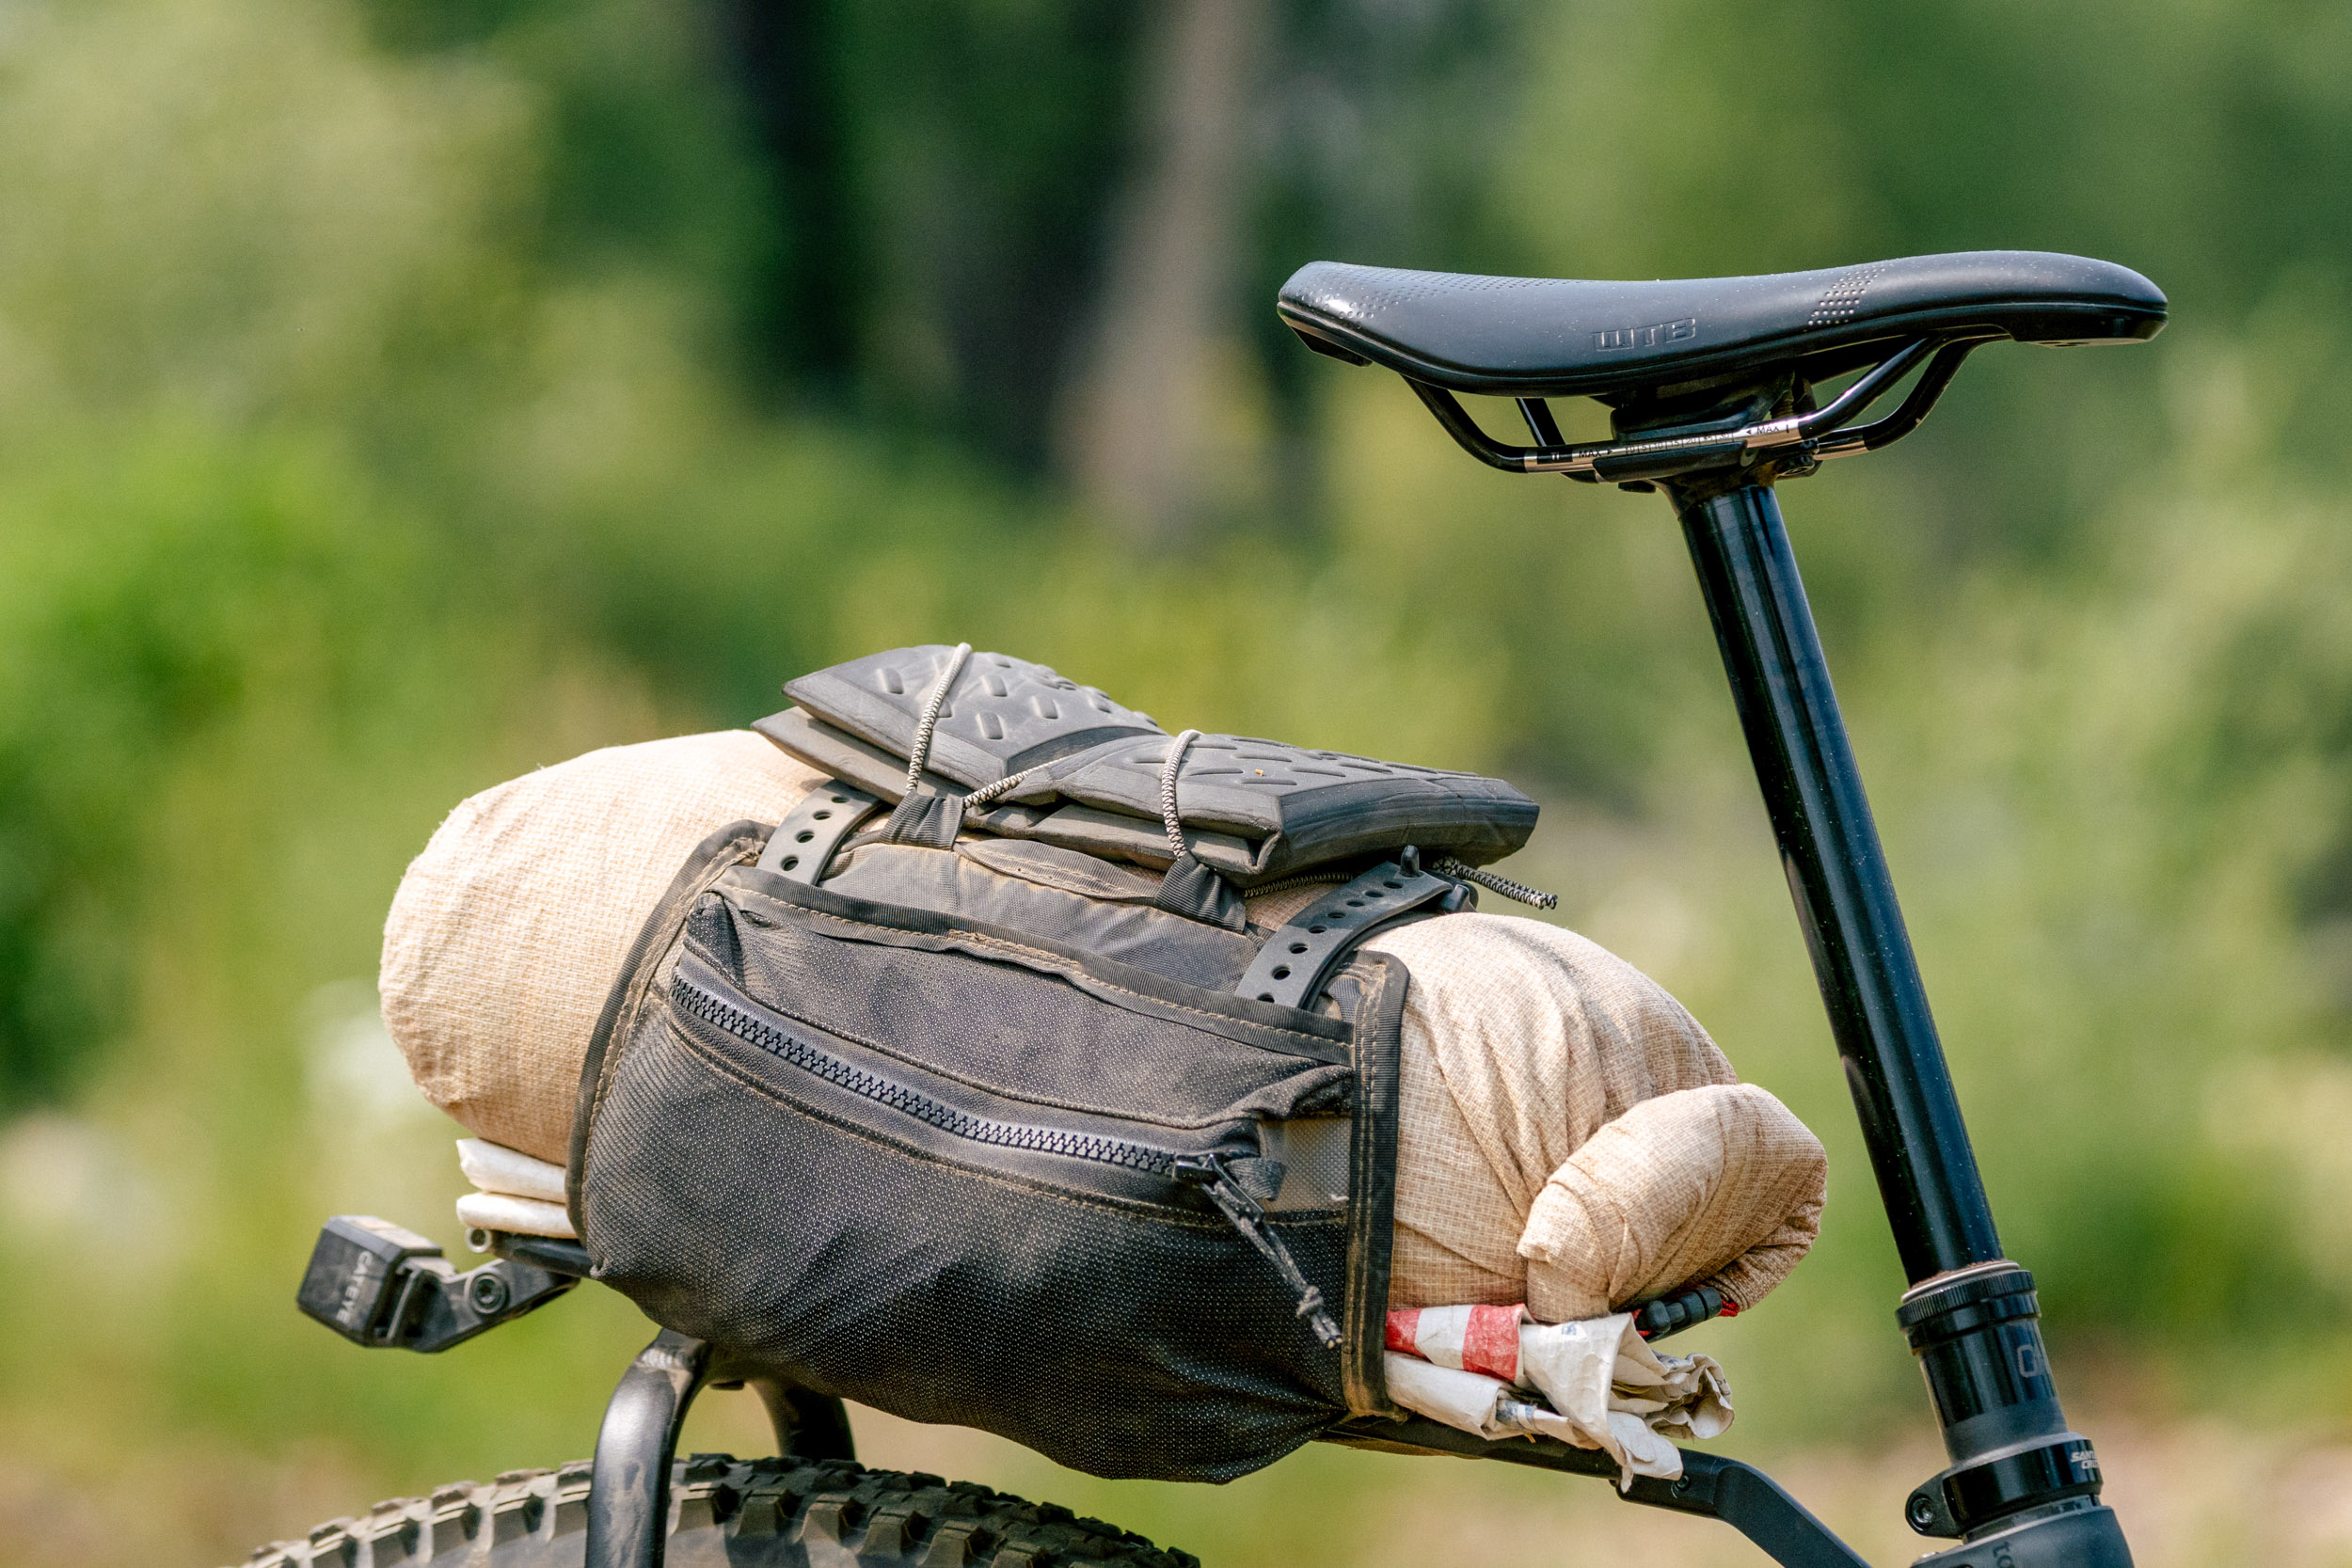
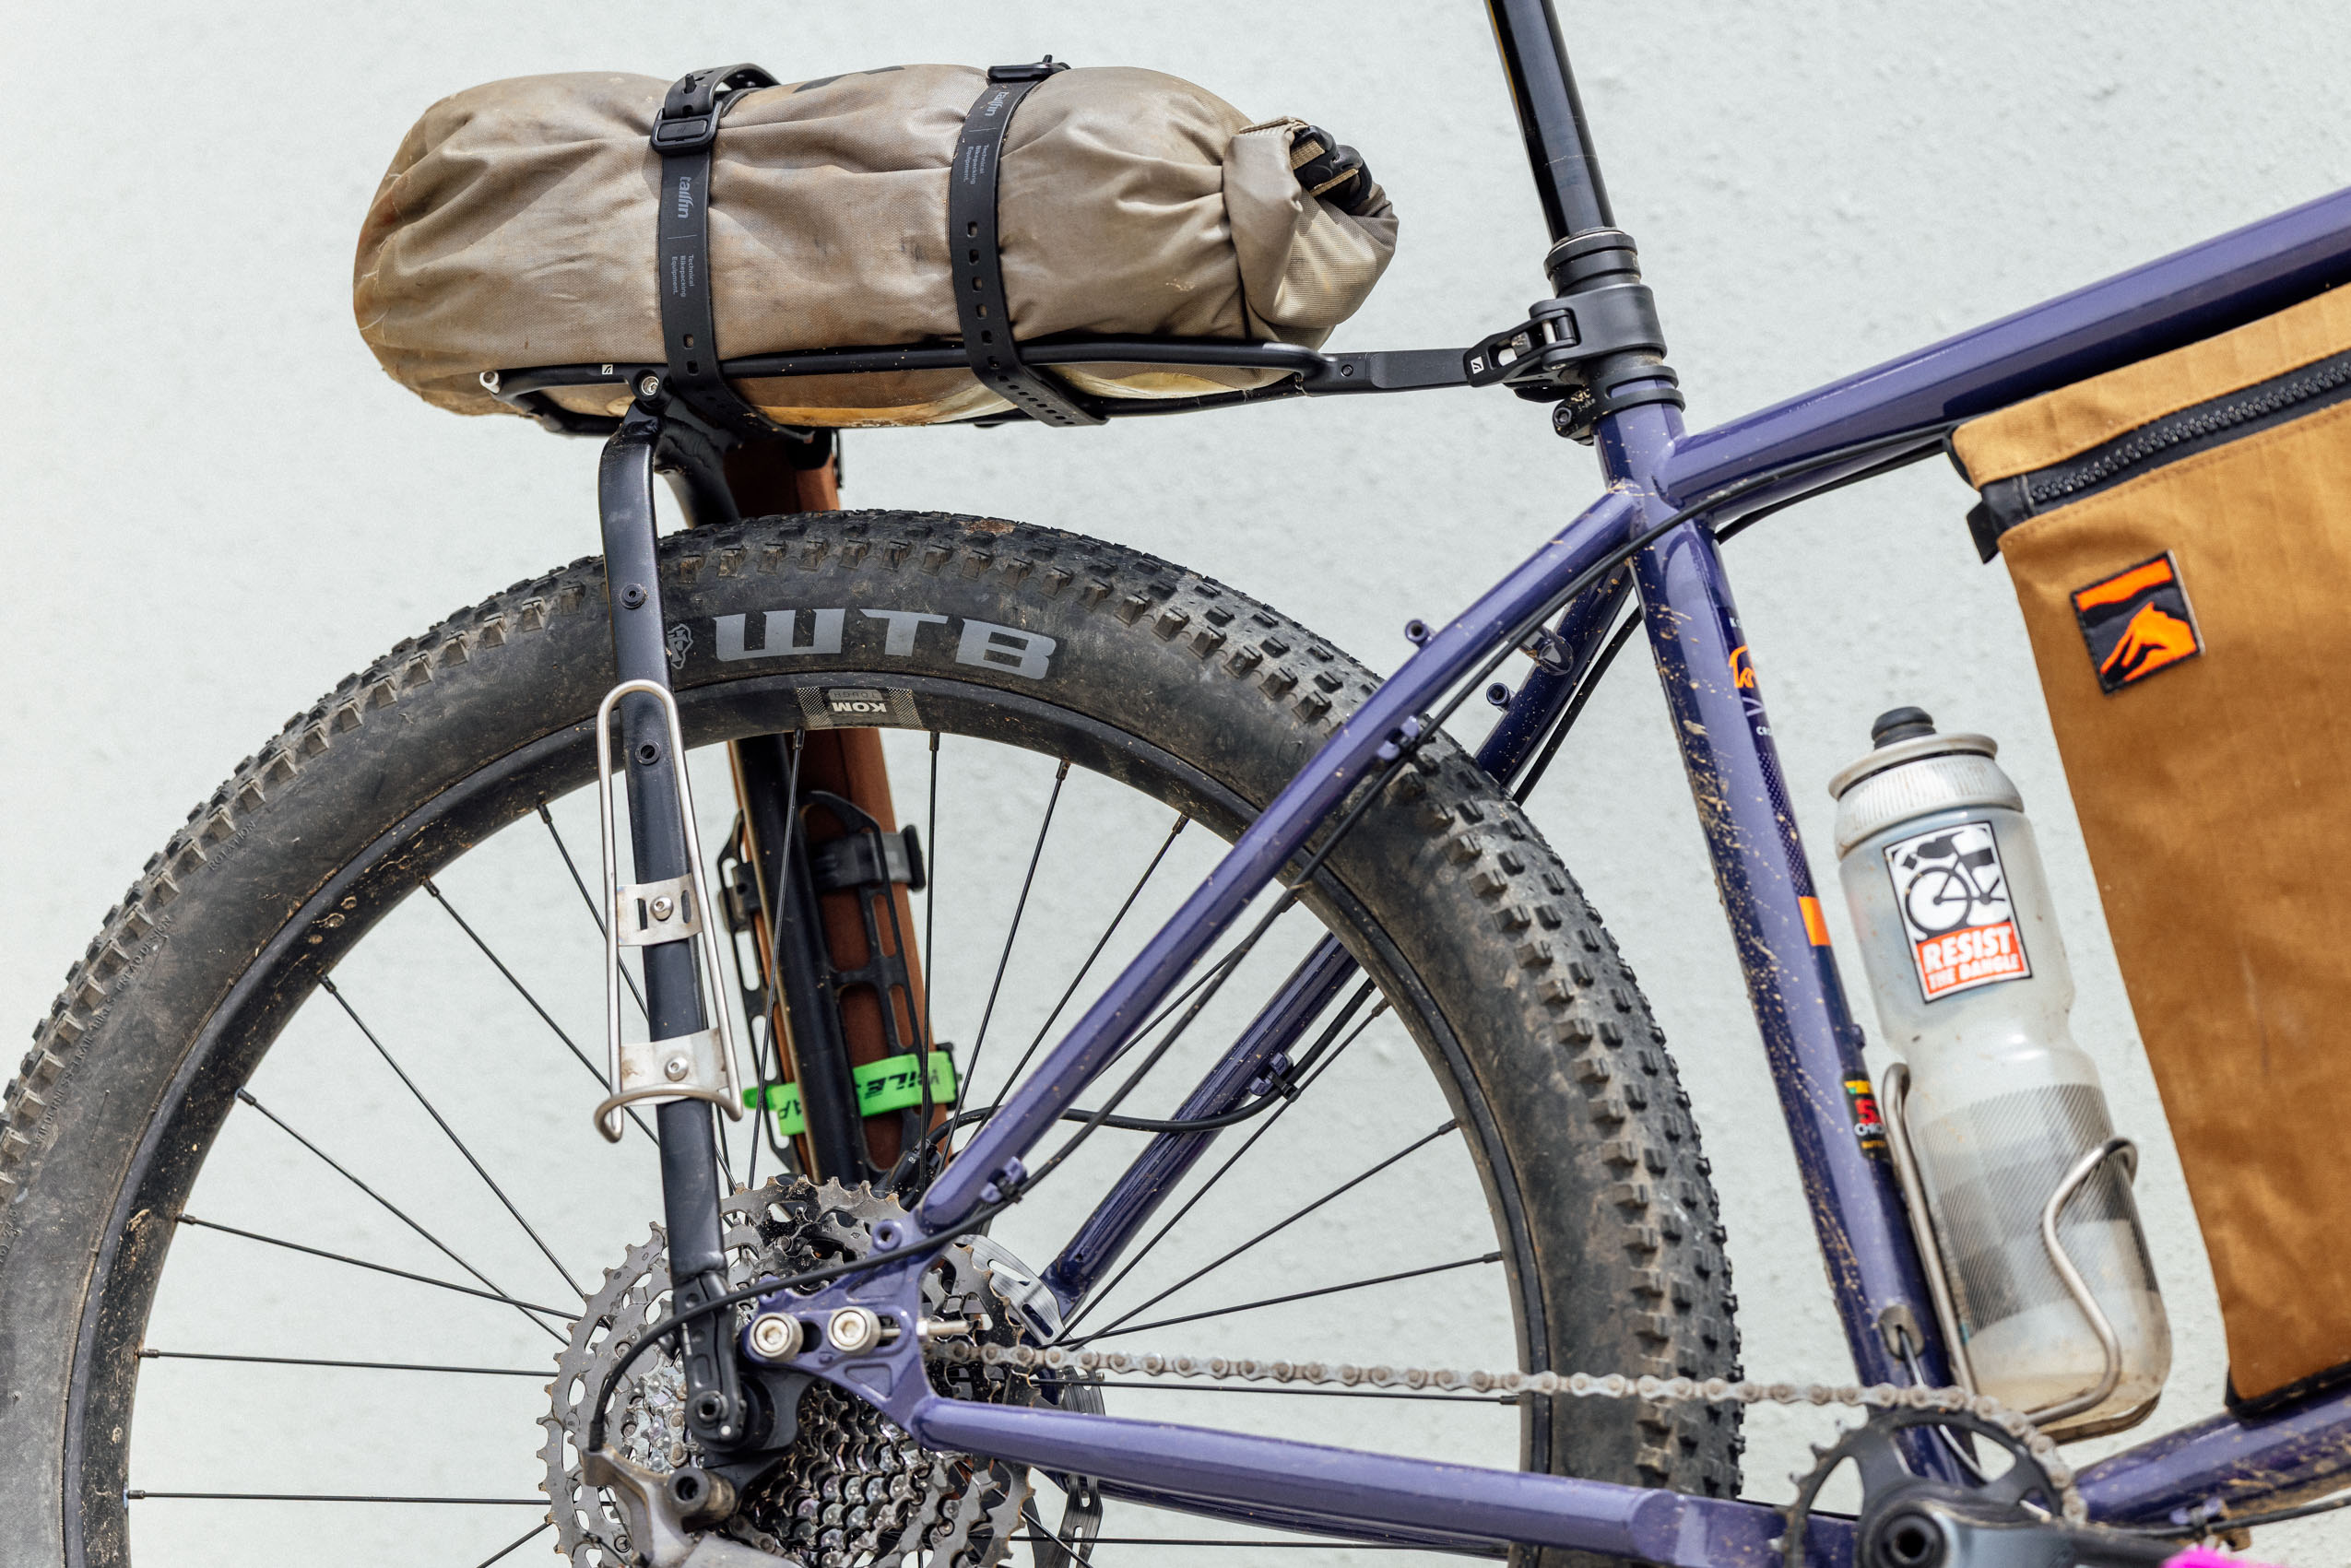
Moving on to the rear system, I ended up going with the new Tailfin Journey Rack, and I could not be more impressed. I’ll admit, I had loads of spare parts for the Journey Rack stashed in the Glovebox, but I’m happy I didn’t need any of them, and this thing saw some seriously chunky trail. After testing it on the Revel Rascal on a rough overnighter a few weeks ago, I decided it was worthy of the Colorado Trail. I didn’t mount anything to the sides of the rack, but I used what I think is another one of my favorite pieces of gear from the past year: the South City Stitchworks Love Handles. The reason I like this system is that it essentially acts as a rack harness that hugs a dry bag. In this case, I used an old Revelate Pronghorn dry bag.

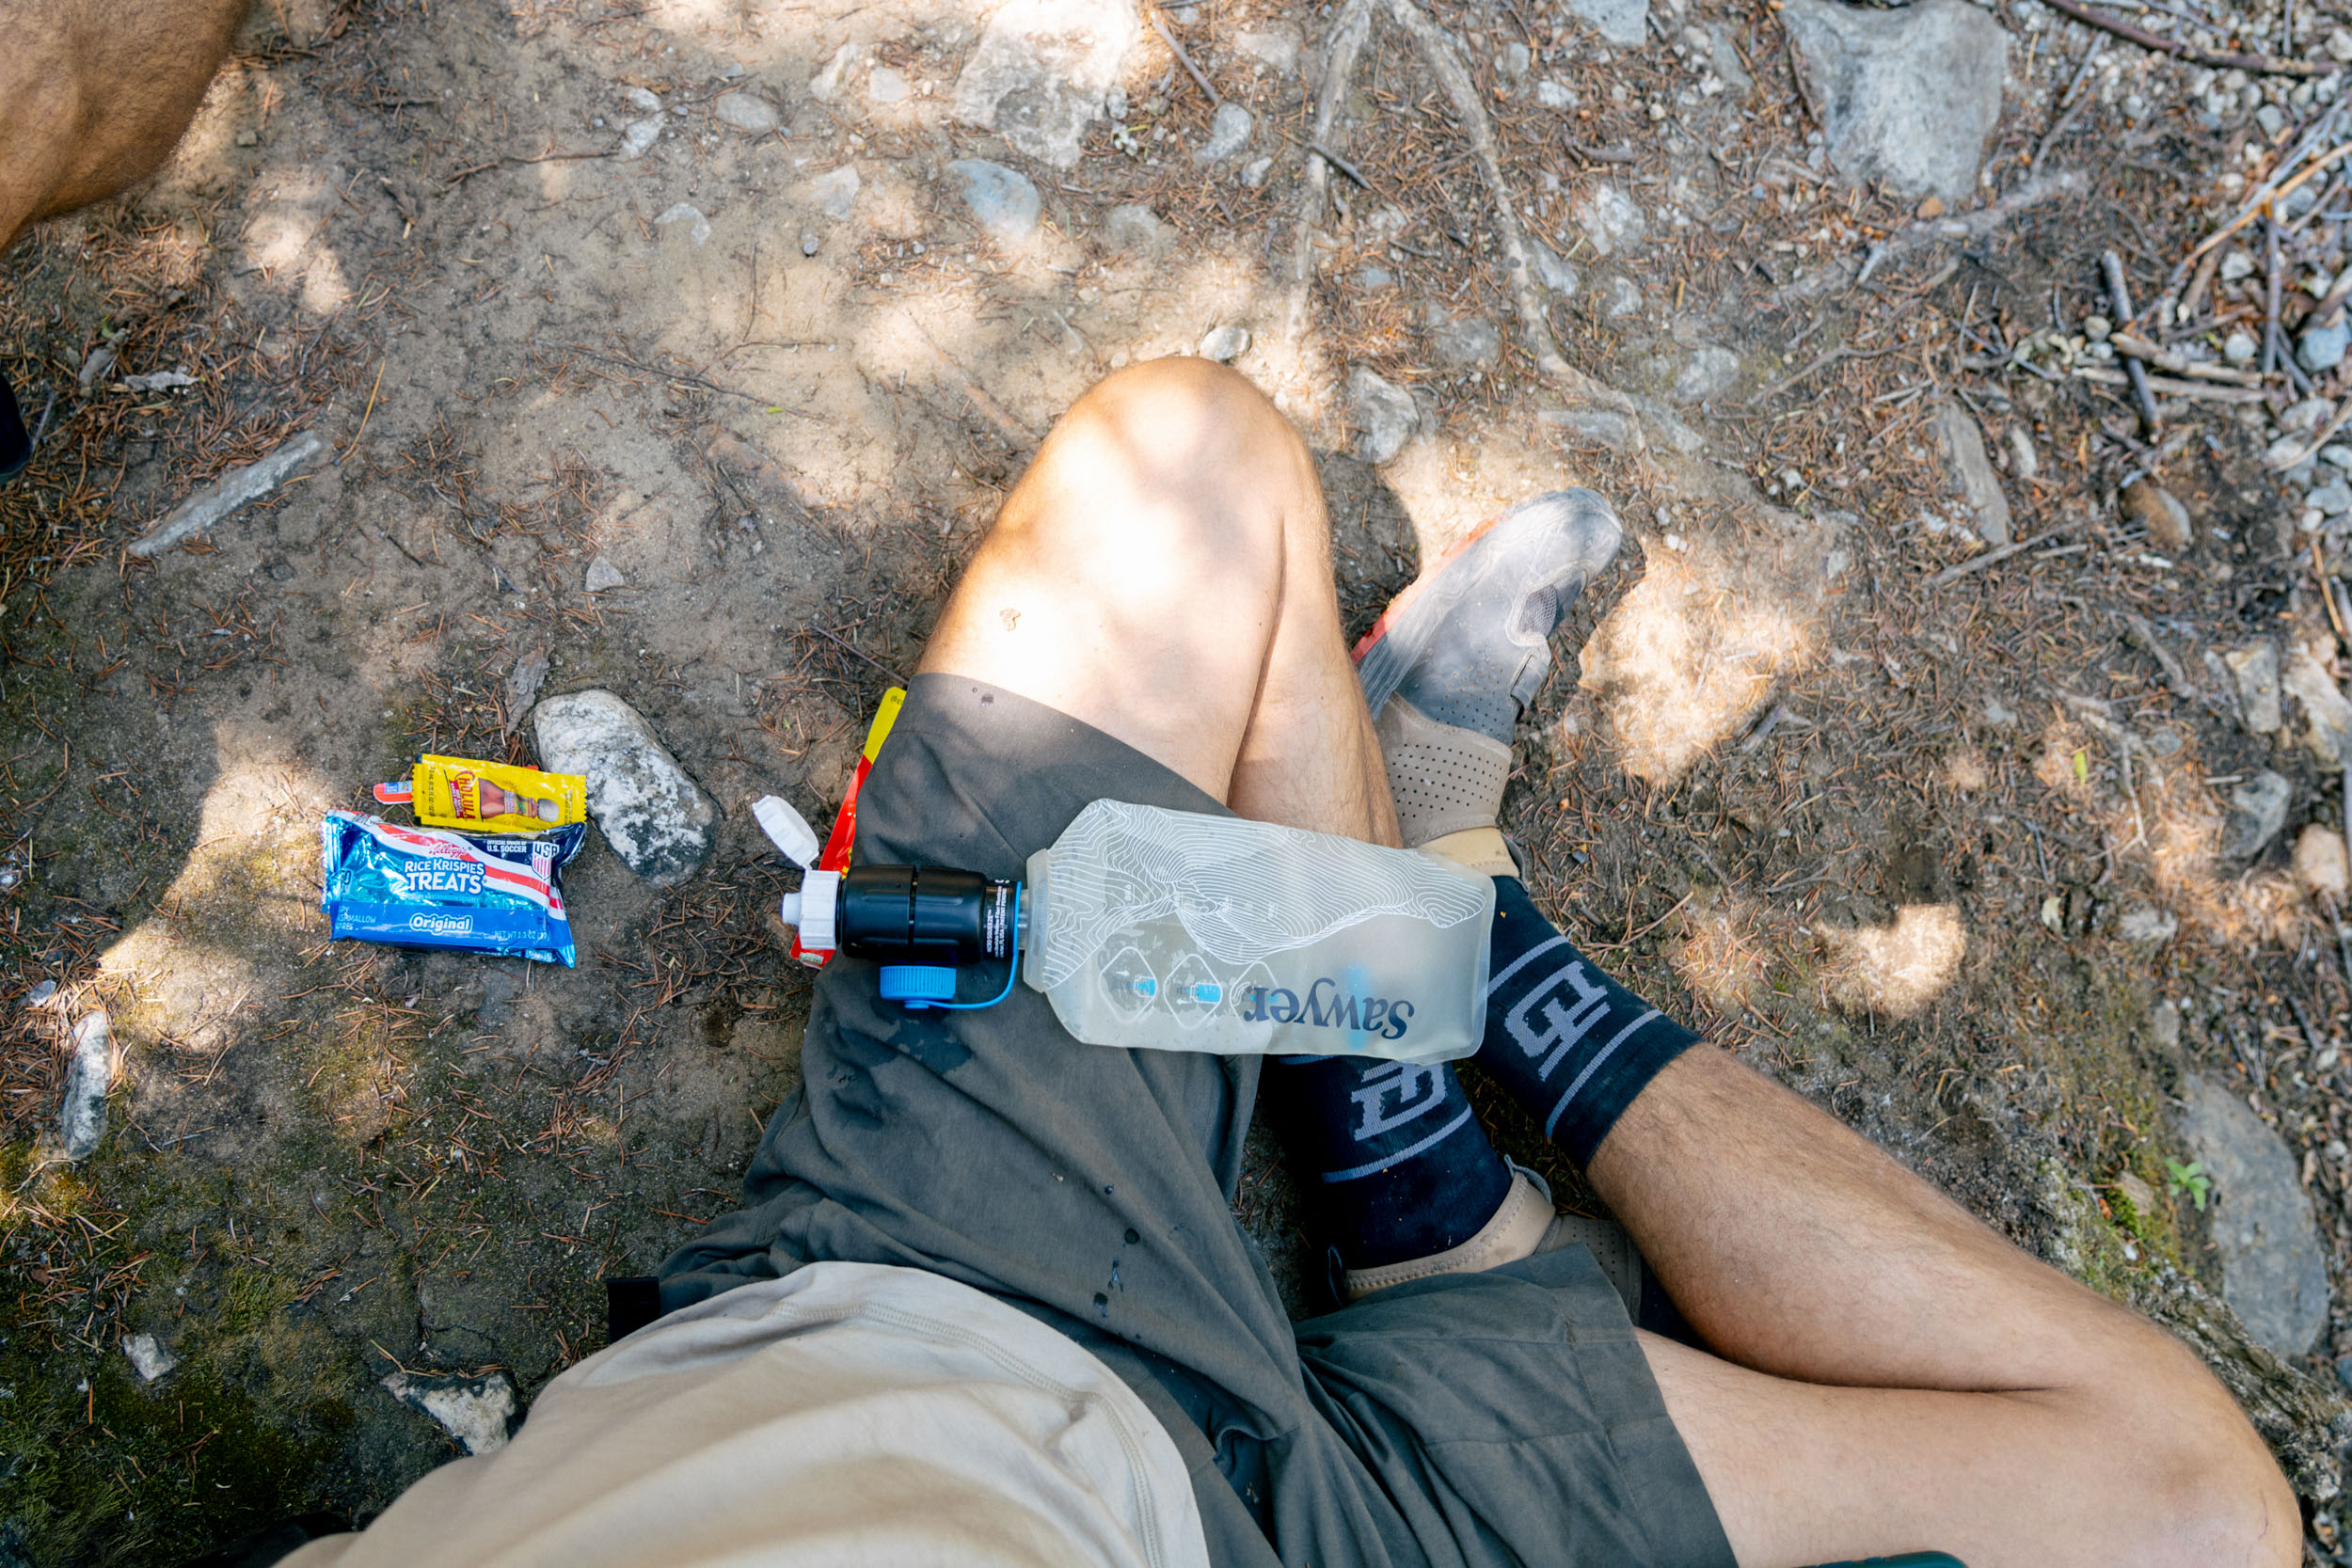
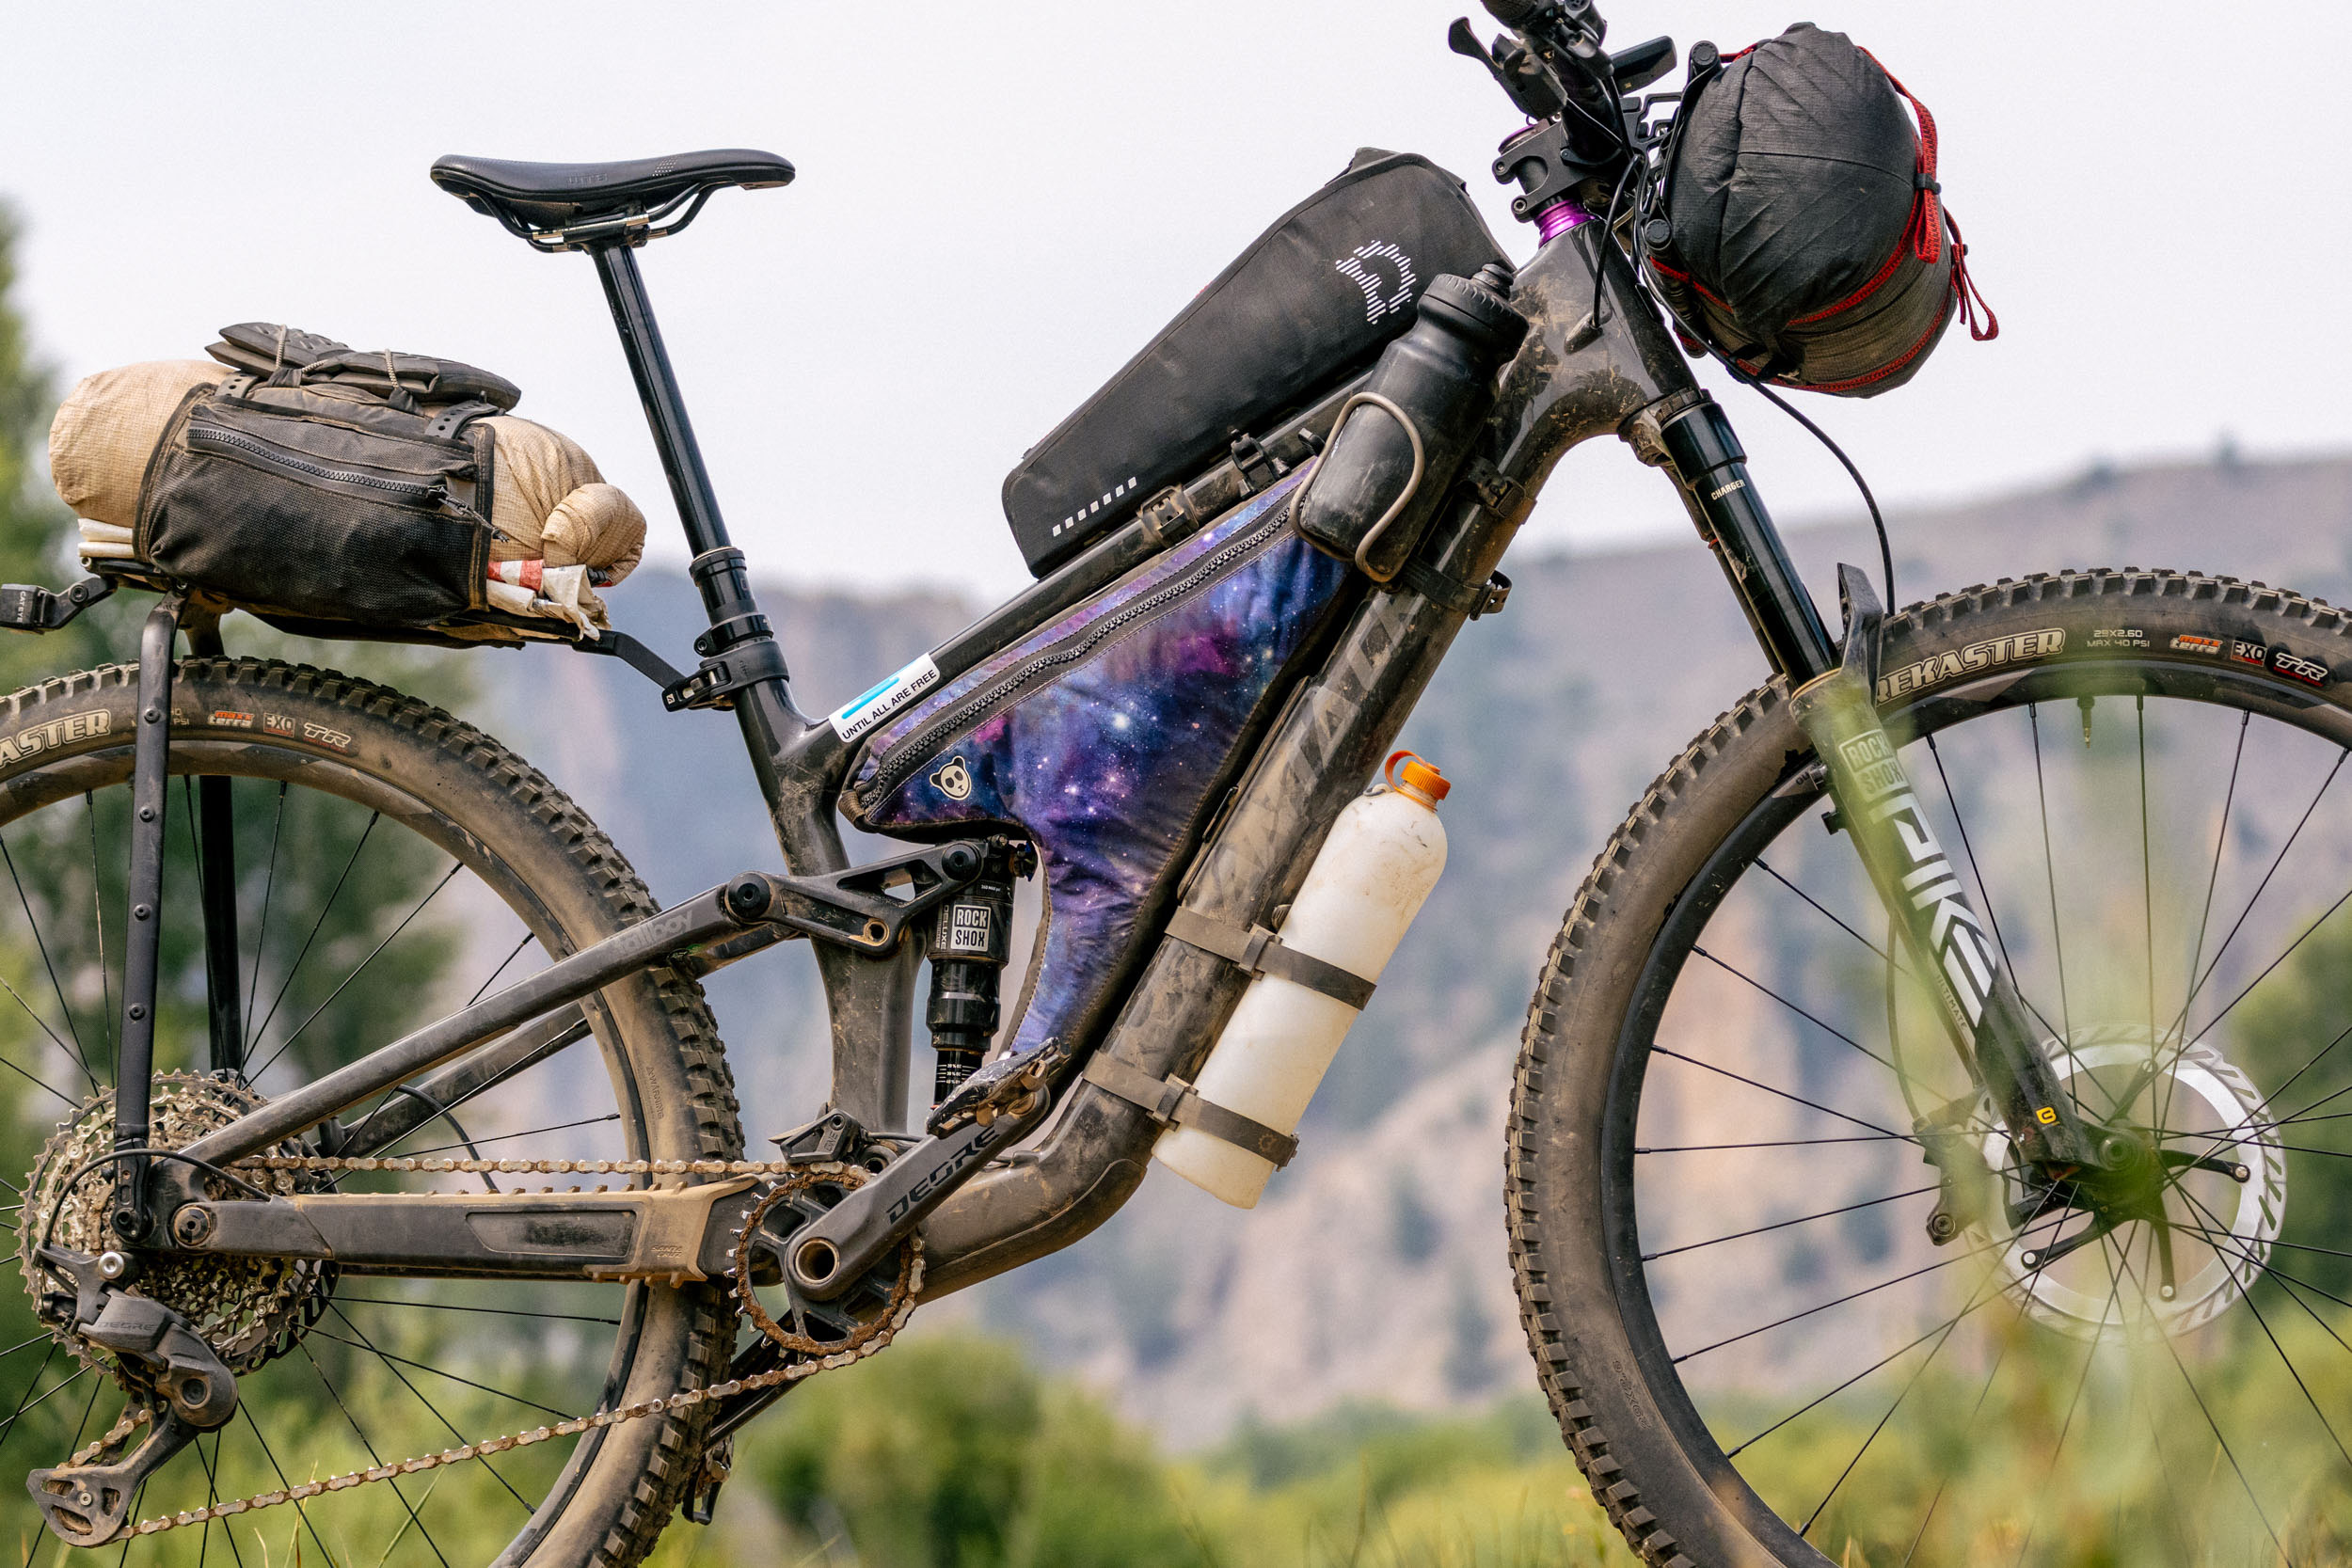
This setup fit really well on the back of the Journey Rack and also provided some expandable storage. Inside the Love Handles was a somewhat revolving rotation of stuff. I always had some Tailwind Nutrition, Pretty Great Instant coffee, oatmeal, and tea on one side. On the other side, I had a small musette or some trash from the day before. I even put my bladders in there at one point.
Outside of the coffee, the single most useful thing was the musette. I found myself dry camping quite a bit. While we were often close to water sources, we sometimes had to ride anywhere from a few hundred feet to roughly seven miles after filling up, so having a simple way to carry extra water was helpful. For that, I brought a musette from Albion. It’s actually more like a tiny backpack—kind of like something you’d see kids carrying around at soccer tournaments. I got this one last minute, as I’m testing their shorts and shirt, and I had them send it along for the trip. It’s a unique musette because it goes over both shoulders instead of just one, and it carried all the extra water I needed. It would also be great for a quick meal stop if the timing worked out while passing through towns. This may have been the lightest, most convenient piece of gear I brought with me. Since it packs down so small, I’ll continue bringing it on just about every trip. Inside the dry bag, I had all my clothes and my sleeping pad. If the weather had been more challenging, I would have separated wet and dry items, but it was dry. So much so that we were dealing with smoke and nearby wildfires.
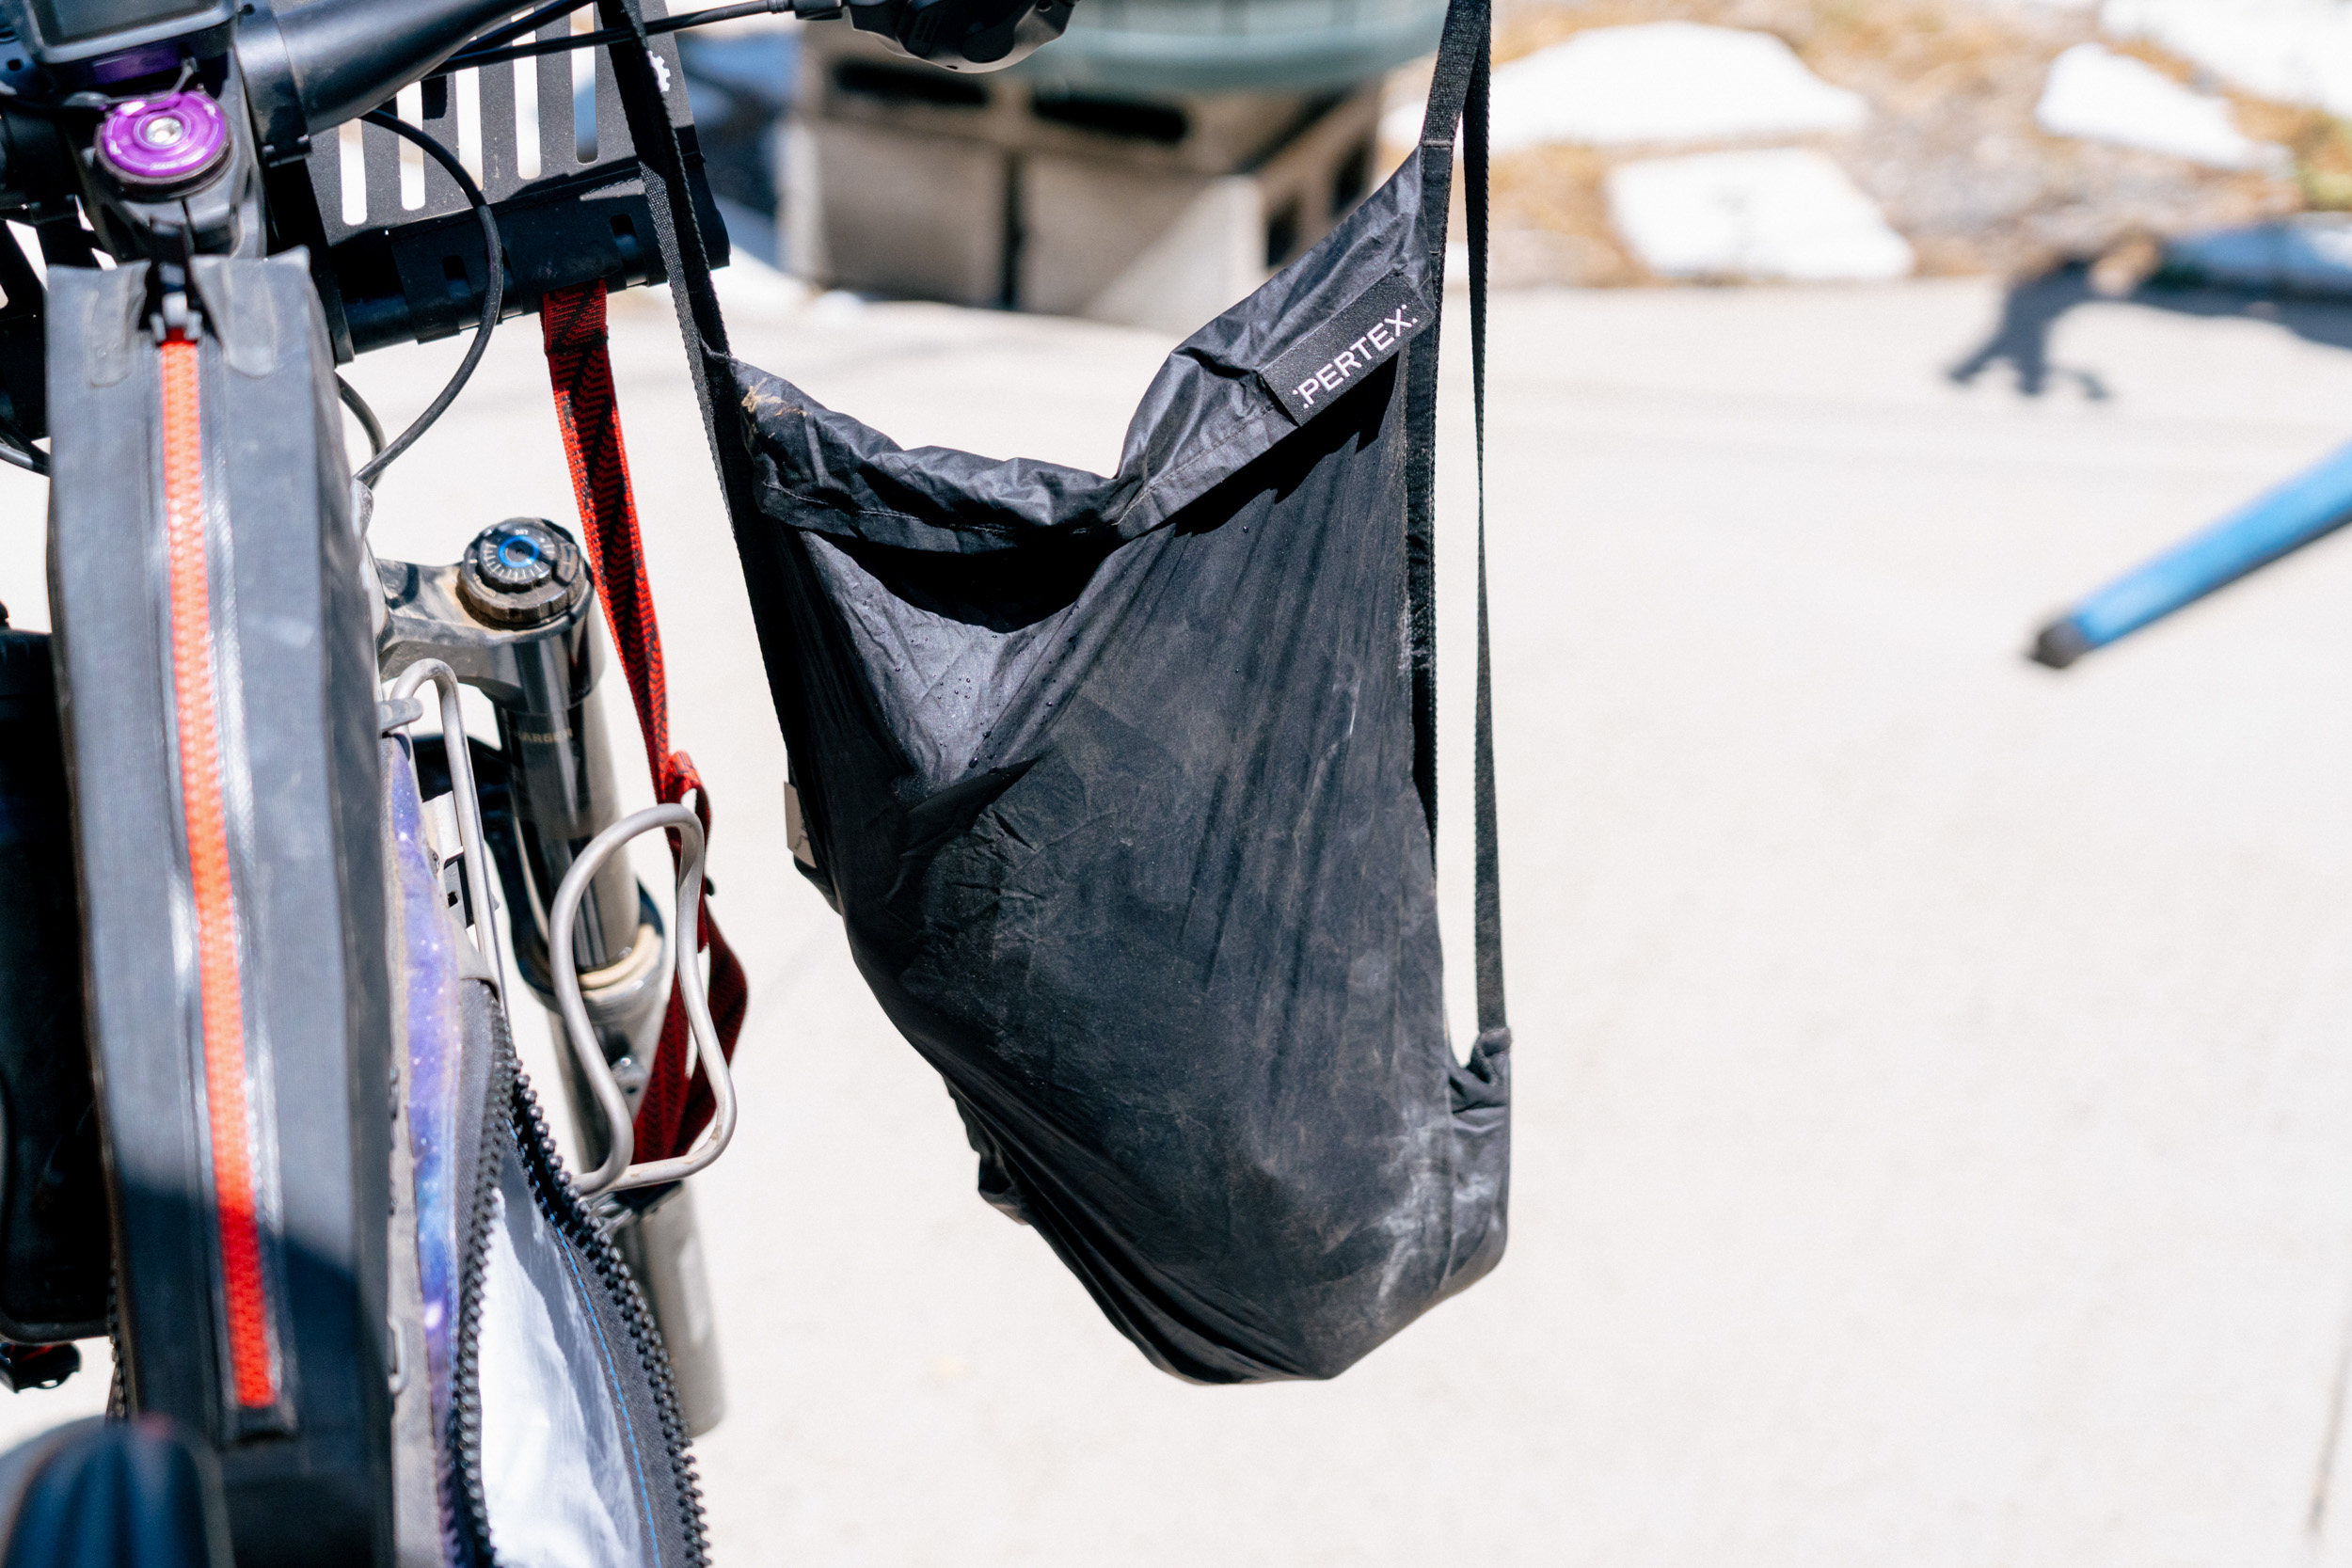
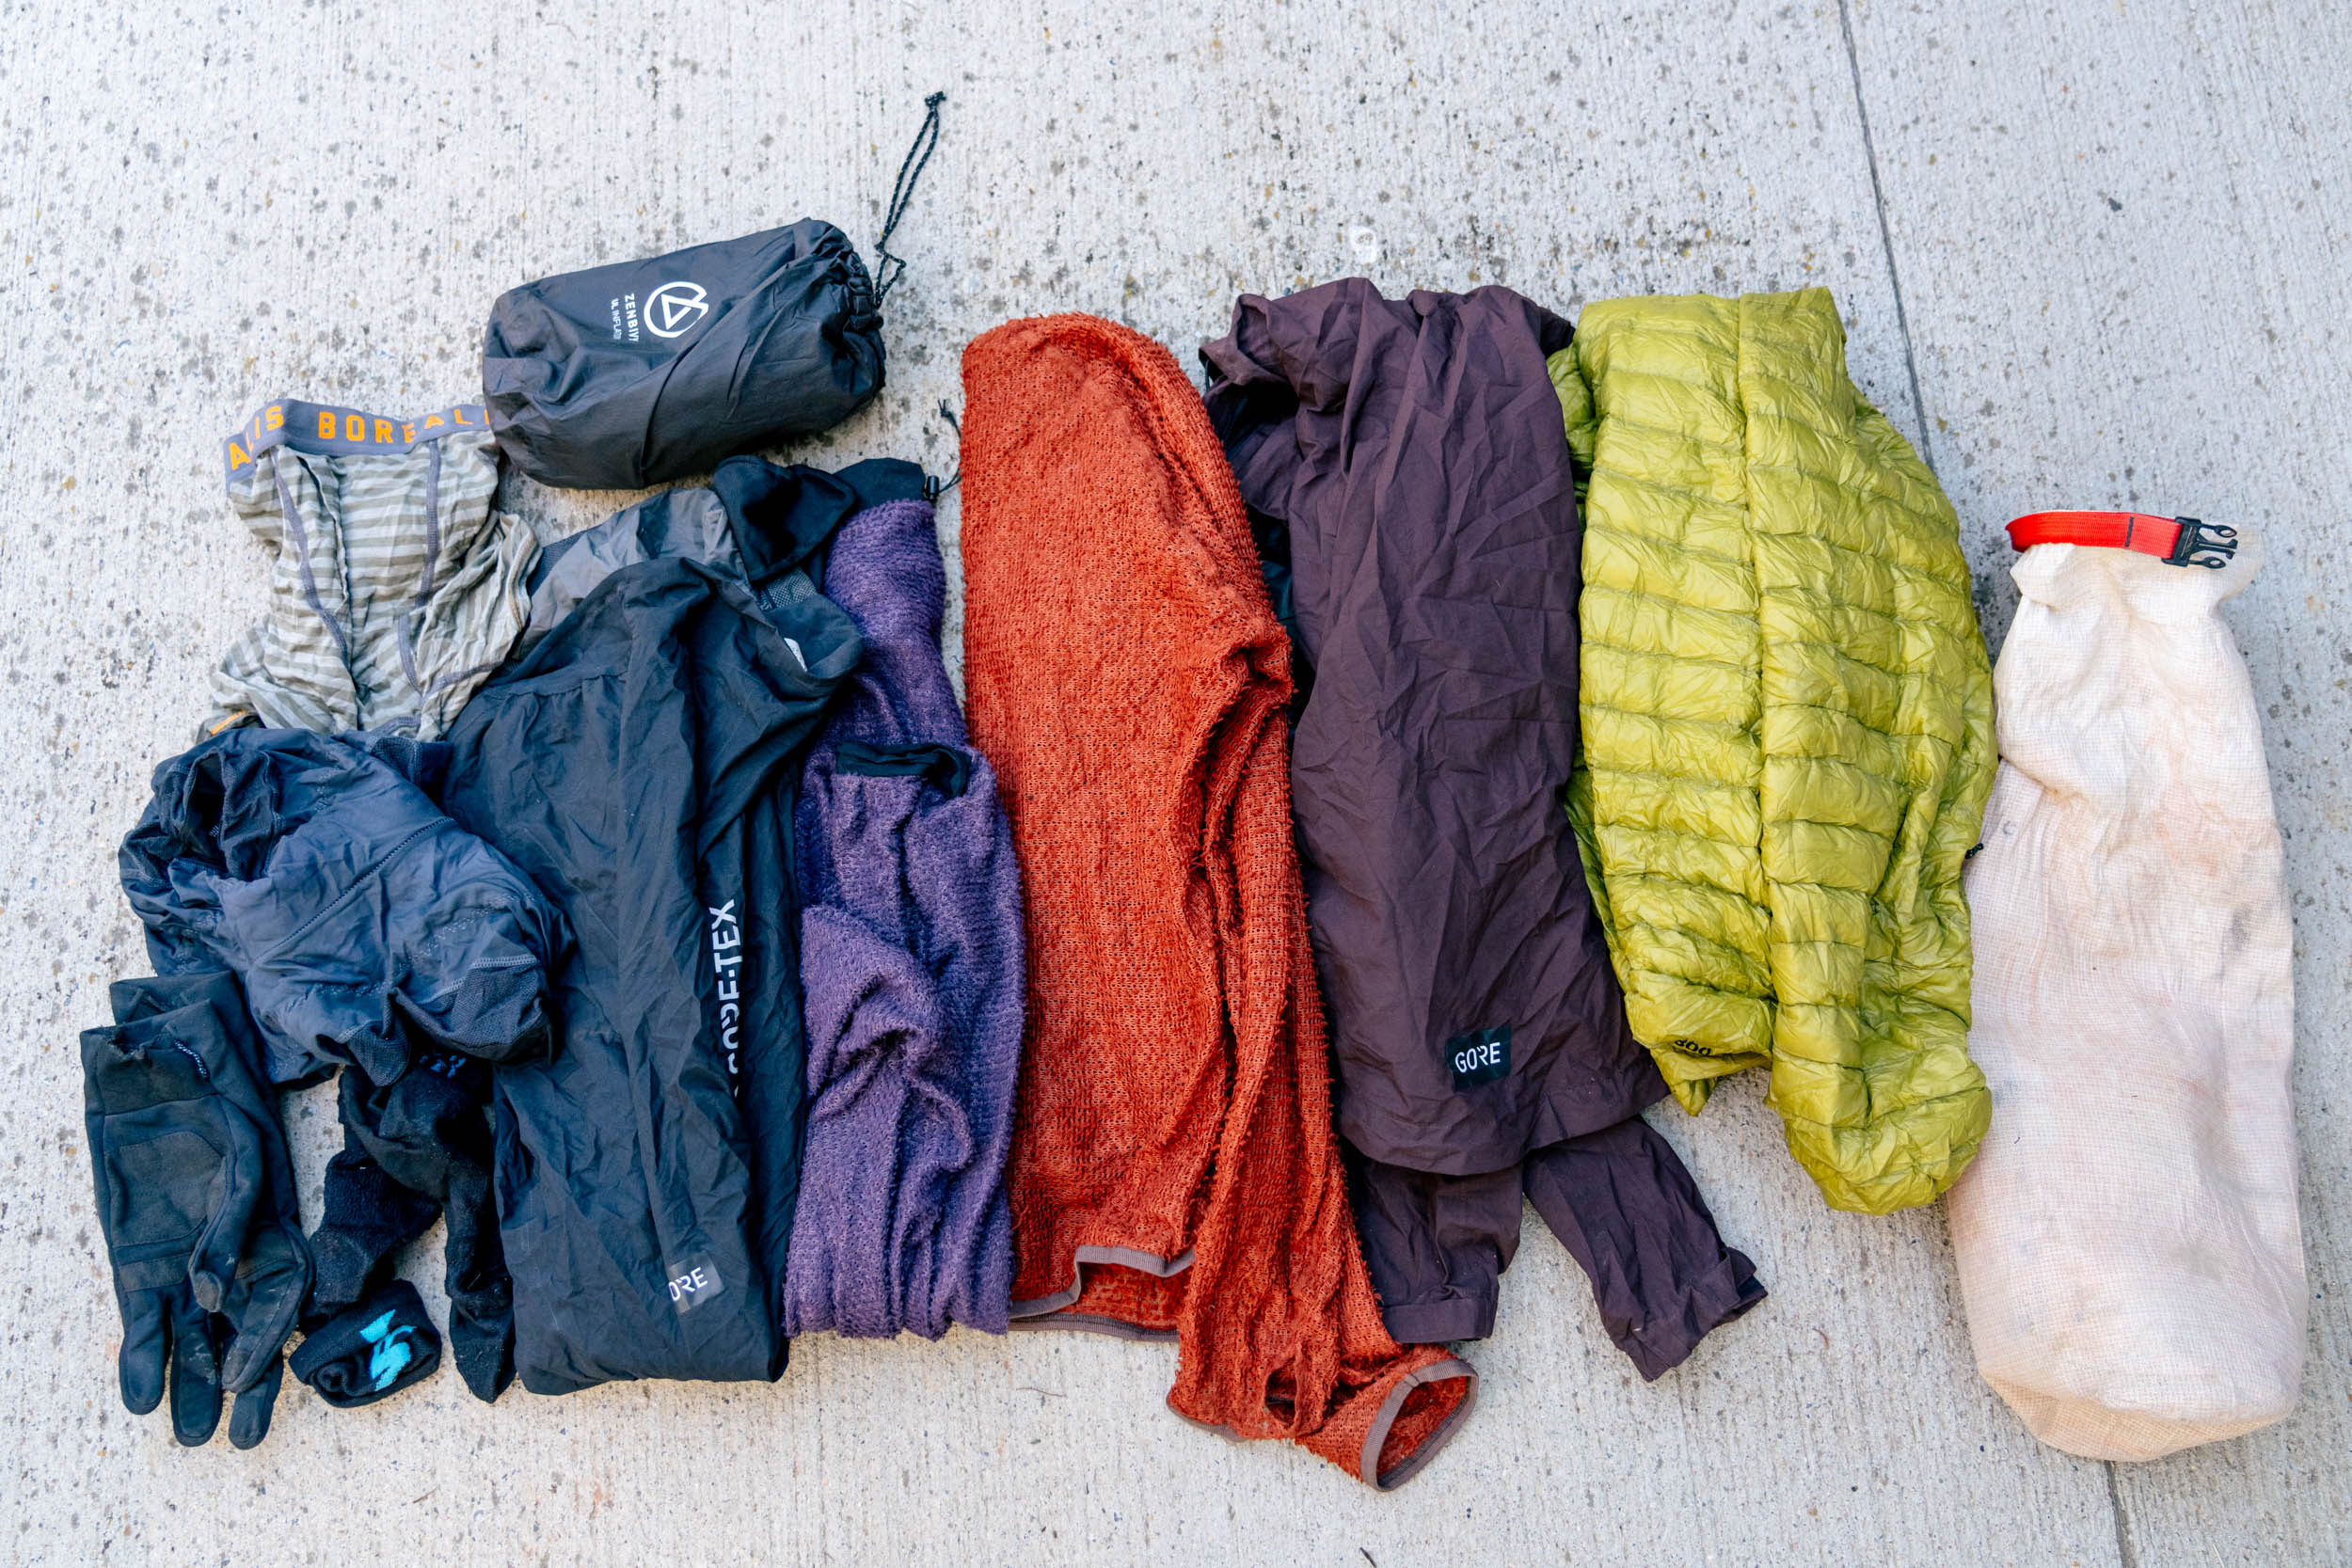
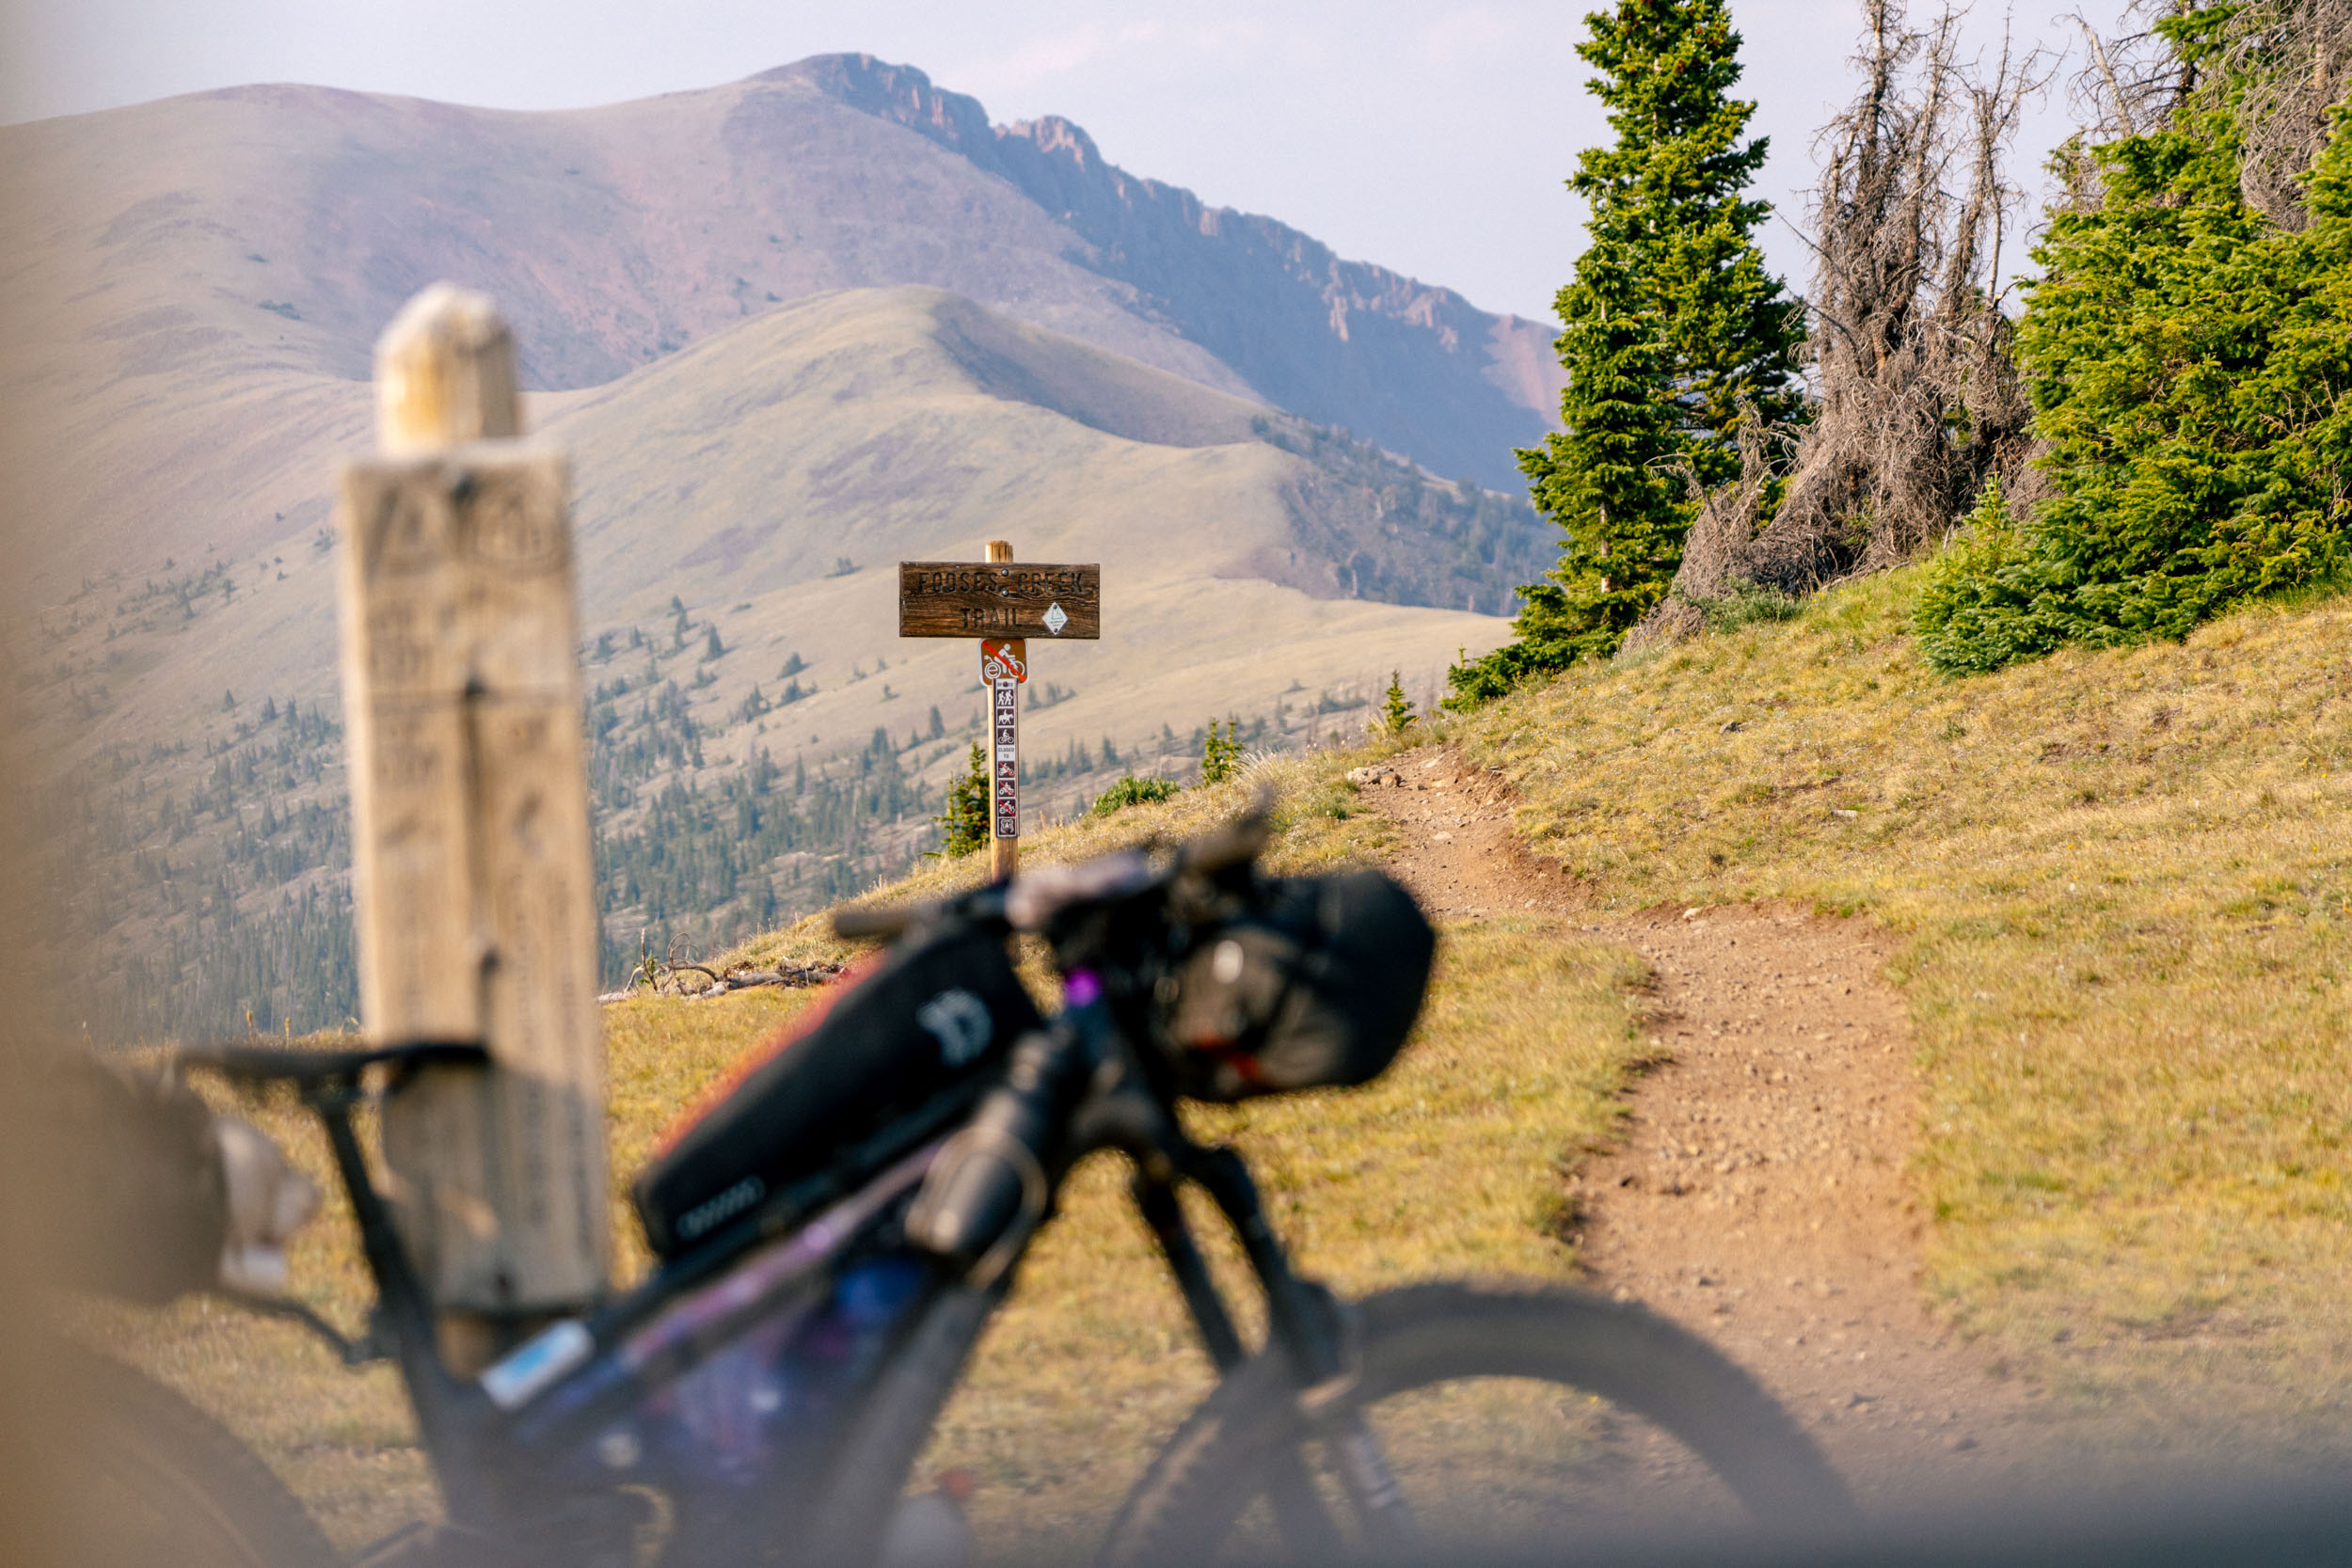
Outside of my typical layering system, there weren’t many extras outside of warmer socks and padded shorts. I rotated my padded shorts each day, one pair from Kitsbow and one from 7mesh. That ended up being a great idea, as it changed up the pressure points and helped keep my butt happy from 8 a.m. to 7 p.m. each day. The layering system I’ve detailed before is comprehensive, and I strongly recommend checking that out in the links below if you’re interested in a lightweight, versatile system.
The last thing attached to the top of this system was my Gossamer Gear seat pad. While any old seat pad would do, what I like about this one is that it’s perfectly creased, only costs $6, and is small. It worked great for this trip. When getting to a rest spot, I could pull it out, sit on it, and bungee it back to the top of the love handles for the rough road ahead; it was great.
Up Front
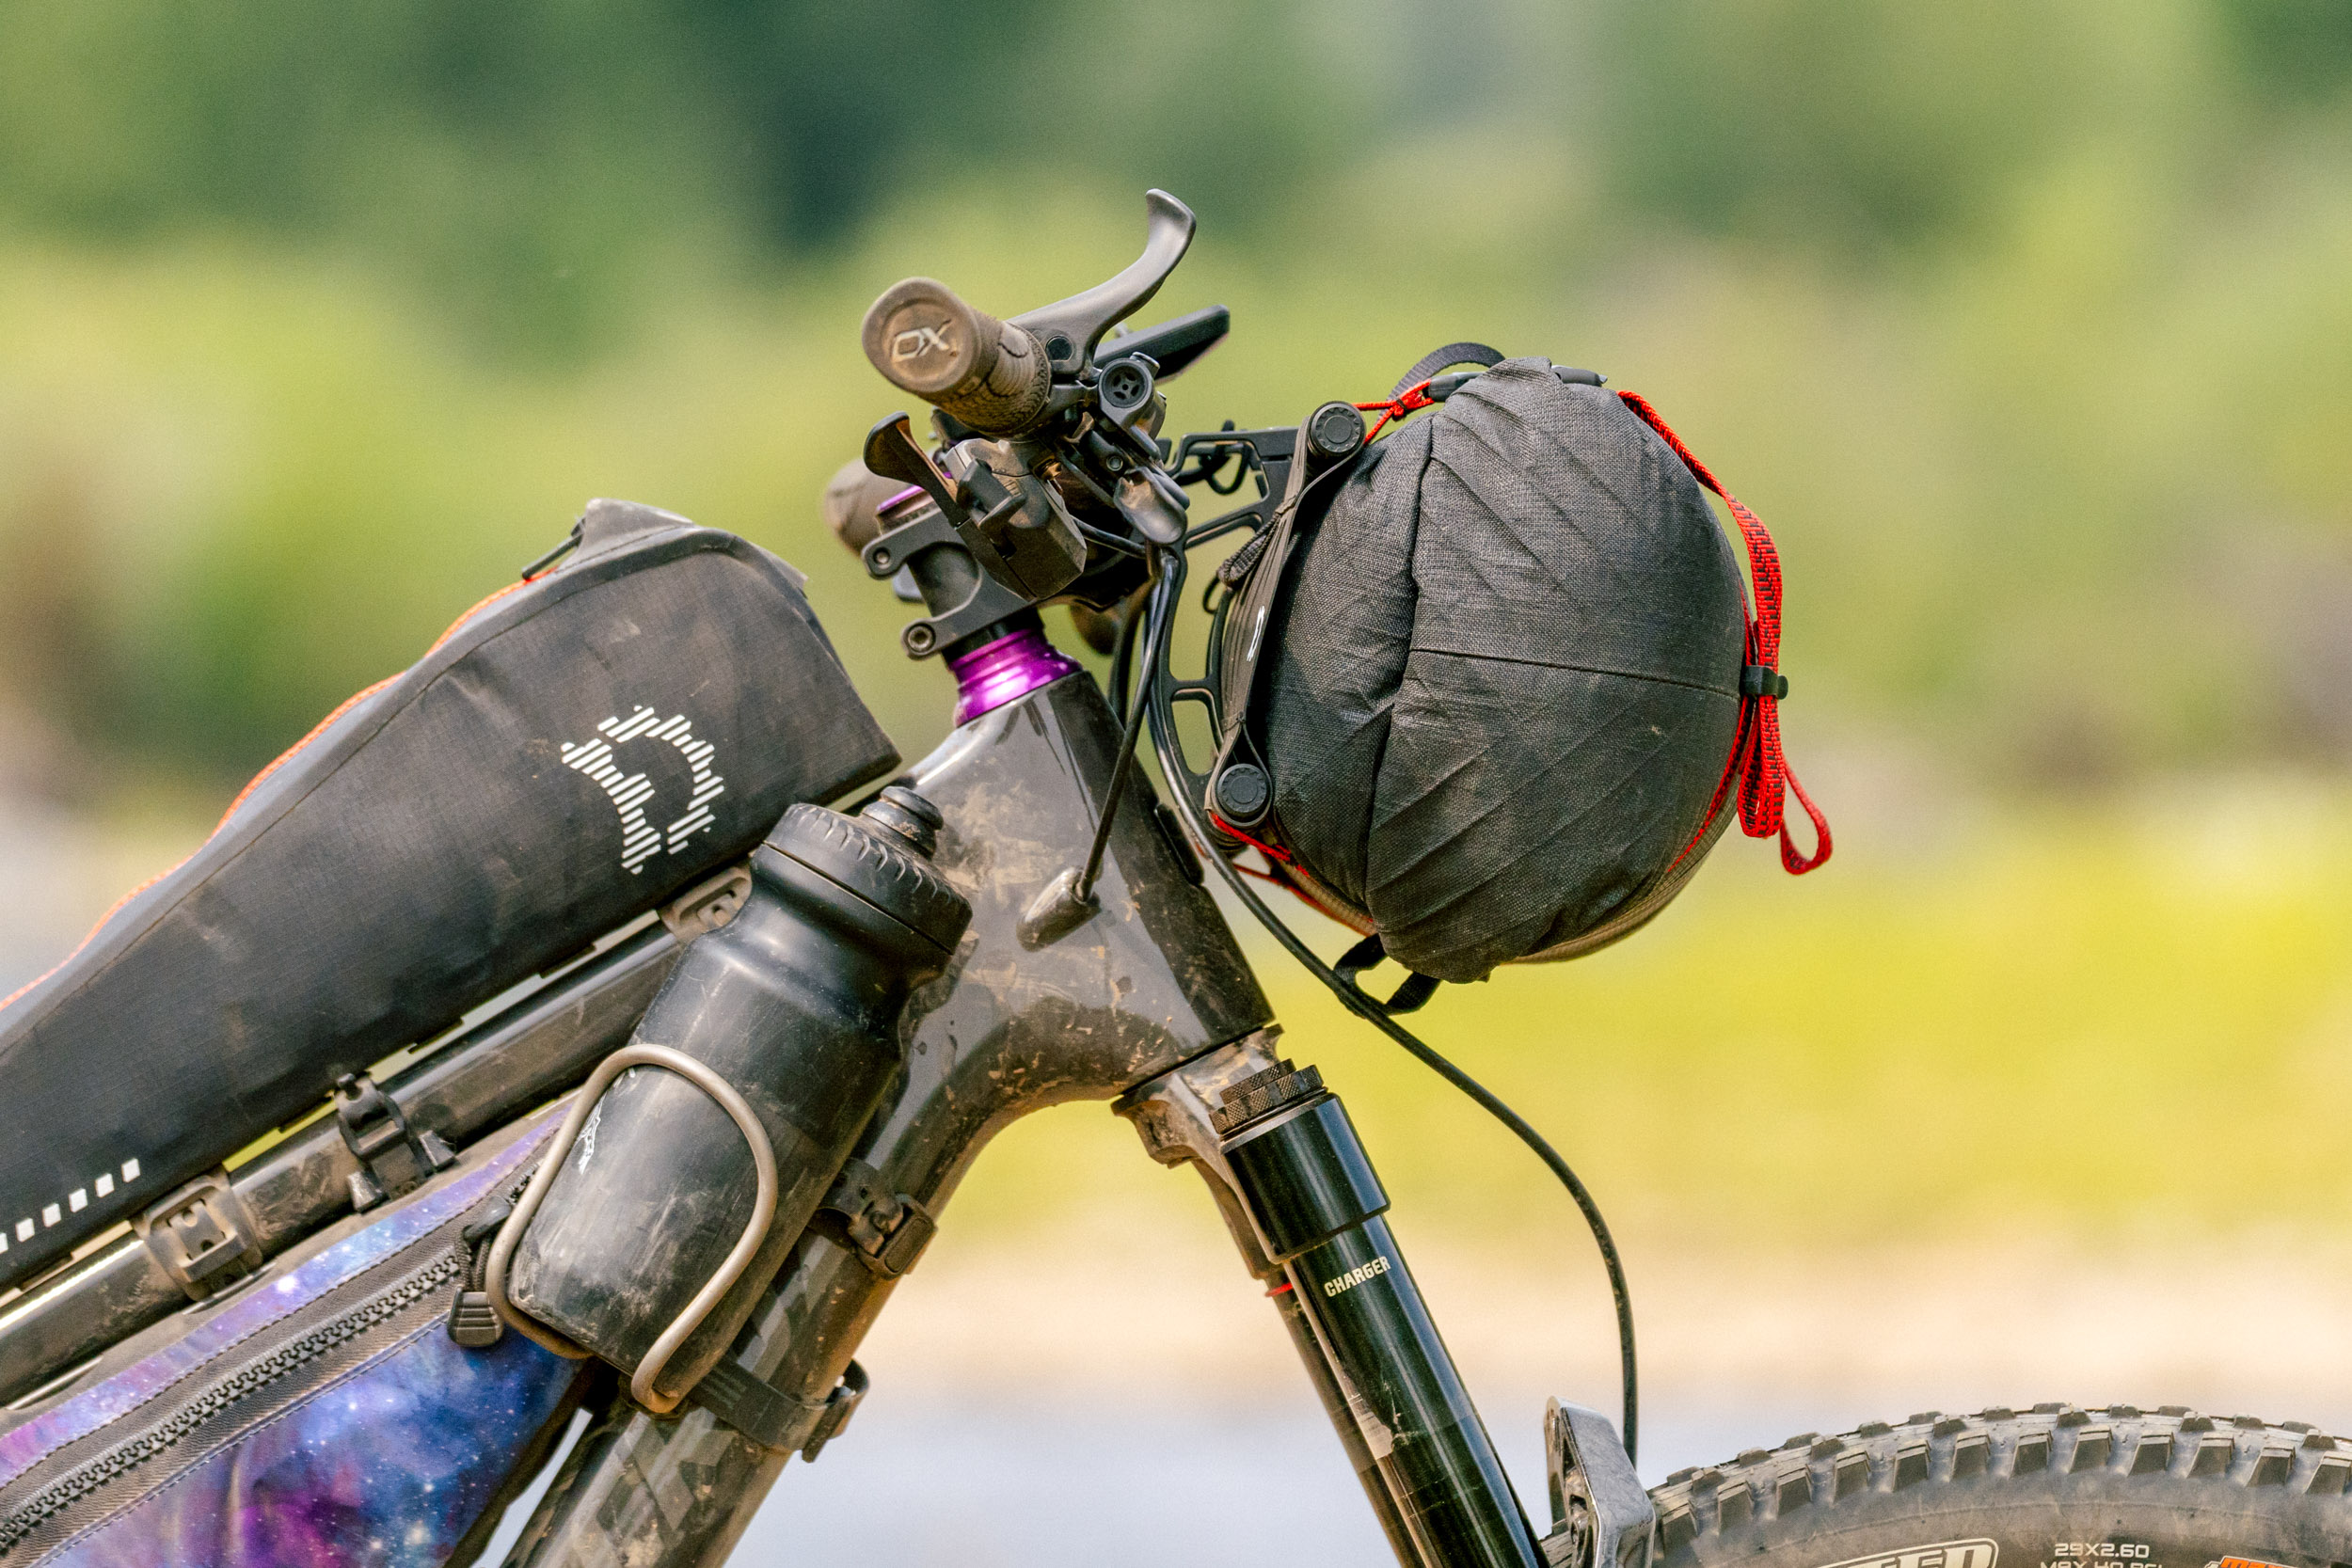
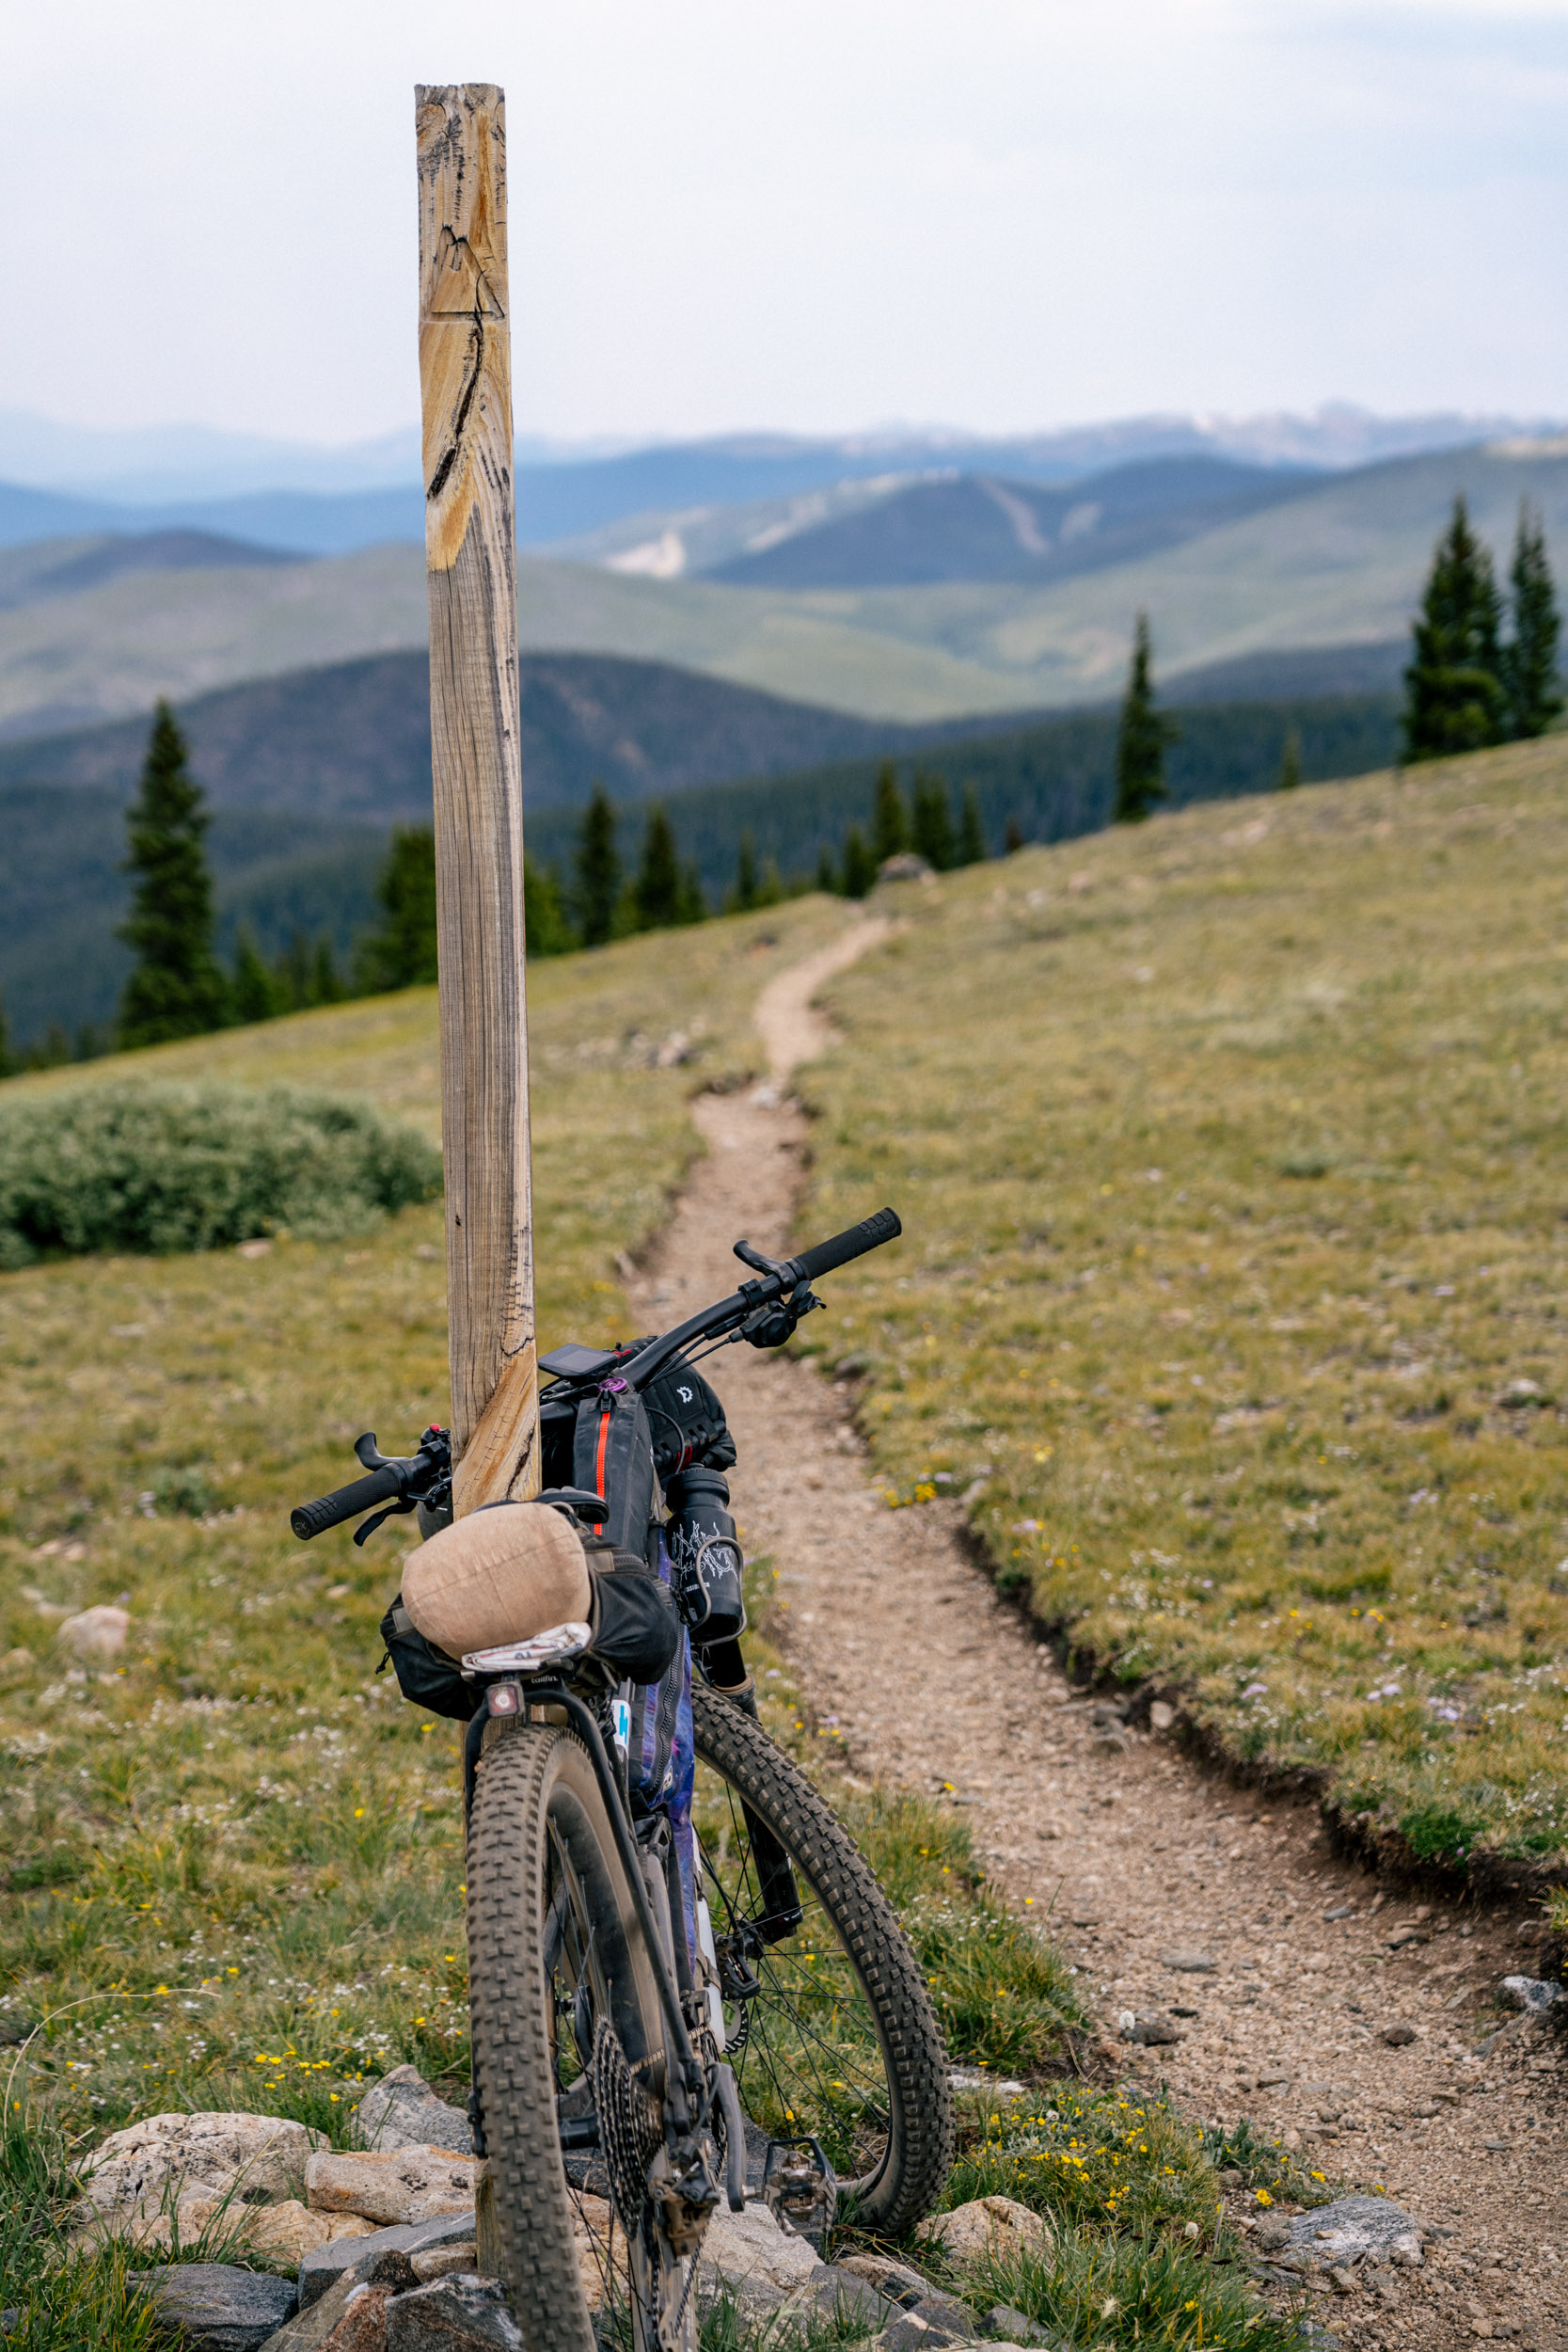
Up front, I ended up using the new Revelate Designs Hammerhead Harness. I was excited to test it, as Revelate has always made great gear. I didn’t use it with the extension bar, simply because I didn’t need to. I also think keeping things simple is usually best. I’ll touch on all of this more in an upcoming review.
The goal with my pack system up front was to keep things relatively light. Though you eventually get used to the weight, it’s important to keep things light on the bars for the long haul. Lifting up on the bars and navigating rough terrain is simply easier with less weight mounted up front. More in back and less up front is my goal on trail rides like this. As a result, all I had up there was my Yama Swiftline tent and my Zenbivy sleep system. Both have been awesome so far. They’re both modular; the tent is stable in the wind, and the sleep system helps me recover while keeping me cool or warm at night. That’s a win-win.
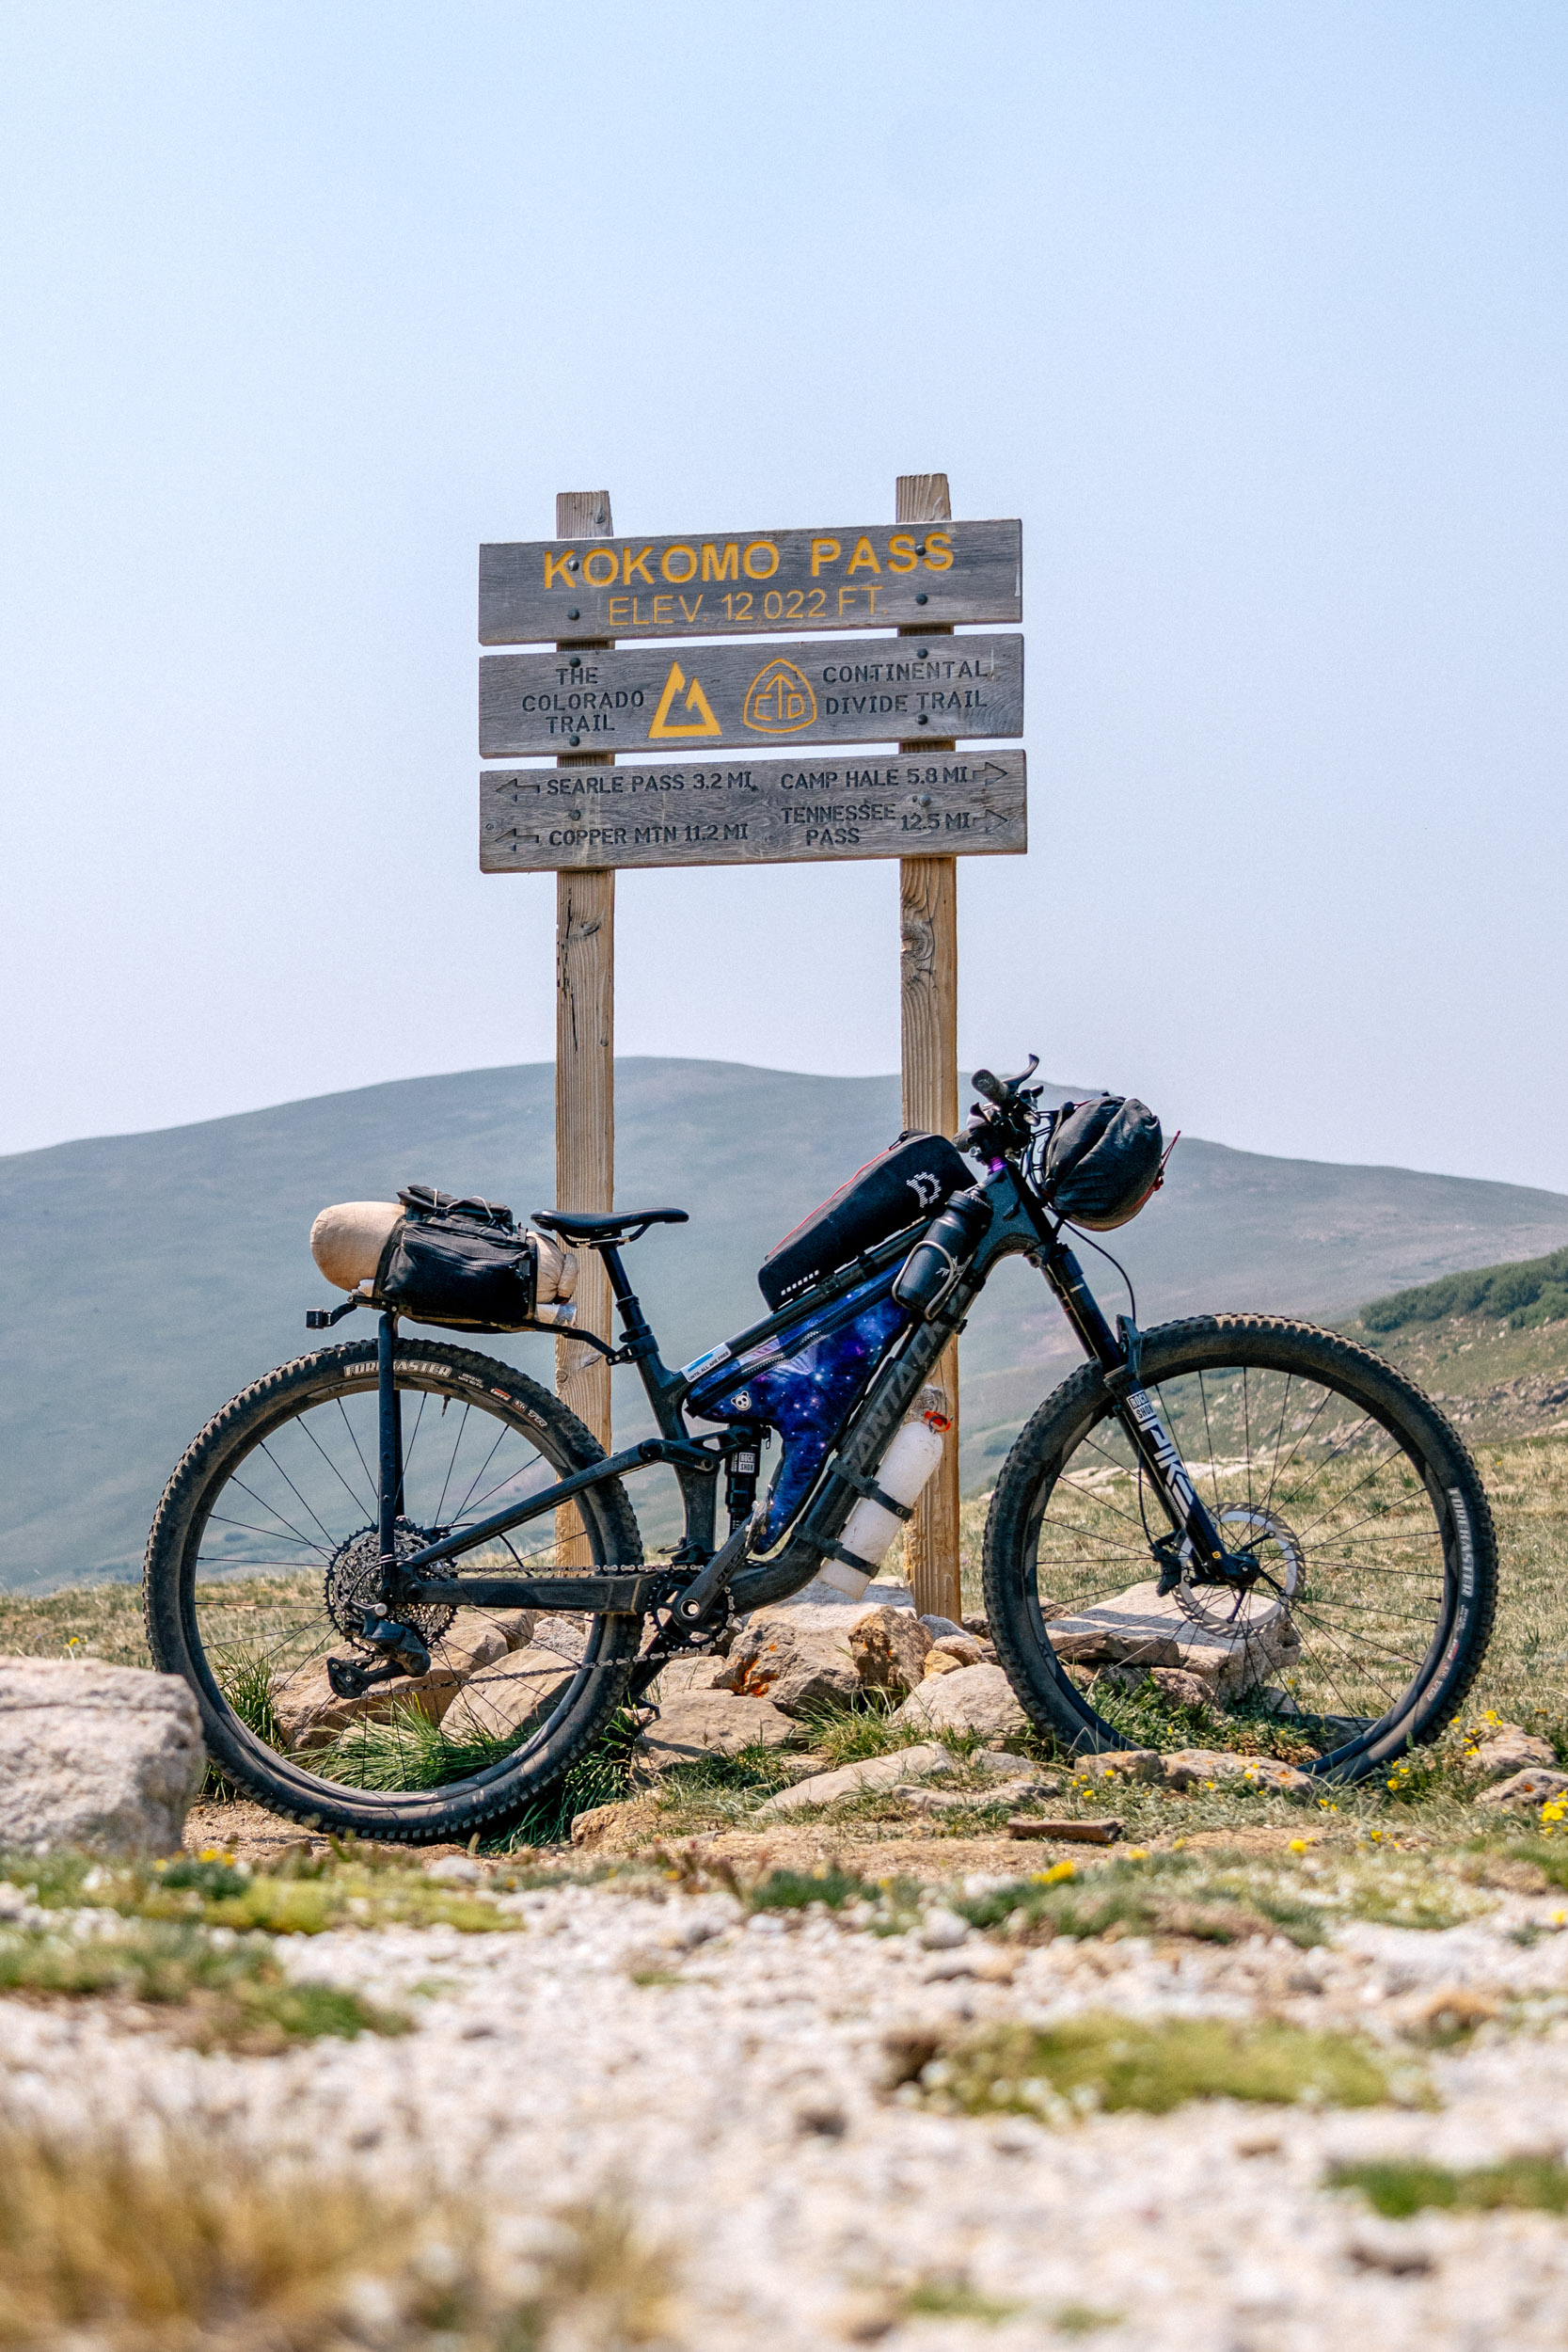
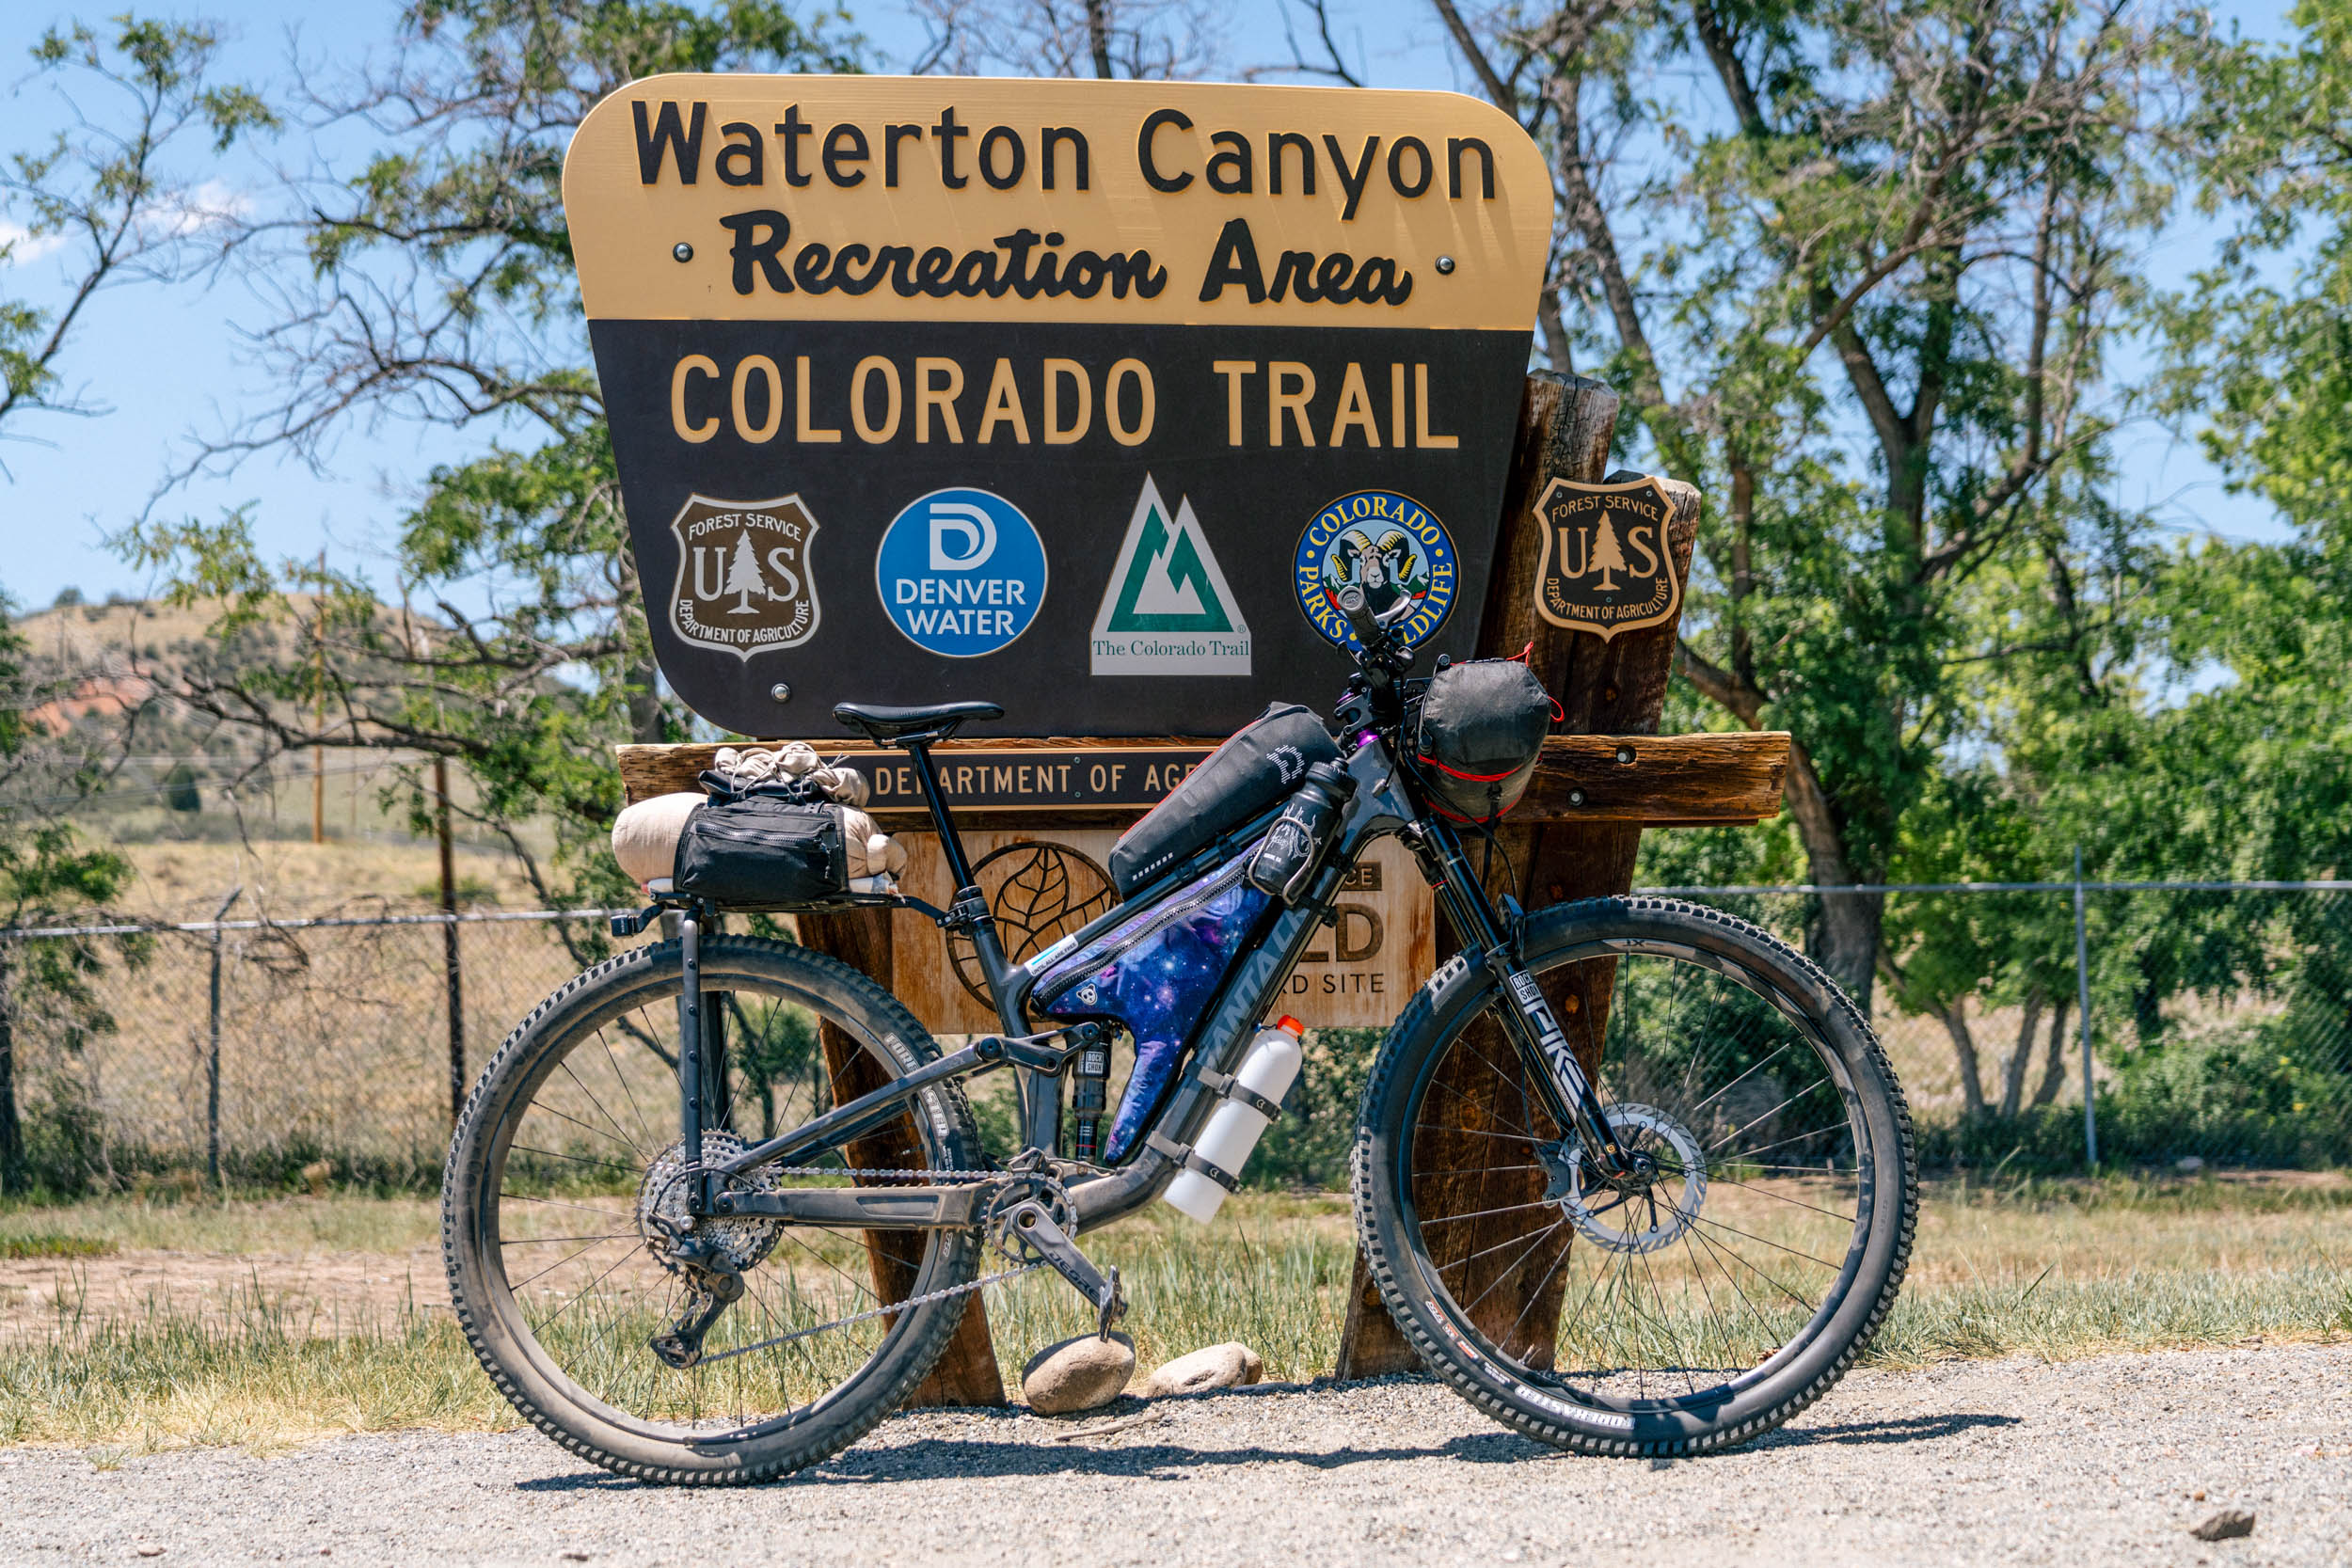
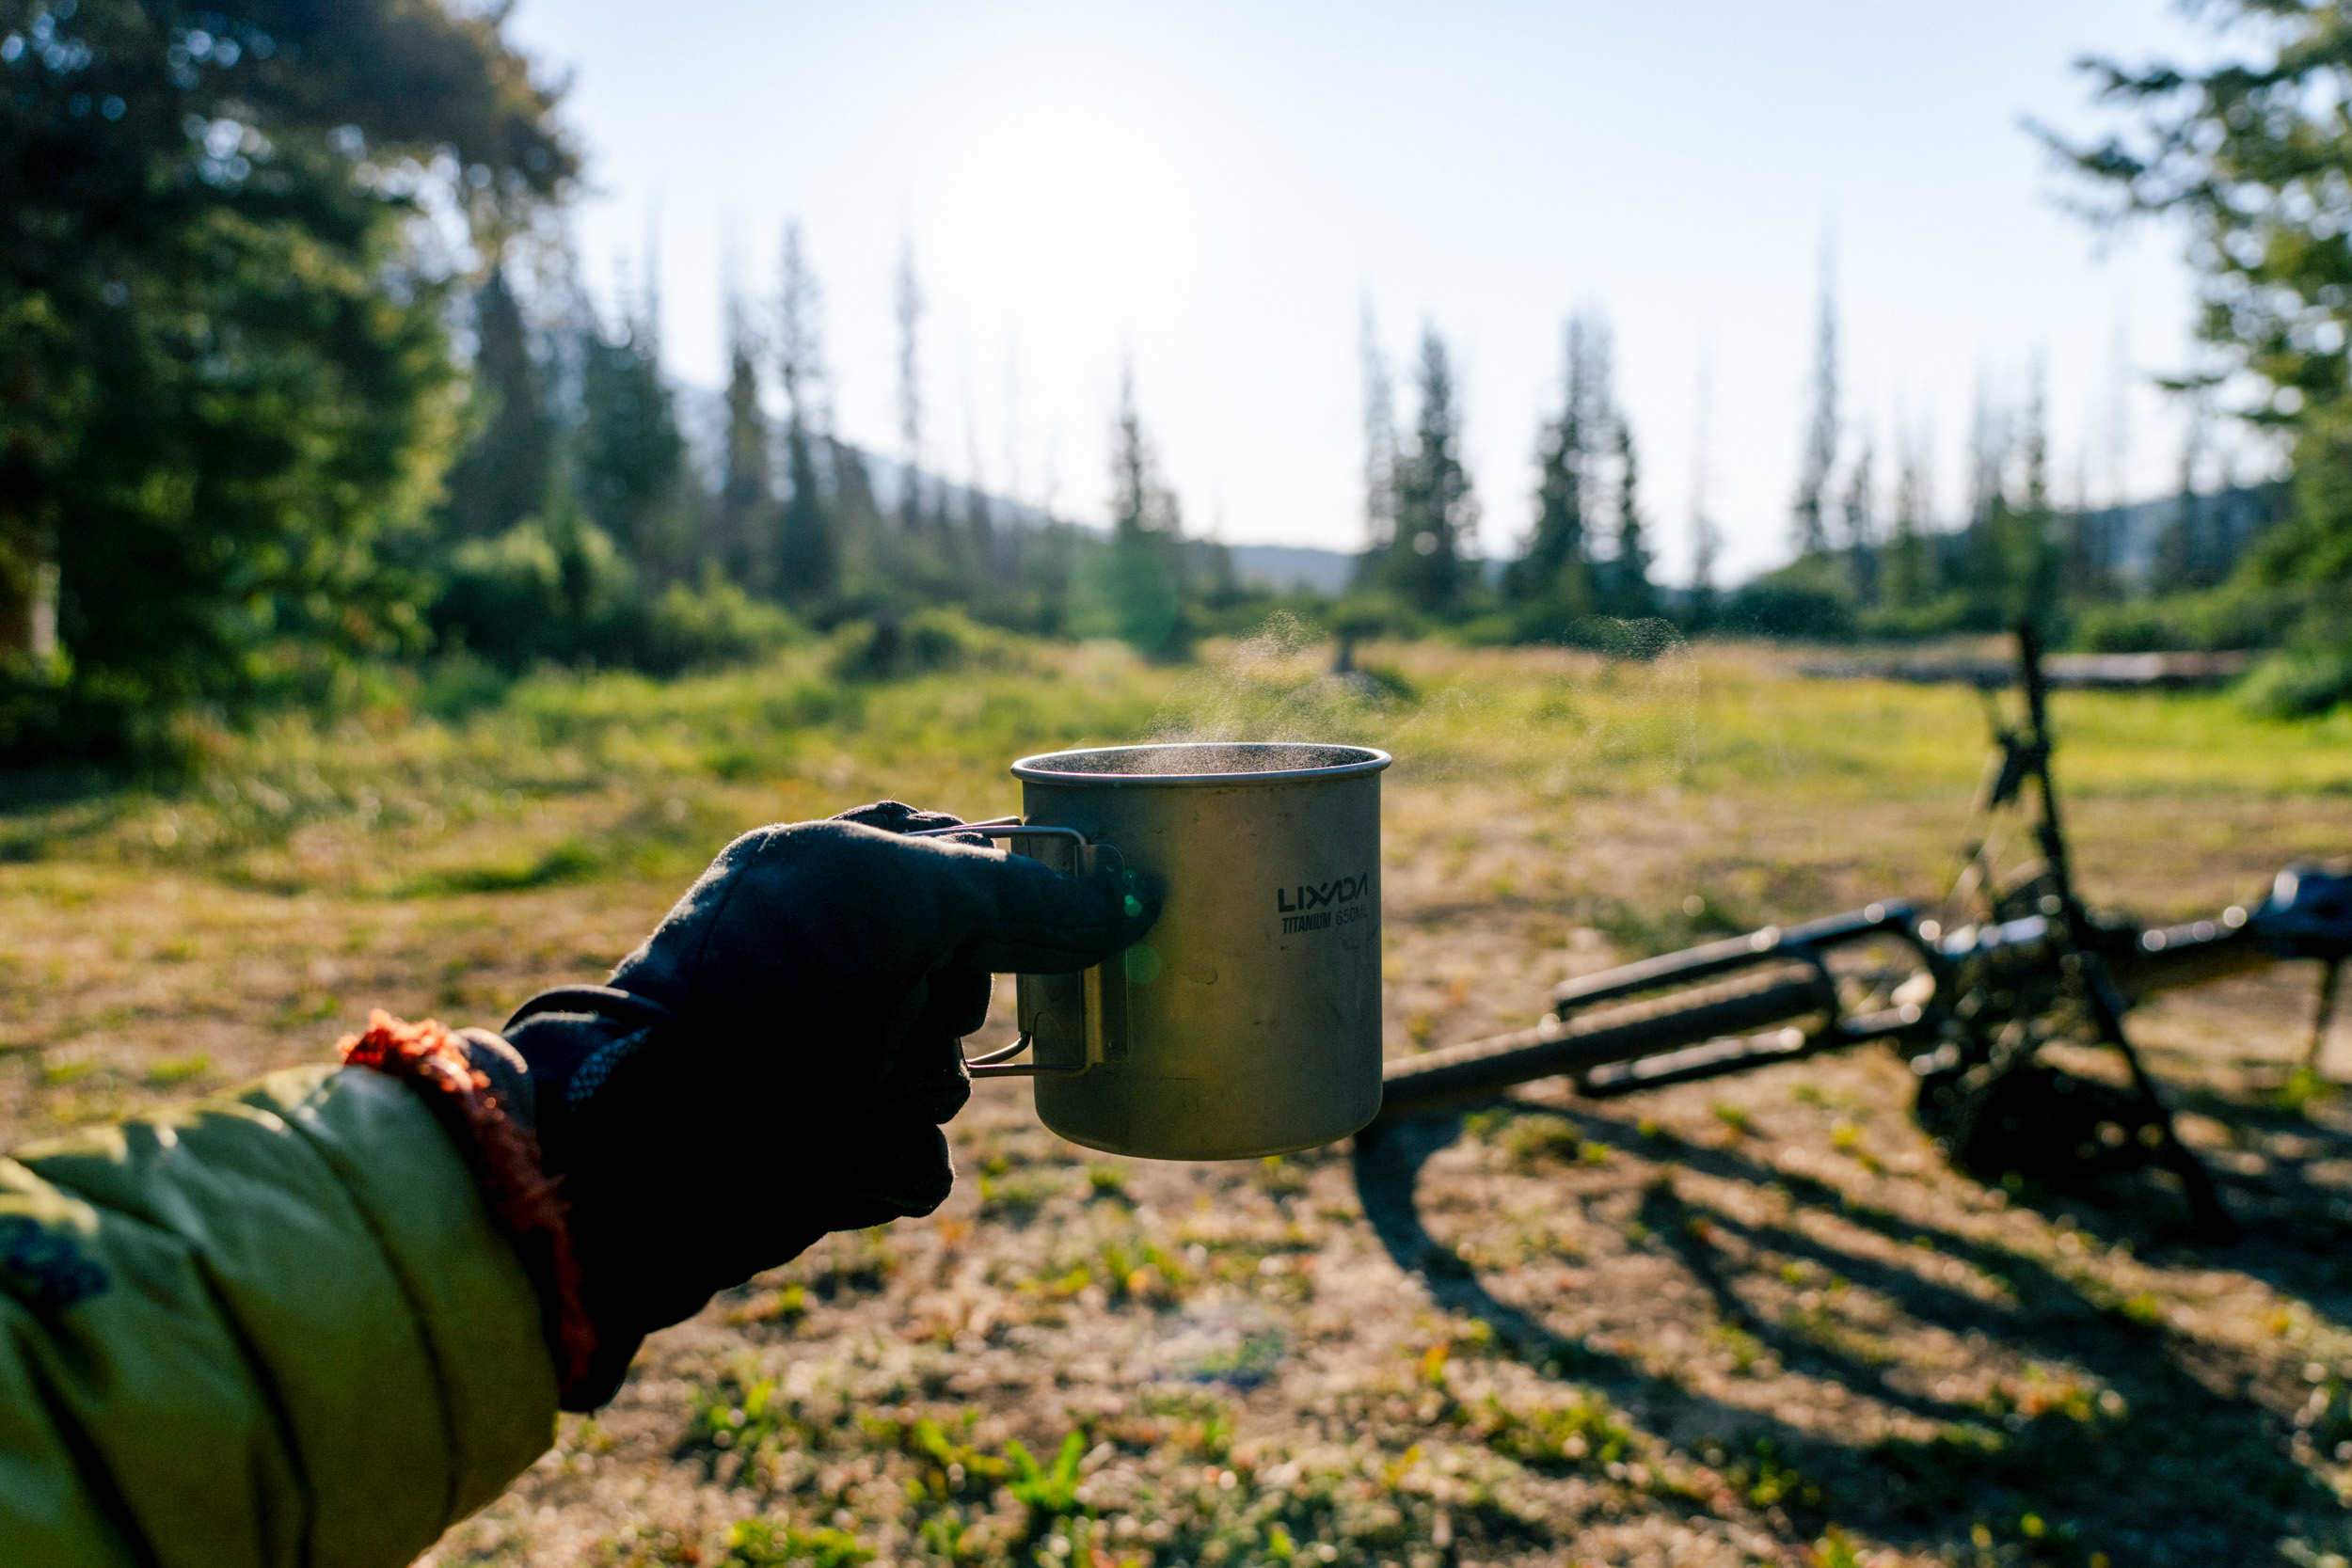
The only thing on top of the bars was my Coros DURA, and I had my Apex 4 watch paired with it to help track sleep and heart rate, which was nice. It also helps me keep track of time, and the battery life on both devices is great. The DURA is a standout item, and one I would recommend to anyone.
Speaking of standouts, one thing that stayed in my pocket was my phone. While the smartphone itself is nothing to write home about, the FarOut app is so darn good. I used it in the past under a different name, and now that they’ve refined the app, it’s even better. It allows users to leave public comments on topics like camping, water sources, trail conditions, and so on, and it gives you a good idea of mileage between sources. It’s a must-download app for the Colorado Trail, or any longer trail like the Arizona Trail. It’s mostly made for backpackers, but it works great for biking the CT and even includes wilderness detours.
The other thing I had on my body, and something I would recommend bringing, is an inReach or some sort of satellite communication device. It’s good to have an extra way to reach out on the trail beyond your phone, along with a battery pack to keep things charged, and a cord and plug to charge devices and the battery pack when in towns.
I also had an assortment of other items, like a drone, camera, and GoPro, but I’ll leave that for another video. Also, it’s worth noting that my buddy had the first-aid kit and I had the repair kit for this trip, so that’s one reason I didn’t mention first aid. If I was going solo, I would put it in a reasonably easy-to-access spot.
Wrap Up
I’ll be diving deeper into a few of these products in the not-too-distant future, but I figured I’d share my trail-ready setup with you all. The Tall Boy did not hold me back in any regard. It kept me comfortable on long, slogging climbs, still excelled on fast descents, and allowed me to bring all the little luxuries I wanted for six days on the Colorado Trail.
If you have any questions, comments, or thoughts on my gear choices, please let me know in the Conversation below…
Further Reading
Make sure to dig into these related articles for more info...


Please keep the conversation civil, constructive, and inclusive, or your comment will be removed.