


Waxed Canvas Bags: Beginner’s Guide + How to Wax Canvas


When was the last time you showed your waxed canvas bags some love? In preparation for a long, wet winter in the Pacific Northwest, Miles decided it was time to re-wax some neglected bikepacking gear. In this guide, you’ll find instructions on how to make your own waterproofing gear wax, how to wax canvas, our experience with ready-made wax, and tips from some of our favorite waxed canvas bag makers…
PUBLISHED Dec 14, 2023
Waxed canvas bags and gear has seen a resurgence in the bikepacking world, but this material has been used in demanding outdoor applications for more than 100 years. Long before Dyneema and fancy synthetic fabrics, waxed canvas was the go-to fabric for sailors looking for waterproof jackets and better-performing sails, eventually making its way to the British Armed Forces during WWII. According to some sources, Britain’s military was the first to use waxed canvas for waterproof clothing for their soldiers. After the war, waxed canvas found its way to farmers, tradespeople, and motorcyclists. The rest is history.
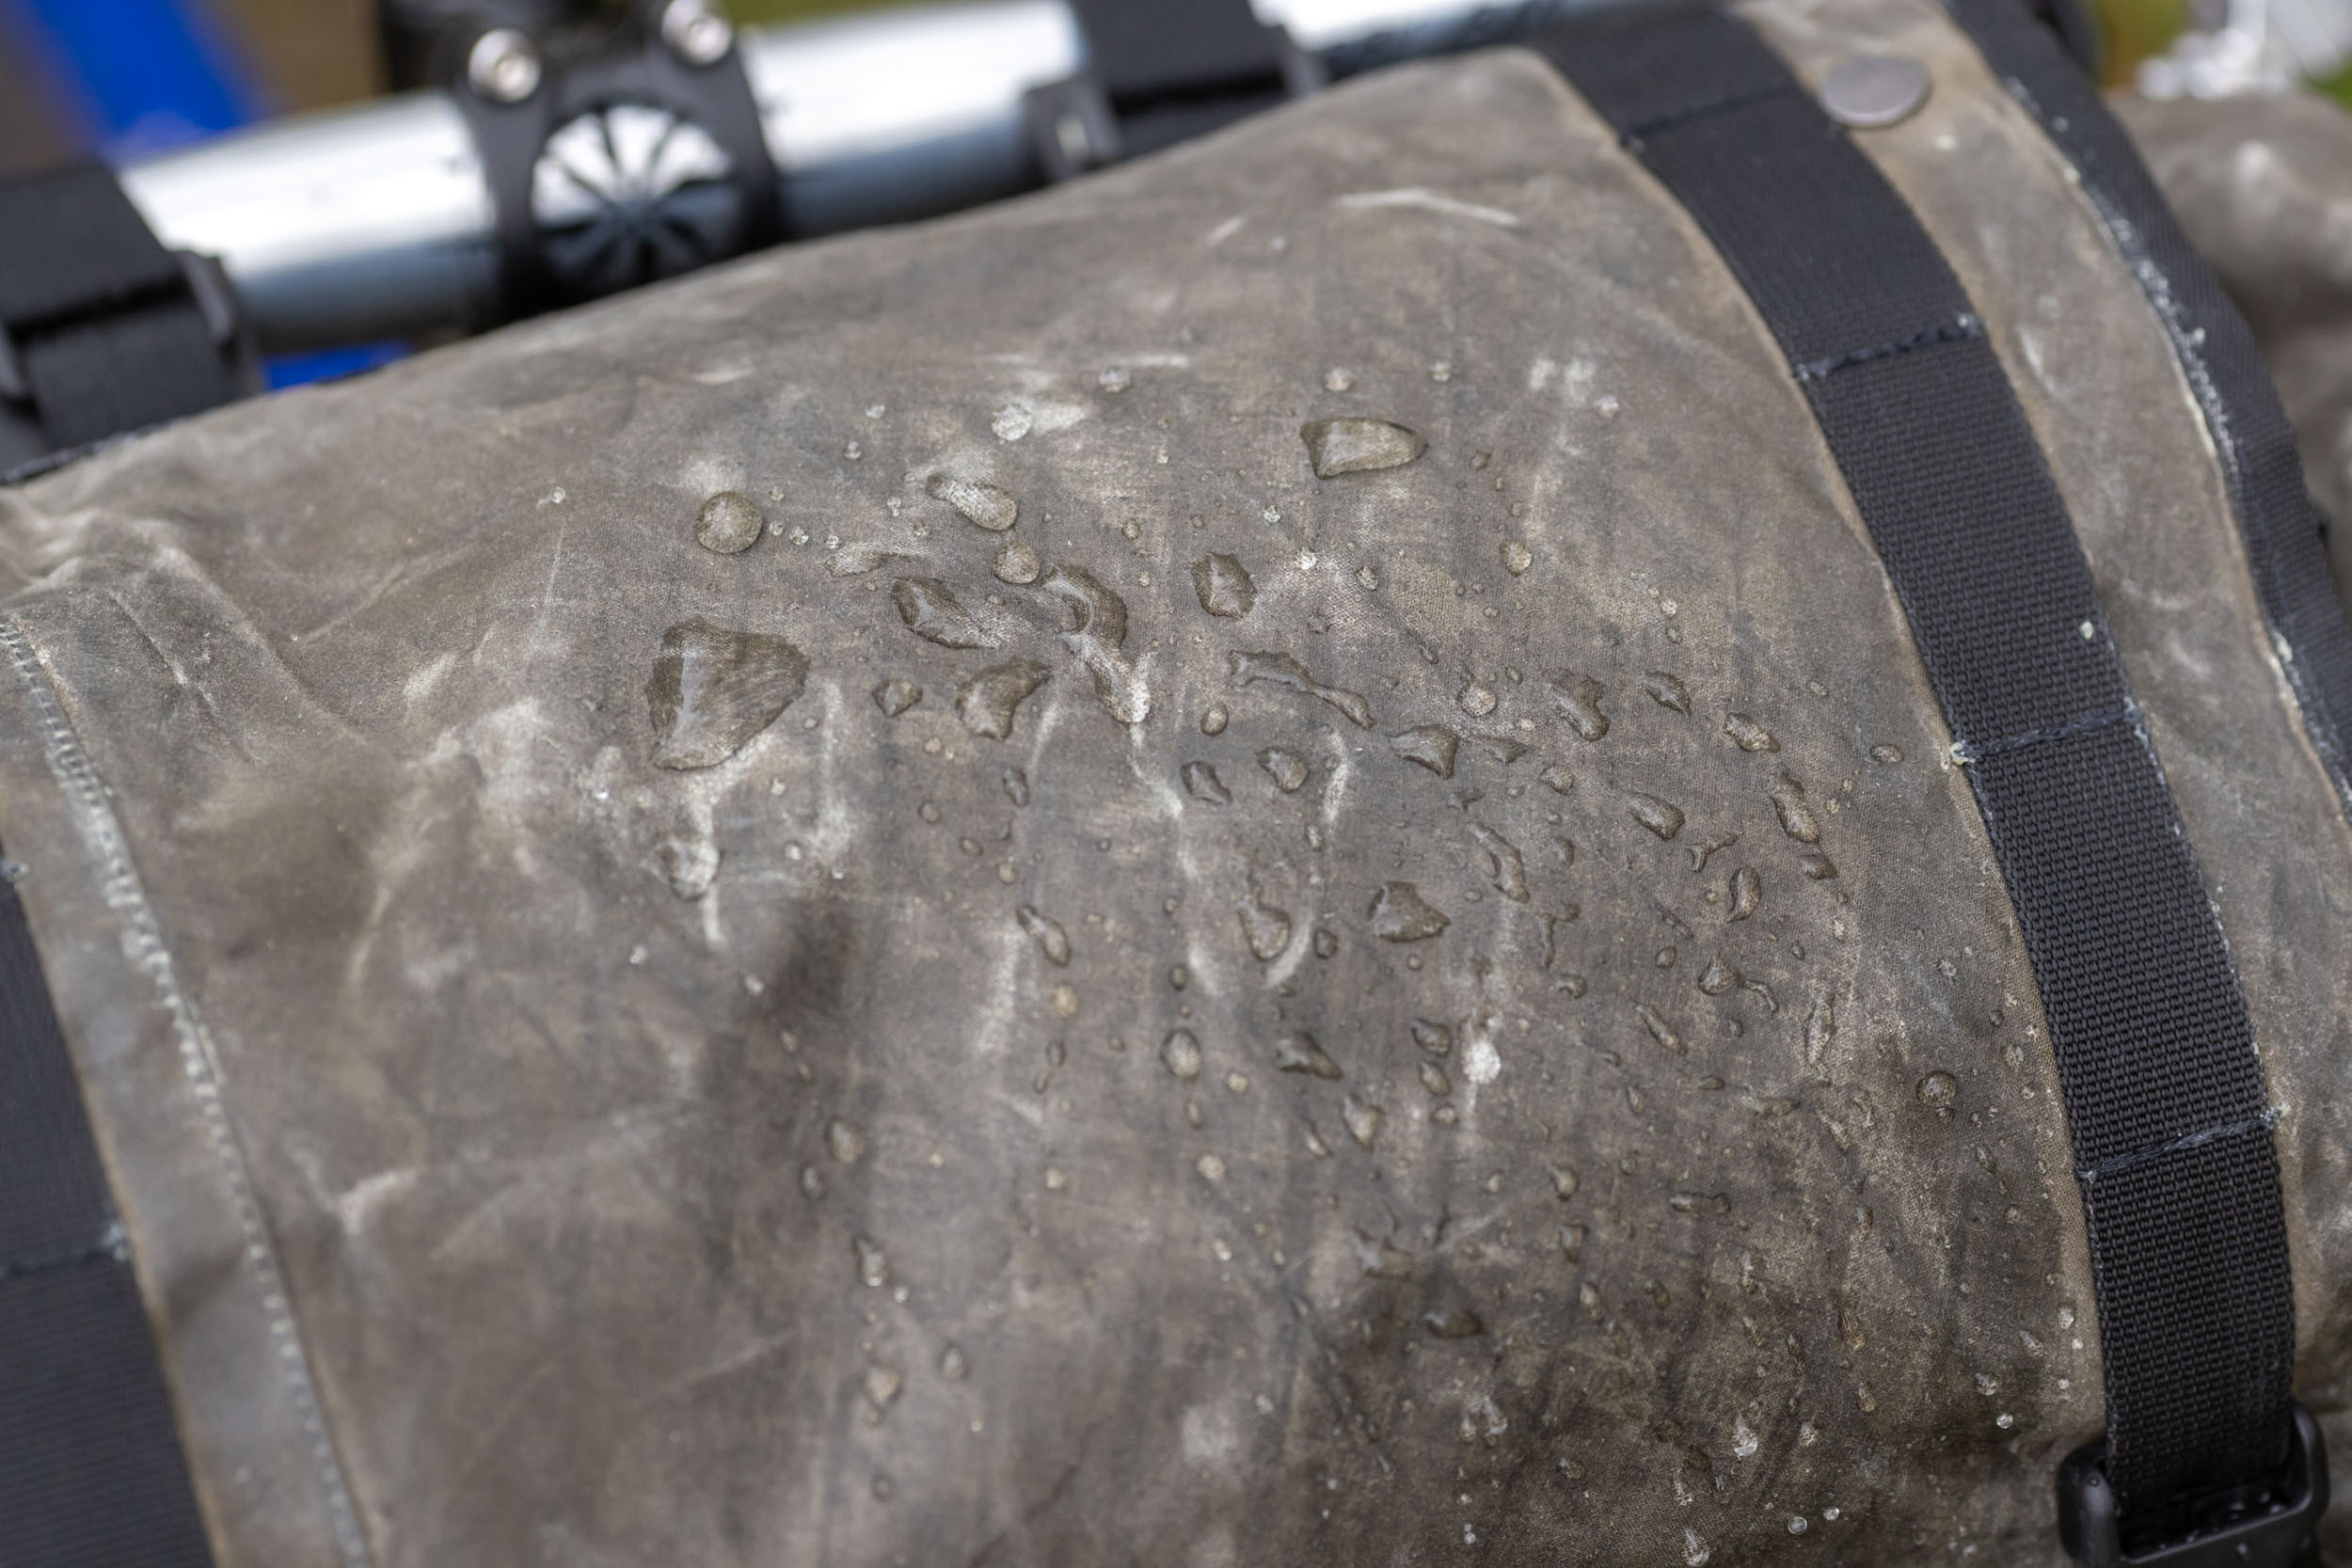
Today, waxed canvas is generally made from heavy-duty cotton treated with paraffin, beeswax, natural oils, or a combination of all of the above. It’s a popular fabric because it’s economical, animal-friendly, and usually less expensive than leather. It’s heavy, but its weight is made up for by its durability, abrasion resistance, repairability, and longevity. New waxed canvas is stiff and has a waxy feel, but it breaks in nicely over time, develops a patina, and looks better the more you use it. Waxed canvas is extremely water-resistant but not technically waterproof, making it ideal for backpacks and duffels or other high-wear gear. Its wax coating repels water and can easily be restored to its original beauty.
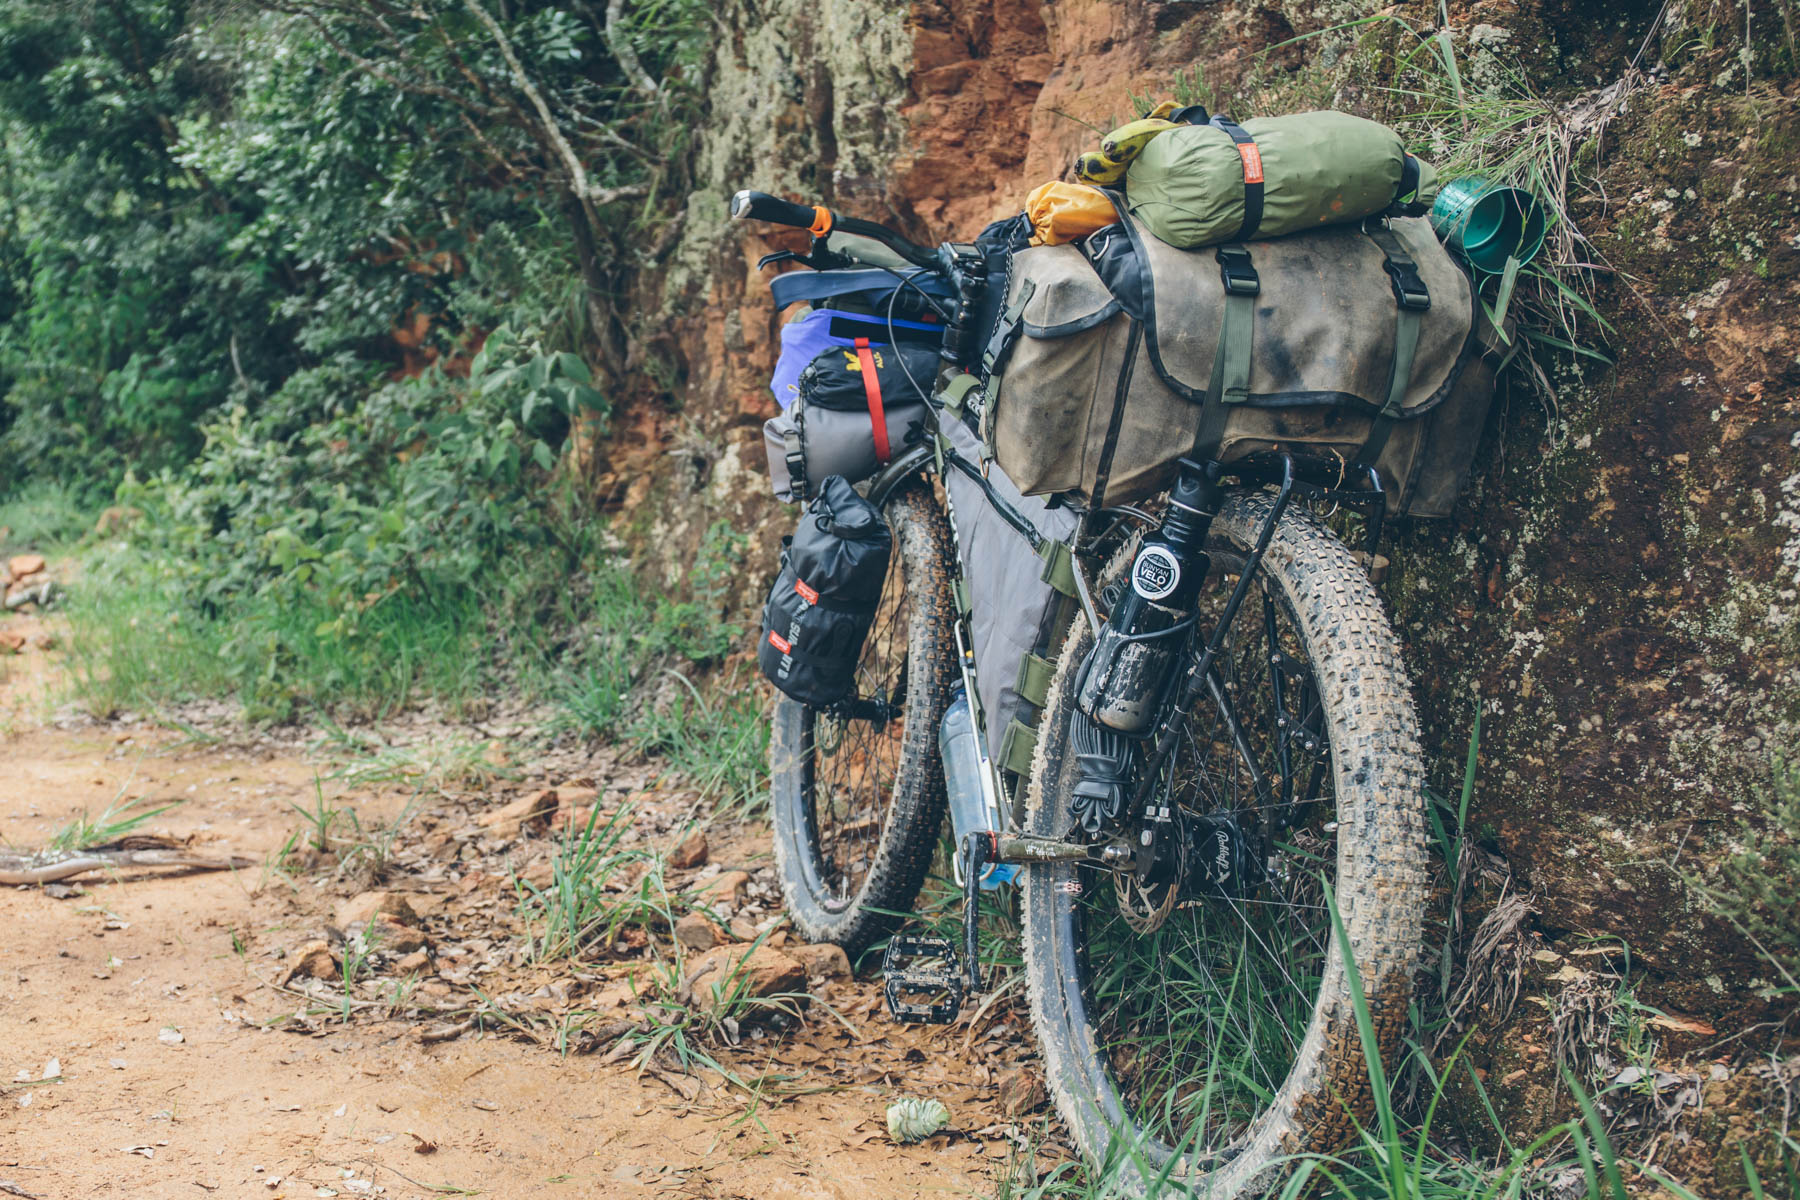
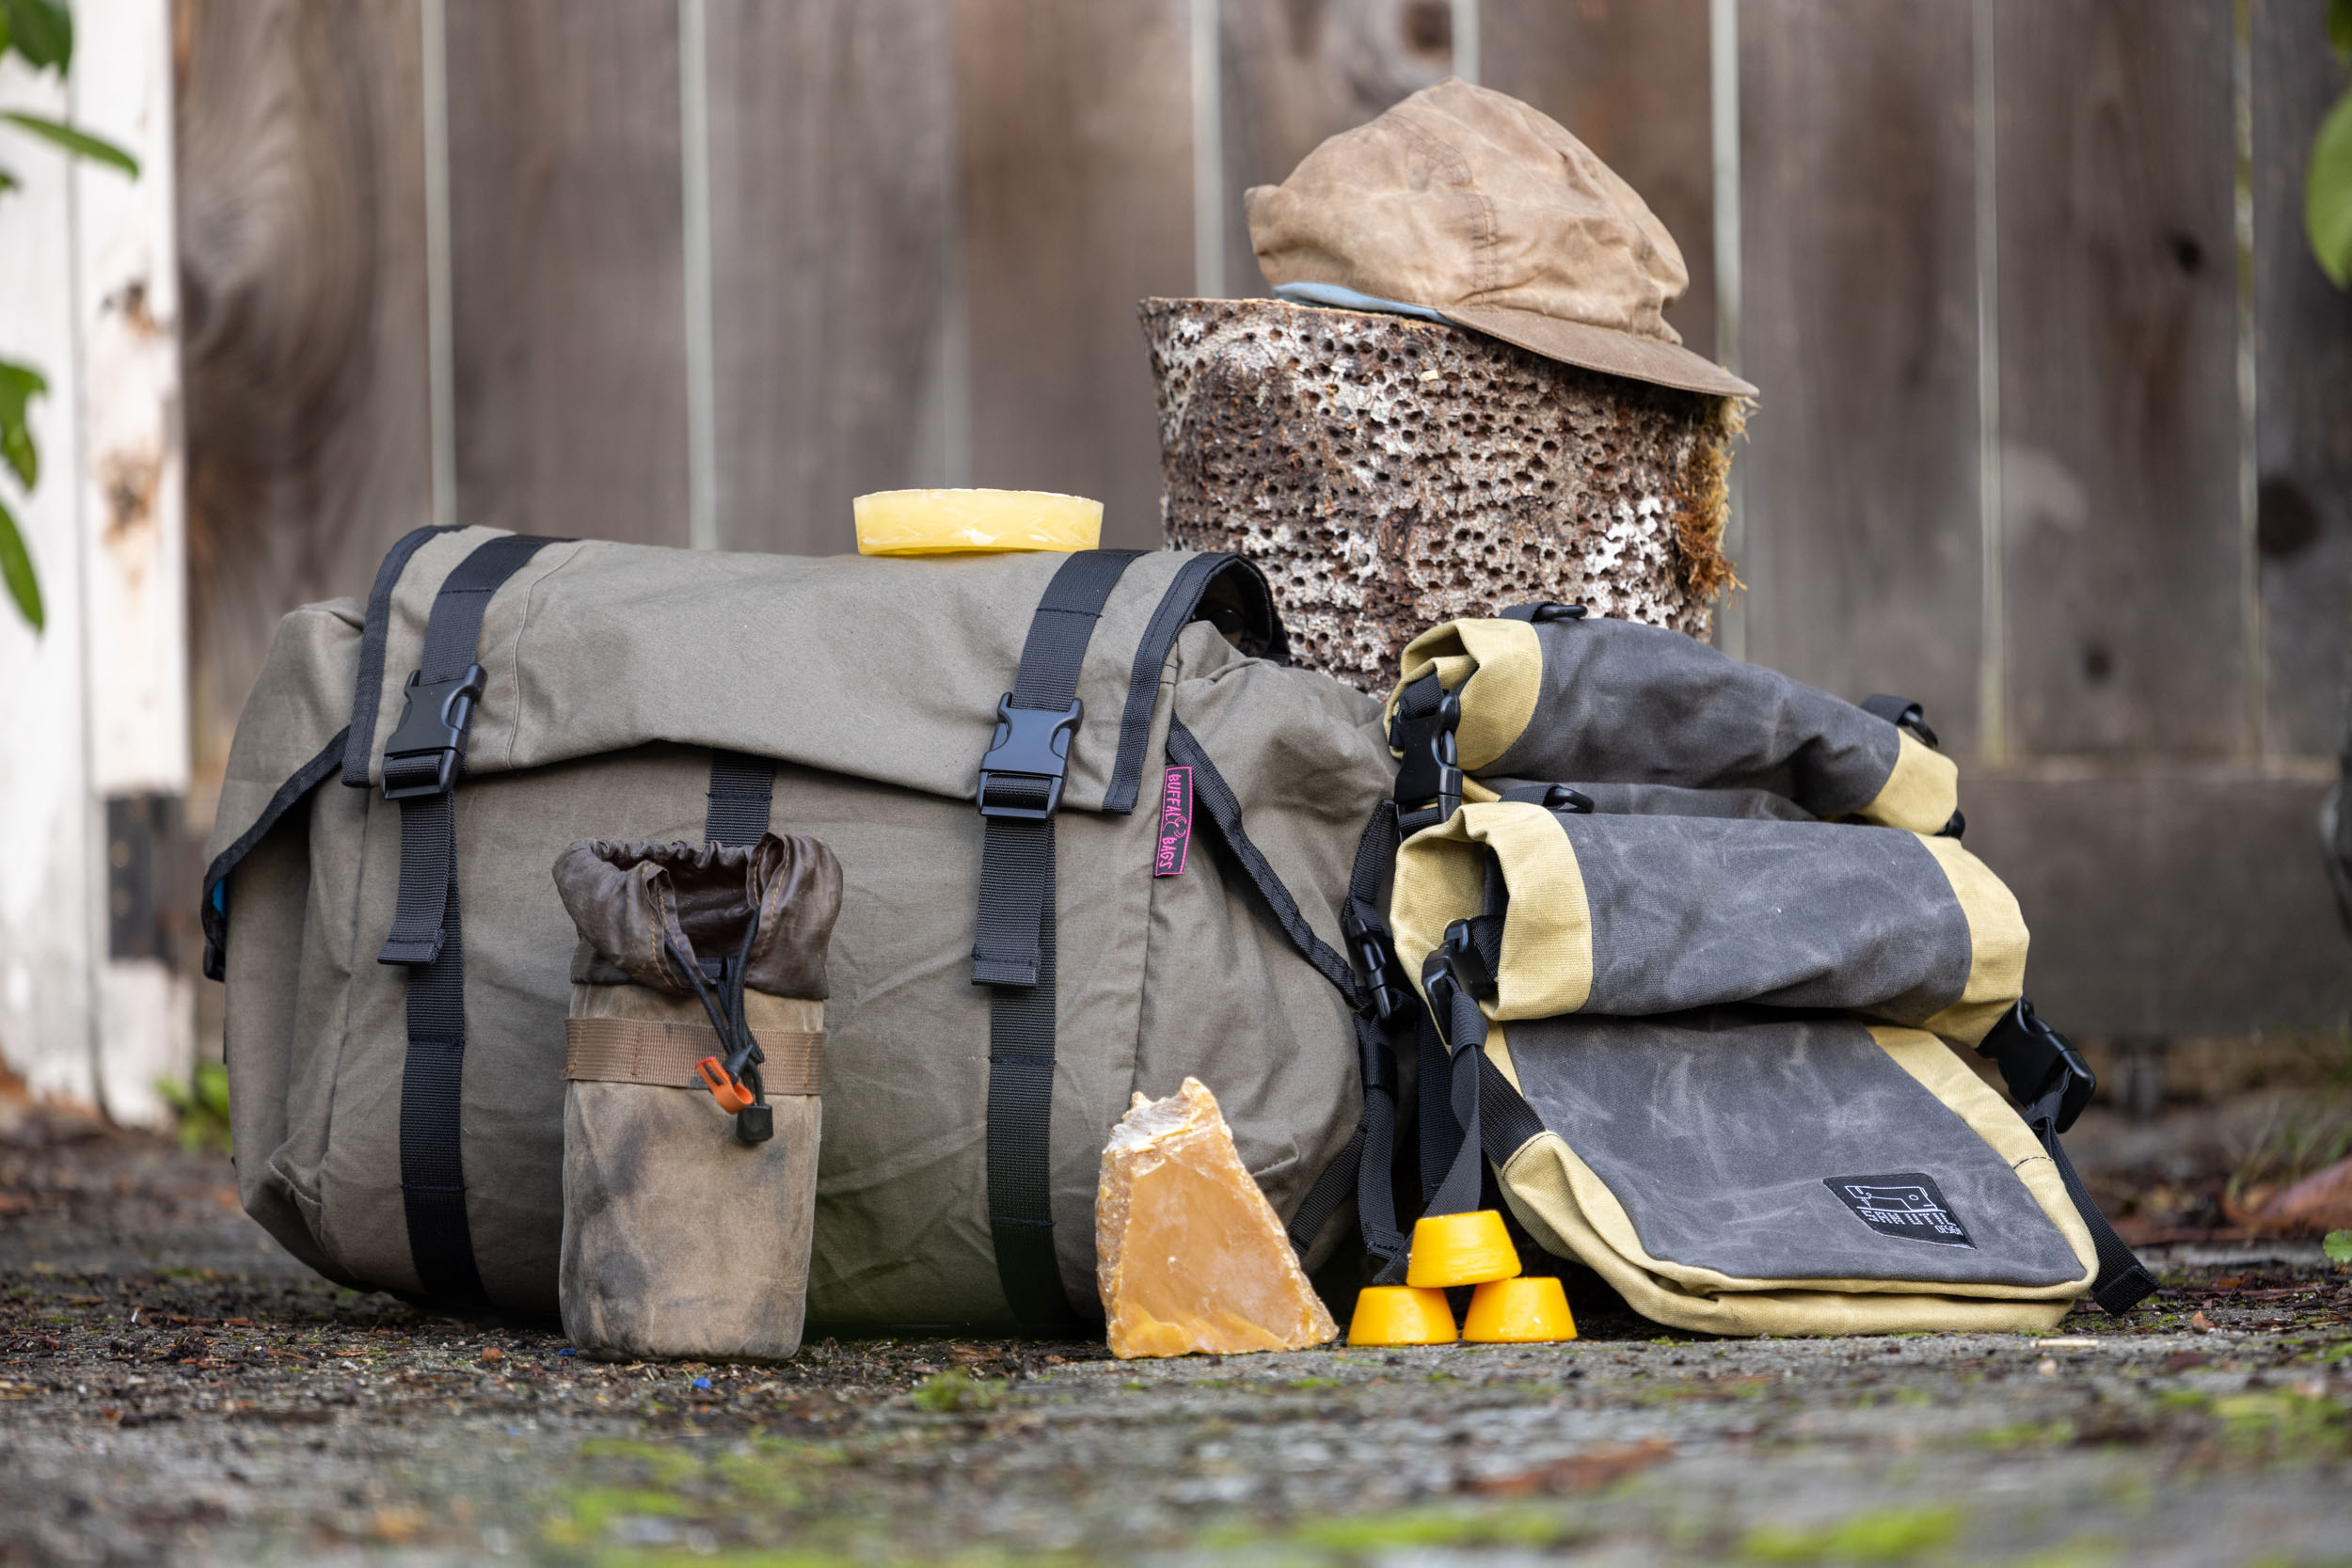
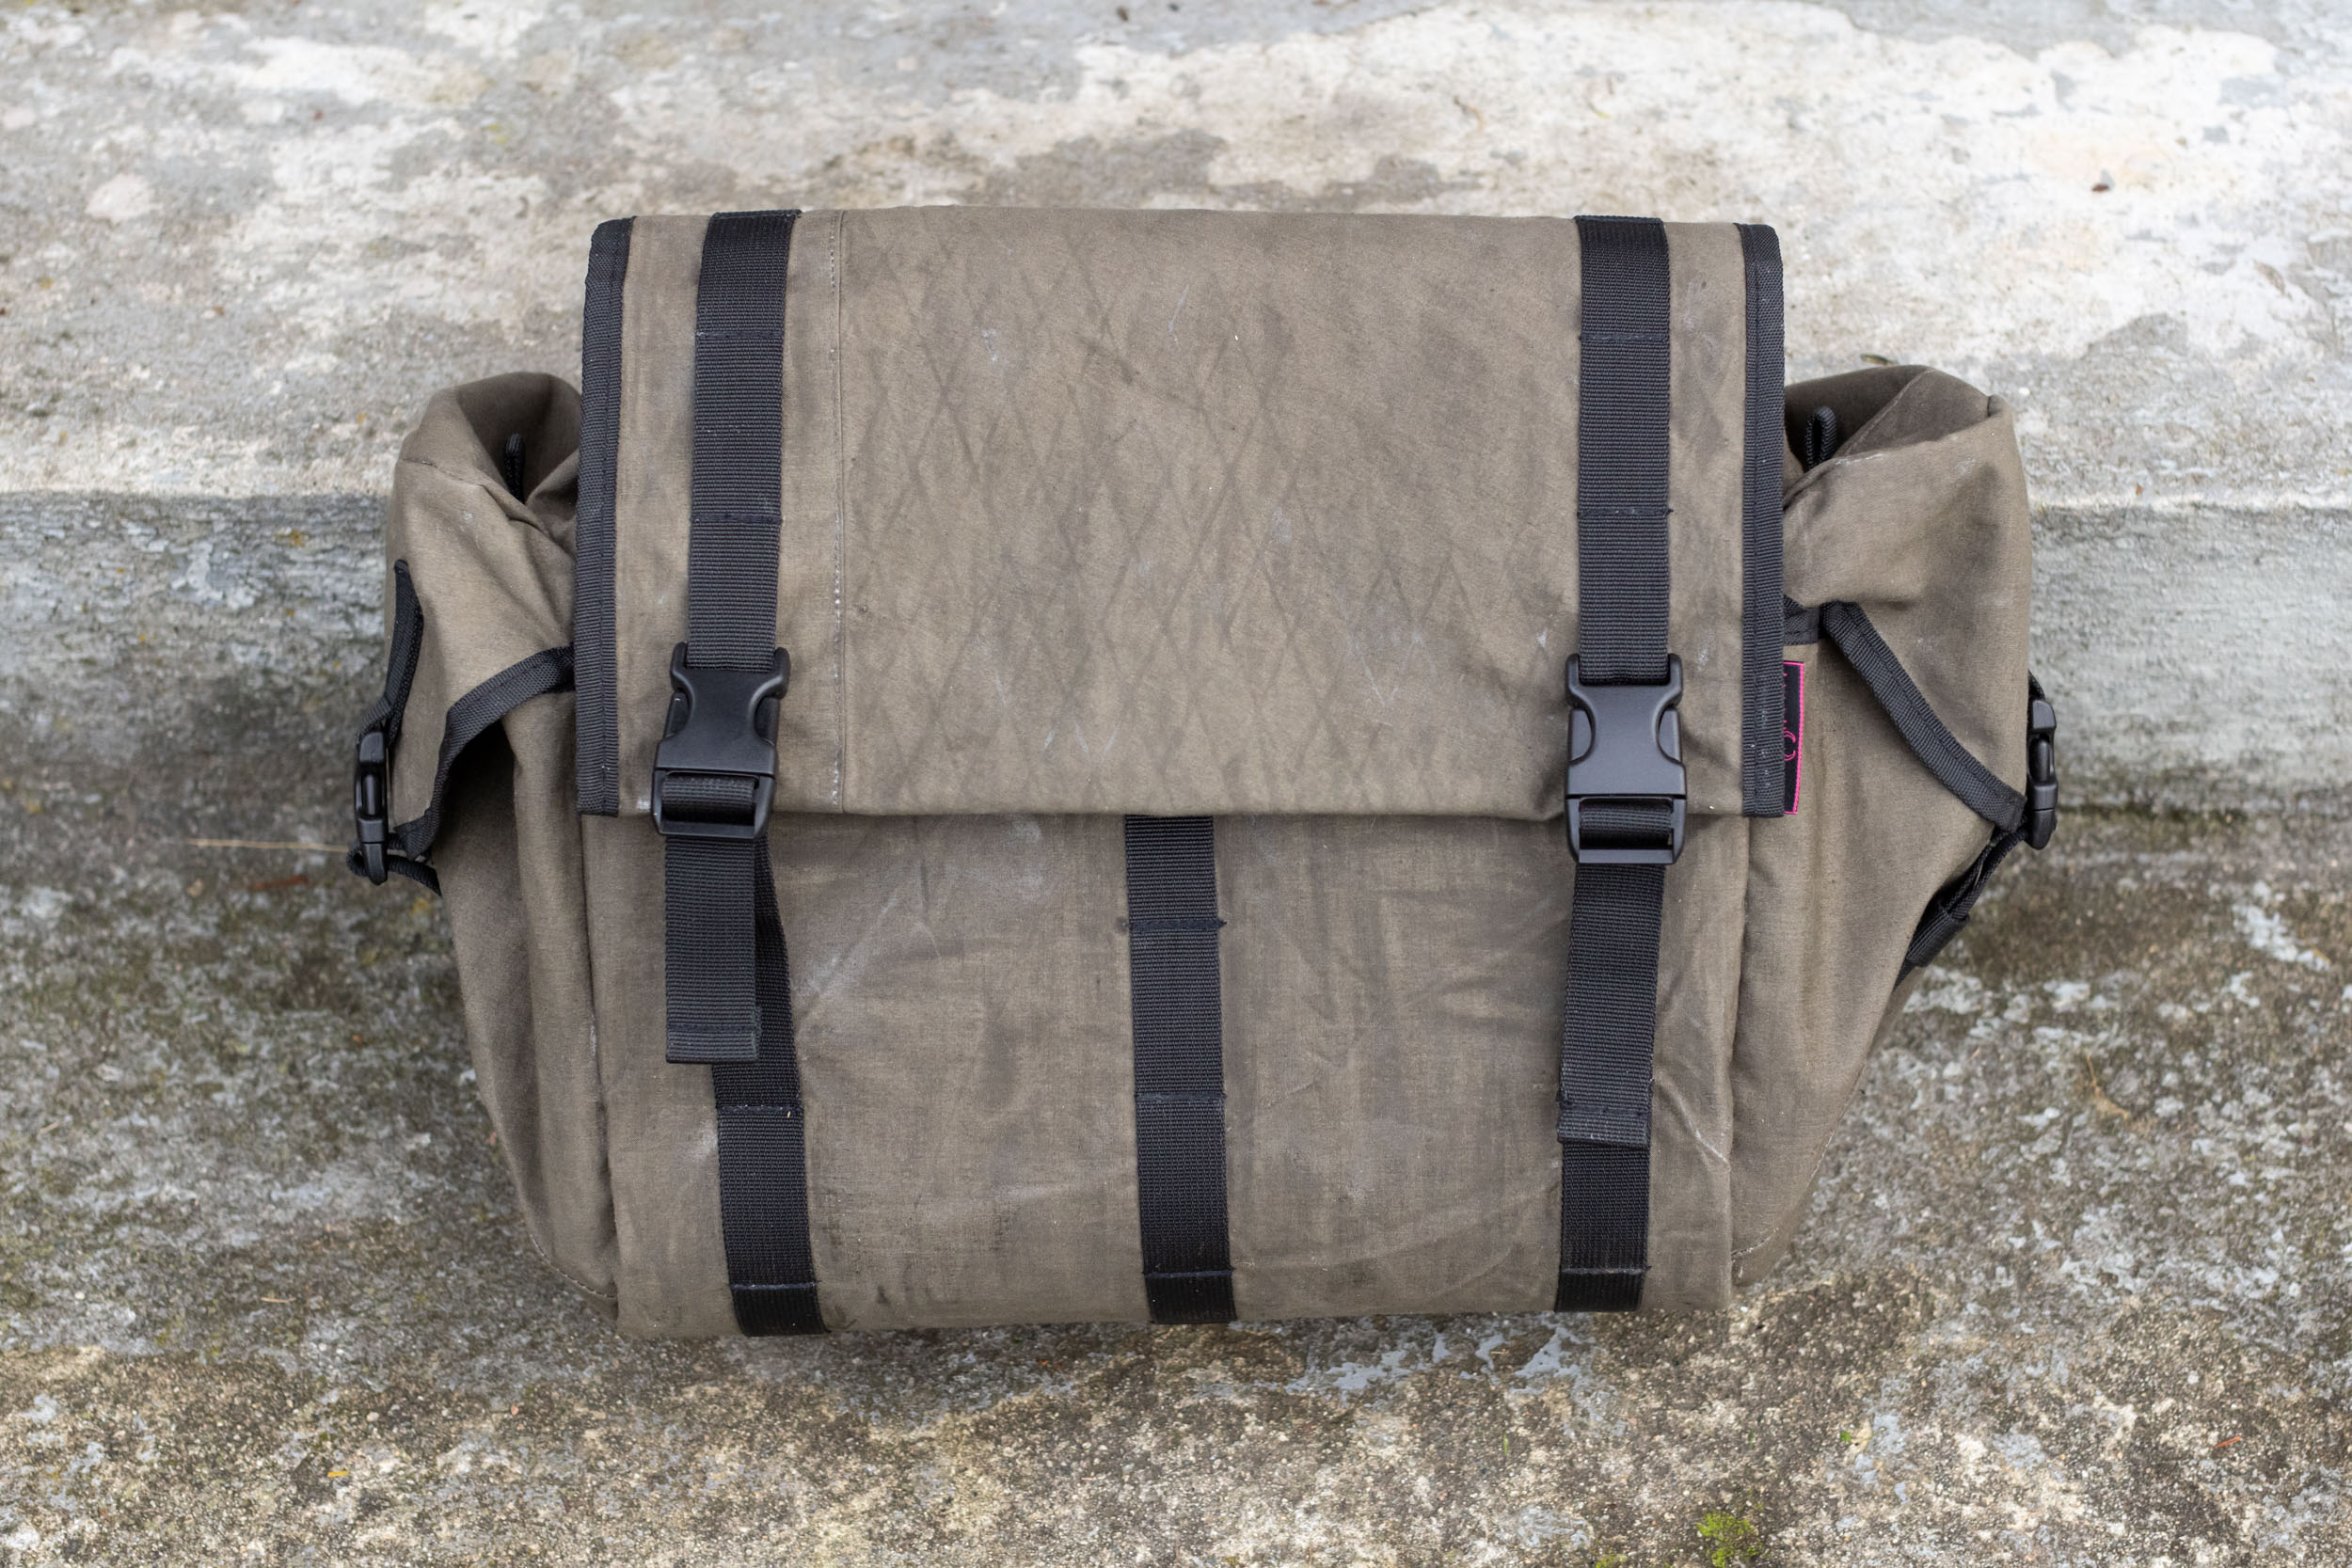
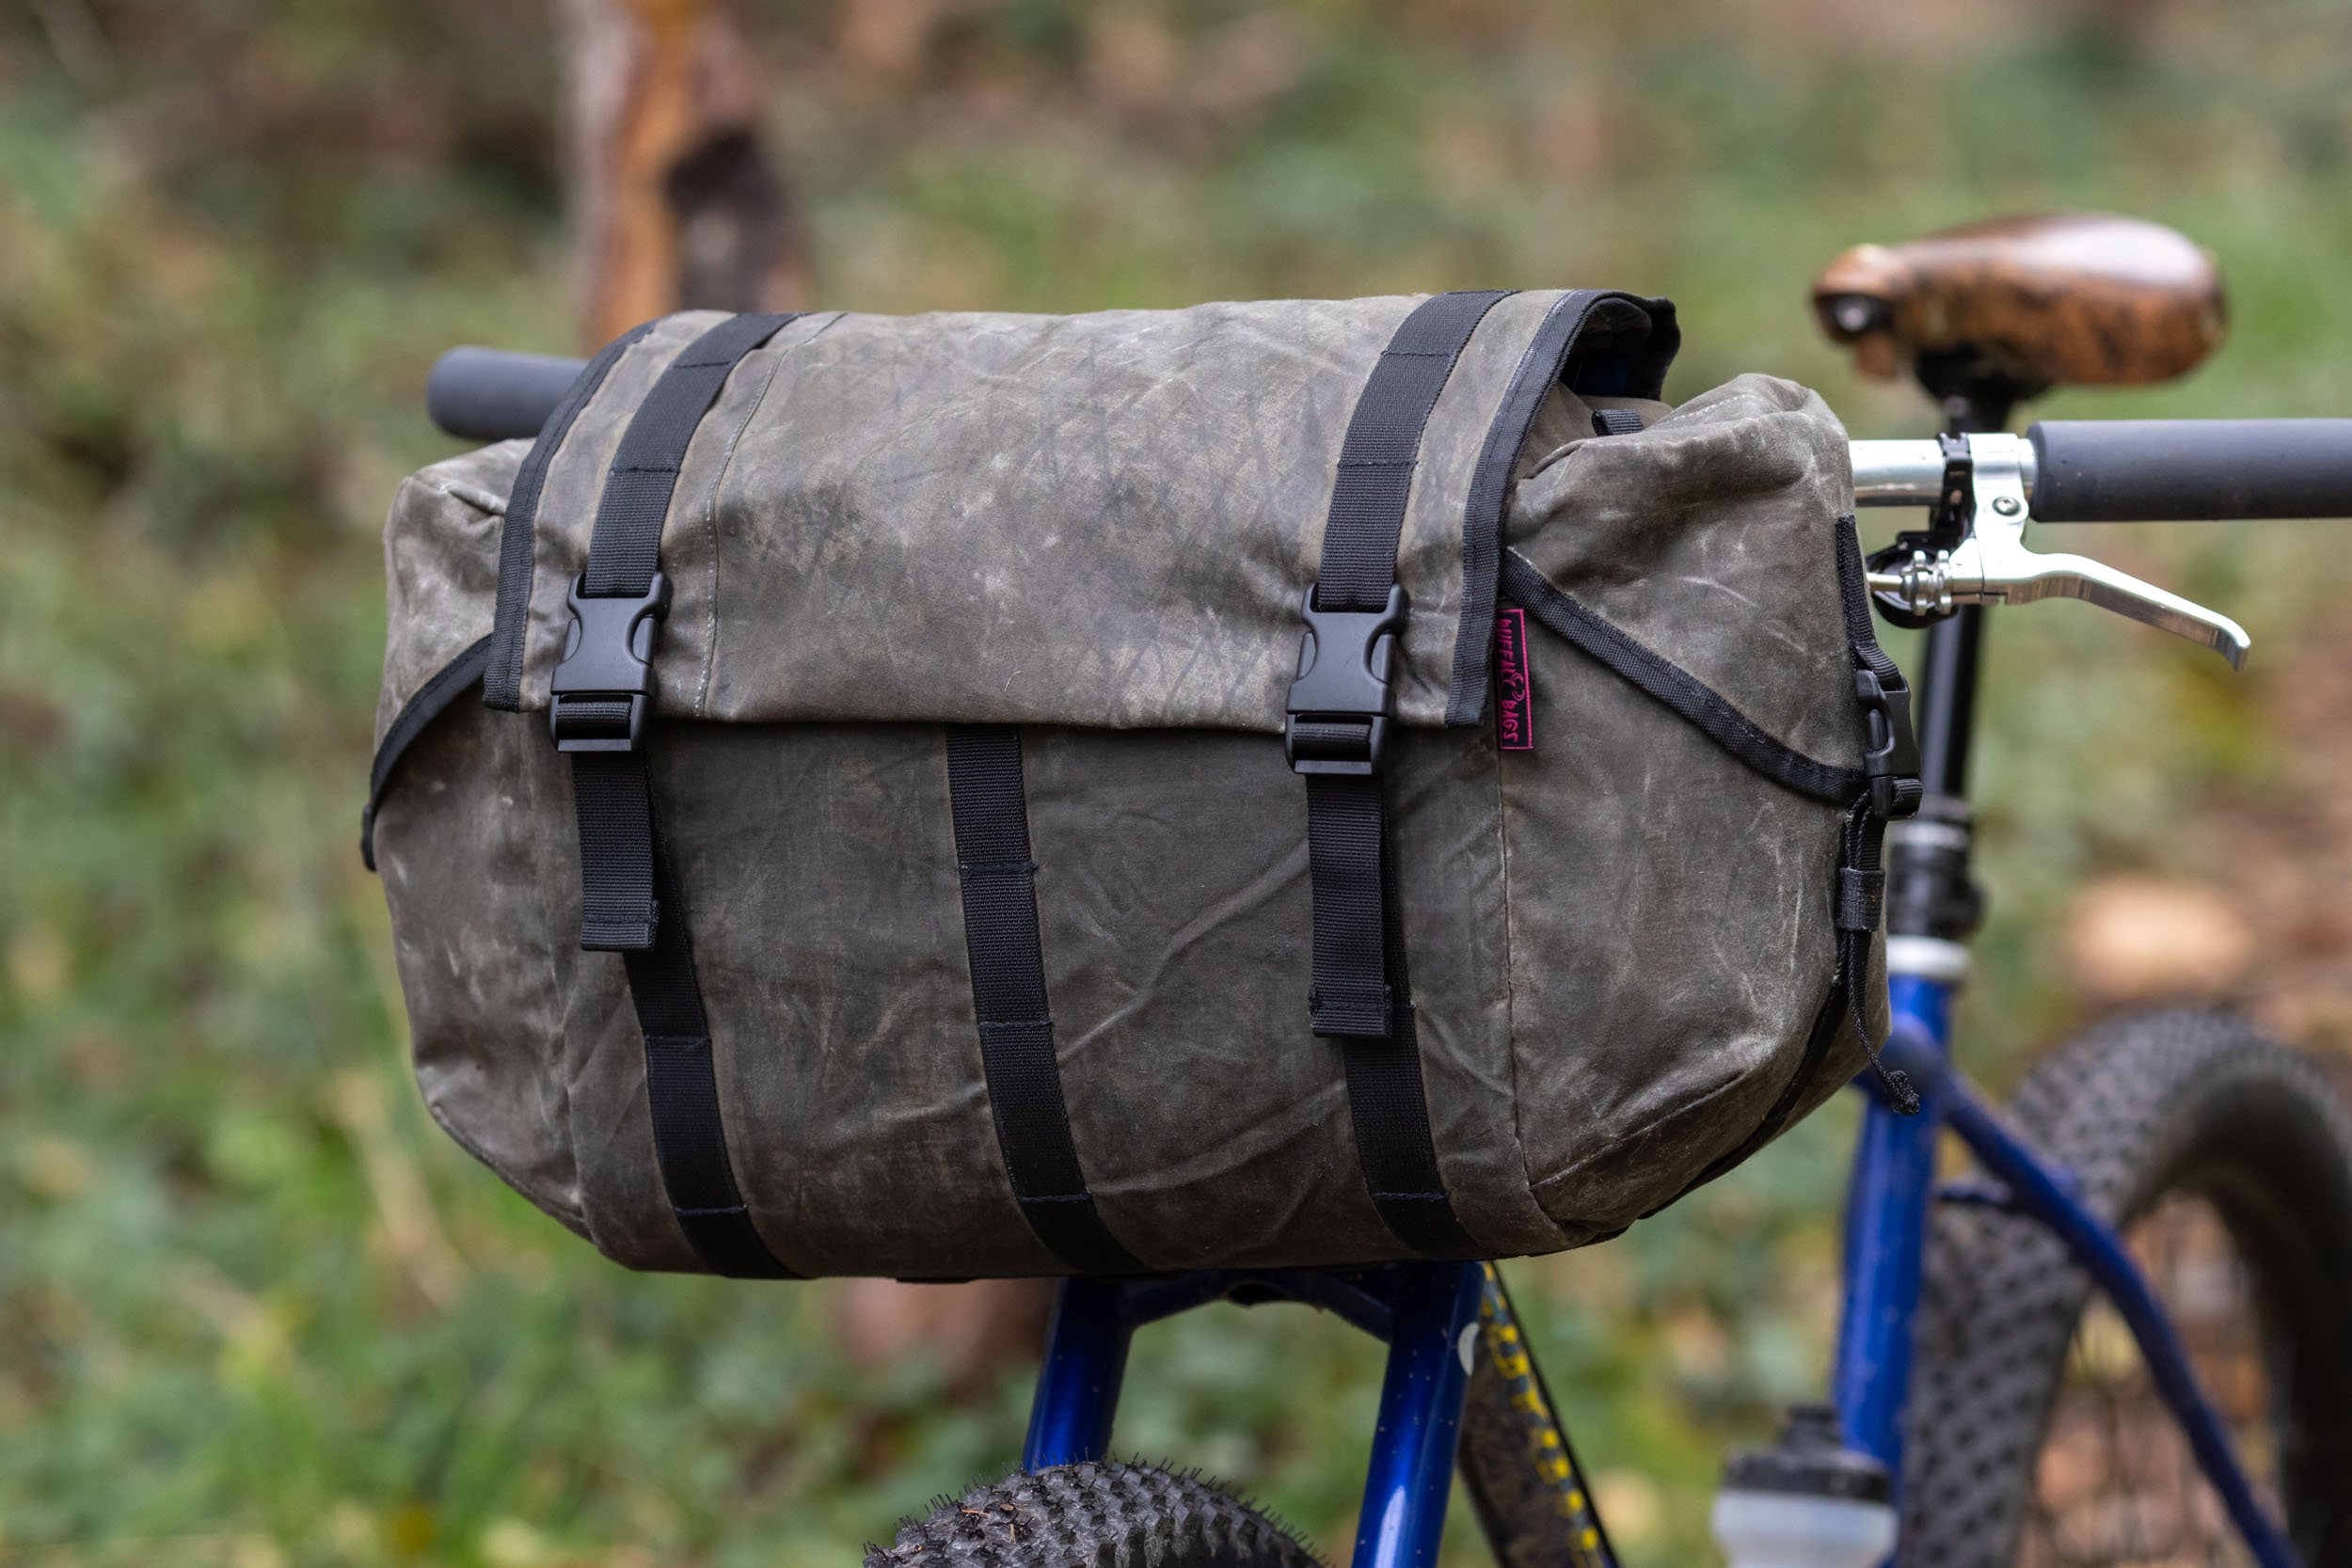
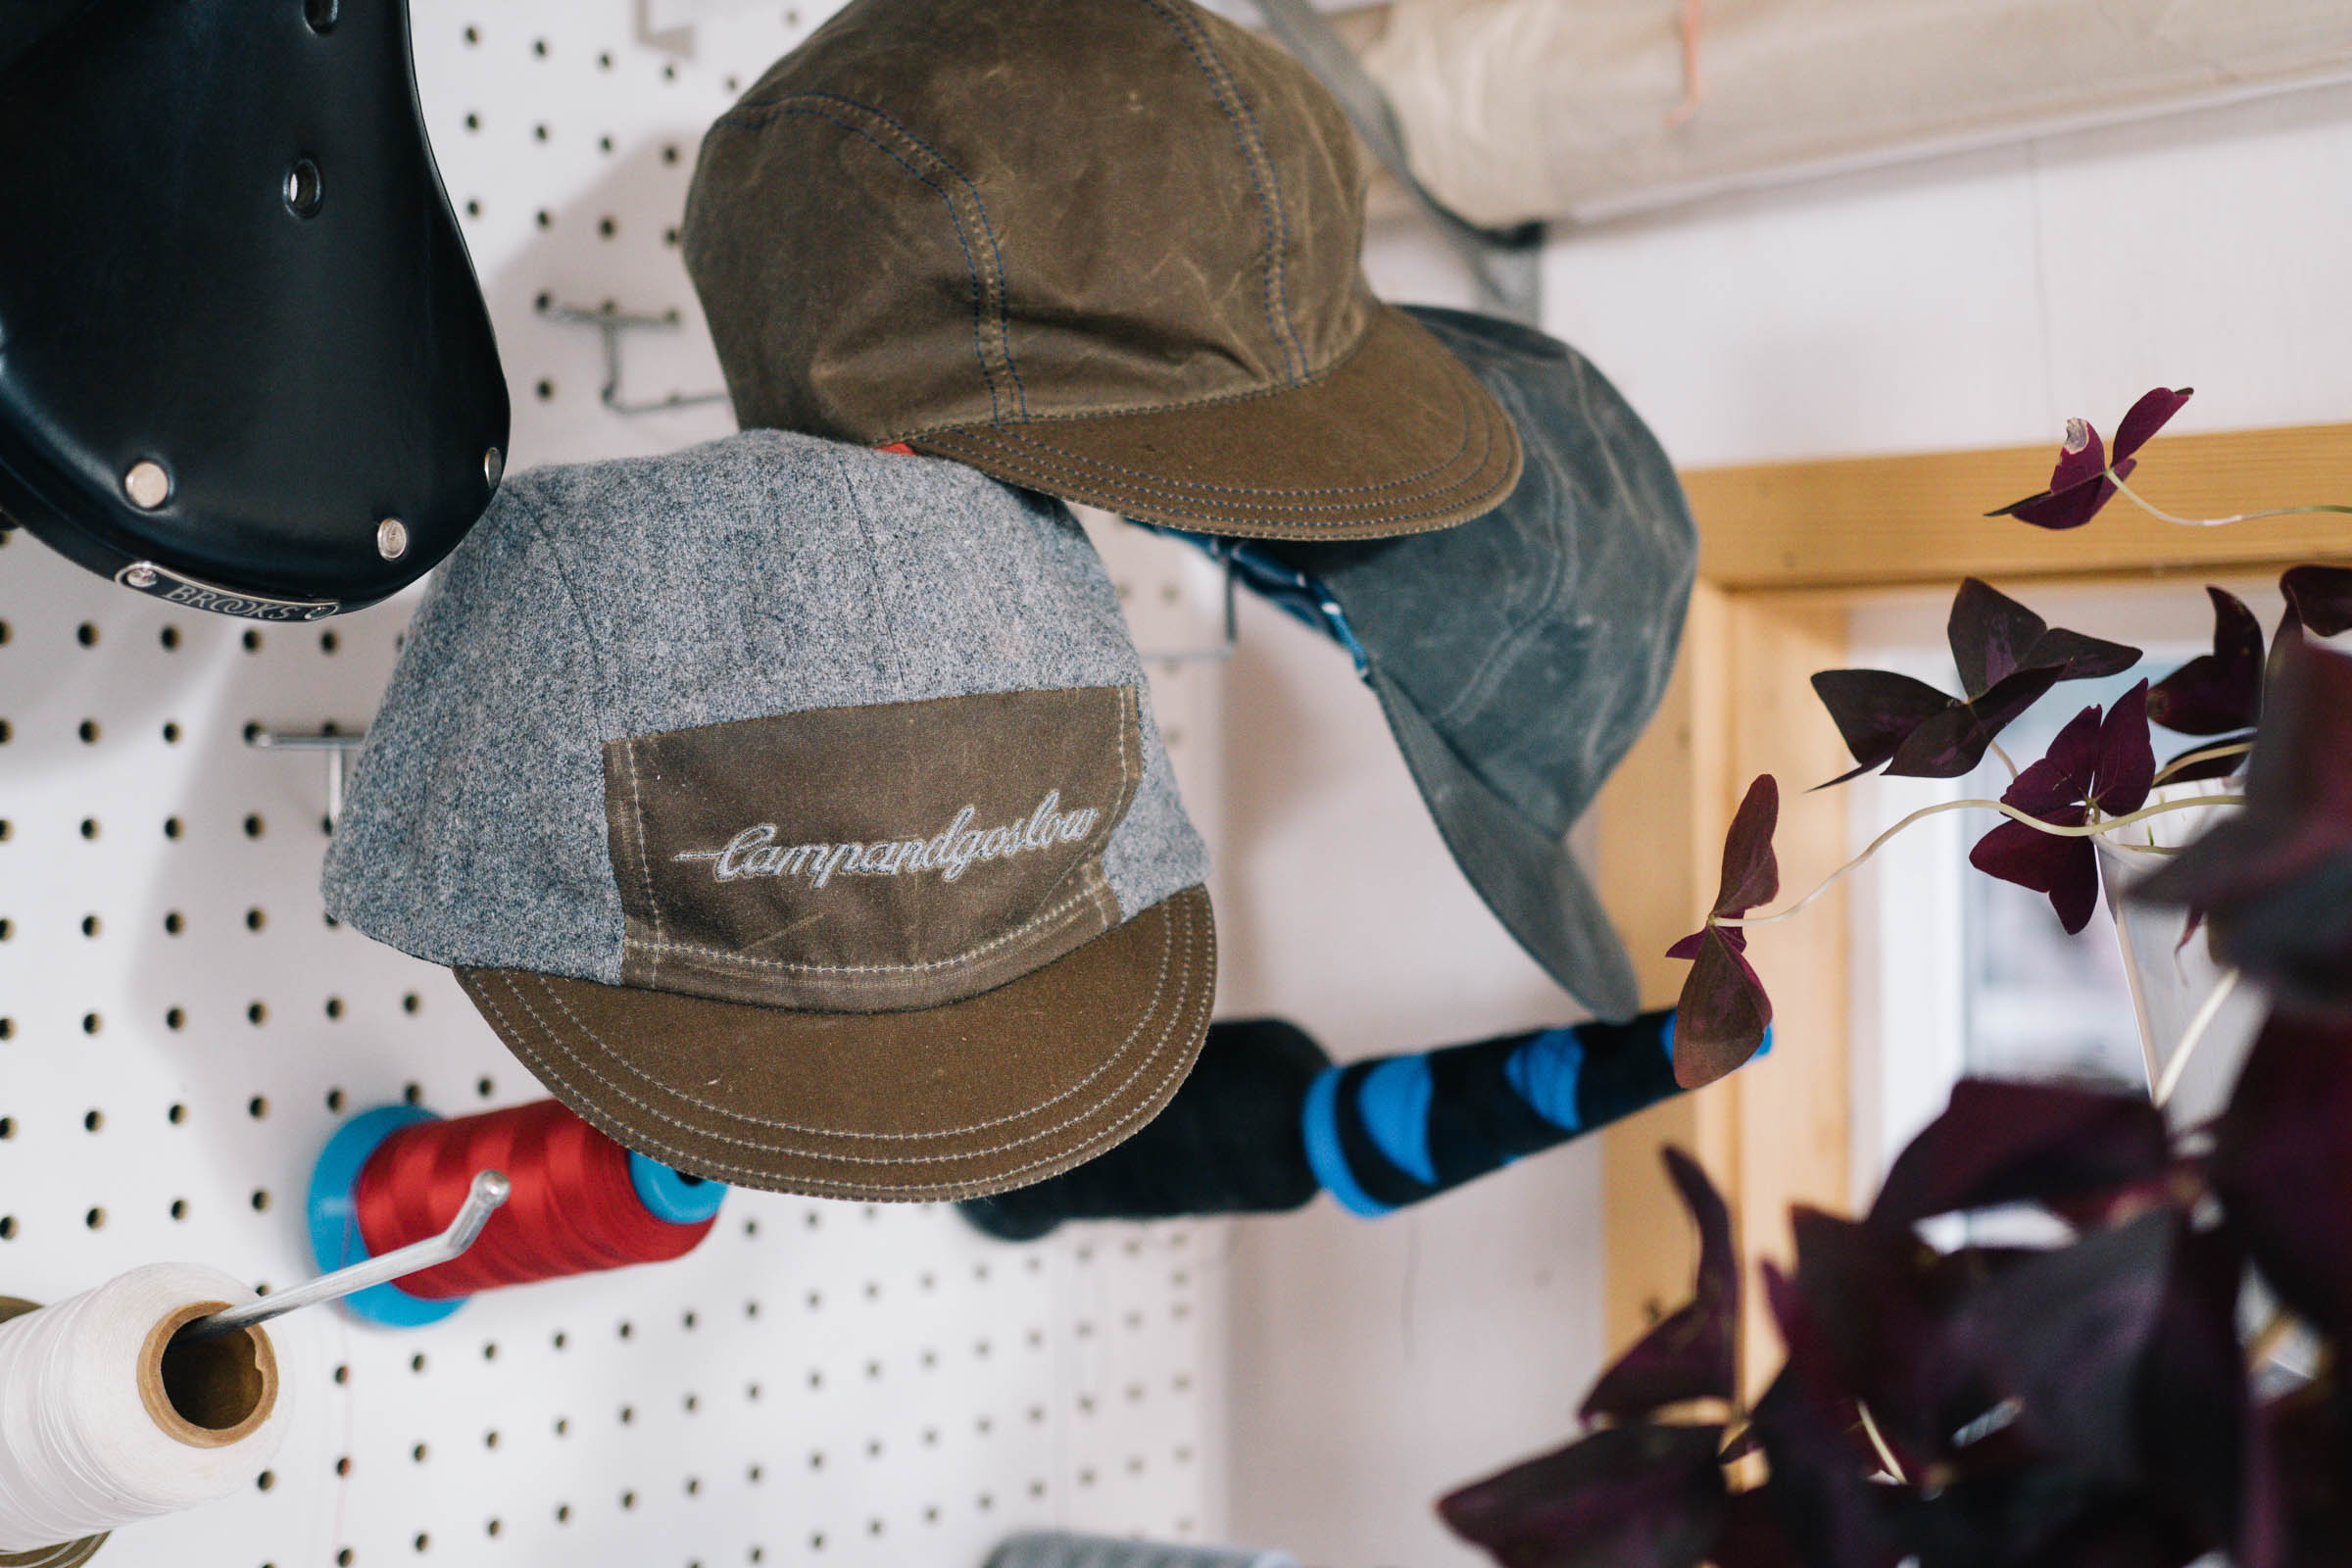
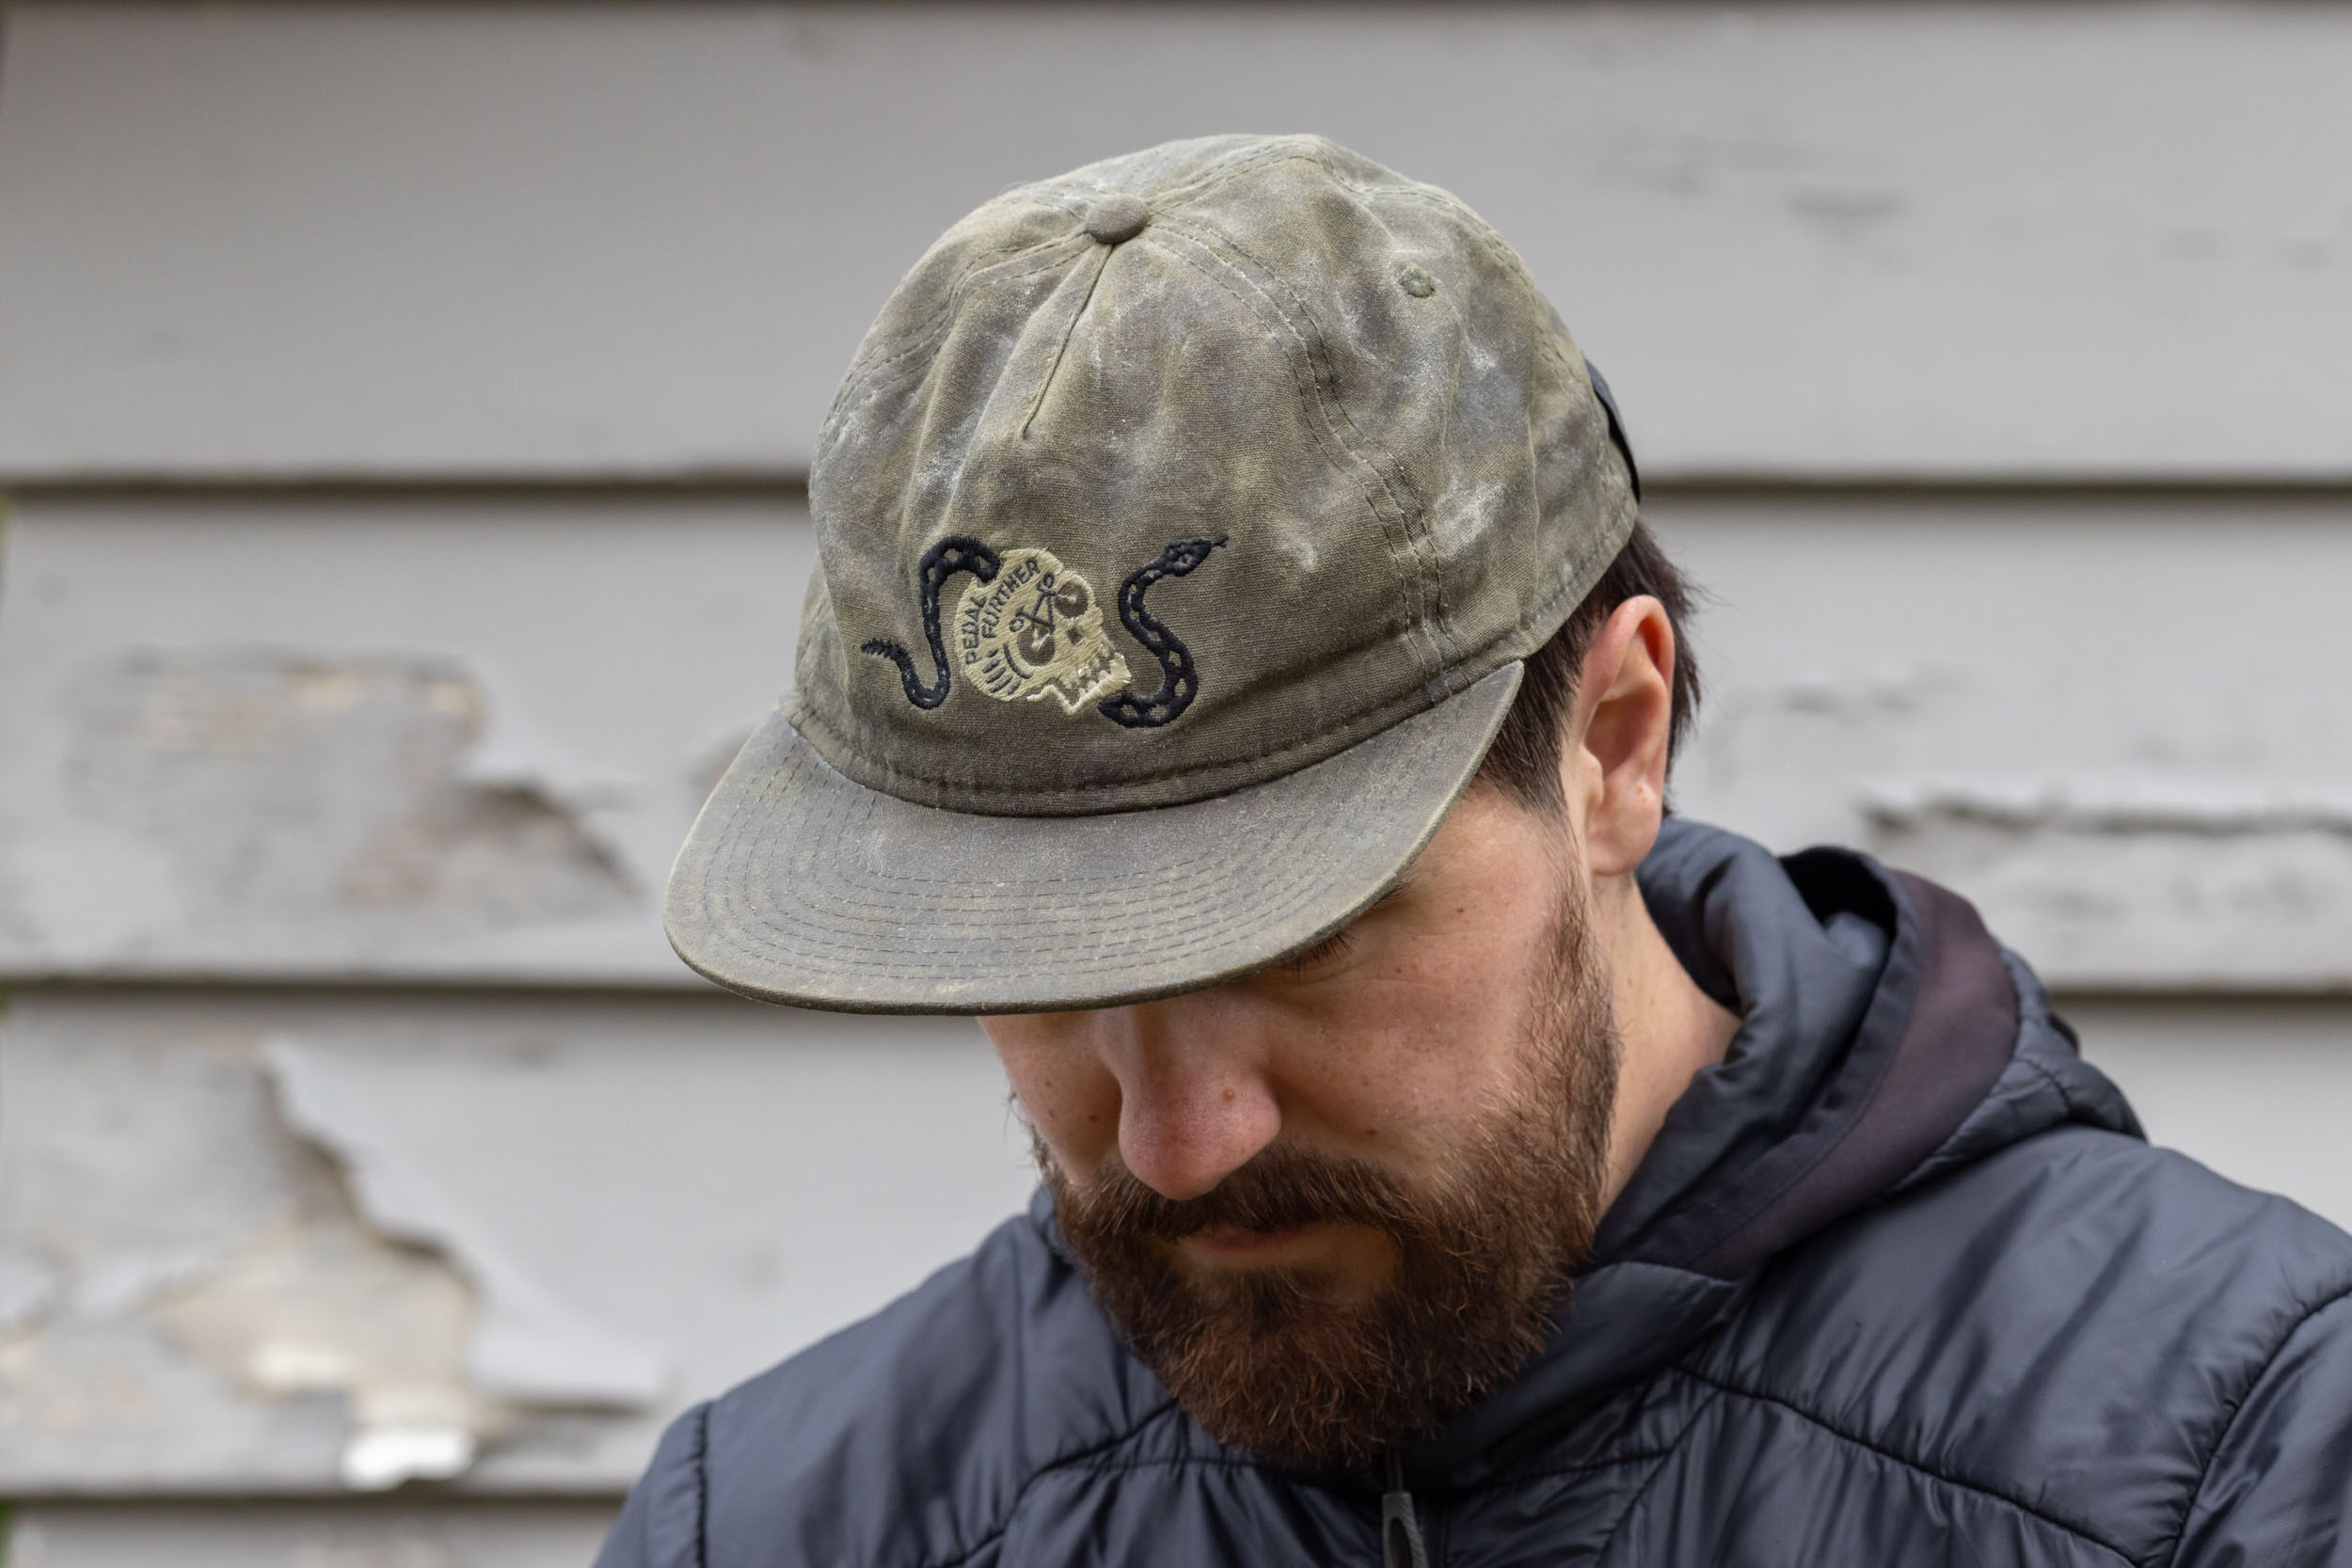
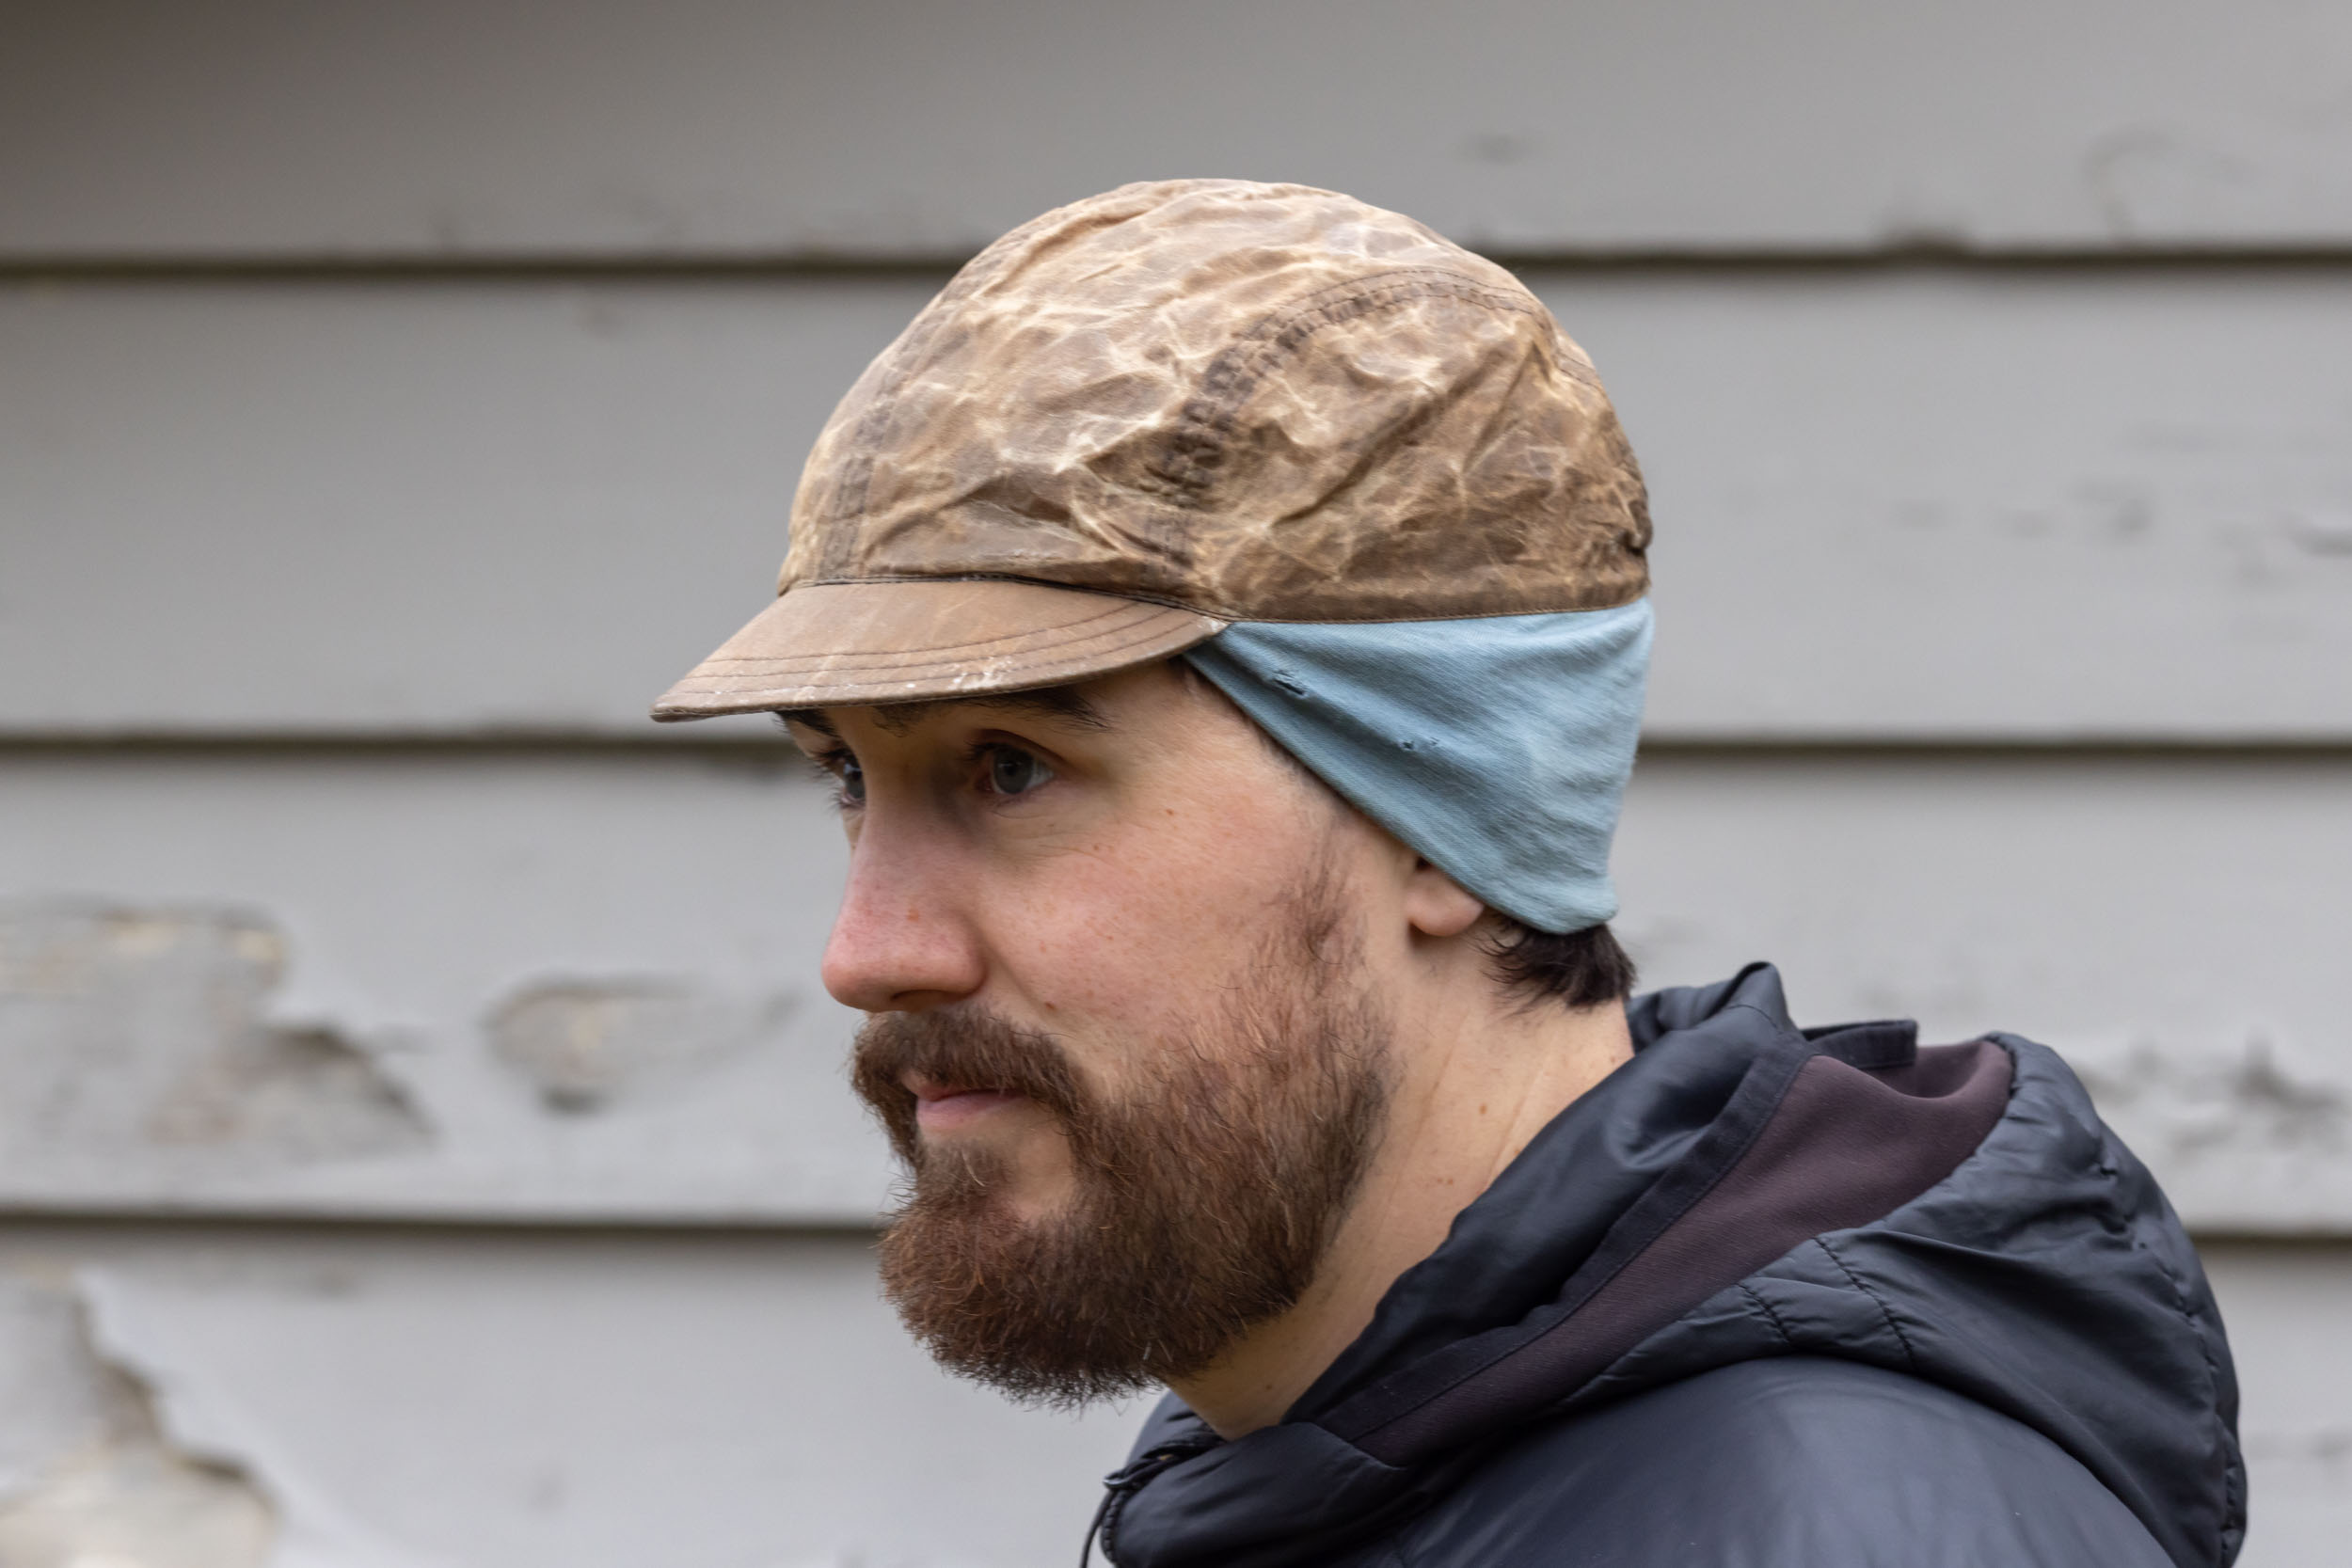
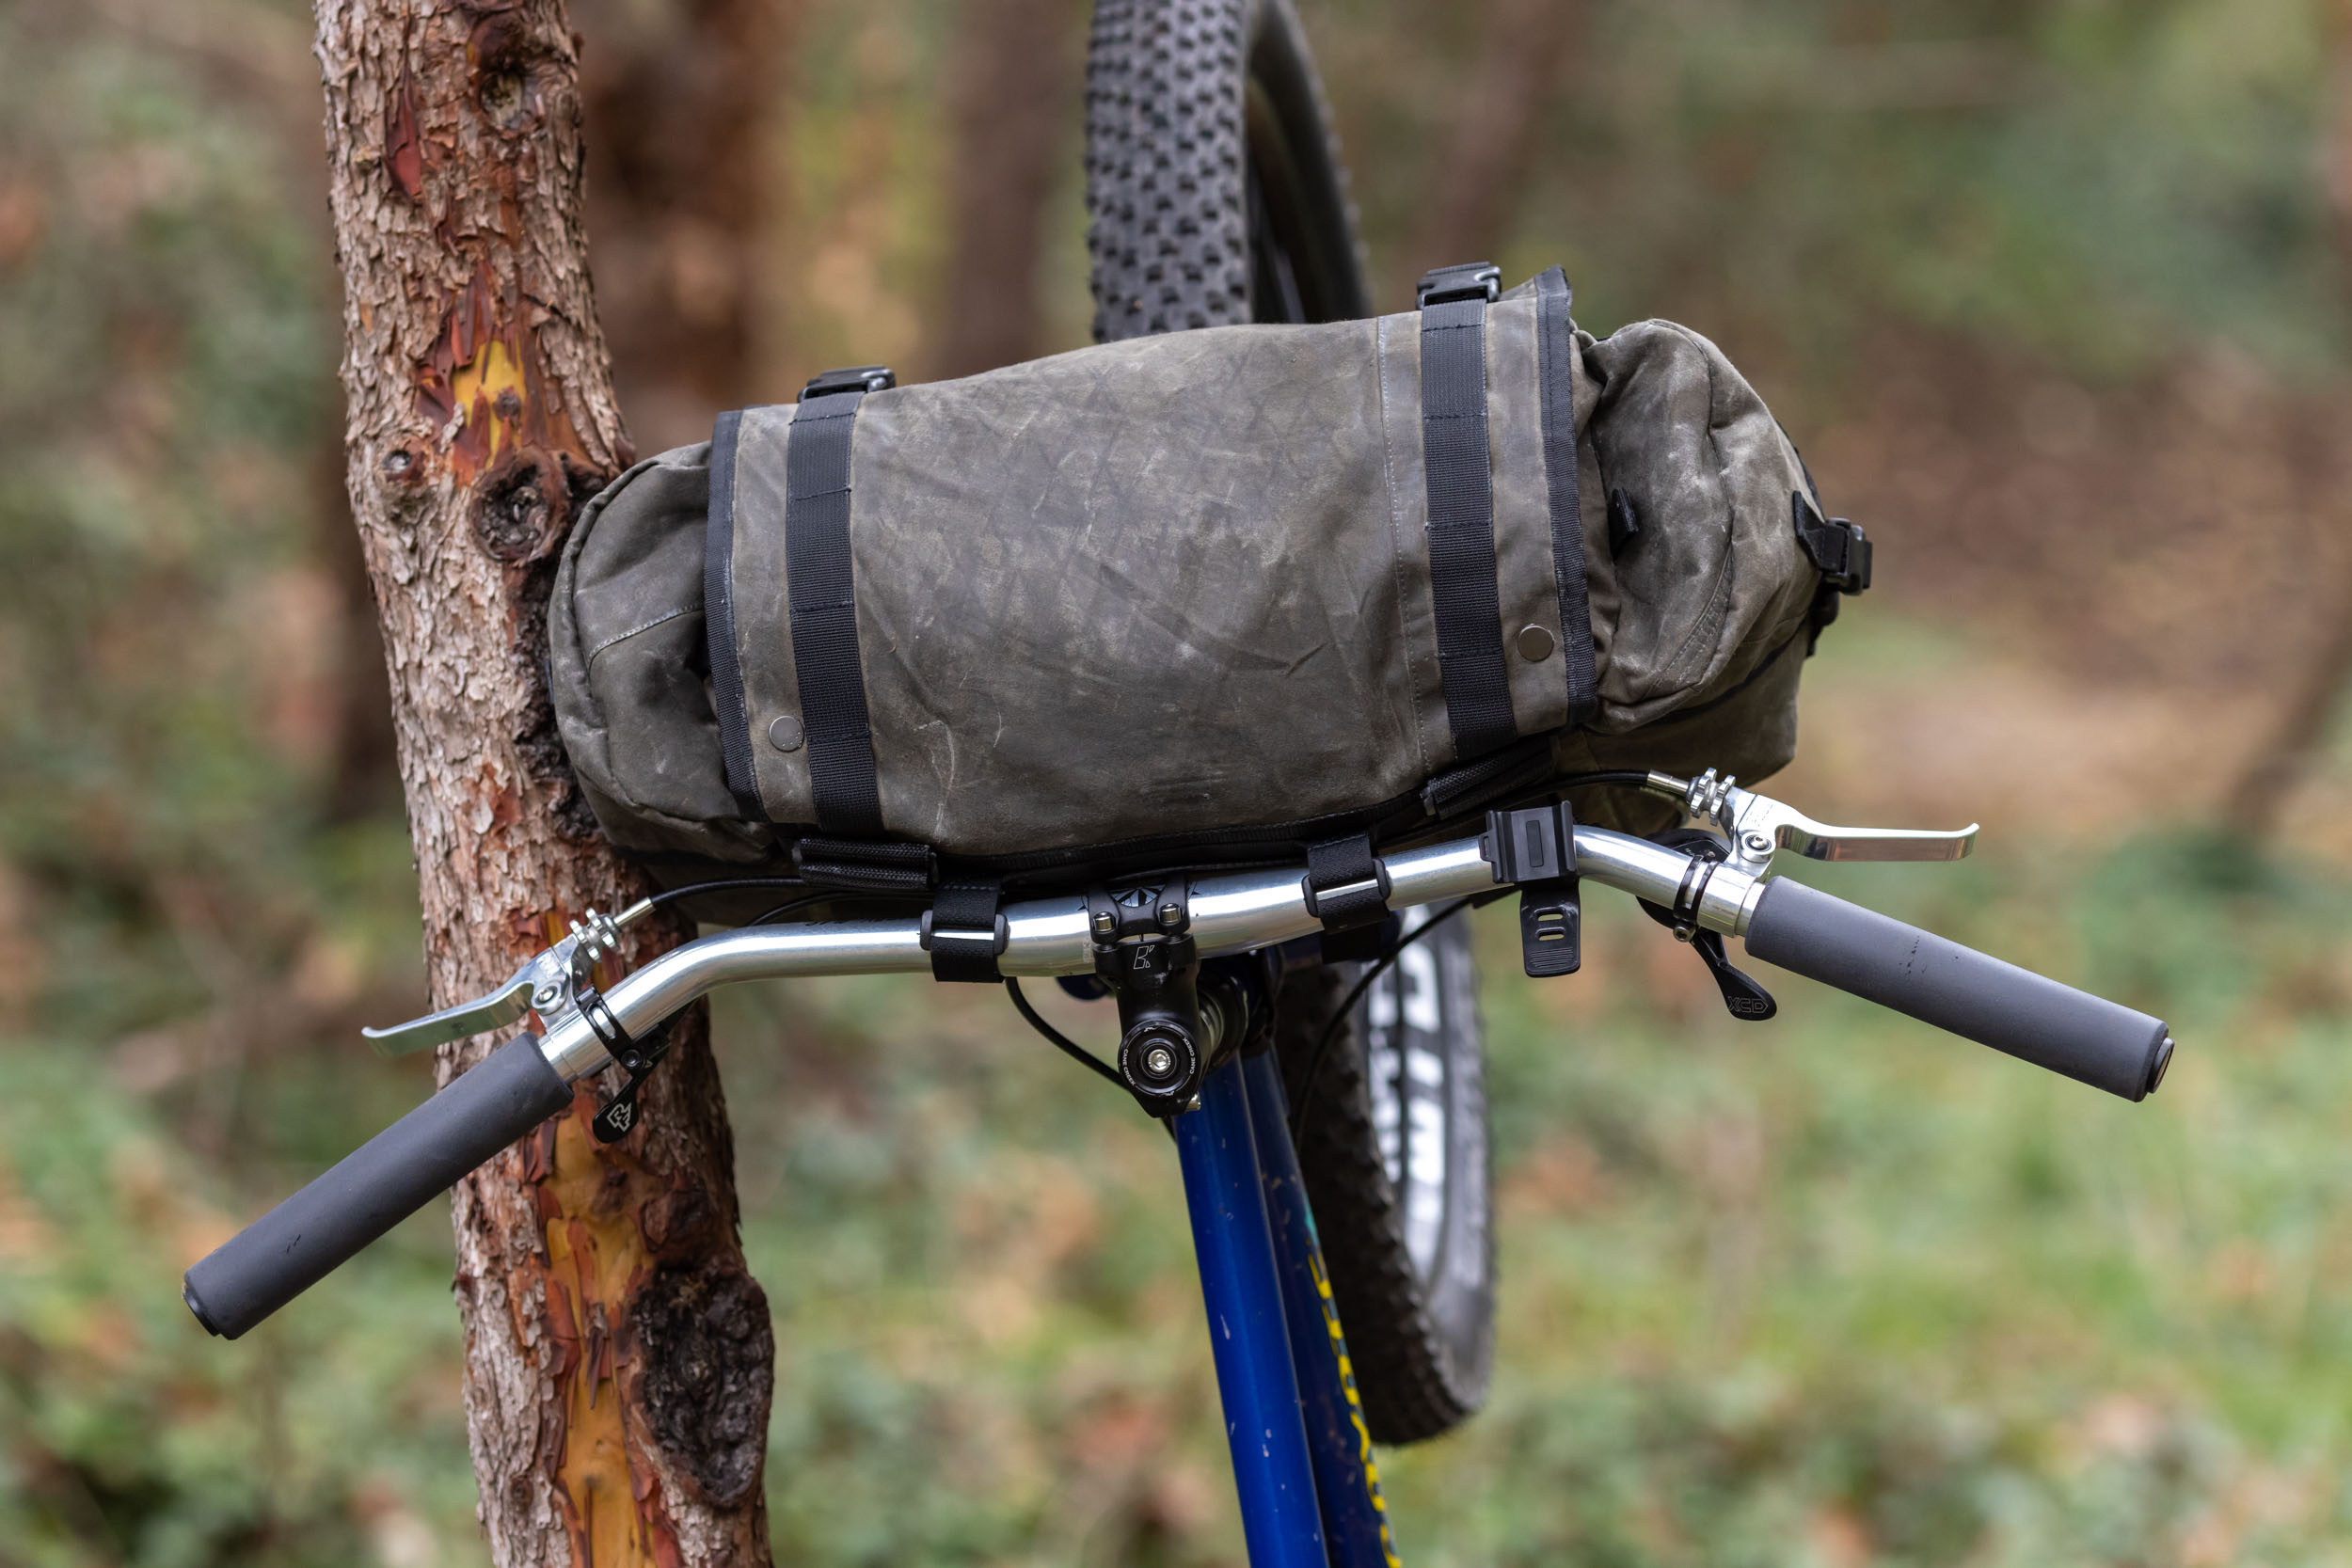
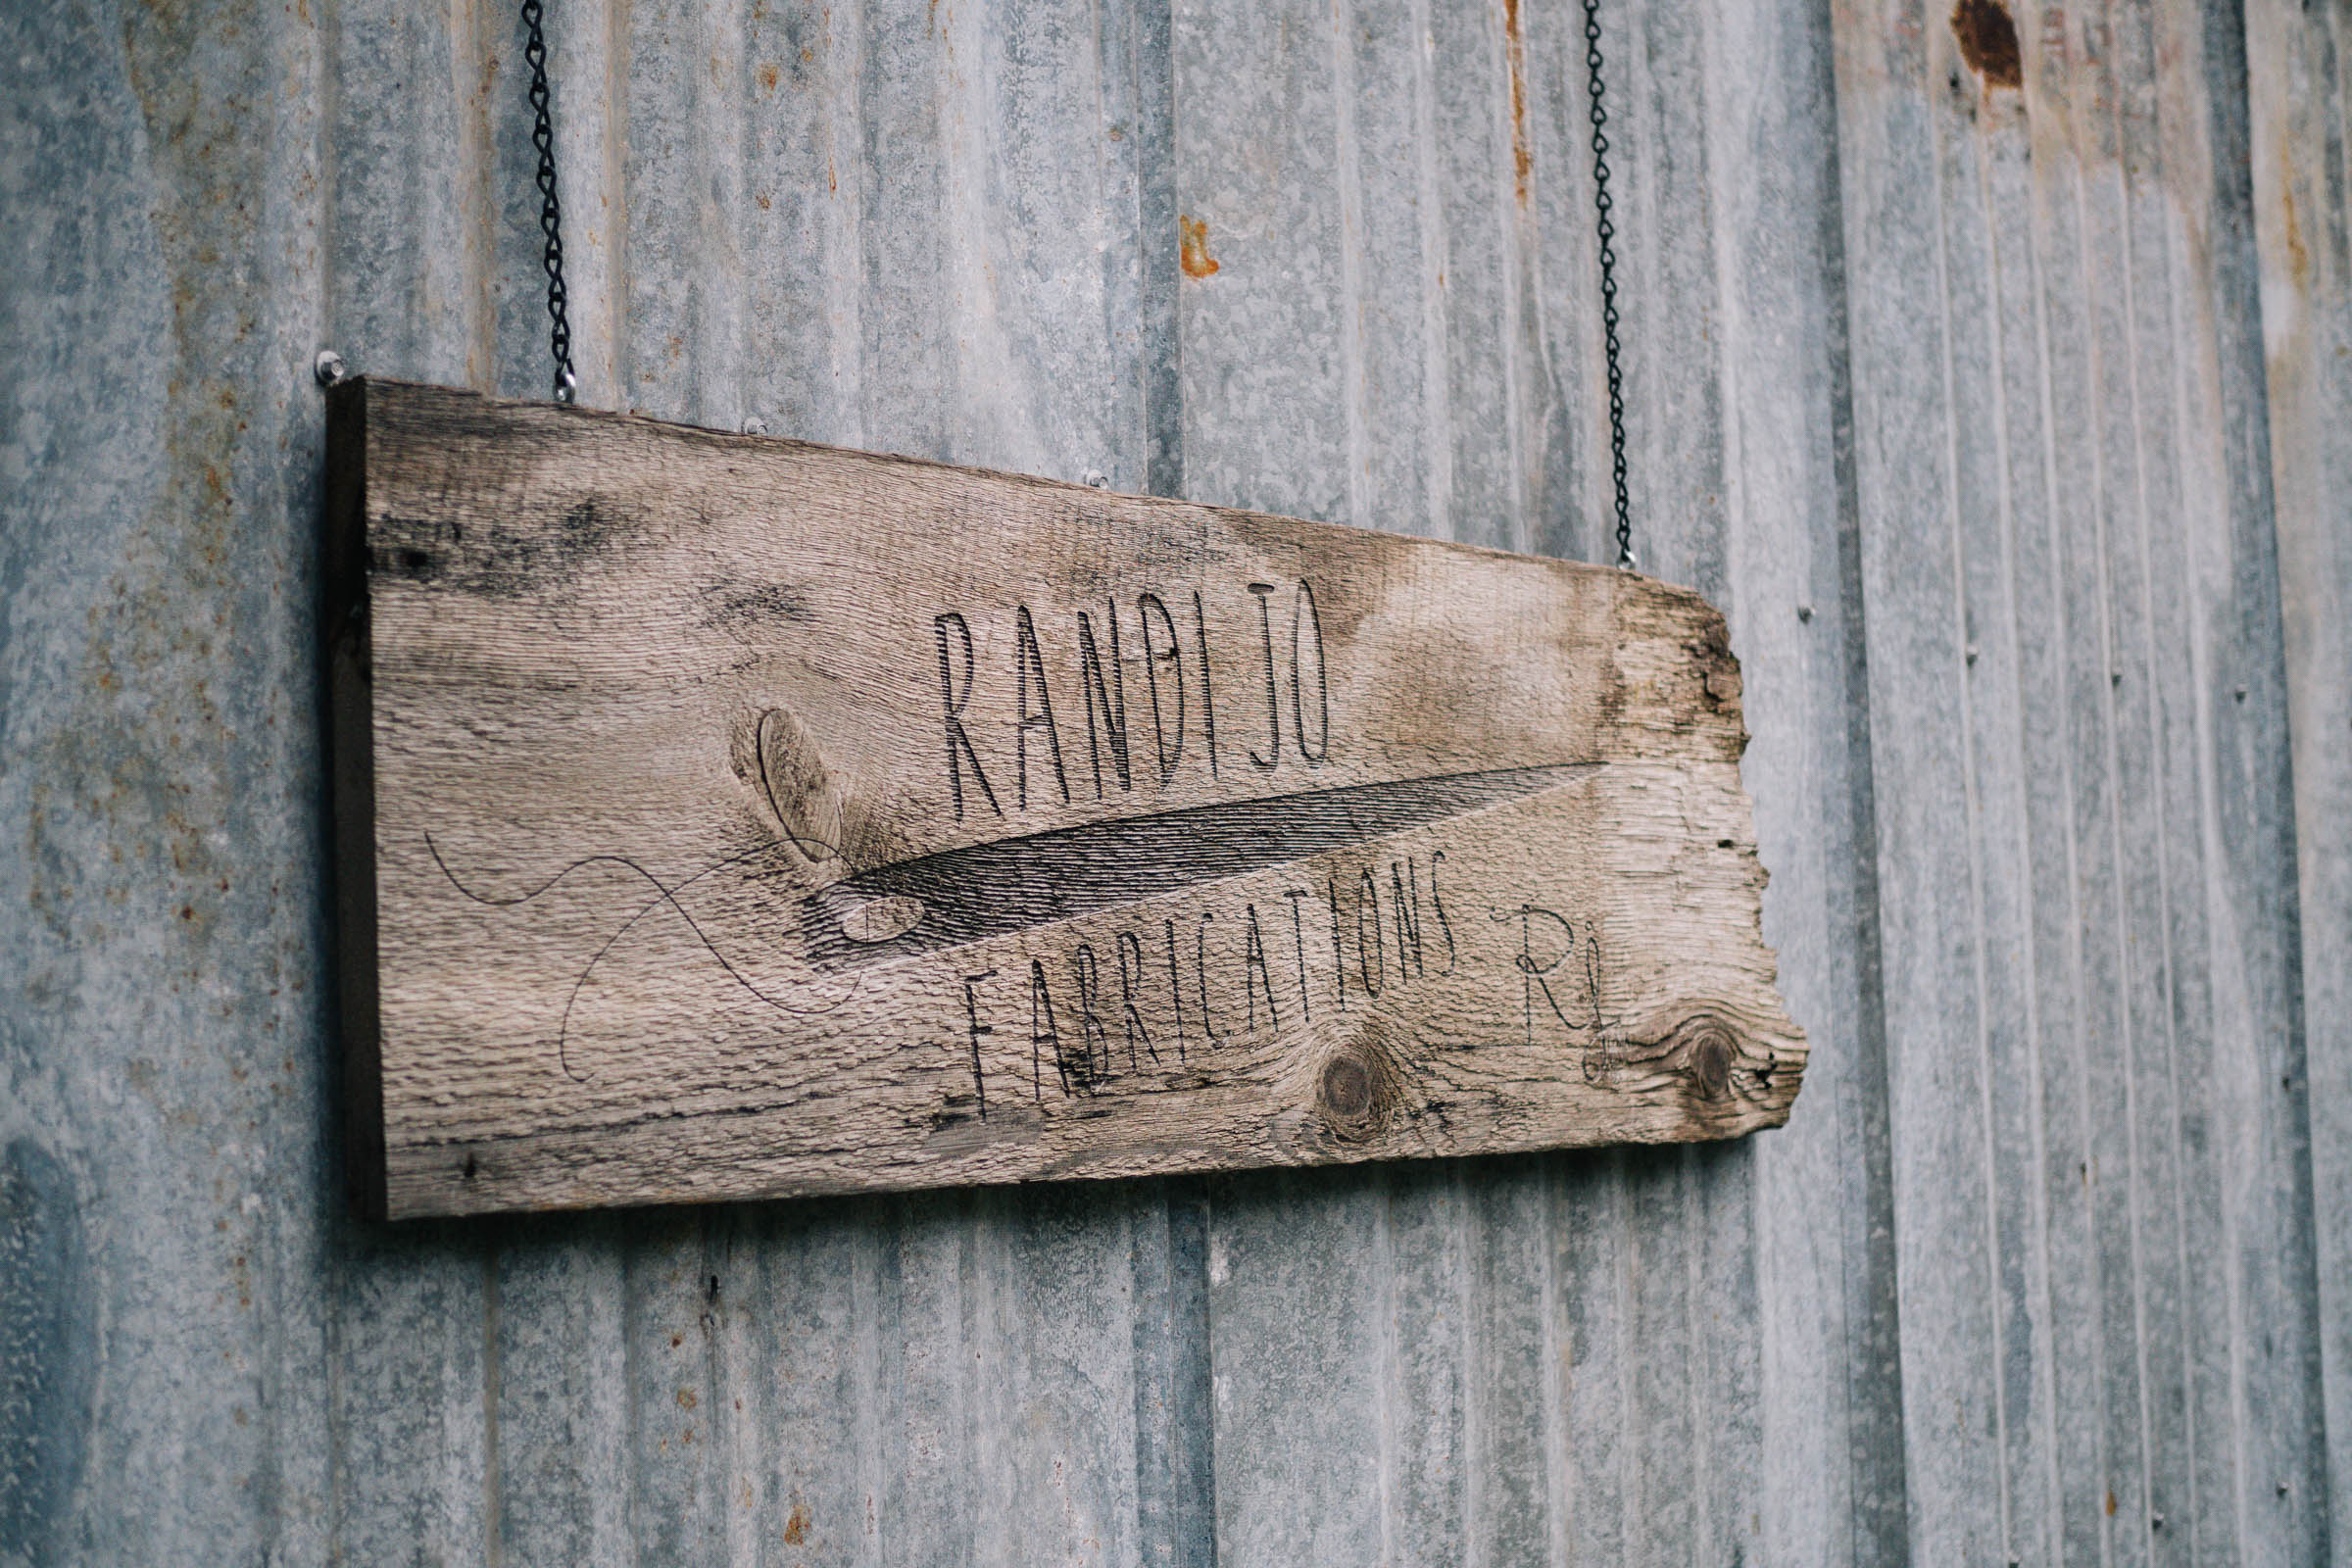
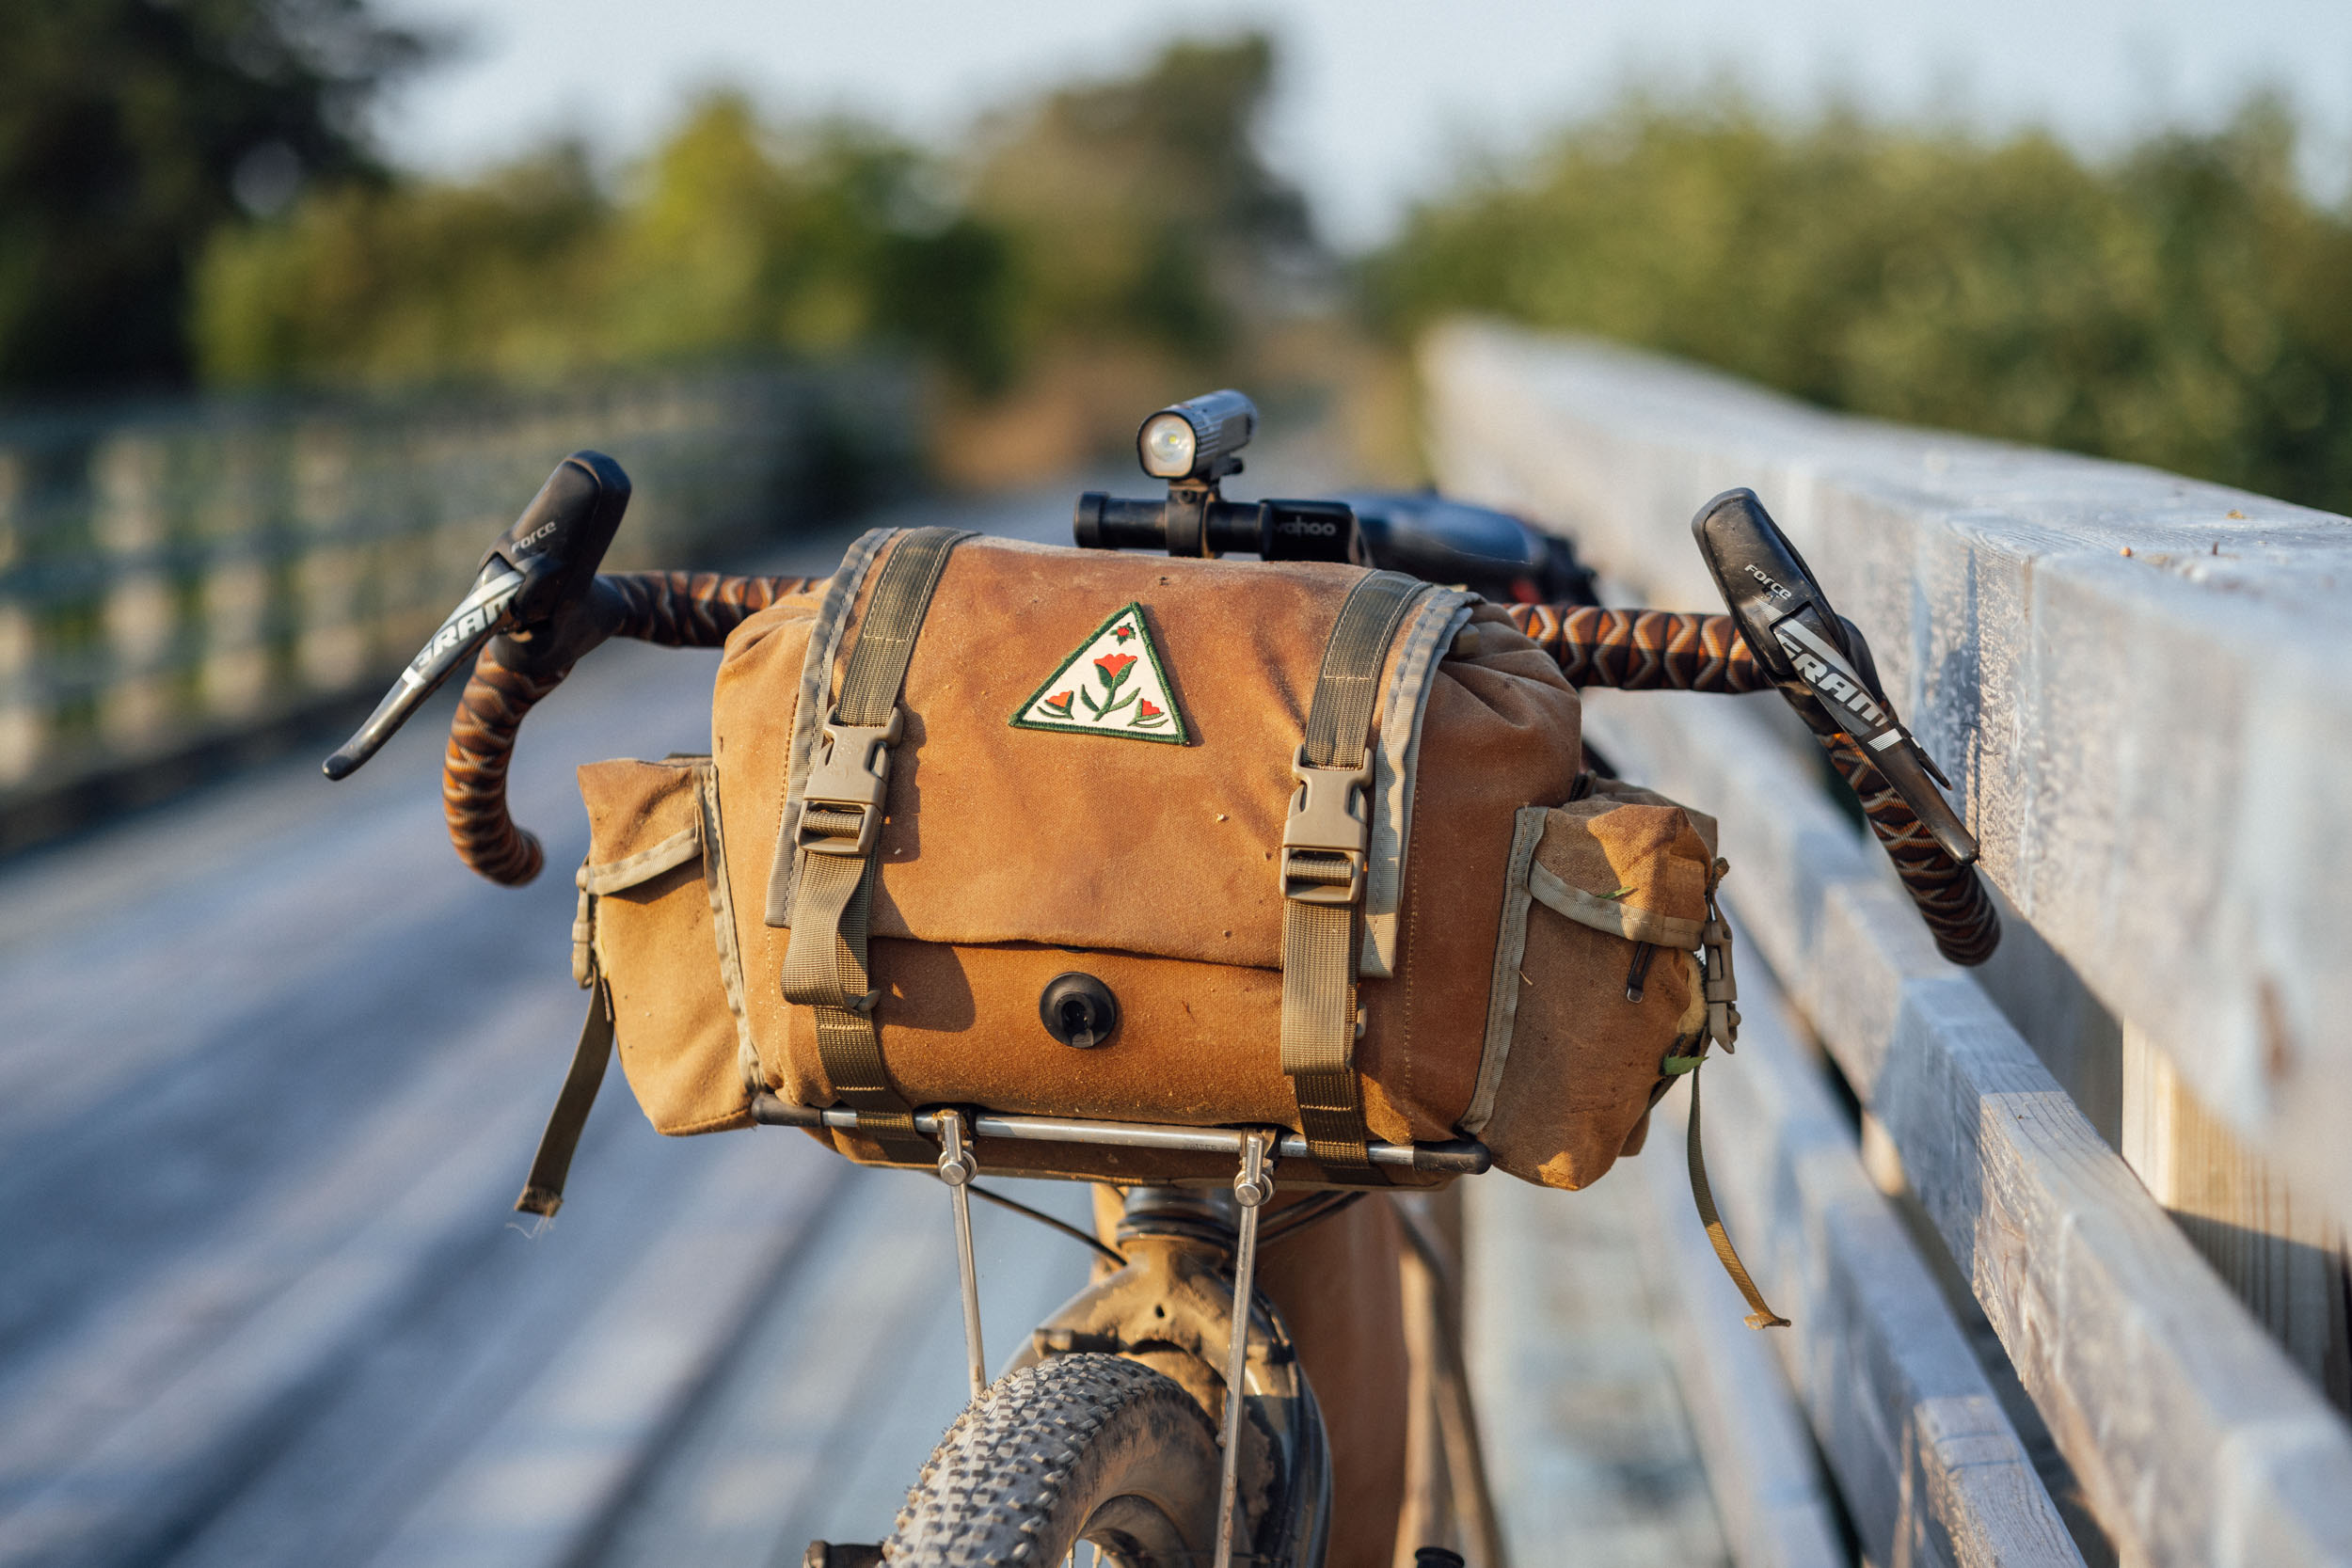
I’ve been meaning to re-wax a few of my prized Randi Jo Fabrications pieces, including a well-loved Bartender Bag and a waxed canvas cycling cap. Both have seen hundreds of hours of use, and I haven’t treated them with a fresh coat of wax since I originally purchased them years ago. Having just received some fresh waxed canvas mini panniers to test and purchasing a limited edition handlebar bag from Buffalo Bags made from recycled vintage military tarps, I figured it was about time to dig and learn how to wax canvas. I am by no means a waxed canvas expert but I’ve spoken to a handful of bag makers, researched, learned as I went, and feel confident that this guide will serve as a good starting point for anyone who is waxed canvas curious.
What and When to Wax
Before you go waxing every bikepacking bag in sight, it’s important to understand where wax does and doesn’t belong. Generally speaking, fabrics with a high cotton blend tend to be great for waxing. This includes denim, canvas, and most cotton/synthetic blends. The key is using fabrics that can soak up the wax and aren’t treated with another waterproofing or water-resistant finish. With this in mind, treating fabrics such as X-Pac (which has a waterproof, laminated construction) and other synthetic fabrics isn’t recommended as they will have a tough time absorbing the wax or their other properties will be compromised during the waxing process. I was curious where cotton-faced X-Pac laminates fit in, and the experts at Randi Jo Fabrications, who answered a number of my questions, said it would be okay as long as you’re careful when applying heat given its synthetic backing.
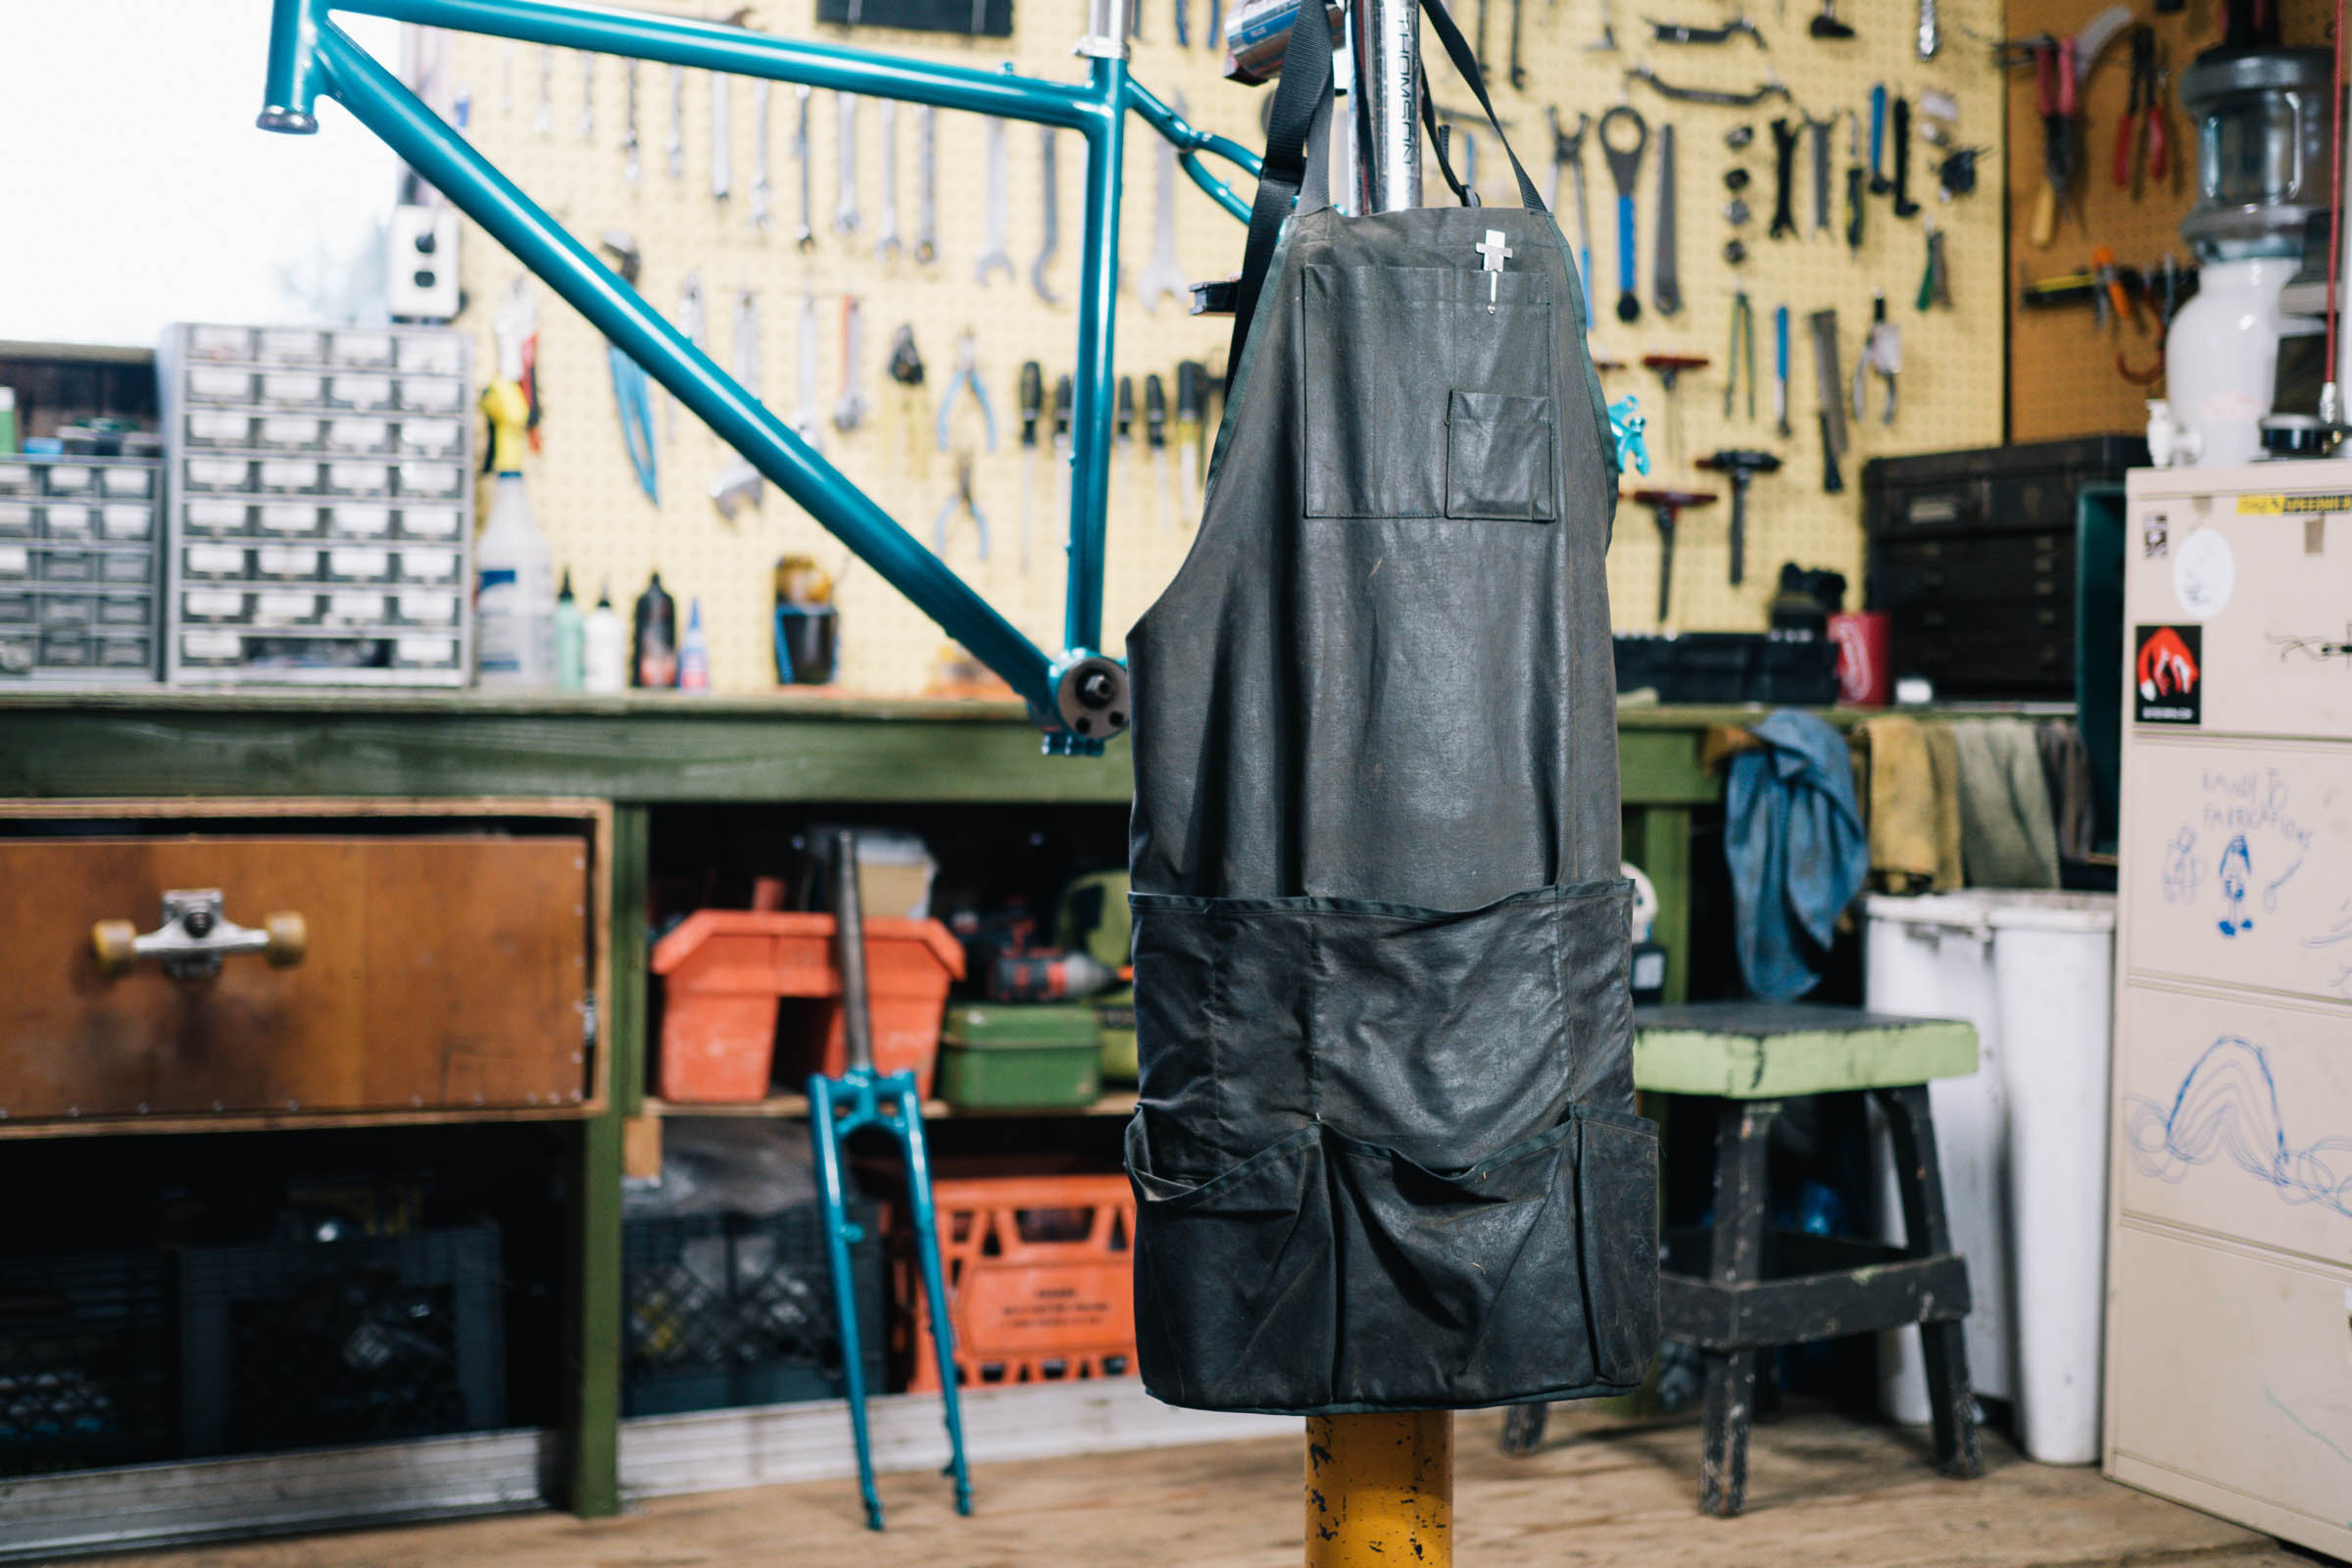
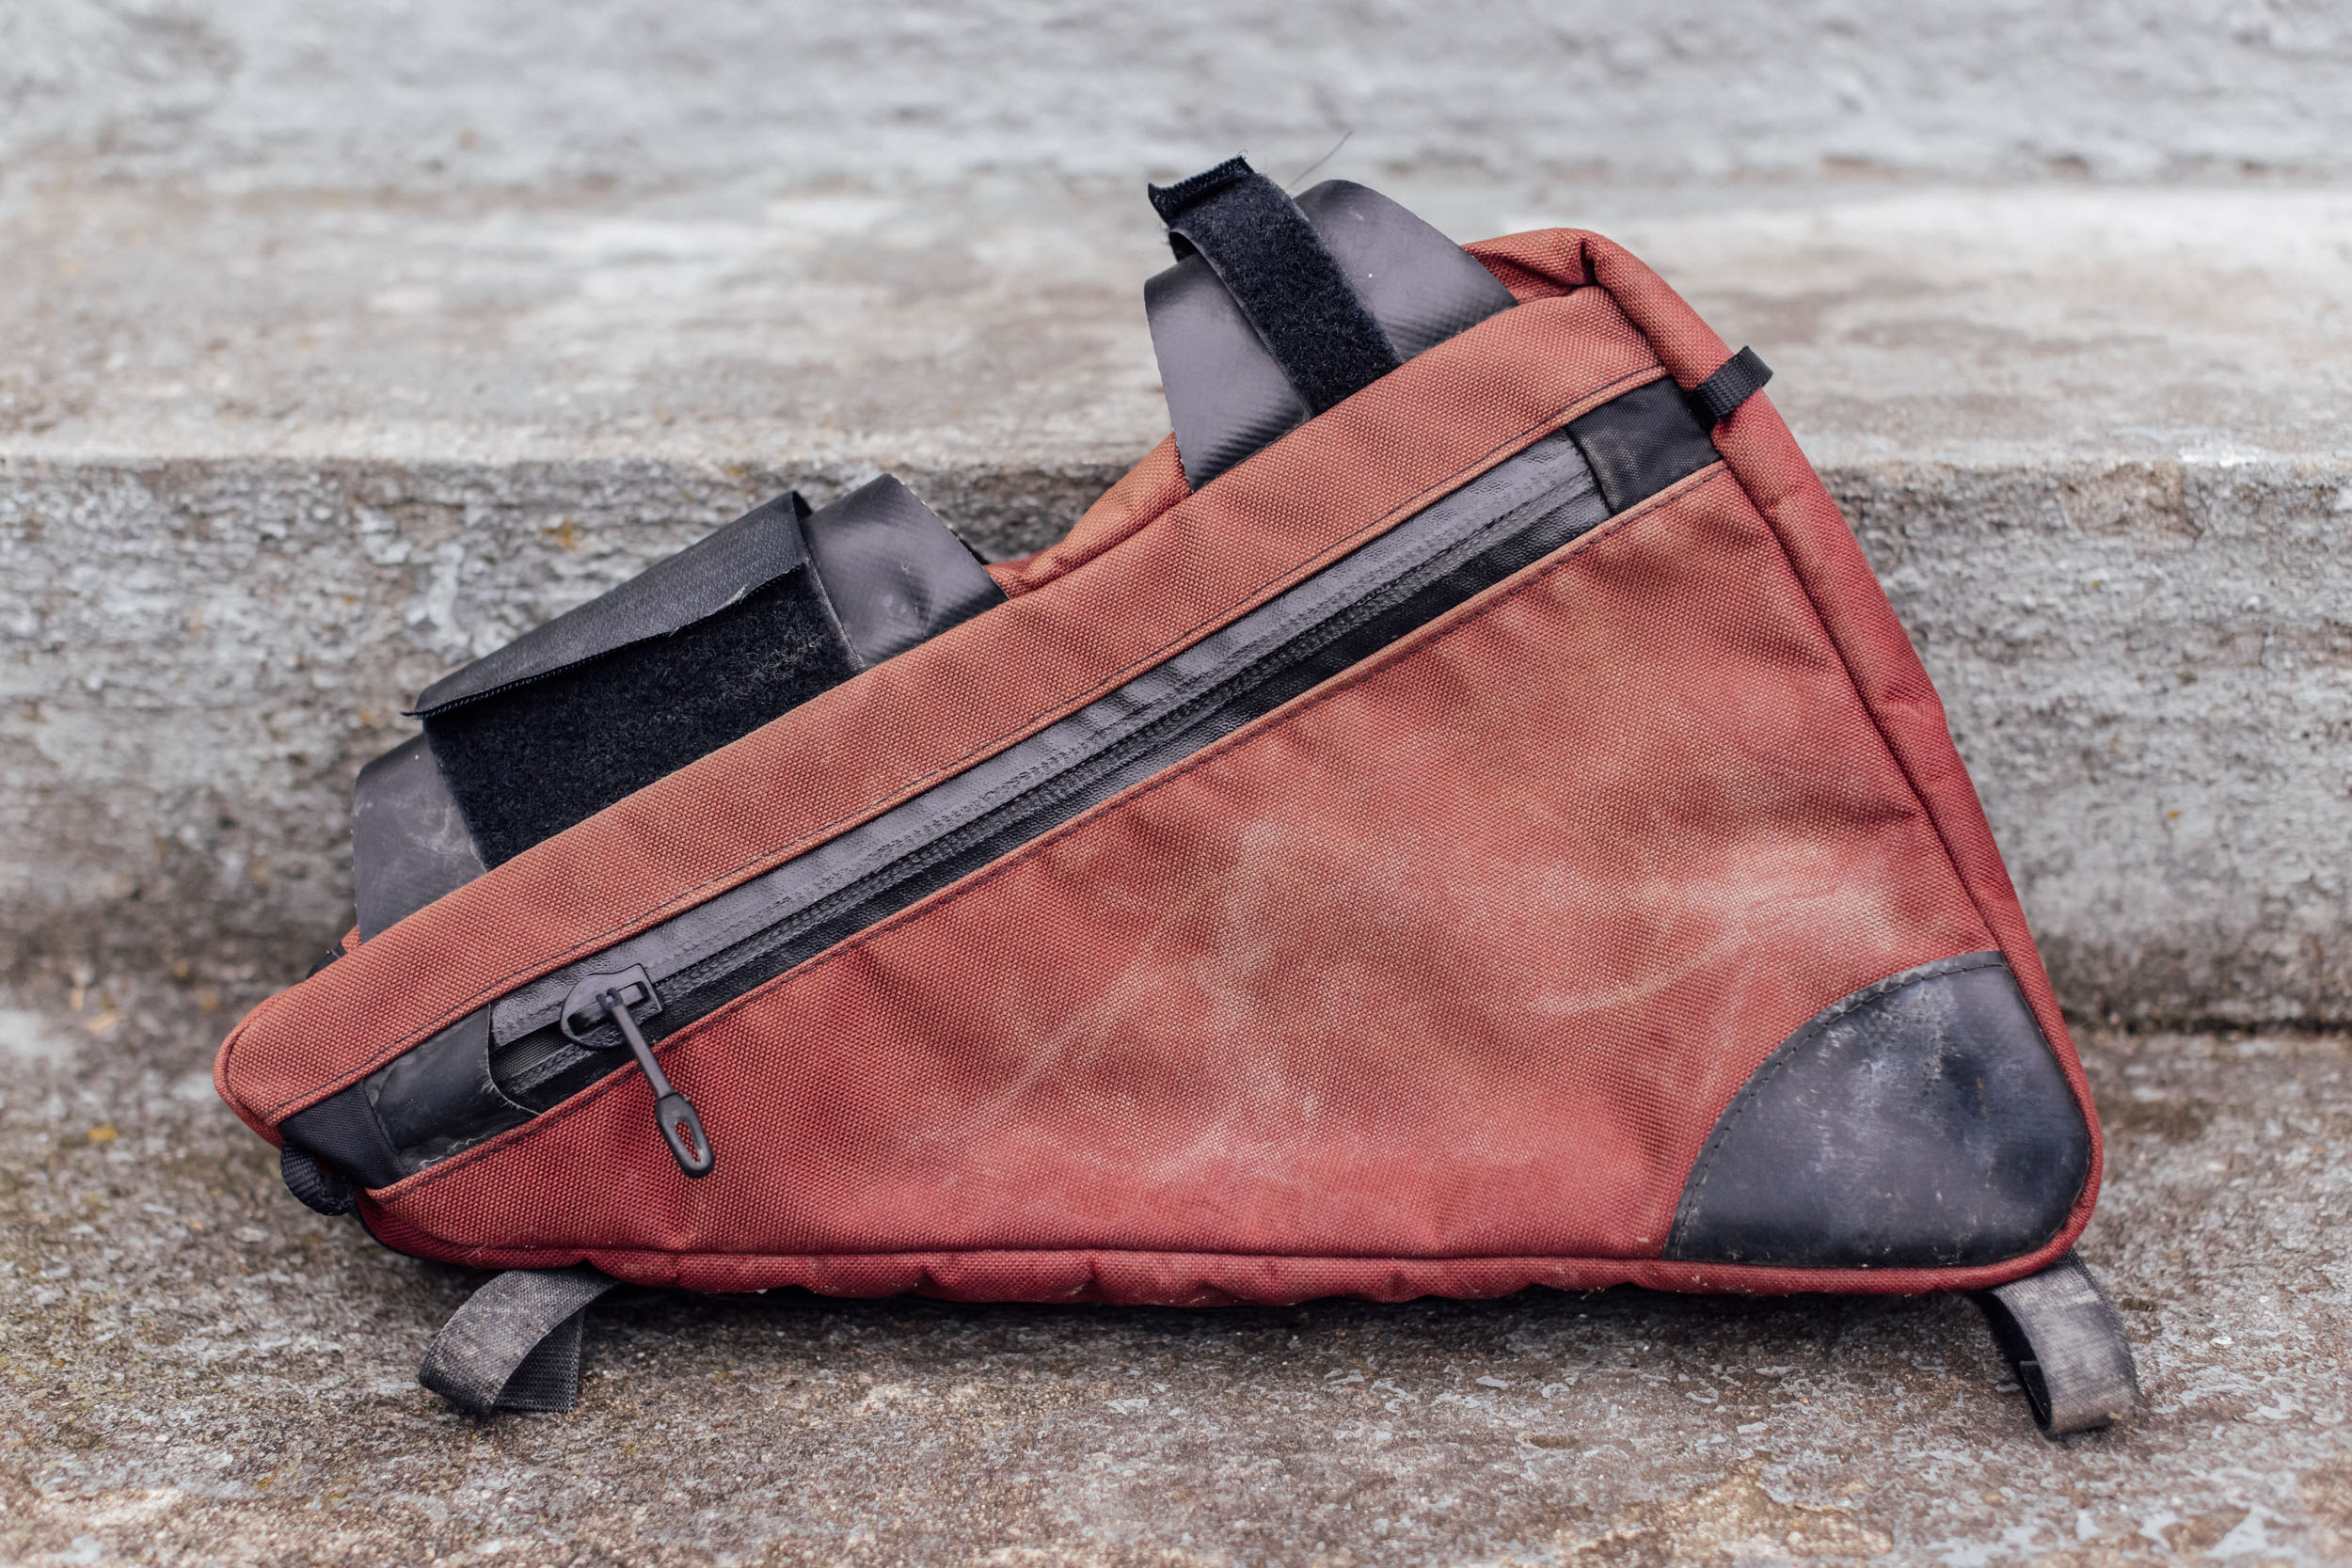
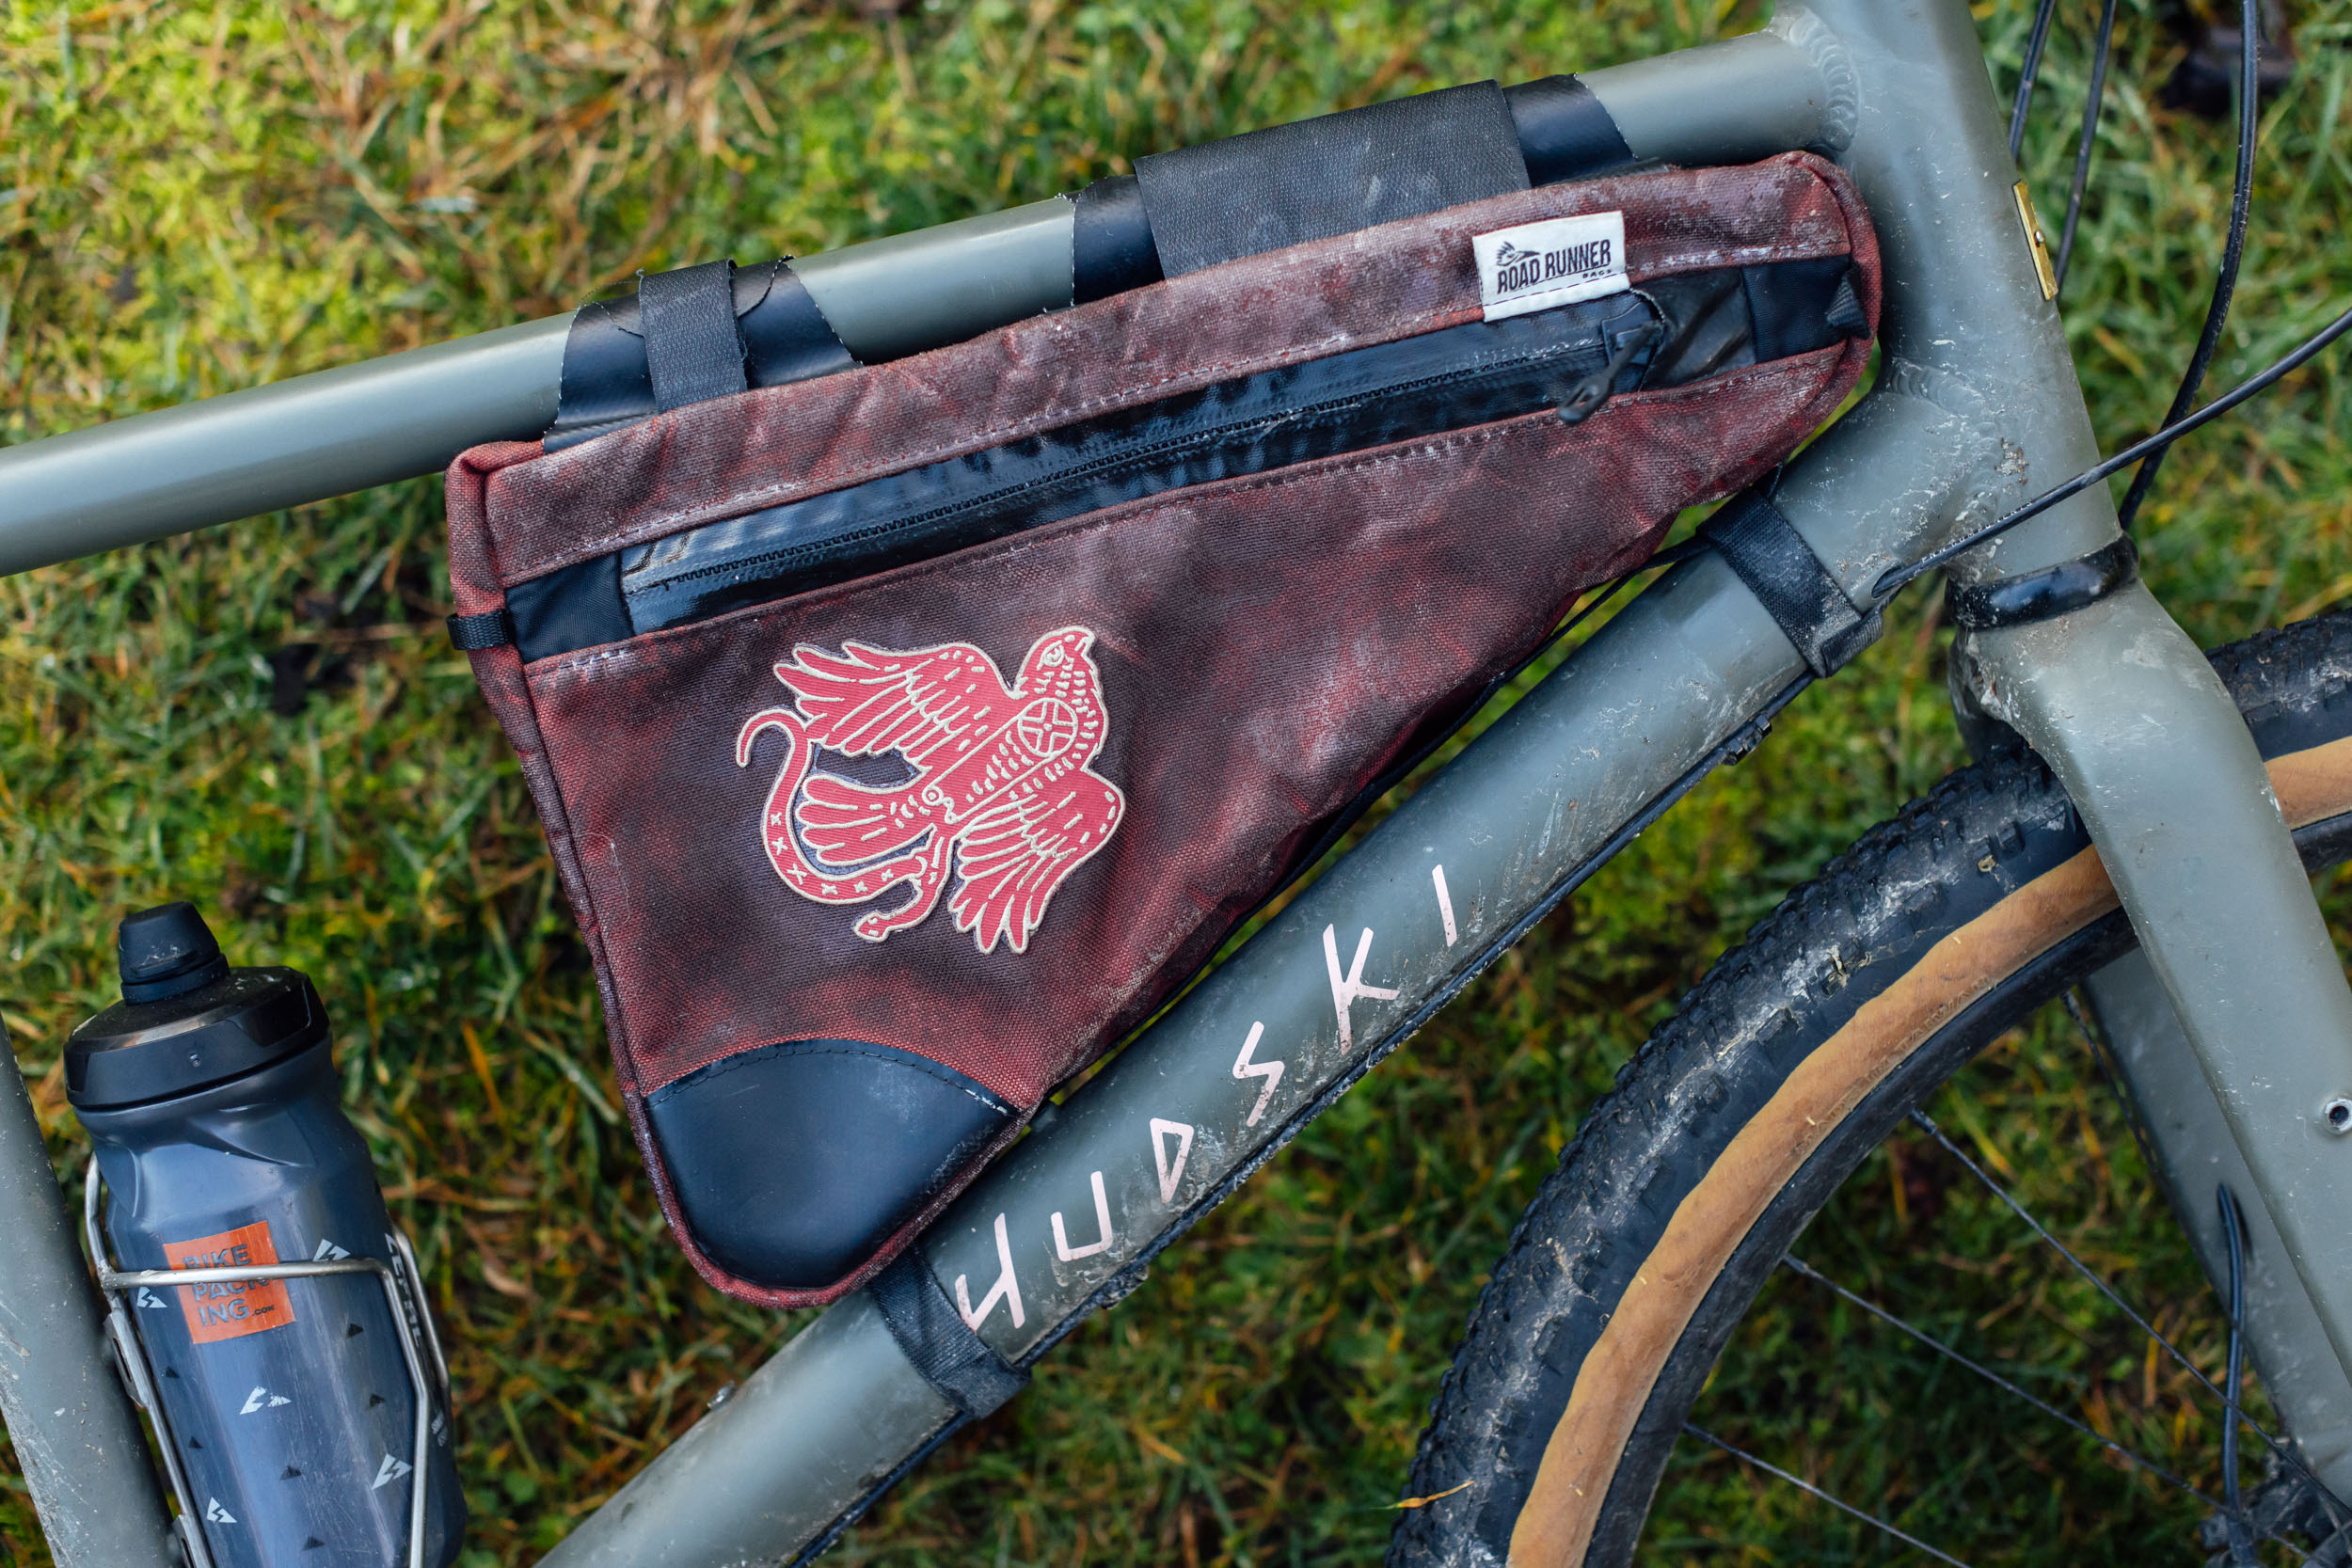
I also originally figured that Cordura would be off the table due to its durable water repellent (DWR) finish, but then I found Ron’s Bikes’ line of waxed Cordura bags. Ronnie Romance shared that the 90% cotton/10% nylon mix of Cordura has a slightly more coarse weave than waxed canvas and has proven to be more rot and mildew resistant. Ronnie said if it came in more colors, they’d probably make everything out of waxed Cordura. With that said, it’s probably a good idea to avoid waxing new Cordura fabrics that still have a DWR finish and repel water effectively. Older Cordura bags, like my Road Runner Mountain Wedge Frame Bag with a worn-out DWR coating, pictured below, are perfectly suited for a day at the DIY wax spa.
Having seen Australia’s obsession with canvas first hand earlier this year, I reached out to Tia at Framework Designs to learn about Dynaproofed Canvas, the canvas she uses in many of her waxed canvas bags. It’s not technically waxed canvas, but it does have a water-based waterproof-breathable coating that is also resistant to rot, mildew, and UV. According to Tia, once it starts loosing its waterproofness, it can be treated with beeswax, plant-based wax, or waterproofing sprays.
I started down this rabbit hole after noticing my canvas Randi Jo Fabrication Bartender Bag and cap were looking dried out and weren’t repelling water like they did when they were new–two telltale signs that your gear needs to be rewaxed. I could have purchased some ready-made wax, but I thought I’d seize the opportunity to make some of my own, which turns out to be incredibly simple.
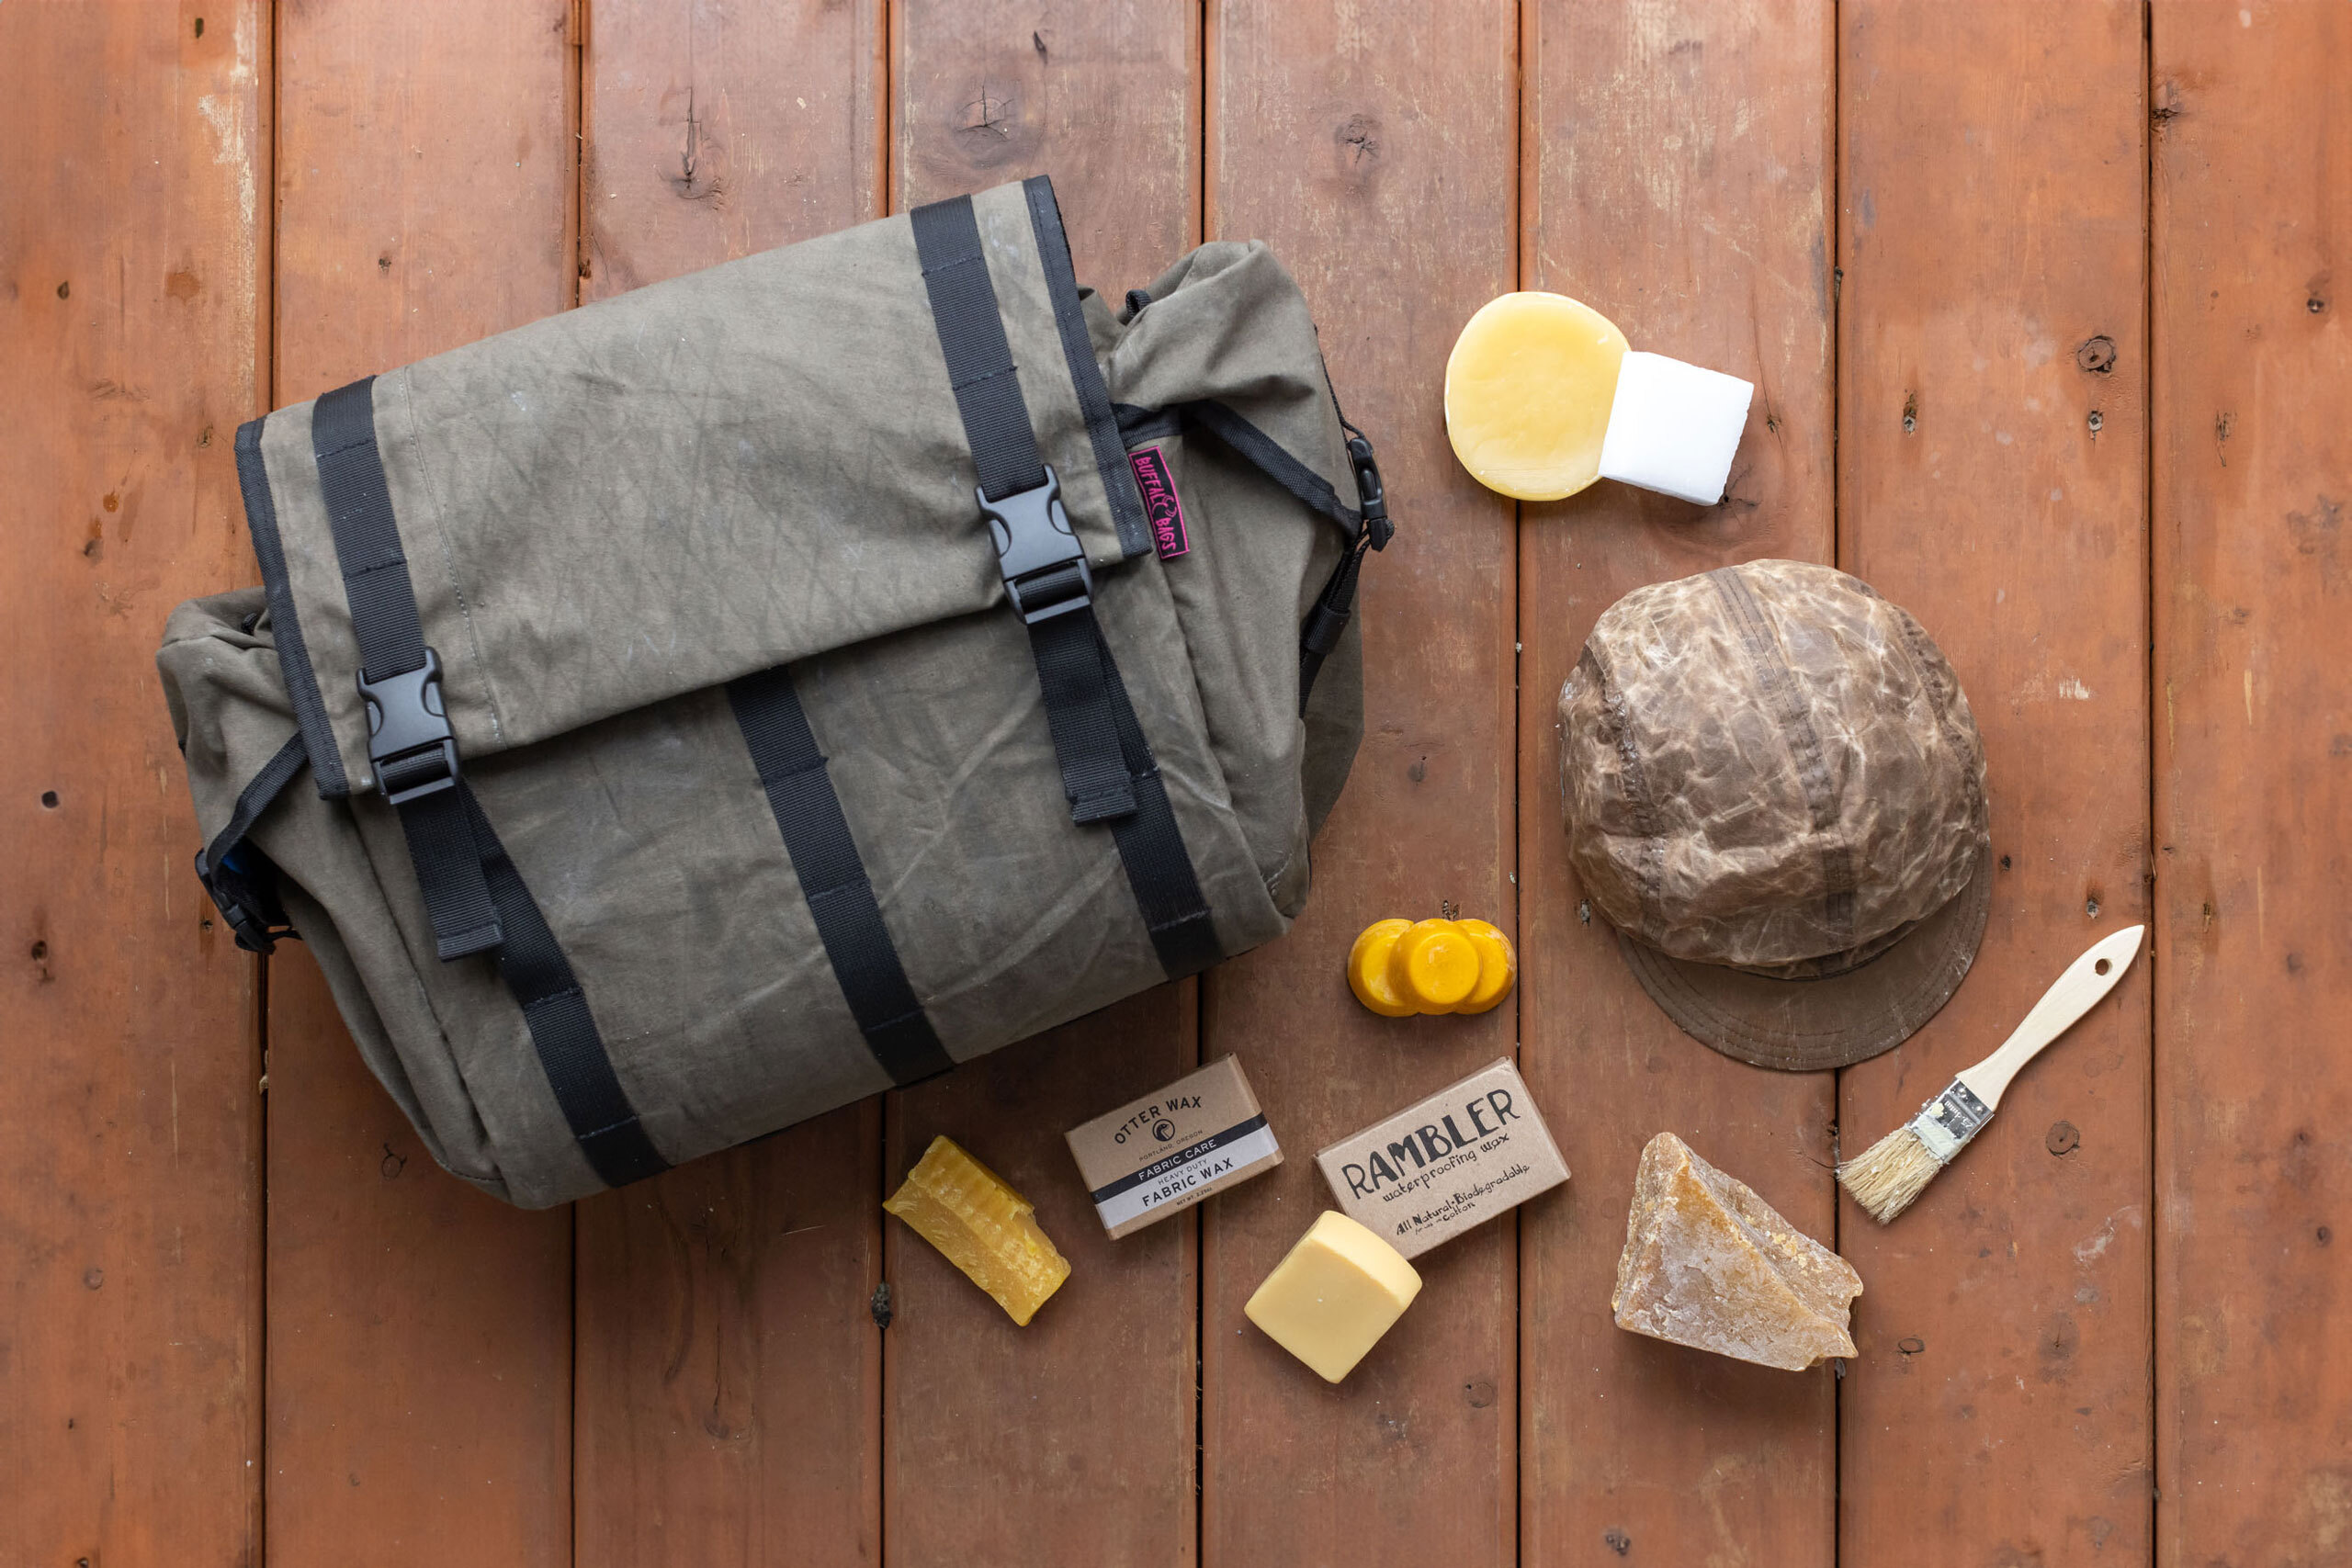
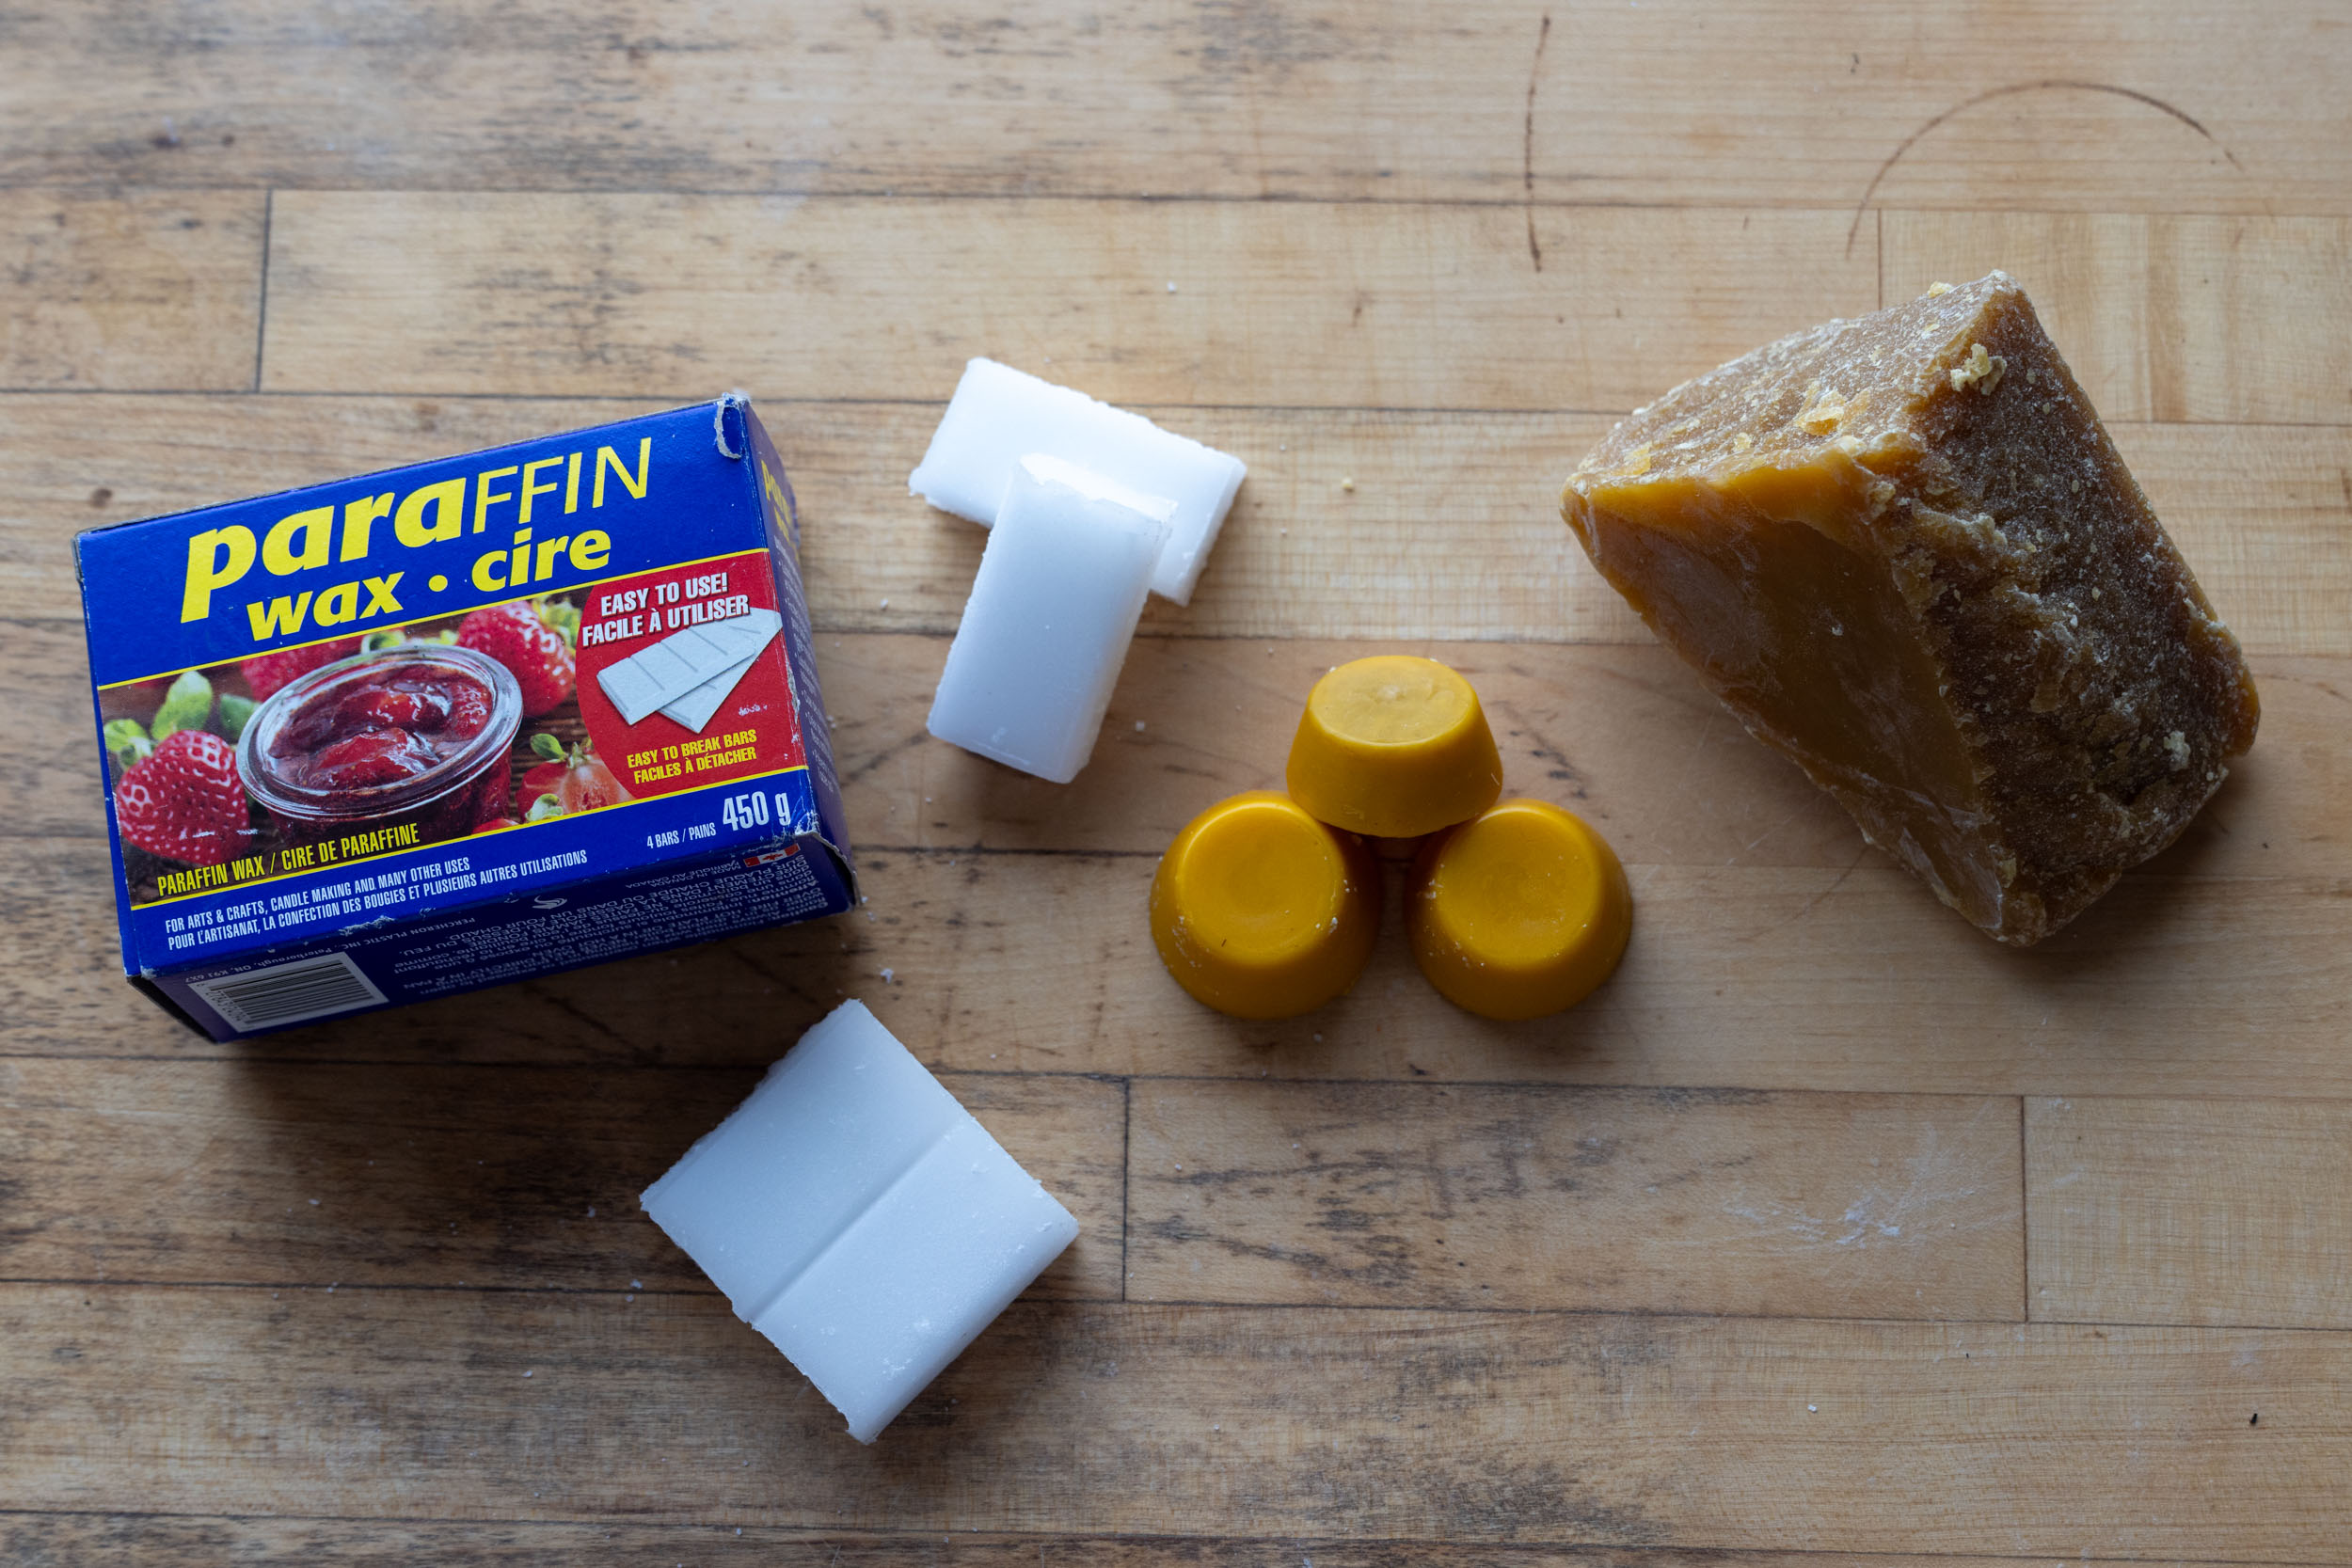
Paraffin, Beeswax, and Microcrystalline
Before we dive into a DIY wax recipe, it’s worth a brief explanation of the three main waxes used to treat canvas and other fabrics. Paraffin wax is one of the most popular options as it is cheap, easy to find, and clear, so it doesn’t discolor the fabric. It’s also derived from petroleum and has been known to contain carcinogens, so it’s important to work in a well-ventilated area when using it. There’s also food-safe paraffin wax made from vegetable oils, palm oil derivatives, and synthetic resins, which is technically edible and much safer to work with. It’s worth noting that palm oil has a scandalous past, including labour exploitation on the plantations where it is grown. Beeswax is 100% natural and more malleable than paraffin, but it has an odor and is more expensive. It’s also hard and crumbly, so it doesn’t work as well on its own. Microcrystalline is sometimes referred to as “synthetic beeswax” because it’s soft, durable, lightweight, flexible, and very hydrophobic (repels water). However, it’s also a byproduct of the petroleum refining process, so while it has some of the most attractive properties, it’s generally not as popular as paraffin or beeswax. The most common DIY wax recipes use a blend of paraffin and beeswax, making it more cost effective and flexible (and less brittle) than using beeswax alone.
Kuba at Rambler Bags explained that most production waxes that use oils do so to soften up the beeswax and paraffin, which are both quite hard. But, integrating oils into your DIY wax recipe deserves special attention. Kuba explains, “If you choose to use oil you should experiment with the types of oils you use and start with very low quantities. You should also be careful sourcing oils, as many that are suggested in wax recipes can be found in hardware stores, but as versions that contain chemical or heavy metal additives. Never make wax with any store bought material that has a VOC warning. (EX: traditional “oil cloth” waxes and finishes use a heavy amount of boiled linseed oil, a product made by boiling linseed oil. At the hardware store, there is a container called “Boiled linseed oil” that contains un-boiled linseed oil with added cobalt and/or manganese, as a cheaper way of producing a similarly drying product! It goes without saying, heavy metals have serious health effects that can occur via skin contact.”
How to Wax Canvas: Make Your Own Waterproofing Gear Wax
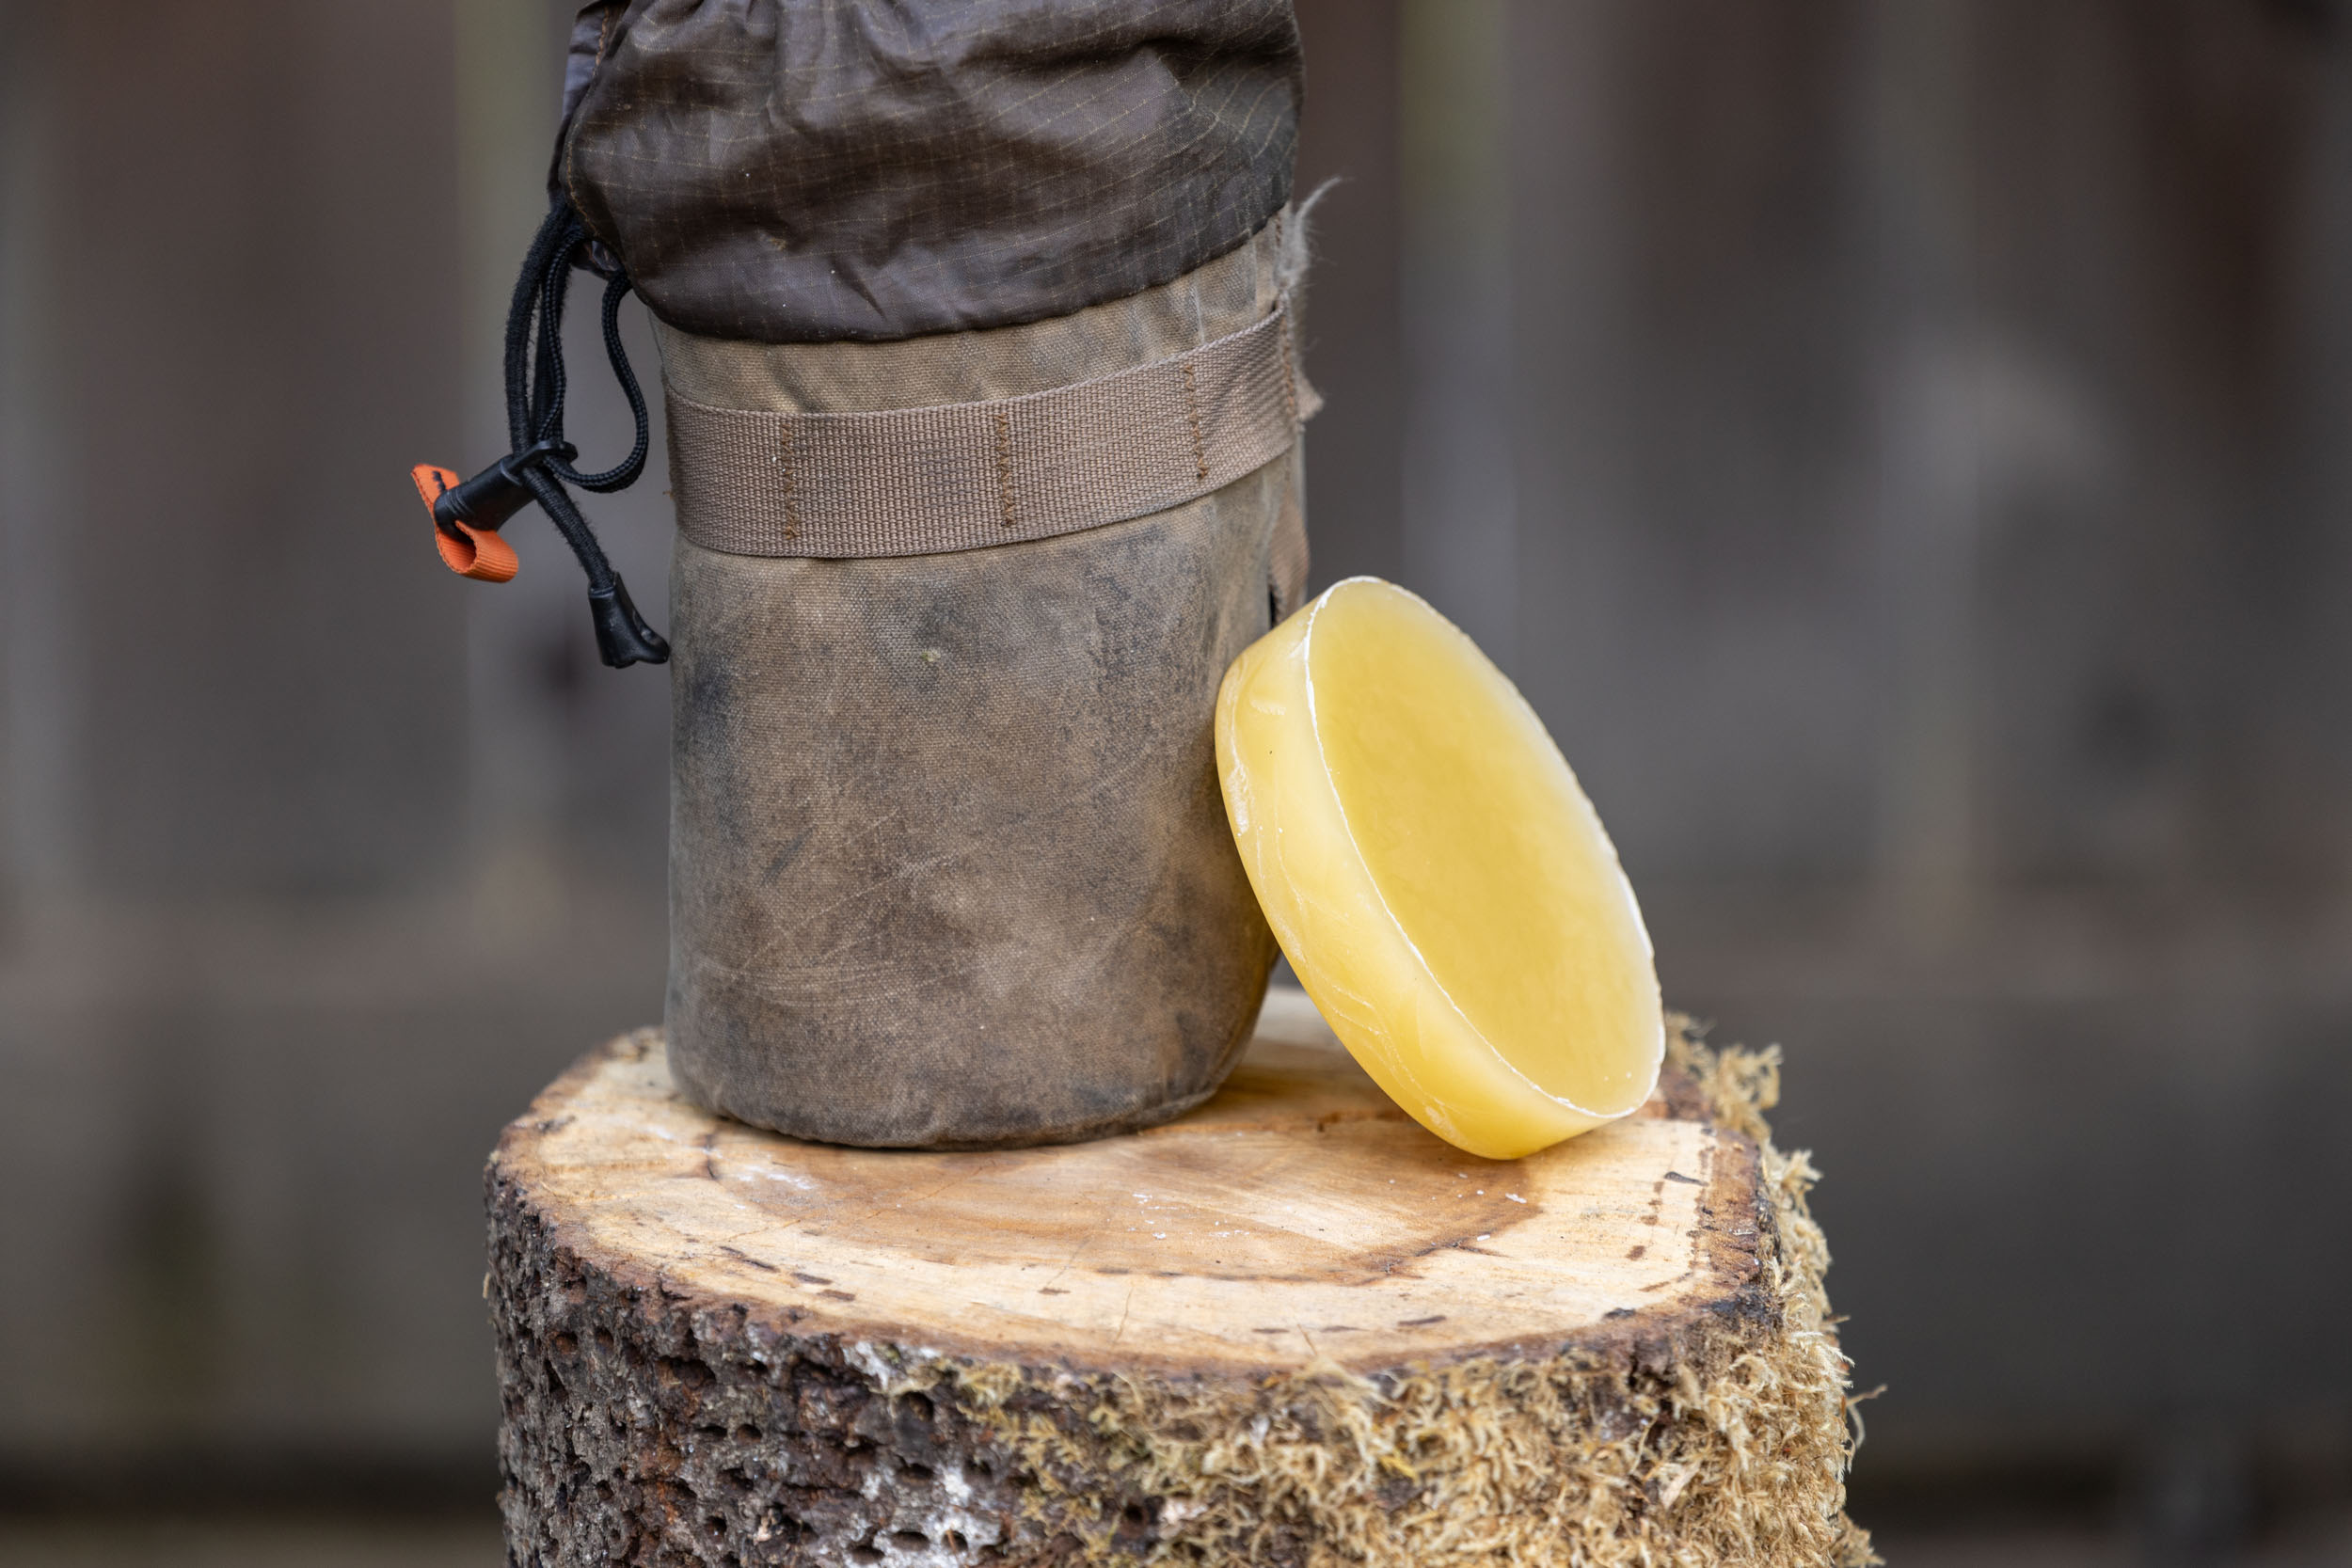
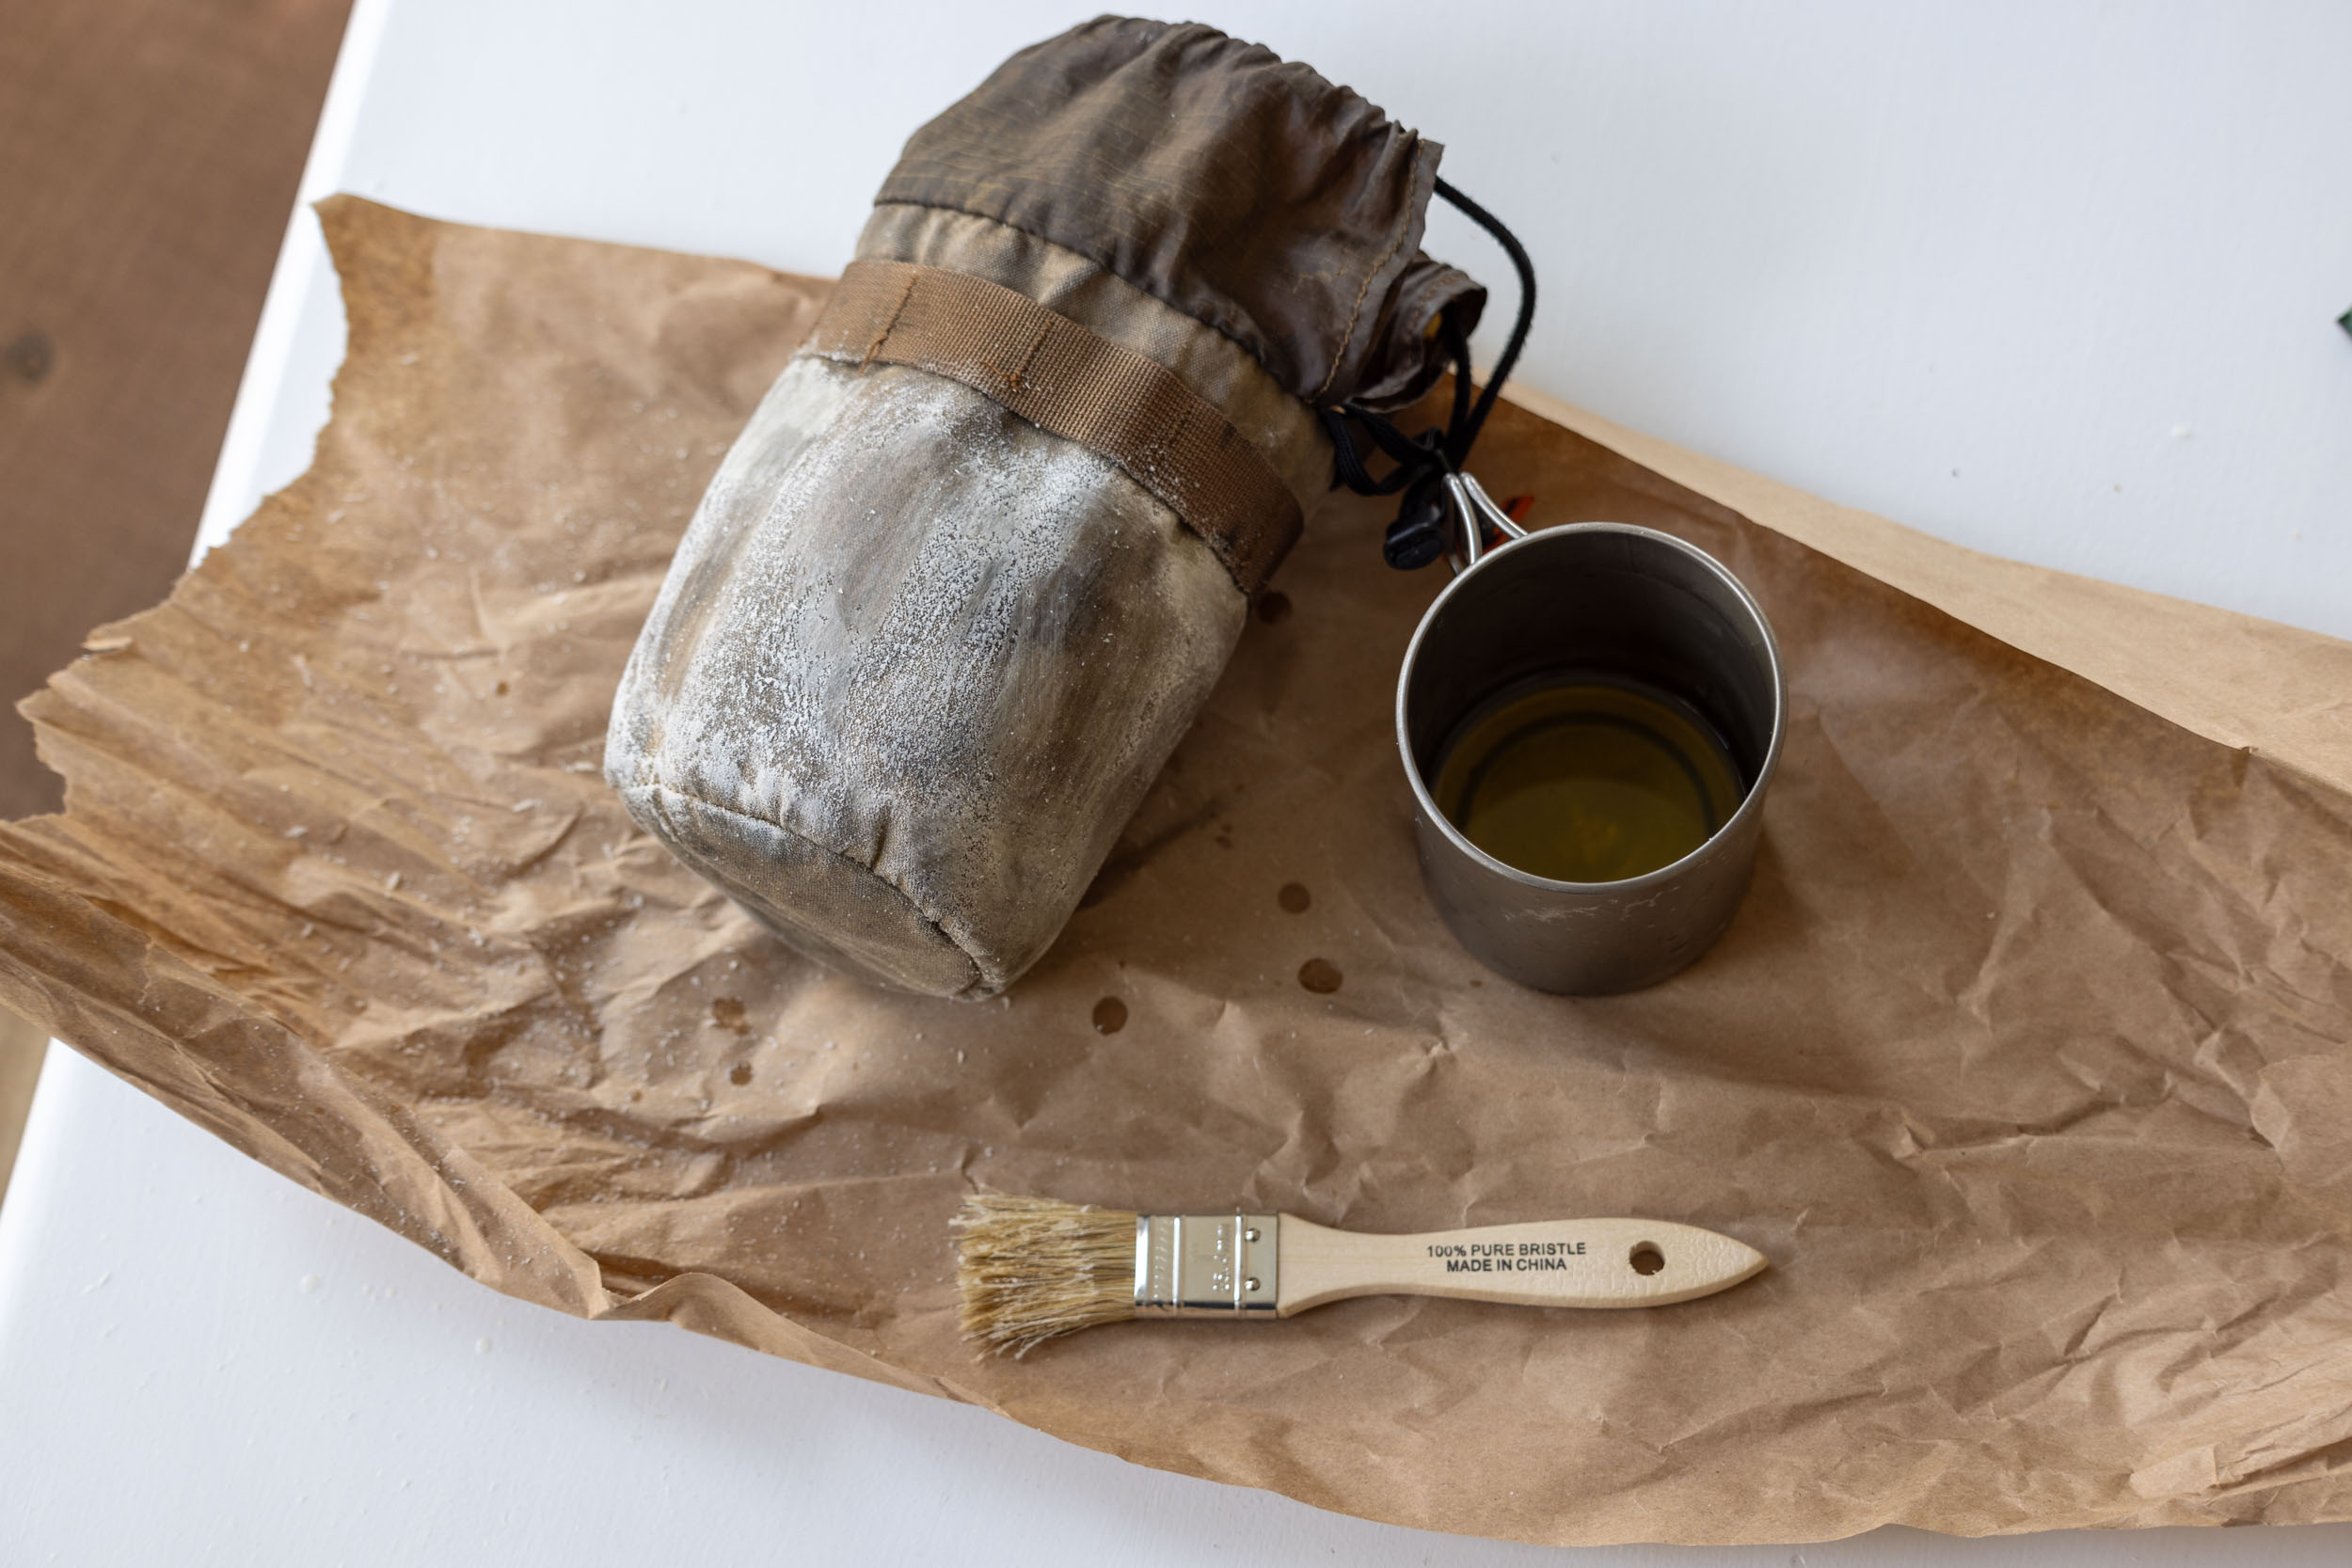
Making your own gear wax is incredibly simple. All it takes is two ingredients: paraffin and beeswax. Paraffin is a white wax that’s commonly used as a lubricant and in candles, and beeswax is a natural wax produced by honey bees. You should be able to find paraffin in most craft and dollar stores, and beeswax can be purchased from any local beekeeper or from online distributors. Since I knew people were producing honey locally, it didn’t take long to find a beekeeper a few kilometers away willing to sell me a pound of clean beeswax. It was $25 well spent because, all you’ll see, you don’t need much beeswax to treat your gear. I’ll be waxing gear until I die.
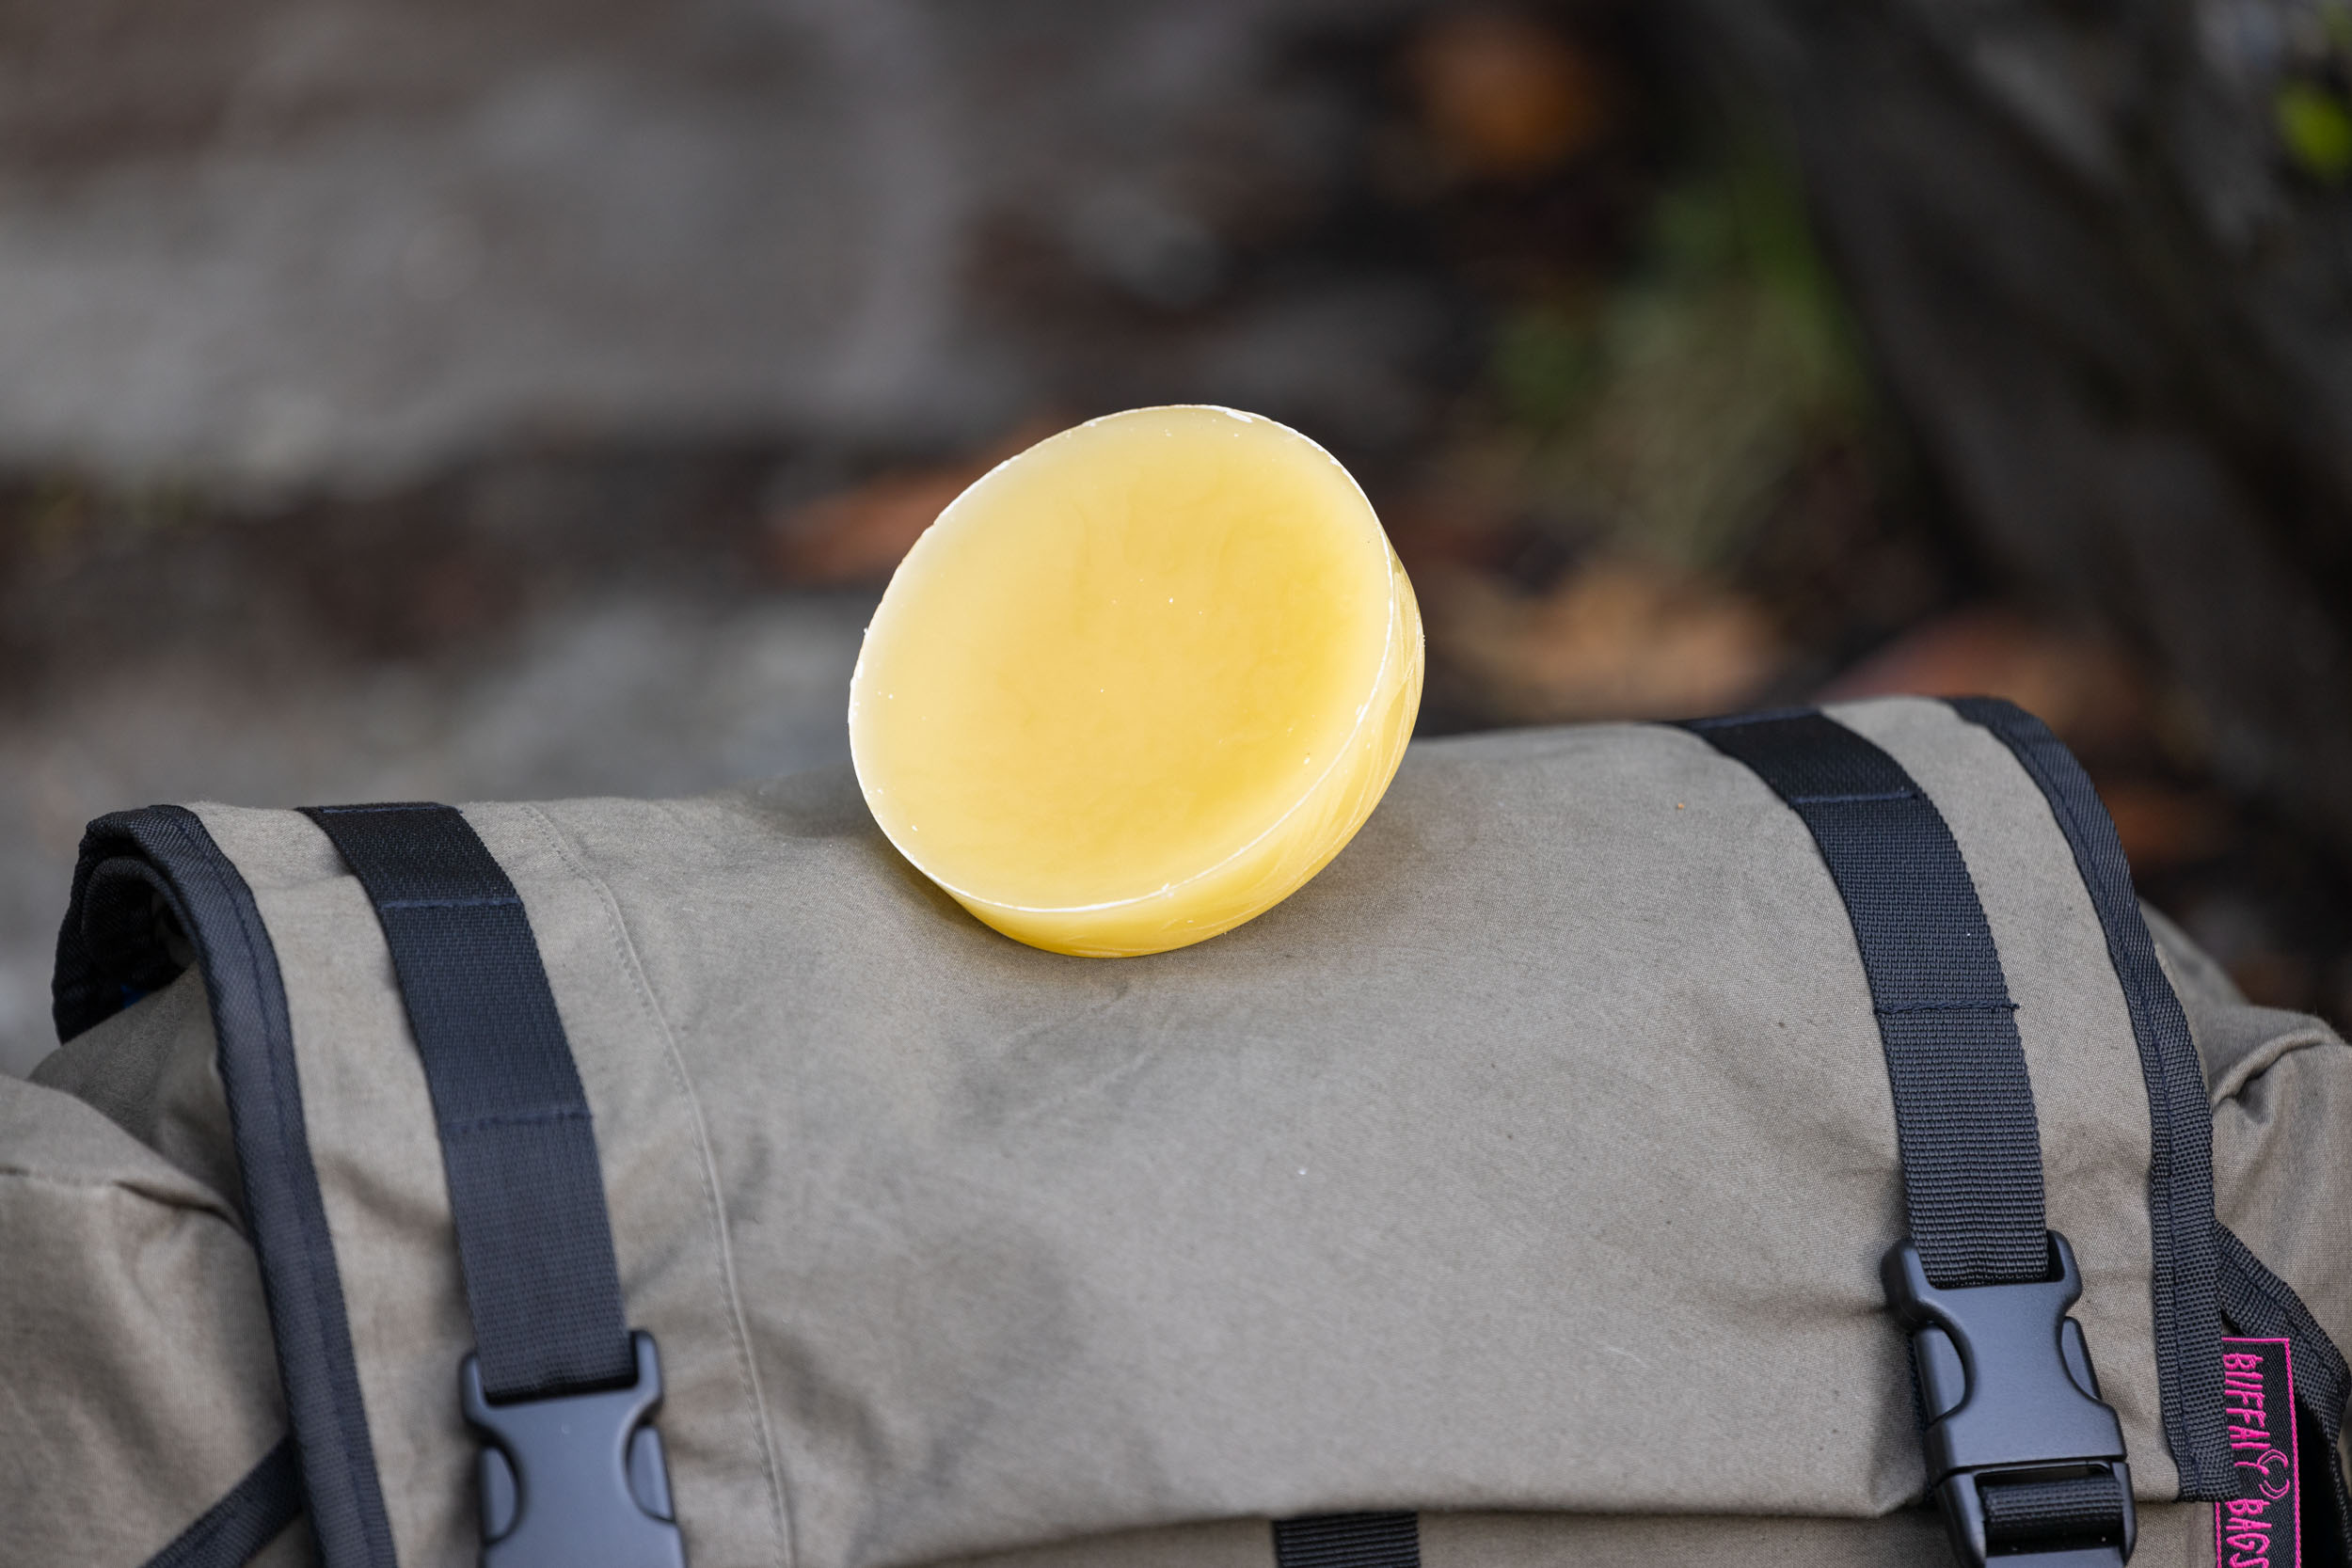
Step 1: Find a suitable container to act as a mold for your wax. A small hummus container works great.
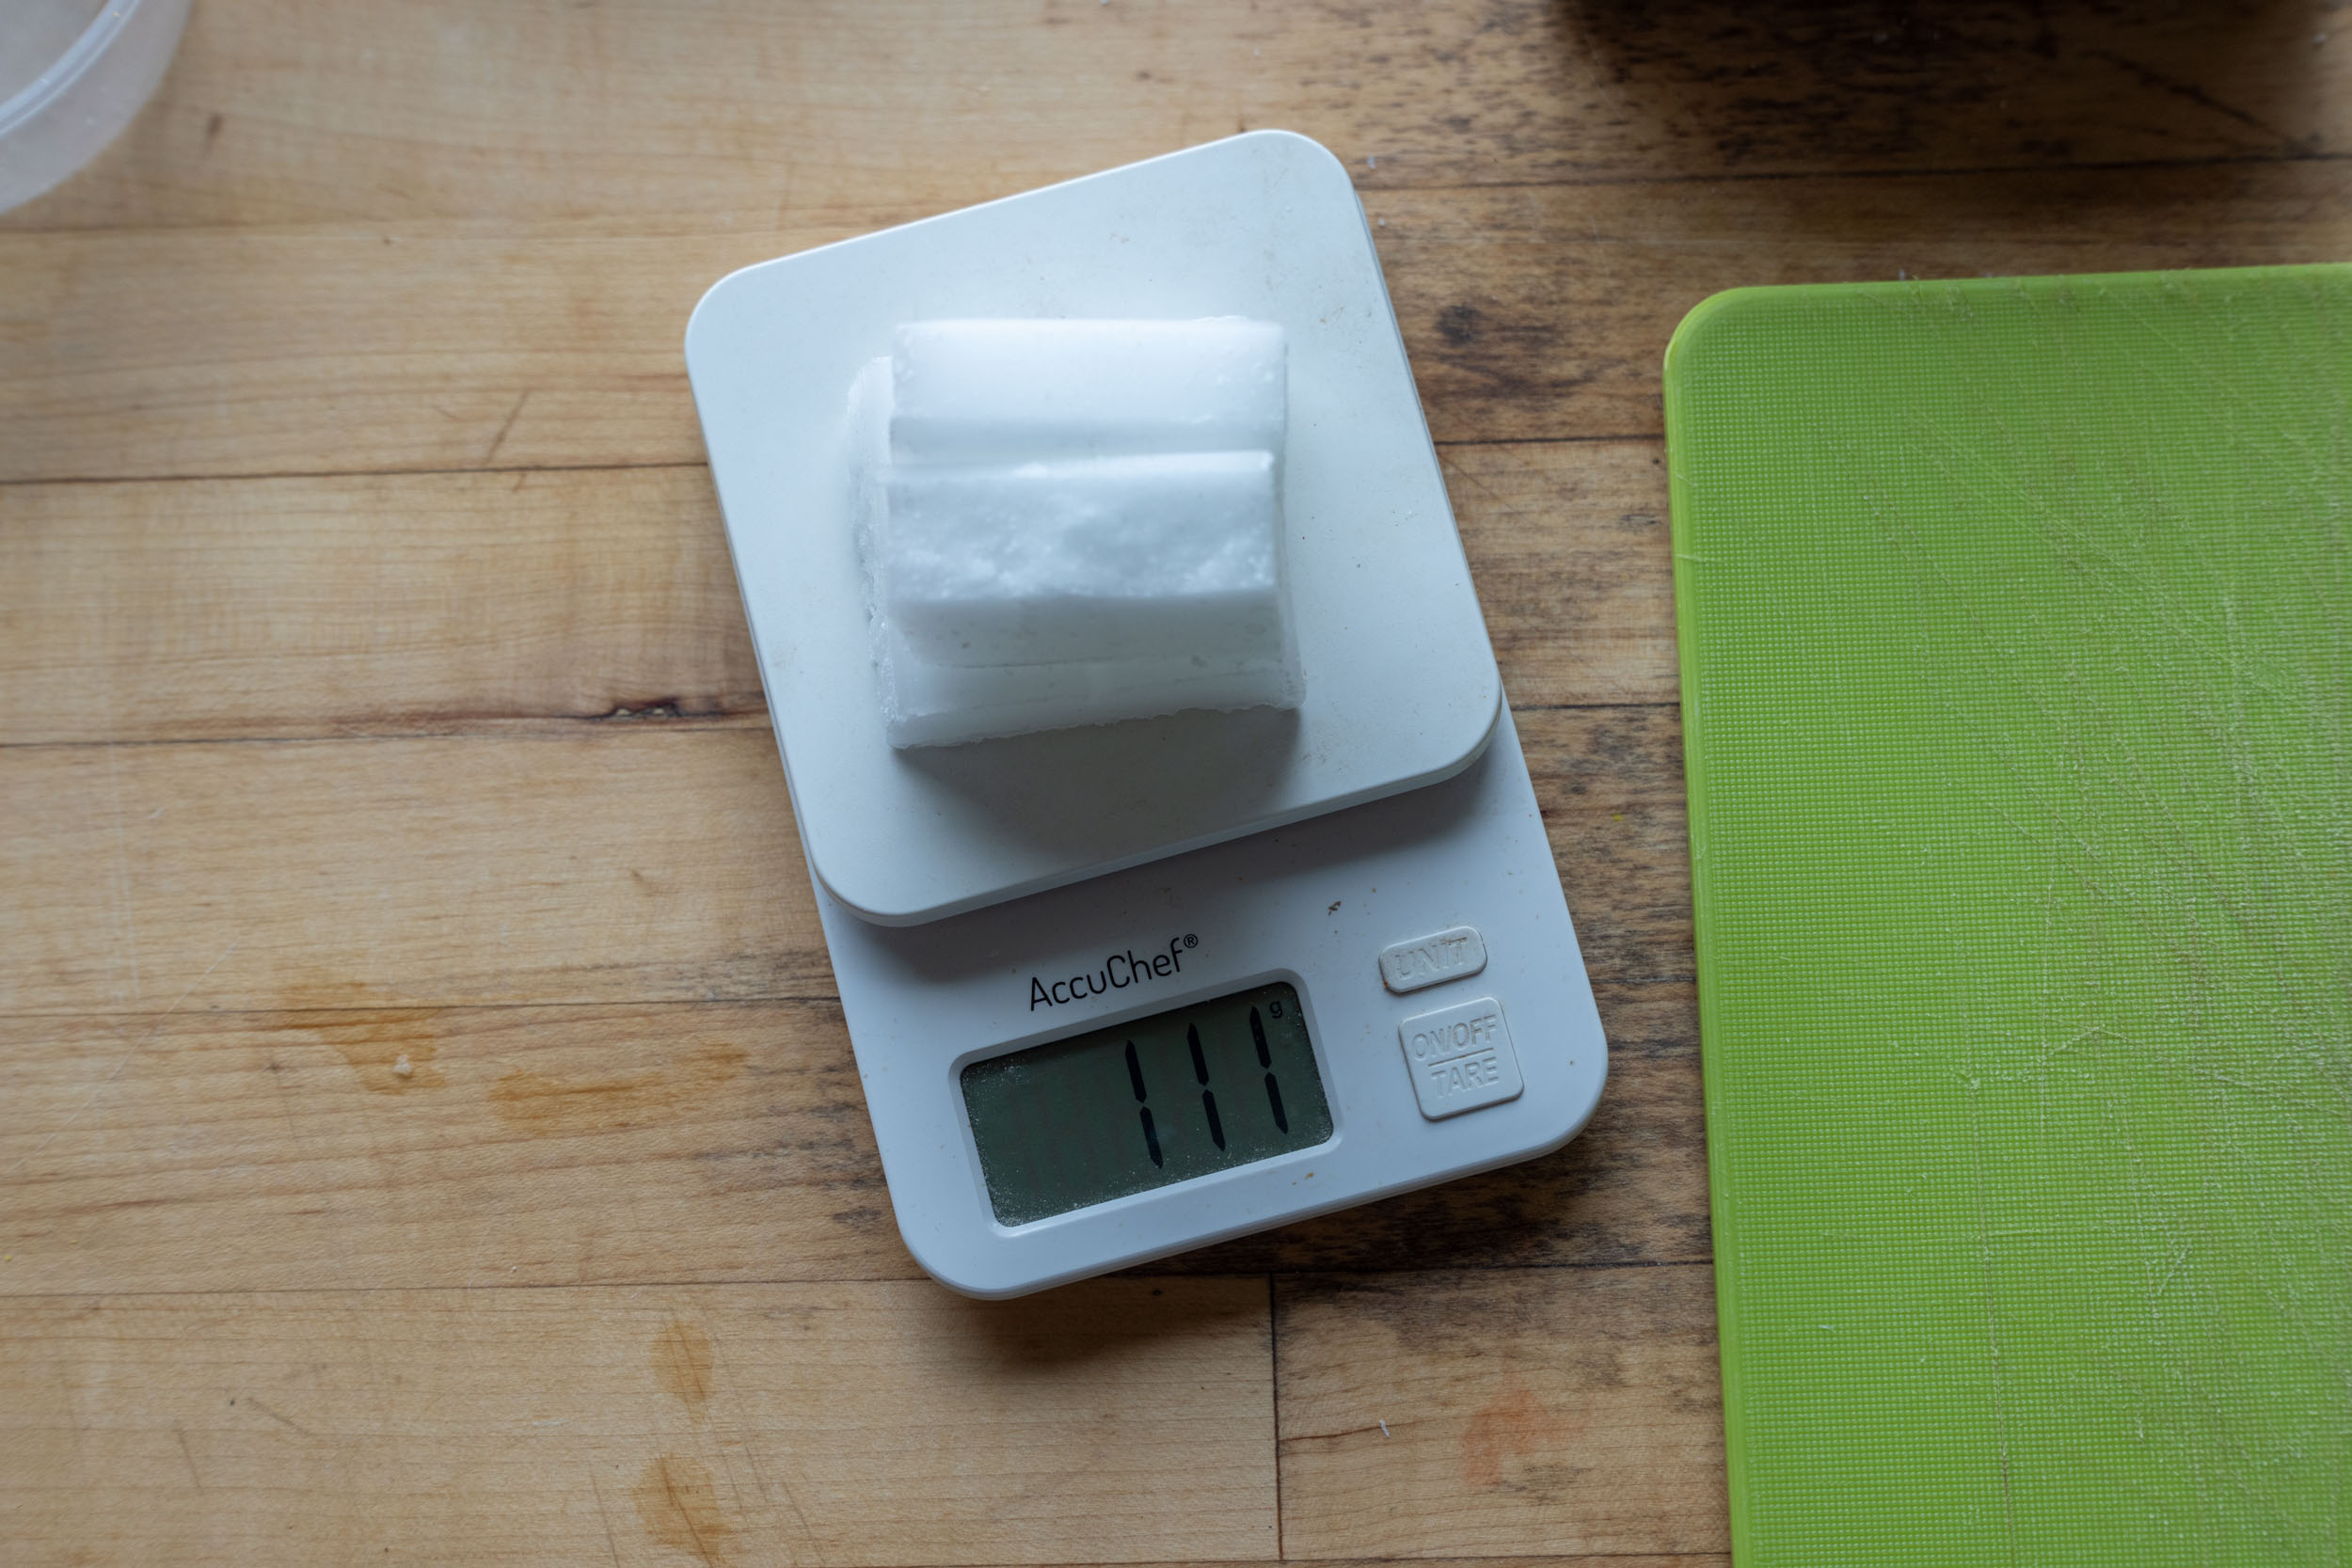
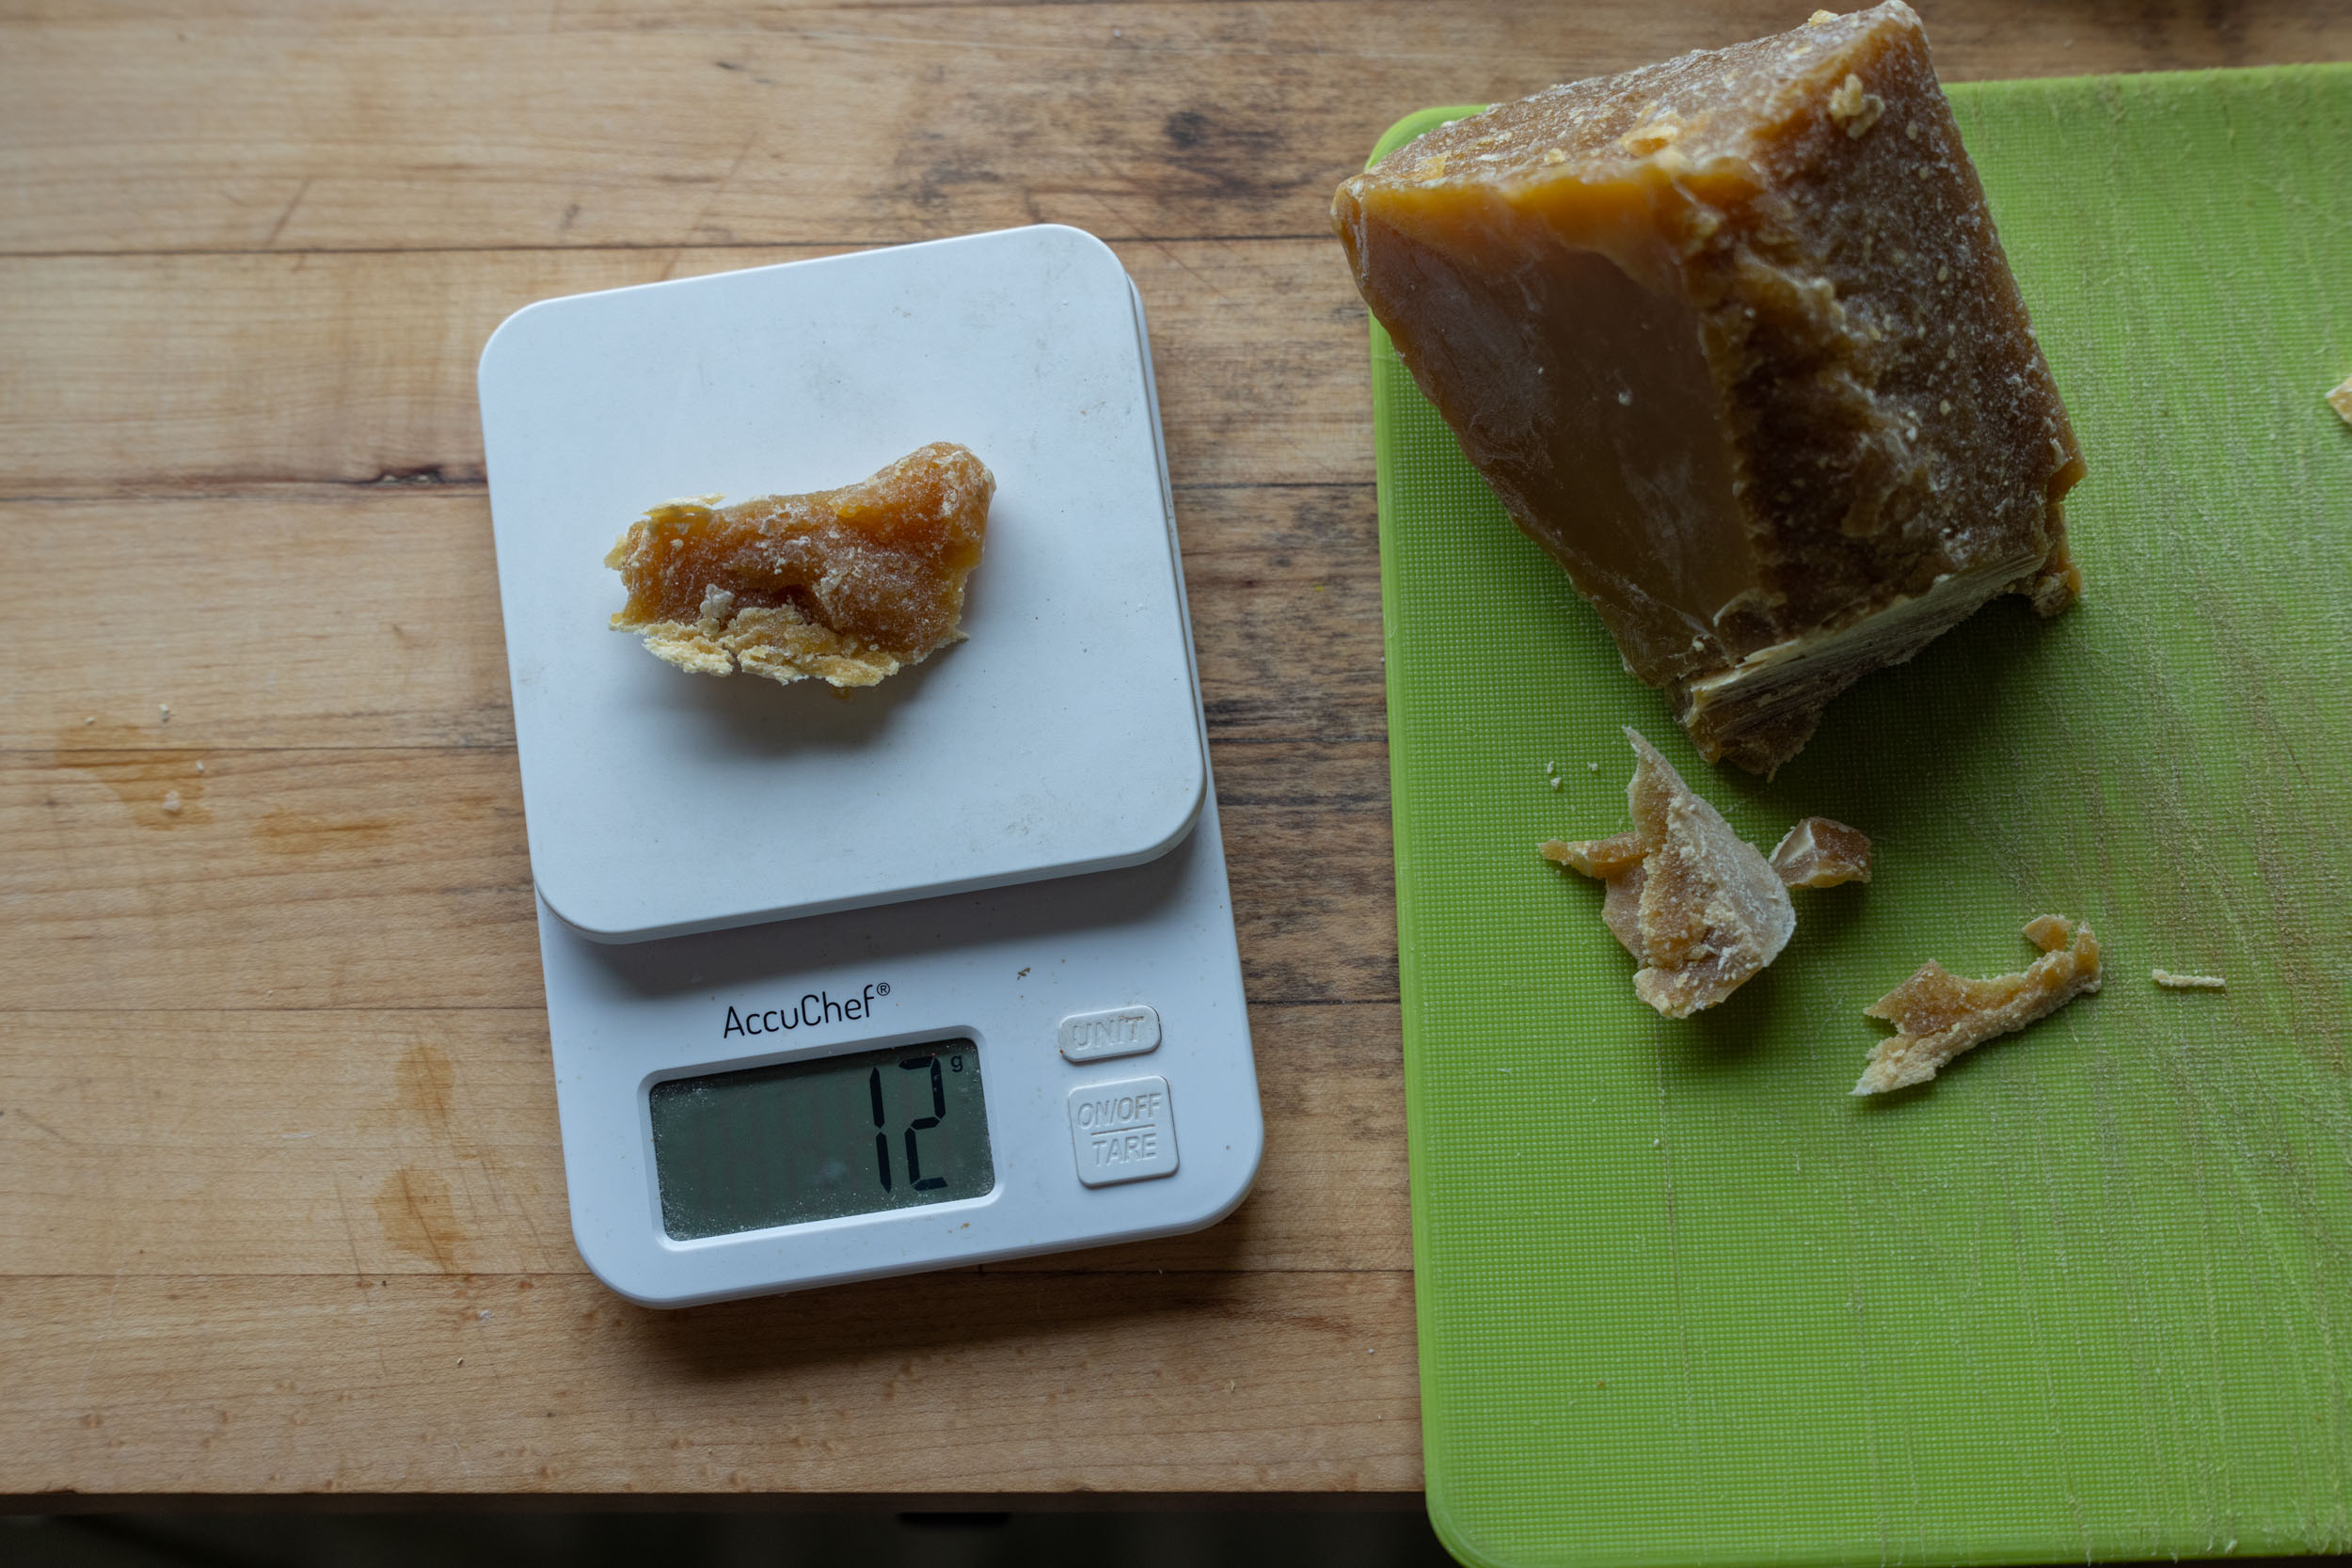
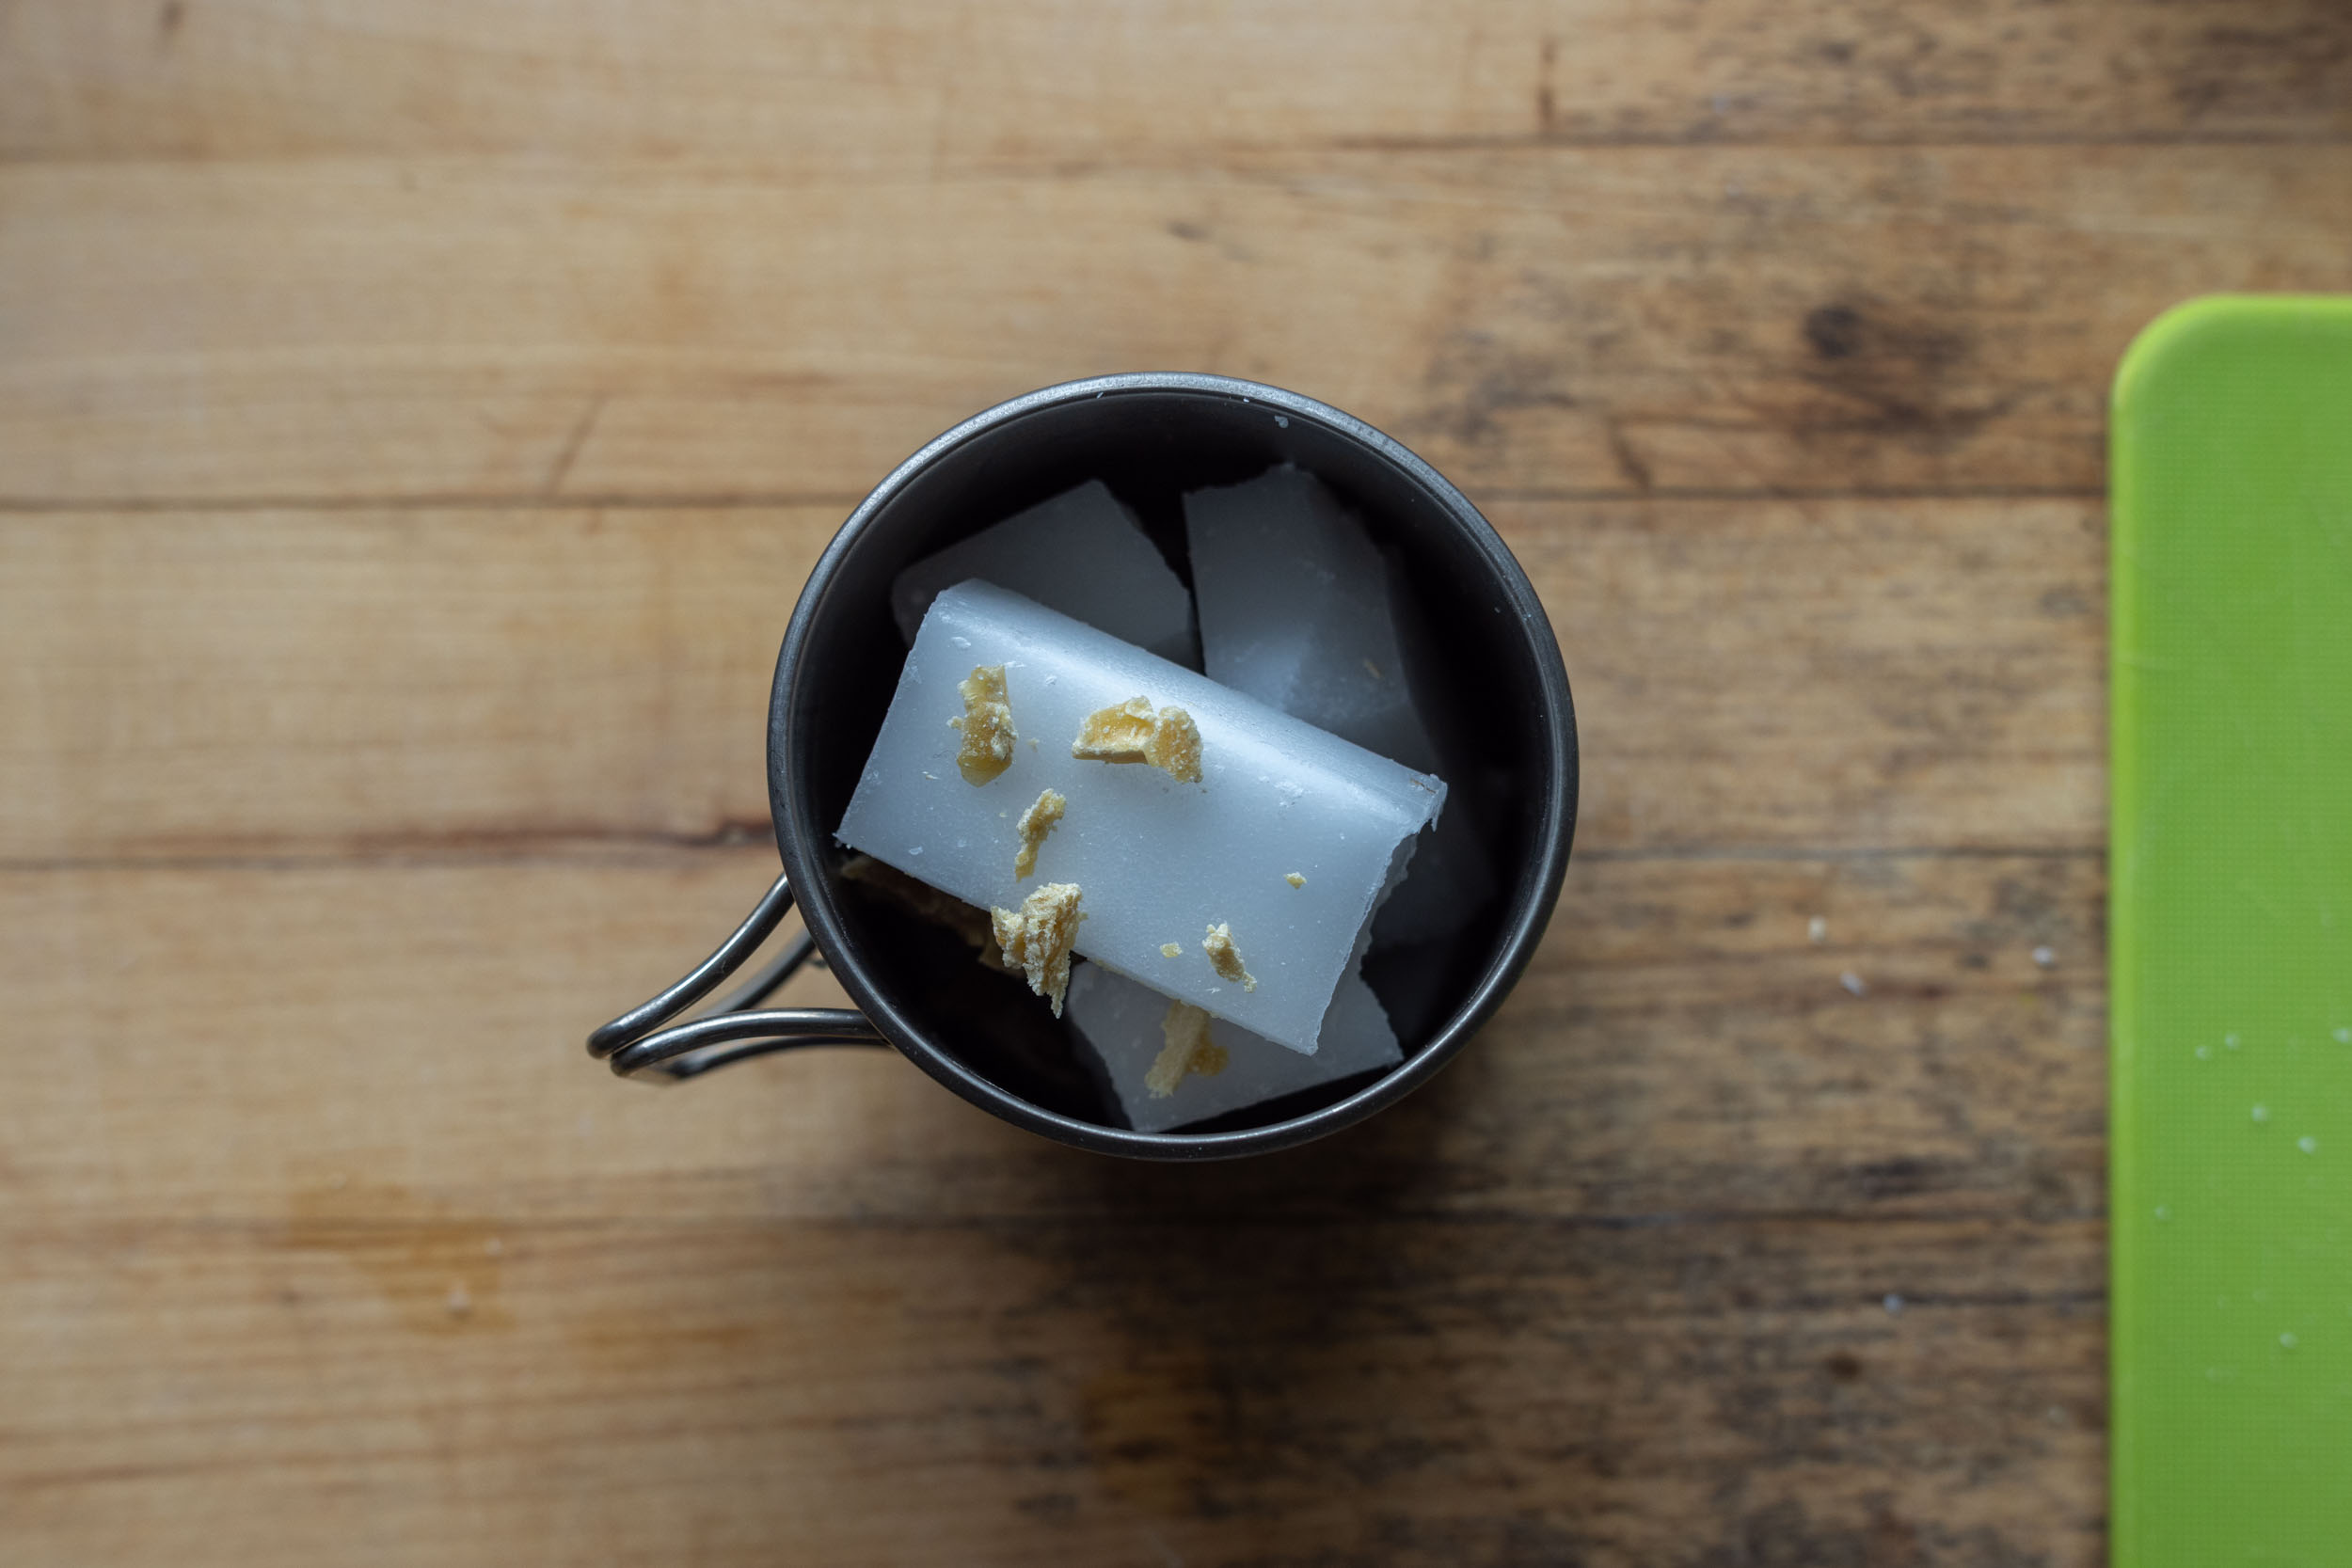
Step 2: Fill the container with a mix of 90% paraffin and 10% beeswax. I used a scale and only partially filled my container.
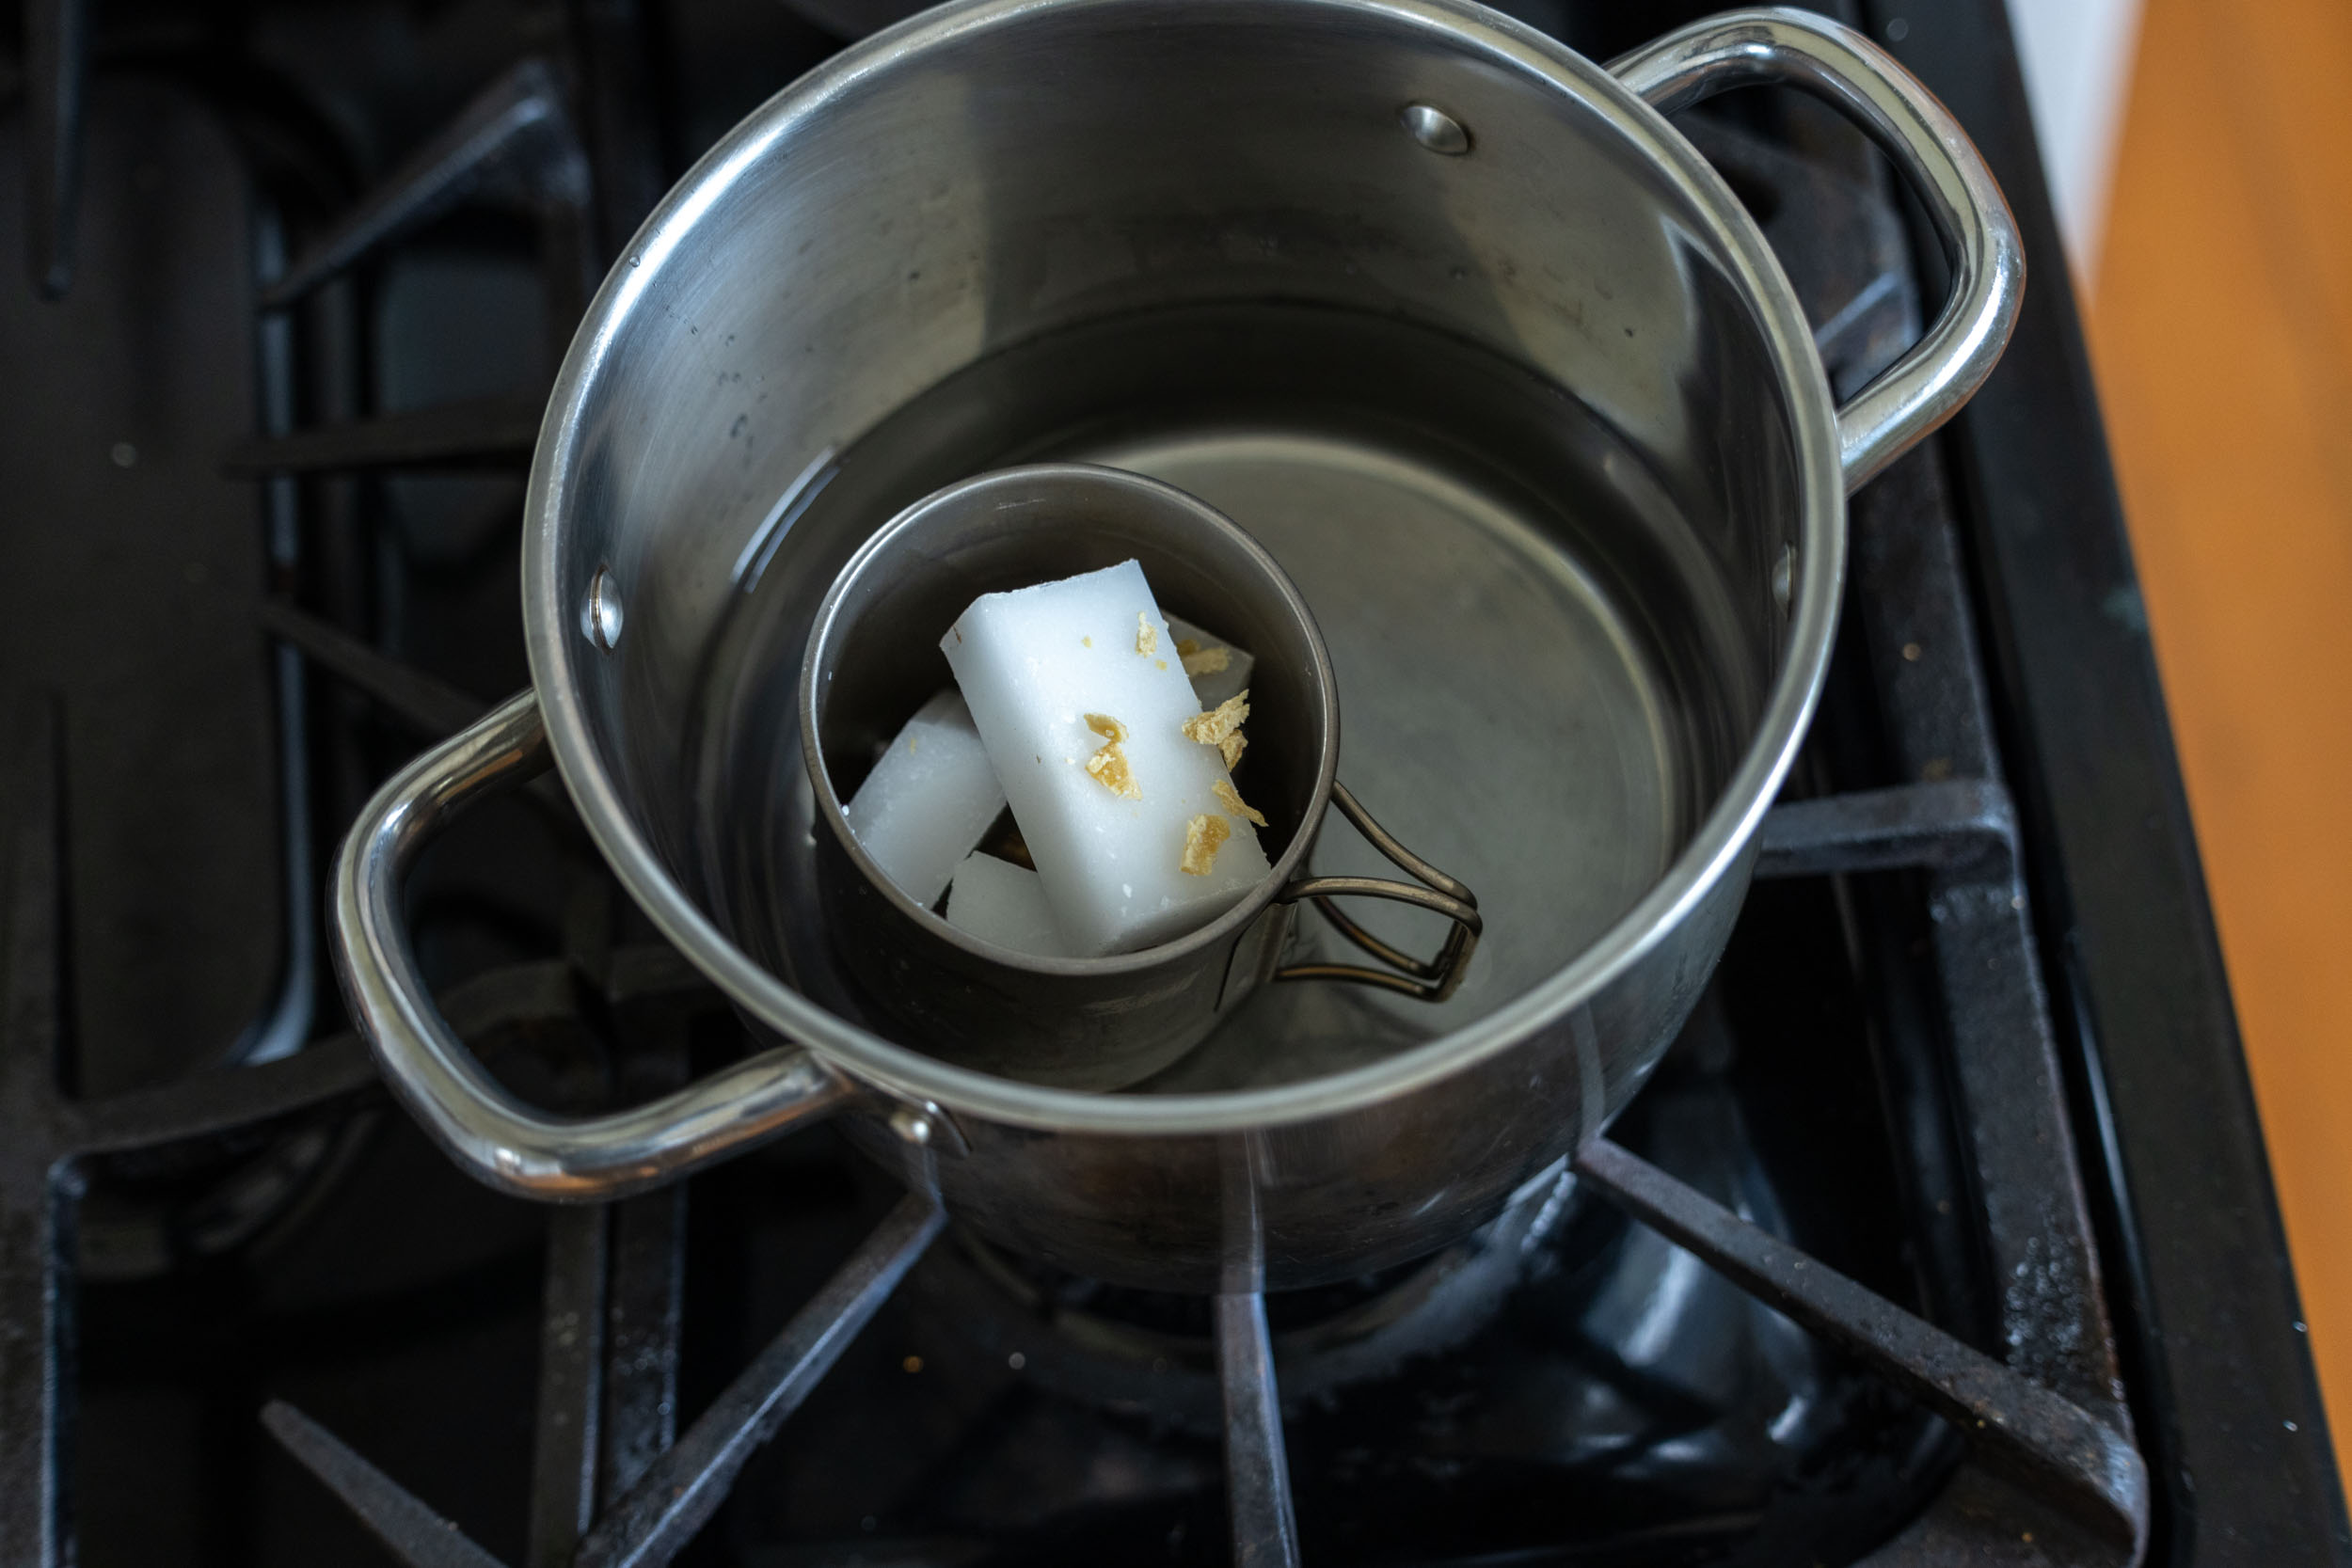
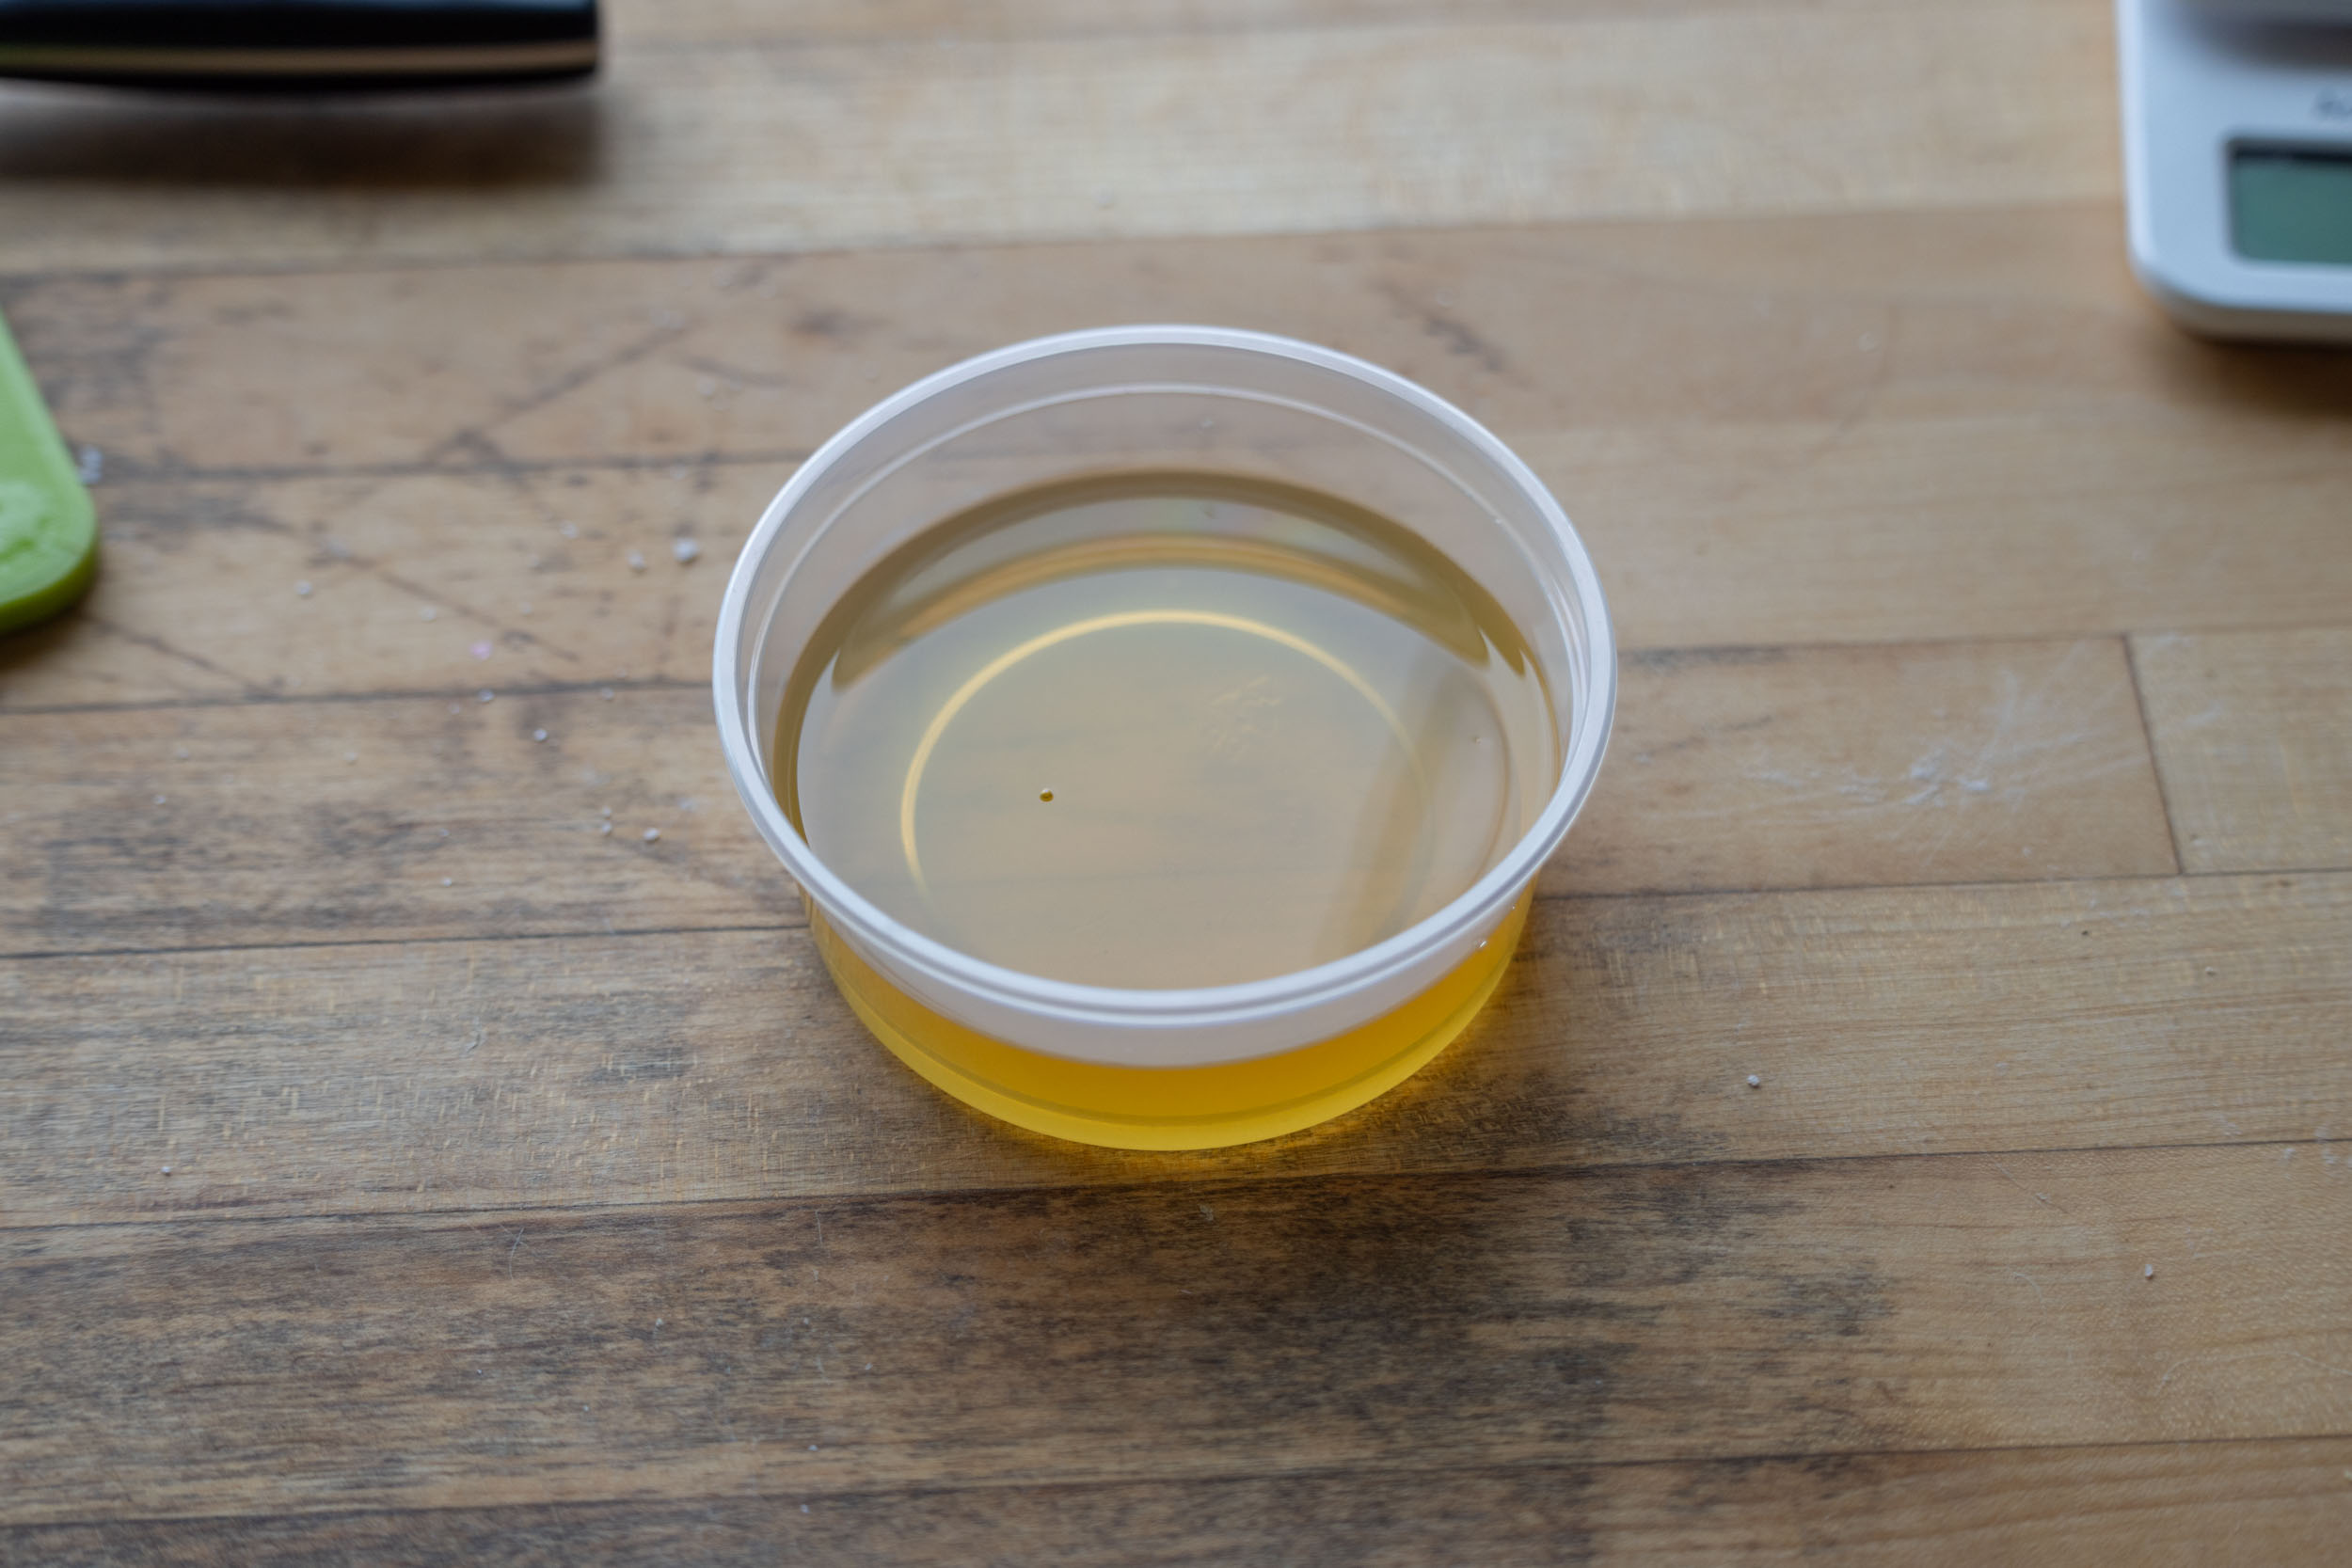
Step 3: Create a double boiler by filling a large pot with water and floating or nesting a smaller pot or old camp mug inside. Heat the water on medium until the wax melts fully. Mix the wax. Remove from heat.
Step 4: Pour the melted wax back into the mold and let cool fully before trying to remove.
Step 5: Congrats! You just made your own Fjallraven Greenland Wax for a fraction of the cost.
Other Waxes
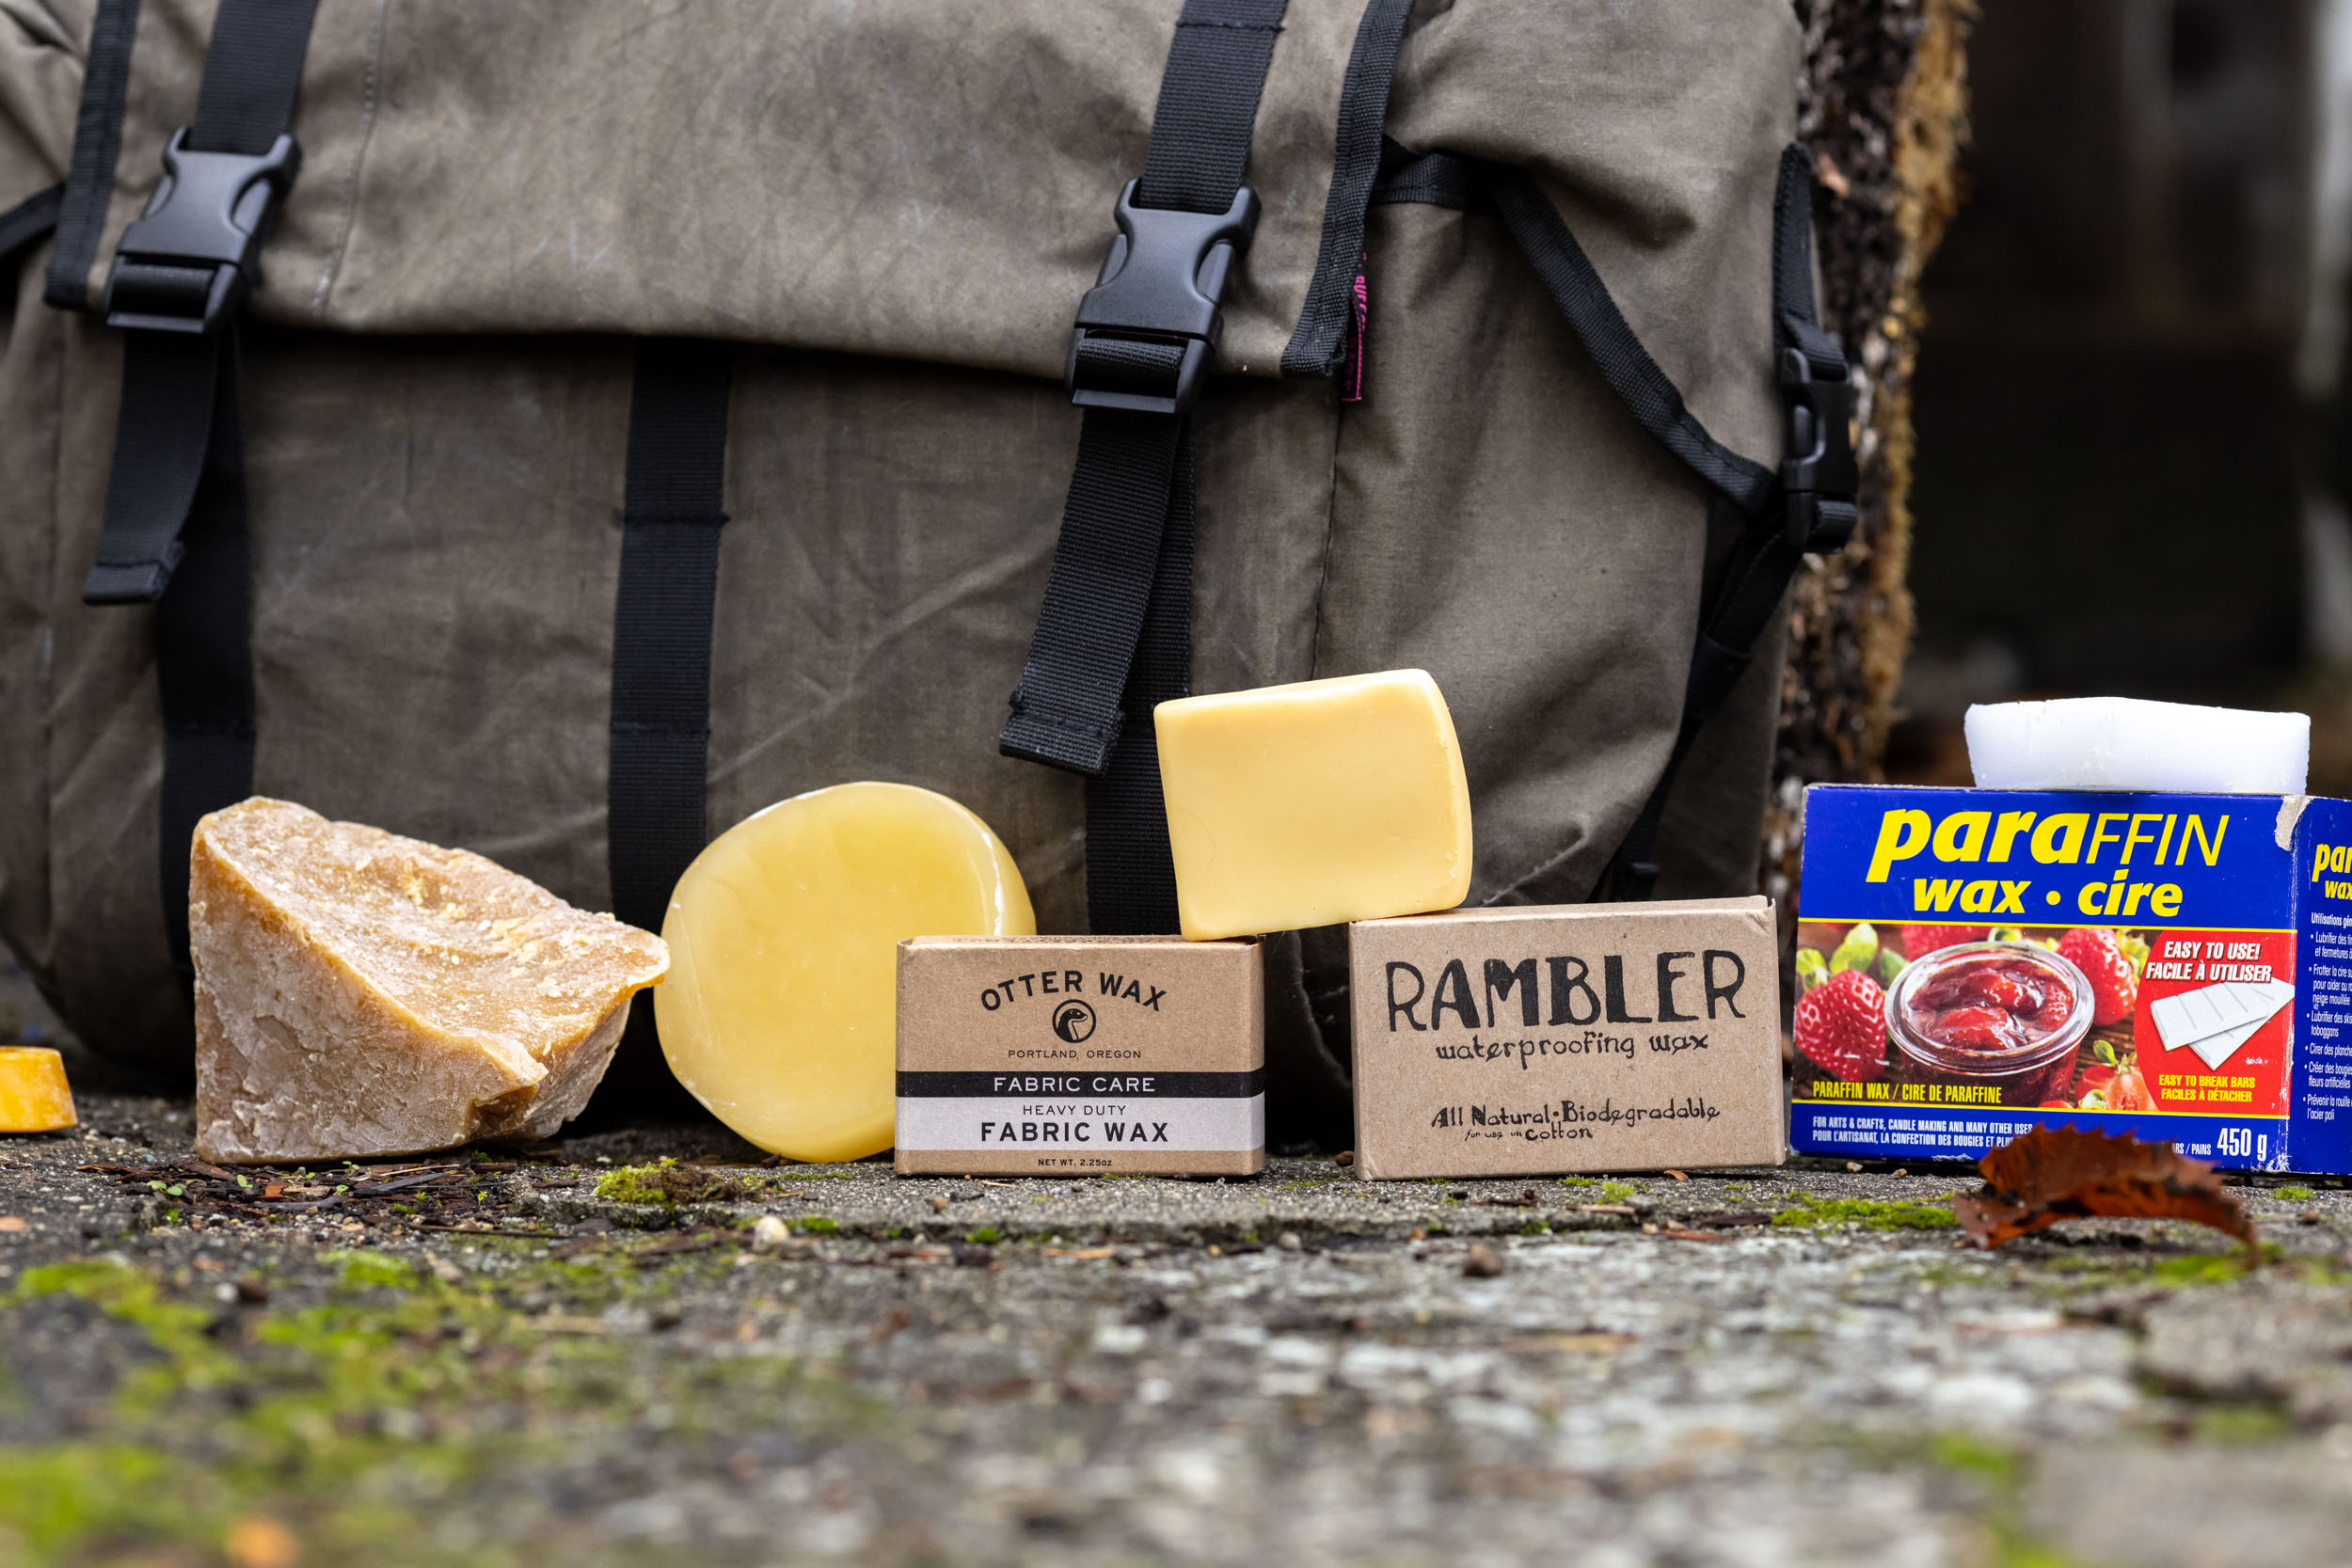
As mentioned earlier, there are a number of ready-made waxes available to purchase if you don’t want to make your own or prefer to avoid paraffin. In most cases, bag and gear markers recommend using the same wax that the product was originally treated with if that’s available, but I’ve mixed and matched during my testing with positive results. I got my hands on a few of the most popular pre-made waxes and experimented with them on some bags. Here are my findings:
- Rambler Bags Wax: A plant-based wax bar that contains all natural ingredients and zero monoculture ingredients like soy or petrochemicals like paraffin. It’s a soft wax and requires less pressure and friction to rub on directly to the fabric. I treated an old Road Runner Cordura frame bag and was pleased with the results.
- Carradice Cotton Duck Wax: We’re not exactly sure what kind of mix Carradice is using. There are some reports of it being a re-branded Martexin wax, which is made from non-toxic food-grade waxes.
- Otter Wax: Similar to Rambler’s wax, Otter Wax is also 100% natural and plant-based. It’s made up of natural oils, humanely harvested beeswax, and lanolin, a waxy substance secreted from sheep. It’s also a soft wax, and it applies easily by hand.
- Fjällräven Greenland Wax: Greenland wax is made from paraffin and beeswax, just like the DIY recipe above. It’s economical and functional, but perhaps not the most environmentally friendly option. However, because it’s more dense and harder than oil-based waxes, it lasts longer, and a single bar will treat more gear/garments compared to Rambler or Otter Wax.
- Martexin Original Wax: Makeshifter Canvas Works in Portland has several bags made from Martexin waxed canvas, and they recommend using their own wax to treat them when dry spots start to develop. Martexin’s wax was apparently designed in the early 1900s and is a mix of food- and pharmaceutical-grade waxes, making it non-hazardous and long-lasting.
How to Wax Canvas: Two Methods
Everyone I spoke to confirmed that there are two recommended ways to re-wax your gear. The first involves rubbing the wax bar directly into the fabric and then using a heat gun or blow dryer to heat the fabric up so it absorbs the wax. The second way requires the wax mixture to be melted and then brushed onto the fabric before being finished with heat to absorb.
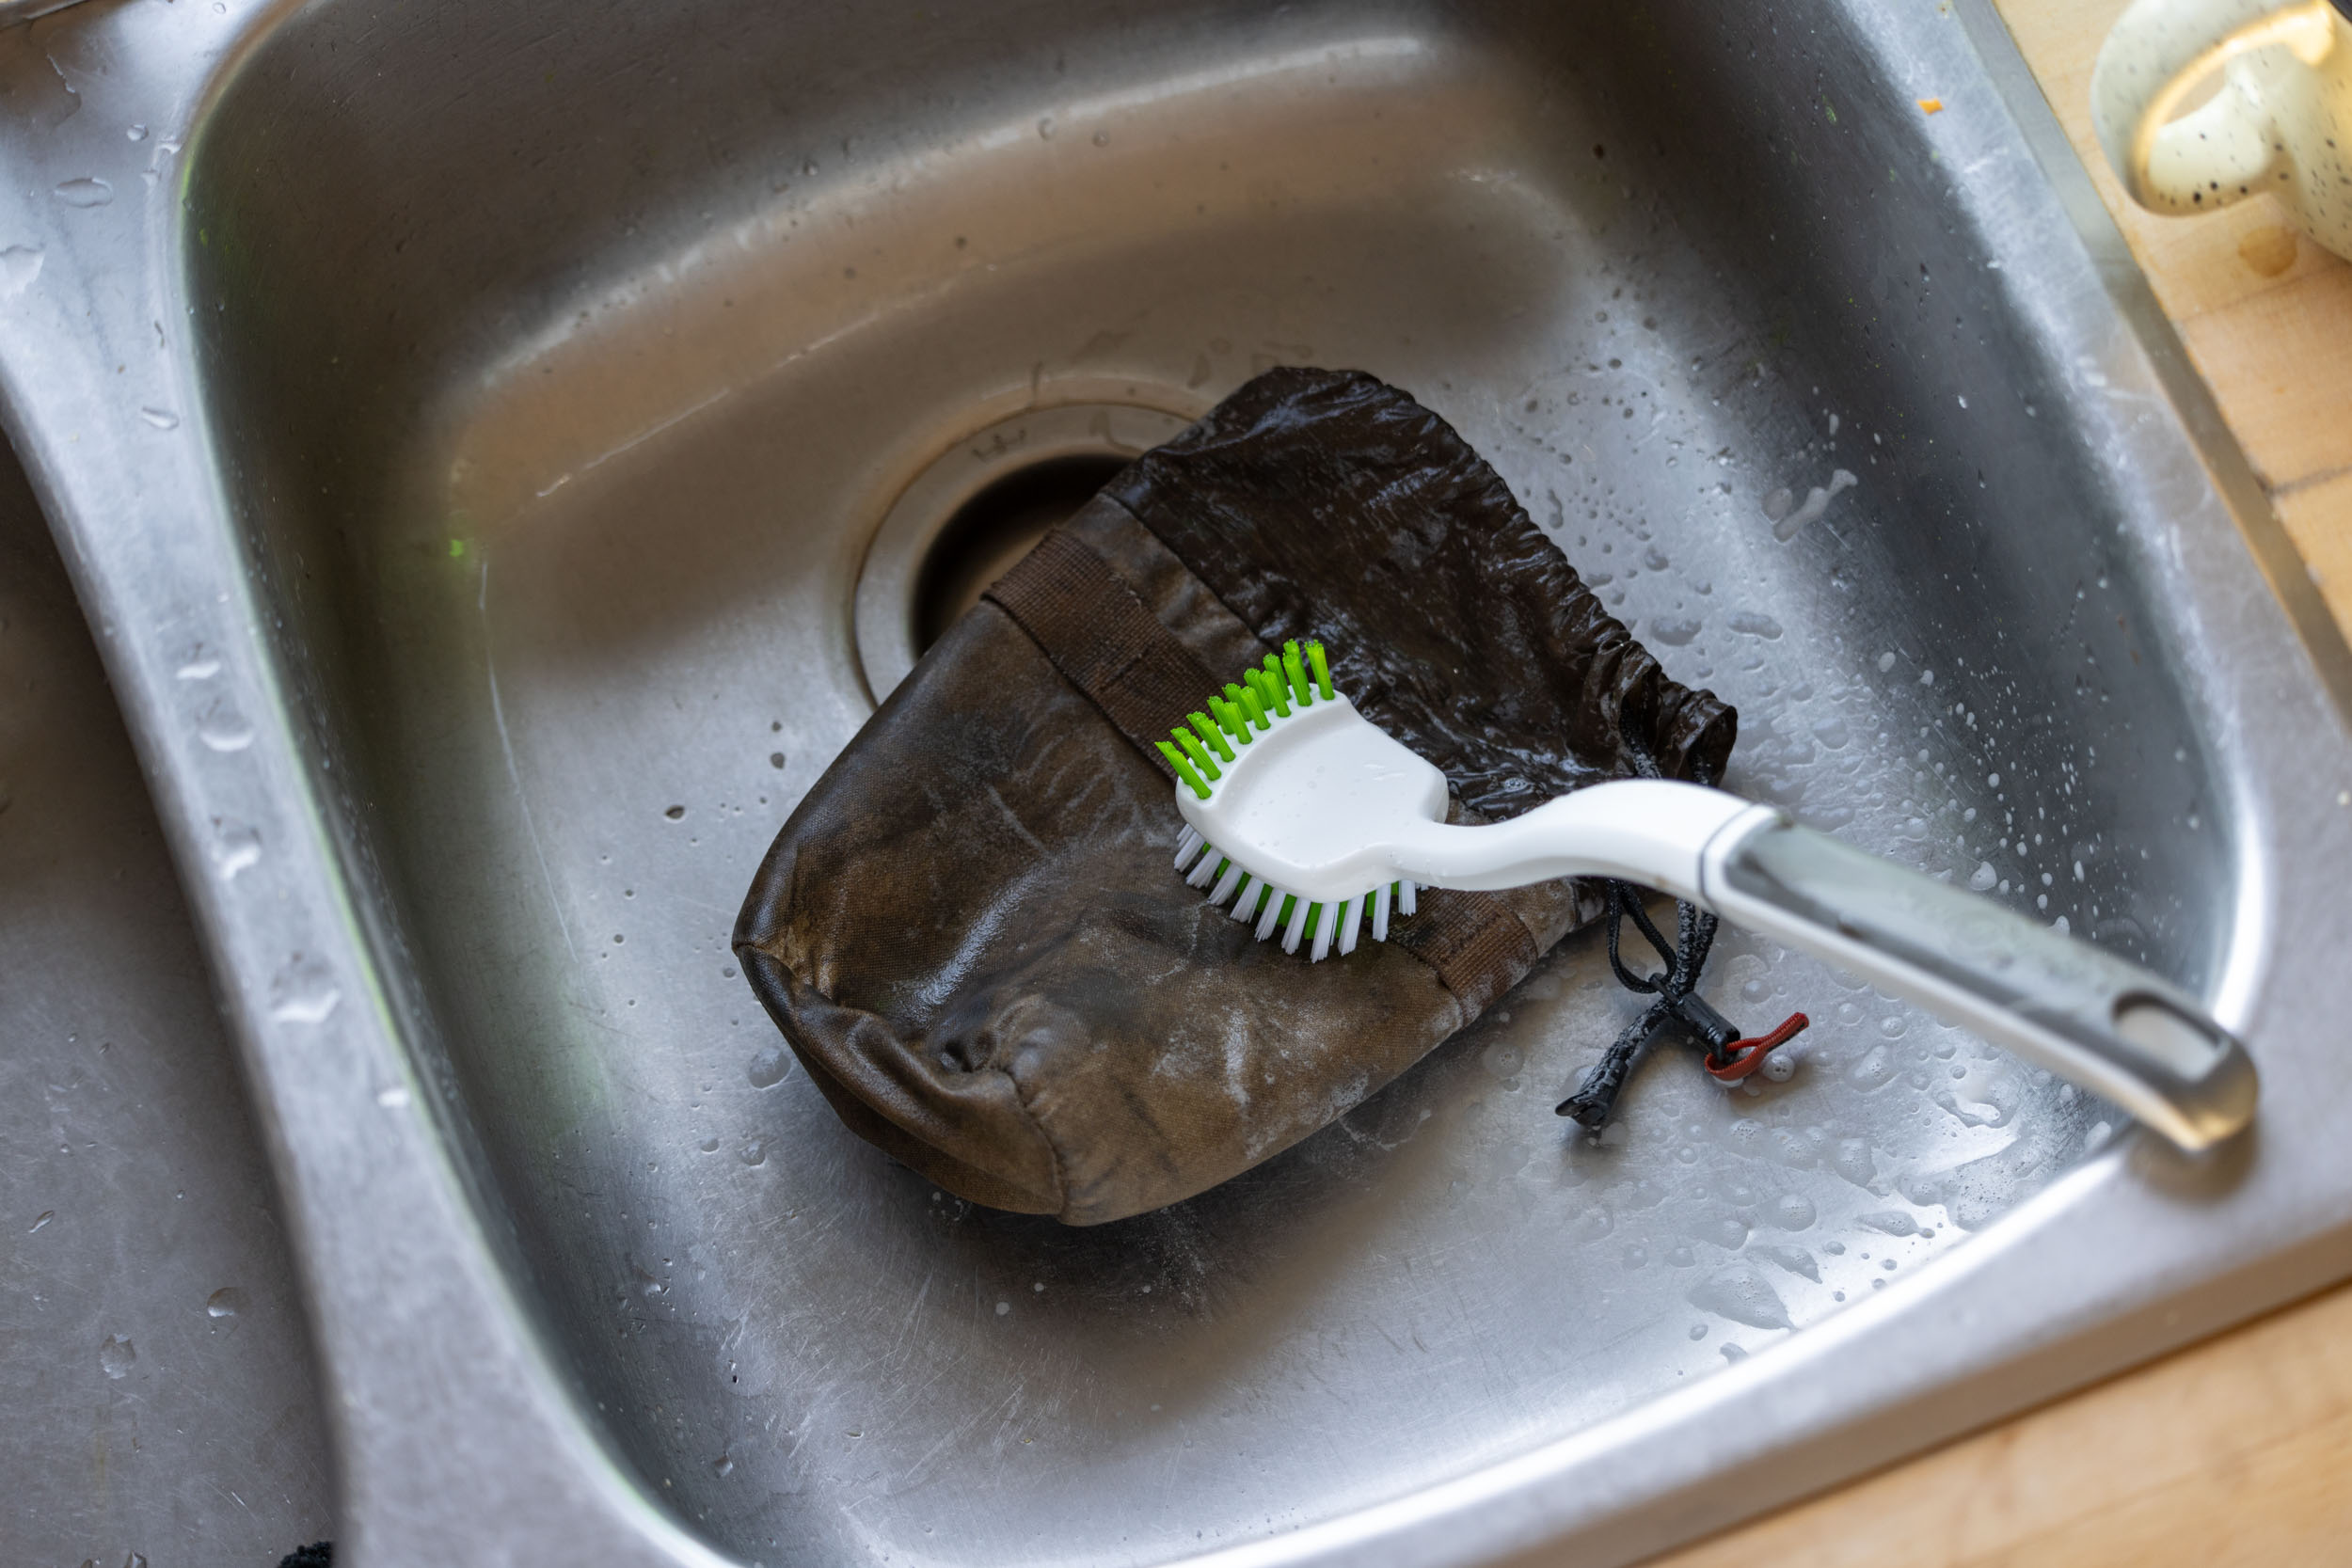
No matter which method you use, it’s important to give your gear a good cleaning before starting. Use a stiff brush, warm water, and some light detergent to really work into the fabric to clear out any dirt or oils that might limit how much wax it can absorb. Before waxing, ensure the fabric has time to dry thoroughly. For bags that aren’t in need of a complete re-wax, Ronnie at Ron’s Bikes recommends using a coarse brush to loosen up any dirt spots, rinse with water, and then go straight to the heat gun/blowdryer to redistribute the original wax. He’s also had success using the Otter Wax canvas care kits, which include a spot cleaner, odor eliminator, and their own heavy-duty canvas wax. If you’re unsure on what method to use, ask the manufacturer.
Method One: The Rub-On Wax Method
Rubbing your homemade wax into your fabric is a good place to start. It’s a slower process compared to melting it and brushing on, but it generally goes on thinner and will give you an idea of how much wax your gear can absorb. There’s no right or wrong way to rub the wax into the fabric, but I found quick, straight rubbing motions worked best. If you’re having a hard time getting much wax onto the fabric, warming both the fabric and the wax up can help move things along.
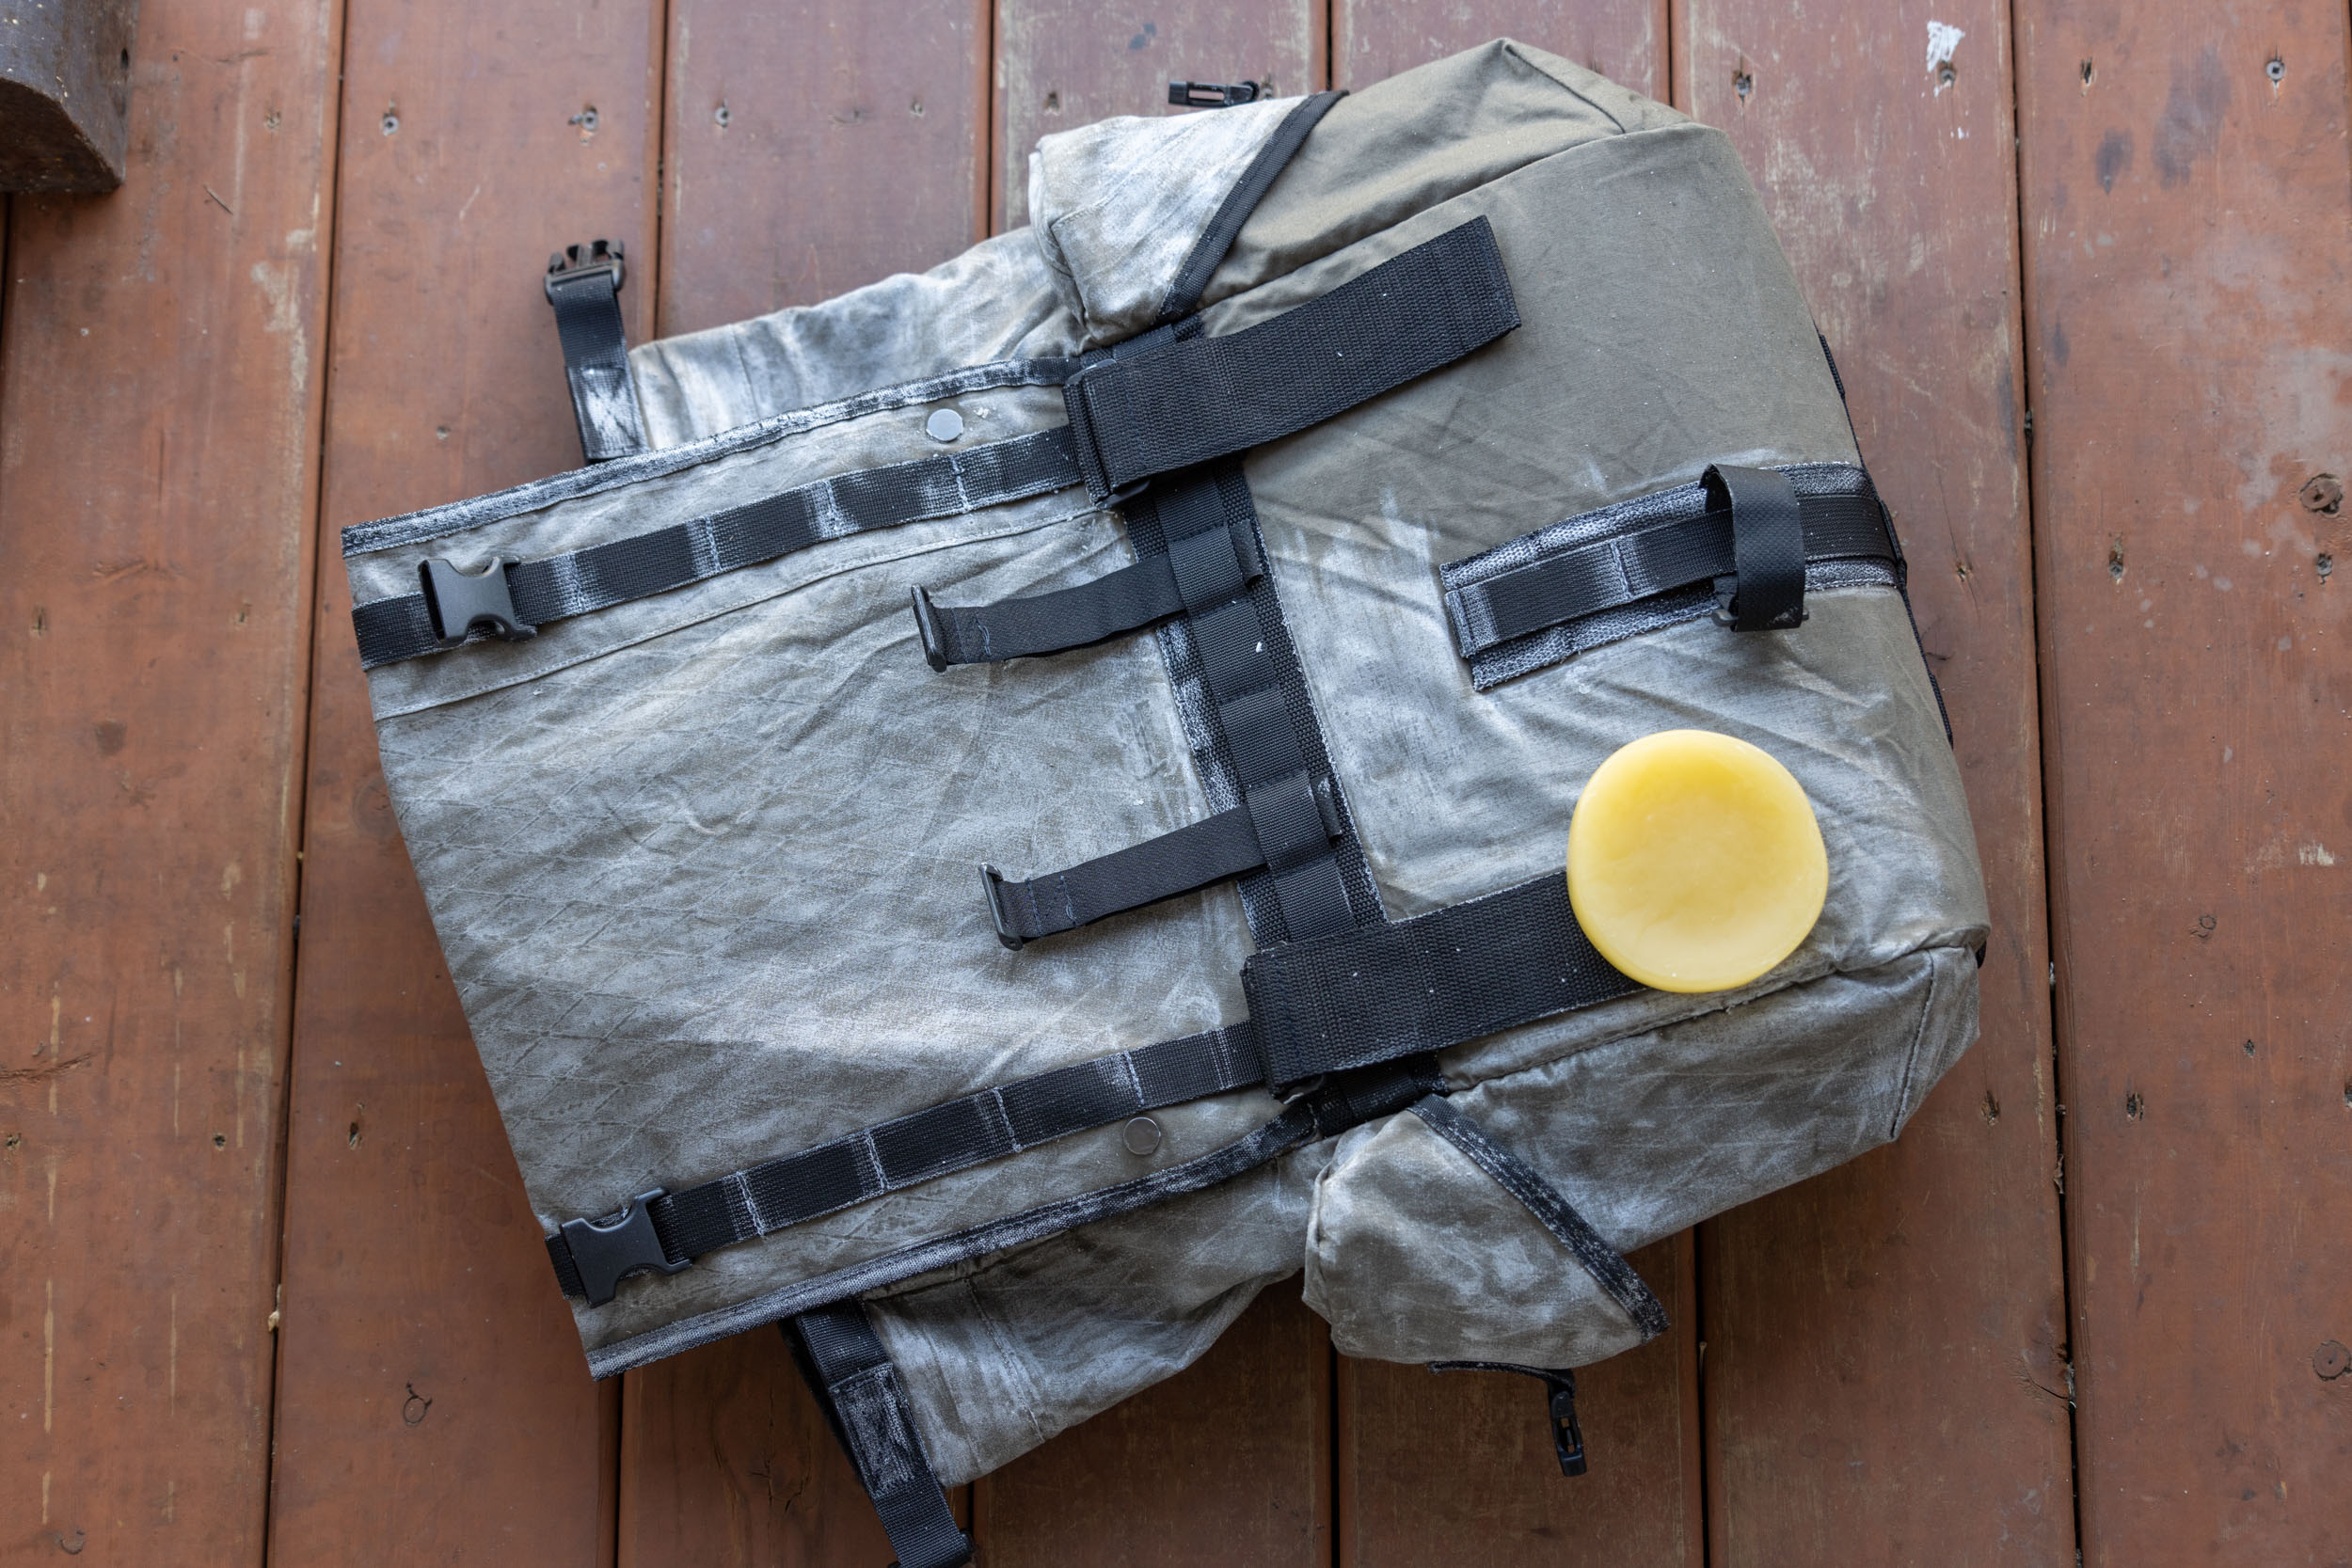
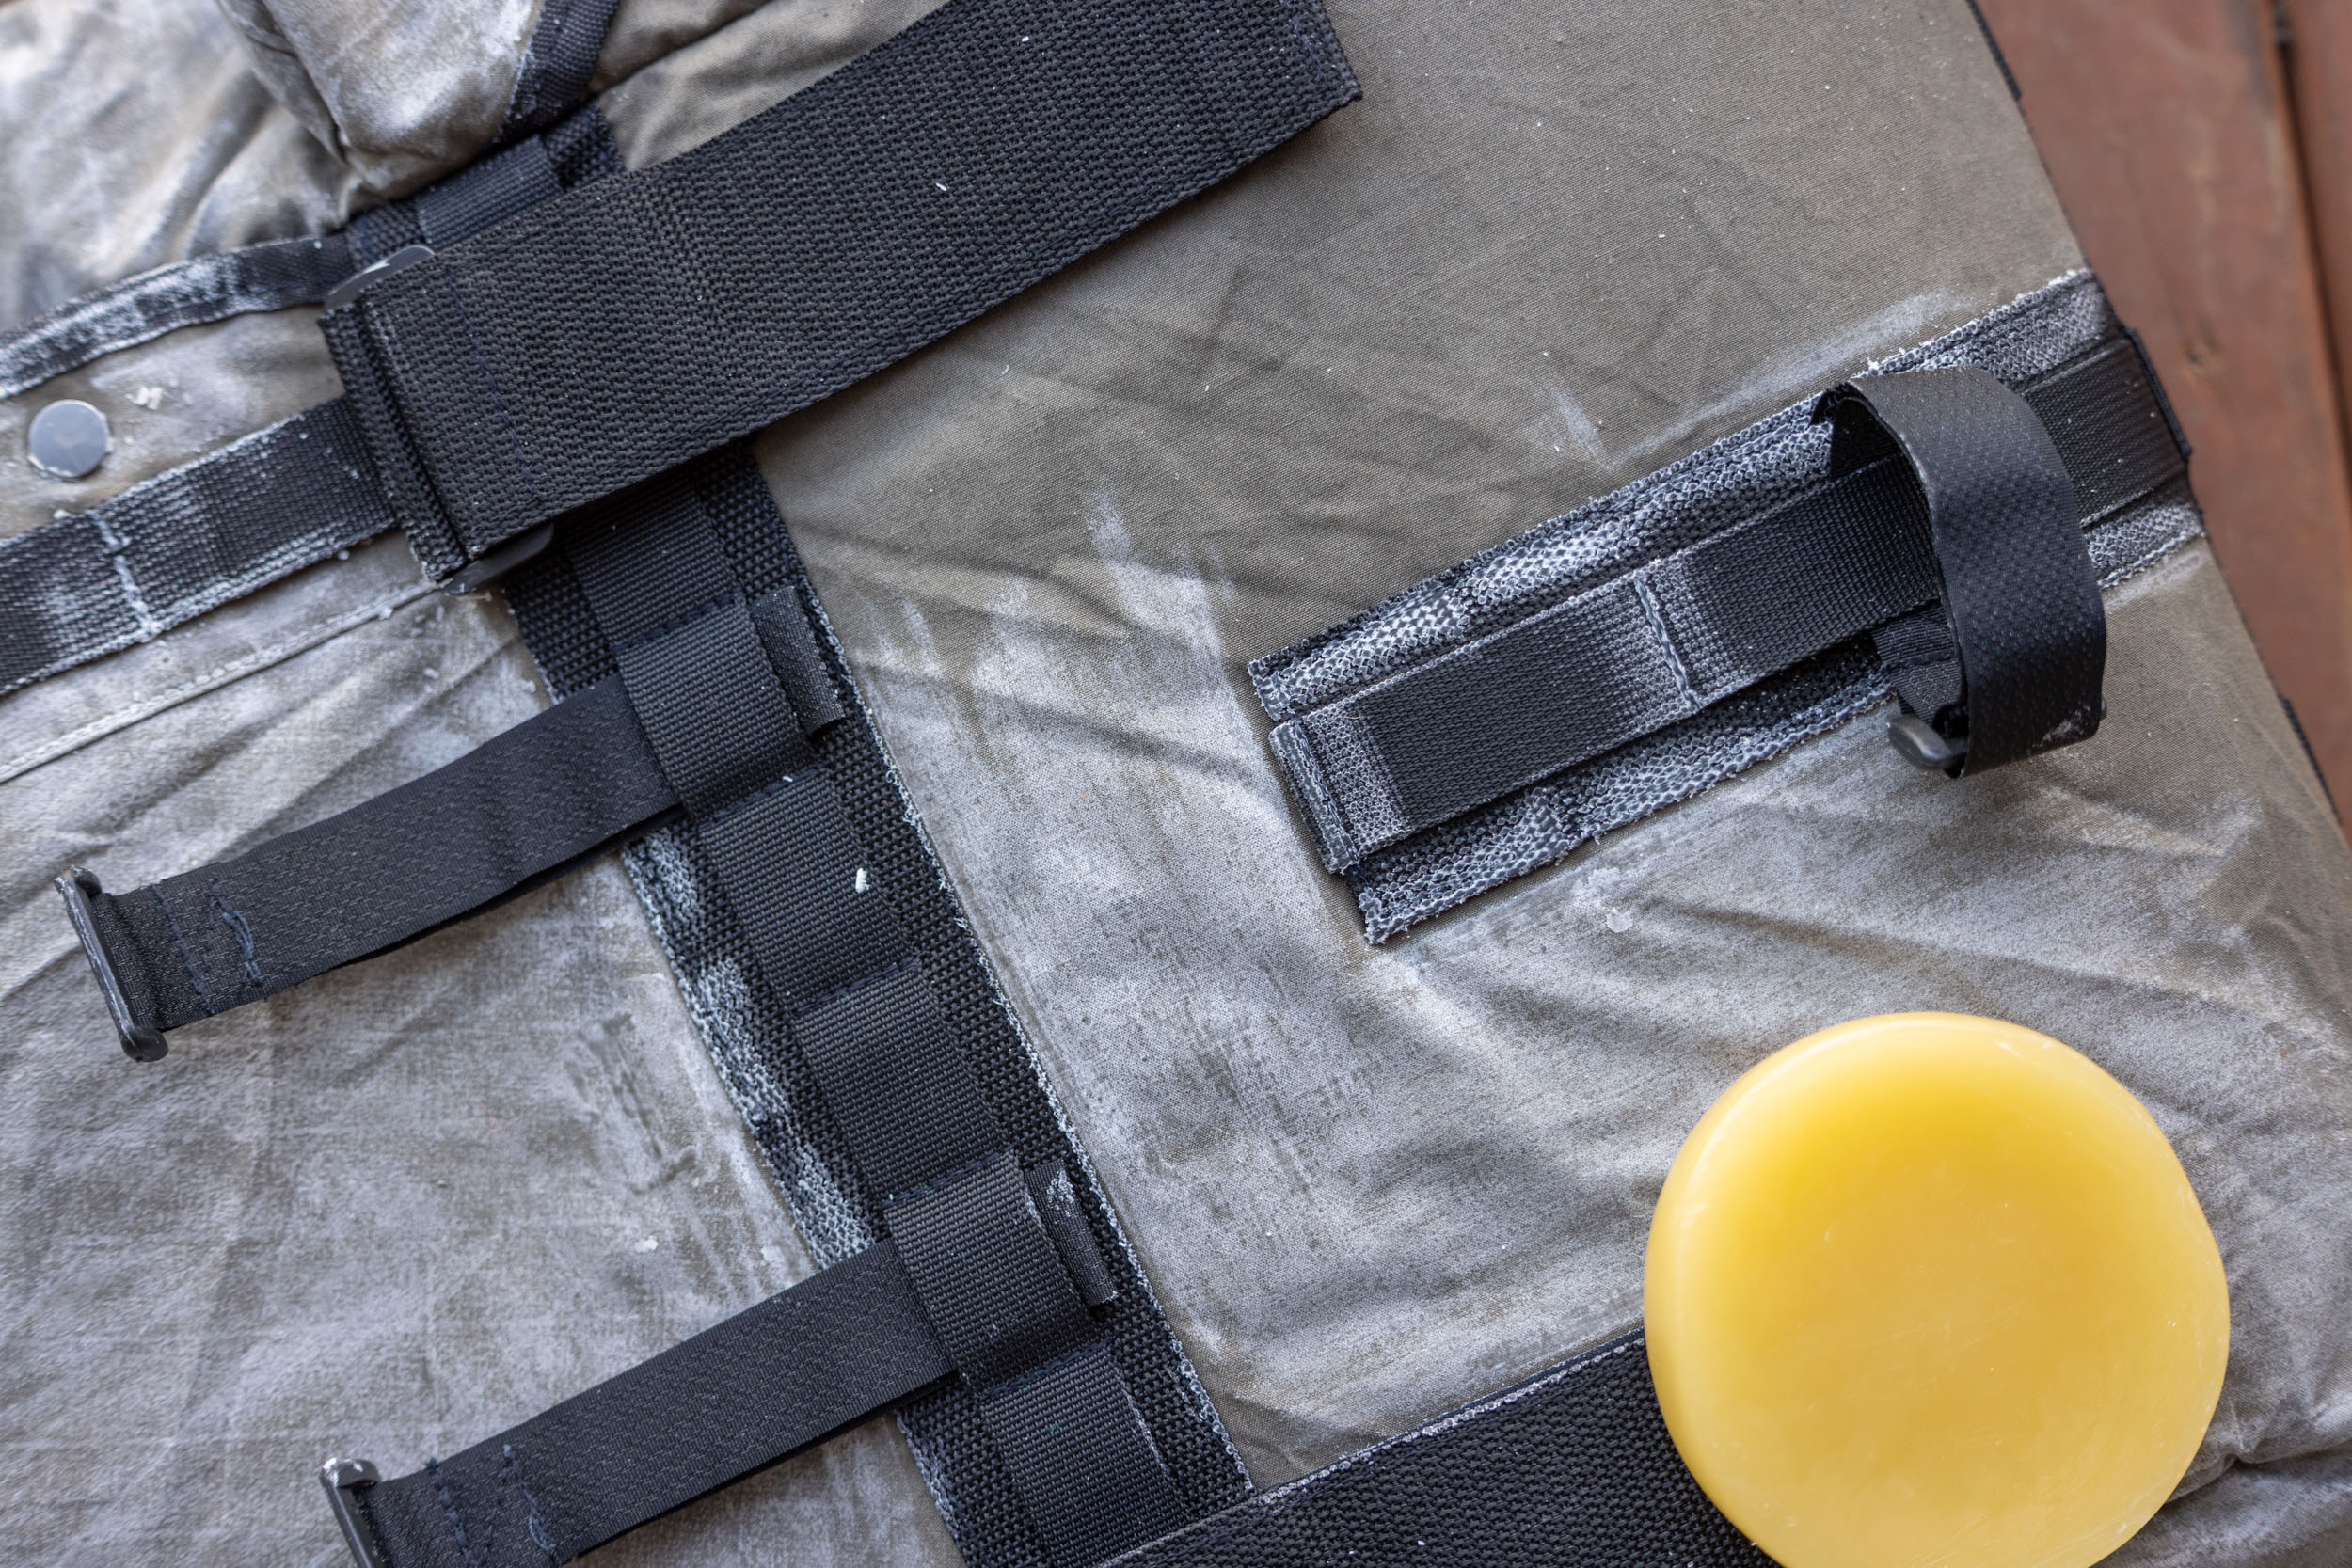
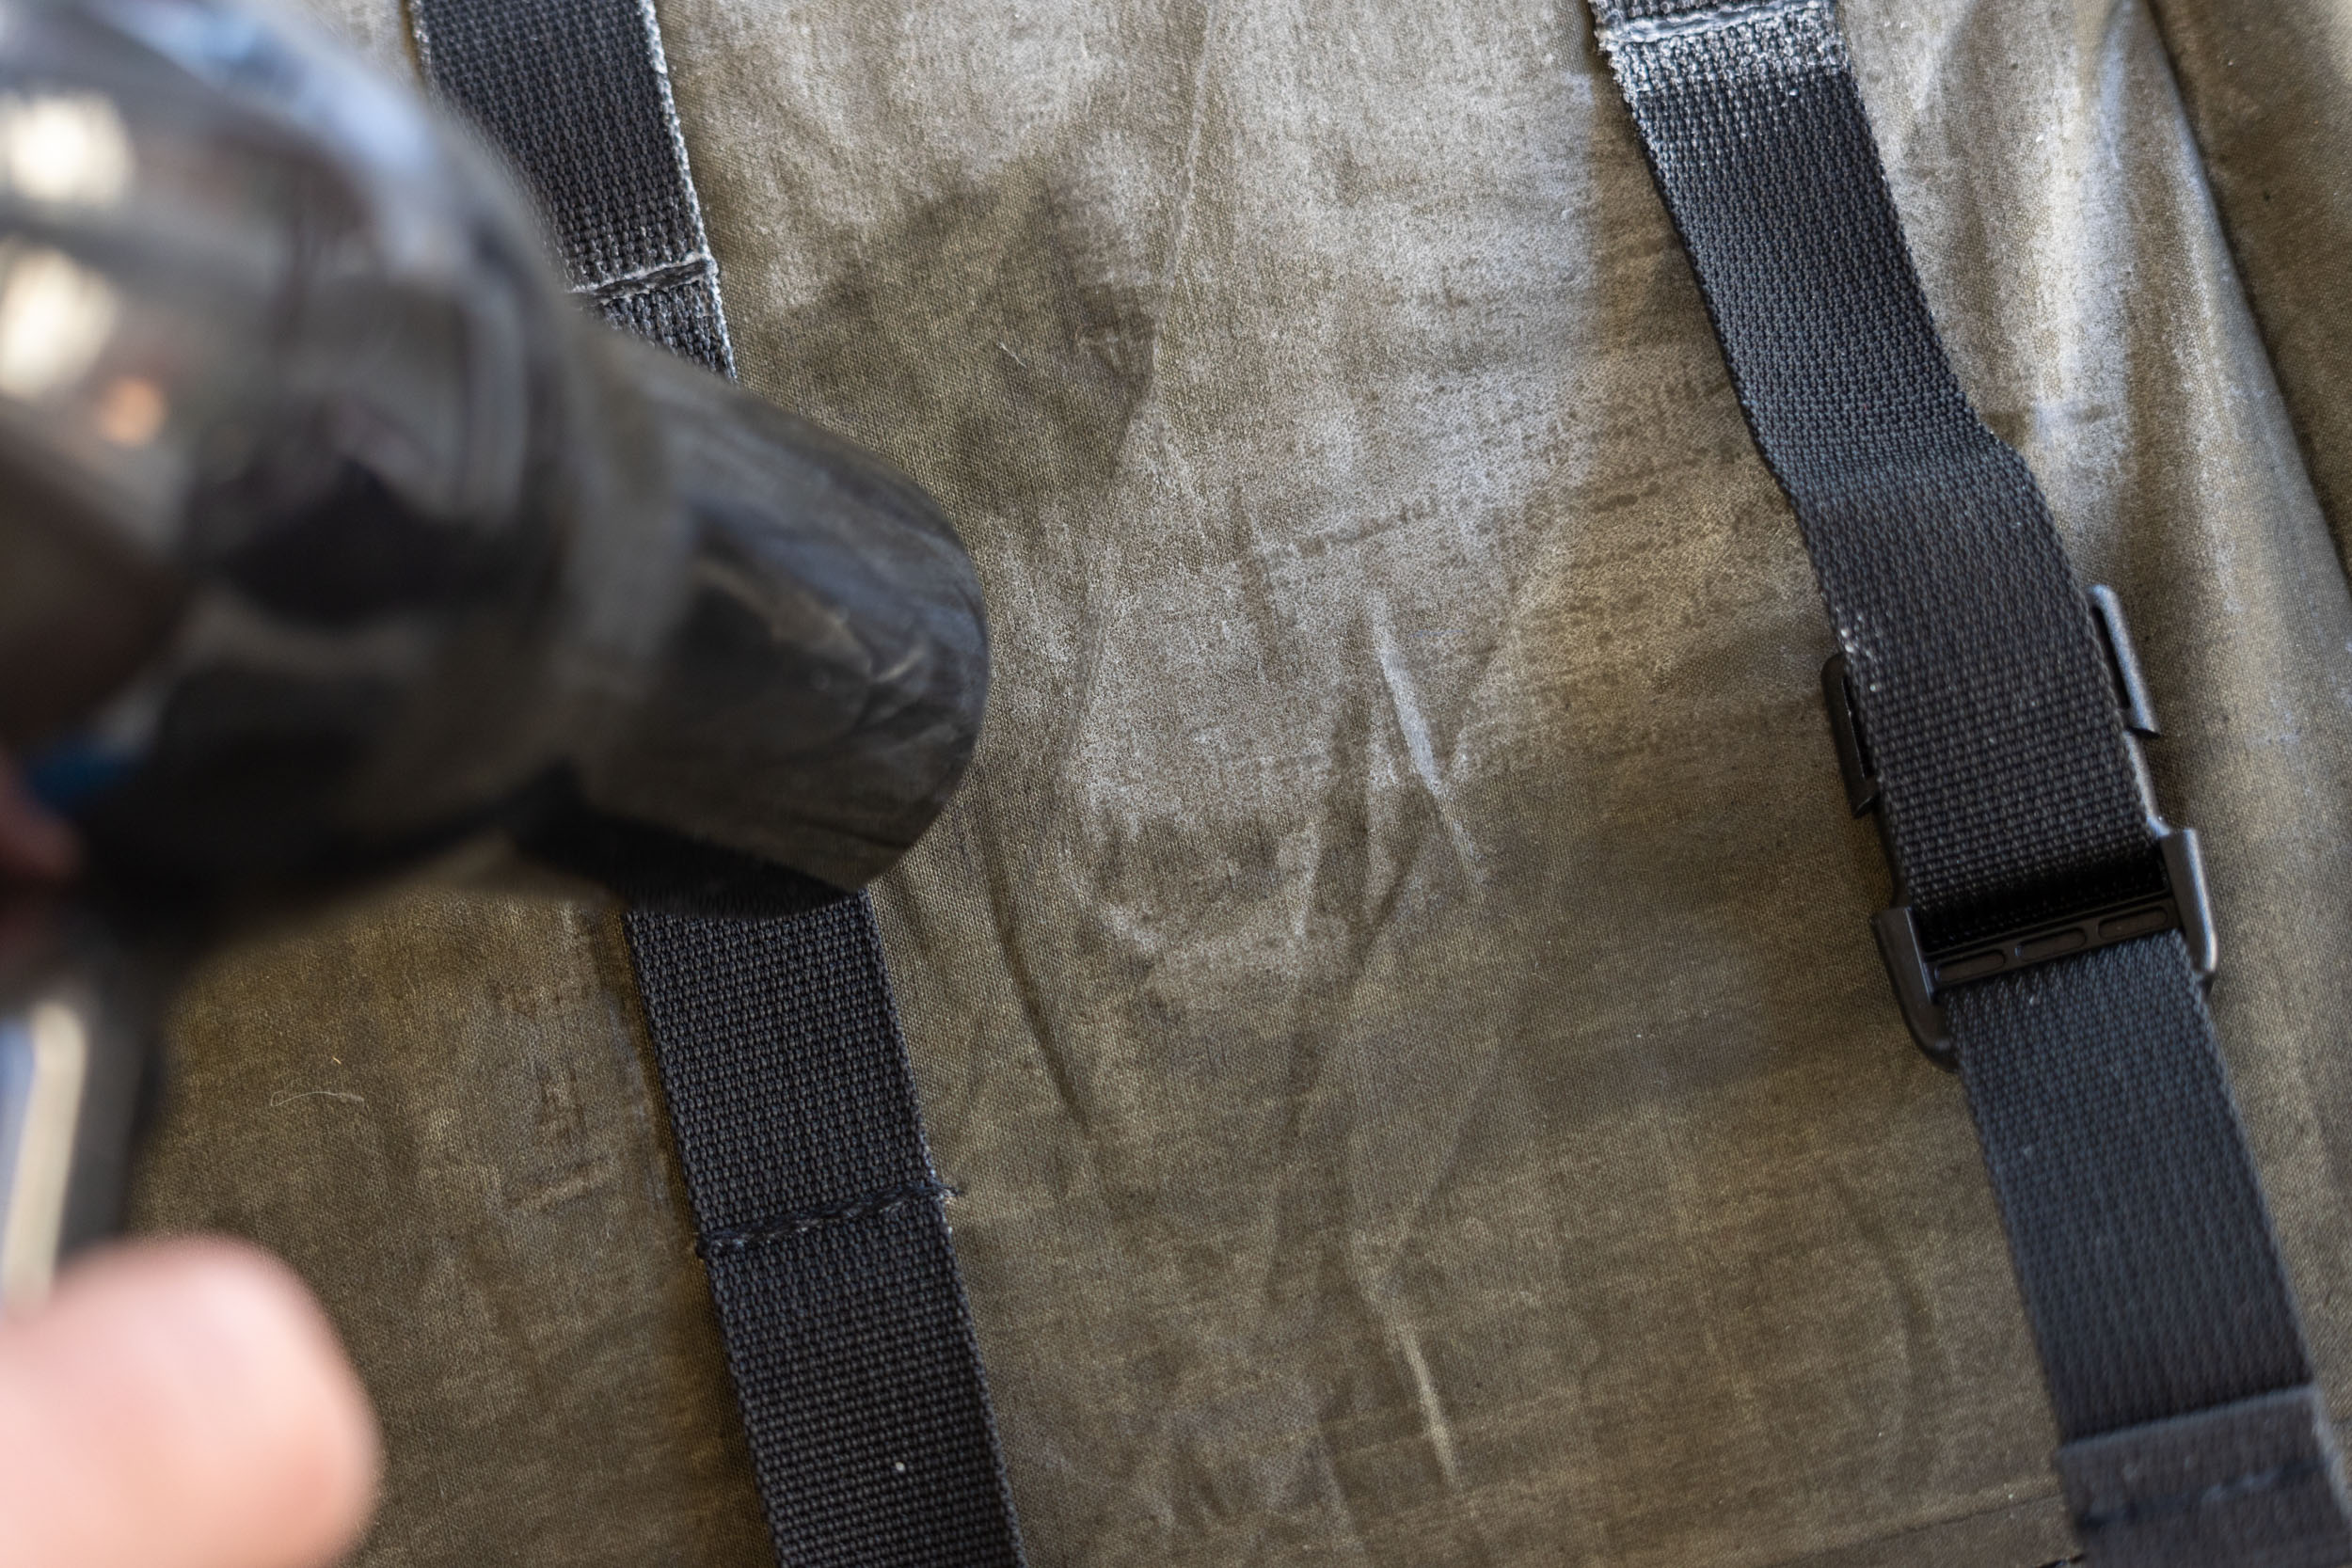
After the exterior has been completely covered with wax, you can use a blowdryer, heat gun, or an iron without steam to set the wax. It’s amazing how quickly the canvas absorbs the wax with some direct heat, liquefying and soaking into the fabric almost instantly. If any white blotchy wax patches appear when you’re done, hit it with some more heat or distribute with a rag until they disappear. Be careful around webbing, as direct heat with a heat gun could melt it. Because rubbing on the wax by hand is a slower process and results in a thinner coat of wax, this method is best suited for thinner fabrics (like caps and other wearables) than handlebar bags and panniers.
Tips
- Re-waxing your gear in the summer or heating the fabric/wax up slightly will make the process easier. Ronnie Romance puts his bags directly into the oven to warm them up before waxing!
- Use bigger pieces of wax for large flat areas of fabric and smaller pieces for awkward corners and seams.
- Carradice recommends warming up solid wax, like their Reproofing Wax, in warm water and using a lint-free cloth to apply to wax as needed.
- If the wax you use is soft and creamy, like Otter Wax or Rambler Bags wax, you might not need to use heat to set the wax and can instead use the edge of a ruler or Otter Wax’s Wax Smoothing Tool to press the wax into the fabric.
- A patchy finish is normal after a fresh wax; it will usually even out after some use.
- If the fabric was unwaxed before treating it, it might require multiple coats.

Method Two: The Brush-On Method
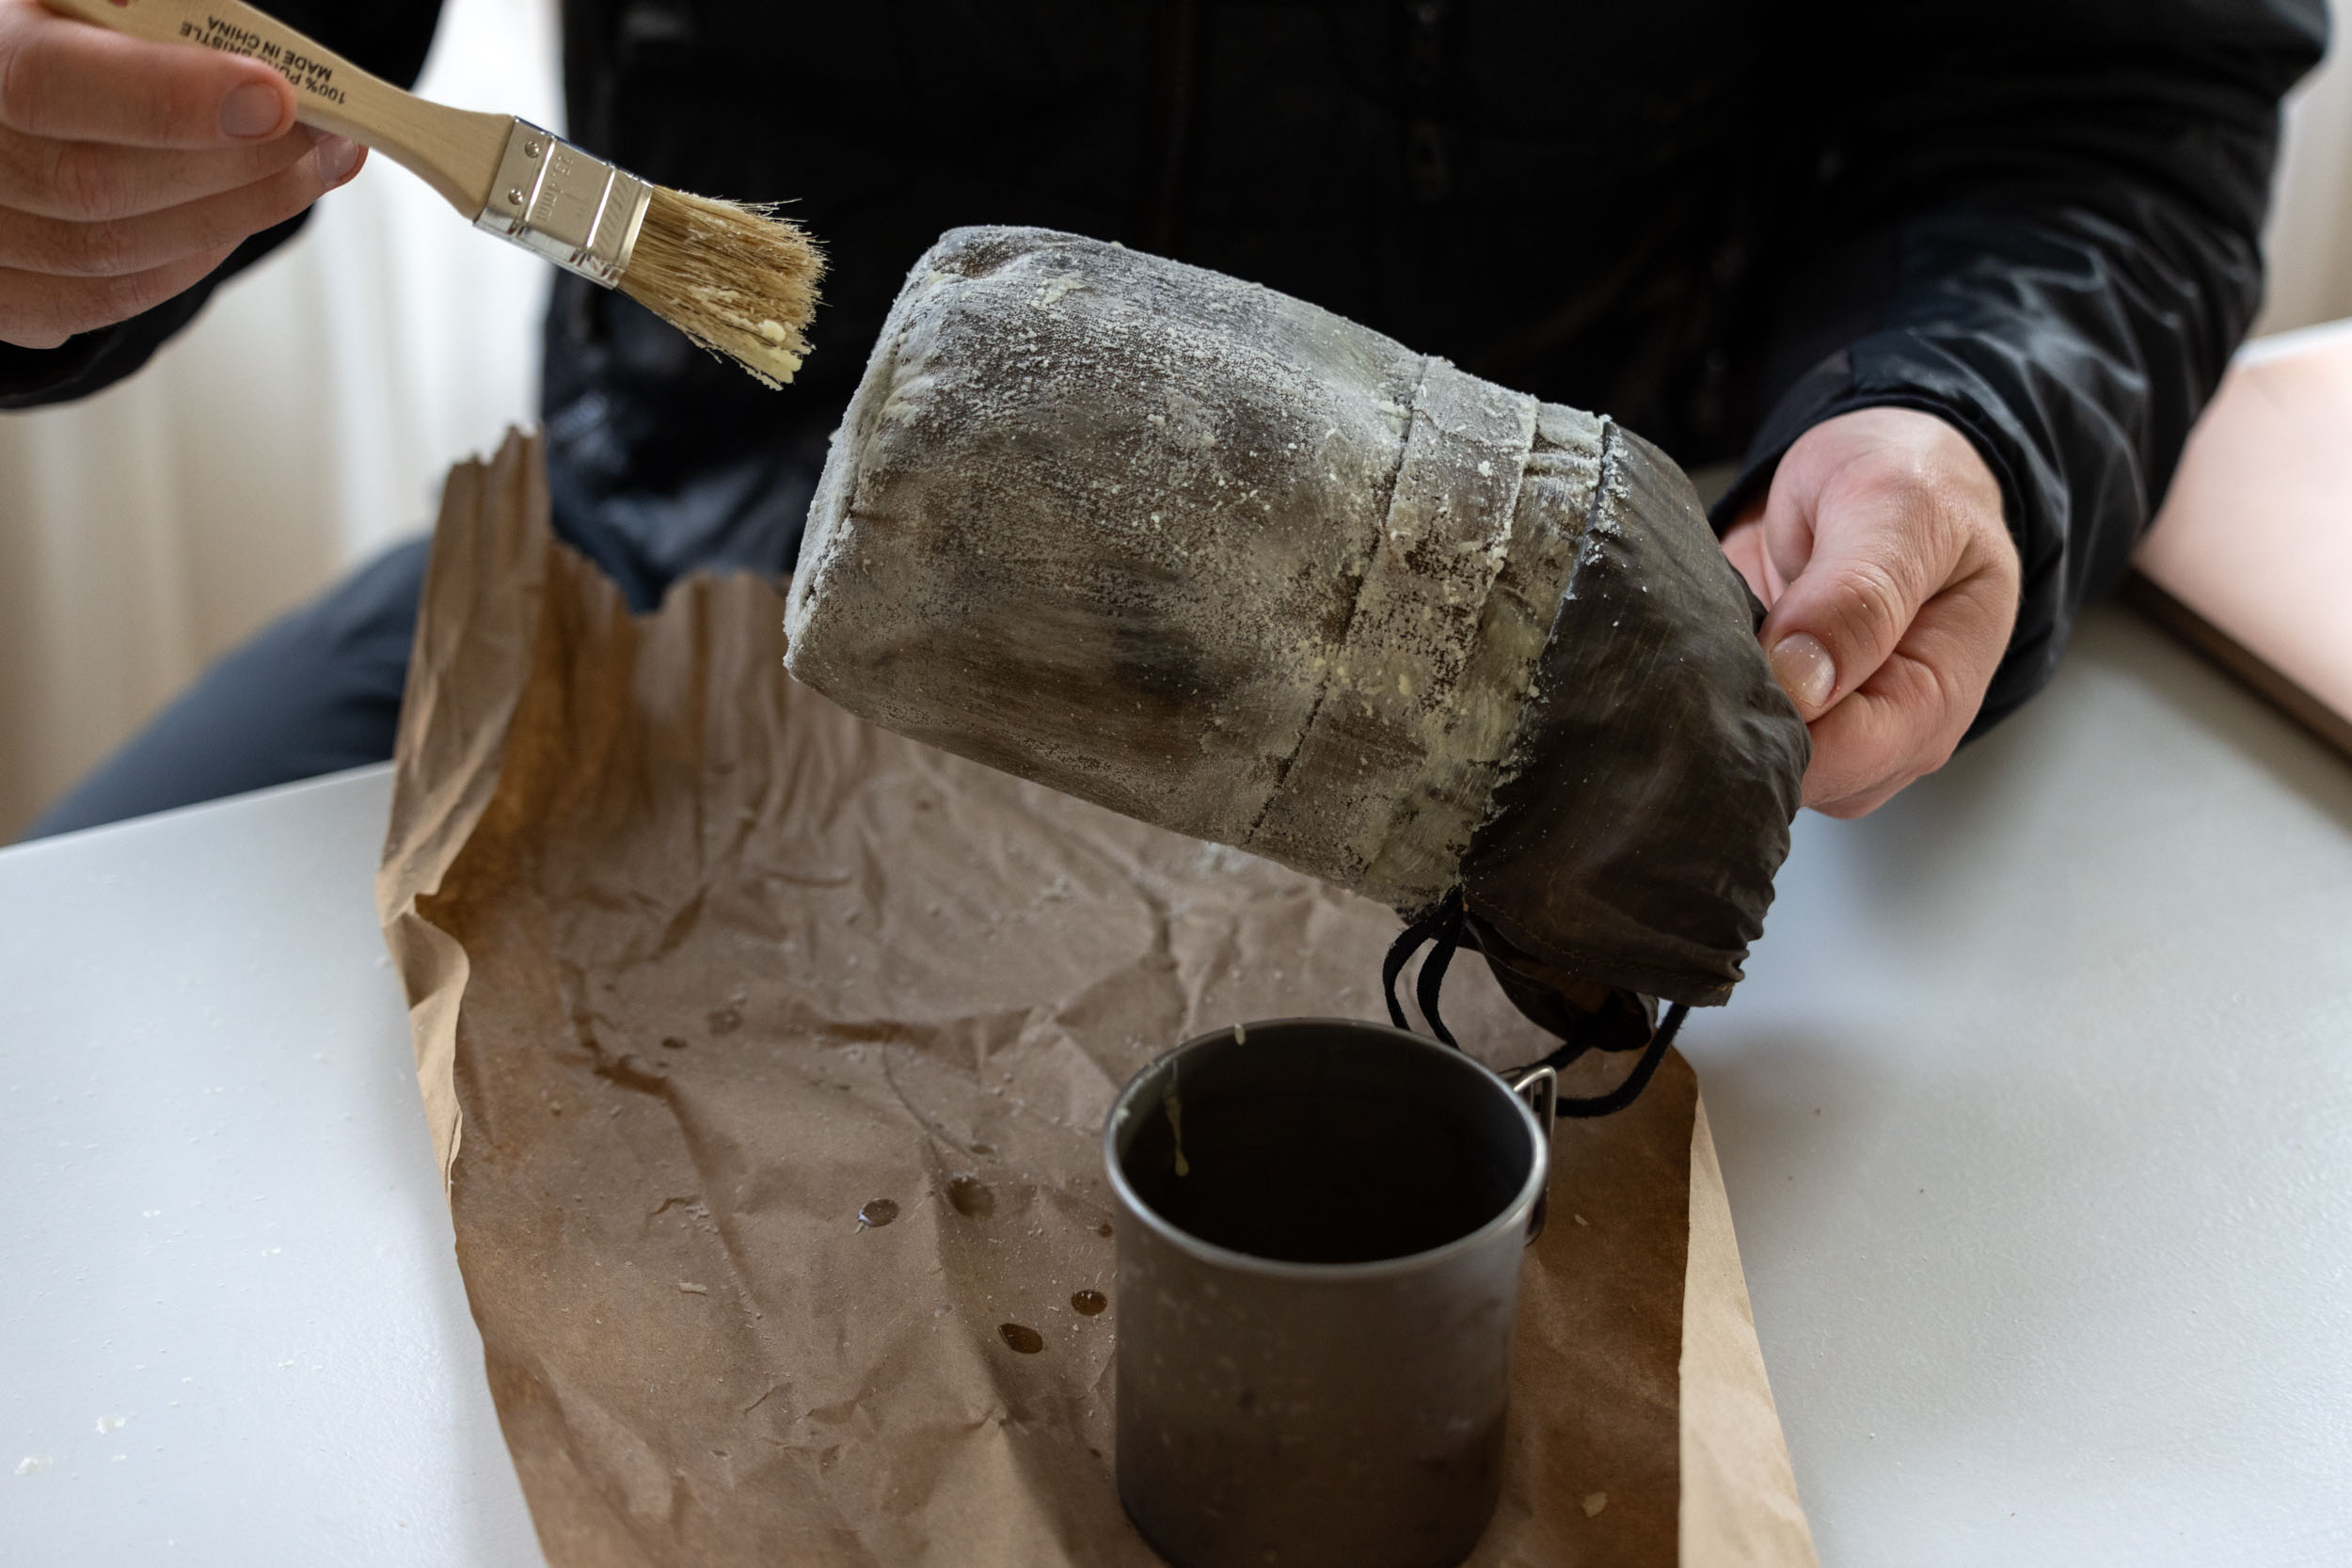
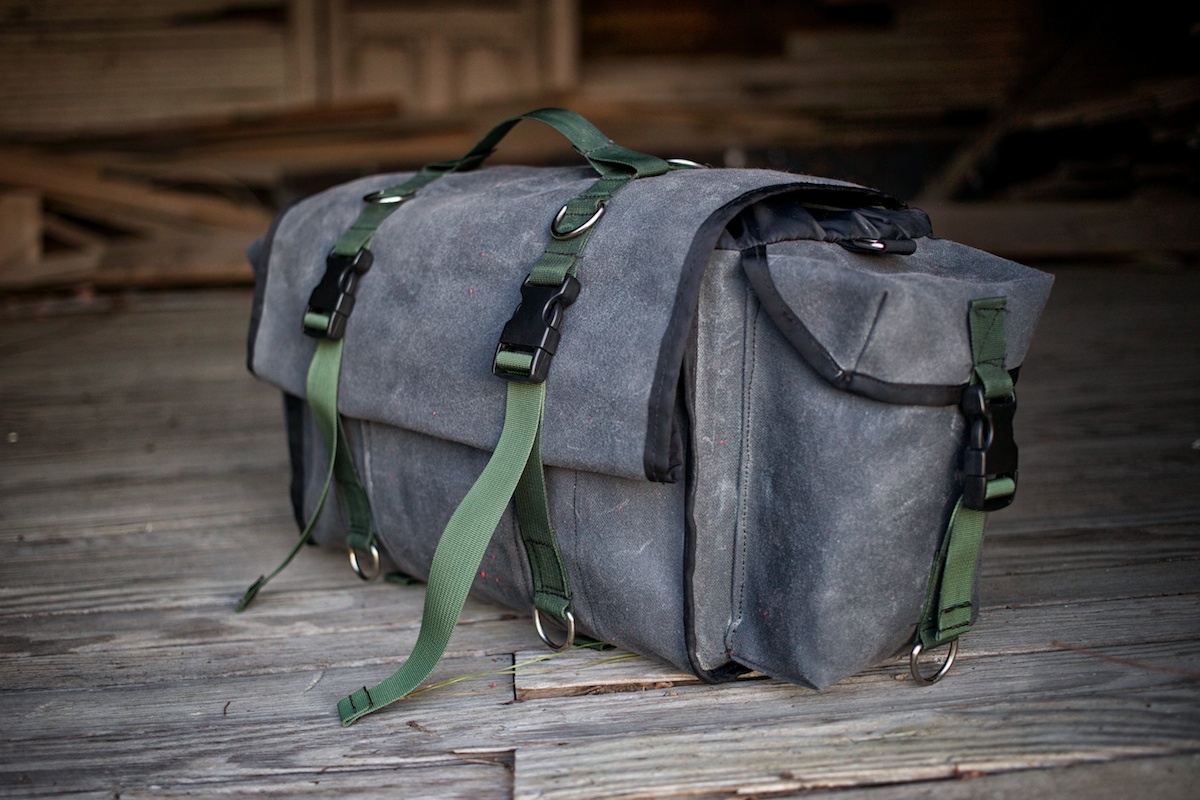
Brushing the liquid wax onto my Randi Jo Bartender Bag was quicker and far less work than working the wax into the fabric by hand. It was difficult to apply a thin layer of wax to start, which is what Randi Jo recommended, and I was skeptical that the bag would absorb the layer of dried wax after it was covered. However, just like the rub-on method, the hair dryer heated things up, and the canvas quickly absorbed all of the wax. It took a few passes, and the ripstop nylon drawstring closure didn’t absorb as much, but I was happy with the finished product. Using the brush-on method is best for high-wear gear and bags where achieving 100% waterproof status is the goal. It also seems to work better on thicker fabrics that can fully absorb the wax.
Tips
- Use the double boiler to reheat your wax and keep it on low heat while you treat your gear so the wax doesn’t cool off and harden on you while you’re working.
- Start with a light layer of wax, heat with a blowdryer to let the fabric absorb it, and repeat as needed. Waxing a bag from scratch might require multiple applications.
- A stiff brush works better for working the wax into awkward spots.
- If white, blotchy patches appear after the fabric cools down, reheat with a blow dryer so the fabric can absorb it. Work it in with a clean lint-free cloth or your fingers.
- Ripstop nylon drawstring closures, like on Randi Jo Fab Bartender Bag, can absorb some wax, but less than canvas. Apply sparingly.
Our Favorite Waxed Canvas Bags & Gear
There are loads of awesome waxed canvas bikepacking bags and accessories available from talented makers all over, but here’s a list of some of our favorite makers and bags.
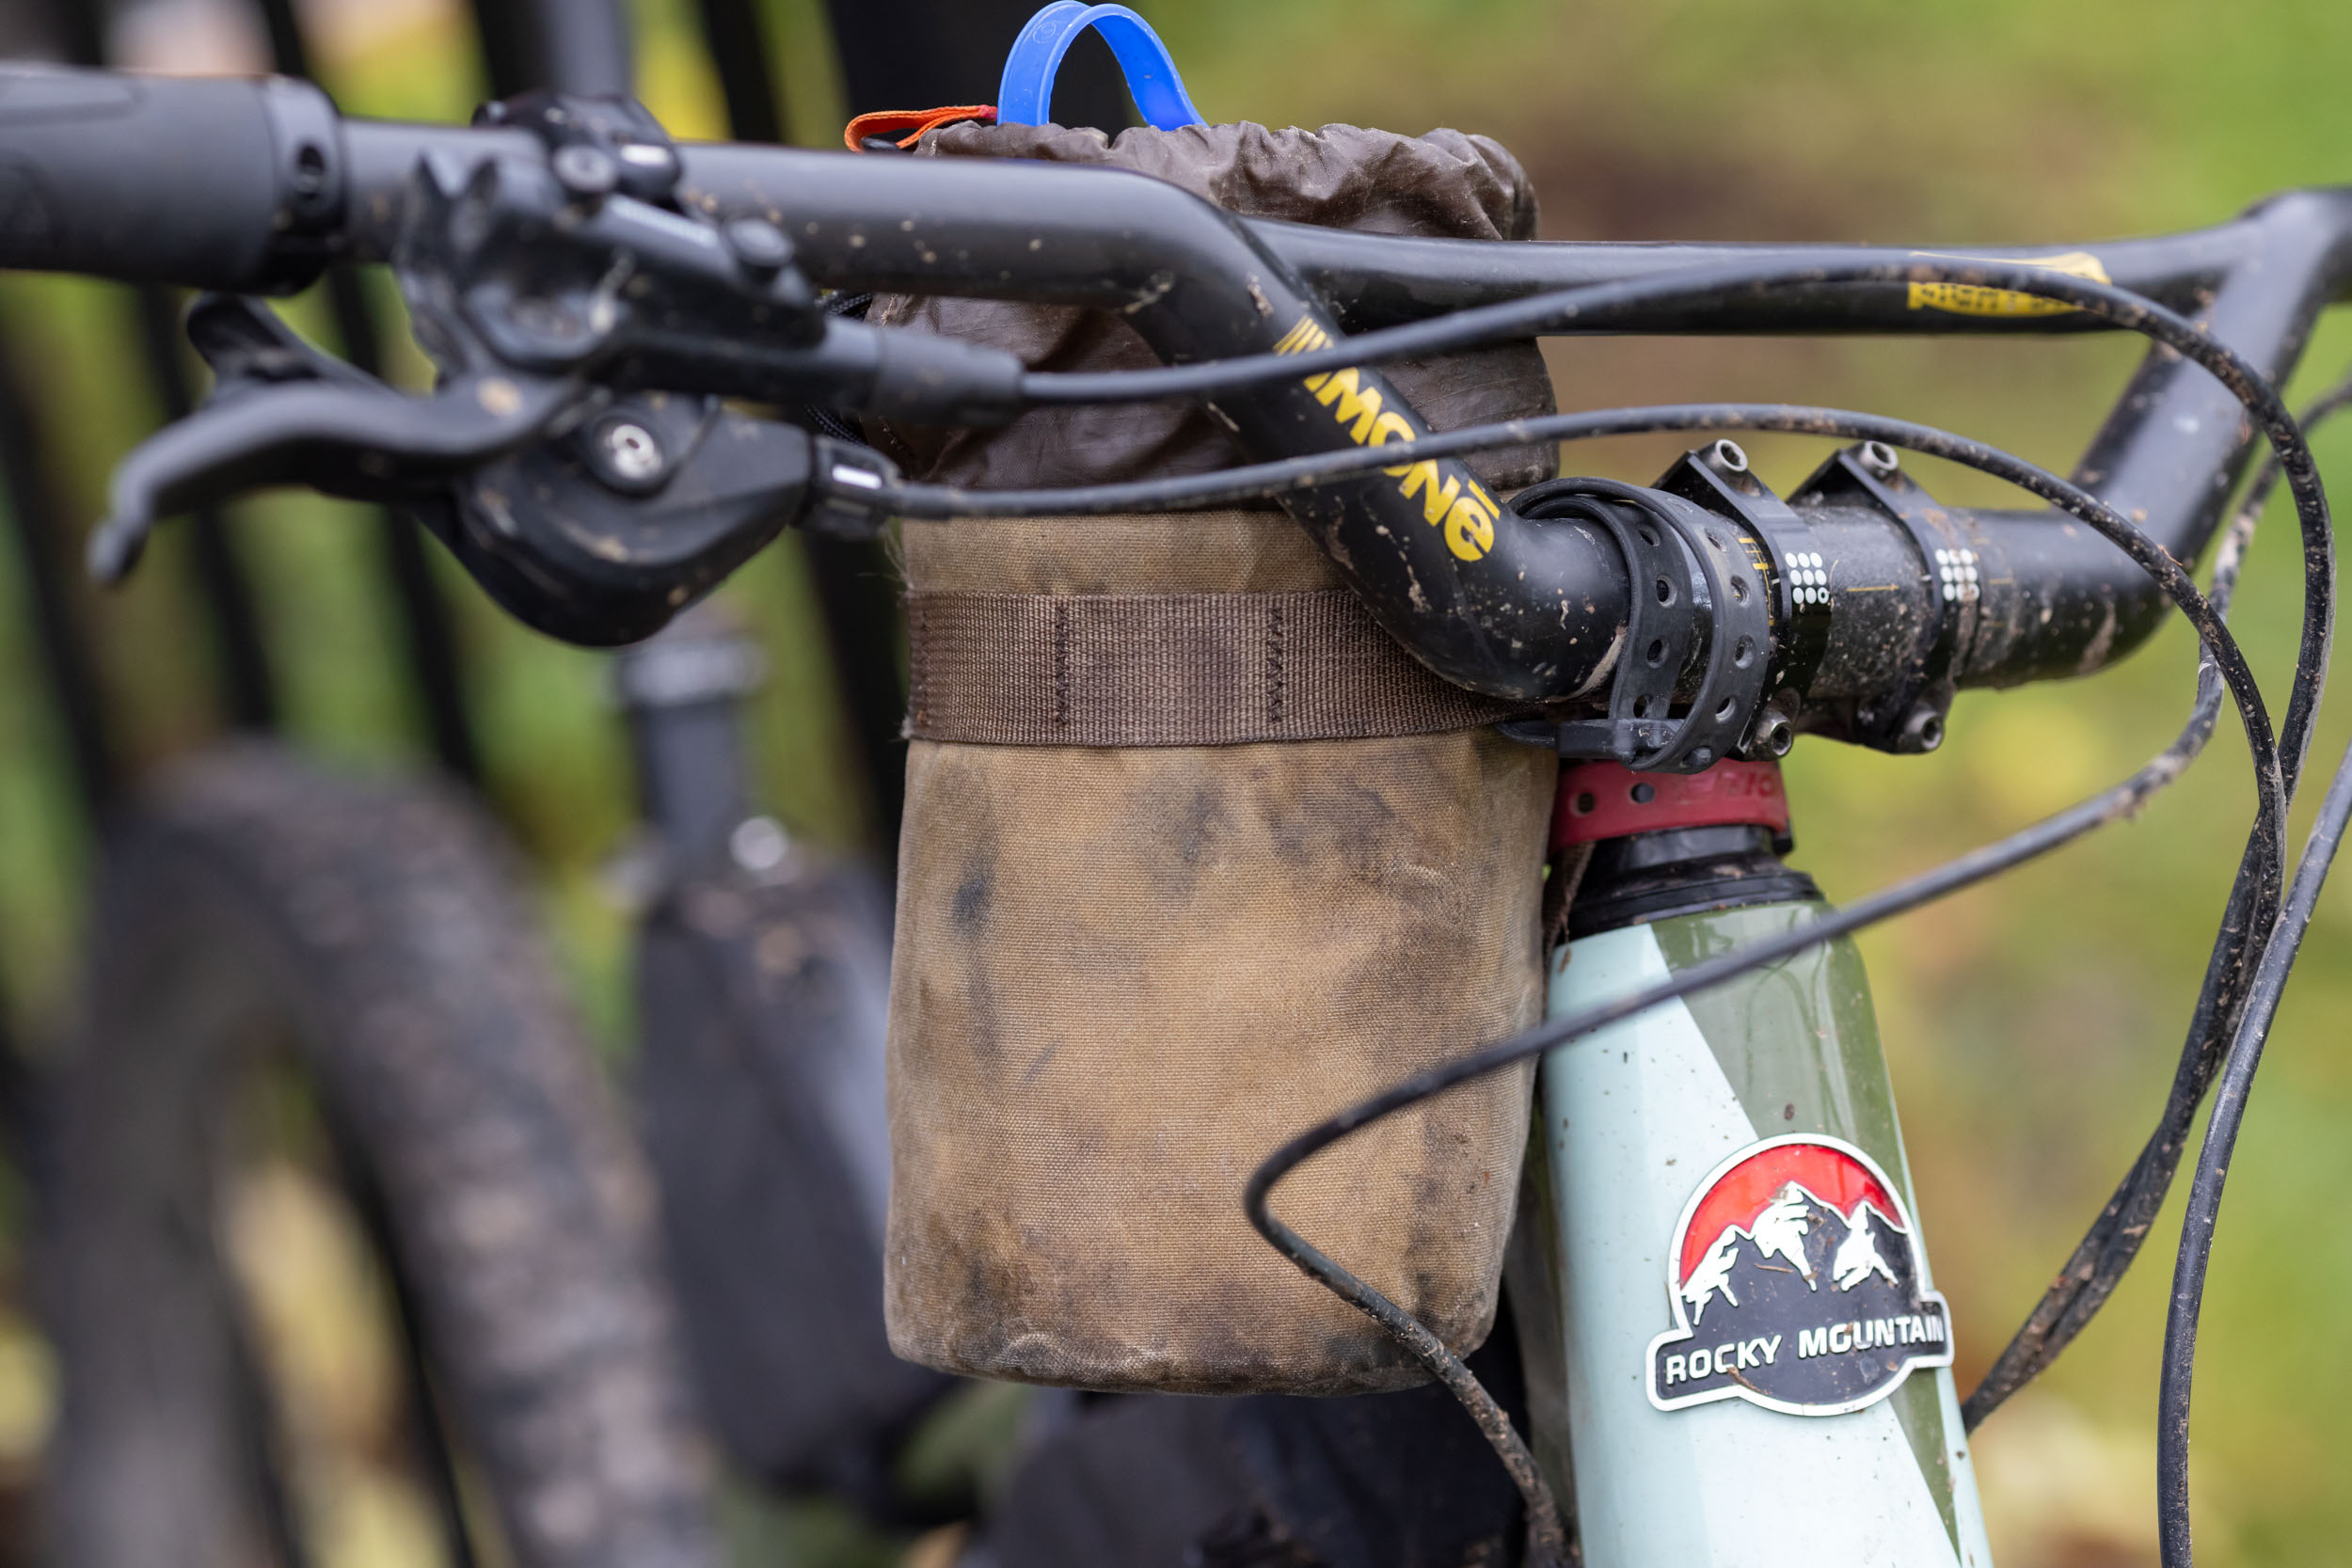
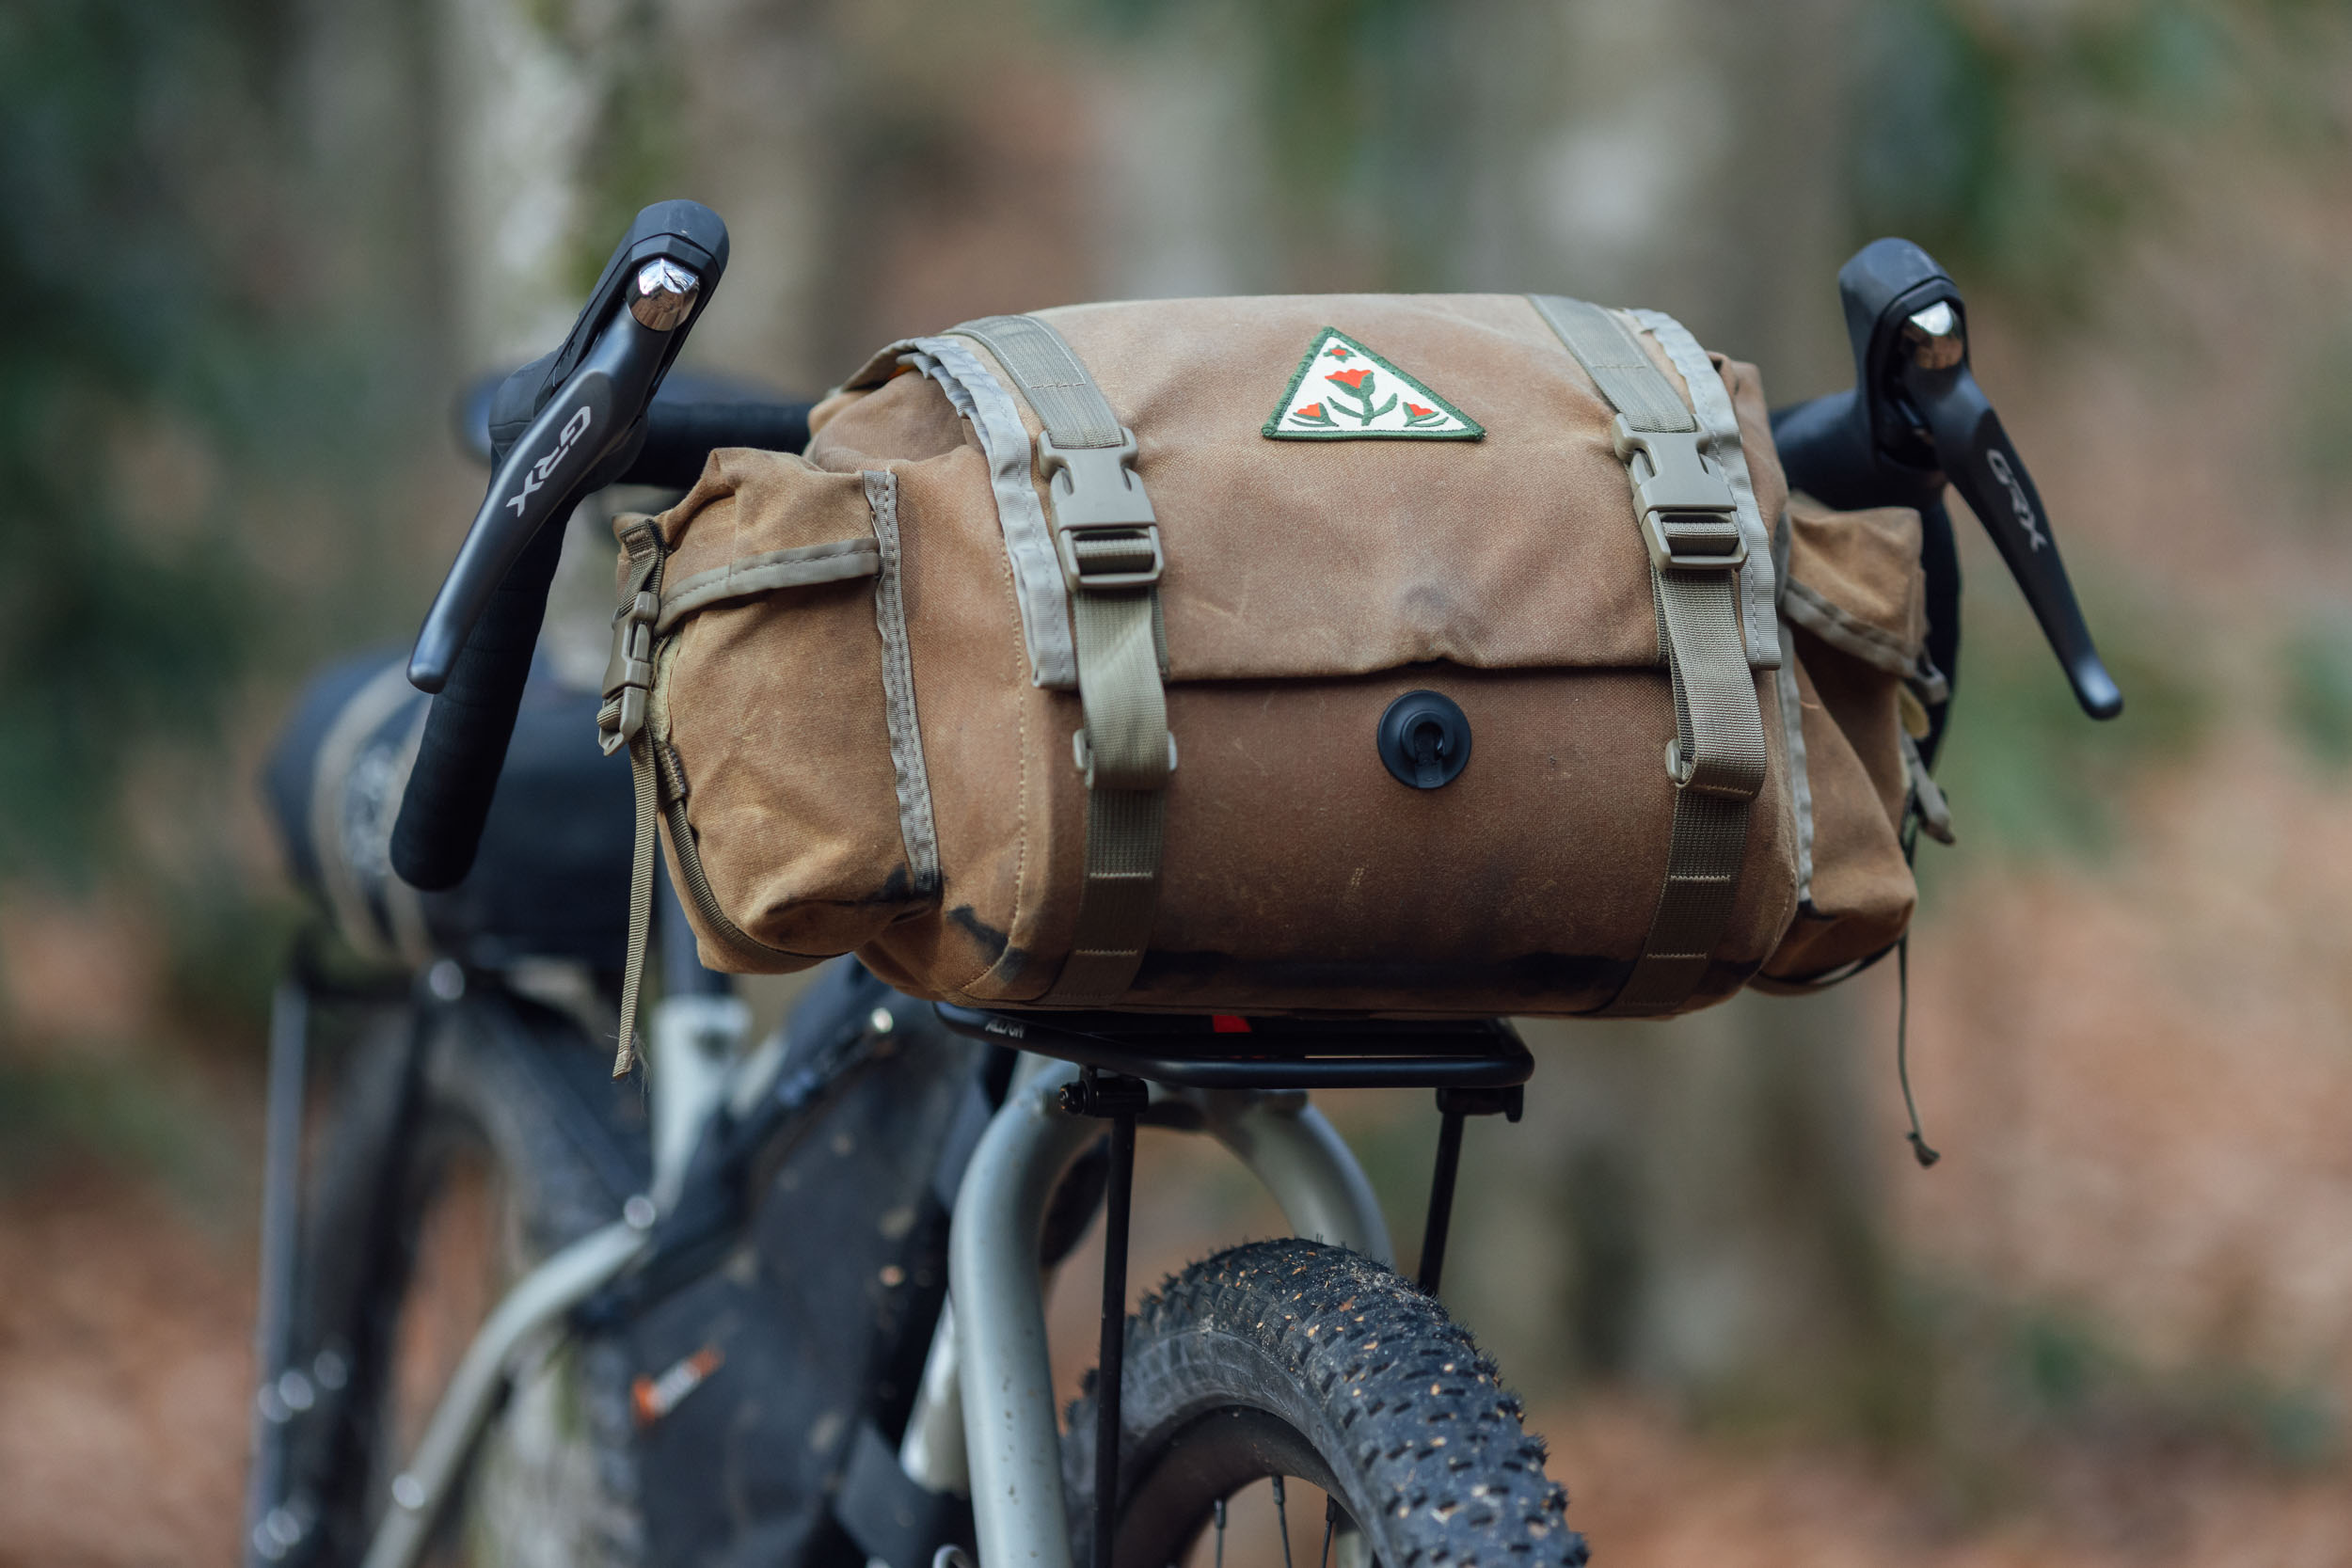
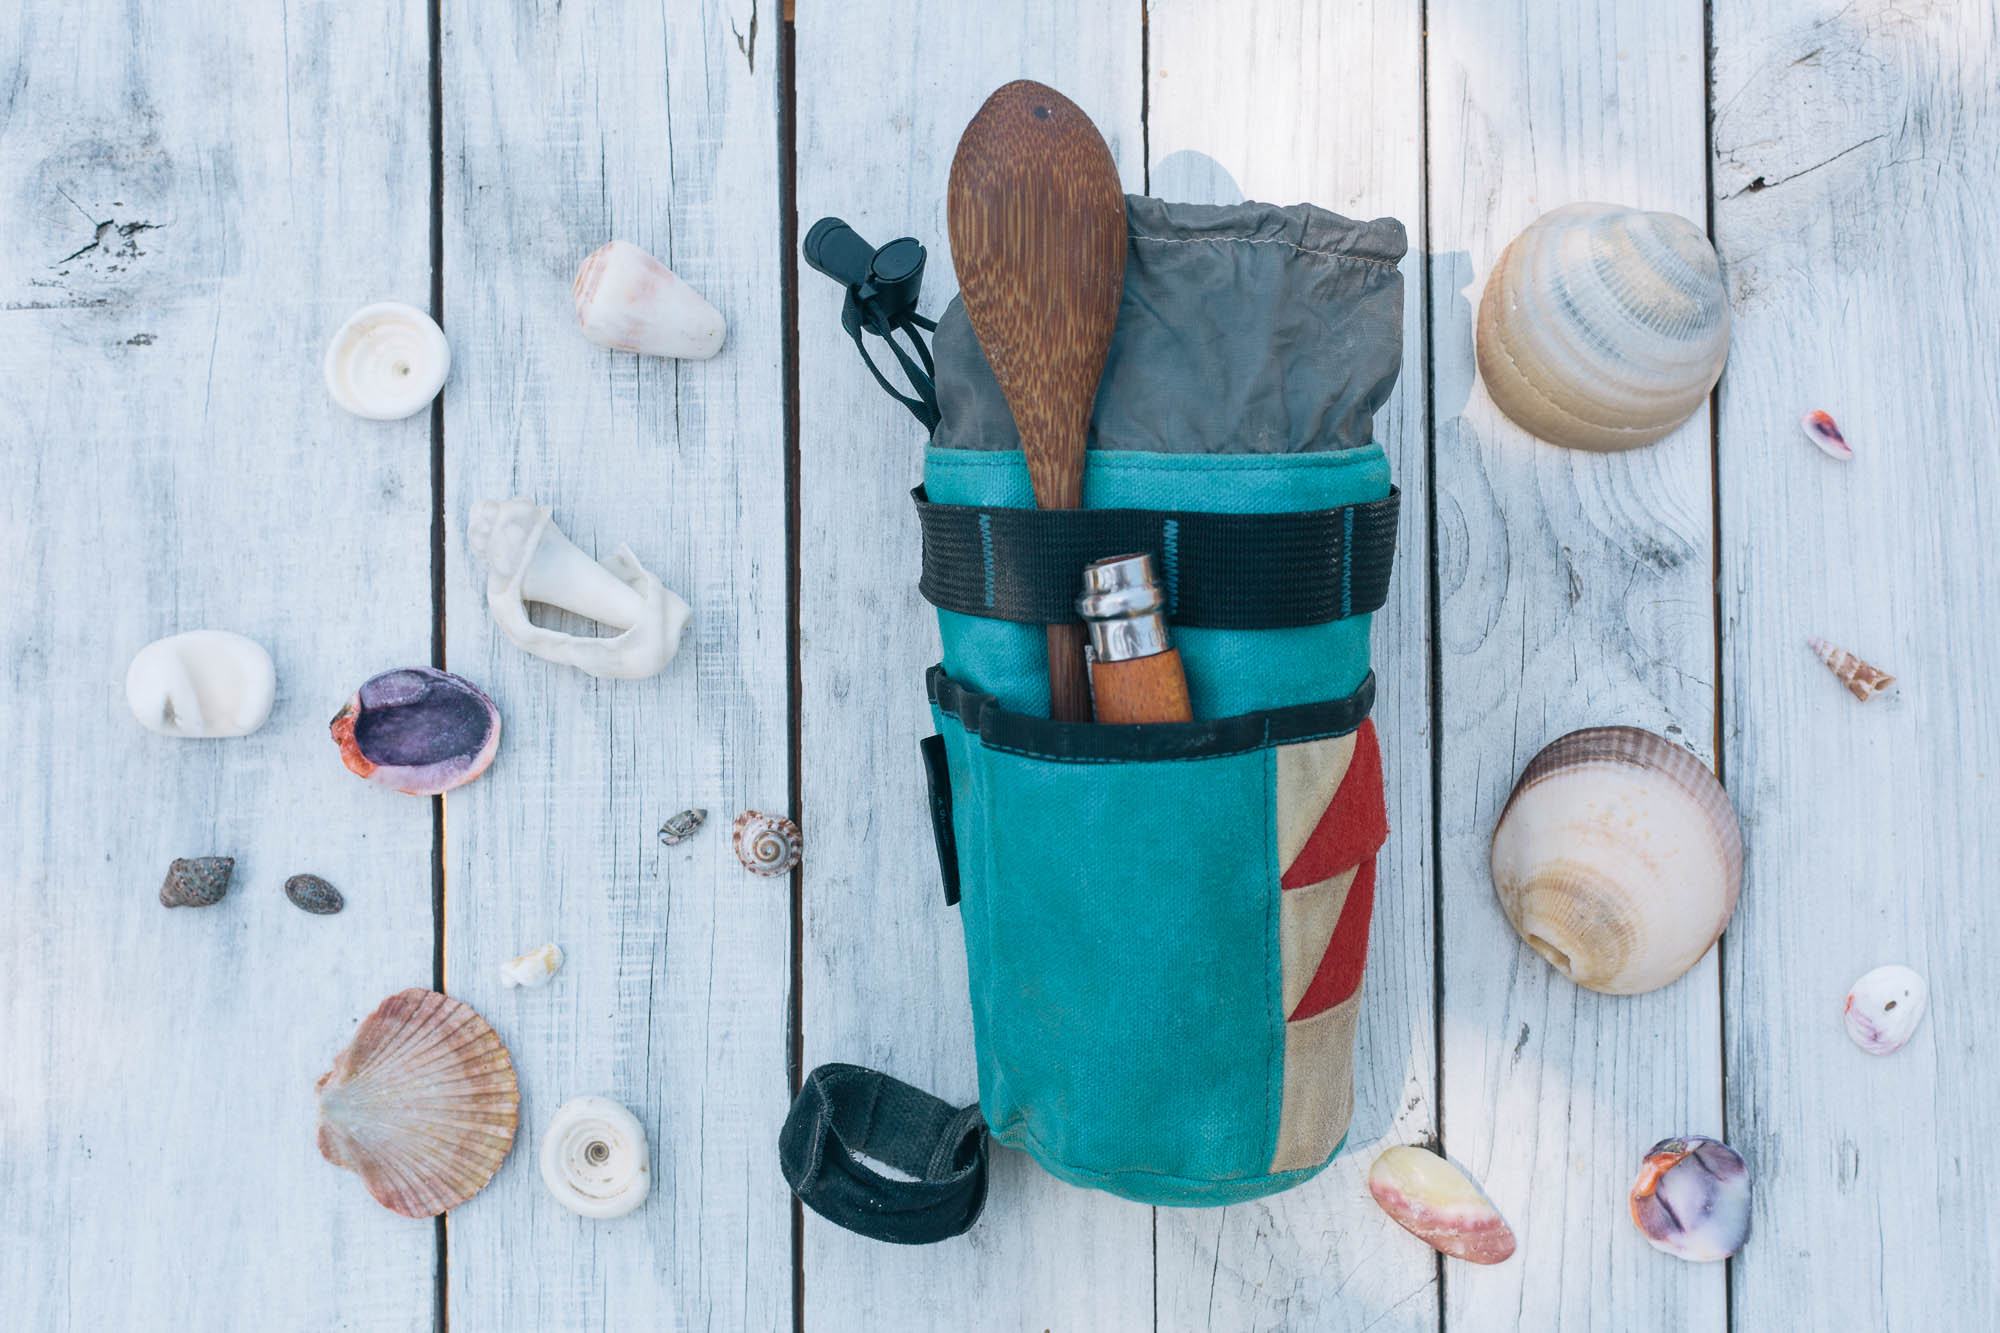
- Randi Jo Fab Bartender Bags : Handmade in Oregon, my Randi Jo Fab Bartender Bags are by far my longest-running stem bags. They normally have a lovely selection of fabrics and colors available, and they are built to last.
- Randi Jo Fab Caps: Just like their bags, Randi Jo’s selection of caps are a favorite among several of us. Their waxed canvas cap with the wool flip-up ear cover is my personal pick.
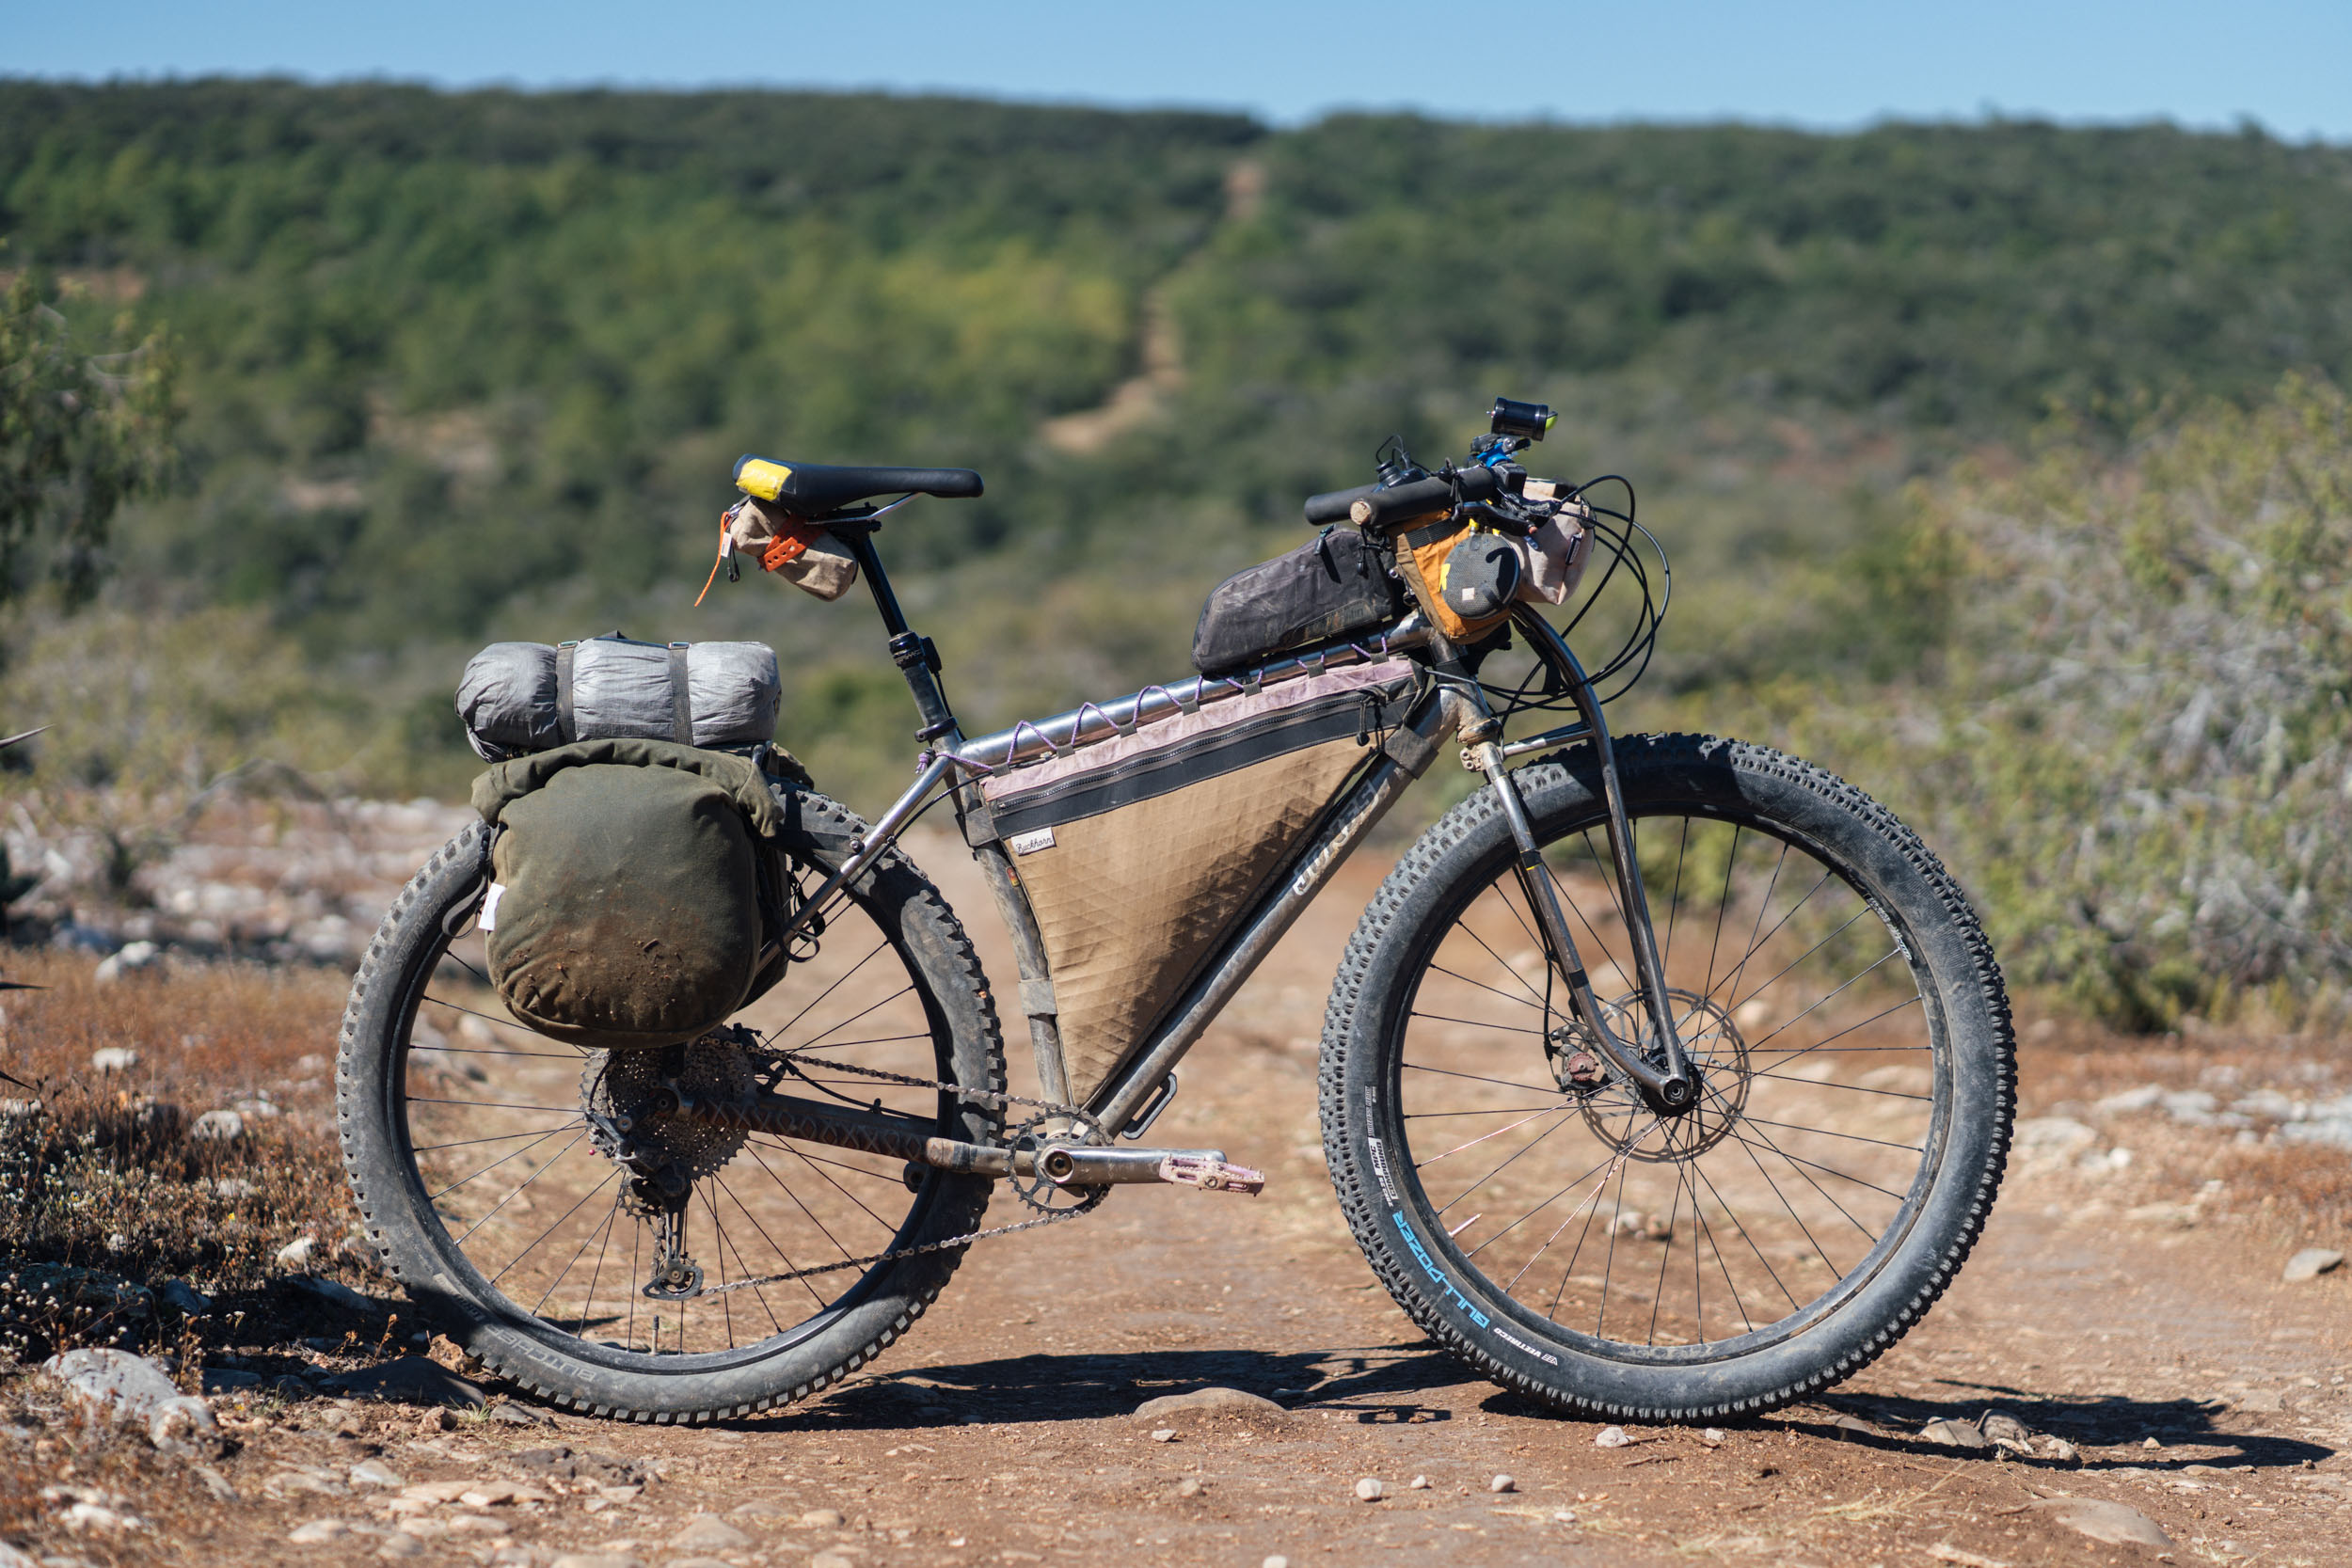
- Buckhorn Bags: Based in Arkansas, Buckhorn Bags has received a lot of compliments on their waxed canvas panniers. They are a good example of where using waxed canvas makes a lot of sense.
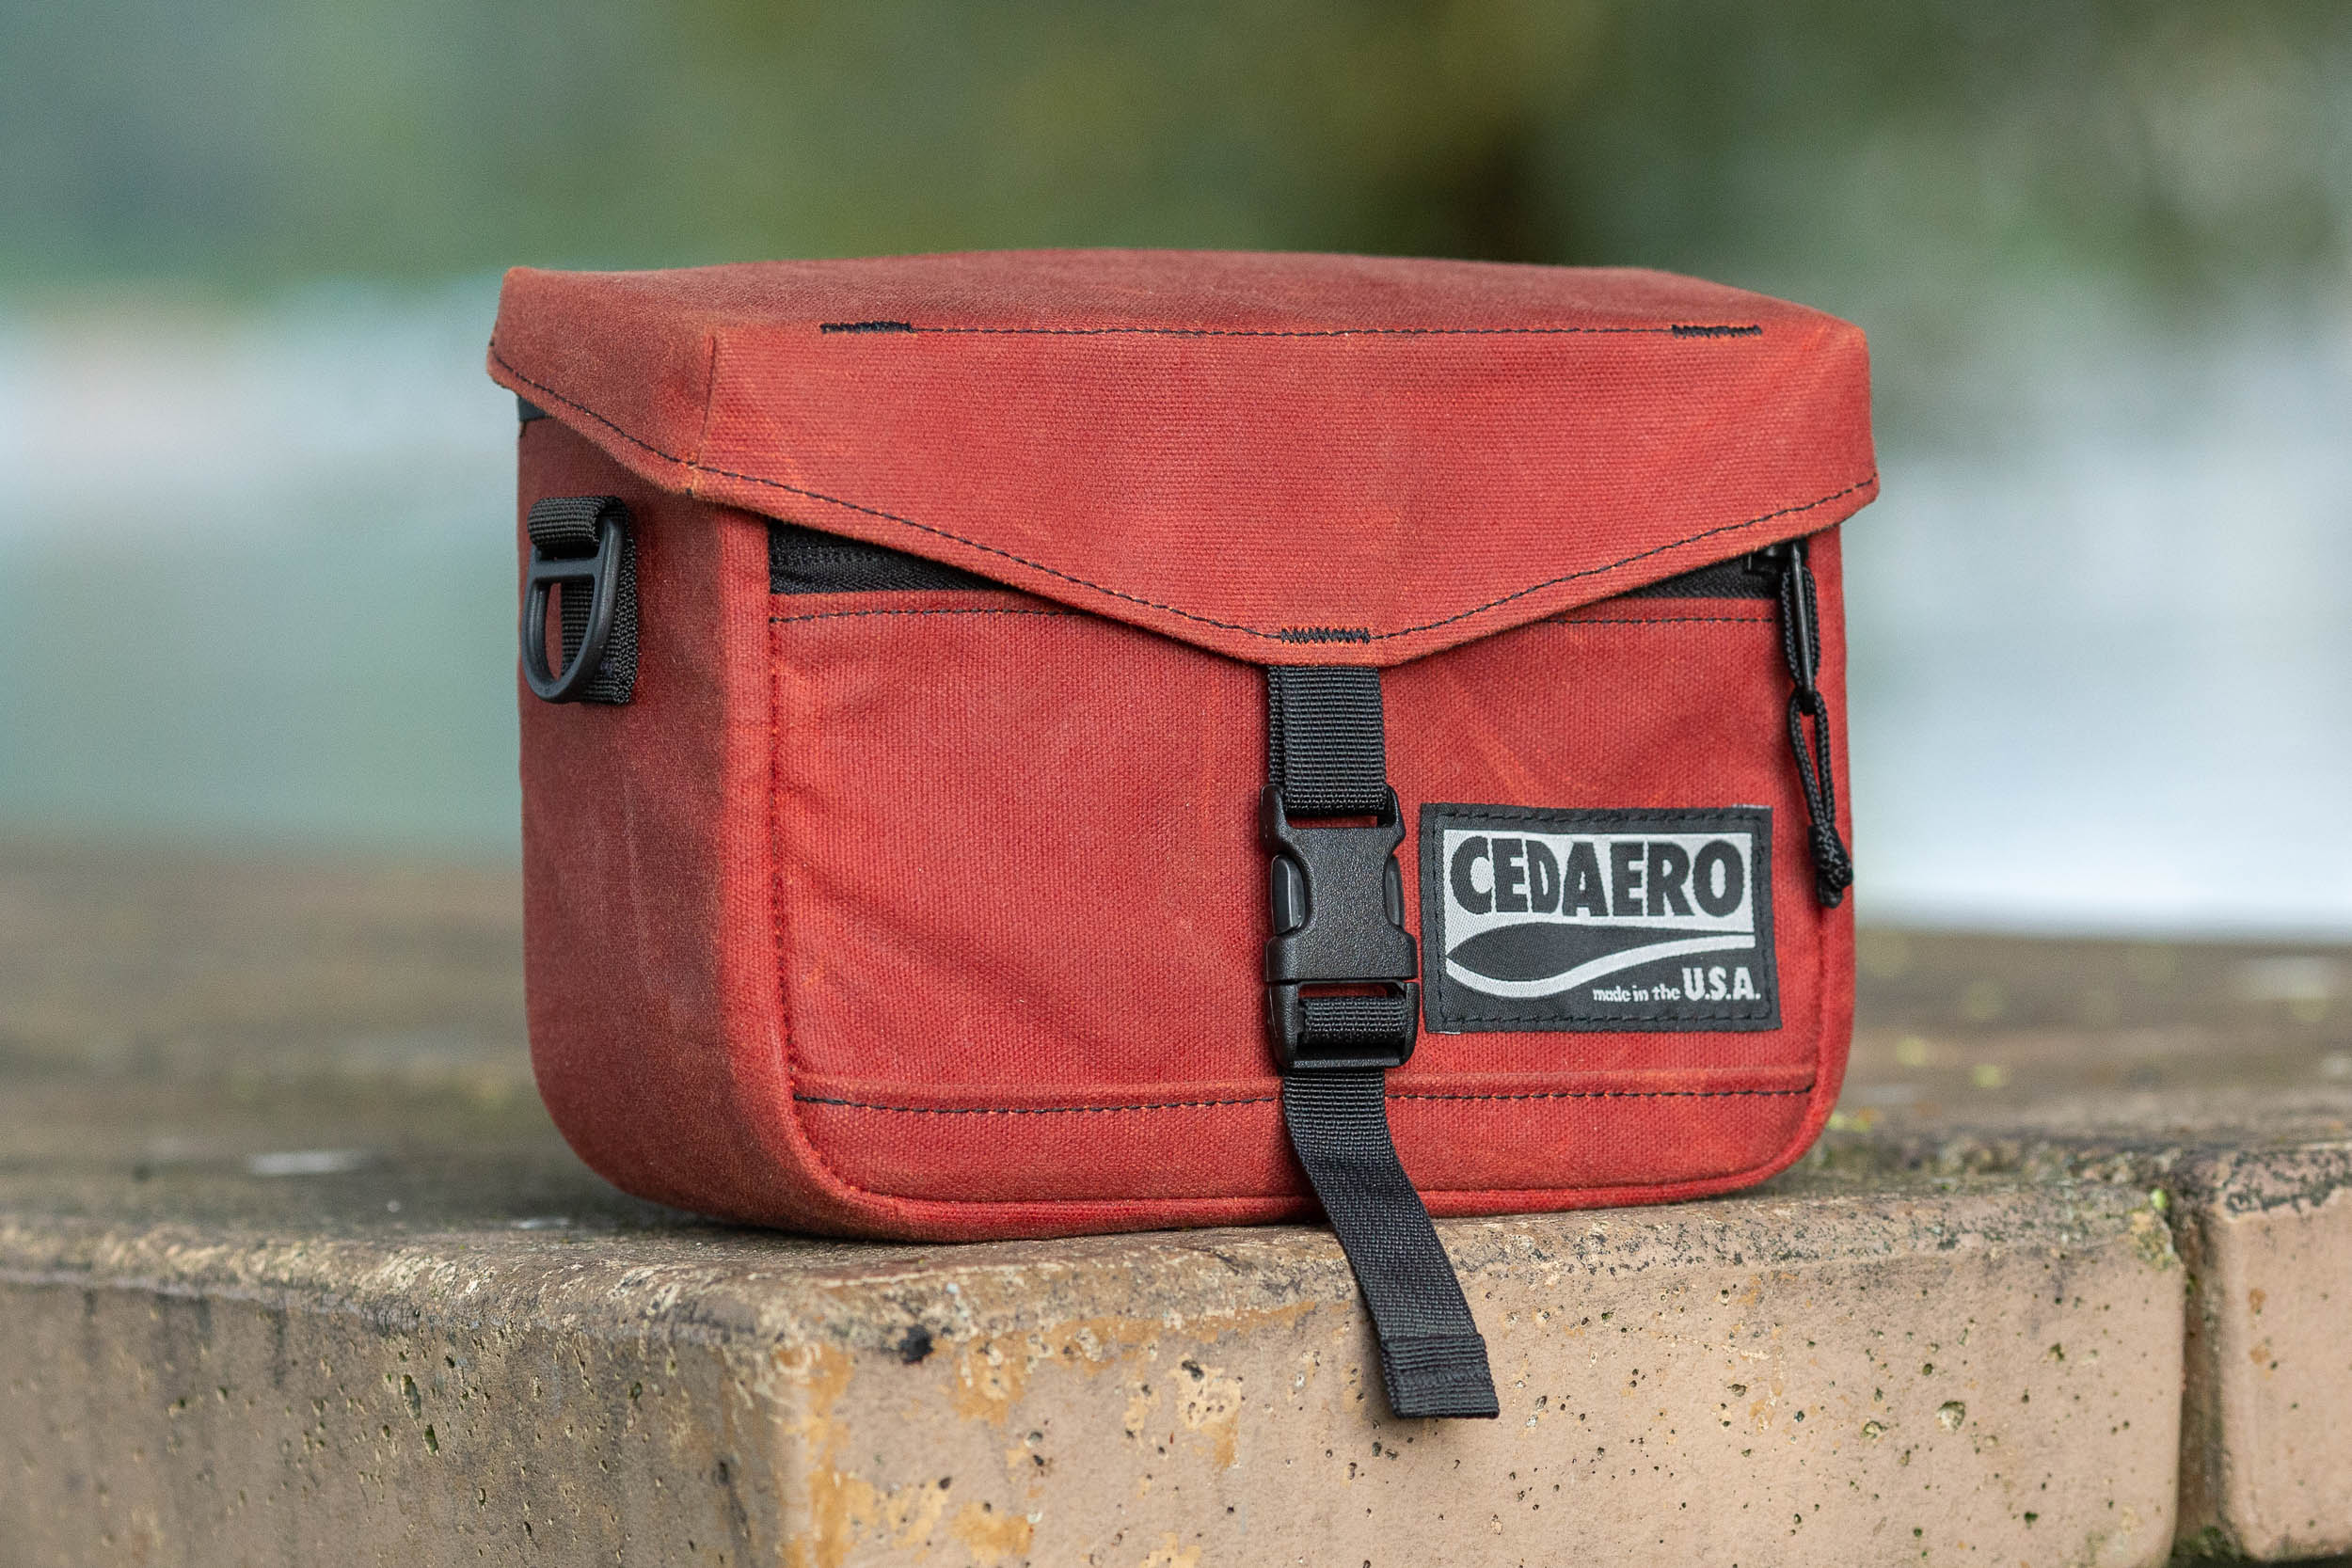
- Cedaero Viewfinder Pack: The Viewfinder Pack was introduced as “the perfect point-and-shoot companion,” a versatile handlebar/cross-body camera pack for cameras and more. I think the waxed canvas version I tested suits its design, but Cedaero also offers a variety of waxed canvas colors as part of their custom and ready-made bag lineup.
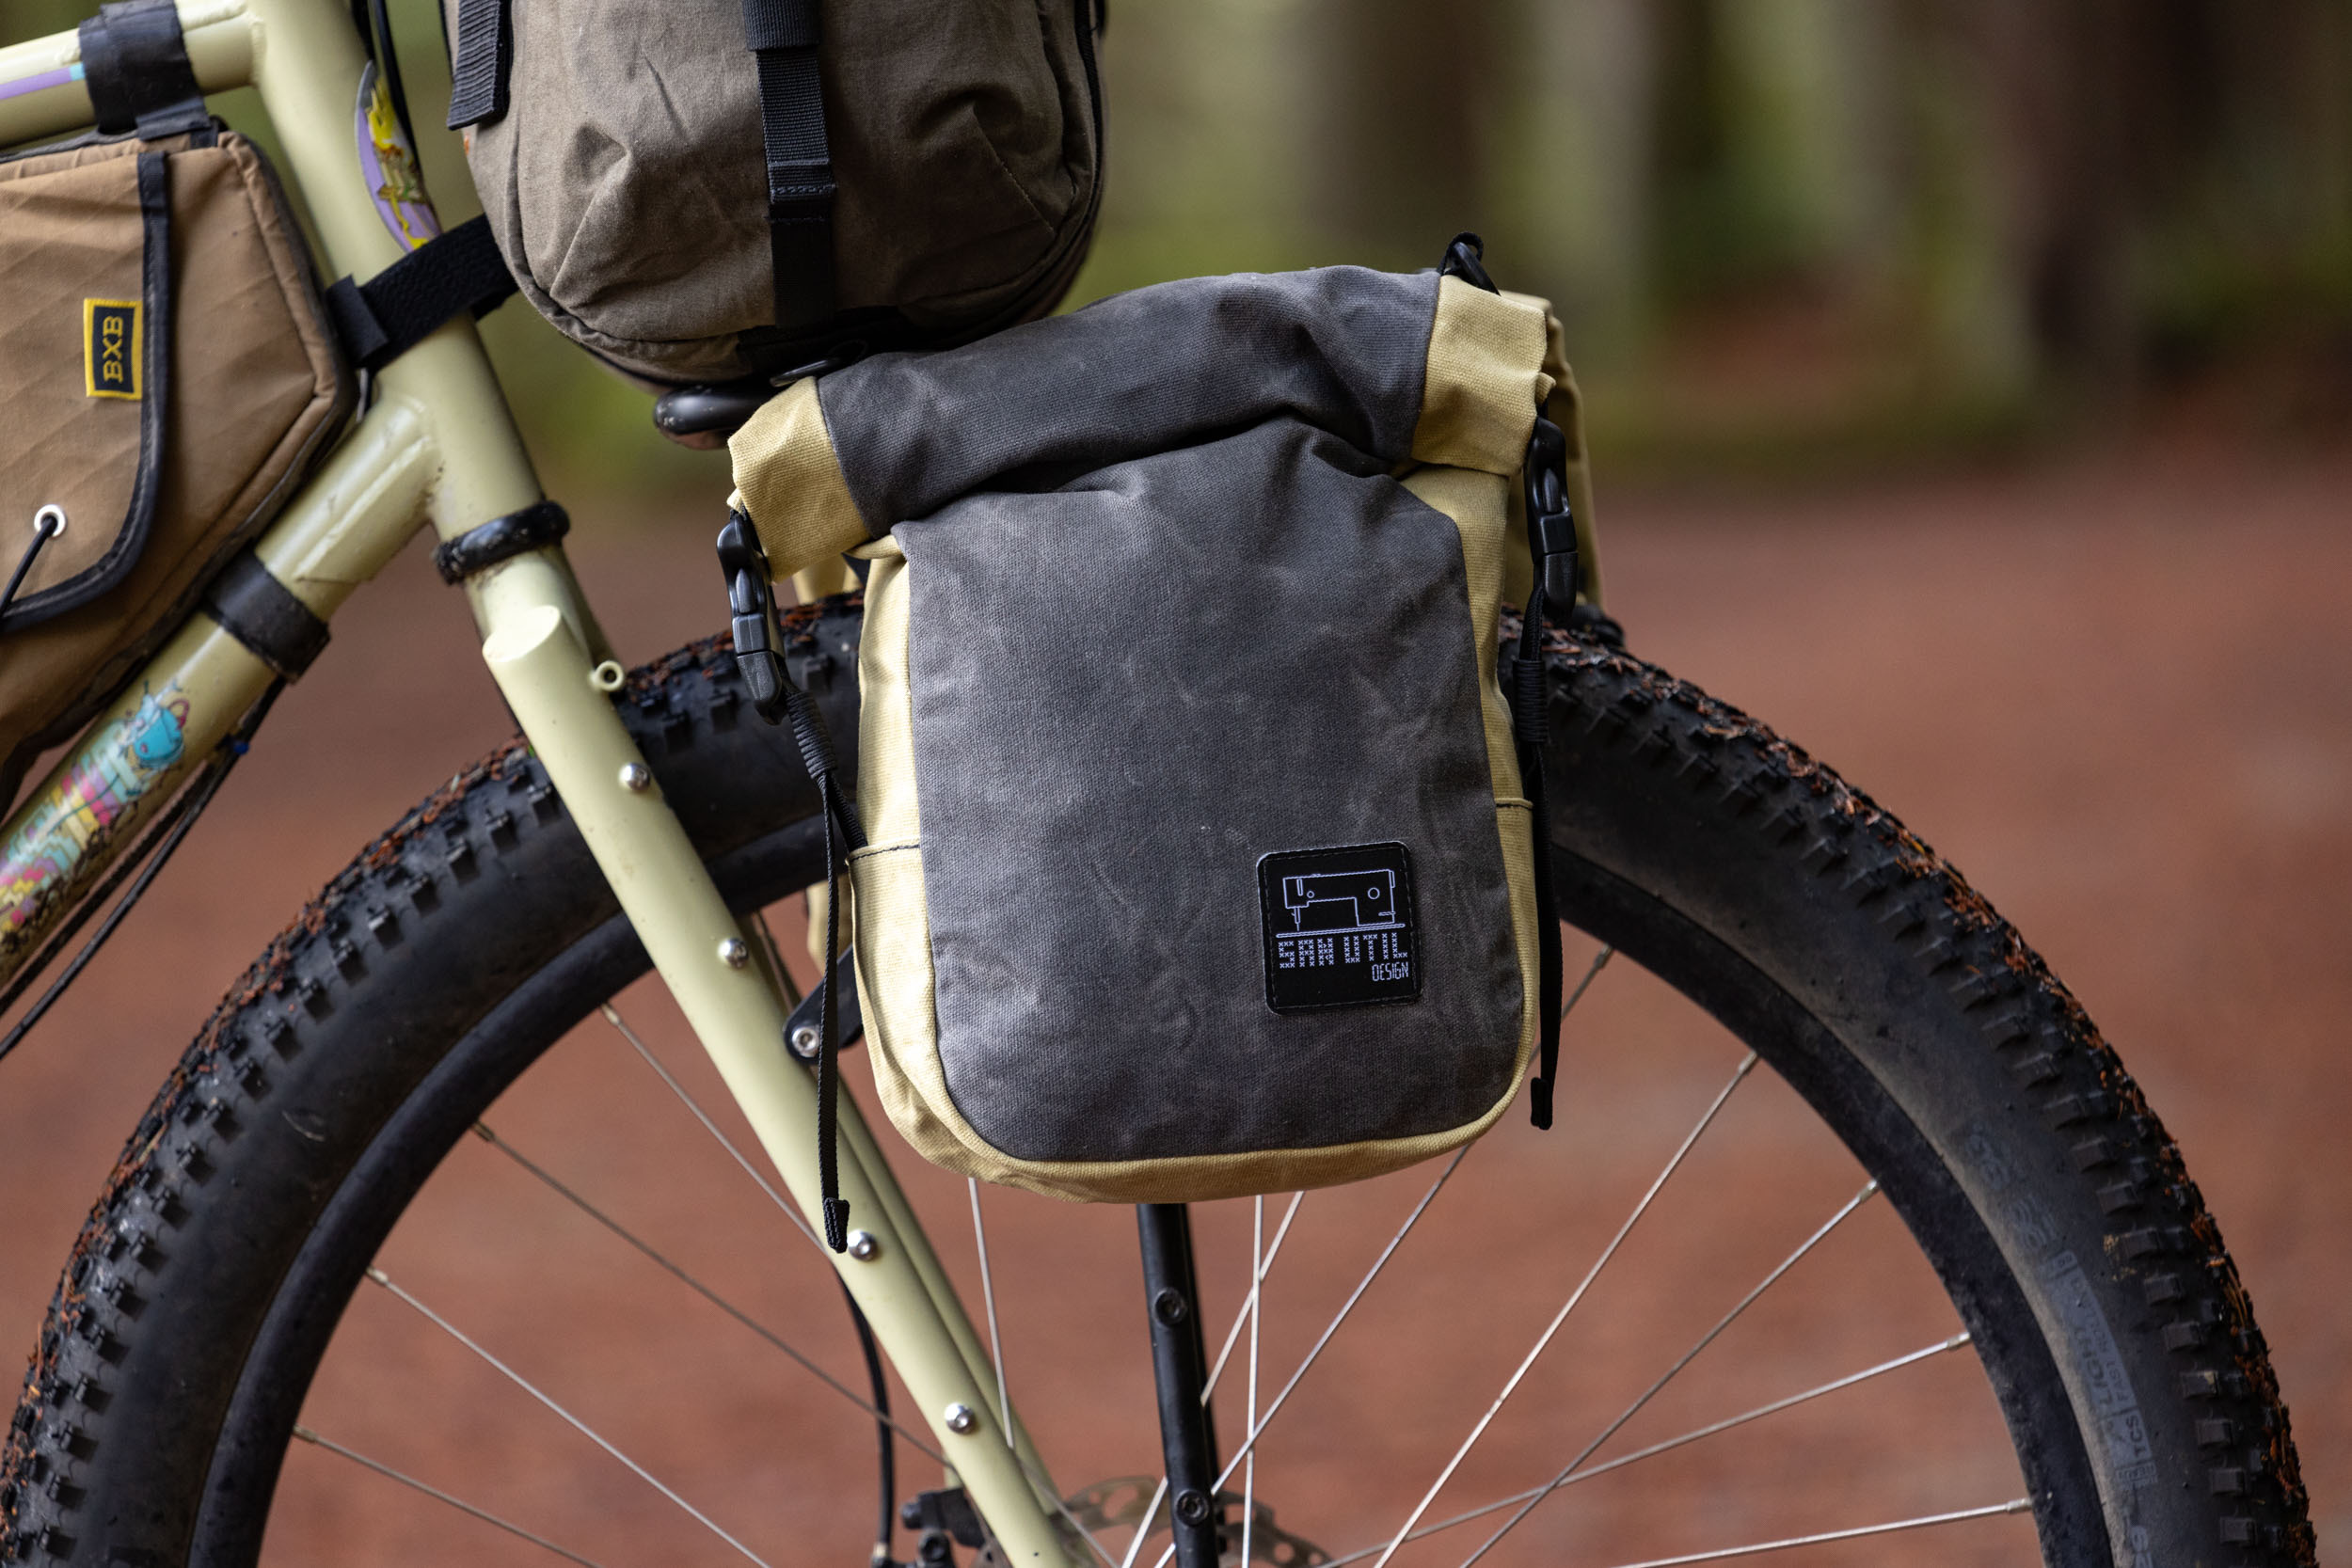
- San Util Designs Panniers: San Util Designs has added two sizes of panniers to their growing lineup of bikepacking bags, both available in custom fabric/color configurations, including several 12oz waxed canvas options. We have our hands on both models, so look out for a review soon.
- Rambler Bags: Not only was Rambler Bags gracious enough to answer my never-ending list of questions about waxed canvas, they also make their own waterproofing wax and regularly work with high quality duck canvas.
- Ron’s Bikes Fabio’s Chest: The Classic Waxed version is made from cotton duck, and the Waxed Cordura model looks like classic waxed canvas with a slightly coarser weave and better water repellence. Both are made in Connecticut.
- Makeshifter Canvas Works: Based in Portland, Makeshifter has been incorporating waxed canvas into their bag designs since the beginning. They also sell Martexin Original Wax on the website and have some tips for re-waxing their bags.
- Framework Designs: While not technically waxed canvas, Australia-based Framework Designs loves their Australian-made waterproof canvas and the unique range of earth-tone colors it’s offered in. We’ve had great experiences using their Travellers Panniers and Sight Seeker basket bag.
Takeaways and Lessons Learned
There’s something pleasantly cyclical about maintaining gear that was originally hand-made. Caring for waxed canvas bags is a very straightforward process, especially when using pre-made wax. And, as you now know, making your own wax blend at home is also surprisingly simple. The big takeaway here is that there isn’t a right or wrong way to do it. Excess wax can be scraped or melted away, additional coats can be added if there’s too little, and in the end, any type of wax finish will help improve your gear’s overall resistance to the elements. Kuba from Rambler Bags sums this up well, “It’s one of those things where you have to accept that the process is a bit uncontrollable, and you will get whatever result you get.” I love the aged, classic patina that waxed canvas bags develop and how they show distress and signs of wear in a unique way. Maintaining them just adds character.
If you’re not sure where to start, I’d suggest looking at the DIY recipe or working with a paraffin/Beeswax blend. From what I’ve experienced, this mix is harder, goes on thinner, and has less of an effect on the overall appearance of the fabric. Natural wax blends with oils seem to darken the fabric more and go on thicker, so be prepared for a real aesthetic change. Still unsure? Test a small amount of wax somewhere discrete, hit it with a blow dryer, and see what it looks like in a few days.
Whether you’re a seasoned gear waxer with trade secrets on how to wax canvas or a first-timer who just waxed their first bag, we want to hear from you. Post a photo, share your results, or leave a tip in the conversation below!
More Waxed Canvas Bags
Make sure to dig into these related reviews and DIY articles...
Please keep the conversation civil, constructive, and inclusive, or your comment will be removed.