


HOVERAir X1 ProMax Review: A Compact Drone For Cyclists


Neil has been putting the Hover Air X1 ProMax through its paces over the past several months, bringing it along on bikepacking trips and day rides. It’s become a go-to tool for capturing B-roll for reviews and other videos. In his latest review, he digs into all the details and showcases a wide range of shots he’s captured along the way…
PUBLISHED Aug 21, 2025
As a YouTuber, I’m always looking for new ways to tell a story, showcase a product, or just keep things fresh. Video is a huge part of that. Without it, you’d just have a talking head on screen. I don’t know about you, but I wouldn’t want to watch myself for 20 minutes straight. Getting that third-person footage is a priority, but it usually means setting up a camera, riding past it, turning around, and doing it again. A drone not only gives you a different perspective but also makes that process a whole lot easier. The Hover Air ProMax is a great tool for this job. You can watch my full video review below, which is followed by a written version with photos.
A Brief History
The company behind the HoverAir brand is Zero Zero Robotics, co-founded in 2014 by MQ Wang and Tony Zhang. They debuted the Hover Camera Passport in 2016, a foldable, enclosed-prop selfie drone sold in Apple Stores across more than 30 countries. In 2018, they launched the Hover 2 with improved tracking, obstacle avoidance, and a Palm-Pilot remote, followed by the long-flight V-Coptr Falcon in 2019. In 2022 came the ultra-compact HOVERAir X1, and in mid-2024 they introduced the HOVERAir X1 Pro and ProMax with upgraded imaging and tracking capabilities. I hate to call them “selfie drones,” but these are drones designed to be incredibly easy to use and to capture you without needing a remote; that’s the key here.


Size and Weight
Let’s start with the size. When folded, the HoverAir X1 ProMax is basically the size of my hand—about 15cm by 10cm and 3.5cm thick. It weighs 194 grams with the 1920 mAh battery, and each battery comes in at 63 grams. For bikepacking trips, I usually bring two spares along with the now very dirty little stuff sack it came with, and either fit it in my frame bag or my hip pack. All told, that setup weighs about 340 grams. The batteries themselves are pretty small, too—8.5cm by 3.5cm and 1.5cm thick. Charging is simple with the included USB-C cable, and there’s a microSD card slot that supports up to a 1TB card, plus the drone comes with 64GB of internal storage, which is great to have both. On top, there are three buttons for powering on and cycling through flight modes.

Unfolded, the drone basically doubles in length, measuring 17cm by 15cm by 5cm. It’s still compact and held closed by a single small but surprisingly strong magnet. It uses four props that are fully enclosed in a durable, hyper-elastic protective frame. Both the props and the protective frame are replaceable.
Before we go any further, it’s worth mentioning that Hover sells a few different bundles. They sent me this unit for review along with a pile of extras, but you don’t need more than the drone and a phone to get started. And even then, you don’t actually need a phone beyond the initial setup, depending on the flight modes you want to use. The bundles mainly add extra batteries for more flight time or a controller/beacon if you want manual control. After using the controller and trying to install the beacon on my handlebars, I found that the phone was the best way to manually fly the drone, especially when weight and space are a premium when it comes to bikepacking or any ride.
Specs
The HoverAir ProMax will shoot up to 8K at 30 frames per second, and if you want slow-mo, you can drop to 4K at 120. It has a 1/1.3-inch CMOS sensor with up to 48-megapixel photos, 10-bit HLG HDR, and a 107-degree ultra-wide field of view. The ProMax is essentially an upgraded HoverAir X1 Pro, with the most notable change being the video. Resolution jumps from 4K 30 fps to 8K 30 fps, plus 4K 120 fps slow-mo and 10-bit HLG HDR for richer color. It also adds a slightly wider field of view (107° versus the Pro’s 103°) and an extra sensor for collision detection. Both models share the same compact foldable design, enclosed props, and core flight modes, but the ProMax’s improved sensor and processing push it into “flying action camera” territory rather than just a selfie drone, in my opinion.


HoverAir claims there is roughly 16 minutes battery life, which is more than the previous HoverAir x1, and that time mostly matches my experience, though I rarely had it in the air that long. Most automated programs take under a minute to run. In manual mode, flight times will obviously stretch longer, but I was impressed with how far my phone could maintain a connection. HoverAir lists different ranges depending on your device, with Android supposedly offering better range than iOS. Using my phone, I never felt limited. With the beacon remote, you get up to 0.62 miles (about 1 kilometer) of range, while a phone connection maxes out at about 820 feet (0.25 kilometer) unobstructed. I never needed more than that.
Quick Comparisons
Since I also have the DJI Neo and the DJI Mini 3 Pro, let me offer a quick comparison. The DJI Neo shoots 4K at 30 frames per second, takes 12-megapixel photos, and uses a single-axis gimbal. You’ll get around 18 minutes of flight time, and it’s super light at just 135 grams. It also has an impressive 10-kilometer transmission range, with remote, and is very beginner-friendly, with a bunch of quick-shot modes to get you started fast. The DJI Mini 3 Pro steps things up with 4K at 60 frames per second, 48-megapixel photos, and tri-directional obstacle sensing. It can fly for around 34 minutes and still comes in under 250 grams, but it’s a bit bulkier, and you will need a remote to fly it. I also don’t think they make the 3 Pro anymore, but they have the Mini 3 and the 4 Pro.


If you want the highest resolution and slow-mo in a truly tiny drone, the HoverAir X1 ProMax is hard to beat. If flight time and advanced safety features matter most, the Mini 3 Pro feels like the better all-rounder. And if you want something ultra-light with excellent range and ease of use, the Neo is a solid choice. I’d actually argue the DJI Flip is the closest competitor, but I haven’t tested that one yet.
In Use
Using the HoverAir ProMax is pretty straightforward. Unfold it, hold the main button for three seconds, and wait for it to power up. You can scroll through all the video modes right on the drone, which is how I used it about 90 percent of the time—just for quick shots. That’s one of the biggest highlights of this drone: no fussing with a phone app before you can get a shot. Once you’ve picked your mode, you can long-press the side buttons to adjust height or distance, or simply hold the drone out in front of you and press the button. It’ll count down, then take off.

Before pedaling off or walking away, make sure the red light comes on—that means you’re being tracked. Once tracking starts, the drone begins recording automatically, which is a big win. No more realizing after the fact (like I have with my DJI Mini 3) that I forgot to hit record. Sometimes, it doesn’t lock on right away, but if that happens, the easiest fix is to land it in your palm and restart it.


When running a programmed shot, most modes return to you automatically—just place your hand under the drone and it will land. For tracking modes like Dolly Track, Bike, or Ski Mode, you’ll need to give a landing gesture (making an X over your head). The drone will then fly to you so you can catch it in your palm. It doesn’t work 100 percent of the time, but once you get a feel for how it responds, it’s reliable.
Video Modes
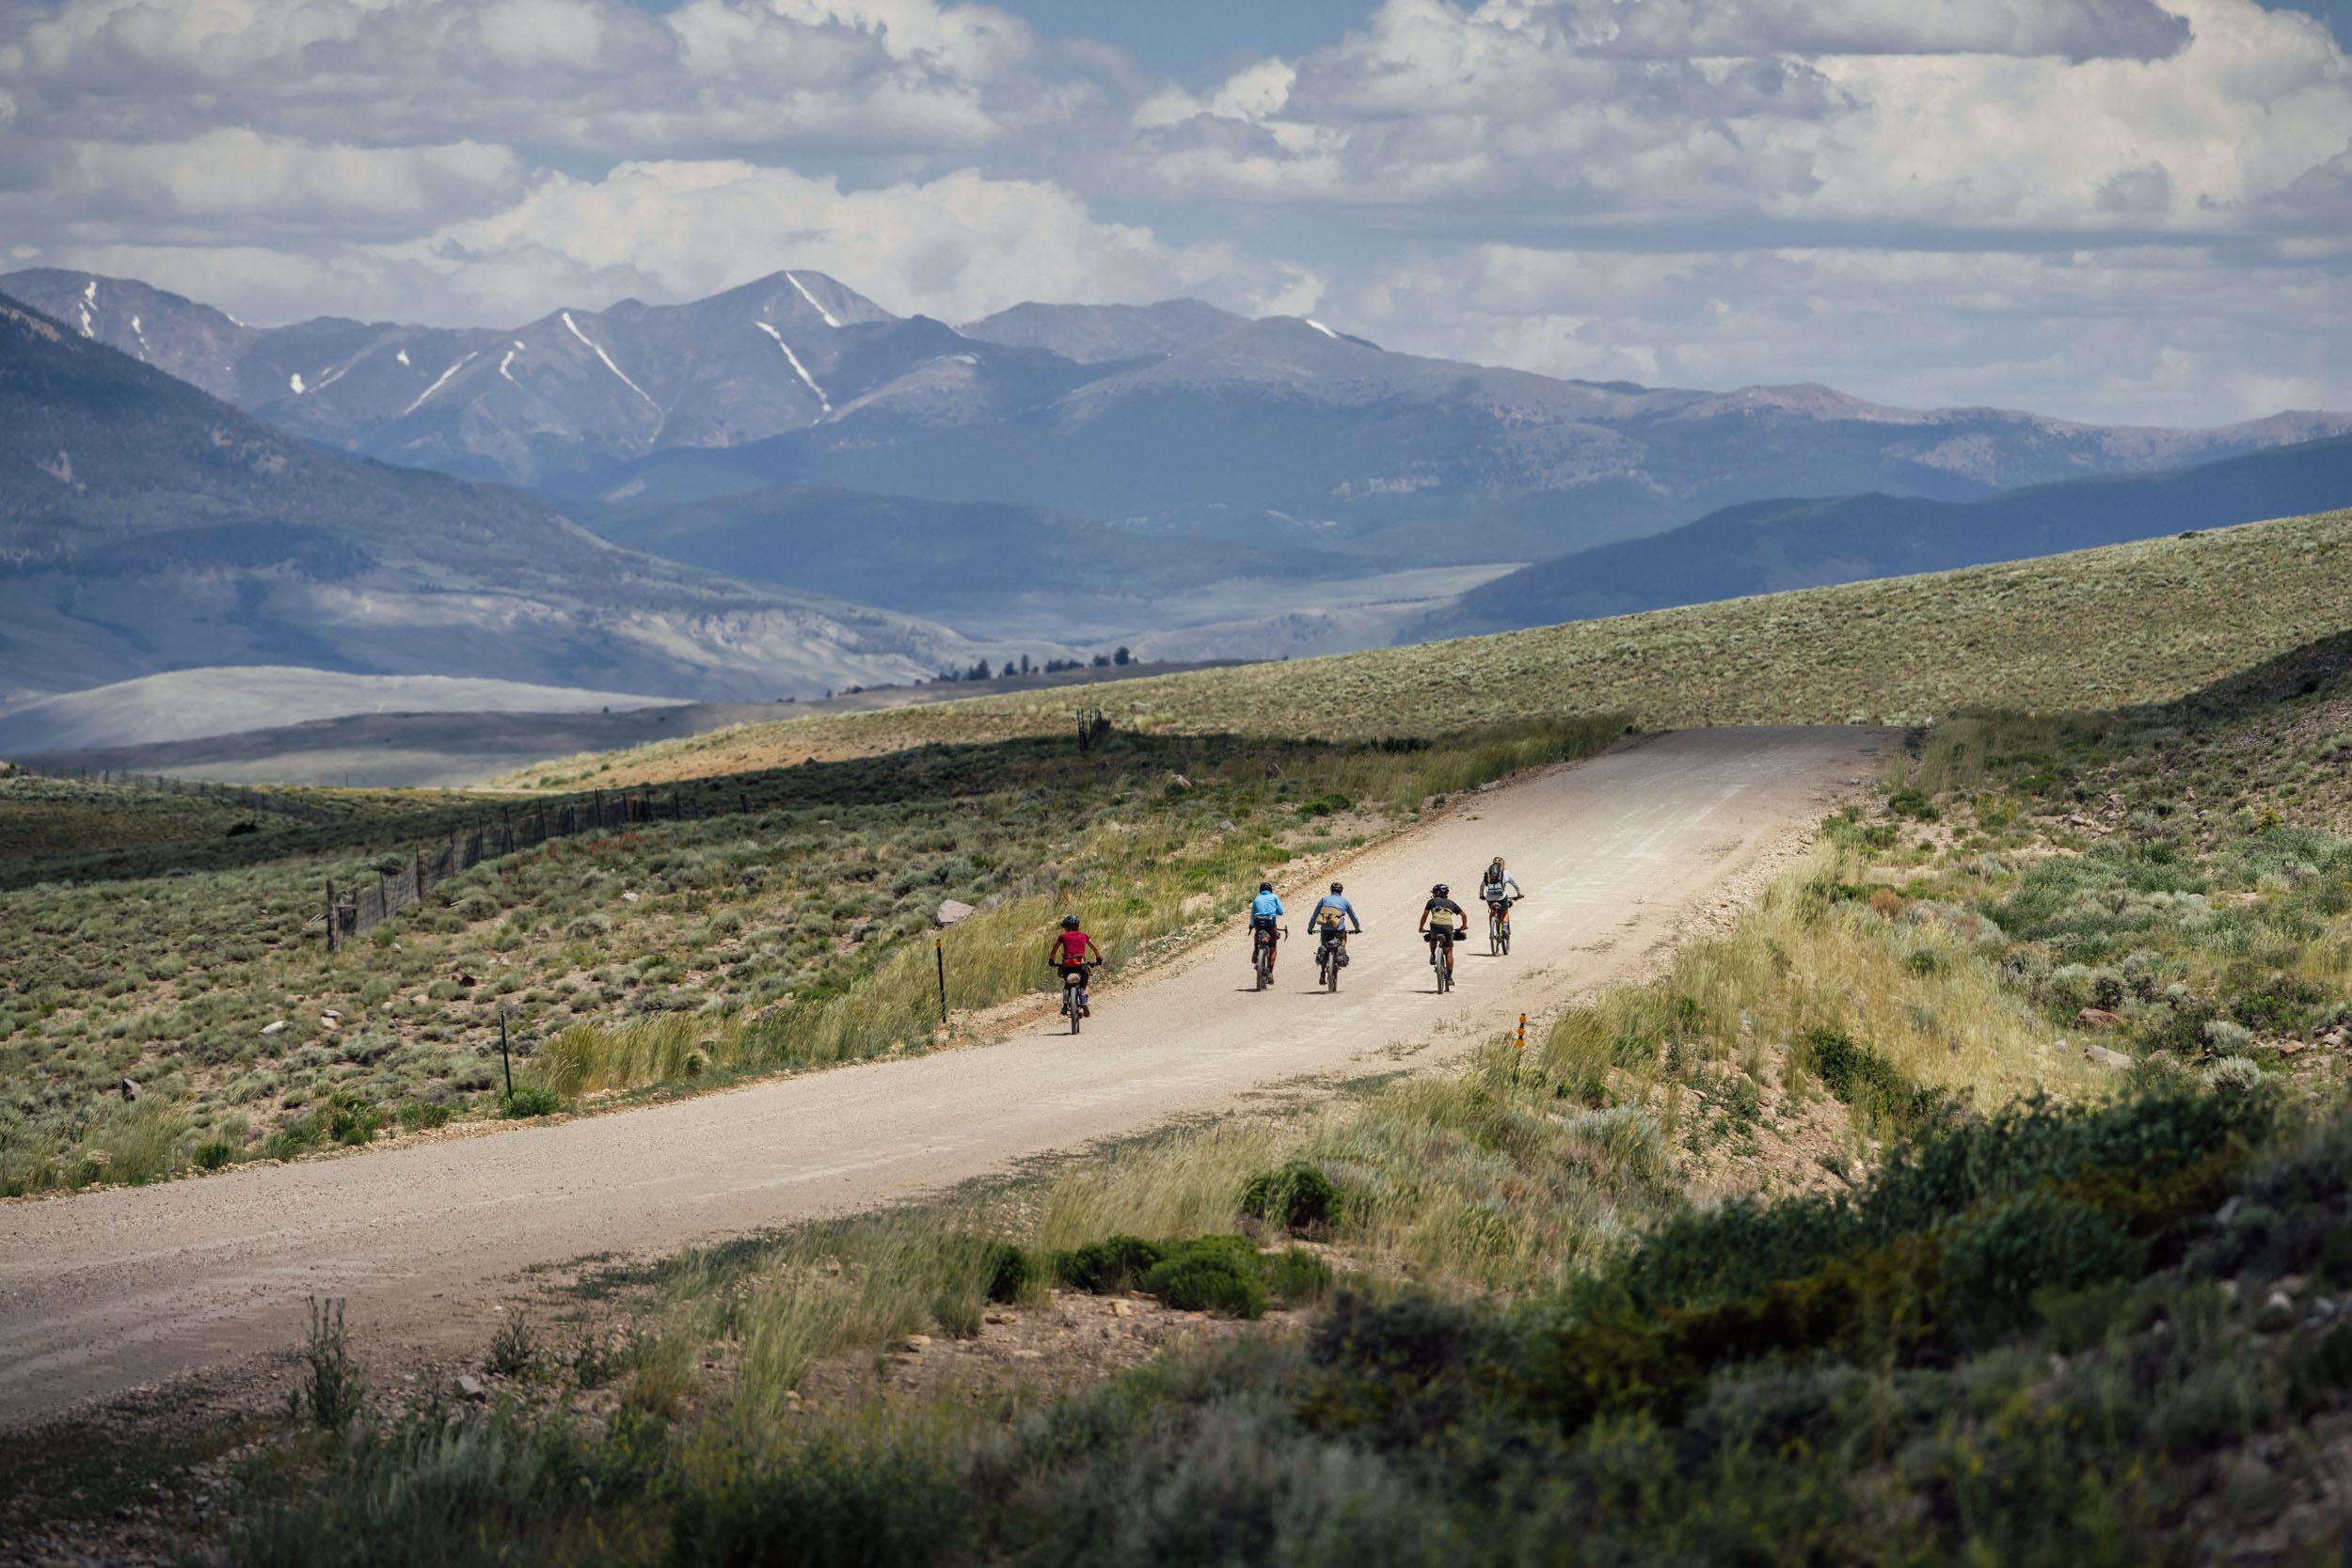
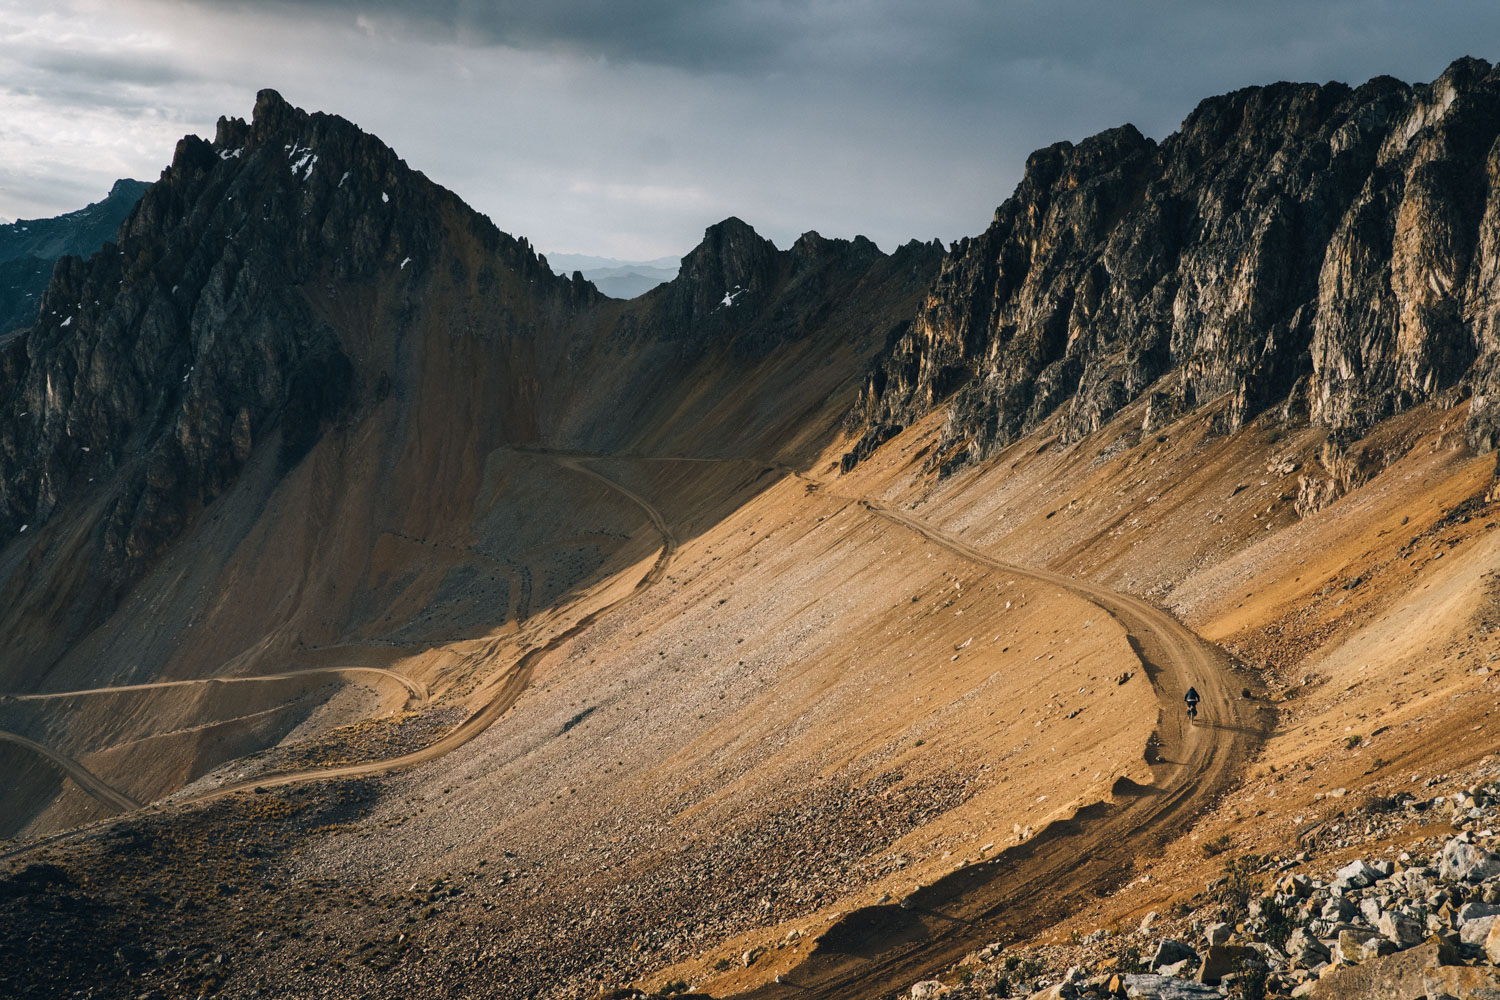
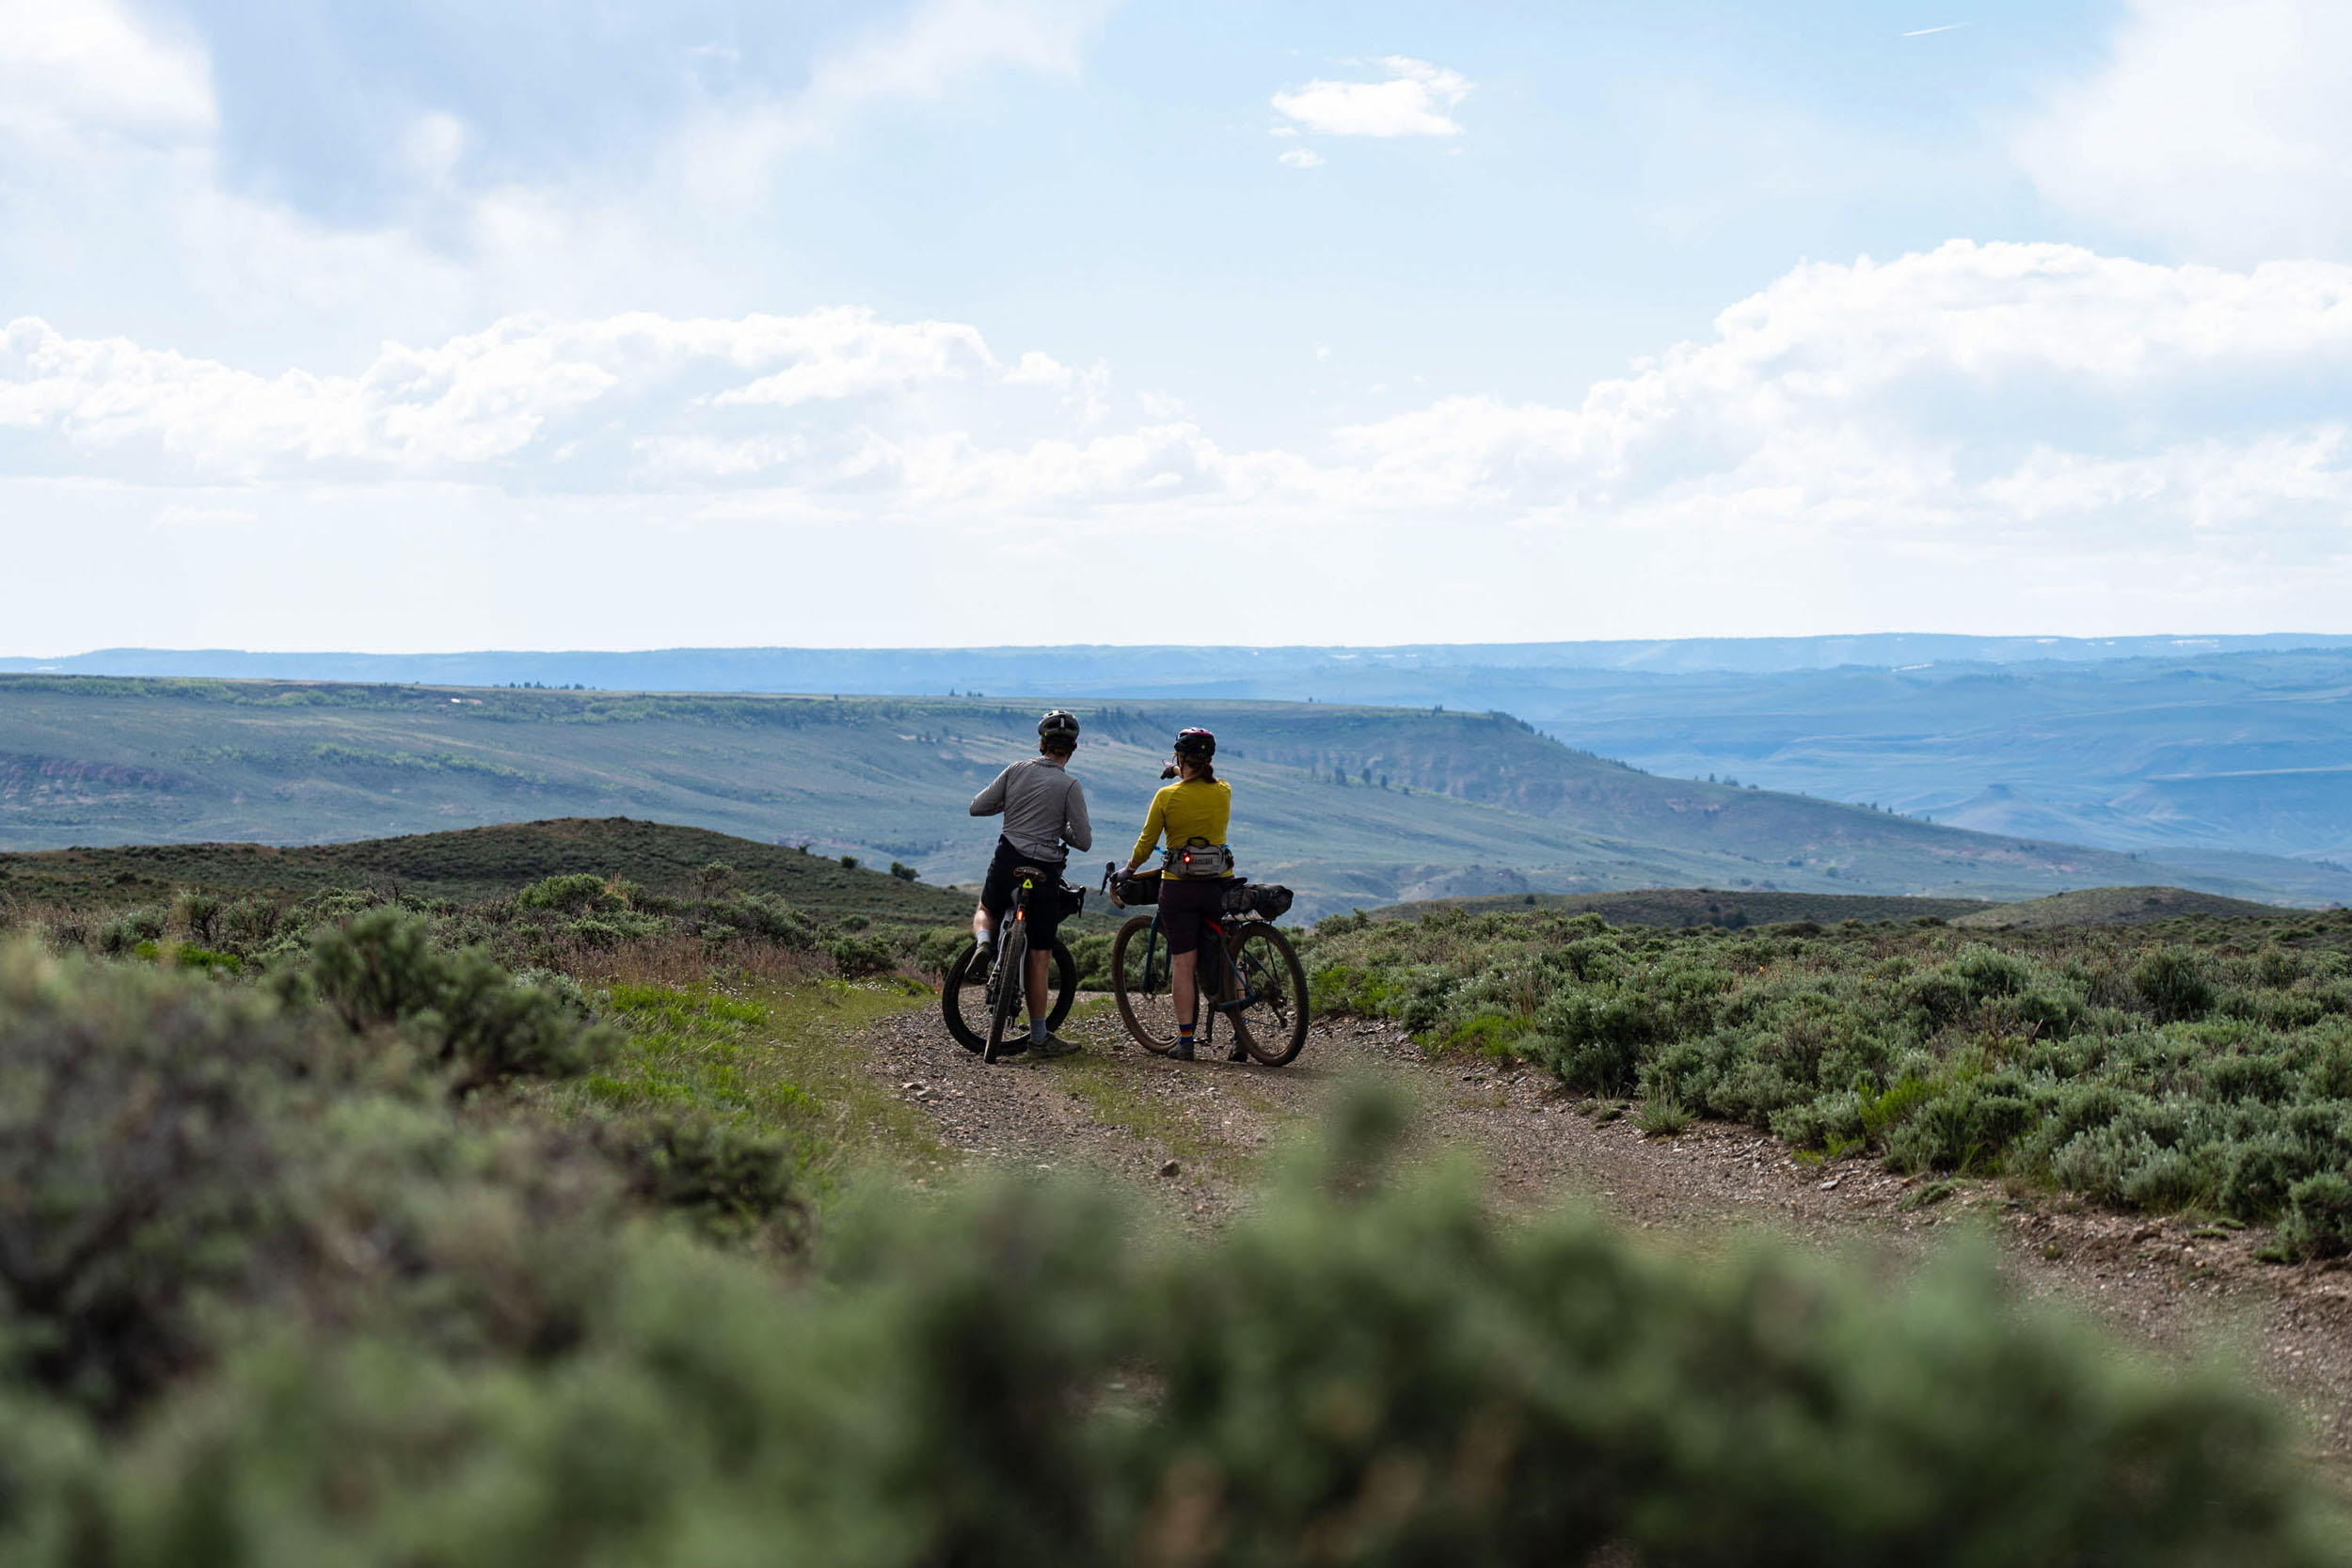
There are loads of pre-programmed shots. Some work while you’re stationary, including Zoom Out, Orbit, Spiral, and Bird’s Eye, which have been great for dramatic summit shots or clean product footage of tents with overhead views. Then there are also Ski Mode, Cycling Mode, and Dolly Track, which, in my opinion, are what really make this feel like an action camera. It’s tracked me well on climbs, flats, and descents, both high and low, and the gimbal does a solid job of keeping footage steady while following me on the bike.

Of course, it’s not without quirks. For example, the drone kept up nicely until I got going a bit too fast and outran its 26-mile-per-hour limit. I was probably hitting 30+ miles per hour, so I can’t truly fault it there. Obstacle avoidance also struggles at higher speeds. Descending a bit of singletrack, we weren’t going that fast, but it still couldn’t avoid hitting a small tree. I’ve also noticed that Bike Mode can feel a little jarring on super-tight singletrack with constant side-to-side movement. It works best on straighter trails, though you can smooth things out by recording in slow motion. That said, the 4k 120fps mode comes with a slightly diminished video quality.
Dolly Track is one of my favorites since it gives you a front-facing view. Firmware updates have helped create some fantastic shots, but speed and wind can throw it off. It’s the most challenging follow mode for the drone. Another thing to note is that these programmed modes are designed for tracking people—if you want to follow a car or pan to focus on something else, you’ll need to use manual mode.


I’ve crashed this drone maybe half a dozen times, all at high speeds. Unfortunately, the last one cracked the cage. The cage is replaceable, and I actually have a new one on order. I’d planned to share that replacement process, but that’ll have to wait for another video. The upside is that it has worked for maybe 20 or 30 flights since it broke, and it’s still going.
While there are some weird nuances with this drone, I don’t want those quirks or mishaps to overshadow just how much great footage I’ve gotten from it. I’ve used it in all kinds of situations, and at times, the results have been absolutely stunning and well worth bringing along on trips.
Elements
In moderate wind, the drone handles itself pretty well. I never flew it in extreme conditions, but I dealt with some strong gusts and steady winds on high mountain passes. The gimbal does a great job of smoothing out those gusts or when pushing against the wind, though the subject can drift off-center. Even then, the footage is still totally usable, which I appreciate.

I was also impressed with how it performed at higher elevations. The windiest and highest I flew it was at the top of Star Pass in the Gunnison area, and it had no real issues. Most of my testing was above 7,000 feet, with one trip down to about 5,000 feet. At higher elevations, drones tend to work harder, so you’ll see battery life dip below the claimed 16 minutes on this one, no doubt.


I’ve flown it in very light rain—nothing major, since it’s not designed for that—and in dry, dusty conditions. One nice perk is that you can catch-land it in your palm rather than setting it down on the ground, which keeps it away from dust and debris. As for temperatures, I’ve used it close to freezing, but I haven’t tested it in true winter conditions yet. That’s on my list for this year, so I’ll add a note to the Conversation below once I do.
Color and photo
I kept the drone in auto mode most of the time because it was easier, but it supports ND filters and log shooting. For those unfamiliar, log mode captures a wider dynamic range, meaning more detail in highlights and shadows, but produces a flat, desaturated image that requires color grading. Even without shooting in log, I found the color pretty solid in both bright sun and at dusk, and you can quickly fine-tune settings such as ISO, shutter speed, and white balance in manual mode. If you want to dive deeper into log workflows for this drone, there are plenty of great YouTube tutorials out there.


The photos look surprisingly good. You can shoot in RAW, but I stuck with JPEG and was happy with the results. Like video, low-light shots can get noisy, but in daylight, they’re sharp and vibrant. I don’t typically take many drone photos, but these have me rethinking that.
Hover X1 App
The Hover app is simple but covers everything you need—and then some. Along the bottom, there are a few tabs:
- Home: Basically, a built-in social feed where you can share your Hover shots with other users.
- Store: Pretty self-explanatory. They want to sell you stuff.
- Hover: The tab I use the most. This is where you connect to your drone, locate it if needed, tweak settings, and more. You can also set up all the flight settings for each mode and so much more.
- Flight Modes: Allows you to preview what each flight mode does. This was helpful when I first got the device.
- Me: Your profile page, where you can manage Hover Care and other account info.

- Model/Size Tested: HOVERAir X1 ProMax
- Actual Weight: 194 grams (with battery)
- Place of Manufacture: China
- Price: $699
- Manufacturer’s Details: HOVERAir
Pros
- Really easy to use
- Loads of pre-programmed modes give you lots of variety
- No need for a special remote to use manual mode, a smartphone will do
Cons
- Expensive
- While firmware updates have improved some modes, higher speeds tend to limit its capabilities.
- Light enough that wind can be an issue
Wrap Up
Over the years, I’ve been blown away by how far POV cameras have come—the stability, the durability, the sheer usefulness. I’ll admit that I don’t use as much POV footage as I once did, but I still love my GoPro. Now, with tech moving forward, it feels like we’re in the era of third-person shots, and plenty of companies are jumping into that space, including HoverAir.
The HoverAir ProMax fits right into that style of camera drone, but it goes a step further with higher-resolution video features that do a fantastic job capturing the kind of footage I’d normally shoot on my DJI Mini 3 Pro but without needing to make space for a dedicated remote. I’m no drone expert, but I know a thing or two about shooting video and convenience, and the HoverAir ProMax is the drone I’m going to keep taking with me. It offers the best quality in the smallest package I’ve found.
As for pricing, if top-tier video resolution isn’t a must-have for you, the X1 Pro might be a good starting point at $499. The ProMax is $699, which is a $200 jump. It’s not cheap, but it’s also not the most unreasonable in the drone world. My tip? Go for the Power Bundle so you get the external battery charger and an extra battery at a slight discount, as you will want the extra battery and the faster charging capabilities.
What do you think about the HoverAir ProMax? Let me know in the Conversation below! I’m curious if you’d use a drone like this in your own setup.
Further Reading
Make sure to dig into these related articles for more info...

Please keep the conversation civil, constructive, and inclusive, or your comment will be removed.