


Make Your Own Silky Saw Storage Sleeve


After learning that not all Silky Saws include a protective storage sheath, Miles took it upon himself to design one. In our latest DIY tutorial, he walks through how to make your own cinchable sleeve that keeps your saw protected and ready for action. Find a supply list, photos, and step-by-step instructions here…
PUBLISHED Jan 14, 2026
Keeping gear organized, both at home and on the bike, is essential. Early in my bikepacking days, I was okay with stuffing everything into bags and dealing with the chaos of retrieving them, but over the years, I’ve come to appreciate the elegance of a well-organized setup. I’m no racer, but having a dedicated spot for everything you need for a ride reduces headaches and frustrations. Heck, even my poop trowel now has a dedicated storage pouch.
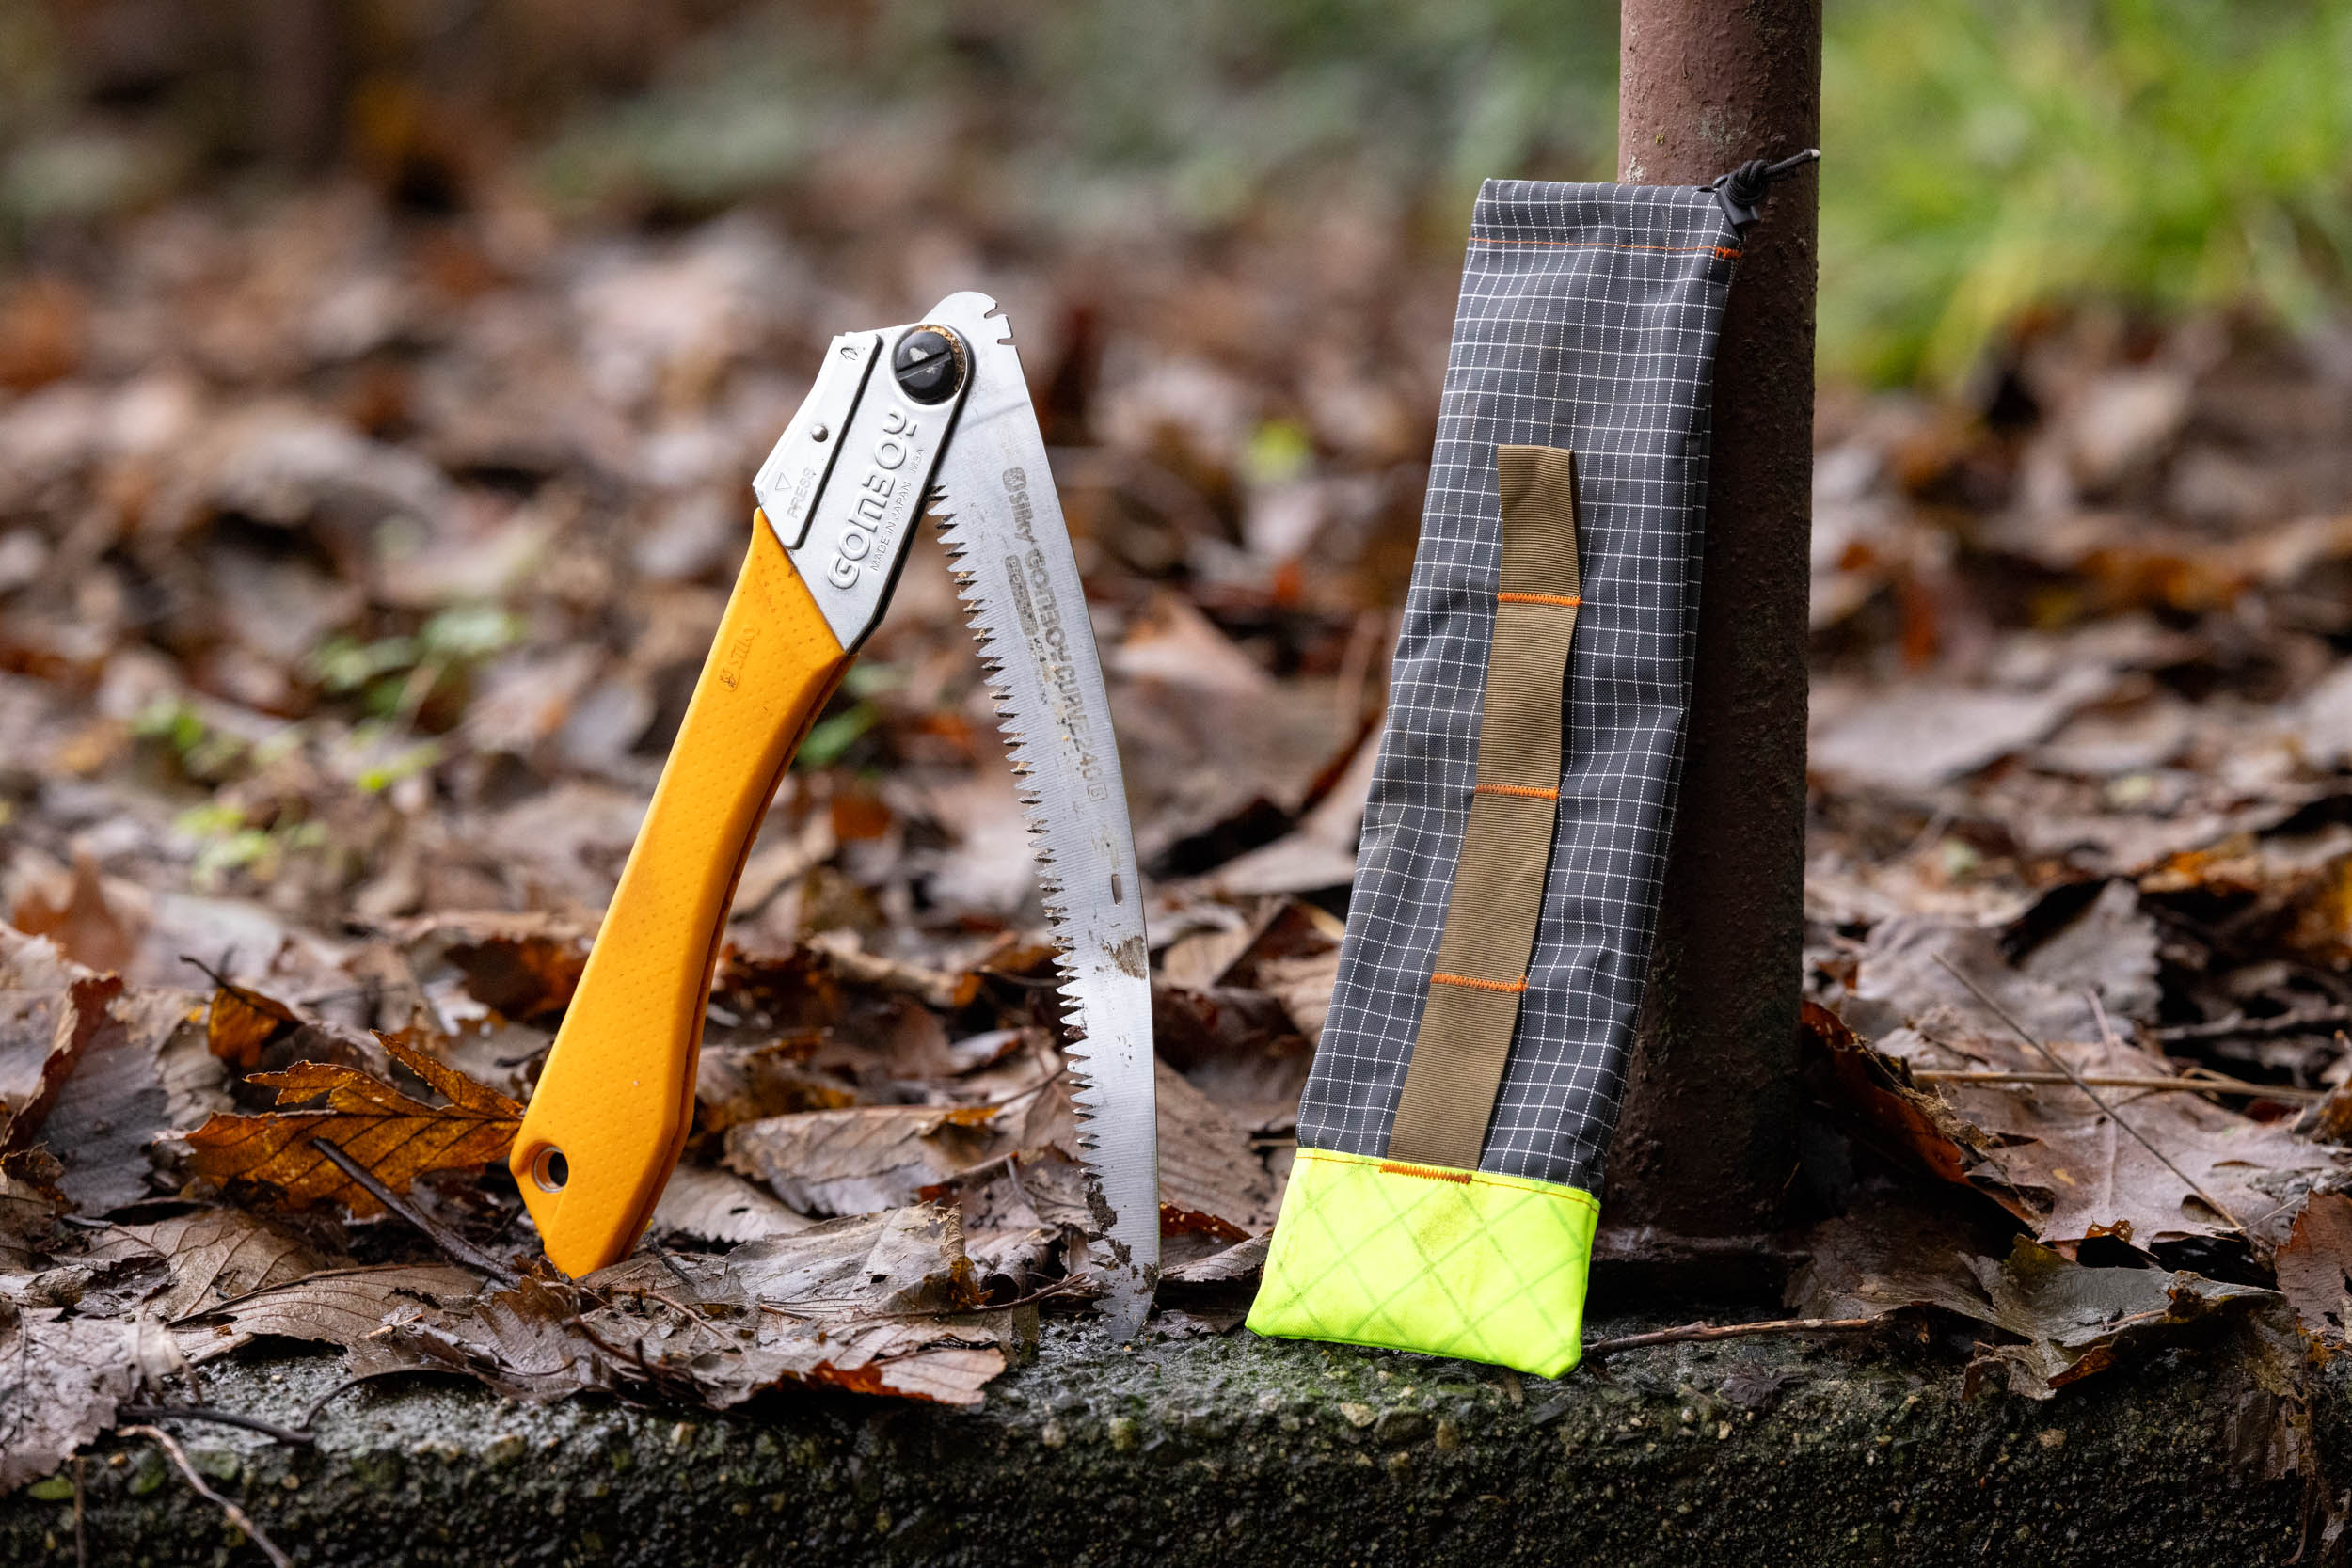
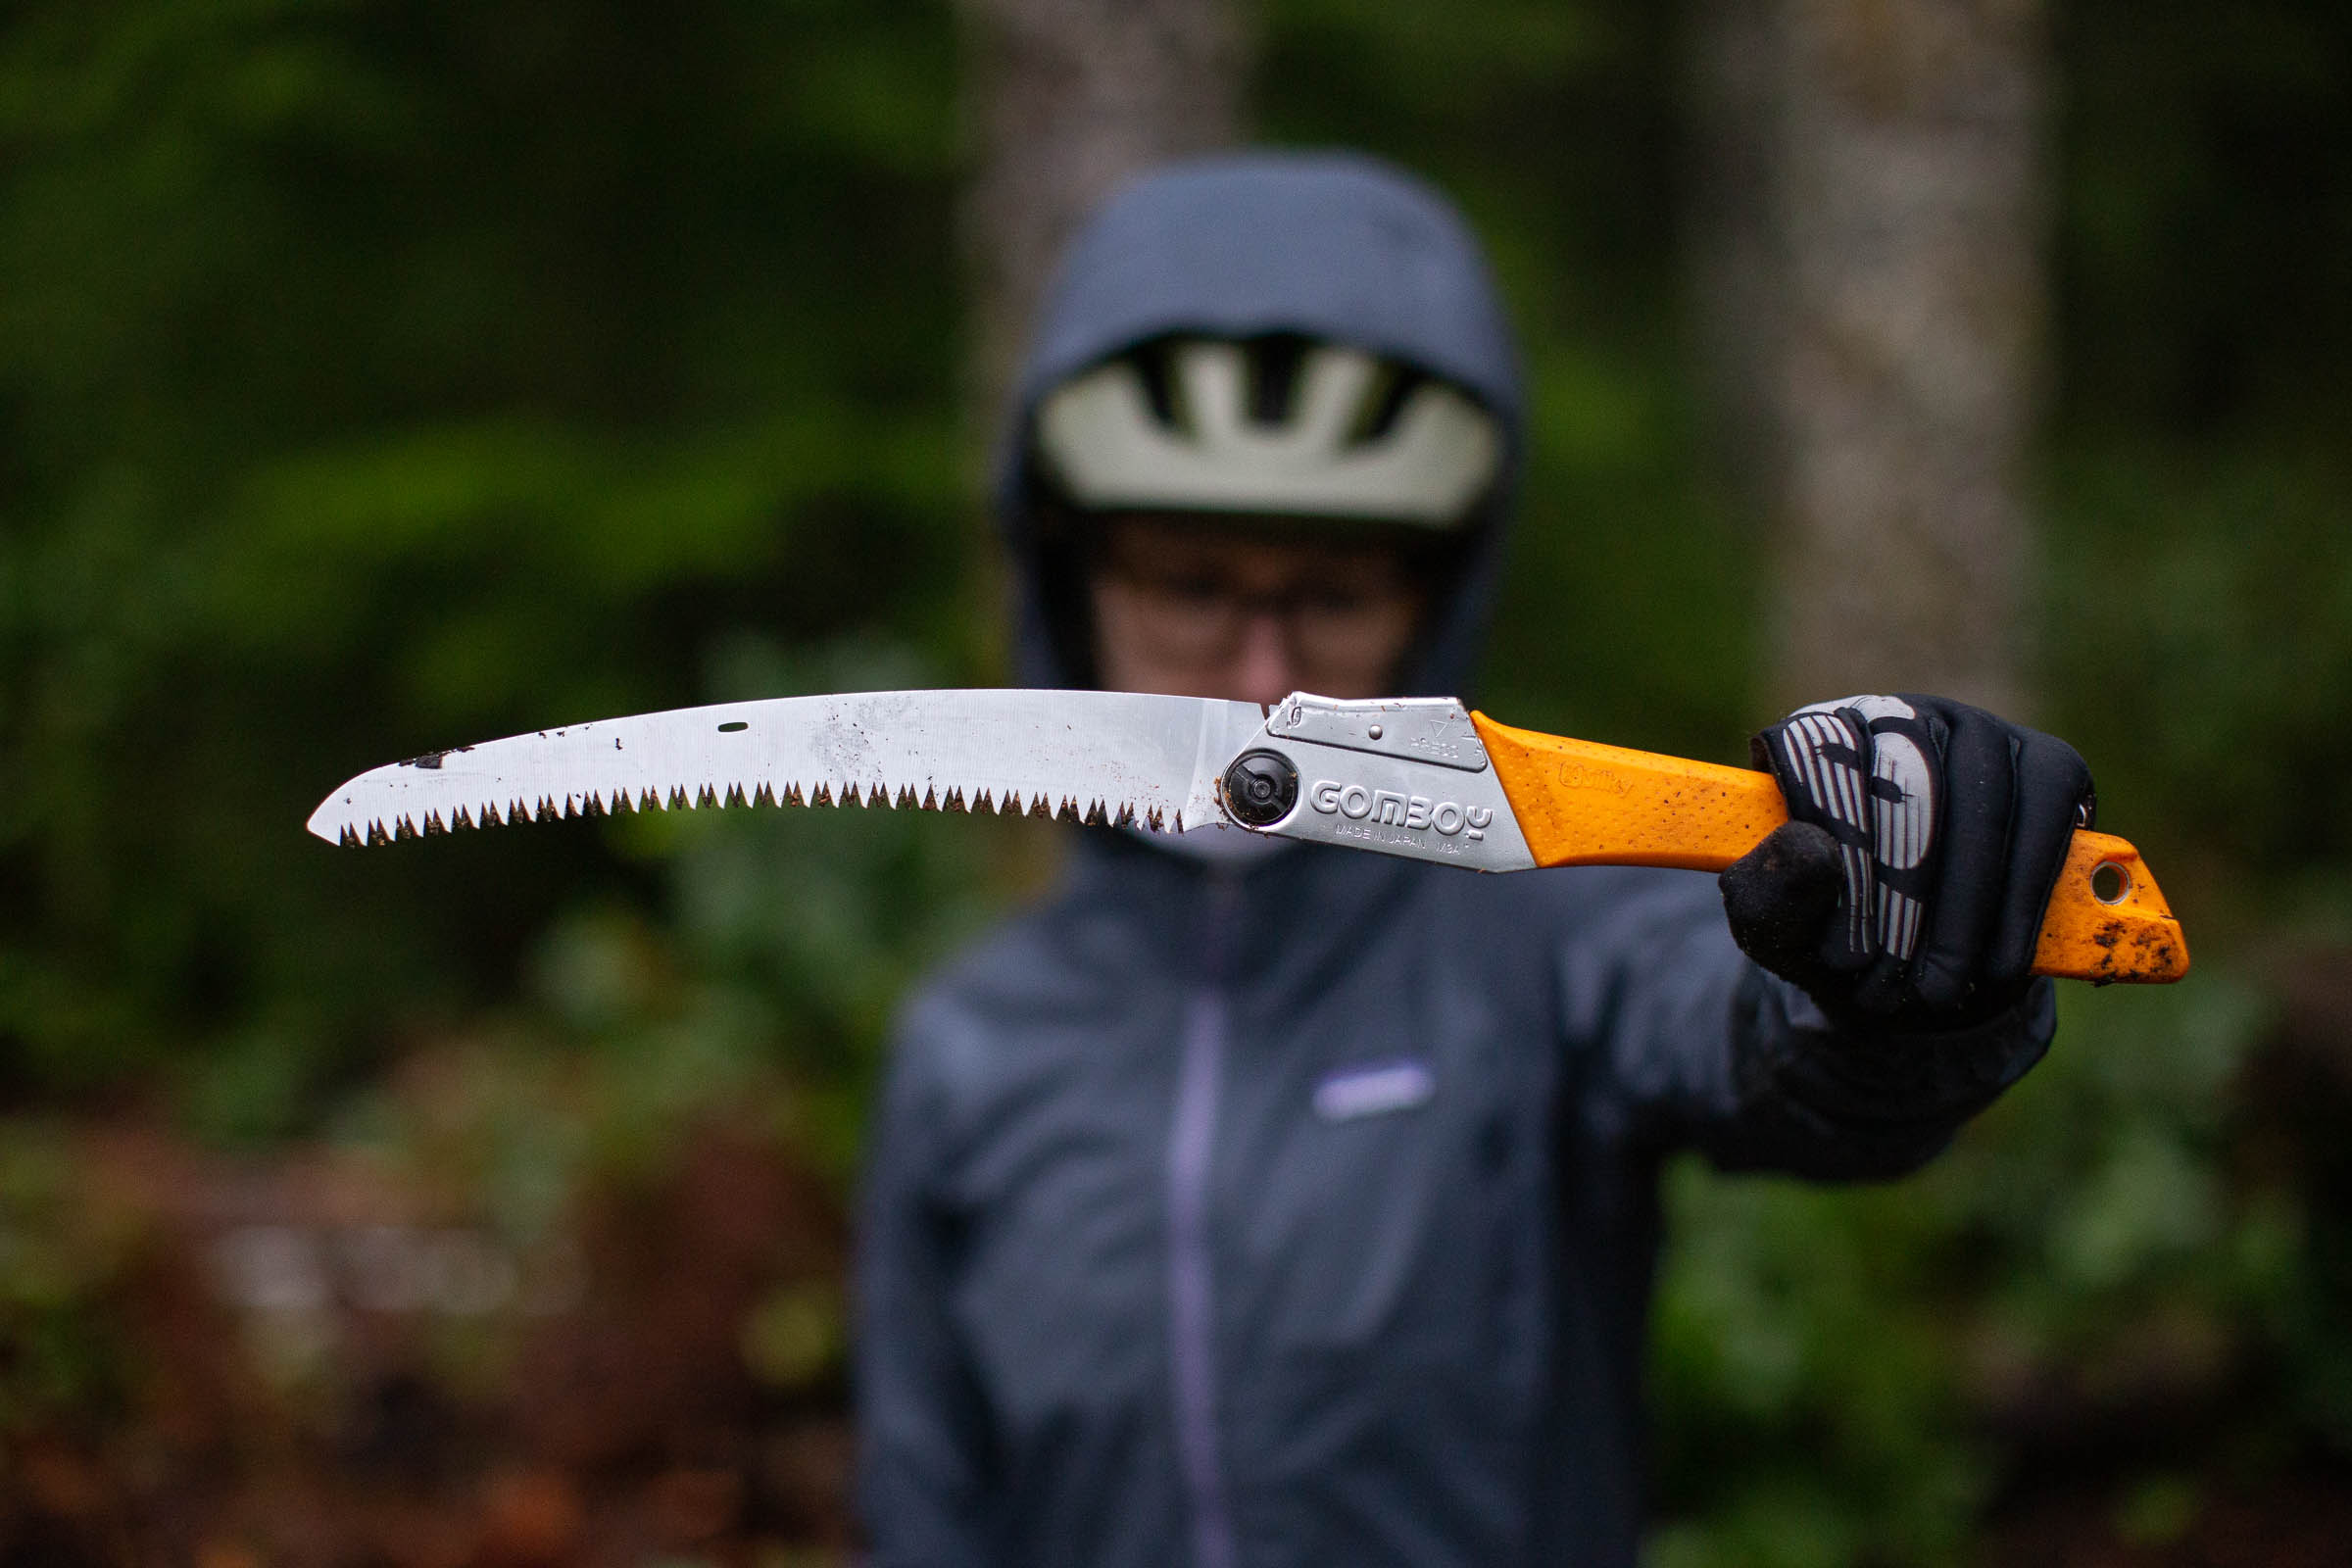
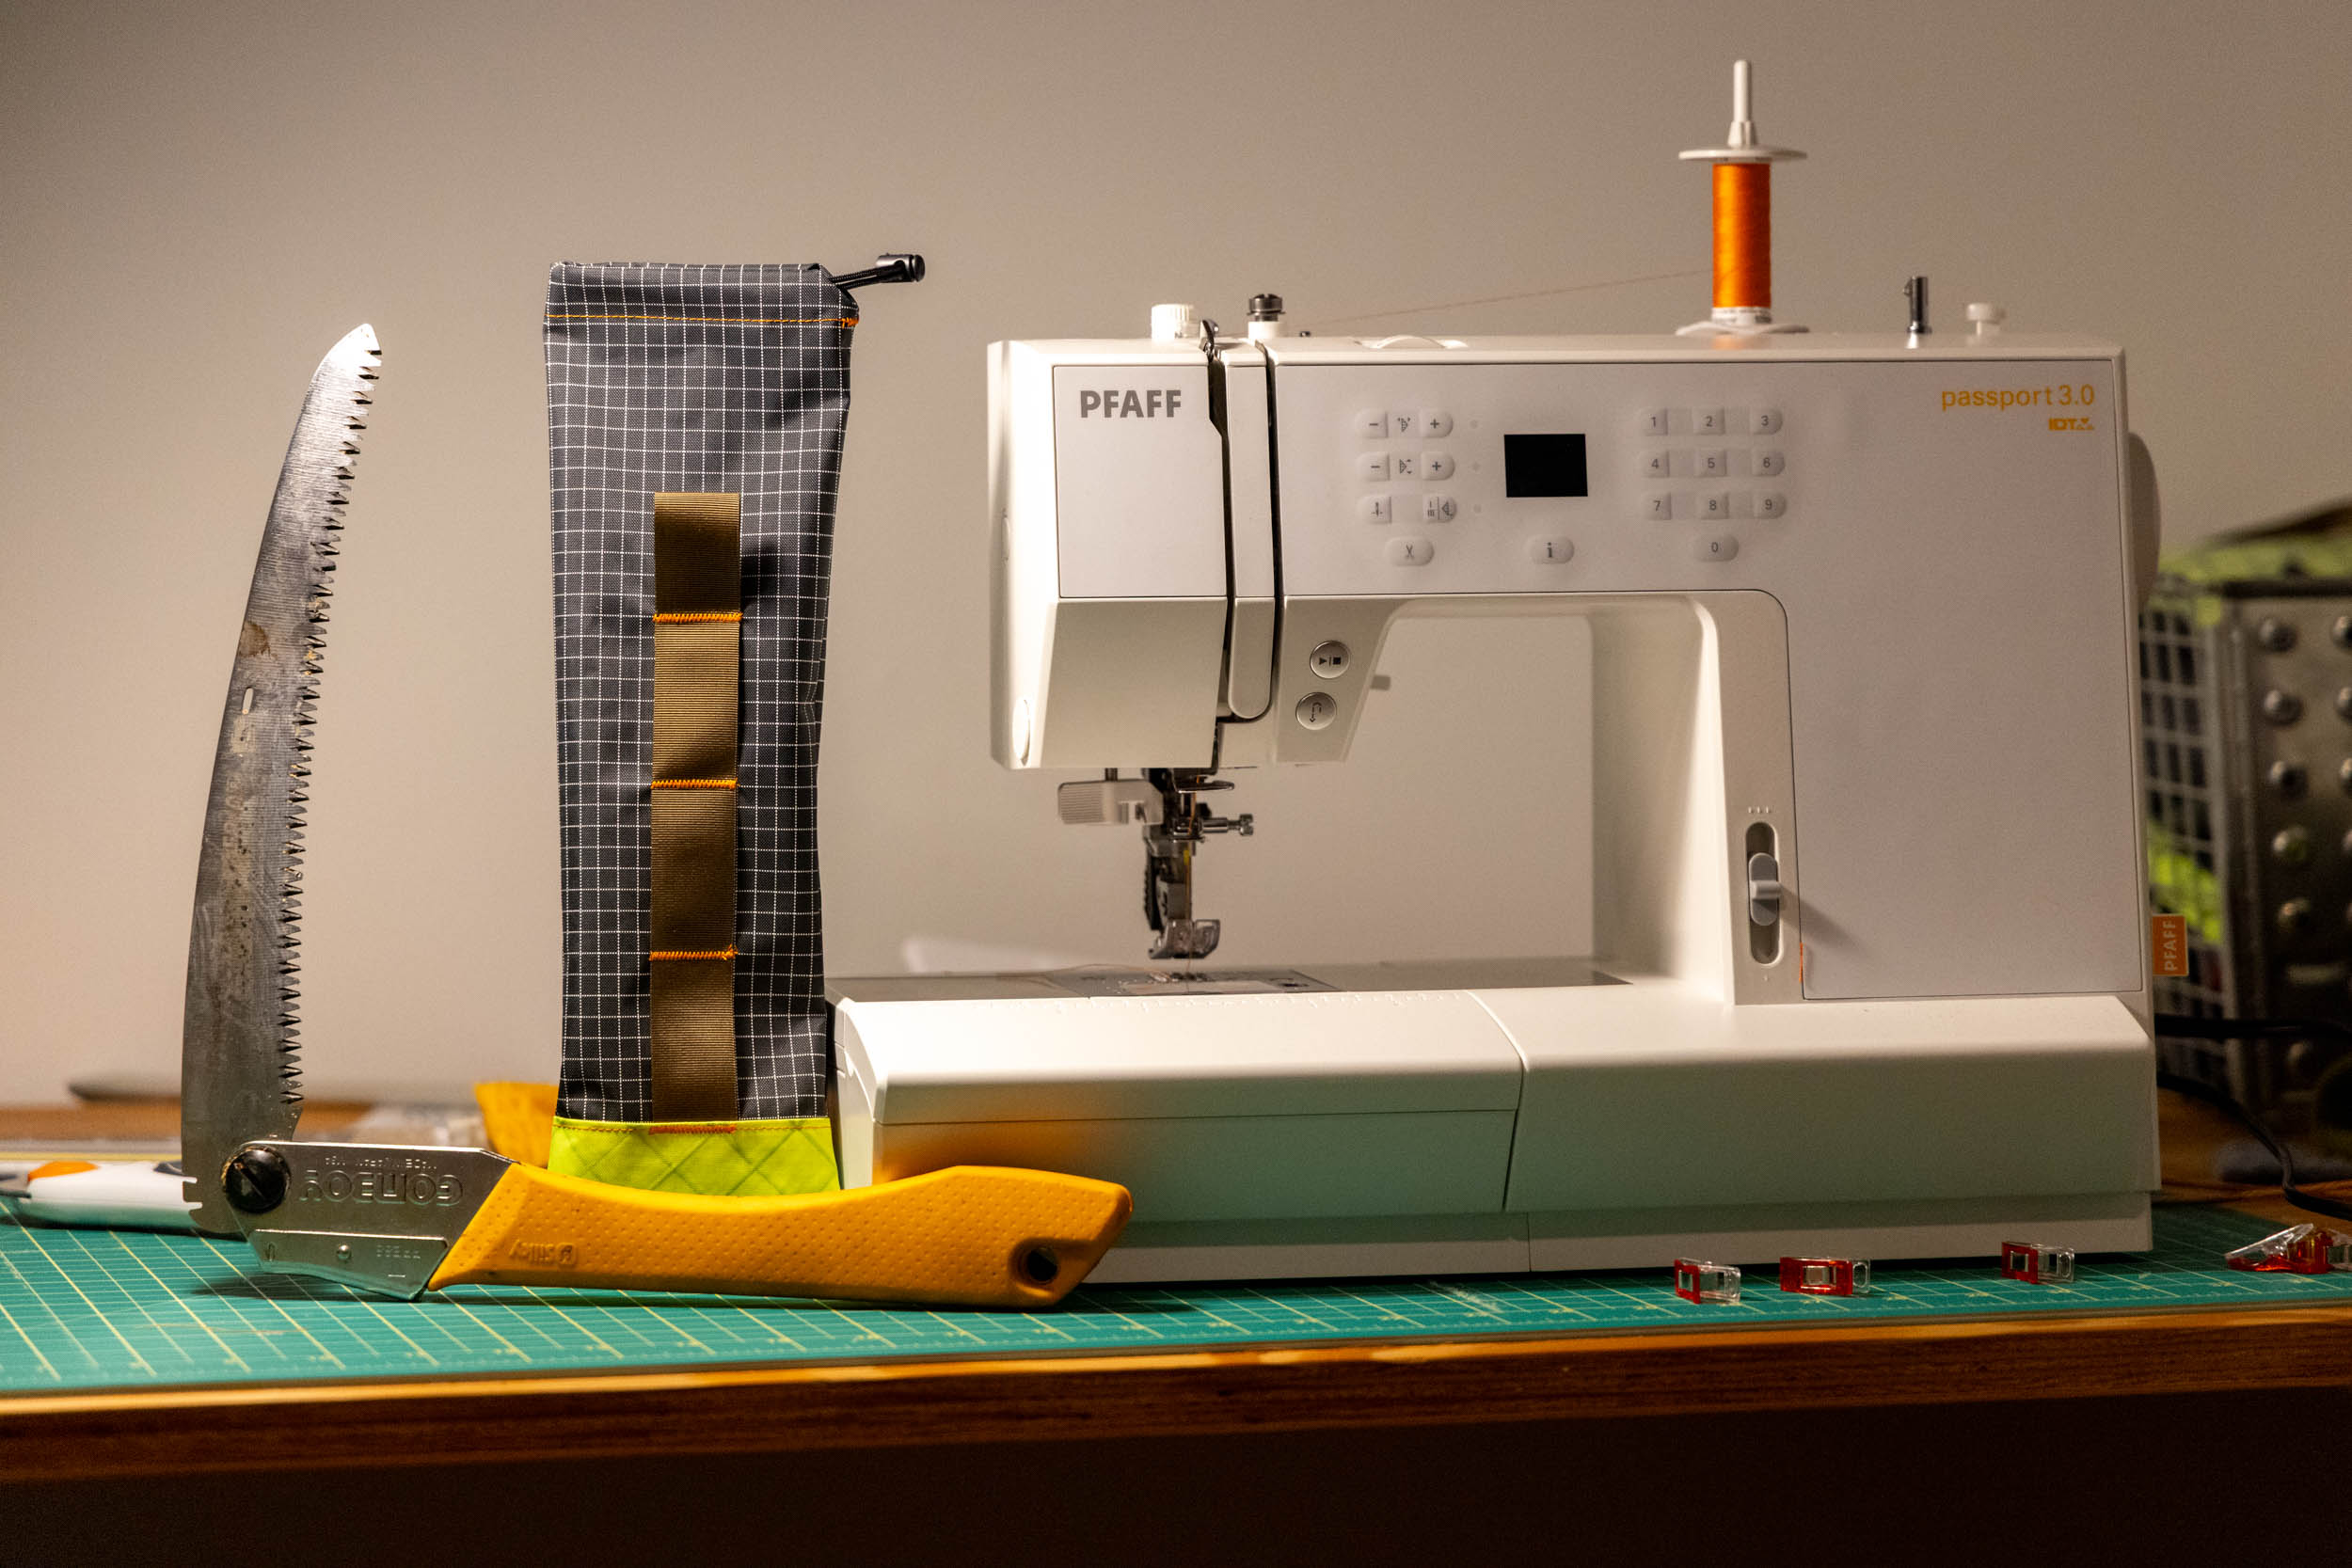
One of the first trail tools I purchased after relocating to British Columbia’s Sunshine Coast five years ago was a Silky Saw. I chose the Silky Gomboy because it’s small enough to fit in a frame bag or large hip pack yet powerful enough to cut through surprisingly thick trees. It’s an excellent tool for post-storm rides in our local trail system, and makes a real difference for other trail users. However, I’ve never liked the chunky plastic storage case it came with, so I decided to whip up a simple sewn storage sleeve as a lightweight alternative. I posted a few photos of my sleeve on Instagram, and I was soon blasted with requests for more. It turns out not all Silky Saws include a plastic case, and a handful of local riders were pleased to have something for their saws to live in when stashing them in backpacks, hip bags, or even strapped to their bikes.

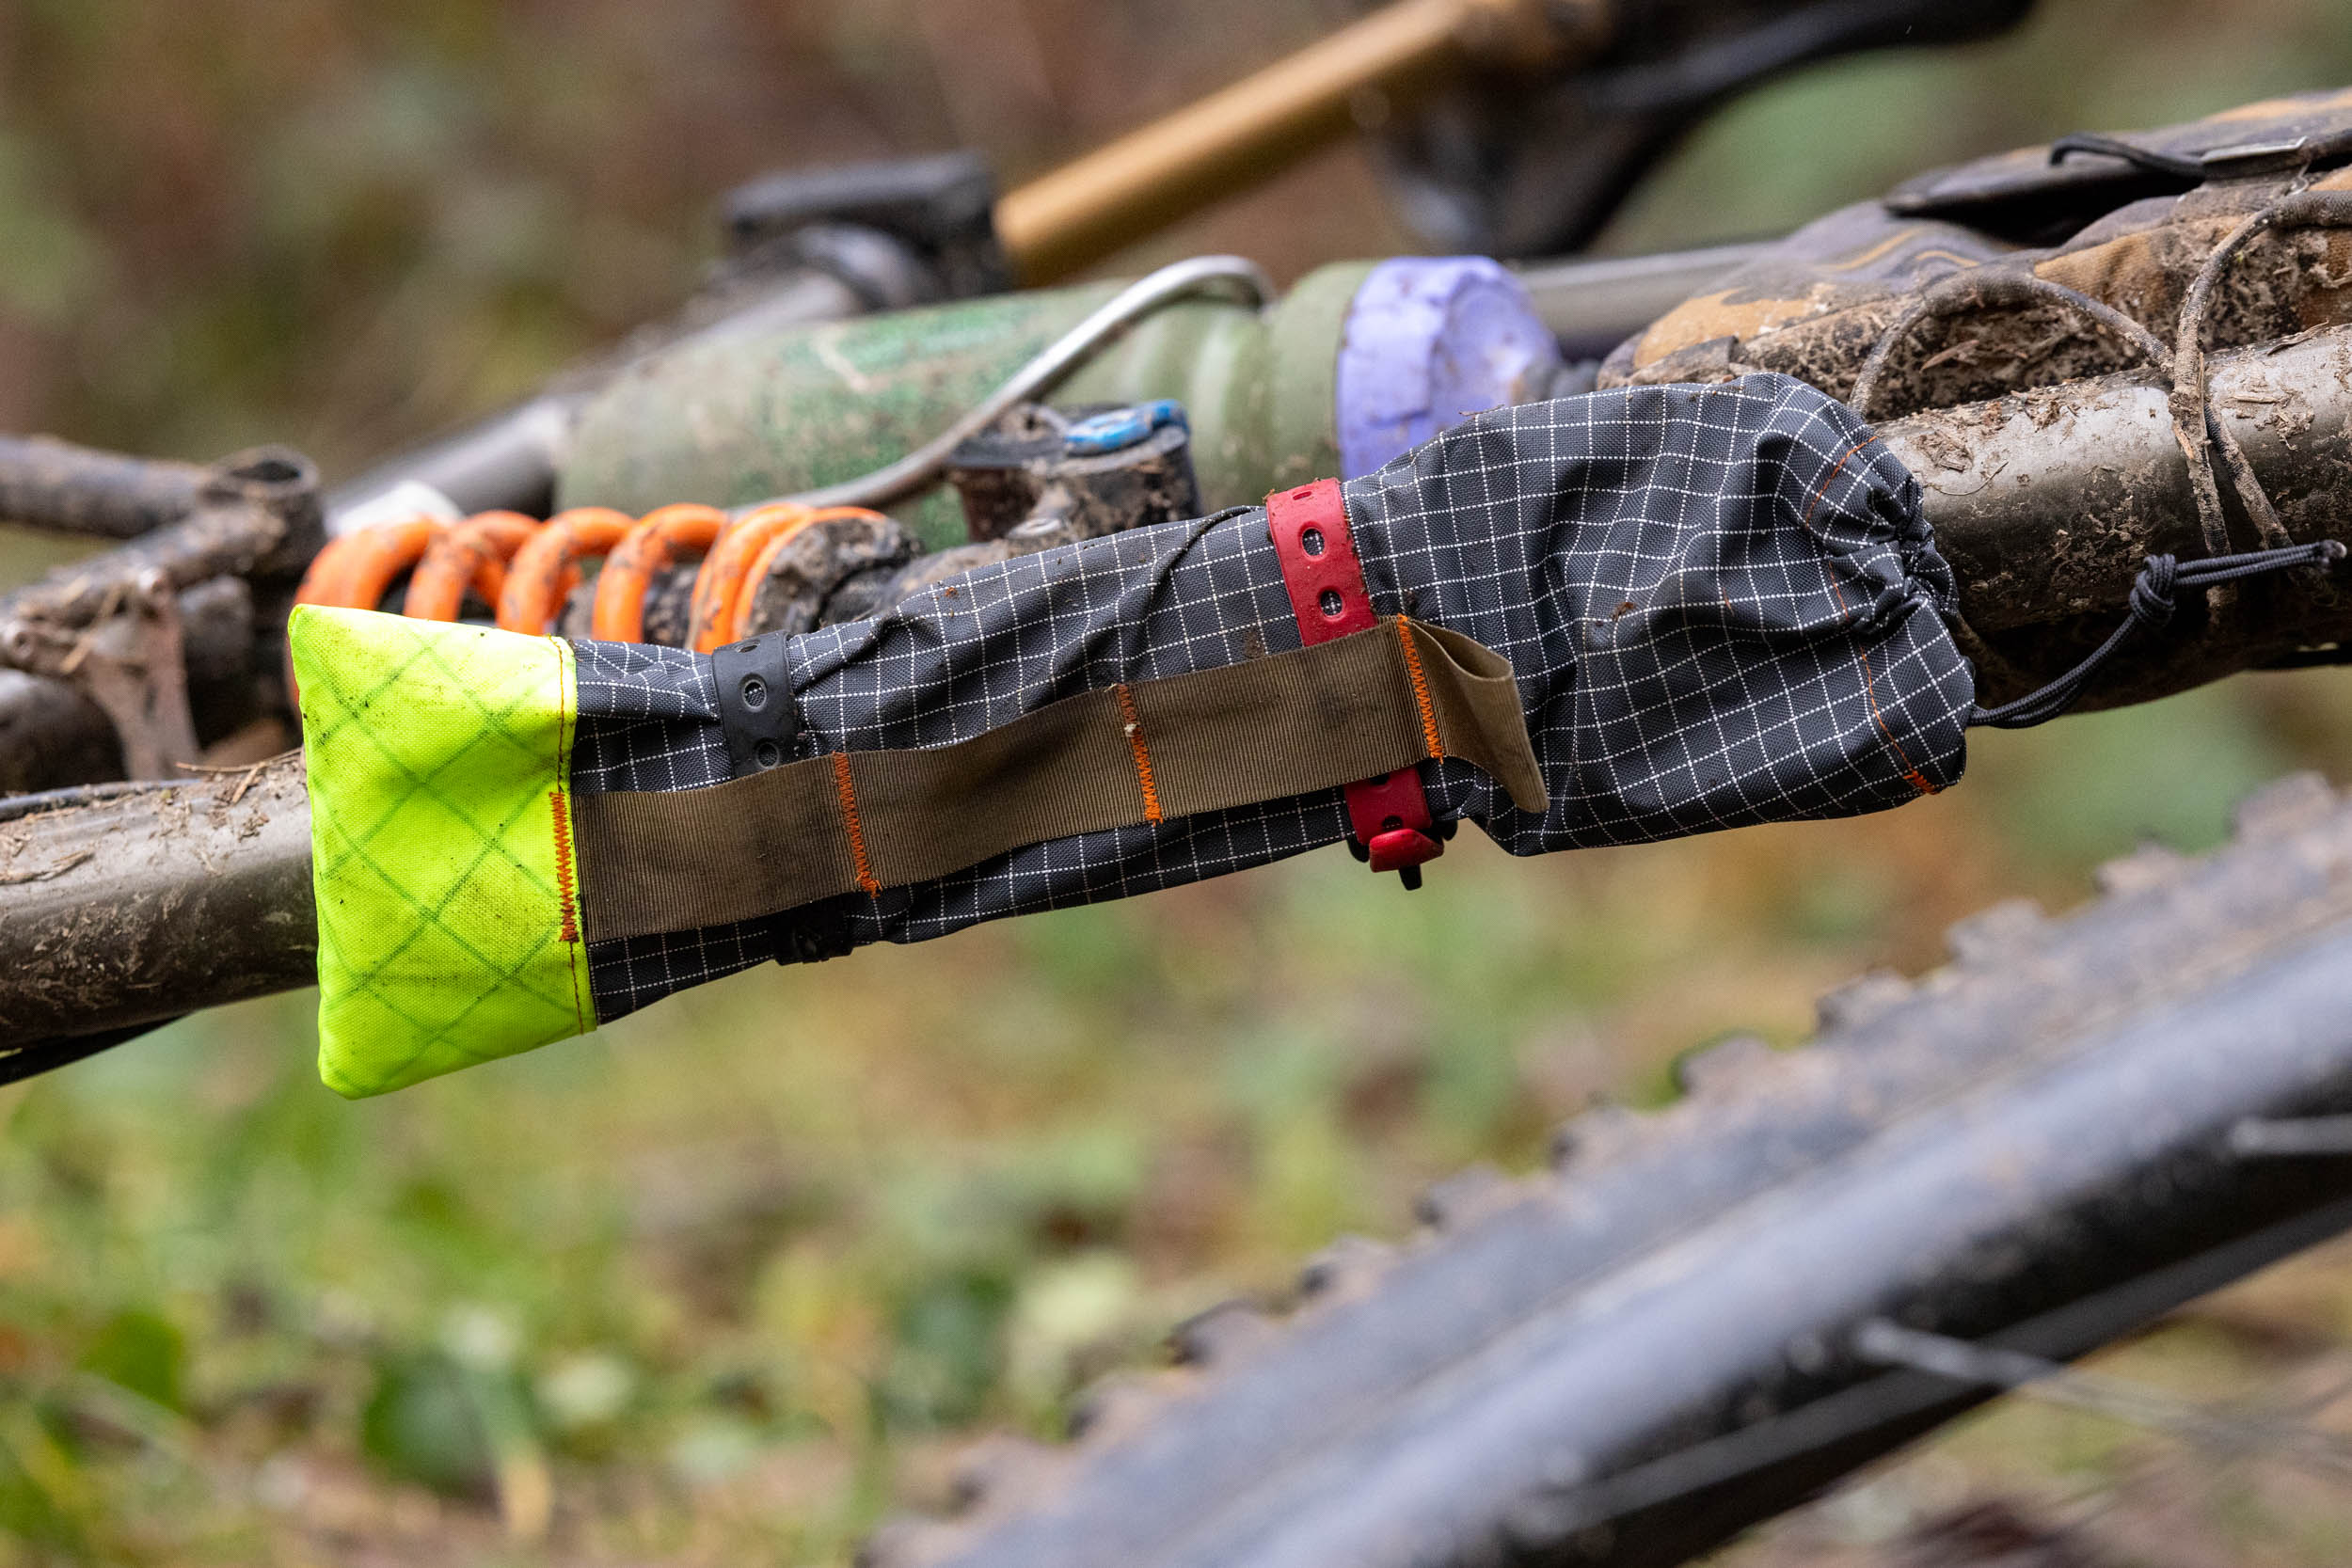
Leading up to the holidays, I produced about a dozen of these sleeves, but because I don’t want to spend every weekend doing this, I decided to make a guide so people can make their own. Making your own Silky Saw storage sleeve is a great entry-level sewing project, and it can be adapted to hold any number of flat items, such as tent poles, pegs, photo sticks, toothbrushes, and more. After some user feedback, I added a small strip of daisy chain webbing to the sleeve, providing a nice place to loop a few straps through to lash your saw or tent poles onto a frame or rack top. It’s surprising how stable it is lashed under the downtube.
What You’ll Need
- Lightweight ripstop material, like HyperD 300 (Ripstop by the Roll), Venom Gridstop, or Ripstop Nylon. It needs to be pliable enough to cinch closed (since the cinch closure is built into the bag’s main body) but durable enough to withstand some abrasion.
- Heavier fabric, like 1000D Cordura, X-Pac, or canvas, for the base of the bag
- Cord Lock
- Paracord or shock cord
- ¾” webbing or grossgrain ribbon
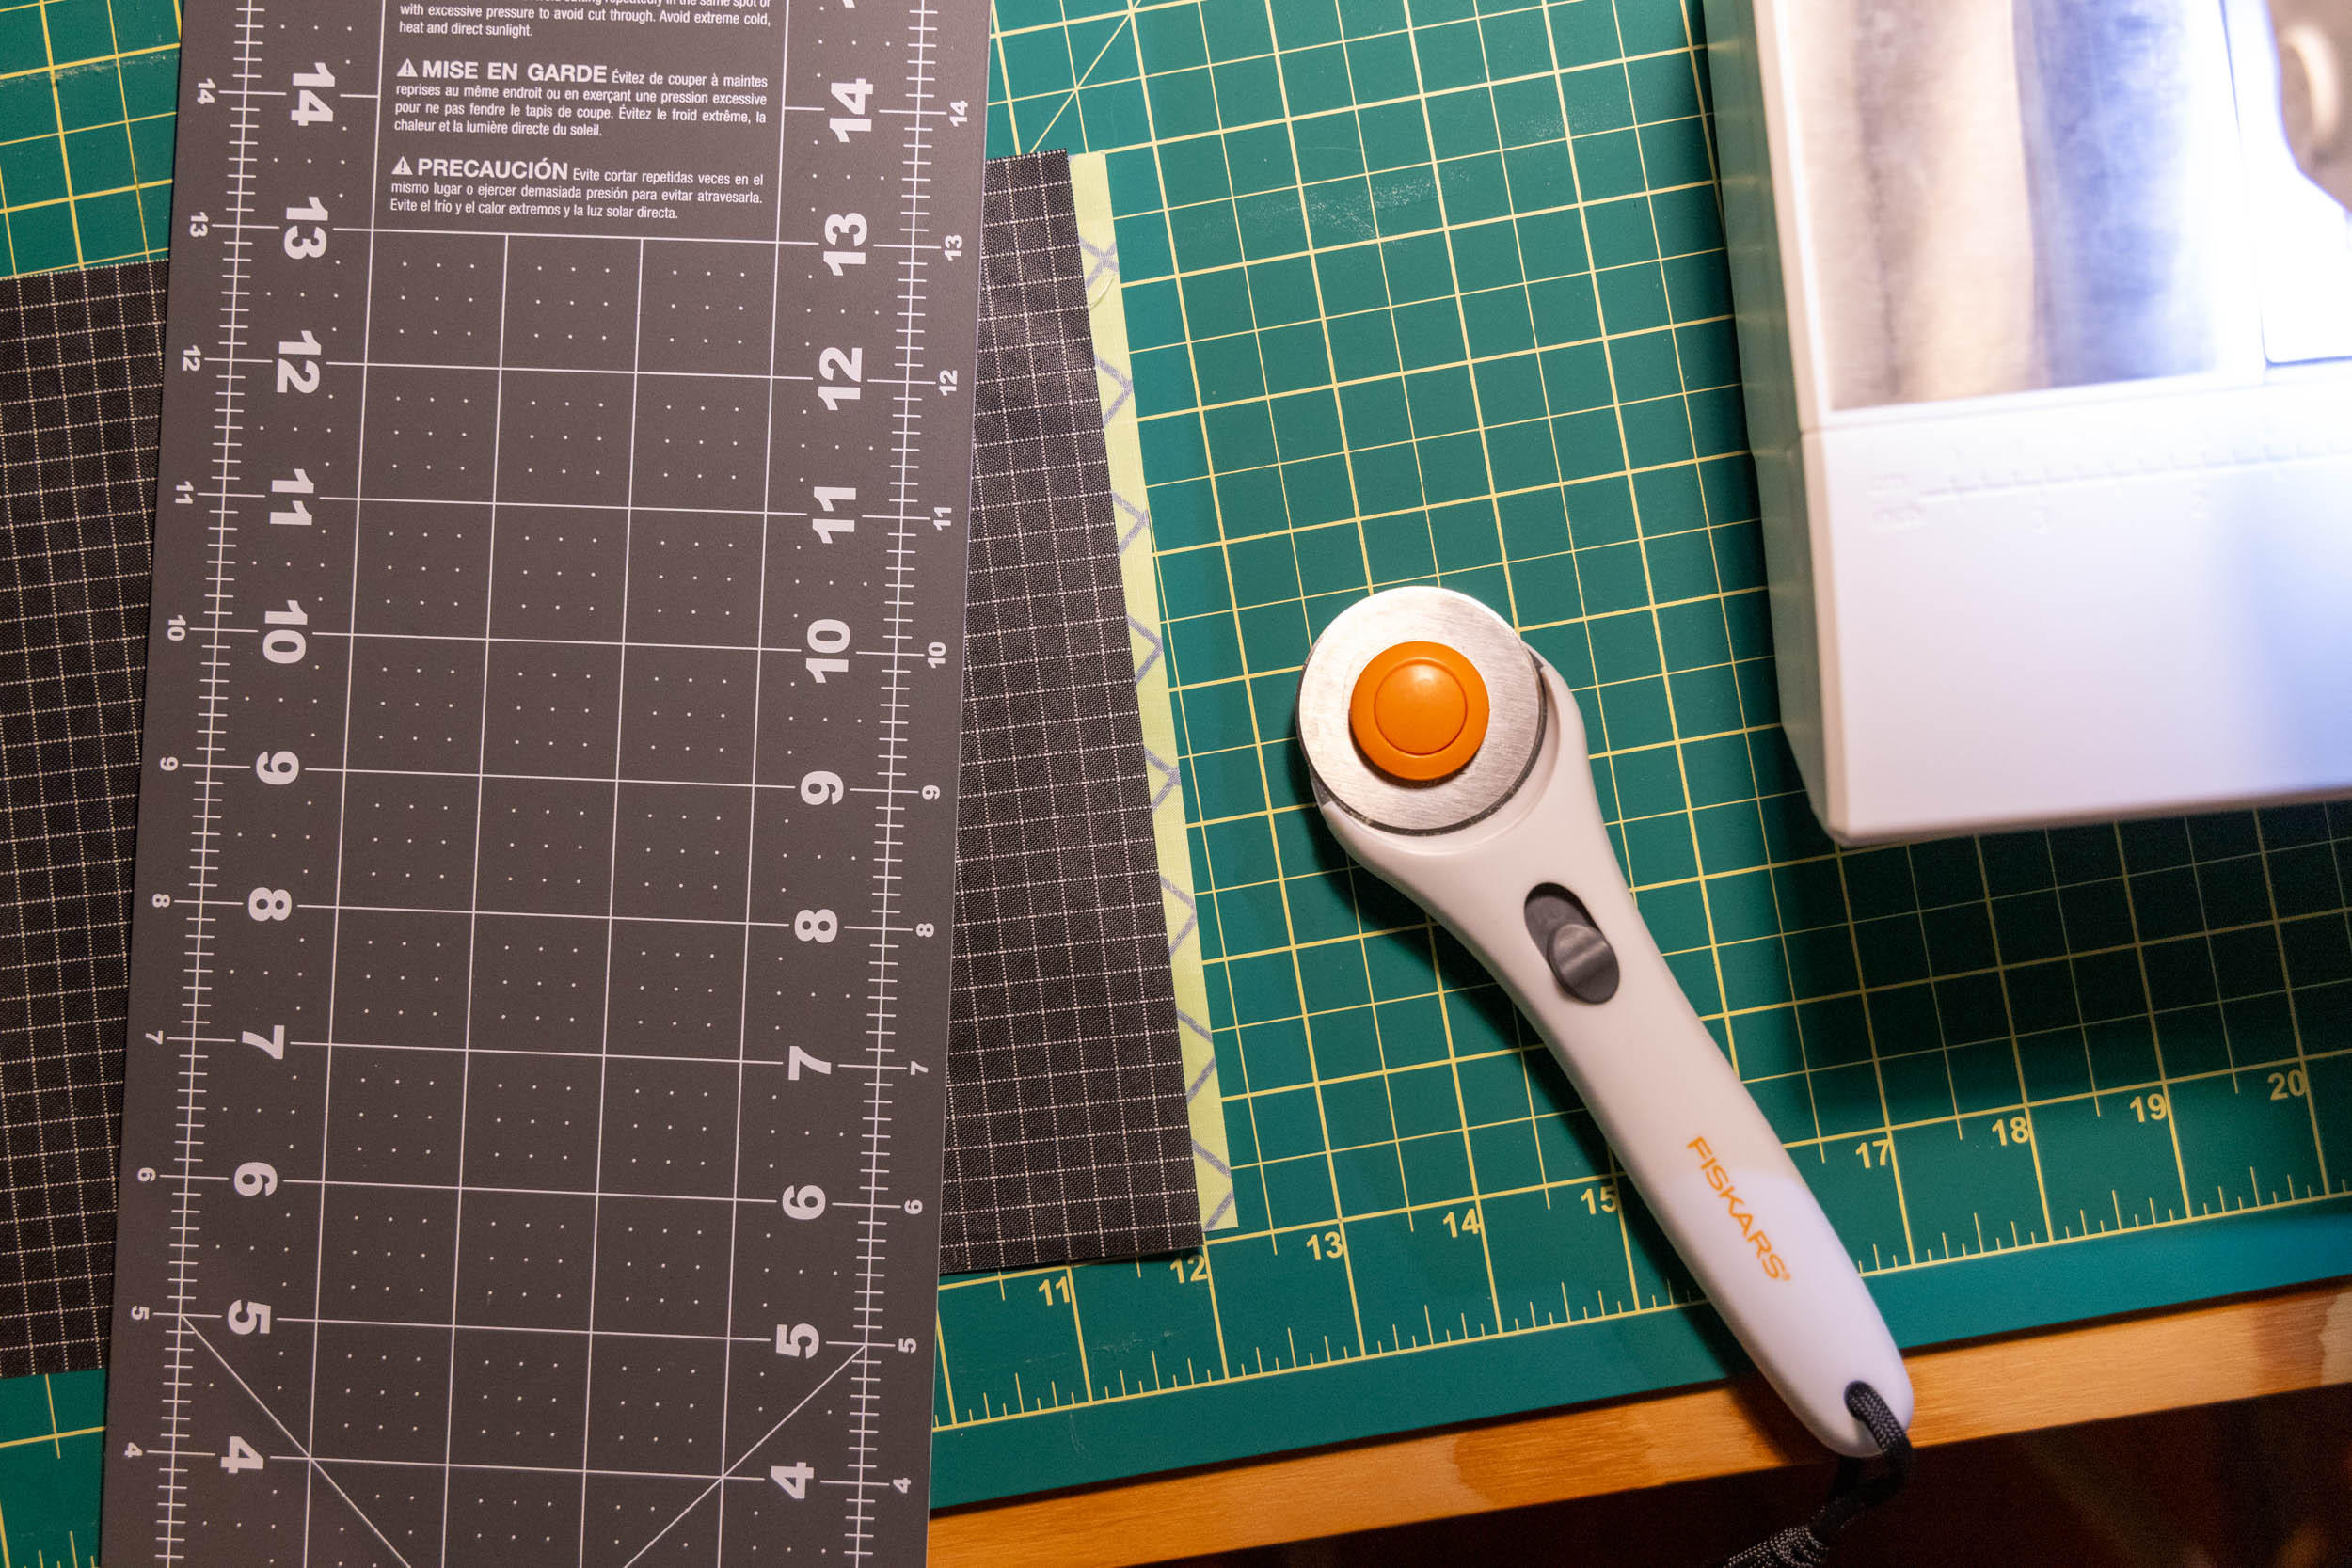
- Sharp fabric scissors or a rotary blade
- Ruler, cutting mat, and chalk or pen
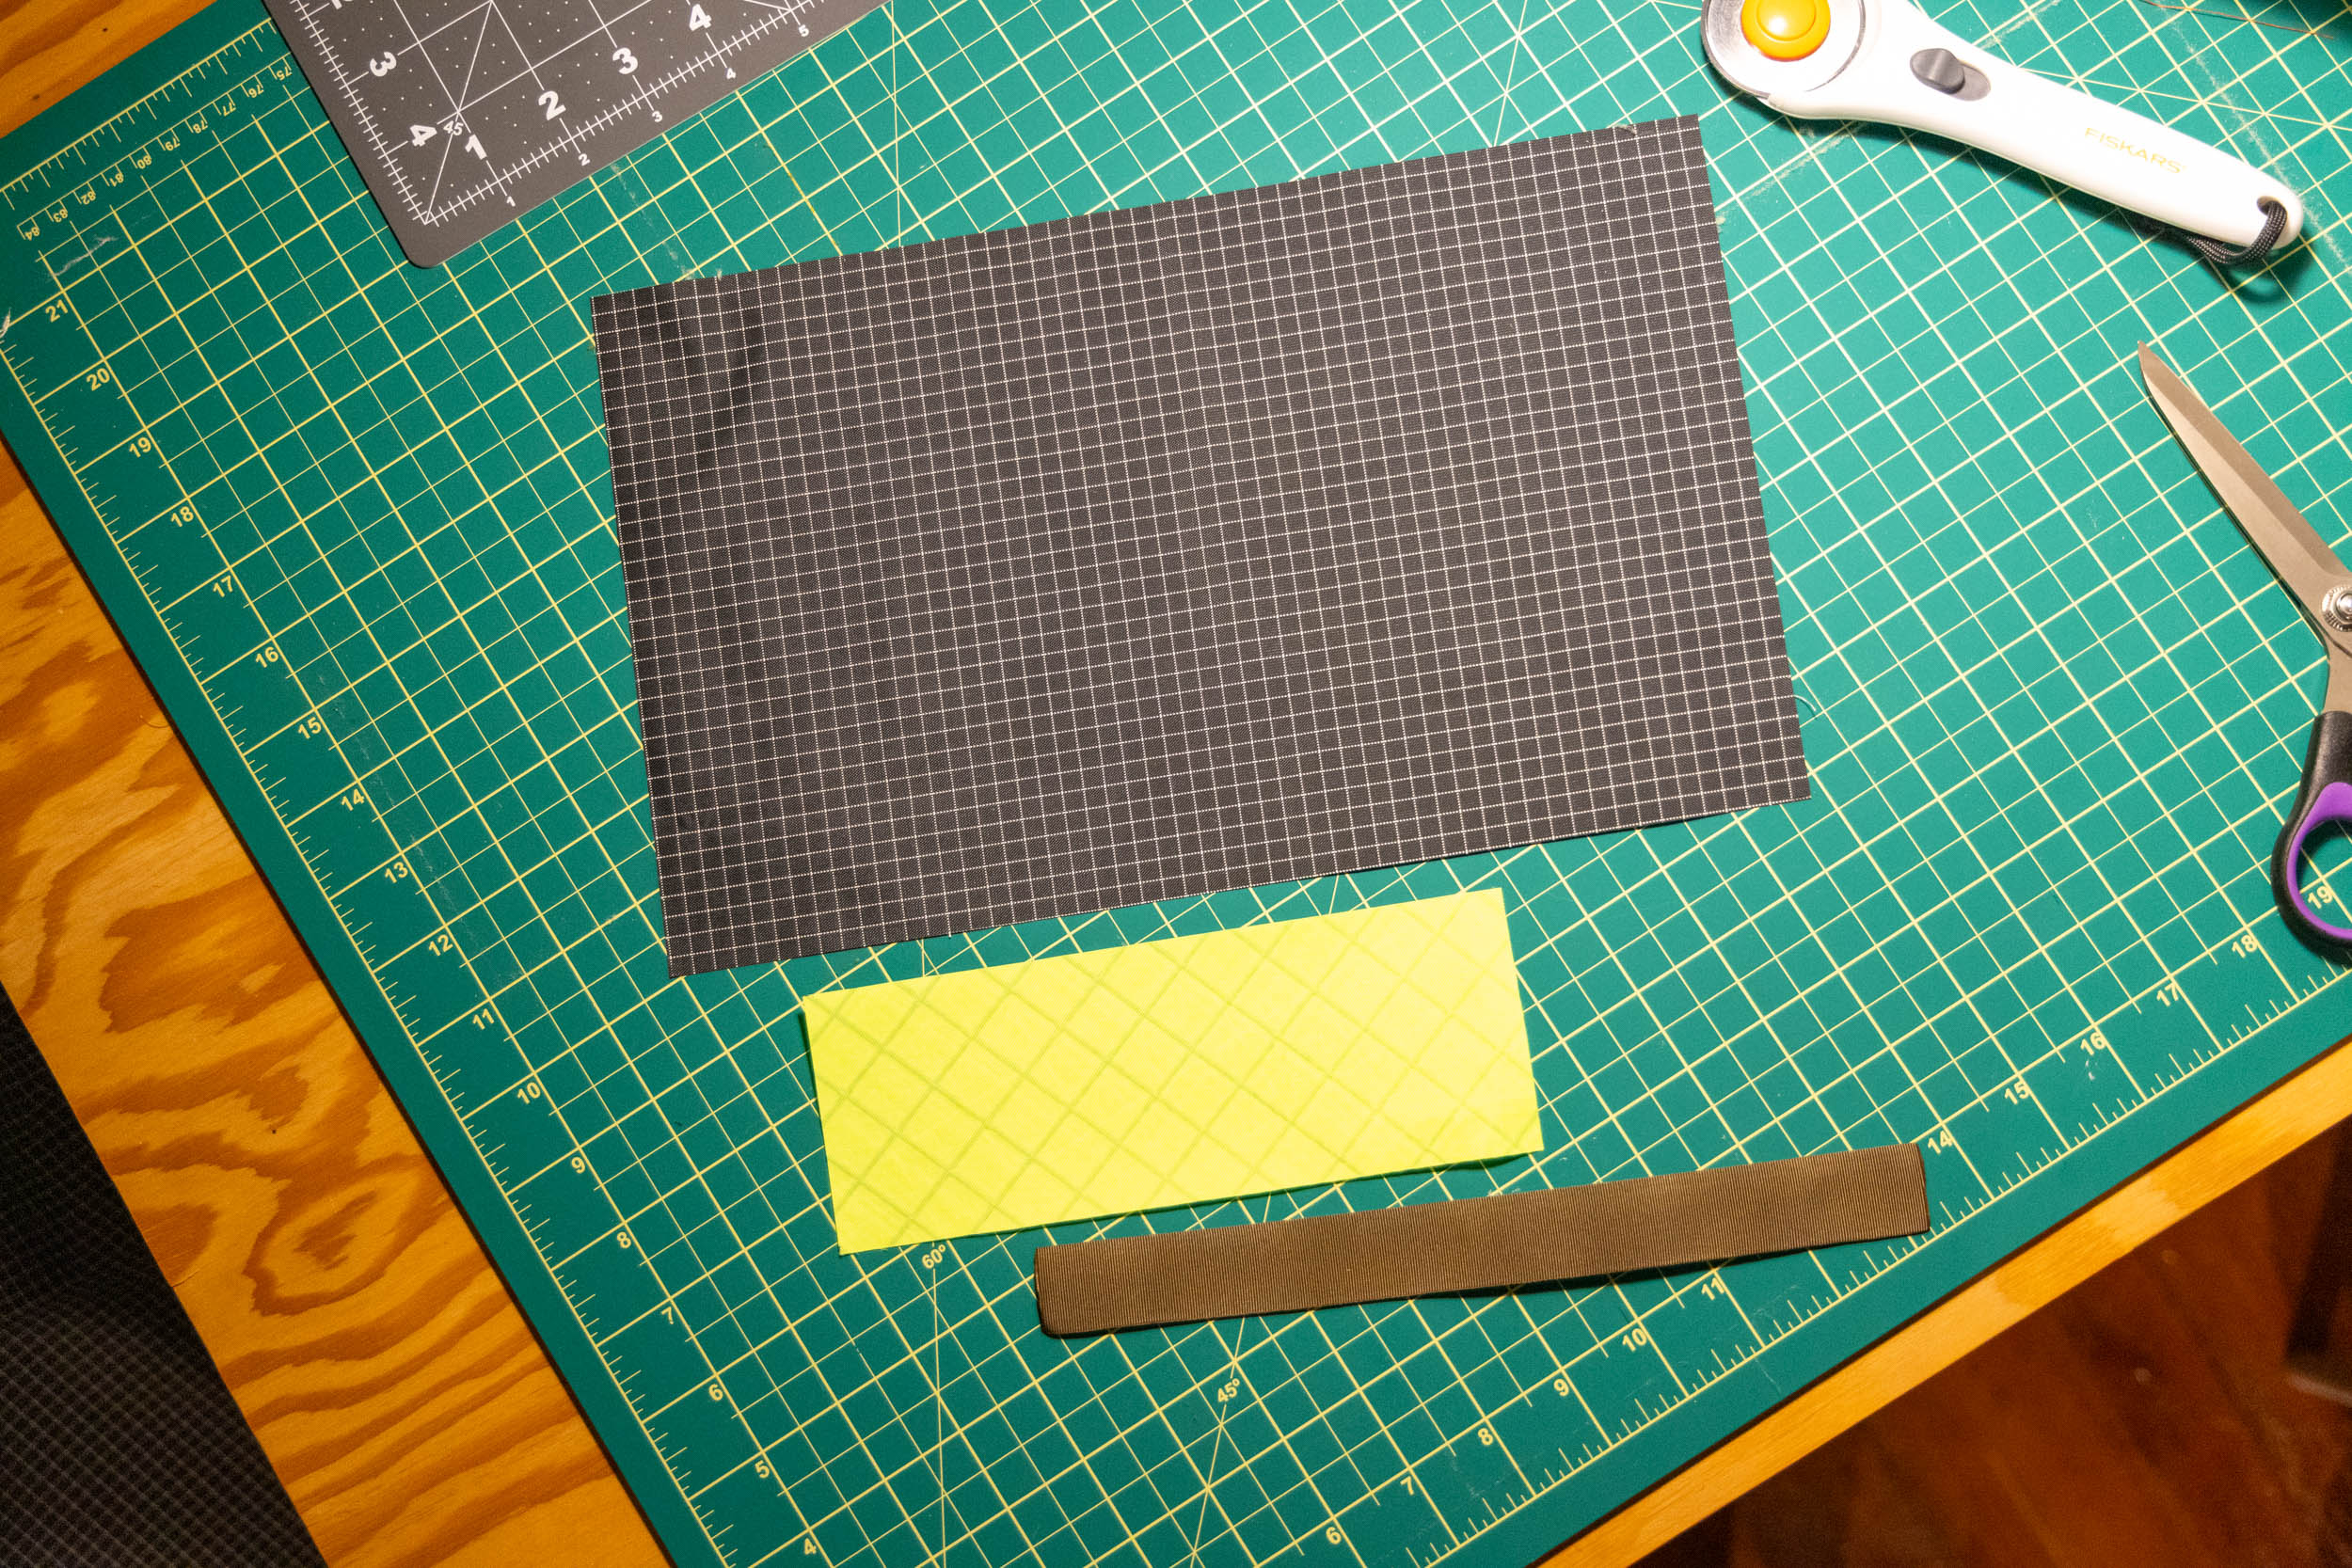
Step 1: Cut Your Fabric and Components
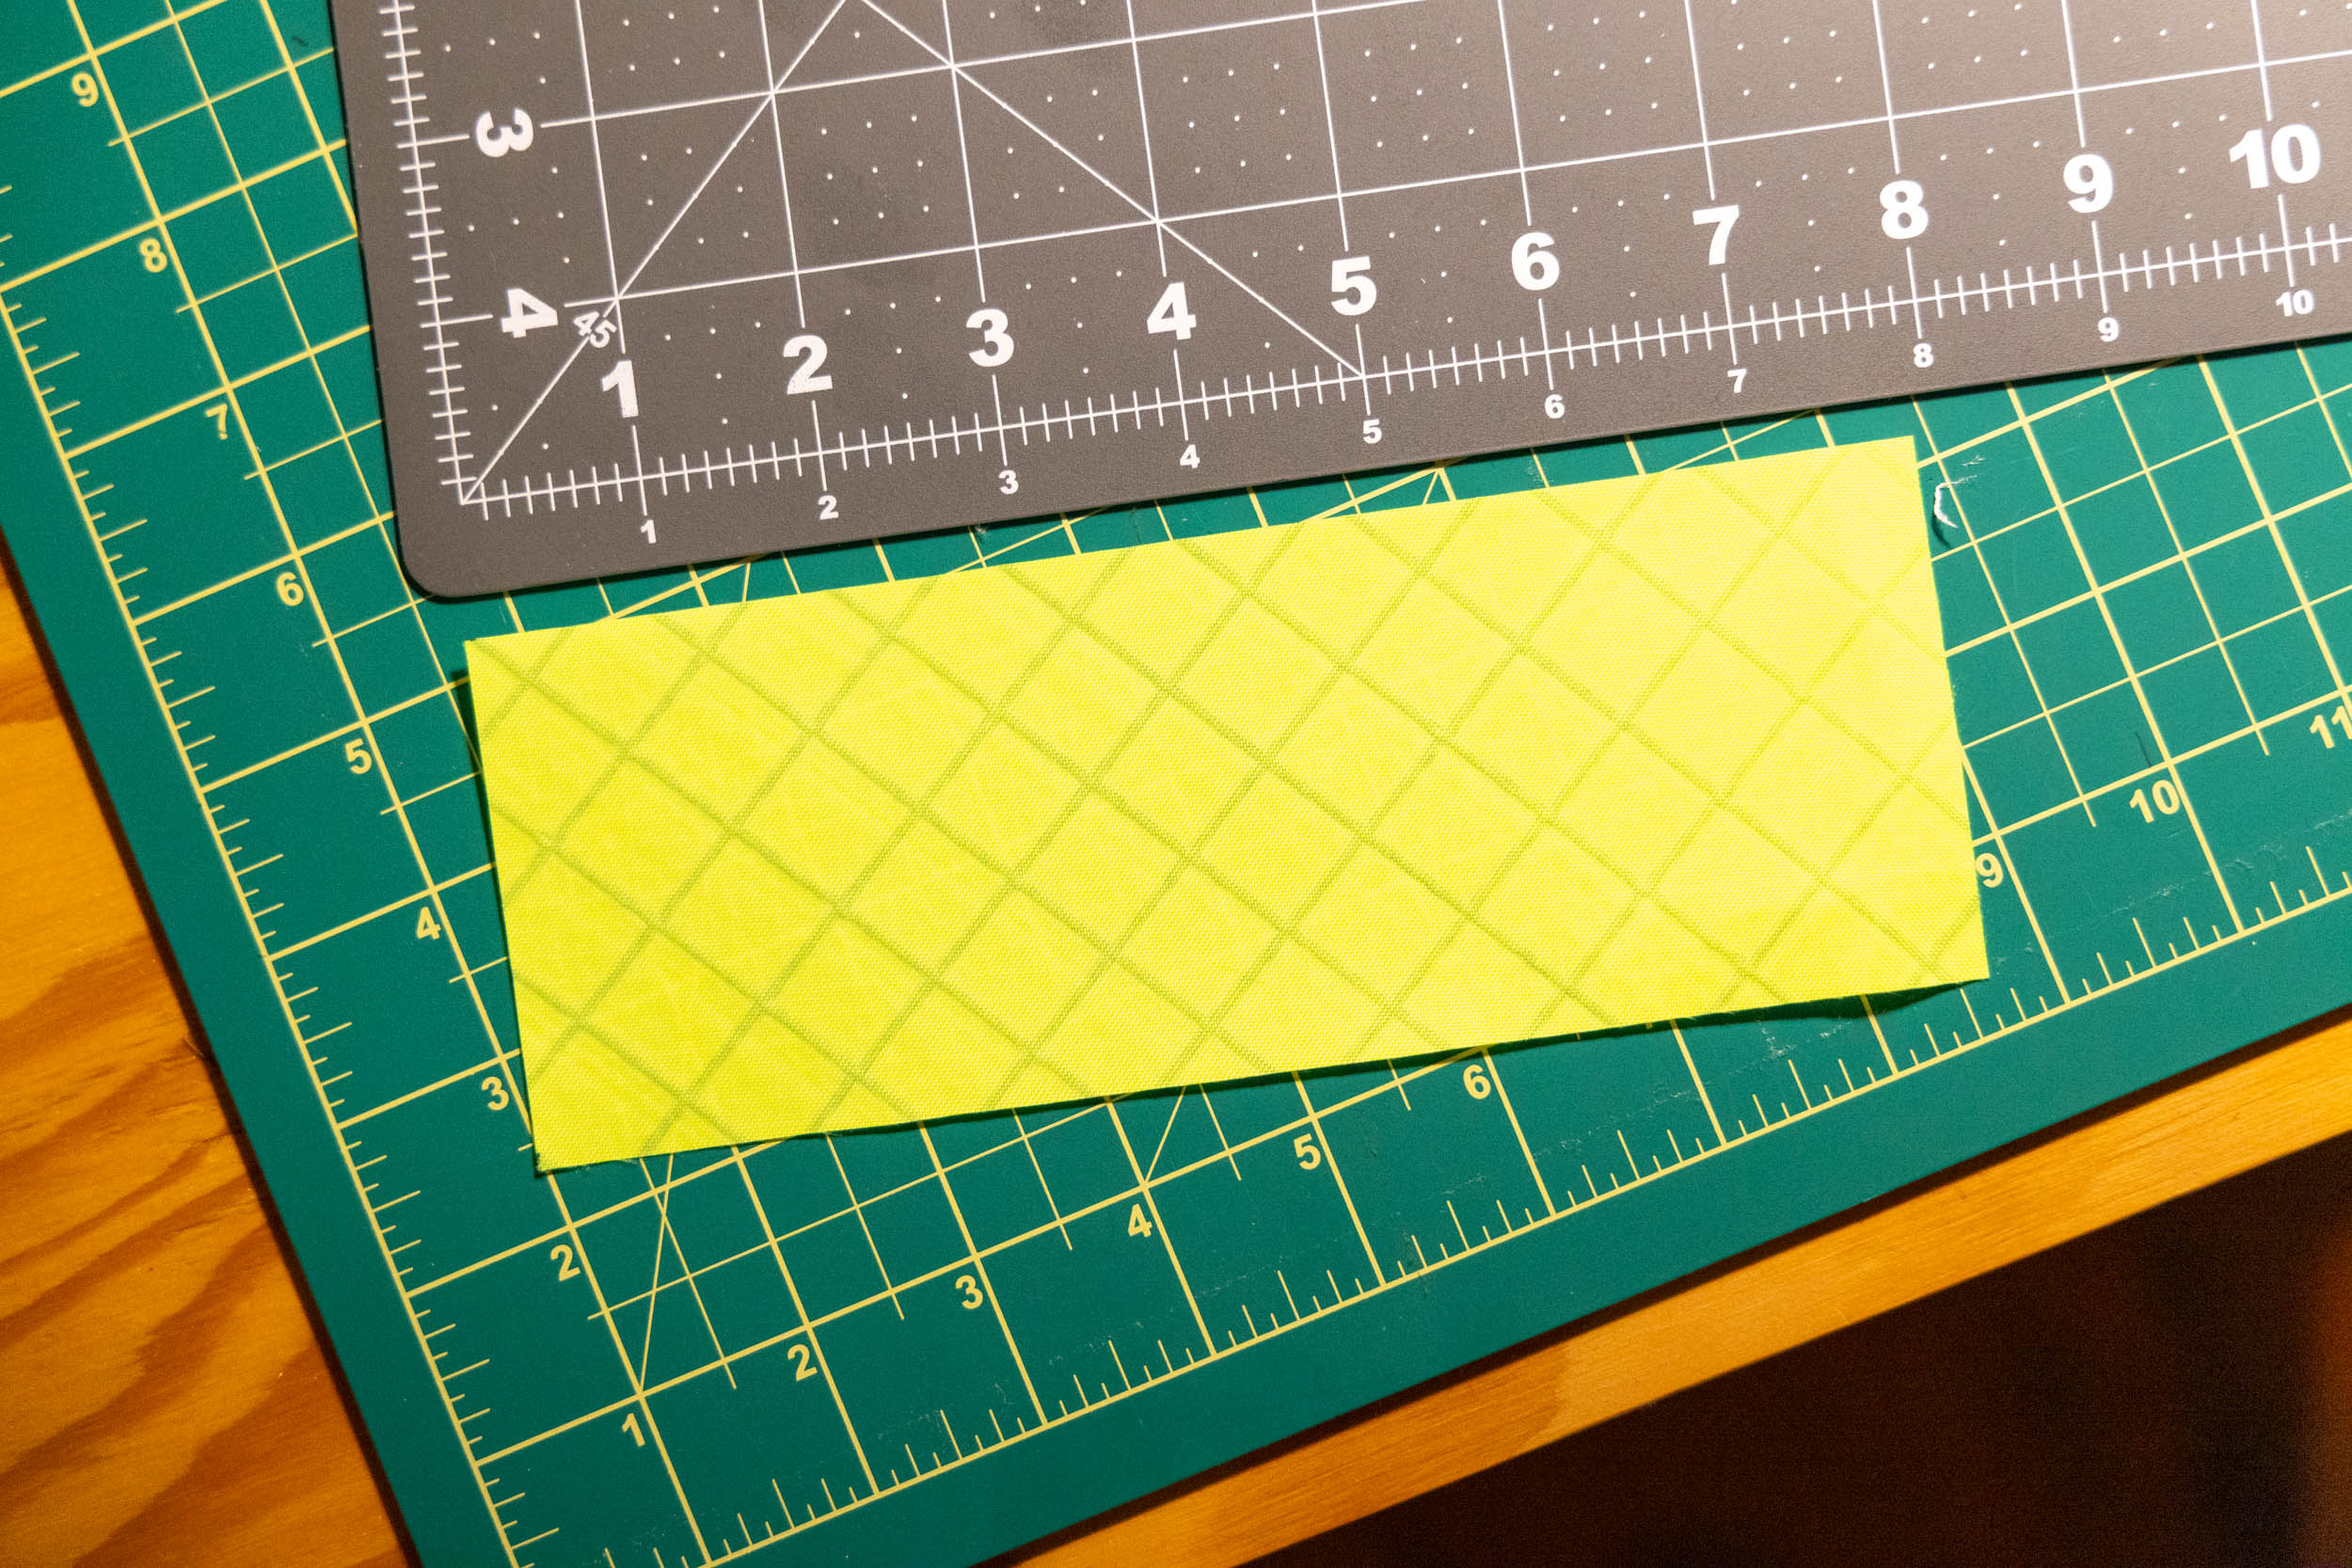
The beauty of this project is that the main pieces of fabric are just rectangles, so there’s no need to print a pattern. I’ve included measurements for the Big Boy and Gomboy saws, but it’s straightforward to adjust the sizing to work with other saws.
The Silky Big Boy requires a 19 x 8” piece of lightweight ripstop fabric for the main body and a 3 x 8” piece for the reinforced base. The Silky Gomboy features a 13 x 8” main body and the same 3 x 8” base, made from a heavier fabric.
Each bag requires a length of webbing for a daisy-chain attachment that is a few inches shorter than the sleeve length. For the Big Boy, I used a 14” length of webbing, and the Gomboy uses a 10” length. I normally wait to cut my shock cord or paracord for the cinch opening until after I’ve run it through the bag.
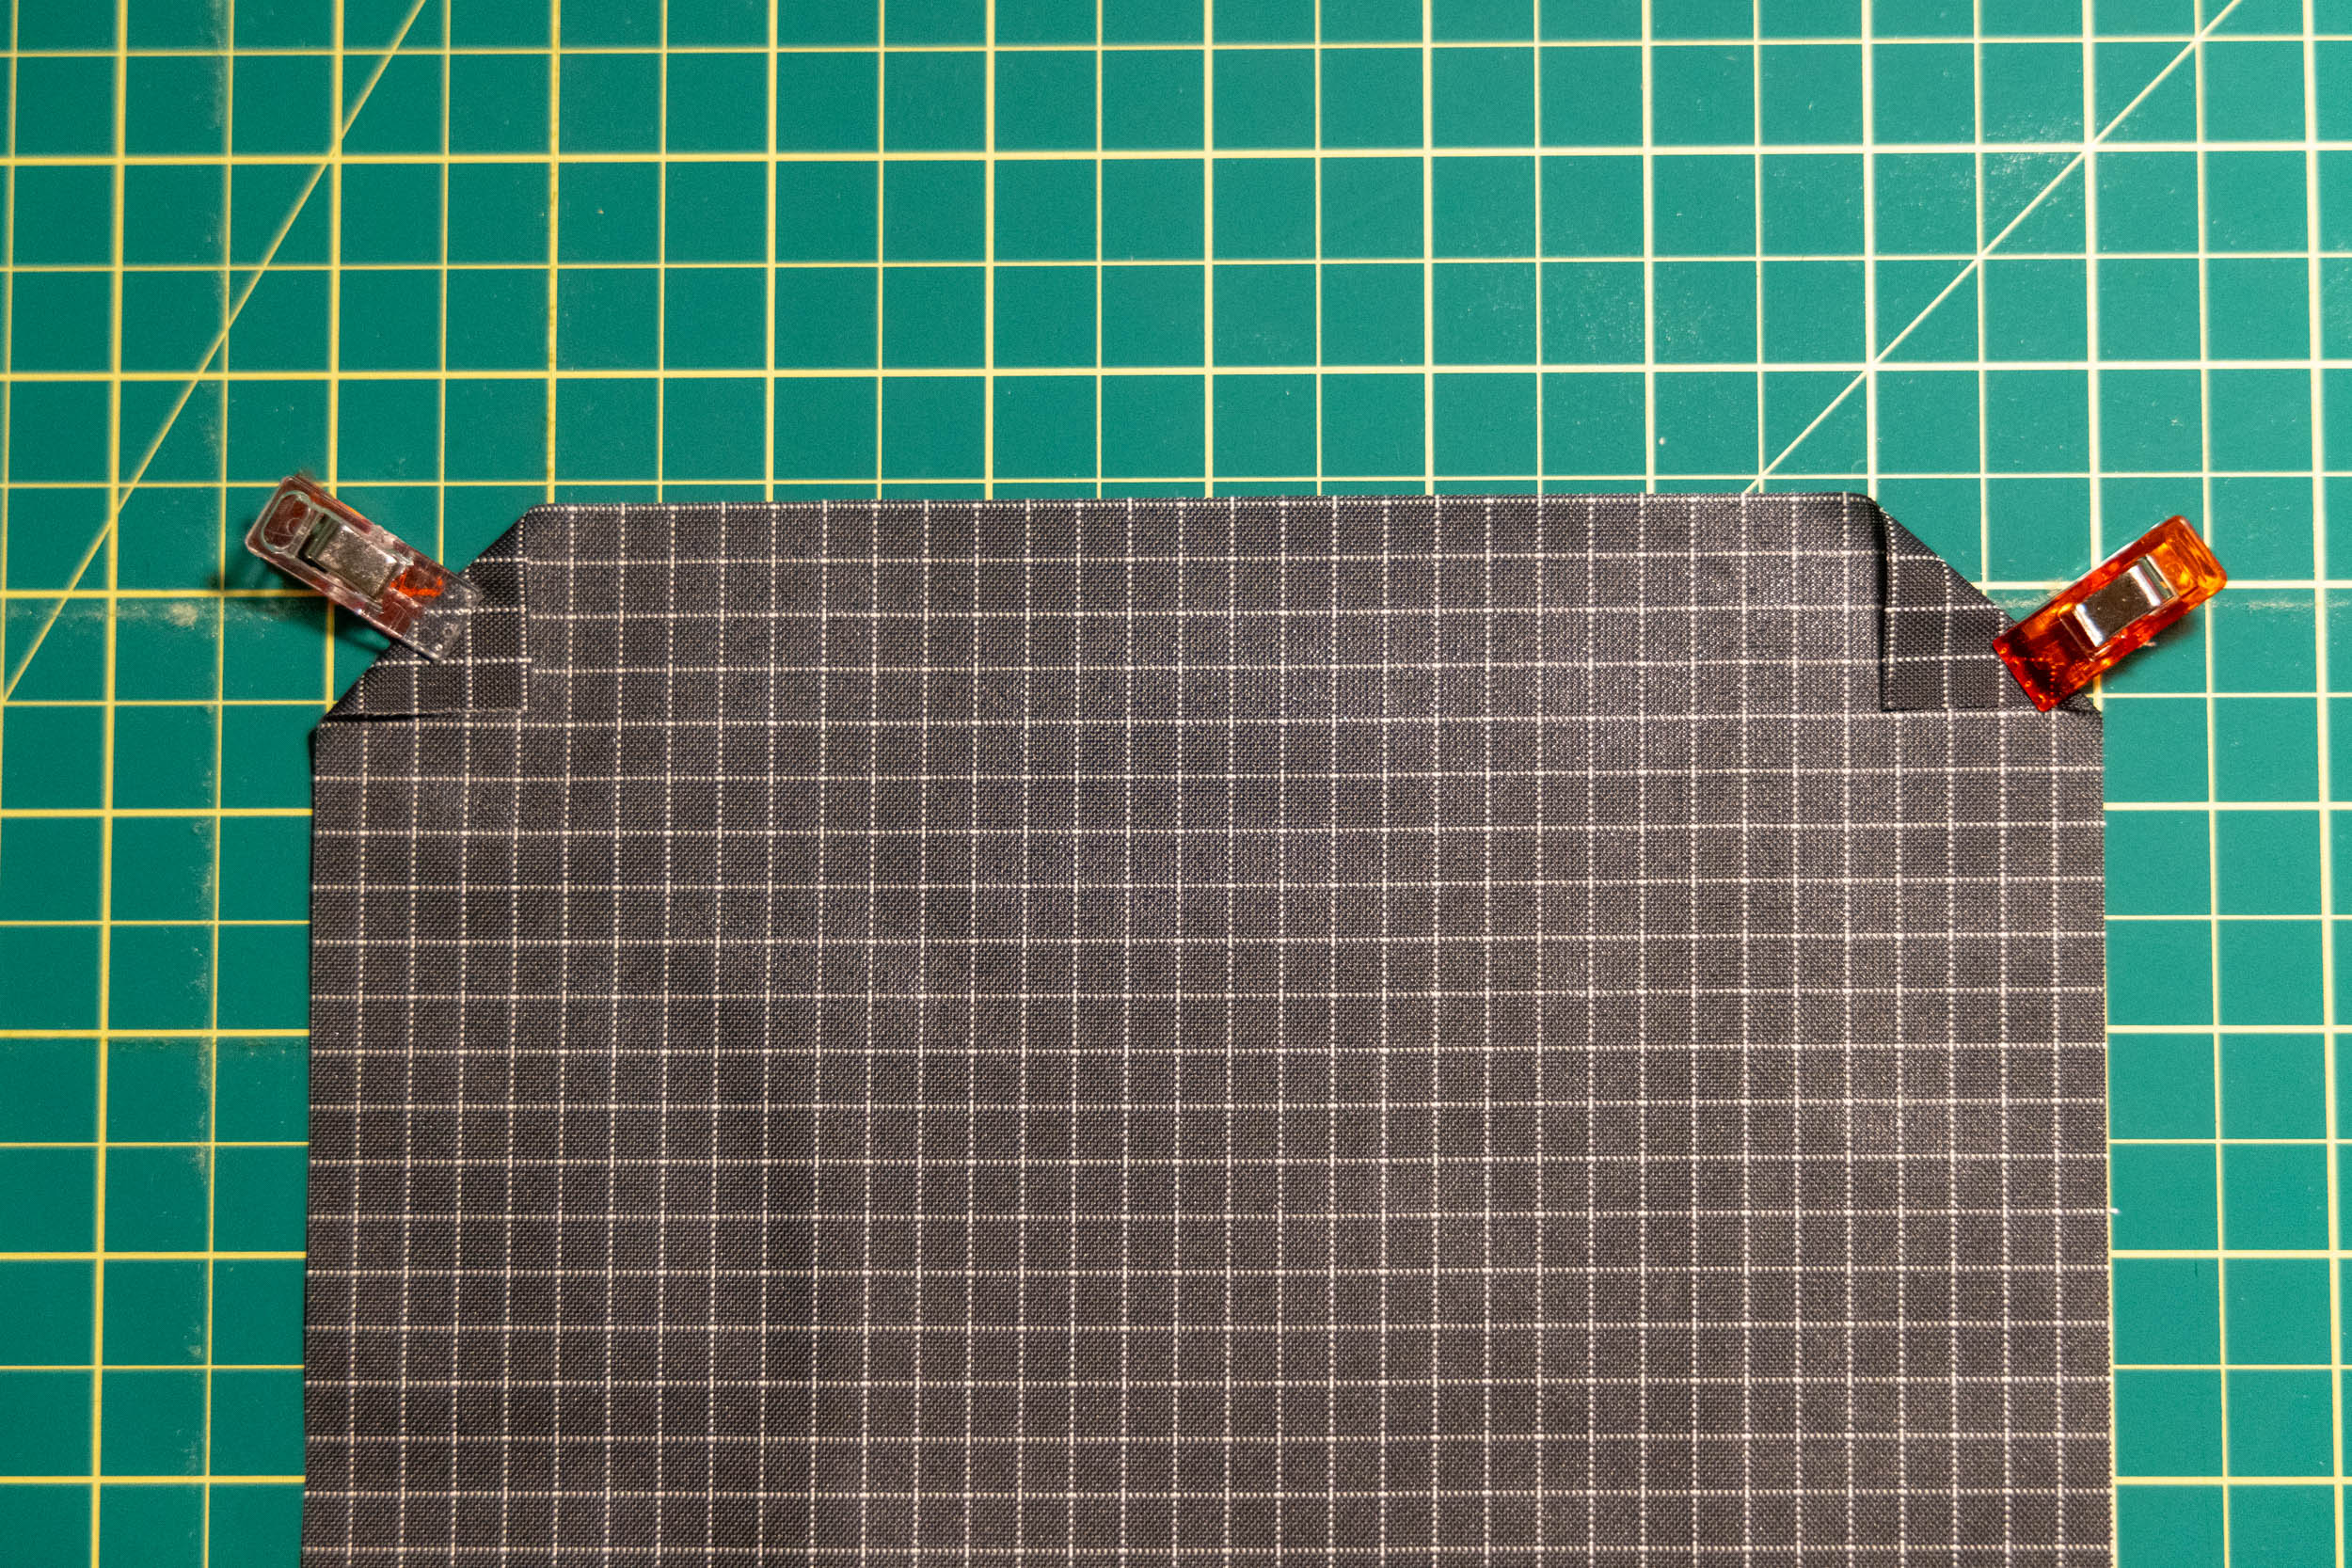
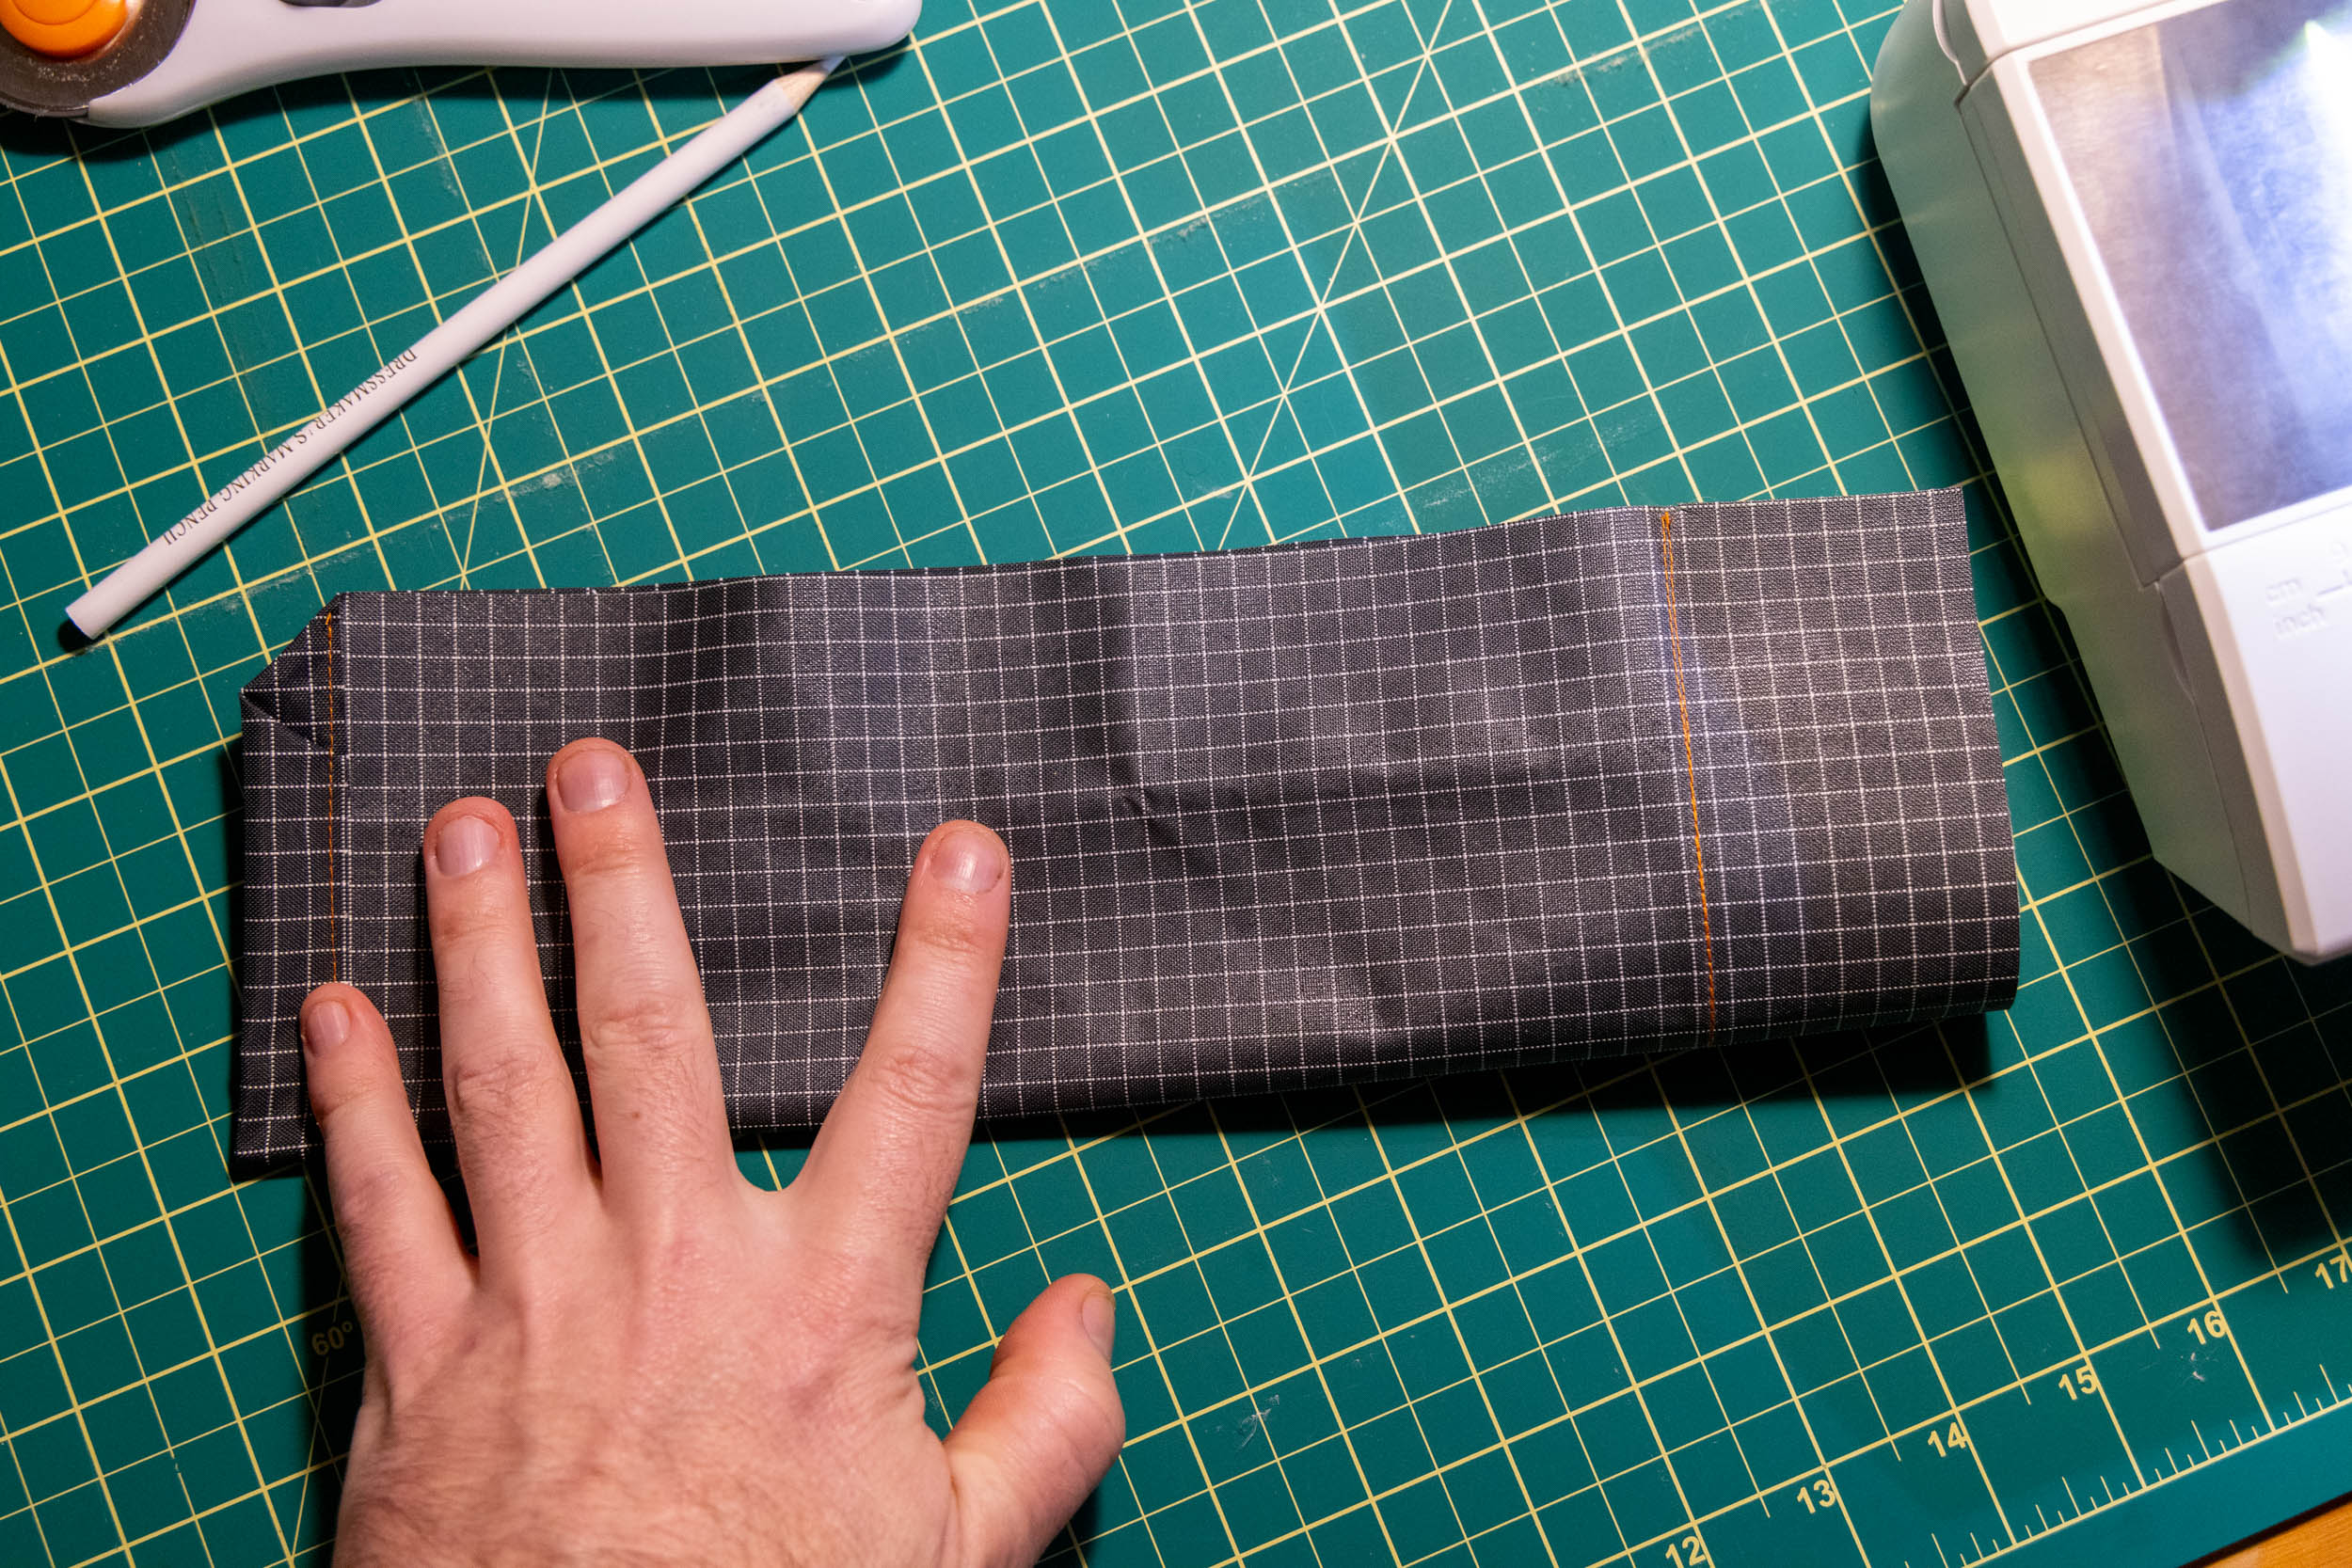
Step 2: Sew the Drawcord Channel
Similar to making any drawcord stuff sack, the saw sleeve has a sewn channel for the cord to run through at the top of the bag. Face the good side (the side you want to be seen) of the fabric down. On the top left and top right of the fabric edge, fold down 90-degree corners approximately 1″. Use clips or pins to hold it in place. Fold the top edge down to meet the just-folded corners, and clip or pin it into place.
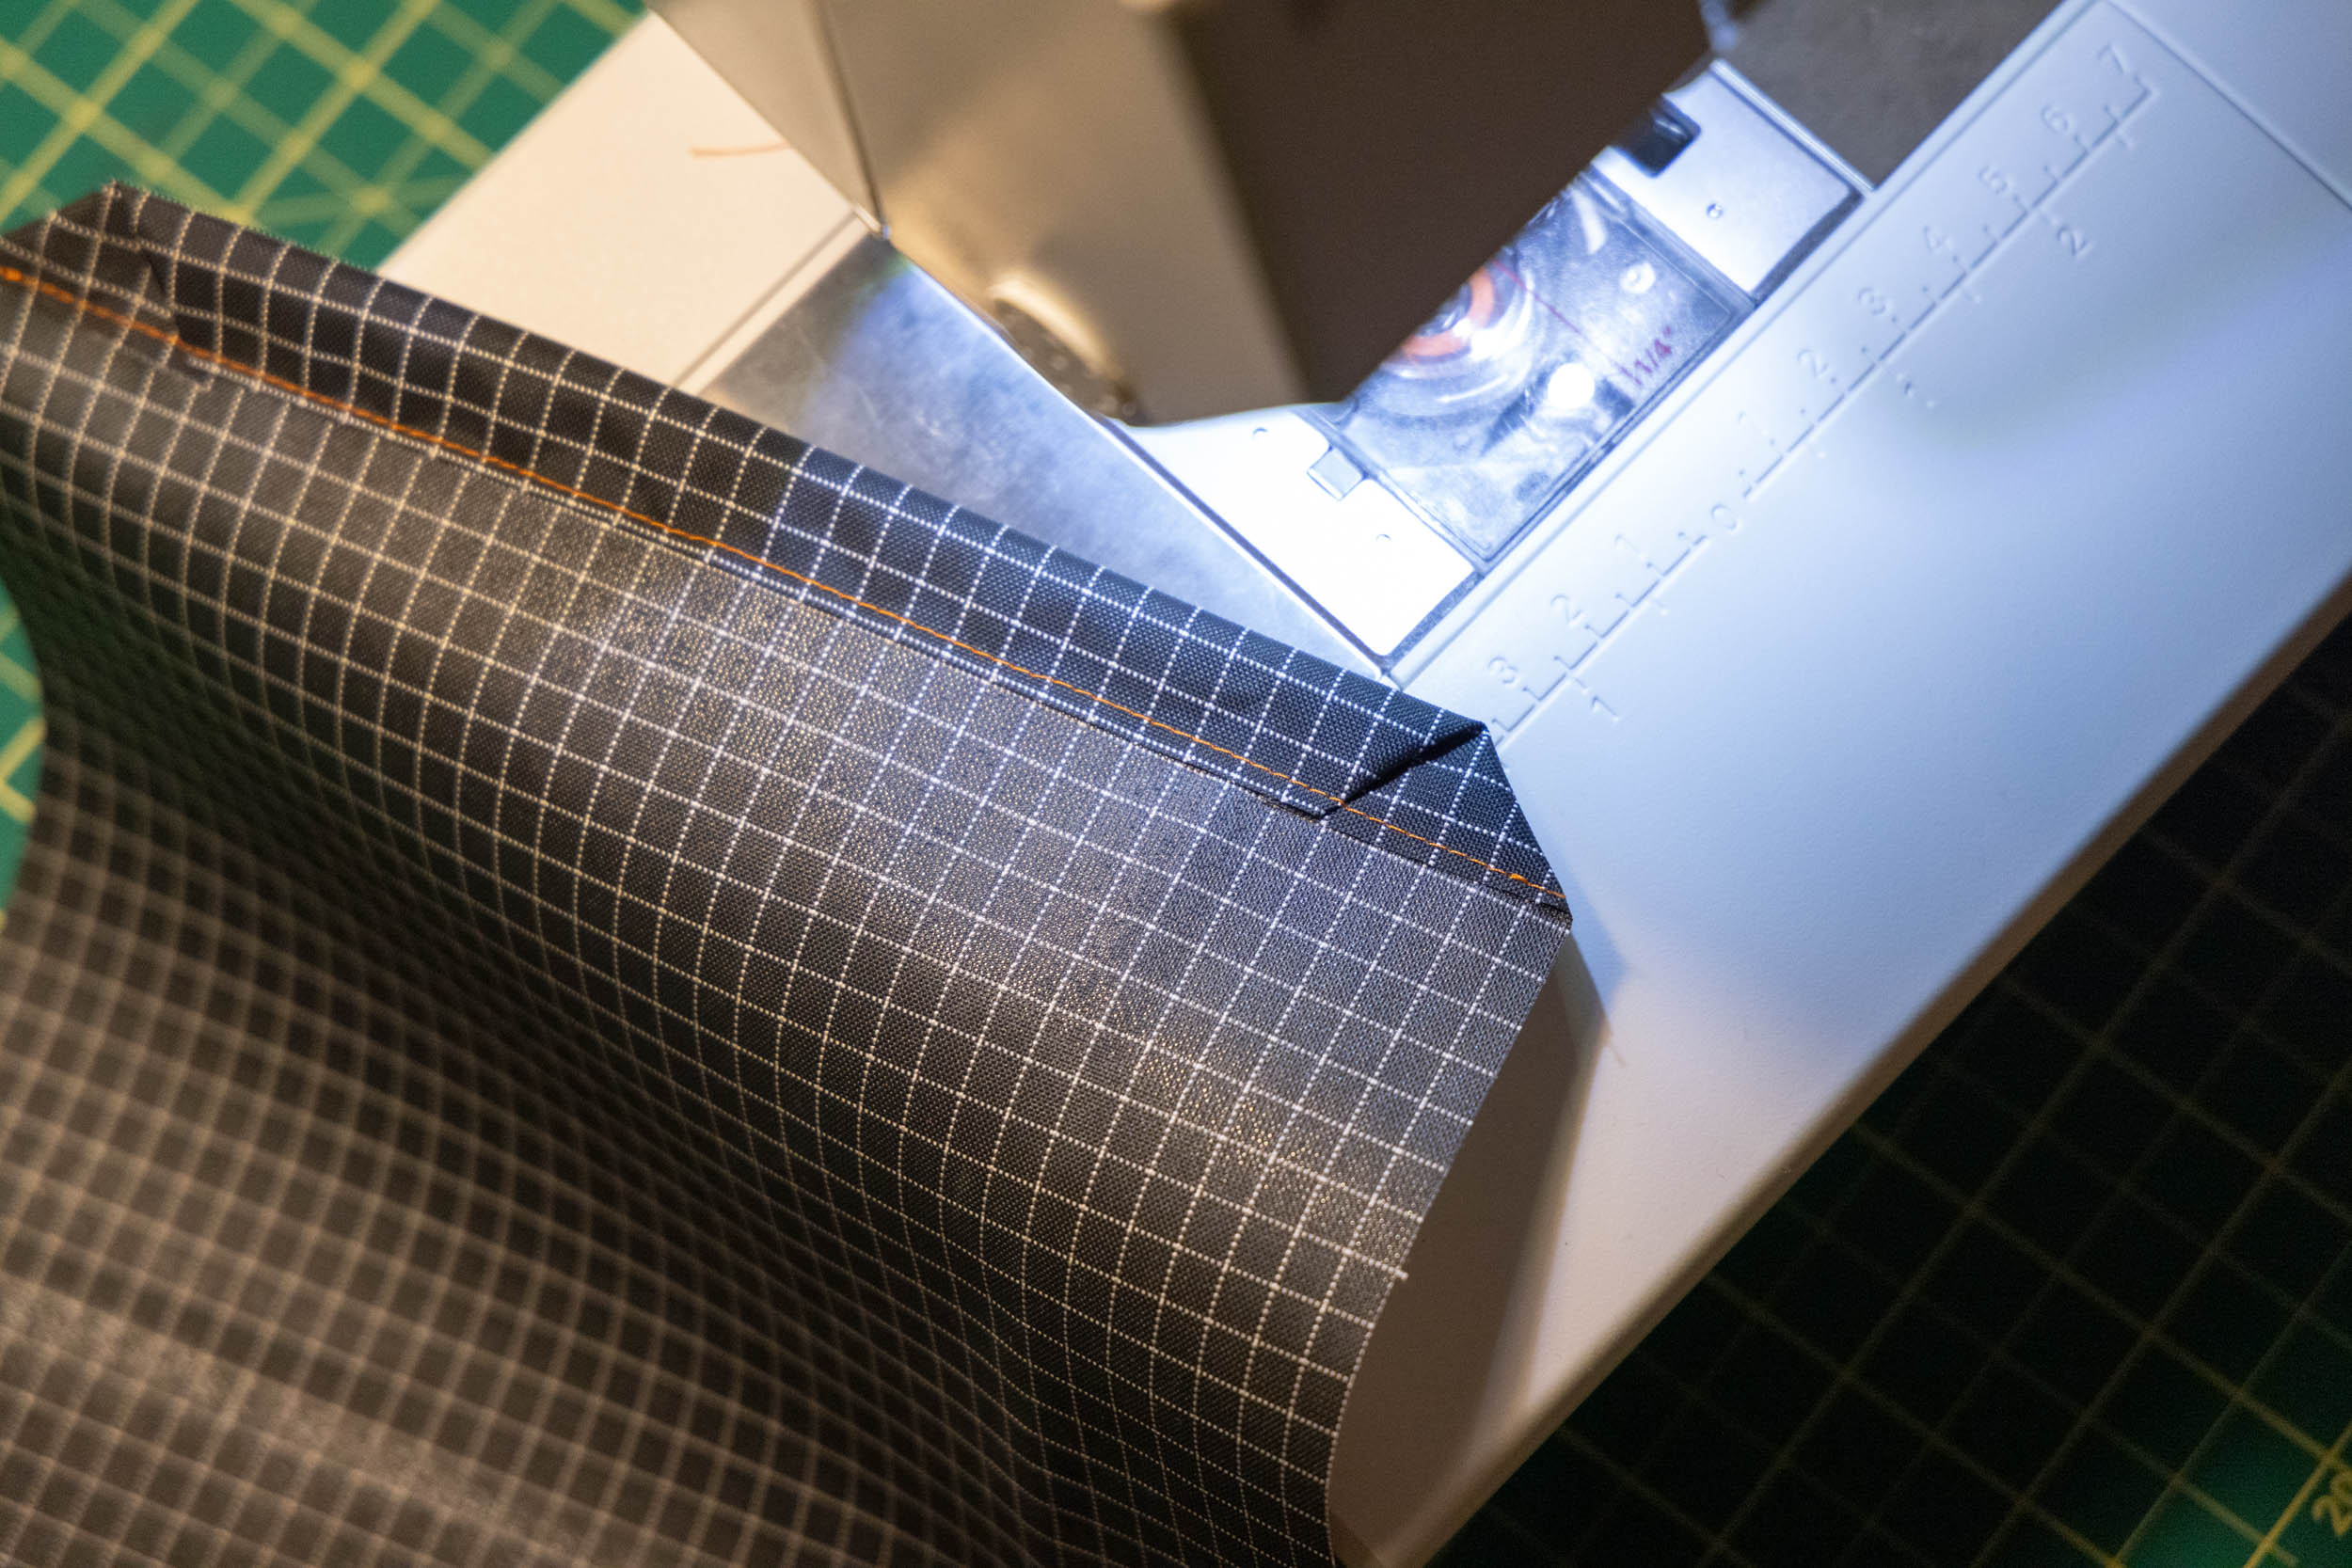
Sew this section down along the length of the channel and use a ¼” (or tighter) seam allowance from the live fabric edge.


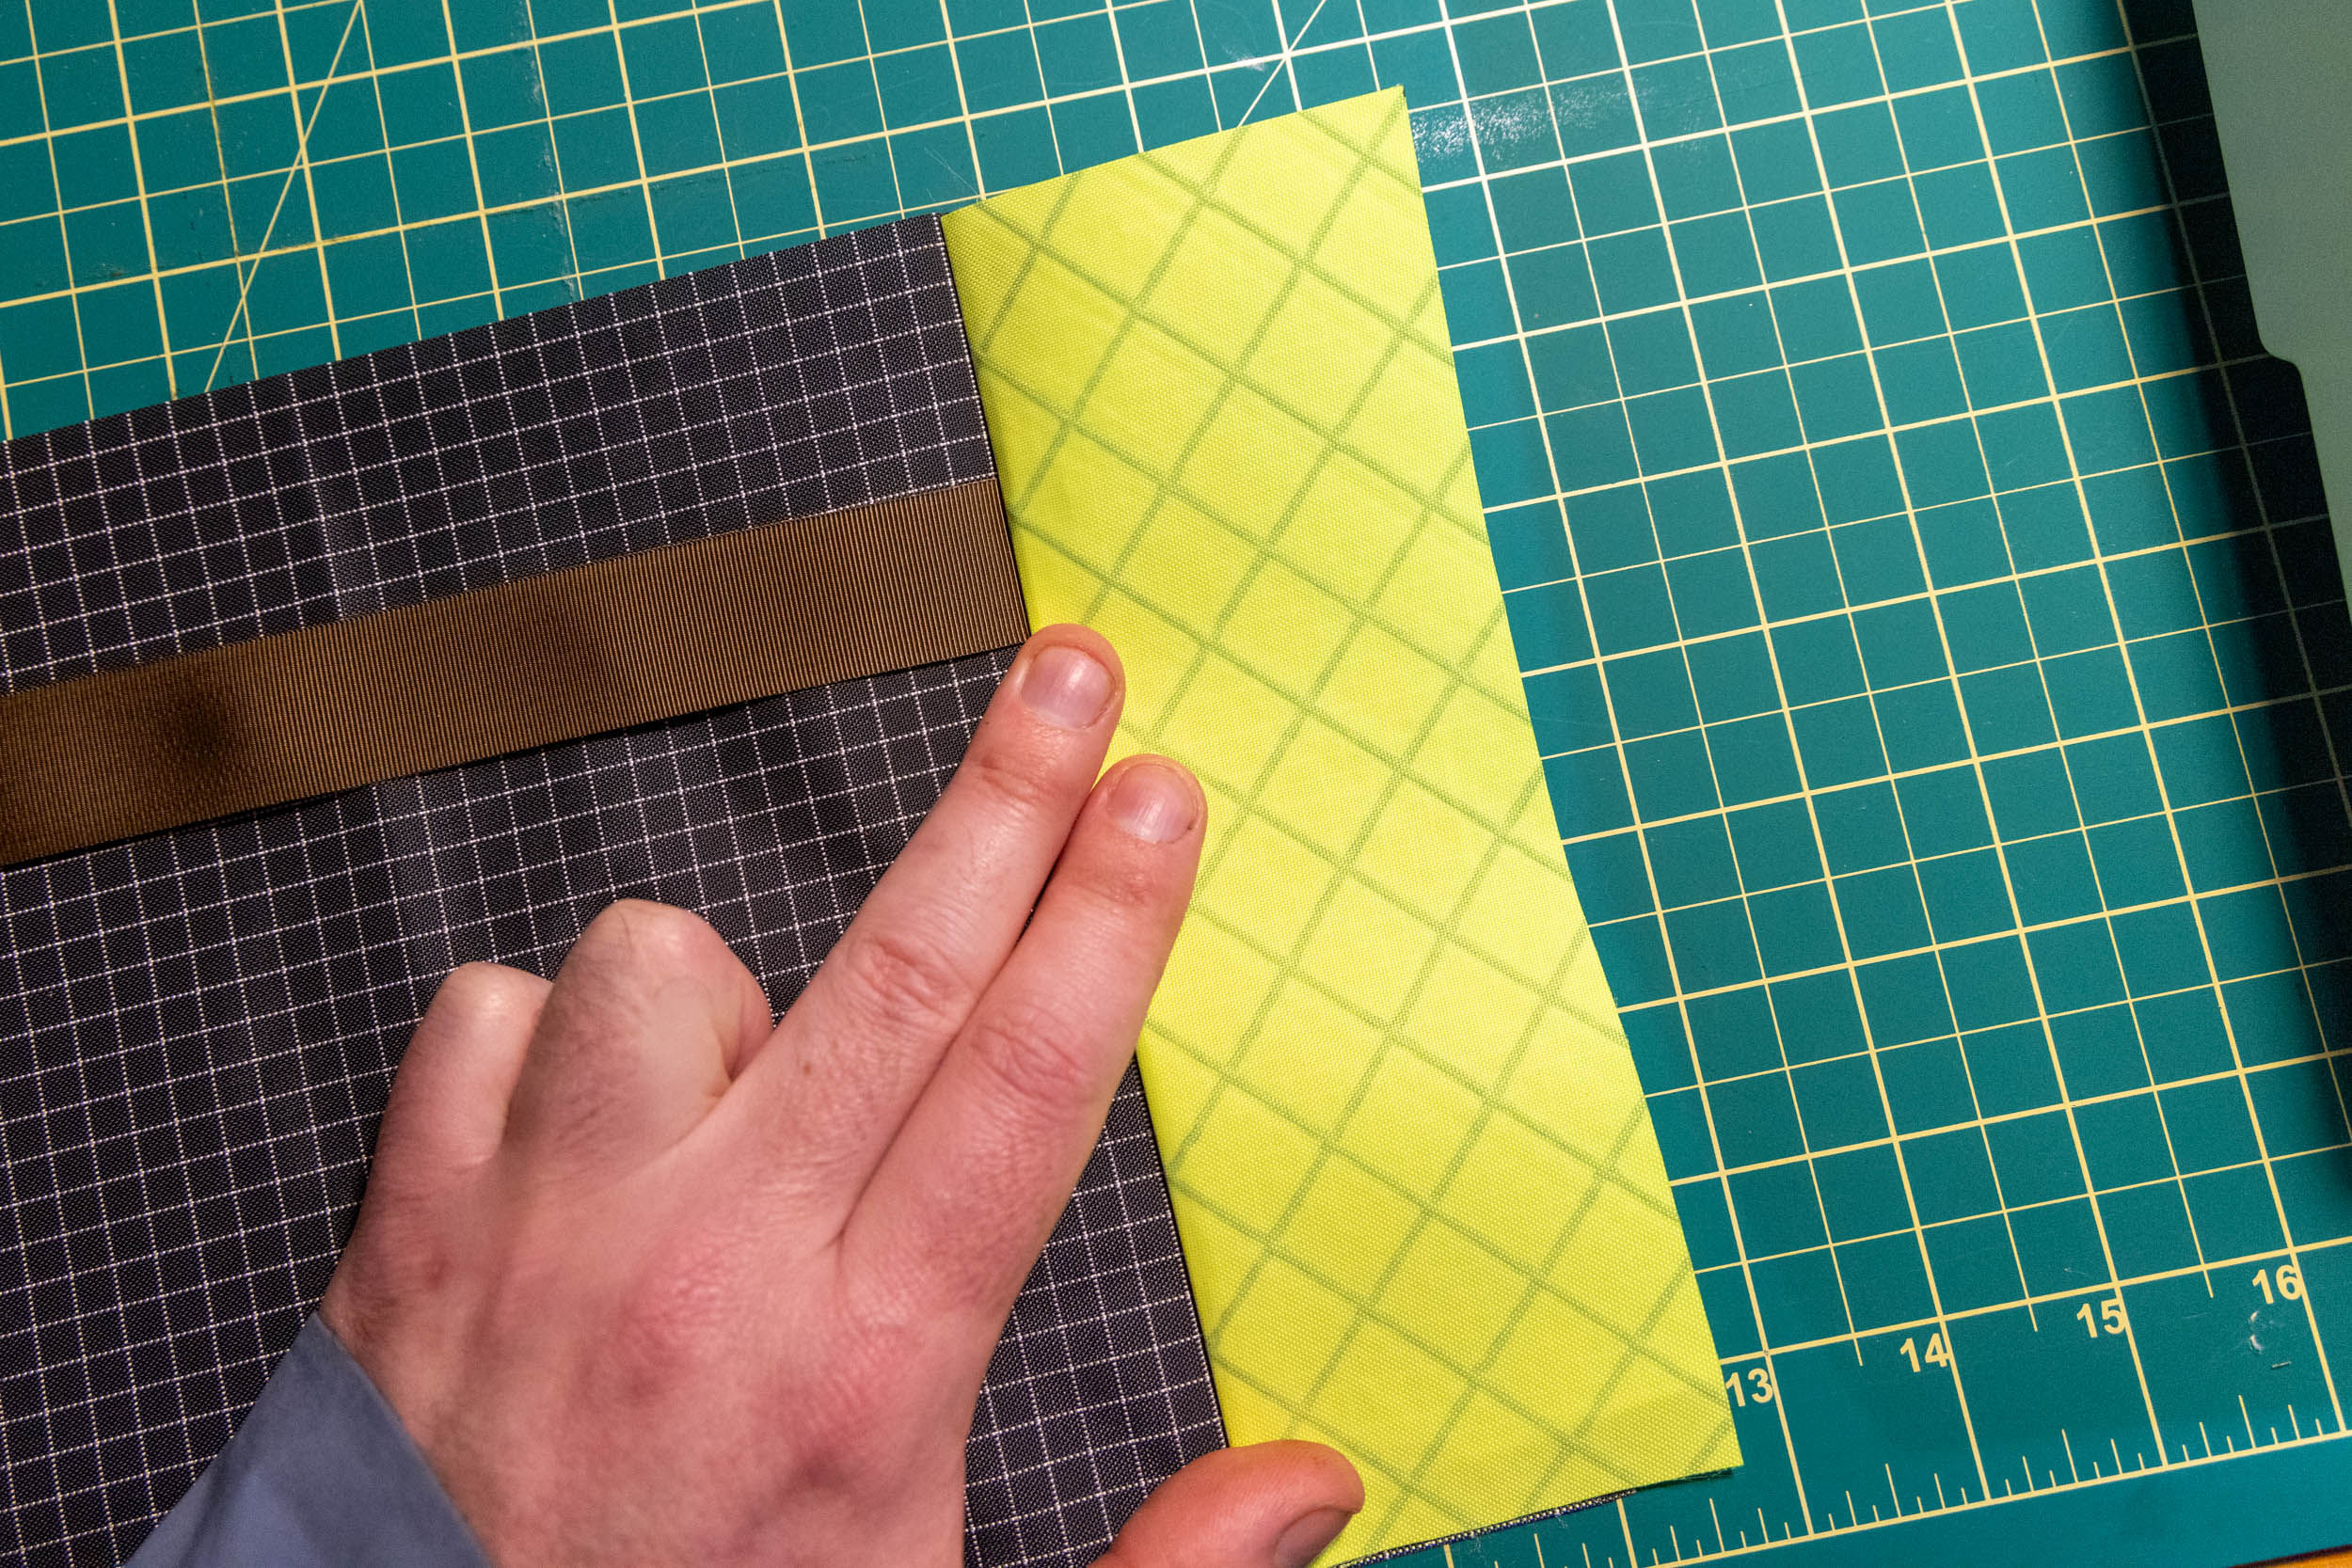
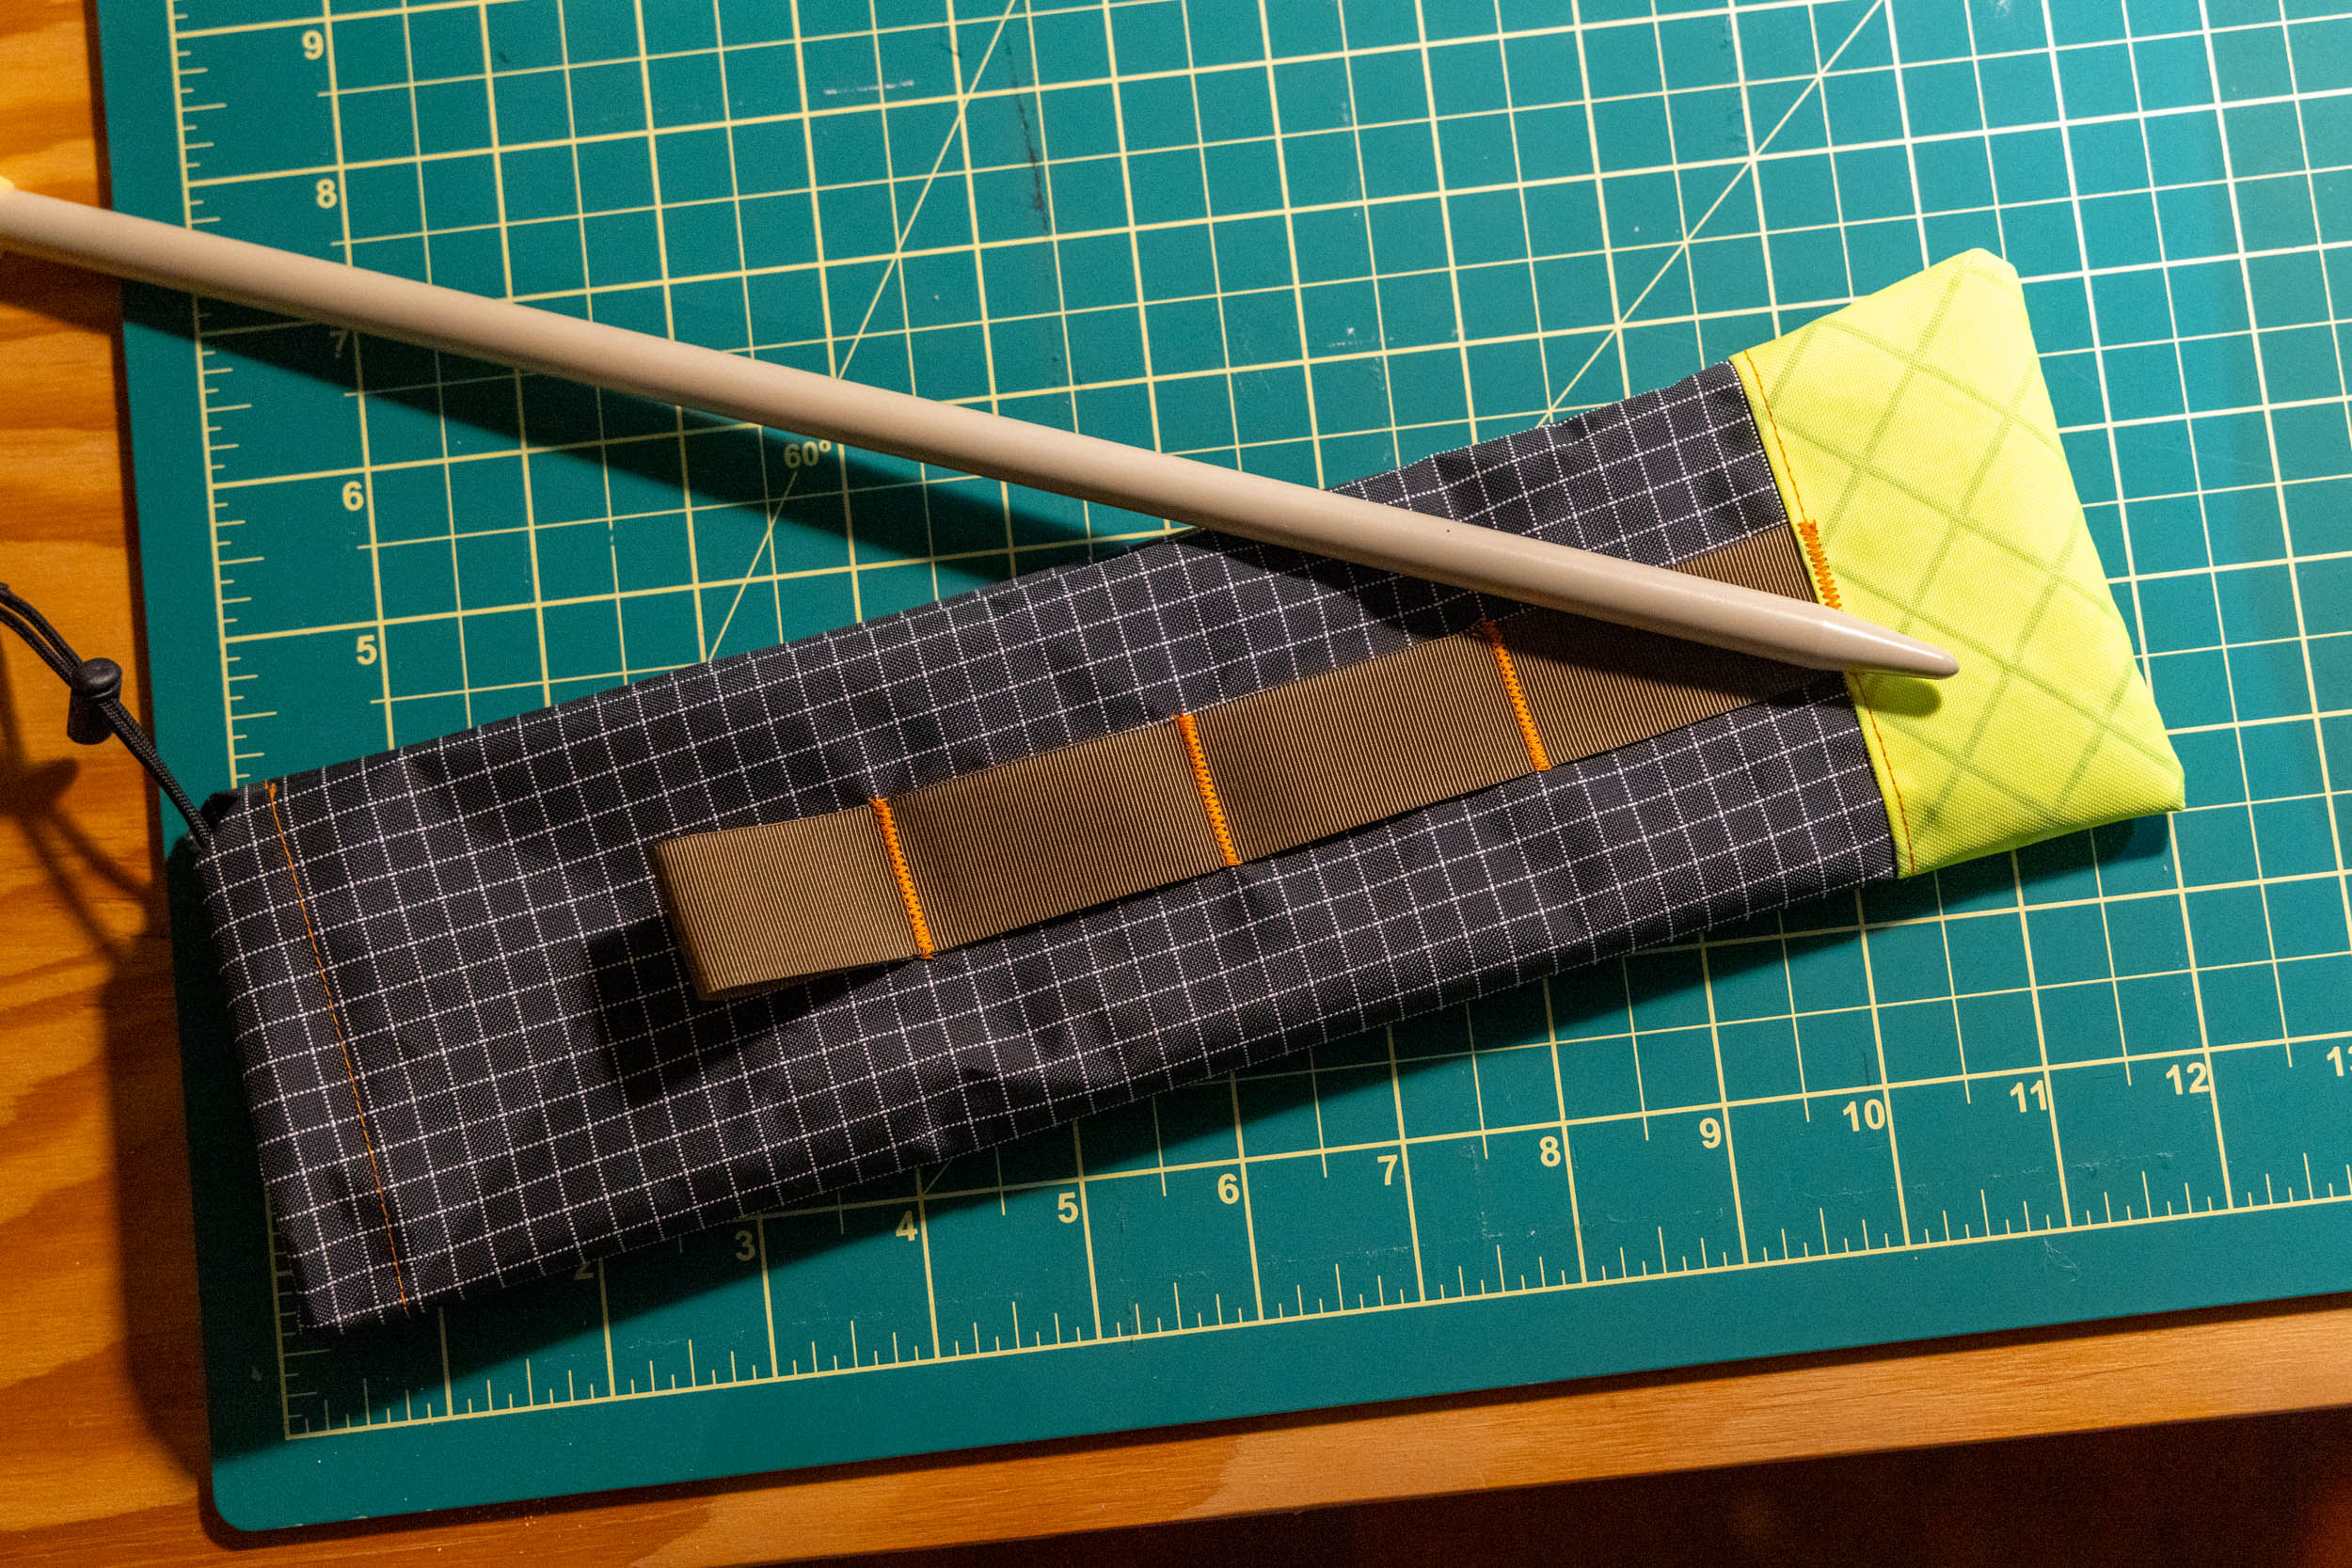
Step 3: Attach the Reinforced Base + Webbing
Not only does adding a heavier-duty fabric to the bag’s base provide reinforcement in a high-wear area, but it also makes the bag look more professional and allows you to mix and match colors/fabrics. Positioning the base in the correct spot is a little tricky, so it’s best to let it overhang the bottom of the main fabric slightly after sewing it into place, then trim to match.
With the good side down, position the base fabric about 2.5” from the bottom of the main body. Clip or pin it into place. Now, take your length of webbing, and 1.5” from the side of the body, slip it under the base with ~¼” poking out toward the bottom of the bag. Clip/pin it into place. See photos for details. This is the most awkward part of the project.


Stitch down the side of the base, running over the webbing to hold it in place, ensuring the webbing stays parallel to the body’s length. Fold the base back over the stitch you just made, taking care to crease it firmly against the main body. Now, the good side should face up. Clip or pin it into place, and then run another stitch ¼” from the folded edge. Don’t worry if the base fabric overhangs the bottom of the main body fabric; you’ll trim that next. Flip the project over and trim off any base fabric that extends past the bottom of the bag.

Step 4: Bartack the Webbing
It’s possible to recreate a bartack on your home sewing machine using a combination of straight and zigzag stitches. Thanks to Scott at Porcelain Rocket for the tips to up my DIY bartack game. On my machine, I run a straight stitch, then a tight dual zigzag stitch along the same path. For my zigzag, my settings are 2.5 (width) and 0.5 (length), but these may vary by sewing machine.
Run a dual zigzag stitch over the straight stitch where the webbing goes under the base fabric. Then, mark the webbing every 2” from there and bartack it into place. Before you reach the end of the webbing, loop it under itself to form a small loop, then bartack it in place. For the Gomboy, you’ll sew three additional bartacks, and for the Bigboy, you’ll sew five.


If you haven’t threaded your drawstring/shock cord through the channel yet, this is a good time to do so while the bag is still flat. Clip it at either end, or tie small knots to ensure it stays in place.
Tip: I had trouble reverse stitching my zigzag, so I opted to zigzag straight, then lower my needle, raise my presser foot, rotate the project 180°, raise my needle, align the stitch again, and finish the other zigzag. It’s a little awkward at first, but it starts to make more sense as you go.

Step 5: Sew the Side and Base
With the cinch channel sewn, the base in place, and the webbing bartacked, it’s time to turn the rectangle into a sleeve. Fold the entire project in half, good sides facing inward. Align the corners first, then clip them in place, paying close attention to existing seams to ensure alignment.


Starting at the top corner, straight stitch down the length of the sleeve using a ¼” seam allowance. Stop before reaching the bottom, leave your needle down, and rotate the project 90 degrees to continue sewing across the base of the bag. Make sure to lock both ends of the stitch in place with a short reverse stitch. Now is a good time to use a lighter to clean up any loose threads from the project.
Tip: For bonus points, you can add some grosgrain ribbon to the inside seam to strengthen the bag and protect the main stitch. Alternatively, you can add a second straight stitch slightly inward from the first.
Step 6: Turn the Bag Right-side out + Reinforce the Closure
You did it! Turn the bag right-side out and inspect all seams to make sure everything looks tight and solid. Use the end of a wooden spoon or another narrow, rounded object to press out the corners.
The final stitch is a small horizontal bartack or a straight stitch just below the channel opening. It’s a little awkward to hold the fabric together while stitching, but the reinforcement is necessary to prevent this seam from pulling apart.
Run your shock cord or paracord through the channel, add the cord lock, trim the excess, and tie a knot. You’re all done!


I hope someone can make use of this simple little guide, whether it’s for a packable saw or something else that needs a home. I’ll be practicing my sewing skills and have a few other #MYOBG guides in mind, but if there’s anything you’ve always wanted to know how to make, let us know in the Conversation below, and we’ll do our best to make it happen!
Further Reading
Make sure to dig into these related articles for more info...


Please keep the conversation civil, constructive, and inclusive, or your comment will be removed.