


Mica Rack Review: The End of the Seat Pack?


Well over a year in the making, we’re excited to finally share details on a promising new minimal rear rack designed specifically for bikes without rack mounts. Read on to find Miles’ Mica Rack review after testing several prototypes, plus the development story and some thoughts on why seat packs might be a thing of the past…
PUBLISHED Jun 19, 2024
Among the growing list of industry folks I’m proud to call my friends, I look up to the bag makers and product designers the most. Seeing how different minds work to develop an idea, build something, or solve a problem is inspiring on many levels. I can probably list a dozen items I’ve encountered in the cycling world that make me wonder, “Why didn’t I think of that?”
Skyler Des Roches is on the short list. I first met Skyler years back when he was still working at Porcelain Rocket in Calgary. I joined Skyler, Scott, the Porcelain Rocket crew, and a few of their friends on a weekend bikepacking trip in 2018. At the time, I was just getting started with BIKEPACKING.com and remember being nervous around the group of talented makers. I forgot most of my food and survived on nothing more than a large portion of focaccia and a few sausages, so I’m pretty sure it wasn’t a great first impression.


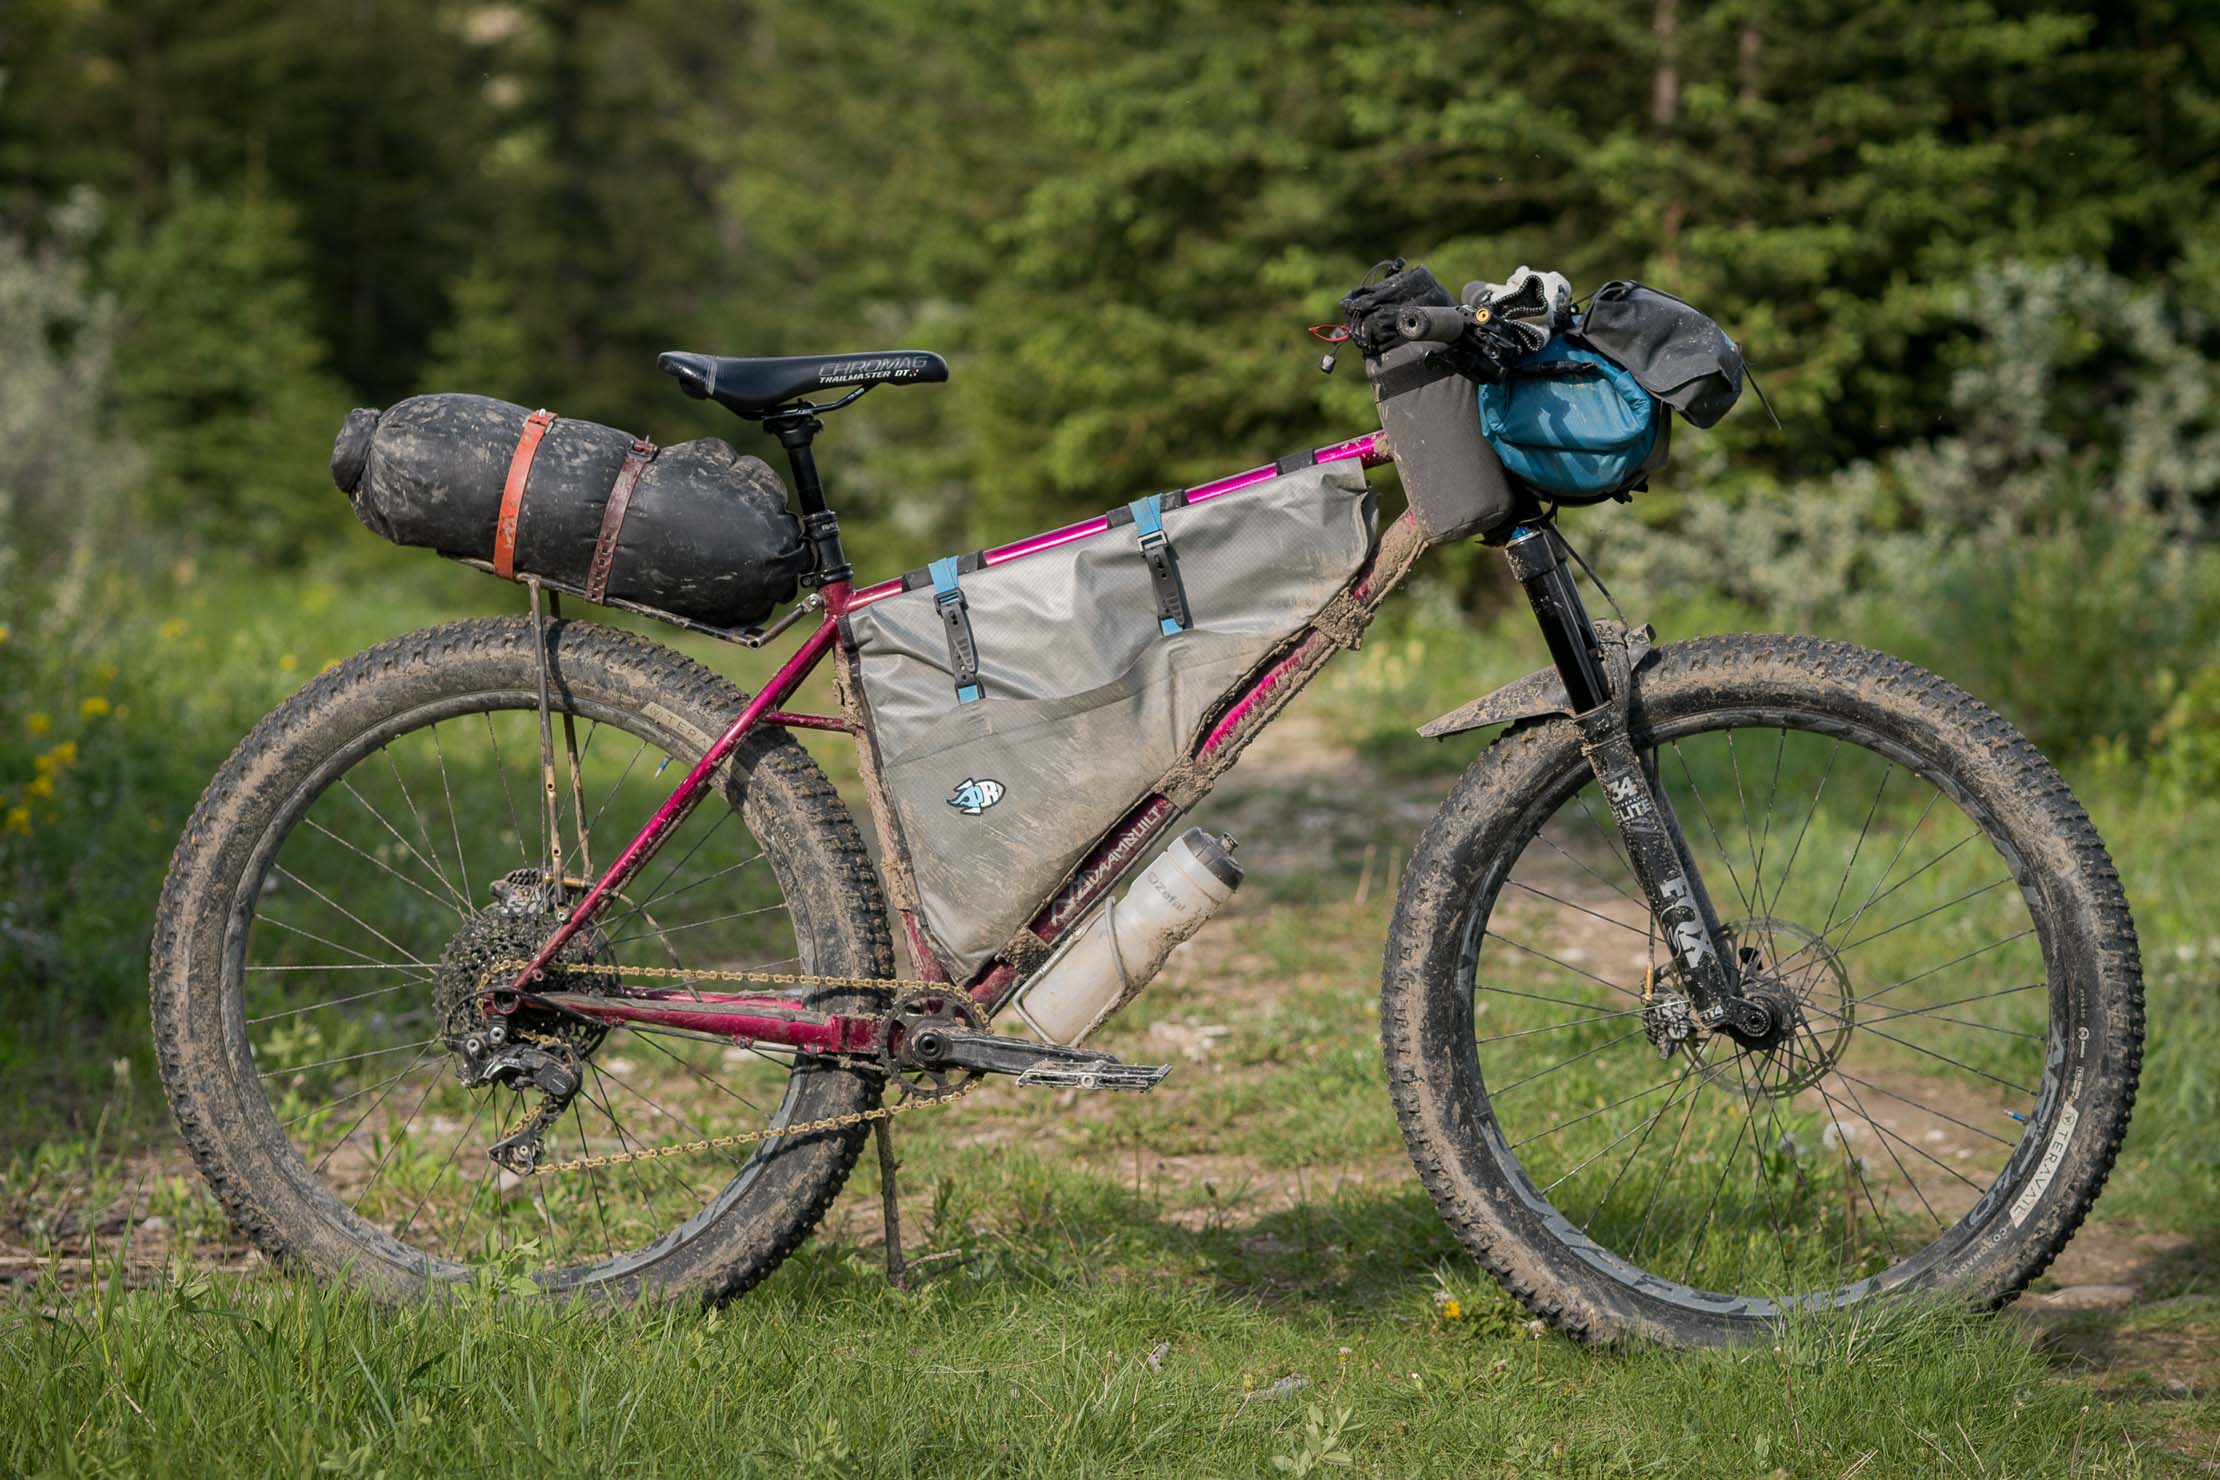
Despite an embarrassing start to our friendship, Skyler and I have kept in touch over the years and I’ve been trying to get him to move away from the city to join me on BC’s Sunshine Coast. Skyler played a key role at Porcelain Rocket, including designing the wildly popular Microwave Panniers, the first fully waterproof framebag, the 52Hz, the Nigel handlebar bag, and the Dumpling hip pack lineup. Rockgeist continues to offer all of these bags today. To say Skyler has flown under the radar as a designer and maker in the bikepacking world is quite an understatement. In 2018, he shared the details on his custom-made Daambuilt hardtail (above), with a nifty integrated rear rack designed to carry loads similar to a seat pack. At the time, Skyler’s thoughtfully designed hardtail and rack earned a great deal of praise in the comment section. It seemed folks liked the idea of a simple, lightweight rear rack.
Here’s a short excerpt from Skyler’s rig story: “I wondered how light a rear rack could be if the objective was not to carry panniers, but rather only lighter loads on top of the rack. Based on the minimum amount of tubing needed, we estimated it might be possible to actually end up with something lighter than a seat pack. The rear rack has proven to be one of my favorite experiments with this build, and we’ve endeavored to design a similarly ultralight bikepacking rear rack that would offer a universal fit for bikes without rack braze-ons.”


At the time, Skyler contemplated designing a lightweight alternative to the seat pack but couldn’t think of a way to offer a universal fit. He also explained that metalworking and sewing can’t happen in the same space because of the dust and filings that don’t play nice with fabric and sewing machines. When he moved back to the Pacific Northwest, he got a new job where he learned a lot about mechanical design and had access to a shop to start producing prototypes. From there, he began to hone in on his design.
Mica Rack V1, V2, V3…
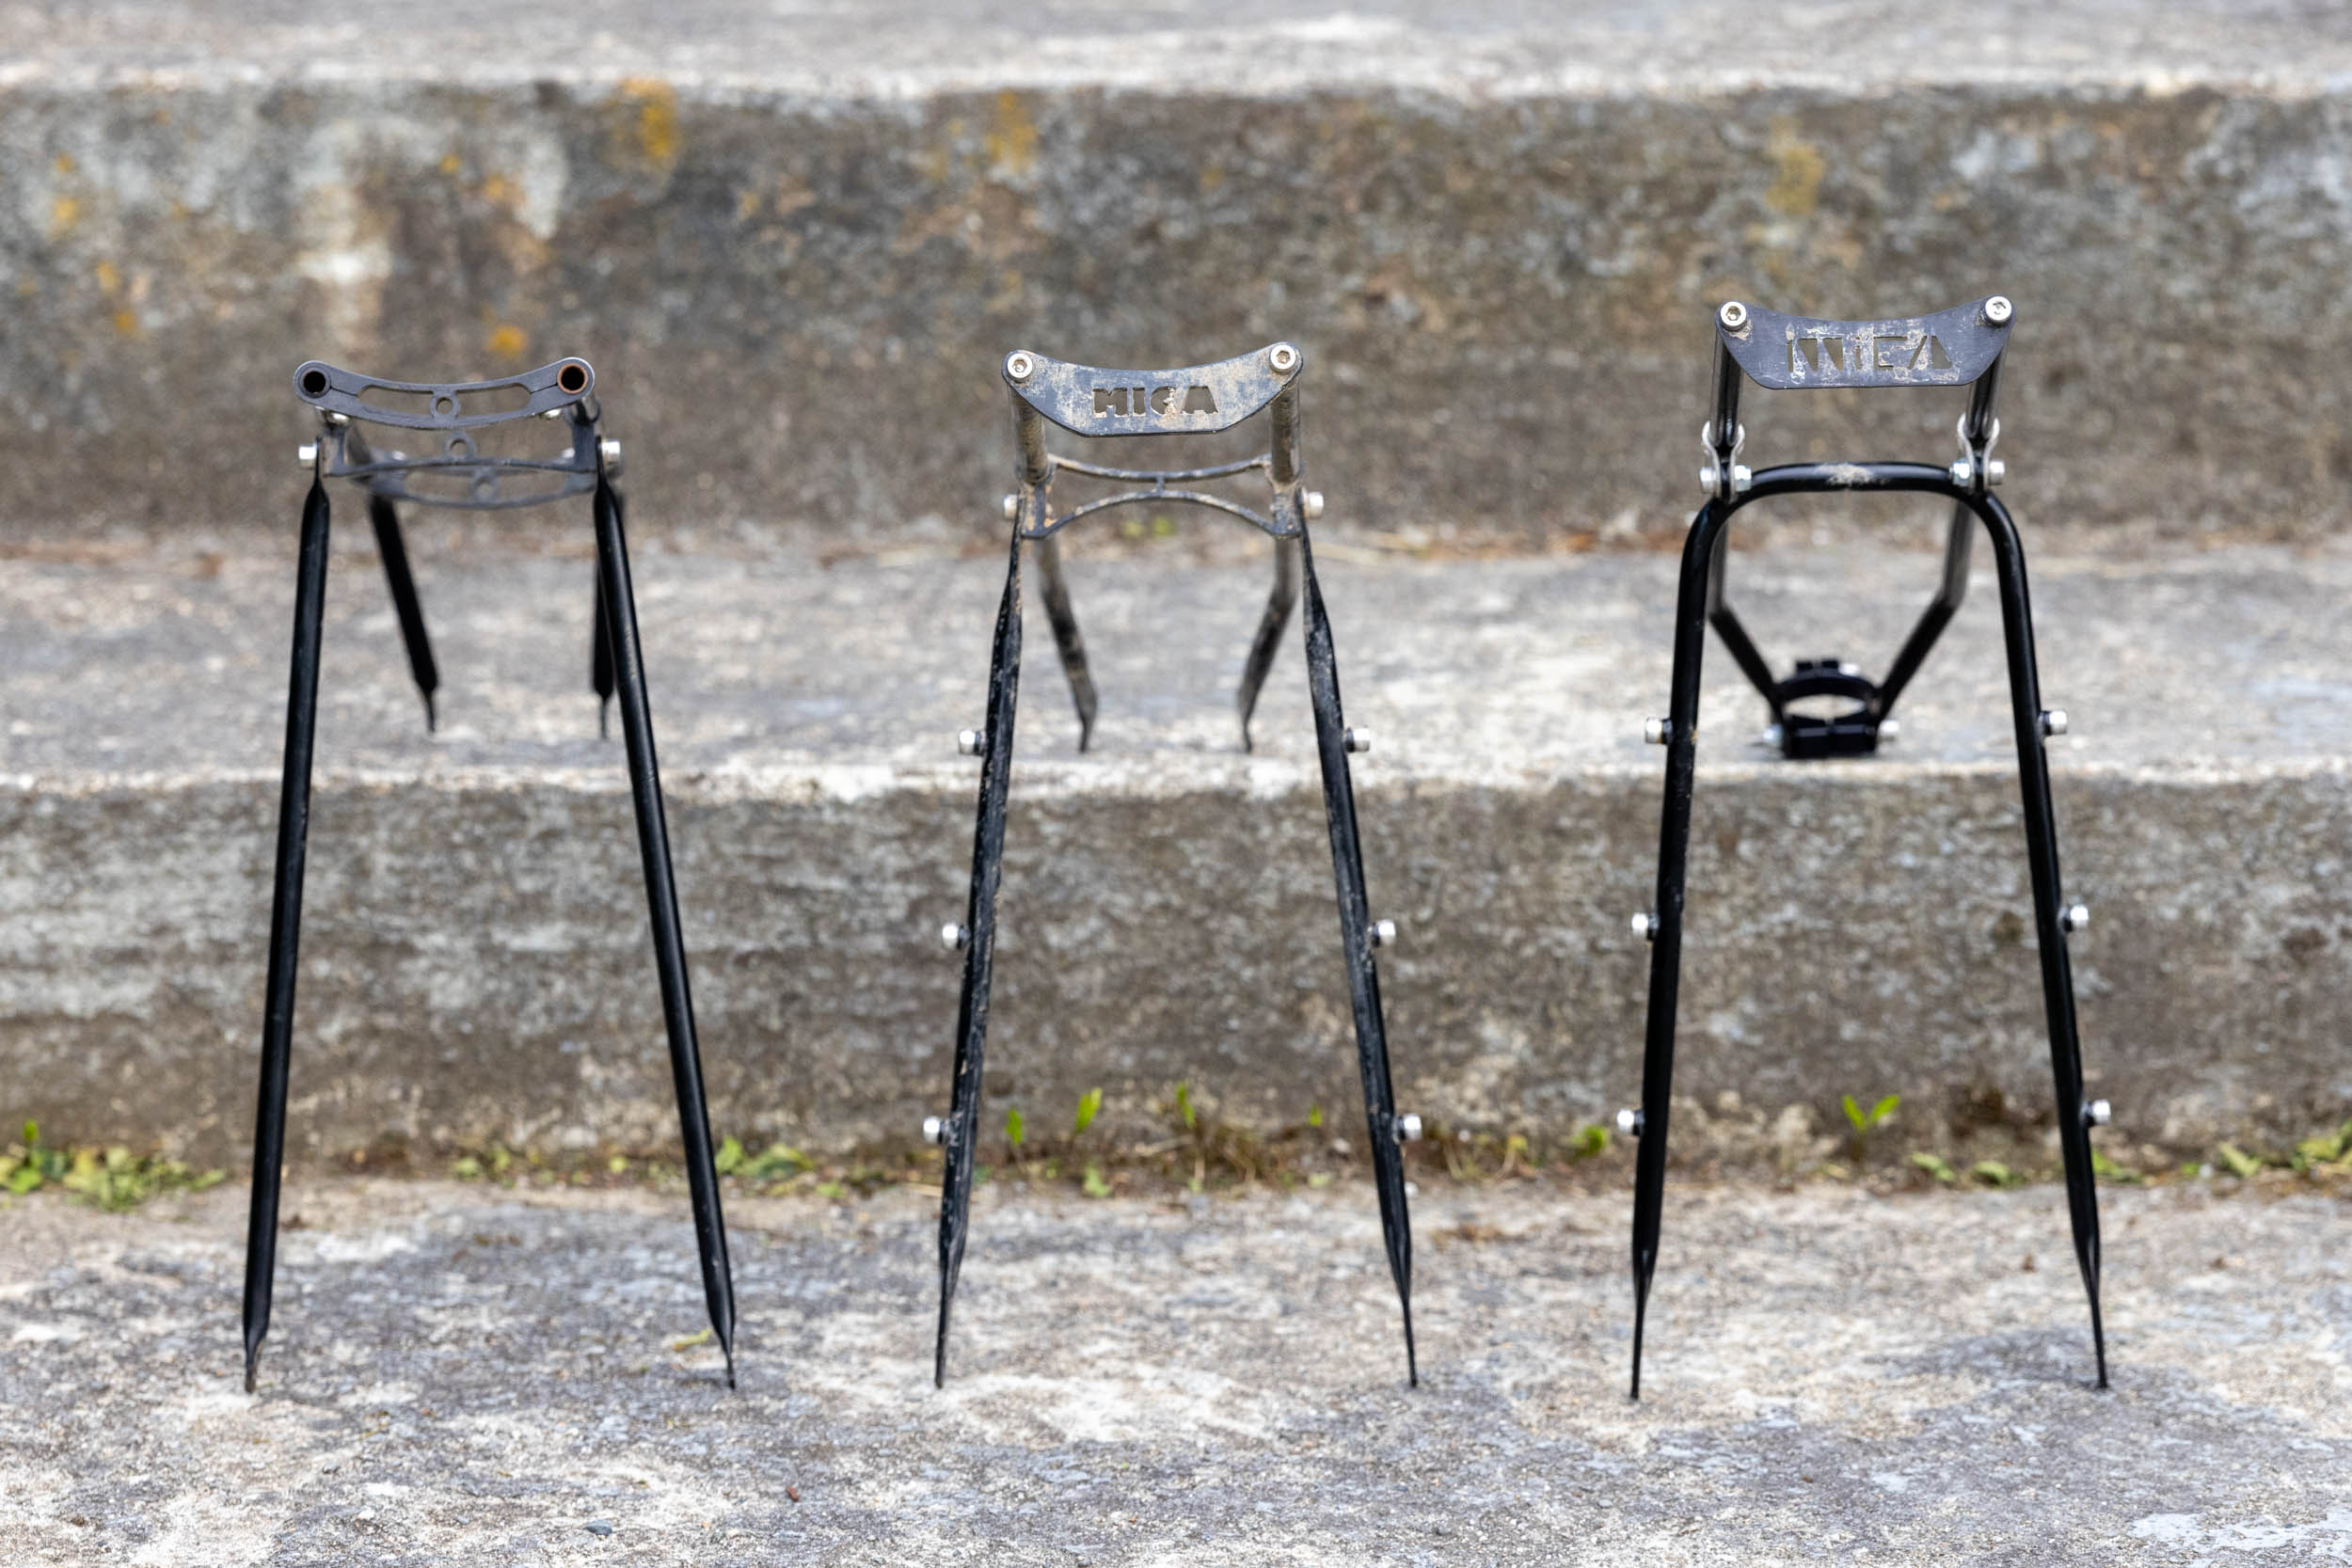
The first rack prototypes shared the same functionality as his custom Daambuilt rack but were conceptually quite different. The “aha!” moment came when Skyler designed a way to borrow the shape of his custom rack but enabled it to fit any bike. The first Mica Racks consisted of two horizontal struts to create a platform, machined bridges that slid onto the struts to create stability and structure, and pivoting vertical struts. The first few prototypes, which I’ve tested, offered a universal fit because the top platform could be flipped upside down to provide more tire clearance on smaller frames, and the middle bridge could slide across the horizontal struts to accommodate different chainstays while also adjusting the angle of the platform itself.


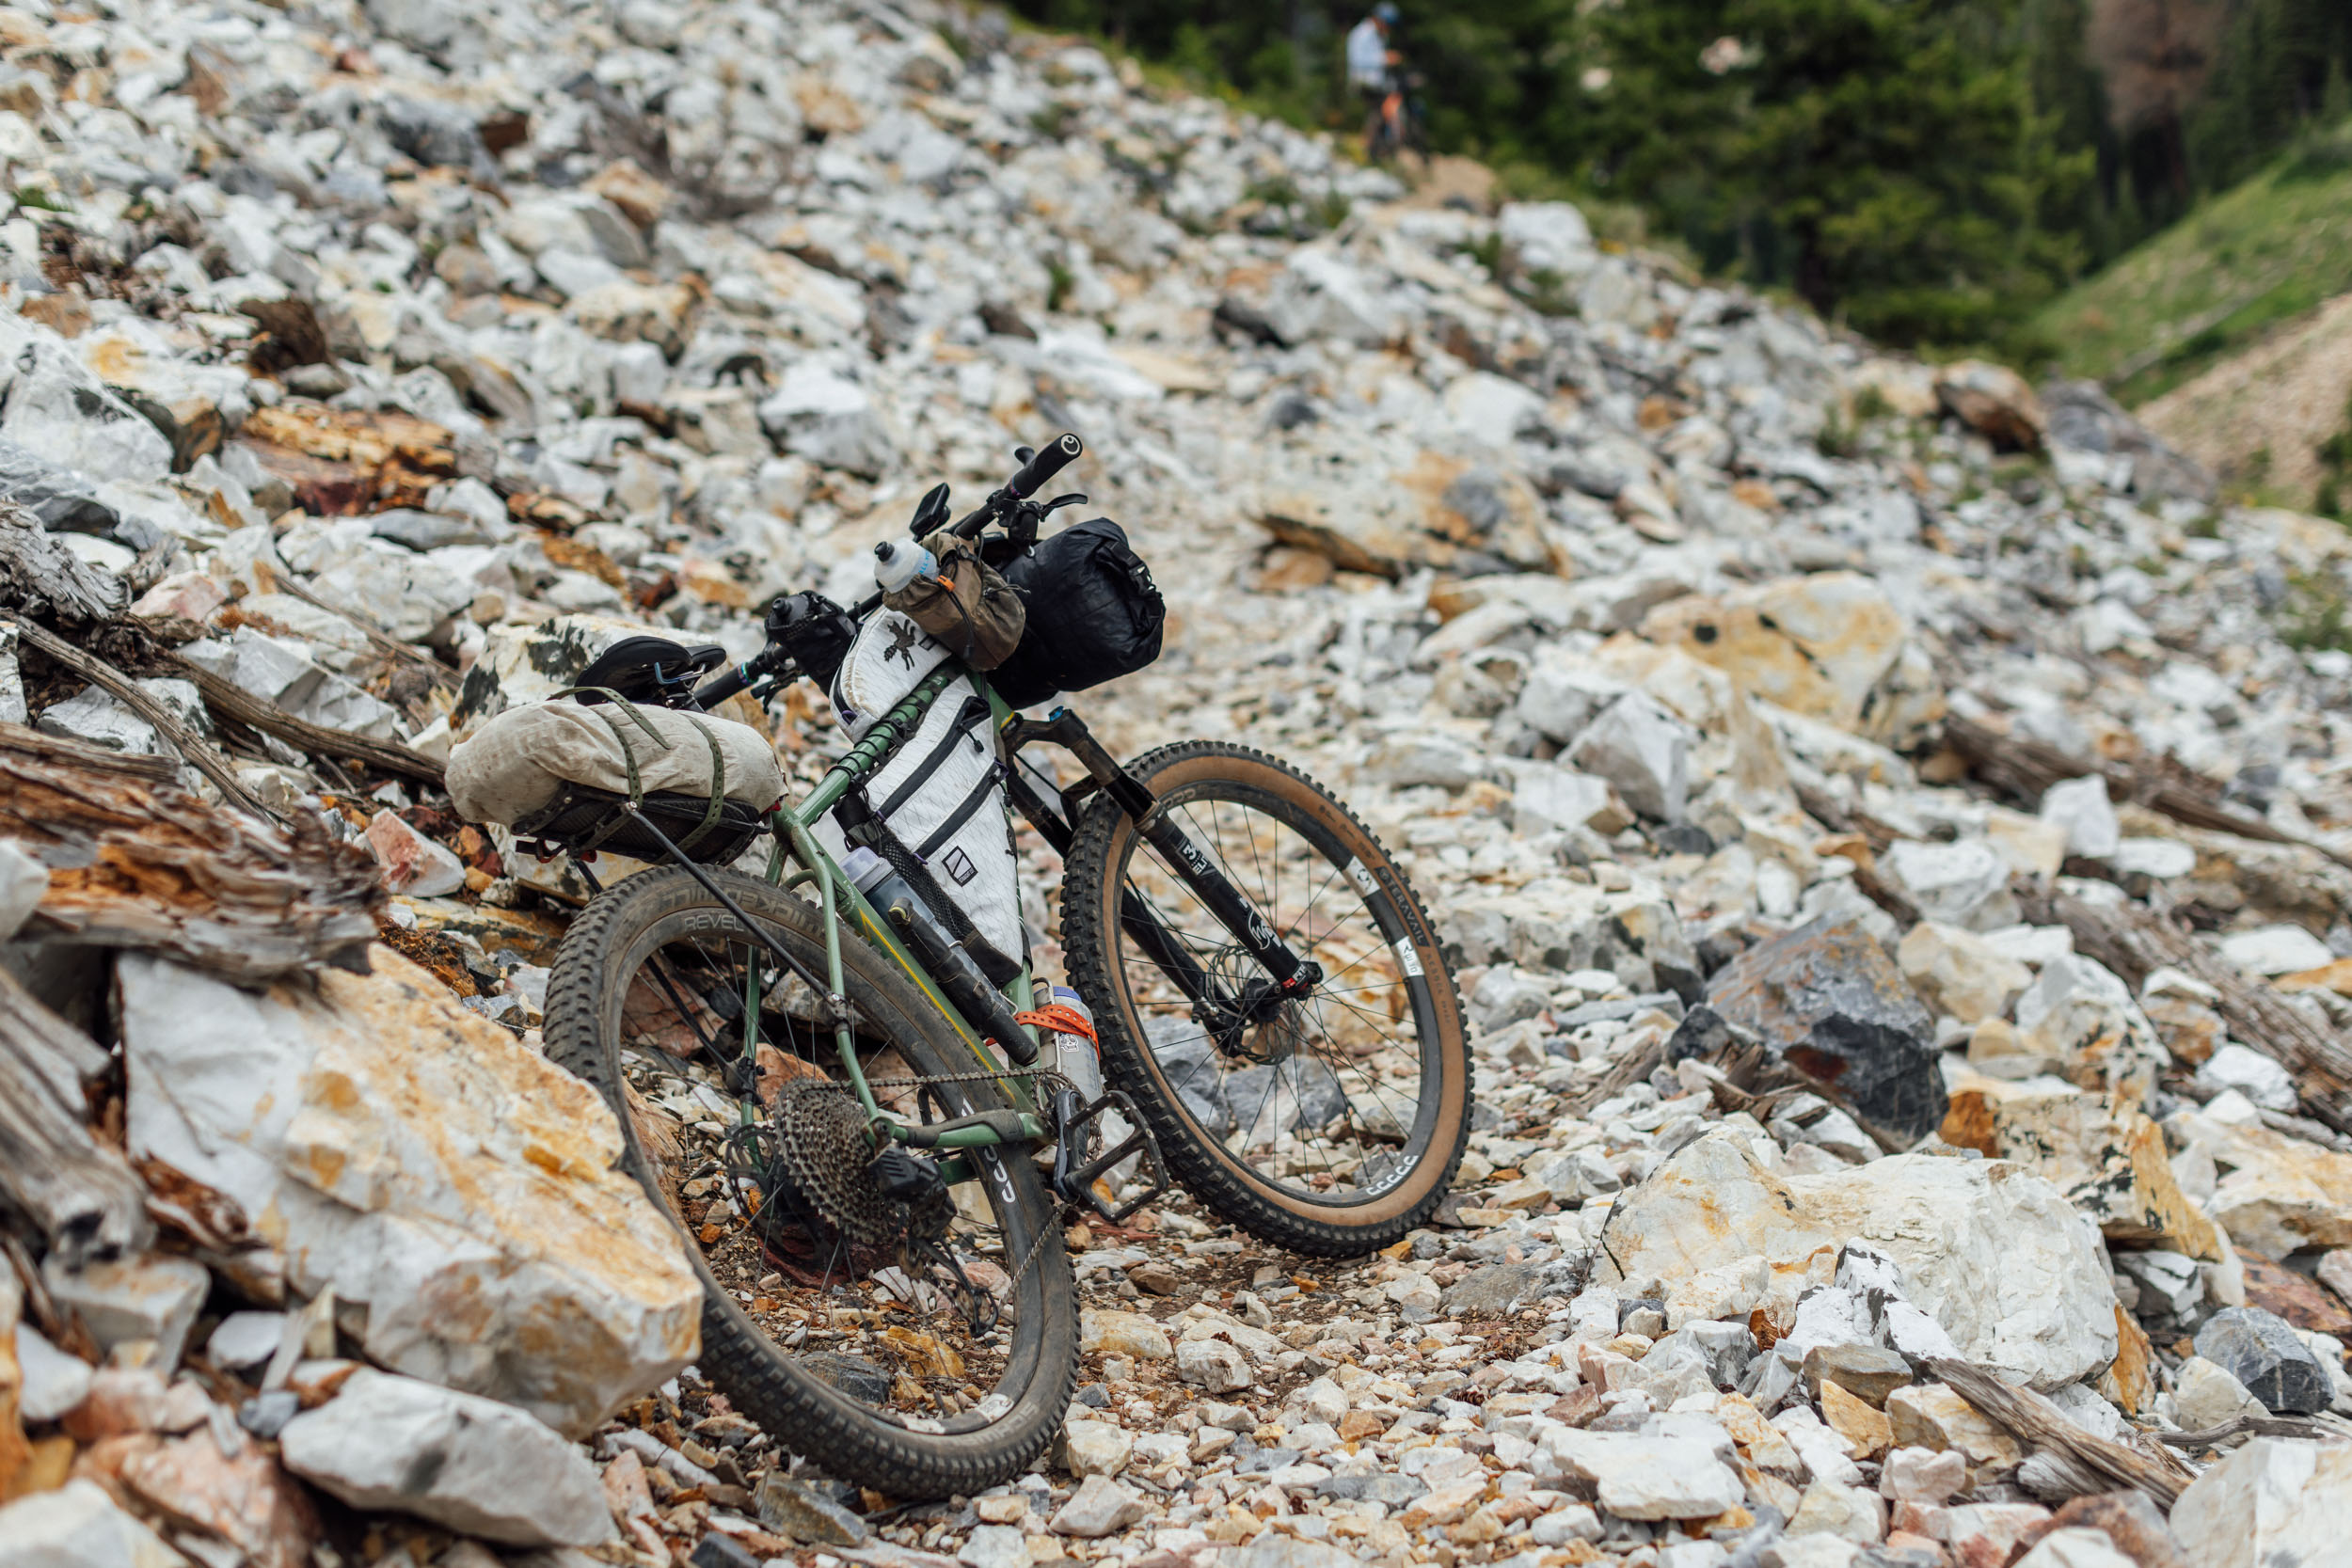
Skyler’s dream of designing a universal and minimal rear rack system was coming together, but it still wasn’t perfect. The first few designs had too many moving parts, making installing them awkward. It took some time to align the legs and platform on the frame since everything could rotate and adjust independently. Functionally, once installed, it was spot on. Our friend Nathan took the first prototype to the Baja Divide in Mexico for testing, and it held up great. I took the same prototype on a week-long route scouting trip to Idaho, which involved a lot of chunky, technical singletrack, and was quickly sold on the design.

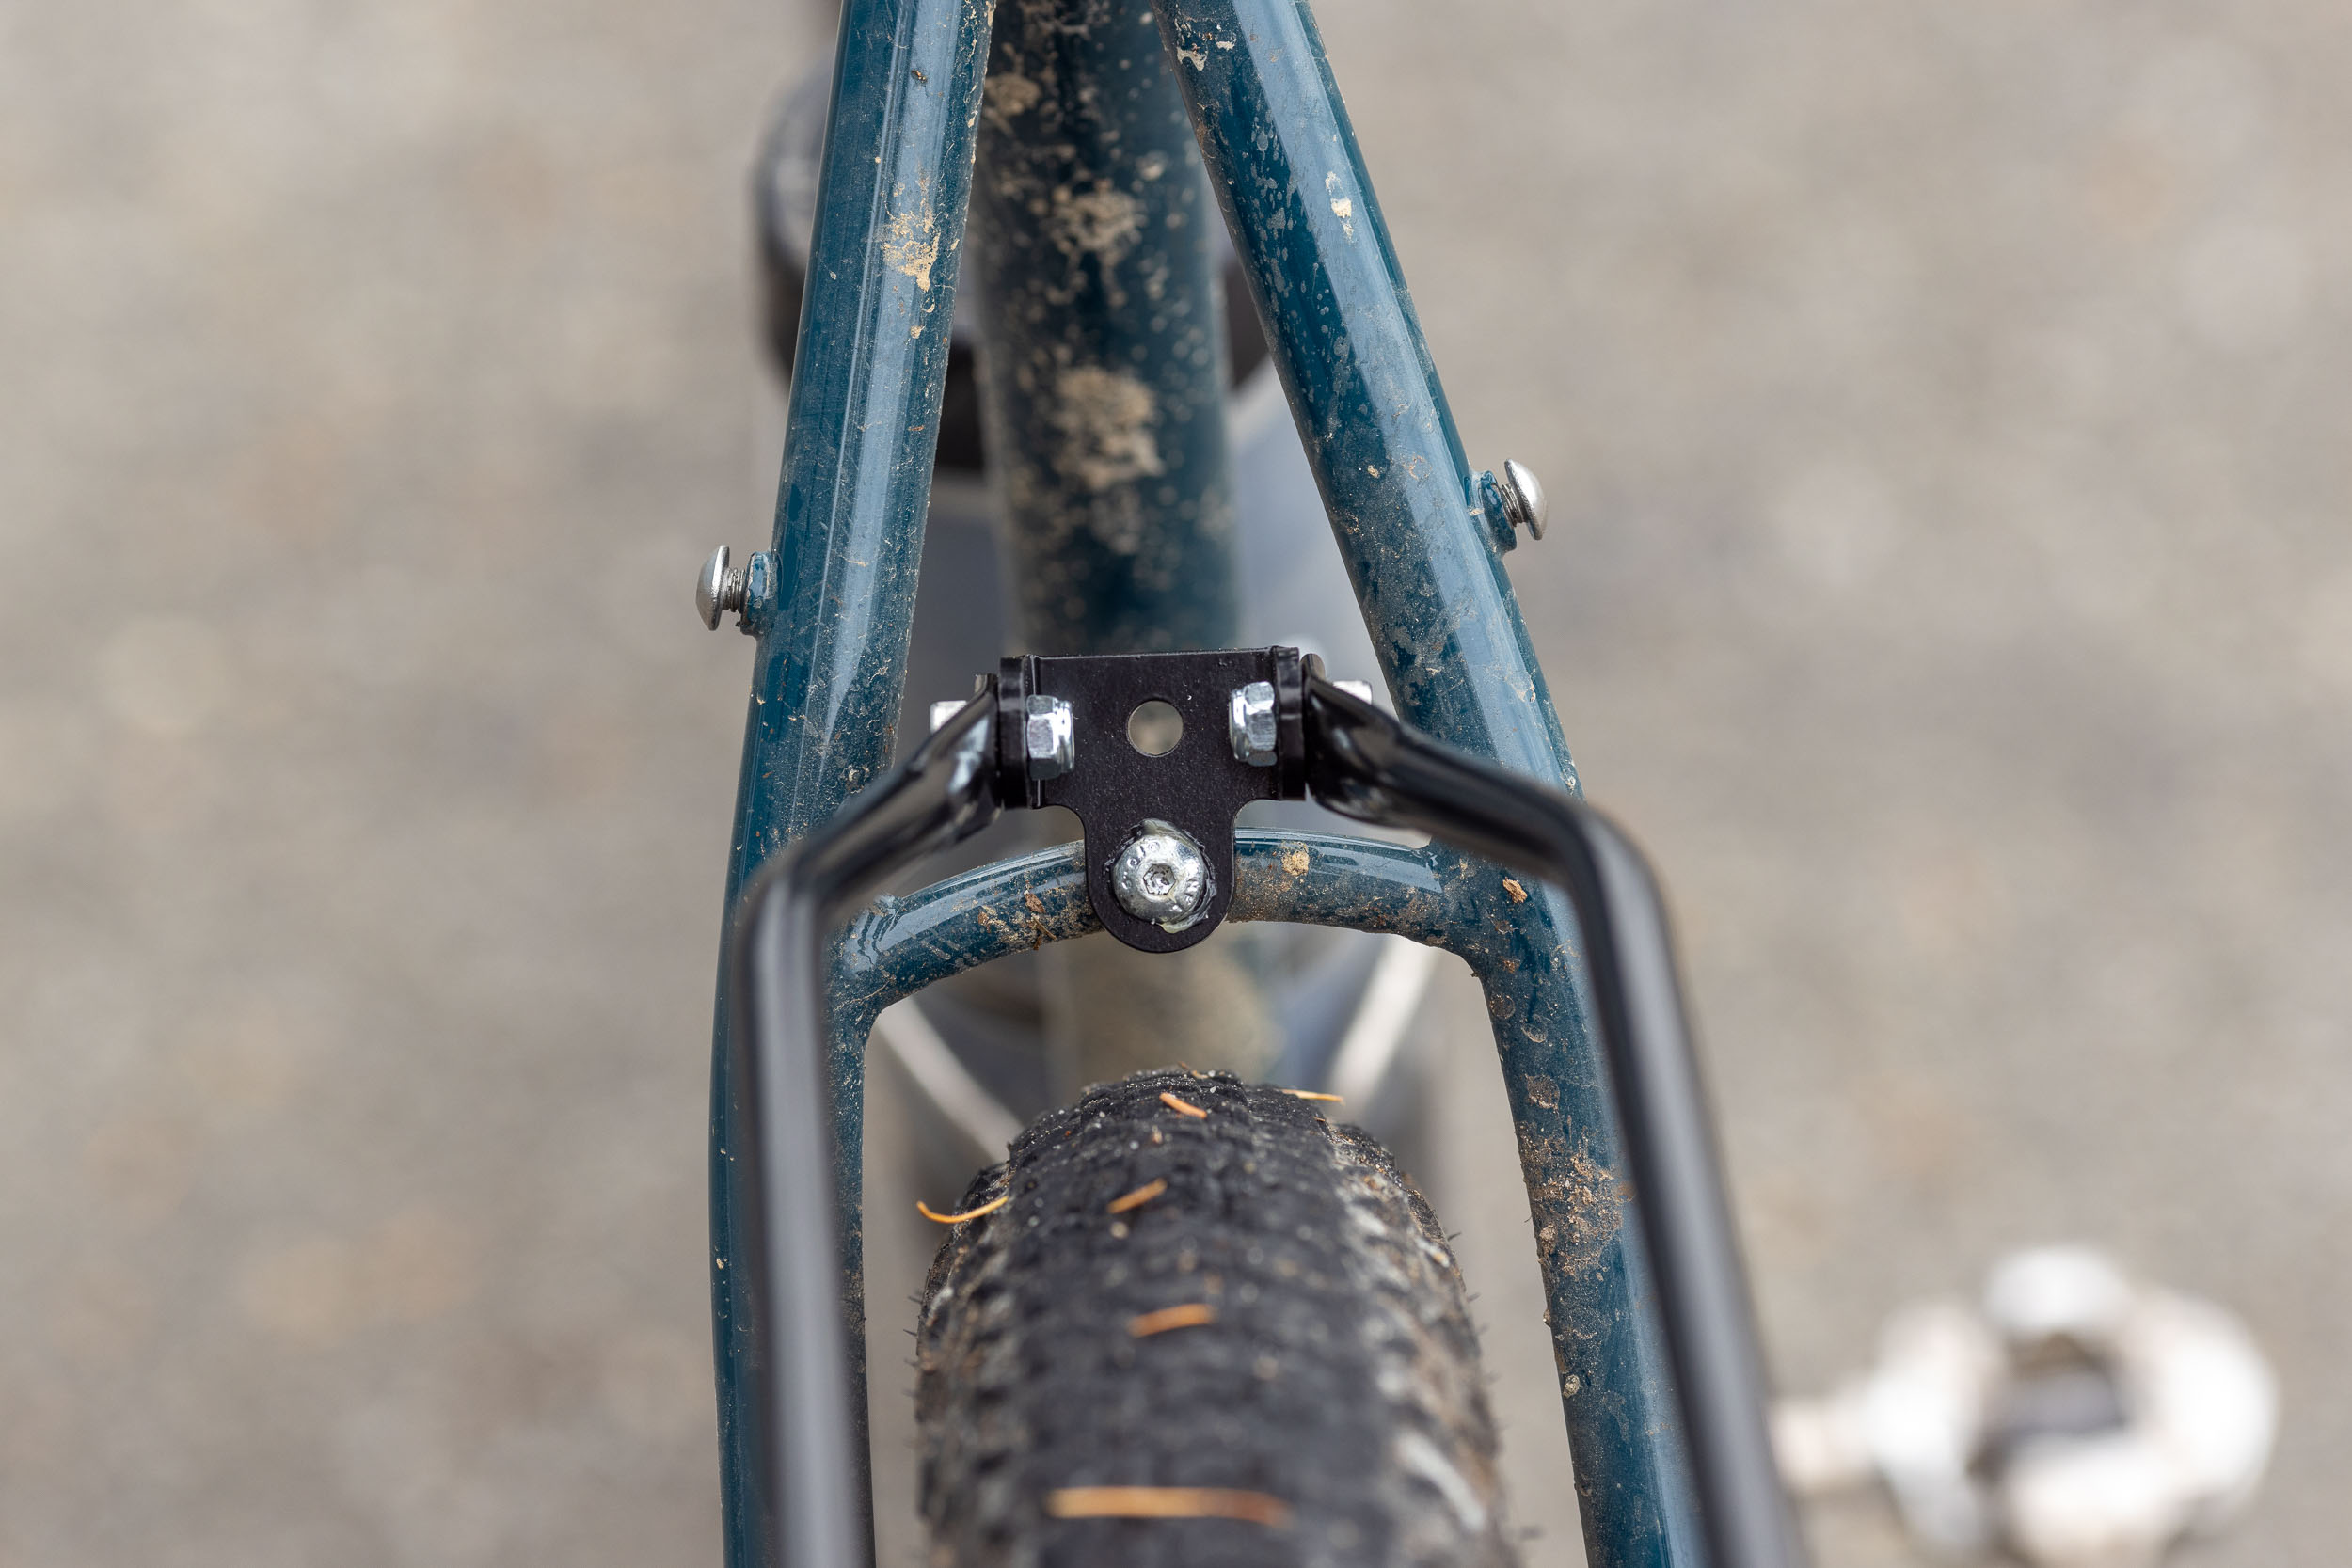
Although I had already been transitioning away from running seat packs attached to a dropper post, my go-to racks were heavy, and their position on the bike was set depending on the placement of frame mounts. The beauty of the original Mica Rack was that the angle of the platform allowed the load to be tucked down toward the top tube/seat tube junction or positioned flat like a more traditional rack. Skyler included seat stay mounting blocks that zip-tied onto the frame, where the legs were bolted onto. It was designed to mount to an included seat post/seat tube clamp. Skyler’s dream of a lightweight rack for bikes without dedicated rack mounts was coming together.

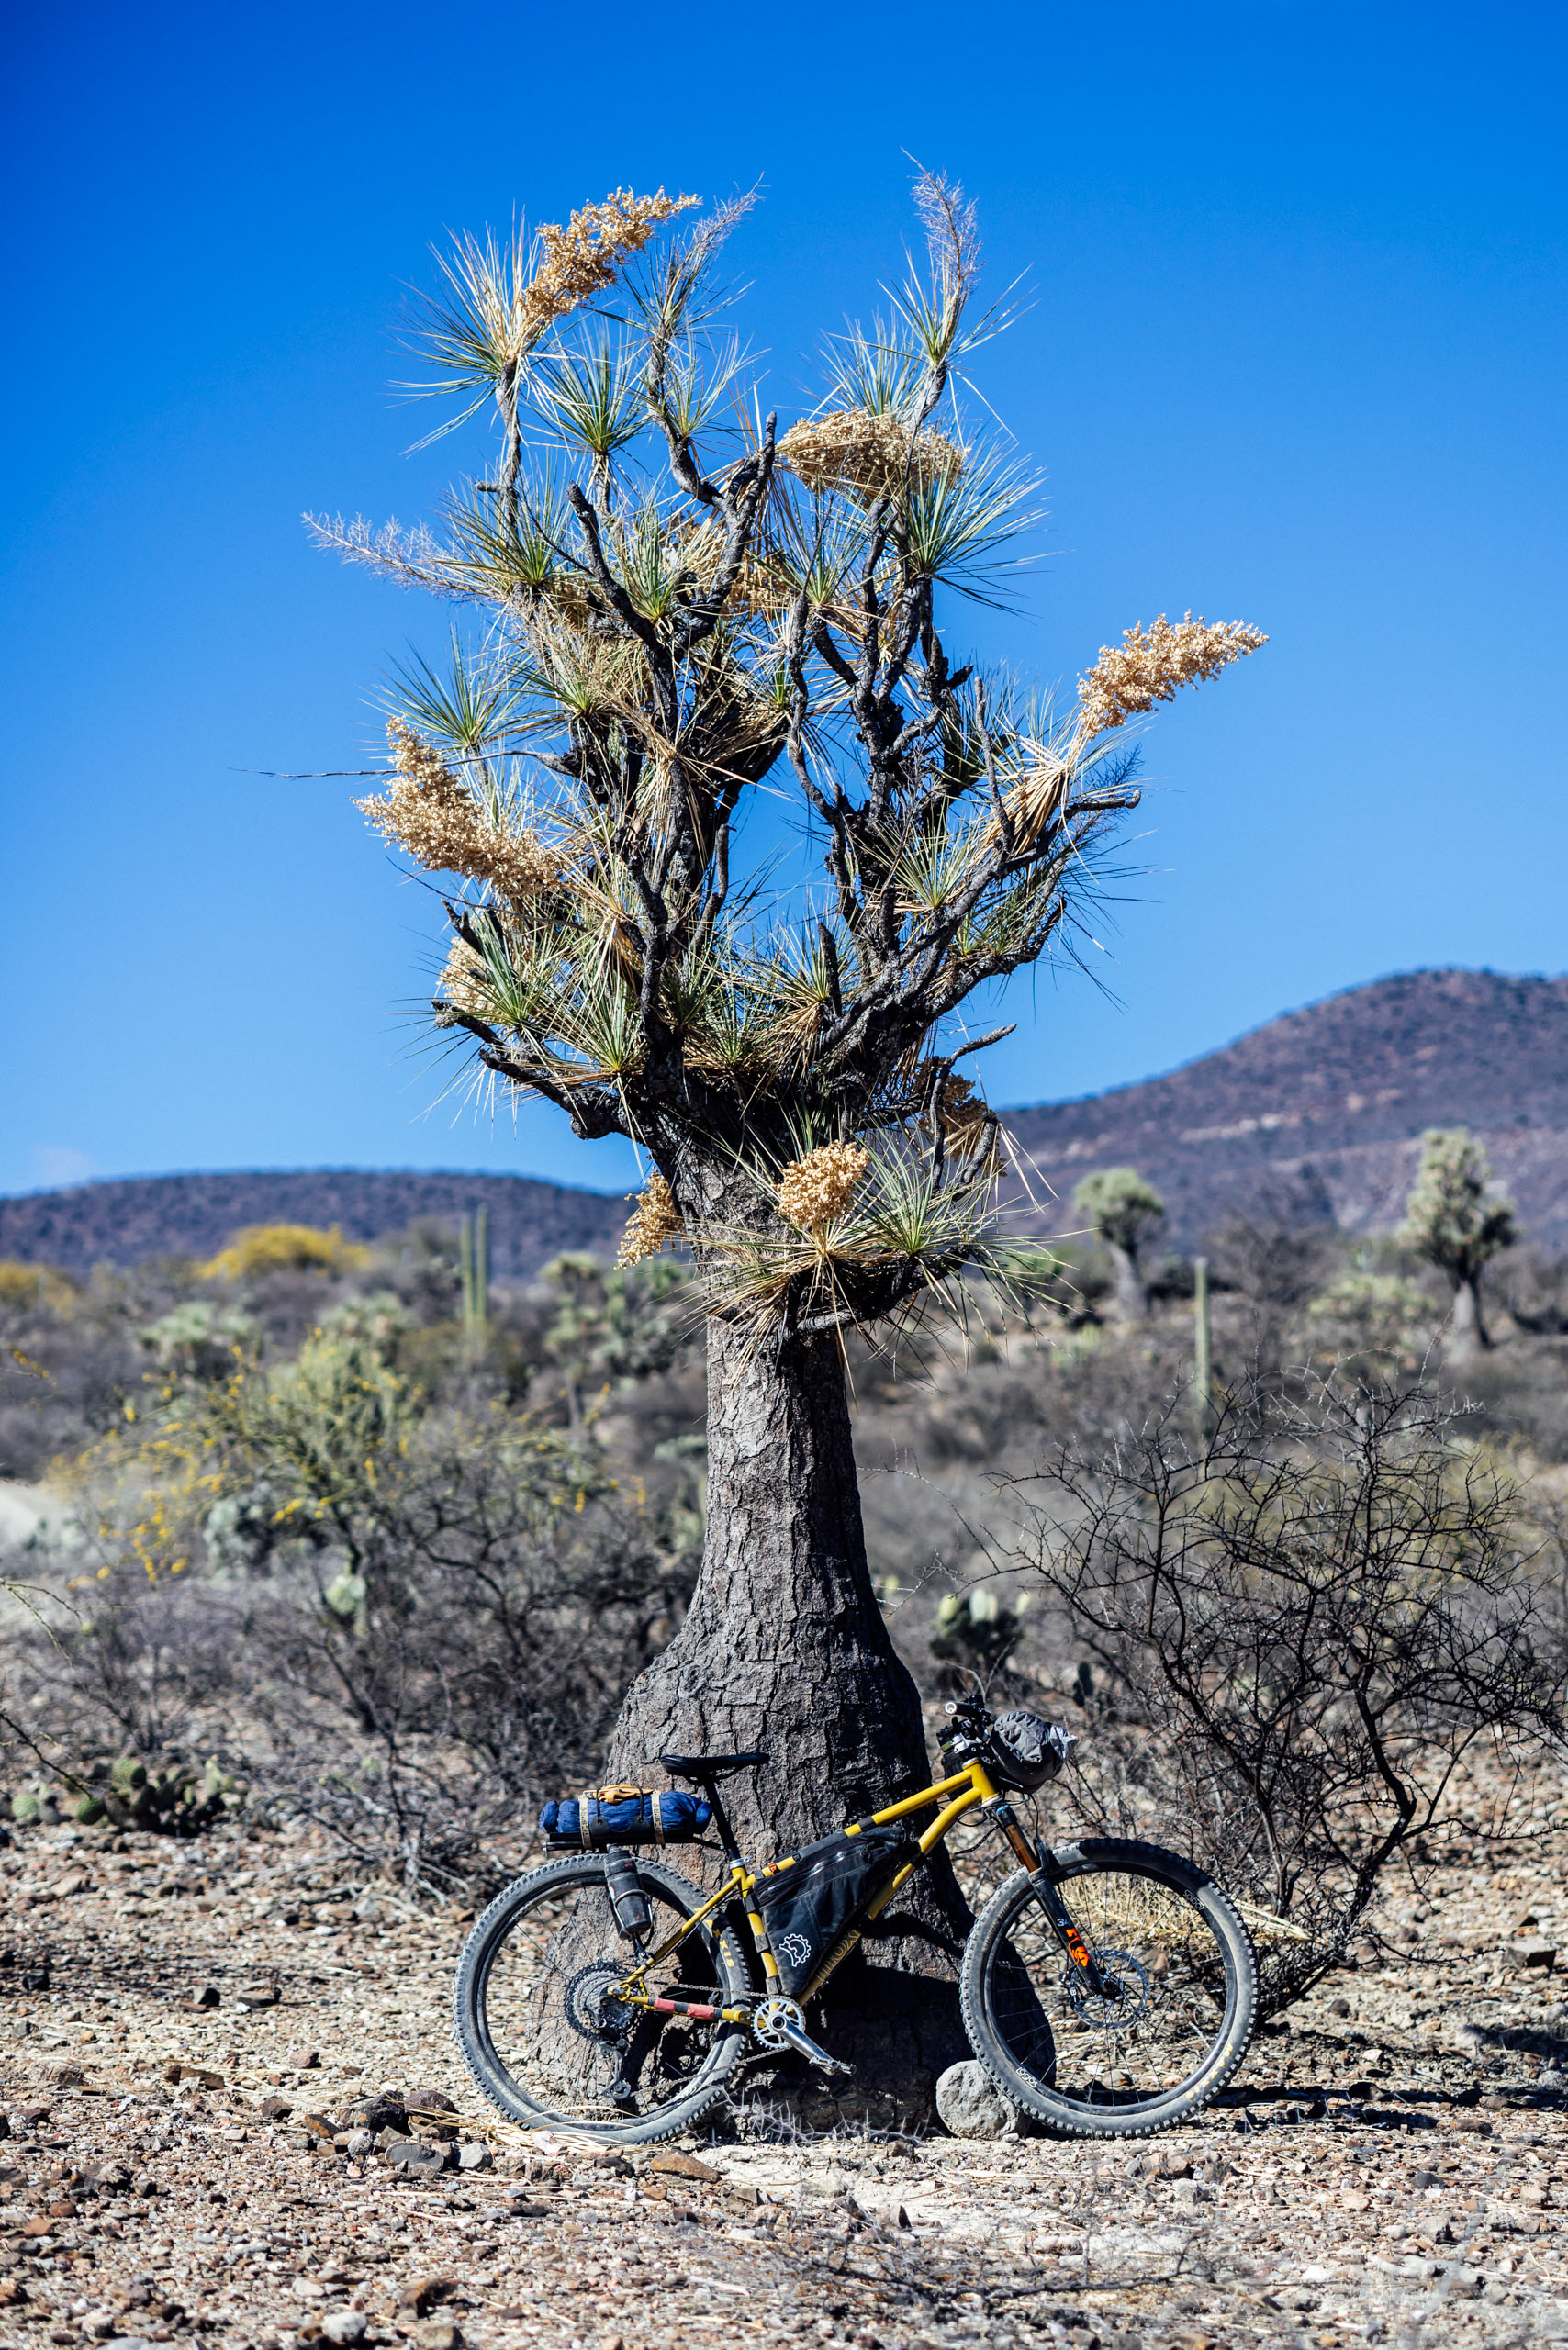
The second version swapped the rear bridge out for a machined plate because the original bridges were too complicated and expensive to produce. At this stage, the separate top rails were necessary to be installed through the middle bridge. Three-pack mounts were added onto the legs, and the middle bridge where the legs connected was slimmed out and refined. I took this version down to Arizona while scouting Joe Cruz’s new Madrean Rugged Ramble route, and aside from a few bolts loosening up on me while riding chunky Arizona Trail (a problem that has since been addressed), it continued to serve as promised. This was also an excellent chance to see just how much weight the Mica Rack could handle on rough terrain, and winter in the Southwest called for a bulky sleep kit and two bottles of water mounted on either side of the rack. It was solid.
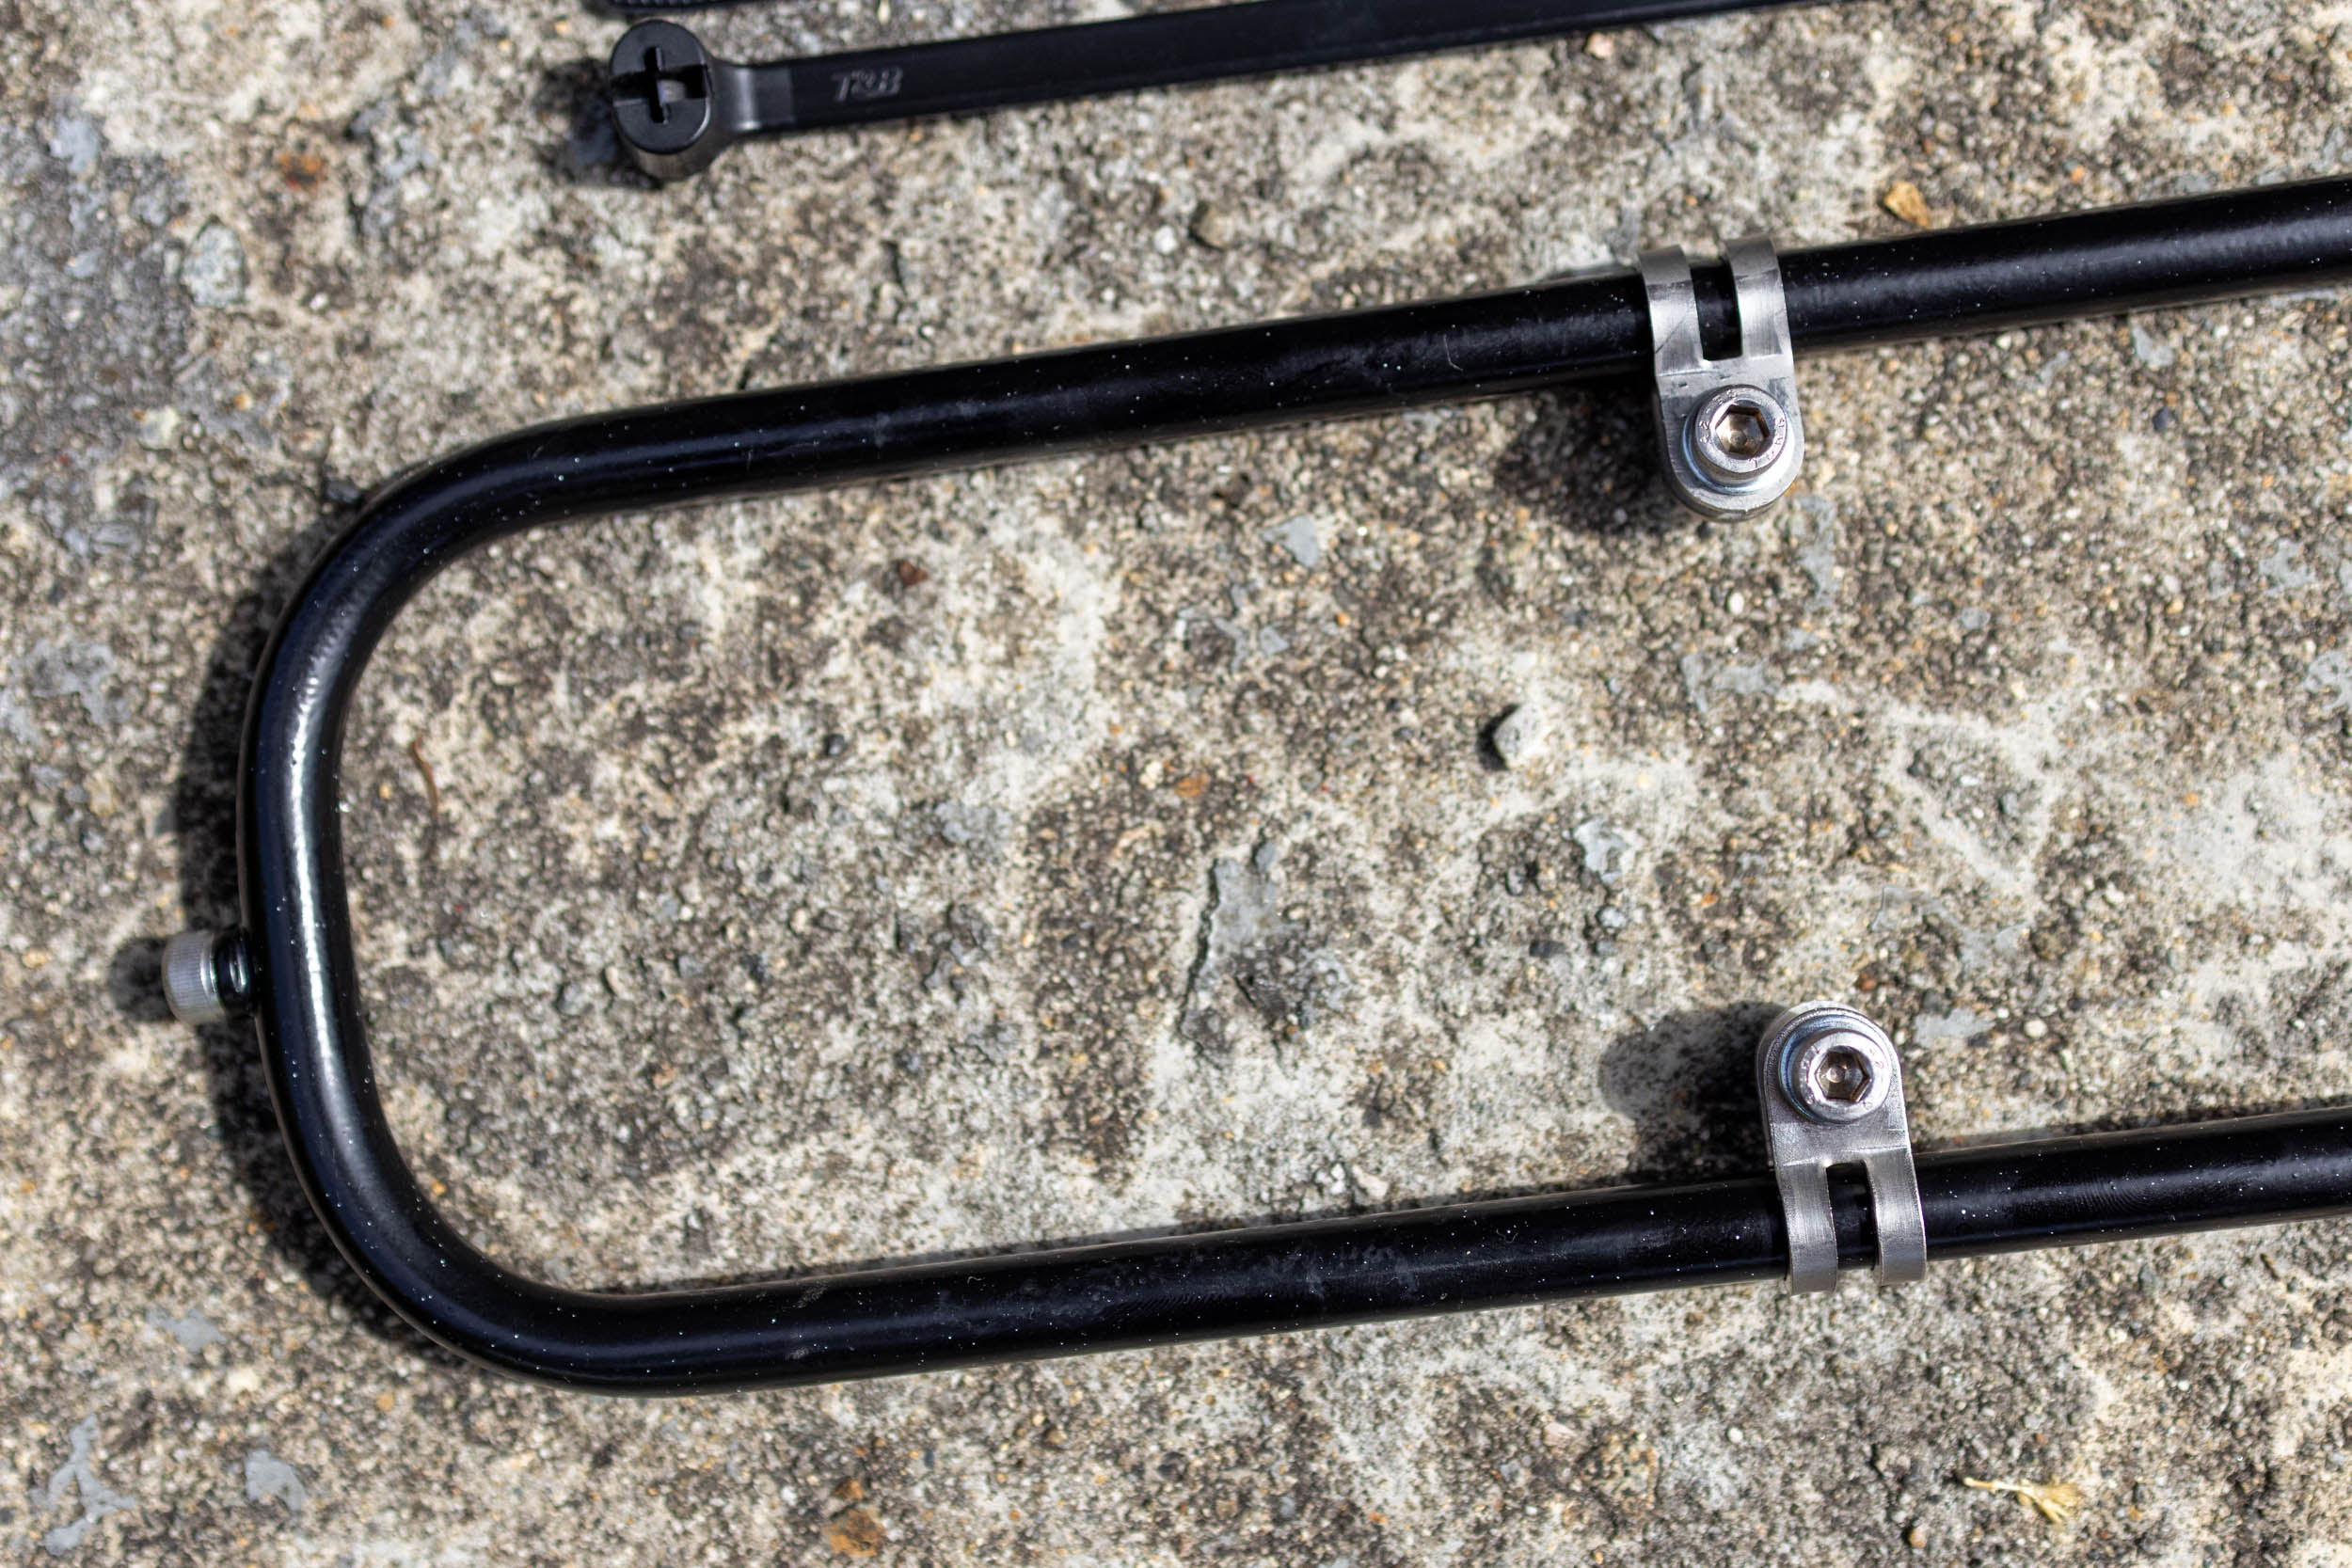
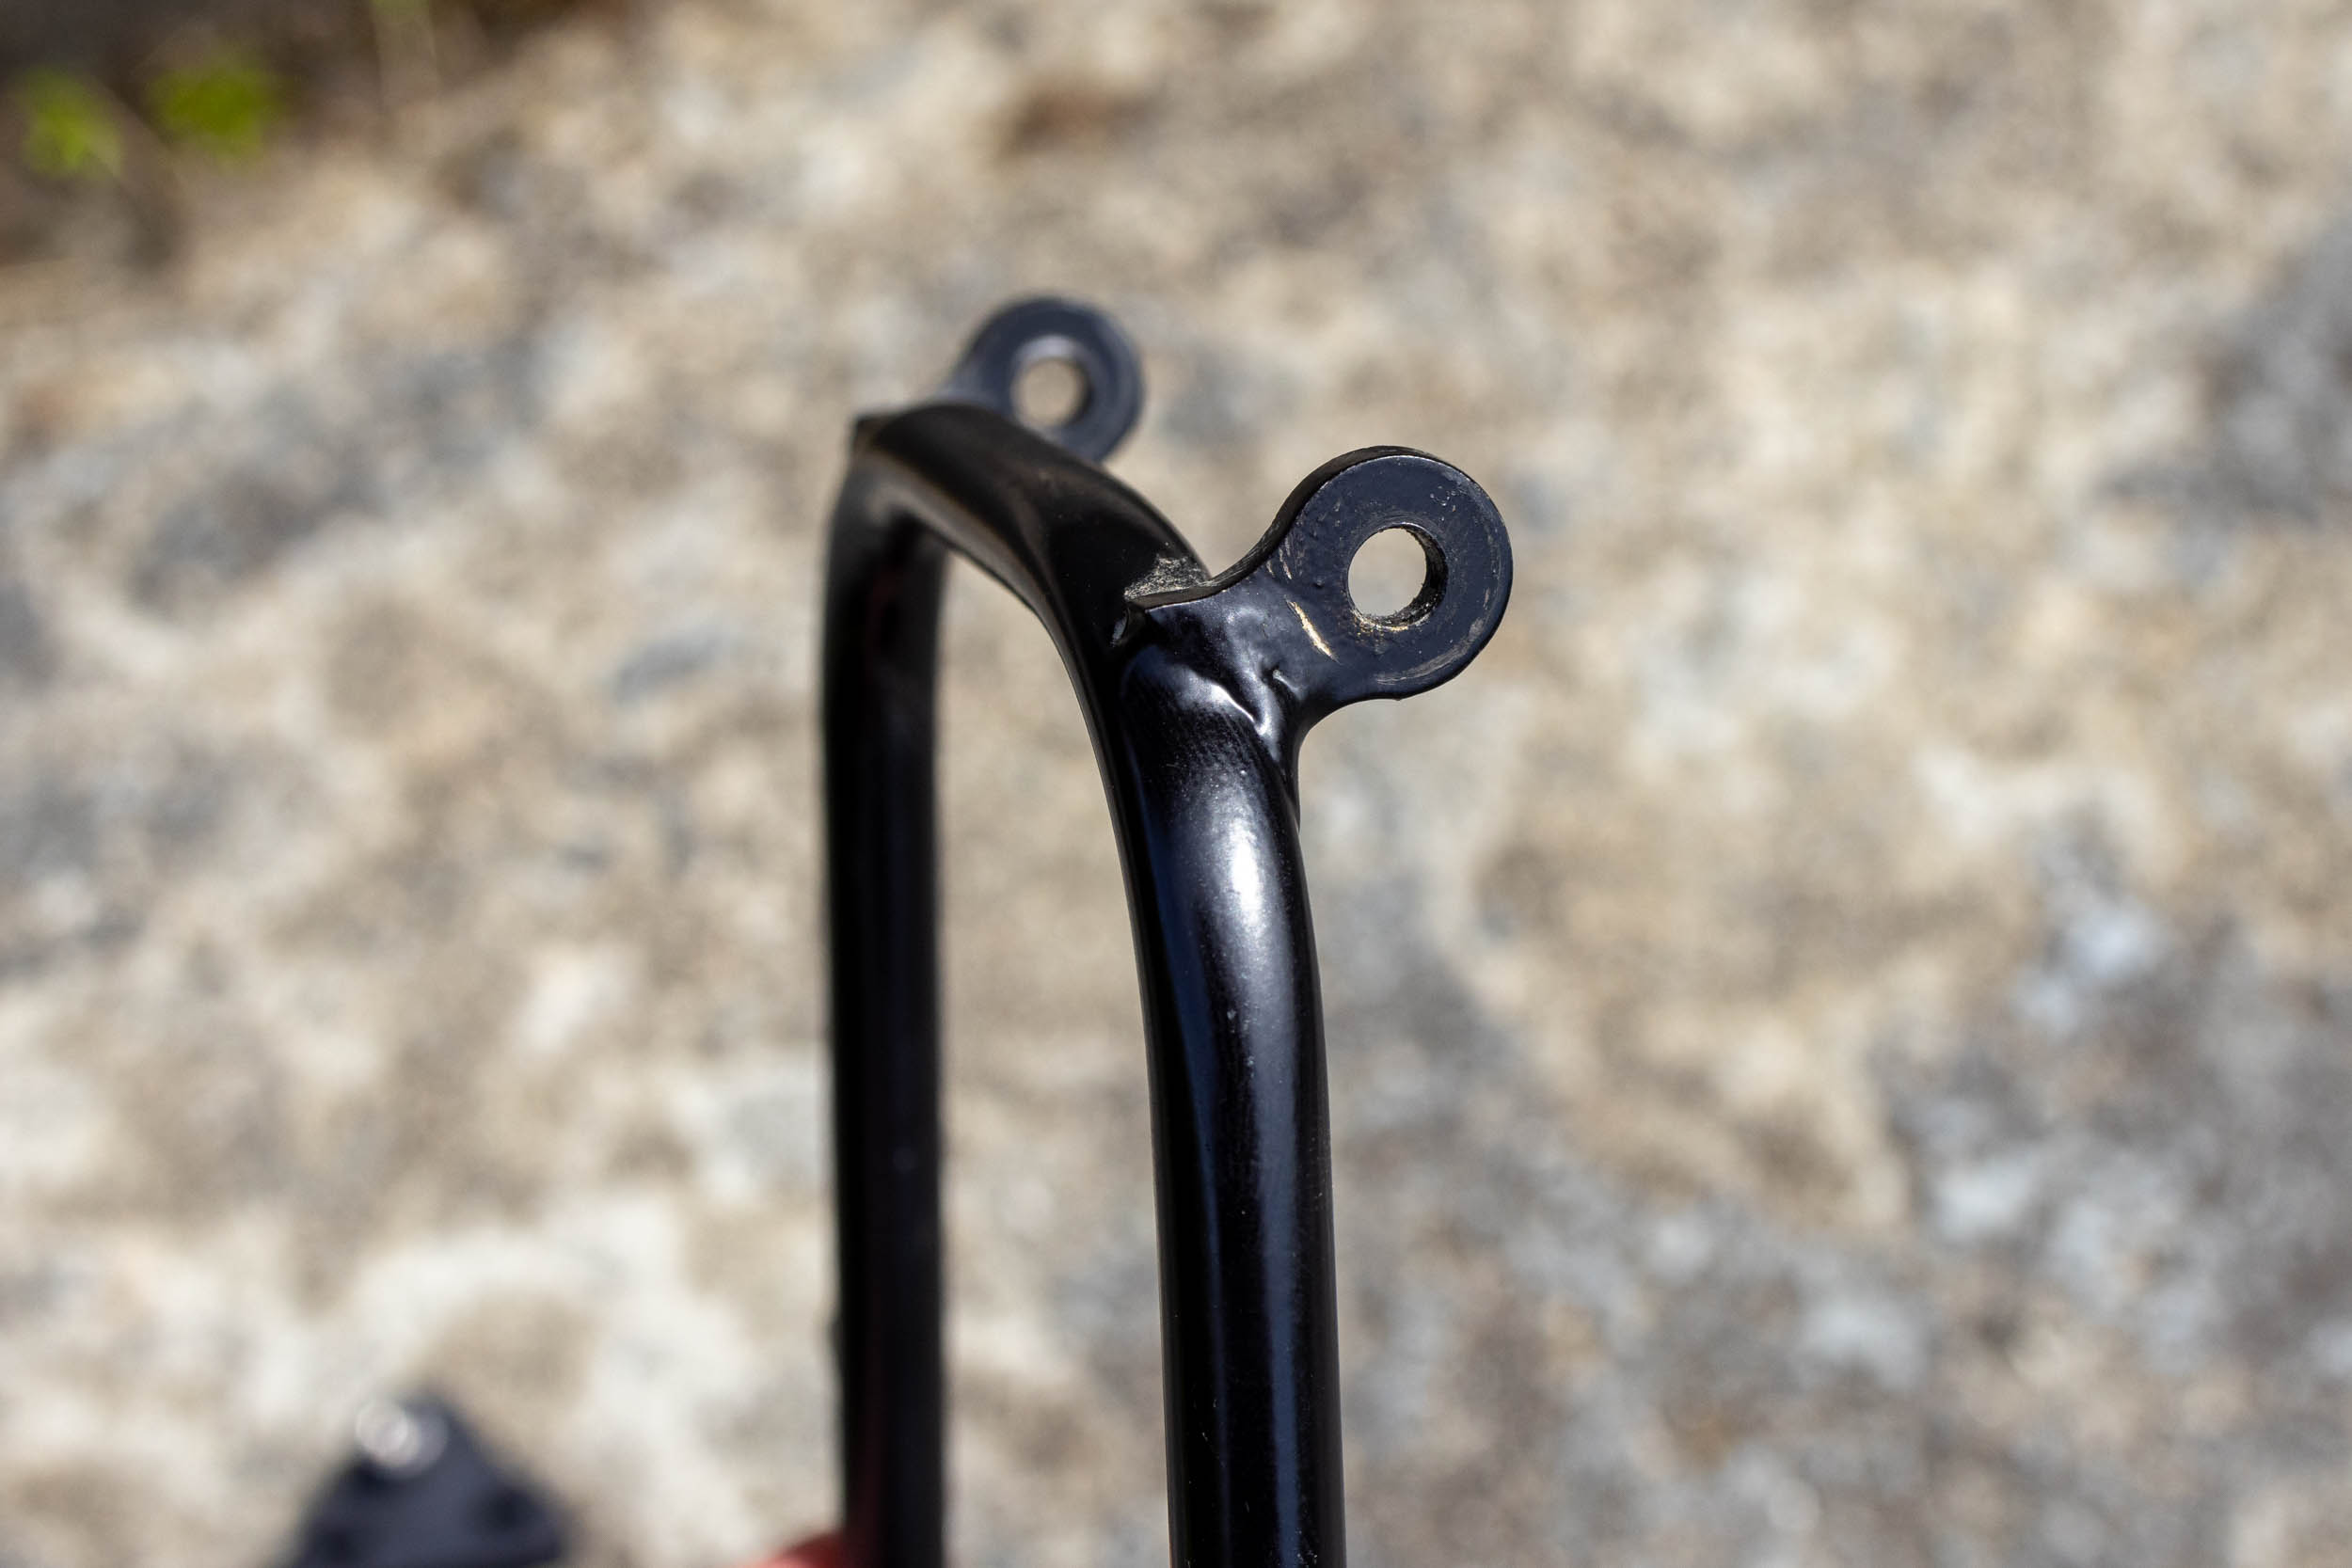
Mica Rack V3 addressed a few lingering opportunities. The separate legs were replaced with a single curved tube, which made installation simpler and increased the overall stiffness significantly. This also allowed the middle bridge, which was expensive and required a tight tolerance, to be replaced with small 316 stainless steel loops attached using a small bolt and lock nut. According to Skyler, using stainless steel loops makes sense as they are susceptible to work hardening, where they get stronger and harder from being deformed. In short, when he hand-bends the silver loops, they actually get stronger. The design was simpler to manufacture and still allowed the legs to pivot and slide down the length of the platform. The third prototype still used a bolt-on rear plate as a legacy from V2.
Mica Rack: The Final Boss
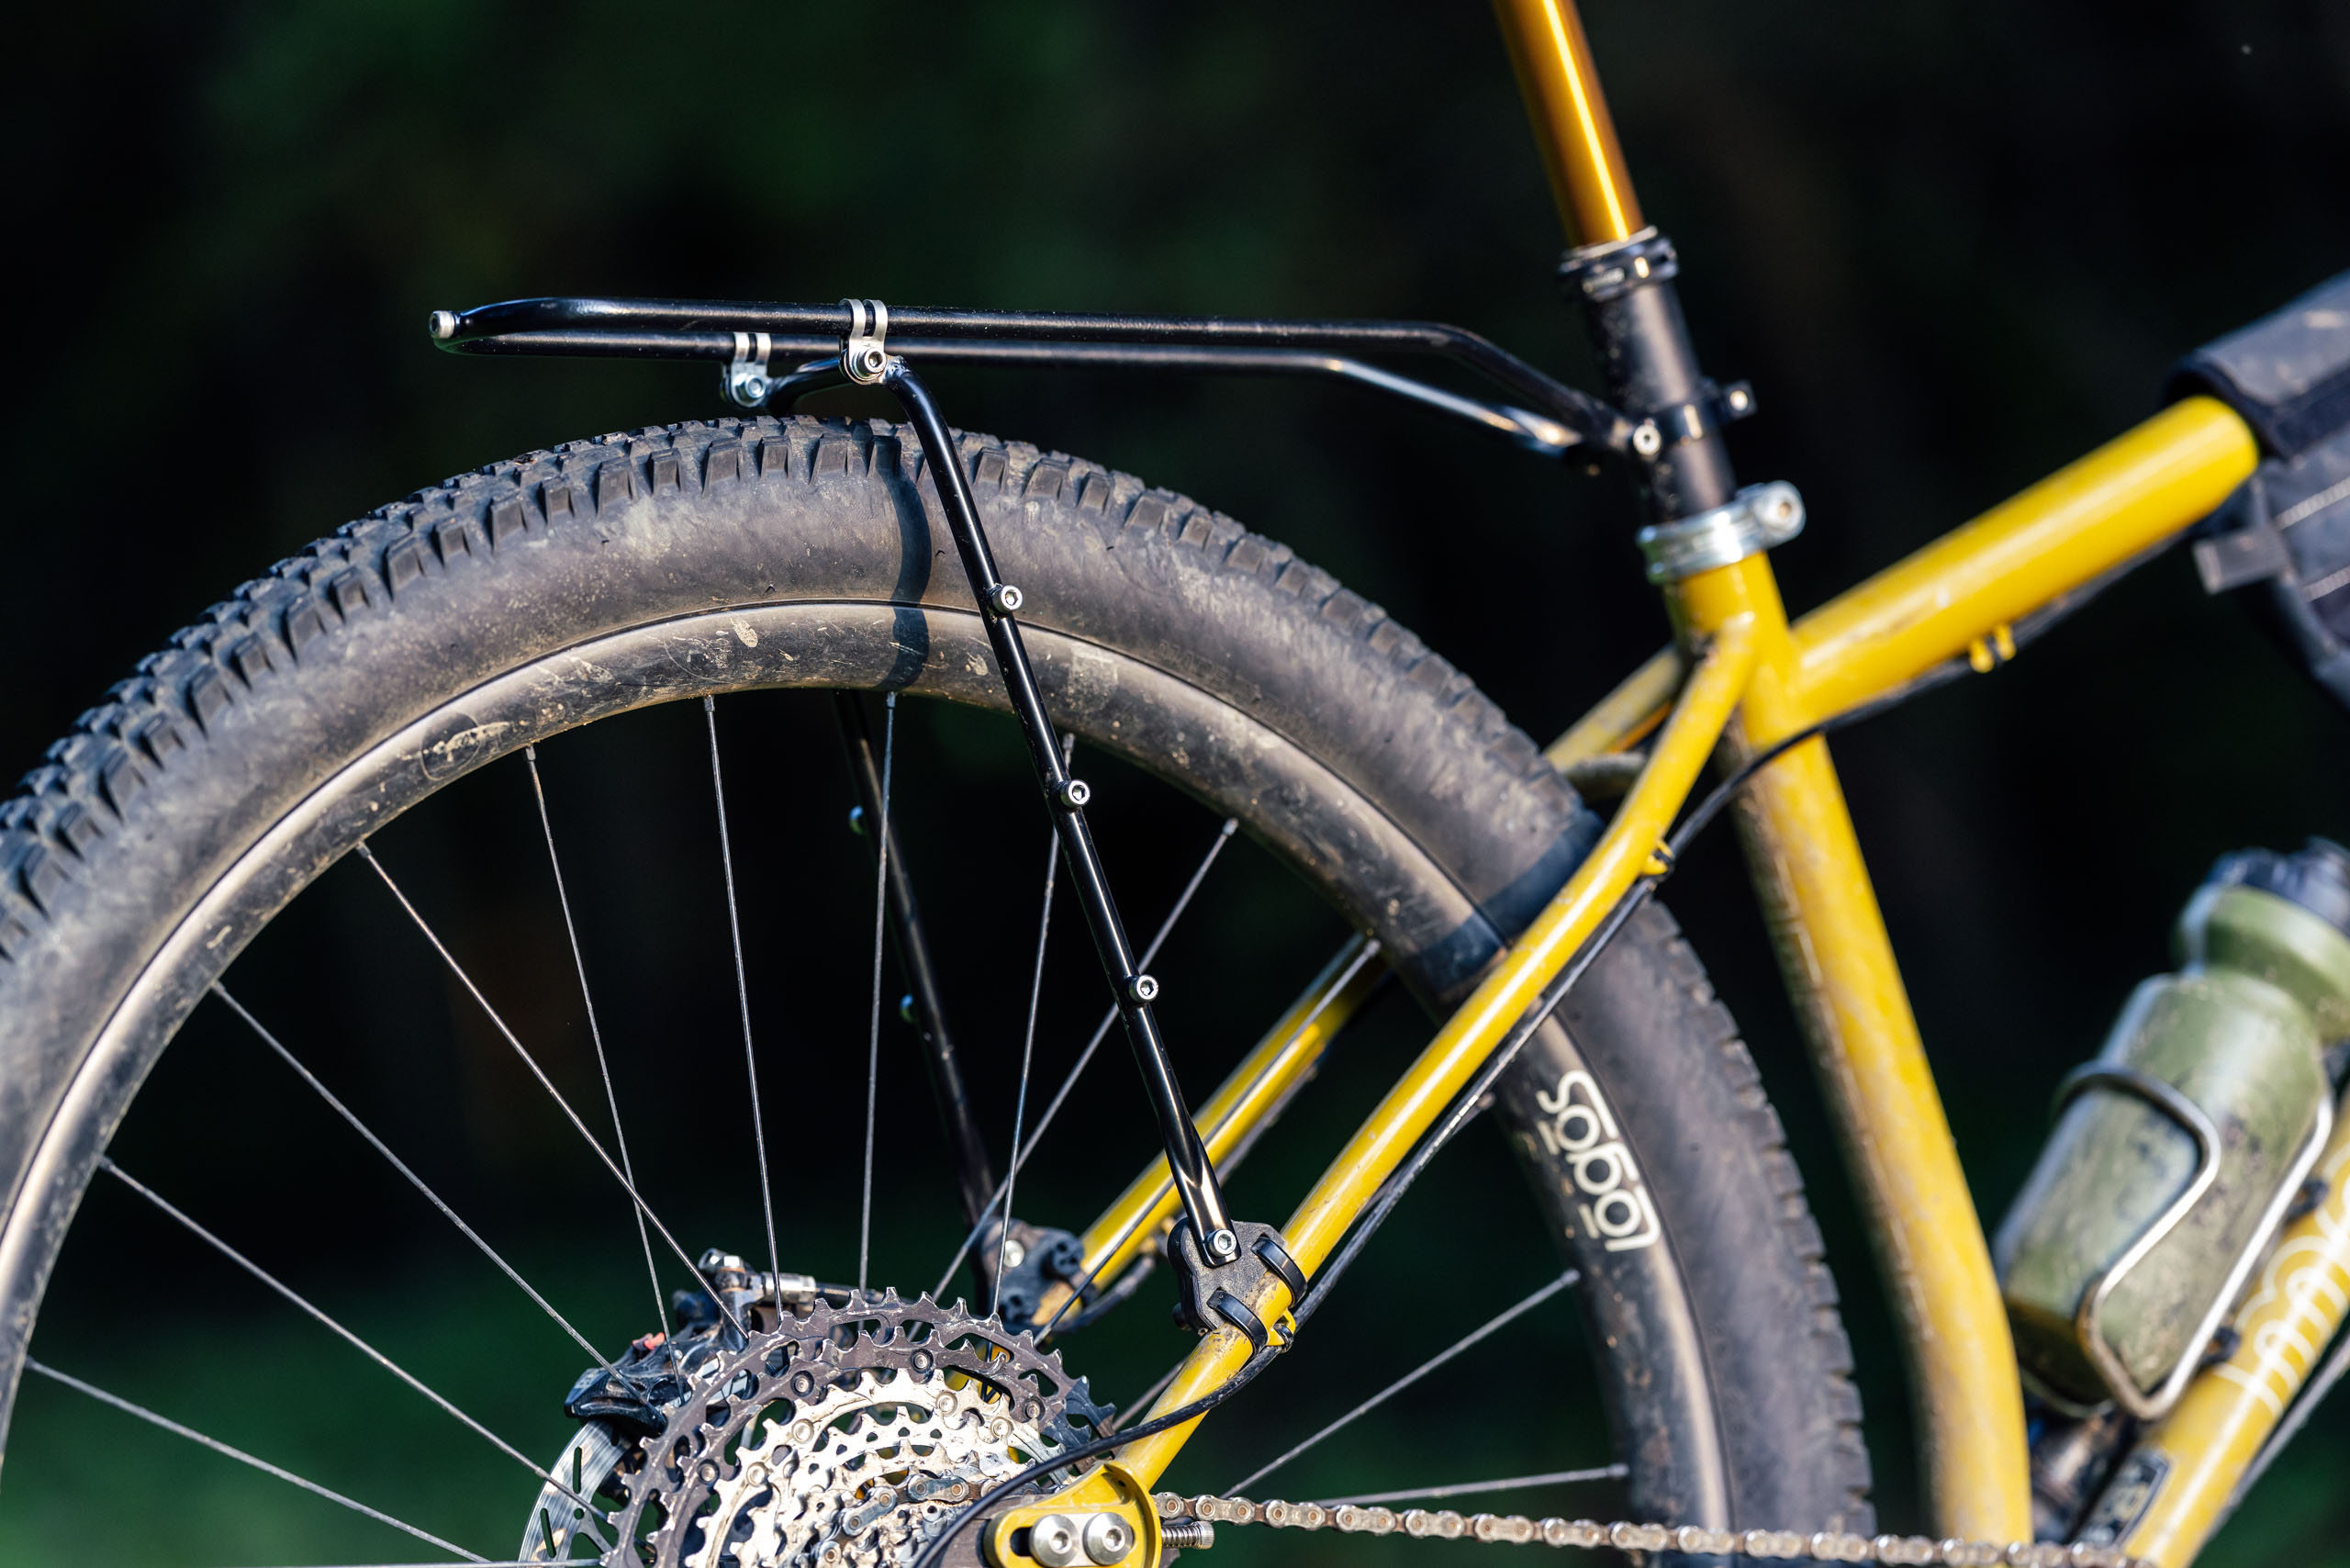
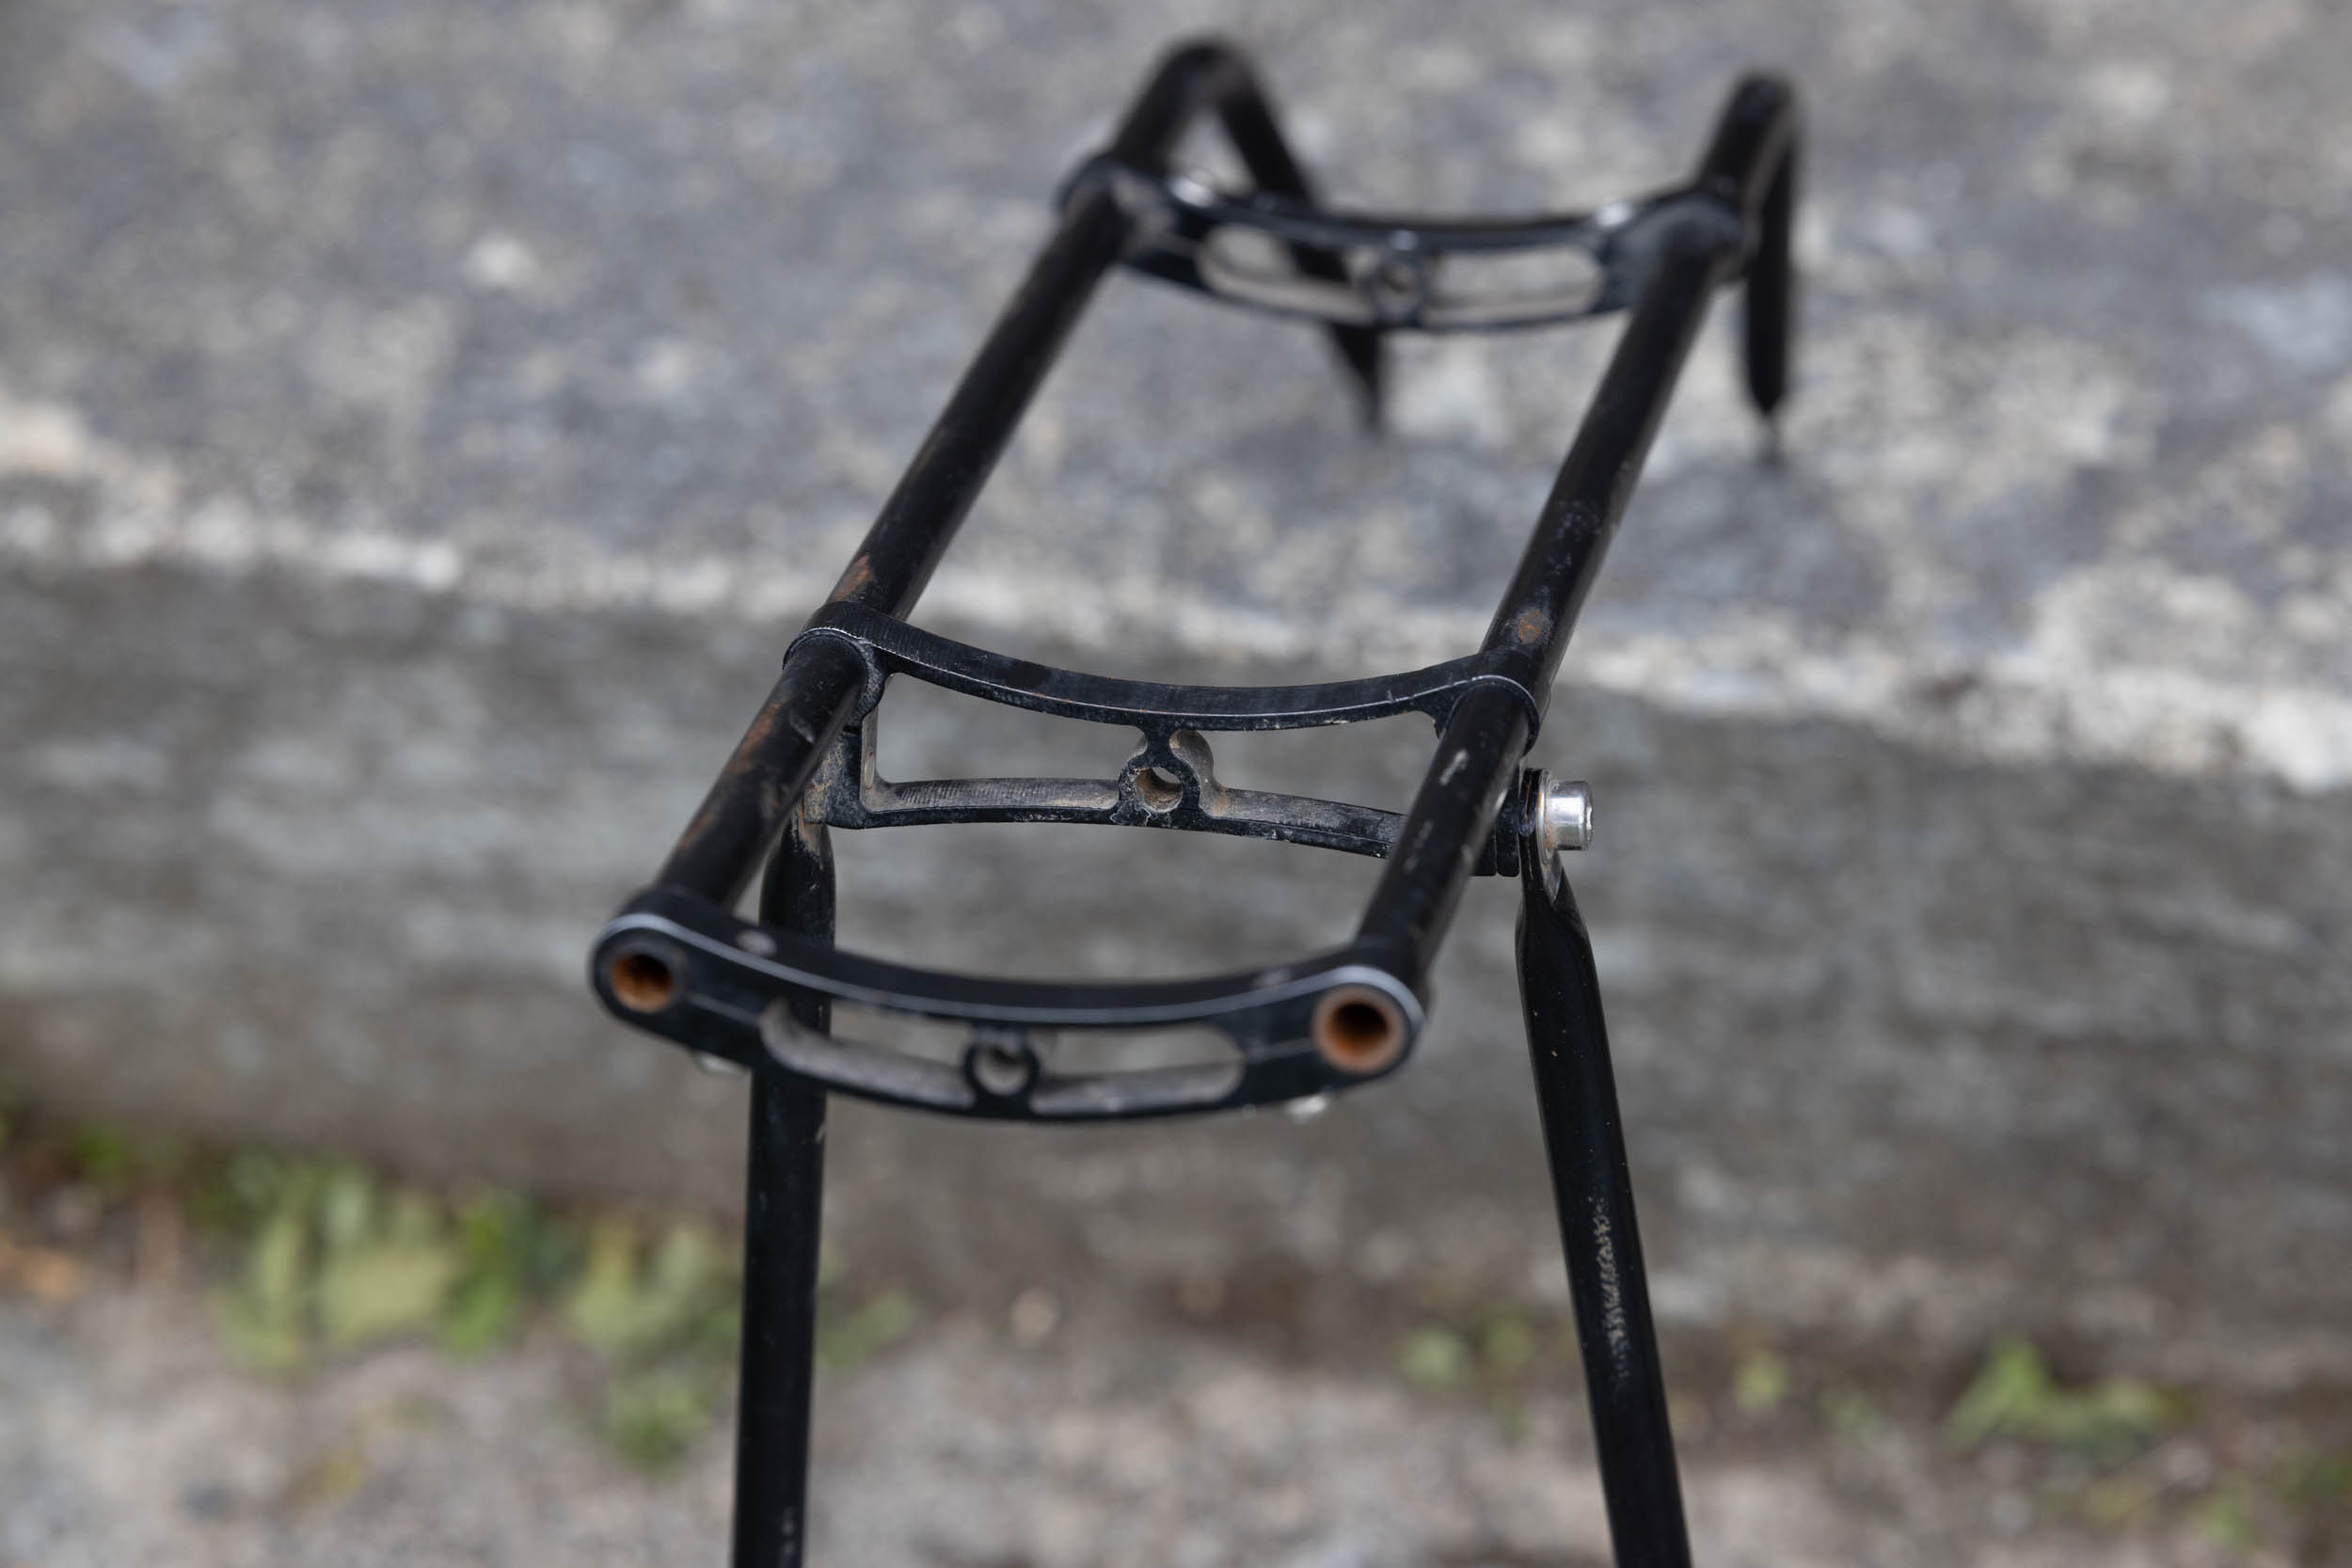
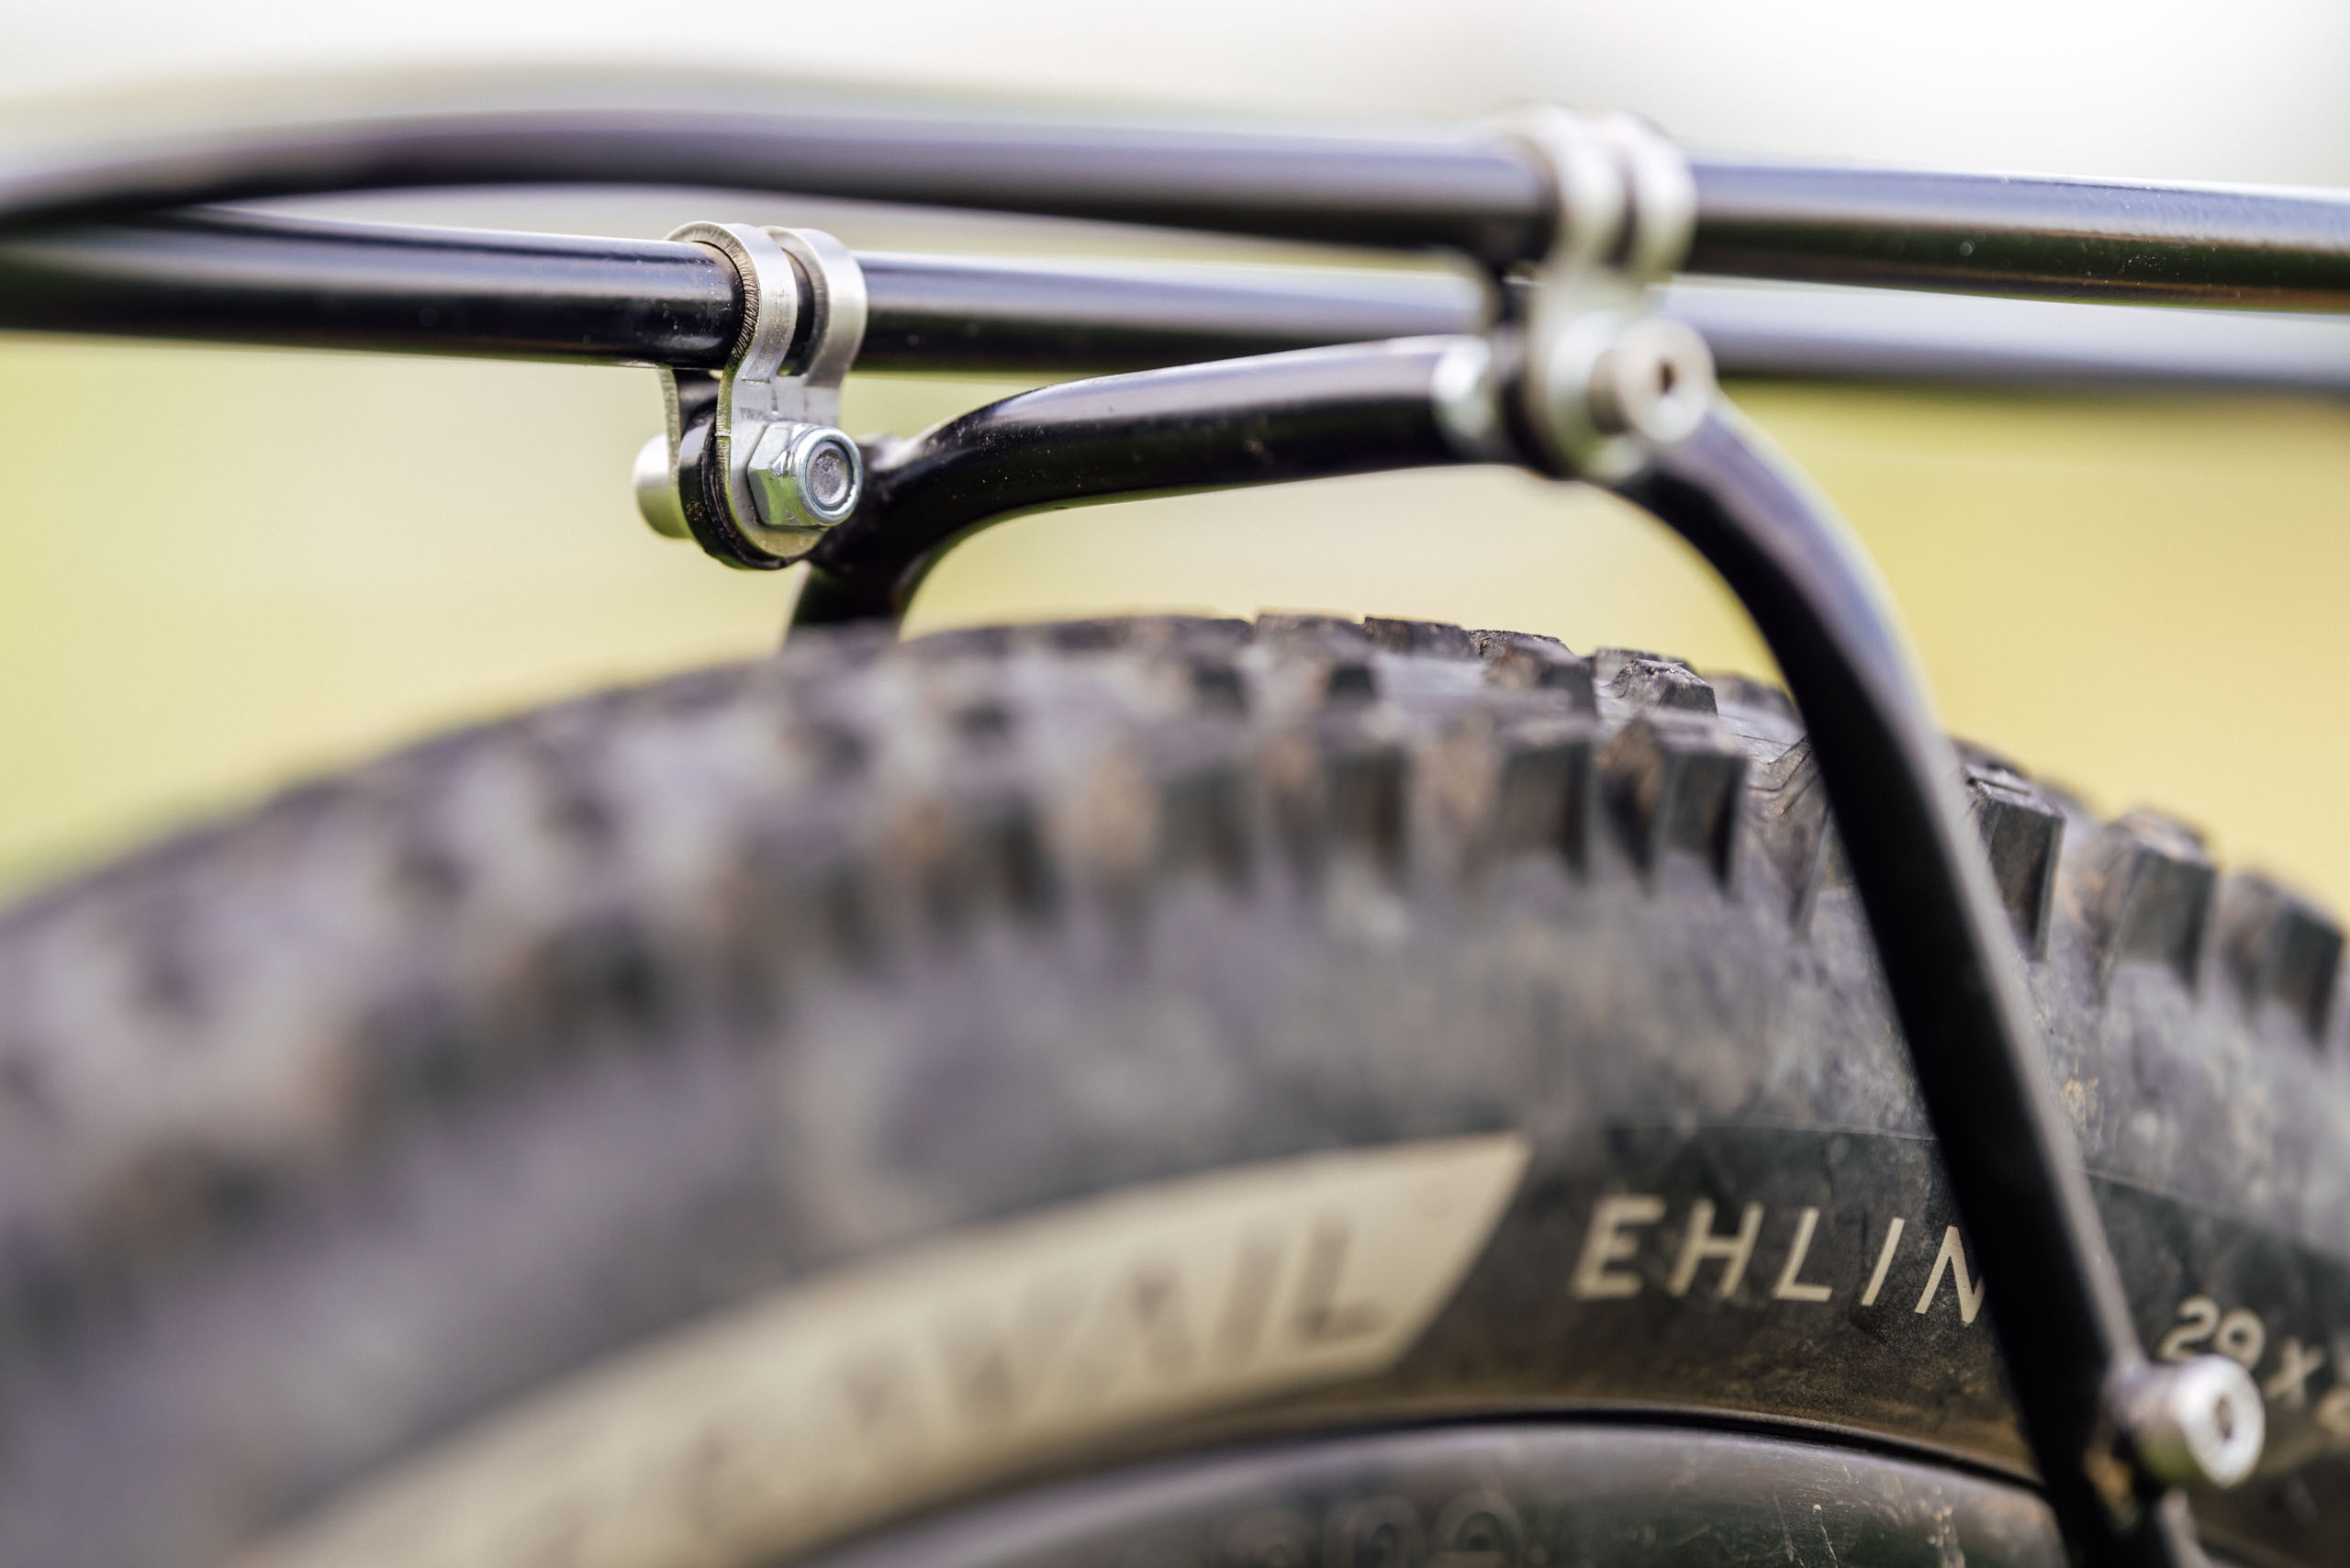
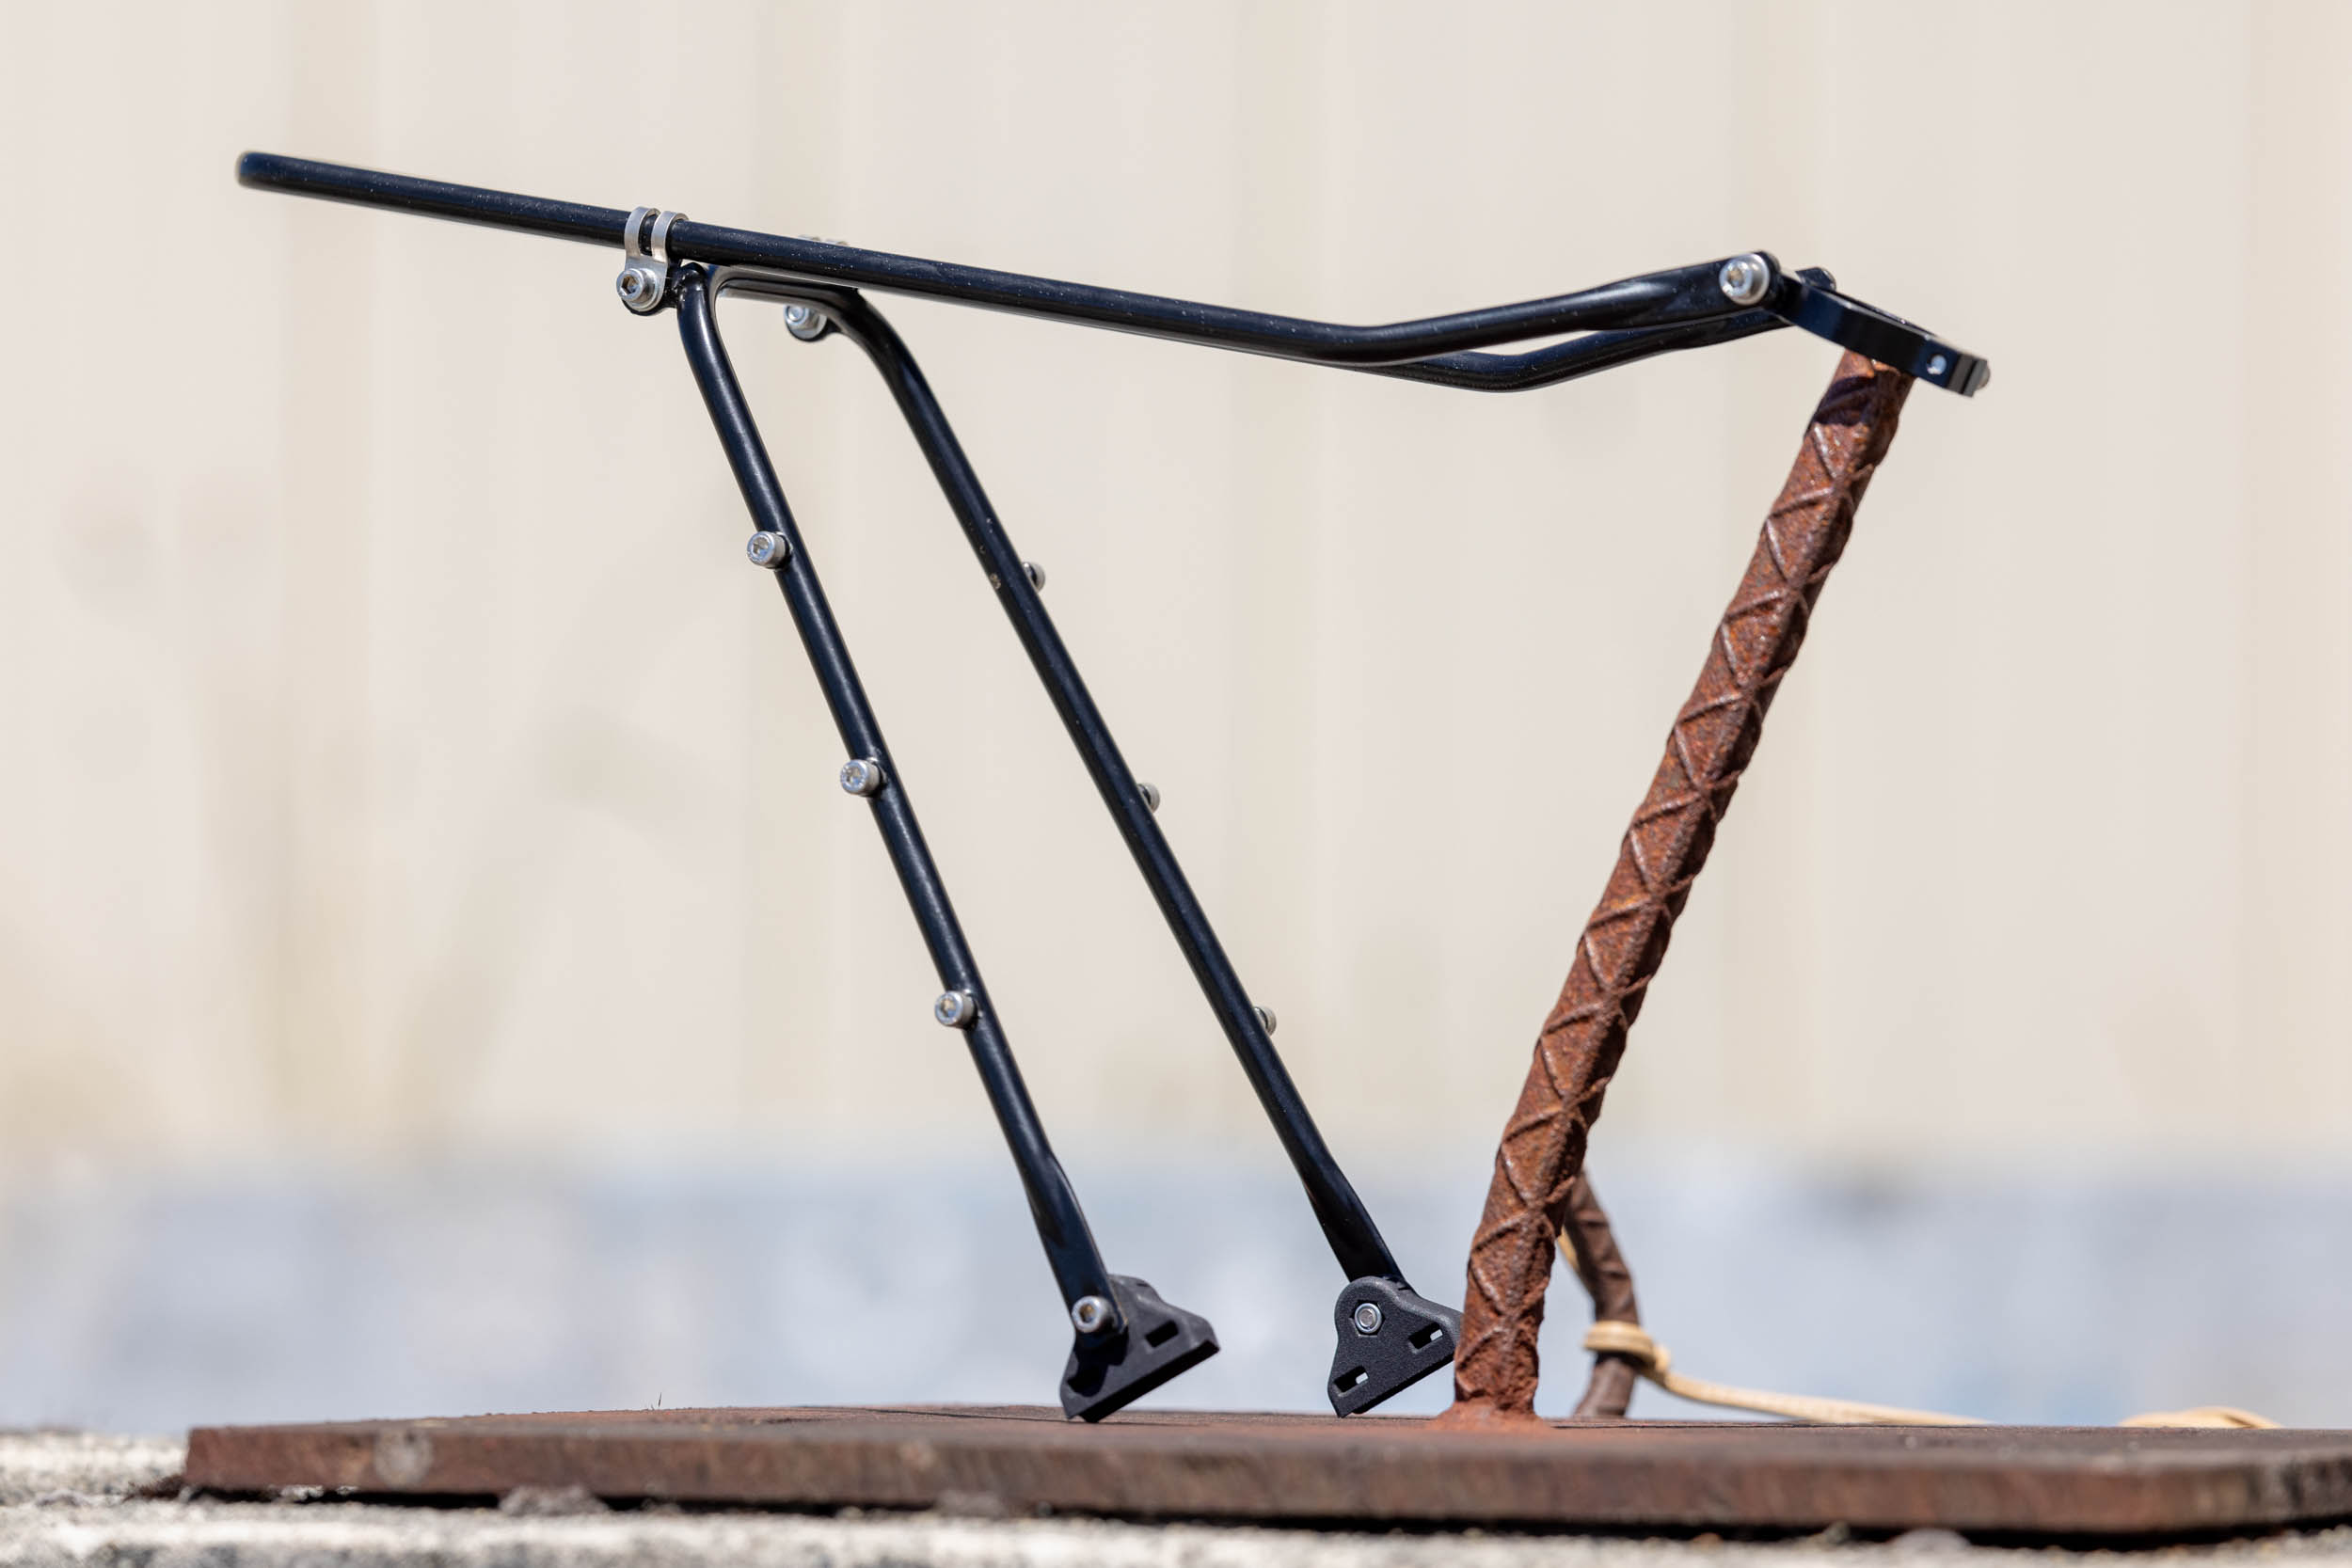
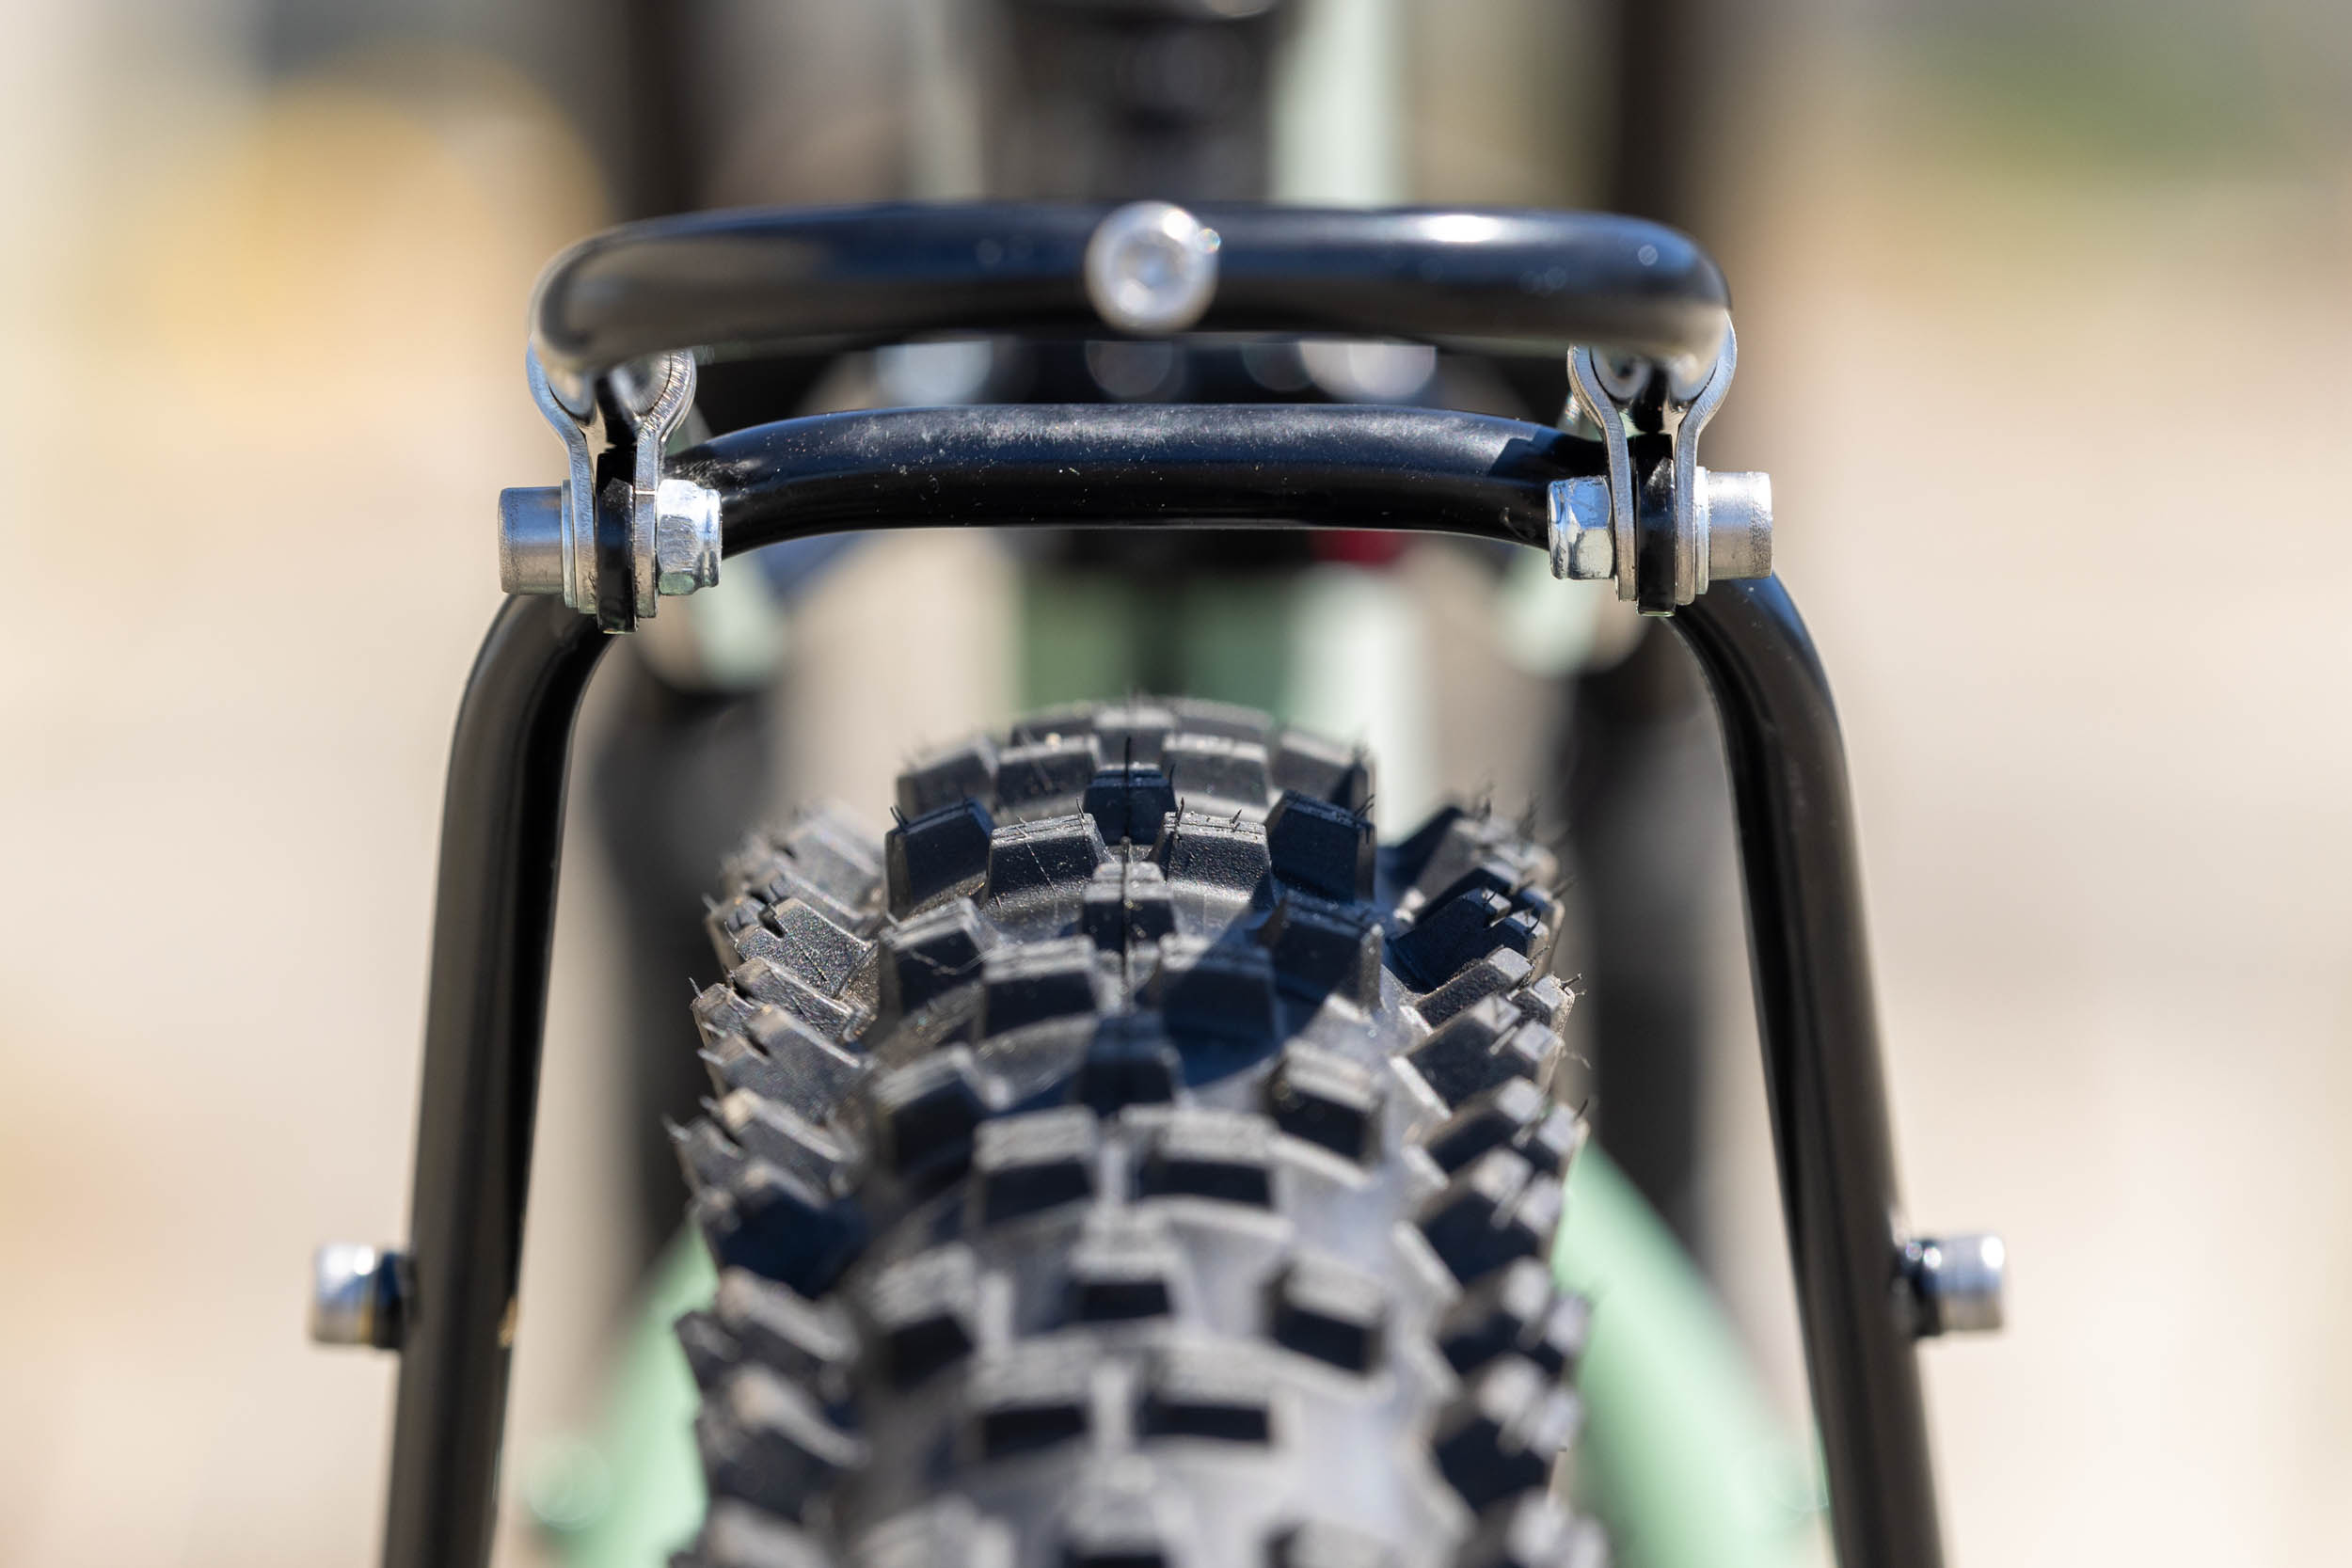
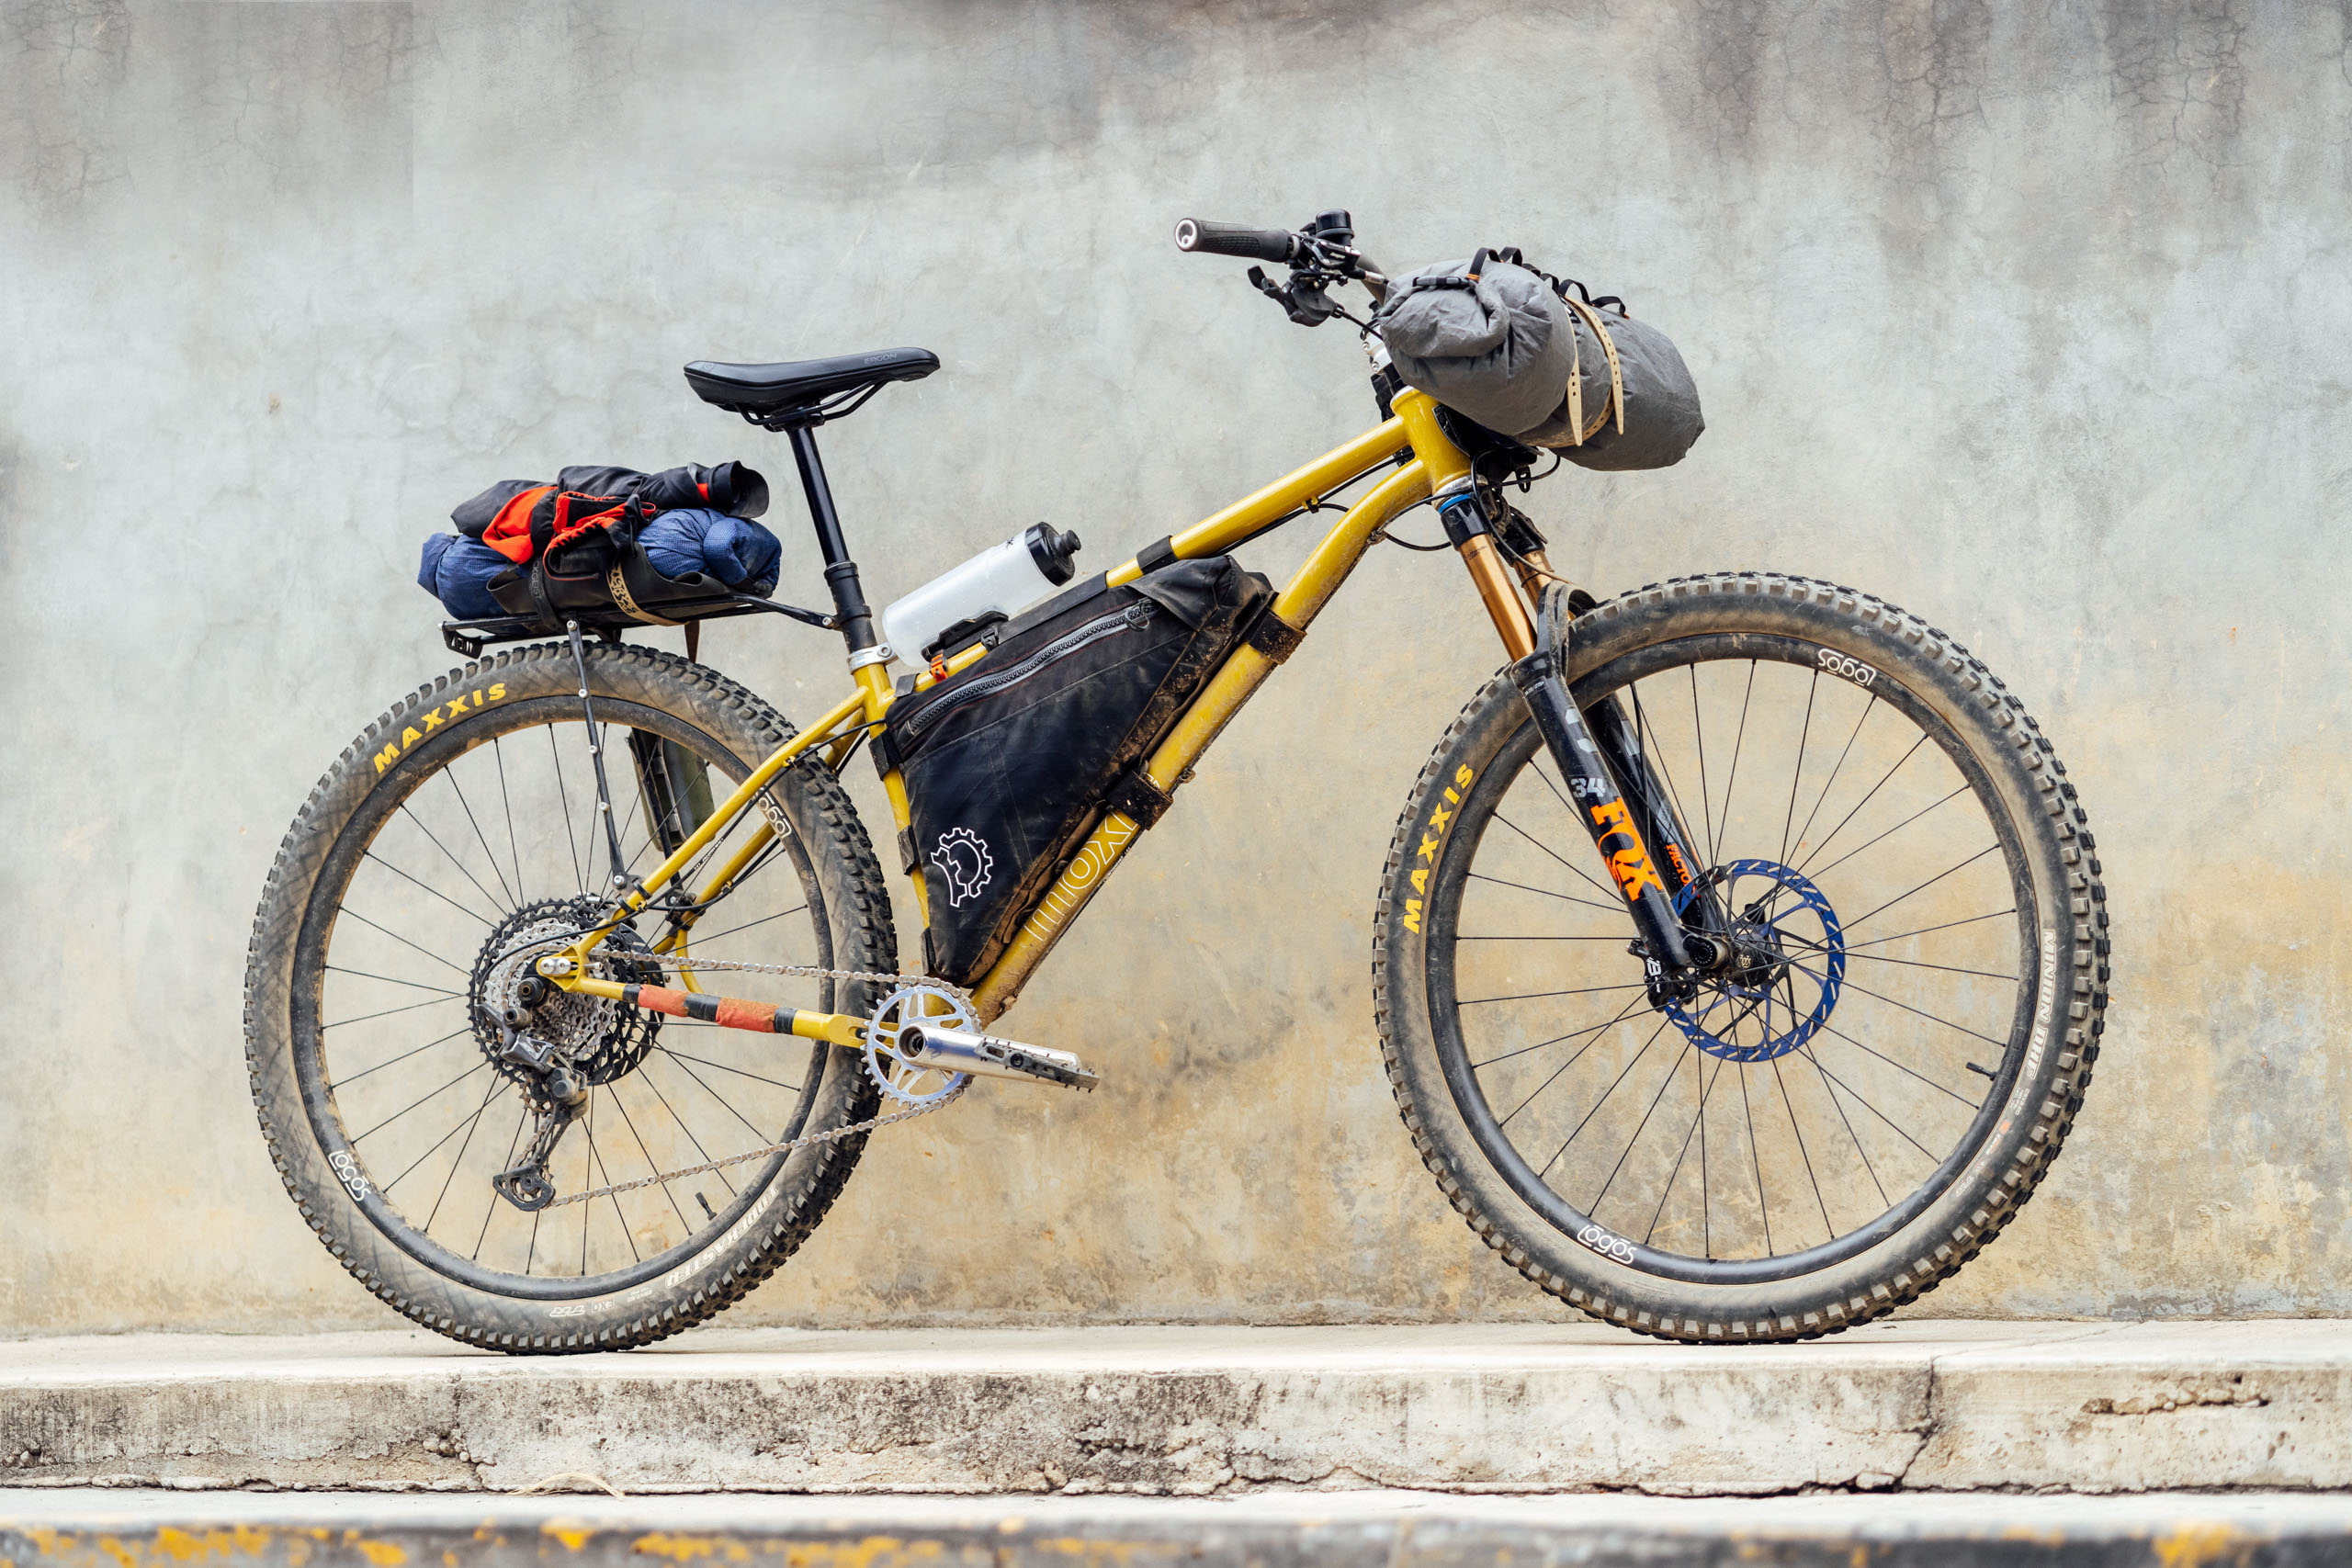
The final design ditched the back plate in favor of a curved one-piece top platform, similar to the vertical stays. The platform’s curve has slowly become more subtle, but it can still be flipped upside down to curve up away from the rear tire or tucked down toward it. A few months ago, Mica Rack V4 was born, and while the functionality has remained the same, Skyler managed to make it more refined, easier to produce, and far more stable and stiff.

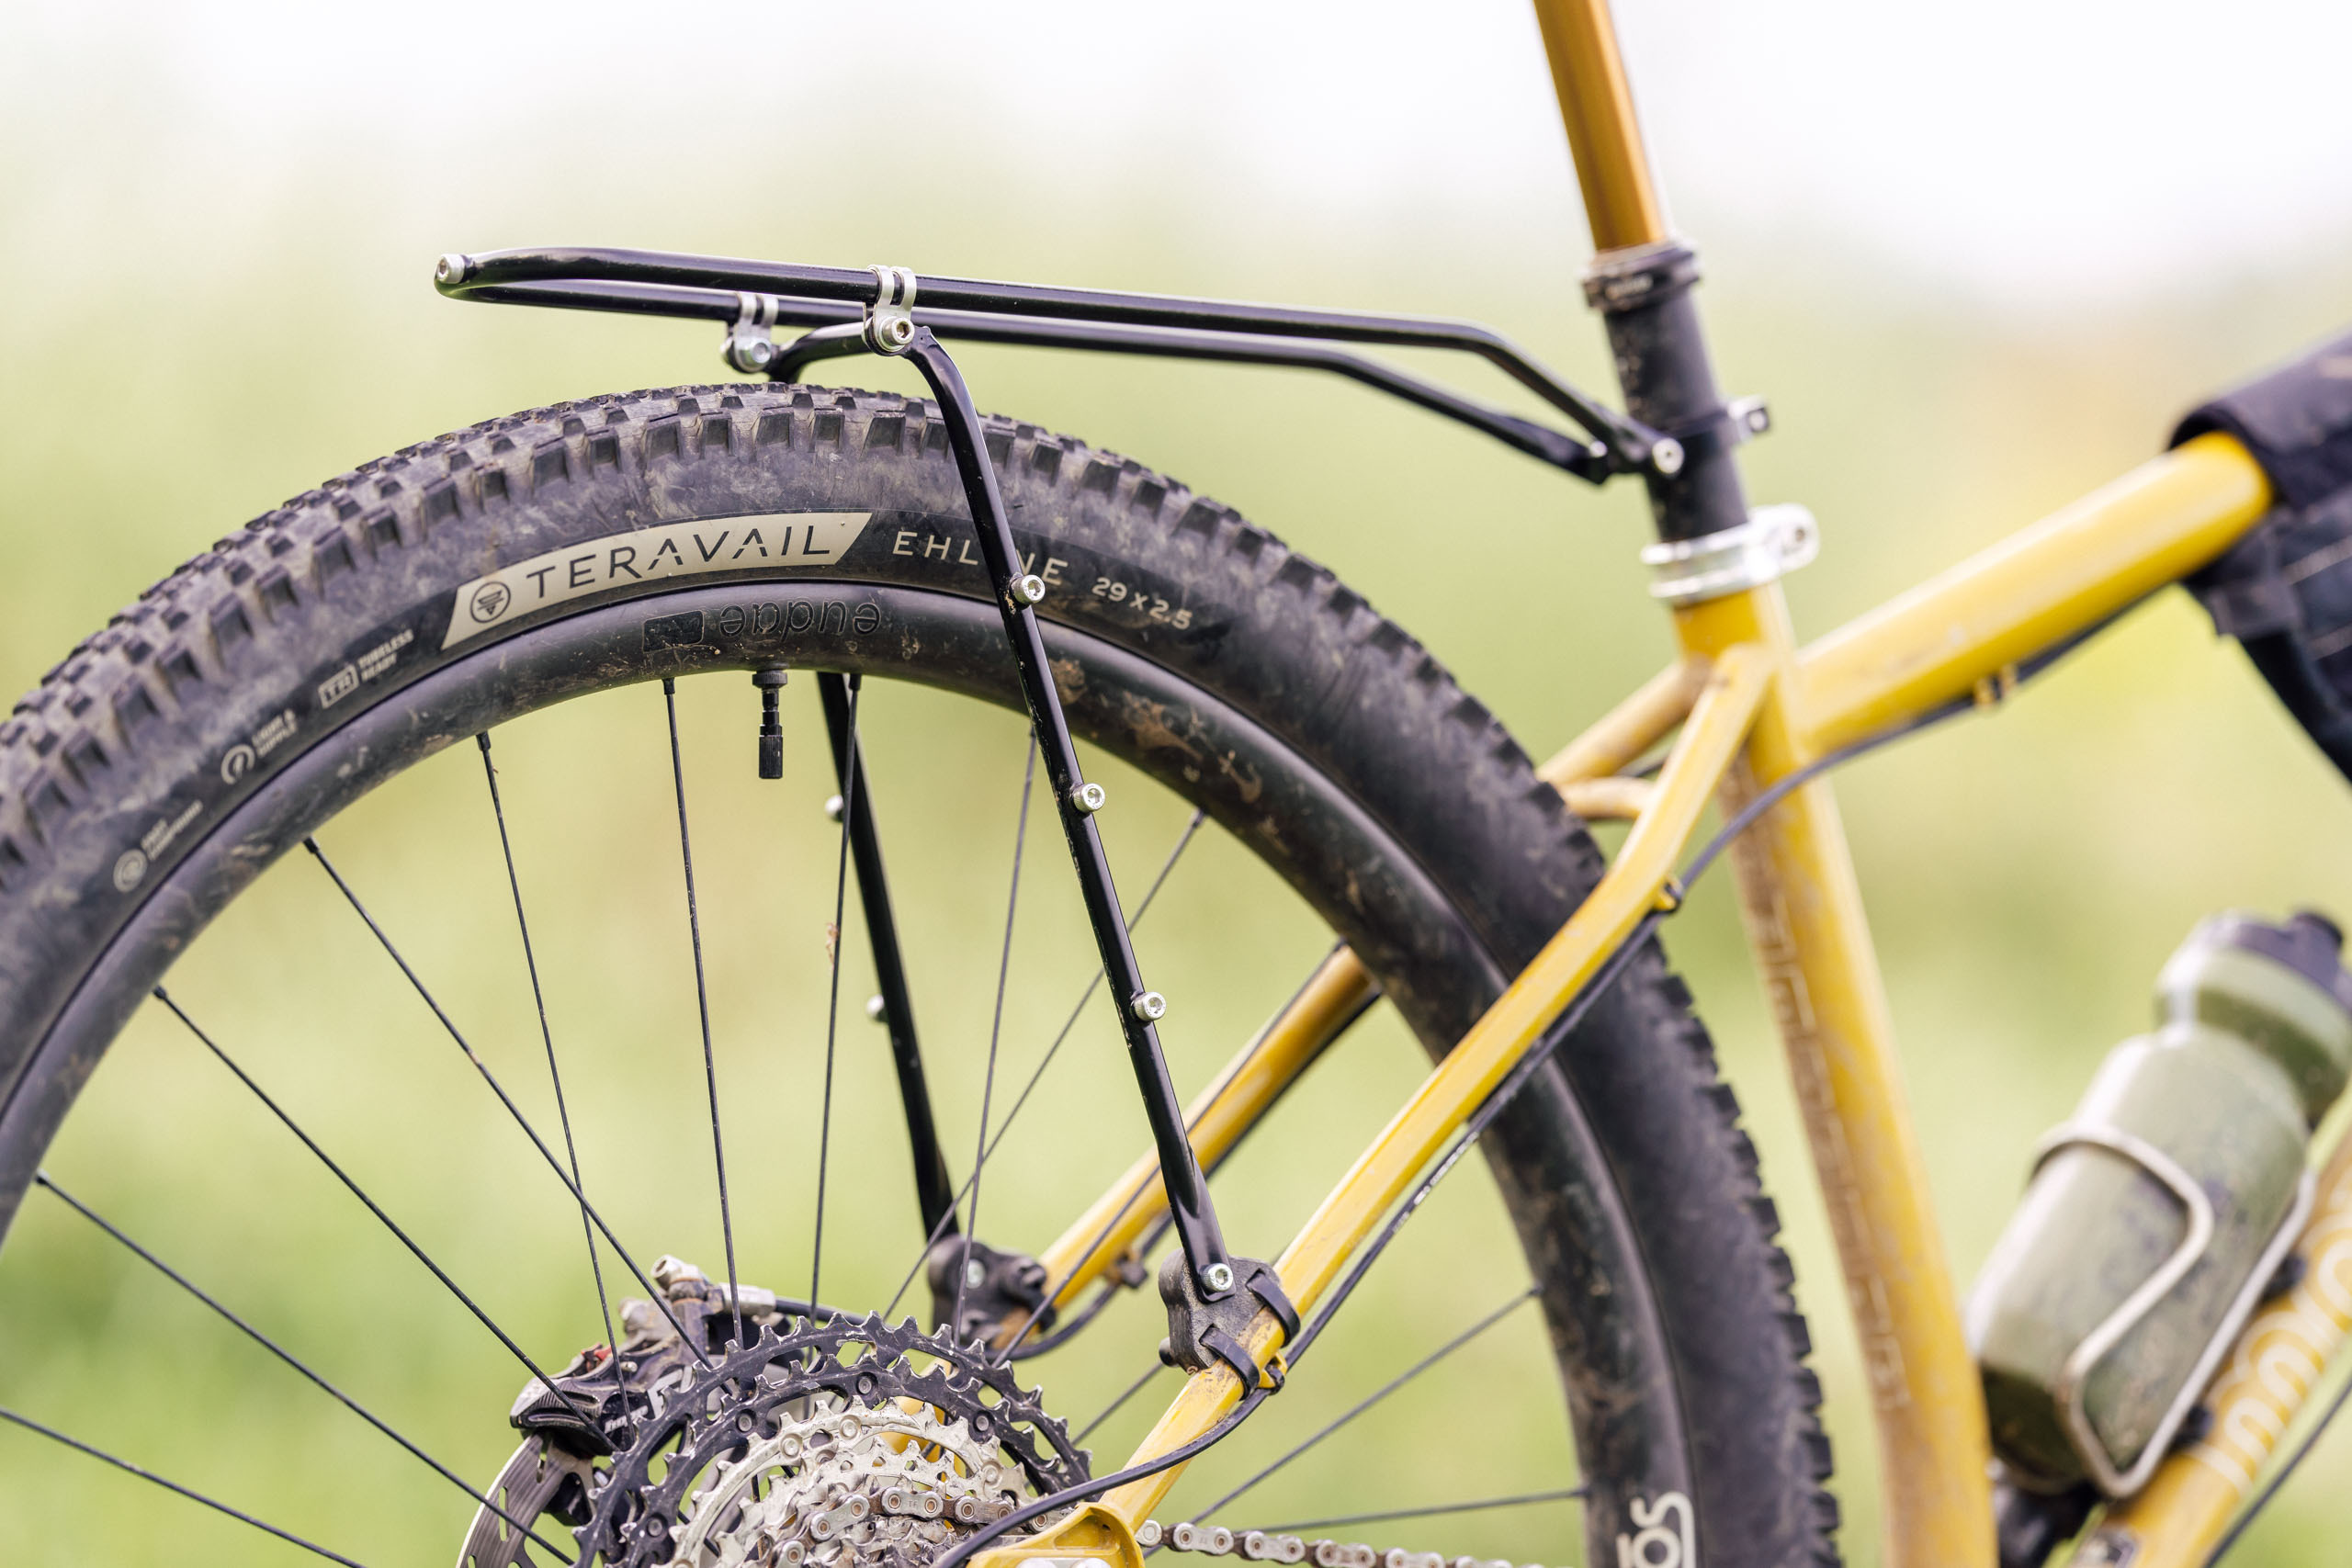
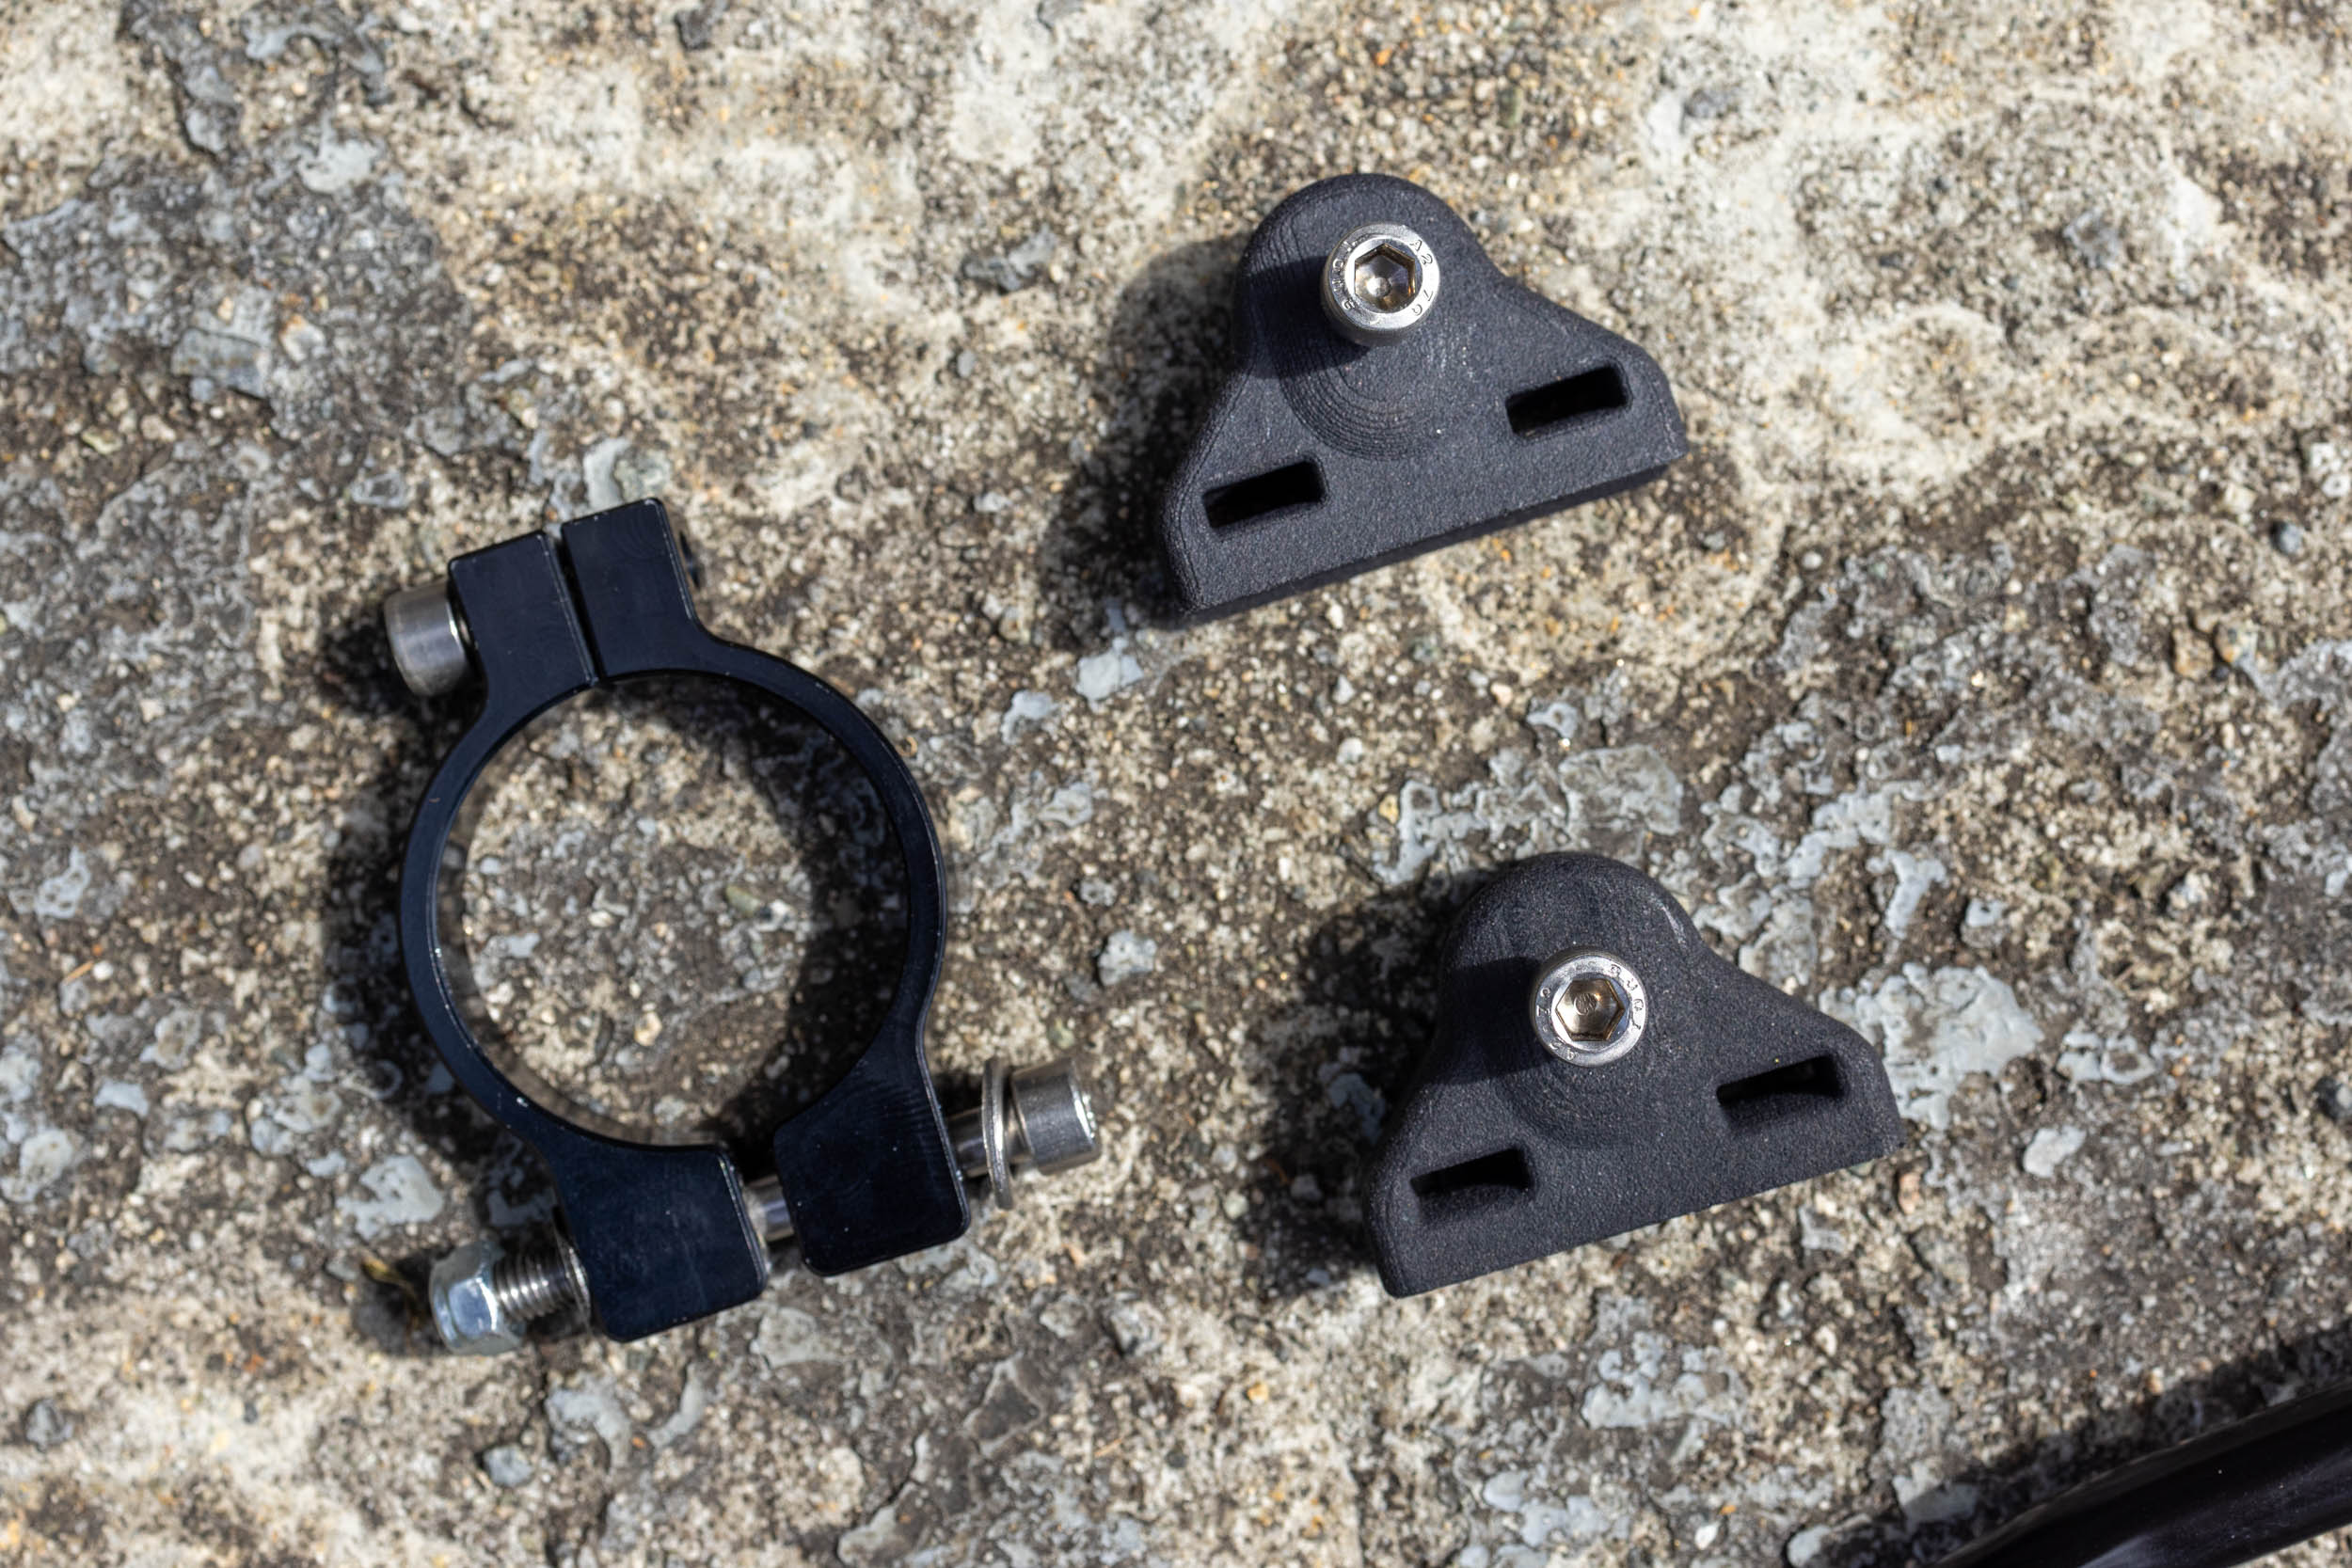
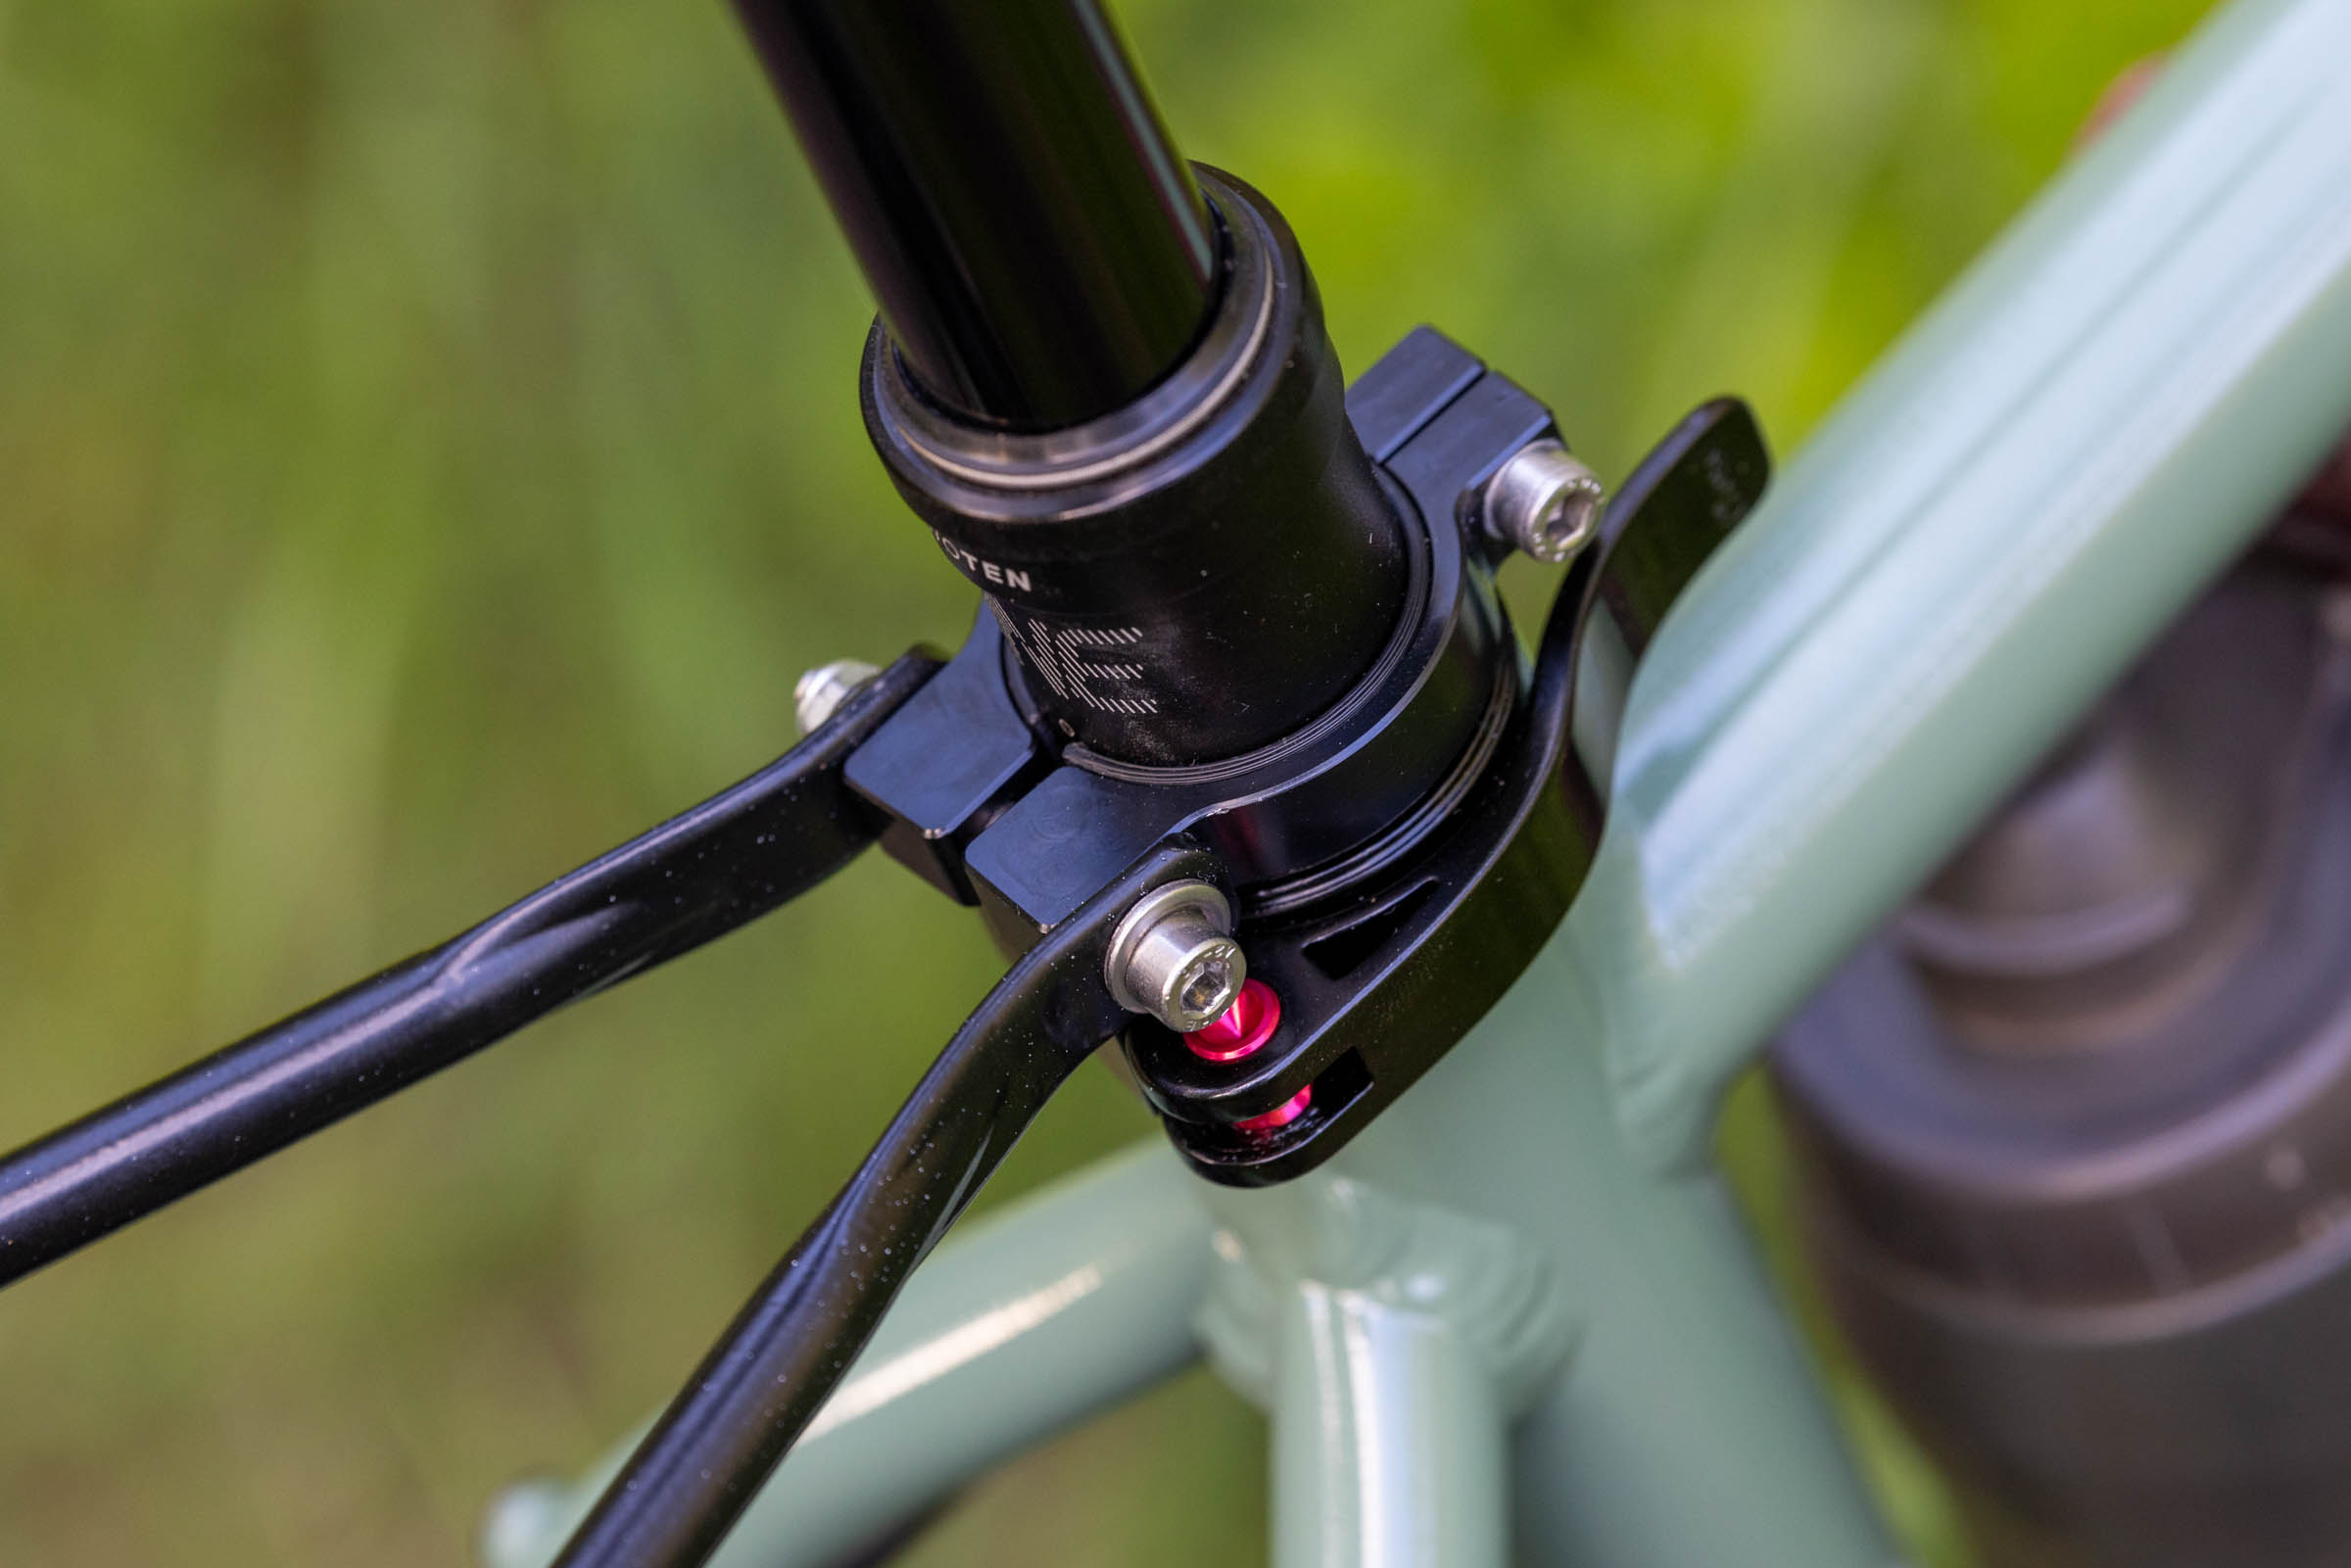
The platform and vertical stays are made from 10mm 4130 chromoly steel tubing. A 35mm aluminum seat post clamp and shims for 27.2mm, 30.9mm, and 31.6mm posts/seat tubes are included. There are two 3D-printed nylon seat stay mounting blocks, and stainless steel hardware is used throughout. Heavy-duty Ty-Rap cable ties are included to secure the mounting blocks to the seat stays. They are made for outdoor electrical use in all temperatures and don’t get brittle like cheap zip ties.
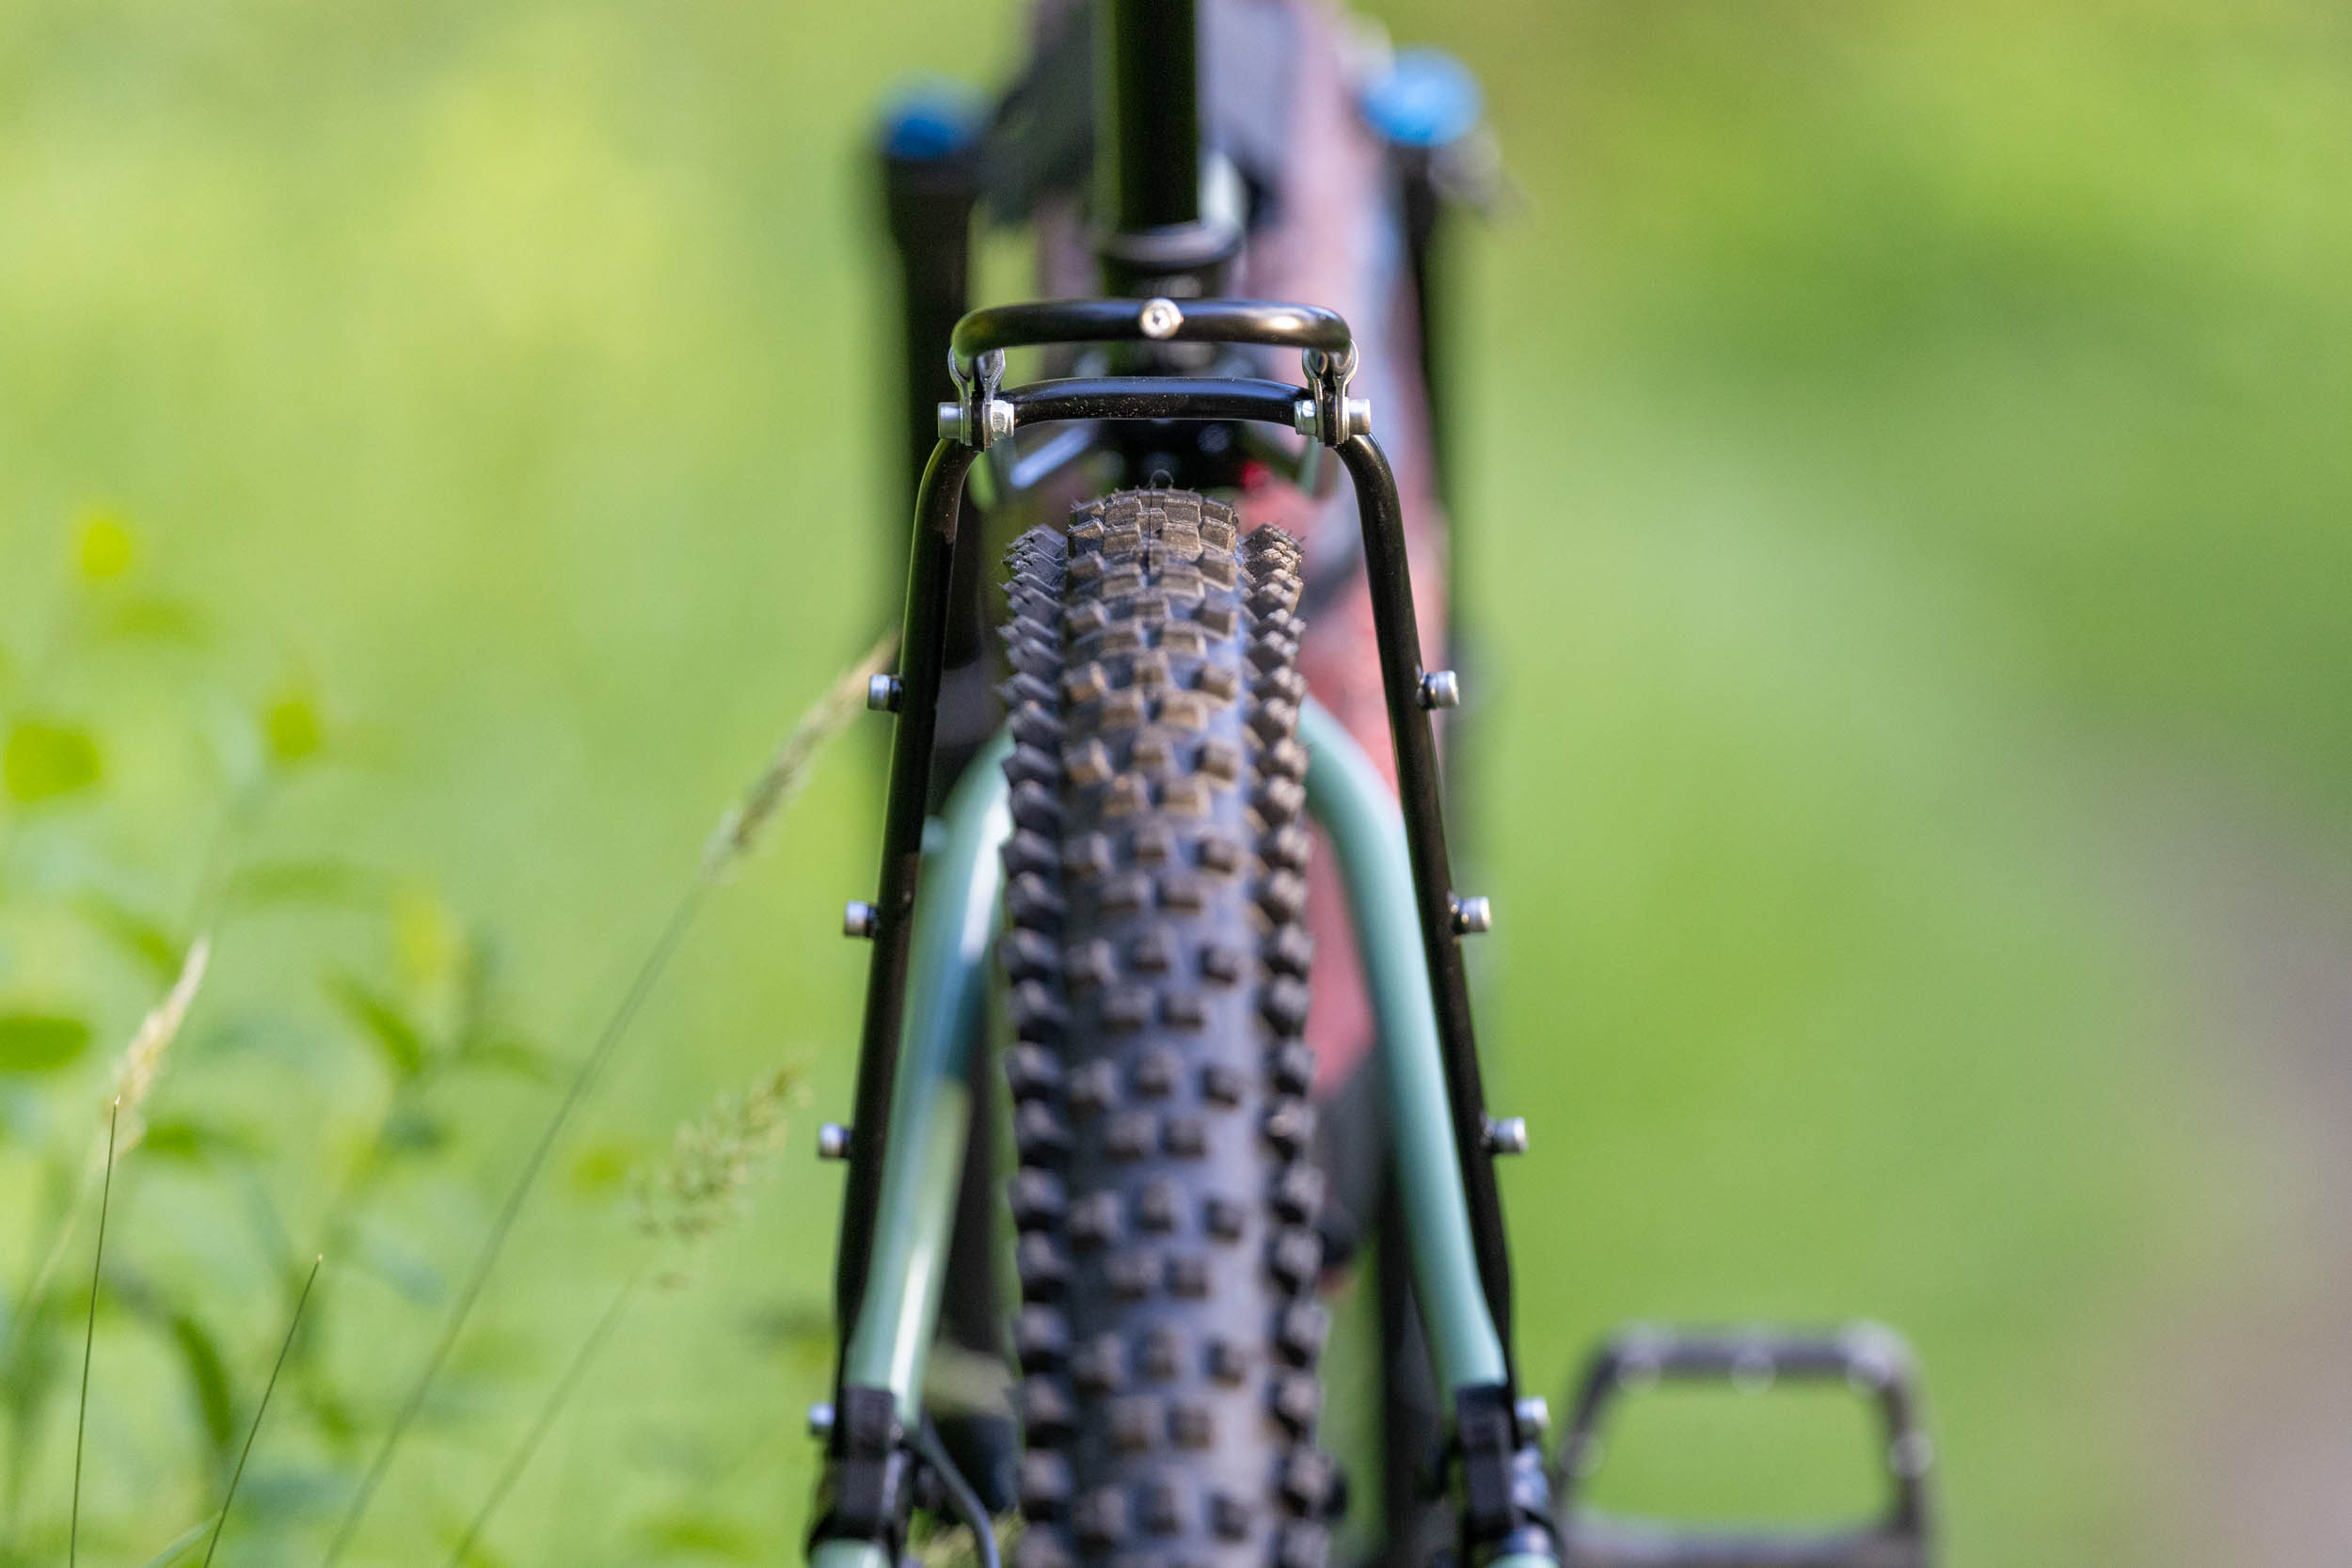
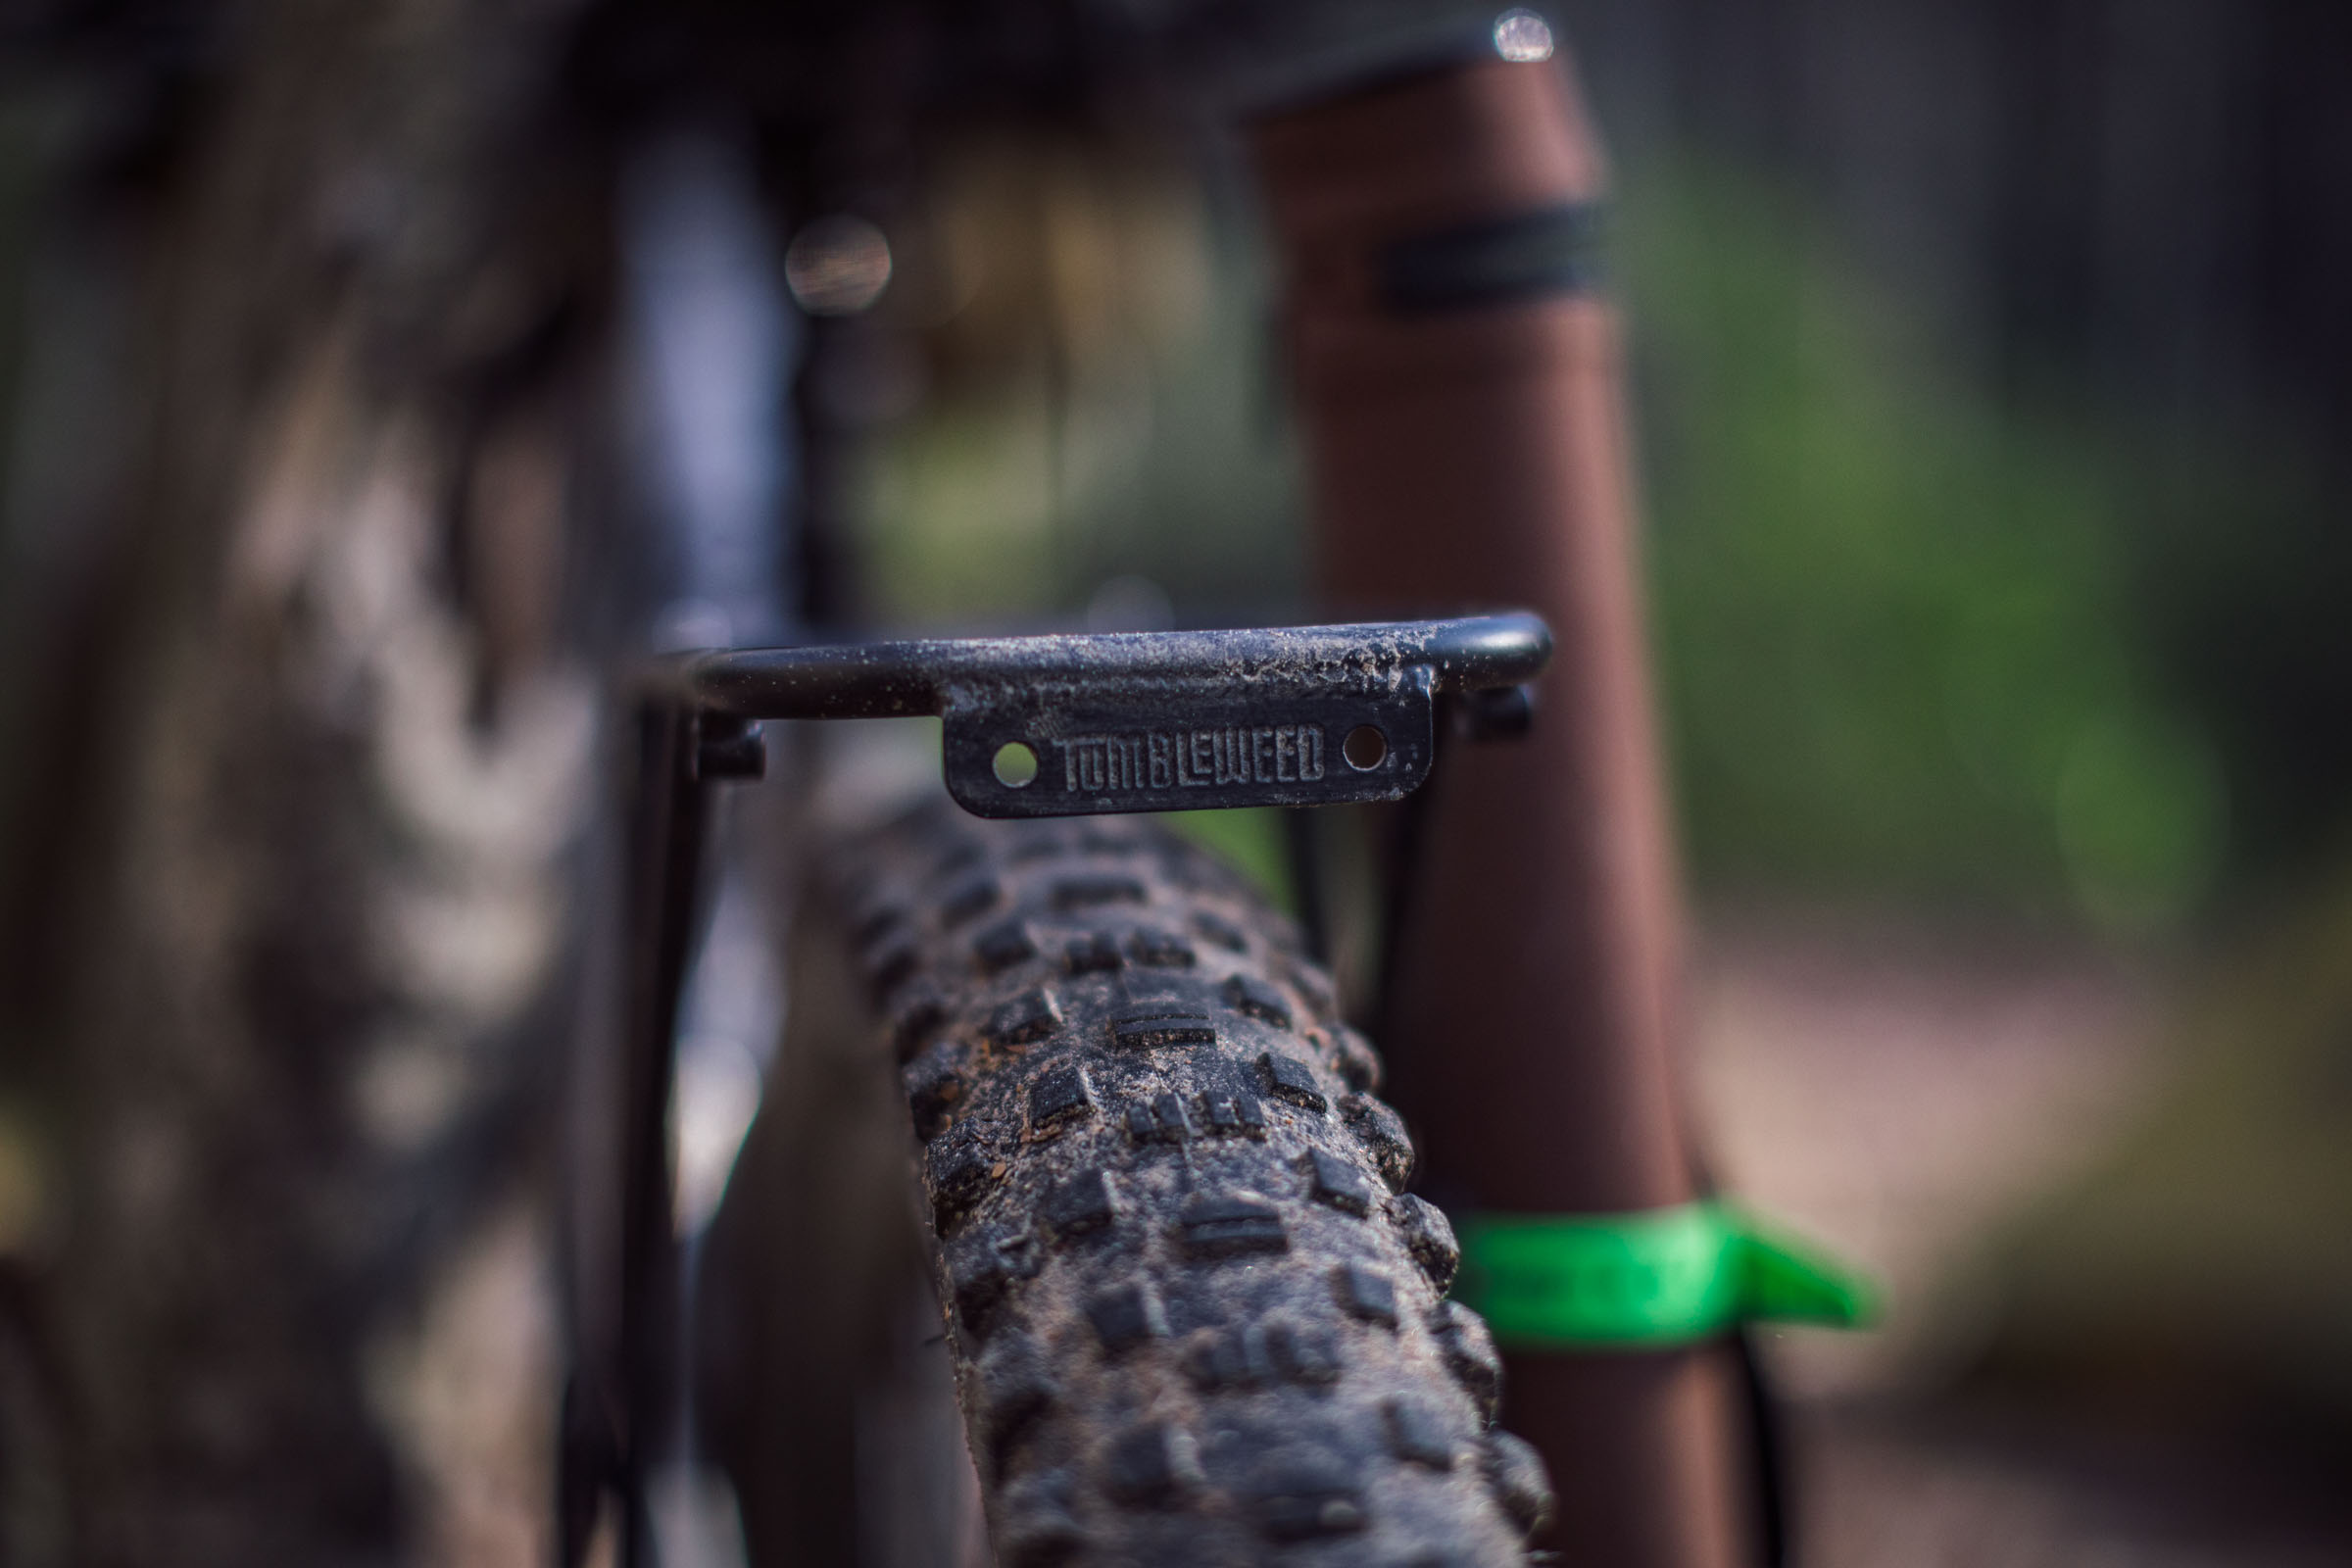
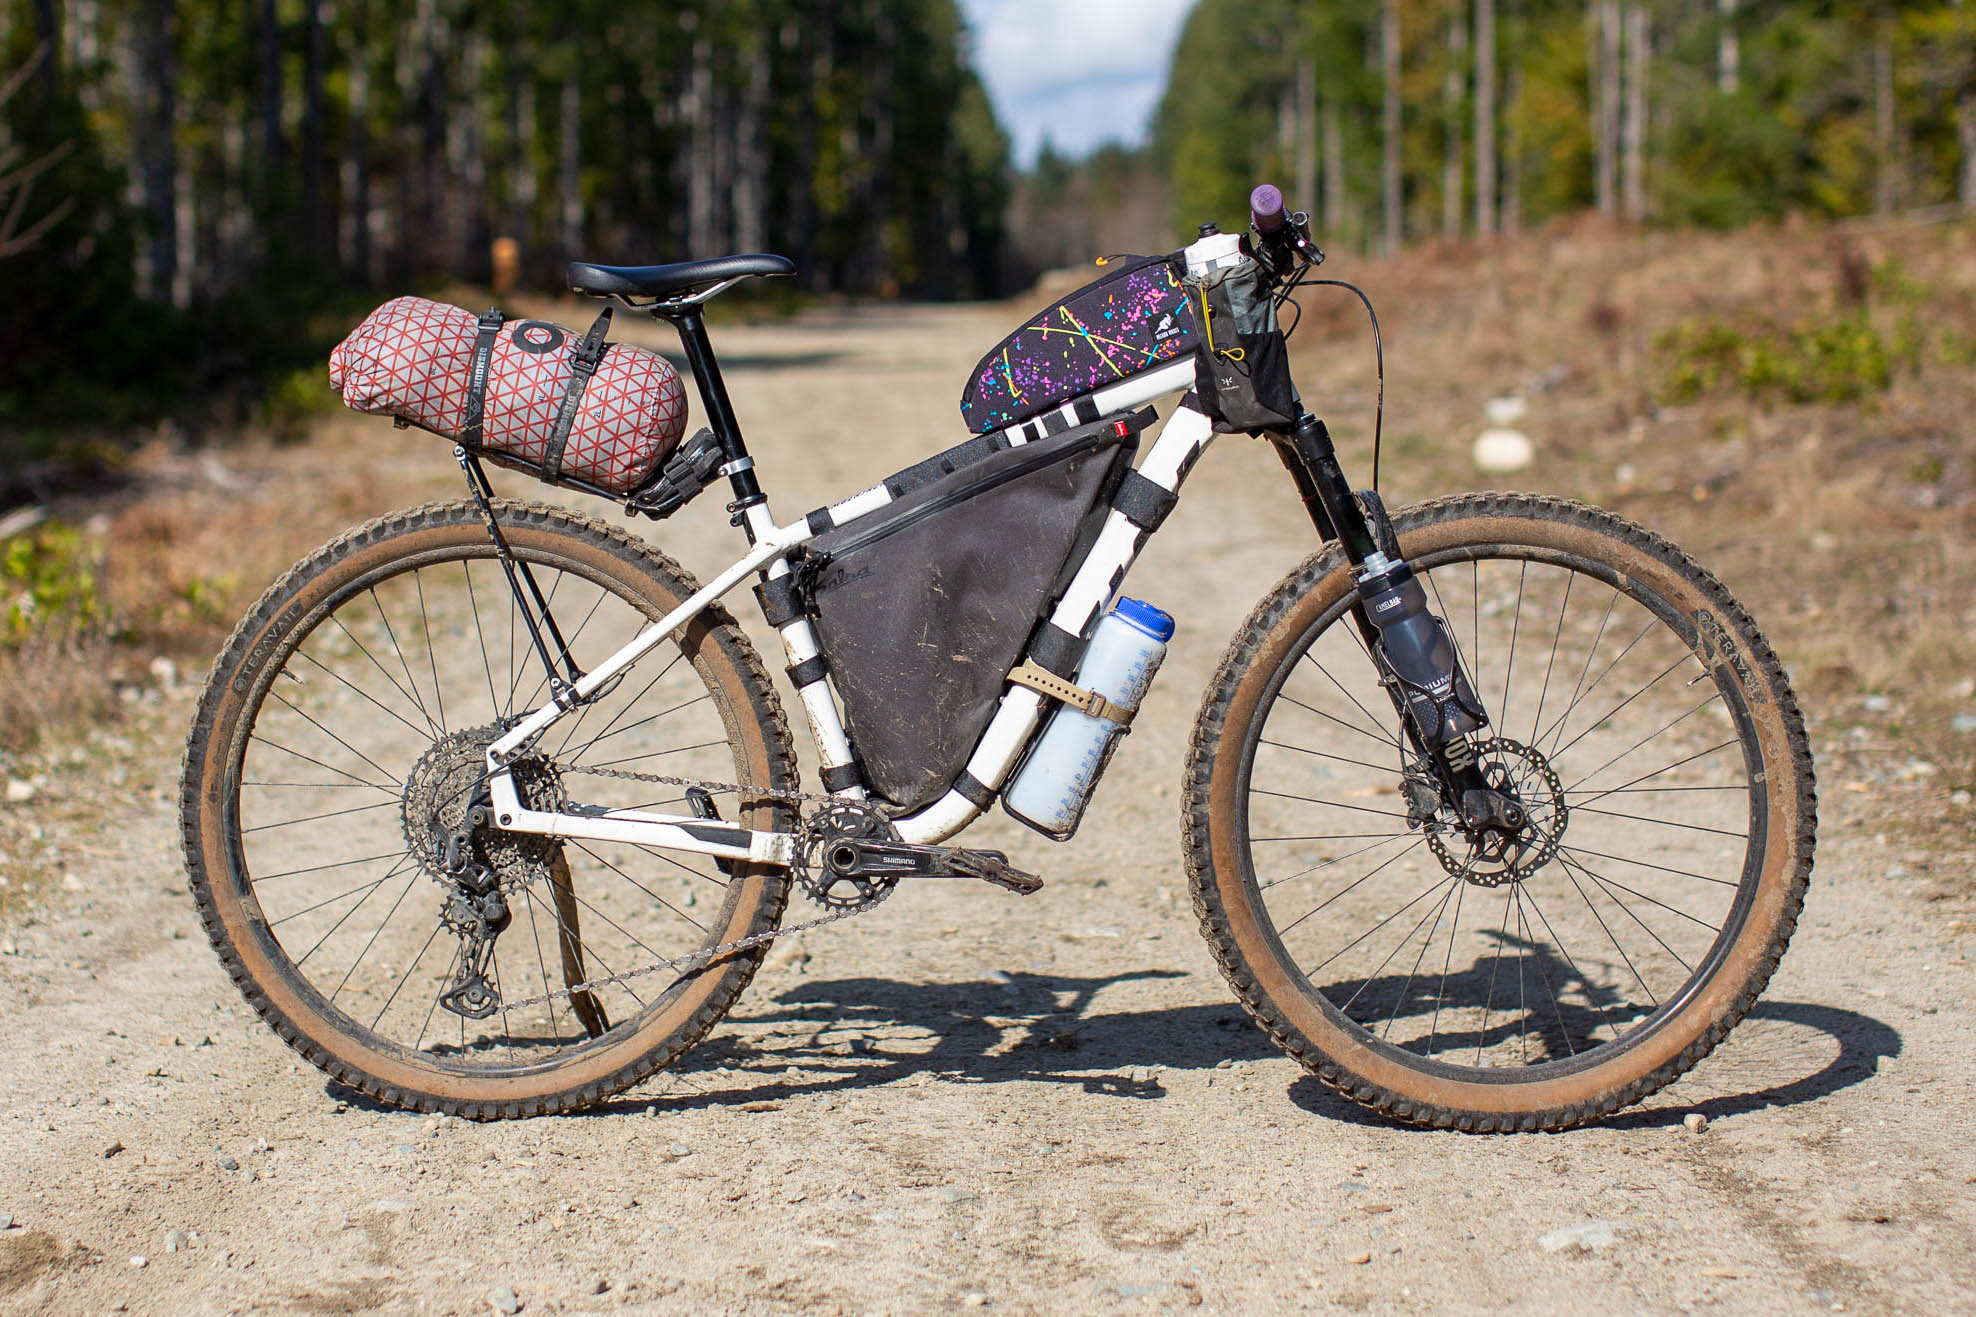
The top platform is 17″ (43.1 cm) long from tip to tip and about 3.5″ (8.9 cm) wide. The vertical stays are wide enough to easily accommodate a 3.0″ tire with room for mud, and because they can slide along the platform and pivot, their length is less important than other rear racks.


The complete Mica Rack (with mounting blocks, seat post clamp, and hardware, but no zip ties) weighs in at just 375 grams (13.2 ounces). Leaving the cargo cage bolts at home can get the minimum functional weight down to just 355 grams (12.5 ounces), but you can expect to add a few grams for the zip ties.
It’s worth highlighting that none of the racks below include special mounting hardware (mounting blocks, seat post clamp, etc.), and they’re also not included in the total price or weight, so comparing the website specs doesn’t do the Mica Rack justice. What is important to note is that the Mica Rack isn’t a pannier rack, as made clear on the Mica Cycles website. As such, the weight limit is significantly less than most rear racks. It’s designed to carry a 6-9″ diameter dry bag and mount additional bottles on the cargo cage mounts. If you’re looking to load up panniers for winter bikepacking or a multi-week expedition with bulky gear, you might want to check out one of the other options in the list below.
| Rack | Rack Mounts Req. | Load Limit | Weight | Price |
|---|---|---|---|---|
| Mica Rack | No |
15 lbs
6.8 kg
|
13.2 oz
375 g
|
$185 |
| Ortlieb Quick Rack | No |
44 lbs
20 kg
|
20.1 oz
569 g
|
$110 |
| Old Man Mountain Elkhorn* | No |
25 lbs
11.34 kg
|
22.5 oz
638 g
|
$168 |
| Tailfin Alloy Rack | No |
60 lbs
27 kg
|
20.2 oz
572 g
|
$300 |
| Aeroe Spider Rack + Cradle | No |
8.8 lbs
3.9 kg
|
35 oz
996 g
|
$149 |
| Tumbleweed Mini-Pannier Rack | Yes |
45 lbs
20.4 kg
|
26.3 oz
746 g
|
$150 |
| Tumbleweed T-Rack | Yes |
30 lbs
13.6 kg
|
22.8 oz
649 g
|
$140 |
| Tumbleweed Ti Pannier Rack | Yes |
45 lbs
20.4 kg
|
15.4 oz
437 g
|
$400 |
| Tubus Vega | Yes |
55 lbs
25 kg
|
19.0 oz
540 g
|
$150 |
| Nitto R-10/Simworks Burrito Rack | No |
22 lbs
10 kg
|
14.5 oz
410 g
|
$150+ |
*Old Man Mountain racks can be used on bikes without rack mounts but require the purchase of an ~$80 Fit Kit.


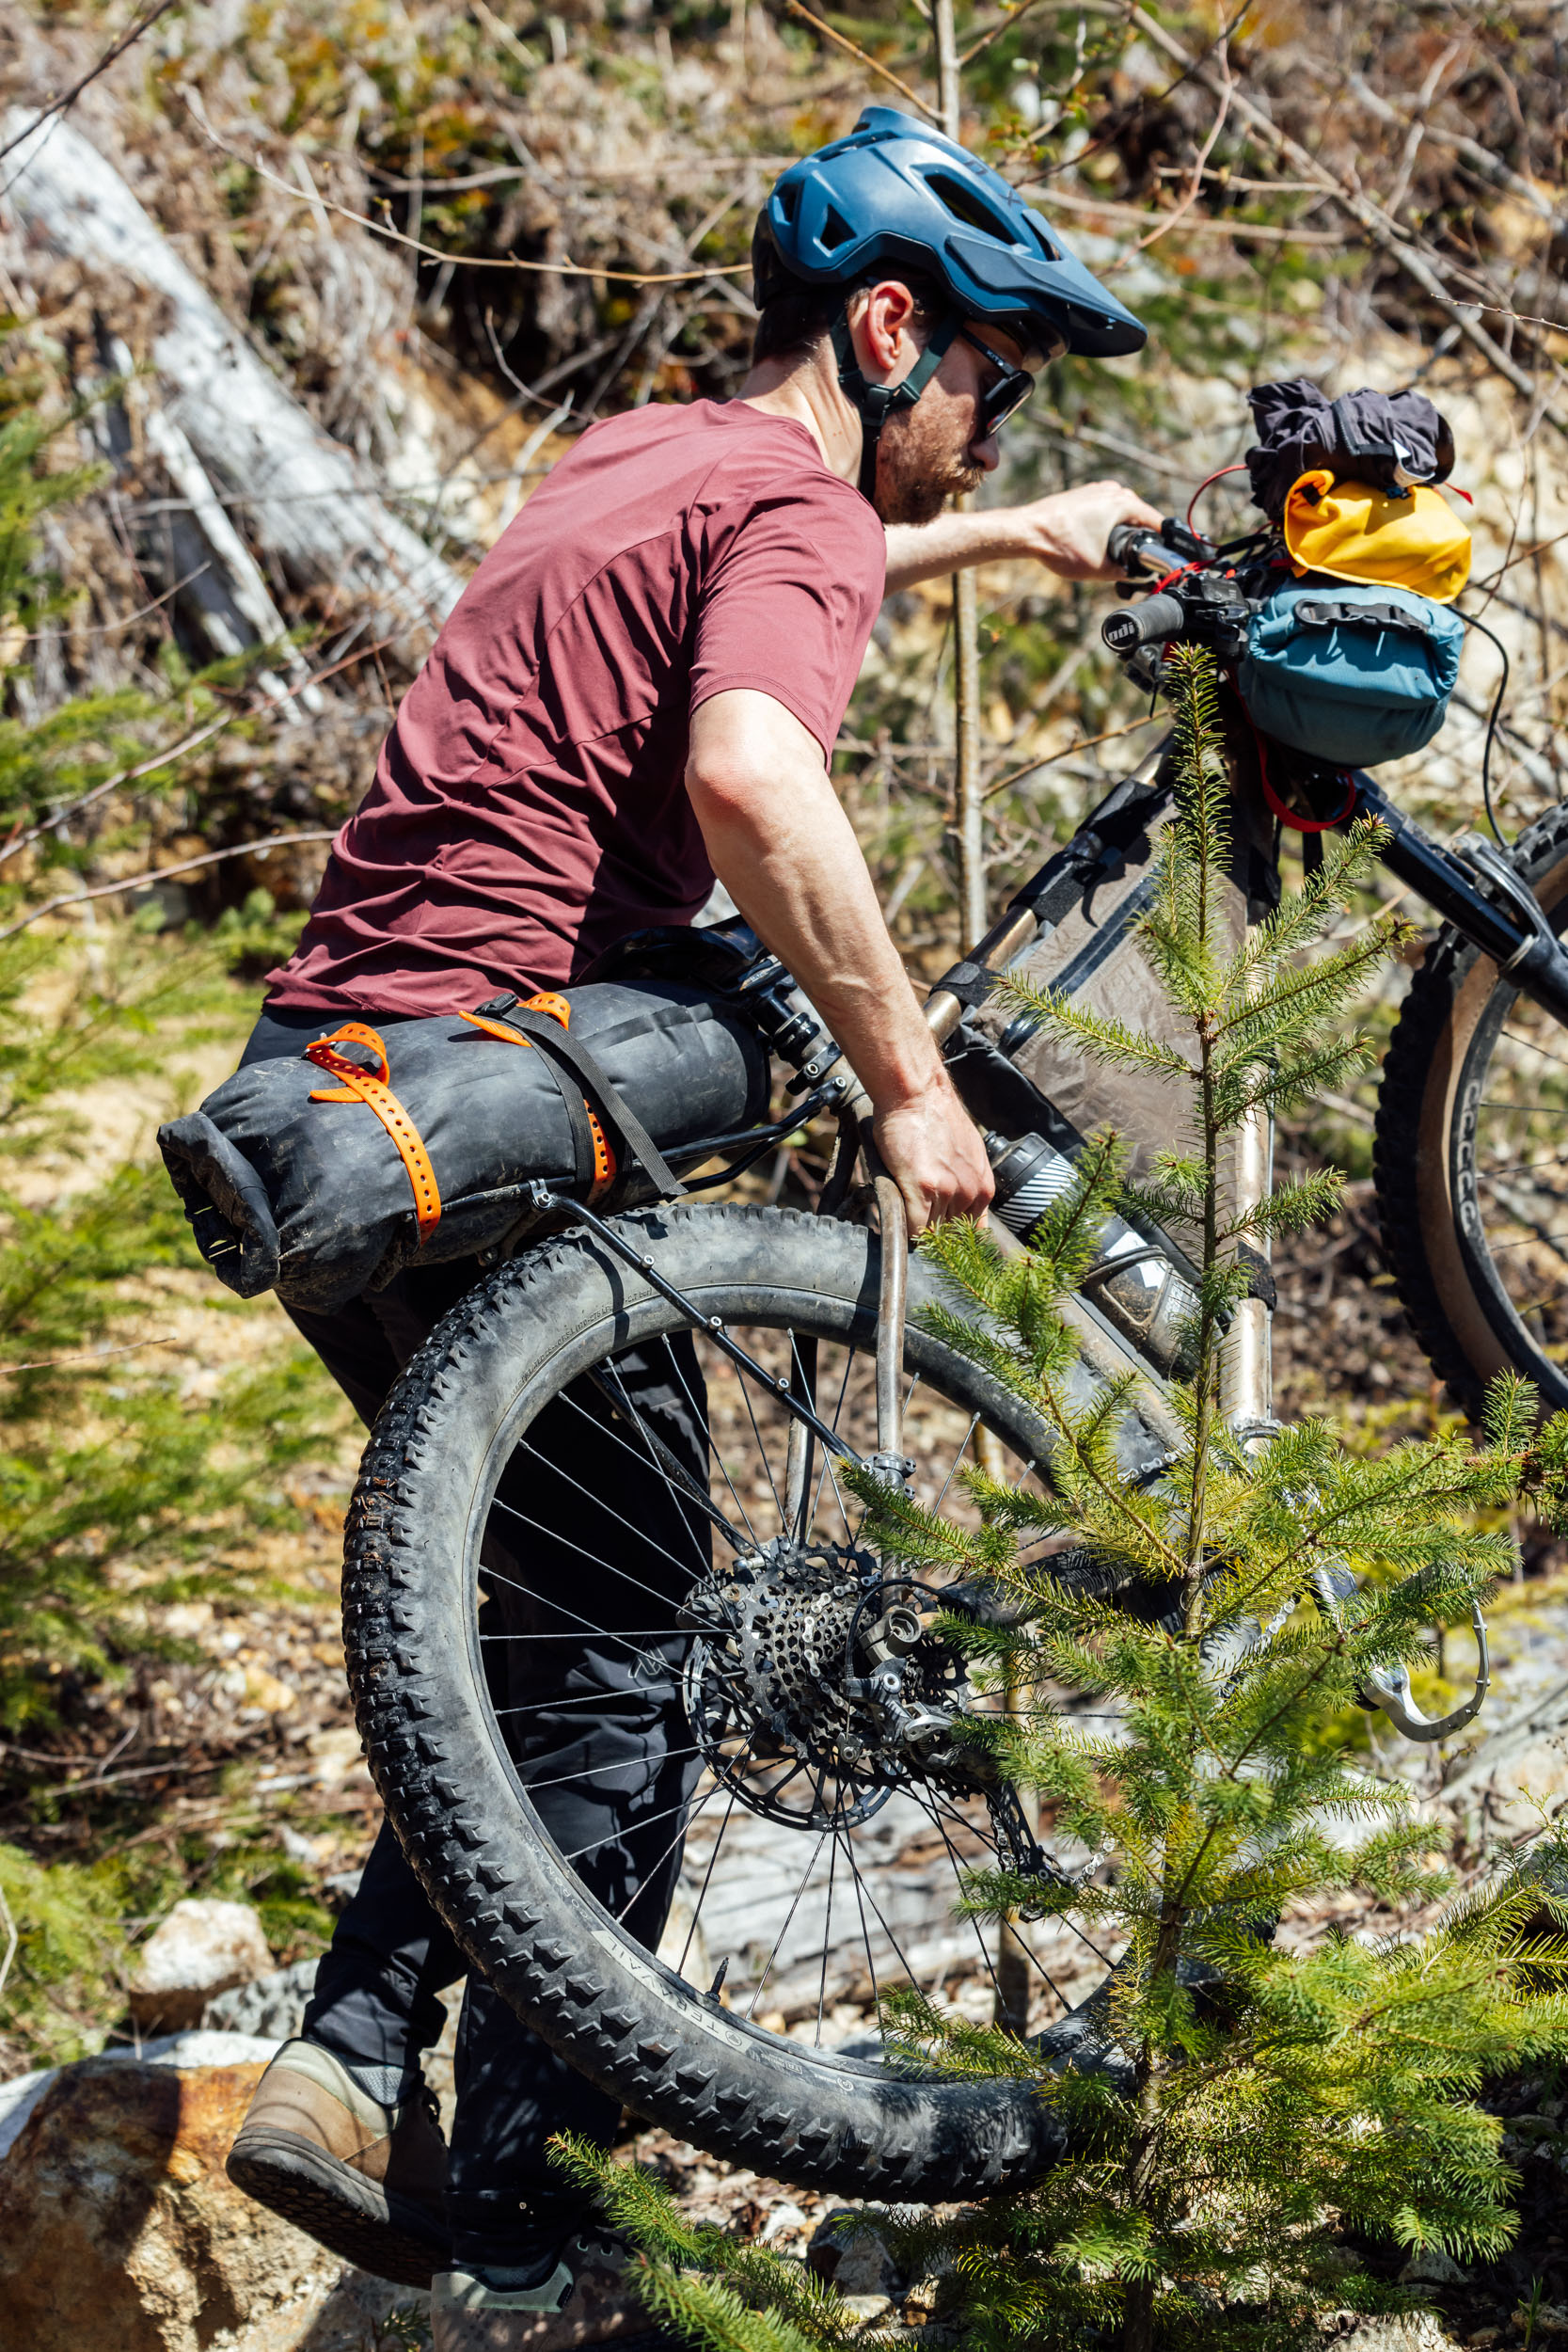
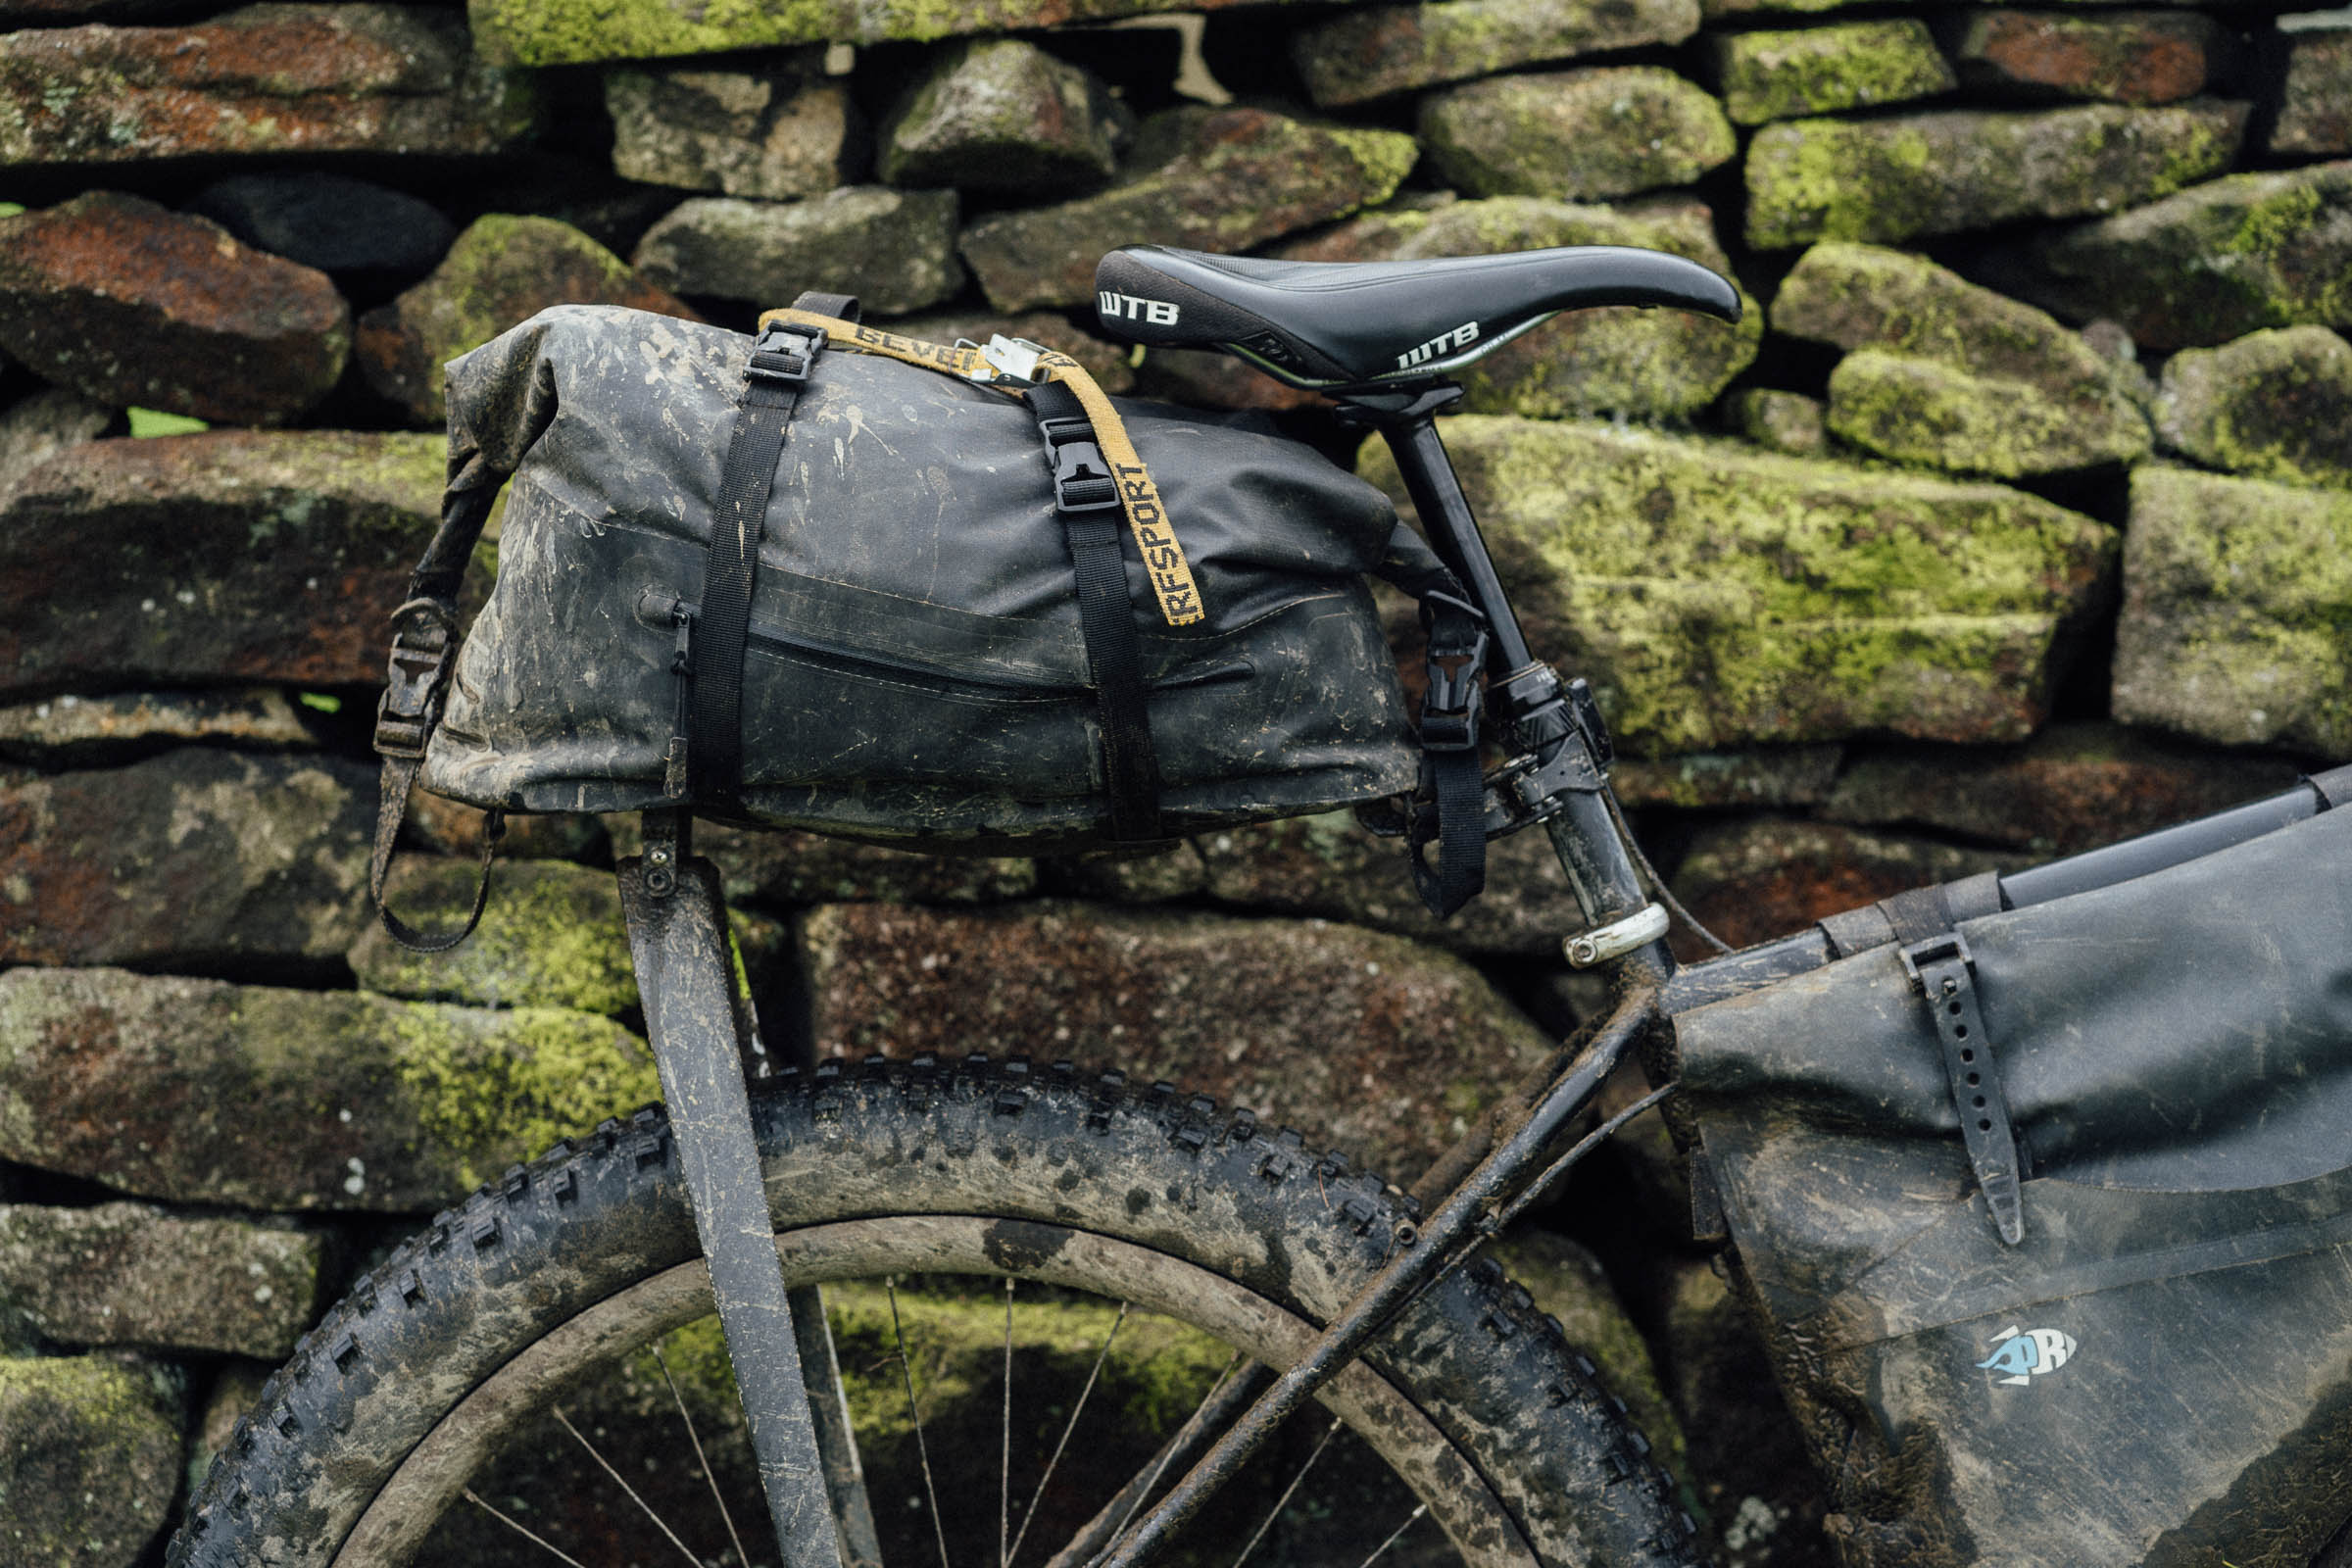
But wait, isn’t the Mica Rack supposed to be a seatpack killer? Yep, it does that too. While it might not compete against some burly rear racks designed for heavy loads, it makes dropper-compatible seat packs look somewhat irrelevant, particularly for small riders who can’t fit one. I’ve been saying this for years, but loading up a dropper post bag almost always (unless your gear list is super minimal) results in a sluggish dropper post and positions the weight higher than it needs to be. The Mica Rack takes the weight off your dropper and lowers the weight down toward the center of the bike, which has less effect on bike handling and feel. Plus, a rack doesn’t limit dropper post travel, which is often a major concern for shorter riders with limited tire-to-saddle clearance.
While a few small dropper-compatible seat packs weigh less than the Mica Rack, they usually max out at about 5 liters, which is only really suitable for lightweight summer trips or racing. Compared to larger bags, the Mica Rack weighs less. For reference, the Ortlieb Seat-Pack QR weighs 626 grams (22.1 ounces), the Rogue Panda Ripsey weighs 368 grams (13 ounces), and the Blackburn Outpost Elite Universal Seat Pack weighs 572 grams (20.2 ounces). The Wayward Riders Louise Dropper Post Harness might be the largest capacity seat pack that beats the Mica Rack on weight at 170 grams (5.9 ounces), but it requires at least 7″ of clearance between the tire and saddle rails, which is a no-go for some bikes.
| Rack/Bag | Volume | Weight | Price |
|---|---|---|---|
| Mica Rack | 15L |
13.2 oz
375 g
|
$185 |
| Rogue Panda Ripsey | 8L |
12.9 oz
368 g
|
$200 |
| Ortlieb Seat-Pack QR | 13L |
22.1 oz
626 g
|
$195 |
| Wayward Riders Louise | 10L |
5.9 oz
170 g
|
$60 |
| Rockgeist Mr. Fusion* | 12L |
19.7 oz
560 g
|
$230 |
*Mr. Fusion is not a dropper-compatible seat pack, but it’s a burly and popular option that is more comparable to Mica than other minimal seat bags.
Of course, it’s unfair to compare the Mica Rack’s weight against seat packs without including a dry bag. Skyler recommends using a tapered dry bag, like the Rockgeist Mr. Fusion or the 14L Revelate Designs Terrapin bag, with the tapered end pointing down toward the seatpost, leaving plenty of room for full dropper post function. With this in mind, you can expect to add another ~100 grams to the total weight, putting the Mica Rack setup with a bag at around 475 grams (16.7 ounces). Even with the added weight of a dry bag, the Mica Rack still manages to weigh less than many alternatives.

I’d also like to point out that there’s still a time and place for dropper post bags. For lightweight summer trips on full-suspension mountain bikes, low-profile bags like the Rogue Panda Ripsey and Rockgeist Gondola are great options. However, for hardtail mountain bikes, the benefits of removing the weight from your seatpost and positioning it lower on the bike are clear.
Installation and Use
As long as you’re not riding a full-suspension mountain bike, there’s a strong likelihood that the Mica rack will be compatible with your frame. First and foremost, it’s designed around bikes without rear rack mounts, but as you can see in some of the photos here, there’s a chance that you’ll be able to use existing mounts if you’re lucky. Generally, most lower rack mounts will be too low, and upper rack mounts will be too wide, as the platform is meant to bolt onto the included seat post clamp. If your upper mounts are around 30mm apart, it could work. Since carbon fiber frames are designed for directional loads, Skyler recommends against using a Mica rack on a bike with carbon seat stays.


There’s no definitive order of installation for the Mica Rack, but I usually start with the seat post clamp. Because of its two-piece design, you won’t need to remove your seatpost. Depending on your frame, you can decide if it will mount directly to the post or the seat tube, using the correct shim for a snug fit. From there, it’s a good idea to figure out what orientation the top platform will be in while also playing with the position of the lower struts to see what angle they’ll end up at. This will ultimately determine where the mounting blocks attach to the seat stays. I first use some cheap zip ties to mock up the position of the blocks to get everything in place. A good rule of thumb is that the further back the lowers are connected to the top, the stronger the setup will be, but depending on your bike and how much your seat stays flare out, they might be quite angled.

Once you’re happy with how it looks, use some frame protection tape or electrical tape on the seat stays where the mounting blocks live (to protect your frame and give the blocks something to grip onto) and begin tightening the various bolts. I usually start with the seatpost clamp, ensuring the platform is in line with the rear tire, and then work my way back, ending with the Ty-Rap cable ties. The cable ties are strong—rated for 120 pounds tensile strength each—so you can use pliers to cinch them down tight. It’s a good idea to carry a small 8mm wrench, like the Forager Link Wrench, on bikepacking trips if you need to make any adjustments.


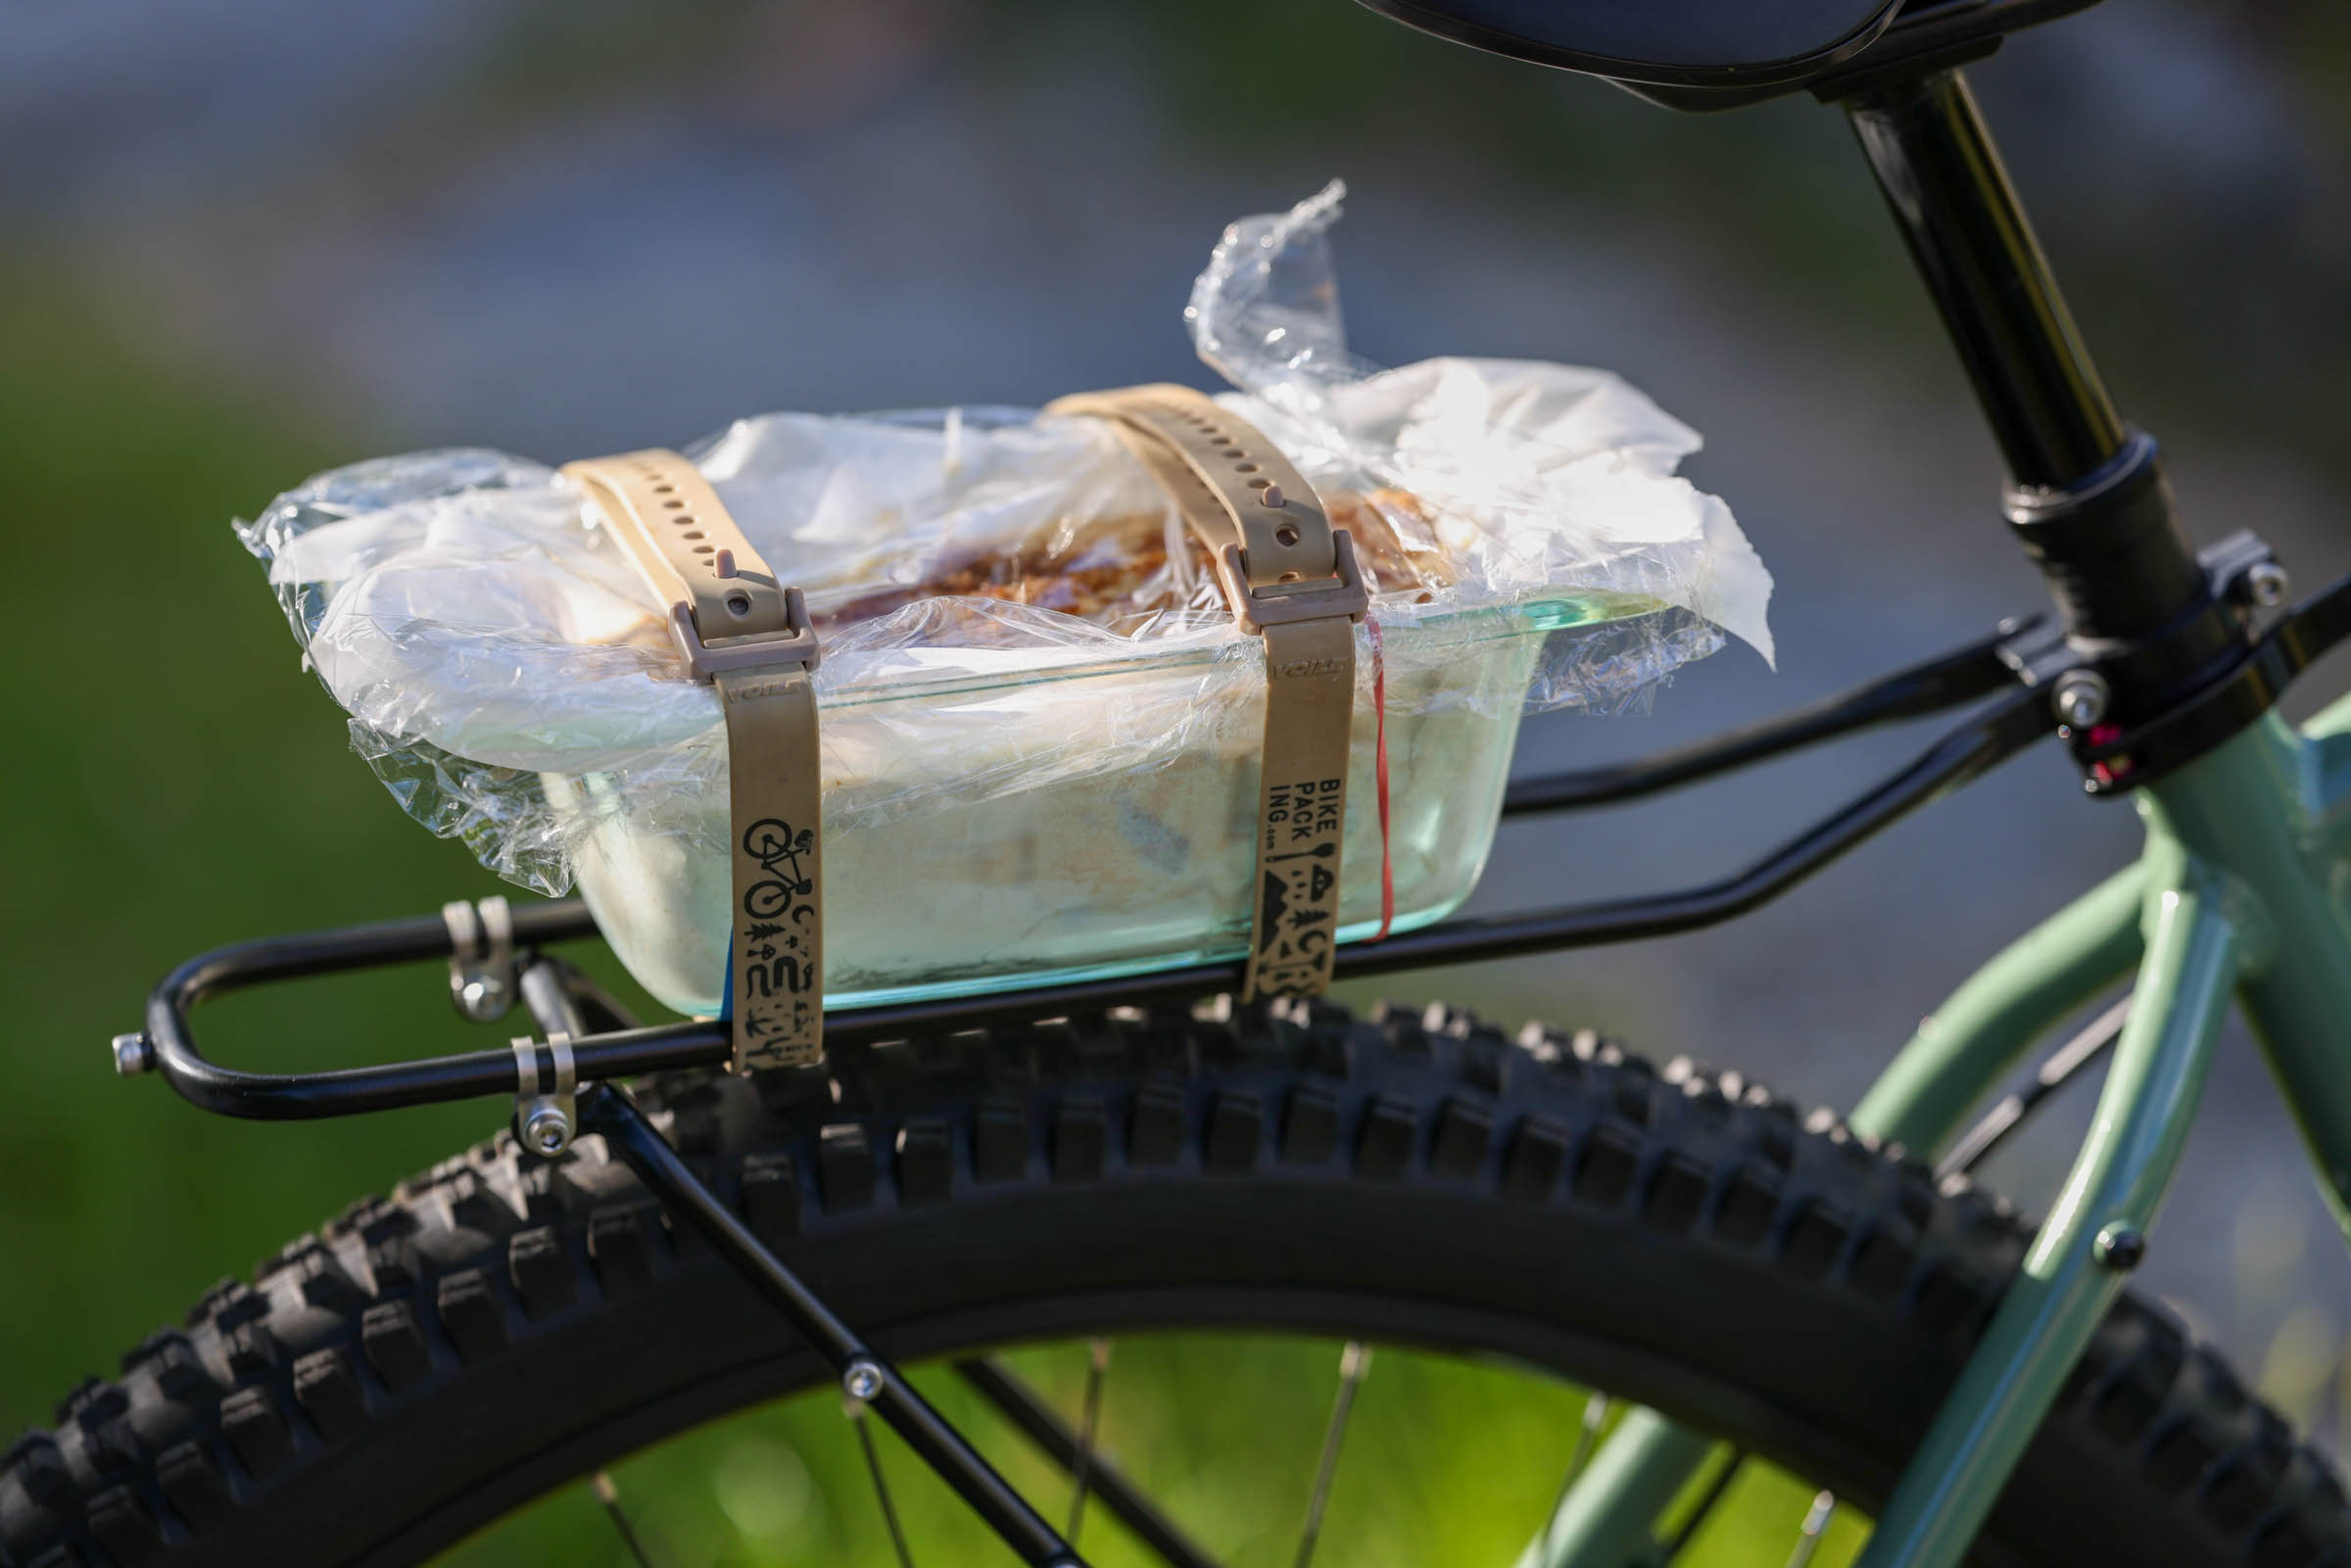
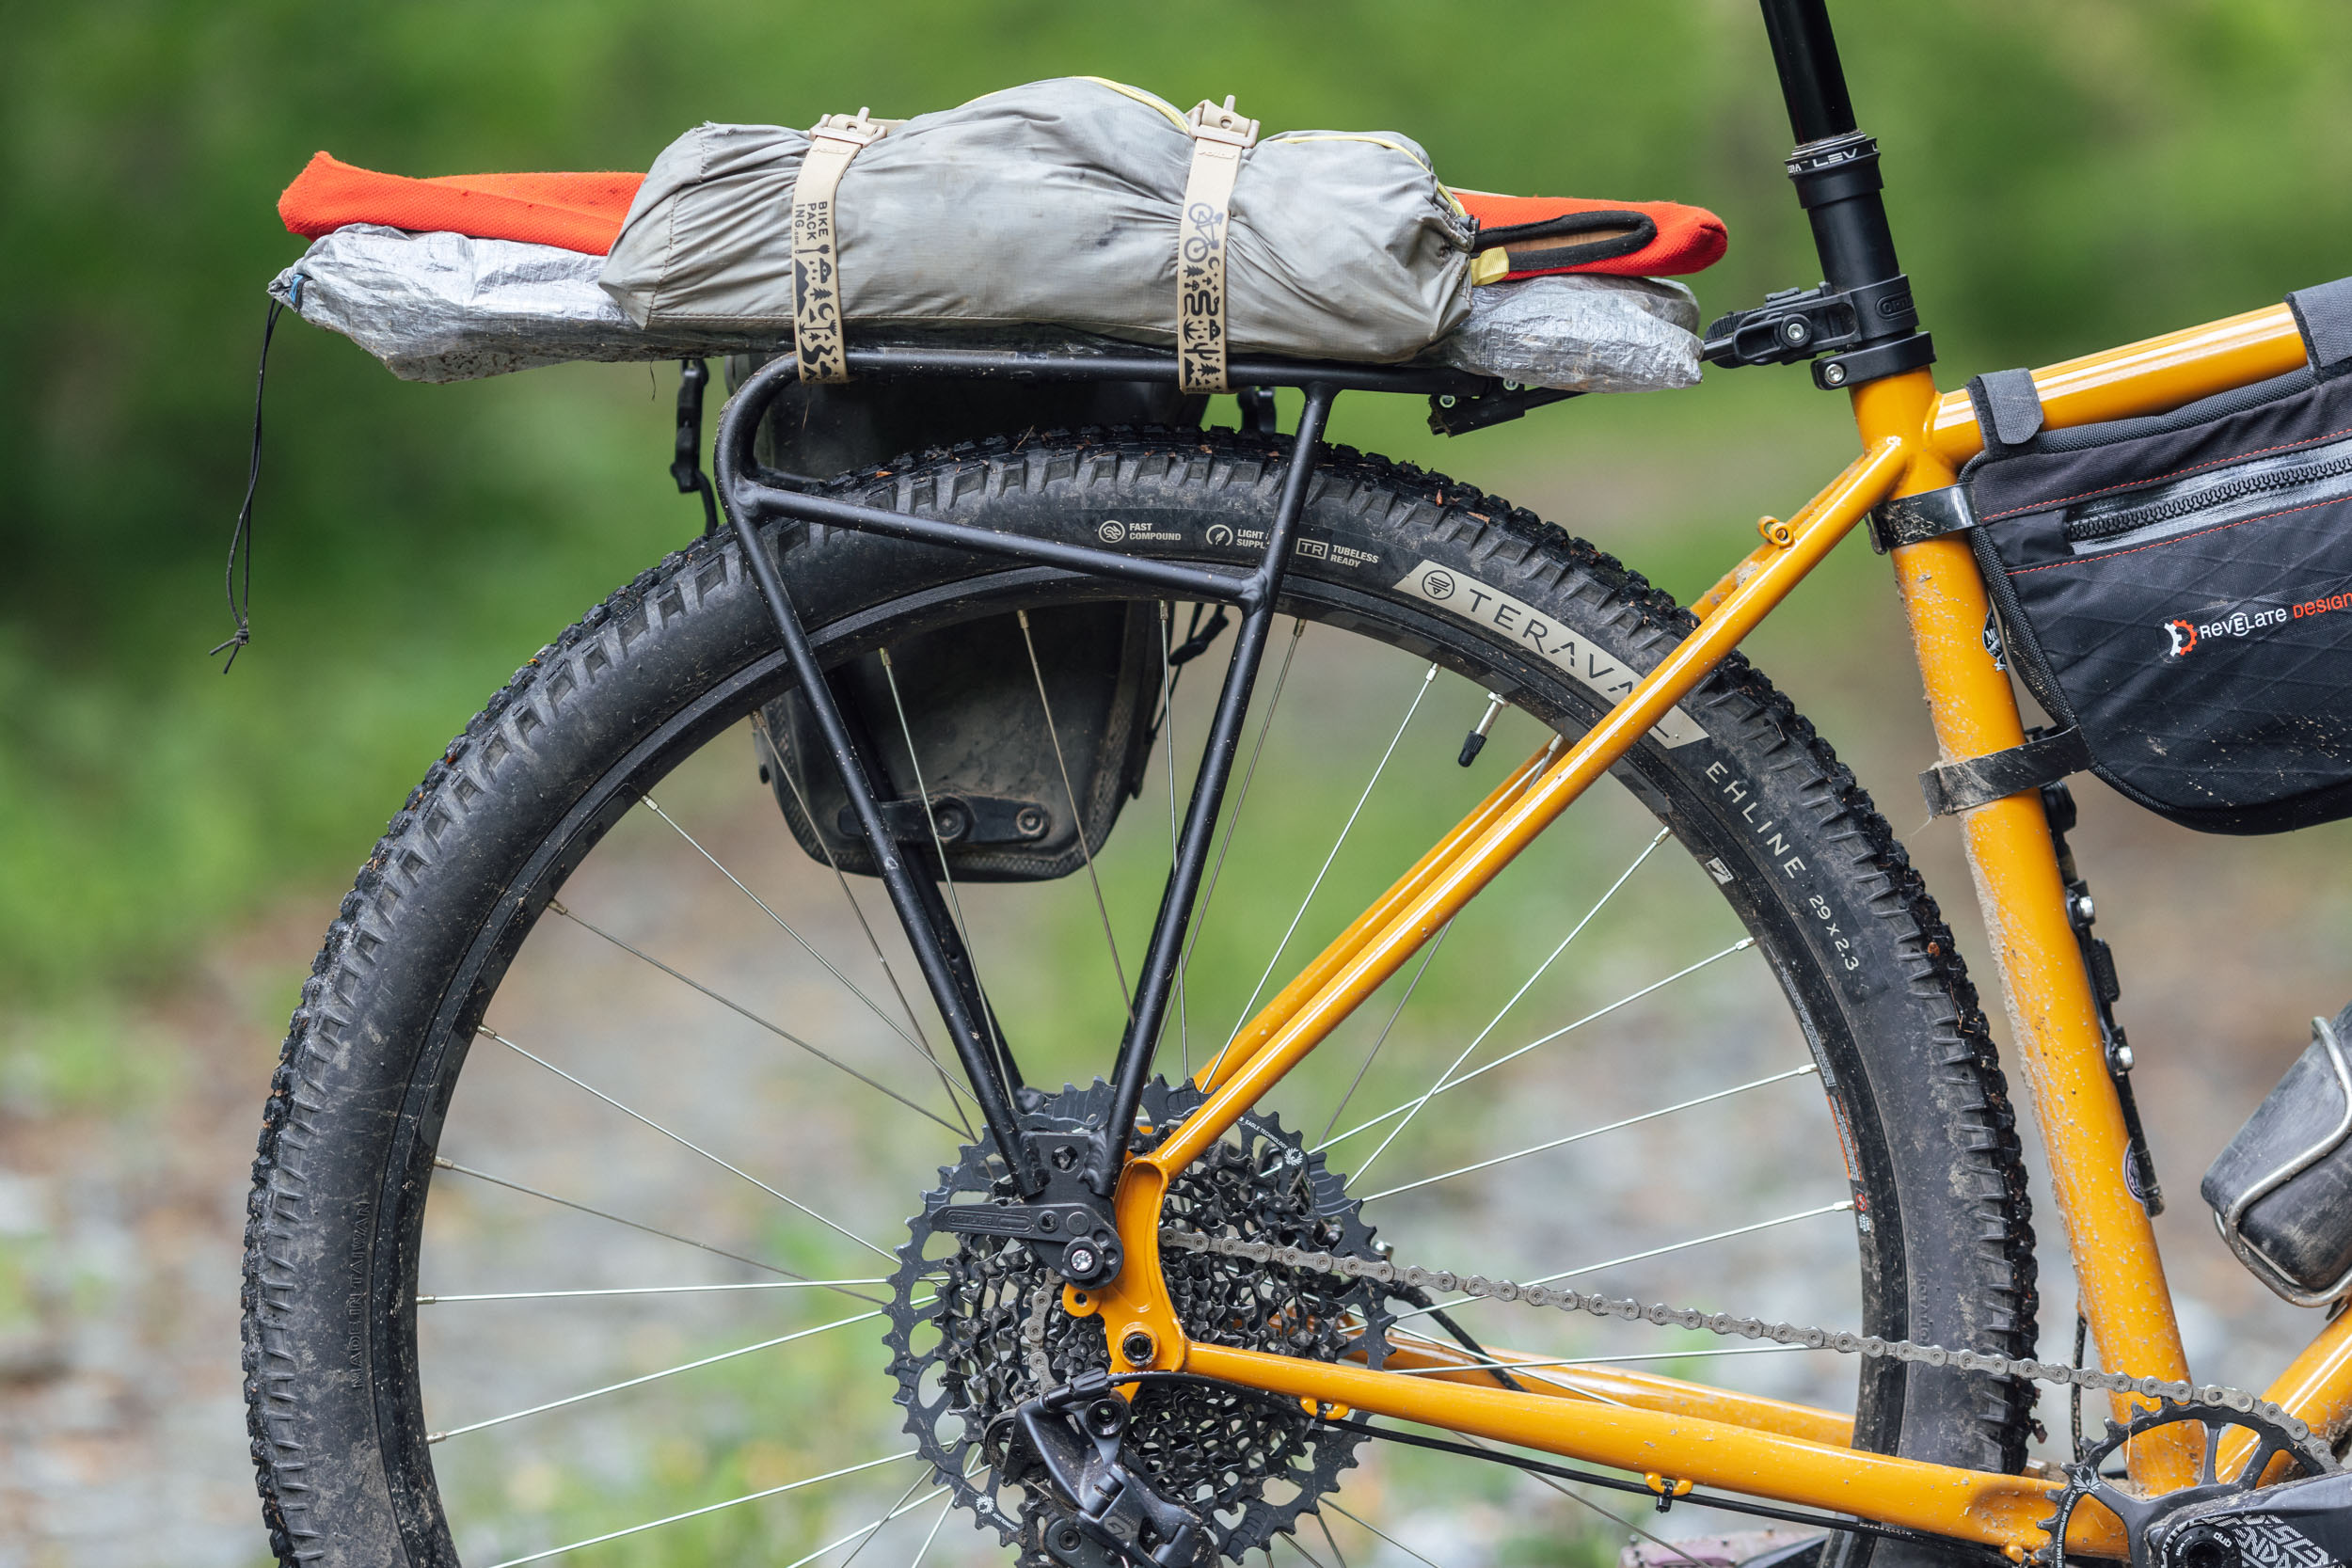
Once installed, it’s simply a matter of strapping your favorite dry bag directly to the platform, and you’re good to go. Like any rack setup, you must pack your dry bag tightly so things don’t shift around on you and work the dry bag loose. I’ve tested this setup on rough sections of the Arizona Trail without any issues. Thankfully, the benefit of a rack and dry bag setup is that you can pack the bag off the bike and take it into your tent at night.
The three-pack mounts on the vertical struts are perfect for water bottle cages and cargo cages, and you might be able to get away with some small bolt-on mini panniers/cargo bags, but you’ll want to keep an eye on the total weight limit. The final version also includes a small braze-on on the back of the top platform for rear light adapters or dynamo lights. Because the platform is relatively minimal, adding a small plastic sheet, making a tape hammock, or using the Rockgeist Armadillo Dry Bag Protector is an excellent idea to help keep your dry bag clean.
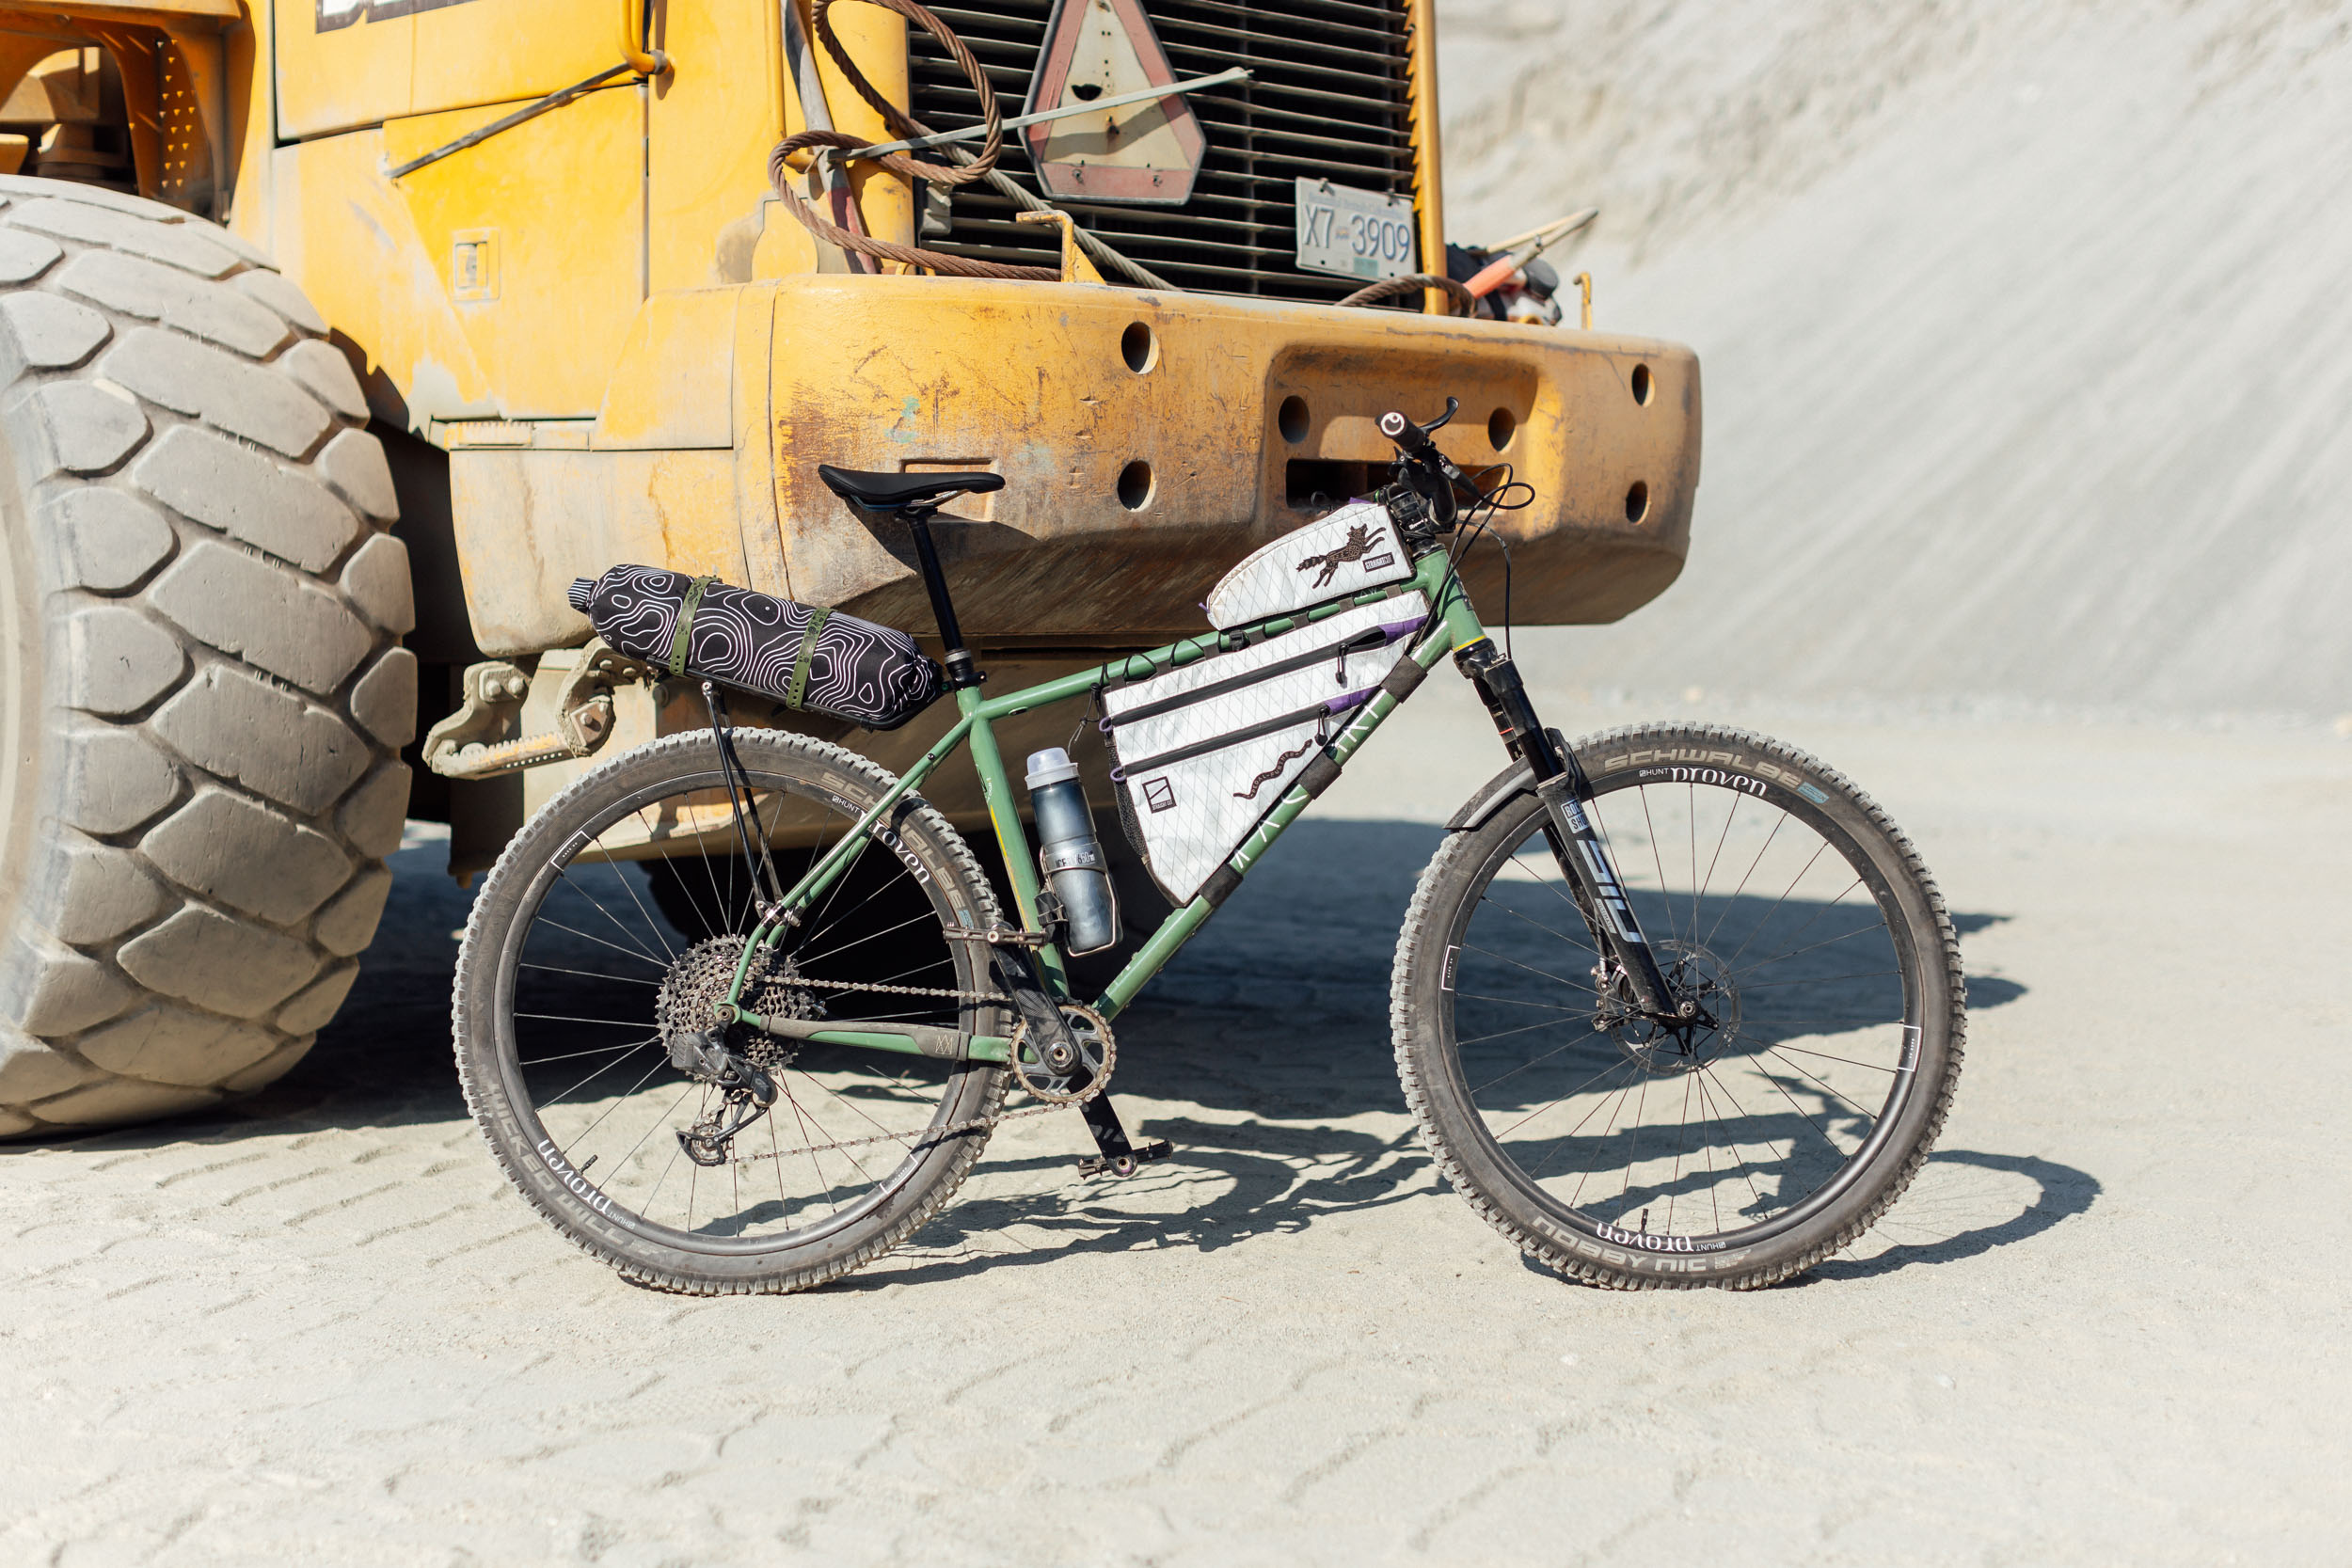
I’ve tested the Mica Rack with a number of bags, and the medium Revelate Designs Pronghorn bag (11L) and the Rockiest Mr. Fusion bag (12L) were my favorites. Both bags max out the length of the rack without feeling too big when fully loaded. To secure the load, I alternated between Voile straps and Austere Cam Buckles, and although I haven’t had a chance to test them yet, Voile’s 10mm Rack Straps should also work well.
Availability and Future Plans
Currently, each Mica Rack is handmade by Skyler in North Vancouver, British Columbia. Depending on demand, outsourcing production is a realistic possibility, but that’s unlikely to happen soon. Pre-sale opens today online, and they are expected to ship by the end of July.
Pros
- Impressively lightweight yet still stable
- No rack mounts required
- Great option for small bikes that lack clearance for a seat pack
- Works with a dropper post
- Two sets of three-pack mounts provide useful overflow storage
- Rack position and angle are highly adjustable to work around different frames and tire sizes
Cons
- Installation is slower than traditional racks, and mounting blocks must stay on the bike if switching between bikes
- Limited weight capacity and not designed for panniers, although this isn’t a lab-tested limit
- Not compatible with full-suspension mountain bikes
- Dry bag will get dirty and eventually wear out unless protected with something like the Rockgeist Armadillo Dry Bag Protector
- Model Tested: Mica Rack
- Actual Weight: ~375 grams (13.2 ounces)
- Load Limit: ~6.8 kilograms (15 pounds)
- Place of Manufacture: British Columbia, Canada
- Price: $185 USD
- Manufacturer’s Details: MicaCycles.com
Wrap Up
If you’re a regular reader here on the site, this is probably not the first time you’ve seen the Mica Rack. It was first teased in my Mason Raw review last summer, and folks have been curious ever since. I’d be remiss not to admit that my involvement with testing prototypes and sharing feedback with Skyler is somewhat biased. Yes, he’s a good friend, but my love/hate relationship with rear racks while bikepacking started long before he mentioned the Mica Rack. I’ve been dreaming of a lightweight option for singletrack-heavy bikepacking trips for years. As it stands, most steel options are heavy and not that adjustable, and dropping $500+ dollars on a carbon alternative is out of reach for many of us.
My ideal bikepacking setup is a dry bag lashed directly onto the top platform of a rear rack, allowing for normal dropper post function while keeping the weight as low as possible. Mica Rack is the minimal rear rack I’ve secretly wished for, and I doubt I’m alone in this. It weighs less than the competition, will fit more bikes thanks to Skyler’s ingenious sliding/pivoting strut design, and is far more stable and functional than a seat pack. While I see the Mica Rack as an ideal solution for rowdy hardtail bikepacking trips, it’s also just as useful as a minimal rack for gravel bikes and commuters. I look forward to continuing to use the Mica Rack this summer, including trying out some minimal bolt-on cargo bags or mini panniers on the vertical struts.
Further Reading
Make sure to dig into these related articles for more info...
Please keep the conversation civil, constructive, and inclusive, or your comment will be removed.