The Local Overnighters Project is a unified effort to document and map one-night bikepacking routes all over the world—by locals, in their own backyards.
The Bikepacking Journal is our biannual printed publication. Each issue features a collection of inspiring writing and beautiful photography. Find details on the three most recent issues below, join the Bikepacking Collective to get it in the mail (anywhere in the world), or click here to find a collection of selected stories in digital format.
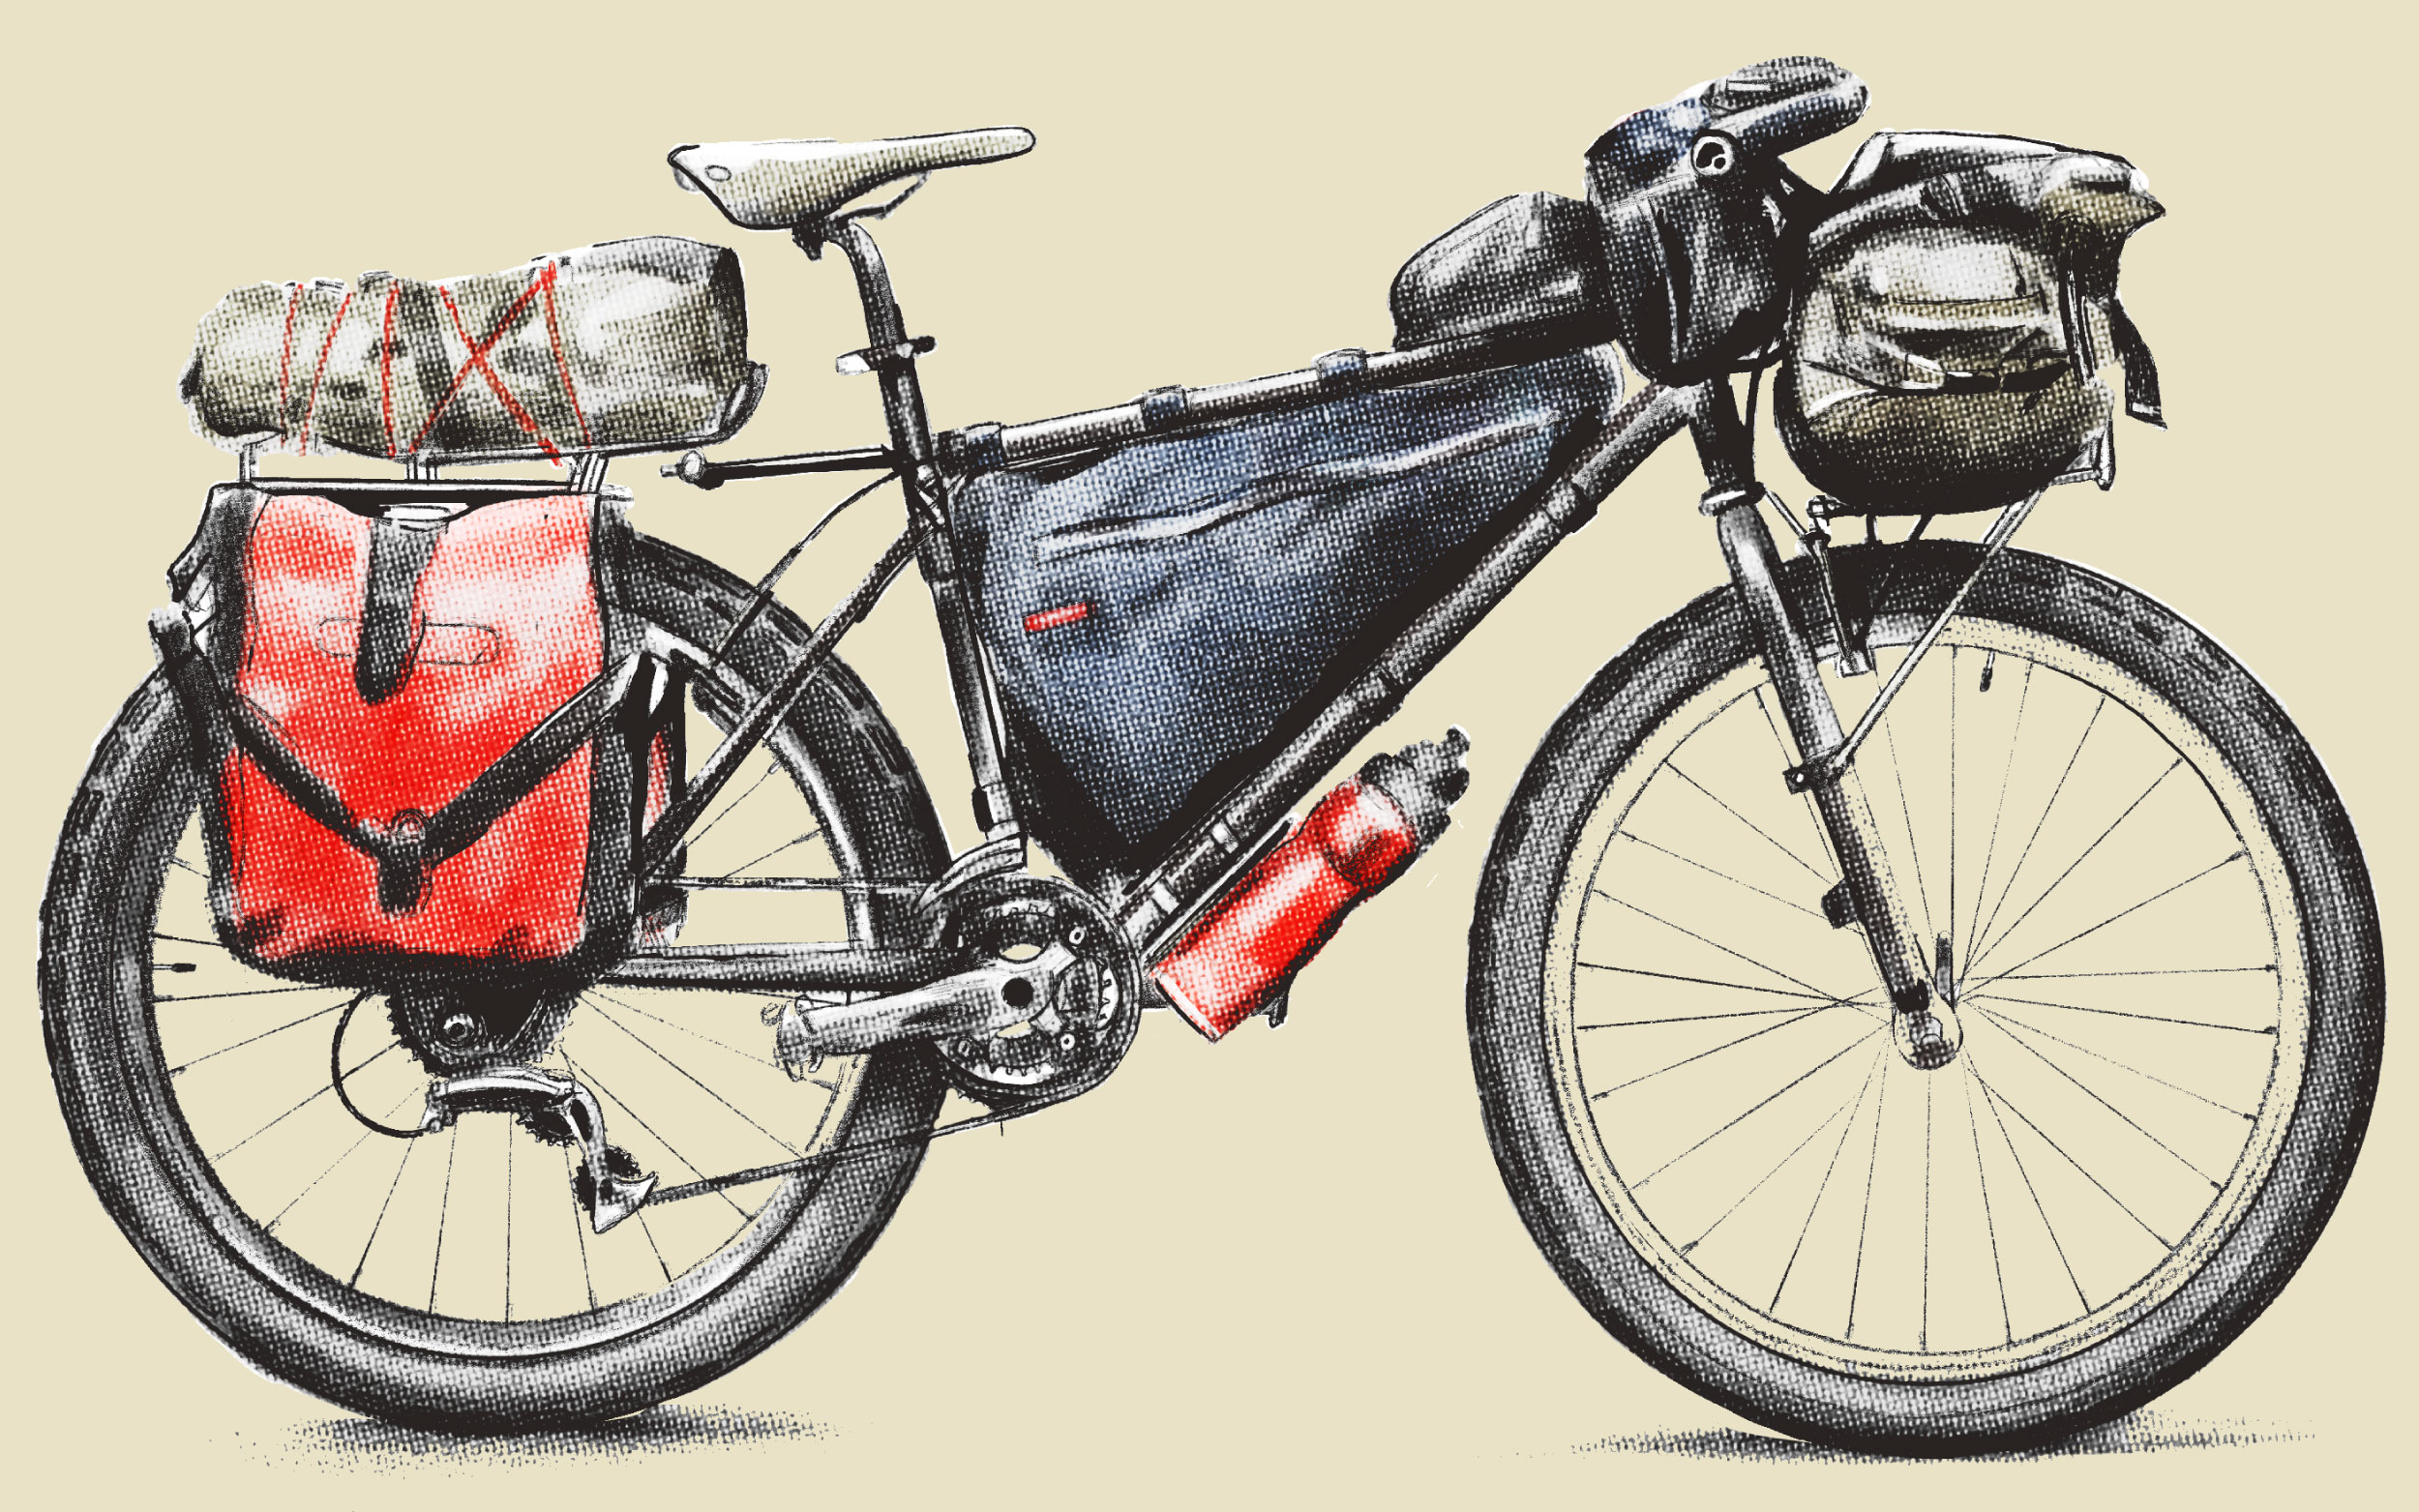
One of the best things about bikepacking is how open-ended and welcoming it is. There’s no wrong way to go bikepacking because there’s technically not a “right” way to do it! With a broad range of bikes, bags, camping equipment, and clothing that works well for bikepacking, the possibilities for setups are nearly endless. The same can be said of the riding, too. Routes can be long or short, based on gravel or singletrack, ridden fast or slow, and roll through fascinating communities or away from civilization deep in the backcountry. All of these variables and nuances lead to a diverse mix of people with unique riding styles and aesthetic preferences joining our community, and with that comes an infinite array of bikepacking setups. To showcase some examples, here are the seven most common types we’ve identified over the years.
If you’re just getting started, be aware that all these styles are dictated by the types of riding for which they’re intended. In short, the type of route you’re planning on riding can impact your bike of choice. On the gravel and dirt roads of the Great Divide Mountain Bike Route, for instance, almost any bike will do, with many people choosing fully rigid ones. But on the technical singletrack of the Colorado Trail, a full-suspension bike might make more sense. In snowy or sandy conditions, such as El Camino del Diablo, having plus-sized or fat tires could make or break your trip.
Any Ol’ Mountain Bike
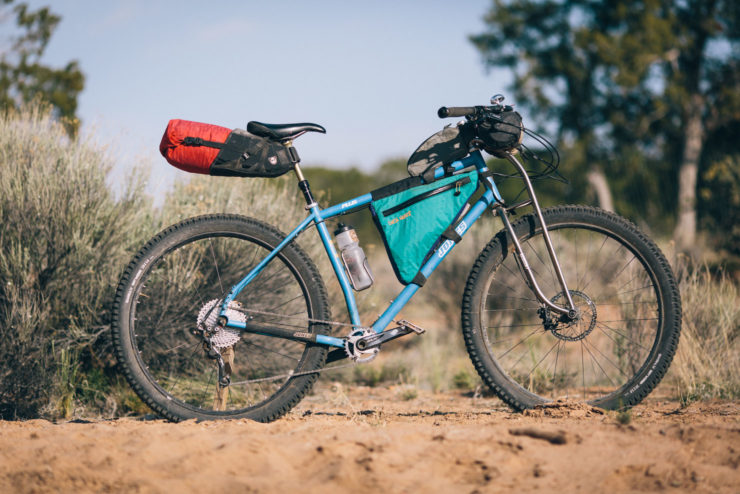
First things first: you can use almost any bike to go bikepacking. The best bike to get started with is likely the one you already have. If you currently ride a mountain bike that works for you on the trail or a gravel bike that you’re happy with, chances are, it will make a very capable bikepacking rig with little to no modification. After all, bikepacking doesn’t rely on a frame having eyelets for racks and panniers, as with other styles of bike touring. The only caveat is that bikepacking usually involves gravel, dirt roads, and/or singletrack trails, so make sure you use a bike that can handle whatever terrain you set out to explore. If you don’t have a bike that fits that description and you’re on a budget, scour the classifieds for a secondhand cross-country hardtail, as they’re very versatile, affordable, fun to ride, and offer maximum frame space for carrying gear. They’re the ideal type of bike to use when figuring out what terrain you like to ride and your unique style of bikepacking.
There are also many affordable options for gearing up your bike, and if you already have some camping gear, you can probably make that work for your first bikepacking outing. Between simple and cheap rear racks, drybags, and backpacks you have on hand, or an old pair of panniers, a starter bikepacking kit is fairly easy to cobble together. We’ll dig into types of bags more in the next section, but here’s a simple starter kit if you just want to try out a quick overnighter:
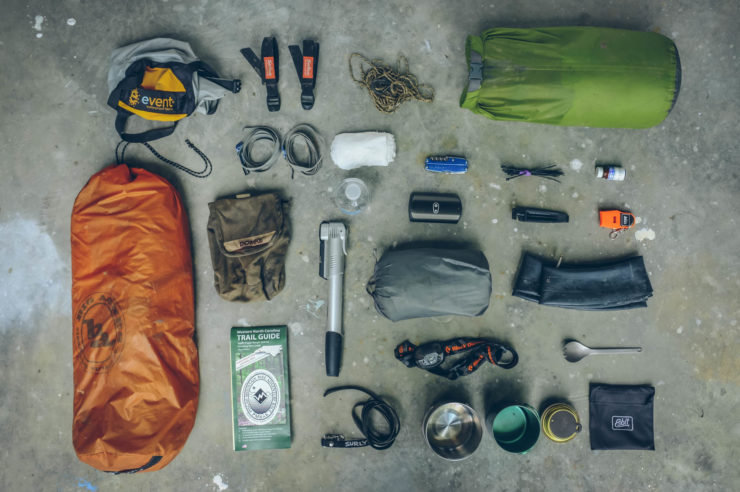
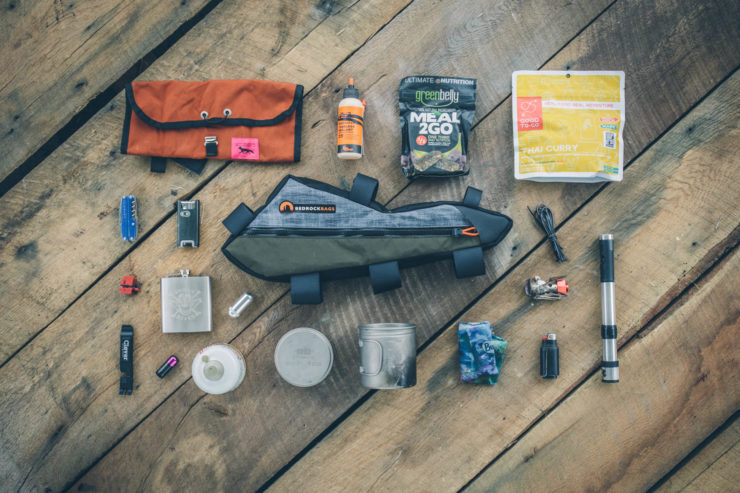
The Starter Kit
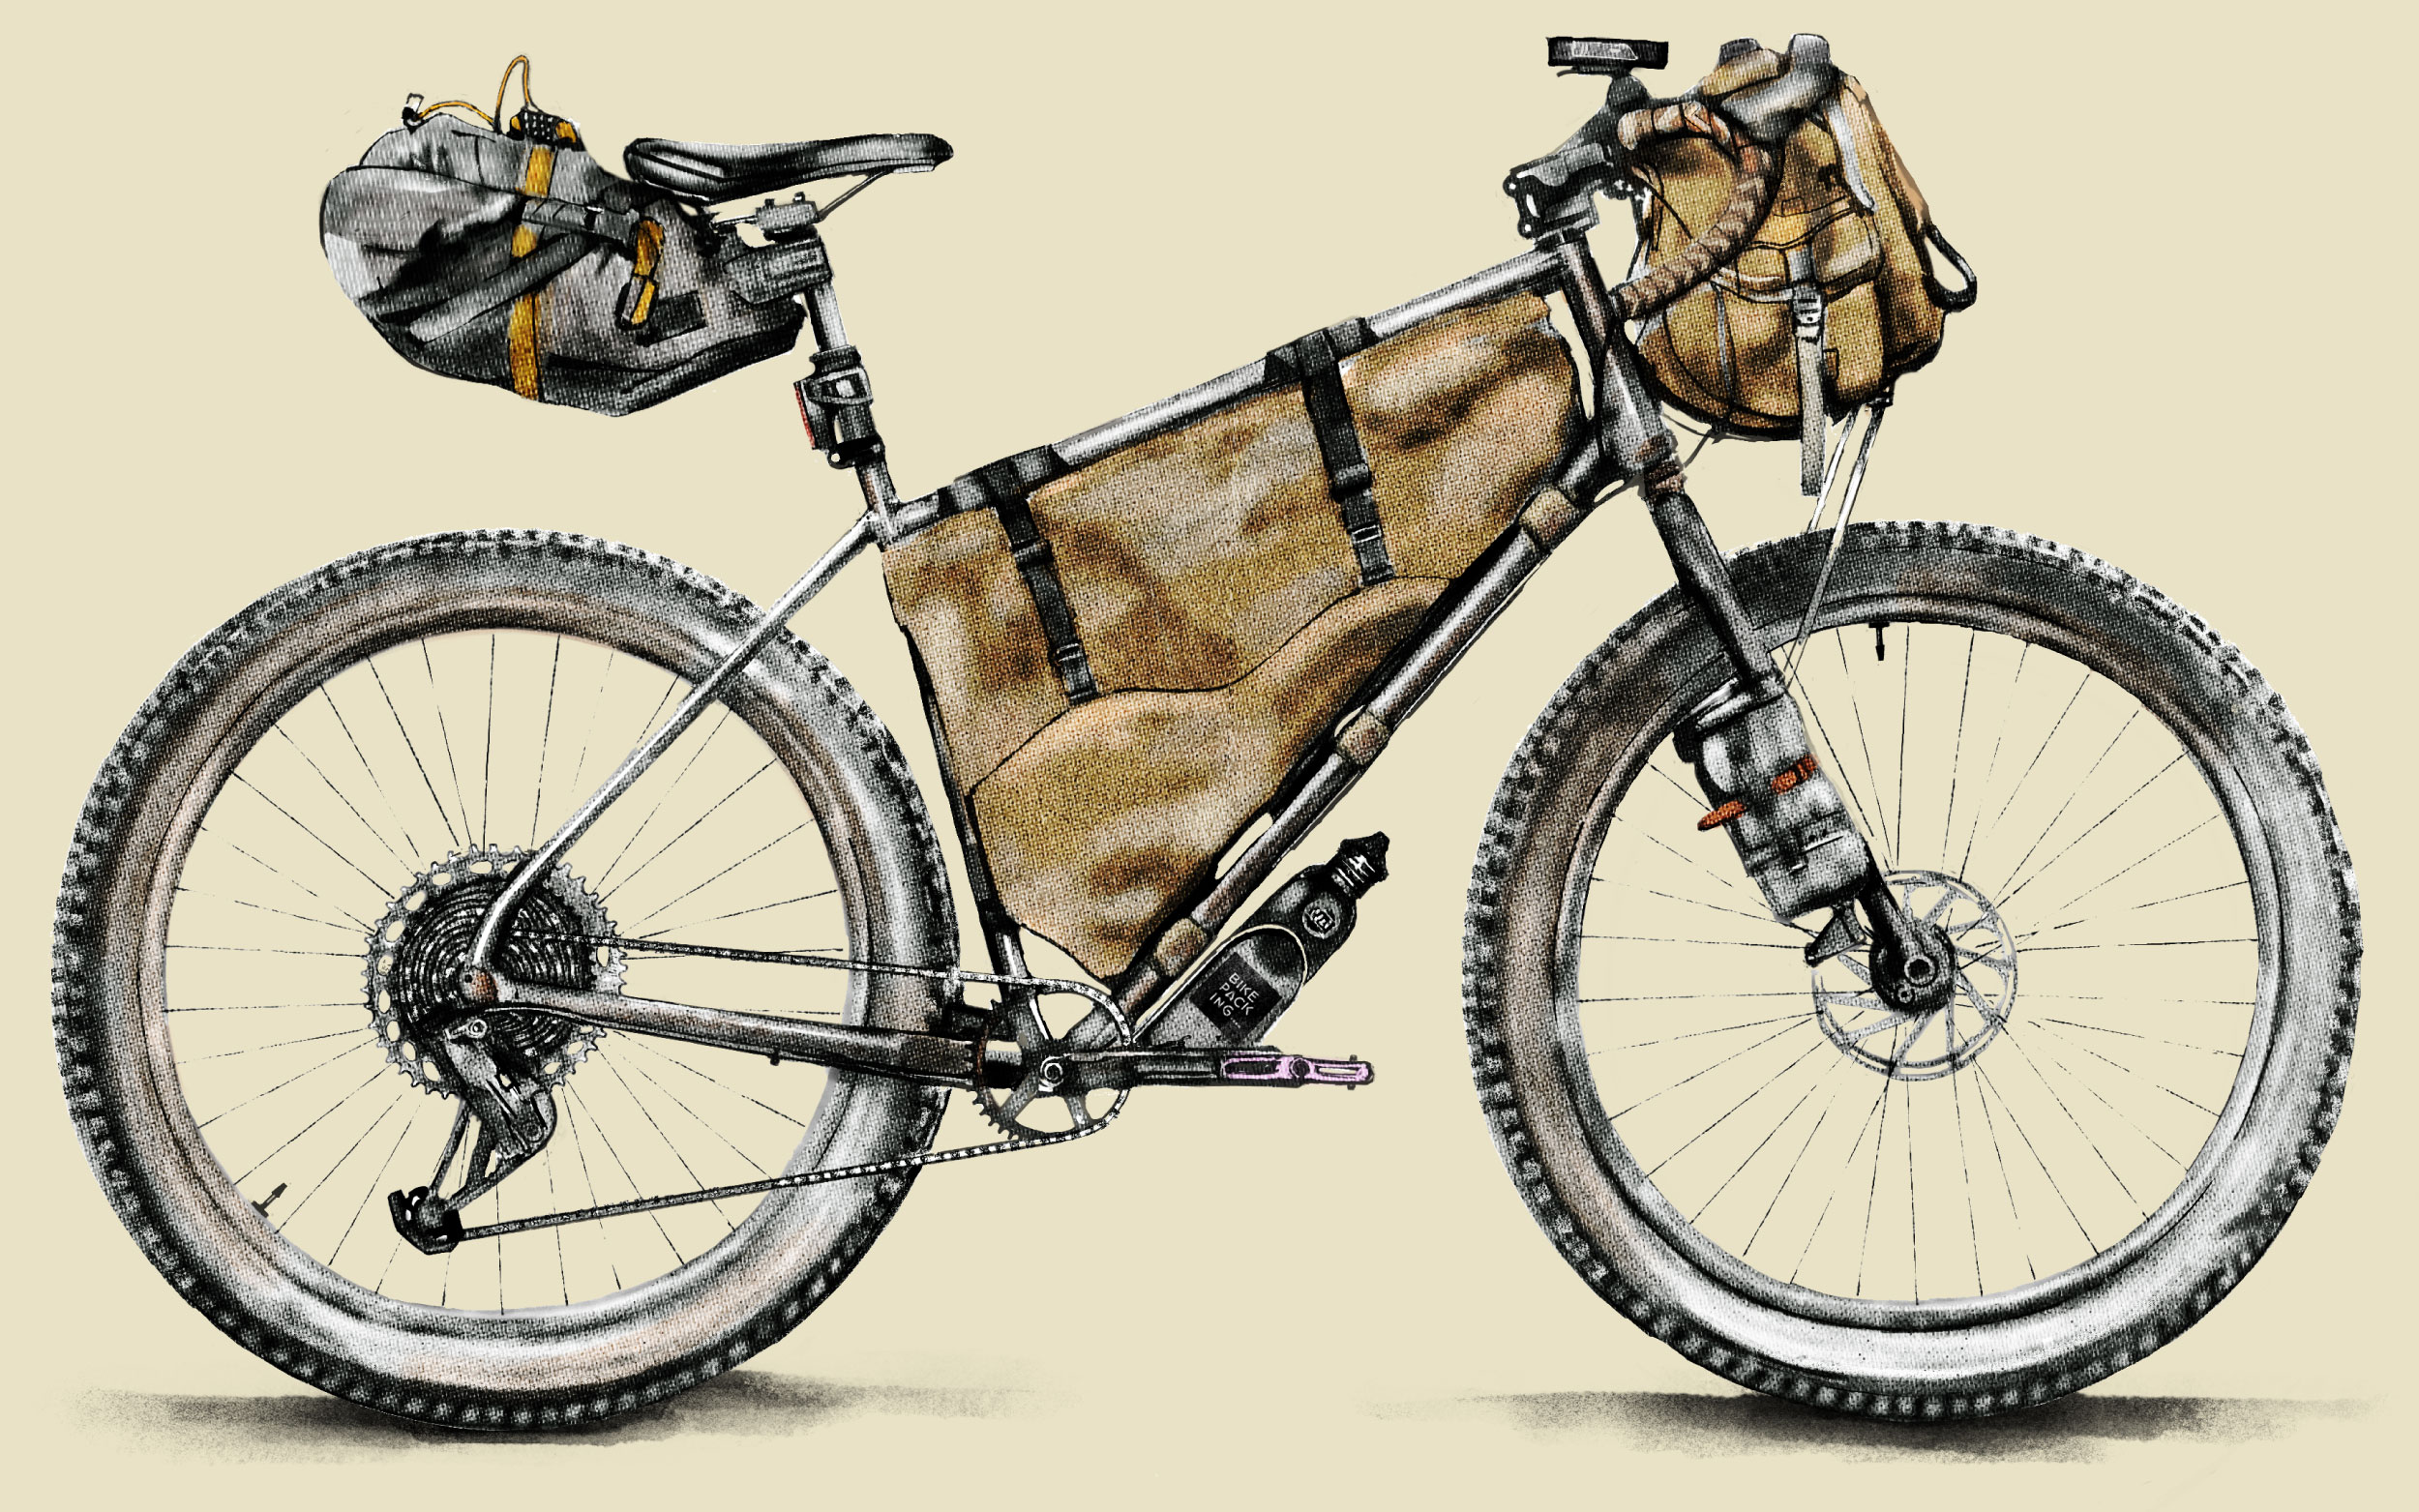
If you want to try bikepacking but aren’t ready to invest in a set of purpose-made bags, you can use a few simple pieces of gear you probably already own to do a quick overnighter. For starters, a comfortable daypack along with dry bags lashed to your handlebars and seatpost makes a good barebones approach.
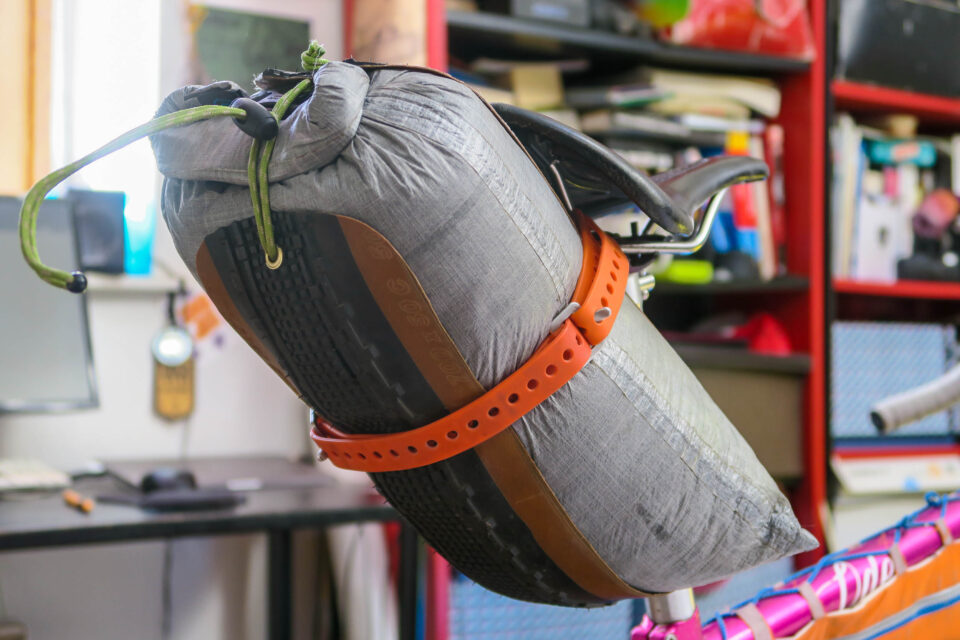
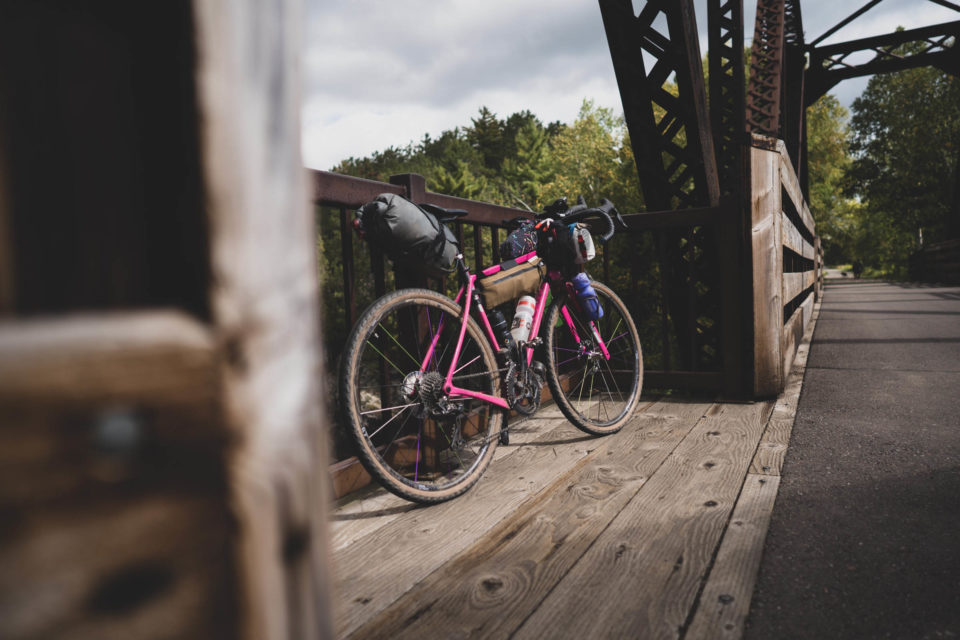
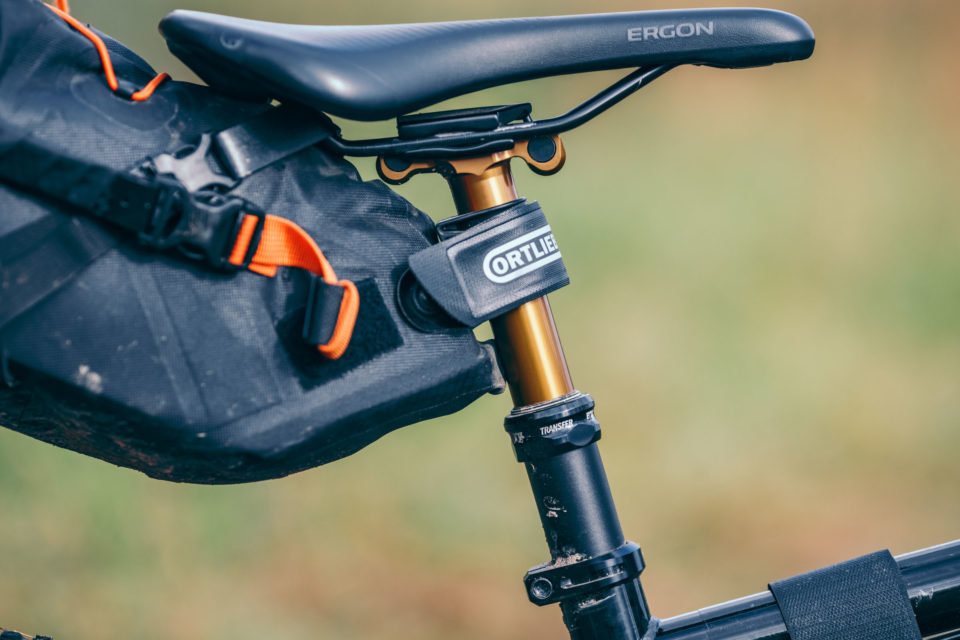
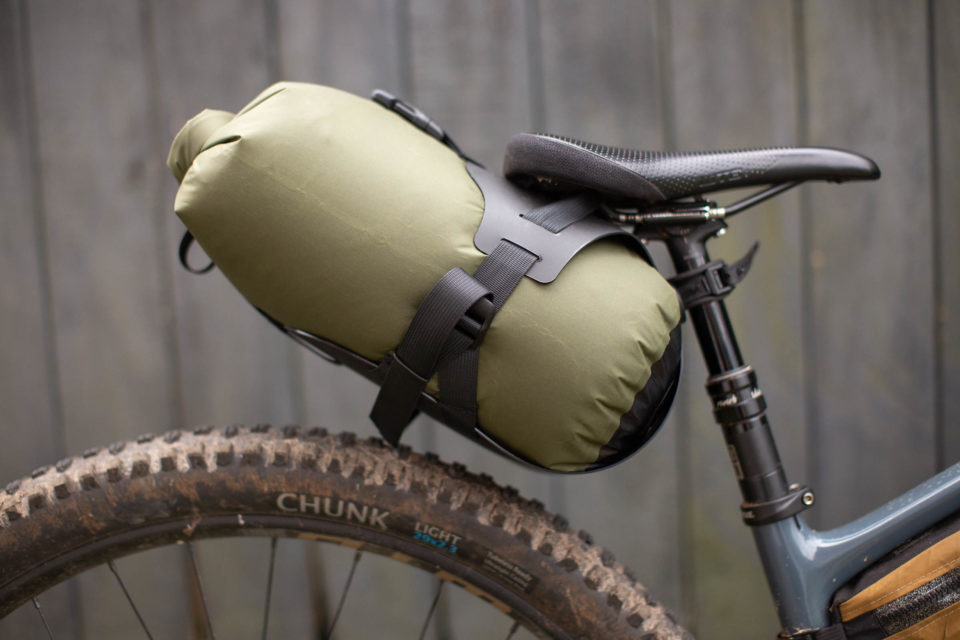
Seat pack dry bag: For a seat pack, you can use a 5- to 7-liter dry bag clipped around the seatpost and cinched to the saddle rails with a webbing strap to store a change of clothes and a few other odds and ends. To help stabilize the load, pack something stiff in the bag, such as tightly rolled clothes. Conversely, if your bike has mounting provisions for one, buy an inexpensive rack, and you can strap a dry bag and other items on the platform.
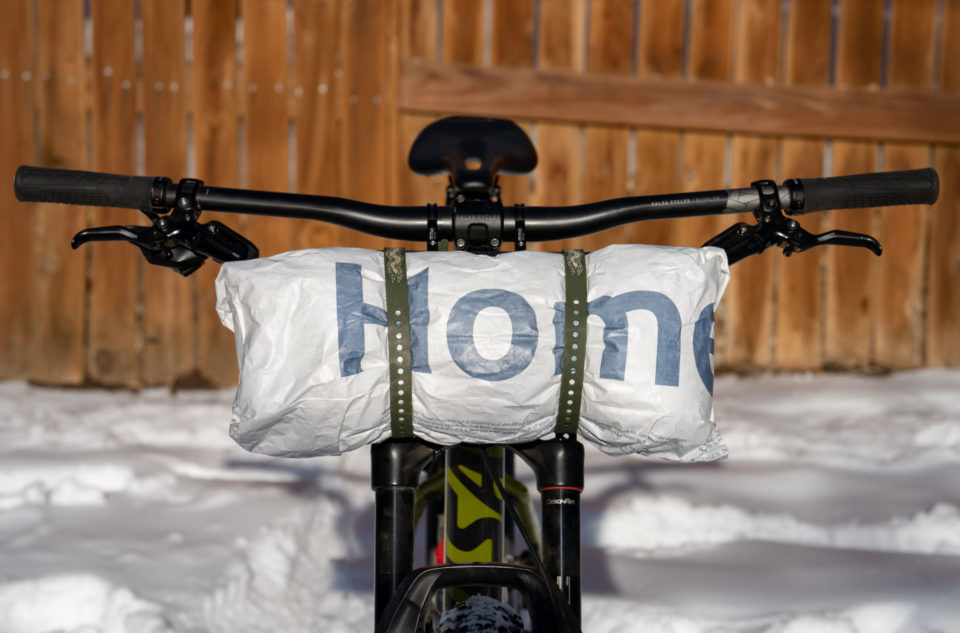
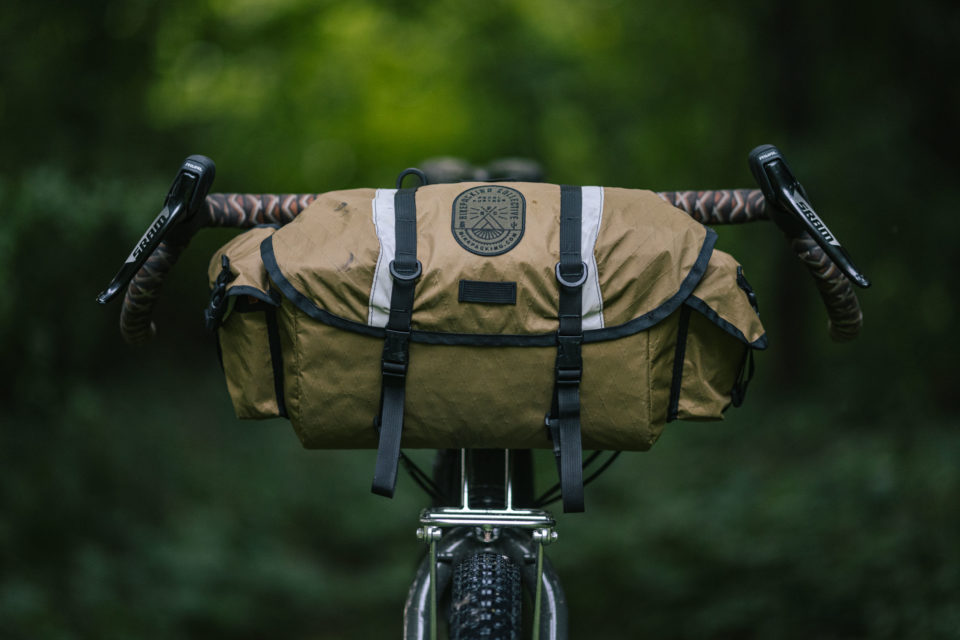
On the handlebars: Use a larger 14- to 20-liter dry bag cinched to the handlebars with two pieces of webbing or Voile straps. This can fit a small tent, with the poles assisting in keeping the bag’s shape, and a lightweight down sleeping bag. Long and slender bags work better than short and stubby ones. Sea to Summit Big River bags are a good option.
Backpack: For many types of bikepacking, it’s more comfortable to ride without a backpack, but they can be useful for more technical rides (especially those that require their fair share of hike-a-biking), or for carrying a camera, or if you don’t yet have bikepacking bags. In fact, all of us used a backpack when we were first getting started. For such purposes, a 14+ liter hydration pack will do, or, just use a day pack you have lying around. This can carry extras like a sleeping setup, rain gear, or food and cooking supplies.
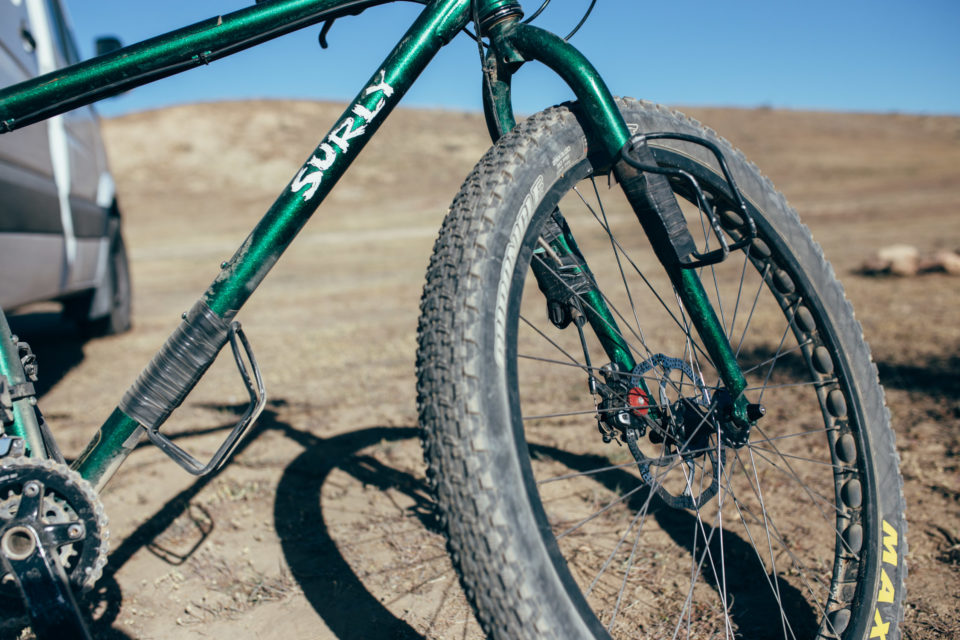
Electrical tape bottle cages: In addition to your standard water bottle cage mounts, use about one third to a half roll of electrical tape to add bottle cages to your fork legs or the underside of your down tube. This will reduce the water you need to carry on your back and help maximize the storage space in your backpack. Another space-saving trick is to use electrical tape to attach a spare inner tube to your bike.
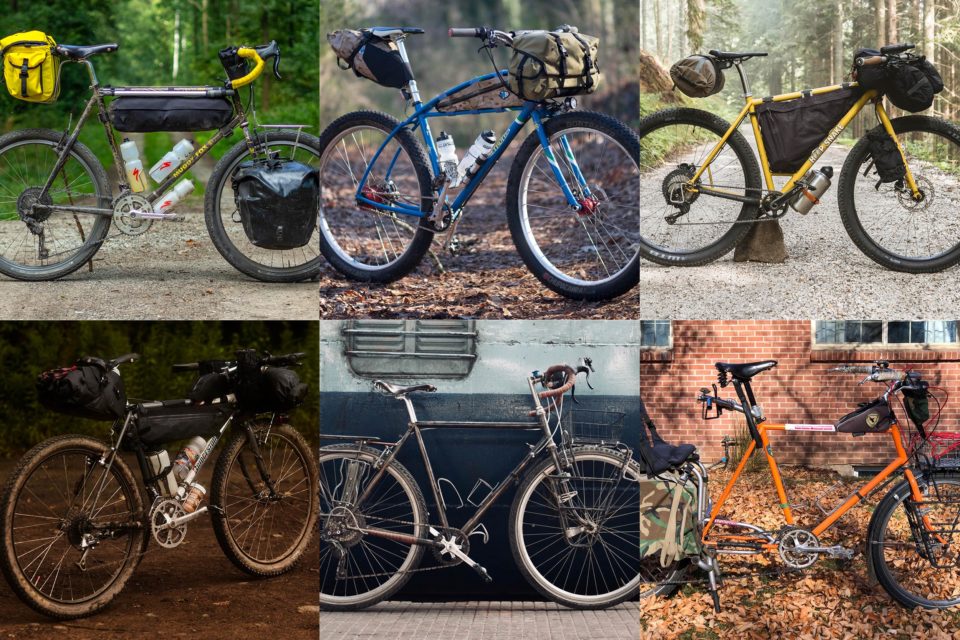
You can do a lot with an old secondhand bicycle. Find a few inspirational write-ups here to show you what’s possible with a used mountain bike. Whether you have a small budget or want to start simply with a plan to invest later, it’s pretty amazing to see what you can do with very little.
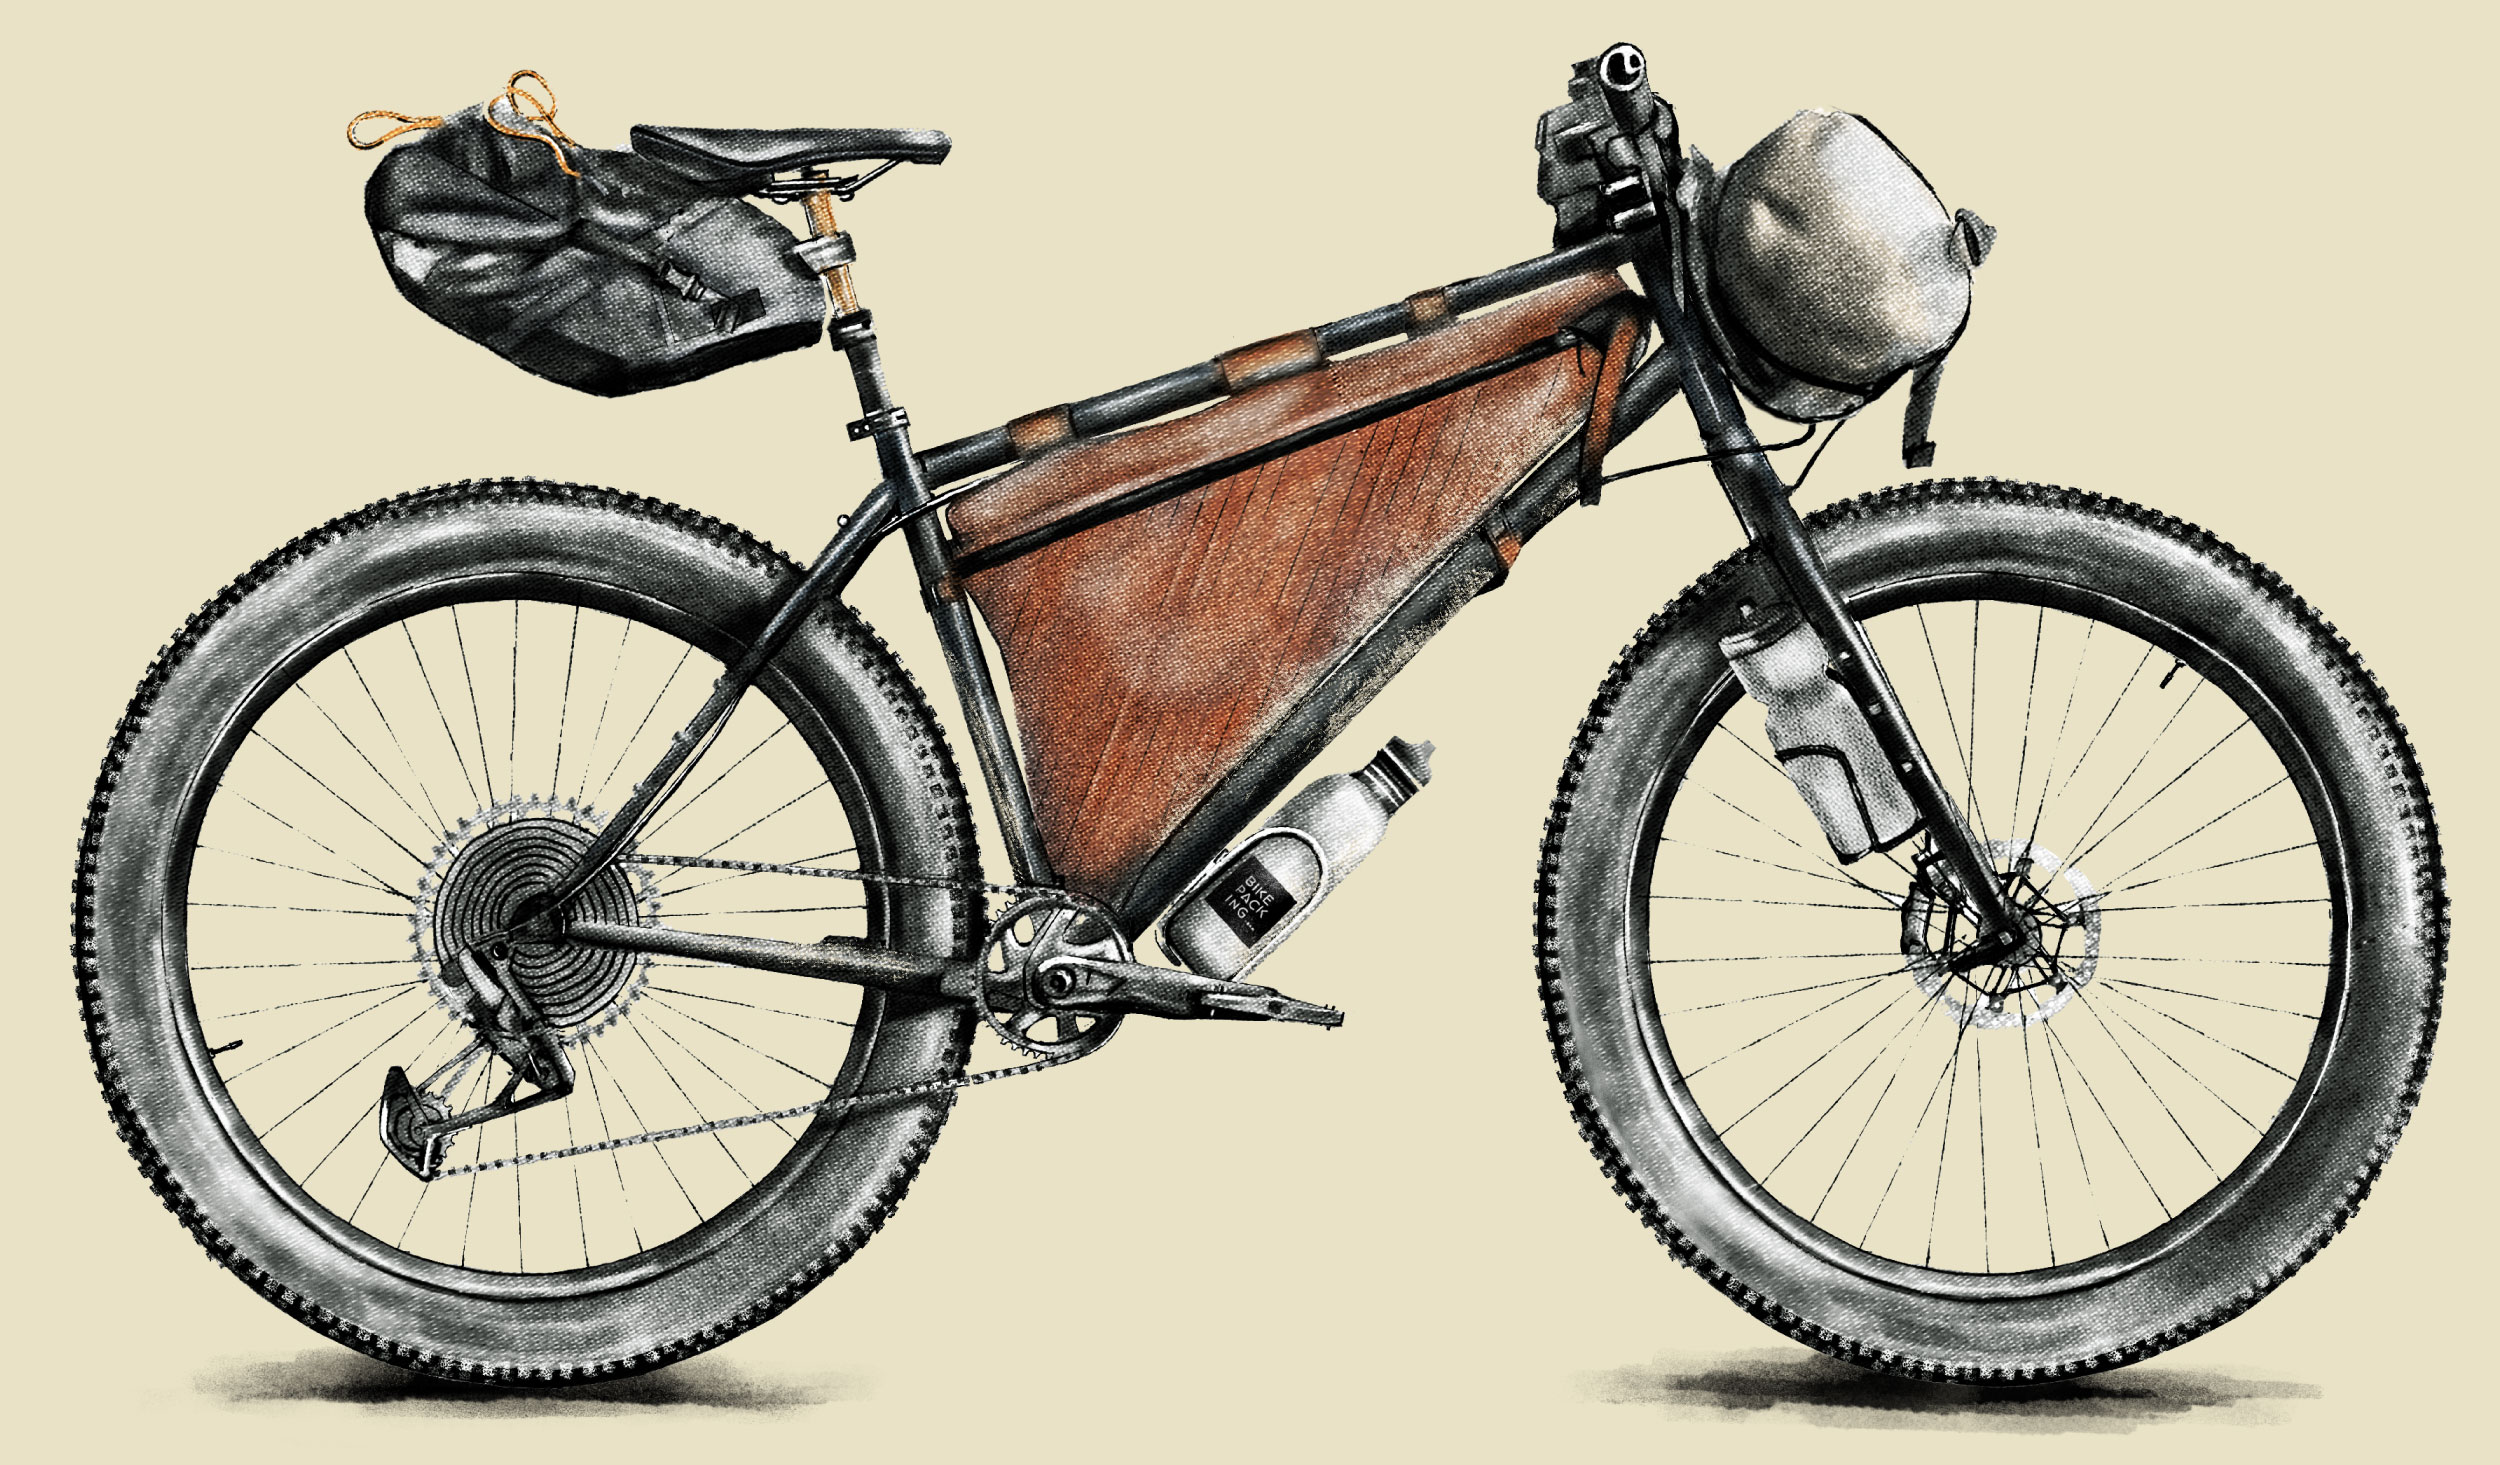
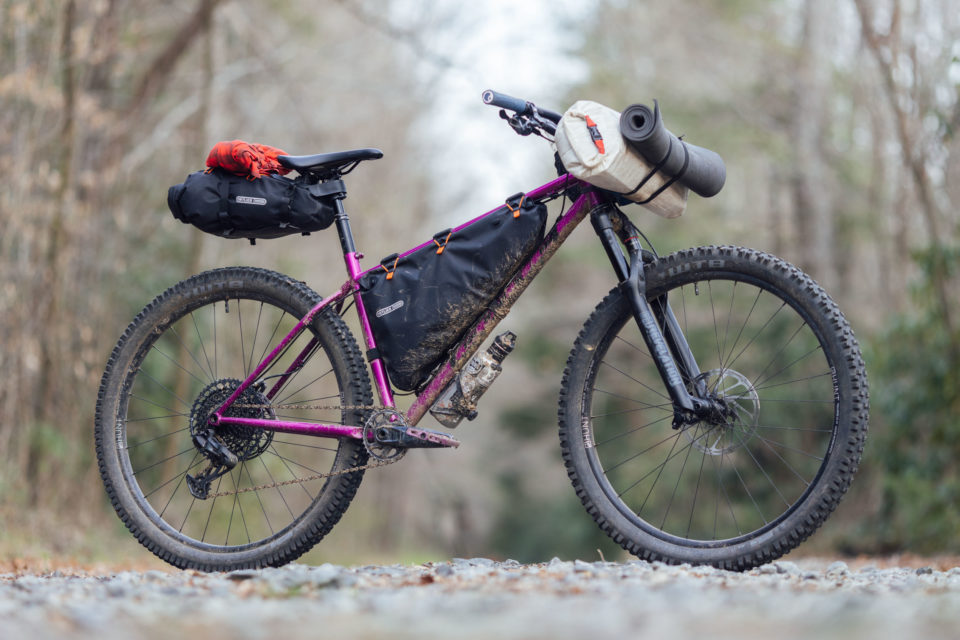
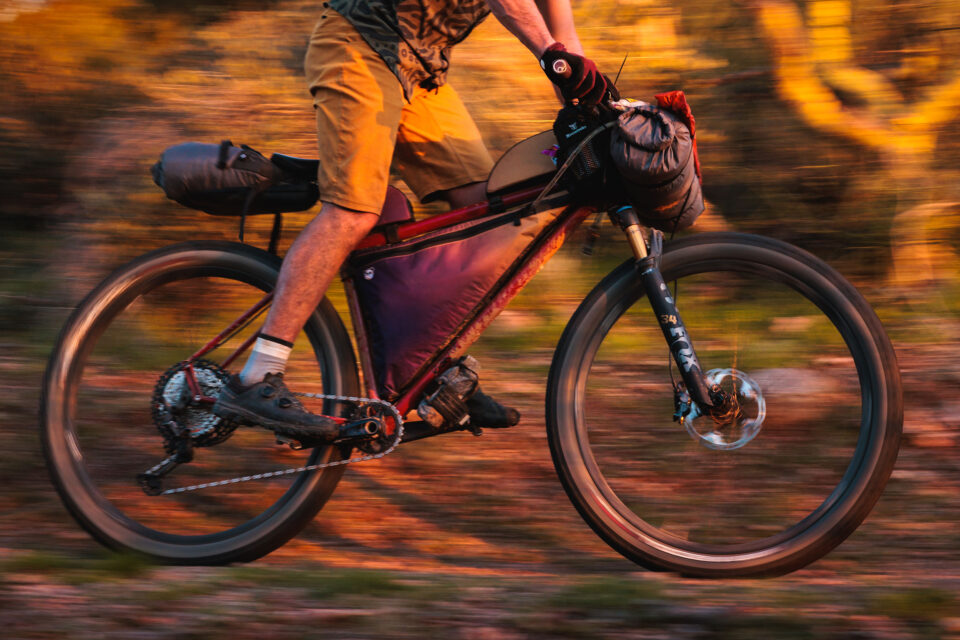
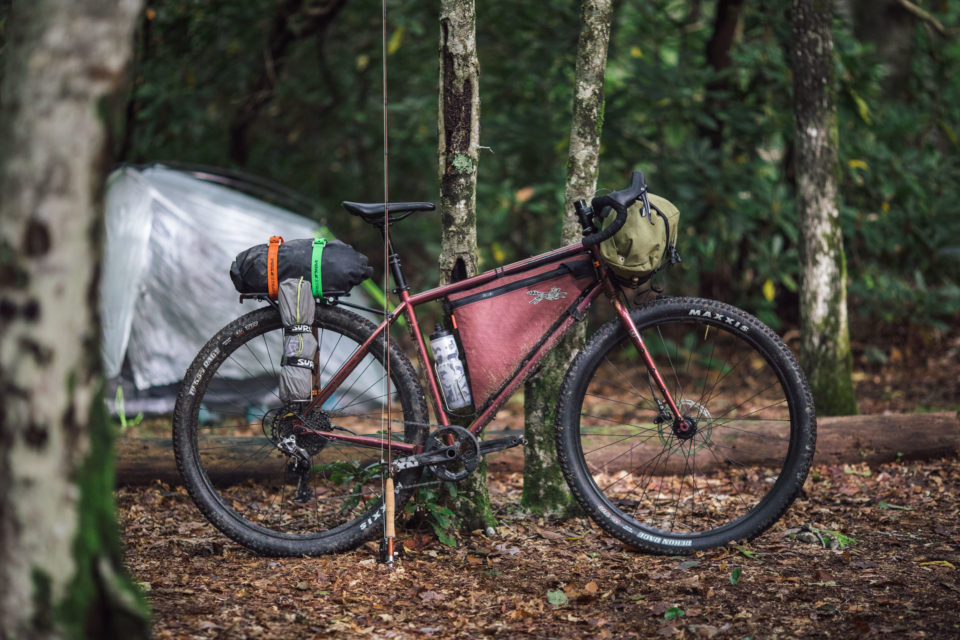
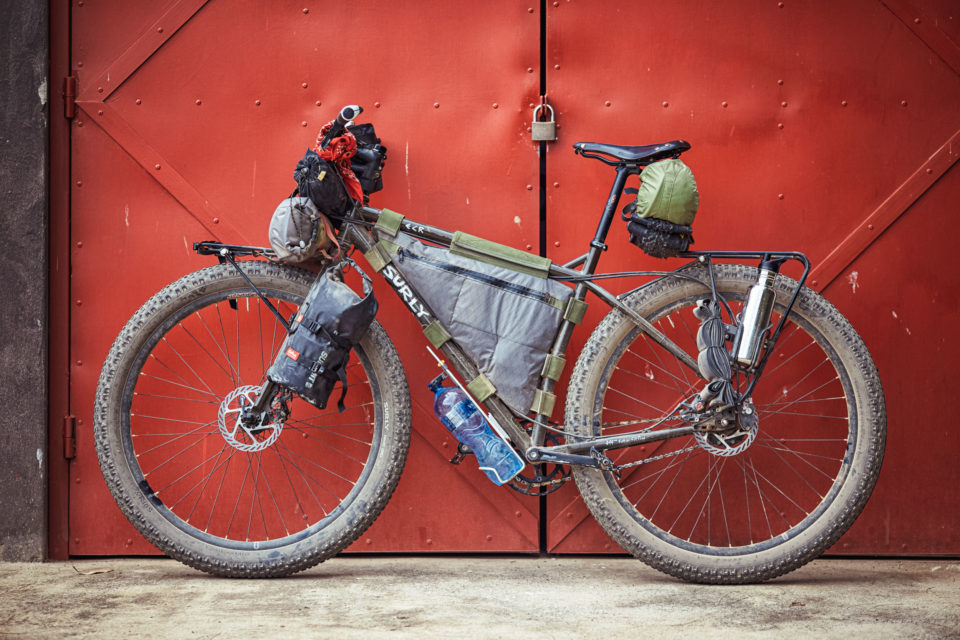
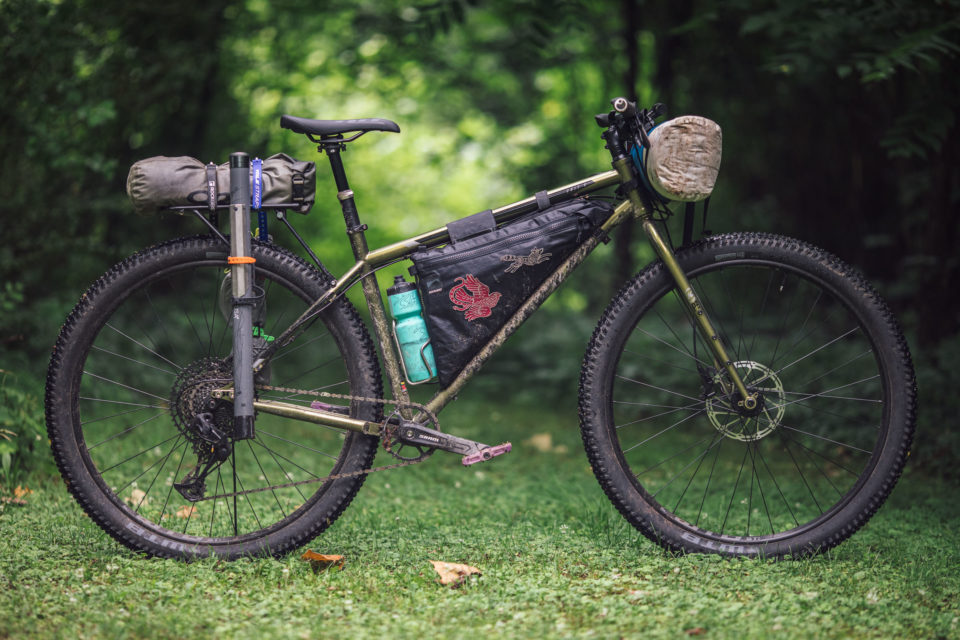
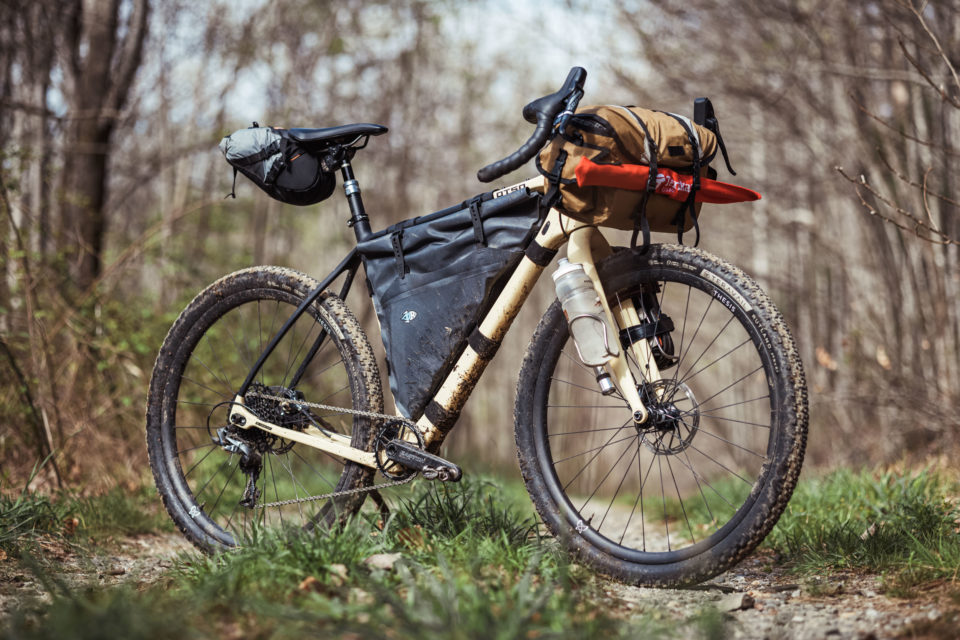
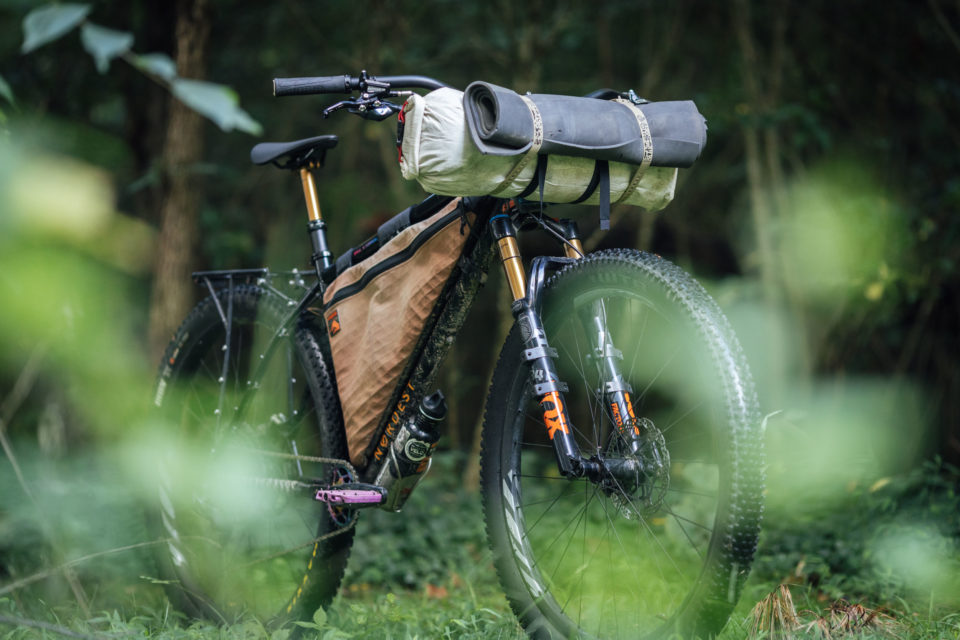
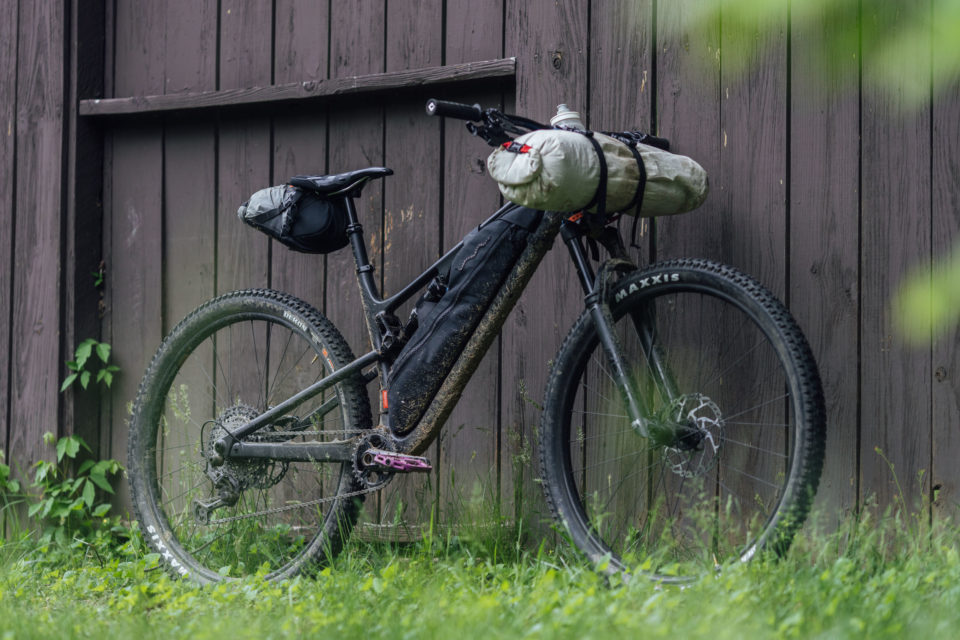
The roots of modern bikepacking are based on using a hardtail cross-country bike or a rigid all-terrain bike (ATB) with soft bags and minimal racks (or none at all). Bikepacking at its core is carrying only the bare necessities on a bike that’s capable, reliable, nimble, and light enough to explore a medley of trails, dirt tracks, and gravel roads. Almost all mountain bikes can be made into capable bikepacking rigs, but the quintessential choice is a rigid or hardtail 29er outfitted with 2.2-2.6” tires.
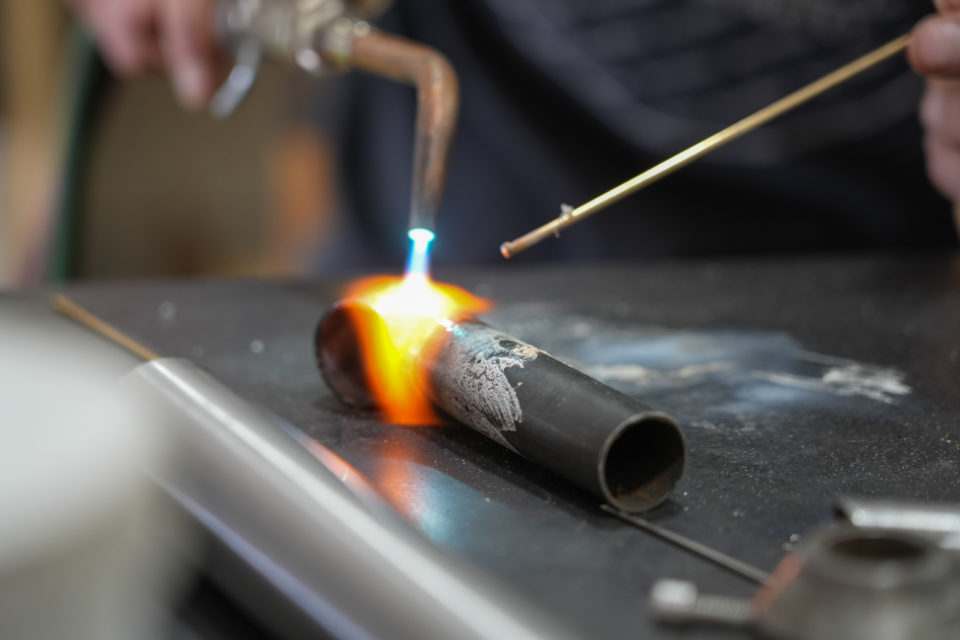
These bikes come in all sorts of materials, but steel is the most popular for this type of bicycle. Aside from the fact that it’s the most economical, steel tubing can also be very compliant and comfortable, and it’s arguably the most environmentally sound choice, considering its durability, seemingly infinite lifespan, and recyclability.
Frame Considerations
If you’re on the hunt for your first all-terrain bike, there are a few basic factors you might consider:
Tire clearance: Knowing the maximum tire size allowed within a bike frame is one thing, but it’s also a good idea to leave some wiggle room for mud clearance. Caked-on mud can often damage chainstays, so having a little more clearance than your intended maximum tire size is ideal—a frame that has a maximum tire clearance of 2.6″ shouldn’t always have 2.6″ tires on it.
Bottle and gear mounts: If you’re looking for a bike for bikepacking specifically, or just one to be as versatile as possible, having bottle and accessory cage mounts, rack mounts, and fender mounts could be an important consideration, although there are alternative ways to mount bottles and cages.
Frame features: Pay attention to features that might help you evolve your bike as your tastes change or you grow more into your own personal style. For example, you’ll probably want sliding dropouts if you think you might want to try your bike as a singlespeed or with an internally geared hub; and you’ll want internal seat tube cable routing if you’re going to use a dropper post.
Standards: This concept is pretty basic, but think about future-proofing your bike or building it around standards that are important to you. If you have another modern mountain bike, for example, you might want to get a bike with Boost hub spacing (148mm rear and 110mm front) so you can swap wheels between the two bikes. If you want to run a dropper post, we’d recommend getting a bike with a 30.9 or 31.6mm (ideally) seatpost size; there are more options in those sizes than there are in the 27.2mm variety.
Key Components
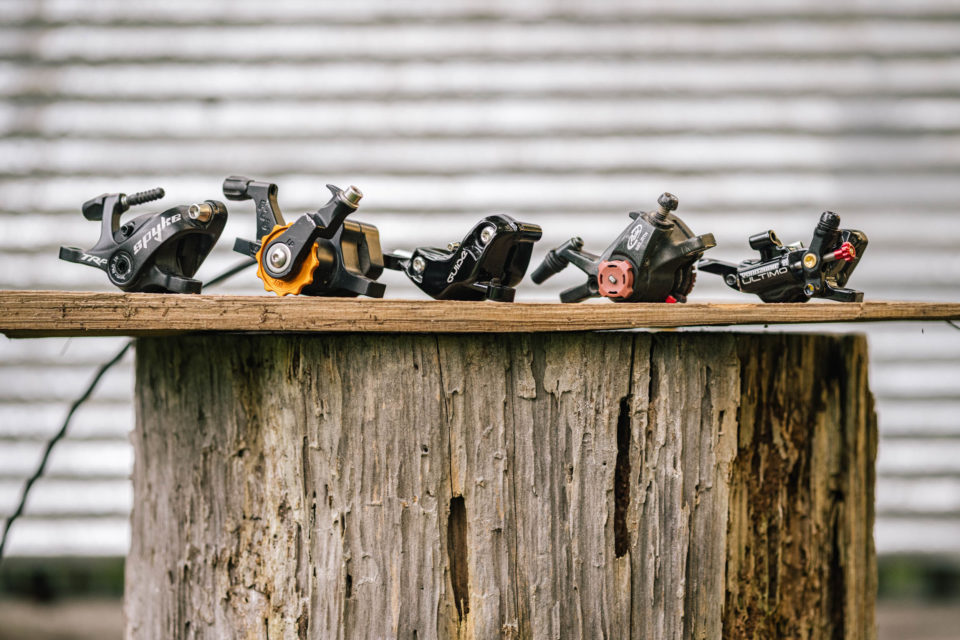
Brakes: While hydraulic brakes are becoming more and more reliable, it’s worth weighing out the options. There are a lot of great mechanical disc brakes on the market. We really like the Growtac Equal brakes, PAUL Klampers, and the Spykes and Spyres from TRP.
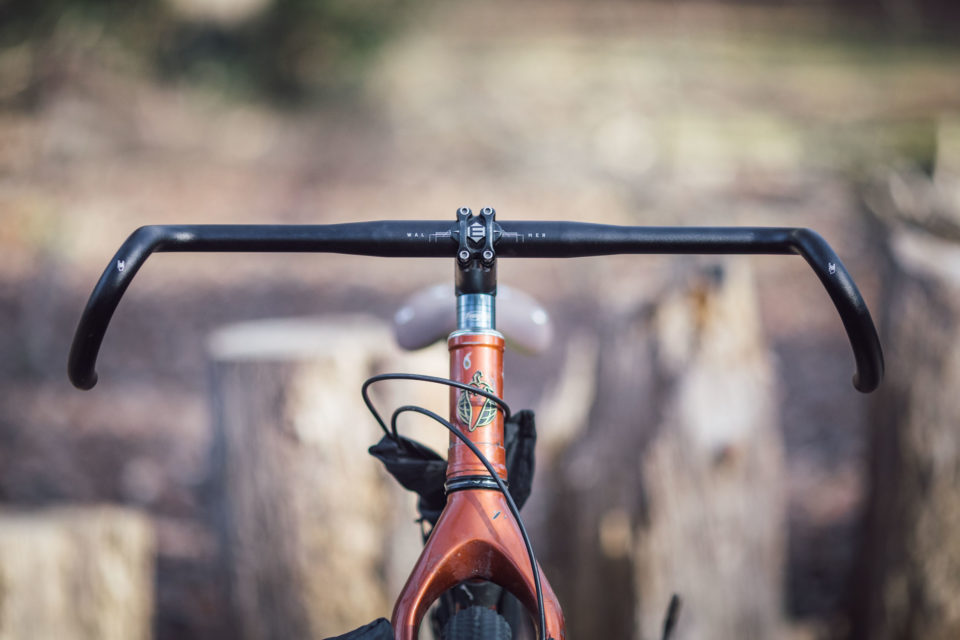
Bars: Hand comfort is key, and one approach to dialing this in is with alt mountain bike bars and flared gravel bars. Find links to our Gear Indexes below to learn more about flare, backsweep, and loads of alternative bars that might help make the ride more comfortable.
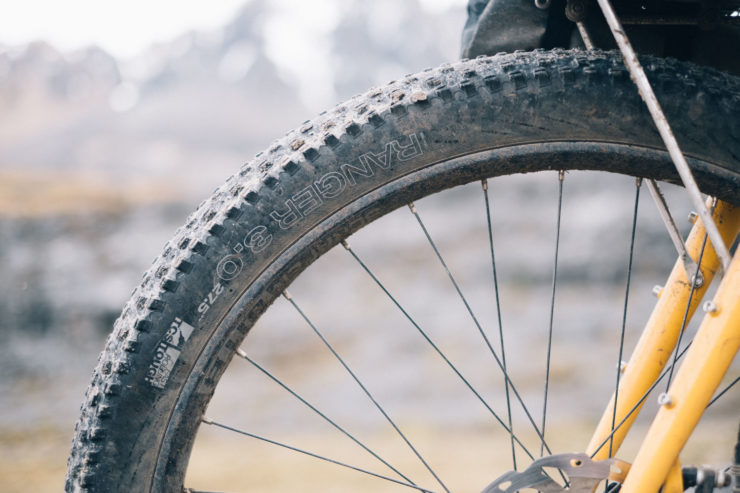
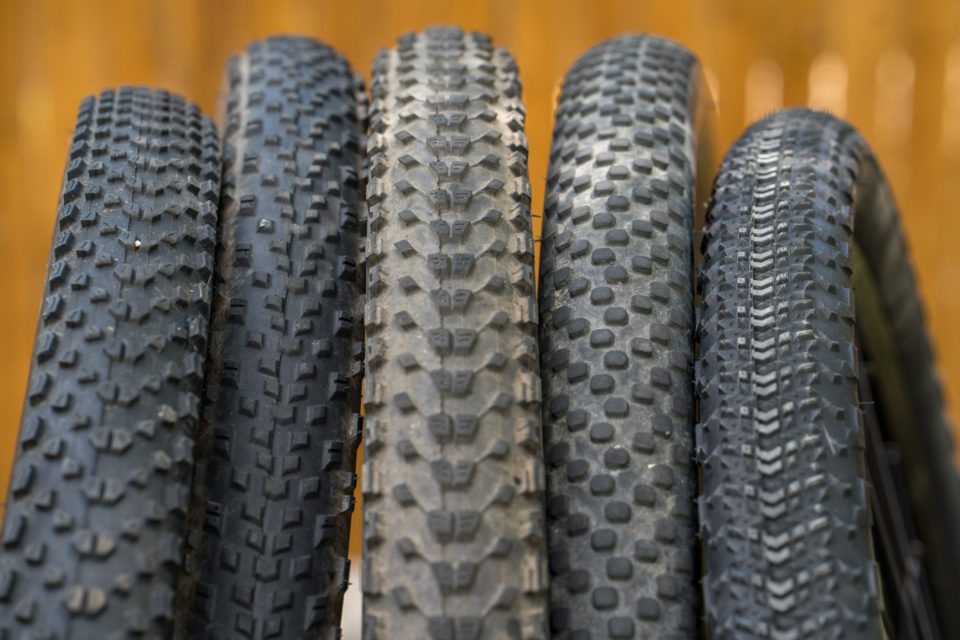
Tires: Get a set of tires that are good for all-terrain riding. These usually have tightly spaced, fast-rolling center knobs and bigger side lugs for cornering traction on dirt. A few good options we like include the Teravail Ehline, Maxxis Icon, and WTB Ranger.
Drivetrains: One thing that’s certain about loaded bikes is that they require a much lower gear for climbing. Learn more about wide-range cassettes here, and find our gearing calculator to help figure out the ideal bailout gear here.
There are a multitude of great ATBs that fit in this category, but here are some of our favorite all-around bikepacking mountain bikes that we’ve tested over the years:
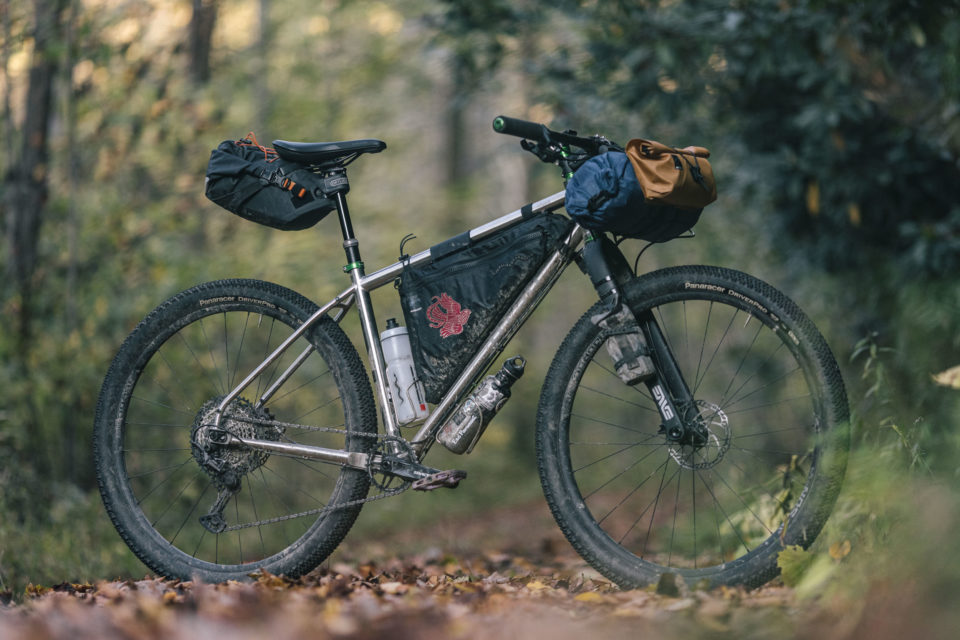
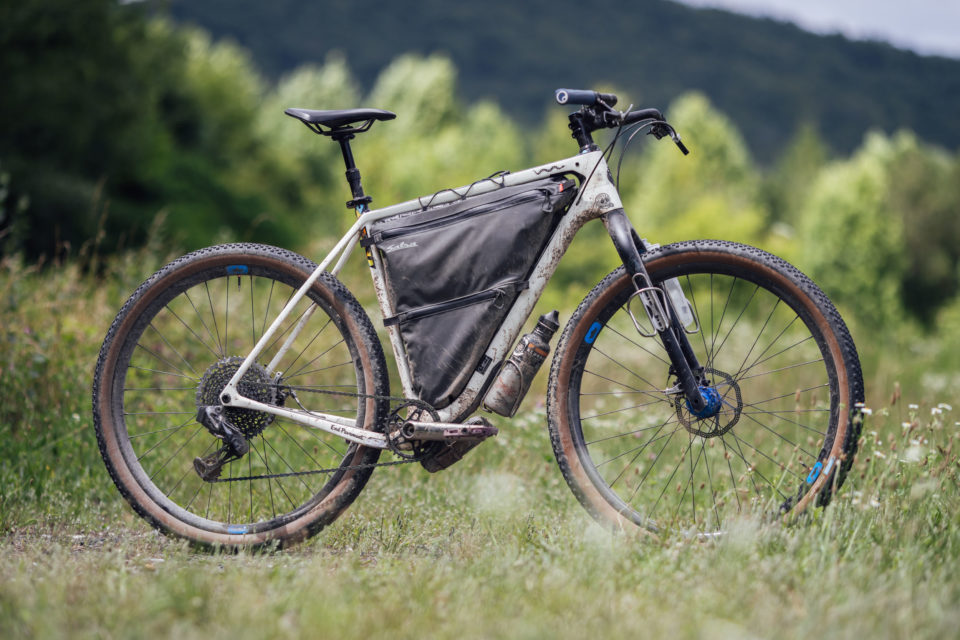
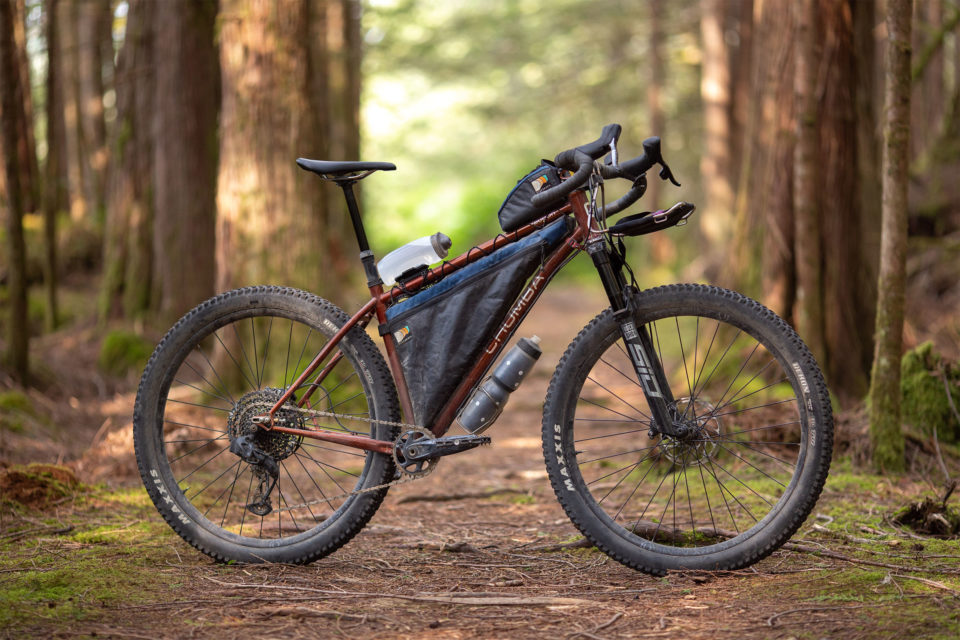
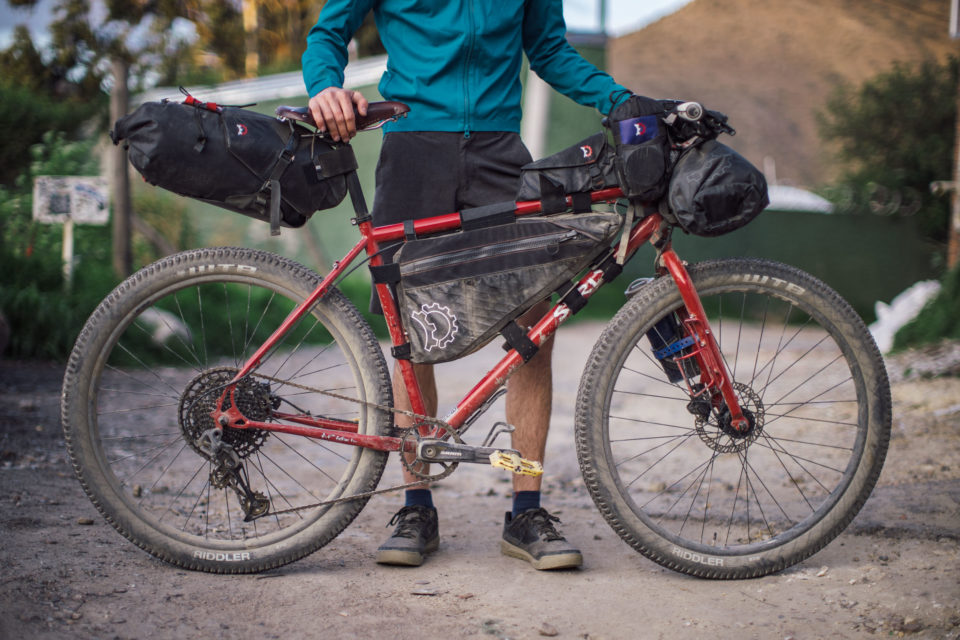
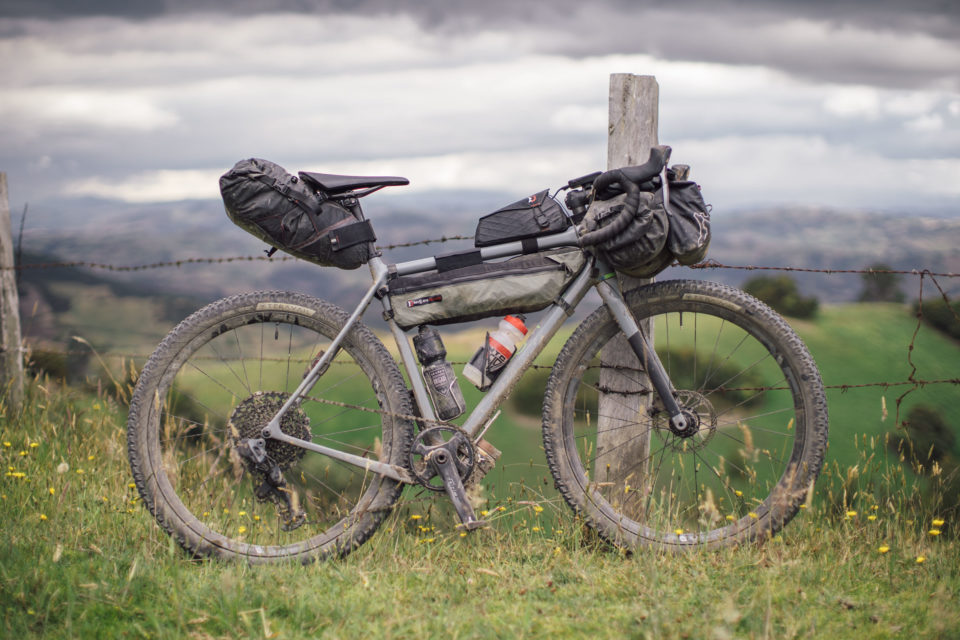
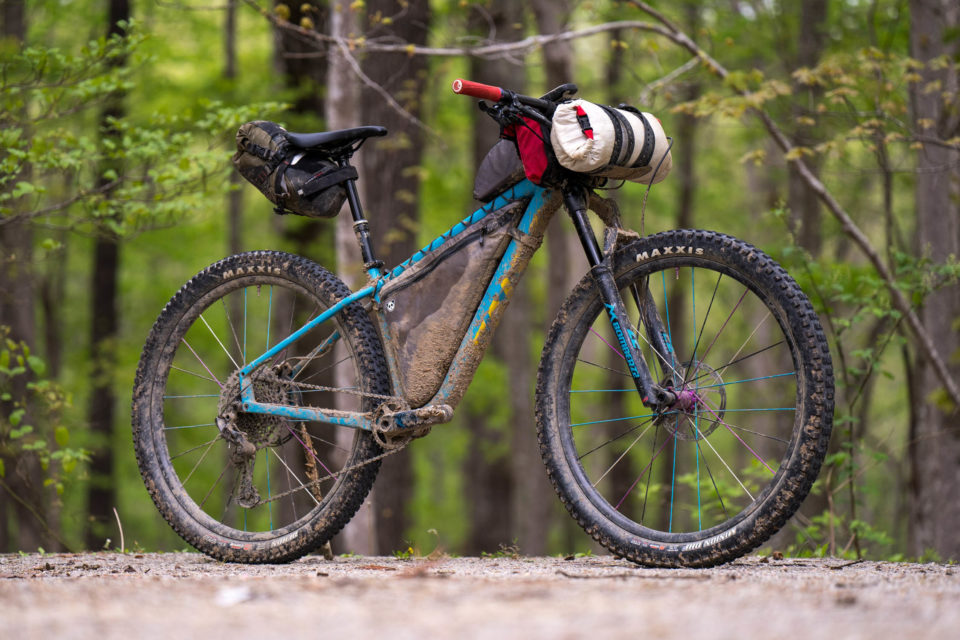
Self-supported, ultra-distance rides were popularized by the Tour Divide, an iconic 2,750-mile bikepacking race from Alberta, Canada, to Antelope Wells at the US/Mexico border that happens every year as hundreds of riders depart from Banff on the first Friday in June. Similar races and routes have sprung up around the world, taking inspiration from the Tour Divide. This style of bikepacking typically involves the use of a lightweight mountain bike outfitted with an efficient, ultralight gear kit. A typical Divide bike is assembled to move quickly and reliably across a mixture of surfaces and terrain, often including gravel, doubletrack dirt roads, a little bit of singletrack, and some pavement.
So, what makes the perfect bike for this style of ride and route? Terrain and surface conditions vary greatly between routes, which can change the requirements. Bikes fit for the Great Divide Mountain Bike Route or the Eastern Divide Trail are typically shod with 2.0-2.6” cross-country-oriented mountain bike tires (2.35” is a common size). Due to the massive distances, fast-rolling and long-wearing tires are a priority, as is having a comfortable bike fit and alternate handlebar positions. Riders choose drop bars or flat handlebars based on personal preference; the field is usually split 50/50 in events such as the Tour Divide.
Our Favorite Divide Bikes
We’ve written about quite a few bikes in this category, which you can see in our Drop-bar 29er Index, but some of our favorite Divide-style bikes include:
There’s a lot of information on bikes, gear, and event coverage for the Tour Divide and similar rides. Here are a few relevant links to get you started:
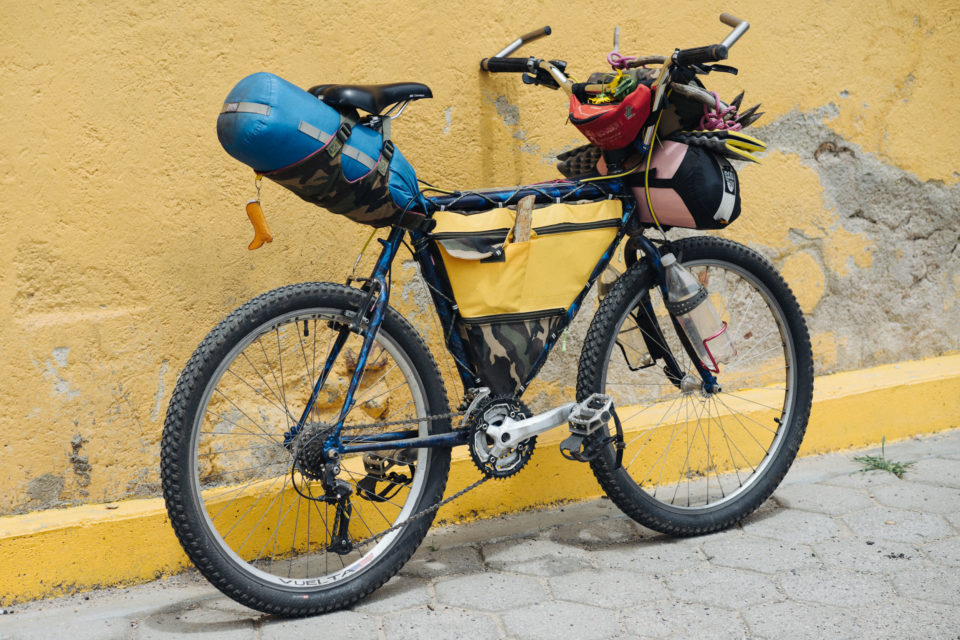
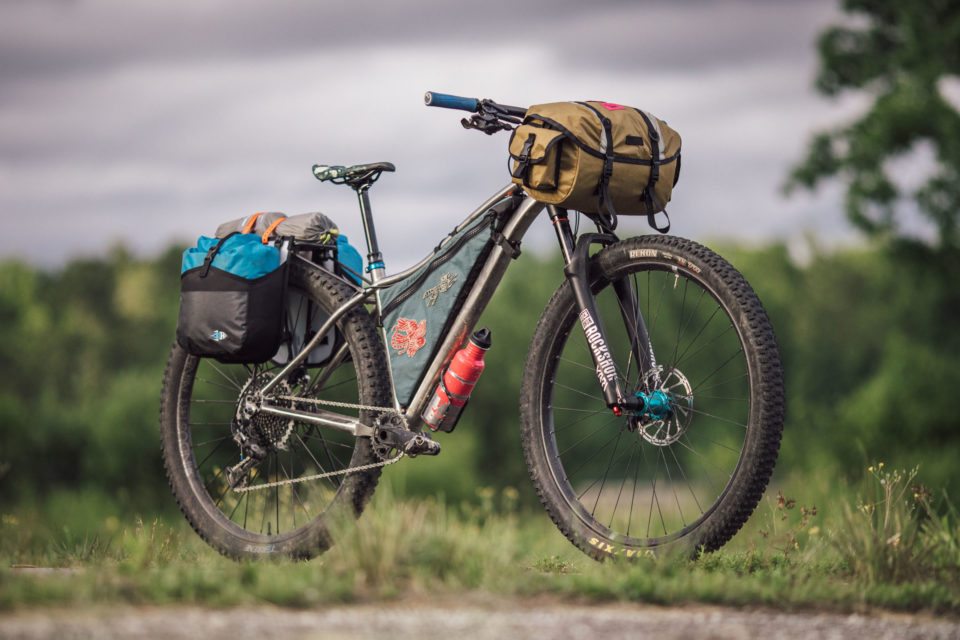
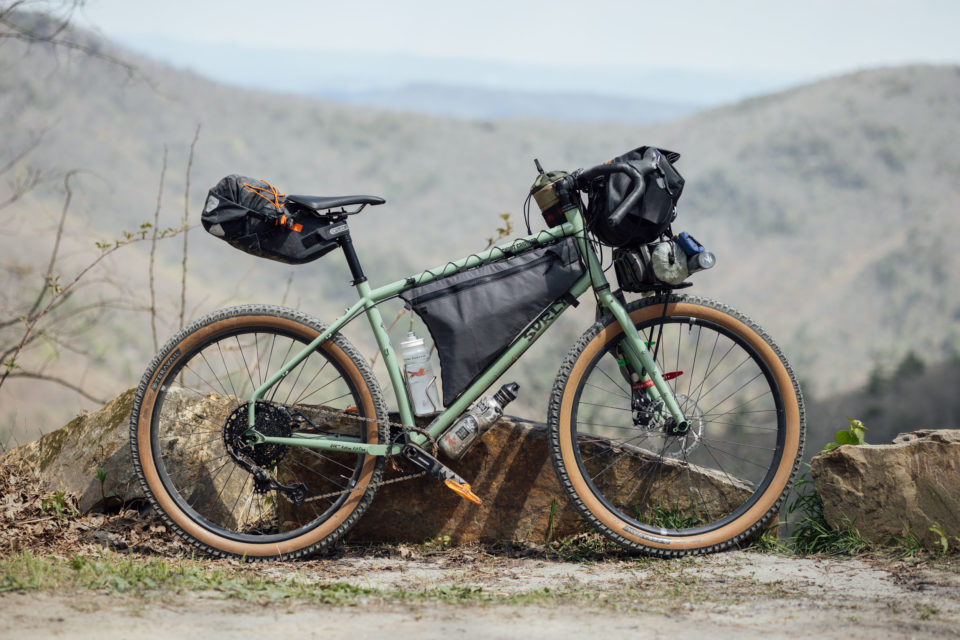
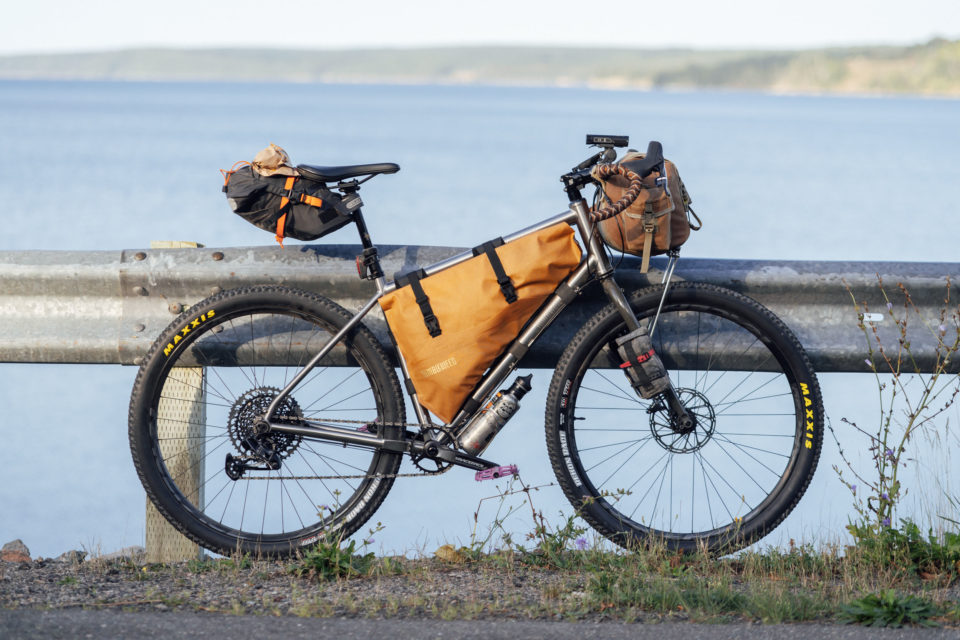
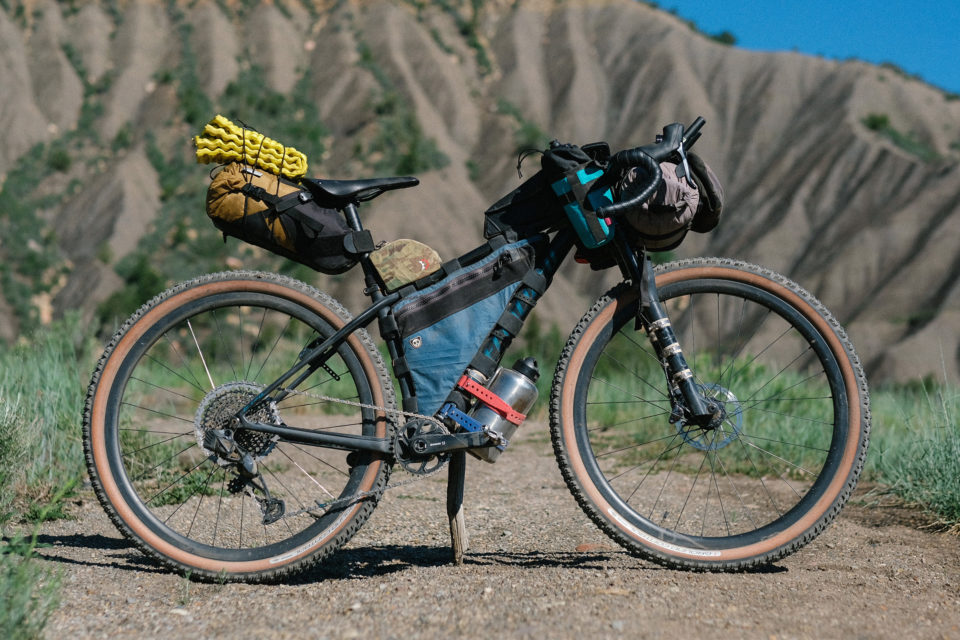
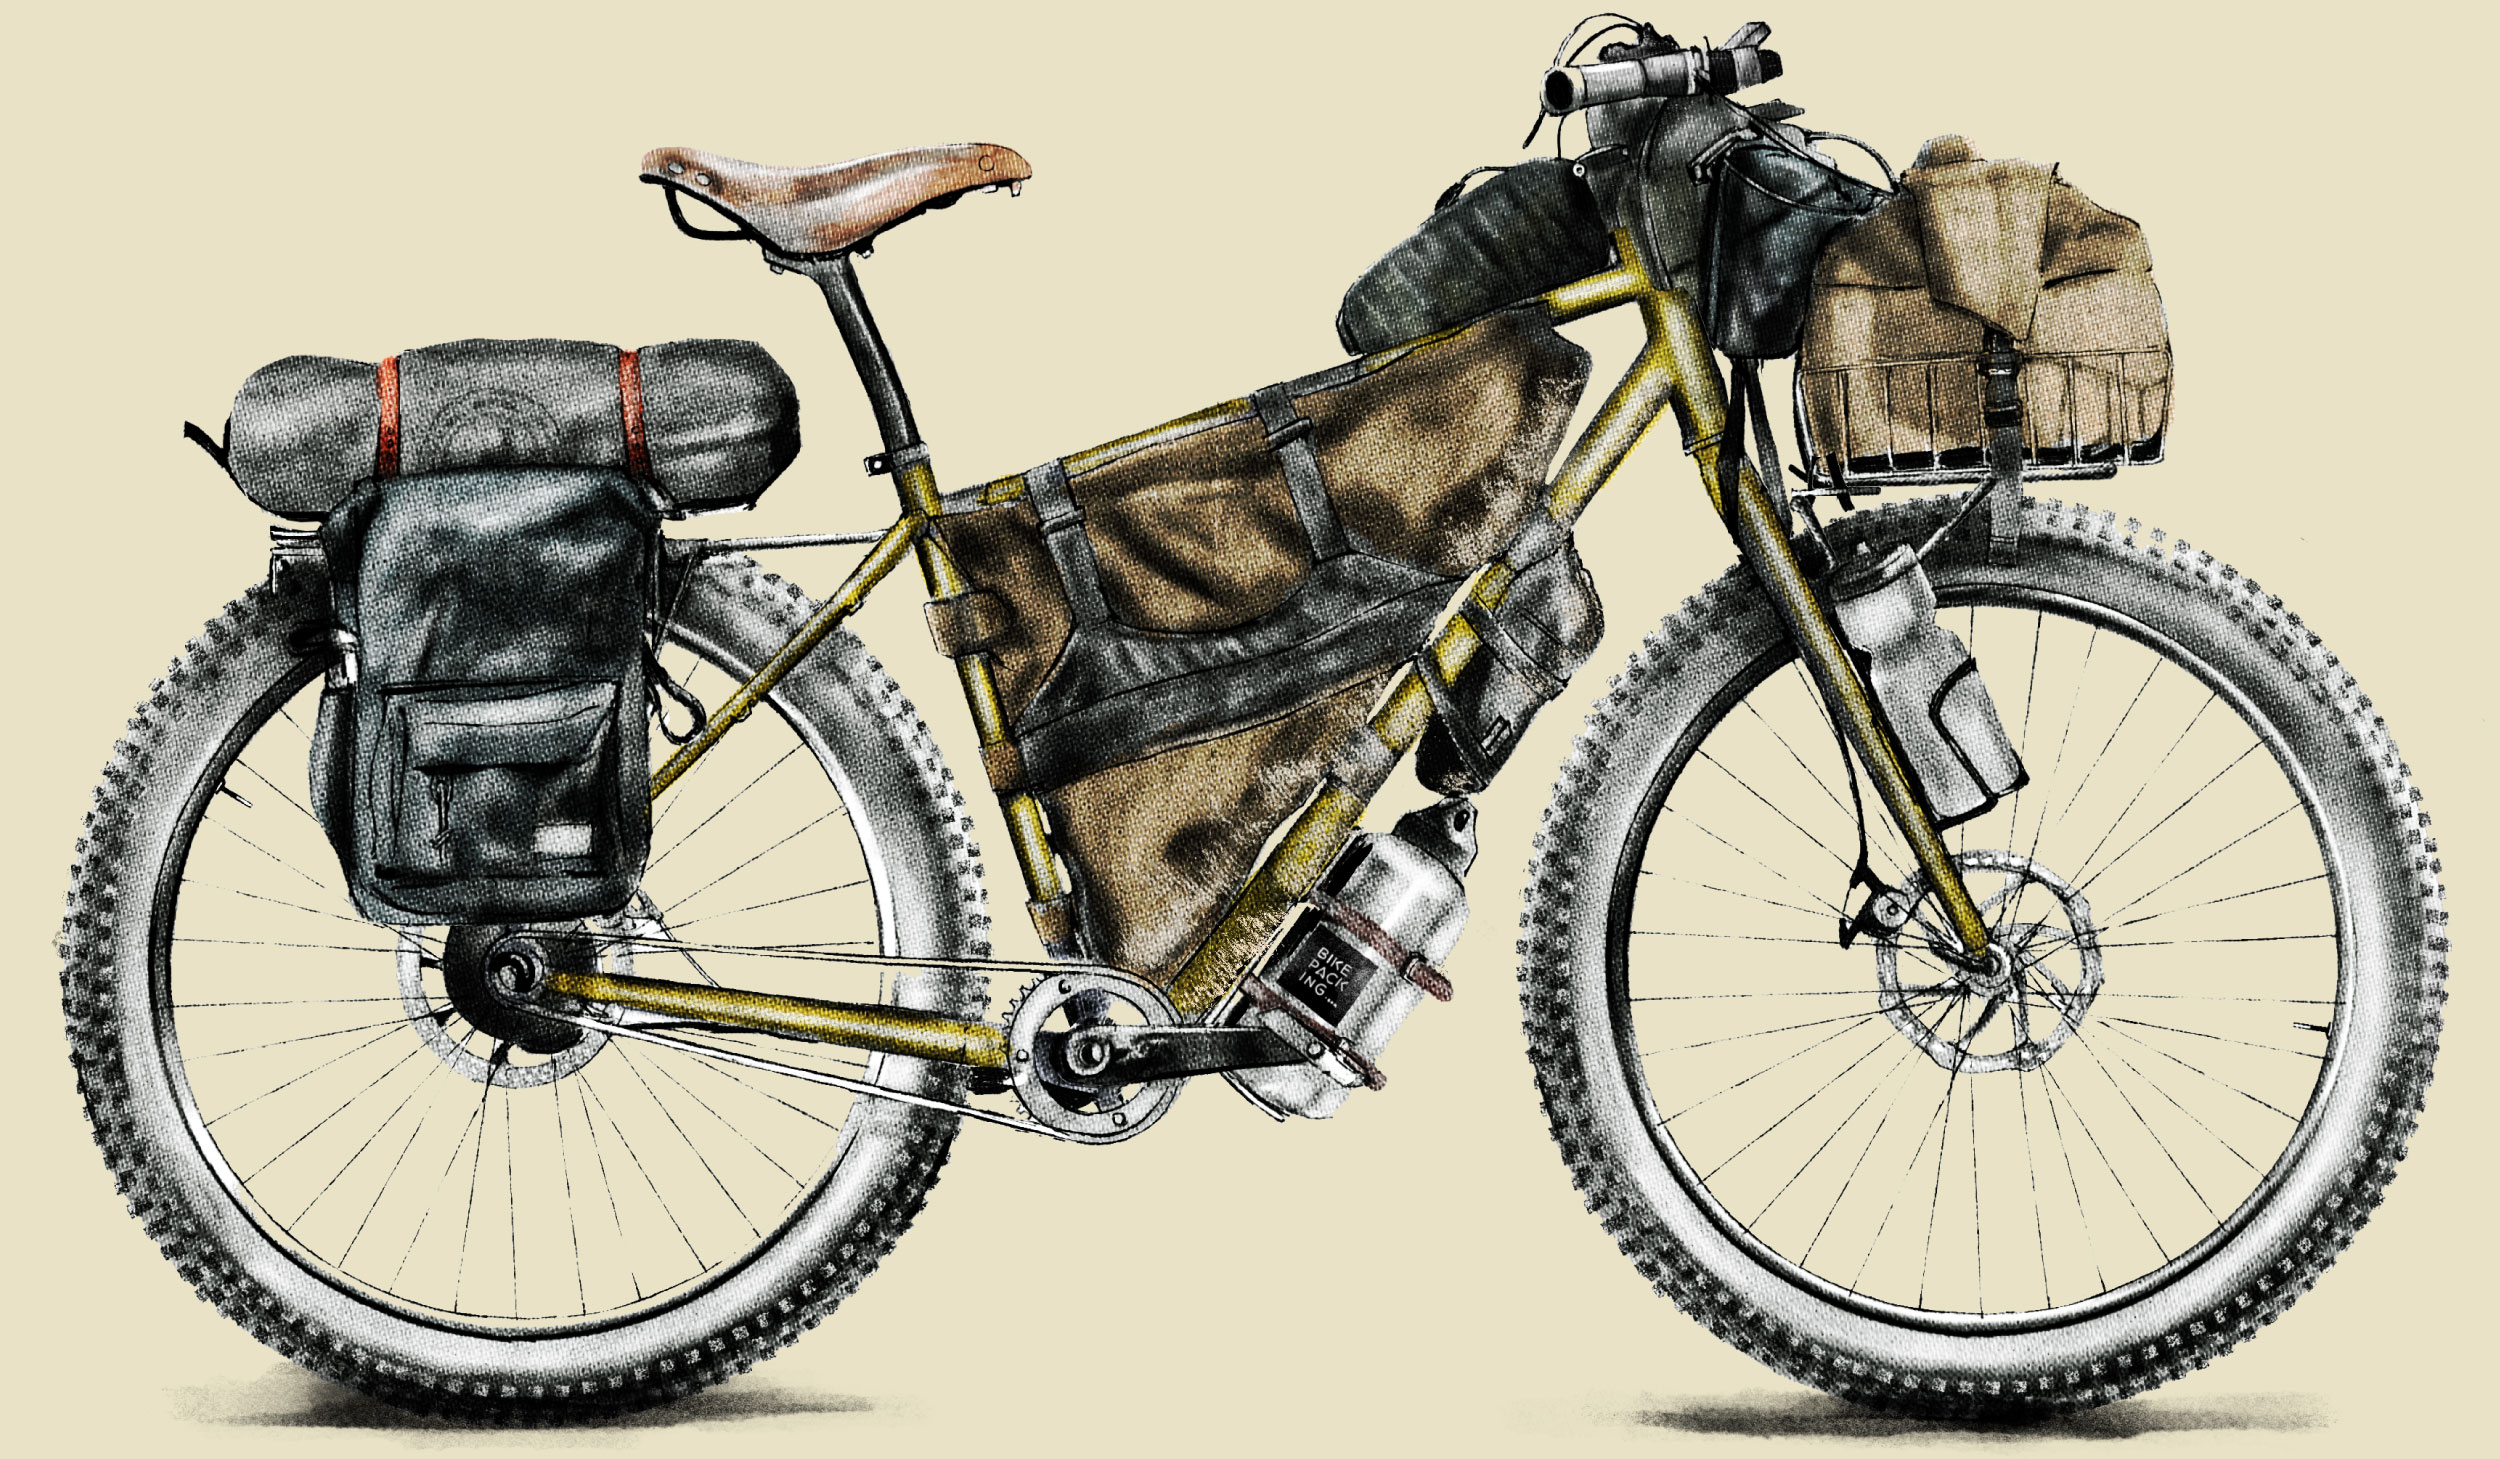
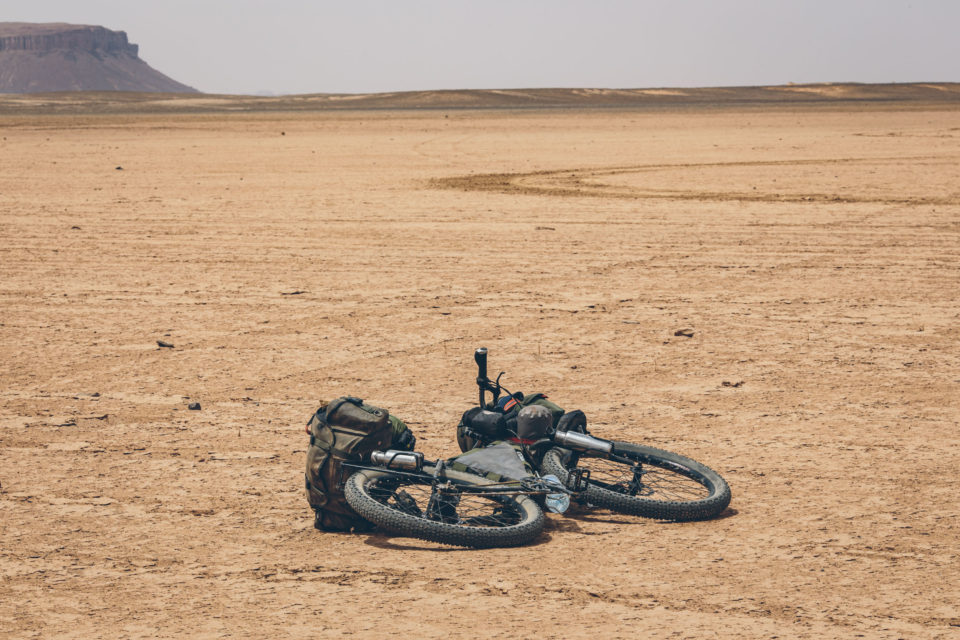
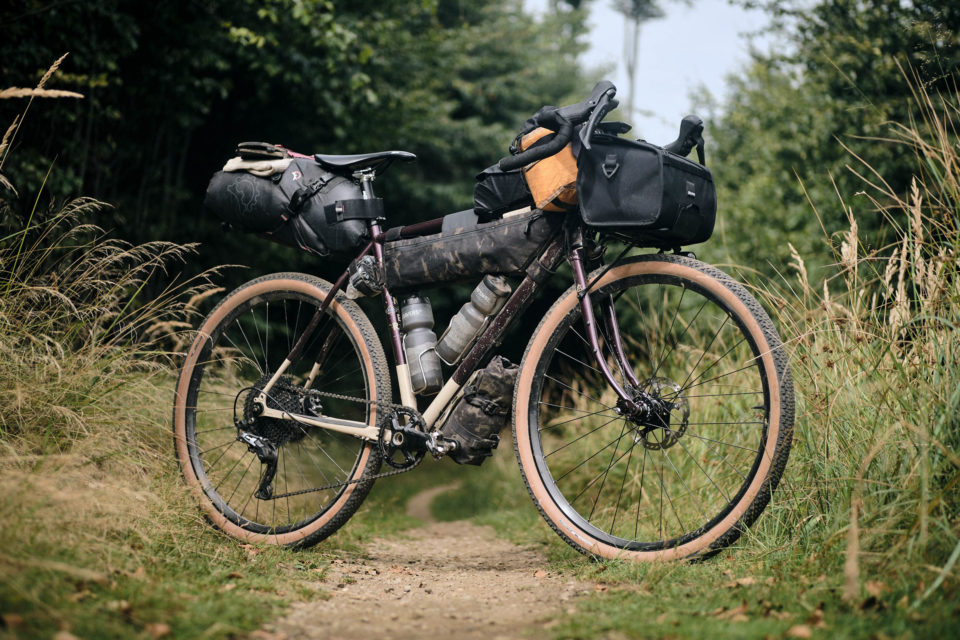
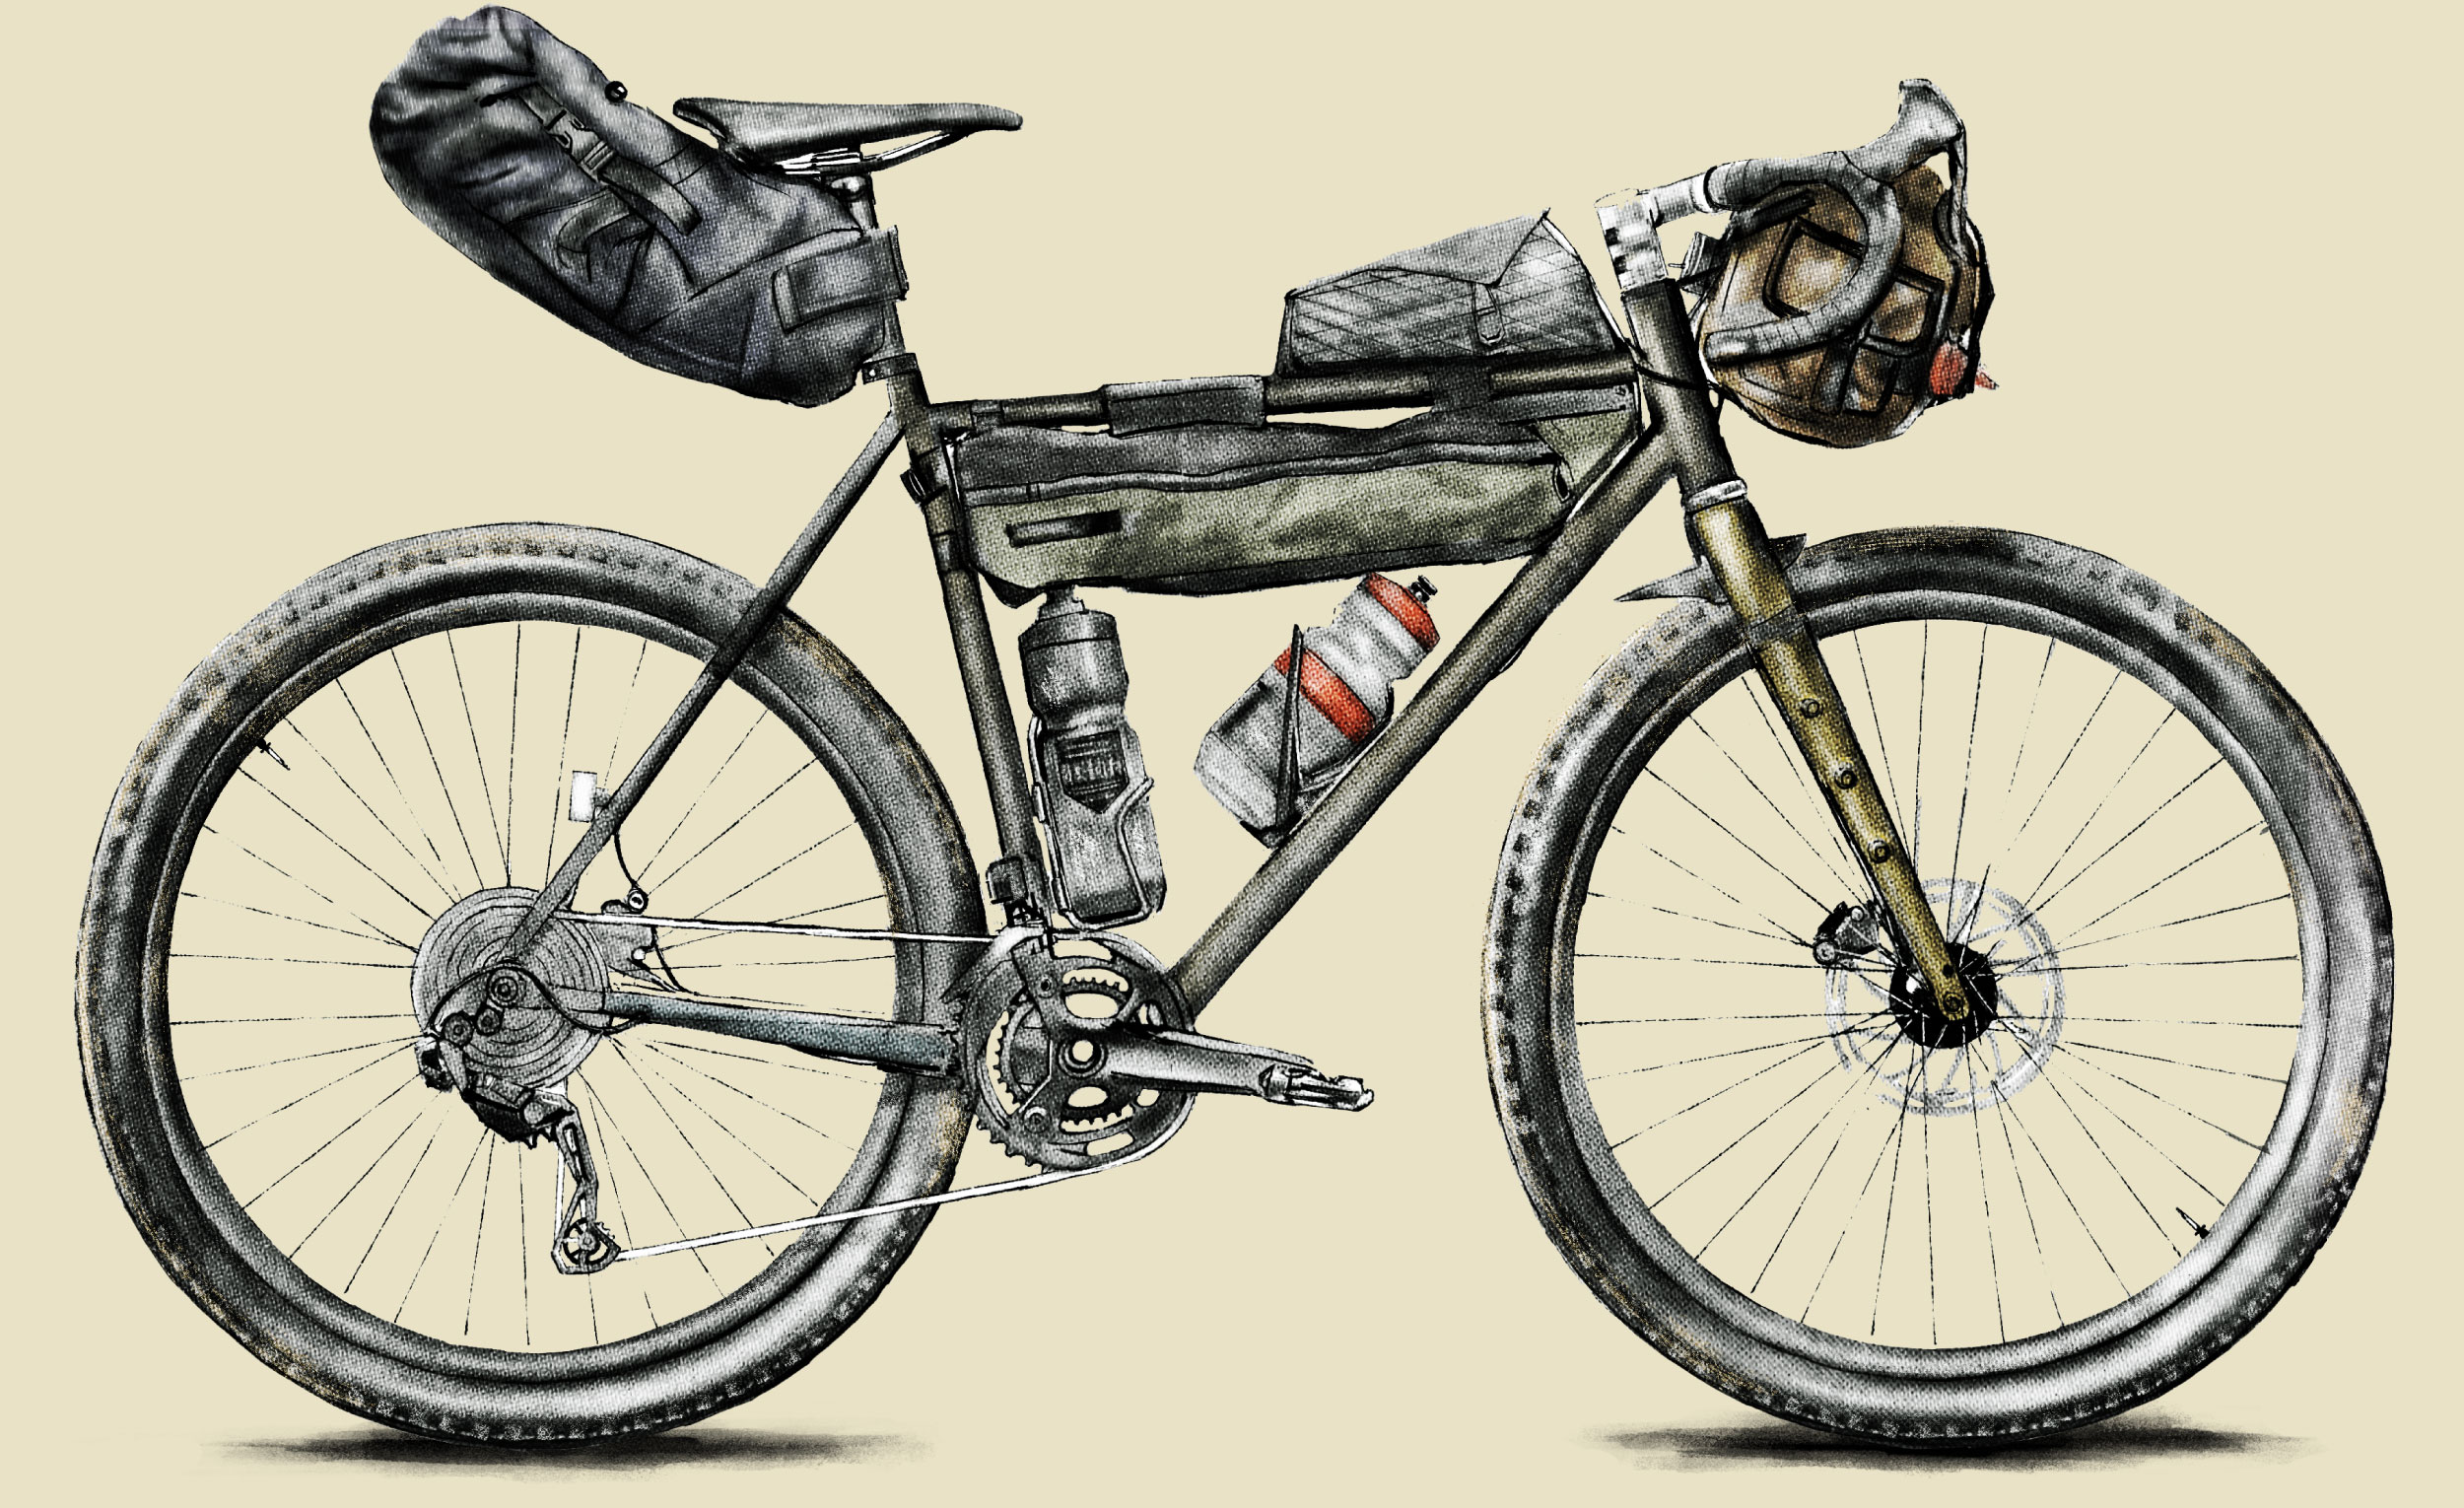
Traveling by bicycle has always been an incredible way to connect with people and experience cultures. It becomes even more special when your itinerary explores low-traffic, unpaved roads and involves experiencing rugged and remote places seldom seen by other travelers. And that’s exactly where a bikepacking-inspired setup excels. It allows you to adapt to changing surfaces and move more efficiently than you might using a bulky four-pannier setup that has long been favored by cycle tourists. A bike curated for a long-term dirt tour is built with durability, repairability, and capability in mind.
The typical frame material of choice for this style of bike is chromoly steel, which is both repairable and better suited to being slung on the roof of a bus or boxed up for a flight. Reliable building blocks like mechanical brakes, 32-spoke wheels, and sturdy aluminum cockpit components are usually spec’d over their hydraulic, 24- or 28-spoke, and carbon counterparts. This style of bike often has the ability to run larger-volume tires than would be considered typical for long-distance touring.
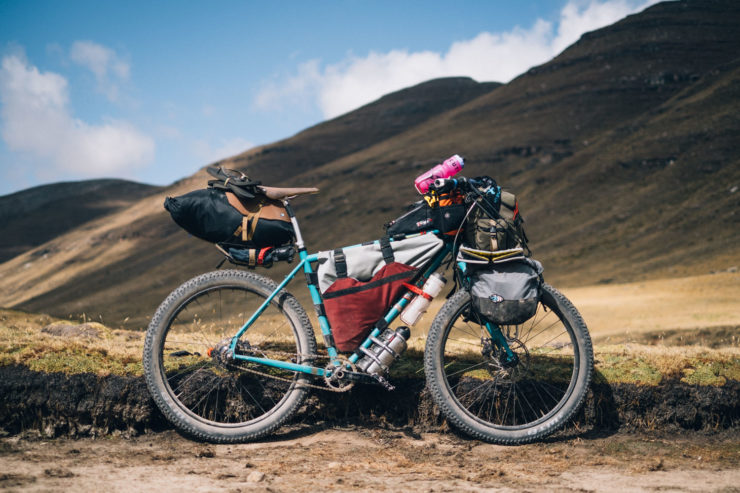
Plus Tires
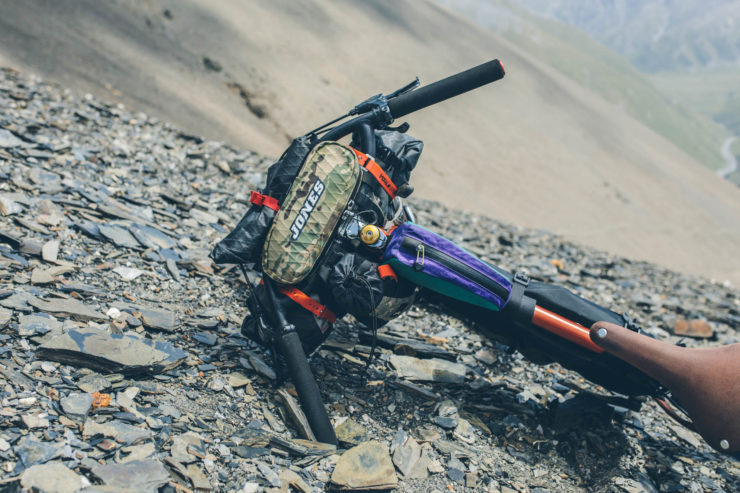
Fatter tires—2.4” and up—add comfort without requiring the usual maintenance of a suspension fork. Bigger 2.6-3.0” tires also facilitate floatation, which opens up more terrain such as sand and snow. From experience, we’ve found that larger-volume tires encourage expeditions along the road less traveled, opening up new horizons. Teamed with a lightweight packing mentality, the world will really become your oyster. Learn more in the links below.
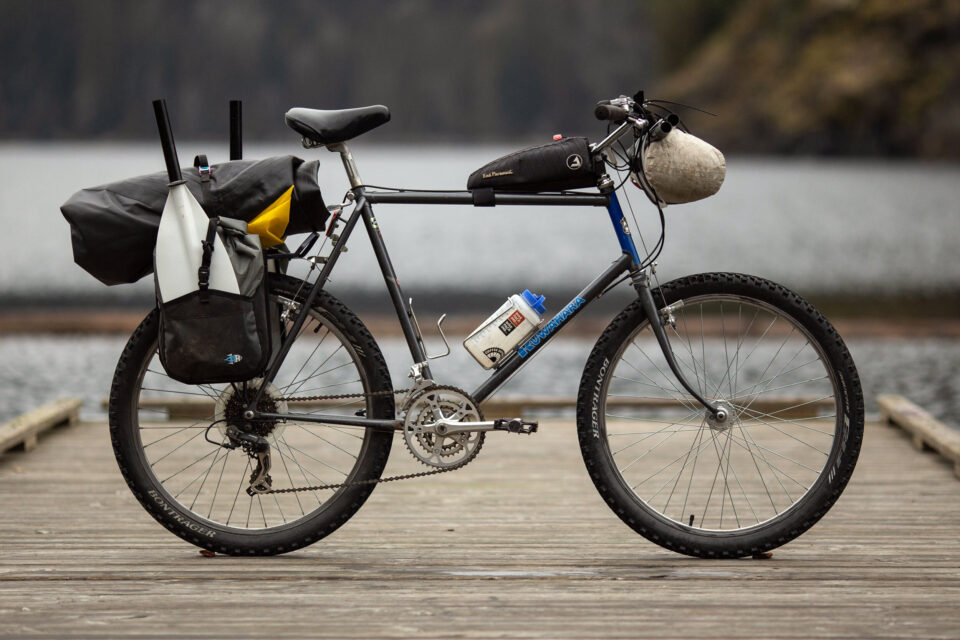
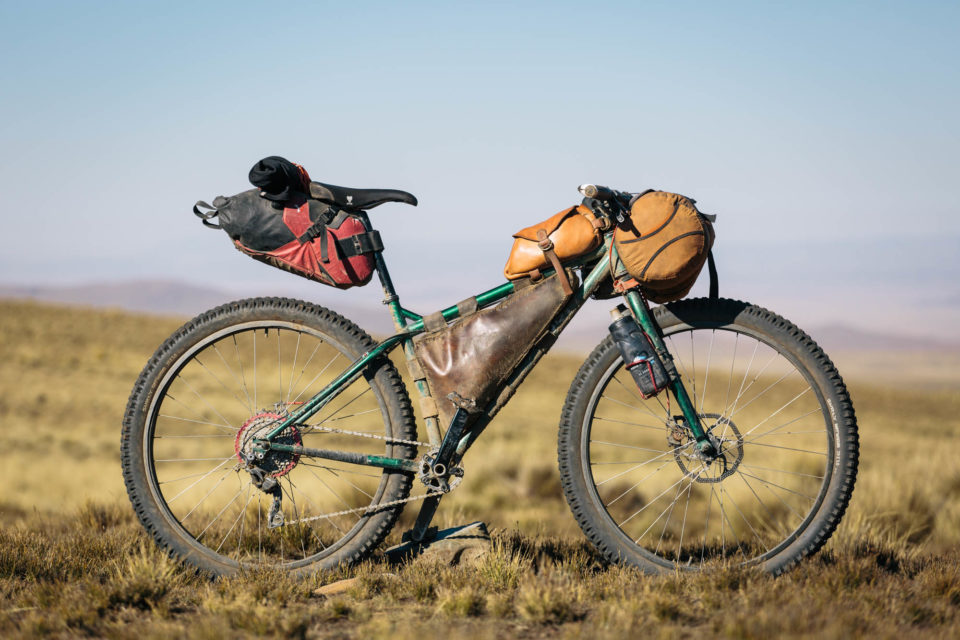
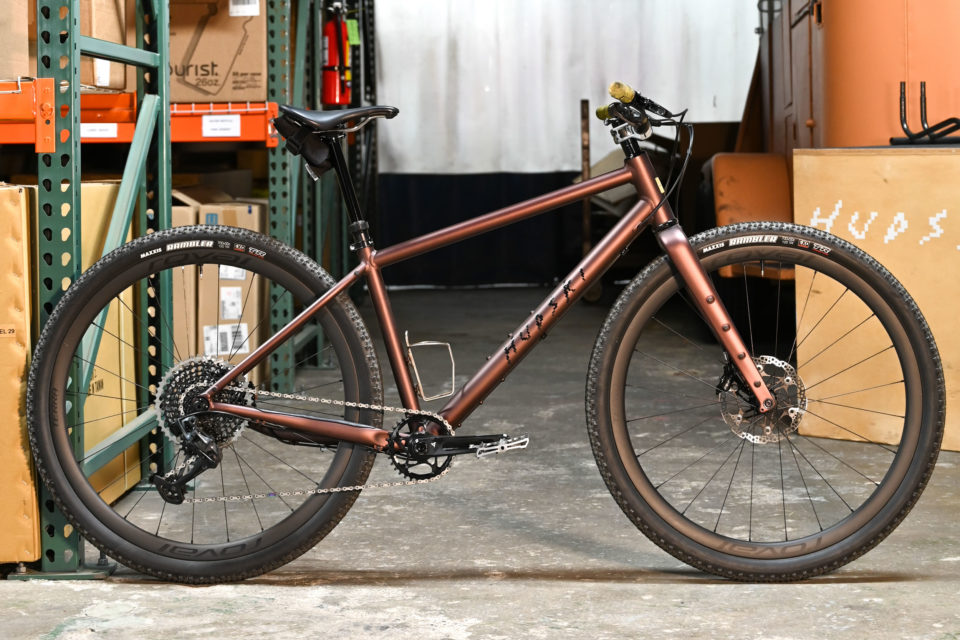
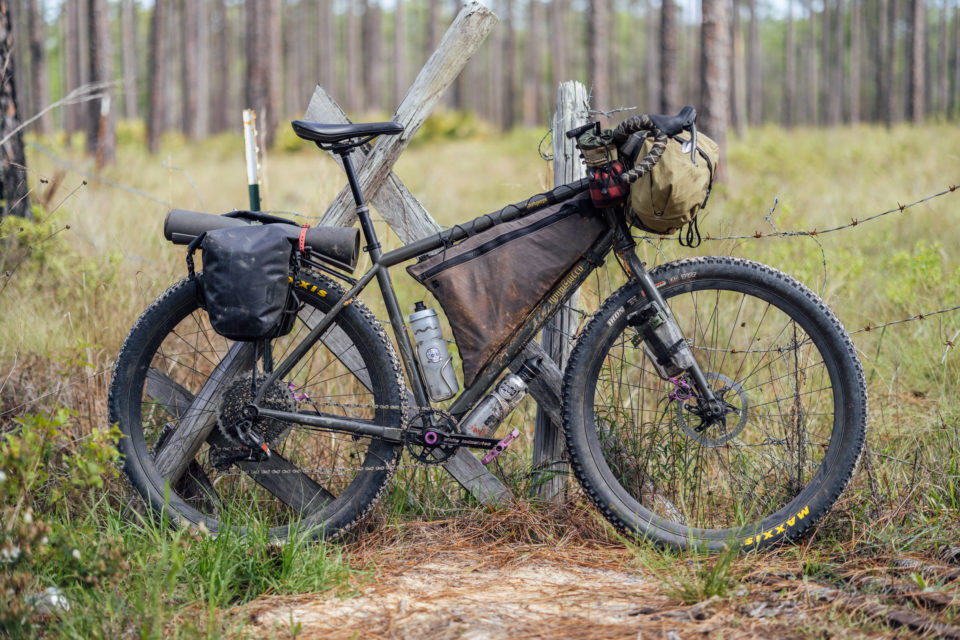
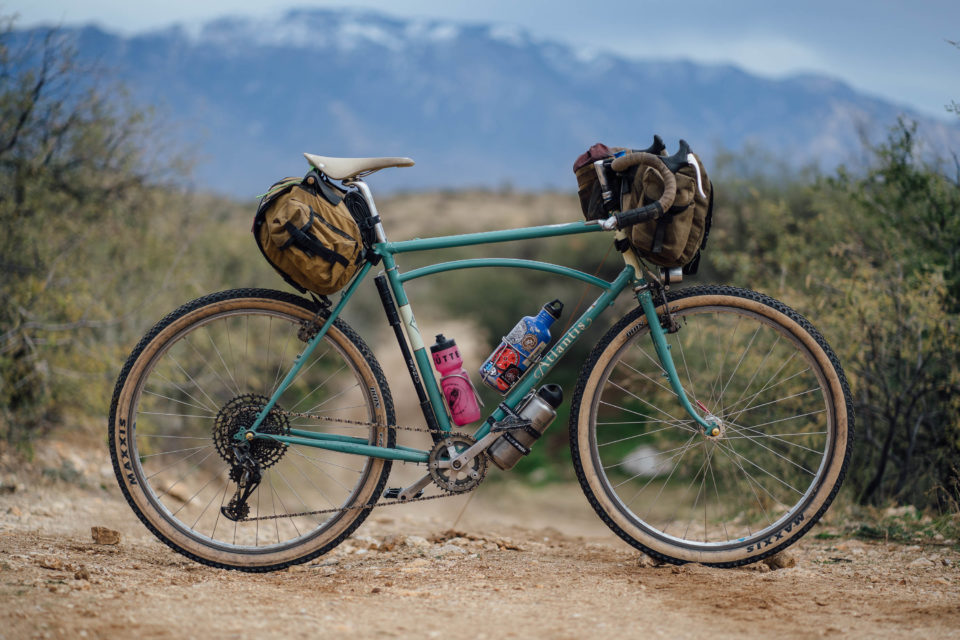
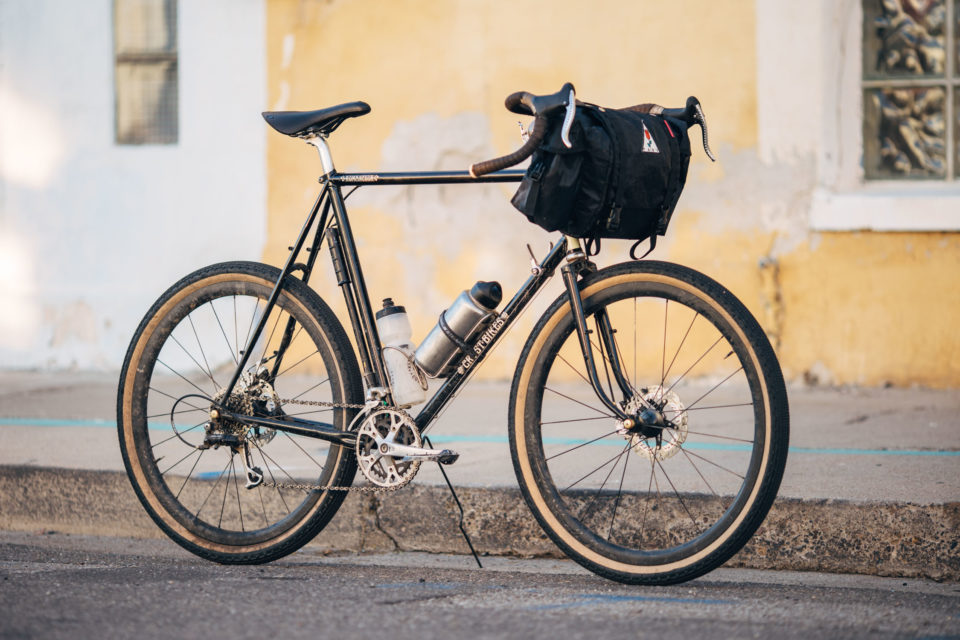
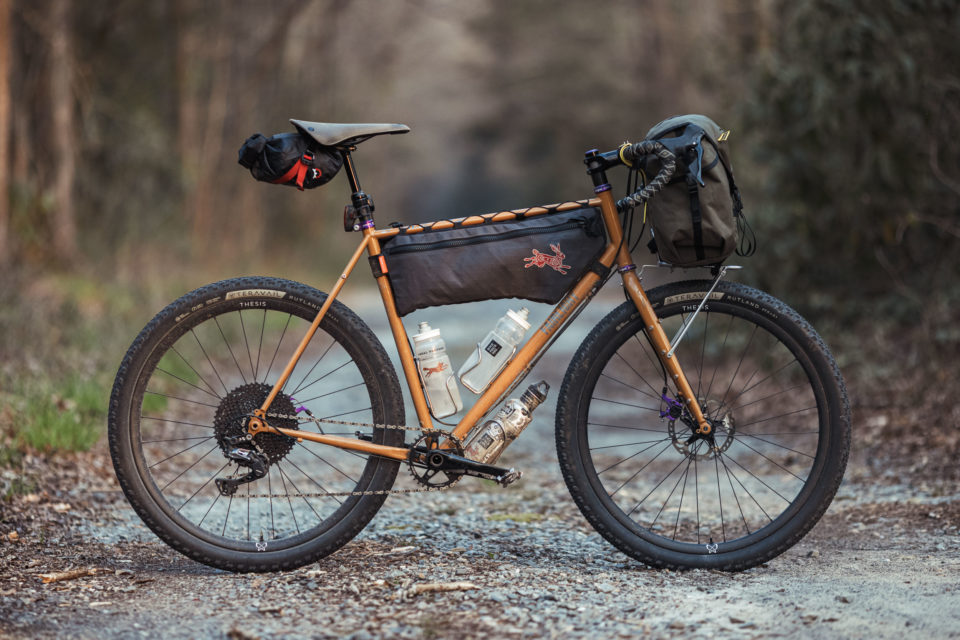
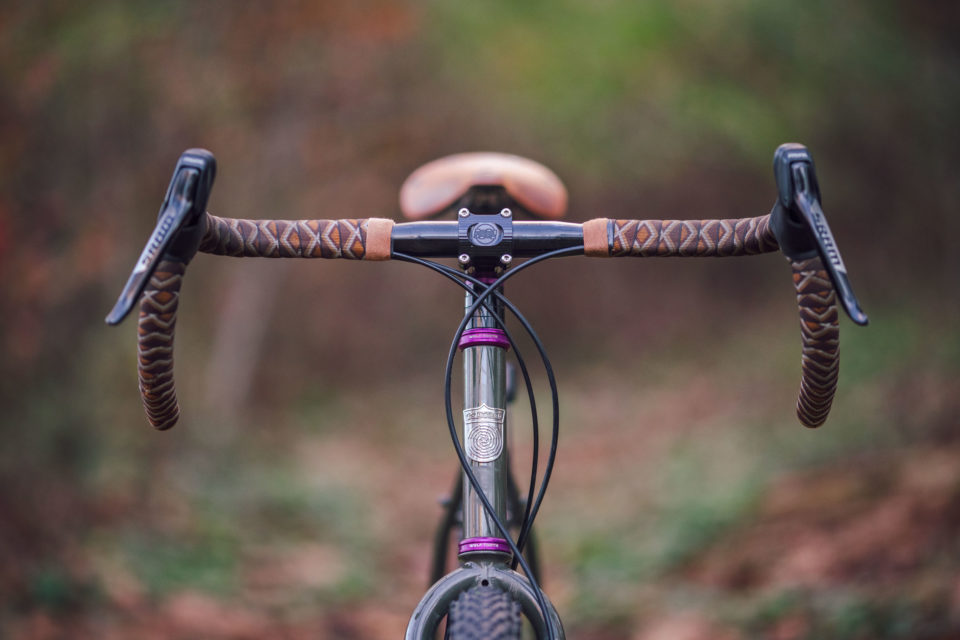
Modern mountain and gravel bikes aren’t for everyone. Some people gravitate to the more classic look of lugged steel frames, nickel-plated racks, waxed canvas bags, hammered fenders, and rim brakes. Concurrently, restoring or retrofitting a classic mountain bike from the 1990s is a great way to save some money and outfit a stylish bikepacking bike. This aesthetic draws a lot of people into “alt cycling” and bikepacking. And there’s certainly nothing wrong with that, and these bikes can do it all with the right mindset.
For a modern take on the classic look, brands such as Rivendell and Velo Orange offer several timeless models that have room for meaty tires and make a great option for folks with aesthetic-forward sensibilities.
Our Favorite Neo-retro Bikes
Some of our favorite bikes that have the classic vibe include:
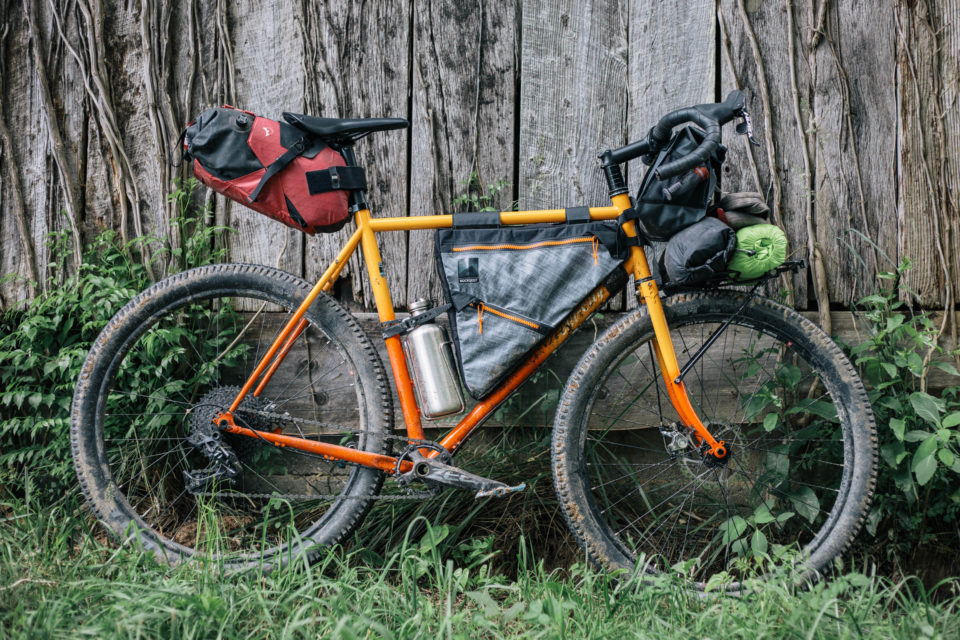
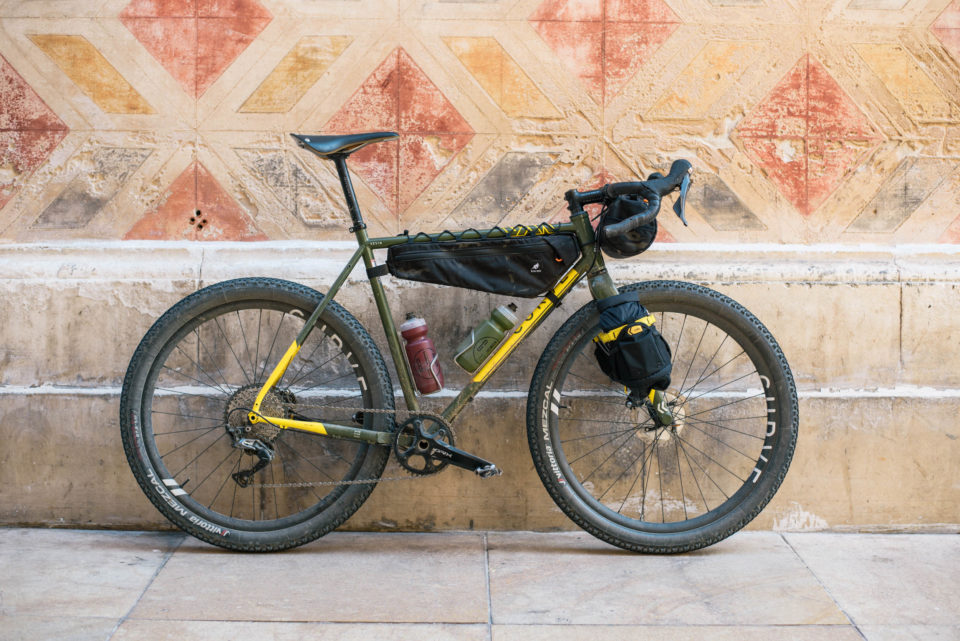
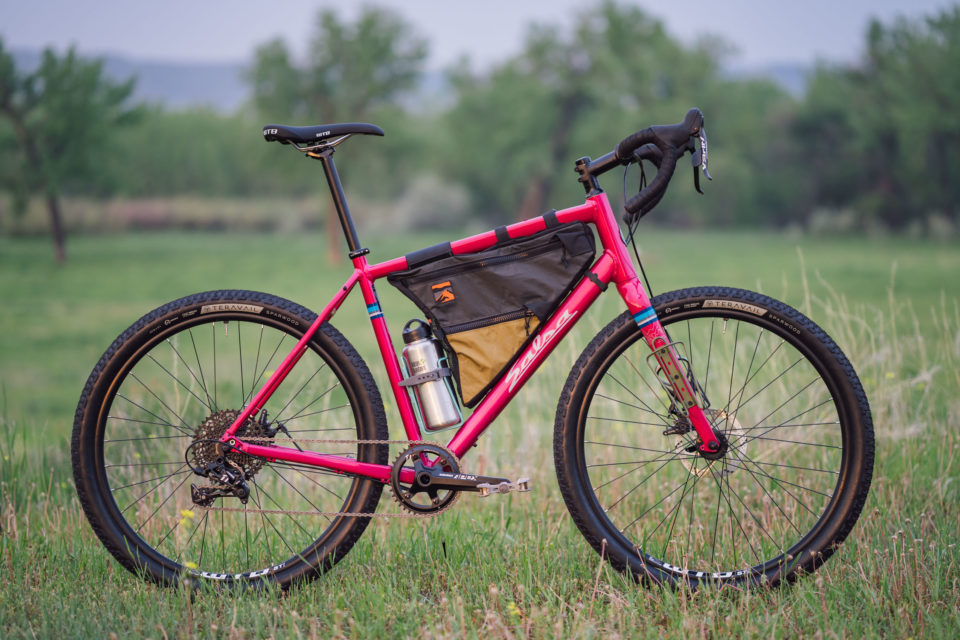
If your intended path leads more toward pavement and gravel roads or a speedier and more efficient style of riding, there are plenty of options. With the explosion of the gravel bike category in recent years, there’s a wealth of great bikes on the market that are capable of lightweight bikepacking. Bikes in this genre tend to have more of an aggressive stance, much like that of a road bike, but with a longer profile, a slightly slacker head tube angle, clearance for larger tires up to around 52mm, and often several sets of accessory mounts for carrying gear.
Gravel bikes are usually kitted with a wide-range drivetrain, which is fundamental when carrying extra gear. They also often have wider flared handlebars for better control and stability on rough surfaces.
Our Favorite Bikes
Some of our favorite light and fast gravel bikes include:
If you want to go a little deeper into gravel bikepacking, be sure to check out a few established gravel bikepacking events around the world, such as Granguanche Audax and Badlands. You can also dig further into bikes and gear with these links:
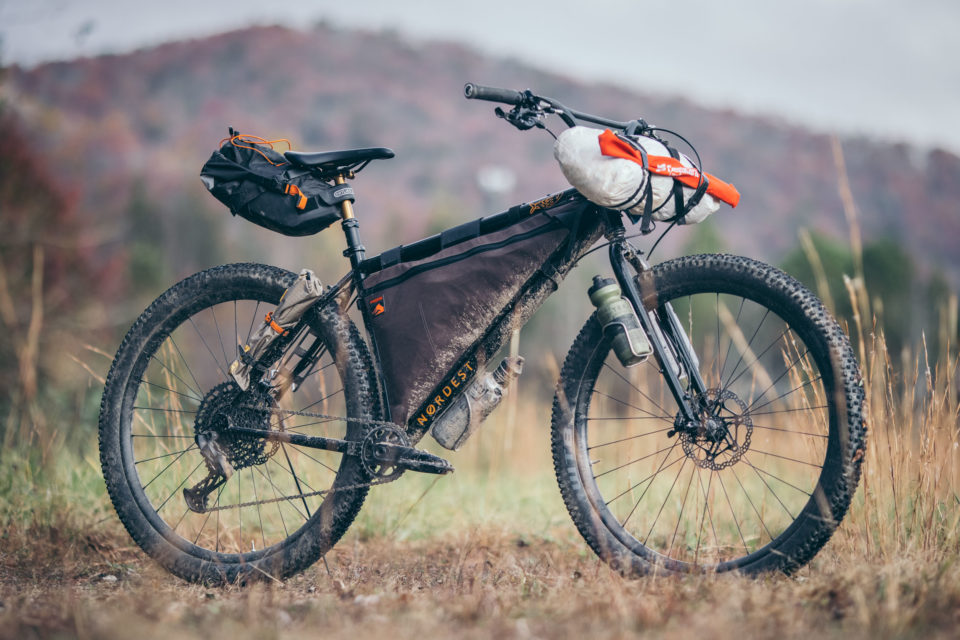
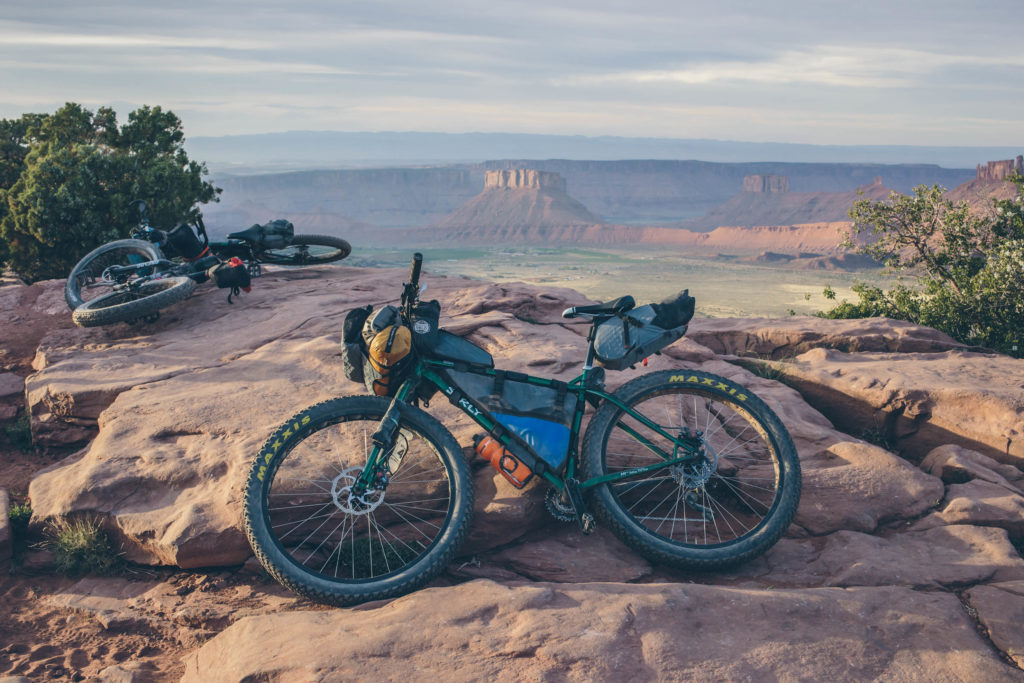
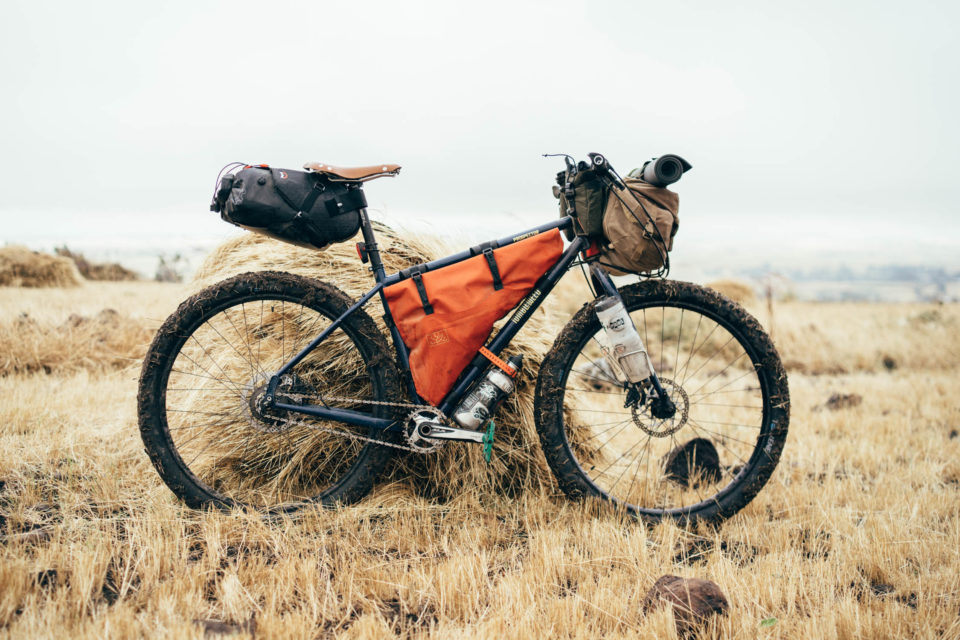
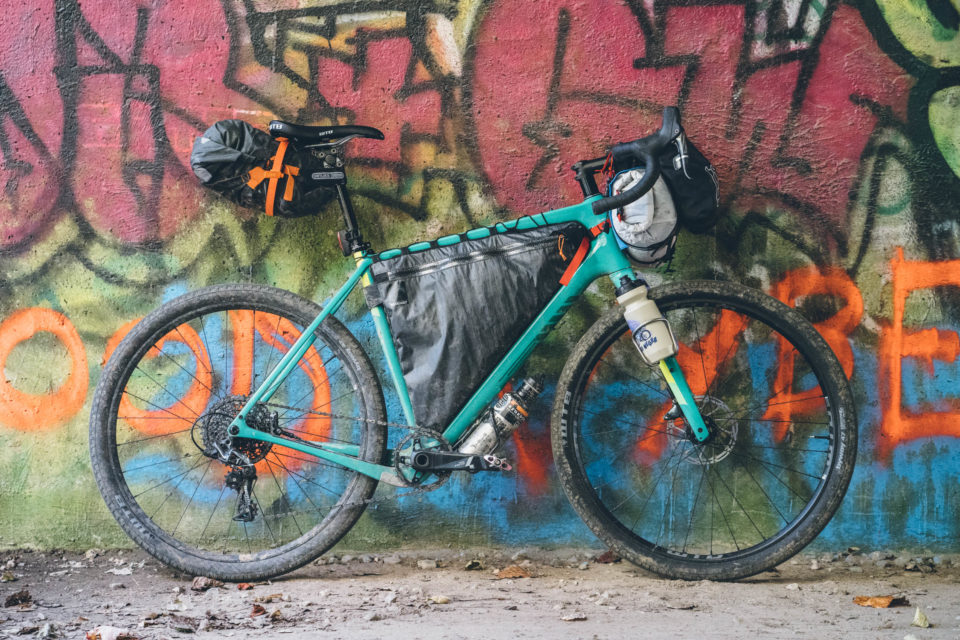
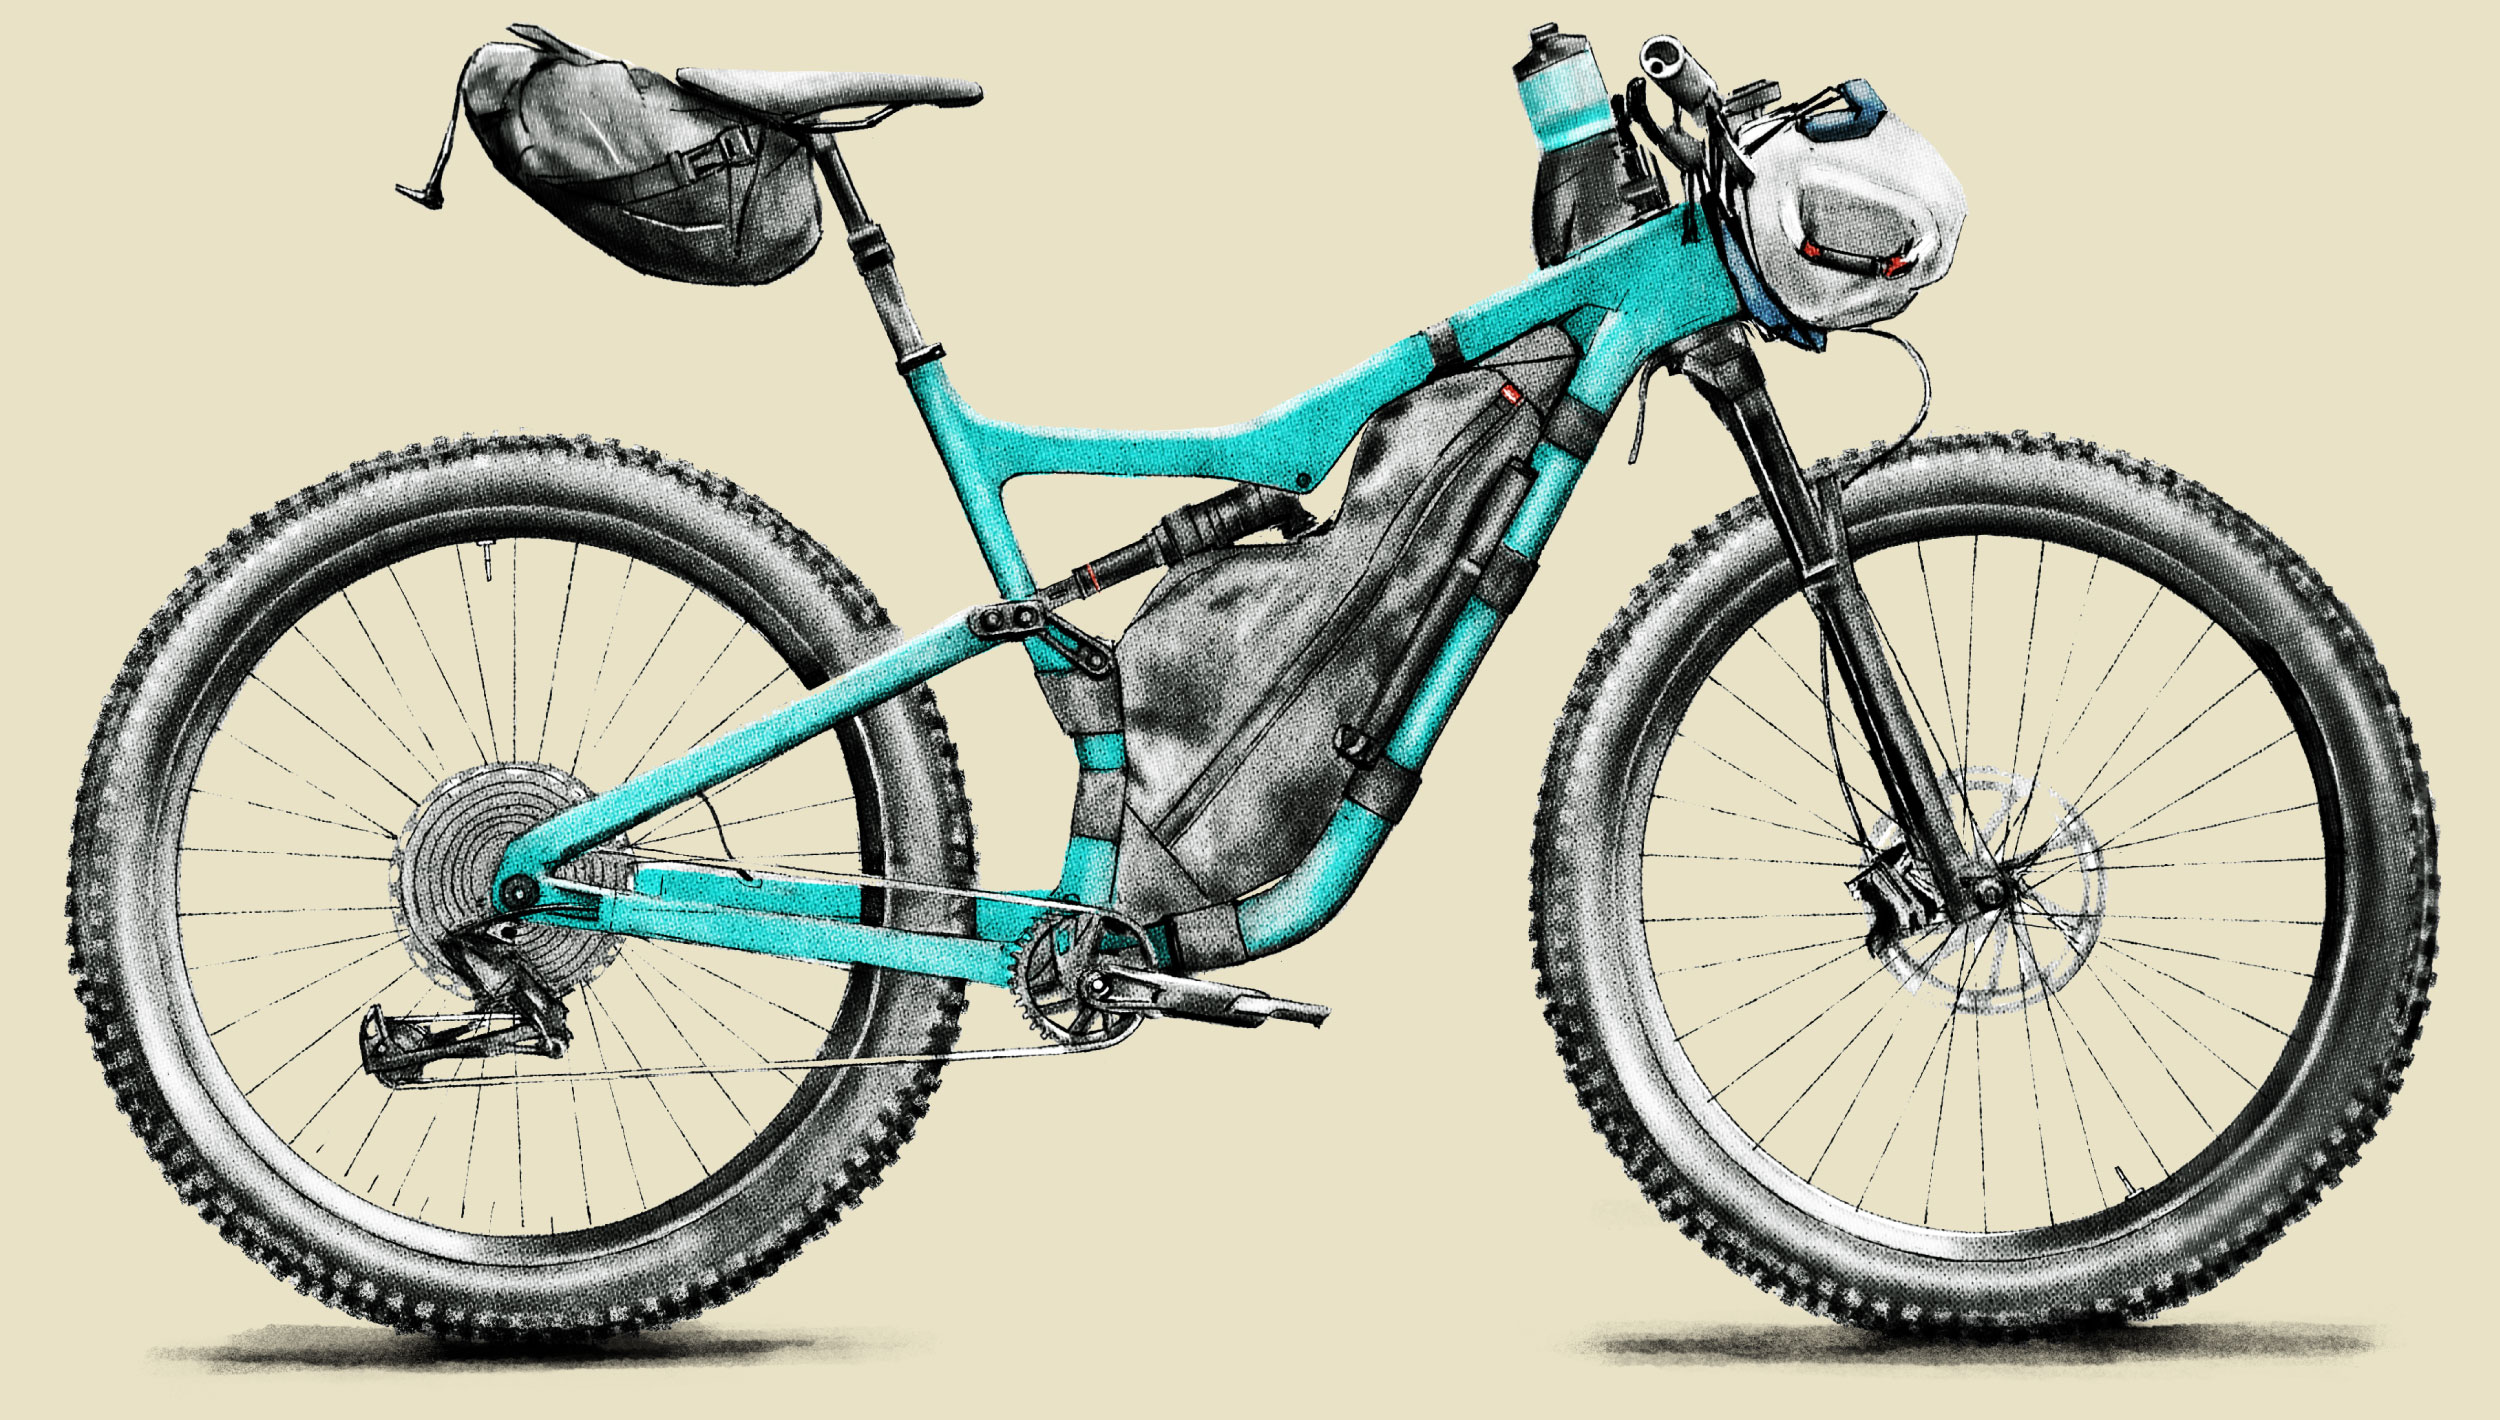
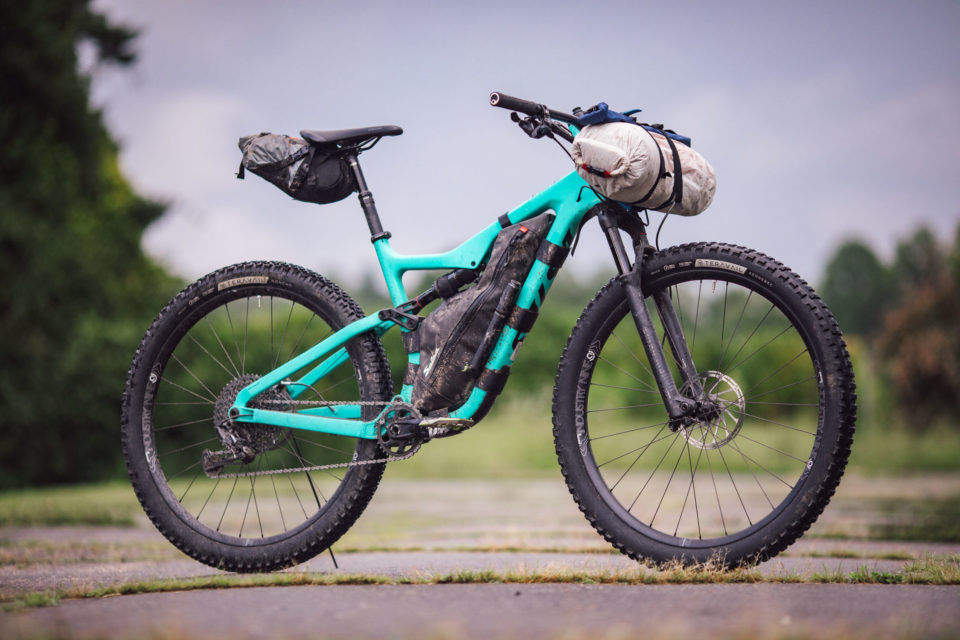
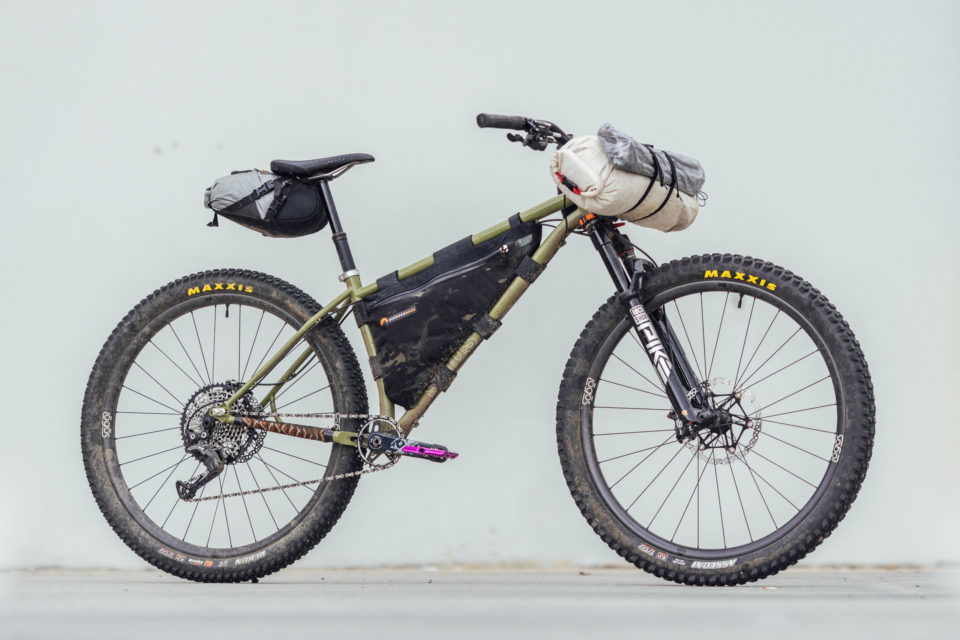
Some might argue that singletrack was the impetus behind bikepacking and the reason it came to be. There’s no doubt that the narrow and technical nature of backcountry trails inspired the development of rackless bags that eventually became synonymous with the term “bikepacking bags.” As the sport has developed, bikepacking on singletrack has become a subgenre and a means for riders to approach multi-day trips using the same performance-oriented mountain bikes that folks pedal on their local trails. This style is all about using a bike built for trails and keeping it light and nimble.
For some, this category will cover the bike they already have, as many mountain bikers are new to bikepacking and are coming to it from a singletrack background. Others might be approaching singletrack bikepacking as an evolution of their interests. We’ve included a list of some of our favorite bikes in the category, as well as what to look for in a bike that doubles as a trail bike and bikepacking rig.
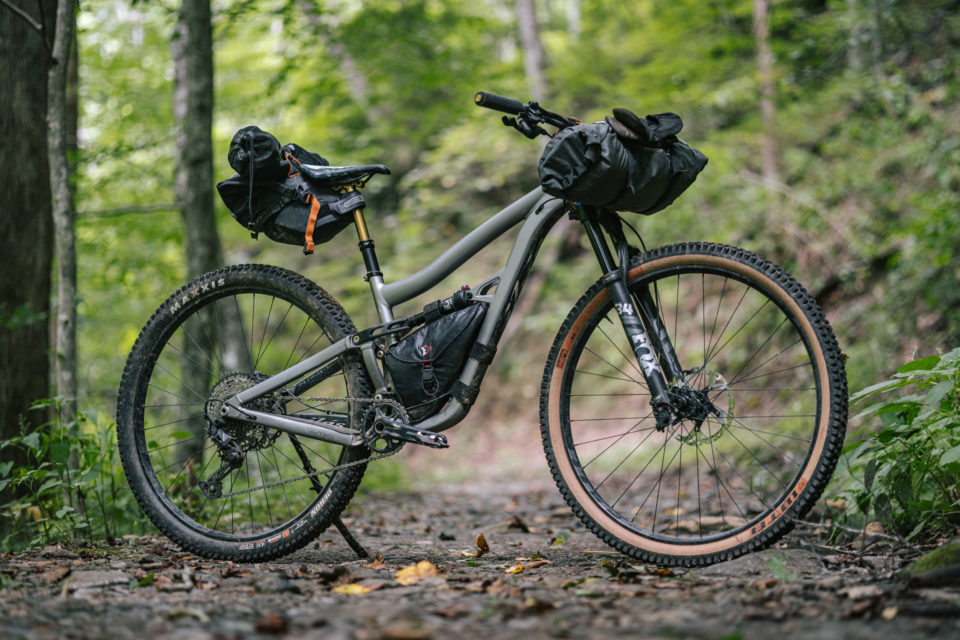
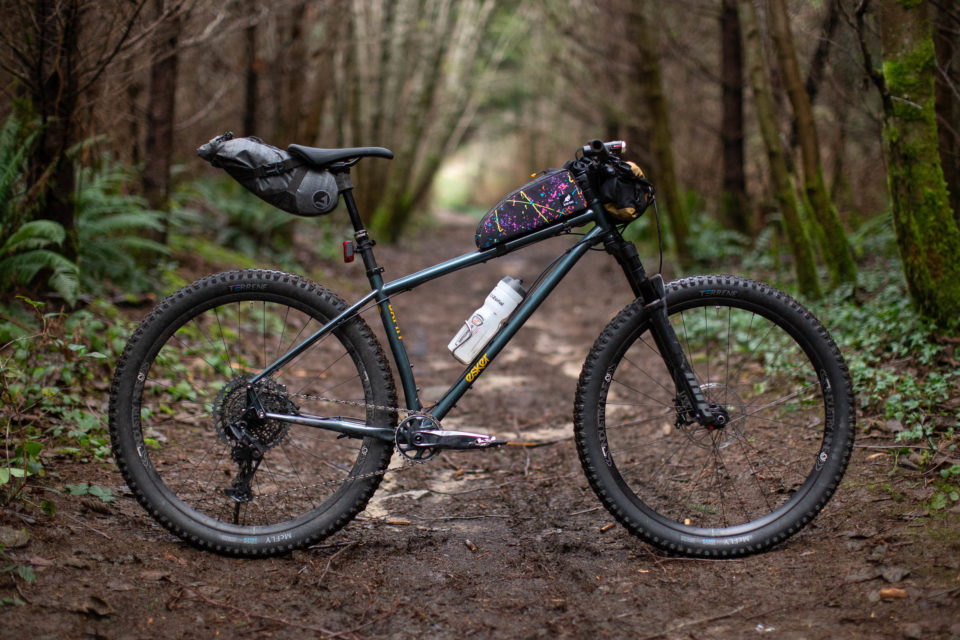
What to Look For
If you’re in the market for a new trail bike that can double as a singletrack bikepacking machine, here are a few things to keep in mind:
Adequate frame triangle space is usually the most significant feature to consider. Having a decent-sized frame bag is not only good for bikepacking, it’s a nice thing to store layers, snacks, and tools in during all-day trail rides. That said, you can get creative with frames that have a mid-mount shock design. The Ibis Ripley is a good example of a frame that can easily have two custom frame bags.
Cage mounts under the down tube can come in handy, but there are options if this isn’t a possibility. The Revelate Joey is one example and is designed to hold gear or a bottle in that position.
Saddle-to-tire clearance can be an issue with shorter riders or bikes with long-travel rear suspension. Using the lockout on a full-suspension model can sometimes solve this.
Odd cable routing can sometimes pose an issue when the bike is loaded with bags. Some modern carbon bikes route housing right out front at the head tube, for example. This can require some creativity with foam spacers when using a handlebar bag.
Short-travel suspension platforms in the 110-130mm range offer a great balance of capability and efficiency. Look for shocks and forks that can lockout, as well as well-regarded linkage designs.
Here are a few relevant links delving into these topics:
Revised and expanded in 2023, the Bikepacking 101 Handbook (2nd ed.) required thousands of hours of research, design, and writing, all of which was made possible through the generous support of our Bikepacking Collective members. As with all of our detailed route guides, in-depth reviews, and daily news, stories, and event coverage, this 20,000-word resource is available to the public for free. If you appreciate what we do here at BIKEPACKING.com, consider joining to support our efforts.